mNo edit summary |
m (Adding backup links) |
||
| Line 624: | Line 624: | ||
{{Scroll_box|content= |
{{Scroll_box|content= |
||
*{{SWArchive|url=theclonewars/guide/episode205.html|text=''The Clone Wars'' Episode Guide: Landing at Point Rain|archivedate=20110621114454}} |
*{{SWArchive|url=theclonewars/guide/episode205.html|text=''The Clone Wars'' Episode Guide: Landing at Point Rain|archivedate=20110621114454}} |
||
| − | *{{SWE|characters|aaylasecura|Aayla Secura}} |
+ | *{{SWE|characters|aaylasecura|Aayla Secura|archivedate=20140107183337}} |
| − | *{{SWE|characters|yularen|Admiral Yularen}} |
+ | *{{SWE|characters|yularen|Admiral Wulff Yularen|archivedate=20131212102156}} |
*{{SWE|characters|ahsokatano|Ahsoka Tano|archivedate=20140104050218}} |
*{{SWE|characters|ahsokatano|Ahsoka Tano|archivedate=20140104050218}} |
||
*{{SWE|characters|anakinskywalker|Anakin Skywalker|archivedate=20140104085330}} |
*{{SWE|characters|anakinskywalker|Anakin Skywalker|archivedate=20140104085330}} |
||
| − | *{{SWE|characters|aurrasing|Aurra Sing}} |
+ | *{{SWE|characters|aurrasing|Aurra Sing|archivedate=20140107104853}} |
| − | *{{SWE|technology|barcspeeder|BARC |
+ | *{{SWE|technology|barcspeeder|BARC speeder|archivedate=20131213012456}} |
| − | *{{SWE|characters|bokatan|Bo-Katan}} |
+ | *{{SWE|characters|bokatan|Bo-Katan|archivedate=20131218163223}} |
| − | *{{SWE|characters|argyus|Captain Argyus}} |
+ | *{{SWE|characters|argyus|Captain Argyus|archivedate=20140201172002}} |
| − | *{{SWE|locations|carlac|Carlac}} |
+ | *{{SWE|locations|carlac|Carlac|archivedate=20131025162039}} |
| − | *{{SWE|characters|cassiecryar|Cassie Cryar}} |
+ | *{{SWE|characters|cassiecryar|Cassie Cryar|archivedate=20131014183146}} |
| − | *{{SWE|characters|chewbacca|Chewbacca}} |
+ | *{{SWE|characters|chewbacca|Chewbacca|archivedate=20140106231910}} |
*{{SWE|characters|rex|Clone Captain Rex|archivedate=20140103142042}} |
*{{SWE|characters|rex|Clone Captain Rex|archivedate=20140103142042}} |
||
| − | *{{SWE|characters|daughter|Daughter}} |
+ | *{{SWE|characters|daughter|Daughter|archivedate=20140222101610}} |
| − | *{{SWE|characters|evenpiell|Even Piell}} |
+ | *{{SWE|characters|evenpiell|Even Piell|archivedate=20140107230448}} |
*{{SWE|characters|garnac|Garnac|archivedate=20140209135129}} |
*{{SWE|characters|garnac|Garnac|archivedate=20140209135129}} |
||
| − | *{{SWE|characters|ionemarcy|Ione Marcy}} |
+ | *{{SWE|characters|ionemarcy|Ione Marcy|archivedate=20131114151009}} |
*{{SWE|technology|jedistarfighter|Jedi starfighter|archivedate=20140106030512}} |
*{{SWE|technology|jedistarfighter|Jedi starfighter|archivedate=20140106030512}} |
||
*{{SWE|technology|jedit6shuttle|Jedi T-6 shuttle|archivedate=20140108200752}} |
*{{SWE|technology|jedit6shuttle|Jedi T-6 shuttle|archivedate=20140108200752}} |
||
*{{SWE|characters|jinx|Jinx|archivedate=20140211232237}} |
*{{SWE|characters|jinx|Jinx|archivedate=20140211232237}} |
||
| − | *{{SWE|characters|jocastanu|Jocasta Nu}} |
+ | *{{SWE|characters|jocastanu|Jocasta Nu|archivedate=20140222203526}} |
| − | *{{SWE|locations|kiros|Kiros}} |
+ | *{{SWE|locations|kiros|Kiros|archivedate=20131027041558}} |
| − | *{{SWE|characters|korkie|Korkie}} |
+ | *{{SWE|characters|korkie|Korkie Kryze|archivedate=20140109225629}} |
| − | *{{SWE|characters|luminaraunduli|Luminara Unduli}} |
+ | *{{SWE|characters|luminaraunduli|Luminara Unduli|archivedate=20140106212505}} |
*{{SWE|groups|lurmen|Lurmen|archivedate=20140222232133}} |
*{{SWE|groups|lurmen|Lurmen|archivedate=20140222232133}} |
||
| − | *{{SWE|characters|luxbonteri|Lux Bonteri}} |
+ | *{{SWE|characters|luxbonteri|Lux Bonteri|archivedate=20140104072943}} |
| − | *{{SWE|characters|omer|O-Mer}} |
+ | *{{SWE|characters|omer|O-Mer|archivedate=20131212225425}} |
*{{SWE|technology|phoenix|''Phoenix''|archivedate=20140108214706}} |
*{{SWE|technology|phoenix|''Phoenix''|archivedate=20140108214706}} |
||
*{{SWE|characters|plokoon|Plo Koon|archivedate=20140104071319}} |
*{{SWE|characters|plokoon|Plo Koon|archivedate=20140104071319}} |
||
| − | *{{SWE|characters|princeleechar|Prince Lee-Char}} |
+ | *{{SWE|characters|princeleechar|Prince Lee-Char|archivedate=20140306190049}} |
*{{SWE|characters|queenmirajscintel|Queen Miraj Scintel|archivedate=20131009030955}} |
*{{SWE|characters|queenmirajscintel|Queen Miraj Scintel|archivedate=20131009030955}} |
||
*{{SWE|technology|retailcaucusdroid|Retail Caucus droid|archivedate=20140502065844}} |
*{{SWE|technology|retailcaucusdroid|Retail Caucus droid|archivedate=20140502065844}} |
||
*{{SWE|characters|riyochuchi|Riyo Chuchi|archivedate=20140531065236}} |
*{{SWE|characters|riyochuchi|Riyo Chuchi|archivedate=20140531065236}} |
||
| − | *{{SWE|characters|son|Son}} |
+ | *{{SWE|characters|son|Son|archivedate=20140222215337}} |
*{{SWE|characters|tarkin|Tarkin|archivedate=20140102014840}} |
*{{SWE|characters|tarkin|Tarkin|archivedate=20140102014840}} |
||
*{{SWE|technology|twilight|''Twilight''|archivedate=20140111135417}} |
*{{SWE|technology|twilight|''Twilight''|archivedate=20140111135417}} |
||
| − | *{{SWE|characters|yoda|Yoda}} |
+ | *{{SWE|characters|yoda|Yoda|archivedate=20140104071254}} |
*{{SWE|technology|zygerrianslaveship|Zygerrian slave ship|archivedate=20140222213629}} |
*{{SWE|technology|zygerrianslaveship|Zygerrian slave ship|archivedate=20140222213629}} |
||
*{{InsiderCite|150|Insider Looks Back}} |
*{{InsiderCite|150|Insider Looks Back}} |
||
Revision as of 02:52, 24 March 2020
| | |


Warning: This infobox is missing the following parameters: parents, pronouns, children, siblings, partners, families, feathers
- "It's every citizen's duty to challenge their leaders, to keep them honest, and hold them accountable if they're not."
- ―Ahsoka Tano
Ahsoka Tano, nicknamed "Snips" by her master and known as "Ashla" after the Clone Wars, was a Jedi Padawan who, after the conflict, helped establish a network of various rebel cells against the Galactic Empire. A Togruta female, Tano was discovered on her homeworld of Shili by Jedi Master Plo Koon, who brought her to the Jedi Temple on Coruscant to receive Jedi training. Following the outbreak of the Clone Wars, Jedi Grand Master Yoda assigned the young Tano to be the Padawan learner of Jedi Knight Anakin Skywalker, whom she joined at the Battle of Christophsis. Whereas Tano was eager to prove herself, Skywalker had a reputation for recklessness, and they had a rather difficult start as master and apprentice. Yet, they worked together to rescue Rotta, the son of crime lord Jabba Desilijic Tiure, and returned Rotta to his father, thus facilitating a crucial alliance between the Hutt Clan and the Galactic Republic.
As a commander in the Grand Army of the Republic, Tano found a mentor in Clone Captain Rex of the 501st Legion, with whom she and Skywalker collaborated to lead frontline campaigns against the Confederacy of Independent Systems. In her first command position at the Battle of Ryloth, Tano disobeyed orders and lost her entire squadron of pilots, but she managed to rebound and helped secure a victory at Ryloth. Her assignments pitted her against a variety of opponents, from General Grievous and Sith apprentice Asajj Ventress to bounty hunters such as Cad Bane and Aurra Sing. Over time, she matured into a respected leader, contributing to key Republic victories like the Second Battle of Geonosis and the Battle of Mon Cala. She even died during a series of events on Mortis, but the Force wielder known as the Daughter sacrificed herself to bring Tano back to life.
Tano gained much experience on and beyond the war front, leading a group of Jedi younglings to revolt against their Trandoshan captors, helping rescue a colony of Togruta from enslavement by the Zygerrian Slave Empire, and serving as an advisor to the Onderon rebels—with her close friend, Lux Bonteri, among them—as they liberated their world from the Confederacy. In a stark turn of events, Tano was framed for the bombing of the Jedi Temple hangar and other homicides, and she escaped into the Coruscant underworld to clear her name. Though she formed an unlikely alliance with Asajj Ventress, she was detained by Republic forces and was consequently barred from the Jedi Order. Ultimately, Skywalker uncovered the true culprit, Tano's friend, and fellow Padawan Barriss Offee, and prevented his former apprentice from being convicted of sedition. Nevertheless, the ordeal dislodged Tano's faith in the Jedi. She refused the Jedi Council's offer to rejoin the Order, instead departing in search of a new path.
After the Galactic Empire came to power, Tano went into hiding on Thabeska and Raada. Following the evacuation of Raada, Tano joined Senator Bail Organa's growing rebel movement. She became the manager of his intelligence network and adopted the codename "Fulcrum." As Fulcrum, Tano provided intelligence to various rebel factions including Hera Syndulla's Spectres rebel cell. Tano took a particular interest in Syndulla's rebels because one of their members, a former Jedi named Kanan Jarrus, had begun to train his own Padawan, Ezra Bridger. In addition, Tano's efforts against the Empire brought her into contact with the Dark Lord of the Sith Darth Vader, who, unknown to her, was actually her former master, Anakin Skywalker, as well as the Imperial Inquisitors known as the Fifth Brother and the Seventh Sister. Following the mission to Malachor, Tano became lost to the rubble and shadows of the Sith temple and was believed by many including Jarrus and Bridger to have perished during a duel with Darth Vader.
However, Tano was unexpectedly saved from Vader's wrath by a future Ezra Bridger, who pulled her through a time portal into the world between worlds, a dimension of the Force connecting all time and space. After a confrontation with Darth Sidious, who desired access to the dimension, Tano returned to her time, promising Bridger that she would find him once she returned. After the end of the Galactic Civil War, Tano returned to a freed Lothal and joined Sabine Wren in her quest to find a missing Bridger, who had disappeared during the liberation of Lothal.
Biography
Early life
- "It was Master Plo Koon who found me and brought me to the Temple where I belonged…"
- ―Ahsoka Tano, to Anakin Skywalker
Plo Koon discovering a three-year-old Ahsoka Tano
Thirty-three years before the Battle of Yavin,[2] Ahsoka Tano was discovered by Jedi Master Plo Koon among her people on the planet Shili[1] at the age of three and accepted into the Jedi Order.[2] Around this time, she was nearly enslaved by an impostor who intercepted the signal to the Jedi Order and who hoped to use her powers for their own ends. However, this scheme was thwarted, and Tano began her life as a Jedi.[8] Like all Jedi of her era, she was raised at the Jedi Temple on Coruscant.[10]
The Clone Wars
- "I'm the new Padawan learner. I'm Ahsoka Tano."
- ―Ahsoka Tano introduces herself
At the age of fourteen,[2] Tano was assigned to Jedi Knight Anakin Skywalker—and would learn the ways of the Force as his apprentice—by Grand Master Yoda.[6] Having been granted the rank of Padawan,[2] she demonstrated an eagerness to prove herself worthy to be his apprentice. Yoda did this to alleviate Skywalker's fear and inability to lose loved ones, as he believed that by becoming a teacher, Skywalker would develop emotionally and understand that his excessive bonding to those he cared about was unnecessary once Tano was ready to go off on her own. However, her future choice to leave the Order further pushed Skywalker towards the dark side.[11]
Battle of Christophsis
- "You're reckless, little one. You never would have made it as Obi-Wan's Padawan… but you might make it as mine."
- ―Anakin Skywalker to Ahsoka Tano, following the Battle of Christophsis
Ahsoka introduces herself to Anakin and Obi-Wan during the Battle of Christophsis.
The Jedi Council finally sent Tano on her first mission to Christophsis in order to aid the Republic forces and finally meet her new master, as well as pass on a message that masters Kenobi and Skywalker were needed back at the Jedi Temple on Coruscant. She arrived on the planet moments after the first wave of Separatist forces pulled back. After giving her message to Master Kenobi and Skywalker, Obi-Wan introduced himself, presuming that she was his new Padawan learner. She corrected him, insisting that Master Yoda specifically assigned her to Skywalker.[6]
Meanwhile, the droid army set up a deflector shield that would block the artillery bombardment that earlier halted their advancements. Anakin and Ahsoka eventually set out a plan to infiltrate the enemy lines while Kenobi and his troops held off the enemy forces to buy them time. The two Jedi hid inside a box while the droid tanks moved around them. As they made their way to the source of the shield, Ahsoka tripped on a sensor antenna, accidentally activating a batch of retail droids. While Skywalker was occupied with the droids, Tano began to place charges around the generator. As she was planting charges, a battle droid snuck up behind her, but Ahsoka noticed it and sliced it in half. The battle droid's body rolled over more sensors and activated additional retail droids. With her master pinned down by the horde, Ahsoka noticed a piece of wall behind him with a convenient hole right where Skywalker was positioned. She used the Force to push the wall down, crushing the droids around her master.[6]
Meanwhile, back in the city, Kenobi had been captured by the Separatist General Whorm Loathsom. To stall for time, Kenobi suggested the two sit down for a drink and discuss Kenobi's surrender. However, the general quickly got tired of this and saw through Kenobi's plan. Just as Loathsom ordered Kenobi's forces to surrender, the shield blew up and Kenobi was able to take the Separatist General hostage. The Battle of Christophsis had proved a major victory for the Republic.[6]
When the battle was over, Skywalker noted how reckless his new Padawan was. As Tano and Skywalker found themselves settled, Yoda wondered if having a Padawan would calm Skywalker's wild ways.[6]
Battle of Teth and rescuing Jabba's son
Ahsoka and Rotta the Huttlet during the Battle of Teth
After the Battle of Christophsis, Skywalker and his new apprentice were dispatched to find and rescue Jabba the Hutt's missing son Rotta, who was captured by Separatist forces and brought to the planet Teth. Rescuing Rotta was critical to ensure trade and shipping routes for the Republic through Hutt Space in the Outer Rim Territories.[6]
Once on Teth, it became clear that it was impossible to land at the B'omarr Monastery, which forced the Republic forces to land below the monastery and climb the mountain with AT-TE walkers where the building was located. The climb proved to be a challenge, but the Jedi and clones eventually reached the top of the mountain.[6]
Ahsoka Tano crosses blades with Asajj Ventress.
After securing the outer perimeter, they discovered a protocol droid caretaker called 4-A7, who revealed the location of the captured Hutt. Skywalker and Tano went to look for him and had to go through a few droids but eventually found the cell where the Hutt was located. Rotta turned out to be just a baby. Meanwhile, 4-A7, who was the dark acolyte Asajj Ventress' servant, recorded the Jedi's speech. Ventress transmitted the recording to her master, Count Dooku, who gave the "evidence" to Jabba that the Jedi were behind the kidnapping. Dooku assured Jabba that he would sent his army to "rescue" Rotta.[6]
With the incoming droid army on their way and the little Huttlet sick, the Jedi had to look for another way out to bring the kidnapped Hutt back to Tatooine. On their way out, Ventress had arrived and eventually located the two and engaged them in battle. After a brief duel, they managed go escape on a Can-cell to a nearby hangar, where a ship was landed, followed by their astromech droid, R2-D2. Once on the other platform, they encountered 4-A7 once again. However, it became obvious the droid was a spy when three battle droids came out of the ship. The Jedi destroyed the droids and hijacked the ship.[6]
While on the escape, Master Kenobi and Republic reinforcements had arrived with Kenobi engaging in a duel with Ventress. Now on the ship, Skywalker and Tano attempted to land on a Republic Star Destroyer, but the cruiser's hangar was destroyed, forcing the Jedi to make their way to Tatooine on their own. As the two jumped to hyperspace, Ventress and Kenobi sensed their withdrawal. Kenobi, knowing that Ventress had failed her mission and that her master wouldn't be pleased by that, managed to gain the upper hand over Ventress until she boarded a Vulture droid to escape capture.[6]
Meanwhile, Tano and Skywalker found medicine for the Huttlet, which saved his life as they made their way back to Jabba's palace on Tatooine. However, as they approached Tatooine, they came under attack by two MagnaGuards in Rogue-class starfighters. Despite destroying the fighters, their ship was forced to crash-land in the Dune Sea. Tano, Skywalker and R2 then took Rotta across the Dune Sea to reach his father's palace. However, she and Skywalker sensed Dooku's presence.[6]
Tano returns "Stinky" to his father
While Skywalker distracted Dooku, Tano and R2 took Rotta to Jabba's palace. However, they came under attack by several MagnaGuards. Tano fought the MagnaGuards, destroying them all and meeting up with her master at Jabba's palace. However, Jabba ordered their execution until he was contacted by his uncle, Ziro. Senator Padmé Amidala then revealed to Jabba that his uncle was working with Dooku and was the one who arranged Rotta's kidnapping. Jabba then spared their lives, and Tano and her master were picked up by Master Kenobi and Yoda.[6]
The Malevolence
- "Wait! Just because there haven't been any survivors before doesn't mean there won't be any this time!"
- ―Ahsoka Tano, to Chancellor Palpatine and Jedi Council
Tano, along with her master, were sent to protect the staging area in the Bith system. She and Skywalker were contacted by Master Plo Koon, who had tracked the Confederacy's secret weapon to the Abregado system. When Koon's transmission was lost, Tano urged her master that they send support to him, but they needed the Chancellor's and Council's permission. During the meeting, Skywalker and the Council believed that there were no survivors and ordered him to protect their convoys. Tano then spoke up and urged them to search for survivors, but she was rebuffed by the Council and the Supreme Chancellor for her outburst. Skywalker had Admiral Yularen deploy their fleet while Skywalker and Tano took the Twilight to "scout ahead."[12]
Despite Tano's outburst, her master agreed with her that they must search for survivors. At first they were unsuccessful and were ordered by both Kenobi and Palpatine to give up their search. Tano then sensed Master Plo and piloted the Twilight to his escape pod's location. Tano and Skywalker found Koon, Commander Wolffe, Sergeant Sinker and trooper Boost. They learned from Koon that the weapon was an ion cannon mounted on an enormous ship that could disable ships. Tano then detected the ship approaching them. At first, the ship passed, but it then detected the Twilight's medical droid TB-2. They were able to escape before the mega-ion cannon's blast wave reached them.[12]

Plo Koon and Ahsoka Tano
Following their return to the Resolute, Skywalker and Tano were given Shadow Squadron to carry out their next mission: to destroy both General Grievous and the Malevolence. Tano and Koon were a bit skeptical of the plan, knowing that Grievous would be well protected by his ship's defenses. Tano and Skywalker were then informed Grievous had attacked a medical convoy in the Ryndellia system. Skywalker deduced that Grievous's next target was the Republic's secret Outer Rim medical center near the Kaliida Nebula. Tano served as Skywalker's gunner aboard his BTL-B Y-wing fighter-bomber.[13]
Tano, along with her master, Koon and Shadow Squadron, took a shortcut through the nebula. Tano detected several Neebray mantas. Despite damage to one of the bombers and an astromech, Tano, Skywalker, Koon, and Shadow Squadron reached the medical station. The Malevolence then arrived, and Tano shot down several of the vulture droids despite her master's fancy flying. When Shadow Squadron started to lose more ships, Tano convinced her master to target the ion cannon instead of the bridge. They succeeded in disabling both the Malevolence's ion cannons and its hyperdrive.[13]
Tano, Skywalker and Koon then rejoined Kenobi aboard the Resolute as he continued in attacking the Malevolence. However, Tano detected a Naboo ship approaching the battlefield. Tano then picked up a comm signal from the ship's pilot, Senator Padmé Amidala. When she was captured and her master decided to rescue the senator, Tano was able to scan. She was able to guide both her master and Kenobi through the ship to find Amidala and her protocol droid, C-3PO, until Grievous jammed their transmissions. Tano watched as Skywalker, Kenobi, and Amidala made their escape and the Malevolence crashed into the Dead Moon of Antar.[14]
Battle of Bothawui and Search for R2-D2
Following the Republic's defeat at Falleen, Tano, Skywalker and their fleet were stationed at Bothawui to protect it. Tano agreed with Kenobi that they should retreat, but stood by her master when he refused. Tano was part of Resolute command as Skywalker, R2, and Gold Squadron engaged Grievous's fleet. As Grievous's fleet hit them, Tano then signaled Rex and his AT-TEs to open fire from the asteroids behind Grievous's fleet. Though they destroyed the bulk of Grievous's fleet, Grievous himself escaped.[15]
After Skywalker was injured after his starfighter collided with a large piece of shrapnel, he was brought to the Resolute to recover, though R2 was left behind. Tano later accompanied her master along with R2's temporary replacement R3-S6 on a subsequent salvage operation to try and recover the droid, boarding a nearby salvaging ship piloted by the slimy Trandoshan Gha Nachkt. R3, secretly in league with the Separatists, activated several IG-88 assassin droids which attacked the two Jedi within the ship's cargo hold. After failing to find R2, they left to continue their search, unaware that Nachkt was also in league with Grievous and was secretly hiding R2 from the Jedi. After Skywalker was caught in an ambush by Grievous as a result of R3's sabotaging, Tano and Rex were forced to rescue him. Though they once again escaped the General's clutches, they were also no closer to finding R2.[15]

Ahsoka duels Grievous inside the Separatist Listening Post.
Upon receiving a transmission from R2 aboard Gha Nachkt's ship, Tano and Skywalker were able to follow the transmission coordinates the Grievous's Separatist Listening post on one of Ruusan's Moons. In order to avoid the station's scanners, Tano, Skywalker, R3, Rex, Denal, and several other clones skydived from the Twilight onto the station's surface, gaining entry via lightsaber. Once inside, Skywalker went to rescue R2 while Tano and the clones began to plant explosives all around the station. Tano and the clones were found and attacked by Grievous, who killed all troopers but Rex and Denal. Before he could deal a killing blow to Rex, his strike was parried by Tano's own lightsaber, and the two engaged in a duel. Far outmatched by the cyborg General, Tano retreated into another room full of spare droid parts along with R3. As she hid, she contacted Rex and ordered him to proceed with the mission and continue to plant explosives while she distracted Grievous. Though she was discovered and ambushed by General thanks to the betrayal of R3, she managed to escape into the ventilation shaft and rendezvous back with the rest of the crew and the newly rescued R2. They managed to escape on board the Twilight just as the station exploded, this time with R2.[16]
Capture of Viceroy Gunray
Following the Republic's apprehension of Separatist Viceroy Nute Gunray thanks to the efforts of Padmé Amidala and Senator Onaconda Farr on Rodia, Ahsoka Tano and Master Luminara Unduli were tasked with overseeing Gunray's trip aboard the Tranquility to Coruscant, where he would be put on trial for his crimes. Several Senate Commandos under Captain Argyus were also dispatched as extra security to accompany the Jedi. Though Tano was initially skeptical of the need for so much security for just one Neimoidian, Unduli assured the Padawan that his allies could easily be conspiring against them and devising a rescue plan. The Mirialan Jedi Master was indeed correct, as Count Dooku had already sent his most trusted assassin, Asajj Ventress, to extract the Viceroy and return him to the Separatists. As Tano and Unduli attempted to interrogate Gunray, with the Jedi Master chastising Tano for threatening him out of impatience, Ventress and her small contingent of Super Battle Droids breached the hull of the ship.[17]
Ahsoka duels Ventress aboard the Tranquility.
Tano was left to guard Gunray as Unduli and Commander Gree went to deal with the droids, where she was confronted by Ventress, who had slipped inside the ship undetected. The two dueled for a short time before Ventress managed to free Gunray and trap the Padawan behind an energy shield in his holding cell. Unduli arrived shortly after, freeing Tano so the two of them could duel Ventress together. However, instead of surrendering, Ventress set off several explosives which she had planted in the engine room, knocking both Jedi to the floor and escaping down the elevator shaft. Though Tano wanted to follow and confront the assassin once again, Unduli beckoned her to stay put despite her protests. Ultimately deciding to disobey Unduli's instructions, Tano arrived just in time to save the Jedi Master from certain death by Ventress's blade. United as a team, the two Jedi confronted Ventress for a second time, though she once again escaped, this time accompanied by Gunray, successfully completing her mission much to the dismay of Tano and Unduli.[17]
Rescue on Vanqor

Rex and Ahsoka during the Skirmish at Vanqor
After her master, Skywalker, and Obi-Wan Kenobi were trapped in a cave on the crystalline planet of Vanqor after crash landing during a confrontation with the leader of the Confederacy of Independent Systems Count Dooku, Tano and a small extraction team of clone troopers were dispatched to rescue to two Jedi. Tano and her team blasted apart the collapsed cave opening in order to free Skywalker and Kenobi, who had collapsed from the fumes of a noxious green gas which they had accidentally released. They then re-sealed the cave entrance, trapping a swarm of Gundarks inside.[18]
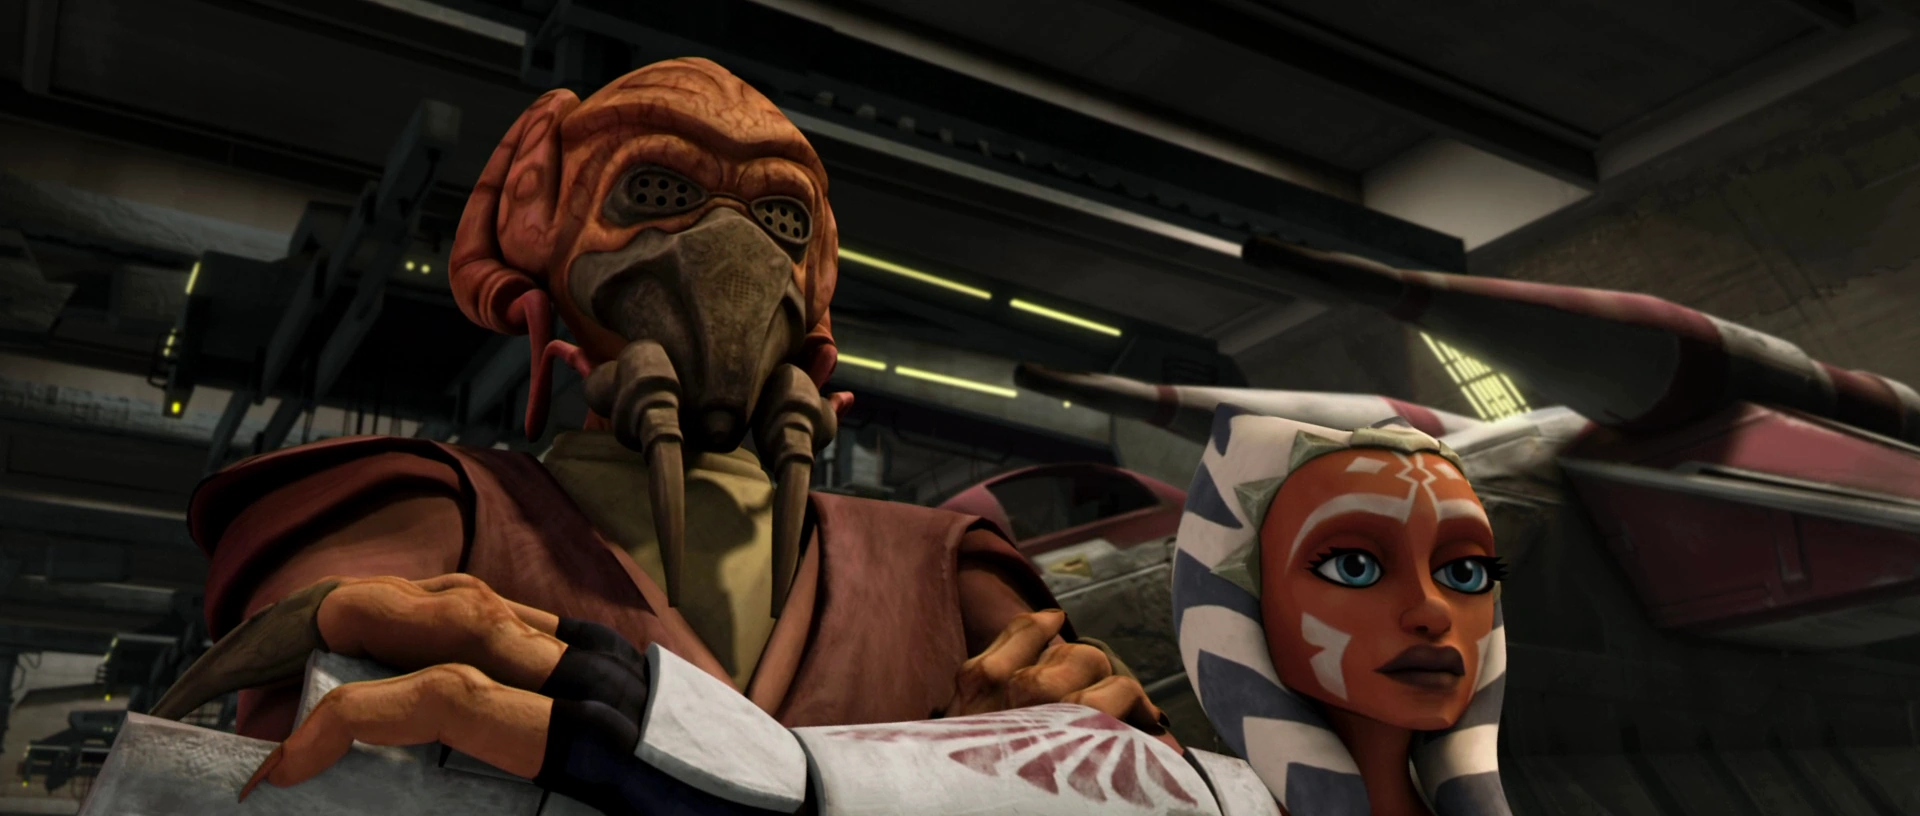
Stranded on Maridun
Ahsoka Tano and Anakin Skywalker, along with a fleet of Low Altitude Assault Transport Republic gunships, were later sent to evacuate Jedi Knight Aayla Secura from Separatist forces after her defeat during the Battle of Quell. The two Jedi, Rex, and their clone battalion managed to board Secura's ship, the Resolute, and rendezvous with the Twi'lek Jedi and her own battalion, narrowly escaping onto a docked cruiser with an injured Skywalker, who had been caught in an explosion from the Separatist attack. They were then forced to jump to hyperspace prematurely in order to escape the exploding Resolute in time, much to the alarm of Admiral Yularen. As a result, they were forced to crash-land on Maridun in order to avoid colliding with one of its nearby stars.[19]
Ahsoka helps defend the Lurmen village on Maridun.
Stranded on the planet's surface following the explosion of their cruiser, they set up a crude camp using some parts from the wrecked ship. Fearing for her wounded master, Tano volunteered to watch over him with Rex, but Secura insisted that they instead work together to find help from the local population. Tano reluctantly agreed and accompanied Secura and Commander Bly to scout for help while Rex remained with Skywalker. Along the way, the young Padawan confessed to Secura her feelings of confusion towards the Jedi Code over the rule of not forming attachments yet also showing compassion. In response, Secura shared similar feelings that she used to have regarding her own master, whom she eventually was able to let go. Not long after, they were ambushed by a pack of Mastiff phalones which killed Flash, Lucky, and Cameron. After a long journey, they eventually found the local Lurmen village, encountering the village elder Tee Watt Kaa and his son Wag Too. Initially, Watt Kaa refused to help the Jedi, not wanting to be involved in the war, but later agreed to send his son with Tano to retrieve Skywalker for healing on the condition that Secura remain with him as insurance. Wag Too and Tano later returned with Skywalker, and Too was able to heal his wounds using native healing oils.[19]
The Jedi were later forced to leave the village after Separatist forces arrived under the command of Lok Durd in order to impose their "protection" of the Lurmen people, in order to prevent the villagers from paying the price due to their presence. As the Jedi were in hiding, they discovered a nearby heavily guarded Separatist base the the existence of a Durd's superweapon: the Defoliator, which was capable of destroying all organic life. Determining that Durd meant to test this weapon on the Lurmen village, the Jedi revealed themselves to protect the villagers. At first, Tee Watt Kaa adamantly opposed getting involved, even if it meant defending his people, but changed his mind after the Jedi successfully fended off Durd's forces and saved the village from annihilation, thanking them personally for their efforts.[20]
Containing the Blue Shadow Virus
Ahsoka and Padmé investigating the Blue Shadow Virus
After the sudden disappearance of Senators Padmé Amidala and Jar Jar Binks on Naboo during her investigation of a viral outbreak among the natives, Tano, Skywalker and Kenobi were dispatched to Theed. Upon arrival, Skywalker sent Tano with Gungan native Peppi Bow to investigate the swamps where Amidala and Binks were last seen. Inadvertently, they triggered a spy camera, which they managed to hide from, indicating the presence of an underground bunker beneath the swamp. Acting on the instructions of Kenobi and Skywalker, Tano infiltrated the facility by dropping a thermal detonator down one of the exit hatches, allowing for easier entrance. Tano and Rex then distracted Nuvo Vindi's droids, allowing Kenobi and Skywalker to infiltrate the facility quietly. The Jedi captured Vindi before he could detonate the bombs inside the facility and thus release the Blue Shadow Virus into Naboo's atmosphere. However, unbeknownst to anyone, one of Vindi's servant droids had stolen one of the bombs before it could be deactivated by Kenobi and the bomb squad.[21]
Before the facility could be properly evacuated, the servant droid activated its bomb, releasing the virus. Amidala triggered the alarm in time, shutting down the facility and preventing the virus from escaping to the outside. Ahsoka Tano, trapped inside, made it into a safe room along with several other clones, but was unfortunately contaminated. While her masters attempted to find a cure on Iego, Tano and Amidala worked together to prevent any droids from escaping the facility and thereby releasing the virus into the Naboo's air. Eventually, thanks to Jar Jar Binks's clumsiness, Amidala also became infected by the virus, and her and Tano's conditions began to worsen as time went on, and many clones died. At one point, Tano collapsed and fell unconscious from the effects of the virus. Luckily, Skywalker and Kenobi were able to obtain a cure, stop the virus, and rescue Rex, Amidala and Tano.[22]
Battle of Ryloth
Anakin consoles Ahsoka after the loss of her squad.
Ahsoka Tano took command of her own squadron for the first time during the Battle of Ryloth, which she participated in along with her master, leading clone pilots Axe, Slammer, Kickback, Tucker, and Swoop into battle against the Separatist Blockade led by Captain Mar Tuuk over Ryloth. However, after they were ambushed by four Munificent-class star frigates, Tano insisted stubbornly that they continue their attack rather than retreating as instructed to her by Skywalker and Admiral Yularen. After many of the clones' starfighters was destroyed as a result, Tano returned to the Resolute, devastated by the loss of her squad. Her master then reprimanded her for disobeying direct orders, and though she claimed that she was only acting on his teachings, she accepted full responsibility for her actions. Though Skywalker attempted to console her, the loss of her pilots left Tano scarred and feeling incredibly guilty.[23]
Later, Skywalker devised a plan to ram the Defender directly into the blockade, thus taking out Tuuk in the process, and allowing the full bulk of their forces, under the command of Tano, to finish the job by taking out the rest of the blockade while Skywalker jettisoned himself in an escape pod. Tano, still affected by her losses, reluctantly accepted leadership once again, this time successfully destroying the blockade with her Y-wing squadron while simultaneously protecting the Resolute by ordering Rex and Yularen to tilt it away from the enemy fire so that only the belly of the ship was exposed. With the blockade destroyed, the Republic could begin their liberation of the Twi'lek people.[23] Tano and Skywalker later assisted Mace Windu by fighting off the bombers tasked with destroying Lessu City as air support. By driving out and defeating the Separatists and Wat Tambor, the Republic successfully liberated the planet from Dooku's control.[24]
First battle of Felucia and protecting the archives
Tano, Skywalker, and Kenobi were later dispatched to Felucia to participate in the first battle of Felucia against the Separatist forces that had blockaded the planet. Unfortunately, they were vastly outnumbered and an evacuation squad led by Plo Koon was sent to retrieve them. Despite instructions from both Kenobi and Skywalker to retreat, Tano continued to engage the battle droids, insistent on continuing the defensive and refusing to run. However, she eventually relented after he master ordered her and her troops to get inside his gunship. Moments later, the clone turbo tank that she had previously been standing on was destroyed by the droids, making Tano realize that she would have died had she not retreated.[25]
Tano reprimanded by the High Council on Coruscant.
As a result of her actions during the battle, Tano was brought before the Jedi High Council. Tano admitted that she had been wrong not to retreat immediately, stating that she had been "caught in the moment." Though Skywalker tried to take responsibility for the incident, arguing that he had given Tano "too much freedom," Master Windu dismissed his argument and had Tano sent to the Jedi archives for guard duty to work alongside master Jocasta Nu, in order to allow her time to reflect on her disobedient actions. When Tano asked how long she would be on guard duty, Windu responded by extending the punishment.[25]
Unbeknownst to Tano, she was about to see more action than expected as skilled bounty hunters Cad Bane and Clawdite Cato Parasitti, disguised as recently deceased Jedi Ord Enisence, had infiltrated the temple with the goal of obtaining a holocron from the vaults. Alerted to the presence of the infiltrators by master Yoda over her comlink, Tano confronted Parasitti, now disguised as Jocasta Nu, and engaged her in a short lightsaber battle. Tano easily defeated the inexperienced Clawdite, taking her into her custody. Unfortunately, Bane was able to complete his mission and steal a holocron. Luckily, the Jedi were given a clue towards finding him after the captured Parasitti told them that Bane's next objective involved keeper of the kyber memory crystal Bolla Ropal. As Kenobi remained on Coruscant to search for Bane, Tano and Skywalker headed to the Devaron system.[25]
Confronting Cad Bane
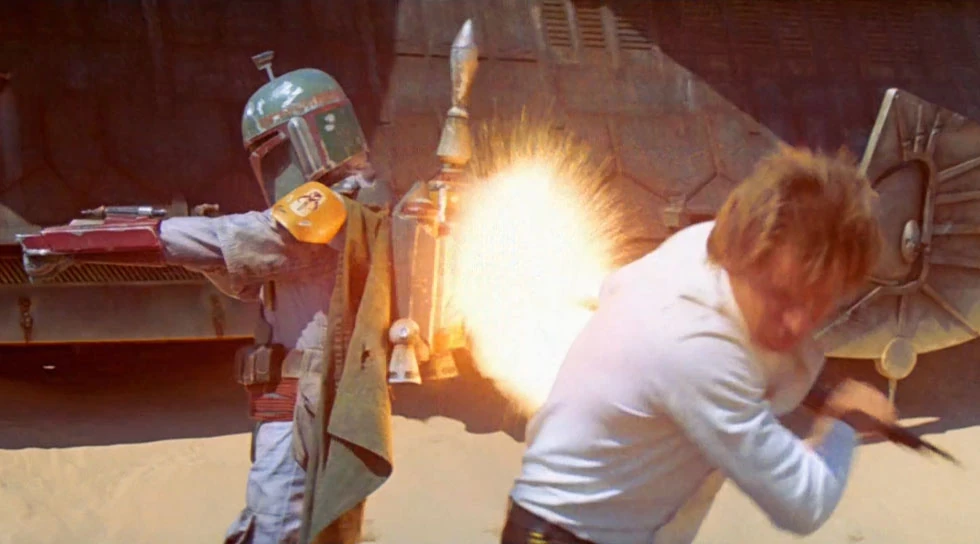
Arriving in the Devaron system, Tano and Skywalker's cruiser was forced to engage Bane's Separatist fleet, as the Duros bounty hunter had already captured Ropal. Infiltrating Bane's frigate, the two Jedi stormed the bridge, using R2-D2 to access the ship's computer to locate Ropal. Unfortunately, they arrived too late, with Tano finding only his corpse inside the detention block. The Jedi then pursued Bane into the ship's gunnery room, with the latter switching off the artificial gravity as he and his battle droids attacked. After R2 reactivated the gravity, Bane attempted to flee. Tano, not willing to let him escape, pursued him despite her master's warnings. Confronting him in a dead-end corridor, Tano managed to beat Bane in hand-to-hand combat after he disarmed her. However, as she attempted to retrieve her lightsaber with the Force, Bane suddenly grabbed her ankle and sent a paralyzing electric shock through her body, rendering her unconscious. Bane then bound her wrists with Stuncuffs and stole her Padawan Silka bead braid, holding her hostage, hoping that her master would come and try to rescue her.
Tano is held hostage by Cad Bane.
Once Skywalker did indeed arrive, Bane blackmailed him into unlocking his stolen holocron, threatening to launch Tano into space by opening an airlock behind her. Bane opened the airlock anyway, forcing Skywalker to save his Padawan as Bane once again escaped. The Jedi escaped the exploding ship along with Rex, Denal, and several other clone troopers, completely unaware that Bane had actually killed Denal and redressed himself in the clone's armor. Tano later apologized to Skywalker for once again disobeying her master's orders, but he replied that the mission's failure was his fault and not hers.[26]
After returning from their failed mission, Tano and Skywalker were instructed by the Council to track down and intercept Bane on Naboo in order to prevent him from abducting one of the local Gungans, a Force-sensitive infant named Roo-Roo Page. Tano and Skywalker were able to ambush Bane in the infant's bedroom, with Tano confronting him with her lightsaber. After a failed escape attempt, Bane wad finally brought into custody and Page was returned to his mother. Before he was taken away, Tano reclaimed her stolen Padawan braid. Though they successfully prevented the kidnapping, there still remained several other Force-sensitive children that Bane had succeeded in stealing away, and so the two Jedi began to investigate Bane's starfighter in order to find any clues as to where he might have hidden the children. Determining that they were most likely on Mustafar, Tano and Skywalker set out immediately to the volcanic planet. There, they found the children in one of Darth Sidious's secret facilities, battling several surgery droids in order to recover the children, whom they returned safely to their respective families. After the mission, they returned to the Temple, where Tano was disappointed to learn from the Council that Bane had escaped once again.[27]
Second battle of Geonosis


Ahsoka and Barriss Offee during the Second Battle of Geonosis
Along with her master, Ahsoka Tano participated in the Second Battle of Geonosis with masters Obi-Wan Kenobi, Luminara Unduli, and Ki-Adi-Mundi. The Jedi, hoping to recapture Geonosian and Separatist leader Poggle the Lesser, planned a three-pronged attack against Poggle's Geonosian droid foundries. Early on in the mission, Skywalker and Tano's gunship was shot down, but the Padawan-master duo survived and continued their attack, battling the Geonosian defense line. After reuniting with Mundi and his troops, who had been separated from the main force, Tano and Skywalker began to throw Electromagnetic pulse grenades to disable the enemy cannons, enabling the AT-TEs to destroy the shield generator, which forced the remaining Geonosians to surrender. Tano and Skywalker then playfully exchanged their kill counts, though Mundi's far rivaled both of their own.[28]
Tano began to grow frustrated with Skywalker after he continually cut her off during the briefing for the next stage of the mission, believing that she had not earned her master's complete trust. After master Luminara and her Padawan Barriss Offee arrived to help plan the attack on the droid foundry, Tano and Offee were sent to infiltrate and destroy the foundry from the inside by sneaking through the underground Geonosian catacombs underneath the facility while Unduli and Skywalker engaged in a frontal assault as a distraction. Though Tano was initially annoyed by Offee's "dependable" nature due to her own feelings of inadequacy, the two Padawans quickly bonded and were able to work well as a team. Though the two Padawans were able to make it into the reactor room, they were ambushed by one of Poggle's super tanks, which promptly fired upon them. After Offee destroyed the two droid drivers, she and Tano took control of the tank, deciding to use it on the reactor, fully aware that they would likely perish as a result of the explosion. They successfully destroyed the foundry and were buried under the rubble, surviving the explosion. Tano was then able to save both of their lives by hot-wiring her comlink in order to alert Unduli and Skywalker of their location. Upon being rescued, both masters were happy to see that their Padawan's had survived. Unduli informed Tano of the fact that her master never gave up on her.[29]
Incident aboard TB-73
After the successful rescue of master Luminara Unduli from the Geonosians and the subsequent death of Queen Karina the Great,[30] Tano and Offee were sent to transport medical supplies from Geonosis to Mace Windu on Dantooine from a station near Ord Cestus on board the medical frigate TB-73. They were, however, unaware that several Geonosian brain worms had been smuggled inside the ship by Scythe, a worm-infected clone trooper. As the worms began to infect the rest of the ship's crew, the worm-controlled clone troopers turned on the two Padawans, who were forced to defend themselves, first in the mess hall against Ox and Edge and later against Trap, whom Offee was forced to kill. Tano, using her lightsaber, then killed Trap's worm, which had emerged from his mouth. In the cargo hold, Tano and Offee fled into the ventilation system after the infected clones outnumbered them. Splitting up, Tano headed towards the communication room to warn master Kit Fisto of the situation while Offee went to disable the thrusters.[31]
Upon making contact with Fisto, the Nautolan Jedi Master instructed her to dock at the medical base despite her concerns over the brain worms spreading. She also updated her master on the situation before ending the transmission. Immediately following her message, she was suddenly ambushed by Barriss Offee, who had been infected by one of the worms on her way to the reactor room. The two fought each other as Tano tried in vain to break the creature's influence over her friend's mind. After a short confrontation, Tano once again escaped into the ventilation system, now the only individual on the ship not under the control of the worms. After learning that the worms were in fact affected by cold temperatures from Skywalker over her comlink, Tano ruptured the coolant system, weakening the brain worms. Offee once again confronted Tano on the bridge, though Tano managed to fight her off, temporarily releasing Offee from the brain worm's influence with a blast from a ruptured coolant pipe. Though Offee begged Tano to kill her, the Padawan instead killed her brain worm as it emerged from Offee's mouth. As the ship docked in the medical base, Fisto entered the freezing ship to find a barely conscious Tano cradling her unconscious friend. The two Padawans were then taken to the medical bay to recover from their ordeal. As Tano pondered what might have happened if she had killed Offee, Skywalker attempted to console her, believing that she did the right thing to save her friend.[31]
At the Jedi Temple on Coruscant, Tano along with Offee watched a transmission of General Grievous and his MagnaGuards torturing Master Eeth Koth. Tano and Offee comforted several of the younglings when Koth screamed in pain. She and Offee then took the younglings away at Master Yoda's request.[32]
An important lesson
Sometime later, Tano and Skywalker were in pursuit of wanted Weequay arms dealer Car Affa within Coruscant's slums. Tracking the criminal to a run-down bar, her master instructed her to wait while he apprehended him. Due to Affa's sudden arrest, a large crowd of patrons swarmed from the bar, and in the commotion that followed, the small Patrolian Bannamu managed to steal the Padawan's lightsaber from her hip. Ashamed, Tano could not bring herself to admit to Skywalker that she had lost her weapon and immediately headed to the archives in the hopes of tracking down her thief once they reached the temple. There, she met the elderly Jedi Master Tera Sinube, who agreed to help her locate her missing lightsaber. At first, Tano was frustrated with Sinube's preference of patience over speed, but grew to accept and respect the old Jedi Master's methods. Eventually, they found the lightsaber in the possession of underworld criminals Cassie Cryar and Ione Marcy. Tano engaged with Cryar in a wild foot chase throughout the city, though the Terrelian Jango Jumper was too quick for the young Padawan and managed to escape.[33]
An unlikely alliance
During the investigation of a missing medical base over Felucia, Tano, Skywalker and Kenobi instead found a Separatist Vulture droid base. After being attacked by a swarm of Vulture droids, the three Jedi were forced to crash-land their shuttle onto the planet's surface, where they discovered a small Felucian village. Though it initially appeared deserted, they soon discovered a group of farmers in hiding, under the protection of a group of bounty hunters.[34]
The hunt for Aurra Sing
After Ahsoka Tano and master Plo Koon rescued Skywalker and Mace Windu on Vanqor,[35] Tano and Koon journeyed into the Coruscant underworld to find a lead on bounty hunter Aurra Sing after the Jedi received a threatening transmission from her and a young Boba Fett, hoping to track her down.[36]
Rescuing Papanoida's daughters
After Chairman Notluwiski Papanoida's two daughters Che Amanwe Papanoida and Chi Eekway Papanoida were kidnapped by the Trade Federation, Ahsoka Tano teamed up with Pantoran senator Riyo Chuchi to help rescue them from custody.[37]
Undercover on Mandalore
Not long after, Tano was dispatched to Mandalore on an undercover mission to help educate Mandalore's youth on the basics of lawful and public-serving conduct.[38]
Return of Aurra Sing
Following her mission to Mandalore, Tano was commended by the Jedi Council for her actions. However, the Council ordered her to remain at the Temple while her master commanded the 3rd Legion on Balith to assist with its civil war. Tano then had a disturbing dream about Aurra Sing,[39] who she thought had perished on Florrum.[36] The visions then showed that Sing was targeting Senator Amidala.[39]
Tano then warned Amidala that she was being targeted by Sing. Despite her warning, Amidala then continued to prepare for her speech at Alderaan's Refugee Conference. However, Tano was allowed to accompany her to the conference as additional security. After their arrival, Tano then saw the location of Sing's attack on Amidala. Tano warned her and Captain Gregar Typho of this. When the conference started, Tano found Sing and stopped her attempt. However, Sing escaped when Tano pursued her.[39]
Despite Tano's and Organa's pleas for Amidala to return to Coruscant, she chose to stay and resume her speech. However, she used a BD-3000 luxury droid to deliver her speech. However, Tano sensed that Sing was not deceived and was able to find Amidala in her room. Tano then rushed and deflected the blast. She then pulled Sing down out the vent. Tano fought her until Sing knocked her out. However, Amidala was able to stun Sing. Tano and Amidala then returned to Coruscant, where Tano identified Sing's employer as Ziro the Hutt,[39] who wanted her dead due to her interference with his plans earlier in the war.[6]
Experiencing politics
Tano watched a session of the Senate as they debated deregulating the banks to fund the creation of more clone troopers. Tano had difficulty understanding the politics behind the war. Tano was left with Amidala by her master so that she could try to understand politics. Tano then allowed Amidala to use her status as a Jedi to go behind enemy lines and speak with her mentor, Senator Mina Bonteri of Onderon of the Separatist Senate on Raxus.[40]
Together, they ventured to Raxus. In Raxulon, they met Bonteri and went to her home. There, Tano met Bonteri's son, Lux. She spoke with Lux about their differences and her meeting with other Separatists such as Ventress and Grievous. Tano then attended a session of Separatist Senate at their Senate Building and watched as the Senate voted to open negotiations with the Republic. Tano and Amidala then returned to Coruscant, where they informed Chancellor Palpatine of their negotiations. However, the banks were deregulated when there was an attack on the power generators. She also learned that her master knew of their mission, and scolded her because it was reckless of her. Tano, however, learned that the politics behind the war were not as black and white as she thought.[40]
Journey to Mortis


Ahsoka was briefly poisoned by the dark side on Mortis
Tano, along with her masters Skywalker and Kenobi, was then sent to rendezvous with Captain Rex to investigate a 2,000-year-old distress signal in the Chrelythiumn system. There, they were brought to the planet Mortis,[41] where Tano had a brief brush with the dark side after being infected with it by the Son. She even died, but the Daughter resurrected her.[4]
Continuation of the war
During the next two years,[5] Tano and her master achieved many things during the war including the freeing of Togruta slaves,[42] saving her Master and many others on multiple occasions, and even halting a plot masterminded by Darth Sidious himself. She also engaged some of most deadly people in the galaxy, most notably Asajj Ventress, General Grievous, and Cad Bane several times, always surviving without any serious injury. Tano formed close bonds with many members of the Order, which included Plo Koon, Barriss Offee and Obi-Wan Kenobi, as well as people outside the Order such as Padmé Amidala and Lux Bonteri, to whom she developed a romantic attraction.[source?]
Skirmish on Coruscant
- "Ahsoka... what happened?."
"Let's just say there some complications." - ―Anakin and Ahsoka
Ahsoka runs into some complications on her way to the Jedi temple
In the later part of the Clone Wars, Tano was out on a patrol throughout the busy streets of Coruscant, when she heard Skywalker's booming voice crackle through her comlink demanding she get back to the Jedi Temple for a ceremony in which she was to take part. As she approached the temple, she heard a large crowd screaming for help. Within an instant the Togruta Jedi turned around and followed the sounds of their screams to help them. Upon turning the corner she witnessed a female Aleena and her child being attacked by a rogue droid. Immediately she noticed that some of its wiring was exposed. She at first utilized the Force to throw a crate towards it, to get its attention. As it approached her underneath residential water pipes, Tano ignited her dual lightsabers. She sprinted towards it, slicing one of its legs off, and proceeded to jump up and sever the water pipes. Water gushed down onto the droid, causing it to break down. The Padawan checked to see if the mother and child were okay, before she suddenly remembered the ceremony that she was already late for. As she eventually arrived at the Jedi Temple, she met Skywalker and Yoda by the Great Tree. As the ceremony began, Master Yoda stated that Tano was humble and brave, which he thought of as a sign of maturity. He went on to say that she was on the right path to becoming a Jedi Master, before awarding her with an add-on to her Padawan braid.[43]
Training Onderon's Rebels
Tano, along with her master Skywalker, Kenobi, and Captain Rex by the Jedi Council to train and assist the rebels of Onderon in their fight against King Sanjay Rash and his Confederate occupation forces. There, she met up with rebels' leaders, Steela Gerrera, her brother Saw, and former junior senator Lux Bonteri. She, and her fellow Jedi were successful in teaching the rebels in fighting the battle droids.[44]
After infiltrating Iziz, Tano was left behind to continue acting as liaison between the Rebels and the Jedi.[44] With the rebels, Tano, Bonteri and the Gerrera destroyed the power generator to disrupt the battle droids.[45] Tano then assisted the rebels in rescuing King Ramsis Dendup and Saw from their execution. However, she exposed the Jedi's presence.[46]
Bombing at the Jedi Temple
Towards the end of the war, when Tano was at the age of 16,[5] her friend Barriss Offee,[47] who believed the Jedi Order had become evil, corrupt and overly belligerent during the war, secretly orchestrated the bombing of the Jedi Temple on Coruscant, killed the bomber, Letta Turmond, and caused the deaths of clone troopers while framing Tano for these crimes.[48] While running away from Republic authorities and Skywalker, who still believed her to be innocent, Tano met her longtime nemesis Asajj Ventress and briefly allied with her, since both were on the run from their masters. Tano was led by Offee, the only Jedi whom she still saw as an ally, into a trap at an abandoned Coruscant warehouse in Coruscant's undercity, where she was captured by Skywalker's forces.[49] The Jedi Council then expelled Tano from the Jedi Order and turned her over to the Republic for trial, where she was prosecuted by Admiral Wilhuff Tarkin and defended by Senator Padmé Amidala. Tano came very close to a conviction and death sentence, but due to the tireless efforts of her master, she was acquitted at the last moment by the forced confession of a captured Offee.[47]
A new path
- "I'm sorry, Master, but I'm not coming back."
- ―Ahsoka Tano, to Anakin Skywalker
Following her trial, Tano was personally pardoned by the Jedi Council. Plo Koon apologized to her on the Council's behalf, stating they had been wrong to question her loyalty. The Council also stated that the Force worked in mysterious ways and therefore considered her ordeal in hindsight as being her great trial, making her a greater Jedi and proving herself worthy of the title of Jedi Knight.[47] However, the events surrounding her expulsion and trial had severely shaken Tano's faith in the Jedi.[1] As a result, she refused to accept their invitation to rejoin the Order, and left to discover a new purpose for herself.[50]
Ahsoka Tano walks away from the Jedi Order.
Tano's departure from the Jedi Order had a deep impact on those she knew. During a quest to discover the secrets of immortality, Yoda was faced with visions of the Jedi Purge. In one such vision, he saw Tano dying in the halls of the Jedi Temple, with the vision of her asking if she could become one with the Force after being expelled from the Jedi Order.[51] The vision of Tano was a result of Yoda's guilt over having placed her on the path that led to her departure.[52]
Tano's former mentor Skywalker was particularly affected by her departure and felt even more alone in having to fulfill the expectations of being the prophesied Chosen One.[1] Her departure also intensified Skywalker's frustration with the Council, as he felt they had betrayed her and left her with no choice by turning their backs on her during her trial.[53] Kenobi disagreed with Skywalker's opinion, asserting that it had been Tano's decision to leave and that she had allowed her emotions to influence her judgement, something against the Jedi way.[54]
Dawn
The last meeting
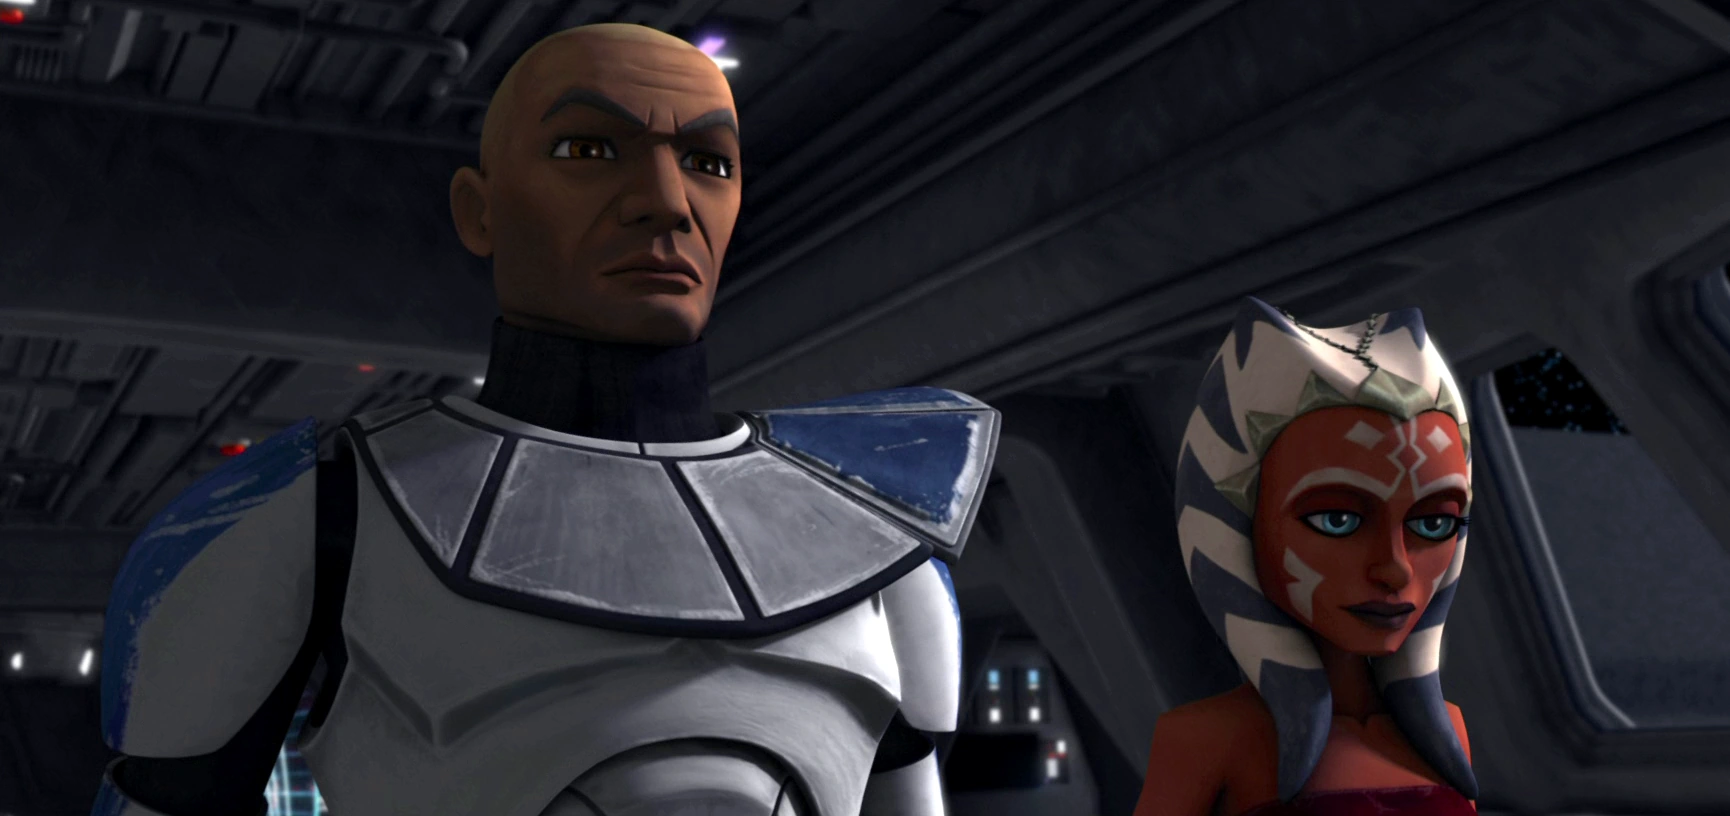
In the last weeks of the Clone Wars,[55] approximately a year after she left,[source?] Tano discovered the whereabouts of the former Sith Lord Maul, who had taken over Mandalore and gained leadership of Death Watch. Shortly before establishing a siege to Mandalore, Skywalker and Kenobi were called back to Coruscant to save Chancellor Palpatine, who had been abducted by General Grievous.[55] Unable to use the help of her former masters, Tano was given the possession of her old lightsabers, and the command of an army of clone troopers led by Rex. Unbeknownst to Tano, this would be the last time she would ever see Skywalker as a friend.[8]
Maul
While Skywalker and Kenobi set out to rescue the chancellor, Ahsoka Tano, with Rex at her side, led the Siege of Mandalore. After a lengthy battle against Maul's forces, she eventually ended up engaging the former Sith in a lightsaber duel. As the two fought, Maul taunting her for her self-imposed exile from the Jedi Order, Tano lured Maul into a plaza where her comrades trapped him in a ray shield.[8]
Fall of the Jedi
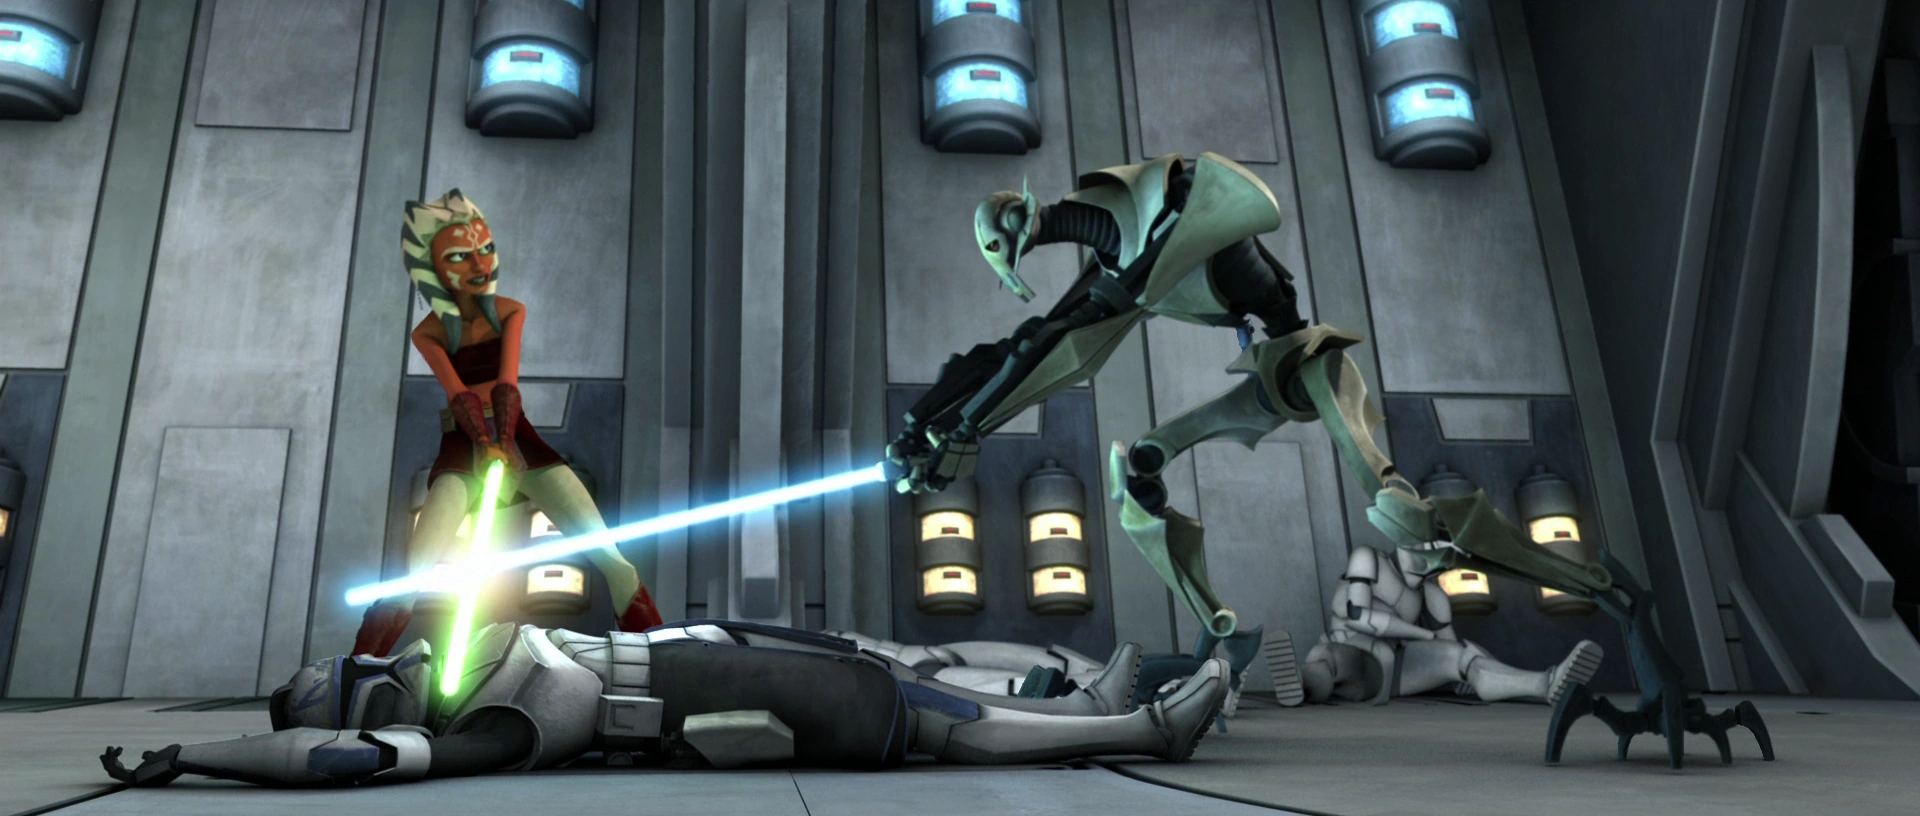
However, all the efforts of Tano and her allies were undone when Chancellor Palpatine, who was actually the Sith Lord Darth Sidious, enacted Order 66, a command that turned the clones against the Jedi and nearly wiped out the entirety of the Jedi Order, including Tano's former mentor Plo Koon. As a result, the clone troopers under Tano's command turned on her, with the exception of Rex, who had previously removed his inhibitor chip, an organic brain implant that compelled each clone trooper to comply with Order 66. As a result, Maul was able to escape once again. Tano and Rex, now fugitives and enemies of the Republic, were forced to fake their own deaths and go into hiding.[8] Neither were aware that Tano's former master, Anakin Skywalker, had turned to the dark side of the Force and massacred the entire Jedi Temple under the new name of "Darth Vader."[56][57]During the last days of the Clone Wars, Darth Sidious used Skywalker's frustration with the Jedi Council, as well as his fear of losing his wife in childbirth, to lure him to the dark side.[57] Following the destruction of the Jedi Order, Tano was listed among the presumed survivors of the purge.[58]
Age of the Empire
Life on Thabeska
After fleeing Mandalore, Tano went into the Outer Rim in order to hide from the Empire. She traveled to Thabeska, which was a planet in control of the Fardi clan, a powerful family of smugglers who hid their operations from the Imperials by also running several legal businesses to cover the illegal ones. Upon arriving on Thabeska, Tano was greeted by several young girls who showed her where she could find food and a place to stay, and introduced her to Fardi, who bought her ship for a less than reasonable price. She later discovered that these girls were Fardi's daughters and nieces, and that Fardi was their family name. The girls had taken her under their wing, and Tano secured herself a place working for Fardi once the girls learned that she was a good mechanic. Under the assumed name Ashla, Tano worked for the Fardi family for several months, earning some money while she continued to grieve the loss of the Republic, clones, and the Jedi Order.[8]
Two months before Empire Day, the first anniversary of Emperor Palpatine's rise to power, Tano was working on some droids in the shipyard on Thabeska, when she noticed some of the Fardi children playing with some crates. When one of the crates began to fall on the children, Tano used the Force to keep the crates from hitting them. Tano had kept her Jedi powers a secret since leaving Mandalore, and feared that she had revealed herself to the children. She reminded them that they should not have been playing near the crates, and they begged her not to tell Fardi, ignoring the supernatural incident they had just witnessed. Only young Hedala Fardi looked at Tano with fascination, and Tano later discovered Hedala lifting some small stones using the Force, revealing herself to be Force-sensitive.[8]
On Empire Day, Tano was informed by the Fardi girls that their father was having important Imperial guests over for dinner and that they wanted to meet anyone who was new to the planet. The girls offered for Tano to come and sit with them at the Empire Day parade and flyby, and told her about how security was a disaster due to the high amount of ships in the shipyard. Tano took this invitation as a subtle warning and opportunity to escape the planet, and Tano used this opportunity to her advantage. She gathered the belongings she had and escaped the city, stealing one of Fardi's ships and leaving the planet. Once in orbit, Tano remembered Hedala Fardi and the danger that she was in, being a Force-sensitive child who would likely be sought out by the Empire, but Tano knew that she was too late, so she left.[8]
Raada
A pastoral refuge


Ahsoka Tano, Jedi refugee
Tano found herself on the remote agrarian moon of Raada in the Outer Rim. Tano landed the Fardi ship at the planet's main settlement. Under the alias of Ashla, Tano befriended a local girl named Kaeden Larte, who was part of a farming community. Kaeden allowed Tano to move into her older sister Cietra's abandoned home. Tano agreed to work as a mechanic repairing droids and other machinery in return for ration packs. While adjusting to her new surroundings, Tano reminisced about her droid friend R2-D2 and having to hide her Force powers. The following day, Kaeden hired Tano to repair her thresher. While repairing the machinery, Tano learned more about Kaeden's life and work as a farmer and considered settling on the remote moon due to the lack of an Imperial presence. After repairing Kaeden's thresher, Tano explored the town and sighted several nearby hills and caves which she identified as a potential hiding place.[8]
On her third day on Raada, Tano took the opportunity to explore the hills and caves ringing the settlement. She found a cave which she identified as her hiding place. Tano later met with Kaeden, her sister Miara Larte and several local friends including the farmer Tibbola, the work crew leader Vartan, and the twins Hoban and Neera at Selda's cantina, which had the best food in the settlement. The cantina was owned by the Togruta bartender Selda and run by the Sullustan woman Malat, who reminded Tano of Jedi Master Plo Koon. While socializing with her hosts, Tano learned that Kaeden and Miara were orphans who had lost their parents in an accident. Vartan had adopted the two girls. When Kaeden asked "Ashla" about her family, Tano claimed that she was adopted. When Selda asked Tano if she was part of the influx of aliens that had migrated out of the Core Worlds, Tano claimed that she was not running from anything but only longed for quiet. Selda advised her to talk to him or Vartan if she encountered any changes.[8]
As time passed, Tano became the settlement's mechanic and repaired numerous broken threshers and other farming equipment. Kaeden and Miara came to regard "Ashla" as an adopted family member and regularly visited Tano to chat and deliver gifts including a door lock. Despite the friendship of the Larte sisters, Tano decided that she had grown bored with her new rustic, backwater adopted home. One free day, she packed up some supplies and went to meditate in the caves alone. Tano sensed a disturbance in the Force and witnessed the arrival of an Imperial Star Destroyer above the settlement. The Imperial official Jenneth Pilar had decided to exploit Raada as a source of crops for the Imperial Military. Despite panicking, Tano decided that the Empire had not come to hunt her.[8]
Tano traveled to Selda's cantina and discussed the arrival of the Empire with Kaeden and her friends. Miara speculated that the Empire had come to explore the possibility of growing crops on Raada. The arrival of Imperial rule saw the introduction of new restrictive measures including night curfews, rules forbidding large group meetings, and restricting cantinas' operating hours, food, and alcohol. In response, Tano advised her friends to start stockpiling rations. While several Imperial personnel visited the cantina, Tano and her friends avoided contact with the Imperials by playing a game of crokin.[8]
Sowing seeds of rebellion
The following day, Tano was visited by a pair of stormtroopers who attempted to conscript her into the food production. However, Tano used a mind trick to convince the stormtroopers not to reassign her. After evading the stormtroopers, Tano headed to the caves to hide her rations. Tano then headed to the spaceport to retrieve her starship. After haggling with an Imperial officer, she manage to hide her freighter in a nearby gully. To ensure a quick escape, she positioned the starship's nose upwards towards the sky.[8]
Later, Tano met up with Kaeden, Miara, and the other farmers at Selda's cantina where they learned that Malat and her husband had migrated to Sullust. Tano also learned that the Empire had added two hours to every shift, much to the resentment of the farmers. Tano and her friends were present when a drunken Tibbola got into a scuffle with an Imperial officer. The Imperial officer overpowered Tibbola and ordered a stormtrooper to shoot the farmer dead. Following the incident, Tano advised the farmers to resist the Empire by slowing down crop production since they lacked the weapons to expel the occupiers. She also encouraged the farmers to form a resistance movement from among the work crews.[8]
For the next two weeks, Tano spent her days smuggling food, medical supplies, and water recyclers out to the caves. Tano was aided by the bartender Selda and several local vendors. In response to the slow production, the Imperials extended the farmers' work shifts without increasing food rations, water, and breaks. Vartan discovered that the Empire was growing a new artificial crop on Raada that leached the planet's soils, preventing the farms from growing more crops. This fueled local resentment against the Empire since Raada had little arable land. Tano convinced Vartan to lend her Miara and Kaeden, whom she recruited for assembling bombs that were to be used to attack Imperial forces. After several days, Vartan had recruited forty farmers including Hoban into the resistance movement.[8]
Later, Tano led a team consisting of Miara, Neera, and the Rodian Kolvin on a mission to plant the corrosive charges on the Imperial walkers stored at the Raadian shipyard. Due to the weak stormtrooper security, Tano and her team infiltrated the spaceport easily. While planting charges, Tano discovered that Miara had smuggled a real bomb. After evading stormtrooper sentries, Tano and her team headed back to Selda's cantina. There, she discovered that Vartan had sent Hoban and Kaeden on an unsanctioned mission to attack the Imperial admin building. Since the uprising was premature, Tano urged the farmers to return home and to disavow any knowledge of what had happened that night. However, Miara refused to abandon her older sister. A reluctant Tano agreed to rescue Kaeden and the others but warned Miara to follow her orders and bring the explosives.[8]
An abortive uprising
As they headed towards the Imperial admin building, Neera revealed that Hoban had split the resistance fighters into three groups and that they had taken most of the explosives and blasters. Tano ordered Miara to hide in the caves and Neera to bring the remaining resistance fighters to the caves. Tano decided to disable the Imperial tanks. When Miara asked "Ashla" what she was going to do, Tano responded that she would head to the thickest part of the fighting and evacuate as many people as she could. Tano also confided that she was a veteran of the Clone Wars.[8]
After separating from Miara, Tano and Neera headed to the Imperial compound. Hoban's ill-equipped peasant fighters had been repelled by the garrison's heavy artillery and the five remaining survivors including Hoban and Kaeden were pinned down by enemy fire. While Neera rounded up the surviving farmers, Tano planted explosives behind the Imperial tanks. These explosives did not destroy the tanks but immobilized them. With the Imperial advance halted, Tano took the opportunity to lead the five survivors to safety. Tano managed to knock a stormtrooper to the ground and stole his blaster. While fleeing the fighting, Tano and the farmers were blocked by a row of stormtroopers. Hoban surrendered but was gunned down by the stormtroopers.[8]
Before the stormtroopers could execute the remaining survivors, Tano used the Force to fling the stormtroopers' blasters to the ground. Tano and the Raadian farmers then fled to the caves. With little choice, Tano revealed her identity as a former Jedi apprentice to Kaeden and the other farmers. Kaeden was angry with Tano for not revealing her Jedi identity since she could have saved Hoban's life. Following the failed uprising, Tano considered leaving to avoid drawing further attention from the Empire. While meditating, Tano was interrupted by Miara, who informed her that her sister Kaeden had left the caves and headed back to town. Tano instructed Miara to stay in the caves while she went to find Kaeden.[8]
Meanwhile, Kaeden returned to her home only to be captured by eight stormtroopers. Despite being tortured, Kaeden refused to reveal Tano's name and the location of her fellow rebels. Kaeden managed to infiltrate the Imperial admin building and retrieve Kaeden from her cell. Using her Force powers, Tano managed to carry Kaeden out of a high window. After escaping to the outskirts, Kaeden told Tano that the Imperial commander had taken an interest in her and advised her to leave offworld. Kaeden thanked her for helping them and Tano promised that she would return.[8]
Return to the Fardis
Tano's presence on Raada drew the attention of both the Galactic Empire and Senator Bail Organa, an old friend of the Jedi. The Empire also dispatched an Inquisitor known as the Sixth Brother to Raada to draw her out of hiding. Meanwhile, Senator Bail Organa took an interest in reports of Jedi activity on Raada and contacted Captain Raymus Antilles to retrieve R2-D2 for a secret mission to find Tano. After retrieving R2-D2, Organa hired the pilots Chardri Tage and Tamsin to find Tano and then contact him to arrange a rendezvous. Organa believed that the former Jedi would make a worthy ally in the rebel movement he was building.[8]
After traveling through seven systems and hearing reports about Imperial oppression on the Wookiee homeworld of Kashyyyk, Tano decided to returned to Thabeska in order to check on the Force-sensitive Hedala Fardi. Upon landing in the Fardi shipyard, Tano was greeted by the Fardi patriarch who told her that she was always welcome to work as a mechanic for his family. The Fardi patriarch also told Tano that his daughters missed her and invited her for dinner. Tano was greeted by the now five-year old Hedala, who confided that she had sensed a "shadow" while Tano was away. While having dinner, Tano chatted with the older Fardi sisters Chenna and Makala about life while taking care not to disclose her adventures on Raada. "Ashla" claimed that she had seen people suffering in the galaxy, but there was nothing she could do about it. Tano also remarked that it was difficult for her to hide since she stood out as a Togruta.[8]
Over the next five days, Tano spent her time working on a large Fardi transport, turning the engine and installing a new compressor. When she managed to find time alone with Hedala, Tano asked the little girl about the shadow. Hedala explained that she never saw the entity but could sense its presence. Hedala also mentioned that the shadow had one day mysteriously disappeared. Tano believed that this shadow was a dark side creature, recalling rumors of a dark lord that served the Emperor. This "shadow" was actually the Sixth Brother, who had been hunting Hedala, but was redeployed to Raada in response to Tano's activities. Tano complimented Hedala for staying out of the shadow's way and told her not to mention the shadow to her sisters. Tano decided to stay with the Fardis since she was safe with them.[8]
A week later, Tano requested a new job from the Fardi patriarch. Fardi sent her to ferry supplies to the other branches of the Fardi family in the other cities on Thabeska. During her flights, Tano came to suspect that the Fardis were using her to smuggle goods. Fardi later assigned her offworld transport missions. While on a routine flight, she rescued a group of humans from an escape pod. Their shuttle had been attacked by pirates, who had taken several hostages. The humans were part of a company that had been targeted by a rival firm competing for a large project. Tano suspected that the rival firm had colluded with the pirates to kidnap hostages in an attempt to bankrupt the company. Tano agreed to help the humans and rescued their companions from the pirates.[8]
Entanglements
Later, Tano returned to the Fardi household and discovered that stormtroopers were conducting a routine search of the house. To avoid drawing Imperial attention, Tano claimed that she had repaired the Fardis' ship and taken it for a spin around the system. The Fardi patriarch vouched for "Ashla" and claimed that she was his mechanic. Tano also spoke with Hedala and learned that she had sensed no "shadows" that day. When the stormtroopers and their commanding officer asked about the metal pieces they had found in her room, Tano claimed that they were just "bits of junk" that she had picked up from doing various jobs. The Imperials accepted her story but "advised" Fardi to be careful about associating with criminal elements.[8]
After the stormtroopers had left, Fardi apologized for getting Tano entangled in his family's activities. Fardi confided that he was aware that she had been using the ships to run her own mercy missions. While appreciating her services as a mechanic and pilot, Fardi advised Tano to leave to avoid further entanglements with the Empire. Without telling Fardi that his youngest daughter Hedala was Force sensitive, Tano told him that she was special and to be careful with her. Thinking that Hedala had potential to be a mechanic, Fardi promised to protect his youngest daughter. Before leaving, Tano hugged Hedala and told her to avoid the "shadows." The Fardis allowed her to leave in her ship.[8]
Tano took the Fardi ship to small, sparsely populated world in the Thabeska system. However, she was followed by a starship flown by a female Black Sun agent, who had come to extort credits from her for the damage her smuggling activities with the Fardis had inflicted on their operations. In order to pay off these "debts," the Black Sun agent offered her a job, but threatened to kill her if she did not accept her offer. Tano rejected the Black Sun agent's offer and fled back to her ship under fire. The Black Sun agent gave chase in her ship. During the dogfight, Tano decided to cast her aside her pseudonym as "Ashla" for good and to embrace her identity as Ahsoka Tano.[8]
The Black Sun ship managed to damage her freighter's starboard engine. Before Tano's ship could sustain further damage, a larger ship appeared in the atmosphere and chased the Black Sun ship away. Tano managed to take her freighter into space, but burned out her port engine. Before she could engage the hyperdrive, she was caught in the tractor beam of the second ship that she had encountered. This ship belonged to Tage and Tamsin, who had been sent by Senator Organa to find Tano. Believing the second ship to be hostile as well, Tano armed herself with batons. When Tage and Tamsin entered the ship through the hatch, she knocked them out cold.[8]
While navigating her way to the bridge to disable the tractor beam, Tano encountered her old friend R2-D2 in the engine room. R2-D2 told her that he now worked for a senator and that Tage and Tamsin had been sent on a mission to take her to meet someone. The droid also confirmed that the senator was the Jedi sympathizer Bail Organa and that he had indeed sent the pilots to pick her up. Tano convinced R2-D2 to release the tractor beam on her ship and to tell everyone that he never saw her. However, she instructed him to make sure that she could track his ship. After repairing her ship, Tano left Tage's ship and hid on one of the small moons that orbited the planet where she had encountered the Black Sun agent. After R2-D2 had transmitted the coordinates of Tage's ship, she slept aboard her freighter.[8]
A new ally
After Senator Organa arrived in his CR90 corvette Tantive IV, Tano donned a pressure suit and boarded the Senator's ship through a hatch that R2-D2 had left open. Tano surprised Senator Organa in his temporary office. After exchanging pleasantries about R2-D2, Tano explained that she did not come with Tage because she distrusted anyone who employed a tractor beam before saying a hello. Organa admitted not telling his pilots who she was in order to protect her true identity. Addressing her as "Padawan Tano," Organa then told Tano that he was recruiting people for a rebellion against the Emperor, the Empire and everything it stood for.[8]
Tano responded that she was no longer a Padawan and recounted the previous events on Raada to Organa. Senator Organa told her that she could not fight the Empire alone and offered her a place in the emerging rebellion. However, Tano stated that she could not become a commander again due to her experiences during the Clone Wars. Organa replied that he could find another job for her. Tano then told Organa that "something" was hunting down Force-sensitive children throughout the galaxy. She agreed to join the rebellion if Organa agreed to help her protect the children. Senator Organa accepted her bargain and told Tano that he needed her help for a mission on Raada.[8]
Tano agreed to the mission, but requested a meal since she was exhausted from her earlier adventures. Bail informed her that his contacts in Raada's sector had reported the presence of a new Imperial agent who had gray skin and was armed with a lightsaber. This agent turned out to be the Inquisitor Sixth Brother, who had been stalking Hedala and was now charged with rooting out Tano. The Sixth Brother had earlier launched an attack on the Raadian insurgents who had retreated to the caves. He had recaptured Kaeden but killed the other farmers including Kolvin and Neera. Only Kaeden's younger sister Miara survived the massacre.[8]
Tano opined that the new Imperial agent was a Force wielder who had been sent by the Empire to hunt down Jedi. She traced the Inquisitor's arrival to Imperial interest in her "acts of kindness" in the local sector. Senator Organa cautioned Tano that the Empire could be setting a trap for her. While studying footage of the Imperial agent on Organa's datapad, Tano discovered that her friend Kaeden had been captured and was bound to chair. Tano panicked, but Organa firmly told her to calm down. He stressed that she needed to rest and plan. Organa also assured her that the Empire would not hurt Kaeden because they wanted to lure her out of hiding. In the Tantive IV's hangar bay, Tano reflected on her mission with R2-D2.[8]
When Captain Antilles entered the office to investigate Tano's intrusion, Organa reassured him that she was a friend. Tano then rested in a room that Senator Organa had provided for her. While sleeping, Tano experienced a flashback of her acquiring her Kyber crystal as a youngling on the crystal world of Ilum. After resting, Tano assembled two lightsaber hilts from the scrap metal pieces she had acquired on Raada. Tano then met with Senator Organa and told him about her plan for the Raadian mission.[8]
Evacuation of Raada


Tano crafted a pair of white lightsabers using crystals from an Inquisitor's dual blade.
Prior to the mission on Raada, Tano declined Organa's offer to provide back up since she preferred to work alone. When Organa recalled that many of the Jedi he had encountered preferred to work alone, Tano reiterated that she was not a Jedi. Organa then asked what Tano was, stating that she still sounded and acted like a Jedi. Tano replied that she would let him know once she figured out who she was. After finishing the modifications to her ship, Tano rested before departing on her mission. On the way to Raada, Tano traveled past the planet Ilum. She discovered that the Empire had been mining the planet extensively. Tano considered going back to Rex's fake grave to retrieve her lightsabers, but decided against it.[8]
After arriving on Raada, Tano parked her ship on the opposite side of the moon from the main settlement. After loading her weapons into a small carry bag, Tano walked for two hours to the Raada settlement. On the way, she found Miara sitting by a small fire. Tano learned that Miara was the lone survivor of the farmers who had fled into the caves and that the mysterious Inquisitor had taken Kaeden prisoner. Tano convinced Miara to dowse the fire and keep watch while she meditated in the Force. While meditating, Tano decided that while she was no longer a Jedi, she would still use her Jedi training to help the people to fight back against the Empire. As they approached the settlement, Tano discovered that the Imperial crops had drained the life out of the planet's soil. She told Miara to remind her to burn the dying fields if they got a chance. Miara also informed Tano that the Empire was not forcing the farmers to work for the entire daytime. While Tano headed to the Imperial compound, she instructed Miara to find Selda or Vartan and give them the holo she had recorded in hyperspace.[8]
While approaching the Imperial compound, Tano encountered the Sixth Brother, who taunted her about her friendship with Kaeden, mocking Tano for violating the Jedi Code by forming attachments. The Inquisitor attacked her with his double-bladed spinning lightsaber, but Tano dodged him using the Force. The Sixth Brother tried to disconnect his weapon and fight her with two blades. Despite lacking her lightsabers, Tano used the Force to invigorate her hand as she touched the hilt of his lightsaber. The lightsaber hilt shattered and the Inquisitor was killed by the ensuing explosion. Tano felt pity for her fallen foe and closed his helmet as a mark of compassion. She then retrieved the kyber crystals from his lightsaber and used the Force to heal them of the dark side presence, causing them to turn white.[8]
Armed with her new pair of white lightsabers, Tano Force-jumped into the Imperial compound and fought her way through to the stormtrooper sentries to Kaeden's cell. Tano also managed to free the other prisoners in the process. After reuniting, Tano and Kaeden headed to Selda's cantina. When Kaeden asked about Tano's plan, Selda reassured them that Miara had transmitted Tano's message and that Vartan was evacuating the farmers. Tano told the farmers that she had contacted an "old friend." In response, Kaeden said that she understood that Tano had lied to keep them safe while the Inquisitor had lied because he enjoyed suffering. After treating Kaeden's injuries, Tano exited the cantina to find several of Organa's A-wings bombing the Imperial compound.[8]
Shortly thereafter, Organa landed several transports and cargo ships, which proceeded to evacuate the farmers. Tano led Kaeden, Selda, and Miara to the Tantive IV. When Captain Antilles told her they had to evacuate soon, Tano responded that Organa's A-wings were taking care of the Imperial fighters. After seeing to the evacuation of the Larte sisters, Tano aided the evacuation of the remaining farmers, who numbered fewer than a hundred. Three Imperial tanks then appeared and began bombarding the ships and civilians. Using her Force powers, Tano jumped onto the leading tank and cut off its cannon with her lightsaber. She then opened the hatched and hauled the pilot out. Tano then destroyed the tank's controls and overloaded the cannon.[8]
The resulting explosion toppled the nearby tank, disabling its hover mechanism. Tano sliced off its gun and let it crash into a house. Tano then headed to the third tank, but was unable to stop it from blasting Vartan and a group of refugees. Enraged, Tano used the Force to cause the tank's turret to implode. Tano then tended to the wounded Vartan and carried him to the Tantive IV. After evacuating the last of the refugees, Tano and her rebel allies departed in their ships. Once aboard, Tano comforted the wounded Kaeden. When Kaeden moaned that she should not have listened to her feelings, Tano reassured her that Jedi made that mistake. Tano expressed confidence that she would be able to handle the galaxy now and promised to meet Kaeden again.[8]
Joining the Rebellion
Ahsoka shows Bail a hologram of the Fulcrum symbol.
Following the evacuation of Raada, Tano smuggled herself aboard the Tantive IV in order to arrange a meeting with Senator Bail Organa. She overheard a conversation between the Senator and his young adopted daughter Princess Leia Organa. After exchanging pleasantries, Organa confided that the Empire hoped to use his image as a family man to ensure his compliance. When Tano asked if he worried about his daughter, Organa replied that she took after her mother. When Tano asked what Organa was doing to fight against the Empire, he briefed her about Captain Antilles' glowing report of the Raada evacuation. There had been fifteen casualties including fourteen evacuees and one A-wing pilot. However, Antilles' medical staff had been able to save Vartan.[8]
Tano also confided that the Inquisitor she encountered was not the last of his kind. While the Inquisitor had some training, she observed that he mostly relied on brute strength and lacked the skills of a Jedi. Organa promised to do what he could and then asked about Raada. Tano explained that the farmers could not go back because the Empire would wipe out the moon's surface. Organa agreed to resettle the Raadian refugees on Alderaan. However, Tano responded that the farmers wanted to join the rebellion. Organa agreed to resettle the farmers on an agricultural planet and to train pilots and soldiers.[8]
At Organa's request, Tano showed him her new lightsabers. She told Organa that she had acquired the kyber saber crystals from the Inquisitor. She explained that the crystals had previously been red because they had been corrupted by the dark side when those who wielded them had bent them to their will, causing the crystals to "bleed." Tano speculated that the kyber crystals had been looted from the former Jedi Temple. Tano also remarked that her former friend Barriss Offee, for all her treachery and atrocities, had been right that the Jedi and the Republic had taken the wrong approach to the Clone Wars. Organa commented that the former Chancellor Palpatine had been a skilled manipulator.[8]
Tano added that she had tried to escape the war, but kept being drawn back into it. Organa responded that their job was to focus on the present which he likened to a middle road. Tano agreed with Organa's sentiments and opined that she wanted to pursue a path separate from a general or a Padawan. At that point, the Tantive IV exited hyperspace above Alderaan. Tano also commented that the lack of communications had caused deaths on Raada and her hostile response to Tage and Tamsin. After some discussion, Tano convinced Organa to let her run his intelligence networks. She also convinced Organa to provide her with a new ship. At Organa's suggestion, Tano adopted the code name Fulcrum for her work as a rebel spy. Unknown to Tano, her activities had also attracted the attention of the Grand Inquisitor, who informed Darth Vader that he had discovered evidence of another Jedi Purge survivor.[8]
Undercover messenger
- "Fulcrum."
"Ahsoka. My name is Ahsoka Tano." - ―Ahsoka Tano introduces herself to the Spectres
Ahsoka, as "Fulcrum," speaking to rebel member Hera via hologram, urging her to bring her cell into hiding
By 4 BBY, Tano was a key member of Senator Organa and Senator Mon Mothma's rebel network. Under the code name "Fulcrum," Tano facilitated the flow of intelligence and communications between the rebel cells across the galaxy. One of these cells was the crew of the Ghost, which operated on and around the Outer Rim world of Lothal. She spoke only with Hera Syndulla, the owner and pilot of the Ghost, and identified herself only by her codename. As Fulcrum, Tano provided the Ghost rebels with intelligence for missions in order to hit Imperial forces or interests, and those missions were part of a larger plan that the rebels were part of—one that, amongst the rebels, only Syndulla knew. Tano's intelligence was generally accurate, but sometimes only partially so. One mission that Syndulla, along with Ezra Bridger and Sabine Wren, went on was an attack on an Imperial convoy. The intelligence that Fulcrum provided was correct about the route and timing of the convoy, but underestimated the Imperial defenses. As a result, the Phantom—the shuttle used by the rebels—sustained minor damage while outrunning a squadron of TIE fighters.[59]
Shortly thereafter, Syndulla—along with Wren, who insisted on knowing more about Fulcrum and the missions the rebels were being sent on—traveled to Fort Anaxes, an asteroid base used by the Grand Army of the Republic during the Clone Wars, in order to pick up supplies from Tano. Tano contacted Syndulla while she en route and informed Syndulla that the supplies were unloaded and ready for pickup. Wren, eager to know more about the individual giving them their intelligence, suggested that "Fulcrum" wait for them at the rendezvous, prompting Tano to wonder if something was wrong. Syndulla convinced Tano, however, that Wren was just there to help with the mission. Nonetheless, Wren felt untrusted and wanted to know why the rebel missions were becoming so dangerous, but Syndulla assured her that the less she knew, the safer she would be if captured by the Empire. Once they arrived on Fort Anaxes, Tano was already gone.[59]
Sometime later, the rebels rescued Tseebo, a Rodian in the Imperial Information Office whose AJ^6 cyborg construct headpiece contained vital Imperial information, including a five-year plan for the entire Outer Rim.[60] After fleeing Lothal, the Ghost rendezvoused with Tano's vessel. Syndulla turned Tseebo over to Tano, who would be able to analyze the information contained within Tseebo's headpiece.[61]
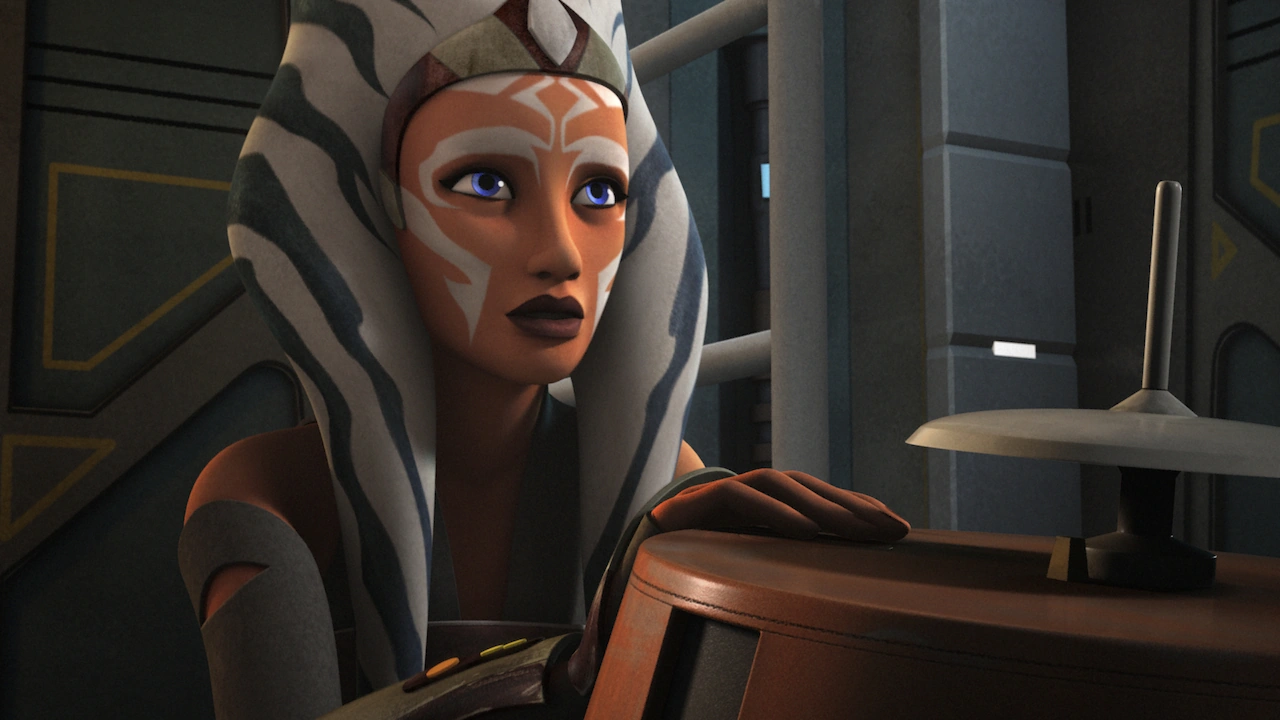

Ahsoka introducing herself to the Spectres
After the capture of Kanan Jarrus, the leader of the Lothal cell, by the Empire, and the Ghost crew's subsequent transmission of messages intended to inspire the public, Tano contacted Syndulla and dissuaded her from attempting to rescue Jarrus. After reminding her that Jarrus understood the risks he took, and that Bridger—the crew's remaining Jedi—was too important to be risked, Tano informed her that their message had reached beyond Lothal and had attracted attention from the top ranks of the Empire. Tano urged Syndulla to take her crew into hiding to avoid further jeopardizing their mission. The crew ignored Tano's warning and set out on a mission to rescue their captive leader.[62]
The rebels soon learned that Jarrus was being held on the Sovereign, the personal Star Destroyer of Grand Moff Tarkin, in orbit of Mustafar. The crew set out to rescue him and succeeded, but were overwhelmed by Imperial forces. The crew's astromech droid, C1-10P, contacted Fulcrum and requested reinforcements. Tano—leading Phoenix Cell, a fleet of rebel ships—arrived at Mustafar and helped the crew of the Ghost escape. When the rebels were safe and away from Mustafar, Tano revealed her identity and told them that they were part of a wider rebel movement.[63] Tano wrote a report to General Davits Draven about the operation, summarizing the battle and in a post-action report, detailed on how the Spectres had been integrated into Phoenix Squadron, and Syndulla had received an Alliance officer's commission.[64]
The Siege of Lothal
After the crew of the Ghost joined the Phoenix Squadron, Ahsoka Tano acted as a mentor and adviser to the newer rebels. She had a particular affinity with Kanan and his apprentice Ezra Bridger, fellow Jedi who were resisting the Empire. During the Imperial Siege of Lothal, Tano along with Syndulla, Jarrus and the Phoenix Commander Jun Sato sanctioned a mission to rescue the Imperial Minister Maketh Tua, who wanted to defect from the Empire. The crew of the Ghost returned to Lothal but stumbled into a trap set by Darth Vader, Tano's former mentor and friend.[9]
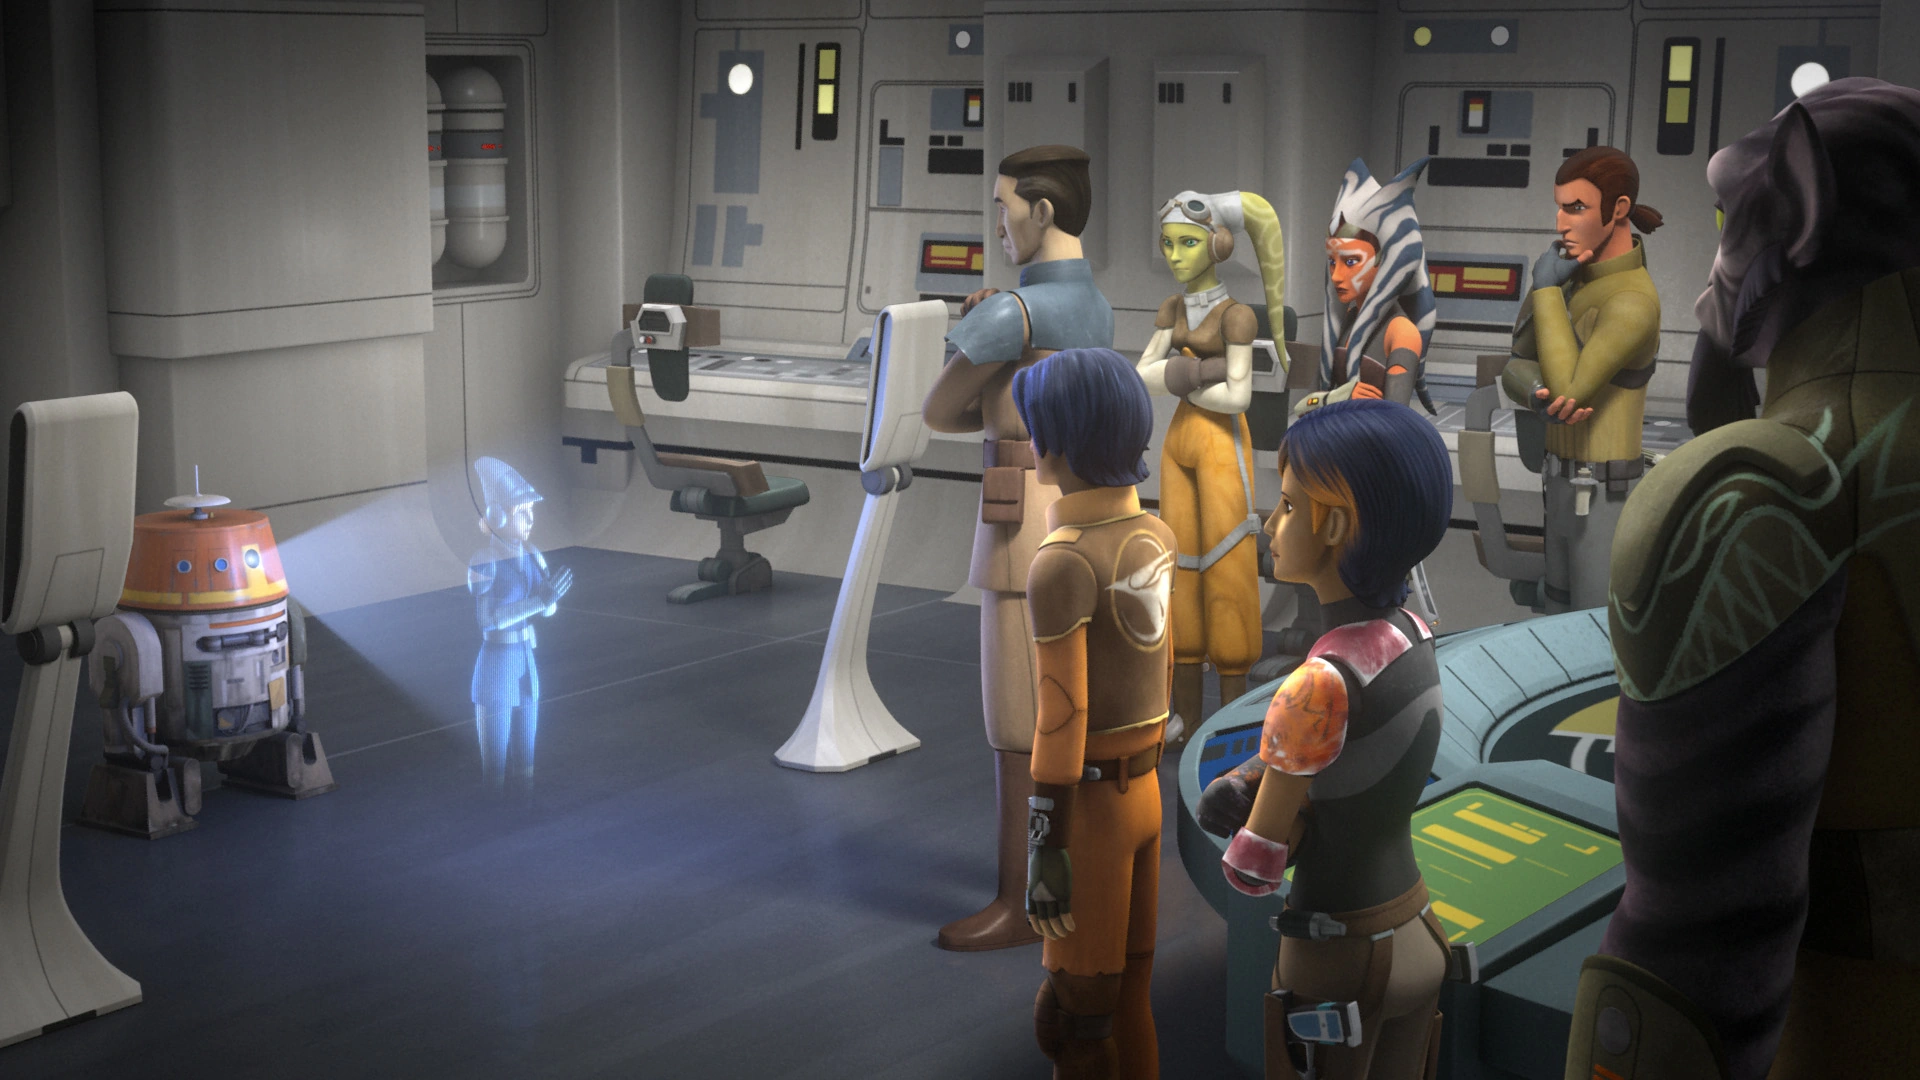

Maketh Tua, a defector of the Empire, asks the Rebellion for their help.
With much difficulty, the crew of the Ghost escaped Lothal in a shuttle. However, Vader had planted a tracking device on that shuttle which allowed him to track down the Phoenix rebel fleet. When Vader attacked the rebel fleet with his TIE Advance starfighter, Tano joined the crew of the Ghost aboard their ship. During the battle, Tano and Jarrus used the Force to probe the mysterious TIE pilot only to learn that he was none other than Anakin Skywalker. Vader also sensed her presence and Tano collapsed unconscious in shock.[9]
After escaping Vader, Tano questioned Jarrus and Bridger about their earlier confrontation with Darth Vader on Lothal. Jarrus recalled that he had not sensed a presence as evil as Vader since the Clone Wars. When Bridger asked Tano about the identity of the Sith Lord, Tano feigned ignorance of his identity. However, she told them that she knew that Vader would be coming for the rebels again in an effort to destroy them. Whether they chose to fight Vader and the others who would try to destroy them, the Ghost crew told her that they would fight them together. She also told them that she had to depart "to answer questions that need answering."[9]
Reuniting with Rex
- "Commander. You got old."
"Had to happen sometime, Rex." - ―Ahsoka Tano reunites with Rex
Ahsoka embraces Rex after years of being apart.
Following the destruction of the Phoenix flagship Phoenix Home, the Phoenix rebels were on the run. When the rebels discussed their next move, Tano suggested that the crew of the Ghost seek out an old friend: the former Clone Captain Rex. For their mission, she gave Wren and the crew of the Ghost the head of an old tactical droid and sent them to the desert planet of Seelos. Prior to departing, she told Jarrus to trust her friend.[65] After some difficulty, the crew of the Ghost managed to win over Rex, who supplied them with a datacard containing a list of Republic installations in the Outer Rim and Mandalore. After fighting off an Imperial assault, Rex agreed to join the Rebellion. After returning from Seelos, Tano reunited with her old friend, who commented that she had grown "old." Tano responded by saying that it "had to happen sometime."[66]
Learning about the Inquisitorius
With Rex's datacard, the Phoenix rebels gained access to a list of abandoned Republic bases and installations. During a salvaging mission to an abandoned Republic medical station, the crew of the Ghost encountered two more Inquisitors—the Seventh Sister and the Fifth Brother. These Inquisitors were aware about the existence of Tano and attempted to force Bridger and Wren to divulge all information they knew about her. However, these rebels escaped with the help of Garazeb Orrelios.[67]
Rescuing Infants
- "I know why you want the children!"
"Well, who doesn't want to be a mother?" - ―Ahsoka Tano speaks with the Seventh Sister whilst dueling both her and the Fifth Brother
While monitoring transmissions from Mustafar, Tano discovered that the Empire's Inquisitors had a secondary mission which involved kidnapping Force-sensitive children. Traveling to the planet Garel, she related her discovery to Kanan Jarrus. Tano had also decoded two sets of coordinates. While she'd investigate the first set of coordinates, she sent Jarrus to investigate the second set. Jarrus accepted the mission and was accompanied by Bridger, Zeb, and the astromech droid Chopper. The first set of coordinates led Tano to the planet Chandel, where she encountered a derelict passenger ship. She quickly encountered an elderly woman named Darja, who revealed that the Seventh Sister and Fifth Brother had abducted her grandchild, Alora. Tano comforted the grandmother and promised to find her grandchild.[68]
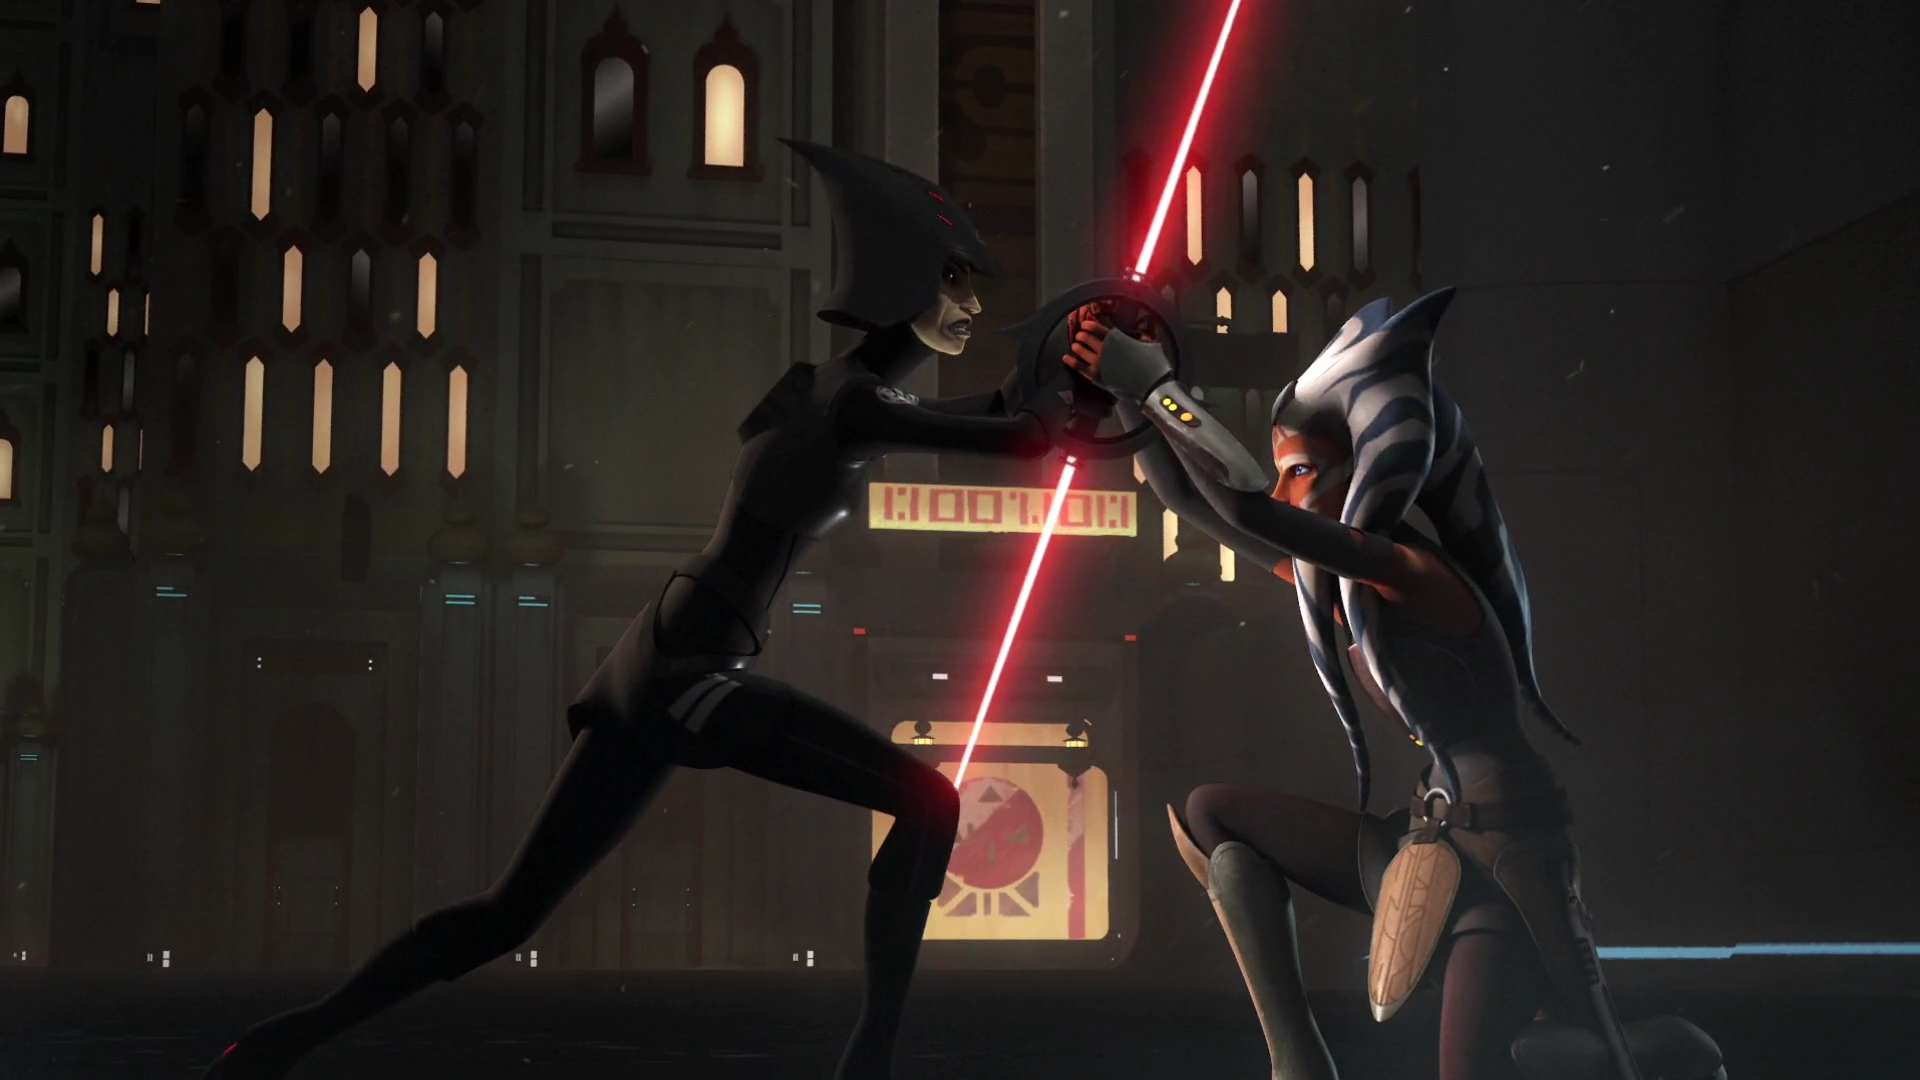
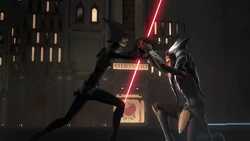
Ahsoka deactivates the Seventh Sister's lightsaber during their duel.
Meanwhile, Jarrus and his fellow rebels traced the second set of coordinates to a flat in Hammertown, a settlement on the planet Takobo. After rescuing Alora and an Ithorian infant named Pypey, the rebels ran into trouble with the Seventh Sister and Fifth Brother. Following a protracted pursuit and confrontation, the rebels were bested by the Inquisitors outside the spaceport where they had berthed their ship, the Phantom. However, before long, Tano arrived and engaged the two Inquisitors in a lightsaber duel. Through her mastery of the Force and lightsaber skills, Tano easily defeated the two Inquisitors. Before she could capture them, however, she was surrounded by Imperial reinforcements. Tano managed to escape Takobo with Jarrus and his rebels, who fled aboard the Phantom. As the Rebels departed from Takobo, Tano recalled that a similar attempt had been made by a Sith Lord to abduct children during the Clone Wars. In the past, the Jedi had protected them, but since they were now eradicated, the Rebellion was now their only protection.[68]
Anakin's fate
- "Ahsoka, why did you leave? Where were you when I needed you?"
"I made a choice. I couldn't stay."
"You were selfish."
"No!"
"You abandoned me! You failed me! Do you know what I've become?"
"No. No!" - ―Ahsoka Tano, communicating with a vision of Anakin Skywalker through the Force
After Jarrus and Bridger were attacked by the Inquisitors on Oosalon, they realized their presence was endangering the rebellion's search for a base and met with Tano on the Ghost to discuss a plan of action. While waiting for them, she viewed a holocron of Skywalker giving a demonstration in lightsaber combat, which Ezra also watched when he arrived. Remarking on his skills, he asked her what happened to Skywalker. Hesitant, she claimed to have seen him once more when he was sent to rescue Chancellor Palpatine, but did not know what happened to him as the Jedi Purge unfolded. When Jarrus arrived expressing his concerns, she mentioned in difficult times she would have had asked Kenobi or Yoda for advice. Jarrus revealed that they had communed with Yoda in the Lothal Jedi Temple, and decided to return there in the Phantom.[55]


Through a vision, Ahsoka accepts that her former master fell to the dark side.
Tano declined to raise the entrance to the temple, pointing out she was no longer a Jedi. Jarrus and Bridger raised the temple from the ground, discovering a new door below the one they had entered before. Inside, Tano, Bridger and Jarrus had their own separate visions. Tano was confronted by a vision of Skywalker, who expressed anger at her departure, calling her selfish and accusing her of abandoning him. He asked Tano if she knew what he had become. Lashing out with her lightsaber, she howled in agony as she finally accepted the fact that her master had become Darth Vader.[55]
The Inquisitors arrived, but the visions in the temple took the shape of a Jedi Temple Guard and distracted them, buying Tano and the Jedi time to escape. As she fled, Tano turned and saw Yoda on Dagobah, who waved at her. Smiling back, she turned and continued on her way back to the Phantom. On board, Bridger revealed he had spoken to Yoda and that he had been told to find Malachor. Tano explained that Malachor was not a person, as Ezra assumed, but a planet.[55]
Twilight of the apprentice
Atollon
- "You are set on this confrontation then?"
"I have to know the truth."
"So be it, but understand this, much will change as a result of this encounter, including you."
"Isn't that true of all things, as time advances?"
"My dear, when I say change, I mean death."
"So I will die?"
"Will you? I didn't know that. Goodbye then, Ahsoka Tano, former Jedi Knight." - ―Bendu and Ahsoka Tano, prior to Tano's confrontation with her former master
Ahsoka speaks with Ezra about the Force before heading off on their mission to Malachor.
After the rebellion set up a new base on planet Atollon, Tano traveled there to meet with Jarrus and Bridger, to join them on their quest to Malachor. Before leaving Atollon, Bridger told Tano about his predicament with the krykna and she explained that the Force became more mysterious as one learned more about it. Bridger then followed Tano back to the camp where they prepared to take off to Malachor.[69]
Before they left, Tano met Bendu, an ancient Force-sensitive being living on the planet. During their conversation, Bendu mentioned Tano's upcoming confrontation with her former master. When Tano explained that she had to know the truth, Bendu retorted that everything would change as a result of their encounter, including her. As the Togruta failed to see his point, he specified that "change" meant death. Tano asked then if she would die, but Bendu acted as if she was affirming it, and so replied that he did not know that before telling her goodbye.[70]
Malachor
The trio land on Malachor.
On their way to Malachor, Rex contacted Tano and offered to join the crew on their mission to Malachor, as he would be there in just two rotations, but Tano declined his offer. After her talk with Rex, Tano moved to the cockpit of the Phantom. When Bridger asked Jarrus why Rex was so worried, Jarrus explained that before the Jedi Purge, the Jedi were told to never travel to Malachor, because of old legends about the planet. Tano remarked that legends always hold a bit of truth, after which Bridger wondered why Master Yoda would send the three to Malachor.[71]
The group eventually made it out of hyperspace and Tano explained that they were seeking knowledge that would help them defeat the Sith. Before they landed on the planet, Chopper picked up a ship on the planet, but couldn't recognize what type it was. Jarrus told him to trace it as someone was clearly after the same thing the three were after as well.[71]
Once on the surface, they landed on a site with strange looking obelisks. As they moved closer to one of them, they noticed that it was covered in an ancient dialogue that Tano could partially translate. As Tano began reading the phrases out loud, Bridger became hypnotized by them and touched the pillar, causing the surface below them to collapse and the three to fall underground. As they were recovering, they noticed that the place had a hidden, underground Sith Temple, which might have been the reason Master Yoda had sent them there.[71]

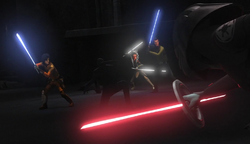
The trio discover the Eighth Brother.
On closer inspection, they realized the place was a battlefield with some figures turned into stone. Bridger also found an old crossguard lightsaber. While discussing the events of the battle, they were attacked by the Eighth Brother who launched projectiles at them, breaking another layer of rock beneath them and causing Bridger to fall further down. Tano and Jarrus decided to pursue the Inquisitor, as Bridger tried to look for a way back up. In his search for a way up, Bridger met a seemingly old and frail man trapped just as he was himself.[71]
Back on the surface, Chopper had discovered the Inquisitor's TIE Advanced, while Tano and Jarrus pursued the Inquisitor. Jarrus had noticed that the Inquisitor was surprised to meet the Jedi here, which could mean that the Inquisitor was searching for something on Malachor, further backing up his theory that the Inquisitor was after something other than the Jedi. At the Inquisitor's TIE, Chopper managed to hijack the ship and use it against the Inquisitor, helping Tano and Jarrus capture him. The Inquisitor revealed that he was hunting "a shadow."[71]
When Bridger and his companion, who had revealed himself to be named Maul, managed to claim a Sith Holocron which they had located beneath the temple, the whole structure went into "stand-by" mode with lights activating around it. This distracted Tano and Jarrus, which allowed the Inquisitor to secretly call for backup. They made their way to the temple, where they encountered the Seventh Sister and Fifth Brother. The two Inquisitors freed the Eighth Brother and a fight broke out between the Inquisitors and the two Jedi. Maul and Bridger soon found Tano and Jarrus, and Maul activated his double-bladed lightsaber, taking on the three Inquisitors single-handedly and forcing them to retreat.[71]
Tano asked Maul what "game he was playing," to which he responded, "the end game." Maul then said that the four had little time, as Vader himself was probably on his way to Malachor. The group slowly made their way to the top of the temple, but on their way, they met the Inquisitors again. Maul told Bridger to run to the top of the temple with the Sith Holocron, while Maul stayed back to help Tano and Jarrus against the Inquisitors. Maul was able to kill two of them with ease, while Jarrus indirectly finished off the last one. Not soon after, Maul revealed his true intentions to Tano and Jarrus, then lashed out at Jarrus, slashing him in the eyes and blinding him. Before Maul could deliver the killing blow, however, Tano intervened. The two fought briefly, but Tano realized time was running short and left Maul with Jarrus, who managed to throw Maul off the Temple.[71]
The fateful duel
- "I won't leave you! Not this time."
"Then you will die." - ―Ahsoka Tano and Darth Vader
Tano made her way to the top of the temple where she found Vader about to execute Bridger. She drew his attention away from Bridger by addressing him. Vader told her that she would be spared if she gave him the location of any remaining Jedi. Tano told him that the Jedi had all been killed by Vader and his Inquisitors. Vader, clearly disbelieving, obliquely threatened to torture any such information out of Bridger if Ahsoka would not cooperate. Tano replied in disgust that, though she had begun to suspect who Vader was behind his mask, his cruelty now lead her to believe that he could not possibly be her former master. Vader stated flatly that Anakin Skywalker had been weak, and that he had perished by Vader's own hand. Tano then snarled that she would avenge Skywalker's death. Vader reminded her that revenge was not the Jedi way, but Tano retorted that she was not a Jedi and attacked him.[71]

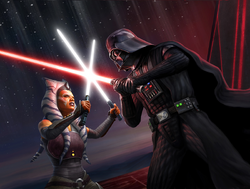
Ahsoka fights her former master, once Jedi Knight Anakin Skywalker, now Sith Lord Darth Vader, in a lightsaber duel.
After several minutes of intense swordplay, Vader blasted Tano off of a ledge with the Force, and went to claim the temple's Sith holocron from Ezra. Tano, however, managed to survive her fall and rushed to re-engage Vader. She managed to catch up to him at the summit of the temple as he used the Force to pull Bridger, Jarrus, and the holocron to himself. Tano then ambushed Vader and managed to cut a furrow into his mask above his right eye.[71]
As Jarrus and Bridger escaped, Tano heard Vader call out to her. However, because of the damage that had been done to his mask, his voice was no longer that of Vader, but a combination of Vader's mechanical baritone and Skywalker's unfiltered voice. She turned around to face him, and saw through the gash in his mask the charred face of her former master, confirming beyond any doubt that Vader and Skywalker were one and the same. As Vader regained his feet, Tano proclaimed that she would not leave him as she had years ago. Vader paused for a moment upon hearing this, but then coldly responded that she would die and reactivated his weapon. The two engaged in combat once again and the temple locked down with a burst of energy, allowing Bridger and Jarrus to escape.[71]
Following the mission, Bridger blamed himself for the disaster, believing that Tano had been killed by Vader. Jarrus however, reassured him that the mission's outcome had not been his fault.[72][73]
A world between worlds


Bridger's hand reaches out from the world between worlds and grabs Tano
Unbeknownst to Jarrus and Bridger, however, the duel between Tano and Vader had had a very different outcome from the one in which they believed. As the holocron chamber locked down, Vader re-engaged Tano and quickly overwhelmed her. As the two engaged in a final bladelock, Vader began to push through her guard, but became distracted by the enormous energy discharges emanating from the damaged holocron dock. This allowed Tano to push Vader back a step with the Force and disengage. She then plunged her lightsabers into the floor near her feet, destabilizing the floor beneath herself and Vader. Vader glanced down at the floor, but disregarded it and prepared to strike down his former apprentice. However, as Vader struck what would have been a killing blow, a portal suddenly appeared from behind Tano and a figure grabbed her by the shoulder, pulling her into a mysterious dimension. Vader's strike missed, and he fell through the collapsing floor into a pool of light.[74]
Once Tano came to, she realized the one who pulled her into the portal was in fact Ezra Bridger, although two years older. Tano was confused about what was happening and she wondered where Jarrus was. Bridger explained what had happened and where the two were located. Bridger concluded that if he could save Tano, he could also save his master. Tano warned him that if he were to do so, Bridger and the others would die. Depressed by the inevitable, he allowed the fire caused by the fuel pods to consume Jarrus for good.[74]
After accepting the fate of Bridger's master, the two decided to head out of the dimension. However, the portal about Jarrus turned out to be a trick by Darth Sidious, who attempted to manipulate Bridger into letting the Emperor travel into the world. Tano and Bridger helped each other to evade the Emperor's attacks and were separated in the process, but promised to meet each other once again in the future. As Bridger headed back to the portal from where he arrived, Tano made her way into another portal, which brought her back to Malachor, near the base of the Sith temple, accompanied by her convor friend. She wished the Force to be with Ezra Bridger and headed down into a dark tunnel.[74]
In search of Ezra Bridger
Ahsoka arrives on Lothal.
Eventually, Tano was able to leave Malachor and sometime after the climactic Battle of Endor, she traveled to Lothal on a T-6 shuttle to meet with Wren, who sought to search for Bridger.[75]
Legacy
- Anakin Skywalker: "The Force surrounds you Rey."
- Aayla Secura: "Let it guide you."
- Ahsoka Tano: "As it guided us."
- ―Ahsoka, Anakin and Aayla speaking to Rey[src]
During the battle of Exegol in 35 ABY, Tano's voice was heard by Rey among the voices of many Jedi of the past who aided her with destroying the resurrected Darth Sidious.[76]
Tano was remembered in the time after the Galactic Civil War, and was mentioned by a member of the Whills as someone to be remembered in galactic history.[77]
Personality and traits
Ahsoka Tano was a Togruta female who had blue eyes, dark orange skin, brownish-grey lips, white facial markings, a very slender build, and white Lekku and montrals with blue stripes.[2]
As a teenager, Tano was snarky, cocky, stubborn, reckless and impulsive, yet loyal, brave, generous and kind-hearted. She was very feisty and snippy, which earned her the nickname "Snips" from her master, Anakin Skywalker. Like her master, she was known to be very aggressive, eager for battle and willing to use terror or threats to get the answers she wanted.[6] She had a tendency to follow her heart, which negatively impacted her path to Jedi knighthood. In her younger years, Tano's emotions inhibited her ability to make wise decisions, although she eventually gained the confidence to make the right choice, despite the great cost to her feelings.[1]
Over time, Tano became more mature and enlightened, her experiences during the Clone Wars shaping her. She had her victories, her failures, and her losses yet strove through them all, as she felt it was her duty as a Jedi to help restore peace and prosperity to the Republic. Her constant travels and experiences made her more worldly than most people her age, and often she was surprised by the various events and people she came across during the Clone Wars.[47]
However, when Tano was framed for murder and treason, she was horrified when the Jedi Order cast her out and all but condemned her to a Republic military tribunal, and came very close to being sentenced to death. When Skywalker unveiled the true culprit, Tano was shocked to see it was her friend Barriss Offee.[47] Though conflicted,[1] she ultimately rejected the opportunity to become a Jedi again, having lost faith in the Order[50] for not standing by her.[78]

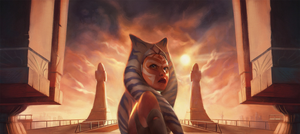
Following her expulsion and trial, Tano lost faith in the Jedi Order.
Tano was a confident and moralistic person, and a firm defender of the innocent. This carried on even after she left the Order, as she joined Bail Organa's rebellion to restore liberty and democracy to the people oppressed by the Empire. Tano also felt pity and compassion for the Inquisitor known as the Sixth Brother despite slaying him in combat. She regarded the Sixth Brother as a victim whose potential for good had been twisted and turned to the dark side. After befriending the Force-sensitive Hedala Fardi, Tano became concerned with protecting Force-sensitive children from being captured by the Empire's Inquisitors.[8]
During her time running from the Empire, Tano continued to suffer from grief over the loss of her friends and guilt over the fact that she wasn't there to help them. During her time on Raada, Tano was unsure about making new friends, largely due to the emotional pain inflicted by Offee's betrayal. Despite everything Offee had done, Tano believed that while she was wrong about "a lot of things", she did have a point about the Jedi and the Republic, and later expressed her belief that if had they truly listened to her, they might have been able to stop Darth Sidious before it was too late.[8]
As a rebel Informant code-named "Fulcrum", Tano worked indirectly with various rebel cells, always with her face hidden and her voice disguised, and became somewhat pragmatic as she advised Hera Syndulla to cease searching for Kanan Jarrus to protect her crew, especially Ezra Bridger. This may suggest she developed a more discreet nature and decided overall to put the many before the few.[62]
Even after revealing her true identity to the rebels, her dealing in secret as Fulcrum appeared to have remained, as Tano told Jarrus and Bridger that she had no knowledge about the Sith Lord they encountered, as she herself was having trouble coming to terms with the horrific realization of what had become of her former master.[9]
Those feelings recently made themselves apparent when she was refused to help open the Lothal Jedi Temple, stating she was no longer a Jedi for leaving the Order. While inside the temple, she was haunted by a phantom of her master, who angrily scolded Tano for leaving him to a fate worse than death. Tano, shedding tears and welling up with grief, lashed out at the illusion, and then wept when she saw no one there, but now realized her fears were true - that her former master was a ruthless Sith Lord.[55]
Upon finally coming face-to-face with her former master once again, Tano refused to believe he and Vader were the same person, stating Skywalker "could never be as vile as Vader," to which Vader responding by claiming he had destroyed Skywalker. Tano then swore to avenge Skywalker's "death," something against her Jedi training and morals, but affirmed she was not a Jedi and proceeded to duel Vader, only to find that he was indeed her former friend and mentor. Feeling guilty over leaving him before, Tano offered Vader compassion, refusing to leave him behind again, only to be rebuffed and sentenced to death. Despite Vader's ruthlessness and power, Tano bravely continued the fight.[71]
When Tano was saved and reunited with Bridger in the world between worlds, she was saddened to learn of the fate of Jarrus, but disturbed by Bridger's idea of saving Jarrus from dying. Drawing from her own experience of being unable to save her master, Tano successfully convinced Bridger to let Jarrus go, and they parted ways, promising to find each other again as Tano went back to Malachor and resumed her journey.[74]
After the Battle of Endor, Tano sought to keep her promise to Bridger and joined Sabine Wren in her quest to find him and bring him home.[75]
Powers and abilities
Lightsaber training
- "I admit, Ahsoka's a little rough around the edges, but with a great deal of training… and patience… she might amount to something."
- ―Anakin Skywalker, on Tano
Even as a padawan, Ahsoka Tano was very skilled in lightsaber combat. She made use of the unorthodox reverse grip during combat, but she utilized the standard grip at the insistence of her master.[79] When she was apprenticed to Anakin Skywalker by Yoda, she was already proficient in Form V and capable of its use even in unideal conditions.[6] Tano's combat skills were clearly quite considerable, as she was able to defeat three IG-100 MagnaGuards single-handedly[6] and at least temporarily hold her ground against the skilled assassin Asajj Ventress[17] and the Jedi hunter General Grievous.[16]


While still an apprentice, Tano became a practitioner of Jar'Kai.
At some point during the Clone Wars, Tano began to learn Jar'Kai, wielding a yellowish-green bladed shoto lightsaber with a hilt that matched with her original lightsaber. She still sometimes used only her main lightsaber, such as when she dueled Skywalker on Mortis before Kenobi arrived, but would use Jar'Kai when facing multiple opponents and was able to hold her own against both Skywalker and Kenobi on Mortis, even though both of her opponents were more experienced warriors than she was.[4][80] During her second encounter with Grievous, Tano showed that her skills had improved vastly, as she was able to hold off all four of Grievous's lightsabers and survive for the second time, whereas previously she only lasted a short time when Grievous was only using two lightsabers.[81][16]
Whilst fleeing from clones after being framed for murder, Tano lost her second lightsaber and was forced to use only her main lightsaber to fight Barriss Offee. Her duel against Offee showed that she had become too reliant on her second lightsaber, something she had in common with Asajj Ventress, and though she did put up a considerable fight, Offee ultimately proved too powerful for her.[49]
Sixteen years after her departure from the Jedi Order, Tano's skill in lightsaber combat had greatly improved to the point of mastery. During a skirmish at Hammertown, she was able to defeat two Imperial Inquisitors at once and even managed to deactivate the double-bladed lightsaber of the Seventh Sister with her bare hands.[68] During the mission to Malachor, Tano was also able to duel evenly with former Sith Lord Maul before breaking off the fight to rescue Ezra. Afterwards she engaged Darth Vader himself and was able, during the first portion of their duel, to hold her own for several minutes before being pushed off of a ledge.[71] However the second portion of their duel, occurring after Ahsoka damaged Vader's mask, lasted under a minute before she plunged her lightsabers into the unstable ground, leaving herself defenseless against what would have been a killing blow without intervention from Ezra Bridger.[74]
Force powers
- "Because of Ahsoka's advanced abilities, I forgot how young she is."
- ―Anakin Skywalker
Tano was gifted with raw Force skill[1] and often performed Force-enhanced jumps and other acrobatic feats. She possessed advanced telekinetic abilities, as seen during the Battle of Christophsis, where she pulled down a large wall in order to save Skywalker from a group of retail droids. In another instance, Tano was able to deliver a strong push at Ventress and flung her back far away, saving the life of Luminara Unduli.[17]
Tano also had a strong ability to sense things in the Force, able to feel the presence of Plo Koon after his fleet was destroyed by the Malevolence[12] and the presences of the children who were kidnapped by Cad Bane.[27] She also eventually learned how to perform mind tricks.[38][37] In addition, Tano's Force powers enabled her to leap to incredible heights. She used this to her advantage when leaping into the Phantom in order to escape two Inquisitors.[68]
Tano also experienced Force visions and dreams. She was able to use the Force to heal two corrupted kyber crystals that had been "bled red" and restore them to their natural white color. These crystals became part of her new twin lightsabers. Tano was also able to use the Force to amplify her touch. On one occasion, she used this Force power to shatter the hilt of the Sixth Brother's double-bladed spinning lightsaber.[8]
Other abilities
- "When I was out there, alone, all I had was your training and the lessons you taught me. And because of you, I did survive. And not only that, I was able to lead others to survive as well."
- ―Ahsoka Tano, to Anakin Skywalker
In addition to her Force powers and lightsaber combat skills, Tano was also a talented pilot and also displayed potential as a skilled war strategist by leading an attack that penetrated a Separatist blockade on Ryloth.[23] Due to her piloting skills, Tano found work as a courier for the Fardi clan while on the run from the Empire.[8]
Tano also displayed skill in hand to hand combat as she was able to easily overpower Cad Bane before dropping her guard and being incapacitated by the bounty hunter.[27] She later used her hand to hand combat skills on Mandalore by single handedly defeating a group of the Mandalorian Secret Service and later holding off several guards and subduing Prime Minister Almec despite being handcuffed at the time. However, on that occasion, she armed herself with one of the guards' shields, which she used to fend them off and defend herself from a stun gun.[38] While she was a prisoner of Trandoshan hunters, Tano was able to kill the hunters Dar, and his father, Garnac, by only using hand to hand combat and her Force powers.[82][83]
Tano also showed a considerable knowledge of mechanics which she had learned from her Master. She was able to use her mechanical skills to contact Skywalker and save her and Barriss Offee's lives when they were trapped under a destroyed droid factory on Geonosis. She also knew how to repair vehicles. While on Mortis, she repaired the shuttle that she, Kenobi and Skywalker had crashed on the planet.[29][84] Tano had the ability to understand Shyriiwook, as demonstrated by her translations for Chewbacca while captured on Wasskah.[83] Tano later put her skills as a mechanic to great use repairing starships and threshers while hiding on Thabeska and Raada. Tano was able to assemble her new twin lightsabers from scrap metal parts she had acquired from the Fardis.[8]
Behind the scenes
Ahsoka Tano was voiced by Ashley Eckstein in the Star Wars: The Clone Wars television series and film,[6] as well as in the following Star Wars Rebels television series.[63]

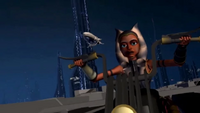
Ahsoka, as she appeared in unfinished episodes after she left the Jedi Order.
Early in The Clone Wars' development, Ahsoka was named Ashla, a reference to an early name for the light side of the Force when George Lucas was developing Star Wars, and later canonized as the Lasat name of the Force.[85] Ashla is also the name of one Togruta Jedi youngling who appeared in Star Wars: Episode II Attack of the Clones.[86] The two characters, however, are otherwise unrelated.[87] The name 'Ahsoka' was pitched by Lucas after Ashoka the Great, the Indian Emperor of the Maurya Dinasty.[88]
Following the cancellation of The Clone Wars, supervising director Dave Filoni revealed that he had 12 more episodes that continued Ahsoka's story. He went into detail of these four-episode arcs at Celebration Europe, where in the first arc she would find a new way of life in the underworld of Coruscant and get close to a scoundrel called Nyx Okami. The second arc dealt with Ahsoka helping the Jedi Order with a threat and traveling beneath the Jedi Temple to a Sith shrine. The last arc would deal with the Siege of Mandalore.[89]
In an interview with the official Star Wars website, Rebels co-creator and executive producer Dave Filoni stated that Vader wouldn't want a memory of Tano, a relationship that he considered a failure, and that he would be angry with her in a twisted way.[90]