| | |


- "Watch out kid, this thing handles like a drunken bantha."
- ―Han Solo, to Luke Skywalker while piloting an AT-AT
This model of All Terrain Armored Transport was used during the Galactic Civil War. It replaced its larger predecessor.
Description[]
- "Not every place can be fully armored. Think about it. The legs are vulnerable exactly where any creature's legs would be."
"Gotcha. Targeting the joints." - ―Thane Kyrell and Yendor flying snowspeeders during the Battle of Hoth

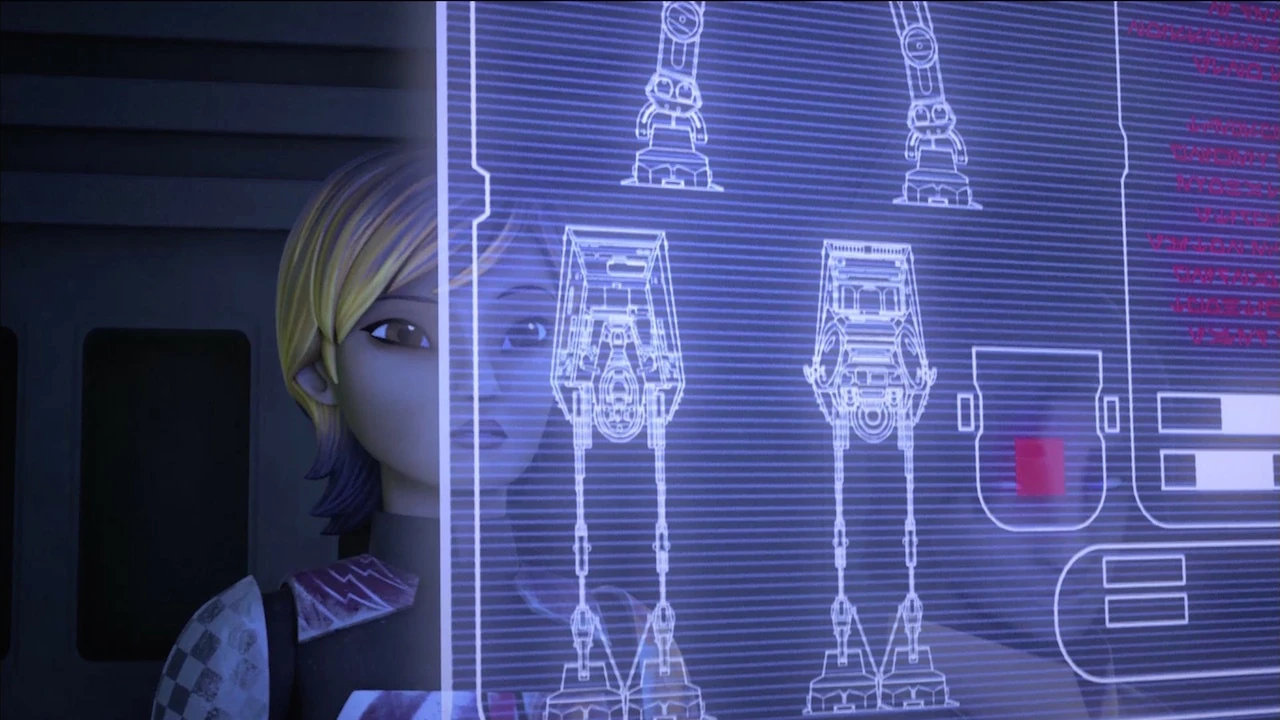
All Terrain Armored Transport blueprints seen by Sabine & Ezra.
The All Terrain Armored Transport was an imposing, heavily armored, quadrupedal combat walker of the All-terrain vehicle line that stood over 22 meters tall. Its impressive size was used for both psychological effect as well as for tactical reasons, a weapon of terror that could cow the local populace with its mere presence. It's purpose was to use its sheer mass and impressive firepower to break through enemy lines and deploy its cargo of crack assault troops.[1][2][14][15]
The walker's cockpit was located in its heavily armored "head"[1] (also referred to as the "command pod"[7]), which connected to the main body via a "neck" composed of a ringed electromagnet system to allow greater flexibility. The head also carried a variety of systems such as sensors (including rangefinders and terrain scanners), power cells, targeting computers,[1] and spotlights.[7] The head also contained a top hatch which was secured by cryptographic lock.[16]
The command crew consisted of two AT-AT pilots and a vehicle commander. One pilot drove the walker while the other acted as the gunner, although both were capable of filling either roles. Fire control could be surrendered to the vehicle commander via a periscope display, which could also be used to view sensor readouts and tactical data.[1] Other standard personnel stationed elsewhere in the walker included an engineer and loadmaster.[6] AT-AT pilots and crew wore specialized suits in case the walker's pressurized cockpit was smashed open in hostile environments.[17]
The walker's main armaments were also carried in its head: medium blasters located on the sides or "temples" and a pair of Class II heavy laser cannons fitted on the "chin."[1][7] The chin-mounted cannons could be fired simultaneously to create a powerful blast or in rapid succession and could vary their power intensity.[1][18] During the Battle of Hoth, AT-AT laser fire was able to penetrate through the ground to hit Echo Base's command center.[19]
The armor on the AT-AT, too heavy to be carried by repulsorlifts, was impervious to normal blaster bolts and cause them to glance off or be absorbed and dissipated. Only the heaviest turbolaser weaponry could actually penetrate an AT-AT's armor plating.[1] The neck and the underbelly however were weak points on the AT-AT and vulnerable to vehicular blasters and portable missile launchers, necessitating AT-STs as escorts to protect its flanks.[14] The walker was also vulnerable to other AT-AT fire if one happened to be hijacked and turned against the other.[13]


An AT-AT as part of an Imperial parade
The AT-AT strode into battle on four tall, reinforced armored legs which (while making it highly visible) helped the vehicle to see over obstructions and provide a clear line of sight for its weapons. Fitted with powerful shock absorbers and piston drives, each leg's foot pad was equipped with terrain scanners and computers to help the pilots navigate rough ground. Although capable of traversing a variety of terrain types, certain features such as steep hillsides or deep swamps proved impassible.[1] The legs were also unstable and gave the walker a high center of gravity, leaving it vulnerable to being tripped up.[14]
Connecting the "head" to the "body" was what was dubbed the "tunnel," which led to a troop compartment capable of ferrying up to 40 troopers along with heavy weapons. Troops were seated in double-tiered benches which also functioned as backpack chargers.[1][10] Extendable boom racks with harnesses and high-speed cable winches allowed troopers to quickly deploy from the AT-AT.[1] The main, rectangular troop hatch was located in the middle of the walker's side, while two smaller escape hatches were located both to the main hatch's immediate left and right,[10] and in the walker's underside.[16] Past the main troop compartment was a vehicle bay at the walker's rear that could hold up to five speeder bikes, typically 74-Z models.[10] These also were deployed via harnesses from the AT-AT and typically used for scouting and mop-up operations.[1]
A powerful reactor provided all of the energy the AT-AT needed to function, with fuel cell, energizer rods and fuel pump located in the rear of the walker above the vehicle bay.[1] On the exterior of the walker was a steep staircase, that could be used by the walker's personnel to climb from one hatch to the other, or to the walker's roof.[10] Special locking points along the exterior of the AT-AT helped to secure it for transport via landing barges.[1] Along the top of the walker were filtered atmosphere intakes, while at the bottom was the walker's fuel slug tank, which had a reputation of being dangerous.[10]
The Elite AT-AT, a more heavily armored variant with a darker color scheme, was based on the body of this version.[12]
History[]
Age of the Empire[]
- "I heard of these. Imperial armored transports. Giant four-legged things that were used to keep the peace on conquered worlds."
- ―Scoggan, to Davjan Igo upon entering the ruins of an AT-AT
This model succeeded the model used in the pre–Galactic Civil War conflict against the rebellion.[21] Plans for this version existed as early as 4 BBY.[22][23]
Galactic Civil War[]
- "That armor's too strong for blasters. Rogue group, use your harpoons and tow cables. Go for the legs; it might be our only chance of stopping them."
- ―Luke Skywalker, during the Battle of Hoth

The stolen AT-AT on Cymoon 1
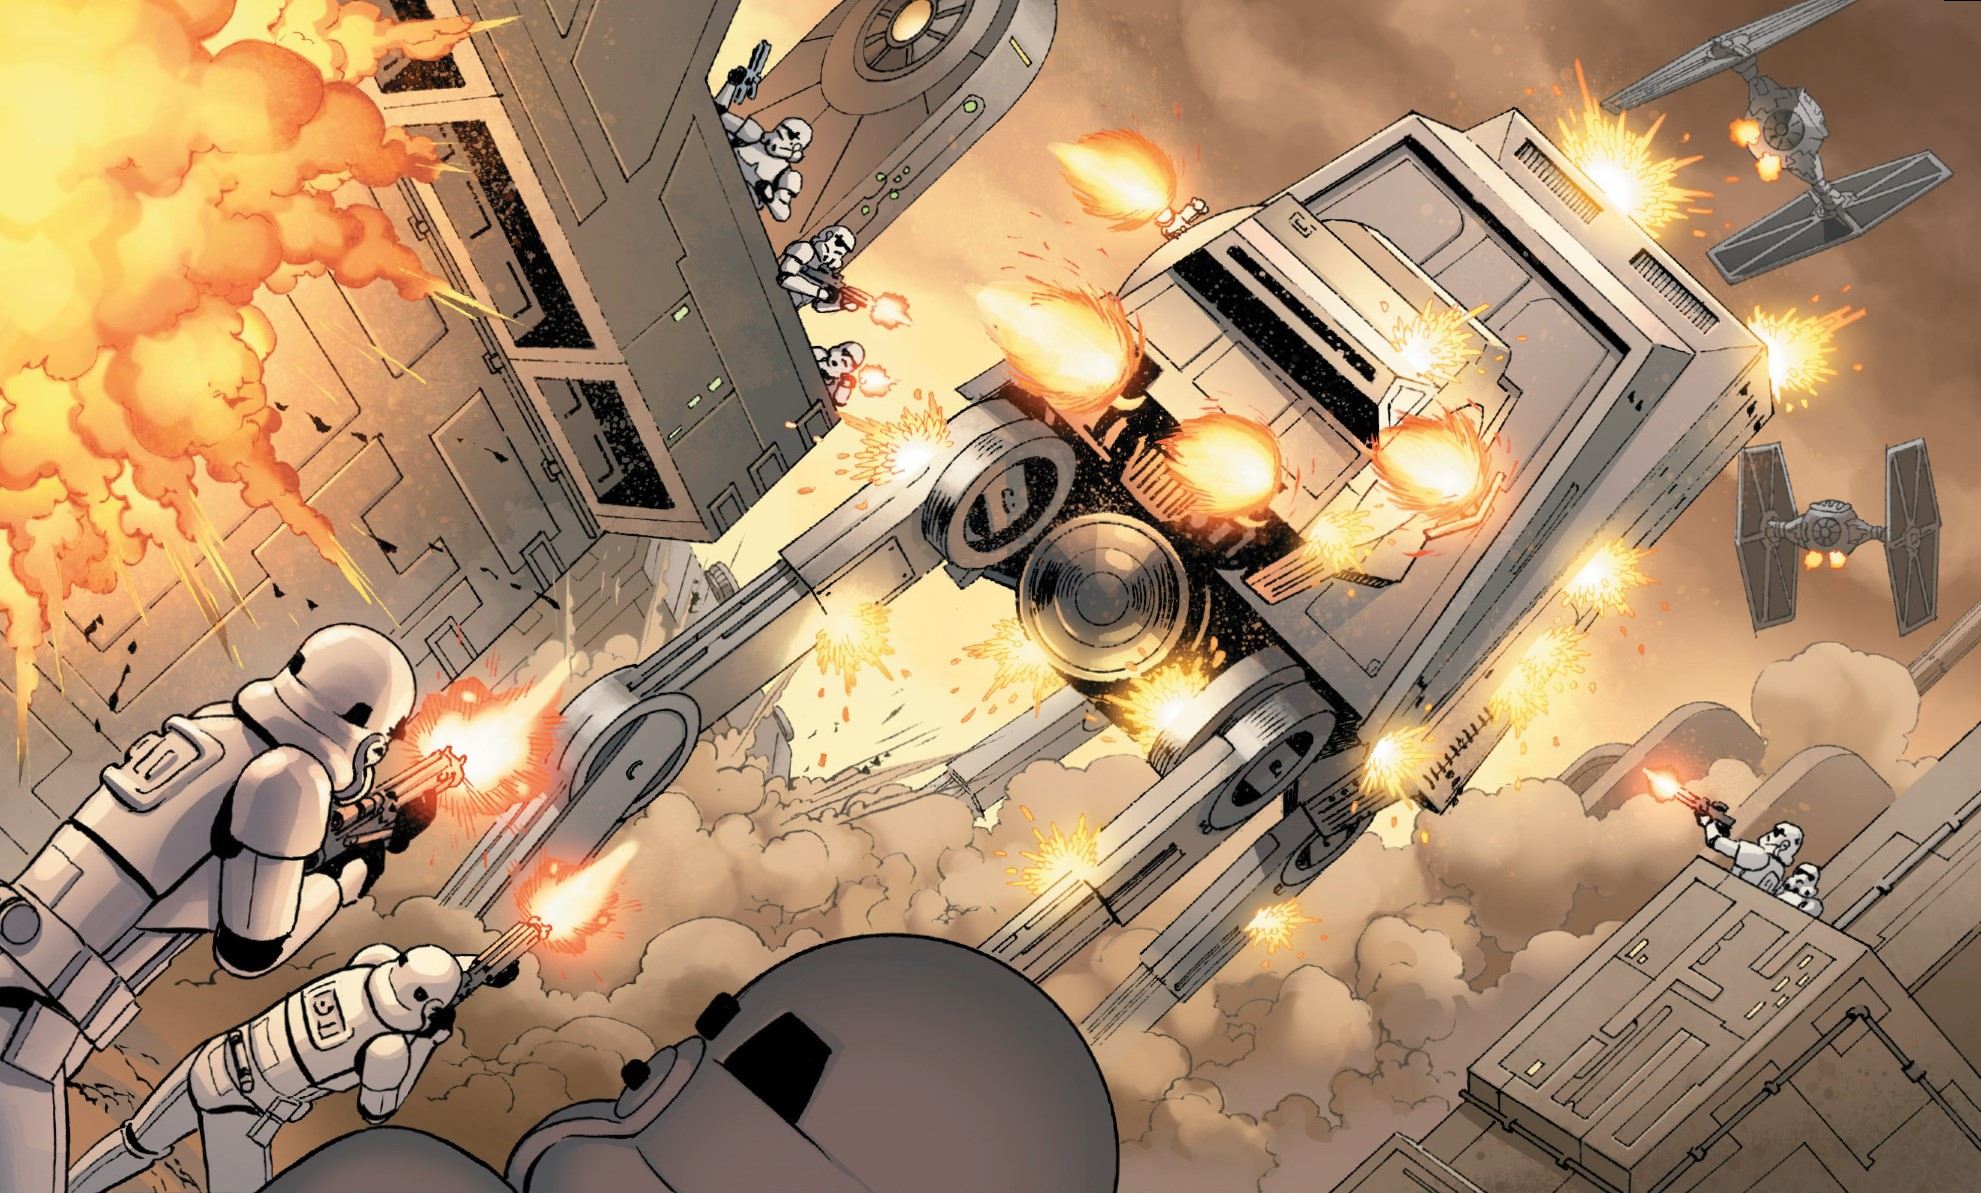
Following the Battle of Yavin, AT-ATs were employed in several skirmishes on Tatooine. The Alliance to Restore the Republic also stole a number of AT-ATs and provided them to Saponza's Gang.[12] At least one AT-AT helped enforce the Imperial occupation of the Rebellion's former base, the Great Temple, on Yavin 4.[24] During the Rebel assault on the Imperial weapons factory moon of Cymoon 1, the Heroes of Yavin group of Rebels led by Han Solo and Leia Organa stole an AT-AT from Weapons Factory Alpha. They used the walker to escape from the factory after they sabotaged its main power core to explode. During their escape, Solo fired a shot that nearly killed the Sith Lord Darth Vader, using the AT-AT's powerful quad laser cannons.[9] Soon after, Vader overtook the Rebels in their escape and cut down the massive walker's back left leg. The AT-AT fell tremendously, and its passengers barely escaped the wreckage[25] before fleeing Cymoon 1 entirely for the safety of the Alliance Fleet.[26]
AT-ATs[27][28] were also used by the Empire in support of the Kingdom of Shu-Torun during the civil war on the mining planet Shu-Torun, where rebellious ore-duke refused to bow to the Empire and its puppet regime. One AT-AT was destroyed in the assault on a delving citadel at an ore-duke stronghold by a laser shot to its neck, but the delving citadel itself would be destroyed shortly after.[27] After the Empire fought off an ambush, Imperials forces, including an AT-AT, joined the Shu-Torun troops in the siege of Rubix's delving citadel, which ended the war in a victory for the Empire and its regime.[28] When Aphra's crew raided the Great Temple on Yavin 4, they spotted an AT-AT[24] amongst the occupying platoons and then watched one move through the jungle. 0-0-0 and BT-1 passed an AT-AT and the rest of the Imperial force during the raid.[29] An AT-AT cut off the crew's escape from the Great Temple until Krrsantan rescued them in the Ark Angel II.[29]

Imperial AT-ATs near-effortlessly march through Echo Base's defenses
During their escape from an oceanic planet, Organa and Luke Skywalker destroyed an AT-AT.[30] During the Battle of Hoth, General Maximilian Veers led his Blizzard Force of AT-ATs on the icy fields of Hoth to knock out the shield generator that protected Echo Base, the Rebel headquarters. Despite facing resistance from the Alliance Army and T-47 airspeeders, Veers' squadron emerged victorious, allowing the Imperials to invade Echo Base and rout the Rebels, striking a major blow in the war. However, the battle also revealed that the AT-ATs could be toppled by a cable wrapped around their legs. Although that weakness had been used effectively by the Alliance on Hoth,[4] the Empire continued to use these mechanical behemoths in the later stages of the war.[31]
In the Battle of Ab Dalis, AT-ATs marched against the grounded Eleventh Division of the Alliance Navy, which would be reinforced by Starlight Squadron. The AT-ATs and other Imperial forces were unable to prevent a rebel victory after the squadron destroyed the Ultima II.[32] AT-ATs marched as part of an Imperial Unity Day parade on Bar'leth, only to be destroyed by a surprise rebel ambush.[33] At least one AT-AT was part of the occupation of Endor. The walker was used by Commander Altadan Igar to transport Skywalker to the Death Star's shield generator. [31] AT-ATs took part in the Battle of Cawa City.[34]
Rise of the First Order[]
Decades after the war, a young scavenger named Rey used one of the downed AT-ATs, designated Hellhound Two, as her home on Jakku.[35]
Appearances[]
Non-canon appearances[]
- Star Wars Epic Yarns: The Empire Strikes Back
 LEGO STAR WARS: Celebrate the Season — "Reindeer Walker"
- LEGO STAR WARS: Celebrate the Season — "New Year's Hothin' Eve"
- LEGO STAR WARS: Celebrate the Season — "Vader's Vacation"
- LEGO Star Wars: The Freemaker Adventures — "Showdown on Hoth"
- LEGO Star Wars: The Freemaker Adventures — "Return of the Kyber Saber"
- LEGO Star Wars: The Freemaker Adventures — "A Perilous Rescue"
- LEGO STAR WARS: Celebrate the Season — "Droid Holiday Hustle"
- LEGO Star Wars: The Resistance Rises — "Rey Strikes Back" (Mentioned only)
- LEGO Star Wars: The Resistance Rises — "Attack of the Conscience"
- LEGO Star Wars: The Force Awakens
- LEGO Star Wars Battles
- LEGO Star Wars: The Skywalker Saga
Sources[]
Non-canon sources[]
Notes and references[]
- ↑ 1.00 1.01 1.02 1.03 1.04 1.05 1.06 1.07 1.08 1.09 1.10 1.11 1.12 1.13 1.14 1.15 1.16 1.17 1.18 1.19 1.20 1.21 1.22 1.23 1.24 1.25 Star Wars Complete Vehicles, New Edition
- ↑ 2.0 2.1 2.2 2.3 2.4 Star Wars Encyclopedia of Starfighters and Other Vehicles
- ↑
 Star Wars Rebels on Facebook: AT-AT (October 25, 2015): "The iconic behemoth of the battlefield." (screenshot)
- ↑ 4.0 4.1 4.2 4.3 4.4 Star Wars: Episode V The Empire Strikes Back
- ↑ 5.0 5.1 5.2 5.3
 All Terrain Armored Transport in the Encyclopedia (content now obsolete; backup link)
- ↑ 6.0 6.1 6.2 6.3 6.4 Starships and Speeders
- ↑ 7.0 7.1 7.2 7.3 7.4 7.5 7.6 Star Wars: Rogue One: AT-ACT Deluxe Book and 3D Wood Model
- ↑ Star Wars Rebels– Secrets #3 AT AT | Toys R Us Canada on the ToysRUsCanada YouTube channel (backup link)
- ↑ 9.0 9.1 9.2 Star Wars (2015) 2
- ↑ 10.00 10.01 10.02 10.03 10.04 10.05 10.06 10.07 10.08 10.09 10.10 Rey's Survival Guide
- ↑ 11.0 11.1 11.2 We've Spotted Imperial Walkers: A History of Legged War Machines on StarWars.com (content now obsolete; backup link)
- ↑ 12.0 12.1 12.2 12.3 Star Wars: Commander
- ↑ 13.0 13.1 Lost Stars
- ↑ 14.0 14.1 14.2 Ultimate Star Wars, New Edition
- ↑ Star Wars: The Complete Visual Dictionary, New Edition
- ↑ 16.0 16.1 Star Wars: Complete Locations
- ↑ Star Wars Character Encyclopedia: Updated and Expanded
- ↑ Star Wars: Episode V The Empire Strikes Back
- ↑ Battlefront: Twilight Company
- ↑ "True Love" — Tales from a Galaxy Far, Far Away: Aliens: Volume I
- ↑ "Relics of the Old Republic" Trivia Gallery on StarWars.com (backup link)
- ↑ Star Wars Rebels — "Empire Day"
- ↑ Star Wars: Galactic Atlas
- ↑ 24.0 24.1 Doctor Aphra (2016) 2
- ↑ Star Wars (2015) 3
- ↑ Star Wars (2015) 4
- ↑ 27.0 27.1 Darth Vader (2015) 16
- ↑ 28.0 28.1 Darth Vader (2015) 17
- ↑ 29.0 29.1 Doctor Aphra (2016) 3
- ↑ Star Wars (2015) 33
- ↑ 31.0 31.1 Star Wars: Episode VI Return of the Jedi
- ↑ Star Wars (2020) 15
- ↑ Star Wars (2020) 26
- ↑ Shattered Empire 2
- ↑ Star Wars: Episode VII The Force Awakens
External links[]
- Star Wars Rebels on Facebook: AT-AT (October 25, 2015): "The iconic behemoth of the battlefield." (screenshot)