| | |


Warning: This infobox has missing parameters: sector, system and unrecognized parameters: defacto
- "We, the Rebel Alliance, do therefore in the name—and by the authority—of the free beings of the Galaxy, solemnly publish and declare our intentions:
- To fight and oppose you and your forces, by any and all means at our disposal;
- To refuse any Imperial law contrary to the rights of free beings;
- To bring about your destruction and the destruction of the Galactic Empire;
- To make forever free all beings in the galaxy.
- To these ends, we pledge our property, our honor, and our lives."
- ―Declaration of Rebellion
The Alliance to Restore the Republic, commonly known as the Rebel Alliance, Alliance, the Rebellion, the First Rebellion, and rarely the Separatists, was a resistance movement formed by Bail Organa and Mon Mothma to oppose the reign of the Galactic Empire. The Alliance was formed from a less organized movement to oppose the Empire that existed, which was secretly led by Organa. This early group came together from a series of rebel cells, including the crew of the Ghost and the Phoenix Cell. The Atrivis Resistance Group was one of the first cells to join what Mothma began calling "the Alliance", before the formal formation of the Alliance to Restore the Republic. The Alliance was publicly and formally declared with the Declaration of the Rebel Alliance and the document of the Declaration of Rebellion.
The Alliance and the cells before it were born from the overall discontent within the Empire who wished the Old Republic restored whose efforts were led by renegade members in the Imperial Senate such as Mon Mothma, Bail Organa, and later, his daughter Leia Organa and made up from the citizens of the Empire and defectors from the Imperial Military such as Jan Dodonna, Ryder Azadi and Wedge Antilles. Founded and united by Organa and Ahsoka Tano, the early rebels were assisted by surviving Jedi, such as Kanan Jarrus, and his Padawan, Ezra Bridger. Clone Wars veterans such as Captain Rex also assisted in the initial movement.
As opposed to waging all-out war, the Alliance waged a war of attrition against the government, establishing small bases across the galaxy instead of controlling an entire planet.
When the Alliance successfully stole the plans for the Empire's ultimate weapon, the Death Star, and destroyed the space station in the Battle of Yavin with the help of Luke Skywalker, the tide of the war began to change and the Rebel threat began to prove a severe thorn in the Empire's side, and continued to engage in battles with the Empire in the Galactic Civil War. However, under the command of Darth Vader, the Imperial forces succeeded in defeating the Alliance on Hoth, forcing the Alliance to scatter their forces in order to survive.
Eventually, the Alliance prevailed against the Empire and critically damaged it when they launched an attack against the second Death Star during its construction in what would become the Battle of Endor. Not only did the Alliance manage to destroy the super weapon, but the Imperial Navy was severely crippled by the loss of one of their Super Star Destroyers, and Luke Skywalker managed to redeem his father, Darth Vader, who killed Emperor Sheev Palpatine, before dying himself in the battle. The Alliance was soon reorganized into the fledgling New Republic which would later defeat the Empire at the Battle of Jakku, and force the Empire to surrender by signing the Galactic Concordance, effectively ending the war.
By the time of the Battle of Yavin, the Rebel Alliance had chosen a red starbird as its symbol and logo.
History
Early foundations
Resistance movements aided by the Jedi
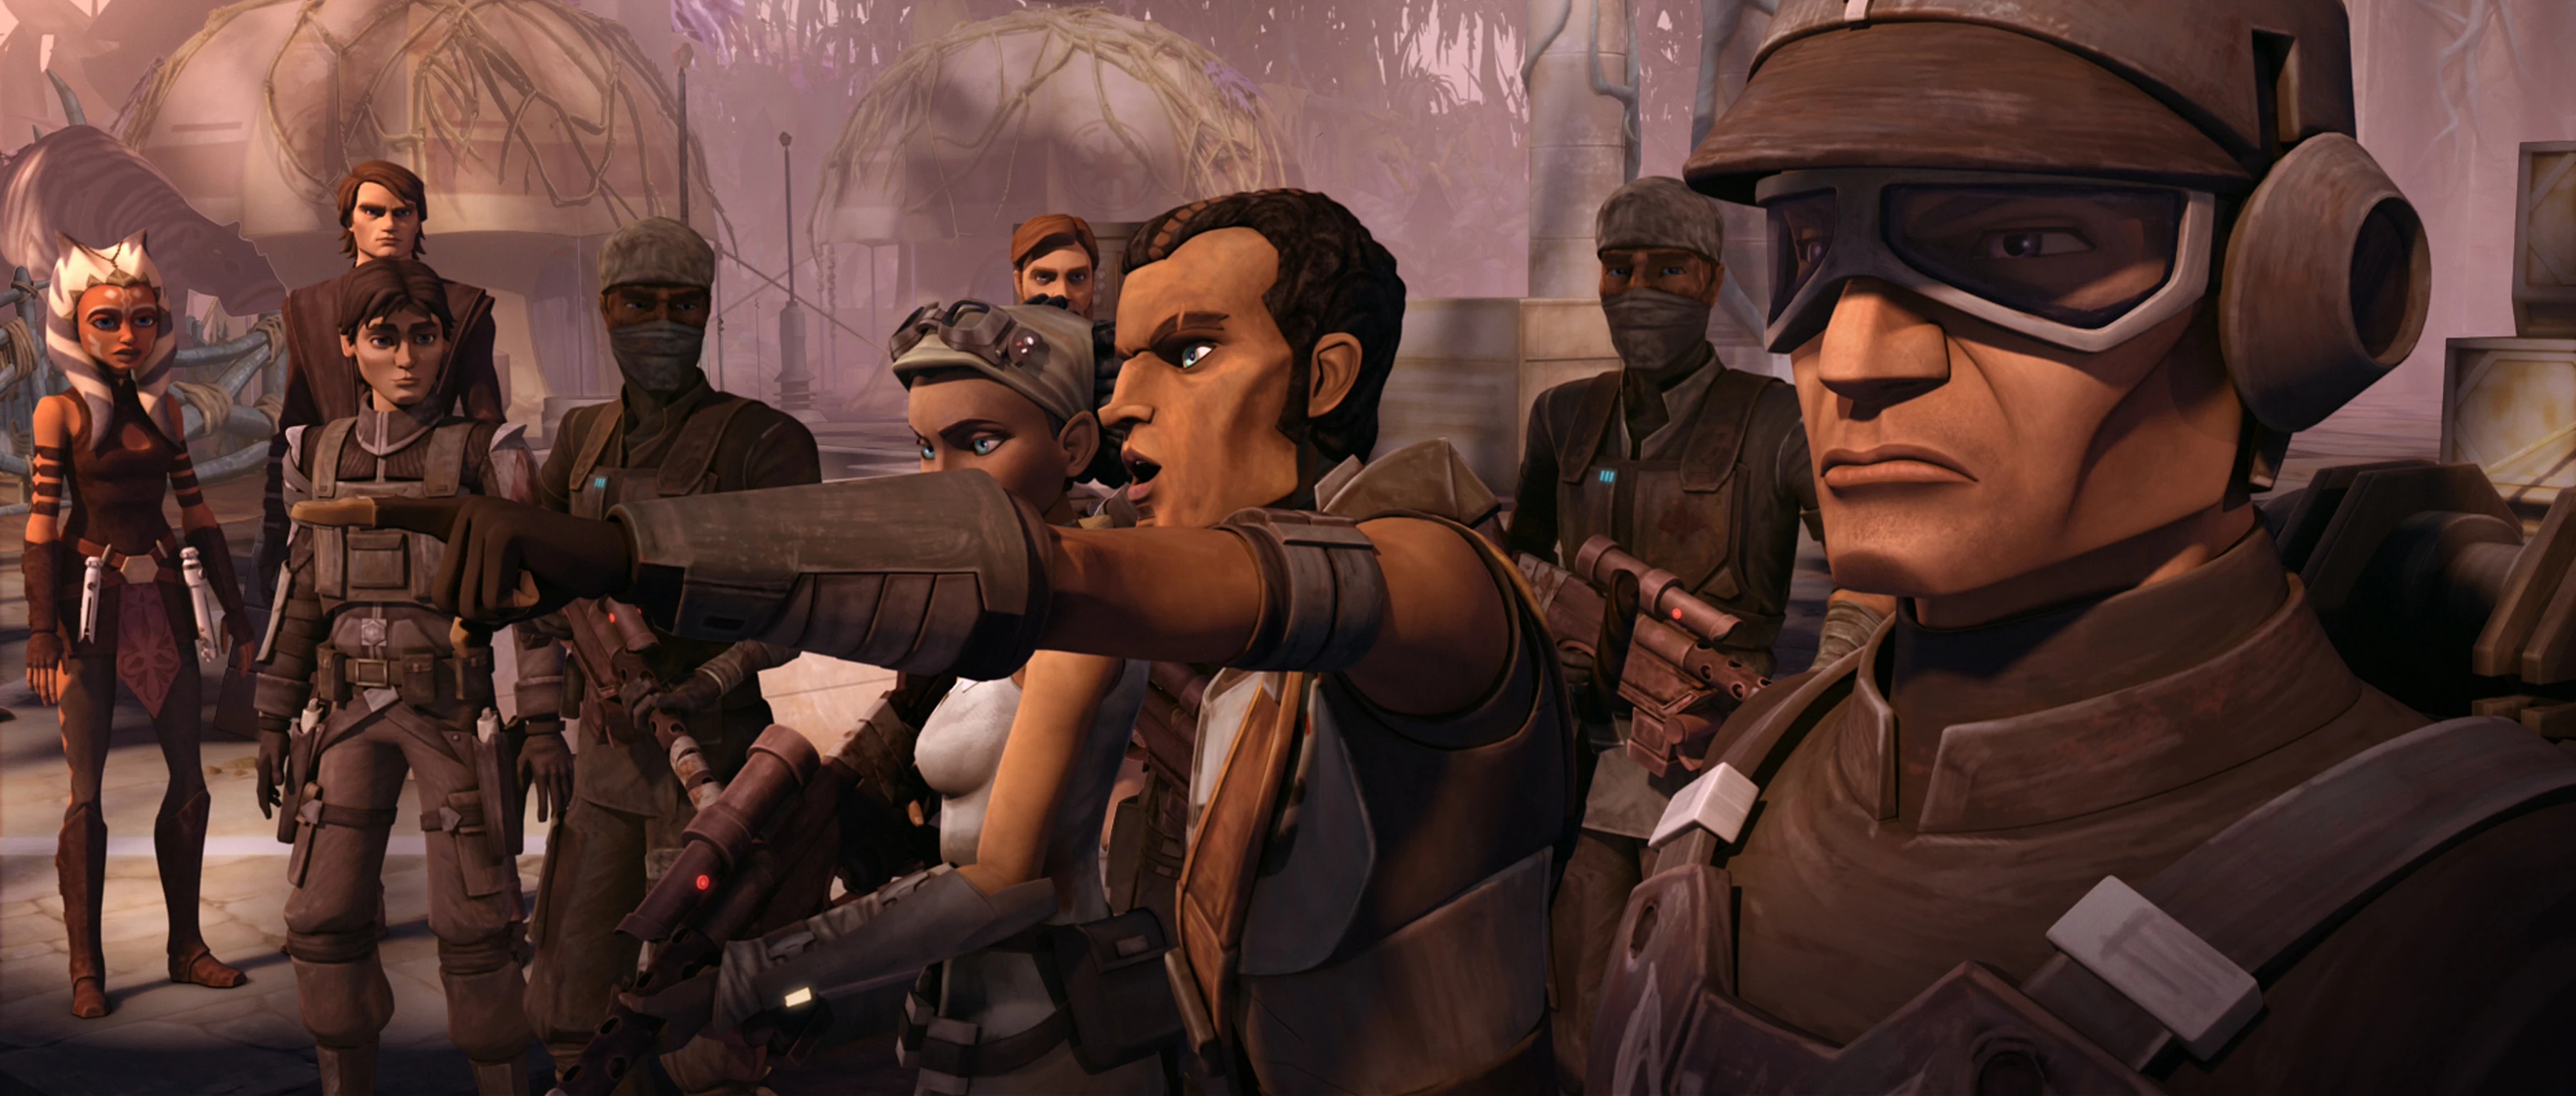
- "The Separatists have strength in numbers. We're going to show you how to target and destroy them."
"Now to be clear, we are not here to fight your war—rather, to show you how to conduct it in the most efficient and successful way possible." - ―Anakin Skywalker and Obi-Wan Kenobi brief the Onderon rebels

The Onderon rebels, the first of many militias that were created, receive training from the Jedi.
While the Alliance to Restore the Republic was a resistance movement opposed to the tyranny of the Galactic Empire and its New Order, its roots predated the actual birth of the Empire itself, when the Galactic Republic was in its last years of existence. During the Clone Wars, a conflict that pitted the Republic against the Confederacy of Independent Systems,[15] the Jedi helped create resistance units on Separatist-held worlds, according to the plan proposed by Jedi Anakin Skywalker, one example being the Onderon rebels.[16] Such cells, along with many new ones during the Age of the Empire, would coalesce into a loose network that would later be reorganized into the Alliance to Restore the Republic.
Delegation of 2,000
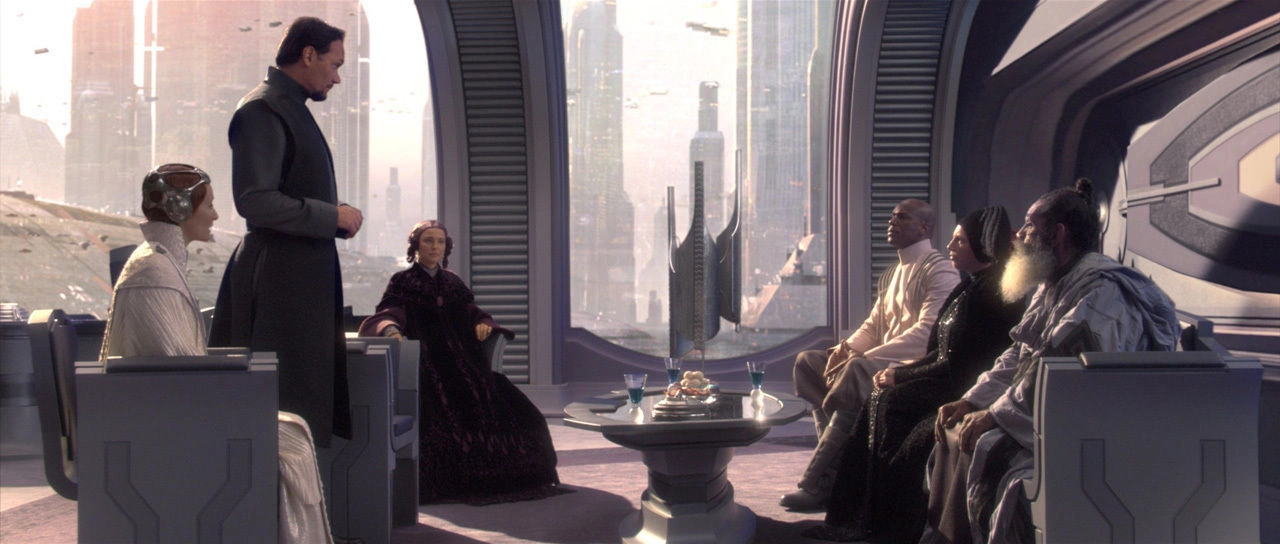
- "So this is how liberty dies... with thunderous applause."
- ―Padmé Amidala, to Bail Organa following the declaration of a New Order

Mon Mothma, Bail Organa and Padmé Amidala (left) were among the first to oppose Palpatine, even before he became Emperor.
Also during the Clone Wars, Supreme Chancellor Sheev Palpatine had managed to obtain many emergency powers from the Galactic Senate, which caused certain members of the Chancellor's own Loyalist Committee, including Bail Organa of Alderaan, Padmé Amidala of Naboo,[17] and Mon Mothma of Chandrila[18] to start to complain about the chief of state's conduct.[17] The discontent senatorial representatives ended up forming the Delegation of 2,000. They signed the Petition of 2,000, a document that formally expressed its signatories' concerns with Palpatine's rule and called for him to relinquish his emergency powers as soon as possible. Senator Meena Tills of Mon Cala was among the petitioners.[19]
Shortly thereafter, the Clone Wars was brought to an end. Far from relinquishing his dictatorial status, Chancellor Palpatine unilaterally abolished the Republic in front of the whole Senate and anointed himself as the Galactic Emperor, thus transforming the democratic government into an authoritarian regime, the Galactic Empire. Unbeknownst to most of the galactic community, the self-promoted Emperor Palpatine was in fact the Sith Lord Darth Sidious, who had masterminded the Clone Wars just so he could gain power and overthrow the Republic. The Emperor immediately started to subvert democracy in the galaxy and declared the peace-keeping Jedi Knights enemies of the state.[20] In the immediate aftermath of the Clone Wars and Senator Amidala's death at the hands of her husband Jedi Anakin Skywalker, now twisted into Palpatine's Sith apprentice Darth Vader, Senators Organa and Mothma started working in secret to overthrow the Empire.[10]
Age of the Empire
- "They're not trying to make a difference. They're just trying to strike back."
"And I understand that. But if the people who have a beef with the Empire act solely in their own interests, it won't do anybody else any good. In fact, it might make it harder for any kind of real rebellion to flower—" - ―Kanan Jarrus and Hera Syndulla
In the absence of any major opposition, the Galactic Empire thrived during the early days of Palpatine's reign, amassing a vast military and using it to instill fear in the civilian population. The reformed Senate, being even less effective than it was during the last years of the Republic, did nothing to restrain that massive military expansion. Meanwhile, in the deepest secrecy, the Empire worked on the Death Star, a moon-sized battle station capable of destroying entire planets.[21] Although many people held a grudge against the Empire, few dared to act. Those who did often acted solely in their own interests, which actually made it harder for any kind of real, organized rebellion to appear.[22]
A rare example of organized resistance against the Empire was that of Cham Syndulla's Free Ryloth movement, which wanted to end the Imperial occupation on the planet Ryloth. It was formed from the Twi'lek Resistance, which had resisted the occupation of Ryloth by the Separatists during the Clone Wars. Over the years, the movement established hidden bases across the Ryloth system and executed raids against the Imperials.[23]
Another example of a rebel cell emerged one year after the end of the Clone Wars, when the Empire decided to severely punish the world of Antar 4 for its past ties with the Confederacy of Independent Systems. That murderous operation, spearheaded by Wilhuff Tarkin, prompted the former Republic Intelligence agent Berch Teller into founding his own resistance cell. Four years after its formation, the insurgents managed to steal the Carrion Spike, the personal starship of Tarkin, to attack various Imperial targets with information provided to them by an Imperial traitor, Vice Admiral Dodd Rancit. Teller's insurgents later launched an attack on an Imperial convoy transporting important parts for the Death Star project. Their plans were soon thwarted by Tarkin's timely intervention which resulted in the killing of every insurgent except Teller.[21]
The early rebellion
- "Back in the early days, before the Rebellion formally existed, a lot of guerrillas got their hands dirty doing things no one else wanted to do—or even think about. The Alliance would never have existed without them, Princess. Those men and women were my mentors—I've spent my entire career trying to live up to their example."
- ―Major Lokmarcha, to Princess Leia Organa
Scattered cells
- "I know nothing of a larger rebellion. And if I did, I'd rather give my life than tell you."
- ―Kanan Jarrus, to the Inquisitor

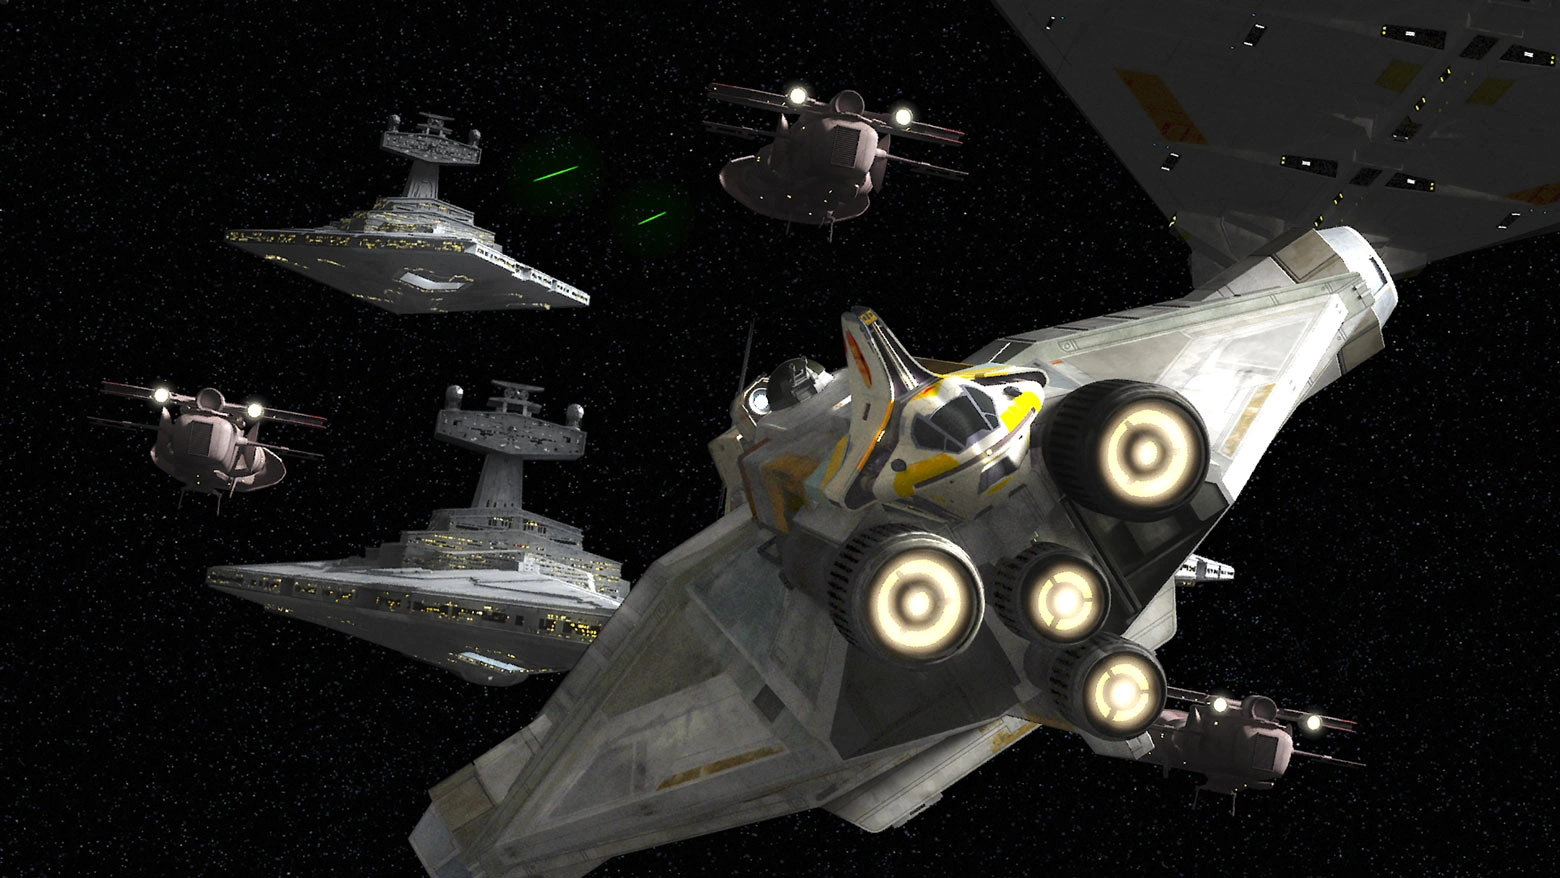
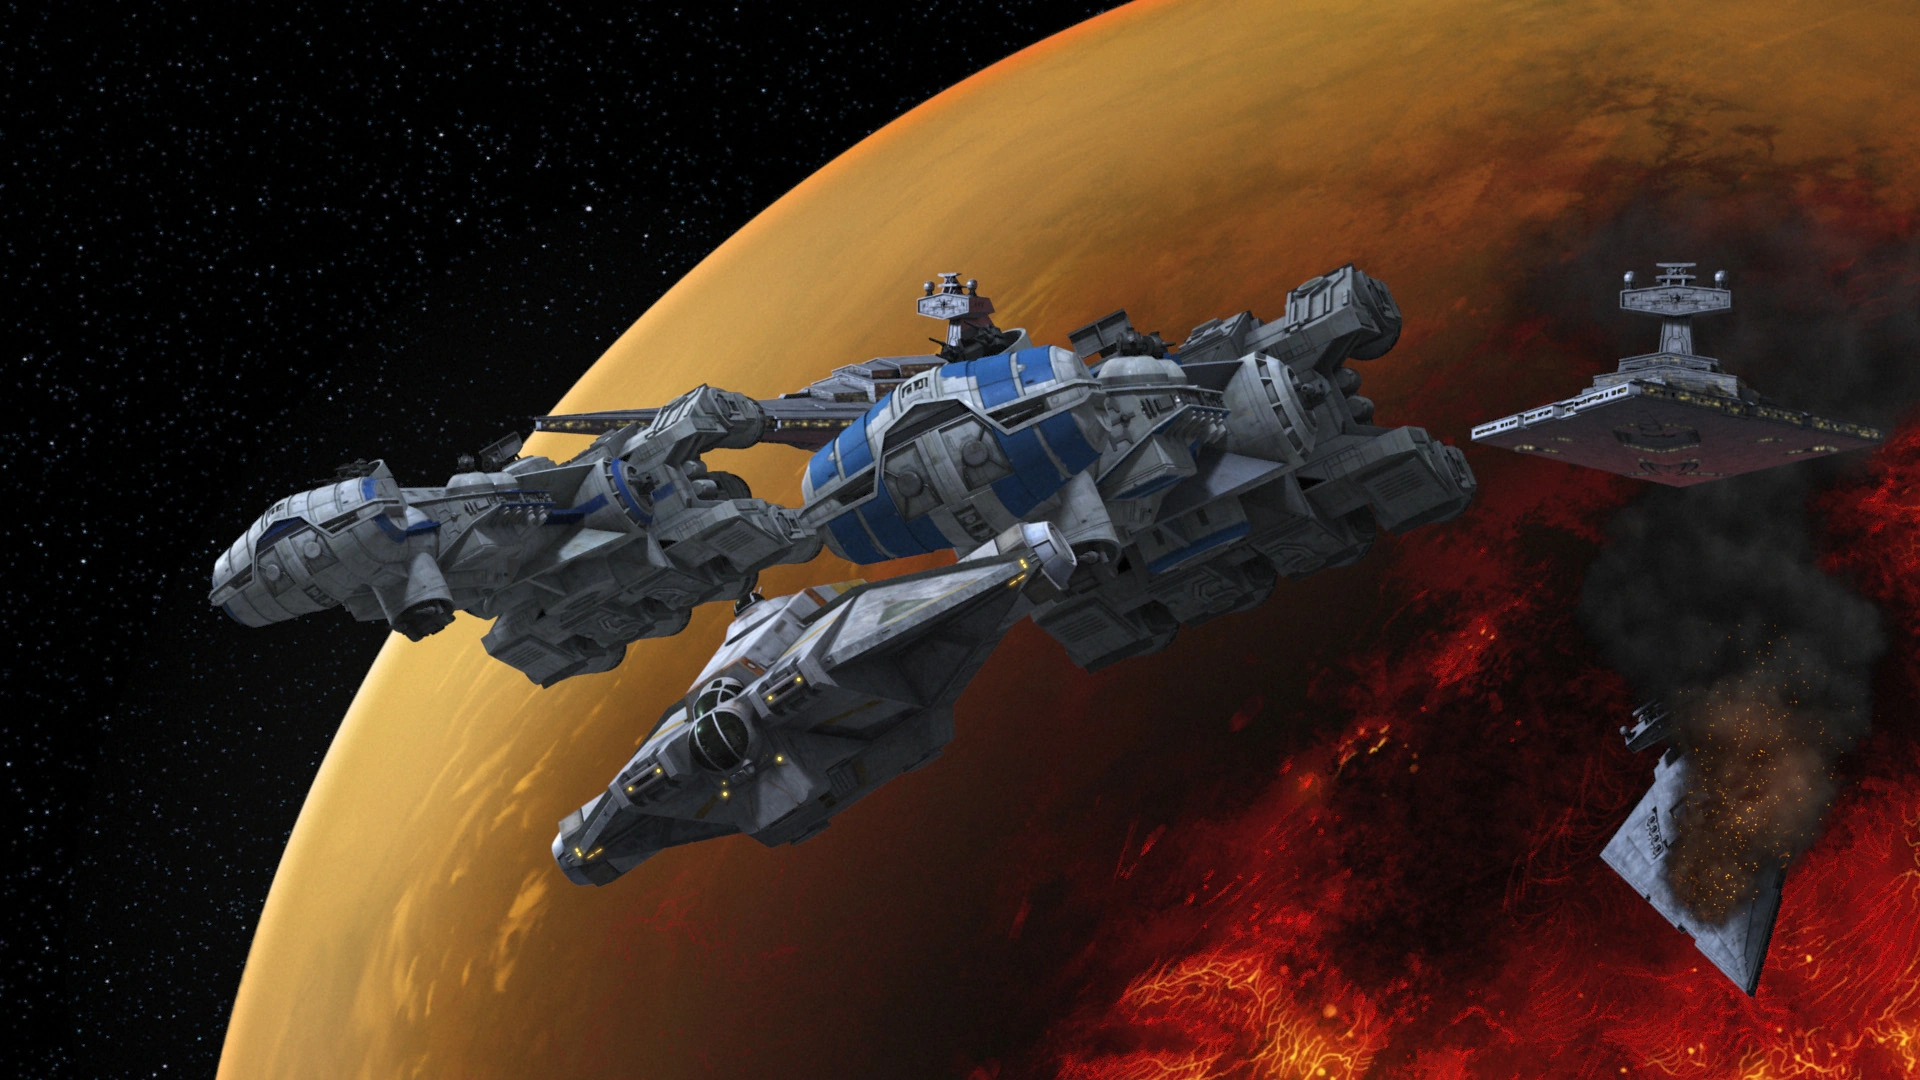
A fleet of rebel cells over Mustafar.
However, by 5 BBY, a number of rebel cells had formed, operating all across the galaxy in reaction to growing Imperial oppression, especially in light of the Empire's continuing expansion throughout the Outer Rim. One of these cells were the Spectres, which formed on the Imperial-controlled Outer Rim planet of Lothal. The Spectres were the crew of a VCX-100 light freighter called the Ghost, consisting of: Hera Syndulla, Cham Syndulla's daughter and the ship's captain; Kanan Jarrus, a Padawan of Jedi Master Depa Billaba in hiding from the Empire's Jedi persecution[24]; Garazeb "Zeb" Orrelios, a former Lasat Honor Guard who survived the Siege of Lasan[25]; Sabine Wren, a teenage Mandalorian graffiti artist, weapons expert, and former Imperial cadet from the Imperial Academy of Mandalore[26]; the astromech droid C1-10P ("Chopper")[27]; and later joined by Ezra Bridger, a teenage Force-sensitive Lothallian con-artist and orphan, whose parents had been imprisoned years earlier for speaking out against the Empire. Insurgencies began in the Atrivis sector as well, with the Liberators seizing an Imperial garrison, yet being devastatingly defeated by the Imperial Navy soon afterwards. The Atrivis Resistance Group led by Travia Chan, was also active in the Atrivis sector, and after deliberation, decided to join Senator Mon Mothma, becoming one of the first groups of what Mothma had begun calling "the Alliance".[5]
Another rebel cell was Phoenix Cell, led by Commander Jun Sato,[28] who were a part of a larger rebel network led by Ahsoka Tano, a former Padawan of Anakin Skywalker, and Senator Organa,[24] who had already opposed Palpatine many years earlier.[20] At that point, members of those cells were not supposed to know they were part of a larger movement known as the rebellion, so if captured, they could not give information on the other rebel cells. The cells were only provided with intelligence on a need-to-know basis by Ahsoka Tano, using the code name of "Fulcrum."[24]
Due to the increased rebel activities around Lothal, the Imperial Security Bureau dispatched Agent Kallus to hunt down the Spectres. Kallus saw the rebel activities as part of a pattern which could lead to a spark of rebellion.[27] After the Spectres frustrated several Imperial efforts to capture them, Grand Moff Wilhuff Tarkin visited Lothal and warned the imperial officials and officers that while the various factions, cells, tribes lacked unity, the rebels on Lothal were unique because they in fact had unity, which made them a credible threat to the Empire. Tarkin warned that the failures of Imperial forces on Lothal have allowed the Spectres to represent hope, and ordered The Grand Inquisitor to execute two of the incompetent imperial officers, and warned the others that failure will have consequences.[29]
The rebellion's existence was finally revealed to the Empire when they were able to captured Kanan Jarrus after he and the rest of the Spectres were able to hack and send out a rebellious transmission to Lothal and many surrounding systems. His capture prompted his fellow Spectres into launching a mission to rescue him from Tarkin's personal Imperial Star Destroyer, the Sovereign, over Mustafar. In order to save one of their cells and the only other Jedi involved in the movement other than herself, Tano led Phoenix Squadron to assist in their escape. Following the successful rescue, she informed the Spectres that their protocol of secrecy had changed. In response to the transmission sent by the Spectres and the rumors of the rebel action over Mustafar, anti-Imperial unrest began on Lothal and several other worlds. In response, the Emperor dispatched Darth Vader to deal with the issue.[24]
New alliances
Following the Siege of Lothal, the Spectres were forced to retreat from Lothal and Phoenix Squadron was crippled when Vader destroyed their command ship. As a result of their encounter with Vader on Lothal, the Spectres decided to permanently join Phoenix Squadron.[30] Despite the attack, the Spectres were able to recruit retired Clone Captain Rex to their cause.[31] Phoenix Squadron was also able to acquire a prototype B-wing starfighter from Mon Calamari engineer Quarrie.[32] Working with Rex, the Spectres were able to destroy the Imperial Interdictor.[33] The Spectres also prevented members of the Inquisitorius from capturing several Force-sensitive children.[34]
The rebellion gets three Hammerheads corvettes for their cause after suffering losses at Garel.
Later, the Phoenix Squadron suffered a major blow when the Empire learned they were hiding on the planet Garel.[35] The Phoenix Squadron managed to escape but suffered some losses during the Battle on Garel. After Senator Bail Organa learned of their losses, he sent his daughter Princess Leia Organa to deliver three Sphyrna-class corvettes to them on Lothal.[36] In 3 BBY, Phoenix Squadron undertook a mission to seek safe passage for the rebellion through the Concord Dawn system. After meeting resistance from Fenn Rau's Mandalorian Protectors, the Spectres managed to kidnap him and force him to meet their demands for safe passage after a second attempt.[37]
Afterward, the Spectres and Cham's Free Ryloth movement joined forces to steal a Quasar Fire-class cruiser-carrier above the planet Ryloth.[38] The stolen carrier became the new flagship Phoenix Nest of Phoenix Squadron. With the help of Chopper and the former Imperial RA-7 protocol droid AP-5, Phoenix Squadron established a new base[39] called Chopper Base on the planet Atollon.[40]
Eluding Thrawn


Grand Admiral Thrawn was tasked to eliminate the burgeoning rebel threat.
In 2 BBY, the Imperial tactician Thrawn was promoted by the Emperor to Grand Admiral for his role in obliterating the rebel insurgency in the Batonn sector and the mastermind vigilante Nightswan. Grand Admiral Thrawn believed that the Empire was facing a galaxy-wide insurgency and studied his enemies' philosophy, art, and history in order to defeat them. In response to the activities of the Phoenix Squadron in the Lothal sector, Governor Arihnda Pryce enlisted his help in defeating them. Thrawn was not content with destroying Phoenix Squadron but sought to destroy the entire rebel fleet. Consequently, he allowed the squadron to escape with several stolen Y-wings during a mission to Reklam Station. These Y-wings were sent to General Jan Dodonna's unit.[41]
The rebellion also received an unexpected ally in the form of Agent Kallus, a former adversary of the Phoenix Squadron and Spectres.[42] Kallus had undergone a change of heart after befriending Zeb on the ice moon of Bahryn.[43] Kallus became the rebel spy known as Fulcrum and informed the Phoenix Squadron that several TIE fighter pilot cadets at the Skystrike Academy were planning to defect. Kallus also helped the rebel Sabine escape with the defecting pilots Wedge Antilles and Derek Klivian,[42] who would later join the Alliance's Starfighter Corps.[44]
After the Imperial Viceroy Gar Saxon massacred the Mandalorian Protectors, Fenn Rau finally joined the rebellion.[45] After the Phoenix rebels evacuated rebel sympathizers from the planet Mykapo, the rebel cell Iron Squadron joined the larger rebellion.[46] The Spectres later undertook a mission with the former Lothal Governor Ryder Azadi's rebel cell to steal Thrawn's plans for a new prototype starfighter from the Imperial Armory Complex on Lothal. During the course of their mission, the rebels were helped by Agent Kallus.[47]
Later, Rebel Command dispatched Saw Gerrera and his Partisans on a mission to investigate the disappearance of the Geonosian species. With the help of the Spectres and the Geonosian survivor Klik-Klak, the rebels discovered evidence that the Empire had perpetrated genocide against the Geonosians. The rebels used this information to raise awareness of Imperial atrocities and to sway more worlds to their cause.[48]
Thrawn also embarked on an ambitious program to search for Phoenix Squadron's base by dispatching E-XD infiltrator droids to sweep the Outer Rim Territories for signs of rebel activity. One unit, EXD-9, discovered Chopper Base but the rebels Zeb, Chopper, and AP-5 reprogrammed him into an improvised bomb that was sent back to its base and destroyed one of Thrawn's Star Destroyers. Despite this setback, Thrawn managed to narrow down the search for Chopper Base to 94 systems.[49] Thrawn also later discovered that Kallus was a rebel spy who was leaking information to the rebellion, and decided to use him against the rebellion.[50]
Official Formation of the Alliance to Restore the Republic
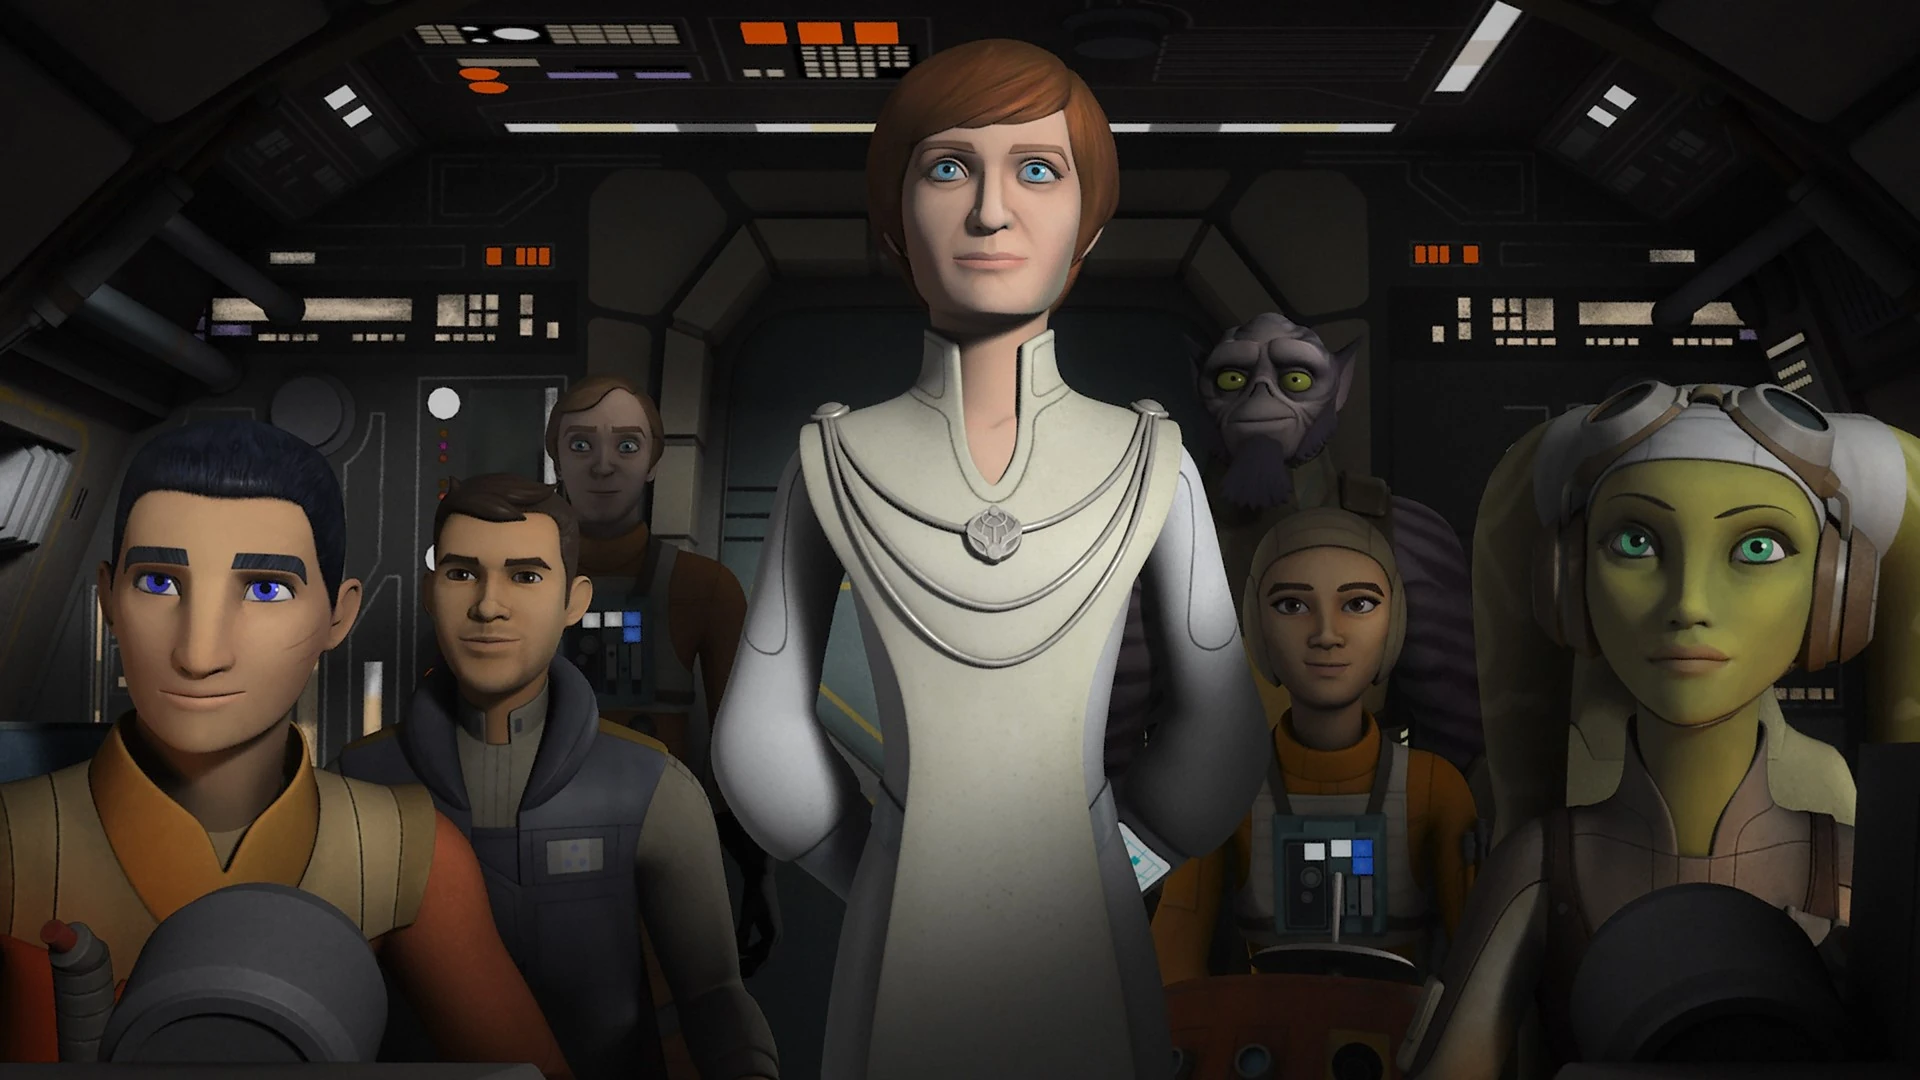
- "This is Senator Mon Mothma, I have been called a traitor for speaking out against a corrupt Galactic Senate. A Senate manipulated by the sinister tactics of the Emperor. For too long I have watched the heavy hand of the Empire strangle our liberties, stifling our freedoms in the name of ensuring our safety. No longer! Despite Imperial threats, despite the Emperor himself, I have no fear as I take new action. For I am not alone. Beginning today we stand together as allies. I hereby resign from the Senate to fight for you, not from the distant hall of politics but from the front lines. We will not rest until we bring an end to the Empire, until we restore our Republic! Are you with me?"
- ―Mon Mothma to the various rebel cells during the Declaration of the Rebel Alliance

Mon Mothma, Jon Vander, Gold Two, Erskin Semaj, and the Spectres witnessing the birth of the Rebel Alliance.
The Rebel Alliance formally came into existence after Senator Mon Mothma resigned from the Imperial Senate and denounced the Emperor for his role in the Ghorman Massacre. With the help of Phoenix Leader Hera Syndulla and her Spectres, Mothma managed to escape Thrawn's forces by traveling through the dangerous Archeon pass and reach Dantooine. There, Mon Mothma gave a HoloNet speech calling for the galaxy to rise up in rebellion against the Empire. Mothma's message was heard by the scattered rebel cells throughout the galaxy including Lothal and Atollon. The rebel fleet converged above Dantooine and the various cells and factions were unified into the Alliance to Restore the Republic.[3][51]
As part of the planned attack on Lothal, Phoenix Leader Hera Syndulla dispatched the droids AP-5 and Chopper along with the former Imperial cadet Wedge Antilles to steal clearance codes from the Imperial Security Bureau station on the moon Killun 71. During the course of the mission, Chopper was hijacked by a group of Imperial slicers and intelligence officers led by LT-319, who were based aboard an IGV-55 surveillance vessel. LT-319 tried to use Chopper to kill the Spectres and find the location of Chopper Base. However, Hera managed to reprogram Chopper and transmitted a data surge that destroyed the Imperial surveillance vessel.[52]
Having obtained the clearance codes, the Phoenix Squadron began training for their mission to Lothal. Ezra was briefly distracted when he departed with Chopper on an errant mission to Tatooine to save Obi-Wan Kenobi from the former Sith apprentice Maul. Kenobi told Ezra to return to his place with the Rebellion and defeated Maul in combat.[53]
Ambush on Atollon
- "We'll never surrender to you, Thrawn."
"You misunderstand, captain. I'm not accepting surrenders at this time. I want you to know failure. Utter defeat. And know that it is I who delivers it crashing down upon you." - ―Hera Syndulla and Thrawn
As part of the final stage of the planned attack on Lothal, General Dodonna and his Massassi Group traveled to Atollon to rendezvous with Phoenix Squadron. However, Thrawn's spies reported the trajectory of Dodonna's forces to the Grand Admiral. After exposing Kallus as Fulcrum, Thrawn used the trajectories of Massassi Group and Kallus' Fulcrum transmission to determine the location of Chopper Base and Atollon. Thrawn's Seventh Fleet, using Interdictor cruisers blockaded the Atollon system, preventing the rebels from carrying out their attack on Lothal and almost instantly taking EF76 Nebulon-B escort frigate. Trapped in the system, the rebels were forced to attack blockade using a tactic which included bombing runs which would try to brake the imperials positions. Thrawn knew about this and ordered his ships to keep to their positions. He then quickley fragmented Green Squadron as they attempted to cripple his star destroyers. He then counter attacked with his TIE squadrons destroying several rebel corvettes including the Sphyrna-class corvette P2. Realizing his tactic was hopeless, Commander Jun Sato ordered the fleet to charge the blockade and the star destroyers took out a second Nebulon-B frigate and the Braha'tok-class gunship Orion almost instantly.[54]

The Ghost and three Braha'tok-class gunships during the Battle of Atollon.
Ezra and Chopper managed to escape on the Gauntlet fighter Nightbrother after Commander Sato sacrificed his life to destroy an Imperial interdictor vessel that was blocking hyperspace jumps. Ezra appealed to Mon Mothma for help but the rebel leader was unwilling to expose the Alliance's true strength to Thrawn. Mothma agreed that Senator Organa was right when he said that the rebels were not yet ready to enter into open warfare with the Empire. With the Rebel Alliance unwilling to help, Ezra solicited the help of Sabine's Clan Wren, who destroyed Thrawn's second interdictor cruiser. As a result, the few surviving rebel forces, under Captain Syndulla and General Dodonna, emerged from the surface taking heavy losses along the way and were able to flee to Yavin 4. Only a few ships, including the Ghost, the CR90 corvette Liberator, two Sphyrna-class corvettes P1 and P3 and an assortment of RZ-1 A-wing interceptors and Y-wings got out.[54]
Return to Lothal
After their attempt to attack the Lothal factories ended with the loss at Atollon, the Spectres returned to Lothal to help the Lothal resistance and its leader Ryder Azadi. They got information of Thrawn's newly upgraded TIE/D Defender. Ezra Bridger and Sabine Wren stole the prototype but didn't get far thanks to its self-destruct system and had to escape with the hyperdrive. They then sent Hera Syndulla back to the Alliance High Command to call for an attack on the TIE Defender factory on Lothal of which they accepted. Hera returned with a Squadron of X-wing starfighters piloted by Mart Mattin, Cleat, Duke and Secon Daree and many others. But Thrawn was there and he had a trap set for them. One by one they fell and Hera, Mattin, and Daree were the only confirmed survivors. Thrawn sent his assassin Rukh to find them and he quickly captured Daree and Hera soon later.[55]
Shortly after, Ezra, Sabine and Kanan Jarrus went to save Hera. Kanan broke into Governor Arihnda Pryce's office and rescued Hera whilst Ezra and Sabine, disguised as TIE pilots, went to find them a way out. Kanan and Hera escaped on a glider to the Lothal City fuel depot where they were met by Ezra and Sabine in a patrol transport. Pryce then arrived on an All Terrain Armored Transport which fired upon the fuel pod. Kanan sacrificed himself to save the others and the fuel depot was lost halting the production of TIE/D Defenders on Lothal.[56]
The Galactic Civil War
- "Stealing food won't help us win. Killing enemies won't, either. Against might on the scale of the Empire, conventional victory is impossible—when our objectives become purely military, we've already lost the larger fight."
- ―Captain Micha "Howl" Evon of the Alliance's Sixty-First Mobile Infantry talking to new recruit Hazram Namir during a campaign on Vir Aphshire
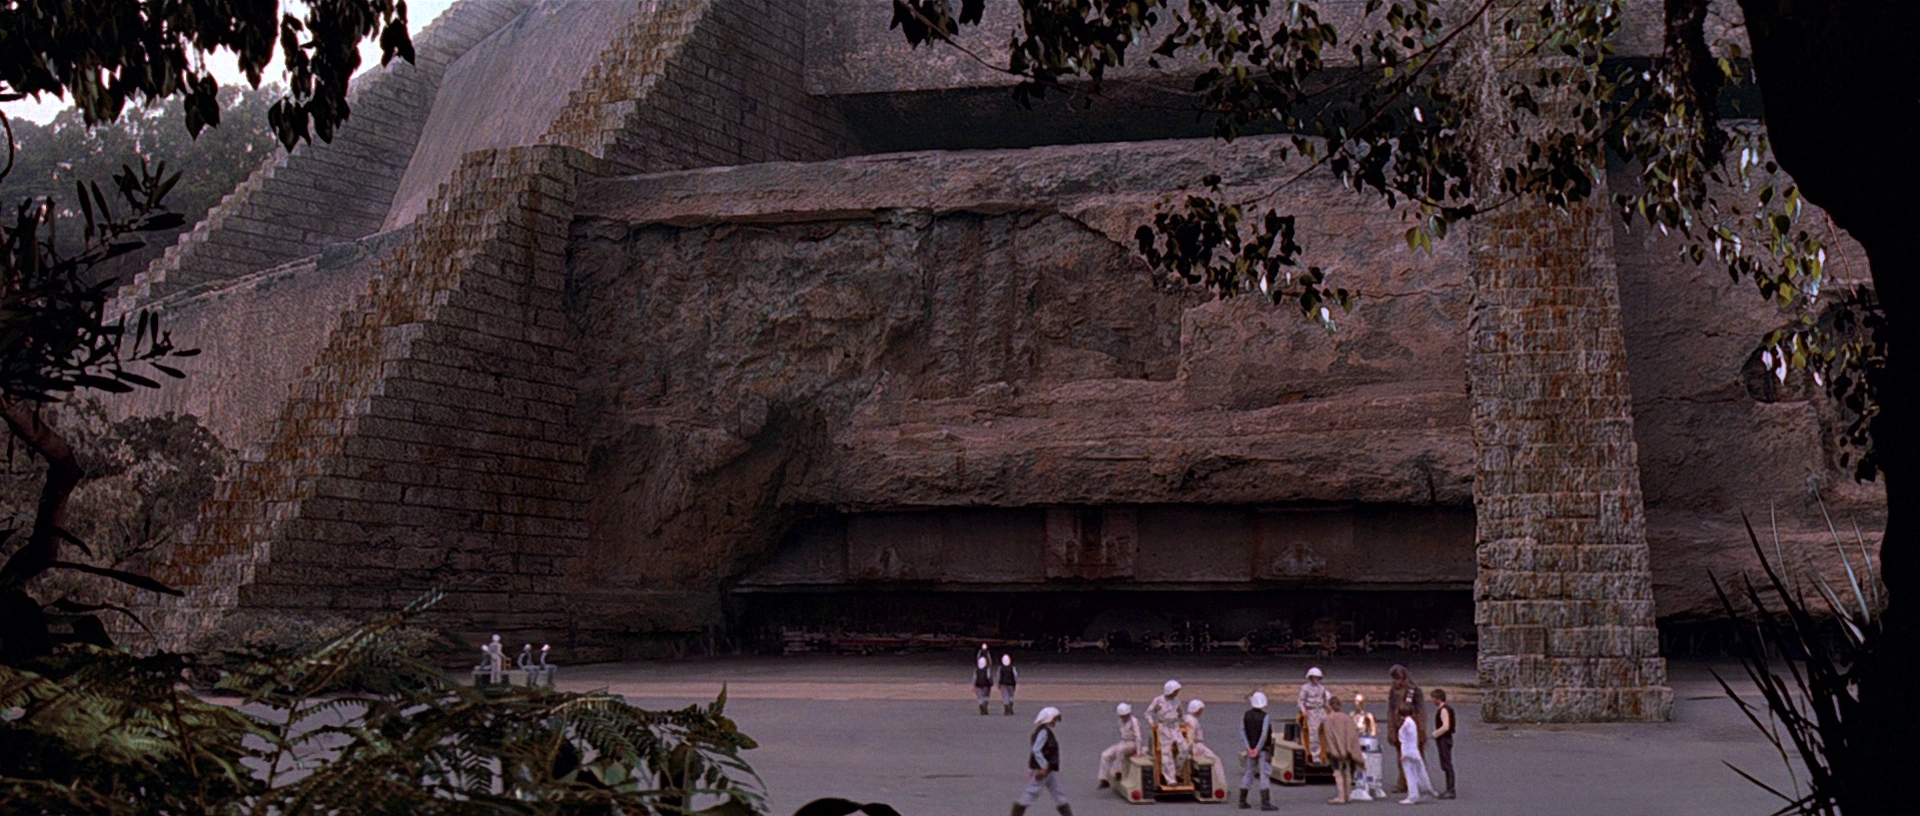

The Alliance headquarters on Yavin 4.
By 0 BBY,[13] the Alliance had become a full-fledged resistance movement headed by Bail Organa and Mon Mothma,[10] with the latter bearing the title of Chancellor, was established.[4] Now in possession of a respectable starfleet that included T-65B X-wing starfighters, BTL-A4 Y-wing assault starfighter/bombers, A-wing starfighters, and large ships that included MC80 Star Cruisers, at least one MC75 star cruiser, EF76 Nebulon-B escort frigate, and various corvettes, gunships, and transports, the Alliance was finally able to fight the Empire on better terms.[10] At the time, the Alliance was headquartered on the lush moon of Yavin 4, in an ancient stone structure known as the Great Temple.[1]
Leia Organa, the surrogate daughter of Bail Organa and crown princess of Alderaan, had succeeded her adopted father in the Imperial Senate and was also a secret member of the Alliance.[1] Prominent Alliance war leaders of the time included General Jan Dodonna and Admiral Gial Ackbar.[57] Some of the Empire's Joint Chiefs, like General Cassio Tagge, realized the full threat of what they called "the Rebellion." Others, like Admiral Conan Antonio Motti, believed in the infallibility of the Empire's might.[1] The Imperials, in an attempt to avoid dissent and sympathy for the Rebellion amongst loyal Imperial citizens, ensured that, through the use of propaganda, they did not know how large of a threat the Alliance truly was, assuring them that it was merely an unorganized and vengeful terrorist organization.[7]
Victory at Scarif
- "They've no idea we're coming. They've no reason to expect us. If we can make it to the ground, we'll take the next chance, and the next, on and on until we win, or the chances are spent."
- ―Sergeant Jyn Erso
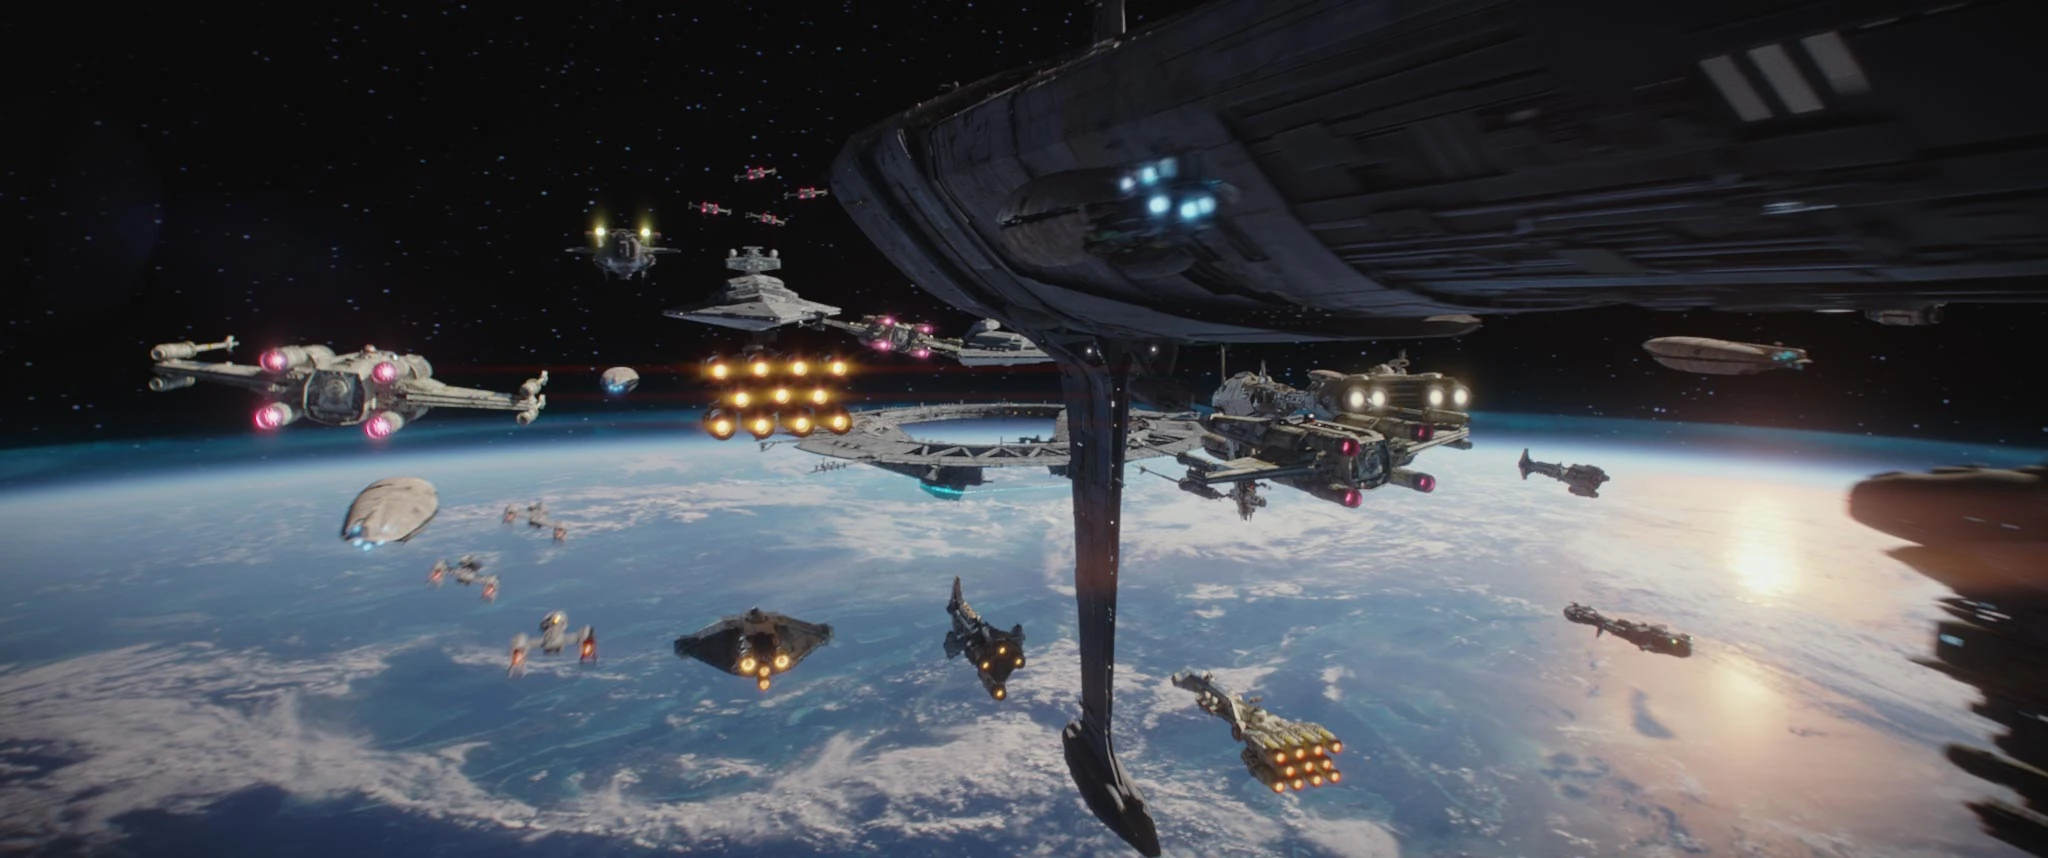

The Alliance Fleet above Scarif.
The Alliance's first major battle with the Galactic Empire was on the tropical planet of Scarif, in which the Alliance scored their first large-scale victory marking the beginning of the Galactic Civil War. Prior to the battle, Alliance Intelligence intercepted information suggesting that renowned scientist Galen Erso was building an Imperial super-weapon capable of destroying entire planets. Alliance leadership sent Galen Erso's daughter, Jyn Erso, and Captain Cassian Andor to learn more about her father's involvement, and their subsequent efforts saw the Alliance discover the existence of the Death Star, as well as a fatal flaw in the design placed there by Galen Erso. During the Battle, the Alliance managed to steal the blueprints of the Death Star, which had just been completed after nearly two decades of work, from the Imperial satellite base on Scarif. The plans to the Death Star were then transported to Princess Leia Organa on the Tantive IV.
Victory at Yavin
- "Thanks to your courage, we have delivered a telling blow to the Empire with the destruction of their Death Star. But our own casualties were not small."
- ―Leia Organa
Following the Battle of Scarif, Princess Leia's ship fell under Imperial attack over Tatooine, and she was captured by the dreaded Darth Vader himself, which prevented her from bringing the blueprints to her father back on Alderaan. She still managed to entrust the plans to the droids R2-D2 and C-3PO, who escaped the ship in an escape pod and landed on Tatooine below. After Imperial Grand Moff Wilhuff Tarkin ordered the destruction of Alderaan with the Death Star's superlaser, Leia Organa was rescued from the battle station's jail by the crew of a Corellian YT-1300f light freighter called the Millennium Falcon, consisting of: Han Solo, the ship's Corellian smuggler captain; Chewbacca, his Wookiee copilot; Luke Skywalker, the son Vader unknowingly had with Senator Amidala who grew up as the farmhand of his Uncle Owen and Aunt Beru's moisture farm on Tatooine; Obi-Wan Kenobi, Vader's old Jedi Master who exiled himself to Tatooine to watch over Luke; and the two droids. The group, except for Kenobi who gave his life battling Darth Vader, escaped the Death Star aboard the Falcon and headed for the Alliance headquarters on Yavin 4, where the plans of Empire's superweapon were analyzed.[1]
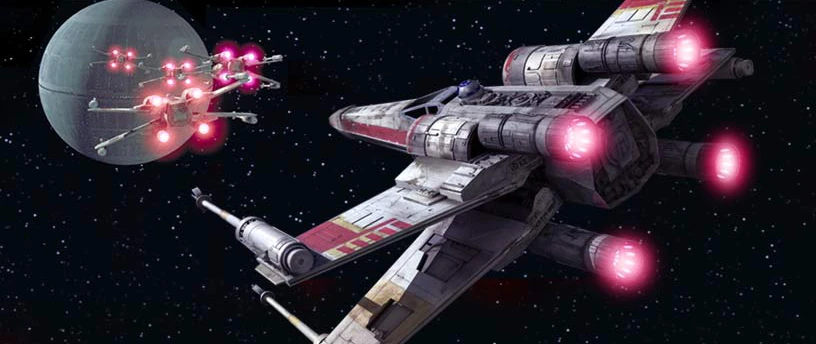

The Alliance launches its attack run on the Death Star.
Having traced the fleeing rebels, the Empire discovered the location of the Alliance base, and the Death Star closed into Yavin 4. The Alliance then launched its assault against the battle station, with Princess Leia monitoring in the command center. Luke Skywalker joined the mission in his own way, piloting an X-wing under the call sign of Red Five. As the Empire readied to destroy Yavin 4 and the Alliance with a single blow of its superlaser, Han Solo unexpectedly saved Skywalker by blasting a group of Imperial TIE/ln starfighters that were giving chase. Skywalker managed to fire a proton torpedo into the Death Star's thermal exhaust port, destroying the battle station by exploiting its only weakness.[1]
In the shadow of Yavin, the Alliance had won its first major tactical victory, but at an enormous cost in lives. In addition to the Alliance pilots who died during the assault, at least millions of Alderaanians had perished with their planet, and Bail Organa was among them. After an award ceremony during which Princess Leia presented the heroes of the day with medal of Bravery, Alliance General Dodonna made it his priority to have Yavin 4 evacuated. Now that the Empire knew their location, they had to find a new base of operations as soon as possible.[57] Darth Vader became obsessed with finding the young rebel who had destroyed the Death Star right under his nose. Unbeknownst to himself, until learning Luke's last name through Boba Fett, and the rebels at the time, he was in fact the biological father of both Luke Skywalker and Leia Organa.[58]
Around Pantora
Not long after the Battle of Yavin, the Rebel fleet relocated to the Pantora system.[59]
Rescuing Drusil Belphorin
Luke Skywalker and Nakari Kelen were tasked with rescuing the Givin Drusil Bephorin, who the Empire was watching closely for her expert slicing skills. They met with a Kupohan spy called Sakhet on Denon, who directed them to Drusil. They extracted the Givin and took her to Kupoh, where another one of Sakhet's contacts Azzur Nessin owned a company in the capital of Tonekh city called Nessin Courier & Cargo. He repaired their ship, whilst they kept one of his employees Migg Birkhit from bringing the Empire to them. They managed to contain a Gotal ISB agent called Barrisk Favvin, along with Migg. Then, another employee Ruuf Waluuk called in a Devaronian mercenary and he killed Nessin before Skywalker and Kelen killed them both. They escaped the Kupoh system and went to Omereth, where Drusil's family were waiting after being extracted by Major Bren Derlin. However, bounty hunters intercepted them and they crashed into the ocean and swam to the land where they face the many mercenaries. Kelen died in the fight, but Luke reunited Drusil with her family and she promised to return and help them.[59]
Advancement into the Mid Rim
Bolstered by the victory at Yavin, the Alliance generals had thousands of ships and hundreds of battle groups, including Twilight Company, advance into the Mid Rim. Many battles broke out and the Alliance gained lots of ground. But nine months in, the Fleet became over-extended and a halt was ordered. This was soon followed by a retreat and the forces began evacuating their bases.[60]
Attack on Weapons Factory Alpha


Han, Luke, Leia, and R2 enter the factory.
Shorty after their victory at Yavin, the Rebels launched an attack on Cymoon 1 due to it's Imperial weapons factory. Luke Skywalker, Princess Leia, R2-D2 and Han Solo went in undercover to the factory, while Chewbacca served as a sniper and C-3PO stayed on the Falcon as their escape pilot. Despite a run-in with Darth Vader, the Rebels were able to destroy the factory. However, during this brief encounter with Vader, he saw Luke's lightsaber. He recognized it as his old saber and began his hunt to find the origins of Luke.[61]
Battle of Vrogas Vas
Darth Vader had been getting information on the boy who blew up the Death Star, he had recently found out his name confirming Luke to be his own son. Vader's rival Commander Karbin discovered his location and leaked it to Vader's helper, Dr. Aphra who sent Vader to the location, Vrogas Vas. He instantly ran into three X-wing squadrons, Red Squadron, Blue Squadron and Yellow Squadron of which he began obliterating, before Luke crashed his X-wing into Vader's TIE Advanced and they both crashed onto the surface. The Alliance forces at Vrogas Vas refueling base, then deployed hundreds of troops supported by dozens of tanks and they went hunting Vader. They also deployed the Y-wings of Gray Squadron to attack Vader and he destroyed them by hurling rocks with the Force.[62]
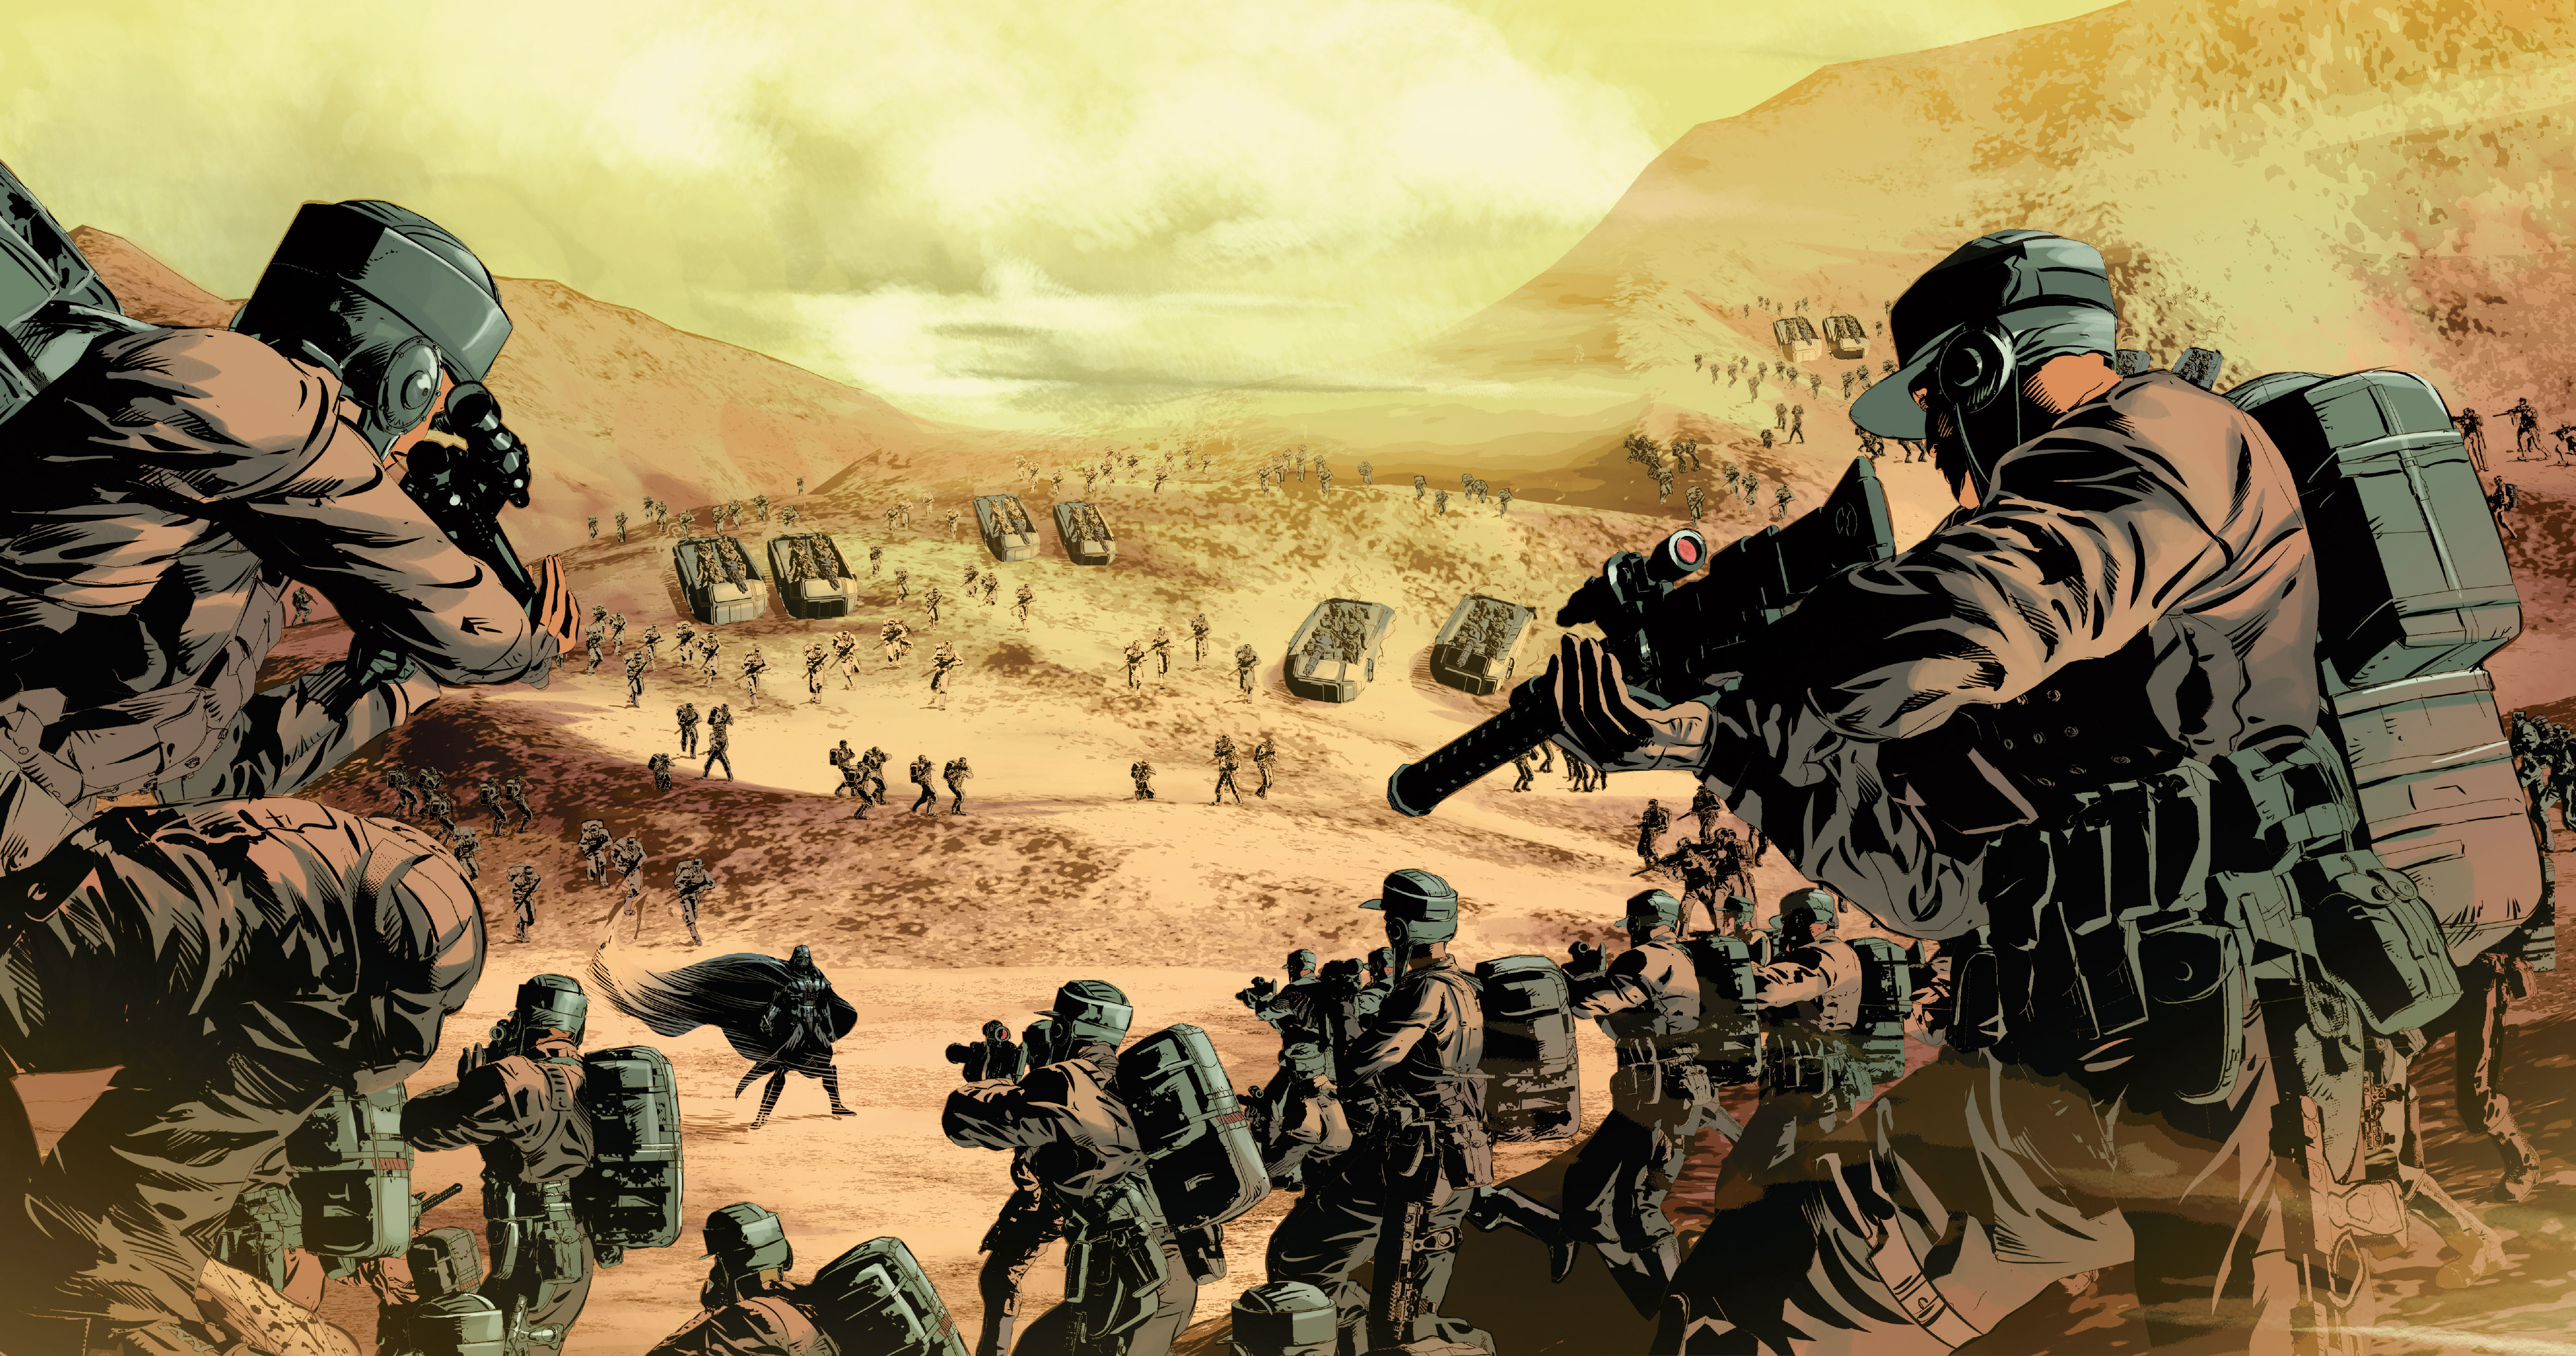

Alliance forces surround Darth Vader.
Vader soon found himself surrounded by the many ground forces but did not fear them. He outsmarted them by activating their grenades and scattering them. He then mowed more of them down, whilst deflecting tank shots and taking out the T-47 airspeeders of Cyan Squadron. Meanwhile, Dr. Aphra had come to Vrogas Vas and captured Luke. Leia Organa, Han Solo, and Chewbacca had also arrived and Han went to save Luke, whilst Leia took a strike team to find Vader. Whilst Han faced off with Dr. Aphra, Vader took out Leia's squad but let her go to attract more rebels to him. Leia sent the Y-wings of Amber Wing to bomb the area, but they were soon stopped by Commander Karbin and his forces and Karbin tried to take Luke. Vader stopped Karbin's men and faced off with Karbin. Vader defeated Karbin, whilst Leia, Han, Luke, and Chewie escaped with a captured Dr. Aphra. With the Empire overrunning them, the Alliance forces were forced to retreat as well.[62]
Mid Rim Retreat
The Mid Rim Retreat was the Empire pushing the Alliance back from the Mid Rim following their former advancement. Companies such as Twilight Company, Fish Eye Company, Bitter Pill Company and the Twenty-First were either defending, distracting or rescuing. It was part of the Alliance's withdrawal from the Mid Rim.[60]
Twilight Company
Twilight Company launched a campaign on Haidoral Prime as a part of a distraction for the Alliance Fleet to withdraw from the Mid Rim. During the campaign, Sergeant Hazram Namir and his squad extracted the defecting Governor Everi Chalis. She offered herself as a necessary asset to the Alliance, as she knew a lot about the inner-workings of the "Imperial war machine". Captain Micha Evon took an interest in this, but the soldiers weren't having it. One of them Corbo took a knife to her holding cell, because he was still grief-stricken after one of her laws had his pet Felinx killed. They then suffered a run-in with an Imperial patrol. But in the Coyerti campaign, Chalis gave them valuable intelligence on a distillery of which Namir and his squad destroyed. Twilight Company then suffered three more attacks in the Metatessu sector and realized the CR90 corvette Thunderstrikes hyperdrive was leaving a trail. Chalis arranged a Raid on an Imperial heavy freighter for them to get supplies. Her plan worked flawlessly, but with the loss of two sergeants, Fektrin and Maximian Ajax.[60]
Meanwhile, the Alliance was taking heavy losses during their withdrawal from the Mid Rim. Whilst the Twenty-First battled on Bestine and Bitter Pill Company lost their transport on a trash heap of a planet, the Alliance lost Unroola Dawn, Talrezan Four and Hope Station, General Amrashad was killed.[60]
Chalis and Captain Evon then got an invite to Echo Base and they took Namir, Roja and Beak with them. Meanwhile, the rest of Twilight Company went to the Elochar sector where a flotilla, including the Sixmoon, was stationed. Chalis, Evon and the other three got to Echo Base on Hoth, where they met up with General Philap Bygar, who took them to a strategy conference. The other three did jobs around the Base in the meantime and Namir got into a fight with an Alliance Special Forces soldier called Kryndal, over the ethics of the Alliance. The strategy conference went as planned, but the alarm soon went off that the Empire had found them.[60]
Defeat at Hoth
- "Your Highness, we must take this last transport. It's our only hope."
"Send all troops in sector twelve to the south slope to protect the fighters!" - ―C-3PO and Princess Leia Organa
In 3 ABY,[13] one of the many Imperial probe droids searching the galaxy ended up discovering the Rebels' presence. The Imperial Death Squadron, Darth Vader's personal armada, headed for Hoth with a contingent of ground troops, ready to crush the rebellion once and for all. However, due to a mistake by the Imperial admiral Kendal Ozzel, the Alliance forces were warned of the Empire's arrival. The Rebels had time to activate the deflector shield protecting Echo Base, rendering orbital bombardment impossible. As the Alliance prepared for evacuation, Imperial troops disembarked on the surface of Hoth, beyond the range of the energy shields. Once there, several legions of snowtroopers advanced on Echo Base. A squadron of All Terrain Armored Transports under the command of General Maximillian Veers was tasked with destroying the massive generators powering the Rebel base's shield. Perimeter Outpost Delta fell first with Sergeant Hazram Namir, Roja and Beak being forced to retreat back to the main base to find Captain Micha Evon and Everi Chalis.[9]
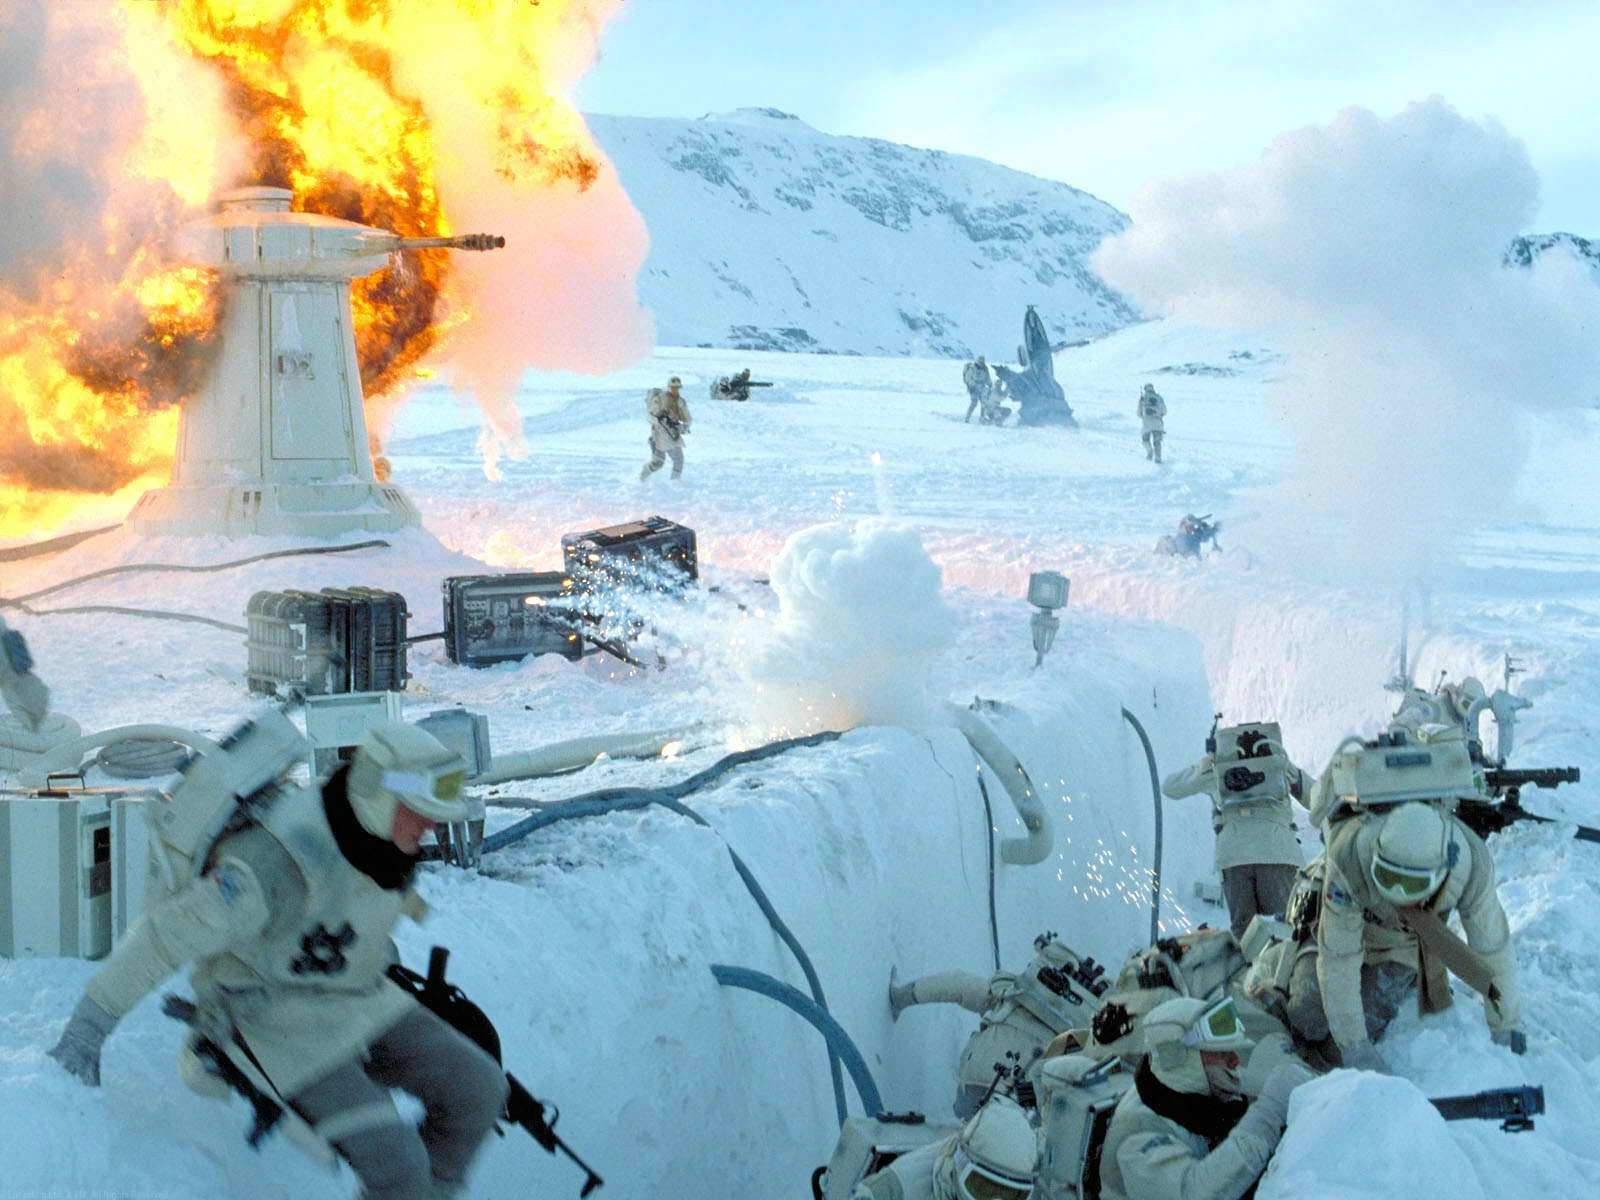

The Alliance soldiers take heavy fire during the Battle of Hoth.
Luke Skywalker, now a commander, led his Rogue Squadron of snowspeeders against General Veers' armored transports. By using a harpoon gun and tow-cable, the Rebels managed to bring down one of the transports, but Skywalker's snowspeeder was shot down. Unlike his gunner Dak Ralter, the Rogue commander survived the accident. With the help of his lightsaber and a grenade, he still managed to destroy another walker. Despite the Rebels' best efforts to delay Veers' armored transports, the Imperial general successfully blew up the protective shield generator, allowing Darth Vader and his men to enter Echo Base. While the Rebel command personnel and material was loaded into transports and whisked away just in time, the unprepared Alliance soldiers engaged the Imperials in conventional warfare. Namir and his two men got back to the main base to find Chalis with and Captain Evon, who was unconscious. They then encountered Darth Vader who killed Captain Evon, Roja, and Beak. Namir and Chalis escaped on a shuttle with Chalis' clearance codes.[60]
Unable to reach a transport, Princess Leia Organa, Han Solo, Chewbacca and the droid C-3PO took their flight in the Millennium Falcon. The Alliance delayed the Imperial troops long enough to get its most important staff off the planet, and its ground-based ion cannon temporarily disabled all ships of the Imperial Death Squadron, preventing them from attacking the escaping transports. All in all, the Empire still won a major victory on Hoth, as the Alliance was routed from its base once again and barely escaped Death Squadron's blockade.[9] The Imperial victory left the Alliance scattered and General Philap Bygar was killed during or after the battle when running from the Imperials.[60]
Leia and Solo on the Run
Princess Leia, Han Solo, Chewbacca, and C-3PO were on the run on the Millennium Falcon. They evaded many Imperial-class Star Destroyers before escaping the clutches of Captain Lorth Needa. They then traveled to Cloud City on the gas giant Bespin to meet with Han's old friend Lando Calrissian. Lando had the Millennium Falcon repaired but when the time was right, he betrayed them for Darth Vader who wanted to set a trap for Luke Skywalker. He had Solo frozen in carbonite and Skywalker came in a nick of time with R2-D2. Vader then confronted Skywalker and revealed he was his father. Meanwhile, Lando had his security turn on the Empire and Cloud City descended into chaos. Skywalker ran from Vader and was rescued by the two as they escaped Cloud City with Chewbacca, C-3PO, and R2-D2. Solo was taken to Jabba the Hutt by Boba Fett who had initially tracked them to Bespin.[9]
Operation Ringbreaker
Shortly following the Battle of Hoth, the Sixty-First had found itself beheaded with their captain Micha Evon killed on Hoth and the rest of the officers killed in the Elochar sector. They were stranded on Ankhural with vital repairs being done to the Thunderstrike and they needed a purpose, so Chalis and Namir (who took charge) initiated Operation Ringbreaker, which sought to force Imperial redeployments from the shipbuilding world of Kuat by assaulting worlds such as Obumubo, Naator, Xagobah and the asteroid mines of the Kuliquo belt, thus allowing for the Alliance to assault its ultimate goal. This was lead by the Alliance's Sixty-First Mobile Infantry, commonly known as Twilight Company. One of the final planets in the chain before the attack on Kuat itself was the mining world of Sullust. The Twilight Company attacked the Inyusu Tor mineral processing facility. The facility was quickly overtaken and victory seemed sure until Twilight Company's ship, the Thunderstrike, was shot down and damaged beyond repair while attempting to pick up the division.[60]
Liberating Sullust
Twilight Company was forced to guard the facility until they could find another way off the planet. The Imperial-class Star Destroyer Herald and the ground forces advanced on them. They were aided by the local rebel cell lead by Nien Nunb, although the tide of the battle was only truly changed when Governor Everi Chalis disabled the Imperial-class Star Destroyer Herald using a shuttle and ion mines. In the following days, an interim government would be installed in Pinyumb, while heavy losses sustained by the Sixty-First would ultimately cancel Operation Ringbreaker, allowing the company to act as a temporary police force for the Sullustan people. Their Braha'tok-class gunship the Apailana's Promise had barely survived after returning to help them against the Herald. Subsequent pirate broadcasts and intercepted Imperial signals indicated further insurrections across the planet, delaying the inevitable Imperial counterattack.[60]
The Second Death Star
Sometime between 3 ABY and 4 ABY, the Bothan spynet found information confirming the existence of a second Death Star, Death Star II, and immediately began to dig for more information. The Emperor found out about this and sought to set a trap for the Alliance. He let more information be fed more to the Bothans, with many of them dying in order to get it, and hid the fact that the Death Star's superlaser was complete. The new information revealed the location of the Death Star (Endor), the shield protecting it and the shafts within it big enough for starfighters to pass through to the core. When the Alliance High Command got this information, they launched Operation Yellow Moon in order to distract Imperial forces across the galaxy.This was led by Princess Organa and her strike team.[63] Meanwhile, the rebels on the MC80 Star Cruiser Invincible Faith had intercepted a message from Moff Raythe, which would reveal the Emperor's trap if they encrypted it in time, but they had also captured Commander Iden Versio of the Empire's Inferno Squad, who had let it happen so she could get rid of the message. She broke free, forced her way through the ship and deleted the message making sure no-one in the Alliance could know about the trap. Iden escaped with the help of the other members of Inferno Squad.[64]
Triumph at Endor
- "Admiral Ackbar is right. The Death Star isn't our only enemy—time is, as well. Our attack must come before the battle station is operational— or all will be lost."
- ―Chancellor Mon Mothma
In 4 ABY,[13] the Alliance to Restore the Republic was determined to deal a fatal blow to Emperor Palpatine's tyranny. After having learned that the Empire had secretly begun construction on a second Death Star even more powerful than the first one, the Alliance fleet rendezvoused near Sullust to plan an attack. Thanks to its Bothan spies, the Alliance had learned that Palpatine himself was to oversee the final construction stages of the new battle station.[65]
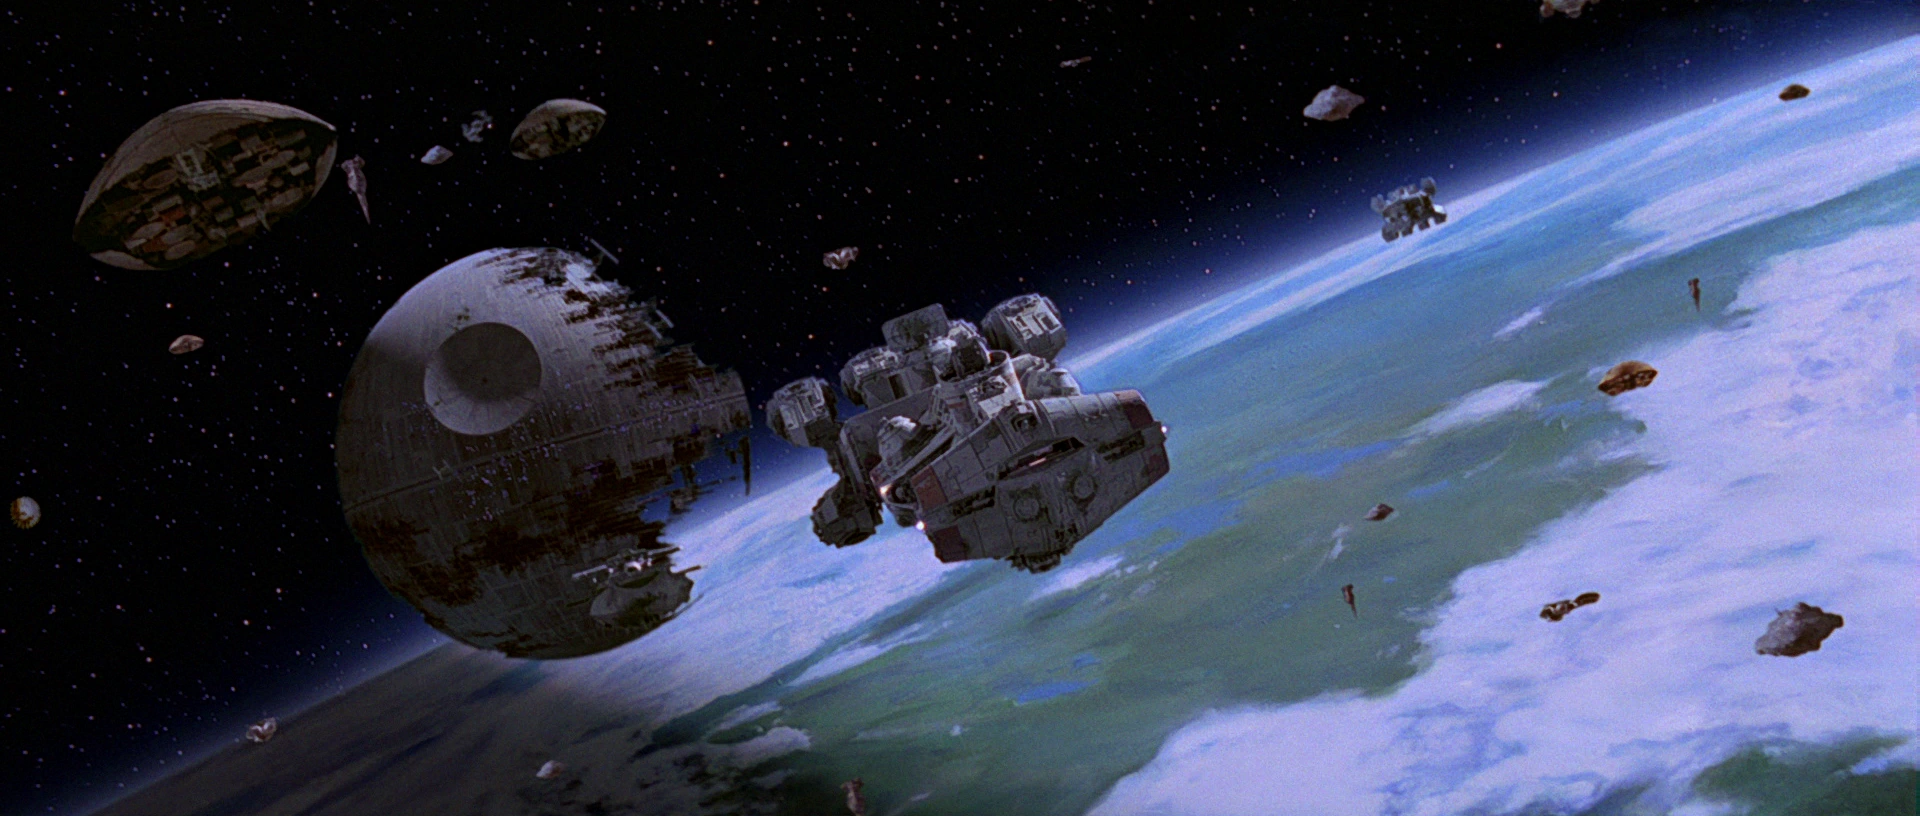

The Death Star II in orbit over Endor during the Battle of Endor.
It was decided that a rebel strike team led by Luke Skywalker, Leia Organa, Han Solo and Chewbacca would land on Endor in a stolen Lambda-class T-4a shuttle, with the mission to deactivate the Death Star's energy defense shield. Little did they know that they had fallen into a trap. When they reached the shield's bunker, the Imperial army was waiting for them. In orbit of Endor, the Alliance fleet was ambushed by a large Imperial armada led by the Super Star Destroyer Executor that emerged from hyperspace. Unable to attack the Death Star until its shield was destroyed, the rebel fleet focused its attack on the Imperial Star Destroyers. Although its starfighters were able to maneuver easily around the Death Star, they were still vulnerable to the battle station's superlaser which destroyed the Liberty and the Nautilian.[65]
On Endor, the rebel strike team ended up allying with the native Ewoks, who used their knowledge of their homeworld's forests to take the Imperial army by surprise. The strike team was finally able to destroy the shield generator after a lengthly ground battle, allowing their Starfleet to attack the Empire's dreaded superweapon. The Alliance general Lando Calrissian managed to fly the Millennium Falcon into the Death Star with Wedge Antilles, Norra Wexley, Keir Santage, Jake Farrell and another A-wing pilot. They flew through the shafts and were pursued by several TIEs which gunned down Keir's X-wing starfighter. Lando then ordered the group to split up and Farrell, Wexley and the other A-wing pilot flew down another shaft to lure TIEs back out. Lando and Antilles then made it to the reactor core and wrecked havoc to the battle station's power plant before retreating back out as the Death Star began to detonate. During an attack on the Executor, Green Leader Arvel Crynyd's A-wing was crippled and crashed into the bridge, killing Admiral Firmus Piett and his staff. Having already taken a considerable amount of damage from the Alliance's starfighters, the Executor failed and drifted into the Death Star's gravity well detonating on impact.[65]
Meanwhile, aboard the station, a blow of an entirely different kind was struck against the Empire. A captive Luke Skywalker, now a Jedi in his own right, appealed to Vader's paternal love, convincing him to turn on his master. Vader— once again Anakin Skywalker— seized the Imperial head of state and hurled him down a shaft to his death, but at the cost of his own life. The Death Star soon exploded itself from the damages to its core. With the loss of both the Emperor and his right-hand man, Vader, the destruction of the Death Star itself, and significant losses inflicted on the Imperial fleet, the Imperial remnants were forced to withdraw. The Empire had suffered a decisive defeat, leaving the Rebels to celebrate in victory.[65]
New horizons
After the Battle of Endor, the Alliance was eventually reorganized into the New Republic. The new government, however, still had to contend with Imperial holdouts. But luckily, the Emperor's contingency plan had the Empire thrown into chaos with Operation: Cinder turning them on their loyal planets.[66] One year after the destruction of the second Death Star,[13] Republic and Imperial forces notably fought a major battle on the desert world of Jakku which saw a Republic victory and the end of the Galactic Civil War.[67]
Legacy
The symbol of the Alliance to Restore the Republic was used in the insignia of the New Republic[14] and later became the emblem of the Resistance, a military force founded by Rebel veteran Leia Organa and made up of several Alliance officers, such as Gial Ackbar and Caluan Ematt, to combat the First Order, the successor of the fallen Empire.[68] During the Bail Organa statue-dedication ceremony in 28 ABY, speeches were delivered by Senators Tai-Lin Garr and Leia Organa that reminded the gathered audience of the sacrifices made by the Rebel Alliance, which were further reinforced by an air show performed by Republic X-wings.[69]
Organization
Government
The Alliance to Restore the Republic was a military resistance movement, headed by the Alliance High Command and dedicated to upholding the ideals of the Old Republic.[70] It frequently changed its base of operations, ranging from numerous worlds across the galaxy in order to avoid detection or regroup from an attack by its nemesis, the massive Galactic Empire. A diplomatic corps who sought to maintain friendly relations and procure support from various worlds in the galaxy was maintained.[70] Despite this, the Alliance had few worlds openly declare their support for the movement, as those few that did find their worlds cordoned behind Imperial blockades.[60]
Military
- "The Rebel Alliance is too well equipped. They're more dangerous than you realize."
- ―General Cassio Tagge
Nebulon B escort frigates, one of the most common starships within the Alliance Fleet.
Prior to the Alliance's official founding, the various rebel cells operated their own military forces. As the cells began coordinating, joint military endeavors were often overseen by cell leaders such as Jun Sato of Phoenix Group,[30] Cham Syndulla of the Free Ryloth movement,[38] and Ryder Azadi of the Lothal resistance.[47] Rebel cells received information from "Fulcrum" intelligence operatives[26]
The formal Alliance Military was served by capable military leaders such as Admiral Gial Ackbar, and received intelligence updates through its own intelligence branch known as Alliance Intelligence.[63][66][65] It could also receive information through the Bothan spynet, and maintained the Alliance Fleet and Alliance army, along with the Rebel Alliance Starfighter Corps.[59] Rebel troopers across the galaxy fought for an end to galactic Imperial rule in units such as the Sixty-First Mobile Infantry and Thirty-Second Infantry, while the Alliance Special Forces was composed of elite commandos of the trooper ranks.[71]
Behind the scenes
- "Before the Empire takes over, we already had these little groups out there… and they need a way to come together. And that's really where your Bail Organas and your Mon Mothmas come in. They're the way that you can galvanize these rebels, and you get a Rebel Alliance."
- ―Dave Filoni, on how the Onderon rebels help set the stage for the Rebel Alliance
Dave Filoni, the supervising director of Star Wars: The Clone Wars animated television series, stated that he and George Lucas intended the Onderon rebels, seen in the Onderon arc, to be the first of many militias that were created by the Jedi during the Clone Wars, militias that would be brought together by characters such as Bail Organa and Mon Mothma to become the Rebel Alliance.[72]