PotentiumRLX (talk | contribs) Tags: Visual edit apiedit |
m (Cleanup and formatting fixes) |
||
| (18 intermediate revisions by 8 users not shown) | |||
| Line 1: | Line 1: | ||
| − | {{Eras|imp|reb|new|njo|leg|canon=BTL-S3}} |
+ | {{Eras|imp|reb|new|njo|leg|canon=BTL-S3 Y-wing Starfighter}} |
{{Expand}} |
{{Expand}} |
||
{{Starship_class |
{{Starship_class |
||
|image=[[File:Btl-s3.jpg]] |
|image=[[File:Btl-s3.jpg]] |
||
|name=BTL-S3 Y-wing starfighter |
|name=BTL-S3 Y-wing starfighter |
||
| − | |manufacturer=[[Koensayr Manufacturing/Legends|Koensayr Manufacturing]]<ref name="RAS">''[[Rebel Alliance Sourcebook]]''</ref> |
+ | |manufacturer=[[Koensayr Manufacturing/Legends|Koensayr Manufacturing]]<ref name="RAS">''[[The Rebel Alliance Sourcebook]]''</ref> |
| + | |designer= |
||
| − | |line=[[BTL Y-wing starfighter]] |
+ | |line=[[BTL Y-wing starfighter/Legends|BTL Y-wing starfighter]] |
|model=BTL-S3 Y-wing starfighter |
|model=BTL-S3 Y-wing starfighter |
||
|class=Assault [[Starfighter/Legends|starfighter]] |
|class=Assault [[Starfighter/Legends|starfighter]] |
||
| Line 18: | Line 19: | ||
|mglt= |
|mglt= |
||
|max speed=1000 km/h<ref name="RAS" /> |
|max speed=1000 km/h<ref name="RAS" /> |
||
| + | |maneuverability= |
||
|engine=2 Koensayr [[R200 Ion Jet engine|R200 ion jet engines]] (rated 250 KTU) |
|engine=2 Koensayr [[R200 Ion Jet engine|R200 ion jet engines]] (rated 250 KTU) |
||
|hyperdrive=Class 1.0 |
|hyperdrive=Class 1.0 |
||
| Line 23: | Line 25: | ||
|hdsystem=Koensayr R300-H [[Hyperdrive motivator/Legends|hyperdrive motivator]] |
|hdsystem=Koensayr R300-H [[Hyperdrive motivator/Legends|hyperdrive motivator]] |
||
|poweroutput= |
|poweroutput= |
||
| − | |power=[[Novaldex/Legends|Novaldex]] power generator; [[Thiodyne]] [[03-R cryogenic power cell/Legends|03-R cryogenic power cells]] and [[ionization reactor]] |
+ | |power=[[Novaldex/Legends|Novaldex]] power generator; [[Thiodyne/Legends|Thiodyne]] [[03-R cryogenic power cell/Legends|03-R cryogenic power cells]] and [[ionization reactor]] |
|shield gen=[[Chempat Engineered Defenses|Chempat]] [[Deflector shield/Legends|shields]] (75 SBD) |
|shield gen=[[Chempat Engineered Defenses|Chempat]] [[Deflector shield/Legends|shields]] (75 SBD) |
||
|hull=[[Titanium/Legends|Titanium]]-reinforced [[Alusteel]] alloy (40 RU) |
|hull=[[Titanium/Legends|Titanium]]-reinforced [[Alusteel]] alloy (40 RU) |
||
|sensor=[[Fabritech/Legends|Fabritech]] [[ANs-5d sensor unit]] with [[PA-9r long range phased tachyon detection array]] and [[PG-7u short range primary threat analysis grid]] |
|sensor=[[Fabritech/Legends|Fabritech]] [[ANs-5d sensor unit]] with [[PA-9r long range phased tachyon detection array]] and [[PG-7u short range primary threat analysis grid]] |
||
| − | |target=Fabritech [[ANc 2.7 tracking computer/Legends|ANc 2.7 tracking computer]] with [[SI 5g7 "Quickscan" imaging system]] |
+ | |target=Fabritech [[ANc 2.7 tracking computer/Legends|ANc 2.7 tracking computer]] with [[SI 5g7 "Quickscan" imaging system/Legends|SI 5g7 "Quickscan" imaging system]] |
|navigation= |
|navigation= |
||
|avionics=[[Sublight Products Corporation|Subpro]] [[NH-7 flight control avionics]] |
|avionics=[[Sublight Products Corporation|Subpro]] [[NH-7 flight control avionics]] |
||
| Line 33: | Line 35: | ||
|countermeasures= |
|countermeasures= |
||
|armament=*[[Taim & Bak/Legends|Taim & Bak]] [[IX4 laser cannon/Legends|IX4]] or [[KX5 laser cannon/Legends|KX5 laser cannons]] (2) |
|armament=*[[Taim & Bak/Legends|Taim & Bak]] [[IX4 laser cannon/Legends|IX4]] or [[KX5 laser cannon/Legends|KX5 laser cannons]] (2) |
||
| − | *[[ArMek/Legends|ArMek]] turreted [[SW-4 ion cannon]] (1) |
+ | *[[ArMek/Legends|ArMek]] turreted [[SW-4 ion cannon/Legends|SW-4 ion cannon]] (1) |
*[[Arakyd Industries/Legends|Aratech]] [[Flex Tube proton torpedo launcher/Legends|Flex Tube]] [[Proton torpedo/Legends|proton torpedo]] launchers (2) |
*[[Arakyd Industries/Legends|Aratech]] [[Flex Tube proton torpedo launcher/Legends|Flex Tube]] [[Proton torpedo/Legends|proton torpedo]] launchers (2) |
||
**10 torpedoes |
**10 torpedoes |
||
| Line 40: | Line 42: | ||
|bays= |
|bays= |
||
|escapepods=0 |
|escapepods=0 |
||
| − | |crew=*[[Pilot/Legends|Pilot]] (1)<ref name="RAS" |
+ | |crew=*[[Pilot/Legends|Pilot]] (1)<ref name="RAS" /> |
*Co-pilot/[[Gunner/Legends|gunner]] (1) |
*Co-pilot/[[Gunner/Legends|gunner]] (1) |
||
*[[Astromech droid/Legends|Astromech droid]] (1)<ref name="RAS" /> |
*[[Astromech droid/Legends|Astromech droid]] (1)<ref name="RAS" /> |
||
| Line 52: | Line 54: | ||
|othersystems=*Koensayr ballistic [[Ejector seat/Legends|ejection seat]] |
|othersystems=*Koensayr ballistic [[Ejector seat/Legends|ejection seat]] |
||
*Detachable cockpit |
*Detachable cockpit |
||
| + | |availability= |
||
|role=*Starfighter |
|role=*Starfighter |
||
*[[Bomber/Legends|Bomber]]<ref name="BFI guide">''[[Star Wars Battlefront: Prima Official Game Guide]]''</ref> |
*[[Bomber/Legends|Bomber]]<ref name="BFI guide">''[[Star Wars Battlefront: Prima Official Game Guide]]''</ref> |
||
| Line 59: | Line 62: | ||
*[[Shuttle/Legends|Shuttle]] |
*[[Shuttle/Legends|Shuttle]] |
||
|firstuse= |
|firstuse= |
||
| + | |retired= |
||
| − | | |
+ | |affiliation=*[[Alliance to Restore the Republic/Legends|Alliance to Restore the Republic]]<ref name="BFI">''[[Star Wars: Battlefront]]''</ref> |
| − | *[[Rebellion era]]<ref name="BFI" /> |
||
| − | *[[New Republic era]]<ref name="X:Empire">''[[Star Wars: X-Wing Rogue Squadron: In the Empire's Service]]''</ref> |
||
| − | *[[New Jedi Order era]] |
||
| − | *[[Legacy era]] |
||
| − | |affiliation=*[[Alliance to Restore the Republic/Legends|Alliance to Restore the Republic]]<ref name="BFI" /> |
||
*[[Alliance of Free Planets]] |
*[[Alliance of Free Planets]] |
||
| − | *[[New Republic/Legends|New Republic]]<ref name="X:Empire" /> |
+ | *[[New Republic/Legends|New Republic]]<ref name="X:Empire">''[[Star Wars: X-Wing Rogue Squadron: In the Empire's Service]]''</ref> |
*[[Galactic Federation of Free Alliances]] |
*[[Galactic Federation of Free Alliances]] |
||
*[[Pirate/Legends|Pirates]] |
*[[Pirate/Legends|Pirates]] |
||
*[[Mercenary/Legends|Mercenaries]] |
*[[Mercenary/Legends|Mercenaries]] |
||
| − | *[[Kota's Militia]] |
+ | *[[Kota's Militia]]}} |
| ⚫ | |||
| − | |modules=}} |
||
| ⚫ | |||
| ⚫ | |||
| ⚫ | |||
==Characteristics== |
==Characteristics== |
||
| Line 83: | Line 81: | ||
==History== |
==History== |
||
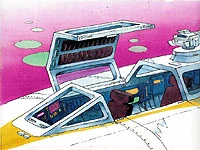
[[File:Y-wingdetach.JPG|thumb|200px|left|An S3 cockpit module detaches from the main body.]] |
[[File:Y-wingdetach.JPG|thumb|200px|left|An S3 cockpit module detaches from the main body.]] |
||
| − | [[Luke Skywalker/Legends|Luke Skywalker]] used this variant on his mission to [[Panna]] in [[0 ABY/Legends|0 ABY]],<ref name="Star Wars Holiday Special">''[[The Star Wars Holiday Special]]''</ref> as did [[Prince/Legends|Princess]] [[Leia Organa Solo|Leia Organa]] and [[C-3PO/Legends|C-3PO]] on their journey to the [[Circarpous system]].<ref name="Splinter of the Mind's Eye">''[[Splinter of the Mind's Eye]]''</ref> |
+ | [[Luke Skywalker/Legends|Luke Skywalker]] used this variant on his mission to [[Panna/Legends|Panna]] in [[0 ABY/Legends|0 ABY]],<ref name="Star Wars Holiday Special">''[[The Star Wars Holiday Special]]''</ref> as did [[Prince/Legends|Princess]] [[Leia Organa Solo|Leia Organa]] and [[C-3PO/Legends|C-3PO]] on their journey to the [[Circarpous system]].<ref name="Splinter of the Mind's Eye">''[[Splinter of the Mind's Eye]]''</ref> |
The [[Deretta Destroyers]], a mixed starfighter [[Squadron/Legends|squadron]] of the [[Alliance to Restore the Republic/Legends|Alliance to Restore the Republic]], consisted of several BTL-S3s. Rebel pilot [[Tenk Lenso]] proved his skill as a gunner in the rear of a BTL-S3 while serving with the Destroyers.<ref name="GG3">''[[Galaxy Guide 3: The Empire Strikes Back]]''</ref> |
The [[Deretta Destroyers]], a mixed starfighter [[Squadron/Legends|squadron]] of the [[Alliance to Restore the Republic/Legends|Alliance to Restore the Republic]], consisted of several BTL-S3s. Rebel pilot [[Tenk Lenso]] proved his skill as a gunner in the rear of a BTL-S3 while serving with the Destroyers.<ref name="GG3">''[[Galaxy Guide 3: The Empire Strikes Back]]''</ref> |
||
| Line 89: | Line 87: | ||
The Rebel Alliance also used two-person Y-wings at numerous battles during the [[Galactic Civil War/Legends|Galactic Civil War]]<ref name="BFII" /> and at the [[Battle of Bespin (Galactic Civil War)|Battle of]] [[Bespin/Legends|Bespin]].<ref name="BFI" /> |
The Rebel Alliance also used two-person Y-wings at numerous battles during the [[Galactic Civil War/Legends|Galactic Civil War]]<ref name="BFII" /> and at the [[Battle of Bespin (Galactic Civil War)|Battle of]] [[Bespin/Legends|Bespin]].<ref name="BFI" /> |
||
| − | Several of the BTL-S3s were stationed at [[Echo Base/Legends|Echo Base]] on the [[Planet/Legends|planet]] [[Hoth/Legends|Hoth]] in [[3 ABY/Legends|3 ABY]]. They assisted the base's [[T-65 X-wing starfighter]] |
+ | Several of the BTL-S3s were stationed at [[Echo Base/Legends|Echo Base]] on the [[Planet/Legends|planet]] [[Hoth/Legends|Hoth]] in [[3 ABY/Legends|3 ABY]]. They assisted the base's [[T-65 X-wing starfighter/Legends|T-65 X-wing starfighters]] in the evacuation of numerous [[GR-75 medium transport/Legends|GR-75 medium transports]] through the [[Galactic Empire/Legends|Imperial]] blockade of the planet. [[Rogue Squadron/Legends|Rogue Squadron]] members [[Derek Klivian/Legends|Derek Klivian]] and [[Wes Janson/Legends|Wes Janson]] escorted the [[Transport/Legends|transport]] [[Thon's Orchard/Legends|''Thon's Orchard'']] to safety using a BTL-S3.<ref name="GG3" /> |
The Rebel Alliance-affiliated [[Bothan/Legends|Bothan]] [[Blue Squadron (Bothan)|Blue Squadron]] used 12 Y-wings. Half of them were destroyed on the [[Raid on the Suprosa|Raid]] on the ''[[Suprosa]].''<ref name="SOTE">''[[Shadows of the Empire (novel)]]''</ref> |
The Rebel Alliance-affiliated [[Bothan/Legends|Bothan]] [[Blue Squadron (Bothan)|Blue Squadron]] used 12 Y-wings. Half of them were destroyed on the [[Raid on the Suprosa|Raid]] on the ''[[Suprosa]].''<ref name="SOTE">''[[Shadows of the Empire (novel)]]''</ref> |
||
| − | During the period after the [[Battle of Endor/Legends|Battle of Endor]], [[Aggressor Wing]]'s New Republic BTL-S3 Y-wing starfighters commanded by Colonel [[Horton Salm/Legends|Horton Salm]] participated in the [[Battle of Brentaal IV (Galactic Civil War)|Battle of Brentaal IV]],<ref name=" |
+ | During the period after the [[Battle of Endor/Legends|Battle of Endor]], [[Aggressor Wing]]'s New Republic BTL-S3 Y-wing starfighters commanded by Colonel [[Horton Salm/Legends|Horton Salm]] participated in the [[Battle of Brentaal IV (Galactic Civil War)|Battle of Brentaal IV]],<ref name="X:Empire" /> and later rescued Rogue Squadron during the [[evacuation of Ciutric]].<ref name="Mandatory Retirement">''[[Star Wars: X-Wing Rogue Squadron: Mandatory Retirement]]''</ref> |
| − | [[ |
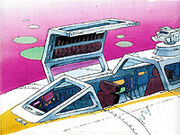
+ | [[File:Y-wing canopy-th.jpg|thumb|left|A BTL-S3 as seen in the Star Wars Holiday Special]] |
==Behind the scenes== |
==Behind the scenes== |
||
| Line 105: | Line 103: | ||
*''[[Star Wars: Battlefront]]'' |
*''[[Star Wars: Battlefront]]'' |
||
*''[[Star Wars: Battlefront II]]'' |
*''[[Star Wars: Battlefront II]]'' |
||
| + | *''[[The Star Wars Holiday Special]]'' |
||
*[[Star Wars: Episode VI Return of the Jedi|''Star Wars'': Episode VI ''Return of the Jedi'']] |
*[[Star Wars: Episode VI Return of the Jedi|''Star Wars'': Episode VI ''Return of the Jedi'']] |
||
*''[[Star Wars Missions 2: Escape from Thyferra]]'' |
*''[[Star Wars Missions 2: Escape from Thyferra]]'' |
||
| Line 110: | Line 109: | ||
*''[[Splinter of the Mind's Eye]]'' {{1st}} |
*''[[Splinter of the Mind's Eye]]'' {{1st}} |
||
*''[[Splinter of the Mind's Eye 1]]'' |
*''[[Splinter of the Mind's Eye 1]]'' |
||
| − | * |
+ | *[[Starfall (adventure)|''Starfall'']] |
*''[[Otherspace II: Invasion]]'' |
*''[[Otherspace II: Invasion]]'' |
||
*{{Journal|14|Crimson Bounty}} |
*{{Journal|14|Crimson Bounty}} |
||
| Line 126: | Line 125: | ||
*''[[Star Warriors: Starfighter Combat in the Star Wars Universe]]'' |
*''[[Star Warriors: Starfighter Combat in the Star Wars Universe]]'' |
||
*''[[The Star Wars Sourcebook]]'' |
*''[[The Star Wars Sourcebook]]'' |
||
| − | *''[[Rebel Alliance Sourcebook]]'' |
+ | *''[[The Rebel Alliance Sourcebook]]'' |
*''[[Galaxy Guide 3: The Empire Strikes Back]]'' |
*''[[Galaxy Guide 3: The Empire Strikes Back]]'' |
||
*[[Star Wars: The Roleplaying Game, Second Edition|''Star Wars: The Roleplaying Game'', Second Edition]] |
*[[Star Wars: The Roleplaying Game, Second Edition|''Star Wars: The Roleplaying Game'', Second Edition]] |
||
*''[[Dark Force Rising Sourcebook]]'' |
*''[[Dark Force Rising Sourcebook]]'' |
||
| − | *[[Rebel Alliance Sourcebook (Second Edition)|''Rebel Alliance Sourcebook'', Second Edition]] |
+ | *[[The Rebel Alliance Sourcebook (Second Edition)|''The Rebel Alliance Sourcebook'', Second Edition]] |
*[[Star Wars Sourcebook (Second Edition)|''Star Wars Sourcebook'', Second Edition]] |
*[[Star Wars Sourcebook (Second Edition)|''Star Wars Sourcebook'', Second Edition]] |
||
| + | *[[Galaxy Guide 1: A New Hope (Second Edition)|''Galaxy Guide 1: A New Hope'', Second Edition]] |
||
| ⚫ | |||
*''[[Shadows of the Empire Sourcebook]]'' |
*''[[Shadows of the Empire Sourcebook]]'' |
||
*''[[The Secrets of Star Wars: Shadows of the Empire]]'' |
*''[[The Secrets of Star Wars: Shadows of the Empire]]'' |
||
| − | *{{SOTE|cardname=Attack on the ''Suprosa''|link=http://www.rebelscum.com/photo.asp?image=/sote/soteTC033.jpg}} |
+ | *{{SOTE|cardname=Attack on the ''Suprosa''|link=http://www.rebelscum.com/photo.asp?image=/sote/soteTC033.jpg|archiveurl=https://archive.fo/lT0U}} |
| ⚫ | |||
*''[[The Essential Guide to Vehicles and Vessels]]'' |
*''[[The Essential Guide to Vehicles and Vessels]]'' |
||
*''[[Star Wars Gamemaster Screen, Revised]]'' |
*''[[Star Wars Gamemaster Screen, Revised]]'' |
||
| Line 152: | Line 152: | ||
{{Interlang |
{{Interlang |
||
| ⚫ | |||
| − | |cs=Y-wing starfighter |
||
| ⚫ | |||
|es=Caza estelar BTL Ala-Y |
|es=Caza estelar BTL Ala-Y |
||
| − | |fr=Y-Wing BTL |
+ | |fr=Chasseur Y-Wing BTL |
|hu=BTL-A4_Y-szárnyú_csillagvadász |
|hu=BTL-A4_Y-szárnyú_csillagvadász |
||
| ⚫ | |||
| + | |ko=BTL-A4 Y윙 강습 전폭기 |
||
|nl=BTL Y-Wing Starfighter |
|nl=BTL Y-Wing Starfighter |
||
| ⚫ | |||
|no=Y-wing |
|no=Y-wing |
||
| − | |pl=BTL-S3 Y-wing |
+ | |pl=Myśliwiec BTL-S3 Y-wing |
| − | |pt=Caça estelar Y- |
+ | |pt=Caça estelar Y-wing BTL |
| + | |ru=Звёздный истребитель BTL «Y-wing» |
||
| − | |fi=BTL Y-siipinen tähtihävittäjä |
||
}} |
}} |
||
Revision as of 03:07, 16 September 2019
| | |

Warning: This infobox has missing parameters: type and unrecognized parameters: class
- "The Koensayr BTL-S3 Y-wing attack starfighter, long the staple of the Alliance Fighter Corps. The all-purpose craft has proved its worth as a fighter and [...] a bomber noted for its precision."
- ―Soontir Fel
The BTL-S3 Y-wing starfighter was a variant configuration of the BTL Y-wing starfighter. It was used primarily by the Alliance to Restore the Republic.
Characteristics
- "The BTL-S3 model's advantage is that the gunner seated behind the pilot is able to use the cockpit ion cannon to find his own targets."
- ―Soontir Fel
The BTL-S3 was the most common Y-wing configuration.[6] A two-man strike starfighter, the first crew member piloted the craft, while the second acted as a gunner and controlled the two swivel-mounted ion cannons, located right on top of the cockpit.[7][1]
Many Y-wings of this variant were modified with defensive rapid-fire blaster turrets replacing the ion cannon turret, and particle cannons instead of the dual laser cannons on the nose.[8] These Y-wings were used as heavy capital ship destroyers, and were eventually phased out by the new B-wing starfighters.
History
An S3 cockpit module detaches from the main body.
Luke Skywalker used this variant on his mission to Panna in 0 ABY,[9] as did Princess Leia Organa and C-3PO on their journey to the Circarpous system.[10]
The Deretta Destroyers, a mixed starfighter squadron of the Alliance to Restore the Republic, consisted of several BTL-S3s. Rebel pilot Tenk Lenso proved his skill as a gunner in the rear of a BTL-S3 while serving with the Destroyers.[11]
The Rebel Alliance also used two-person Y-wings at numerous battles during the Galactic Civil War[8] and at the Battle of Bespin.[4]
Several of the BTL-S3s were stationed at Echo Base on the planet Hoth in 3 ABY. They assisted the base's T-65 X-wing starfighters in the evacuation of numerous GR-75 medium transports through the Imperial blockade of the planet. Rogue Squadron members Derek Klivian and Wes Janson escorted the transport Thon's Orchard to safety using a BTL-S3.[11]
The Rebel Alliance-affiliated Bothan Blue Squadron used 12 Y-wings. Half of them were destroyed on the Raid on the Suprosa.[12]
During the period after the Battle of Endor, Aggressor Wing's New Republic BTL-S3 Y-wing starfighters commanded by Colonel Horton Salm participated in the Battle of Brentaal IV,[5] and later rescued Rogue Squadron during the evacuation of Ciutric.[13]
A BTL-S3 as seen in the Star Wars Holiday Special
Behind the scenes
The BTL-S3 Y-wing starfighter first appeared in 1978's novel Splinter of the Mind's Eye, by Alan Dean Foster, and the first Expanded Universe novel.
Both Star Wars: Rogue Squadron: The Official Nintendo Player's Guide and Star Wars: Rogue Squadron II: Rogue Leader: The Official Nintendo Player's Guide mislabel the single-seat BTL-A4 Y-wing starfighter as the S3 variant.
Appearances
- Star Wars: Battlefront
- Star Wars: Battlefront II
- The Star Wars Holiday Special
- Star Wars: Episode VI Return of the Jedi
- Star Wars Missions 2: Escape from Thyferra
- The Story of the Faithful Wookiee (First pictured)
- Splinter of the Mind's Eye (First appearance)
- Splinter of the Mind's Eye 1
- Starfall
- Otherspace II: Invasion
 "Crimson Bounty" — Star Wars Adventure Journal 14
- Star Wars 68: The Search Begins
- Star Wars 69: Death in the City of Bone (In flashback(s))
- Shadows of the Empire comic
- Shadows of the Empire novel
- Shadows of the Empire audio book
- Shadows of the Empire junior novelization
- "Lucky" — Star Wars Tales 23
- Star Wars: X-Wing Rogue Squadron: In the Empire's Service
- "One of a Kind" — Star Wars Adventure Journal 5
Sources
- Star Warriors: Starfighter Combat in the Star Wars Universe
- The Star Wars Sourcebook
- The Rebel Alliance Sourcebook
- Galaxy Guide 3: The Empire Strikes Back
- Star Wars: The Roleplaying Game, Second Edition
- Dark Force Rising Sourcebook
- The Rebel Alliance Sourcebook, Second Edition
- Star Wars Sourcebook, Second Edition
- Galaxy Guide 1: A New Hope, Second Edition
- Shadows of the Empire Sourcebook
- The Secrets of Star Wars: Shadows of the Empire
- 1996 Topps Star Wars: Shadows of the Empire (Card: Attack on the Suprosa) (backup link)
- The Thrawn Trilogy Sourcebook
- The Essential Guide to Vehicles and Vessels
- Star Wars Gamemaster Screen, Revised
- Star Wars Trilogy Sourcebook, Special Edition
- Star Wars: Incredible Cross-Sections
- Star Wars: Rogue Squadron: The Official Nintendo Player's Guide
- The Official Star Wars Fact File 37 (YWI1, Y-Wing Starfighters)
- Star Wars Battlefront: Prima Official Game Guide
- Star Wars: The Official Starships & Vehicles Collection 12
- The Essential Guide to Warfare
- Star Wars: Edge of the Empire Core Rulebook
- Star Wars: Age of Rebellion Core Rulebook
Notes and references
- ↑ 1.0 1.1 1.2 1.3 1.4 1.5 1.6 1.7 1.8 The Rebel Alliance Sourcebook
- ↑
 Y-wing starfighter in the Databank (content now obsolete; backup link)
- ↑ Star Wars Battlefront: Prima Official Game Guide
- ↑ 4.0 4.1 Star Wars: Battlefront
- ↑ 5.0 5.1 Star Wars: X-Wing Rogue Squadron: In the Empire's Service
- ↑ The Essential Guide to Vehicles and Vessels
- ↑ The Star Wars Sourcebook
- ↑ 8.0 8.1 Star Wars: Battlefront II
- ↑ The Star Wars Holiday Special
- ↑ Splinter of the Mind's Eye
- ↑ 11.0 11.1 Galaxy Guide 3: The Empire Strikes Back
- ↑ Shadows of the Empire (novel)
- ↑ Star Wars: X-Wing Rogue Squadron: Mandatory Retirement