(→Aftermath: add from the lost commanders clip) Tag: Visual edit |
m (4.3 Removed speculation/unverified info) |
||
| Line 212: | Line 212: | ||
Admiral Trench somehow managed to escape the destruction of his flagship, though he was forced to undergo cybernetic reconstruction to replace several limbs and a part of his head.<ref name="The Unknown" /> Loathsom was tried, presumably found guilty, and eventually wound up in the prison of the [[Naval Intelligence headquarters|Republic Center for Military Operations]].<ref name="The Jedi Who Knew Too Much">{{TCW|The Jedi Who Knew Too Much}}</ref> |
Admiral Trench somehow managed to escape the destruction of his flagship, though he was forced to undergo cybernetic reconstruction to replace several limbs and a part of his head.<ref name="The Unknown" /> Loathsom was tried, presumably found guilty, and eventually wound up in the prison of the [[Naval Intelligence headquarters|Republic Center for Military Operations]].<ref name="The Jedi Who Knew Too Much">{{TCW|The Jedi Who Knew Too Much}}</ref> |
||
| − | |||
| − | It was [[The Lost Commanders|recalled]] by Rex to the Spectres. when the Spectres are sent by Ahsoka Tano, to the planet Seelos in order to let the clone troopers joined the rebellion. when Rex said "I fought by her side from the Battle of Christophsis to the Siege of Mandalore. And a friend of hers, is a friend of mine." |
||
==Behind the scenes== |
==Behind the scenes== |
||
Revision as of 14:52, 24 February 2019
| | |
Warning: This infobox is missing the following parameters: unit2, unit1
- "I told you this victory was too easy. We never should have sent the ship back for supplies."
"It wasn't my idea to send the ship back."
"All right, men, second wave incoming."
"Rex, you and your men follow me."
"Cody, battle positions!" - ―Obi-Wan Kenobi and Anakin Skywalker argue while preparing for battle
The Battle of Christophsis took place for control of the planet Christophsis during the Clone Wars. Wanting to gain control of the planet's strategic resources, the Separatist Droid Army, led by General Whorm Loathsom, invaded and captured Christophsis. Responding to a cry for help from the world's inhabitants, the Galactic Republic and the Jedi High Council dispatched Jedi Generals Obi-Wan Kenobi and Anakin Skywalker and Admiral Wullf Yularen with a clone trooper contingent from the Grand Army of the Republic to liberate the planet. After managing to break Confederate Admiral Trench's massive naval blockade of the planet and delivering supplies to Senator Bail Organa's refugee camp on the surface via an experimental stealth ship, the Republic forces attempted to ambush the Confederate battle droid army from a business center in one of the plazas of the capital city. Acting on information from one of its spies, Clone Sergeant Slick, the Separatists foiled the Republic's attack. Despite the turn of events, the Jedi and clones managed to escape and retreated back to their base.
Alerted to the possibility of a spy within their men, Skywalker and Kenobi went to search for more information behind enemy lines while Clone Commander CC-2224 and Clone Captain CT-7567—nicknamed "Cody" and "Rex," respectively—stayed at the base to discover who the agent was. Upon arriving at the Separatist base, Skywalker and Kenobi confronted the Sith acolyte Asajj Ventress and discovered the presence of an invasion force in far greater strength than they had originally believed. Back at the Republic base, Slick was revealed to be the spy and managed to sabotage the Republic's weapons depot, destroying most of the Republic's supplies, before Rex and Cody apprehended him. Raising the stakes with its full strength, the main body of Confederate troops launched an assault on the Republic forces. After several days, the Republic managed to force the Separatist forces into a retreat. When Loathsom mounted a second assault, his forces' advance was halted by the Republic's heavy cannons, and he and his droids pulled back to their base to set up a deflector shield to counter the Republic's artillery.
The renewed Separatist blockade of Christophsis drove Yularen and the Republic fleet away from the planet, but Skywalker's newly assigned Jedi Padawan, Ahsoka Tano, was able to land on the world. Loathsom and the Confederacy mounted yet another assault, this time advancing behind their shield, which effectively neutralized the clone's artillery. While Kenobi, Rex, and 501st Legion troops defended the heavy cannons, Skywalker and Tano went to sabotage the Confederacy's shield generator. After Kenobi faked a surrender to Loathsom to gain time for his comrades to complete their mission, Skywalker and Tano were able to destroy the shield generator. Yularen returned to the system with Jedi Grand Master Yoda and a reinforced fleet and broke through the Separatist blockade, driving the enemy blockade away from Christophsis. In addition, the Republic's renewed artillery usage proved instrumental in annihilating the Separatists in the capital. Kenobi captured Loathsom, and the Republic emerged victorious and landed further reinforcements to secure the victory.
Prelude
- "I knew the Republic would come, but we had to hold out against the Separatists until they came. General Loathsom moved against us as if he was desperate to wipe out a black mark on his ledger. The Confederacy's political narrative had become so twisted that killing the volunteers of a Senate mercy mission would probably have resulted in a medal instead of a prison sentence."
- ―Senator Bail Organa, on his time on Christophsis

Organa leads the Christophsis relief effort.
Several months after the Battle of Geonosis, Count Dooku and his Confederacy sent their Droid Army under General Whorm Loathsom and assassin Asajj Ventress to capture Christophsis,[6] due to its strategic position[5] on the Corellian Run[8] and resources, while Admiral Trench blockaded the planet with a fleet of 30 warships to prevent Republic forces from liberating the world.[5]
Christophsians attempt to defend their planet from the invading Separatist army.
During this time the Republic had sent a relief force under Senator Bail Organa to aid the people of Christophsis, who had become trapped due to the invasion.[5]
While Christophsian rebels fought the Separatists,[6] the Christophsians eventually were forced to plea with the Republic for help, due to worsening conditions and depletion of supplies. The Republic decided in favor of this due to the pleas and Organa's worsening situation. The Republic dispatched Jedi Generals Anakin Skywalker and Obi-Wan Kenobi to disrupt the blockade and deliver Senator Organa's relief supplies. They eventually decided to send Skywalker ahead with a fleet of Star Destroyers with Kenobi and Clone Commander Cody, following behind in Kenobi's flagship, the Negotiator. Kenobi also decided to bring along an experimental stealth ship with cloaking abilities.[5] However, the Separatists had a much larger army present than the Republic believed. In addition, Sergeant Slick, who was among the troops to be brought to Christophsis, had grown disillusioned with the Jedi and the Republic, believing that the clones lives as soldiers was little more than enslavement. Infuriated, he would pass vital info to Asajj Ventress when on the planet, and would be paid for his assistance.[6]
The Battle
Republic Arrival
Attack on the Blockade
- "Master Kenobi better get here soon or this is going to be one short rescue mission."
- ―Anakin Skywalker

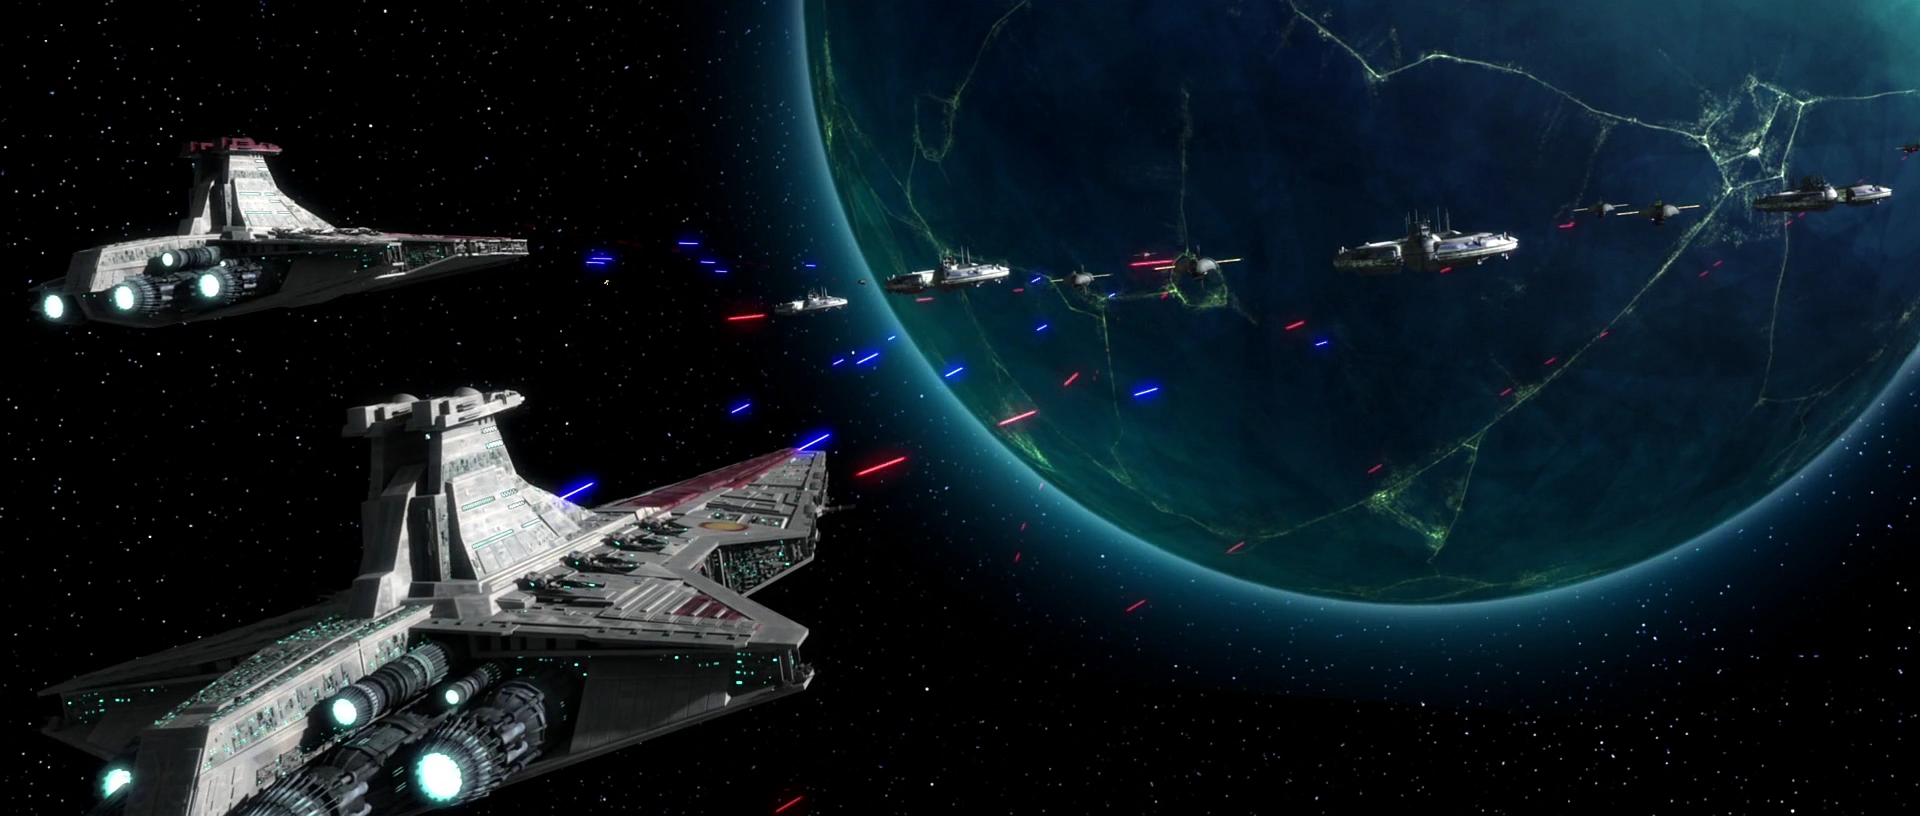
When they arrived in Christophsisian space, Skywalker, Yularen, and their fleet-consisting of 3 Venator-class Star Destroyers- engaged the Separatist blockade, against Kenobi's orders. However, Trench's forces quickly outnumbered the Republic fleet, consisting of Munificent-class star frigates, Droid Control Ships, and Trench's Providence-class dreadnought flagship, Invincible. On the Star destroyer Resolute, Skywalker and Yularen managed to contact Senator Organa on the surface; his position was being overrun by Separatist forces, and they were running low on food, water, and munitions. He and his men were close to being overwhelmed by the army on the surface when the transmission cut off, as one of Skywalker's cruisers was hit by enemy fire. As the two sides exchanged heavy fire, the Invincible advanced on the Resolute unopposed. Yularen ordered the Resolute's forward shields activated just before the Separatist Command ship released a barrage of laser fire at the whole task force. Trench also attacked the Pelta-class frigates, separating them from their escort cruisers.[5]
The left supply ship was then hit by the increased fire, being completly torn apart. In response, Skywalker ordered all reactors to be overfired, intending to charge past the Separatist commander, though he was still unaware of his identity. At that point, Kenobi and Cody arrive on board the Negotiator behind Skywalker's ships, staying close to Christophsis' moon. Though his tactical droid, TI-99, informed him that the Resolute was not breaking off its attack, Trench held his ships in line and had his bridge crew intensify forward shields. As their ship took more fire, Skywalker and Yularen holographically counselled with Kenobi. At his friends' request, Skywalker decided to regroup behind the moon, ordering the supply ships to break away first, with the Star Destroyers covering their escape. His cruisers managed to maneuver around and have their hulls take most of the enemy fire, protecting the supply ships and the fleet behind them. Knowing his orders were to simply blockade the planet, Trench, in the belief that he had won the first round of the battle, decided against pursuing the retreating fleet and remained in orbit to wait for the Republic's inevitable second attack. To ready his ships for this, he had his command ship's shields recycled and forward cannons reset to a full charge.[5]
With the Republic fleet recuperating and waiting for the next attack, Skywalker took a Nu-class transport to the Negotiator, where he met Kenobi to see the ship the general had brought. After he had shown Skywalker the prototype ship and it's stealth capabilities, Kenobi said the ship was completely undetectable to scanners as far as they could tell, but this was it's first true field test. Skywalker, despite the ship's size, believed he could use it to take out the blockade from behind, Kenobi instead instructed him to use it to run a mercy mission to drop off supplies at Organa's camp. Though he wished to attack and destroy the blockade instead, Skywalker agreed to carry out the mission. Meanwhile, onboard the Resolute, Yularen was researching the markings on the Invincible, having noticed a familiarity with the tactics of the earlier battle. He found that it did indeed belong to Admiral Trench, a foe he had previously faced and presumed to be vaporized in the Battle of Malastare Narrows. Concerned, he requested that Skywalker delay his mission and met with the general aboard the Negotiator, reporting his findings to him while the stealth ship was being loaded. Because he had engaged the admiral previously, Yularen volunteered himself as consort on Skywalker's mission, believing it would be beneficial in the inevitable encounter with Trench's wit. Skywalker accepted and welcomed him to the mission.[5]
Stealth mission
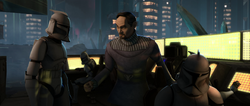
- "I am Admiral Trench. If you are listening, Jedi, you've made a bold move and a grave mistake. I appreciate your decision to face me, ship to ship, to play this little game. It's been so long since I had a worthy opponent. You have an impressive new vessel, but I warn you, I have dealt with its kind before. Your technology will not save you. And your friends on the planet below shall perish as a result of your failure. The people of Christophsis and her resources shall join the Separatist Alliance. Turn back now, retreat while you can, for I am your doom."
- ―Trench, in an open-frequency transmission to Anakin Skywalker's stealth ship

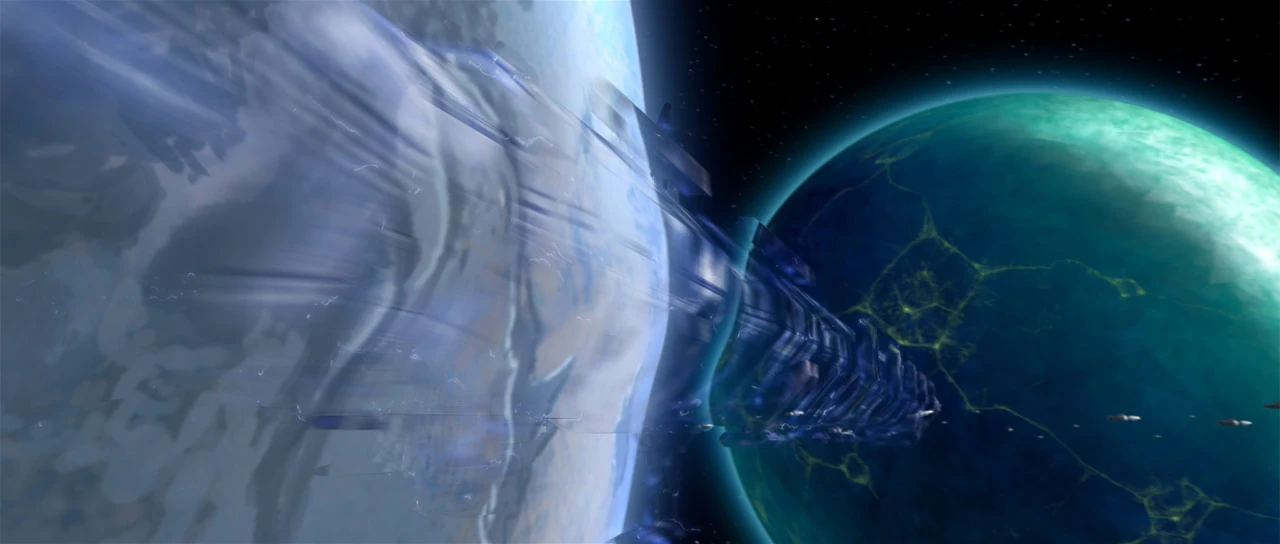
Skywalker's stealth ship cloaks itself as it heads for the Separatist blockade.
With Clone Commander Blackout and trooper CT-1284, nicknamed "Spark"—the last of the stealth ship's crew— on board, at their stations, and ready for takeoff, the stealth ship powered up and prepared to depart. Skywalker piloted the ship out of the Negotiator's main hangar bay and toward the heavily armored Separatist blockade, activating his craft's cloaking shield just as it came out from behind the moon. Remaining undetected by Trench and the rest of his fleet, Skywalker and Yularen slipped right past an ignorant Munificent-class frigate—close enough to leave Yularen worried about alerting the enemy to their presence. Conferring with his tactical droid aboard the Invincible, Trench found that Christophsisian resistance was crumbling, and the droid offered his estimation that it would be a half rotation more before it was completely over. Intending to add some pressure on those who had been sent to rescue Senator Organa, Trench dispatched his Hyena-class bombers to attack the senator's camp on the surface in order to draw his enemies out from behind the moon. The squadron of bombers, accompanied by fighter escort, launched from the Separatist fleet, and their path to the surface inadvertently lead them straight to Skywalker's stealth ship, despite Trench's continued unawareness of the craft.[5]
The approaching bombers presented Skywalker with a tough decision to make: because he did not know if the Separatists had learned of their presence, he was uncertain if the bombers were targeting the stealth ship or not. The Republic craft itself was armed with proton torpedoes and anti-aircraft cannons, but would have to de-cloak to use either weapons—and doing so would tell the Separatists they were there if they did not already know. Yularen noted that an offensive had to be mounted soon, if Skywalker decided to do so. As the diving bombers entered within range, Skywalker elected to chance that the blockade was unaware of the stealth ship and thereby ordered his crew to keep the ship cloaked, power the it down, and let her drift. Despite Yularen's belief to the contrary, the bombers did not attack the stealth ship, zooming right by and rattling it but otherwise leaving it unscathed. However, Yularen pushed away the comforting revelation that the Separatists were oblivious to their presence and voiced his realization that the bombers were heading to bomb Organa's command center. The bombers did just that, releasing their explosives on the senator's camp in the city. With the Separatists approaching both by air and ground, Organa opened a transmission to Kenobi and told him that without reinforcements, there was not much chance for survival. Kenobi then contacted Skywalker and told him to continue with his mission while he himself engaged Trench's fleet with the remaining ships of the task force. Both Yularen and Skywalker disagreed with this course of action; Yularen stated that Kenobi did not have the proper resources to openly engage Trench and asserted that it was a trap, while Skywalker affirmed that the proposed tactic simply would not be successful.[5]
Believing that their ship was in the best position to attack Trench, Skywalker, to the surprise of Yularen, had four of the stealth craft's proton torpedoes prepped, intending to go on the offensive and divert Trench's attention from the Christopsisians and back to the Republic fleet. He then cut off Kenobi's transmission before he could continue to order Skywalker to deliver the supplies to the surface. Trench, meanwhile, found the Republic fleet's silence odd and mused to himself about their intentions. He soon found out, as Skywalker brought the stealth ship around to get a clear shot at Trench's ship. After disengaging the ships cloaking shields, Skywalker had his crew fire the four prepped torpedoes at the Invincible's bridge. Trench managed to put up his ship's Thermal shield, rendering the attack unsuccessful. When the stealth ship began to re-cloak, Trench fired four missiles at the stealth craft. Skywalker decided to have his pilot launch decoy flares to intercept the missiles, and then re-cloaked the ship. Not to be deterred, Trench ordered a large spread of lasers fired at the ship’s last known position, believing he would be able to hit the craft with the sheer number of blasts. In spite of this, Skywalker managed to avoid the laser spread. This did not go unnoticed, as Trench surmised that since no clone pilot would have been able to avoid that many lasers, he must be dealing with a Jedi.[5]
Deciding to speak with his adversary, Trench patched himself over an open frequency and called out to his unseen enemy. Skywalker picked up the transmission and unhesitatingly accessed it, witnessing Trench goading the Republic forces into attacking him and boasting that he had dealt with cloaked ships before. After he had terminated his transmission, Trench was not surprised with his tactical droid's calculation that the Jedi would not turn back as he requested and theorized that the Jedi would attack again. Meanwhile, Skywalker and Yularen were left puzzled with the revelation of Trench's experience with cloaked ships until Kenobi obtained records of Trench's past battles. Kenobi reported that Trench had indeed faced such technology and had successfully hit them with tracking torpedoes, though nothing as small as the stealth ship. Skywalker correctly theorized that Trench had homed in on the ship's magnetic signature as a means of targeting the cloaked ships. Skywalker requested that Kenobi hold off his attack until Trench had been destroyed before ending the transmission. After completing the necessary preparations, the stealth ship de-cloaked once more and fired four more torpedoes at the Invincible. While the torpedoes hit the Invincible's thermal shields and failed to do any damage, the bridge crew locked onto the stealth ship's magnetic signature and was able to track it. Having to lower his shields in order to fire tracking torpedoes, Trench had his tactical droid do just that and released the four-torpedo volley. With the bait taken, Skywalker began to pilot the stealth ship toward the Invincible.[5]
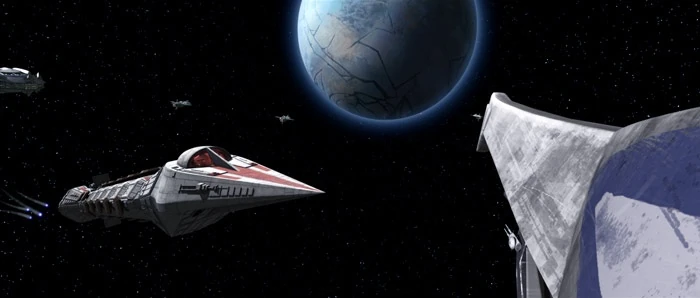

The Republic stealth ship leads the tracking torpedoes back to the Invincible.
With the torpedoes following closely, Skywalker deactivated his ship's cloaking device and diverted all the ships power to her engines. He then steered the ship straight towards the Invincible's bridge. Realizing his error, Trench attempted to raise the thermal shields, but could not because they were still charging. Skywalker piloted the ship across the Invincible's hull, grazing it and leading the tracking torpedoes straight towards the bridge. As the Invincible exploded behind him(though Trench only lost an eye and three arms), Skywalker made for the planet's surface. Giving Skywalker a grudging congratulations, Kenobi engaged the remainder of the blockade with the Negotiator, while the stealth ship continued to the surface to deliver it's supplies. Skywalker and Yularen landed at the refugee camp and unloaded their supplies. Organa thanked the general for the lives he saved, and Yularen expressed his impressed view of Skywalker's unusual tactics.[5]
With Trench out of the way, the Separatist fleet was in disarray, and Kenobi pushed his fleet of Venator-class Star Destroyers forward to break the enemy blockade, which—in the absence of the Invincible—was now comprised of Munificent-class frigates and Droid Control Ships.[5] Skywalker temporarily returned with Kenobi to pilot their respective Jedi interceptors against the remnants of the blockade.[3] With that part of the battle won, they set up a base on the ground for their artillery, gunships and AT-TEs.[6]
Traitor in the ranks
Failed ambush
- "Obi-Wan, what's going on?"
"We're cut off. The droids are on to us." - ―Anakin Skywalker and Obi-Wan Kenobi
Kenobi and Cody joined Skywalker; Clone Captain CT-7567, nicknamed "Rex;" and the rest of the Republic forces on the surface[6] in the capital of Chaleydonia,[8] while Yularen eventually returned to the fleet as its acting commander in the continuing struggle against the Separatist blockade.[6]
Clone troopers fight against the battle droids in the South Tower.
Kenobi, Skywalker, Cody, Rex and their men then planned an ambush on a column of battle droids and Armored Assault Tanks from two towers. Kenobi, Cody, and Slick stationed their men in the south tower, while Skywalker and Rex were based in the parallel north tower. While Separatist battle droids and AATs passed through the plaza below, Kenobi's men set up several blaster cannons, ready to ambush the advancing enemy forces. As the clones kept watch on the droids, however, the column of droids unexpectedly split into two. B1 battle droids took a turbolift up to the level of the south tower where Kenobi's forces were positioned and ambushed them, surrounding and converging on the clones. The backfired ambush made it apparent to Kenobi that their tactic had been compromised. Watching the transpiring events from the north tower and confirming the situation over comlink with Kenobi, Skywalker contacted clone pilot Hawk and ordered an evacuation from the south tower. Skywalker then cut through the window overlooking the plaza with his lightsaber and used the Force to blast a hole through it, enabling his men to fire their blaster rifles' ascension cables across to the south tower. Skywalker, Rex, and the clone troopers crossed the divide and sustained minimal casualties from the battle droids that opened fire on them from the plaza below.[6]
Hawk's gunship picks up the survivors.
Rex, Skywalker, and their men met up with Kenobi in the south tower and cut off battle droids attempting to assault him from behind, and Kenobi telekinetically threw one of the blaster cannons at the droids, momentarily halting their advance. The Jedi and their respective forces entered a turbolift in order to evacuate from the roof of the tower, while droids pursued them in other lifts. After reaching the roof, the clone troopers provided cover fire so the Jedi could attack the droids at close range. Soon after, however, the tactical droid TJ-55 came to the roof with droid reinforcements. Just then, Hawk's gunship arrived and hovered close to the roof of the tower. Continuing to fire at the droids, the troopers began to back into the craft. Before retreating, trooper Gus charged TJ-55 and broke the droid’s head off, taking it into the gunship. Republic forces then left the failed ambush site and returned to the base, where Rex and Cody performed a robolobotomy on the tactical droid's head, managing to access its memory banks. The droid's head confirmed the Separatist forces had known of the Republic's strategy and position, but shut down before revealing anything else.[6]


Cody and Rex preform try to find out how the Separatist knew the Republic attack plan.
When the clones reported their findings to their generals, Skywalker thought that a breach in security systems had been the source for the Confederacy's acquisition of the plans. Kenobi went as far as to suspect that their was a spy in their midst, thinking that they need to act behind enemy lines to find any relevant intel. Before leaving with Skywalker to investigate, Kenobi told Cody and Rex to keep the mission a secret, and to stay and track down and arrest the spy. As Kenobi and Skywalker left, Cody then saw that someone-Slick, though he did not know it at the time-had left their comlink on in the room and had been listening to the whole conversation. Rex and Cody then spotted Slick in the hallway, but he was too far away for them to identify him. Slick ran, and Rex and Cody tried to chase them down, but they lost him. Because of the spy's path, though, they were able to deduce that he must have gone into the mess hall. After realizing that all the people in the mess hall were clones, they were forced to conclude that the spy was one of their brothers. Cody then tried to contact Kenobi and Skywalker to no avail, as the droids were jamming transmissions. Deciding to continue investigating, they returned to the communications center, where, thanks to R2-D2, they discovered several external communications. They had taken place every few days, in a pattern irregular enough to avoid detection. The wavelengths were ultimately traced to a terminal in the barracks of Sargent Slick. Deducing that one of Slick's men was the spy, they decided to interrogate them in hopes of apprehending the individual.[6]
Revealed deception
- "My loyal informant let me know you were coming."
"Well, then we thank you for your hospitality." - ―Asajj Ventress and Obi-Wan Kenobi
Skywalker and Kenobi face off against Ventress in the Separatist base.
Under the cover of night, Skywalker and Kenobi neared the Confederacy base—where the primary Separatist invasion army was landing and preparing to march on the city—on BARC speeders through the streets of the ruined city. The two Jedi noticed an increasing number of battle droids spying them, but because the droids were not attempting to stop them or engage them, the pair realized that they were heading into a trap, but continued anyway. Upon arriving at the base, Skywalker and Kenobi were greeted by the hooded figure of Asajj Ventress. Upon sight of each other, all three adversaries ignited their lightsabers. Taunting her attackers with the knowledge of the spy, Ventress nimbly climbed to the top of the base's stairs. A lightsaber duel ensued when Skywalker slashed at Ventress, who drove him down to the bottom of the stairs. Kenobi joined the fight and engaged Ventress as well. Ventress fought Skywalker and Kenobi simultaneously with her dual lightsabers and used the Force to telekinetically throw a piece of crystal rubble at the duo. Kenobi sliced the projectile in half, and he and Skywalker gradually managed to drive Ventress back up the stairs.[6]
Ventress fled into another room, to where the Jedi pursued her. She summoned numerous books off their shelves and hurtled them at her pursuers; Kenobi stopped them with the Force, and Skywalker's added telekinetic assistance forced the books back at Ventress. As the Dark Acolyte assumed a submissive seated position, the two Jedi approached her with lightsabers ignited. However, Ventress suddenly activated her own lightsabers into the floor and opened up a hole, causing Skywalker and Kenobi to fall into the room below. Ventress mocked the two before fleeing, and the two Jedi jumped back up into the room above and followed Ventress as she broke a window and hurtled out of it. While Ventress landed on the head of an octuptarra magna tri-droid attached to the side of the building, Skywalker and Kenobi walked onto the balcony and discovered the full scale of the Separatist invasion force: numerous C-9979 landing craft were landing, bringing more and more battle droids to the surface, and many troops had already been deployed from their racks and were marching in formation on the ground far below. Despite the revelation of the enormous invasion force, Skywalker and Kenobi continued the duel and jumped onto the legs of the tri-droid, cutting off two of its legs and breaking its hold on the building. Ventress jumped off the droid's head and briefly engaged Skywalker upon one of the droid's remaining legs. As the droid plummeted to the ground, Skywalker Force-pushed Ventress away, and he and Kenobi each commandeered a Single Trooper Aerial Platform from the battle droids piloting them.[6]
Ventress reached the ground while the tri-droid crashed behind her. She then gave orders to General Loathsom through a tactical droid, ordering them to attack the city in order to keep the Jedi occupied while she carried out the next part of her master's plan-turning Jabba the Hutt against the Jedi and the Republic by kidnapping his son. She then left in her Trident-class assault ship, leaving Loathsom and the droid in command of the attack. Back at the Republic base, meanwhile, Rex and Cody, despite Slick's objections that it would demoralize his men, interrogated his squad; Jester, Gus, Punch, Sketch and Chopper. All them had clean alibis except Chopper, who admitted that he was making a necklace out of battle droid fingers, against wartime protocol. Wanting to avoid suspicion, Slick put Chopper's authenticity in question. However, while telling Chopper that he did not have to say anything, he accidentally revealed that he knew the Jedi were gone. Chopper then lashed out, questioning why he had turned left, towards the command center, after returning, when everyone else went right, towards the mess hall and barracks. Cody then realized that he had said that the Jedi were gone, something Slick could not have known unless he was the spy. Found out, Slick punched Cody and dashed for the exit. Rex and Cody tracked him to the gunships and tanks, but found a primed thermal detonator instead of Slick.[6]
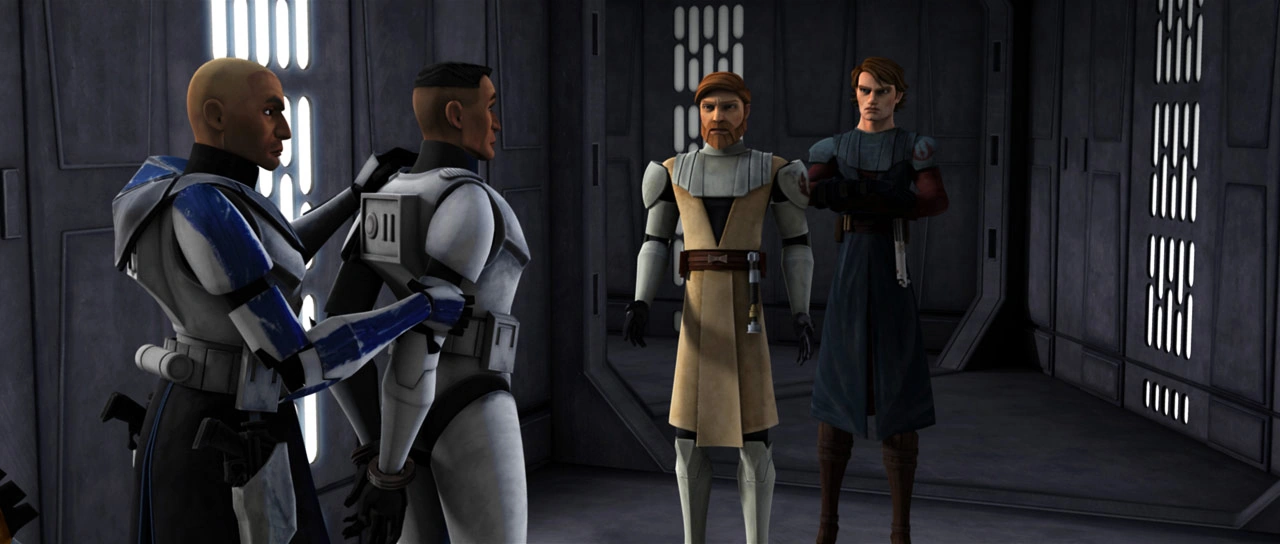
Rex turns the traitorous Slick in to Skywalker and Kenobi.
Rex and Cody took cover moments before numerous explosives went off and completely destroyed the landing pad, the All Terrain Tactical Enforcers, and the weapon supply depot. Slick ran into the command center and hid in the vents above the room, and Cody and Rex pursued him there. The two officers engaged in a ploy to bait Slick out of the vents—while Cody left his DC-15A blaster on the table and secretly removed the ammunition from his weapon, Rex appeared to leave for the south exit to restart the generators. Slick left his hiding spot, stole Cody's blaster, and pointed the weapon at Cody, at which point the commander revealed that it was empty. Rex re-entered the room, and the officers surrounded Slick. The sergeant stole Rex's blaster, and Cody lost his own blaster while disarming the Separatist agent. Cody knocked Slick down as the latter headed for the exit, and the two engaged in close combat before Rex pulled the clone traitor off Cody. Slick head-butted Rex and employed the "groin popper" maneuver to dislocate his leg. As Slick revealed the reasons behind his treason, Cody knocked him out and locked him in handcuffs. Once the Jedi returned to the base, the apprehended Slick accused them of "enslaving" the clones before he was taken to lock-up.[6] Kenobi and Skywalker then sent Yularen's fleet back to Republic space for resupplying.[3]
Loathsom's assault
Battle at the capital
- "We're going to need reinforcements!"
"We haven't been able to get through to the admiral." - ―Obi-Wan Kenobi informs Anakin Skywalker of their inability to contact Admiral Yularen
Skywalker's and Kenobi's forces were only able to save the cannons,[6] but they set them up in anticipation of an assault. Sure enough, Loathsom launched an attack, consisting of B1 and B2 battle droids and three octuptarra magna tri-droids on the front lines, with AATs following behind in large numbers. In response, Kenobi and Cody led the main force of clone troopers—some mounted on All Terrain Recon Transports—in a head-on charge against the droids in the main lane, while Rex, Skywalker, and a platoon of clone troopers to the top of a nearby tower. They surprised the octuptarra droids above, the clones using jetpacks to land on the street, and Skywalker landing on one of the droids. The team succeeded in taking out all three octuptarra droids and proceed to attack the advancing droid forces from behind. Seeing no other choices due to the Republic's heavy cannons, Loathsom was forced to pull back his forces in order to set up a deflector shield, and had an OOM command battle droid relay his orders to the front lines. The droid forces pulled back to regroup in the Separatist-controlled are of the city, though the battle over Christophsis continued to rage.[3]
With squadrons of starfighters waging dogfights across the space over the planet with the Separatists, Admiral Yularen quickly sent the young Padawan Ahsoka Tano to the surface aboard a Nu-class transport from the Resolute as a messenger from the Jedi High Council with important orders for the Jedi, since disruptions in the system's star had led to a communications blackout between Christophsis and the Jedi Temple. Tano landed in the city and was greeted by a surprised Skywalker and Kenobi, who had expected Republic reinforcements instead of her. Tano revealed to Skywalker that Jedi Grand Master Yoda had assigned her to be his Padawan, much to Skywalker's surprise and alarm.[3]
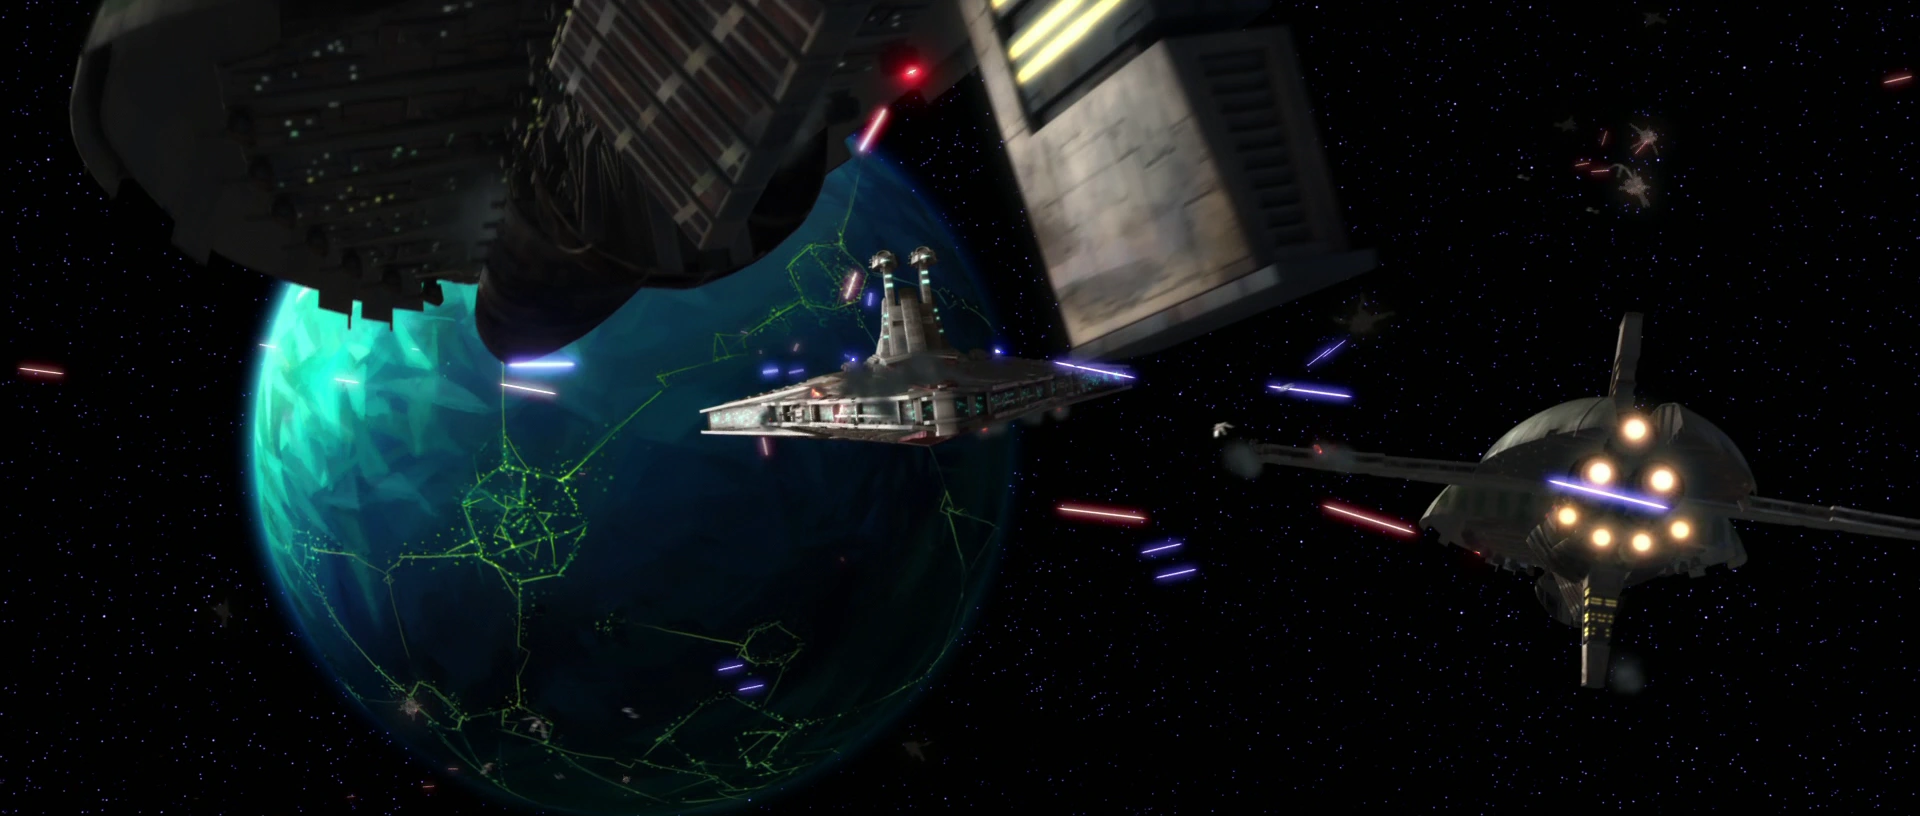
Yularen and the Resolute fight the Separatist blockade over Christophsis.
Back in City Plaza, Skywalker, Tano, and Kenobi managed to contact Yoda at the Jedi Temple through the Resolute—which was being battered by intense turbolaser fire from several Munificent-class frigates of the renewed Confederate blockade,[3] itself numbering less than Admiral Trench's original fleet[5] but still posing a significant threat—and, with all of their support ships already destroyed, requested reinforcements for the battle. Skywalker and Kenobi found that the Jedi Council had been unaware that the Republic forces had engaged the Separatists but managed to get the request for assistance across to Yoda. Before the conversation could continue, increasing enemy fire made the Resolute to drop the transmission. More Separatist ships arrived, and Yularen and the Resolute were forced to retreat from the system to avoid further damage. Without the Republic armada to provide support or transportation away from the planet, the Jedi were left trapped on Christophsis with limited supplies against the large droid army.[3]
Separatist counterattack
- "They're right behind us, sir! They wiped out most of my unit. We had to pull out of there."
"The shield has almost reached the heavy cannons."
"We're not going to be able to stop them, sir."
"Move your troops back to the heavy cannons. Do everything you can to protect them. I'll delay the droids." - ―Rex and Obi-Wan Kenobi
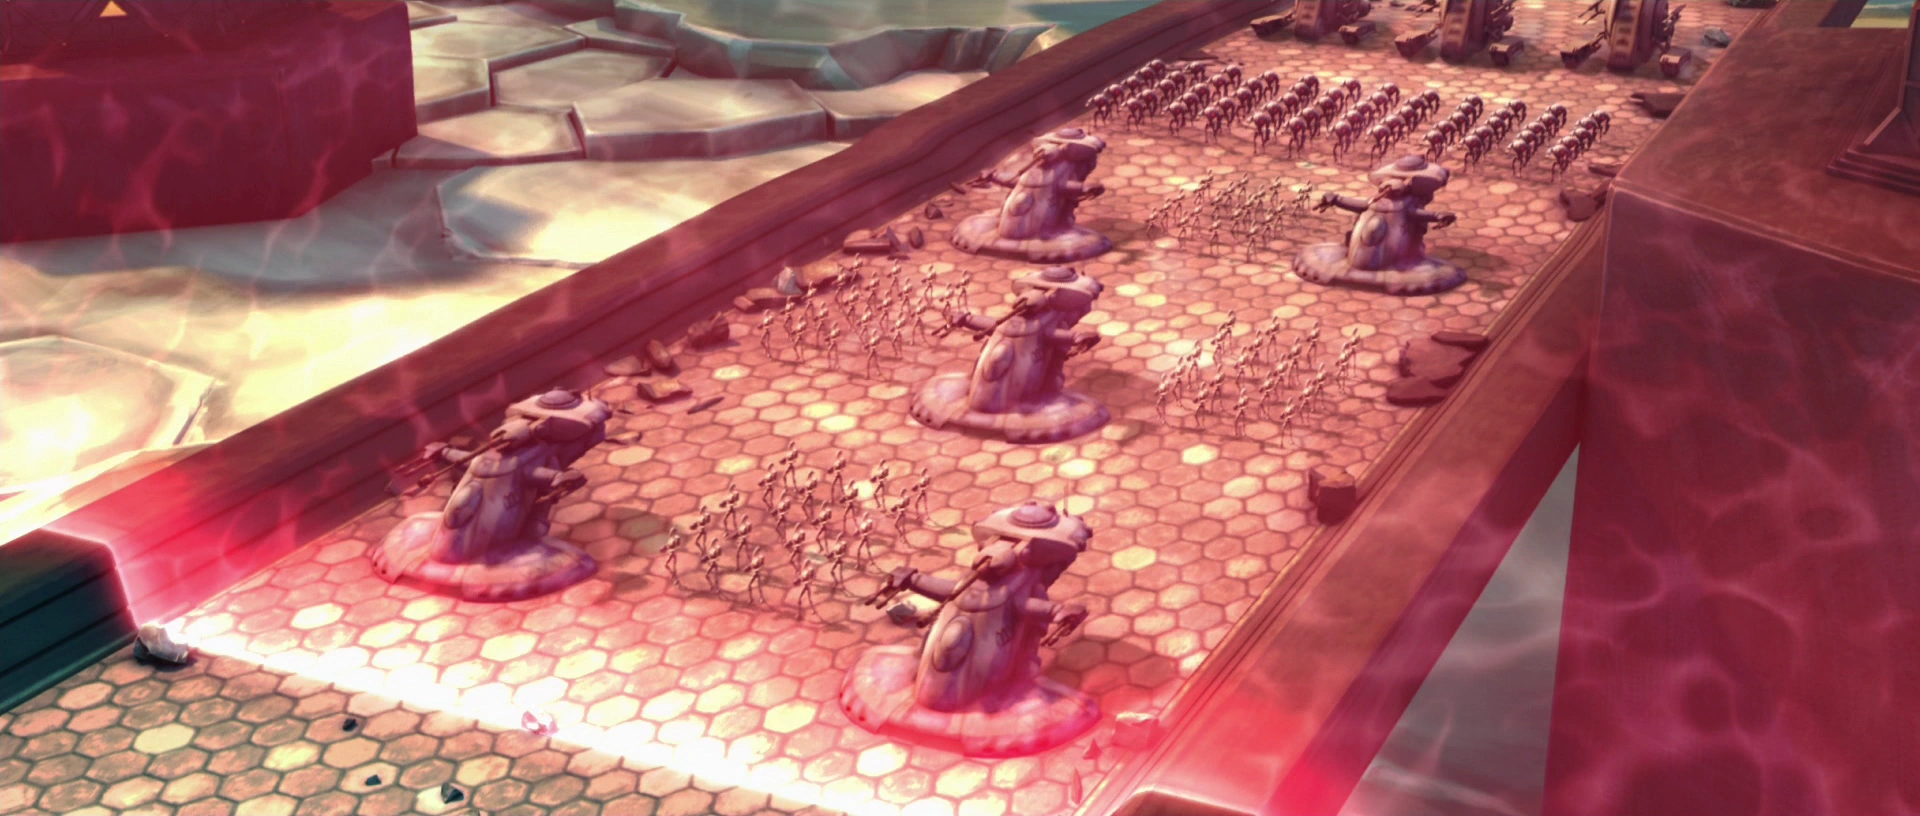
Loathsom advances his droid troops behind the shield unopposed.
While the Republic watched the Separatist forces by using several towers throughout the city as lookout posts, Loathsom finished setting up a deflector shield generator and launched another attack. The Separatist force advanced behind its deflector shield, which negated the Republic's use of long-ranged artillery. The Separatist battle droids and AATs advanced through the city, followed by several lines of NR-N99 Persuader-class tanks. Meanwhile, Skywalker, Kenobi, Tano, and Rex meet at the command center and created an attack plan: Skywalker and Tano would infiltrate the Separatist-held area of the city and shut down the shield generator, while Kenobi and Rex buy them time by defending the base. With Kenobi and Rex rallying their men to defend the Republic's position, Skywalker and Tano proceeded with explosives to the advancing Separatist lines. The pair hide underneath a large box to pass the droid lines. Once the shield and the droid troops had passed over them, Skywalker and Tano made their way to the generator, but bumped into a droideka along the way. Forced to abandon their cover, Skywalker and Tano drew their lightsabers and manage to succeeded in cutting the enemy droid to pieces. They then reached the generator site, which, unknown to them, was being guarded by numerous LR-57 combat droids. Meanwhile, Kenobi and Rex attempted to use the base's heavy cannons to defend their position in the city but were only able to verify that the weaponry was indeed useless against the droids' deflector shield. Loathsom, meanwhile, ordered his troops to target the heavy cannons.[3]
As soon as the deflector shield swallowed them, Kenobi led a charge against the droids while Rex began to lure the enemy into the buildings, where his forces would have the advantage. As the Separatist forces overwhelmed their own, Rex had to order his men to fall back. He and Kenobi met at the command station where the general had Rex organize a defense of the cannons while Kenobi delayed the droids. Reluctantly, Rex agreed and fell back as Kenobi battled the droids by himself. However, he was soon surrounded by a squad of B2 battle droids, DSD1 dwarf spider droids, and Loathsom's personal AAT. Meanwhile, at the shield generator, Tano, against Skywalker's advice, ran towards the generator, accidentally activating buried LR-57 combat droids. As the droids emerged, Skywalker attacked them in order to give Tano time to plant the charges on the generator. However, while avoiding one of the retail droids, Tano cut off it's 'head' and Force pushed it away, accidentally activating even more droids.[3]
As Skywalker was being surrounded by the combat droids, Tano noticed a wall behind her Master with a hole in the middle. Tano carefully brought the wall down with the Force, managing to crush the droids around Skywalker without hurting him. Despite the fact that Tano had saved his life, Skywalker was infuriated with her recklessness and thought that he could have been killed. Meanwhile, in order to gain time for Skywalker and Tano to destroy the shield generator, Kenobi pretended to surrender to Loathsom. Kenobi was brought to a crystal table and patiently discussed the "terms of surrender" with Loathsom over a cup of tea, to the Confederate general's increasing impatience. Continuing to defend the heavy cannons with his men from their cover behind some fallen rubble at the end of the city's main street, Rex discovered that Kenobi had been captured but rallied his men to continue fighting. Loathsom finally realized that Kenobi was stalling and angrily overturned the table. Loathsom ordered two super battle droids to seize Kenobi and demanded that the Jedi General call off his troops immediately under the threat of being killed. At that moment, Skywalker and Tano detonated their charges and destroyed the shield generator, causing the shield to recede. Seeing the dissipating shield, Kenobi broke the droid's hold on him and grabbed Loathsom around the neck. As the battle droids took aim, Loathsom ordered his troops not to attack and surrendered to Kenobi.[3]
Republic reinforcements are deployed to secure Crystal City.
Back at the heavy cannons, Rex saw the shield dissipating and ordered the cannons to fire on the now-exposed battle droids. Just then, Yularen—accompanied by Master Yoda himself—came out of hyperspace with a reinvigorated fleet of Venator-class Star Destroyers and Acclamator-class transgalactic military assault ships. Ordering the cruisers to protect the transports, Yularen's forces engaged the blockade, managing to break through the Separatist defenses and forcing the enemy armada to retreat from the planet. Gunships were then deployed from the fleet to assist the heavy cannons in bombarding the remaining droid forces. One of the assault ships landed in the city, unloading clone reinforcements to further secure the Republic's victory on the planet.[3]
Aftermath
- "Kidnapped, Jabba the Hutt's son has been. Negotiate the treaty with Jabba, Obi-Wan will. Find the renegades that hold Jabba's son, your mission will be, Skywalker."
- ―Yoda gives Skywalker and Tano their new assignment
Yoda gives Skywalker, Tano, and Kenobi their new assignments.
In defeating Loathsom, the Republic had managed to turn what would have been a Separatist victory into a gain for the Republic. Rex took an LAAT/i gunship to retrieve Skywalker and Tano from the generator site and brought them back to the Republic's base. Meeting with Skywalker, Tano, and Kenobi, Yoda told them that the son of crime lord Jabba the Hutt, Rotta the Huttlet, had been kidnapped by a group of renegades. Because rescuing Rotta was necessary to gain Jabba's favor, due to ongoing efforts for the Republic to gain access to hyperspace lanes in Hutt-controlled space, Skywalker and Tano's mission would be to rescue the captive Huttlet to gain Jabba's favor, while Kenobi would enter into negotiations with Jabba on his home planet of Tatooine. Based on clone intelligence reports, Skywalker, Tano, and Rex departed to the Wild Space planet of Teth to rescue Rotta from a monestary with the 501st detachment of Torrent Company. However, they were unaware that they were heading straight into a trap set by Count Dooku and his assassin Asajj Ventress, who were intent on claiming the hyperlanes for the Separatist Alliance and had orchestrated Rotta's capture with help from Jabba's own uncle, Ziro the Hutt, in order to manipulate the Jabba into turning against the Jedi.[3]
Republic High Command used the victory as an example of what Clones and Jedi, when together, could do. The battle had shown that a single Jedi and an armed squad of clone troopers could take out an entire column of battle droids. The Separatist realized this as well and began to research jedi-proof biological weapons. Examples of this project were the Defoliator and the Blue Shadow Virus. These two weapons would see use as soon as later in the first year of the war. Despite this boost to Republic, the CIS received a propaganda boost as well, in the form of Kenobi's false surrender, which Separatist-controlled media used as a clear sign of Republic duplicity. Nearly no more conditional surrenders were offered by either side throughout the remainder of the Clone Wars.[8]
The Republic was able to cover up all evidence of Slick's betrayal, and his motivations were kept a secret from all except Republic High Command in order to make sure that knowledge the clones weren't 100% obedient stayed secret to stop any possible similar sentiments to Slick throughout the trooper ranks. While before the Jedi had viewed their leadership of organics to be more noble than the Separatists use of droids, they now realized they would have to deal with the factor of freewill.[8]
Admiral Trench somehow managed to escape the destruction of his flagship, though he was forced to undergo cybernetic reconstruction to replace several limbs and a part of his head.[7] Loathsom was tried, presumably found guilty, and eventually wound up in the prison of the Republic Center for Military Operations.[9]
Behind the scenes
The Battle of Christophsis first appeared in canon in the 2008 Star Wars: The Clone Wars film. As the film led into the 2008 television series of the same name, the battle was the first to be featured in the series. The battle introduced both the planet Christophsis and Anakin Skywalker's new Padawan, Ahsoka Tano, both subjects of which were expanded upon in the series.[3] The series' January 2009 first season episode "The Hidden Enemy," was created as a prequel to the film at series producer George Lucas's request for Christophsis's backstory to be expanded upon.[10] In March 2010, the battle made an appearance once more in The Clone Wars television series, this time in the second season episode "Cat and Mouse," which occurred chronologically before "The Hidden Enemy," and detailed Admiral Trench's blockade of Christophsis. Including the portion of the battle featured in The Clone Wars film, the episode marked the third such one to expand upon the Battle of Christophsis, stretching it out over a three-part story arc throughout the television series.[5]
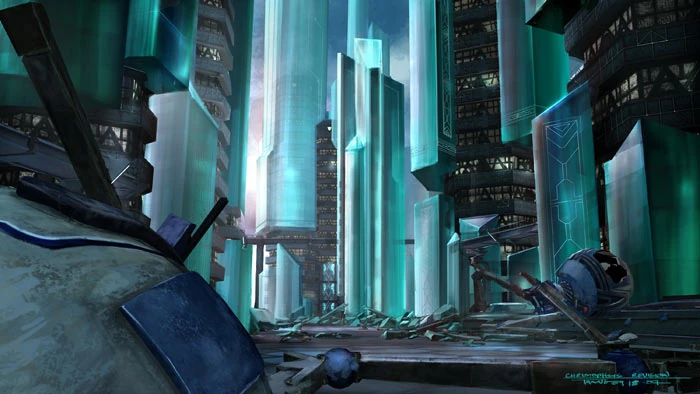

Concept art of the battle's aftermath
The battle was originally to appear in a "flashback" episode, entitled "The New Padawan," that was produced in the television series' first season. After Lucas decided to merge several episodes together for a theatrical release of The Clone Wars, however, the episode was moved to its correct chronological placement with other episodes from the first season, and became the film's opening act.[11]
Appearances
 Star Wars: The Clone Wars — "Cat and Mouse"
- Star Wars: The Clone Wars — "The Hidden Enemy"
- Star Wars: The Clone Wars film (First appearance)
- Star Wars: The Clone Wars — "Clone Cadets" (In flashback(s))
- Star Wars: The Clone Wars — "Grievous Intrigue" (In flashback(s))
- Star Wars: The Clone Wars — "Shadow Warrior" (In flashback(s))
- Dark Disciple (Indirect mention only)
- Ahsoka (In flashback(s))
- Tarkin (Mentioned only)
- Star Wars Rebels — "The Lost Commanders" (Mentioned only)
- Battlefront: Twilight Company (Mentioned only)
Non-canon appearances
- LEGO Star Wars: The Freemaker Adventures — "Zander's Joyride" (Mentioned only)
Sources
Notes and references
- ↑
 Star Wars: The Clone Wars — "The Deserter"
- ↑ Jedi of the Republic – Mace Windu, Part I
- ↑ 3.00 3.01 3.02 3.03 3.04 3.05 3.06 3.07 3.08 3.09 3.10 3.11 3.12 3.13 3.14 3.15 3.16 3.17 3.18 3.19 3.20 3.21 3.22 3.23 3.24 3.25 3.26 3.27 3.28 3.29 3.30 3.31 3.32 3.33 3.34 3.35 3.36 3.37 3.38 3.39 3.40 3.41 3.42 3.43 3.44 3.45 3.46 3.47 3.48 3.49 3.50 3.51 3.52 3.53 3.54 3.55 3.56 3.57 3.58 3.59 3.60 3.61 3.62 3.63 3.64 3.65 3.66 3.67 Star Wars: The Clone Wars film
- ↑ Star Wars: Galactic Atlas
- ↑ 5.00 5.01 5.02 5.03 5.04 5.05 5.06 5.07 5.08 5.09 5.10 5.11 5.12 5.13 5.14 5.15 5.16 5.17 5.18 5.19 5.20 5.21 5.22 5.23 5.24 5.25 5.26 5.27 5.28 5.29 5.30 5.31 5.32 5.33 5.34 5.35 5.36 Star Wars: The Clone Wars — "Cat and Mouse"
- ↑ 6.00 6.01 6.02 6.03 6.04 6.05 6.06 6.07 6.08 6.09 6.10 6.11 6.12 6.13 6.14 6.15 6.16 6.17 6.18 6.19 6.20 6.21 6.22 6.23 6.24 6.25 6.26 6.27 6.28 6.29 6.30 6.31 Star Wars: The Clone Wars — "The Hidden Enemy"
- ↑ 7.0 7.1 Star Wars: The Clone Wars — "The Unknown"
- ↑ 8.0 8.1 8.2 8.3 Star Wars: On the Front Lines
- ↑ Star Wars: The Clone Wars — "The Jedi Who Knew Too Much"
- ↑ The Art of Star Wars: The Clone Wars (booklet)
- ↑ Christophsis in the Databank (content now obsolete; backup link)