(Named forces and squadron members) Tag: Visual edit |
DarthRuiz30 (talk | contribs) (Unnecessary to list every single person that participated) |
||
| Line 1: | Line 1: | ||
{{Eras}} |
{{Eras}} |
||
{{Update|[[Alphabet Squadron (novel)|''Alphabet Squadron'']], [[Star Wars: On the Front Lines]], [[Star Wars: The Rebel Files]], [[Forces of Destiny: The Leia Chronicles]]}} |
{{Update|[[Alphabet Squadron (novel)|''Alphabet Squadron'']], [[Star Wars: On the Front Lines]], [[Star Wars: The Rebel Files]], [[Forces of Destiny: The Leia Chronicles]]}} |
||
| ⚫ | {{Quote|Today is a day of celebration. We have triumphed over villainy and oppression and have given our Alliance—and the galaxy beyond it—a chance to breathe and cheer for the progress in reclaiming our freedom from an Empire that robbed us of it.|Admiral Gial Ackbar, after the Battle of Endor|Aftermath}} |
||
{{Battle |
{{Battle |
||
|width= |
|width= |
||
| Line 33: | Line 32: | ||
*General [[Hera Syndulla]]<ref name="Alphabet Squadron">[[Alphabet Squadron (novel)|''Alphabet Squadron'']]</ref> |
*General [[Hera Syndulla]]<ref name="Alphabet Squadron">[[Alphabet Squadron (novel)|''Alphabet Squadron'']]</ref> |
||
*[[Commander]]/[[Jedi Knight]] [[Luke Skywalker]]<ref name="Episode VI" /> |
*[[Commander]]/[[Jedi Knight]] [[Luke Skywalker]]<ref name="Episode VI" /> |
||
| − | *[[Blade Leader]] |
+ | *[[Blade Leader]] Commander [[Adon Fox]]†<ref name="BS">{{InsiderCite|issue1=149|issue2=150|Blade Squadron (short story)|Blade Squadron}}</ref> |
*[[Corona Leader]] "[[The Contessa]]"<ref name="LS">''[[Lost Stars]]''</ref> |
*[[Corona Leader]] "[[The Contessa]]"<ref name="LS">''[[Lost Stars]]''</ref> |
||
*[[Gold Leader]] General [[Lando Calrissian]]<ref name="Episode VI" /> |
*[[Gold Leader]] General [[Lando Calrissian]]<ref name="Episode VI" /> |
||
| Line 45: | Line 44: | ||
*[[Fleet Admiral]]<ref name="Rebel Files" /> [[Firmus Piett]]†<ref name="Episode VI" /> |
*[[Fleet Admiral]]<ref name="Rebel Files" /> [[Firmus Piett]]†<ref name="Episode VI" /> |
||
*[[Vice Admiral]]<ref name="Battlefront II">''[[Star Wars Battlefront II]]''</ref> [[Rae Sloane]] {{C|late battle}}<ref name="Levers">{{Shortstory|story=The Levers of Power|book=The Rise of the Empire}}</ref> |
*[[Vice Admiral]]<ref name="Battlefront II">''[[Star Wars Battlefront II]]''</ref> [[Rae Sloane]] {{C|late battle}}<ref name="Levers">{{Shortstory|story=The Levers of Power|book=The Rise of the Empire}}</ref> |
||
| − | *Admiral [[Garrick Versio]]<ref name="Battlefront II" /> |
||
| − | *[[Admiral]] [[Jhared Montferrat]]†<ref name="BS" /> |
||
| ⚫ | |||
| − | *Commander [[Ciena Ree]]<ref name="LS">''[[Lost Stars]]''</ref> |
||
| − | *[[Sapphire Leader]] [[Maus Monare]]<ref name="Levers">{{Shortstory|story=The Levers of Power|book=The Rise of the Empire}}</ref> |
||
*Commander [[Iden Versio]]<ref name="Battlefront II" ? |
*Commander [[Iden Versio]]<ref name="Battlefront II" ? |
||
*[[Major]] [[Hewex]]<ref name="Episode VI" /> |
*[[Major]] [[Hewex]]<ref name="Episode VI" /> |
||
| Line 55: | Line 49: | ||
|commanders4= |
|commanders4= |
||
|forces1=*2 [[Jedi]] Knights<ref name="Episode VI" /> |
|forces1=*2 [[Jedi]] Knights<ref name="Episode VI" /> |
||
| − | **Luke Skywalker<ref name="Episode VI" /> |
+ | **Luke Skywalker<ref name="Episode VI" /> |
**Anakin Skywalker {{C|late battle}}†<ref name="Episode VI" /> |
**Anakin Skywalker {{C|late battle}}†<ref name="Episode VI" /> |
||
*At least 4 [[Braha'tok-class gunship|''Braha'tok''-class gunships]]<ref name="Episode VI" /> |
*At least 4 [[Braha'tok-class gunship|''Braha'tok''-class gunships]]<ref name="Episode VI" /> |
||
| Line 69: | Line 63: | ||
**8 [[MC80A star cruiser]]s<ref name="Episode VI" /> |
**8 [[MC80A star cruiser]]s<ref name="Episode VI" /> |
||
***''[[Home One]]''<ref name="Episode VI" /> |
***''[[Home One]]''<ref name="Episode VI" /> |
||
| ⚫ | |||
***''[[Independence]]''<ref name="Starfighters" /> |
***''[[Independence]]''<ref name="Starfighters" /> |
||
***''[[Nautilian]]''†<ref name="Life Debt">''[[Aftermath: Life Debt]]''</ref> |
***''[[Nautilian]]''†<ref name="Life Debt">''[[Aftermath: Life Debt]]''</ref> |
||
| Line 77: | Line 70: | ||
*[[A/SF-01 B-wing starfighter]]s<ref name="Episode VI" /> |
*[[A/SF-01 B-wing starfighter]]s<ref name="Episode VI" /> |
||
**Part of [[Blade Squadron]]<ref name="BS" /> |
**Part of [[Blade Squadron]]<ref name="BS" /> |
||
| − | ***Blade Leader Wing Commander Adon Fox†<ref name="BS" /> |
||
| − | ***[[Blade One (Endor)|Blade One]]†<ref name="BS" /> |
||
| − | ***[[Blade Two]] Lieutenant [[Braylen Stramm]]<ref name="BS" /> |
||
| − | ***[[Blade Three]] [[Cadet]] [[Gina Moonsong]]<ref name="BS" /> |
||
| − | ***[[Blade Four]] [[Fanty]]<ref name="BS" /> |
||
**[[Blue Squadron (Rebel Alliance)|Blue Squadron]]<ref name="SWCT">[[Star Wars: Card Trader|''Star Wars'': Card Trader]]</ref> |
**[[Blue Squadron (Rebel Alliance)|Blue Squadron]]<ref name="SWCT">[[Star Wars: Card Trader|''Star Wars'': Card Trader]]</ref> |
||
| − | ***[[Blue Five]] [[Ten Numb]]<ref name="SWCT" /> |
||
**Part of [[Gray Squadron (Rebel Alliance)|Gray Squadron]]<ref name="SWGeek">''[[Star Wars: Geektionary: The Galaxy From A To Z]]''</ref> |
**Part of [[Gray Squadron (Rebel Alliance)|Gray Squadron]]<ref name="SWGeek">''[[Star Wars: Geektionary: The Galaxy From A To Z]]''</ref> |
||
*[[BTL-A4 Y-wing assault starfighter/bomber]]s<ref name="Episode VI" /> |
*[[BTL-A4 Y-wing assault starfighter/bomber]]s<ref name="Episode VI" /> |
||
**Part of [[Gold Squadron (Rebel Alliance)|Gold Squadron]]<ref name="Episode VI" /> |
**Part of [[Gold Squadron (Rebel Alliance)|Gold Squadron]]<ref name="Episode VI" /> |
||
| − | ***[[Gold Nine]] [[Norra Wexley]]<ref name="Episode VI" /><ref name="Aftermath">''[[Aftermath]]''</ref> |
||
**Part of Gray Squadron<ref name="Episode VI" /> |
**Part of Gray Squadron<ref name="Episode VI" /> |
||
| ⚫ | |||
| − | ***[[Gray Three]] [[Ekelarc Yong]]†<ref name="Episode VI" /> |
||
| − | ***[[Telsij]]†<ref name="Episode VI" /> |
||
**Part of [[Red Squadron (Rebel Alliance)|Red Squadron]]<ref name="Episode VI" /> |
**Part of [[Red Squadron (Rebel Alliance)|Red Squadron]]<ref name="Episode VI" /> |
||
| − | ***[[Red Two (Battle of Endor)|Red Two]]<ref name="Episode VI" /> |
||
*[[RZ-1 A-wing interceptor]]s<ref name="Episode VI" /> |
*[[RZ-1 A-wing interceptor]]s<ref name="Episode VI" /> |
||
**Part of Blade Squadron<ref name="BS" /> |
**Part of Blade Squadron<ref name="BS" /> |
||
**Part of Gold Squadron<ref name="A-Wing">''[[Star Wars: A-Wing Deluxe Book and 3D Wood Model]]''</ref> |
**Part of Gold Squadron<ref name="A-Wing">''[[Star Wars: A-Wing Deluxe Book and 3D Wood Model]]''</ref> |
||
**[[Green Squadron (Rebel Alliance)|Green Squadron]]<ref name="Episode VI" /> |
**[[Green Squadron (Rebel Alliance)|Green Squadron]]<ref name="Episode VI" /> |
||
| − | ***Green Leader Commander Arvel Crynyd†<ref name="Episode VI" /> |
||
| − | ***[[Green Two]] Lieutenant [[L'ulo L'ampar]]<ref name="SE1">''[[Shattered Empire 1]]''</ref> |
||
| − | ***[[Green Three]]<ref name="SE1">''[[Shattered Empire 1]]''</ref> |
||
| − | ***[[Green Four]] Lieutenant [[Shara Bey]]<ref name="SE1">''[[Shattered Empire 1]]''</ref> |
||
| − | ***[[Green Six]] [[Kokely]]†<ref name="SE1">''[[Shattered Empire 1]]''</ref> |
||
| − | ***[[Green Seven]]<ref name="SE1">''[[Shattered Empire 1]]''</ref> |
||
| − | ***[[Pick]]<ref name="SE1">''[[Shattered Empire 1]]''</ref> |
||
**Part of Gray Squadron<ref name="SWGeek" /> |
**Part of Gray Squadron<ref name="SWGeek" /> |
||
**Part of Red Squadron<ref name="Episode VI" /> |
**Part of Red Squadron<ref name="Episode VI" /> |
||
| − | ***[[Red Three]] [[Sila Kott]]† |
||
**Part of [[Riot Squadron]]<ref name="Alphabet Squadron" /> |
**Part of [[Riot Squadron]]<ref name="Alphabet Squadron" /> |
||
| − | ***Riot Leader Rununja<ref name="Alphabet Squadron" /> |
||
| − | ***[[Riot Two]]<ref name="Alphabet Squadron" /> |
||
| − | ***[[Riot Three]] [[Wyl Lark]]<ref name="Alphabet Squadron" /> |
||
| − | ***[[Riot Four]] [[Skitcher]]<ref name="Alphabet Squadron" /> |
||
| − | ***[[Riot Five]] [[Sata Neek]]<ref name="Alphabet Squadron" /> |
||
| − | ***[[Riot Six]]<ref name="Alphabet Squadron" /> |
||
| − | ***[[Riot Seven]] [[Sonogari]]<ref name="Alphabet Squadron" /> |
||
| − | ***[[Riot Eight]] [[Nasi Moreno]]<ref name="Alphabet Squadron" /> |
||
| − | ***[[Heater (pilot)|Heater]]<ref name="Alphabet Squadron" /> |
||
| − | ***[[Kamala]]<ref name="Alphabet Squadron" /> |
||
| − | ***[[Rep Boy|"Rep Boy"]]<ref name="Alphabet Squadron" /> |
||
| − | ***Three unidentified A-wing pilots<ref name="Alphabet Squadron" /> |
||
*[[UT-60D U-wing starfighter/support craft]]s<ref name="Battlefront II" /> |
*[[UT-60D U-wing starfighter/support craft]]s<ref name="Battlefront II" /> |
||
*[[T-65B X-wing starfighter]]s<ref name="Episode VI" /> |
*[[T-65B X-wing starfighter]]s<ref name="Episode VI" /> |
||
**[[Corona Squadron]]<ref name="LS" /> |
**[[Corona Squadron]]<ref name="LS" /> |
||
| − | ***Corona Leader The Contessa<ref name="LS">''[[Lost Stars]]''</ref> |
||
| − | ***[[Corona Two]] [[Yendor]]<ref name="LS">''[[Lost Stars]]''</ref> |
||
| − | ***[[Corona Four]] [[Thane Kyrell]]<ref name="LS">''[[Lost Stars]]''</ref> |
||
| − | ***[[Corona Five]] [[Kendy Idele]]<ref name="LS">''[[Lost Stars]]''</ref> |
||
**Part of Red Squadron<ref name="Episode VI" /> |
**Part of Red Squadron<ref name="Episode VI" /> |
||
| − | ***Red Leader Commander Wedge Antilles<ref name="Episode VI" /> |
||
| − | ***[[Red Five]] [[Grizz Frix]]†<ref name="Episode VI" /> |
||
| − | **[[Keir Santage]]†<ref name="Episode VI" /> |
||
| − | **[[Lak Sivrak]]<ref name="FC">{{ForceCollection|Lak Sivrak|star=1}}</ref> |
||
*1 [[YT-1300 light freighter]]<ref name="Episode VI" /> |
*1 [[YT-1300 light freighter]]<ref name="Episode VI" /> |
||
**''[[Millennium Falcon]]'' {{C|Gold Squadron}}<ref name="Episode VI" /> |
**''[[Millennium Falcon]]'' {{C|Gold Squadron}}<ref name="Episode VI" /> |
||
| Line 141: | Line 95: | ||
*[[Yellow Squadron (Rebel Alliance)|Yellow Squadron]]<ref name="SE1">''[[Shattered Empire 1]]''</ref> |
*[[Yellow Squadron (Rebel Alliance)|Yellow Squadron]]<ref name="SE1">''[[Shattered Empire 1]]''</ref> |
||
*2 [[Lambda-class T-4a shuttle|''Lambda''-class T-4a shuttles]]<ref name="Episode VI" /> |
*2 [[Lambda-class T-4a shuttle|''Lambda''-class T-4a shuttles]]<ref name="Episode VI" /> |
||
| − | **''[[ST 321]]'' |
+ | **''[[ST 321]]''<ref name="BtPotDS!" /> |
**''[[Tydirium]]''<ref name="Episode VI" /> |
**''[[Tydirium]]''<ref name="Episode VI" /> |
||
*1 All Terrain Scout Transport {{C|hijacked}}<ref name="Episode VI" /> |
*1 All Terrain Scout Transport {{C|hijacked}}<ref name="Episode VI" /> |
||
| Line 163: | Line 117: | ||
*Ewoks<ref name="Episode VI" /> |
*Ewoks<ref name="Episode VI" /> |
||
**[[Bright Tree Village]]<ref name="Episode VI" /> |
**[[Bright Tree Village]]<ref name="Episode VI" /> |
||
| − | |forces2=* |
+ | |forces2=*2 [[Sith Lord]]s†<ref name="Episode VI" /> |
| − | ** |
+ | **Darth Sidious†<ref name="Episode VI" /> |
| − | + | **Darth Vader {{C|early-mid battle}}†<ref name="Episode VI" /> |
|
| − | * |
+ | *Death Star II†<ref name="Episode VI" /> |
| − | **Moff Tiaan Jerjerrod†<ref name="Episode VI" /> |
||
*[[Death Squadron]]†<ref name="Episode VI" /> |
*[[Death Squadron]]†<ref name="Episode VI" /> |
||
**1 [[Executor-class Star Dreadnought|''Executor''-class Star Dreadnought]]<ref name="Episode VI" /> |
**1 [[Executor-class Star Dreadnought|''Executor''-class Star Dreadnought]]<ref name="Episode VI" /> |
||
***''Executor''†<ref name="Episode VI" /> |
***''Executor''†<ref name="Episode VI" /> |
||
| − | ****Admiral Firmus Piett†<ref name="Episode VI" /> |
||
| − | ****Commander [[Gherant]]†<ref name="Episode VI" /> |
||
| − | ****Officer [[Berisse Sai]]†<ref name="LS">''[[Lost Stars]]''</ref> |
||
*At least 1 [[Battlecruiser]]<ref name="Levers" /> |
*At least 1 [[Battlecruiser]]<ref name="Levers" /> |
||
**''[[Pride of Tarlandia]]''†<ref name="Levers" /> |
**''[[Pride of Tarlandia]]''†<ref name="Levers" /> |
||
| Line 181: | Line 131: | ||
***At least 2 [[Imperial I-class Star Destroyer|''Imperial I''-class Star Destroyers]]<ref name="On the Front Lines" /><ref name="BS" /> |
***At least 2 [[Imperial I-class Star Destroyer|''Imperial I''-class Star Destroyers]]<ref name="On the Front Lines" /><ref name="BS" /> |
||
****''[[Devastator]]''†<ref name="BS" /> |
****''[[Devastator]]''†<ref name="BS" /> |
||
| − | *****Admiral Jhared Montferrat†<ref name="BS" /> |
||
| − | *****Commander Gradd†<ref name="BS" /> |
||
***[[Imperial II-class Star Destroyer|''Imperial II''-class Star Destroyers]] |
***[[Imperial II-class Star Destroyer|''Imperial II''-class Star Destroyers]] |
||
****''[[Eviscerator]]''<ref name="Battlefront II" /> |
****''[[Eviscerator]]''<ref name="Battlefront II" /> |
||
| − | *****Admiral Garrick Versio<ref name="Battlefront II" /> |
||
****''[[Vehement]]''†<ref name="Levers" /> |
****''[[Vehement]]''†<ref name="Levers" /> |
||
***[[Vigilance (Imperial-class Star Destroyer)|''Vigilance'']]<ref name="Levers" /> |
***[[Vigilance (Imperial-class Star Destroyer)|''Vigilance'']]<ref name="Levers" /> |
||
| − | ****Vice Admiral Rae Sloane<ref name="Levers">{{Shortstory|story=The Levers of Power|book=The Rise of the Empire}}</ref> |
||
| − | ****Lieutenant [[Nils Tothwin]]<ref name="Levers" /> |
||
| − | ****Lieutenant [[Habbel]]<ref name="Levers" /> |
||
| − | ****[[Loyalty officer|Loyalty Officer]] [[Colonel]] [[Emarr Ottkreg]]†<ref name="Levers" /> |
||
| − | ****[[Executive Officer]] [[Nymos Lyle]]<ref name="Levers" /> |
||
| − | ****[[Feldstrom]]<ref name="Levers" /> |
||
| − | ****[[Heurys]]<ref name="Levers" /> |
||
| − | ****[[Ives]]<ref name="Levers" /> |
||
| − | ****[[Springbuck]]<ref name="Levers" /> |
||
**[[Subjugator (Star Destroyer)|''Subjugator'']]<ref name="LS" /> |
**[[Subjugator (Star Destroyer)|''Subjugator'']]<ref name="LS" /> |
||
**[[Tector-class Star Destroyer|''Tector''-class Star Destroyer]]<ref name="Levers" /> |
**[[Tector-class Star Destroyer|''Tector''-class Star Destroyer]]<ref name="Levers" /> |
||
| Line 202: | Line 140: | ||
*[[Interdictor vessel]]s<ref name="Levers" /> |
*[[Interdictor vessel]]s<ref name="Levers" /> |
||
*1 [[Raider II-class corvette|''Raider II''-class corvette]]<ref name="Battlefront II" /> |
*1 [[Raider II-class corvette|''Raider II''-class corvette]]<ref name="Battlefront II" /> |
||
| − | **''[[Corvus]]'' |
+ | **''[[Corvus]]''<ref name="Battlefront II" /> |
| − | *Hundreds of [[TIE/ln space superiority starfighter]]s<ref |
+ | *Hundreds of [[TIE/ln space superiority starfighter]]s<ref name="On the Front Lines" /> |
**[[Sapphire Squadron]]<ref name="Levers" /> |
**[[Sapphire Squadron]]<ref name="Levers" /> |
||
| − | ***Sapphire Leader Maus Monare<ref name="Levers" /> |
||
| − | ***Atleast seven other TIE/ln starfighters<ref name="Levers" /> |
||
*[[TIE/sa bomber]]s<ref name="Galactic Atlas" /> |
*[[TIE/sa bomber]]s<ref name="Galactic Atlas" /> |
||
*Hundreds of [[TIE/IN interceptor]]s<ref name="On the Front Lines" /> |
*Hundreds of [[TIE/IN interceptor]]s<ref name="On the Front Lines" /> |
||
**[[Gradd's squadron]]<ref name="BS" /> |
**[[Gradd's squadron]]<ref name="BS" /> |
||
| − | ***Commander Gradd†<ref name="BS" /> |
||
| − | **Commander Ciena Ree<ref name="LS">''[[Lost Stars]]''</ref> |
||
| − | **Lieutenant [[Nash Windrider]]<ref name="LS">''[[Lost Stars]]''</ref> |
||
*[[Imperial Navy Trooper]]s<ref name="Episode VI" /> |
*[[Imperial Navy Trooper]]s<ref name="Episode VI" /> |
||
*1 [[All Terrain Armored Transport]]<ref name="Episode VI" /> |
*1 [[All Terrain Armored Transport]]<ref name="Episode VI" /> |
||
| Line 221: | Line 154: | ||
*[[Heavy Weapons Stormtrooper]]s<ref name="Battlefront II" /> |
*[[Heavy Weapons Stormtrooper]]s<ref name="Battlefront II" /> |
||
*[[Inferno Squad]]<ref name="Battlefront II" /> |
*[[Inferno Squad]]<ref name="Battlefront II" /> |
||
| − | **Commander Iden Versio<ref name="Battlefront II" /> |
||
| − | **[[Agent]] [[Gideon Hask]]<ref name="Battlefront II" /> |
||
| − | **Agent [[Del Meeko]]<ref name="Battlefront II" /> |
||
|forces3= |
|forces3= |
||
|forces4= |
|forces4= |
||
| Line 229: | Line 159: | ||
*Blade Leader Adon Fox<ref name="BS" /> |
*Blade Leader Adon Fox<ref name="BS" /> |
||
*Green Leader Arvel Crynyd<ref name="Episode VI" /> |
*Green Leader Arvel Crynyd<ref name="Episode VI" /> |
||
| − | * |
+ | *[[Green Six]] [[Kokely]]<ref name="SE1" /> |
| − | * |
+ | *[[Red Three]] [[Sila Kott]]<ref name="A-Wing" /> |
| + | *[[Red Five]] [[Grizz Frix]]<ref name="DB:Rebel Pilots">{{Databank|rebel-pilots-biography-gallery|Rebel Pilots Biography Gallery}}</ref> |
||
| − | *Red Three Sila Kott<ref name="A-Wing" /> |
||
| − | * |
+ | *[[Gray Three]] [[Ekelarc Yong]]<ref name="DB:Rebel Pilots" /> |
| − | * |
+ | *X-wing Pilot [[Keir Santage]]<ref name="Episode VI" /> |
| ⚫ | |||
| − | *X-wing Pilot Keir Santage<ref name="Episode VI" /> |
||
| ⚫ | |||
| − | *Half of Yellow Squadron<ref name="SE1">''[[Shattered Empire 1]]''</ref> |
||
*At least 2 MC80 Star Cruisers<ref name="Episode VI" /> |
*At least 2 MC80 Star Cruisers<ref name="Episode VI" /> |
||
**''Liberty''<ref name="LS" /><ref name="Episode VI" /> |
**''Liberty''<ref name="LS" /><ref name="Episode VI" /> |
||
| Line 250: | Line 178: | ||
*At least 3 Pathfinders<ref name="Episode VI" /> |
*At least 3 Pathfinders<ref name="Episode VI" /> |
||
*Many Rebel [[trooper]]s<ref name="Battlefront II" /> |
*Many Rebel [[trooper]]s<ref name="Battlefront II" /> |
||
| − | |casual2=* |
+ | |casual2=*Emperor Palpatine<ref name="Episode VI" /> |
| − | * |
+ | *Darth Vader {{C|redeemed}}<ref name="Episode VI" /> |
| − | * |
+ | *Moff Tiaan Jerjerrod<ref name="Episode VI" /> |
| − | * |
+ | *Admiral Firmus Piett<ref name="Episode VI" /> |
| − | * |
+ | *Admiral [[Jhared Montferrat]]<ref name="BS" /> |
| ⚫ | |||
| − | VI" /> |
||
| ⚫ | |||
| ⚫ | |||
**''Executor''<ref name="Episode VI" /> |
**''Executor''<ref name="Episode VI" /> |
||
| − | ***Admiral Firmus Piett<ref name="Episode VI" /> |
||
| − | ***Commander Gherant<ref name="Episode VI" /> |
||
| − | ***Officer Berisse Sai<ref name="LS">''[[Lost Stars]]''</ref> |
||
*At least 1 Battlecruiser<ref name="A-Wing" /> |
*At least 1 Battlecruiser<ref name="A-Wing" /> |
||
**''Pride of Tarlandia''<ref name="A-Wing" /> |
**''Pride of Tarlandia''<ref name="A-Wing" /> |
||
*At least 3 Star Destroyers<ref name="Episode VI" /> |
*At least 3 Star Destroyers<ref name="Episode VI" /> |
||
**''Devastator''<ref name="BS" /> |
**''Devastator''<ref name="BS" /> |
||
| − | ***Admiral Jhared Montferrat<ref name="BS" /> |
||
| − | ***Commander Gradd<ref name="BS" /> |
||
**''Harbinger''<ref name="Levers" /> |
**''Harbinger''<ref name="Levers" /> |
||
**''Vehement''<ref name="Levers" /> |
**''Vehement''<ref name="Levers" /> |
||
| − | *Loyalty Officer Colonel Emarr Ottkreg<ref name="Levers" /> |
||
*At least five AT-STs (3 destroyed, 2 hijacked)<ref name="Episode VI" /> |
*At least five AT-STs (3 destroyed, 2 hijacked)<ref name="Episode VI" /> |
||
| − | *Many [[Imperial officer |
+ | *Many [[Imperial officer]]s<ref name="Episode VI" /> |
*Many Navy troopers<ref name="Episode VI" /> |
*Many Navy troopers<ref name="Episode VI" /> |
||
*Many Stormtroopers<ref name="Episode VI" /> |
*Many Stormtroopers<ref name="Episode VI" /> |
||
*Many Scout Troopers<ref name="Episode VI" /> |
*Many Scout Troopers<ref name="Episode VI" /> |
||
*Many TIE fighters<ref name="Episode VI" /> |
*Many TIE fighters<ref name="Episode VI" /> |
||
| − | **Six TIE fighters from Sapphire Squadron<ref name="Levers" /> |
||
*Many TIE bombers<ref name="Galactic Atlas" /> |
*Many TIE bombers<ref name="Galactic Atlas" /> |
||
*Many TIE interceptors<ref name="Episode VI" /> |
*Many TIE interceptors<ref name="Episode VI" /> |
||
| Line 282: | Line 205: | ||
|casual4= |
|casual4= |
||
|civilian=}} |
|civilian=}} |
||
| ⚫ | {{Quote|Today is a day of celebration. We have triumphed over villainy and oppression and have given our Alliance—and the galaxy beyond it—a chance to breathe and cheer for the progress in reclaiming our freedom from an Empire that robbed us of it.|Admiral Gial Ackbar, after the Battle of Endor|Aftermath}} |
||
The '''Battle of Endor''' was a decisive battle of the [[Galactic Civil War]], one in which the [[Alliance to Restore the Republic]] shattered the rule of the [[Galactic Empire]] and saw the destruction of the [[Death Star II]] and the [[death]]s of [[Darth Sidious]] and [[Anakin Skywalker|Darth Vader]]. The triumph of the Alliance over the Empire, and the void left in the wake of the [[Galactic Emperor|Emperor's]] demise, gave the Alliance the opportunity to give rise to the [[New Republic]], which ultimately prevailed over the Empire in the [[Battle of Jakku]] one [[Standard year|year]] later. The legacy of the Battle of Endor reverberated for [[Standard decade|decades]] after the fighting ended, including into the [[Cold war|brewing war]] between the Imperial-inspired [[First Order]] and the [[Resistance]] that arose to combat it. |
The '''Battle of Endor''' was a decisive battle of the [[Galactic Civil War]], one in which the [[Alliance to Restore the Republic]] shattered the rule of the [[Galactic Empire]] and saw the destruction of the [[Death Star II]] and the [[death]]s of [[Darth Sidious]] and [[Anakin Skywalker|Darth Vader]]. The triumph of the Alliance over the Empire, and the void left in the wake of the [[Galactic Emperor|Emperor's]] demise, gave the Alliance the opportunity to give rise to the [[New Republic]], which ultimately prevailed over the Empire in the [[Battle of Jakku]] one [[Standard year|year]] later. The legacy of the Battle of Endor reverberated for [[Standard decade|decades]] after the fighting ended, including into the [[Cold war|brewing war]] between the Imperial-inspired [[First Order]] and the [[Resistance]] that arose to combat it. |
||
Revision as of 22:52, 8 November 2019
| | |

Warning: This infobox is missing the following parameters: unit2, unit1
- "Today is a day of celebration. We have triumphed over villainy and oppression and have given our Alliance—and the galaxy beyond it—a chance to breathe and cheer for the progress in reclaiming our freedom from an Empire that robbed us of it."
- ―Admiral Gial Ackbar, after the Battle of Endor
The Battle of Endor was a decisive battle of the Galactic Civil War, one in which the Alliance to Restore the Republic shattered the rule of the Galactic Empire and saw the destruction of the Death Star II and the deaths of Darth Sidious and Darth Vader. The triumph of the Alliance over the Empire, and the void left in the wake of the Emperor's demise, gave the Alliance the opportunity to give rise to the New Republic, which ultimately prevailed over the Empire in the Battle of Jakku one year later. The legacy of the Battle of Endor reverberated for decades after the fighting ended, including into the brewing war between the Imperial-inspired First Order and the Resistance that arose to combat it.
The origins of the Battle of Endor emerged from the discovery that the Empire was using the Forest Moon of Endor as a staging ground to construct a second Death Star, the first of which had been destroyed four years earlier during the Battle of Yavin. Bothan spies employed by the Alliance gained the intelligence needed to determine the Death Star's location and learn that the emperor himself planned on personally overseeing the final phases of construction, though the Alliance was unaware that this was an elaborate plot to destroy Luke Skywalker, a Jedi and the son of Darth Vader, and the Alliance itself once and for all.
The battle began after the Alliance Fleet assembled near Sullust, and special operations ground forces were deployed to Endor to disable the shield protecting the armored battle station. The Alliance Fleet soon arrived to discover the Imperial Navy waiting for them, along with a fully operational Death Star. Ground forces under the command of General Han Solo and Princess Leia Organa were able to destroy the shield, giving the Alliance Fleet the opportunity to attack the superweapon. Meanwhile, Skywalker engaged Vader in a final lightsaber duel aboard the Death Star, where the emperor tried and failed to convince the Jedi Knight to turn to the dark side of the Force. To save his son from the wrath of the emperor, Vader surprised and betrayed Sidious, killing the Dark Lord of the Sith, and sacrificing his own life in the process—an act that fulfilled the Jedi prophecy of the Chosen One and brought balance to the Force. Shortly thereafter, Alliance forces destroyed the Death Star. Imperial forces were left in tatters, giving the Alliance the opportunity to form the New Republic and forge a new future free of the Sith and the rule of the Empire, thus allowing the Jedi Order to be restored.
Prelude
- "The Empire's time has come."
- ―Iden Versio
Unlike the Battle of Yavin,[28] the last major battle between the Alliance to Restore the Republic and the Galactic Empire, which had taken place on the ice world of Hoth, had resulted in a disastrous defeat for the Alliance. The loss of the recently established Echo Base[29] forced the Alliance High Command to break the Alliance Fleet into small task forces that would constantly jump from one star system to another to prevent another defeat for Imperial propagandists to celebrate.[30]

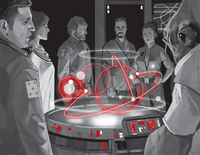
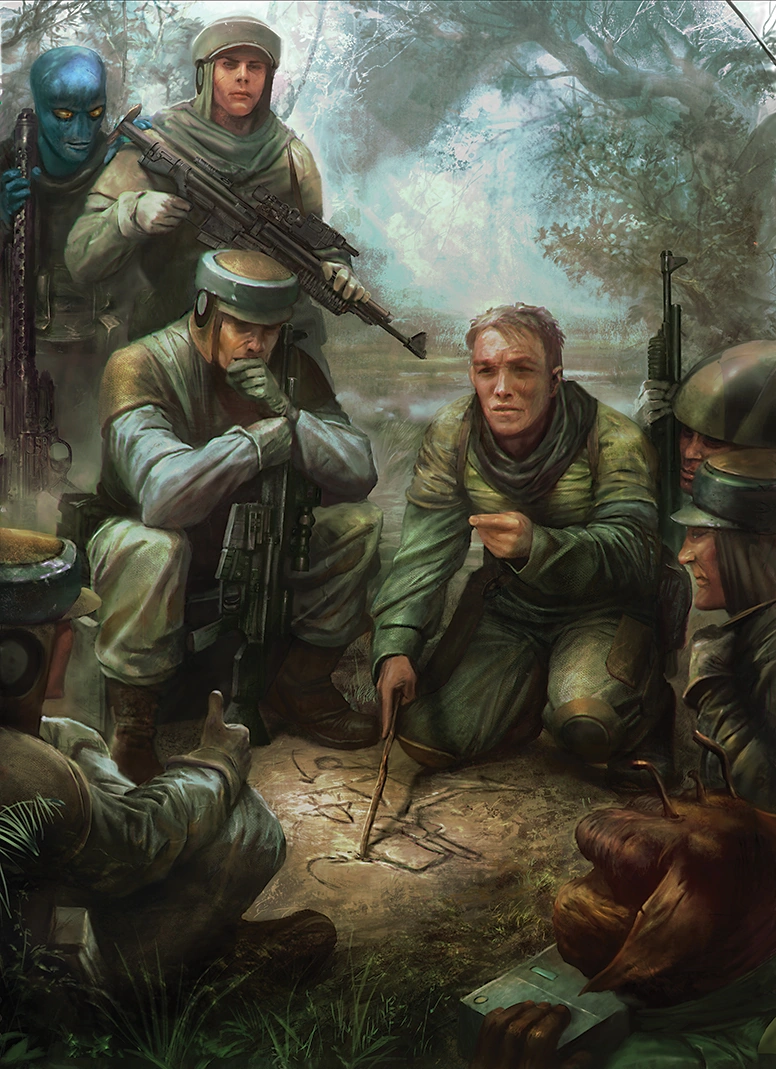
Meeting of the Alliance High Command to discuss an attack on the Death Star II
Several months later, the Bothan spynet intercepted information that revealed the Empire was building a second Death Star in orbit over the forest moon of Endor. Thanks to the Bothan spies, the Alliance also learned that the Emperor himself was to oversee the completion of the Death Star, the construction of which was being overseen by Moff Tiaan Jerjerrod. Unbeknownst to the Alliance, the Emperor, secretly a Dark Lord of the Sith known as Darth Sidious, had foreseen the Alliance's plan and used this to his advantage. The Emperor would allow the Alliance to obtain incomplete information, tricking the Alliance into thinking that the battle station's superlaser was inoperative when in fact the battle station would be fully operational. In addition, the Emperor would hide a large fleet of Star Destroyers on the far side of Endor.[3]
A week after the intelligence report reached Rebel Command, its leader, Chancellor Mon Mothma, organized a top-clearance meeting on Zastiga to relay this information to the other Rebel leaders. Alongside Admiral Gial Ackbar, commander of the Alliance Fleet, and General Airen Cracken, the chief of Alliance Intelligence, Mothma informed a number of top leaders to the meeting: Admirals Massa and Nantz, Generals Tantor and Veertag, and the rest of the Alliance High Command—General Carlist Rieekan, General Crix Madine, and Princess Leia Organa. After swearing all the Rebel leaders to secrecy, Mothma adjourned the meeting for the next day.[30]
The group of leaders devised a plan whereby Alliance warships would engage the battle station's defenses, buying time for starfighters to enter the unfinished Death Star's superstructure to destroy its exposed reactor core. Prior to the arrival of the Alliance Fleet, a strike team of commandos from Madine's Special Forces would be sent to the forest moon to destroy the deflector shield generator protecting the superweapon—though they had yet to secure an Imperial transport to do so. They also decided to use the Sanctuary Pipeline, a hyperspace route that would allow them to go from Sullust directly into the Endor system. Organa and a crew of rebels placed hyper-transceivers in the Corva sector as a part of Operation Yellow Moon. The hyper-transceivers would attract Imperial attention to Organa, deflecting the Empire's attention away from the fleet's gathering at Sullust. The operation was a success. In addition to successfully placing the hyper-transceivers, Organa and her team were able to destroy the Imperial-class Star Destroyer Shieldmaiden and steal the Lambda-class T-4a shuttle Tydirium,[30] which would prove essential to the infiltration mission to the Endor moon.[3]
An Imperial fleet consisting of Star Destroyers, attack cruisers, light cruisers, and more gathered in the Hudalla system as a display of the Emperor's power. Their mission was to attract the Rebels' attention and confirm the Emperor's arrival to Endor. In response, Ackbar sent Corona Squadron to observe the Imperial ships and obtain as much information as possible. Corona Squadron engaged in a dogfight against TIE fighters, during which Corona Three (Smikes) was shot down. Imperial forces allowed Corona Squadron to escape, hoping that the resulting counterintelligence would lead the Rebels to believe that the Imperial Starfleet was dispersed.[12]
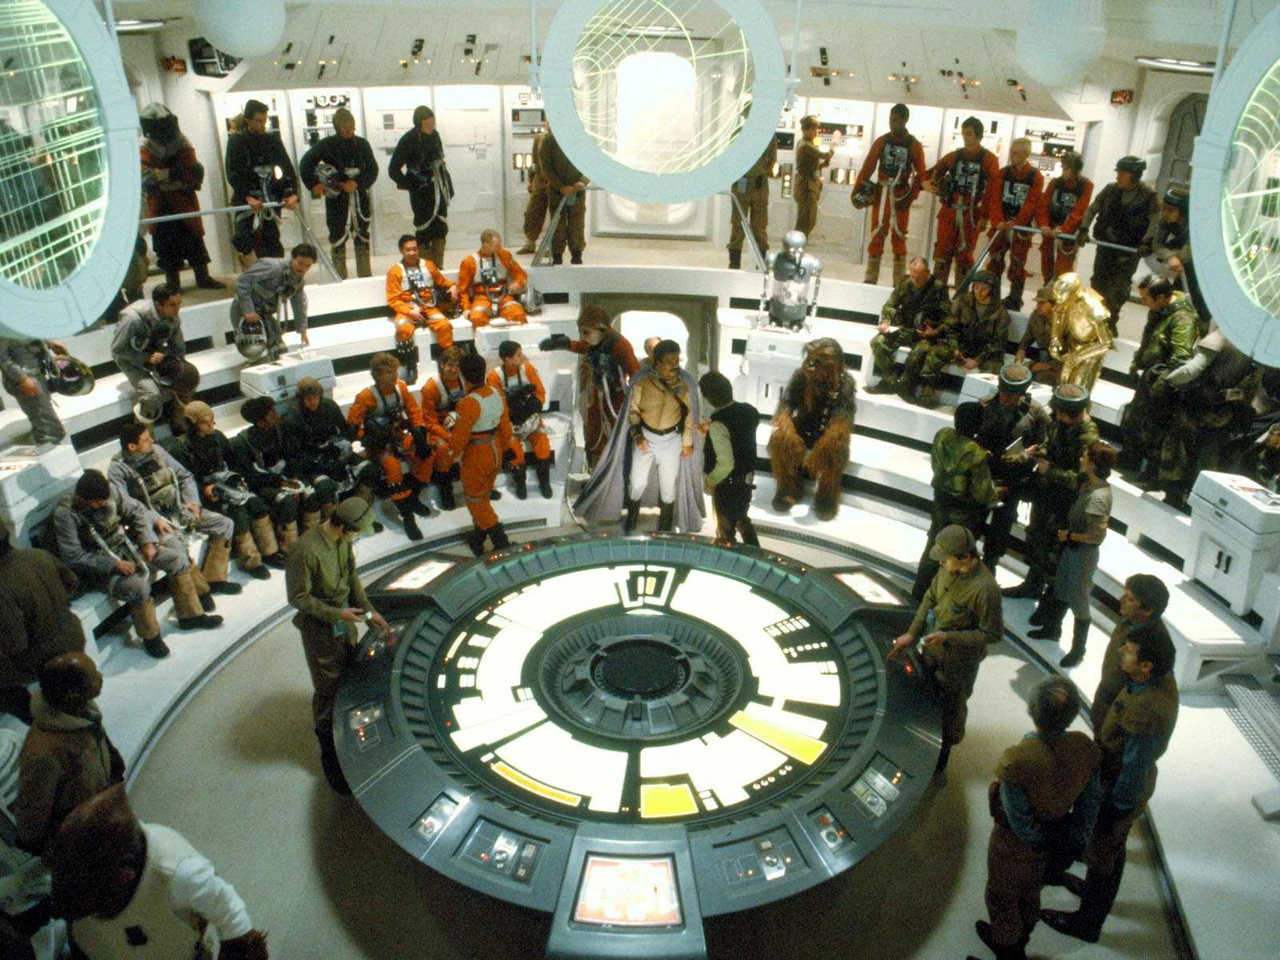
With the Alliance Fleet nearly assembled, wing leaders and other major players were briefed on plans for the upcoming battle by Mothma, Ackbar, and Madine. Ackbar would command the Alliance Fleet, providing cover for the starfighter attack. General Lando Calrissian would lead Gold Squadron and the rest of the starfighter groups in the attack against the Death Star's main reactor. General Han Solo, having recently been rescued from Jabba Desilijic Tiure on Tatooine,[3] would take over command of the ground assault team from the recently deceased Major Lokmarcha.[12] Organa, Chewbacca, and Commander Luke Skywalker along with his droids, R2-D2 and C-3PO, took the opportunity during the briefing to volunteer as the command crew to pilot the Tydirium and assist Solo and his strike team.[3]
After his arrival at the Death Star, and in spite of reports about the Rebel fleet massing near Sullust, the Emperor had his apprentice and servant, Darth Vader, send the Imperial fleet protecting his project to the far side of Endor, to stay there until called for. He also had Vader go to their main command ship, Vader's own Executor-class Star Dreadnought, Executor, to await further orders.[3]
The battle
The ground assault
- "An entire legion of my best troops await them."
- ―Emperor Palpatine
Departing for the Endor system, Solo's strike team consisted of the Pathfinders, among whom Tuck Tyrell and Sergeant Kes Dameron served.[22] As they entered Endor's orbit, they were faced by Executor and two Imperial-class Star Destroyers, and Solo requested that the deflector shield be deactivated and transmitted the clearance code for shield passage as ordered by a flight controller,[9] under the watchful eye of Admiral Firmus Piett. As the Rebels awaited for the codes to be worth the price they had paid, Vader sensed the presence of his son, Skywalker, aboard the shuttle and allowed them to land on the moon.[3]

The Tydirium avoids the Executor to land on Endor.
Agreeing to use comlinks only as a last resort to avoid alerting the Empire to their presence,[9] the Rebel landing party made their way through the forest, but they were soon spotted by four Imperial scout troopers, who made use of 74-Z speeder bikes. Although Solo and Chewbacca took out two of them, Skywalker and Organa were forced to pursue the remaining two and two other troopers with the speeder bikes. During the pursuit, however, Organa was separated from the group and, after taking out another two scouts, brought to Bright Tree Village by the Ewok Wicket W. Warrick, prompting Solo to split the strike team. While the Pathfinder squad made their way to the shield generator ahead of them, Solo, Skywalker, Chewbacca and the two droids searched for Organa before going to the rendezvous point.[3]
At the time, Vader returned to his master to report the arrival of the Rebel shuttle and Skywalker's presence in it. Although suspicious of Vader's impartiality regarding his son, the Emperor allowed Vader to go to the moon, claiming Skywalker would go to him, and that then, Vader was to bring Skywalker before him so that he could turn the young man to the dark side of the Force.[3]
During their search for the princess, the group fell into an Ewok trap and was captured to become a banquet in C-3PO's honor back at Bright Tree Village, as the primitive species believed the protocol droid to be a god. Organa, already a guest of the Ewoks, was unable to talk them out of this plan. However, skillful use of the Force allowed Skywalker to trick the Ewoks into believing C-3PO would unleash his "magic" over them if they did not release them at once. The Ewoks quickly complied.
Now considering the Rebel team their guests, the village in full listened to C-3PO, who used his translator skills to speak Ewokese and tell the tribe[3] of all that had led to their presence in their forest—his and R2-D2's service to the Galactic Republic, R2-D2's work during the Clone Wars, the Jedi Order's demise at the betrayal of the clone army, the birth of Palpatine's Empire and the end of freedom, the gradual birth of the Alliance and the message of a boy across the worlds that ignited a spark of rebellion, Organa's mission to Tatooine, the droids' purchase by Skywalker, their encounter with Obi-Wan Kenobi and meeting with Solo and Chewbacca, the destruction of Alderaan by the first Death Star, the princess' rescue and the Battle of Yavin, the Rebel defeat at Hoth, the Millennium Falcon's escape to Cloud City and Skywalker's fateful duel against Vader. Finally, C-3PO told the Ewoks that the Emperor had constructed another planet-killing "metal moon" above them.[9]

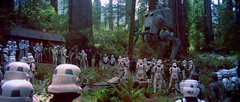
Part of the strike team plans their assault on the shield generator.
After finishing the story at night, the head of the Council of Elders, Chief Chirpa, discussed with his two best hunters, Teebo and Asha Fahn, with input from their shaman, Logray. Though Logray believed they should not interfere for the safety of the tribe, Chirpa decided to aid the rebels, and thanks to Teebo and Asha's support, he was able to overrule Logray and announce that they would help the Rebel group,[9] now members of their tribe.[3] With C-3PO translating, Solo and the Ewoks agreed to set out for the shield generator first thing in the morning,[9] but also to obtain fresh supplies and give their weapons back.[3]
At the same time, Skywalker chose to leave the village, as he had sensed during C-3PO's narration that Vader had landed on the moon. Aware that he could not hide from his father,[9] he revealed to Organa that he was her brother, and Vader was their father. Skywalker then left her to face the Sith Lord in combat alone.[3] Subsequently, he turned himself over to an Imperial patrol in the woods. They proceeded to transport their prisoner on an All Terrain Armored Transport to the shield generator base,[9] where he was greeted by Vader after his landing with the shuttle ST 321. After a short conversation in which Skywalker attempted to turn Vader to the light side, the Sith Lord had Skywalker sent to the Death Star above. Meanwhile, the Imperial Commander Igar went on to conduct a further search of the area for other rebels.[3]
Unbeknownst to both the Rebel team and the Empire, in the middle of the night, the Ewoks held a council of war in Bright Tree Village. Recalling the tribe members killed and the villages that were destroyed by the Empire, Chirpa convinced the village to take arms against the Empire, as did Asha, whereas Romba said it involved all Ewok tribes. In the end, Chirpa sent messengers through the forest to explain it all to the leaders of other tribes, and ask for their help.[9]

The Rebel strike team in Imperial custody
The morning after, when the Rebels awoke, they found the village nearly deserted, as those who were able to fight had left to prepare the battlefield under the leadership of Chirpa, Teebo and Asha. A few Ewoks—Romba, Wicket, and Paploo—remained there to help them find the easiest way to the rendezvous point, where Solo presented the Ewoks to the Pathfinders before going to a bit of high ground to get a first look at the military base and shield generator that he had promised to destroy,[9] just as ST 321 departed, transporting Skywalker and Vader to the Death Star. Upon finding how heavily guarded the main entrance was, the Ewoks showed Solo an alternate entrance, guarded only by a few Imperial soldiers.[3]
At the front of the entrance, Paploo stole a speeder bike to distract most of the guards. Led by Solo, members of the Rebel strike team entered the bunker with intentions of planting the explosive charges to destroy the shield generator. However, as planned by the Emperor, an entire legion of his best troops awaited them, and flushed the strike team out of the bunker and held them at gunpoint. With the generator still intact, the arriving Alliance Fleet above was forced to engage the Imperial forces for longer than expected. Soon, however, the Ewok forces entered the fray; as they provided a successful distraction for the Rebel strike team, they also inflicted many casualties among the Imperial ground forces.[3]
During the confrontation, the Imperial forces scattered to fight the Ewoks, leaving the strike team to take up positions on each side of the bunker. As the door code was changed, Solo and Organa attempted to have R2-D2 open it, but a stormtrooper shot the droid, temporarily disabling him and leaving Solo to manually try and open the doors.[9] Unbeknownst to them, Zabrak bounty hunter Jas Emari targeted Organa; however, she decided against it, even though the Imperial bounty on her head was very high.[8]
The space battle
- "Admiral! We have enemy ships in sector 47!"
"It's a trap!" - ―A Mon Calamari captain and Admiral Ackbar
Ready to lead the planned attack on the second Death Star, Ackbar, from the bridge of the MC80A star cruiser Home One, initiated the countdown to enter the Sanctuary Pipeline, and ordered all groups to assume attack coordinates. On his mark, the entire fleet jumped into hyperspace to arrive at the Endor system—except for Mothma's ship, which after a moment, she ordered to take her to a safe hiding place to await news of the impending battle.[9]
High above the moon, the fleet reverted to realspace with Calrissian leading the charge aboard the Millennium Falcon, alongside his co-pilot Nien Nunb,[3] and their gunners Lieutenant Blount and Cracken.[31] Using the comlink, Calrissian had all wing commanders of his strike force[11] report in: Red Leader (Wedge Antilles), Gray Leader (Horton Salm), and Green Leader (Arvel Crynyd).[32] Upon their leaders' orders, all starfighter squadrons locked their S-foils in attack position to initiate the attack on the Death Star. However, as Nunb realized there were no readings about the deflector shield, and their transmissions likely were being jammed, Calrissian broke off the attack as he correctly surmised the shield was still up,[3] and the leading Falcon and T-65B X-wing fighters peeled away just before hitting the shield, followed by the other starfighters.[9]

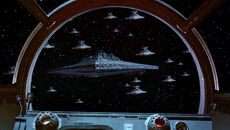
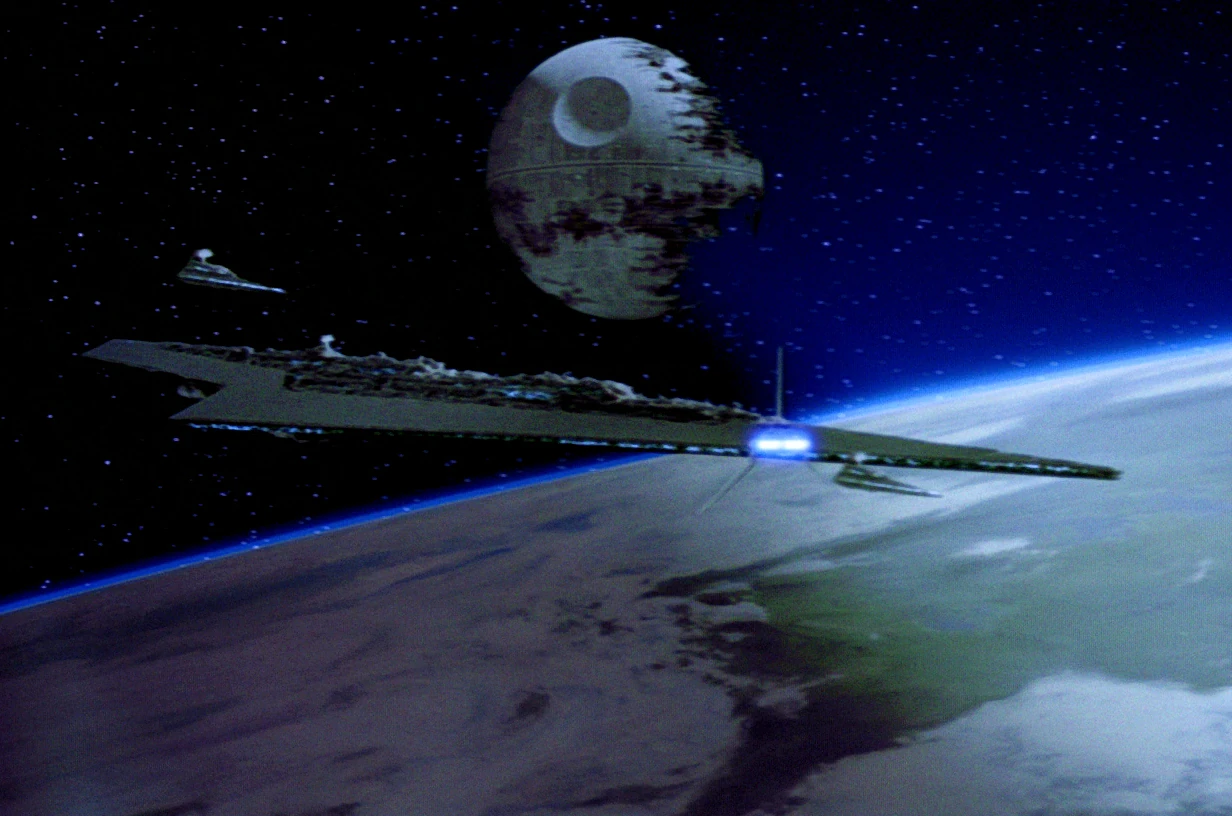
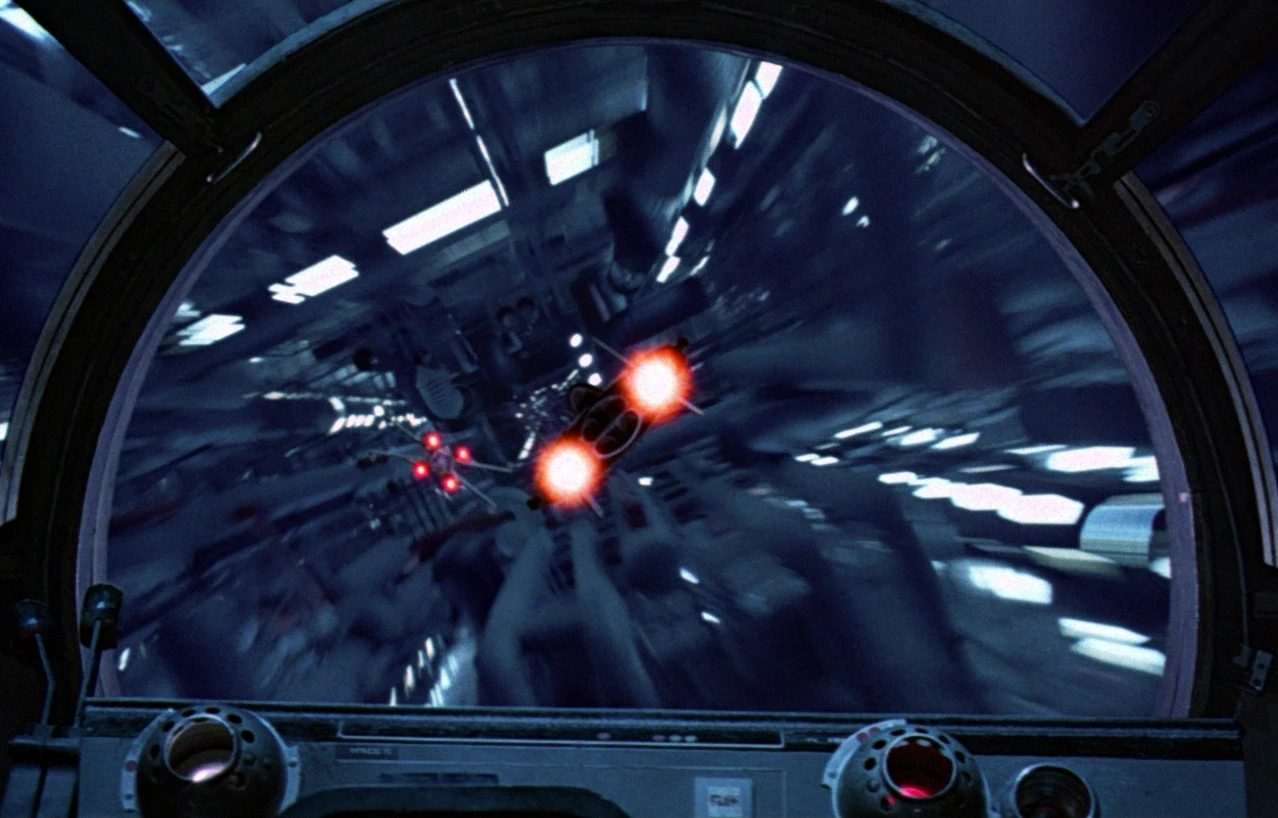
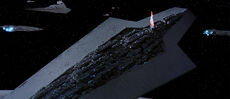
The Imperial Fleet, as seen from the cockpit of the Millennium Falcon
On the Home One, Ackbar ordered the capital ship to take evasive action, and that Green Squadron sticked close to holding sector MV-Seven, when one of his controllers informed him of the appearance of enemy ships in sector 47.[3] As calculated by the Emperor, the Imperial fleet on the other side of Endor, composed of more than eleven Star Destroyers[9] and possibly the largest flotilla of Star Destroyers ever assembled,[11] shot out from their hiding place behind the moon, each one unleashing a swarm of TIE fighters, TIE/IN interceptors and TIE/sa bombers against the Alliance Fleet.[3] At the same time, the starfighter wings on rearguard mission (like Blade Squadron) had orders to cancel their mission and were reassigned to attack the Imperial fleet.[11]
After Calrissian destroyed three TIE fighters with the help of his crew and an incredibly risky maneuver, the Falcon barely avoided the stray fire from three TIE fighters chasing Antilles' X-wing across their path. After Calrissian's heads-up, Antilles ordered Red Two and Red Three (Sila Kott) to pull in, when another two TIEs came in, and Antilles ordered his accompanying fighters to cut to the left, while he took out the TIE leader. At the same time, the Falcon destroyed two other TIEs, but Antilles noticed the remaining three of the group headed for EF76 Nebulon-B escort frigate Redemption. Antilles then knocked out the leader, but not before two X-wings were shot down and the Falcon took a brutal hit to its forward deflectors, and still more TIE fighters bombarded the frigate until the hull started to crack.[9]
It was then that Calrissian ordered all fighter squadrons to accelerate to attack speed and follow him to the encounter of the Executor, in order to draw Imperial fire off their cruisers.[3] The remainder of the Alliance Starfighter Corps and a horde of TIE fighters that rushed to meet their attack collided in a furious cloud of ships, laser bolts, and proton torpedoes, flying in, out, around and sometimes into the Star Destroyers, and mostly producing minor victories for the rebellion. However, the Destroyers themselves would not use their countless cannons to pick off the Rebel fighters,[9] with rare exceptions.[11] The commander of the Executor had the ship maneuvered slightly away from the battle to have a clear shot at the Alliance cruisers, including Ackbar's command ship.[9] However, on the Emperor's orders, Executor was to keep the Alliance Fleet from escaping only,[3] although neither its commander or Piett knew why, and were eager to join the fight.[9]
Aboard the Vigilance, Admiral Rae Sloane ordered Sapphire Leader Maus Monare to reposition their TIE fighters in a perimeter defense and had his controllers send targeting solutions to the turbolaser crews. Assuming a defensive posture, she complied with Piett's fleet-wide orders to hold the line and keep the Alliance fleet from escaping, aware that it was part of their Emperor's plan. Above them, interdictor vessels awaited in position to block the Rebels' retreat.[15]
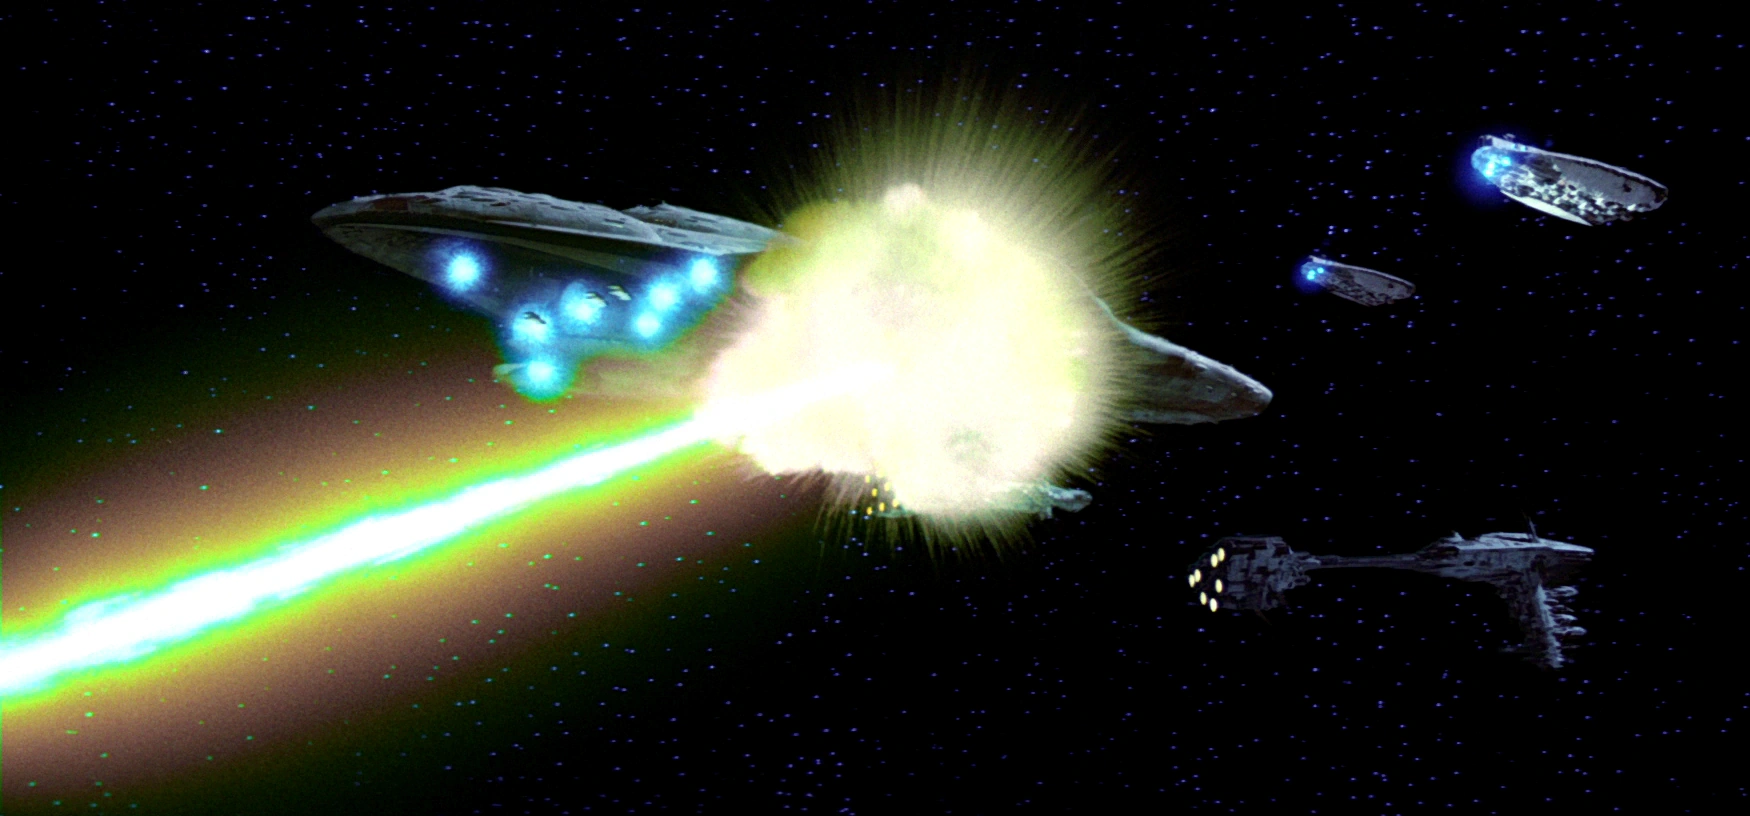

The Liberty destroyed by the Death Star's superlaser
On Blade Leader Adon Fox's orders, his A/SF-01 B-wing squadron and RZ-1 A-wing interceptor escorts headed for Vader's former flagship, Devastator, only for the Imperial cruiser to deploy two dozen TIE Interceptors, commanded by TIE commander Gradd. In their audacity, even as several B-wings were shot down, the squadron managed to engage the TIEs close to Admiral Jhared Montferrat's Devastator.[11] Moments later, both the Rebel and the Imperial fleets understood the extent of the Emperor's design—Palpatine, in the presence of Vader and Skywalker, ordered the Death Star's commander, Jerjerrod, to fire when ready.[3] Despite his reluctance, Jerjerrod gave the order, and both Rebel and Imperial commanders watched dumbfounded as the thought-to-be-incomplete Death Star charged up and fired its newly upgraded superlaser. The battle station targeted the Rebel MC80 Star Cruiser Liberty,[12] striking the huge cruiser amidships and vaporizing it completely.[9] The Nautilian fell victim to the superweapon shortly after.[17]
Taken aback by the attack, and with ships unable to repel the Death Star's superlaser, Ackbar issued the order to prepare their retreat. However, Calrissian, well aware that this attack was the Rebellion's only chance to destroy the space station before it was completed and nigh invincible, convinced the Mon Calamari to continue the fight in order to give the ground team more time to disable the shield.[3] Losing yet another capital ship to the inhumanly powerful superlaser, Calrissian recommended that Ackbar have the remaining Rebel cruisers move right up against the Imperial fleet and engage them at point-blank range, hoping the Death Star wouldn't dare shoot into its own fleet and if it did then they might at least take a few Destroyers with them. Ackbar agreed, and soon the opposing capital ships were exchanging laser fire with barely centimeters between them.[9] Despite the disadvantage, the Alliance forces achieved a few victories—including the destruction of an Imperial-class Destroyer's shield generator dome, although it came at the cost of Red Five (Grizz Frix)'s life.[26][3] Gray Squadron's Gray Three (Ekelarc Yong), whose craft was crippled by TIE fighters, was able to aim his craft toward the bridge of a nearby Imperial Star Destroyer.[26]
Green Squadron attacked the Executor on Crynyd's orders; against eight TIE fighters, they lost Green Six (Kokely) as they took down two enemy ships.[22] Corona Squadron's leader, the Contessa, as well as Corona Two (Yendor), Corona Four (Thane Kyrell), and Corona Five (Kendy Idele), attacked the Star Destroyer Subjugator. Kyrell and Idele, both of whom had formerly served the Empire, used their knowledge of the Imperial vessel's weak points to destroy one of the Star Destroyer's engines, before engaging other TIE fighters.[12]
Under the watchful eye of Emarr Ottkreg, Sloane suspected something was amiss when her executive officer Nymos Lyle pointed out that the Rebel fleet was not retreating despite the Death Star's attacks. She asked Lieutenant Habbel to keep her appraised of the Endor garrison. Concurrently, the Vigilance's Sapphire Squadron skirmished with Rebel fighters and went to intercept a trio of Rebel CR90 corvettes that had survived the passage between the Rebel and Imperial lines. As their laser cannon fired continual barrages at the same point of the Vigilance's protective shields, Sapphire Squadron complied with its orders to engage the targets and fire at will, destroying the corvettes with help of the Vigilance's turbolasers.[15] Meanwhile, Commander Ciena Ree took her TIE interceptor up over the main bridge area of the Annihilator, and cleared the top of the Star Destroyer.[12]
Demise of the Sith
- "Your overconfidence is your weakness."
"Your faith in your friends is yours!" - ―Luke Skywalker and Darth Sidious
Luke Skywalker duels Darth Vader before the Emperor aboard Death Star II.
Escorted by Vader, Skywalker was brought to the Emperor's throne room in an attempt to turn him to the dark side, shortly before the Alliance Fleet arrived. After telekinetically releasing Skywalker from his binders, the Emperor dismissed his protectors, the Royal Guard, and revealed the extent of his plan to destroy the Alliance.[3] Aware of Skywalker's anger and hate,[9] the Sith Master tempted him to give in to his emotions and strike him down with his lightsaber.[3]
In spite of his initial refusal to succumb to the Emperor's temptations, when faced with the imminent destruction of the Rebel fleet and the loss of his friends, Skywalker allowed himself to be coerced into a confrontation. Within the darkened confines of the Emperor's throne room, Luke engaged his father in a fierce lightsaber duel. Although Luke first fought Vader in anger, the Emperor's taunts made him realize that he was following the path Yoda had warned him against. Instead, he once again tried to reach his father, sensing conflict in him about his allegiance. However, Vader dismissed him and threatened to turn Luke's sister, Organa, to the dark side in his stead, something that enraged Skywalker, allowing him to draw upon his anger to overwhelm the Dark Lord. With one final strike, Luke severed Vader's cybernetic right hand, taking the Sith's lightsaber with it as it plummeted into the depths below. Pleased with Skywalker's display of power, Sidious ordered Luke to kill Vader before taking his father's place at the Emperor's side. Seeing at once what he would become if he failed to pull himself back, Skywalker tossed his lightsaber aside and declared himself a Jedi, as his father had been before him.[3]

Sidious falls to his death down the Death Star's reactor shaft.
Seeing his refusal to give in to his demands to kill Vader, the Dark Lord of the Sith decided to torture and kill the Jedi Knight using Force lightning.[3] Hearing his son's pleas for help, Vader returned to the light side and was once again Anakin Skywalker, grabbing the rage entranced Emperor with what was left of his arms and lifting his master up high into the air, lumbering toward the reactor shaft. Angered by his apprentice's sudden betrayal, Sidious turned a yet more powerful lightning attack upon the returned Anakin, wishing out of hatred nothing more than to cause as much pain as possible to him, even with the option to use his own powers and save himself.[9] At the cost of the Emperor heavily damaging his life-supporting armor, Anakin hurled his master down into the reactor, ending with the Emperor plummeting down the shaft, screaming violently as lightning still blasted from his fingertips, expelling a rush of dark side energy upon finally hitting the reactor far below. By killing the Emperor, and ending his reign,[3] the redeemed Anakin fulfilled his destiny by restoring balance to the Force.[9]
Final actions
- "The shield is down! Commence attack on the Death Star's main reactor."
"We're on our way. Red Group, Gold Group, all fighters follow me!" - ―Admiral Ackbar and General Calrissian

The destruction of the Devastator
In the space battle, following the death of Blade One, Blade Squadron's leader was targeted by Gradd and proceeded to maneuver evasively just as Gradd fired his laser cannons; taking heavy damage, Fox executed a roll, taking Gradd by surprise as Fox killed him. Unable to continue, Fox gave the order to his group that if they made it past the fighter screen of the Devastator, they were to execute the primary mission. As Blade Two (Braylen Stramm) became acting commander, and Blade Four (Fanty) peeled out of formation, Blade Three (Gina Moonsong) went on to unleash proton torpedoes on the weak points of the Devastator's navigational shielding, destroying its hyperdrive and primary generators, and causing the ship to undergo systematic demolition.[11]
Like the Devastator, the Pride of Tarlandia had been heavily damaged and was not responding to hails, while both the Vehement and the Tector-class Star Destroyer Harbinger had been destroyed. As for the Vigilance, although three bow deflector generators and one dorsal unit had been damaged, the auxiliary units had kicked in, and the shields had held, while Sapphire Squadron had lost six pilots. Sloane then had her crew prepare navigational and firing solutions for two different scenarios—either a mop-up operation to disable or destroy the remaining Rebel ships, or pursuit of the nearest concentration of enemy ships should the Rebel fleet break off the attack and flee.[15]
On the moon below, while the Ewok forces continued to fight the Imperials, Chewbacca, Widdle Warrick and Wunka[9] hijacked an All Terrain Scout Transport, after taking out its drivers, Lieutenant Blanaid and Major Newland. The trio then used the hijacked walker to make their way to the bunker, taking out another AT-ST and firing on other Imperial forces en route. After Organa was injured by a stormtrooper, they arrived and Solo used the vehicle's video comlink to impersonate an Imperial and trick the bunker personnel into thinking the Rebels had been routed and were fleeing into the woods. By claiming they needed reinforcements to continue the pursuit, Solo got the base commander to open the door and send three squads, who were promptly captured by the Rebels. Solo and his men then placed the explosives and destroyed the shield generator.[3]
High above the exploding generator, Ackbar announced the shield's deactivation and ordered the start of the attack on the Death Star's main reactor.[3] As Stramm informed Ackbar that Calrissian's path was clear after the Devastator's destruction, he had all surviving units of his group pull into formation (himself and Moonsong), and the squadron went onto help the other fighter wings in their attack against the battle station.[11] Another B-wing pilot, Blue Five (Ten Numb), helped in the assault.[26] On Crynyd's orders, his squadron's members—Green Four (Shara Bey), Seven, and Three—protected the Millennium Falcon on its attack run to enter the Death Star.[22] Complying with its original mission, Corona Squadron also protected the Falcon and its accompanying squadrons as it made its way to the battle station.[12]

Wedge Antilles and an A-wing pilot fly ahead of the Millennium Falcon into the second Death Star.
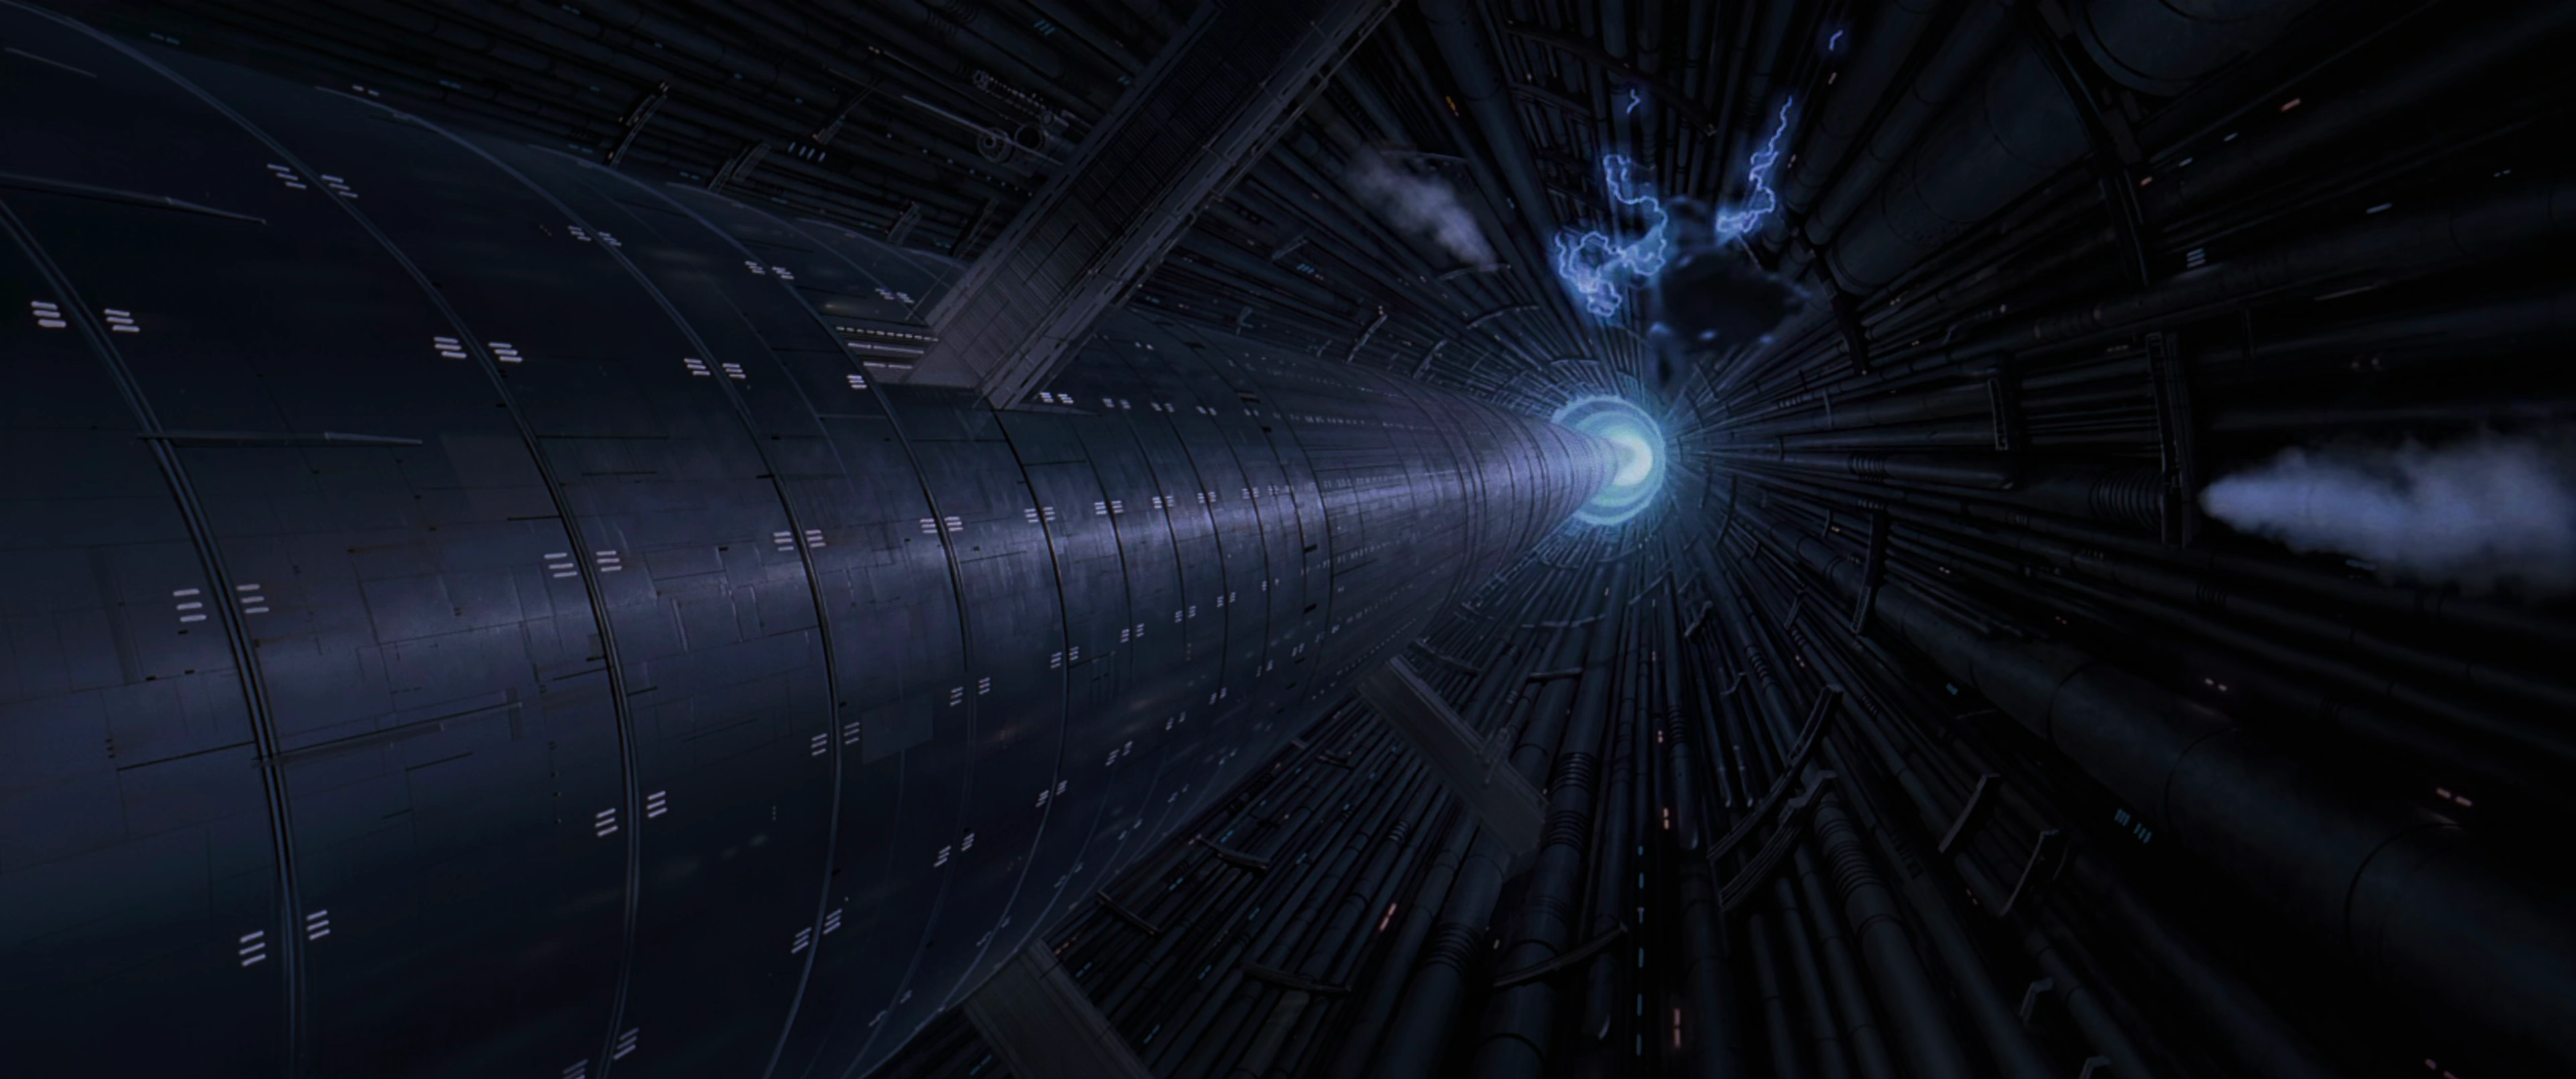
Seizing the opportunity, Calrissian called for the remaining fighters from Red Group and Gold Squadron to follow him into the Death Star's superstructure to destroy its reactor core. Leading the charge was Red Leader Wedge Antilles,[3] followed by the Millennium Falcon and two A-wings,[3] one of which flown by Gold Four (Jake Farrell).[21] The sole Y-wing, flown by Gold Nine (Norra Wexley),[8] and another X-wing, flown by Keir Santage, were behind them. The group were pursued by several TIE fighters as they flew through the station's unfinished ventilation shafts and an Imperial pilot shot down Keir Santage's X-wing. Calrissian ordered the rest of the group to split off and head to the surface. As they drew away some of the pursuing TIE fighters, he and Antilles made their way to the core.[3] Simultaneously, Sloane forbade Flight Leader Monare from entering the Death Star and recalled all Sapphire Squadron fighters.[15]
The assault caused the entire Death Star to jolt wildly, prompting Skywalker to recover his lightsaber, drag his father back to the elevator, and use his memory to find the floor of the docking bay where Vader's shuttle, ST-321, had deposited him hours earlier. After reaching the right floor, Skywalker discovered the Death Star to be in a state of chaos, as troopers, officers, underlings, and construction workers scrambled in every direction. Some raced to repair the damage, some raced to defend the station, and some were expecting the call to evacuate. Luke managed to bring Anakin to the shuttle unopposed.[9] The redeemed Anakin would die soon afterwards, but not before confirming his son's assertion that there was still good in him.[3]
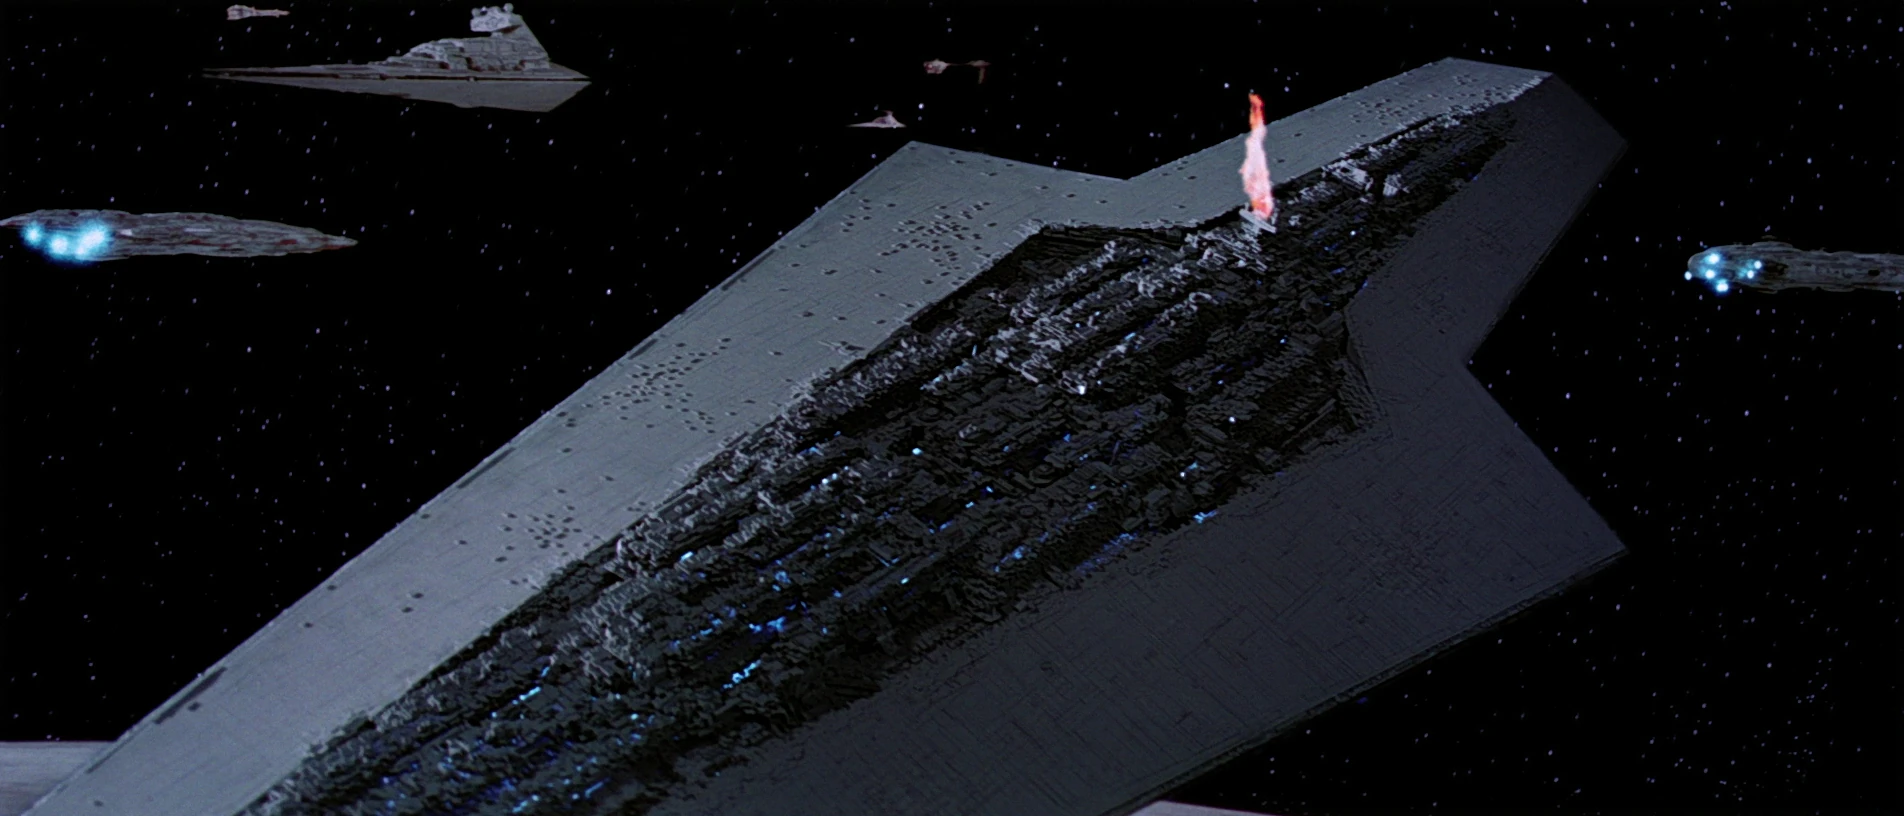
Fall of the Executor
To buy Calrissian's group more time, Ackbar ordered his forces to concentrate all fire on the Executor,[3] and the Rebel cruisers closed on the ship, hammering it with fire from every direction.[15] The Dreadnought soon lost its bridge deflector shields; Piett then ordered the ship to intensify its forward batteries. Although the Executor's gunners destroyed another Rebel X-wing, they also damaged Crynyd's fighter, sending it into a wild spin.[3] Ree tried to stop him from crashing, but was unable to get it in her sights because of its speed and distance from her,[12] and the Rebel pilot's damaged A-wing starfighter plummeted into the Executor's bridge, killing Piett and the bridge crew.[3] The Vigilance moved to flank position on the Executor, as Sloane was aware it would become the fulcrum of not only the battle but also the balance of power in the entire Outer Rim, which meant the flagship had to be defended with every Imperial asset available.[15]
However, it was too late, as the loss of its bridge caused the Executor to lose its main power[12] and control, and to smash into the Death Star.[3] Then, as she was informed that the Death Star's chain of command had been fragmented without the Emperor's input, the now ranking Sloane told her Communications Officer, Ives, to order the surviving captains to recall their TIEs and form up on the Vigilance.[15] Ree complied with the order, but also protected her fellow comrades on their damaged TIEs.[12] In response, Admiral Garrick Versio had commanded a report from Inferno Squad, who had already been deployed to the moon. The group's commander confirmed that the shield generator had been destroyed beyond repair. The admiral then ordered them to return to the Corvus and finish off the remaining rebels.[14]
Inside the Death Star, Calrissian and Antilles soon reached the main reactor. Antilles fired proton torpedoes at the station's power regulator on the side tower, destroying it,[3] prompting Ackbar to order the Alliance Fleet to move away from the Death Star.[9] As the Alliance Fleet broke off their assault on the Imperial line and accelerated away from the Death Star, Sloane killed Ottkreg so that he would not interfere with what was to happen next.[15] Calrissian followed Antilles by launching concussion missiles at the reactor core, causing a chain reaction that would destroy the entire battle station.[3] Receiving orders from Home One, the remainder of Green Squadron and Yellow Squadron were to intercept Imperial launches from the collapsing battle station. Green Four (Shara Bey) attempted to shoot down shuttle ST 321, piloted by Skywalker, until he identified himself. Bey broke off her attack and proceeded to cover him from several TIEs.[22]

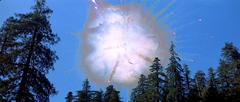
The Death Star II, destroyed over Endor
At the same time, both the Imperial and Rebel fleets moved away from the Death Star,[12] the Millennium Falcon outran the explosion enveloping the battle station and narrowly escaped as the unfinished superweapon finally exploded,[3] lighting Endor's early evening sky.[9] As per her second programmed scenario, Sloane had coordinates sent to all Imperial ships and ordered them to jump immediately to the Annaj system.[15] However, Garrick had stayed behind with his Star Destroyer, the Eviscerator, to evacuate his special forces on the ground.[14]
Escape from Endor
- "Inferno Squad? We weren't expecting you!"
"That's the point, Sergeant." - ―An Imperial sergeant and Del Meeko
Upon seeing the Death Star's destruction, Commander Iden Versio was ordered to evacuate Inferno Squad back to the Corvus by Admiral Garrick Versio. At this point, the rebel fleet had begun sending U-wings to deploy reinforce rebel ground forces, and the remaining Imperial forces on Endor were being overrun. Iden and others quickly helped a squad of stormtroopers under attack by a crashed Lambda-class shuttle and then fought their way to Del Meeko's position, where he and a squad of stormtroopers waited by a downed TIE fighter. Together, the group moved to take back Platform 4 from the rebels, and after securing the base of the platform, Inferno Squad stormed the top and evacuated the moon in TIE fighters as more reinforcements arrived on U-wings.[14]
Once they had reached the wreckage of the second Death Star, the squad discovered that the Corvus was damaged in the explosion and had to undergo repairs to get the power back and the engine working. Three MC80 Star Cruisers cornered the Corvus while a fourth engaged the nearby Eviscerator. The cruisers began deploying X-wings and Y-wings in order to destroy the corvette but the fighters were destroyed by Inferno. Once the Corvus's repairs were complete, Meeko retreated back to the Corvus while Iden was summoned to the Eviscerator and the two vessels departed for Vardos.[14]
Aftermath
- "This is Leia Organa, last princess of Alderaan, former member of the Galactic Senate, and a leader in the Alliance to Restore the Republic. I have a message for the galaxy. Emperor Palpatine—the greatest tyrant civilization has ever known, responsible for death and suffering beyond measure—is dead. He and a second Death Star battle station were destroyed by Alliance forces earlier today. This does not mark the end of the Empire. The fight will continue. But you must take this opportunity. Join us in the foundation of a new Republic to be shaped by the will of the governed. Claim your freedom and your future. Help is on the way."
- ―Leia Organa, to the Anoat sector in the wake of the Battle of Endor
In the immediate aftermath of the battle, Organa revealed to Solo that Skywalker was her brother, and they and the Pathfinders organized a rendezvous at Bright Tree Village.[3] Above them, Rebel pilots docked their starfighters in the fleet's capital ships, counted the casualties suffered, and sent their wounded to the medical frigates.[22] To prevent the battle station's meteoric debris from devastating Endor, the Alliance Fleet deployed an array of shields and tractor beams.[33] Although Madine was worried of an Imperial counterattack, personnel was shuttled down to the moon,[22] where both the Alliance and the Ewok tribes celebrated their victory through the night,[3] with many troopers drinking copious amounts of jet juice.[12] In solitude, Skywalker cremated his father's armor in a funeral pyre, but then joined the celebration with his sister and friends,[3] and reported to the Alliance that both the Emperor and Vader had indeed died during the battle.[8]
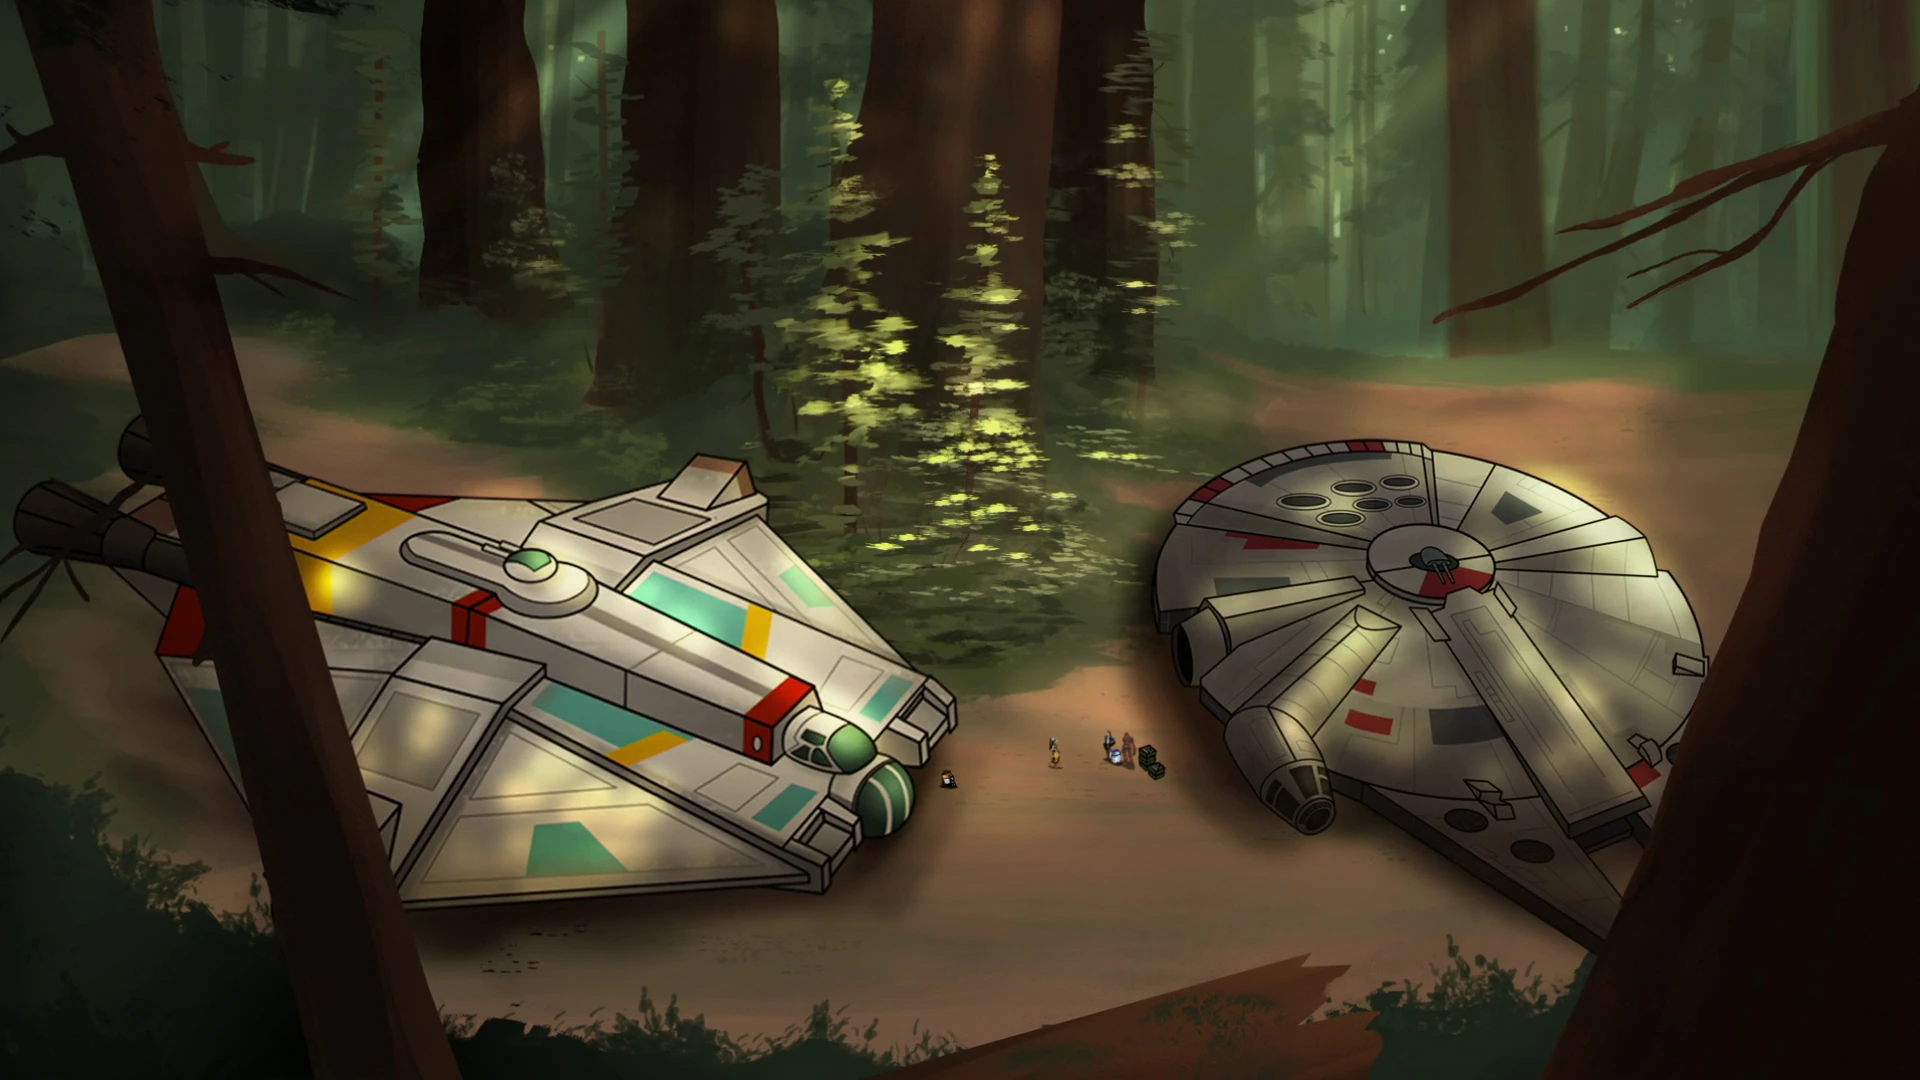
The meeting between Solo and Syndulla
Following the battle, the Ewoks attempted to roast several captured stormtroopers. They were stopped by Organa and Solo, who convinced them to spare the lives of the Imperial prisoners in return for receiving ration sticks through the auspices of General Hera Syndulla. Syndulla agreed to supply the ration sticks in return for Solo stating that her VCX-100 light freighter Ghost was superior to the Millennium Falcon. In private, Organa confided to Solo that the Falcon was a better ship than the Ghost.[34]
During the Alliance celebrations on Endor,[8] ISB[35] Loyalty Officer Sinjir Rath Velus, who had been stationed at the Endor base, took the opportunity to reconsider his life. Velus abandoned his post, killed a Rebel Pathfinder and stole the soldier's clothing and identity.[8] At some point, during a short and to-the-point ceremony held on a flight deck, an admiral spoke of duty, sacrifice and heroism, before proceeding to award a Medal of Bravery to all B-wing pilots who had survived the battle—after which all the ceremony participants headed back to their duty stations; all leave was as of then cancelled.[36]
Coruscant celebrates the Emperor's demise.
The festivities would extend to other parts of the galaxy,[3] as the Alliance sent word of the battle's outcome and the Emperor's death, and sent out mass communications claiming to be the new power in the galaxy.[12] That same day, Organa sent out a holographic transmission to places such as the Anoat sector, relaying the news of the Empire's defeat and urging citizens to take up arms against the remaining Imperial forces.[37] Anti-Imperial protests erupted on several worlds such as Bespin, Tatooine, Naboo and even the Imperial capital of Coruscant.[3] Imperial authorities reacted to the protests, sparking riots such as one in Coruscant's Monument Plaza, during which Palpatine's statue was toppled by Coruscanti citizens.[8]


Thanks to the victory on Endor, the Alliance reorganized into the New Republic.
The next morning, Solo led an assault to take out a group of Imperial holdouts on the far side of the Endor moon. After capturing the base, they found communication records and plans regarding the Imperial post-Endor plans.[22] Concurrently, the Imperial Starfleet regrouped to plan the next assault and name the next emperor in the wake of Palpatine's demise. Coruscant remained in turmoil, and Grand Vizier Mas Amedda tried to keep the Empire together even as other forces threatened to tear it apart: namely, the chain of command had been broken.[12]
Thanks to their victory on Endor, the Alliance reorganized itself into the New Republic and continued to wage war against the Empire, fighting to reclaim the Core Worlds.[12] The Empire, meanwhile, splintered into various factions, some of which the New Republic believed had retreated to the Outer Rim to prepare a major offensive against their enemies. Despite a counterattack posthumously issued by the Emperor,[38] and an emergency summit on Akiva,[8] the Empire's ultimate defeat came one year and four days after the Battle of Endor, following the Battle of Jakku,[12] after which the shattered Empire signed the Galactic Concordance and put an end to the Galactic Civil War.[39]
In regards to the Death Star II, its remains fell on the ocean moon of Kef Bir, where they were still laying as of 35 ABY.[40]
Behind the scenes
- "There was a feeling I had that I would like the (Jedi lightsaber duel between Luke and Vader) to be bigger than the fight in Empire. And then George said that it doesn't have to be bigger, because basically it can't be. George is very blunt. He said, 'It's just a couple of guys banging sticks against each other. Don't worry about that. It is bigger because of what is going on in their heads. That is what makes it bigger.'"
- ―Richard Marquand on George Lucas's changing his mind on the duel aboard the Death Star II
The Battle of Endor acted as the climax for the 1983 film Star Wars: Episode VI Return of the Jedi, the final installment of the Star Wars original trilogy.[3]
The battle on Endor
Originally intended to have the Wookiees participating in the battle, George Lucas shot down the idea, citing that he specifically wanted a primitive race with no prior ties to technology to be the ultimate victor of the battle, and Chewbacca had already used technology in the previous movies.[41] Gary Kurtz, who produced both Star Wars: Episode IV A New Hope and Star Wars: Episode V The Empire Strikes Back, disagreed with the presence of another Death Star in the battle, feeling that it was like a rehash of A New Hope but with better visual effects.[42]
Because of the above-mentioned requirements, and partially to make the film more marketable for kids, Lucas decided to create the Ewok race and have them effectively win the ground portion of the battle, a decision that was met with much controversy both to the actors and to the fans. Lucas was inspired to have a primitive race win against a fully advanced army from the actions of the Vietcong, and also used the battle as a way of expressing his commentary on the United States of America's involvement during the Vietnam War.[43] The inspiration, when it came to light, led to further controversy, as it carried the implication that the Galactic Empire was supposed to represent the American forces.
During pre-production of the film, Lucas argued constantly with screenwriter Lawrence Kasdan over story beats and set pieces, discussing whether it would be better to scrap Endor's presence in favor of setting the climactic battle on Had Abbadon, the Imperial homeworld.[41]
A scene was deleted which expanded a bit on the actions inside the bunker during the second attempt—specifically, where Han Solo and his unit encountered a stormtrooper squad inside the control room.[44]
Duel aboard the Death Star II
In the rough draft of Return of the Jedi, the duel aboard the second Death Star was completely different. Rather than taking place in the Emperor's throne room aboard the Death Star, the duel would have taken place in the Emperor's throne room surrounded by lava deep below the Imperial Palace on Had Abbadon, as originally conceptualized by Ralph McQuarrie. A major idea which went unused in the finished version involved the physical return of Obi-Wan Kenobi and Yoda from the Netherworld of the Force back to the living realm to aid Luke in defeating the Emperor. Darth Vader ultimately sacrificed himself to save Luke like in the finished film though a bit differently, flying towards the Emperor and knocking both of them into the lava.[45] The duel aboard the Death Star II was intended too to be bigger than the duel on Cloud City from The Empire Strikes Back, but Lucas changed his mind during shooting.[41]
Special Edition changes
In 2004, the re-releases of the original trilogy made some minor alterations to certain scenes including those of the Battle of Endor. While most were trivial changes in color, sound effects, or music,[46] very brief scenes of celebrations were added to the end, and Anakin Skywalker's Force spirit was changed from Sebastian Shaw's face to that of Hayden Christensen,[47] who portrayed Anakin in the prequel trilogy and was filming the final prequel film Star Wars: Episode III Revenge of the Sith, released in 2005.[48] Lucasfilm Ltd. has stated that the 2004 DVD versions are the canonical depiction of the events in the trilogy, including the Battle of Endor.[49]
The Freemaker Adventures
The Battle of Endor serves as the climax of "Return of the Return of the Jedi," the final episode of the second season of Bill Motz and Bob Roth's non-canon animated series LEGO Star Wars: The Freemaker Adventures, which premiered on Disney XD on August 16, 2017. In that episode, the antagonistic M-OC realizes that there is a flaw in the second Death Star. Using a giant Kyber crystal, M-OC forms a shield around the Death Star's reactor core. M-OC is ultimately defeated and destroyed by Rowan Freemaker, whose actions allow the Rebel Alliance to destroy the reactor core without any obstacles. The Freemakers, the Mon Calamari starship builder Quarrie, and Lieutenant Valeria later join the other rebels at the victory celebrations in Bright Tree Village.[50]
Appearances
Non-canon appearances
- Star Wars Epic Yarns: Return of the Jedi
- Star Wars (LINE Webtoon)
 LEGO Star Wars: The Freemaker Adventures — "Return of the Return of the Jedi"
- LEGO Star Wars: Droid Tales — "Exit from Endor"
- LEGO Star Wars: Droid Tales — "Gambit on Geonosis"
- LEGO Star Wars: The Resistance Rises — "Hunting for Han" (Mentioned only)
- LEGO Star Wars: The Force Awakens
- LEGO Star Wars: The Skywalker Saga
Sources
Notes and references
Template:Canon Galactic Civil War