m (Cleanup and formatting fixes) |
Secutor IV (talk | contribs) m (3.1 Corrected spelling/grammar) |
||
| Line 167: | Line 167: | ||
As Cody, Wooley and the remainder of Ghost Company prepared to attack the droids, Kenobi, Waxer, Boil, and Numa then made their way through the tunnels to the Gutkurr's cages. Kenobi waited while Cody and his men attacked the droids, leaving only a few guards and the gun crews left. As TX-20's battle droids and tanks took on the clones, Kenobi, Waxer and Boil freed the prisoners. After the prisoners were safe, Kenobi, Waxer and Boil then took control of one of the cannons, using it to destroy the other four cannons. TX-20 was informed of Kenobi's freeing of the prisoners and turned his tank around. He destroyed the cannon that Kenobi was using and then held him and Numa at gunpoint, believing to be victorious. However, the tactical droid's threats towards Numa rallied the Twi'leks, who tossed TX-20 out of his tank and tore him to pieces.<ref name="Innocents of Ryloth" /> |
As Cody, Wooley and the remainder of Ghost Company prepared to attack the droids, Kenobi, Waxer, Boil, and Numa then made their way through the tunnels to the Gutkurr's cages. Kenobi waited while Cody and his men attacked the droids, leaving only a few guards and the gun crews left. As TX-20's battle droids and tanks took on the clones, Kenobi, Waxer and Boil freed the prisoners. After the prisoners were safe, Kenobi, Waxer and Boil then took control of one of the cannons, using it to destroy the other four cannons. TX-20 was informed of Kenobi's freeing of the prisoners and turned his tank around. He destroyed the cannon that Kenobi was using and then held him and Numa at gunpoint, believing to be victorious. However, the tactical droid's threats towards Numa rallied the Twi'leks, who tossed TX-20 out of his tank and tore him to pieces.<ref name="Innocents of Ryloth" /> |
||
| − | General Windu and his transports were able to land after the cannons were destroyed. As Kenobi and Windu regrouped, they knew that they had to take the capital and free the rest of Ryloth.<ref name="Innocents of Ryloth" /> Kenobi and his forces continued to liberate other villages from the droids, eventually securing the [[Jixuan desert]] and Ryloth's southern |
+ | General Windu and his transports were able to land after the cannons were destroyed. As Kenobi and Windu regrouped, they knew that they had to take the capital and free the rest of Ryloth.<ref name="Innocents of Ryloth" /> Kenobi and his forces continued to liberate other villages from the droids, eventually securing the [[Jixuan desert]] and Ryloth's southern hemisphere.<ref name="Liberty on Ryloth" /> |
===Battle of Lessu=== |
===Battle of Lessu=== |
||
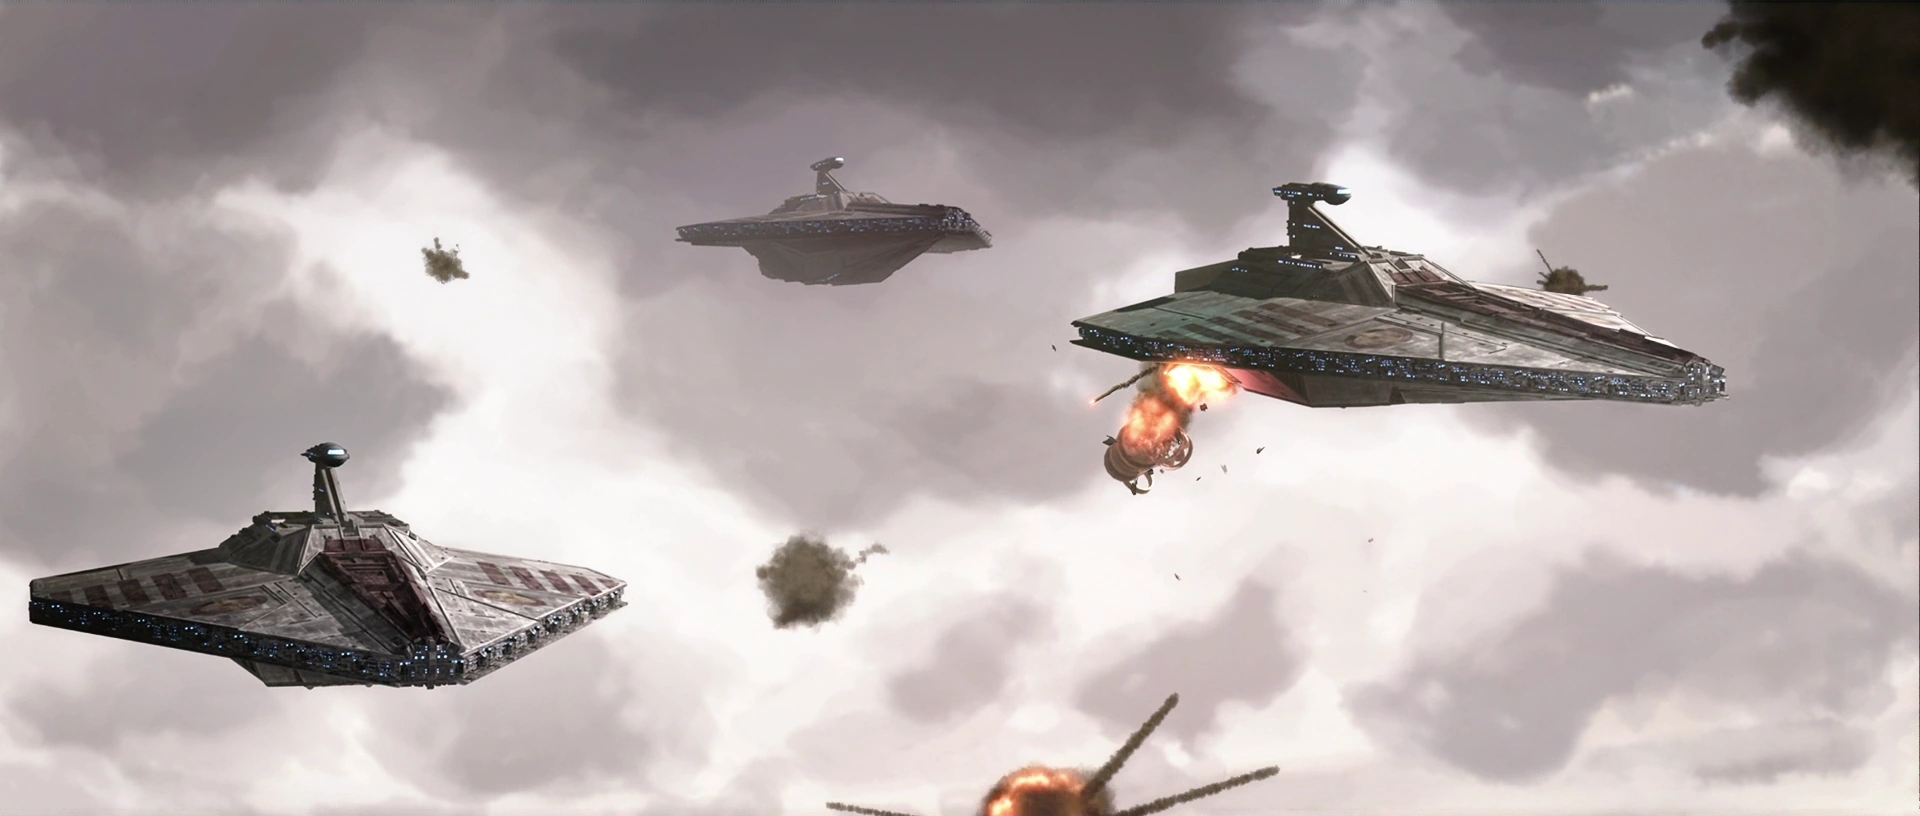
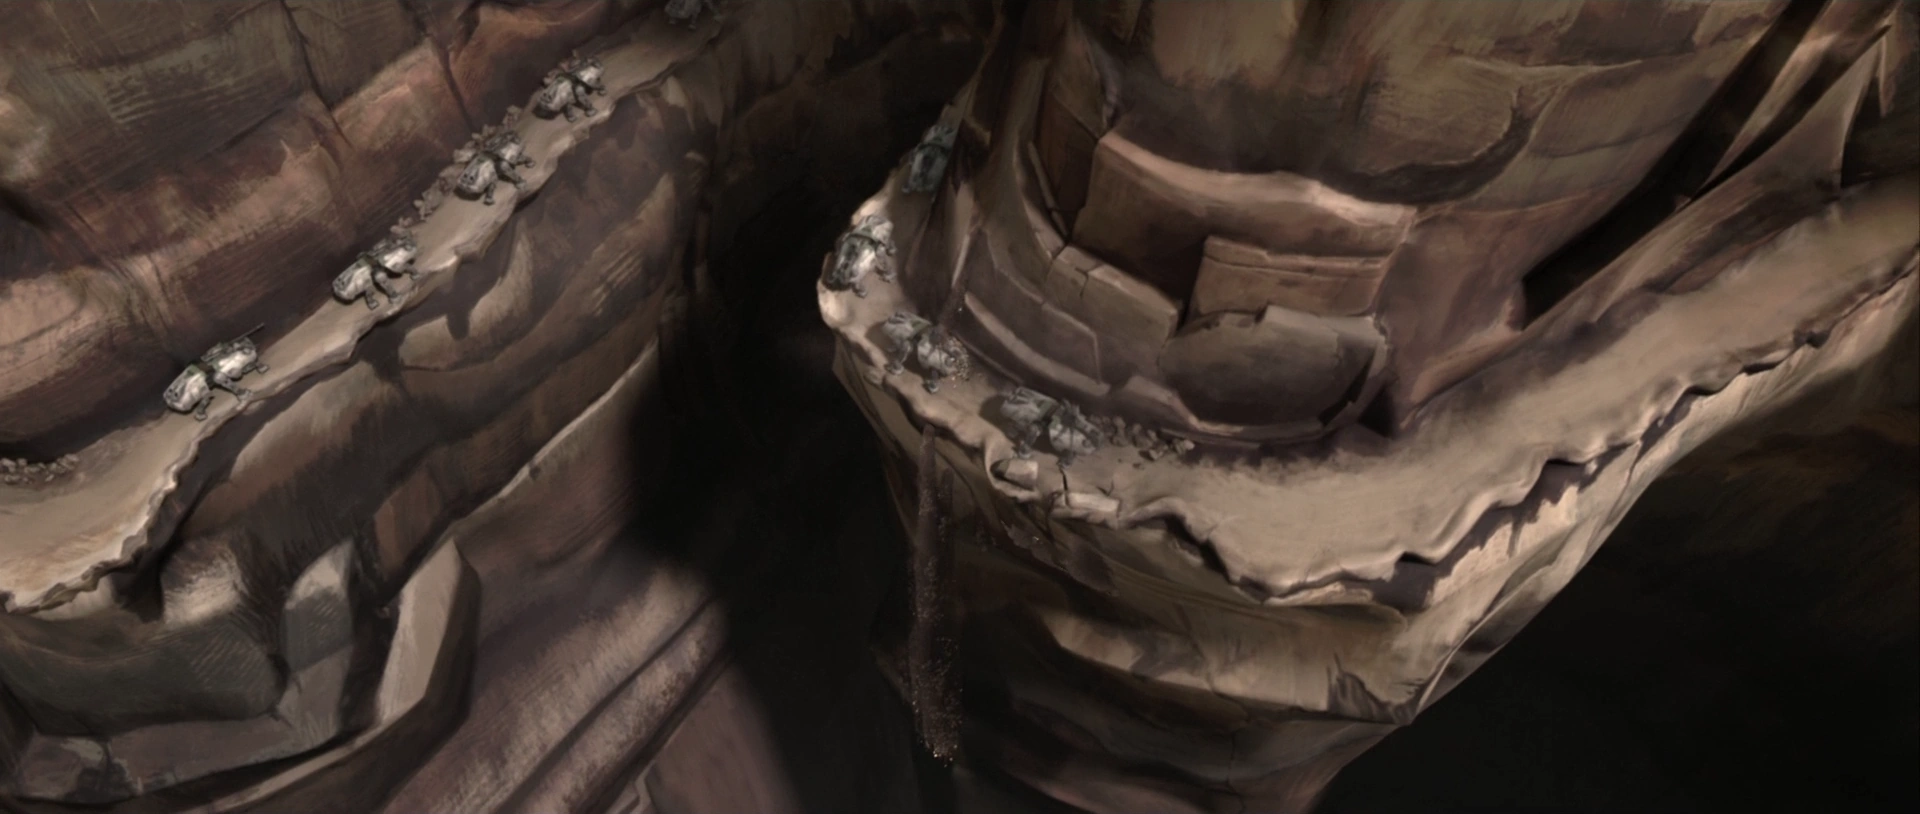
[[File:AT-TEs during Battle of Ryloth.png|thumb|240x240px|Republic forces under attack]] |
[[File:AT-TEs during Battle of Ryloth.png|thumb|240x240px|Republic forces under attack]] |
||
| − | Windu, alongside Commander [[CT-411|Ponds]], led his forces to liberate the capital of Lessu. En route on a cliff, Windu's forces came under attack by a group of [[Armored Assault Tank|AATs]]. The droids were able to stop the Republic forces briefly, but were defeated by Windu's [[Lightning Squadron]]. Windu lost 32 men in the attack, including command crews of three walkers. Windu the attended a [[hologram]] meeting with [[Supreme Chancellor|Chancellor]] [[Darth Sidious|Palpatine]], Senator [[Orn Free Taa]] of Ryloth, [[Grand Master]] [[Yoda]], and Admiral Yularen. Anakin Skywalker also briefly joined, and informed the group that his forces had the |
+ | Windu, alongside Commander [[CT-411|Ponds]], led his forces to liberate the capital of Lessu. En route on a cliff, Windu's forces came under attack by a group of [[Armored Assault Tank|AATs]]. The droids were able to stop the Republic forces briefly, but were defeated by Windu's [[Lightning Squadron]]. Windu lost 32 men in the attack, including command crews of three walkers. Windu the attended a [[hologram]] meeting with [[Supreme Chancellor|Chancellor]] [[Darth Sidious|Palpatine]], Senator [[Orn Free Taa]] of Ryloth, [[Grand Master]] [[Yoda]], and Admiral Yularen. Anakin Skywalker also briefly joined, and informed the group that his forces had the remains of the Separatist fleet in retreat. Windu then revealed that his forces would be unable to capture Ryloth without reinforcements. Thus he decided to recruit the resistance fighters led by Cham Syndulla. Palpatine and Taa warned Windu that Syndulla could not be trusted due to his radical nature. Yularen said that there were no Republic reinforcements available, thus Windu insisted that they could not win without Syndulla's help.<ref name="Liberty on Ryloth" /> |
In Lessu, Tambor and his tactical droid, [[TA-175]], watched as Windu and his forces were moving towards Lessu. Despite TA-175's suggestion to prepare for evacuation, Tambor refused knowing that Windu did not have the troops to take Lessu. Tambor then decided to bring his forces inside the city and to secure the bridge. Dooku was then informed by TA-175 of Tambor's "pitiful job" of protecting the Separatists' investment on Ryloth. Tambor insisted that the droid was exaggerating and that he had not lost yet. Knowing that Tambor was no match for Windu, Dooku ordered him to retreat with valuables that can be taken with him and to destroy everything else on Ryloth. Dooku wanted Ryloth to be a message to demonstrate the cost of a Republic victory. TA-175 prepared the [[Hyena-class bomber|Hyena bombers]] for their fire-bomb campaign and Tambor's shuttle for evacuation. Tambor still refused to leave, then had the bombers destroy every village in range. Ponds noticed how they destroyed the villages after the droids pulled out of them.<ref name="Liberty on Ryloth" /> |
In Lessu, Tambor and his tactical droid, [[TA-175]], watched as Windu and his forces were moving towards Lessu. Despite TA-175's suggestion to prepare for evacuation, Tambor refused knowing that Windu did not have the troops to take Lessu. Tambor then decided to bring his forces inside the city and to secure the bridge. Dooku was then informed by TA-175 of Tambor's "pitiful job" of protecting the Separatists' investment on Ryloth. Tambor insisted that the droid was exaggerating and that he had not lost yet. Knowing that Tambor was no match for Windu, Dooku ordered him to retreat with valuables that can be taken with him and to destroy everything else on Ryloth. Dooku wanted Ryloth to be a message to demonstrate the cost of a Republic victory. TA-175 prepared the [[Hyena-class bomber|Hyena bombers]] for their fire-bomb campaign and Tambor's shuttle for evacuation. Tambor still refused to leave, then had the bombers destroy every village in range. Ponds noticed how they destroyed the villages after the droids pulled out of them.<ref name="Liberty on Ryloth" /> |
||
Revision as of 09:46, 13 May 2019
| | |
Warning: This infobox is missing the following parameters: unit2, unit1
- "The Twi'leks on that planet can't wait forever, Master. The longer the Techno Union keeps control of Ryloth, the more difficult it'll be to free them."
"I agree. We don't have much time." - ―Anakin Skywalker and Mace Windu
The Battle of Ryloth, also known as the Ryloth campaign, broke out on the planet Ryloth during the Clone Wars. The battle was between the Galactic Republic and the Free Ryloth movement allies, against the Separatist Droid Army of the Confederacy of Independent Systems. The battle would result in the liberation of Ryloth after the retaking of Lessu, in what became known as the Battle of Lessu. Years later, the recapturing of the capital would be named the Hammer of Ryloth in songs.
Prelude
Ryloth was invaded and blockaded by the Confederacy of Independent Systems' droid army under Techno Union Emir Wat Tambor. The Separatist ground forces then attacked the Republic garrison, which was under the command of Jedi General Ima-Gun Di and Clone Captain Keeli. The Republic troops received help from the Twi'lek resistance forces under Cham Syndulla. However, supplies started run low and their heavy weapons began going offline. Di then contacted the Republic fleet - two cruisers - under Admiral Dao, but Dao's fleet was running low on fuel, ammunition and supplies, therefore no aid could be sent- both ships were later destroyed by Separatist warships. Di ordered Dao to contact the Jedi Council for support. Dao was able to contact the temple telling Masters Yoda, Windu and Kenobi that he would not be able to re-supply the Outer Rim garrison. The transmission was soon cut off as Dao's flagship was destroyed by the blockade, killing the admiral and his crew.[23]
The Jedi Council then had the Senate send Naboo Representative Jar Jar Binks with supplies to Toydaria which was close to Ryloth to resupply what remained of the Republic's garrison and the Twi'leks. The Council also asked Alderaan Senator Organa to accompany Binks and speak with the Toydarians and their king. However, Dooku was informed by TX-20 of the Council's plan and had Trade Federation Senator Lott Dodd go there to prevent Binks and Organa from convincing Katuunko to send aid. Although King Katuunko officially refused to aid the Republic supply efforts, he allowed Organa and Binks to complete their mission as long as Dod and the Trade Federation did not learn of it. As Binks distracted Dod at a dinner party, Organa then loaded the blockade runners with supplies.[23]

General Di and Captain Keeli's last stand
General Di, Clone Captain Keeli and their troops then prepped their last gunship to evacuate the resistance fighters' families, though the gunship was too small to fit all of them. Di and his men decided to turn the gunship into a bomb and then hold off the droid army to allow Syndulla, his men and their families to escape. After the bomb went off, Syndulla then left with his men through the mountains. Di and his men valiantly fought against the droids, sacrificing themselves to allow the Twi'leks to escape. As the Republic garrison fell, Organa's blockade runners reached the Twi'leks, their hopes renewed and allowed them to continue the resistance. [23]
The occupation
After the annihilation of the Republic garrison, Ryloth had been completely occupied by the Separatist Droid Army, and Separatist Council member, Emir Wat Tambor oversaw the occupation from the city of Lessu. He sent his forces to pillage, ravage and rob the Twi'leks' villages of anything valuable.[21] He also had TX-20 capture the city of Nabat and it inhabitants. Once there, TX-20 and his battle droids set up a battery of 5 proton cannons and used the captured Twi'leks as a living shield to protect them.[22]
During this time however, the Twi'lek resistance continued to harass the Tambor's forces, at heavy cost. They were able to maintain a hideout to ensure their safety. Syndulla also had spies who reported on Tambor's theft of their treasure.[21]
Nevertheless, the Republic Army would answer the Galactic Senate's plea to liberate the planet and free them the Separatist occupation. Thus Jedi Generals Mace Windu, Obi-Wan Kenobi and Anakin Skywalker were sent with their forces to free Ryloth from the Separatists.[19]
The battle
The blockade
Skywalker, along with his apprentice, Commander Ahsoka Tano, Admiral Wullf Yularen, Clone Captain Rex, and his forces were then sent to break through the Separatist blockade under the command of Captain Mar Tuuk. General Skywalker then sent in his apprentice and Blue Squadron to engage the blockade's droid fighters. At first, Tano and her squadron were able to make their attack run through the droid fighters. However, Captain Tuuk summoned reinforcements. Despite that, Tano disobeyed her master's and Yularen's orders and continued with her attack. Tuuk's forces were able to break through the lines, launching suicide runs on the Resolute, Defender, and Redeemer. Tano finally did obey her master's order to return but lost all but two members of her squadron. Admiral Yularen was then injured when a droid fighter crashed into the bridge of his command ship. After Tano's Squadron returned to Resolute and the Redeemer was destroyed, Skywalker retreated. Skywalker then contacted Masters Windu and Kenobi, informing them of his lack of progress and his casualties. Windu warned Skywalker that if he could not break through the blockade the invasion would have to be postponed. Skywalker knew that they could not postpone it much long and assured them that he would break through the blockade. Skywalker then told his apprentice of this. However, Tano told him they could not blast through the blockade.[19]

Defender advancing towards the enemy command ship
Heeding the words of his apprentice, Skywalker decided to used the Defender, which was beyond repair, and ram into the droid's command ship. Skywalker then had the Defender's crew evacuate, leaving only himself and R2-D2 to pilot the cruiser. Skywalker then left Ahsoka in charge of the Resolute and their remaining forces. Skywalker also told her to come up with a plan to finish off the rest of the blockade. After Skywalker left with the Defender, Tano and Rex then discussed their battle plans. Tano then came up with a maneuver to entrap the remaining droid forces and use the bombers to finish them off. Though Rex and one of the bridge officers questioned this tactic, Ahsoka told them that they were out of time. Yularen, still recovering from his injury, agreed to using the bold and unorthodox strategy.[19]
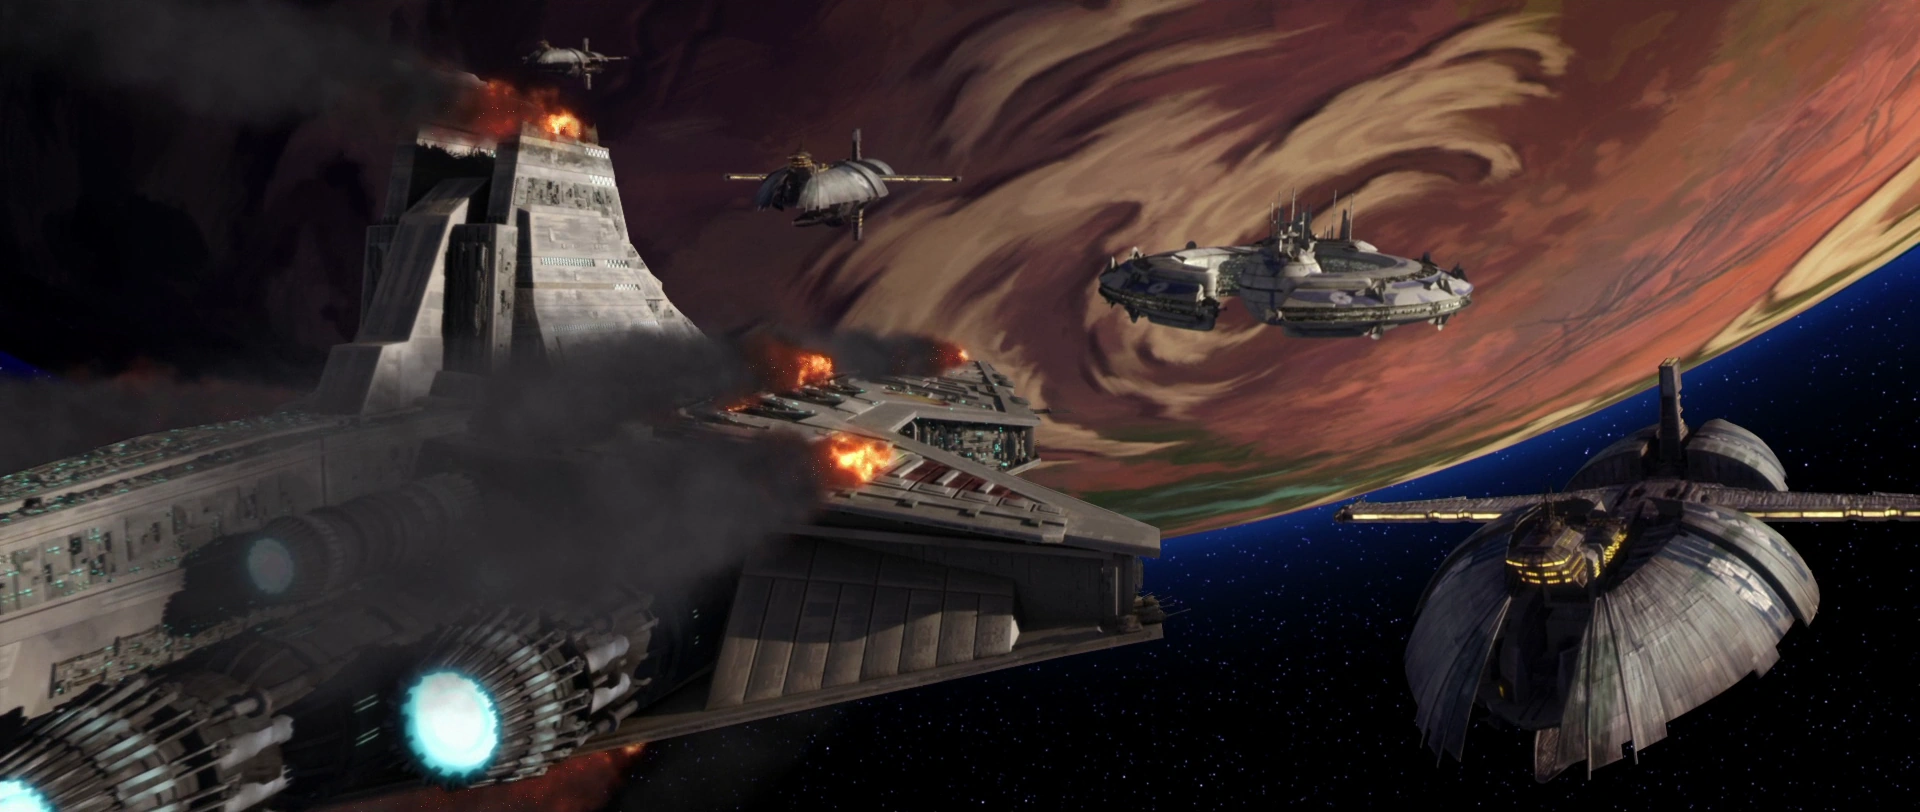
Republic ships damaged by enemy fire
As Skywalker arrived, he then hailed Captain Tuuk. Skywalker then offered to surrender himself, his crew and his ship to his forces in exchange to delivering supplies to the Twi'lek. Tuuk was then informed by his droids that only Skywalker was left onboard. Tuuk told Skywalker that he had nothing to offer, who responded that he could still have his ship. The firepower of the frigates could not destroy the Defender, which proceeded to destroy the droid command ship. Tuuk fled his command ship via escape pod. Ahsoka then performed her strategy; when asked if the droids would catch on to their plan, she commented that they would realize the deception too late. As the Resolute followed Ahsoka's plan, the droids were initially slow to fire on the Star Destroyer but eventually started firing on them. Ahsoka and her bombers then destroyed the frigates. Tambor attempted to contact Tuuk, but was hailed by a droid, realizing that the blockade had been broken when he learned Tuuk fled on an escape pod. Ahsoka then contacted Masters Kenobi and Windu, informing them that they may begin their landing on Ryloth.[19] Skywalker and his forces then completely secured the space around Ryloth.[21]
Landing at Nabat
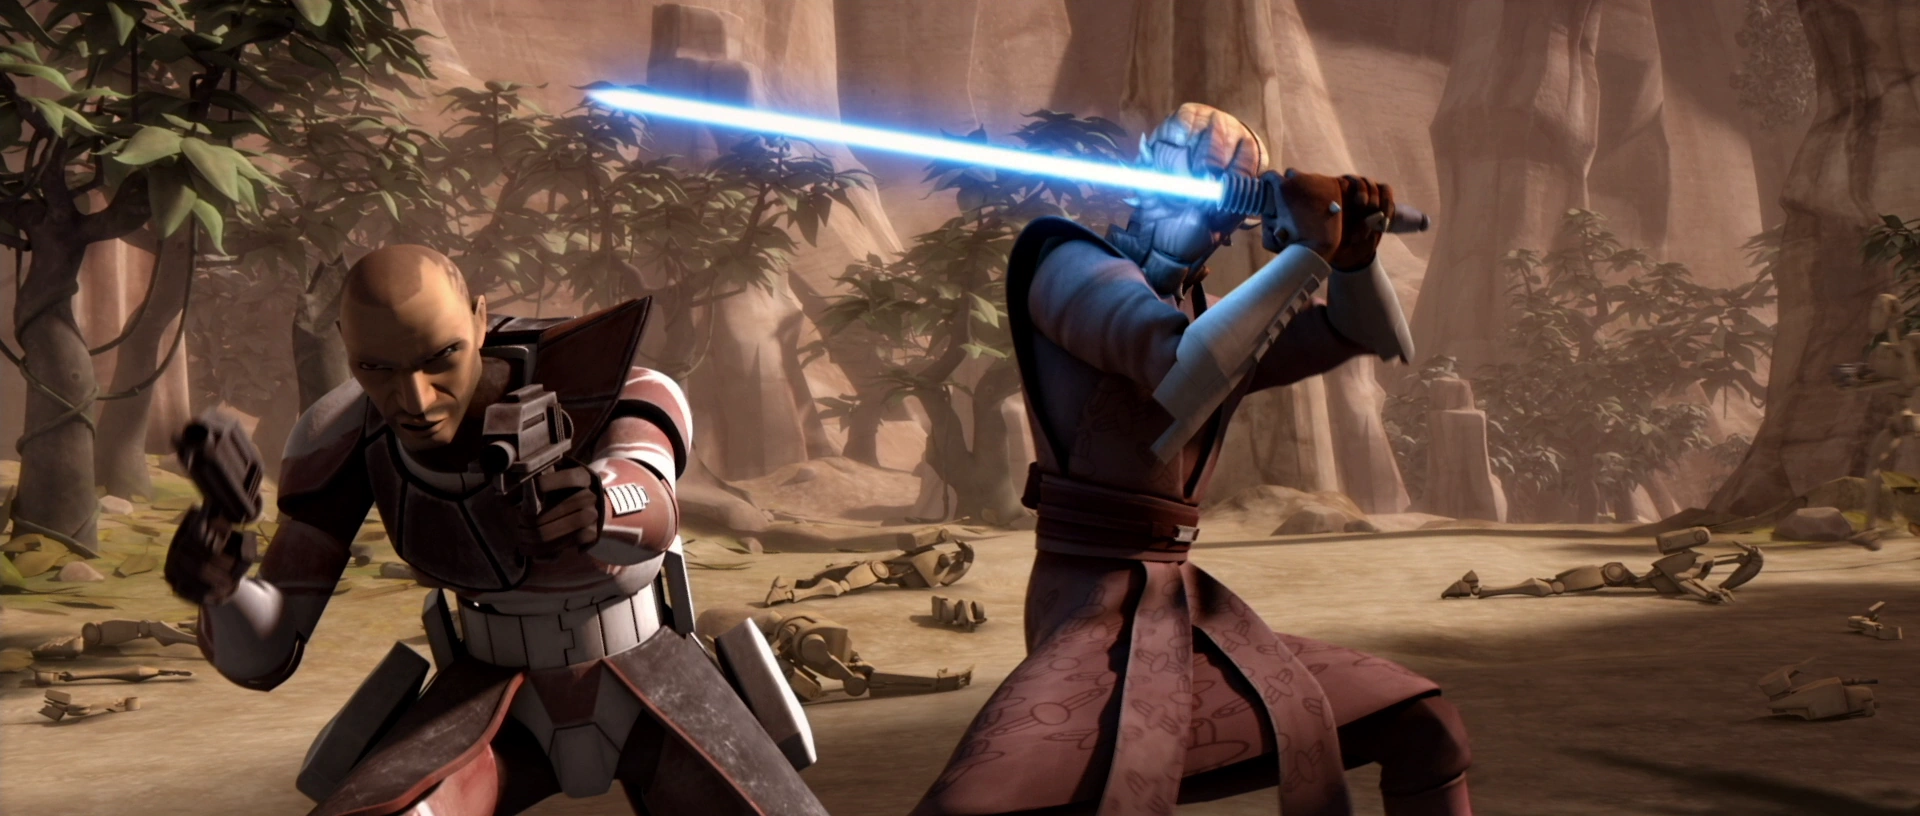
As the Republic forces made their descent, General Kenobi, Commander Cody, and the troopers of Ghost Company were sent in by General Windu to secure the landing area near the city of Nabat. As Kenobi and his troopers made their way to Nabat aboard their gunships, the droid commander in charge of Nabat, TX-20 was ordered by Emir Tambor to ensure that the Republic would not be allowed to land. TX-20 assured Tambor that the proton cannons would prevent the clones from landing and that the Jedi would not risk a ground assault with Nabat's inhabitants acting as his living shield. As Kenobi and his gunships made their way, Kenobi and Cody made it clear that they would not use rockets or detonators in the city. TX-20 then opened fire on the gunships and the landing ships, destroying the right engine of three of the landing ships. Windu and Commander Ponds then contacted Kenobi, telling him that they could not risk landing the larger transports until Kenobi destroyed the canonns. Kenobi and his gunships were then able to land on the outskirts of Nabat.[22]
Kenobi and Ghost Company were greeted with heavy fire from the outer defenses, which they managed to overcome by tossing droid poppers into the machine gun nests. Kenobi then sent Cody and his best men to scout ahead and report on the droids' plans. Cody, along with troopers Wooley, Waxer, and Boil then scouted ahead, before splitting up. Waxer and Boil found a little Twi'lek girl, Numa, in the ruins. Cody and Wooley found the cannons and noticed that the battle droids were using Nabat's survivors as hostages. At the same time, TX-20 then sent out recon droids to learn of the clones' plan of attack. Cody and Kenobi then informed General Windu of the cannons and the hostages. Windu made it clear that getting the hostages out of the way was the priority. Kenobi assured him that he would still be able to take out the cannons. Upon learning that it was Kenobi leading the attack, TX-20 decided to release his captured herd of starving Gutkurr upon the clones. Kenobi and Cody decided to start their attack, but Waxer and Boil were late and decided to take Numa with them. After they got a message from Cody, they came under attack by two Gutkurrs. Luckily, they were able to escape through the tunnels in Numa's home. As Kenobi, Cody and their troopers were moving forward, they came under attack by the Gutkurrs. At first, the Gutkurrs ate and killed several of the troopers, but Kenobi was able to use a mind trick to lure the Gutkurrs away from his troopers and trap them in an alleyway. After that, Kenobi and Cody then found Waxer, Boil and Numa coming out of a tunnel. Kenobi then asked Numa if there was a tunnel that could get him past the droids to free the prisoners. After Numa said yes, Kenobi then asked Cody to create a diversion.[22]
As Cody, Wooley and the remainder of Ghost Company prepared to attack the droids, Kenobi, Waxer, Boil, and Numa then made their way through the tunnels to the Gutkurr's cages. Kenobi waited while Cody and his men attacked the droids, leaving only a few guards and the gun crews left. As TX-20's battle droids and tanks took on the clones, Kenobi, Waxer and Boil freed the prisoners. After the prisoners were safe, Kenobi, Waxer and Boil then took control of one of the cannons, using it to destroy the other four cannons. TX-20 was informed of Kenobi's freeing of the prisoners and turned his tank around. He destroyed the cannon that Kenobi was using and then held him and Numa at gunpoint, believing to be victorious. However, the tactical droid's threats towards Numa rallied the Twi'leks, who tossed TX-20 out of his tank and tore him to pieces.[22]
General Windu and his transports were able to land after the cannons were destroyed. As Kenobi and Windu regrouped, they knew that they had to take the capital and free the rest of Ryloth.[22] Kenobi and his forces continued to liberate other villages from the droids, eventually securing the Jixuan desert and Ryloth's southern hemisphere.[21]
Battle of Lessu

Republic forces under attack
Windu, alongside Commander Ponds, led his forces to liberate the capital of Lessu. En route on a cliff, Windu's forces came under attack by a group of AATs. The droids were able to stop the Republic forces briefly, but were defeated by Windu's Lightning Squadron. Windu lost 32 men in the attack, including command crews of three walkers. Windu the attended a hologram meeting with Chancellor Palpatine, Senator Orn Free Taa of Ryloth, Grand Master Yoda, and Admiral Yularen. Anakin Skywalker also briefly joined, and informed the group that his forces had the remains of the Separatist fleet in retreat. Windu then revealed that his forces would be unable to capture Ryloth without reinforcements. Thus he decided to recruit the resistance fighters led by Cham Syndulla. Palpatine and Taa warned Windu that Syndulla could not be trusted due to his radical nature. Yularen said that there were no Republic reinforcements available, thus Windu insisted that they could not win without Syndulla's help.[21]
In Lessu, Tambor and his tactical droid, TA-175, watched as Windu and his forces were moving towards Lessu. Despite TA-175's suggestion to prepare for evacuation, Tambor refused knowing that Windu did not have the troops to take Lessu. Tambor then decided to bring his forces inside the city and to secure the bridge. Dooku was then informed by TA-175 of Tambor's "pitiful job" of protecting the Separatists' investment on Ryloth. Tambor insisted that the droid was exaggerating and that he had not lost yet. Knowing that Tambor was no match for Windu, Dooku ordered him to retreat with valuables that can be taken with him and to destroy everything else on Ryloth. Dooku wanted Ryloth to be a message to demonstrate the cost of a Republic victory. TA-175 prepared the Hyena bombers for their fire-bomb campaign and Tambor's shuttle for evacuation. Tambor still refused to leave, then had the bombers destroy every village in range. Ponds noticed how they destroyed the villages after the droids pulled out of them.[21]
Windu and two of his troopers then came across Syndulla and his men after they took out a droid patrol. At first, Syndulla was hesitant to join Windu due to another possible occupation by the Republic, but when he learned that the Separatists were bombing Twi'lek villages, he requested an audience with Taa. Taa promised him that once the Separatists were gone, the Republic would also leave as long Syndulla did not pursue political power. Syndulla agreed to his terms and organized his fighters to retake the capital. Meanwhile, Skywalker and Ahsoka were destroying as many bombers as they could before they could bomb the villages.[21]
As the Republic was moving onward towards Lessu, Tambor gathered up the last of the valuables. Dooku, growing impatient with the Emir, ordered him to leave before the Republic arrives. He also ordered TA-175 to bomb the capital after he and Tambor had left. Tambor refused to leave, waiting for his last two MTTs filled with Twi'lek treasure. As the Republic moved in on the outskirts of Lessu, Tambor then had city inhabitants moved to the outside of the city walls, hoping to slow Windu down.[21]
Windu and Syndulla then looked for away across, then Syndulla spotted the two MTTs that were loaded with treasure. Windu, despite the risk of being scanned and discovered, decided to take two of his troopers to get across the bridge. After destroying one of the STAPs, Windu and his two troopers then hid inside one of the MTTs. Windu then ordered Syndulla and Ponds to commence the attack after the bridge was on. The battle droids scanned the cargo on the bridge, and they discovered Windu and his men. After he subdued the droids, Windu pushed the two troopers across the bridge as it was being turned off by the droids. As he fell, Windu was able to jump on one of the STAPs and get to other side of the bridge. Windu then held off the droids as Stak and Razor made their way to the control room.[21]

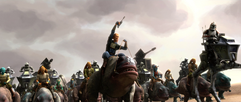
Syndulla orders the attack to re-take Lessu
Syndulla, Ponds and their forces then started their attack, charging towards the bridge to Lessu. Stak and Razor made it to the control center and took out the droids and the commander stationed there. They were then able to turn the bridge on and hold it against a few droid reinforcements, including a pair of commando droids. Syndulla and his men fought the battle droids as Windu went to capture Tambor. Tambor and two super battle droids made their way toward his ship. However, TA-175 got there before him and evacuated without Tambor, calling him a fool. TA-175 informed Dooku of this, who, despite believing this to be unfortunate, ordered him to bomb the capital immediately. As Windu subdued the super battle droids, Tambor attempted to negotiate, despite the fact that he was in no position to. He then laughed as they would all die for the glory of the Separatist Alliance, but the four Hyena bombers sent to bomb the capital were destroyed by Skywalker and Tano. Syndulla then demanded that Tambor unconditionally surrender, and the Skakoan quickly agreed.[21]
The Republic forces, as well as the resistance forces, were then joined by Senator Taa. Both forces then held parade in honor of both the Resistance and the Grand Army's victory over the Confederacy.[21]
Legacy
- "Master Windu spoke highly of your heroics at the Battle of Lessu."
"Ah. Mace Windu. Outnumbered 100 to one, we charged across Lessu's energy bridge to certain doom. We would not be stopped. They named that attack in songs, 'The Hammer of Ryloth.'" - ―Kanan Jarrus and Cham Syndulla
After the success of the collaboration between local fighters and Republic forces, Republic High Command started to experiment by sending commando squads to Separatist occupied worlds and coordinate with local fighters, the experiment was successful on some worlds like Aridus and Tynna, but it attracted controversy that the Republic was exposing civilians to punishment by Separatist forces.[25]
During the early rebellion against the Galactic Empire, the people of Ryloth—now a protectorate and pillaged for slaves and spice by their Imperial overlords—would remember Windu's exploits during the Battle of Lessu, immortalizing both his and Cham Syndulla's name in songs.[26]
Chopper and AP-5, two war veterans became friends and allies due to their experience during the campaign.[24] Chopper's Y-wing bomber was left as a war memorial near the Syndulla residence in the Tann Province.[27]
Behind the scenes
- "Are you aware of our recent defeat at Ryloth?"
"I just heard." - ―Mas Amedda and Orson Krennic in Catalyst: A Rogue One Novel
In Catalyst: A Rogue One Novel Mas Amedda says that the Republic suffered a "recent defeat at Ryloth," and Lieutenant Commander Orson Callan Krennic responds that he had "just heard." This could be a reference to[28] the loss on Ryloth seen in Supply Lines,[23] but this segment of the novel is set at some point after the Second Battle of Geonosis,[28] and that battle occurred some point after Ryloth.[29]
Appearances
- Star Wars Battlefront II
 Star Wars: The Clone Wars — "Supply Lines"
- Star Wars: The Clone Wars — "Jedi Crash" (First appearance) (In flashback(s))
- Star Wars: The Clone Wars — "Storm Over Ryloth"
- Star Wars: The Clone Wars — "Innocents of Ryloth"
- Star Wars: The Clone Wars — "Liberty on Ryloth"
- Star Wars: The Clone Wars — "Landing at Point Rain" (In flashback(s))
- Catalyst: A Rogue One Novel (Indirect mention only)
- Lords of the Sith (Mentioned only)
- Star Wars Rebels — "Wings of the Master" (Mentioned only)
- Star Wars Rebels — "Homecoming" (Mentioned only) (First identified as Battle of Lessu)
- Star Wars Rebels — "The Forgotten Droid" (Mentioned only) (First identified as Ryloth campaign)
- Star Wars Rebels — "Hera's Heroes" (Indirect mention only)
- Thrawn: Alliances (Indirect mention only)
Sources
Notes and references