No edit summary |
mNo edit summary |
||
| (4 intermediate revisions by 3 users not shown) | |||
| Line 1: | Line 1: | ||
{{Eras}} |
{{Eras}} |
||
| + | {{Update|[[Force Collector]]}} |
||
{{Battle |
{{Battle |
||
|width= |
|width= |
||
| Line 96: | Line 97: | ||
{{Quote|So uncivilized.|Obi-Wan Kenobi, after killing General Grievous with a blaster|Star Wars: Episode III Revenge of the Sith}} |
{{Quote|So uncivilized.|Obi-Wan Kenobi, after killing General Grievous with a blaster|Star Wars: Episode III Revenge of the Sith}} |
||
{{Listen|filename=GrievousDeath.ogg|title=The Death of General Grievous|description=Listen to Grievous's death cry}} |
{{Listen|filename=GrievousDeath.ogg|title=The Death of General Grievous|description=Listen to Grievous's death cry}} |
||
| − | [[File: |
+ | [[File:Clone Troops Utapau.png|thumb|right|250px|Grievous tries to escape Kenobi.]] |
The two opponents recovered quickly, Kenobi brandishing the electrostaff against the blaster-wielding Grievous. Disarming the General, Kenobi began unleashing a series of jabs against the cyborg's torso, knocking Grievous over. Grievous retaliated with a kick that threw Kenobi across the platform. As Kenobi regained his feet, Grievous closed the distance, engaging Kenobi in a melee. While Grievous' mechanical exoskeleton provided him with a clear advantage, Kenobi managed to pry apart the plates protecting Grievous's internal organs before being thrown to the ground. Kenobi counter-attacked by kicking Grievous's leg, but only injured himself against the hard, durasteel limb.<ref name="ROTS" /> |
The two opponents recovered quickly, Kenobi brandishing the electrostaff against the blaster-wielding Grievous. Disarming the General, Kenobi began unleashing a series of jabs against the cyborg's torso, knocking Grievous over. Grievous retaliated with a kick that threw Kenobi across the platform. As Kenobi regained his feet, Grievous closed the distance, engaging Kenobi in a melee. While Grievous' mechanical exoskeleton provided him with a clear advantage, Kenobi managed to pry apart the plates protecting Grievous's internal organs before being thrown to the ground. Kenobi counter-attacked by kicking Grievous's leg, but only injured himself against the hard, durasteel limb.<ref name="ROTS" /> |
||
| + | |||
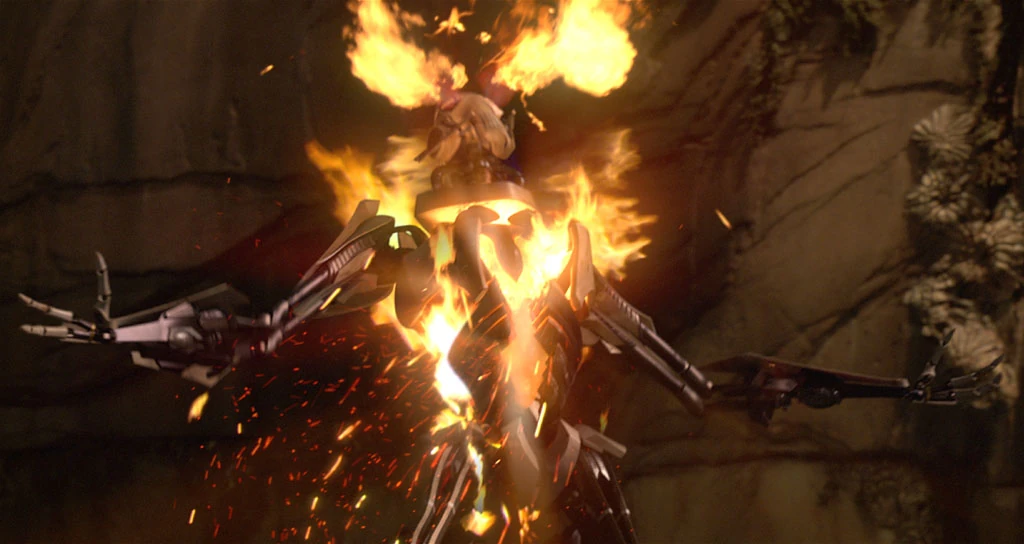
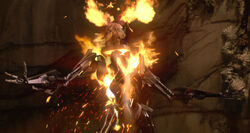
| + | [[File:GrievousFlameOut-ROTS.jpg|thumb|left|250px|General Grievous bursts into flames after being shot by a blaster.]] |
||
Grievous grabbed Kenobi by the collar and threw him across the platform, with Kenobi barely managing to grab onto the edge. Grievous retrieved the electrostaff and advanced on Kenobi to deliver the killing blow. Desperately hanging from the edge, Kenobi used the Force to summon Grievous' blaster to his hand. Blasting five shots through the gaps in the general's armorplast chestplates at the exposed organs, he ignited the tissue. Grievous's internal organs combusted violently, painfully killing the Separatist general. Grievous's death was later reported to the Jedi Council, with Mace Windu preparing to go to Palpatine's office to inform him of this development in the hopes that he lay down his emergency powers, until Anakin revealed Palpatine's stance as a Sith Lord.<ref name="ROTS" /> |
Grievous grabbed Kenobi by the collar and threw him across the platform, with Kenobi barely managing to grab onto the edge. Grievous retrieved the electrostaff and advanced on Kenobi to deliver the killing blow. Desperately hanging from the edge, Kenobi used the Force to summon Grievous' blaster to his hand. Blasting five shots through the gaps in the general's armorplast chestplates at the exposed organs, he ignited the tissue. Grievous's internal organs combusted violently, painfully killing the Separatist general. Grievous's death was later reported to the Jedi Council, with Mace Windu preparing to go to Palpatine's office to inform him of this development in the hopes that he lay down his emergency powers, until Anakin revealed Palpatine's stance as a Sith Lord.<ref name="ROTS" /> |
||
| Line 103: | Line 106: | ||
===Continued fighting and Order 66=== |
===Continued fighting and Order 66=== |
||
{{Quote|Commander Cody, the time has come. Execute Order 66.''"<br />"''Yes, my Lord.|Darth Sidious, to CC-2224 ("Cody")|Star Wars: Episode III Revenge of the Sith}} |
{{Quote|Commander Cody, the time has come. Execute Order 66.''"<br />"''Yes, my Lord.|Darth Sidious, to CC-2224 ("Cody")|Star Wars: Episode III Revenge of the Sith}} |
||
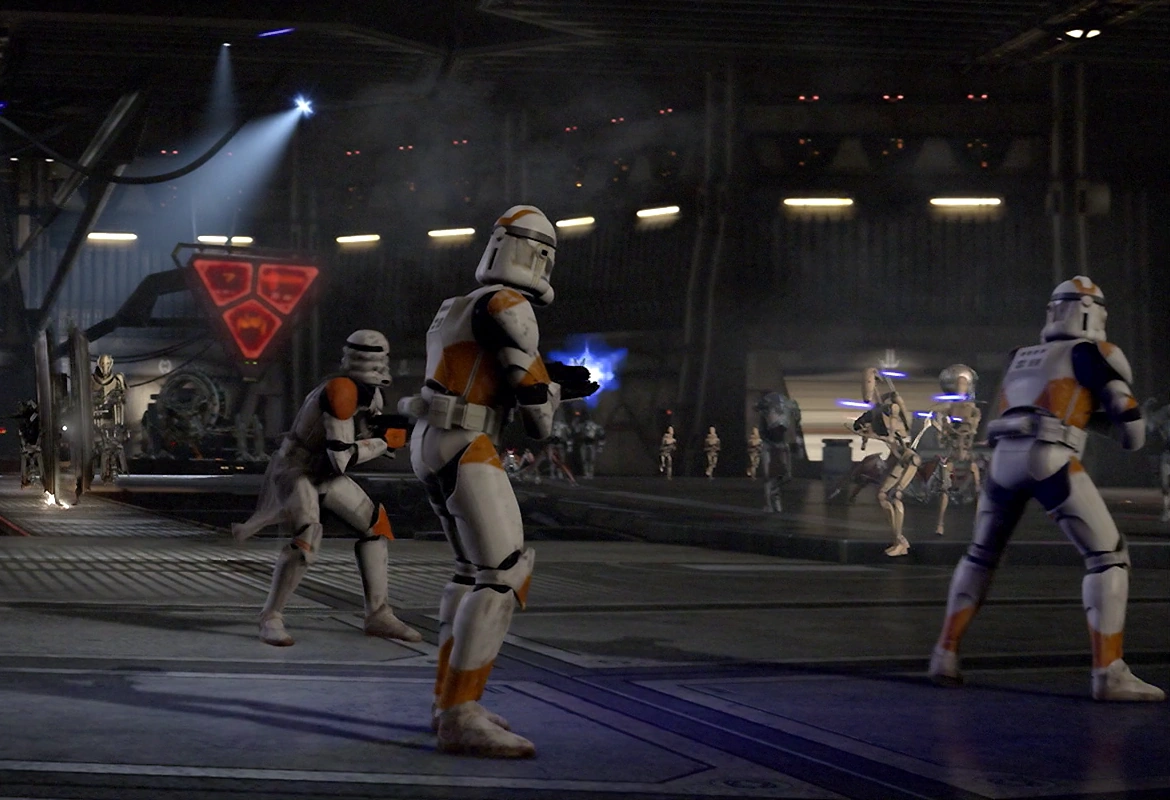
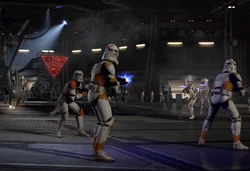
| − | [[File: |
+ | [[File:Battle of Utapau.png|thumb|left|250px|Clone troopers continued to fight the droids.]] |
| − | After the death of Grievous, the droid army continued to engage the clone troopers across Pau City as Kenobi was rejoining the battle. The [[B1 battle droid]] [[2638]] fired down close to |
+ | After the death of Grievous, the droid army continued to engage the clone troopers across Pau City as Kenobi was rejoining the battle. The [[B1 battle droid]] [[2638]] fired down close to Kenobi, but the droid was blasted by enemy fire as heavy fighting continued as the Republic pushed deeper into the city. Kenobi arrived to Cody's position and had his lightsaber returned to him before charging up a cliff ledge. Meanwhile on [[Coruscant]], the [[501st Legion]] led by [[Darth]] Vader, formerly [[Jedi Knight]] Anakin Skywalker, had began to [[Attack on the Jedi Temple|march]] into the [[Imperial Palace|Jedi Temple]]. It was then that Cody received a message from Sidious, who was publicly [[Supreme Chancellor]] Sheev Palpatine, instructing him to execute [[Order 66]] as part of a [[Jedi Purge|purge]] on the [[Jedi Order]].<ref name="ROTS" /> Regardless of having been friends and serving under Kenobi, Cody's loyalty was abolished by his [[Control chip|bio-chip]].<ref name="Cody Databank">{{Databank|clone-commander-cody|Clone Commander Cody|archivedate=20170607175032}}</ref> The order triggered the clone protocol within his genetically implanted bio-chip,<ref name="Orders">{{TCW|Orders}}</ref> as Cody ordered a nearby [[All Terrain Tactical Enforcer|AT-TE]] to fire its main cannon at the [[Jedi]], who was ascending the cliff heading up to the Separatist command headquarters on the tenth level, who fell into the depths of the sinkhole below.<ref name="ROTS" /> |
==Aftermath== |
==Aftermath== |
||
| Line 124: | Line 127: | ||
*[[Ahsoka (novel)|''Ahsoka'']] {{Imo}} |
*[[Ahsoka (novel)|''Ahsoka'']] {{Imo}} |
||
*[[Ahsoka (audiobook)|''Ahsoka'' audiobook]] {{Imo}} |
*[[Ahsoka (audiobook)|''Ahsoka'' audiobook]] {{Imo}} |
||
| + | *''[[Force Collector]]'' {{Mo}} |
||
===Non-canon appearances=== |
===Non-canon appearances=== |
||
Revision as of 04:24, 12 October 2019
| | |

Warning: This infobox is missing the following parameters: unit2, unit1
- "Now, let's get a move on. We've got a battle to win here."
- ―Obi-Wan Kenobi to CC-2224 "Cody"
The Battle of Utapau acted as one of the last decisive large-scale battles of the Confederacy of Independent Systems against the Galactic Republic in the Clone Wars, and was fought between the Separatist Droid Army and Grand Army of the Republic. After intelligence reports suggested General Grievous had fled to Utapau following the Battle of Coruscant, Jedi General Obi-Wan Kenobi and the 212th Attack Battalion were dispatched to deal with Grievous. After landing on Utapau alone ahead of the main clone force, Kenobi was directed by Tion Medon to the tenth level, where Grievous and other Separatist leaders were hiding. Kenobi, after waiting for the Separatist Councilors to leave, had the Republic forces move in and engaged Grievous in a fierce and lengthy duel, eventually shooting him to death. Not long after the general's death, Order 66 was issued to the clone troopers and Kenobi was forced to escape Utapau aboard Grievous' own starfighter.
Prelude
- "Our clone intelligence units have discovered the location of General Grievous. He's hiding in the Utapau system."
- ―Palpatine, to Anakin Skywalker
After three years of fighting, the Galactic Republic began to gain an advantage over the Confederacy of Independent Systems, many of whose high ranking leaders were captured or dead, with the most recent being Head of State Count Dooku. Upon arrival to Utapau, General Grievous conversed with Dooku's Master Darth Sidious, who ordered Grievous to relocate the Separatist Council to the Mustafar system and that the war was drawing to a close. The general expressed concern over Dooku's death but Sidious reassured him that he would soon have a new apprentice far younger and more powerful.[1]
Meanwhile the Republic Clone Intelligence had managed to discover the location of Grievous, this led to and the Jedi Council deciding to send Jedi Master Obi-Wan Kenobi to lead the battle after rejecting Chancellor Palpatine recommendation of sending Jedi Knight Anakin Skywalker to Utapau. After saying farewell to Skywalker in what would be the last time they spoke as friends, Kenobi organized a fleet of Venator-class Star Destroyers carrying an army of clone troopers, led by clone Commander Cody.[1]
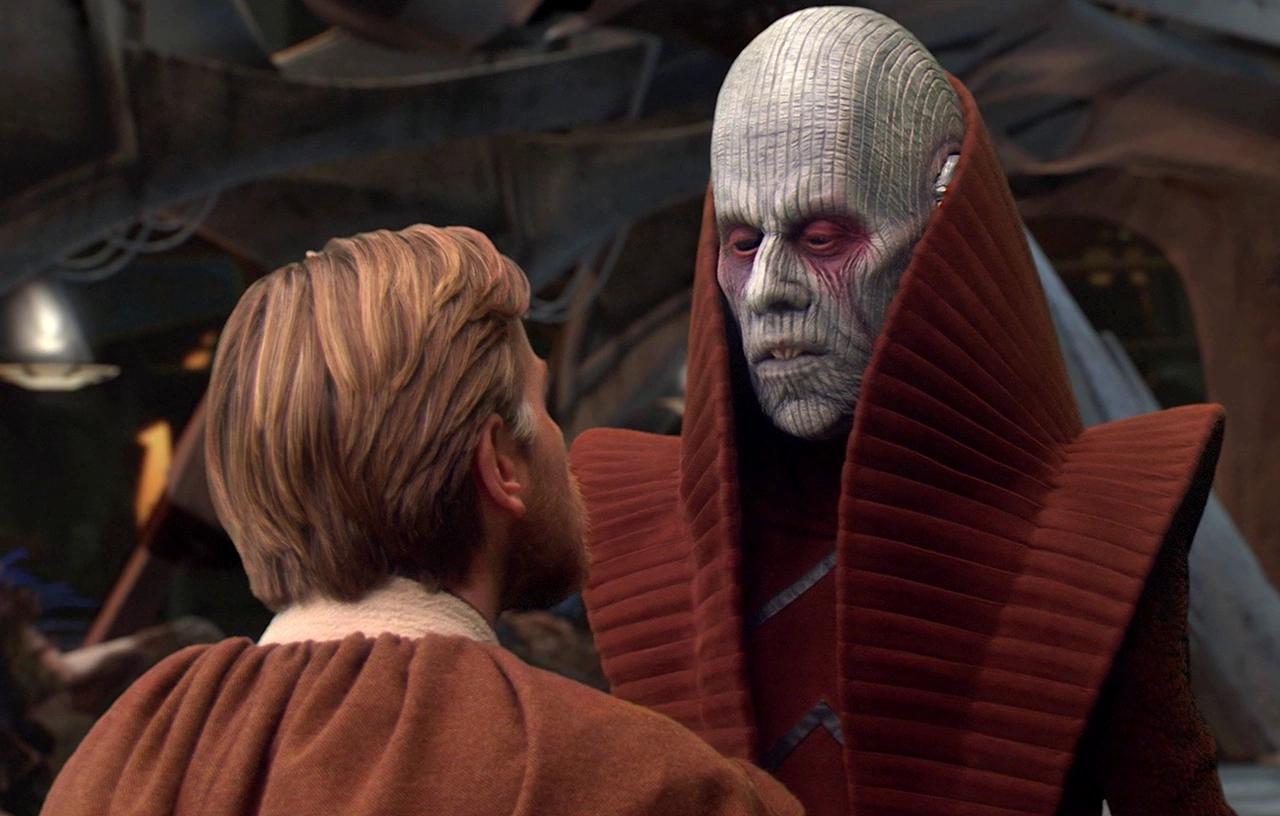

Obi-Wan Kenobi is greeted by Tion Medon.
Kenobi arrived on Utapau in his Eta-2 Actis-class interceptor under the pretense of refueling his ship. He was greeted by Tion Medon, the Port Administrator of Pau City, observed from a distance by one of Grievous' MagnaGuards. Medon discreetly revealed information that the Confederacy were occupying the city and were forced to accept their presence by being held as hostages so that they could use Pau City as a hiding place for the Separatist Council, Grievous and his army of Battle droids. Kenobi sent the droid R4-G9 back to his fleet to inform the clones of the situation, but he stayed in city to engage Grievous. Kenobi commandeered a varactyl beast named Boga as a mount, and rode in secret to infiltrate the hangar of a modified Core ship and went onto a platform overlooking the hangar where he witnessed the summit being held by the Separatist leadership. Where Grievous informed them that an attack by the Republic was expected, and was therefore moving them to the planet Mustafar where he claimed that they would be safe. Though Nute Gunray and the other Council members began to doubt the abilities of their new leader to keep them safe, they nevertheless followed his orders, leaving just moments before Kenobi's arrival.[1]
The battle
Engaging Grievous
- "Back away! I will deal with this Jedi slime myself!"
- ―Grievous

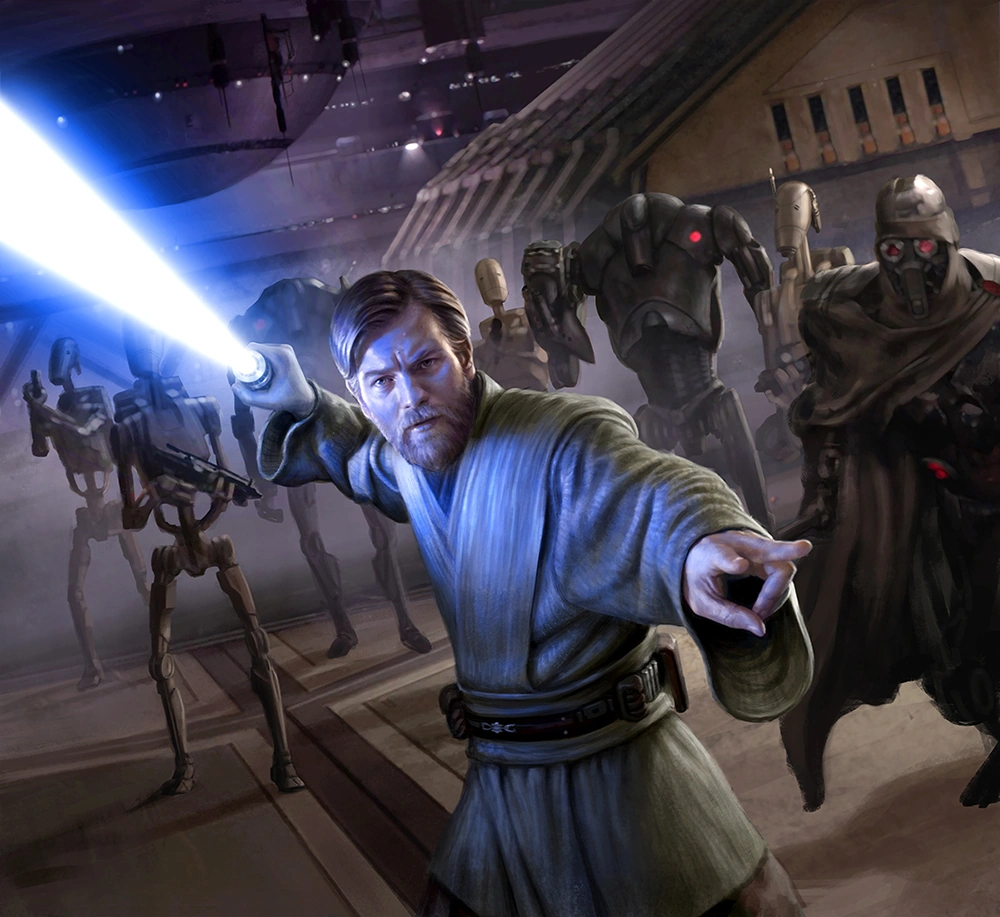
After the Separatist Council departed the hanger, Kenobi revealed himself by dropping from the catwalk above the hangar, and was immediately surrounded by battle droids and found himself confronted by four of Grievous' IG-100 MagnaGuards. Kenobi defeated them quickly, using the Force to dislodge a cargo module hanging from the ceiling and crushed three of them, casually decapitating the sole survivor. Grievous's droids were preparing to open fire on Kenobi, but were called off as Grievous decided to challenge Kenobi himself. Drawing four lightsabers at once, he then spun them rapidly in a buzzsaw motion and advanced on Kenobi. Kenobi slowly retreated before thrusting his lightsaber into the swirling energy blades, engaging Grievous in a spectacular, though brief, display of swordsmanship. Grievous remained unable to penetrate Kenobi's defense, so he ramped up his attacks even further. Kenobi was able to amputate two of Grievous' robotic arms, as Kenobi's blade, instead of intercepting Grievous's blade, sliced the cyborg's left lower wrist. Staring in surprise at his smoking stump, Grievous lunged in another attack. After another brief bout of fencing, another of Grievous' lightsabers, still clutched in his metal hand, bounced on the deck.[1]
Republic arrival
- "Army or not, you must realize you are doomed!"
- ―Grievous

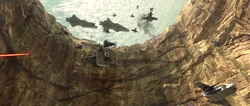
The Battle of Utapau begins.
At that moment, Republic forces led by Commander Cody arrived, with Star destroyers pounding fire on Separatist defensive positions and round after round of Clone Troopers repelling from gunships. While the Clone Troopers were held back by Crab droids and other droid forces, Grievous prepared to resume the duel, advancing on his opponent. However, Kenobi Force pushed the general, sending him flying up and crashing against the ceiling. Dropping his two remaining lightsabers as he plummeted to the hangar floor, an unarmed Grievous chose to flee. Grievous crawled to his wheel bike and mounted it, speeding out of the hangar and dropping to the lower levels of the city, crushing everything in his path as he raced towards the docking platform where his private ship waited. Kenobi pursued on his varactyl, Boga, but lost his lightsaber after the jarring impact on the way down, the lightsaber eventually landing at the feet of Commander Cody who later informed the Jedi Council members about Kenobi's current pursuit and battle with Grievous, to which Mace Windu then had Anakin deliver the news to Chancellor Palpatine. Mace Windu and the other council members secretly voice their suspicions regarding Palpatine's intentions, with Windu mentioning the possibility that they'll have to remove Palpatine from office should he refuse to give up his emergency powers after the defeat of Grievous.[1]
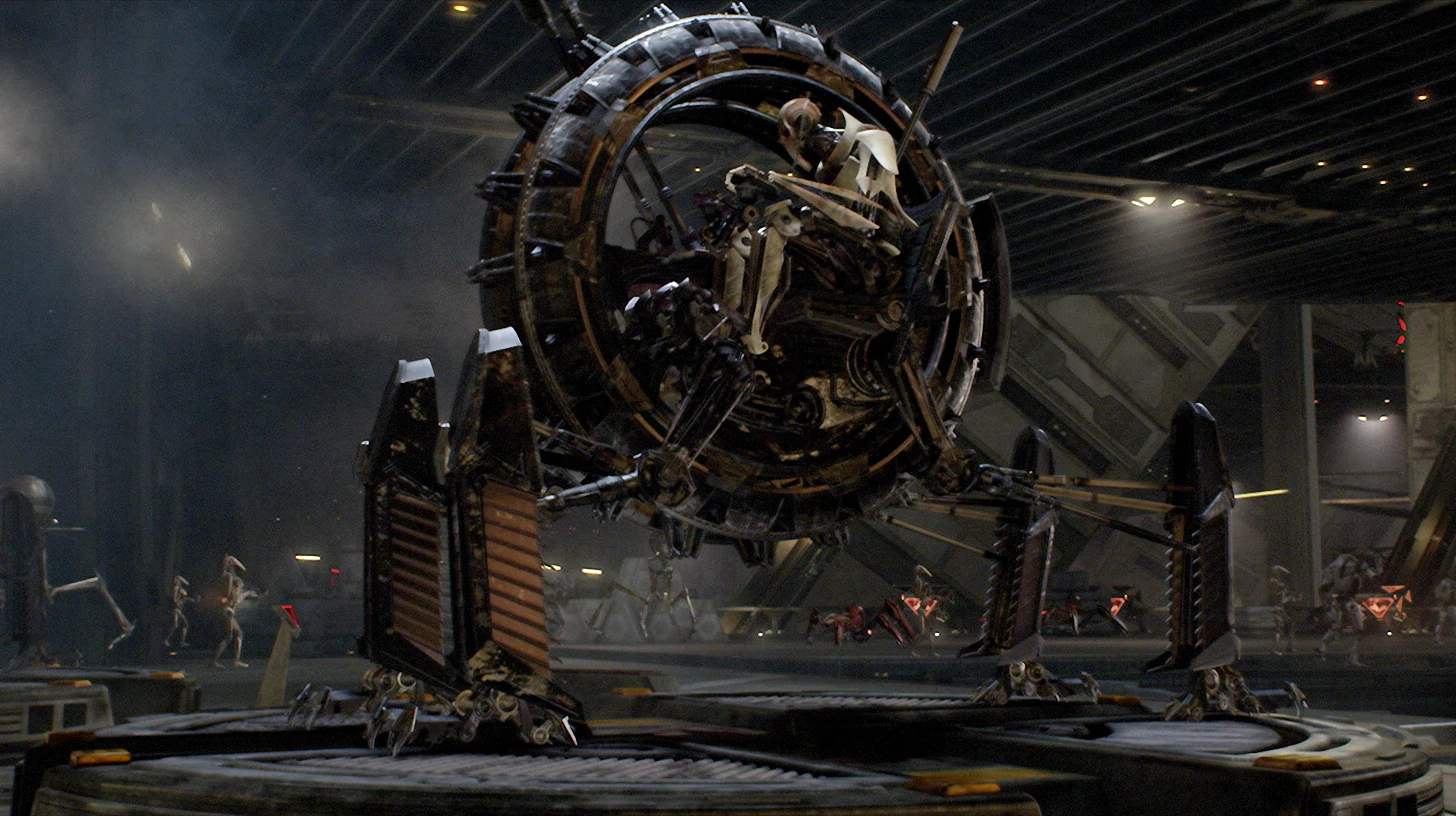
Grievous mounting his wheelbike.
Kenobi pursued Grievous in a furious chase through the streets of Pau City as the battle raged around them. As Kenobi caught up to the General, Grievous thrust at Boga with an electrostaff he stashed in the wheel bike. Kenobi managed to grab hold of the shaft of the weapon and wrench it from the cyborg's hands. Kenobi then attempted to destroy the wheels on Grievous's vehicle with it before attacking the General himself with it. Grievous managed to regain hold of it, and pulled it back, and Kenobi along with it. As the two grappled for control of the wheel bike, Grievous pulled out a blaster and attempted to shoot Kenobi, though the Jedi evaded the shots. Unfortunately, Kenobi's movements off-balanced the wheelbike, causing it to flip as they arrived at Grievous' landing platform. While they were thrown off, the bike skidded off the platform and fell into the sink hole below.[1]
The end of Grievous
- "So uncivilized."
- ―Obi-Wan Kenobi, after killing General Grievous with a blaster
| The Death of General Grievous (info · help) | |
| Listen to Grievous's death cry |
Grievous tries to escape Kenobi.
The two opponents recovered quickly, Kenobi brandishing the electrostaff against the blaster-wielding Grievous. Disarming the General, Kenobi began unleashing a series of jabs against the cyborg's torso, knocking Grievous over. Grievous retaliated with a kick that threw Kenobi across the platform. As Kenobi regained his feet, Grievous closed the distance, engaging Kenobi in a melee. While Grievous' mechanical exoskeleton provided him with a clear advantage, Kenobi managed to pry apart the plates protecting Grievous's internal organs before being thrown to the ground. Kenobi counter-attacked by kicking Grievous's leg, but only injured himself against the hard, durasteel limb.[1]
General Grievous bursts into flames after being shot by a blaster.
Grievous grabbed Kenobi by the collar and threw him across the platform, with Kenobi barely managing to grab onto the edge. Grievous retrieved the electrostaff and advanced on Kenobi to deliver the killing blow. Desperately hanging from the edge, Kenobi used the Force to summon Grievous' blaster to his hand. Blasting five shots through the gaps in the general's armorplast chestplates at the exposed organs, he ignited the tissue. Grievous's internal organs combusted violently, painfully killing the Separatist general. Grievous's death was later reported to the Jedi Council, with Mace Windu preparing to go to Palpatine's office to inform him of this development in the hopes that he lay down his emergency powers, until Anakin revealed Palpatine's stance as a Sith Lord.[1]
Continued fighting and Order 66
- "Commander Cody, the time has come. Execute Order 66."
"Yes, my Lord." - ―Darth Sidious, to CC-2224 ("Cody")


Clone troopers continued to fight the droids.
After the death of Grievous, the droid army continued to engage the clone troopers across Pau City as Kenobi was rejoining the battle. The B1 battle droid 2638 fired down close to Kenobi, but the droid was blasted by enemy fire as heavy fighting continued as the Republic pushed deeper into the city. Kenobi arrived to Cody's position and had his lightsaber returned to him before charging up a cliff ledge. Meanwhile on Coruscant, the 501st Legion led by Darth Vader, formerly Jedi Knight Anakin Skywalker, had began to march into the Jedi Temple. It was then that Cody received a message from Sidious, who was publicly Supreme Chancellor Sheev Palpatine, instructing him to execute Order 66 as part of a purge on the Jedi Order.[1] Regardless of having been friends and serving under Kenobi, Cody's loyalty was abolished by his bio-chip.[7] The order triggered the clone protocol within his genetically implanted bio-chip,[8] as Cody ordered a nearby AT-TE to fire its main cannon at the Jedi, who was ascending the cliff heading up to the Separatist command headquarters on the tenth level, who fell into the depths of the sinkhole below.[1]
Aftermath
The Separatist Droid Army were routed and Pau City[1] was occupied under Republic control, who began to round up and arrested the Utapaun resistance, including Port Administrator Tion Medon.[9] As the Grand Army proceeded to depart, Cody, all too aware of Jedi prowess, was not convinced of Kenobi's death. Probe droids were deployed to the sinkhole floor to find the Jedi Knight's body and ascertain whether he was dead or alive. Kenobi then used stealth to make his way back up to Pau City, get to Grievous's starfighter and escape Utapau.[1]
The Separatist leaders were stationed on the planet before they were moved to a mining complex on Mustafar just prior to the battle on the orders of Darth Sidious, where they were demoralized by their recent defeats and only wished for peace. However they would meet their end by Darth Vader, thus ending the Clone Wars.[1]
Kenobi had fled the Utapau system and established contact with Alderaanian Senator Bail Organa, who had already rescued Grand Master Yoda from Kashyyyk, who had escaped Order 66, by the Alderaanian diplomatic cruiser Tantive III.[1]
Behind the scenes
The Battle of Utapau first appeared in the 2005 film Star Wars: Episode III Revenge of the Sith.[1]
Appearances
- 5-Minute Star Wars Stories Strike Back
- Star Wars: The Prequel Trilogy – A Graphic Novel
- Star Wars Battlefront II (Mentioned only) (DLC)
- Star Wars: Episode III Revenge of the Sith (First appearance)
- Revenge of the Sith Read-Along Storybook and CD
- Ahsoka (Indirect mention only)
- Ahsoka audiobook (Indirect mention only)
- Force Collector (Mentioned only)
Non-canon appearances
- Revenge of the Sith: Episode III (LEGO Star Wars)
- William Shakespeare's Tragedy of the Sith's Revenge: Star Wars Part the Third
 LEGO Star Wars: Droid Tales — "Crisis on Coruscant" (In flashback(s))
Sources
Notes and references
- ↑ 1.00 1.01 1.02 1.03 1.04 1.05 1.06 1.07 1.08 1.09 1.10 1.11 1.12 1.13 1.14 1.15 1.16 1.17 1.18 1.19 1.20 1.21 1.22 1.23 1.24 1.25 1.26 1.27 1.28 1.29 1.30 1.31 1.32 1.33 1.34 1.35 1.36 1.37 1.38 1.39 1.40 1.41 1.42 1.43 1.44 1.45 1.46 1.47 1.48 1.49 1.50 1.51 1.52 1.53 1.54 1.55 1.56 1.57 1.58 1.59 1.60 1.61 1.62 1.63 Star Wars: Episode III Revenge of the Sith
- ↑ Catalyst: A Rogue One Novel
- ↑ Kanan 1: The Last Padawan, Part I: Fight
- ↑ Ahsoka
- ↑ Star Wars: Galactic Atlas
- ↑
 Battle Droid History Gallery in the Databank (backup link); image #29 (of 29)
- ↑ Clone Commander Cody in the Databank (backup link)
- ↑ Star Wars: The Clone Wars — "Orders"
- ↑ Tion Medon in the Encyclopedia (content now obsolete; backup link)