No edit summary |
Orgus Ordo (talk | contribs) m (Updating interlanguage links (script)) |
||
| (298 intermediate revisions by 78 users not shown) | |||
| Line 1: | Line 1: | ||
| − | {{ |
+ | {{Top}} |
| + | {{Update|[[The Ghosts of Maul]], [[Obi-Wan 3]], [[Force Collector]], {{HelmetCollectionCite|24|Highlights of the Saga|Duel to the Death}}, [[Star Wars Helmet Collection 25]], [[Star Wars Helmet Collection 35]]}} |
||
{{Battle |
{{Battle |
||
| ⚫ | |||
| − | |width= |
||
| − | | |
+ | |conc=*[[Battle of Kashyyyk]]<ref name="ROTS">{{Film|III}}</ref> |
| − | *[[Siege of |
+ | *[[Siege of Mandalore]]<ref name="Shattered">{{TCW|Shattered}}</ref> |
| ⚫ | |||
| − | *[[Battle on Lokori]]<ref name="Catalyst: A Rogue One Novel">''[[Catalyst: A Rogue One Novel]]''</ref> |
||
| ⚫ | |||
| − | *[[Battle of Felucia (Outer Rim Sieges)|Battle of Felucia]]<ref name="ROTS" /> |
||
| − | *[[Conquest of Kaller]]<ref name="The Last Padawan 1">''[[Kanan 1: The Last Padawan, Part I: Fight]]''</ref> |
||
*[[Duel in Palpatine's office]]<ref name="ROTS" /> |
*[[Duel in Palpatine's office]]<ref name="ROTS" /> |
||
| − | *[[ |
+ | *[[Battle of Kaller|Conquest of Kaller]]<ref name="Aftermath">{{TBB|Aftermath (episode)}}</ref> |
| + | |next=[[Occupation of Utapau]]<ref name="SWE Tion Medon">{{SWE|characters|tionmedon|Tion Medon}}</ref> |
||
| ⚫ | |||
| ⚫ | |||
| − | *[[Siege of Mandalore]]<ref name="Ahsoka">[[Ahsoka (novel)|''Ahsoka'']]</ref> |
||
| ⚫ | |||
| ⚫ | |||
|name=Battle of Utapau |
|name=Battle of Utapau |
||
| ⚫ | |||
| ⚫ | |||
| − | + | *[[Great Jedi Purge]] {{C|late battle}}<ref name="ROTS" /> |
|
|date=[[19 BBY]]<ref name="Galactic Atlas">''[[Star Wars: Galactic Atlas]]''</ref> |
|date=[[19 BBY]]<ref name="Galactic Atlas">''[[Star Wars: Galactic Atlas]]''</ref> |
||
|place=[[Utapau]]<ref name="ROTS" /> |
|place=[[Utapau]]<ref name="ROTS" /> |
||
| − | |result=*[[Galactic Republic]] victory |
+ | |result=*Decisive [[Galactic Republic]] victory<ref name="ROTS" /> |
| − | **[[Death]] of [[ |
+ | **[[Death]] of the [[Confederacy of Independent Systems|Confederate]] [[Head of State]]<ref name="On the Front Lines">''[[Star Wars: On the Front Lines]]''</ref> and [[Supreme Martial Commander of the Separatist Droid Armies]], [[General]] [[Grievous]]<ref name="ROTS" /> |
| − | ** |
+ | **Presumed death of [[Jedi Master]] [[Obi-Wan Kenobi]]<ref name="ROTS" /> |
| − | ** |
+ | **Destabilizion of the [[Executive Separatist Council|Separatist leadership]]<ref name="ROTS" /> |
| − | ** |
+ | **Beginning of the occupation of Utapau<ref name="SWE Tion Medon" /> and many [[Pau'an]]s arrested<ref name="ROTS" /> |
| + | **Collapse of the Confederacy's [[Separatist officer|military control structure]], marking the technical end of the Clone Wars<ref name="Aftermath" /> |
||
|side1=*Galactic Republic<ref name="ROTS" /> |
|side1=*Galactic Republic<ref name="ROTS" /> |
||
*[[Jedi Order]]<ref name="ROTS" /> |
*[[Jedi Order]]<ref name="ROTS" /> |
||
| − | * |
+ | *[[Utapaun Committee]]<ref name="ROTS" /> |
| − | |side2= |
+ | |side2=Confederacy of Independent Systems<ref name="ROTS" /> |
|side3= |
|side3= |
||
|side4= |
|side4= |
||
| − | |commanders1=*[[Jedi General]] Obi-Wan Kenobi<ref name="ROTS" /> |
+ | |commanders1=*[[High Jedi General]] Obi-Wan Kenobi<ref name="ROTS" /> |
| − | *[[Clone |
+ | *[[Clone Marshal Commander]] [[Cody]]<ref name="ROTS" /> |
| + | *[[Clone Commander]] [[Davijaan]] "Odd Ball"<ref name="HC 45">{{HelmetCollectionCite|45|multiple=[[Helmets]]: Clone Commander Odd Ball; [[Weapons & Uniforms]]: Odd Ball's Pilots in Action; [[Highlights of the Saga]]: The Battle of Teth}}</ref> |
||
| − | |commanders2= |
+ | |commanders2=Head of State General Grievous†<ref name="ROTS" /> |
|commanders3= |
|commanders3= |
||
|commanders4= |
|commanders4= |
||
| ⚫ | |||
| ⚫ | |||
| + | *[[Galactic Republic Navy]]<ref name="ROTS" /> |
||
| ⚫ | |||
| + | **[[Obi-Wan's fleet]]<ref name="HC 41">{{HelmetCollectionCite|41|Databank|Odd Ball}}</ref> |
||
| + | *[[Utapaun Security Forces]]<ref name="ROTS" /> |
||
| + | |unit2=[[Utapau droid army]]<ref name="ROTS" /><ref name="Audio">{{Film|III}} — {{C|Audio description}}</ref> |
||
| + | |unit3= |
||
| + | |unit4= |
||
|forces1=*1 [[Jedi]] Master<ref name="ROTS" /> |
|forces1=*1 [[Jedi]] Master<ref name="ROTS" /> |
||
| − | *[[ |
+ | *A [[battalion]] of [[clone trooper]]s<ref name="Databank Grievous">{{Databank|general-grievous|General Grievous}}</ref> |
| − | **[[ |
+ | **[[Clone paratrooper]]s<ref name="ROTS" /> |
| + | **A [[Clone Sergeant]]<ref name="ROTS" /> |
||
| ⚫ | |||
*[[Low Altitude Assault Transport/infantry]]s<ref name="ROTS" /> |
*[[Low Altitude Assault Transport/infantry]]s<ref name="ROTS" /> |
||
*[[All Terrain Tactical Enforcer]]s<ref name="ROTS" /> |
*[[All Terrain Tactical Enforcer]]s<ref name="ROTS" /> |
||
*[[BARC speeder]]s<ref name="ROTS" /> |
*[[BARC speeder]]s<ref name="ROTS" /> |
||
| − | *At least 2 [[Venator-class Star Destroyer]] |
+ | *At least 2 [[Venator-class Star Destroyer|''Venator''-class Star Destroyers]]<ref name="ROTS" /> |
| + | **[[Vigilance (Venator-class)|''Vigilance'']]<ref name="ROTS" /> |
||
*Many Pau'an warriors<ref name="ROTS" /> |
*Many Pau'an warriors<ref name="ROTS" /> |
||
|forces2=*1 [[cyborg]] general<ref name="ROTS" /> |
|forces2=*1 [[cyborg]] general<ref name="ROTS" /> |
||
| ⚫ | |||
| ⚫ | |||
| + | **[[B1-series battle droid]]s<ref name="ROTS" /> |
||
| ⚫ | |||
| ⚫ | |||
***[[2638]]†<ref name="ROTS" /> |
***[[2638]]†<ref name="ROTS" /> |
||
| − | **[[ |
+ | ***[[OOM-series security droid]]s<ref name="ROTS" /> |
| + | **[[B2-series super battle droid]]s<ref name="ROTS" /> |
||
**[[Droideka]]s<ref name="ROTS" /> |
**[[Droideka]]s<ref name="ROTS" /> |
||
| + | ***[[Droideka Sharpshooter]]<ref name="Star Wars Journeys: Beginnings">''[[Star Wars Journeys: Beginnings]]''</ref> |
||
| ⚫ | |||
| − | * |
+ | **At least 4 [[IG-100 MagnaGuard]]s†<ref name="ROTS" /> |
**[[LM-432 crab droid]]s<ref name="ROTS" /> |
**[[LM-432 crab droid]]s<ref name="ROTS" /> |
||
**[[Octuptarra tri-droid|Octuptarra combat tri-droids]]<ref name="ROTS" /> |
**[[Octuptarra tri-droid|Octuptarra combat tri-droids]]<ref name="ROTS" /> |
||
| + | *1 [[TSMEU-6 personal wheel bike]]†<ref name="ROTS" /> |
||
*[[Variable Geometry Self-Propelled Battle Droid, Mark I]]s<ref name="ROTS" /> |
*[[Variable Geometry Self-Propelled Battle Droid, Mark I]]s<ref name="ROTS" /> |
||
| + | *1 [[Belbullab-22 heavy starfighter]]<ref name="ROTS" /> |
||
| ⚫ | |||
|forces3= |
|forces3= |
||
|forces4= |
|forces4= |
||
| − | |casual1=Many |
+ | |casual1=Many clone troopers<ref name="ROTS" /> |
|casual2=*General Grievous<ref name="ROTS" /> |
|casual2=*General Grievous<ref name="ROTS" /> |
||
| − | * |
+ | *All IG-100 MagnaGuards<ref name="ROTS" /> |
*Many battle [[droid]]s<ref name="ROTS" /> |
*Many battle [[droid]]s<ref name="ROTS" /> |
||
**2638<ref name="ROTS" /> |
**2638<ref name="ROTS" /> |
||
| − | * |
+ | *TSMEU-6 personal wheel bike<ref name="ROTS" /> |
|casual3= |
|casual3= |
||
|casual4= |
|casual4= |
||
| − | |civilian= |
+ | |civilian= |
| + | }} |
||
| ⚫ | |||
| + | {{Quote|A partial message was intercepted in a diplomatic packet from the chairman of Utapau.''"<br />"''Act on this we must. The capture of General Grievous will end this war. Quickly and decisively we should proceed.|Anakin Skywalker and Yoda|<ref name="ROTS" />}} |
||
| − | The '''Battle of Utapau''' acted as one of the last decisive large-scale battles of the [[Confederacy of Independent Systems]] against the [[Galactic Republic]] in the [[Clone Wars]], and was fought between the [[Separatist Droid Army]] and [[Grand Army of the Republic]]. After intelligence reports suggested [[General]] [[Grievous]] had fled to [[Utapau]] following the [[Battle of Coruscant]], Jedi General [[Obi-Wan Kenobi]] and the [[212th Attack Battalion]] were dispatched to deal with Grievous. After landing on Utapau alone ahead of the main clone force, Kenobi was directed by [[Tion Medon]] to the tenth level, where Grievous and other [[Separatist Council|Separatist leaders]] were hiding. Kenobi, after waiting for the Separatist Councilors to leave, had the Republic forces move in and engaged Grievous in a fierce and lengthy duel, eventually shooting him to death. Not long after the general's death, [[Order 66]] was issued to the clone troopers and Kenobi was forced to escape Utapau aboard Grievous' own starfighter. |
||
| + | The '''Battle of Utapau''', also known as the '''liberation of Utapau''', was the decisive final battle that took place on the [[Invasion of Utapau|Separatist occupied]] [[Planet|world]] of [[Utapau]] in [[19 BBY]]. Fought by the [[Separatist Droid Army]] against the [[Grand Army of the Republic]] and [[Utapaun Security Forces|local security forces]], it was one of the last major confrontations of the [[Clone Wars]], [[the galaxy]]-wide military conflict between the [[Galactic Republic]] and the [[Confederacy of Independent Systems]] and was considered to be symbolically the end of the war itself. |
||
| + | |||
| + | The battle occurred as a result of [[General]] [[Grievous]]' escape during the [[Battle of Coruscant|Separatist attack]] on [[Coruscant]], where the Confederate [[Head of State]] [[Count]] [[Dooku]] was [[Death|killed]] by [[Jedi General]] [[Anakin Skywalker]]. As the [[Supreme Martial Commander of the Separatist Droid Armies]], Grievous became the prime target of the [[Republic Military]] after Dooku's demise. Altered to Grievous' presence on Utapau by [[Clone Intelligence]], the Republic deployed the [[7th Sky Corps]] under [[Jedi General]] [[Obi-Wan Kenobi]] who personally engaged Grievous in a [[lightsaber duel]] prior to the arrival of his [[clone trooper]]s. Grievous attempted another escape while his [[battle droid]]s fought the Republic [[Cloning|clone]] [[troop]]s, but ultimately the [[Kaleesh]] [[cyborg]] was killed by Kenobi. Although the [[Executive Separatist Council]] had been evacuated to [[Mustafar]] before the battle started, the [[Separatist officer|Separatist control structure]] effectively collapsed with Grievous' death. |
||
| + | |||
| + | As the clone [[trooper]]s continued to fight the battle [[droid]]s in [[Pau City]], [[Clone Marshal Commander]] [[Cody]] received a message from [[Supreme Chancellor]] [[Darth Sidious|Sheev Palpatine]] ordering him to execute [[Order 66]]. [[Behavioral modification biochip|Programmed]] to comply with the order to [[Great Jedi Purge|exterminate the Jedi]], the [[Clone Commander]] tried to have Kenobi executed for [[treason]]. Betrayed by his [[soldier]]s, Kenobi left Utapau in [[Soulless One|Grievous' starfighter]]. The clones also turned against their Utapaun allies, arresting [[Port Administrator]] [[Tion Medon]] and placing Utapau under [[Occupation of Utapau|military occupation]]. |
||
| + | |||
| + | The Clone Wars officially ended with Grievous' destruction during the Battle of Utapau, after which the remaining Separatist leaders were [[Mission to Mustafar|assassinated on Mustafar]] by the [[Sith Lord]] [[Darth]] Vader. Having all but destroyed the [[Jedi Order]], Chancellor Palpatine—the public persona of the [[Dark Lord of the Sith]] Darth Sidious—[[Proclamation of the New Order|declared]] the start of his [[Imperial Era|reign]] as [[Galactic Emperor|Emperor]] of the [[Galactic Empire]]. |
||
==Prelude== |
==Prelude== |
||
| ⚫ | |||
| − | {{Quote|Our clone intelligence units have discovered the location of General Grievous. He's hiding in the Utapau system.|Palpatine, to Anakin Skywalker|Star Wars: Episode III Revenge of the Sith}} |
||
| + | {{Quote|It won't be long before the armies of the Republic track us here. I'm sending you to the Mustafar system, in the Outer Rim. It is a volcanic planet. You will be safe there.''"<br />"''Safe? Chancellor Palpatine managed to escape your grip, General. Without Count Dooku, I have doubts about your ability to keep us safe.|Grievous and Nute Gunray|<ref name="ROTS" />}} |
||
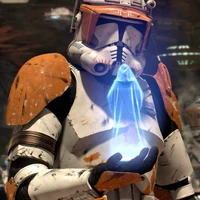
| − | After three years of [[Clone Wars|fighting]], the [[Galactic Republic]] began to gain an advantage over the [[Confederacy of Independent Systems]], many of whose high ranking leaders were captured or dead, with the most recent being [[Head of State]] [[Count]] [[Dooku]]. Republic [[Clone Intelligence]] soon managed to discover the location of [[General]] [[Grievous]], who had succeeded Dooku as Head of State and informed the [[Jedi High Council|Jedi Council]], who asked [[Jedi Master]] [[Obi-Wan Kenobi]] to lead the battle. After saying farewell to [[Anakin Skywalker]], he organized a fleet of [[Venator-class Star Destroyer|''Venator''-class Star Destroyers]] carrying an army of [[clone trooper]]s, led by [[Cloning|clone]] [[Commander]] [[CC-2224|Cody]].<ref name="ROTS" /> |
||
| + | [[File:Sep_council.png|thumb|left|250px|The Separatist Council met with General Grievous on Utapau.]] |
||
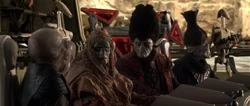
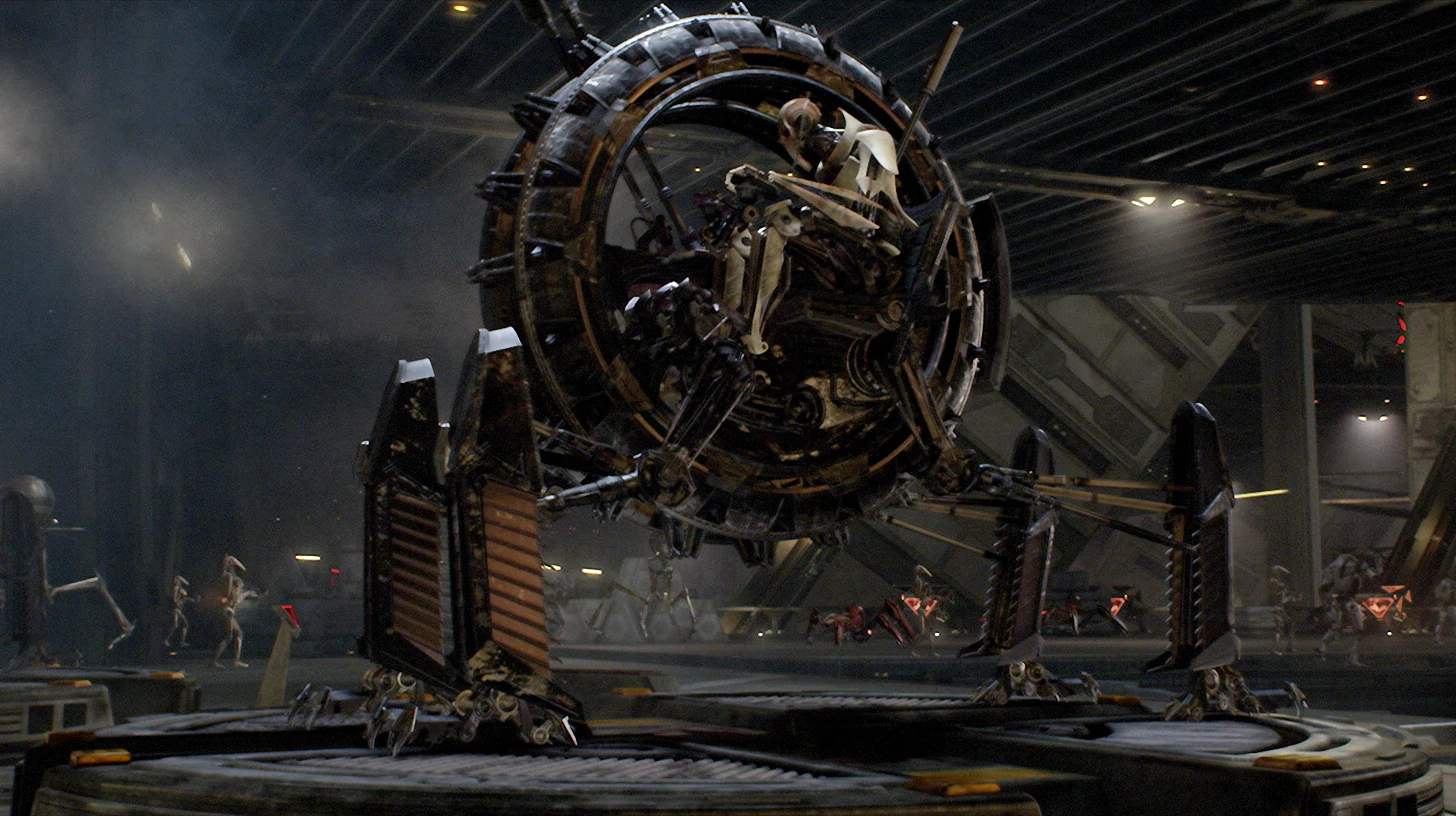
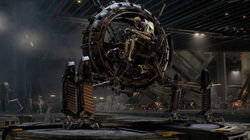
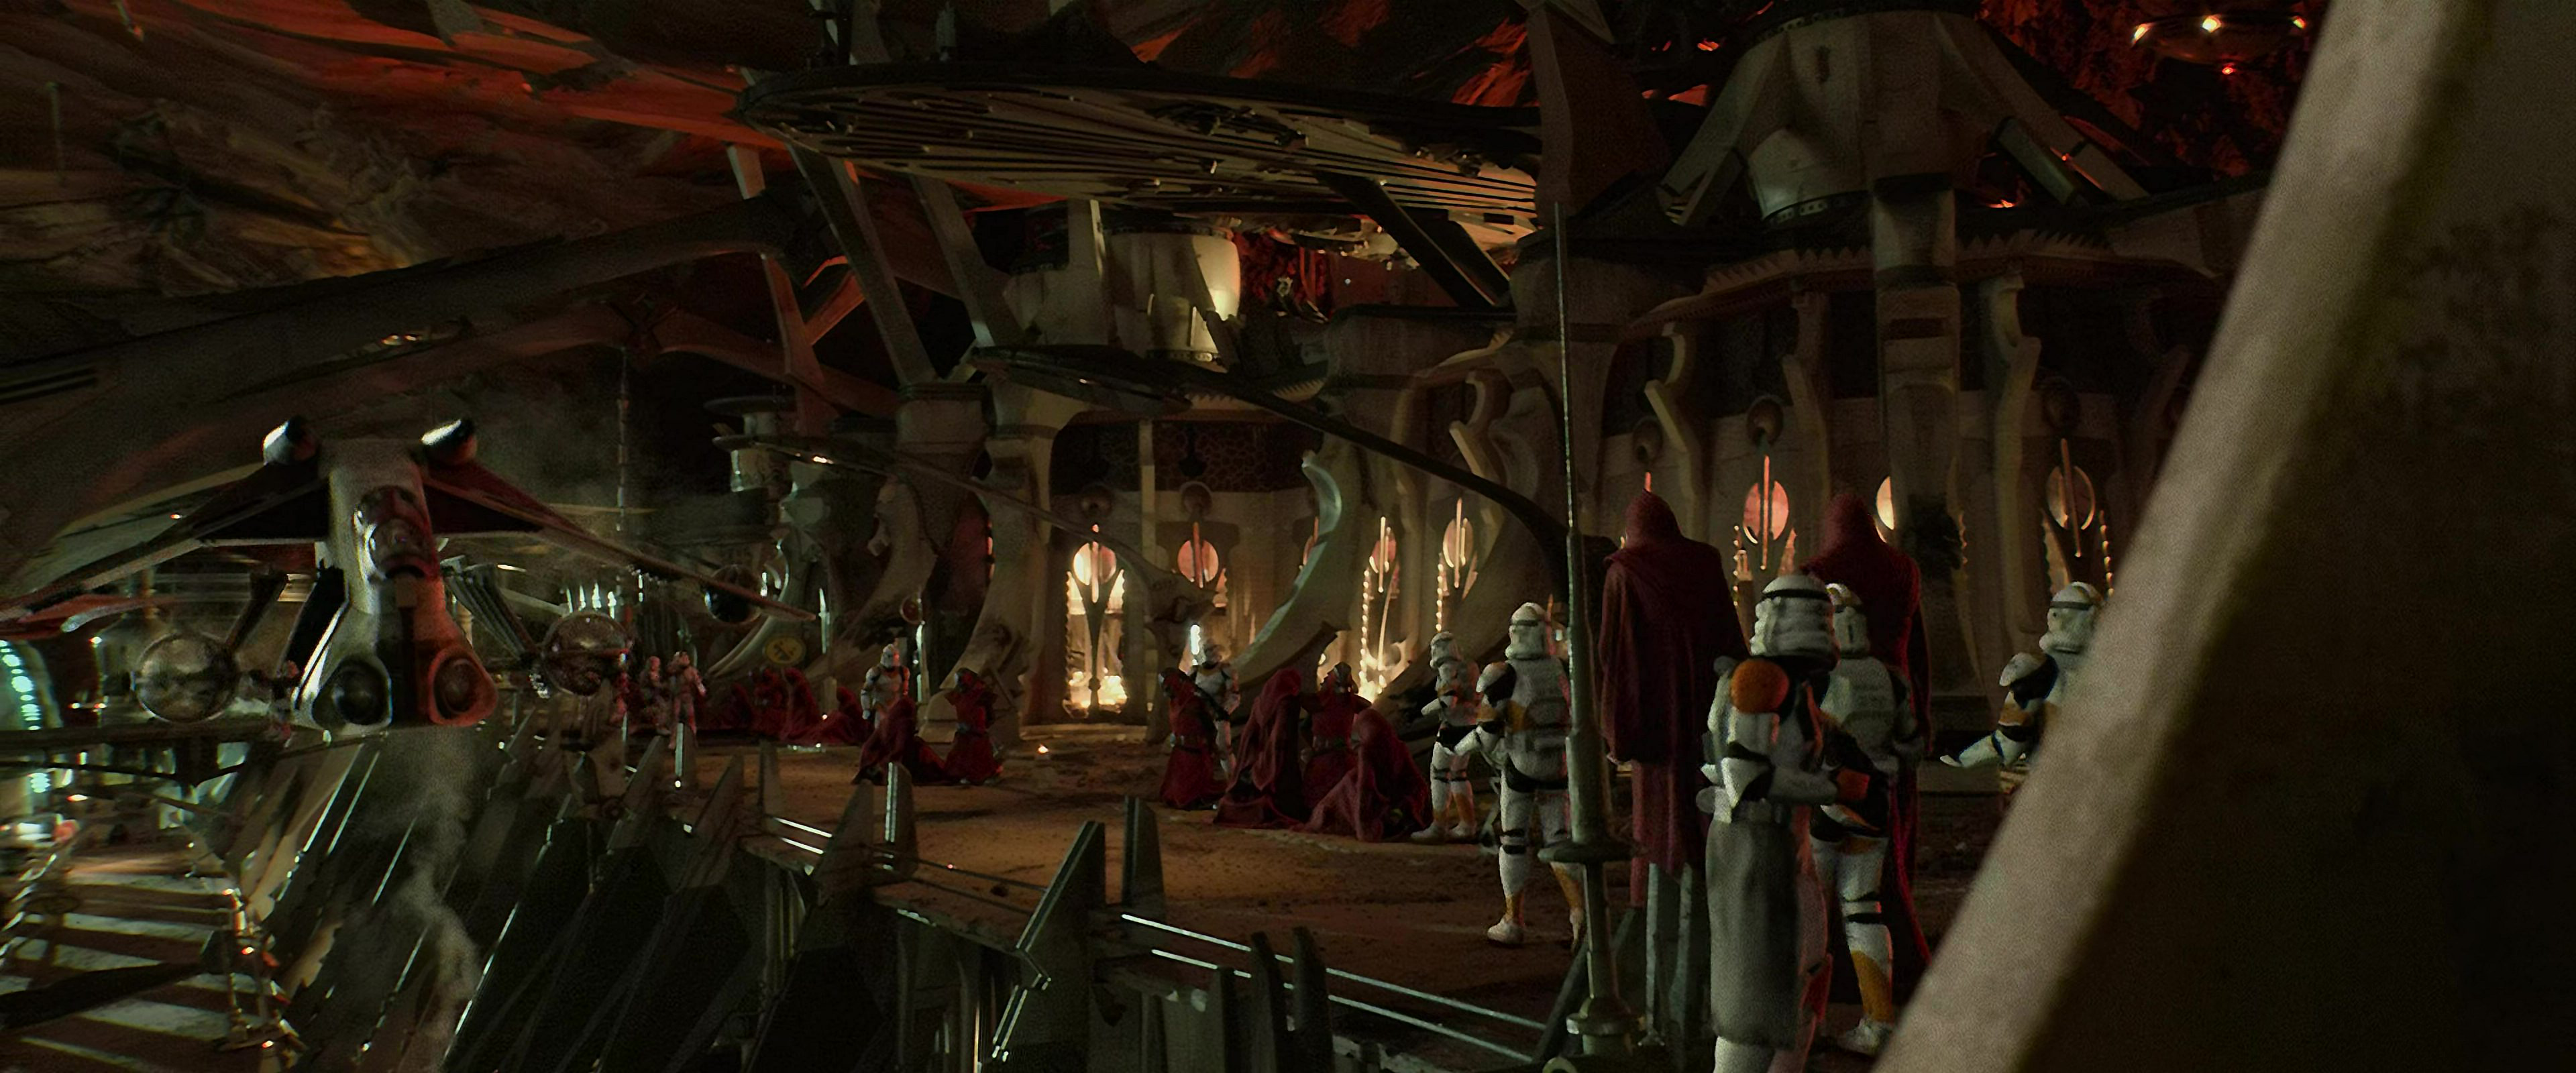
| + | During the [[Clone Wars]], the [[planet]] [[Utapau]] was [[Invasion of Utapau|subjugated]] by the [[Confederacy of Independent Systems]].<ref name="Grievous wheel bike">{{Databank|general-grievous-tsmeu-6-wheel-bike|General Grievous' TSMEU-6 Wheel Bike}}</ref> [[General]] [[Grievous]] retreated to Utapau after escaping from the [[Battle of Coruscant]], where [[Count]] [[Dooku]]—the [[Sith Lord]] [[Darth]] Tyranus—was [[Death|killed]] by the [[Jedi Knight]] [[Anakin Skywalker]]. With Tyranus dead, the [[Kaleesh]] [[warlord]]<ref name="ROTS" /> became the Confederacy's acting [[Head of State]].<ref name="On the Front Lines" /> [[Darth Sidious]], the [[Sith Master]] of the late Tyranus, contacted Grievous upon the general's arrival on Utapau, instructing him to relocate the [[Executive Separatist Council]] to the [[Mustafar system]]. The [[Dark Lord of the Sith]] also assured Grievous that the war's end was near in spite of the loss of Tyranus, which Sidious deemed necessary to his plans. Sidious explained that he would soon have a new [[Sith apprentice]] who was much younger and stronger than the aging Tyranus.<ref name="ROTS" /> |
||
| + | |||
| + | The general addressed the council in a [[Unidentified core ship|converted core ship]], where he informed them that an attack by the [[Grand Army of the Republic]] was expected, and was therefore moving them to the planet [[Mustafar]], where he claimed that they would be safe. Though [[Viceroy of the Trade Federation]] [[Nute Gunray]] with support from other council members began to doubt the abilities of their new leader to keep them safe when compared to the late Dooku. A brief moment of tension arose between Gunray and the general, but he nevertheless followed his orders to relocate the council, leaving just moments before his nemesis [[Jedi General]] [[Obi-Wan Kenobi]]'s arrival.<ref name="ROTS" /> |
||
| + | |||
| + | ===The hunt for Grievous=== |
||
| + | {{Quote|I'm being sent to hunt down General Grievous on Utapau.|Obi-Wan Kenobi, to Ahsoka Tano|<ref name="The Phantom Apprentice">{{TCW|The Phantom Apprentice}}</ref>}} |
||
| + | [[File:CodyObiWan.png|thumb|right|250px|Jedi General Obi-Wan Kenobi and the 212th Attack Battalion deployed to Utapau with orders to capture or destroy General Grievous.]] |
||
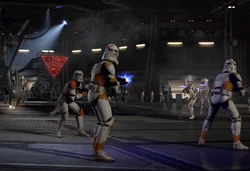
| + | Meanwhile, the [[Galactic Republic]]'s [[Clone Intelligence]] had managed to discover the location of Grievous. this led to the [[Jedi High Council]] deciding to send [[Jedi Master]] Obi-Wan Kenobi to lead the battle after rejecting [[Supreme Chancellor]] Sheev Palpatine's recommendation of sending Anakin Skywalker to Utapau. After saying farewell to Skywalker in what would be the last time they spoke as friends, Kenobi organized a [[fleet]] of [[Venator-class Star Destroyer|''Venator''-class Star Destroyers]] carrying an army of [[clone trooper]]s, led by [[Clone Marshal Commander]] [[Cody]].<ref name="ROTS" /> |
||
| + | |||
| + | En route to Utapau, Kenobi spoke via [[hologram]] to Skywalker's former [[Padawan]] [[Ahsoka Tano]], who was leading forces in the [[Siege of Mandalore]] to capture his other nemesis, the former [[Sith]] [[Lord]] [[Maul]]. Tano asked for information about Sidious, who Maul had mentioned, and Kenobi told her that Darth Sidious was the Sith Lord the [[Jedi]] believed to be behind the Clone War and playing both sides of the conflict from its very start. However, as Count Dooku was now dead after being killed by Skywalker, they could not gain any more information out of him and requested she capture Maul to discover his old master's secret identity. Tano asked Kenobi if he and Skywalker could help her or send more men, but he told her that was not possible due to his mission to Utapau to hunt down General Grievous, and Skywalker having been appointed to [[spy]] on Chancellor Palpatine. Kenobi asked Tano to speak with Skywalker regarding his concerns about the assignment, but the conversation ended when [[Clone Commander]] [[Rex|CT-7567]] "Rex" reported an attack on [[Mandalore]]. Tano asked Kenobi to tell Skywalker of how the Council isn't always right before they signed off.<ref name="The Phantom Apprentice" /> |
||
| − | [[File: |
+ | [[File:ObiWanKenobiEta2-SWZ.png|thumb|left|250px|Kenobi arrived at Pau City in an Eta-2 ''Actis''-class interceptor.]] |
| − | Kenobi arrived on Utapau in his [[Eta-2 Actis-class interceptor|Eta-2 ''Actis''-class interceptor]] under the pretense of refueling his ship. He was greeted by [[Tion Medon]], the Port Administrator of [[Pau City]], observed from a distance by one of Grievous' [[IG-100 MagnaGuard |
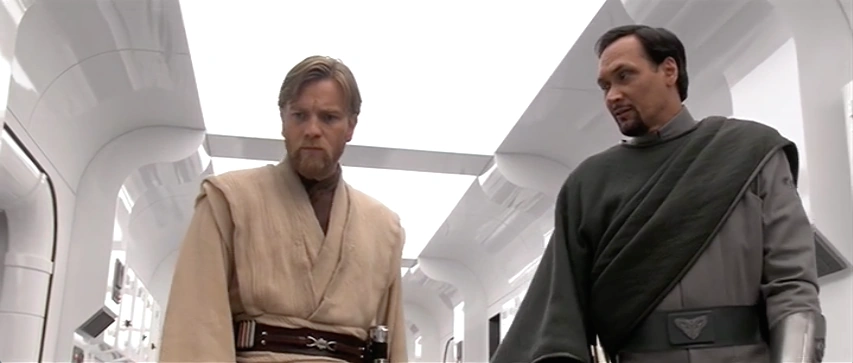
+ | Kenobi arrived on Utapau in his [[Eta-2 Actis-class interceptor|Eta-2 ''Actis''-class interceptor]] under the pretense of refueling his ship. He was greeted by [[Tion Medon]], the [[Port Administrator]] of [[Pau City]], observed from a distance by one of Grievous' [[IG-100 MagnaGuard]]s. Medon discreetly revealed information that the Confederacy was occupying the [[city]] and the [[Pau'an]]s were being held as hostages so that they could use Pau City as a hiding place for the Separatist Council, Grievous, and his army of [[battle droid]]s. Kenobi sent the droid [[R4-G9]] back to his fleet to inform the clones of the situation, but he stayed in city to engage Grievous. Kenobi commandeered a [[varactyl]] beast named [[Boga]] as a mount, and rode in secret to infiltrate the hangar of the modified [[core ship]] and went onto a platform overlooking the hangar where he witnessed the summit being held by the Separatist leadership.<ref name="ROTS" /> |
==The battle== |
==The battle== |
||
===Engaging Grievous=== |
===Engaging Grievous=== |
||
| + | {{Quote|Clone intelligence is reporting Jedi General Obi-Wan Kenobi has found and engaged General Grievous on Utapau.''"<br />"''If he captures or kills Grievous, the Separatist command structure will collapse.''"<br />"''And most likely the droid armies along with them.|"Tech" and CT-1409 "Echo"|<ref name="Aftermath" />}} |
||
| − | {{Quote|Back away! I will deal with this Jedi slime myself!|Grievous|Star Wars: Episode III Revenge of the Sith}} |
||
| − | + | [[File:Obi-Wan_Kenobi_SWDL.png|thumb|right|250px|Kenobi challenged Grievous to single combat.]] |
|
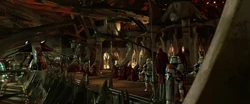
| − | After the Separatist Council departed the |
+ | After the Separatist Council departed the [[hangar]], Kenobi revealed himself by dropping from the catwalk above the hangar, and was immediately surrounded by [[battle droid]]s and found himself confronted by four of Grievous' IG-100 MagnaGuards. Kenobi defeated them quickly, using [[the Force]] to dislodge a cargo module hanging from the ceiling and crushed three of them, casually decapitating the sole survivor. Grievous's [[droid]]s were preparing to open fire on Kenobi, but were called off as Grievous decided to challenge Kenobi himself. Drawing four [[lightsaber]]s at once, he then spun them rapidly in a buzzsaw motion and advanced on Kenobi. Kenobi slowly retreated before thrusting his lightsaber into the swirling energy blades, engaging Grievous in a spectacular, though brief, display of swordsmanship. Grievous remained unable to penetrate Kenobi's defense, so he ramped up his attacks even further.<ref name="ROTS" /> Grievous' usual, more wide-ranging fighting style was neutralized by Obi-Wan limiting his movement to the catwalk. After so many experiences with Grievous, Kenobi kept the fight close to the cyborg.<ref name="The End of the Clone Wars">{{EncyclopediaCite|The End of the Clone Wars}}</ref> Kenobi was able to amputate two of Grievous' robotic arms, as Kenobi's blade, instead of intercepting Grievous's blade, sliced the cyborg's left lower wrist. Staring in surprise at his smoking stump, Grievous lunged in another attack. After another brief bout of fencing, another of Grievous' lightsabers, still clutched in his metal hand, bounced on the deck.<ref name="ROTS" /> |
| + | |||
| + | Clone Intelligence reported Kenobi's battle with Grievous on an encrypted communication channel, which was monitored by "[[Tech]]," a member of [[Clone Force 99]] during the [[squad]]'s [[Battle of Kaller|mission]] on [[Kaller]]. Though assigned to Jedi General [[Depa Billaba]] after her reinforcements were recalled to Coruscant, Tech surmised that the outcome of the Battle of Utapau could mark the end of the Clone Wars. [[Echo|CT-1409]] "Echo," another member of Clone Force 99, commented that Grievous' death would cause the Separatist command structure to collapse, along with their droid armies according to Tech. Though intrigued by the clone's theory, Billaba told them to focus on the Republic operation on Kaller, knowing that they were too far away to affect the outcome of a battle on another planet.<ref name="Aftermath" /> |
||
===Republic arrival=== |
===Republic arrival=== |
||
| − | {{Quote|Army or not, you must realize you are doomed!|Grievous |
+ | {{Quote|Army or not, you must realize you are doomed!|Grievous, to Obi-Wan Kenobi|<ref name="ROTS" />}} |
| − | [[File:Battleofutapau.png|thumb|left|250px|The Battle of Utapau |
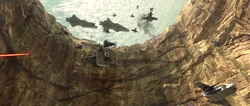
+ | [[File:Battleofutapau.png|thumb|left|250px|The Battle of Utapau began with the arrival of the Grand Army of the Republic.]] |
| − | At that moment, Republic forces led by Commander Cody arrived, with Star destroyers pounding fire on Separatist defensive positions and round after round of |
+ | At that moment, Republic forces led by [[Commander]] Cody arrived, with Star destroyers pounding fire on Separatist defensive positions and round after round of [[Cloning|clones]] repelling from gunships. As Republic forces descended into Pau City, the Separatists deployed [[Variable Geometry Self-Propelled Battle Droid, Mark I|Vulture Droids]] to counter the Republic's aerial forces that had begun attacking the droid garrisons. While the clone [[trooper]]s were held back by [[LM-432 crab droid]]s and other droid forces, Grievous prepared to resume the [[lightsaber duel]], advancing on his opponent. However, Kenobi [[Force push]]ed the general, sending him flying up and crashing against the ceiling. Dropping his two remaining lightsabers as he plummeted to the hangar floor, an unarmed Grievous chose to flee. Grievous crawled to his [[TSMEU-6 personal wheel bike]] and mounted it, speeding out of the hangar and dropping to the lower levels of the city, crushing everything in his path as he raced towards the docking platform where his private ship waited.<ref name="ROTS" /> |
| − | [[File: |
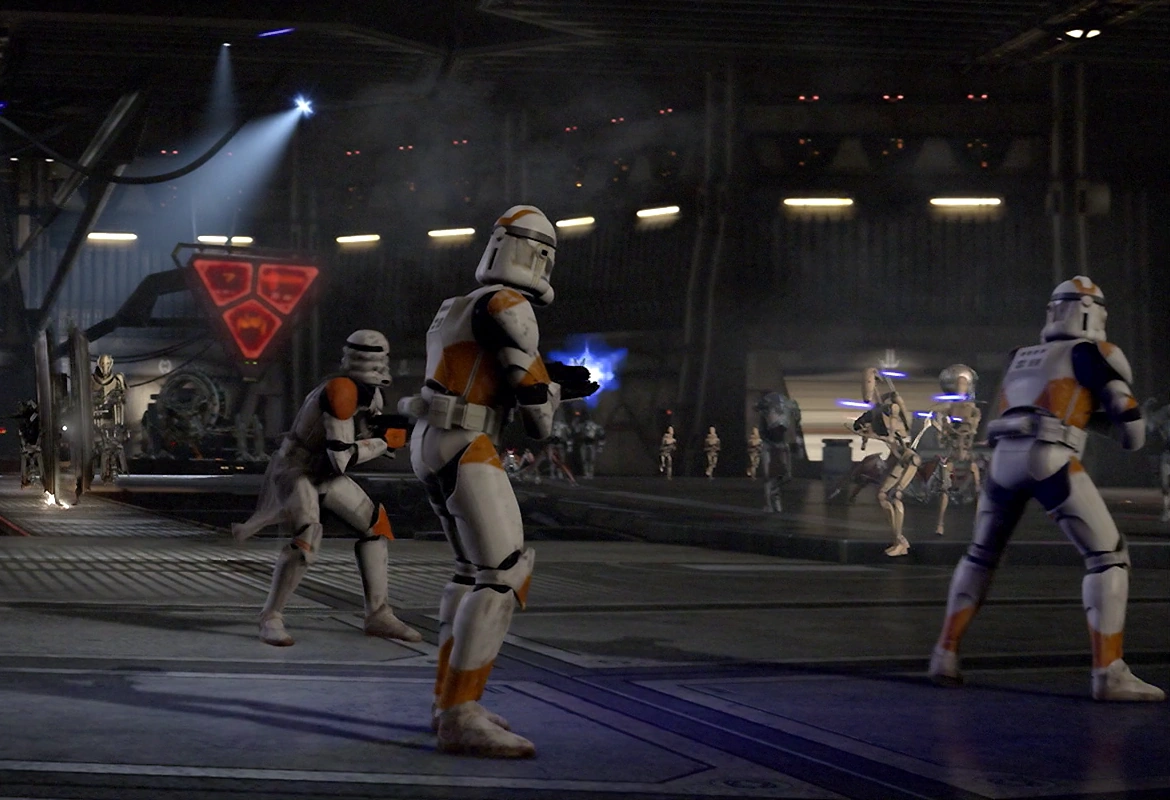
+ | [[File:Clone_Troops_Utapau.png|thumb|right|250px|Clone troopers fighting the droid army after their arrival.]] |
| + | Kenobi pursued on his varactyl, Boga, but lost his lightsaber after the jarring impact on the way down, the lightsaber eventually landing at the feet of Commander Cody who later informed the Jedi Council members about Kenobi's current pursuit and battle with Grievous, to which Jedi Master [[Mace Windu]] then had Skywalker deliver the news to Chancellor Palpatine. Windu and the other council members secretly voice their suspicions regarding Palpatine's intentions, with Windu mentioning the possibility that they would have to remove Palpatine from office should he refuse to give up his emergency powers after the defeat of Grievous, stressing that the council would need to take control of the [[Galactic Senate]] to ensure a peaceful transition of power for a new Supreme Chancellor. However, [[Grand Master]] [[Yoda]] acknowledged they had to take grave care, believing that their current plan would them to a dark place.<ref name="ROTS" /> Yoda also told Ahsoka Tano that Kenobi had engaged Grievous when she joined the meeting before wishing the Force to be with her.<ref name="Shattered">{{TCW|Shattered}}</ref> |
||
| ⚫ | Kenobi pursued Grievous in a furious chase through the streets of Pau City as the battle raged around them. As Kenobi caught up to the General, Grievous thrust at Boga with an [[electrostaff]] he stashed in the wheel bike. Kenobi managed to grab hold of the shaft of the weapon and wrench it from the cyborg's hands. Kenobi then attempted to destroy the wheels on Grievous's vehicle with it before attacking the General himself with it. Grievous managed to regain hold of it, and pulled it back, and Kenobi along with it. As the two grappled for control of the wheel bike, Grievous pulled out a [[blaster]] and attempted to shoot Kenobi, though the Jedi evaded the shots. Unfortunately, Kenobi's movements |
||
| + | [[File:Wheelbike.jpg|thumb|left|250px|Grievous retreated from the battle on his wheelbike.]] |
||
| ⚫ | |||
| ⚫ | Kenobi pursued Grievous in a furious chase through the streets of Pau City as the battle raged around them. As Kenobi caught up to the General, Grievous thrust at Boga with an [[electrostaff]] he stashed in the wheel bike. Kenobi managed to grab hold of the shaft of the weapon and wrench it from the cyborg's hands. Kenobi then attempted to destroy the wheels on Grievous's vehicle with it before attacking the General himself with it. Grievous managed to regain hold of it, and pulled it back, and Kenobi along with it. As the two grappled for control of the wheel bike, Grievous pulled out a [[blaster]] and attempted to shoot Kenobi, though the Jedi evaded the shots. Unfortunately, Kenobi's movements overbalanced the wheel bike, causing it to flip as they arrived at Grievous' landing platform. While they were thrown off, the bike rolled off the platform and fell into the sink hole below.<ref name="ROTS" /> |
||
| − | {{Quote|So uncivilized.|Obi-Wan Kenobi, after killing General Grievous with a blaster|Star Wars: Episode III Revenge of the Sith}} |
||
| − | {{Listen|filename=GrievousDeath.ogg|title=The Death of General Grievous|description=Listen to Grievous's death cry}} |
||
| ⚫ | |||
| ⚫ | The two opponents recovered quickly, Kenobi brandishing the |
||
| ⚫ | The two opponents recovered quickly, Kenobi brandishing the electro staff against the blaster-wielding Grievous. Disarming the General, Kenobi began unleashing a series of jabs against the cyborg's torso, knocking Grievous over. Grievous retaliated with a kick that threw Kenobi across the platform. As Kenobi regained his feet, Grievous closed the distance, engaging Kenobi in a melee. While Grievous' mechanical exoskeleton provided him with a clear advantage, Kenobi managed to pry apart the plates protecting Grievous's internal organs before being thrown to the ground. Kenobi counter-attacked by kicking Grievous's leg, but only injured himself against the hard, [[durasteel]] [[limb]].<ref name="ROTS" /> |
||
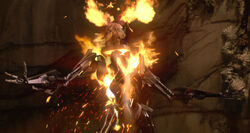
| ⚫ | Grievous grabbed Kenobi by the collar and threw him across the platform, with Kenobi barely managing to grab onto the edge. Grievous retrieved the electrostaff and advanced on Kenobi to deliver the killing blow. Desperately hanging from the edge, Kenobi used the Force to summon Grievous' blaster to his hand. Blasting five shots through the gaps in the general's armorplast chestplates at the |
||
| ⚫ | |||
| ⚫ | |||
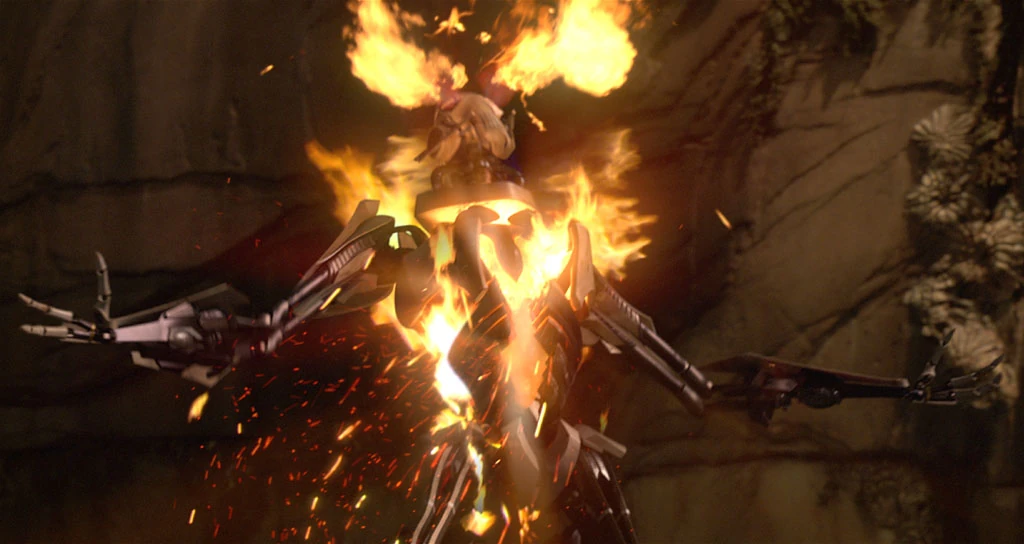
| ⚫ | Grievous grabbed Kenobi by the collar and threw him across the platform, with Kenobi barely managing to grab onto the edge. Grievous retrieved the electrostaff and advanced on Kenobi to deliver the killing blow. Desperately hanging from the edge, Kenobi used the Force to summon Grievous' E-5 blaster to his hand. Blasting five well-placed shots through the gaps in the general's armorplast chestplates at the organs that he had exposed, Kenobi ignited the tissue, violently combusting the internal organs and painfully killing the Separatist leader. Grievous's death was later reported to the Jedi Council, with Windu preparing to go to Palpatine's office to inform him of this development in the hopes that he lay down his emergency powers, until Skywalker revealed Palpatine's stance as a Sith Lord.<ref name="ROTS" /> |
||
| ⚫ | |||
| + | |||
| ⚫ | |||
| ⚫ | |||
| − | After the death of Grievous, the droid army continued to engage the clone troopers across Pau City as Kenobi was rejoining the battle. The [[B1 battle droid]] [[2638]] fired down close to Keonbi, but the droid was blasted by enemy fire as heavy fighting continued. Kenobi arrived to Cody's position and had his lightsaber returned to him before charging up a cliff ledge. Meanwhile on [[Coruscant]], the [[501st Legion]] led by [[Darth]] Vader, formerly [[Jedi Knight]] Anakin Skywalker, had began to [[Attack on the Jedi Temple|march]] into the [[Imperial Palace|Jedi Temple]]. It was then that Cody received a message from the [[Dark Lord of the Sith]] [[Darth Sidious]], who was publicly [[Supreme Chancellor]] Sheev Palpatine, instructing him to execute [[Order 66]] as part of a [[Jedi Purge|purge]] on the [[Jedi Order]].<ref name="ROTS" /> Regardless of having been friends and serving under Kenobi, Cody's allegiance was abolished by his [[Control chip|bio-chip]].<ref name="Cody Databank">{{Databank|clone-commander-cody|Clone Commander Cody|archivedate=20170607175032}}</ref> The order triggered the clone protocol within his genetically implanted bio-chip,<ref name="Orders">{{TCW|Orders}}</ref> as Cody ordered a nearby [[All Terrain Tactical Enforcer|AT-TE]] to fire its main cannon at the [[Jedi]], who was ascending the cliff heading up to the Separatist command headquarters on the tenth level, who fell into the depths of the sinkhole below.<ref name="ROTS" /> |
||
| ⚫ | |||
| + | [[File:Battle_of_Utapau.png|thumb|left|250px|The fighting on Utapau continued despite the destruction of Grievous.]] |
||
| + | The droid army continued to engage the clone troopers across Pau City during the duel between the Jedi Master and the general, with the droids trying to hold back the advancing Grand Army.<ref name="ROTS" /> Some battle droids, however, were ensnared by native [[ginnthos]] during the battle.<ref name="BMF 40">{{BuildFalconCite|40|Guide to the Galaxy|Wildlife of Utapau}}</ref> While Cody continued to commanded the clones safely from behind Republic lines, where he was able to catch Kenobi's falling [[Obi-Wan Kenobi's third lightsaber|lightsaber]] as the fighting waged around him.<ref name="ROTS" /> |
||
| + | |||
| + | After killing Grievous, Kenobi made his way back to the battle. The [[B1-series battle droid]] [[2638]] fired down close to the Jedi, but the droid was blasted by enemy fire as heavy fighting continued as the Republic had finally started to push the droids from the edge of the sinkhole deeper into the city, with heavy street fighting occurring at multiple points in the city as the Republic advanced. Kenobi soon arrived to Cody's command position and had his lightsaber returned to him before charging up a cliff ledge to finish the battle.<ref name="ROTS" /> |
||
| + | |||
| + | ===Order 66=== |
||
| ⚫ | |||
| + | [[File:End_Days.jpg|thumb|right|200px|Darth Sidious ordered Cody to execute Order 66 against his general, Kenobi.]] |
||
| + | Meanwhile, on [[Coruscant]], Anakin Skywalker turned to the [[dark side of the Force]] and became Sidious's Sith apprentice, Darth Vader. The newly anointed Sith Lord led the [[501st Legion]]'s [[Operation: Knightfall|attack]] on the [[Imperial Palace|Jedi Temple]]. It was then that Cody received a message from Sidious who was publicly Supreme Chancellor Sheev Palpatine, instructing him to execute [[Order 66]] as part of a [[Great Jedi Purge|purge]] on the [[Jedi Order]].<ref name="ROTS" /> |
||
| + | |||
| + | With Sidious issuing the order to Cody, Cody's [[Behavioral modification biochip|bio-chip]] activated and immediately brainwashed him into believing that Kenobi was a traitor to the Republic that needed to be executed.<ref name="Cody Databank">{{Databank|clone-commander-cody|Clone Commander Cody}}</ref> Despite serving under Kenobi and being his friend, his loyalty was forcibly abolished due to the activation of his Biochip.<ref name="Orders">{{TCW|Orders}}</ref> Cody then ordered a nearby [[All Terrain Tactical Enforcer]] to fire its main [[cannon]] at the Jedi, who was ascending the cliff heading up to the Separatist command headquarters on the tenth level. The tank fired a single bolt that almost hit Kenobi, who fell into the depths of the sinkhole below.<ref name="ROTS" /> |
||
==Aftermath== |
==Aftermath== |
||
| + | {{Dialogue|"Wrecker"|What did we miss now?|Quartermaster|The end of the war.|"Hunter"|Say again, Trooper?|Quartermaster|General Grievous was defeated on Utapau. The Separatist leadership has collapsed. The war is over.|attr="Wrecker," a shock trooper quartermaster, "Hunter"|src=<ref name="Aftermath" />}} |
||
| − | The [[Separatist Droid Army]] were routed and Pau City<ref name="ROTS" /> was occupied under Republic control, who began to round up and arrested the [[Pau'an military|Utapaun resistance]], including [[Port Administrator]] Tion Medon.<ref name="SWE Tion Medon">{{SWE|characters|tionmedon|Tion Medon}}</ref> As the Grand Army proceeded to depart, Cody, all too aware of Jedi prowess, was not convinced of Kenobi's death. [[Probe droid]]s were deployed to the sinkhole floor to find the Jedi Knight's body and ascertain whether he was dead or alive. Kenobi then used stealth to make his way back up to Pau City, get to [[Soulless One|Grievous's starfighter]] and escape Utapau.<ref name="ROTS" /> |
||
| ⚫ | |||
| + | The [[Separatist Droid Army]] was routed and Pau City<ref name="ROTS" /> was [[Occupation of Utapau|occupied]] by the Republic, which began to round up and arrest the [[Utapaun Security Forces|Utapaun resistance]], including [[Port Administrator]] Tion Medon,<ref name="SWE Tion Medon" /> all before readying to leave the sinkhole world.<ref name="ROTS" /> With the death of Grievous, the Separatist leadership fell apart. News of the battle's outcome spread throughout the galaxy<ref name="Aftermath" /> even though numerous other fronts were still active. Despite the Separatist Council's continued efforts to lead their movement and military,<ref name="ROTS" /> the breakdown of CIS command left the war to have technically already ended with Grievous's defeat.<ref name="Aftermath" /> |
||
| + | When Clone Force 99 returned to [[Kamino]] after witnessing the execution of General Billaba, they encountered a large contingent of [[Imperial shock trooper|clone shock troopers]] of the [[Coruscant Guard]] stationed in [[Tipoca City]]. One of the shock troopers, a [[Unidentified shock trooper quartermaster|quartermaster]], informed "[[Wrecker]]," [[Clone Sergeant]] "[[Hunter]]," and the rest of the squad that the Clone Wars concluded with Grievous' defeat on Utapau and the subsequent collapse of the Separatist leadership, confirming Tech's prediction of the war's end.<ref name="Aftermath" /> |
||
| ⚫ | |||
| + | [[File:Obi-Wan_Kenobi_and_Bail_Organa_Discuss_The_Situation.png|thumb|left|250px|After fleeing Utapau, Kenobi was contacted by Senator Bail Organa, who witnessed the fall of the Jedi Temple on Coruscant.]] |
||
| − | Kenobi had fled the [[Utapau system]] and established contact with [[Alderaanian]] [[Senator]] [[Bail Organa]], who had already rescued [[Grand Master]] [[Yoda]] from [[Kashyyyk]], who had escaped Order 66, by the [[Alderaanian diplomatic cruiser]] ''[[Tantive III]]''.<ref name="ROTS" /> |
||
| + | As the Grand Army proceeded to depart, however, Cody, all too aware of Jedi prowess, was not convinced of Kenobi's death. [[Probe droid]]s were deployed to the sinkhole floor to find the Jedi Master's body and ascertain whether he was dead or alive. Kenobi then used stealth to make his way back up to Pau City, get to [[Soulless One|Grievous' starfighter]] and escape Utapau, becoming one of the few Jedi to escape the destruction of the Jedi Order. As he fled the [[Utapau system]], Kenobi established contact with [[Senator]] of [[Alderaan]] [[Bail Prestor Organa]], who had already rescued Grand Master Yoda from [[Kashyyyk]], where he had been attacked by the [[41st Elite Corps]] during the [[Battle of Kashyyyk]], and reached the [[Alderaanian diplomatic cruiser]] ''[[Tantive III]]''.<ref name="ROTS" /> |
||
| + | |||
| ⚫ | Meanwhile surviving Separatist Council members, who were stationed on the planet before they were moved to a [[Klegger Corp Mining Facility|mining complex]] on Mustafar just prior to the battle on the orders of Darth Sidious, were demoralized by their recent defeats,<ref name="ROTS" /> as the fighting creased.<ref name="Aftermath" /> With Grievous' death, the council only wanted to sue for peace. However, they would be betrayed by Sidious who had them killed by Darth Vader. Vader was then instructed by Sidious to transmit the order to deactivate all remaining droid units of the Separatist Droid Army.<ref name="ROTS" /> |
||
==Behind the scenes== |
==Behind the scenes== |
||
| − | The Battle of Utapau first appeared in the 2005 film [[Star Wars: Episode III Revenge of the Sith|''Star Wars'': Episode III ''Revenge of the Sith'']].<ref name="ROTS" /> |
+ | The Battle of Utapau first appeared in the [[2005]] film [[Star Wars: Episode III Revenge of the Sith|''Star Wars'': Episode III ''Revenge of the Sith'']], the third installment of the ''[[Star Wars]]'' [[prequel trilogy]].<ref name="ROTS" /> The [[StarWars.com]] [[Encyclopedia (StarWars.com)|Encyclopedia]] entry for Tion Medon stated that two entire Republic [[brigade]]s fought in the battle,<ref name="SWE Tion Medon">{{SWE|characters|tionmedon|Tion Medon}}</ref> but General Grievous's later [[Databank (website)|Databank entry]] instead stated a [[battalion]] of clone troopers were deployed.<ref name="Databank Grievous" /> This article assumes the databank, being the more recent source, is correct. |
| + | |||
| + | According to stunt coordinator [[Nick Gillard]], six IG-100 MagnaGuards were originally intended to join Obi-Wan Kenobi and General Grievous during their duel to defend the latter. While [[Ewan McGregor]] trained for a week to get the choreography right, [[George Lucas]] rewrote the scene by having Kenobi crushing just four bodyguards with a piece of the ceiling as Lucas realized that the fight wasn't essential to the story, as well as the production running short of time.<ref name="Cut Beginning">{{Cite_web|url=https://ew.com/movies/2019/12/11/star-wars-best-lightsaber-fight-cut-prequels|title=George Lucas cut the best ''Star Wars'' lightsaber fight out of the prequels|author=Hibberd, James|date=2019-12-11|archiveurl=https://archive.is/uh1zp}}</ref> |
||
==Appearances== |
==Appearances== |
||
| − | *''[[5-Minute Star Wars Stories Strike Back]]'' |
+ | *{{SeriesListing|short}} ''[[5-Minute Star Wars Stories Strike Back]]'' |
*''[[Star Wars: The Prequel Trilogy – A Graphic Novel]]'' |
*''[[Star Wars: The Prequel Trilogy – A Graphic Novel]]'' |
||
*''[[Star Wars Battlefront II]]'' {{Mo}} {{C|DLC}} |
*''[[Star Wars Battlefront II]]'' {{Mo}} {{C|DLC}} |
||
| + | *{{Film|III}} {{1st}} |
||
| − | *[[Star Wars: Episode III Revenge of the Sith|''Star Wars'': Episode III ''Revenge of the Sith'']] {{1st}} |
||
*''[[Revenge of the Sith Read-Along Storybook and CD]]'' |
*''[[Revenge of the Sith Read-Along Storybook and CD]]'' |
||
| + | *{{TCW|The Phantom Apprentice}} {{Imo}} |
||
| + | *{{TCW|Shattered}} {{Imo}} |
||
| + | *{{TBB|Aftermath (episode)}} {{Mo}} |
||
*[[Ahsoka (novel)|''Ahsoka'']] {{Imo}} |
*[[Ahsoka (novel)|''Ahsoka'']] {{Imo}} |
||
*[[Ahsoka (audiobook)|''Ahsoka'' audiobook]] {{Imo}} |
*[[Ahsoka (audiobook)|''Ahsoka'' audiobook]] {{Imo}} |
||
| + | *{{StoryCite|story=The Ghosts of Maul|book=Stories of Jedi and Sith}} {{Imo}} |
||
| + | *{{StoryCite|story=The Ghosts of Maul|book=Stories of Jedi and Sith (audiobook)|bformatted=''Stories of Jedi and Sith'' audiobook}} {{Imo}} |
||
| + | *[[Obi-Wan 3|''Obi-Wan'' 3]] {{Imo}} |
||
| + | *{{Galaxy of Adventures|Obi-Wan Kenobi (Galaxy of Adventures)}} {{Flash}} |
||
| + | *''[[Force Collector]]'' {{Mo}} |
||
| + | *[[Force Collector (audiobook)|''Force Collector'' audiobook]] {{Mo}} |
||
===Non-canon appearances=== |
===Non-canon appearances=== |
||
| − | * |
+ | *[[LEGO Star Wars: Revenge of the Sith (Scholastic)|''LEGO Star Wars: Revenge of the Sith'' (Scholastic)]] |
*''[[William Shakespeare's Tragedy of the Sith's Revenge: Star Wars Part the Third]]'' |
*''[[William Shakespeare's Tragedy of the Sith's Revenge: Star Wars Part the Third]]'' |
||
| − | *{{Droid Tales |
+ | *{{Droid Tales|Crisis on Coruscant}} {{Flash}} |
| ⚫ | |||
==Sources== |
==Sources== |
||
| − | {{ |
+ | {{Scroll_box|content= |
| ⚫ | |||
| − | *{{SW|url=films/star-wars-episode-iii-revenge-of-the-sith|text=''Star Wars |
+ | *<!-- 2014-07-01 -->{{SW|url=films/star-wars-episode-iii-revenge-of-the-sith|text=''Star Wars Revenge of the Sith''}} |
| ⚫ | |||
| + | *<!-- 2014-07-01 -->{{SWE|characters|boga|Boga}} |
||
| ⚫ | |||
| + | *<!-- 2014-07-01 -->{{SWE|characters|clonecommandercody|Clone Commander Cody}} |
||
| ⚫ | |||
| ⚫ | |||
| ⚫ | |||
| − | *{{SWE|characters| |
+ | *<!-- 2014-07-01 -->{{SWE|characters|obiwankenobi|Obi-Wan Kenobi}} |
| − | *{{SWE|characters| |
+ | *<!-- 2014-07-01 -->{{SWE|characters|tionmedon|Tion Medon}} |
| ⚫ | |||
| ⚫ | |||
| ⚫ | |||
| ⚫ | |||
| ⚫ | |||
| − | *{{SWE|characters|tionmedon|Tion Medon}} |
||
| ⚫ | |||
| ⚫ | |||
| + | <!-- 2015-03-11 -->{{CardGameSet|set={{SWCT|set=Base Series 1|nolink=1}}|cards= |
||
| − | *''[[Ultimate Star Wars]]'' |
||
| + | *<!-- 2015-03-11 -->{{SWCT|General Grievous - Separatist - Base Series 1|General Grievous - Separatist - ''Base Series 1''}} {{Imo}} |
||
| − | *''[[Star Wars: Absolutely Everything You Need to Know]]'' |
||
| + | *<!-- 2015-03-11 -->{{SWCT|Tion Medon - Port Administrator - Base Series 1|Tion Medon - Port Administrator - ''Base Series 1''}} {{Imo}} |
||
| ⚫ | |||
| + | }} |
||
| ⚫ | |||
| − | *''[[Star Wars |
+ | *<!-- 2015-04-28 -->''[[Ultimate Star Wars]]'' |
| + | *<!-- 2015-09-02 -->{{BuildFalconCite|35|Starship Fact File|''Venator''-class Star Destroyer}} |
||
| ⚫ | |||
| − | *''[[Star Wars: |
+ | *<!-- 2015-09-04 -->''[[Star Wars: Absolutely Everything You Need to Know]]'' |
| + | *<!-- 2016-03-23 -->{{HelmetCollectionCite|6|Databank A-Z|Jar Jar Binks–B'omarr Order}} {{Imo}} |
||
| − | *{{SWKidsYoutube|UQg6aX7lqTA|Every Droid in Star Wars}} |
||
| + | *<!-- 2016-04-20 -->{{HelmetCollectionCite|8|Helmets|General Grievous}} |
||
| ⚫ | |||
| + | *<!-- 2016-06-01 -->{{HelmetCollectionCite|11|Databank A-Z|Rush Clovis–Coruscant}} |
||
| ⚫ | |||
| + | *<!-- 2016-10-19 -->{{HelmetCollectionCite|21|Databank A-Z|Greedo–Gundarks}} |
||
| ⚫ | |||
| ⚫ | |||
| ⚫ | |||
| + | *<!-- 2016-11-30 -->{{HelmetCollectionCite|24|Highlights of the Saga|Duel to the Death}} |
||
| ⚫ | |||
| + | *<!-- 2016-12-14 -->{{HelmetCollectionCite|25|Helmets|Commander Cody}} |
||
| − | *{{Databank|obi-wan-kenobi|Obi-Wan Kenobi|archivedate=20170625182018}} |
||
| + | *<!-- 2016-12-14 -->{{HelmetCollectionCite|25|Highlights of the Saga|Intrigue on Utapau}} |
||
| + | *<!-- 2016-12-14 -->{{HelmetCollectionCite|25|Weapons & Uniforms|The Utapauns}} |
||
| + | *<!-- 2017-04-04 -->''[[Star Wars: The Visual Encyclopedia]]'' |
||
| + | *<!-- 2017-05-03 -->{{HelmetCollectionCite|35|Helmets|212th Attack Battalion}} |
||
| + | *<!-- 2017-05-03 -->{{HelmetCollectionCite|35|Highlights of the Saga|Escape from Utapau}} |
||
| + | *<!-- 2017-06-28 -->{{HelmetCollectionCite|39|Databank A-Z|Kwazel Maw–Sly Moore}} |
||
| + | *<!-- 2017-07-18 -->''[[Star Wars: On the Front Lines]]'' |
||
| + | *<!-- 2017-07-26 -->{{HelmetCollectionCite|41|Databank A-Z|'Occupier' Tank–Oola}} |
||
| + | *<!-- 2017-09-06 -->{{HelmetCollectionCite|44|Databank A-Z|Zeb Orrelios–Pau City}} {{Imo}} |
||
| + | *<!-- 2017-09-20 -->{{HelmetCollectionCite|45|Helmets|Odd Ball}} |
||
| + | *<!-- 2018-02-06 -->{{BustCollectionCite|2|Star Wars Universe|Stormtroopers}} {{Po}} |
||
| + | *<!-- 2018-05-02 -->{{HelmetCollectionCite|61|Databank A-Z|Unknown Regions–Utai}} |
||
| + | *<!-- 2018-06-13 -->{{HelmetCollectionCite|64|Databank A-Z|Valorum–Vassek}} |
||
| + | *<!-- 2018-08-22 -->{{HelmetCollectionCite|69|Helmets|Galactic Marine}} {{Imo}} |
||
| ⚫ | |||
| + | *<!-- 2018-09-XX -->[[Star Wars: Complete Vehicles (2018)|''Star Wars: Complete Vehicles'']] {{1stID|liberation of Utapau}} |
||
| + | *<!-- 2018-10-04 -->''[[Star Wars: Alien Archive]]'' |
||
| + | *<!-- 2019-06-28 -->''[[Collapse of the Republic]]'' |
||
| + | *<!-- 2019-07-25 -->{{SWKidsYouTube|UQg6aX7lqTA|Every Droid in Star Wars | Star Wars By the Numbers|nolive=1}} |
||
| + | *<!-- 2020-03-06 -->{{SW|url=series/clone-wars/on-the-wings-of-keeradaks-episode-guide|text="On the Wings of Keeradaks" Episode Guide | The Clone Wars}} {{Po}} |
||
| + | *<!-- 2020-04-24 -->{{SW|url=series/clone-wars/the-phantom-apprentice-episode-guide|text="The Phantom Apprentice" Episode Guide | The Clone Wars}} {{Imo}} |
||
| + | *<!-- 2020-05-01 -->{{SW|url=series/clone-wars/shattered-episode-guide|text="Shattered" Episode Guide - The Clone Wars}} {{Imo}} |
||
| + | *<!-- 2021-05-07 -->{{SW|url=series/the-bad-batch/aftermath-episode-guide|text="Aftermath" Episode Guide | The Bad Batch}} |
||
| + | *<!-- 2021-10-28 -->''[[Star Wars: Battles that Changed the Galaxy]]'' |
||
| + | *<!-- 2022-05-24 -->{{SW|url=news/10-obi-wan-kenobi-moments|text=10 of Obi-Wan Kenobi's Greatest Moments (So Far)}} |
||
| + | *<!-- 2023-06-02 -->{{Shatterpoint|Hello There Squad Pack}} {{Imo}} |
||
| + | *{{Topps|set=2023 Topps Star Wars|stext=2023 ''Topps Star Wars''|subset=Epic Clashes|cardname=Obi-Wan Kenobi / General Grievous|link=https://www.tcdb.com/ViewCard.cfm/sid/379262/cid/22199676}} |
||
| + | *{{InsiderCite|223|A Certain Point of View (Star Wars Insider)}} |
||
| ⚫ | |||
| ⚫ | |||
| ⚫ | |||
| ⚫ | |||
| ⚫ | |||
| ⚫ | |||
*{{Databank|tion-medon|Tion Medon}} |
*{{Databank|tion-medon|Tion Medon}} |
||
| − | *{{Databank|utapau|Utapau |
+ | *{{Databank|utapau|Utapau}} |
| + | }} |
||
==Notes and references== |
==Notes and references== |
||
{{Reflist}} |
{{Reflist}} |
||
| + | {{Canon_Clone_Wars}} |
||
| − | {{Canon Clone Wars}} |
||
{{Interlang |
{{Interlang |
||
| + | |de=Schlacht von Utapau |
||
|el=Μάχη του Ούταπαου |
|el=Μάχη του Ούταπαου |
||
| − | |ru=Битва за Утапау/Канон |
||
|es=Batalla de Utapau |
|es=Batalla de Utapau |
||
| + | |ja=ウータパウの戦い |
||
| + | |ka=უტაპაუს ბრძოლა |
||
| + | |tr=Utapau Savaşı |
||
}} |
}} |
||
{{DEFAULTSORT:Utapau, Battle of}} |
{{DEFAULTSORT:Utapau, Battle of}} |
||
| − | [[Category:Battles in |
+ | [[Category:Battles in 19 BBY]] |
[[Category:Battles of the Clone Wars]] |
[[Category:Battles of the Clone Wars]] |
||
| − | [[Category:Battles of the Great Jedi Purge]] |
+ | [[Category:Battles of the Great Jedi Purge during the Clone Wars]] |
| + | [[Category:Battles of Utapau]] |
||
[[Category:Duels]] |
[[Category:Duels]] |
||
Latest revision as of 11:06, 13 April 2024
| | |

- "A partial message was intercepted in a diplomatic packet from the chairman of Utapau."
"Act on this we must. The capture of General Grievous will end this war. Quickly and decisively we should proceed." - ―Anakin Skywalker and Yoda
The Battle of Utapau, also known as the liberation of Utapau, was the decisive final battle that took place on the Separatist occupied world of Utapau in 19 BBY. Fought by the Separatist Droid Army against the Grand Army of the Republic and local security forces, it was one of the last major confrontations of the Clone Wars, the galaxy-wide military conflict between the Galactic Republic and the Confederacy of Independent Systems and was considered to be symbolically the end of the war itself.
The battle occurred as a result of General Grievous' escape during the Separatist attack on Coruscant, where the Confederate Head of State Count Dooku was killed by Jedi General Anakin Skywalker. As the Supreme Martial Commander of the Separatist Droid Armies, Grievous became the prime target of the Republic Military after Dooku's demise. Altered to Grievous' presence on Utapau by Clone Intelligence, the Republic deployed the 7th Sky Corps under Jedi General Obi-Wan Kenobi who personally engaged Grievous in a lightsaber duel prior to the arrival of his clone troopers. Grievous attempted another escape while his battle droids fought the Republic clone troops, but ultimately the Kaleesh cyborg was killed by Kenobi. Although the Executive Separatist Council had been evacuated to Mustafar before the battle started, the Separatist control structure effectively collapsed with Grievous' death.
As the clone troopers continued to fight the battle droids in Pau City, Clone Marshal Commander Cody received a message from Supreme Chancellor Sheev Palpatine ordering him to execute Order 66. Programmed to comply with the order to exterminate the Jedi, the Clone Commander tried to have Kenobi executed for treason. Betrayed by his soldiers, Kenobi left Utapau in Grievous' starfighter. The clones also turned against their Utapaun allies, arresting Port Administrator Tion Medon and placing Utapau under military occupation.
The Clone Wars officially ended with Grievous' destruction during the Battle of Utapau, after which the remaining Separatist leaders were assassinated on Mustafar by the Sith Lord Darth Vader. Having all but destroyed the Jedi Order, Chancellor Palpatine—the public persona of the Dark Lord of the Sith Darth Sidious—declared the start of his reign as Emperor of the Galactic Empire.
Prelude[]
The loss of Count Dooku[]
- "It won't be long before the armies of the Republic track us here. I'm sending you to the Mustafar system, in the Outer Rim. It is a volcanic planet. You will be safe there."
"Safe? Chancellor Palpatine managed to escape your grip, General. Without Count Dooku, I have doubts about your ability to keep us safe." - ―Grievous and Nute Gunray

The Separatist Council met with General Grievous on Utapau.
During the Clone Wars, the planet Utapau was subjugated by the Confederacy of Independent Systems.[13] General Grievous retreated to Utapau after escaping from the Battle of Coruscant, where Count Dooku—the Sith Lord Darth Tyranus—was killed by the Jedi Knight Anakin Skywalker. With Tyranus dead, the Kaleesh warlord[1] became the Confederacy's acting Head of State.[6] Darth Sidious, the Sith Master of the late Tyranus, contacted Grievous upon the general's arrival on Utapau, instructing him to relocate the Executive Separatist Council to the Mustafar system. The Dark Lord of the Sith also assured Grievous that the war's end was near in spite of the loss of Tyranus, which Sidious deemed necessary to his plans. Sidious explained that he would soon have a new Sith apprentice who was much younger and stronger than the aging Tyranus.[1]
The general addressed the council in a converted core ship, where he informed them that an attack by the Grand Army of the Republic was expected, and was therefore moving them to the planet Mustafar, where he claimed that they would be safe. Though Viceroy of the Trade Federation Nute Gunray with support from other council members began to doubt the abilities of their new leader to keep them safe when compared to the late Dooku. A brief moment of tension arose between Gunray and the general, but he nevertheless followed his orders to relocate the council, leaving just moments before his nemesis Jedi General Obi-Wan Kenobi's arrival.[1]
The hunt for Grievous[]
- "I'm being sent to hunt down General Grievous on Utapau."
- ―Obi-Wan Kenobi, to Ahsoka Tano


Jedi General Obi-Wan Kenobi and the 212th Attack Battalion deployed to Utapau with orders to capture or destroy General Grievous.
Meanwhile, the Galactic Republic's Clone Intelligence had managed to discover the location of Grievous. this led to the Jedi High Council deciding to send Jedi Master Obi-Wan Kenobi to lead the battle after rejecting Supreme Chancellor Sheev Palpatine's recommendation of sending Anakin Skywalker to Utapau. After saying farewell to Skywalker in what would be the last time they spoke as friends, Kenobi organized a fleet of Venator-class Star Destroyers carrying an army of clone troopers, led by Clone Marshal Commander Cody.[1]
En route to Utapau, Kenobi spoke via hologram to Skywalker's former Padawan Ahsoka Tano, who was leading forces in the Siege of Mandalore to capture his other nemesis, the former Sith Lord Maul. Tano asked for information about Sidious, who Maul had mentioned, and Kenobi told her that Darth Sidious was the Sith Lord the Jedi believed to be behind the Clone War and playing both sides of the conflict from its very start. However, as Count Dooku was now dead after being killed by Skywalker, they could not gain any more information out of him and requested she capture Maul to discover his old master's secret identity. Tano asked Kenobi if he and Skywalker could help her or send more men, but he told her that was not possible due to his mission to Utapau to hunt down General Grievous, and Skywalker having been appointed to spy on Chancellor Palpatine. Kenobi asked Tano to speak with Skywalker regarding his concerns about the assignment, but the conversation ended when Clone Commander CT-7567 "Rex" reported an attack on Mandalore. Tano asked Kenobi to tell Skywalker of how the Council isn't always right before they signed off.[14]


Kenobi arrived at Pau City in an Eta-2 Actis-class interceptor.
Kenobi arrived on Utapau in his Eta-2 Actis-class interceptor under the pretense of refueling his ship. He was greeted by Tion Medon, the Port Administrator of Pau City, observed from a distance by one of Grievous' IG-100 MagnaGuards. Medon discreetly revealed information that the Confederacy was occupying the city and the Pau'ans were being held as hostages so that they could use Pau City as a hiding place for the Separatist Council, Grievous, and his army of battle droids. Kenobi sent the droid R4-G9 back to his fleet to inform the clones of the situation, but he stayed in city to engage Grievous. Kenobi commandeered a varactyl beast named Boga as a mount, and rode in secret to infiltrate the hangar of the modified core ship and went onto a platform overlooking the hangar where he witnessed the summit being held by the Separatist leadership.[1]
The battle[]
Engaging Grievous[]
- "Clone intelligence is reporting Jedi General Obi-Wan Kenobi has found and engaged General Grievous on Utapau."
"If he captures or kills Grievous, the Separatist command structure will collapse."
"And most likely the droid armies along with them." - ―"Tech" and CT-1409 "Echo"

Kenobi challenged Grievous to single combat.
After the Separatist Council departed the hangar, Kenobi revealed himself by dropping from the catwalk above the hangar, and was immediately surrounded by battle droids and found himself confronted by four of Grievous' IG-100 MagnaGuards. Kenobi defeated them quickly, using the Force to dislodge a cargo module hanging from the ceiling and crushed three of them, casually decapitating the sole survivor. Grievous's droids were preparing to open fire on Kenobi, but were called off as Grievous decided to challenge Kenobi himself. Drawing four lightsabers at once, he then spun them rapidly in a buzzsaw motion and advanced on Kenobi. Kenobi slowly retreated before thrusting his lightsaber into the swirling energy blades, engaging Grievous in a spectacular, though brief, display of swordsmanship. Grievous remained unable to penetrate Kenobi's defense, so he ramped up his attacks even further.[1] Grievous' usual, more wide-ranging fighting style was neutralized by Obi-Wan limiting his movement to the catwalk. After so many experiences with Grievous, Kenobi kept the fight close to the cyborg.[15] Kenobi was able to amputate two of Grievous' robotic arms, as Kenobi's blade, instead of intercepting Grievous's blade, sliced the cyborg's left lower wrist. Staring in surprise at his smoking stump, Grievous lunged in another attack. After another brief bout of fencing, another of Grievous' lightsabers, still clutched in his metal hand, bounced on the deck.[1]
Clone Intelligence reported Kenobi's battle with Grievous on an encrypted communication channel, which was monitored by "Tech," a member of Clone Force 99 during the squad's mission on Kaller. Though assigned to Jedi General Depa Billaba after her reinforcements were recalled to Coruscant, Tech surmised that the outcome of the Battle of Utapau could mark the end of the Clone Wars. CT-1409 "Echo," another member of Clone Force 99, commented that Grievous' death would cause the Separatist command structure to collapse, along with their droid armies according to Tech. Though intrigued by the clone's theory, Billaba told them to focus on the Republic operation on Kaller, knowing that they were too far away to affect the outcome of a battle on another planet.[3]
Republic arrival[]
- "Army or not, you must realize you are doomed!"
- ―Grievous, to Obi-Wan Kenobi

The Battle of Utapau began with the arrival of the Grand Army of the Republic.
At that moment, Republic forces led by Commander Cody arrived, with Star destroyers pounding fire on Separatist defensive positions and round after round of clones repelling from gunships. As Republic forces descended into Pau City, the Separatists deployed Vulture Droids to counter the Republic's aerial forces that had begun attacking the droid garrisons. While the clone troopers were held back by LM-432 crab droids and other droid forces, Grievous prepared to resume the lightsaber duel, advancing on his opponent. However, Kenobi Force pushed the general, sending him flying up and crashing against the ceiling. Dropping his two remaining lightsabers as he plummeted to the hangar floor, an unarmed Grievous chose to flee. Grievous crawled to his TSMEU-6 personal wheel bike and mounted it, speeding out of the hangar and dropping to the lower levels of the city, crushing everything in his path as he raced towards the docking platform where his private ship waited.[1]
Clone troopers fighting the droid army after their arrival.
Kenobi pursued on his varactyl, Boga, but lost his lightsaber after the jarring impact on the way down, the lightsaber eventually landing at the feet of Commander Cody who later informed the Jedi Council members about Kenobi's current pursuit and battle with Grievous, to which Jedi Master Mace Windu then had Skywalker deliver the news to Chancellor Palpatine. Windu and the other council members secretly voice their suspicions regarding Palpatine's intentions, with Windu mentioning the possibility that they would have to remove Palpatine from office should he refuse to give up his emergency powers after the defeat of Grievous, stressing that the council would need to take control of the Galactic Senate to ensure a peaceful transition of power for a new Supreme Chancellor. However, Grand Master Yoda acknowledged they had to take grave care, believing that their current plan would them to a dark place.[1] Yoda also told Ahsoka Tano that Kenobi had engaged Grievous when she joined the meeting before wishing the Force to be with her.[2]
Grievous retreated from the battle on his wheelbike.
Kenobi pursued Grievous in a furious chase through the streets of Pau City as the battle raged around them. As Kenobi caught up to the General, Grievous thrust at Boga with an electrostaff he stashed in the wheel bike. Kenobi managed to grab hold of the shaft of the weapon and wrench it from the cyborg's hands. Kenobi then attempted to destroy the wheels on Grievous's vehicle with it before attacking the General himself with it. Grievous managed to regain hold of it, and pulled it back, and Kenobi along with it. As the two grappled for control of the wheel bike, Grievous pulled out a blaster and attempted to shoot Kenobi, though the Jedi evaded the shots. Unfortunately, Kenobi's movements overbalanced the wheel bike, causing it to flip as they arrived at Grievous' landing platform. While they were thrown off, the bike rolled off the platform and fell into the sink hole below.[1]
The two opponents recovered quickly, Kenobi brandishing the electro staff against the blaster-wielding Grievous. Disarming the General, Kenobi began unleashing a series of jabs against the cyborg's torso, knocking Grievous over. Grievous retaliated with a kick that threw Kenobi across the platform. As Kenobi regained his feet, Grievous closed the distance, engaging Kenobi in a melee. While Grievous' mechanical exoskeleton provided him with a clear advantage, Kenobi managed to pry apart the plates protecting Grievous's internal organs before being thrown to the ground. Kenobi counter-attacked by kicking Grievous's leg, but only injured himself against the hard, durasteel limb.[1]
Kenobi killed Grievous before the cyborg general could escape, effectively ending the Clone Wars.
Grievous grabbed Kenobi by the collar and threw him across the platform, with Kenobi barely managing to grab onto the edge. Grievous retrieved the electrostaff and advanced on Kenobi to deliver the killing blow. Desperately hanging from the edge, Kenobi used the Force to summon Grievous' E-5 blaster to his hand. Blasting five well-placed shots through the gaps in the general's armorplast chestplates at the organs that he had exposed, Kenobi ignited the tissue, violently combusting the internal organs and painfully killing the Separatist leader. Grievous's death was later reported to the Jedi Council, with Windu preparing to go to Palpatine's office to inform him of this development in the hopes that he lay down his emergency powers, until Skywalker revealed Palpatine's stance as a Sith Lord.[1]
Continued fighting[]
- "Now, let's get a move on. We've got a battle to win here."
"Yes, sir." - ―Obi-Wan Kenobi and Cody


The fighting on Utapau continued despite the destruction of Grievous.
The droid army continued to engage the clone troopers across Pau City during the duel between the Jedi Master and the general, with the droids trying to hold back the advancing Grand Army.[1] Some battle droids, however, were ensnared by native ginnthos during the battle.[16] While Cody continued to commanded the clones safely from behind Republic lines, where he was able to catch Kenobi's falling lightsaber as the fighting waged around him.[1]
After killing Grievous, Kenobi made his way back to the battle. The B1-series battle droid 2638 fired down close to the Jedi, but the droid was blasted by enemy fire as heavy fighting continued as the Republic had finally started to push the droids from the edge of the sinkhole deeper into the city, with heavy street fighting occurring at multiple points in the city as the Republic advanced. Kenobi soon arrived to Cody's command position and had his lightsaber returned to him before charging up a cliff ledge to finish the battle.[1]
Order 66[]
- "Commander Cody, the time has come. Execute Order 66."
"Yes, my Lord." - ―Darth Sidious, to Cody

Darth Sidious ordered Cody to execute Order 66 against his general, Kenobi.
Meanwhile, on Coruscant, Anakin Skywalker turned to the dark side of the Force and became Sidious's Sith apprentice, Darth Vader. The newly anointed Sith Lord led the 501st Legion's attack on the Jedi Temple. It was then that Cody received a message from Sidious who was publicly Supreme Chancellor Sheev Palpatine, instructing him to execute Order 66 as part of a purge on the Jedi Order.[1]
With Sidious issuing the order to Cody, Cody's bio-chip activated and immediately brainwashed him into believing that Kenobi was a traitor to the Republic that needed to be executed.[17] Despite serving under Kenobi and being his friend, his loyalty was forcibly abolished due to the activation of his Biochip.[18] Cody then ordered a nearby All Terrain Tactical Enforcer to fire its main cannon at the Jedi, who was ascending the cliff heading up to the Separatist command headquarters on the tenth level. The tank fired a single bolt that almost hit Kenobi, who fell into the depths of the sinkhole below.[1]
Aftermath[]
- "Wrecker": "What did we miss now?"
- Quartermaster: "The end of the war."
- "Hunter": "Say again, Trooper?"
- Quartermaster: "General Grievous was defeated on Utapau. The Separatist leadership has collapsed. The war is over."
- ―"Wrecker," a shock trooper quartermaster, "Hunter"[3]
The Galactic Republic occupied Utapau after the battle.
The Separatist Droid Army was routed and Pau City[1] was occupied by the Republic, which began to round up and arrest the Utapaun resistance, including Port Administrator Tion Medon,[4] all before readying to leave the sinkhole world.[1] With the death of Grievous, the Separatist leadership fell apart. News of the battle's outcome spread throughout the galaxy[3] even though numerous other fronts were still active. Despite the Separatist Council's continued efforts to lead their movement and military,[1] the breakdown of CIS command left the war to have technically already ended with Grievous's defeat.[3]
When Clone Force 99 returned to Kamino after witnessing the execution of General Billaba, they encountered a large contingent of clone shock troopers of the Coruscant Guard stationed in Tipoca City. One of the shock troopers, a quartermaster, informed "Wrecker," Clone Sergeant "Hunter," and the rest of the squad that the Clone Wars concluded with Grievous' defeat on Utapau and the subsequent collapse of the Separatist leadership, confirming Tech's prediction of the war's end.[3]

After fleeing Utapau, Kenobi was contacted by Senator Bail Organa, who witnessed the fall of the Jedi Temple on Coruscant.
As the Grand Army proceeded to depart, however, Cody, all too aware of Jedi prowess, was not convinced of Kenobi's death. Probe droids were deployed to the sinkhole floor to find the Jedi Master's body and ascertain whether he was dead or alive. Kenobi then used stealth to make his way back up to Pau City, get to Grievous' starfighter and escape Utapau, becoming one of the few Jedi to escape the destruction of the Jedi Order. As he fled the Utapau system, Kenobi established contact with Senator of Alderaan Bail Prestor Organa, who had already rescued Grand Master Yoda from Kashyyyk, where he had been attacked by the 41st Elite Corps during the Battle of Kashyyyk, and reached the Alderaanian diplomatic cruiser Tantive III.[1]
Meanwhile surviving Separatist Council members, who were stationed on the planet before they were moved to a mining complex on Mustafar just prior to the battle on the orders of Darth Sidious, were demoralized by their recent defeats,[1] as the fighting creased.[3] With Grievous' death, the council only wanted to sue for peace. However, they would be betrayed by Sidious who had them killed by Darth Vader. Vader was then instructed by Sidious to transmit the order to deactivate all remaining droid units of the Separatist Droid Army.[1]
Behind the scenes[]
The Battle of Utapau first appeared in the 2005 film Star Wars: Episode III Revenge of the Sith, the third installment of the Star Wars prequel trilogy.[1] The StarWars.com Encyclopedia entry for Tion Medon stated that two entire Republic brigades fought in the battle,[4] but General Grievous's later Databank entry instead stated a battalion of clone troopers were deployed.[10] This article assumes the databank, being the more recent source, is correct.
According to stunt coordinator Nick Gillard, six IG-100 MagnaGuards were originally intended to join Obi-Wan Kenobi and General Grievous during their duel to defend the latter. While Ewan McGregor trained for a week to get the choreography right, George Lucas rewrote the scene by having Kenobi crushing just four bodyguards with a piece of the ceiling as Lucas realized that the fight wasn't essential to the story, as well as the production running short of time.[19]
Appearances[]
- † 5-Minute Star Wars Stories Strike Back
- Star Wars: The Prequel Trilogy – A Graphic Novel
- Star Wars Battlefront II (Mentioned only) (DLC)
- Star Wars: Episode III Revenge of the Sith (First appearance)
- Revenge of the Sith Read-Along Storybook and CD
 Star Wars: The Clone Wars — "The Phantom Apprentice" (Indirect mention only)
- Star Wars: The Clone Wars — "Shattered" (Indirect mention only)
- Star Wars: The Bad Batch — "Aftermath" (Mentioned only)
- Ahsoka (Indirect mention only)
- Ahsoka audiobook (Indirect mention only)
- "The Ghosts of Maul" — Stories of Jedi and Sith (Indirect mention only)
- "The Ghosts of Maul" — Stories of Jedi and Sith audiobook (Indirect mention only)
- Obi-Wan 3 (Indirect mention only)
- Star Wars Galaxy of Adventures — "Obi-Wan Kenobi" (In flashback(s))
- Force Collector (Mentioned only)
- Force Collector audiobook (Mentioned only)
Non-canon appearances[]
- LEGO Star Wars: Revenge of the Sith (Scholastic)
- William Shakespeare's Tragedy of the Sith's Revenge: Star Wars Part the Third
- LEGO Star Wars: Droid Tales — "Crisis on Coruscant" (In flashback(s))
- LEGO Star Wars: The Skywalker Saga
Sources[]
Notes and references[]
- ↑ 1.00 1.01 1.02 1.03 1.04 1.05 1.06 1.07 1.08 1.09 1.10 1.11 1.12 1.13 1.14 1.15 1.16 1.17 1.18 1.19 1.20 1.21 1.22 1.23 1.24 1.25 1.26 1.27 1.28 1.29 1.30 1.31 1.32 1.33 1.34 1.35 1.36 1.37 1.38 1.39 1.40 1.41 1.42 1.43 1.44 1.45 1.46 1.47 1.48 1.49 1.50 1.51 1.52 1.53 1.54 1.55 1.56 1.57 1.58 1.59 1.60 1.61 1.62 1.63 1.64 1.65 1.66 1.67 1.68 1.69 1.70 1.71 1.72 1.73 1.74 1.75 1.76 1.77 1.78 1.79 1.80 Star Wars: Episode III Revenge of the Sith
- ↑ 2.0 2.1
 Star Wars: The Clone Wars — "Shattered"
- ↑ 3.0 3.1 3.2 3.3 3.4 3.5 3.6 3.7 3.8 Star Wars: The Bad Batch — "Aftermath"
- ↑ 4.0 4.1 4.2 4.3 Tion Medon in the Encyclopedia (content now obsolete; backup link)
- ↑ Star Wars: Galactic Atlas
- ↑ 6.0 6.1 Star Wars: On the Front Lines
- ↑ 7.0 7.1 Star Wars Helmet Collection 45 ([[{{{2}}}|{{{2}}}: {{{3}}}]])
- ↑ Star Wars Helmet Collection 41 (Databank: Odd Ball)
- ↑ Star Wars: Episode III Revenge of the Sith — (Audio description)
- ↑ 10.0 10.1 General Grievous in the Databank (backup link)
- ↑ Battle Droid History Gallery in the Databank (backup link); image #29 (of 29)
- ↑ Star Wars Journeys: Beginnings
- ↑ General Grievous' TSMEU-6 Wheel Bike in the Databank (backup link)
- ↑ 14.0 14.1 Star Wars: The Clone Wars — "The Phantom Apprentice"
- ↑ "The End of the Clone Wars" — Star Wars Encyclopedia
- ↑ Star Wars: Build the Millennium Falcon 40 (Guide to the Galaxy: Wildlife of Utapau)
- ↑ Clone Commander Cody in the Databank (backup link)
- ↑ Star Wars: The Clone Wars — "Orders"
- ↑ George Lucas cut the best Star Wars lightsaber fight out of the prequels by Hibberd, James on ew.com (December 11, 2019) (archived from the original)