Cavalier One (talk | contribs) |
m (Canon/Legends switch) |
||
| (34 intermediate revisions by 9 users not shown) | |||
| Line 57: | Line 57: | ||
|availability= |
|availability= |
||
|role= |
|role= |
||
| − | |era= |
||
|affiliation=*[[Geonosian Industries]] |
|affiliation=*[[Geonosian Industries]] |
||
*[[Order of the Sith Lords]] |
*[[Order of the Sith Lords]] |
||
| Line 76: | Line 75: | ||
|sectors= |
|sectors= |
||
|modules=}} |
|modules=}} |
||
| − | {{Quote|Don't be too proud of this technological terror you've constructed.|[[Anakin Skywalker/Legends|Darth Vader]]|Star Wars: Episode IV A New Hope}} |
+ | {{Quote|Don't be too proud of this technological terror you've constructed. The ability to destroy a planet is insignificant next to the power of the force.|[[Anakin Skywalker/Legends|Darth Vader]]|Star Wars: Episode IV A New Hope}} |
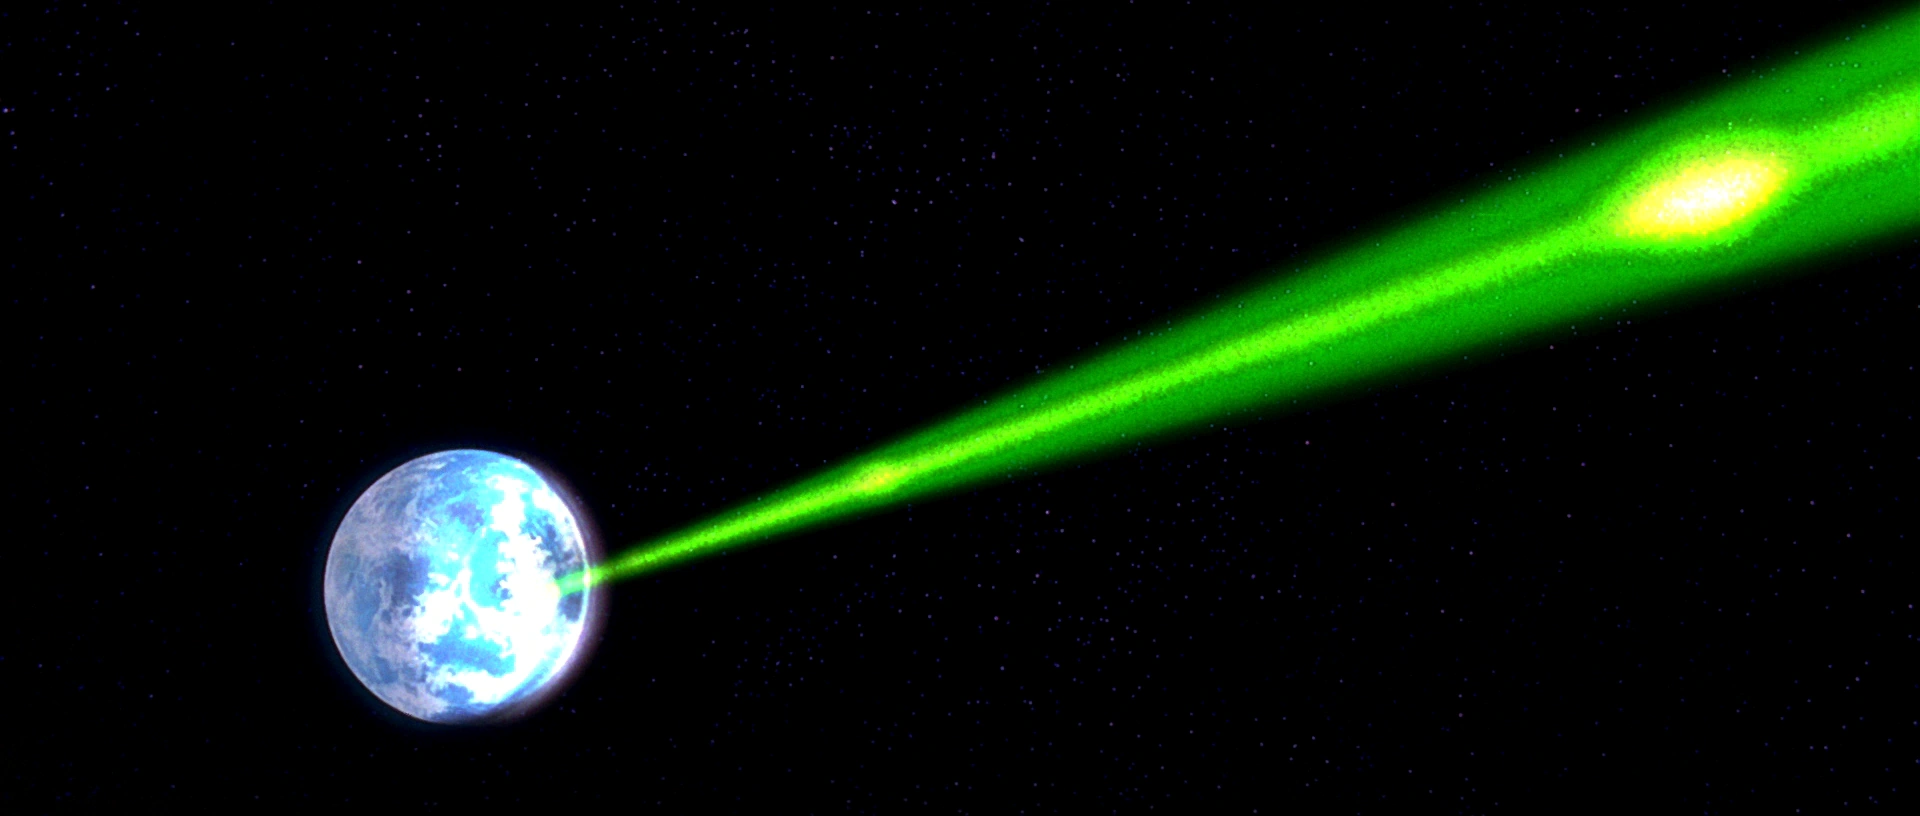
A '''Death Star''' was a [[Moon/Legends|moon]]-sized [[Galactic Empire/Legends|Imperial]] military [[battlestation]] armed with a [[Planet/Legends|planet]]-destroying [[Concave Dish Composite Beam Superlaser|superlaser]]. |
A '''Death Star''' was a [[Moon/Legends|moon]]-sized [[Galactic Empire/Legends|Imperial]] military [[battlestation]] armed with a [[Planet/Legends|planet]]-destroying [[Concave Dish Composite Beam Superlaser|superlaser]]. |
||
The Death Stars, whose concept had been explored even before the [[Clone Wars/Legends|Clone Wars]], were the first in a long series of [[Superweapon/Legends|superweapons]] developed to execute the [[Tarkin Doctrine/Legends|Tarkin Doctrine]]. The Death Star was designed to allow [[Galactic Emperor/Legends|Emperor]] [[Palpatine/Legends|Palpatine]] to more directly control the Galactic Empire through fear. In most instances, a Death Star was to be commanded by a [[Moff/Legends|Moff]]. |
The Death Stars, whose concept had been explored even before the [[Clone Wars/Legends|Clone Wars]], were the first in a long series of [[Superweapon/Legends|superweapons]] developed to execute the [[Tarkin Doctrine/Legends|Tarkin Doctrine]]. The Death Star was designed to allow [[Galactic Emperor/Legends|Emperor]] [[Palpatine/Legends|Palpatine]] to more directly control the Galactic Empire through fear. In most instances, a Death Star was to be commanded by a [[Moff/Legends|Moff]]. |
||
| − | [[DS-1 Orbital Battle Station/Legends|One]] Death Star was completely built by the Empire, with a [[Death Star II/Legends|second]] and [[Death Star III|third]] one never reaching full completion, as well as a [[Death Star prototype|prototype]] being in existence. In addition, a scaled-down version, the |
+ | [[DS-1 Orbital Battle Station/Legends|One]] Death Star was completely built by the Empire, with a [[Death Star II/Legends|second]] and [[Death Star III|third]] one never reaching full completion, as well as a [[Death Star prototype|prototype]] being in existence. In addition, a scaled-down version, the [[Tarkin (superweapon)|''Tarkin'']], and a [[Hutt/Legends|Hutt]] knockoff, the [[Darksaber (superweapon)|''Darksaber'']], would be created by the Empire and [[Durga Besadii Tai|Durga the Hutt]], respectively. |
Both Death Stars were destroyed by the [[Alliance to Restore the Republic/Legends|Rebel Alliance]] shortly after they became operational. The first Death Star was destroyed by [[Luke Skywalker/Legends|Luke Skywalker]], with the help of [[Han Solo/Legends|Han Solo]], and the second Death Star was destroyed by [[Wedge Antilles/Legends|Wedge Antilles]] and [[Lando Calrissian/Legends|Lando Calrissian]]. Prior to the second Death Star being built, the Galactic Empire tested out a [[Dubrillion superlaser facility|planetary superlaser]] for protecting its installations on the planet of [[Dubrillion/Legends|Dubrillion]]. At some point after the second's destruction, the Rebel Alliance also attacked and destroyed a [[Death Star III|third Death Star]]. Following their destruction, other planet-devastating superweapons followed, including the [[Galaxy Gun]], the [[Darksaber (superweapon)|Darksaber]], the [[Sun Crusher]], and the [[World Devastator]]s. |
Both Death Stars were destroyed by the [[Alliance to Restore the Republic/Legends|Rebel Alliance]] shortly after they became operational. The first Death Star was destroyed by [[Luke Skywalker/Legends|Luke Skywalker]], with the help of [[Han Solo/Legends|Han Solo]], and the second Death Star was destroyed by [[Wedge Antilles/Legends|Wedge Antilles]] and [[Lando Calrissian/Legends|Lando Calrissian]]. Prior to the second Death Star being built, the Galactic Empire tested out a [[Dubrillion superlaser facility|planetary superlaser]] for protecting its installations on the planet of [[Dubrillion/Legends|Dubrillion]]. At some point after the second's destruction, the Rebel Alliance also attacked and destroyed a [[Death Star III|third Death Star]]. Following their destruction, other planet-devastating superweapons followed, including the [[Galaxy Gun]], the [[Darksaber (superweapon)|Darksaber]], the [[Sun Crusher]], and the [[World Devastator]]s. |
||
| Line 92: | Line 91: | ||
The Death Stars, the Galactic Empire's ultimate terror weapons, were battle stations several hundred kilometers in diameter and mounting a directed energy [[Superlaser/Legends|superlaser]] capable of completely destroying a planet with a single shot along with 15000 lasers, ion, turbolasers batteries, and heavy turbolasers in all plus an additional 768 tractor beam emplacements. However, the first Death Star's defenses were not tight enough to stop [[Starfighter/Legends|starfighters]] from penetrating them. |
The Death Stars, the Galactic Empire's ultimate terror weapons, were battle stations several hundred kilometers in diameter and mounting a directed energy [[Superlaser/Legends|superlaser]] capable of completely destroying a planet with a single shot along with 15000 lasers, ion, turbolasers batteries, and heavy turbolasers in all plus an additional 768 tractor beam emplacements. However, the first Death Star's defenses were not tight enough to stop [[Starfighter/Legends|starfighters]] from penetrating them. |
||
| − | The first Death Star was 120 kilometers in diameter,<ref name="ICS">''[[Star Wars: Incredible Cross-Sections]]''</ref><ref name="dsn">[[Death Star (novel)|''Death Star'' (novel)]]</ref> while the second Death Star was 160 kilometers in diameter.<ref name="Complete Locations"> |
+ | The first Death Star was 120 kilometers in diameter,<ref name="ICS">''[[Star Wars: Incredible Cross-Sections]]''</ref><ref name="dsn">[[Death Star (novel)|''Death Star'' (novel)]]</ref> while the second Death Star was 160 kilometers in diameter.<ref name="Complete Locations">[[Star Wars: Complete Locations (2005)|''Star Wars: Complete Locations'']]</ref> Much of its interior space was devoted to systems required to maintain its massive superlaser and power plant. At the heart of each Death Star was a gigantic [[Hypermatter/Legends|hypermatter]] reactor, which possessed an output equal to that of several main-sequence stars. Within this chamber burned a reaction of prodigious proportions, fed by stellar fuel bottles lining its periphery. |
Splitting the station into two equal hemispheres was a huge equatorial trench approximately 503 kilometers in length for the first Death Star and 2,827 kilometers for the second Death Star. This area of the station housed most of the major landing bays, drive thrusters, sensor arrays and tractor beam systems. Halfway between the equator and each pole were two supplementary trenches. The Death Star was divided into 24 zones, 12 per hemisphere, each controlled by a "bridge". To further organize the immense amount of activity aboard, there were specific "sectors" denoting function. These included the General, Command, Military, Security, Service, and Technical sectors. |
Splitting the station into two equal hemispheres was a huge equatorial trench approximately 503 kilometers in length for the first Death Star and 2,827 kilometers for the second Death Star. This area of the station housed most of the major landing bays, drive thrusters, sensor arrays and tractor beam systems. Halfway between the equator and each pole were two supplementary trenches. The Death Star was divided into 24 zones, 12 per hemisphere, each controlled by a "bridge". To further organize the immense amount of activity aboard, there were specific "sectors" denoting function. These included the General, Command, Military, Security, Service, and Technical sectors. |
||
| Line 99: | Line 98: | ||
Since service onboard the Death Star was a long-term affair, the station maintained a number of civilian amenities to make the time aboard a deep space station more comfortable. Parks, shopping centers, recreation areas, and taverns such as the [[Hard Heart Cantina]] could be found in the general sectors of the station.<ref name="Death Star Designer">''[[Death Star Designer]]''</ref> |
Since service onboard the Death Star was a long-term affair, the station maintained a number of civilian amenities to make the time aboard a deep space station more comfortable. Parks, shopping centers, recreation areas, and taverns such as the [[Hard Heart Cantina]] could be found in the general sectors of the station.<ref name="Death Star Designer">''[[Death Star Designer]]''</ref> |
||
| − | Facilitating the Death Star's realspace propulsion were a network of powerful [[ |
+ | Facilitating the Death Star's realspace propulsion were a network of powerful [[Ion drive|ion engines]] that transformed reactor power into needed thrust. In order for the Death Star to be a deadly threat, it needed to be mobile. Using linked banks of 123 [[Hyperdrive/Legends|hyperdrive]] field generators tied into a single navigational matrix, the Death Star could travel across the Galaxy at superluminal velocities. The incredible energies harnessed by the station combined with its great mass gave the Death Star magnetic and artificial gravitational fields equal to those found on orbital bodies many times greater in size. |
The Death Star's superlaser derived power directly from the hypermatter reactor. Its faceted amplification crystal combined the destructive power of eight separate tributary beams into one single blast with the intensity of a stellar core. After firing a blast, though, the Imperial engineers had to recharge the reactor, which took at least 24 standard hours. Though the energy output of this blast could be scaled to fire at smaller targets such as [[Capital ship/Legends|capital ships]], as was the case during the Rebel assault on the second Death Star, the two major instances in which the superlaser was fired were at full power at planetary bodies. |
The Death Star's superlaser derived power directly from the hypermatter reactor. Its faceted amplification crystal combined the destructive power of eight separate tributary beams into one single blast with the intensity of a stellar core. After firing a blast, though, the Imperial engineers had to recharge the reactor, which took at least 24 standard hours. Though the energy output of this blast could be scaled to fire at smaller targets such as [[Capital ship/Legends|capital ships]], as was the case during the Rebel assault on the second Death Star, the two major instances in which the superlaser was fired were at full power at planetary bodies. |
||
| Line 136: | Line 135: | ||
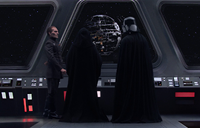
[[Galen Marek]] traveled to the Death Star to free [[Bail Prestor Organa]], [[Rahm Kota]], and rest of the founders of the [[Alliance to Restore the Republic/Legends|Rebel Alliance]] including [[Mon Mothma/Legends|Mon Mothma]]. He fought Darth Vader in the corridor leading to Sidious' Observation Chamber. He severely injured the Sith Lord and Palpatine urged Galen to kill Vader. Galen instead attacked Sidious himself. The pair dueled viciously with the force and lightsaber combat. Galen sacrificed his life in an explosion which allowed the Rebels to escape. He was honored by the Alliance when his family crest was used as their symbol. |
[[Galen Marek]] traveled to the Death Star to free [[Bail Prestor Organa]], [[Rahm Kota]], and rest of the founders of the [[Alliance to Restore the Republic/Legends|Rebel Alliance]] including [[Mon Mothma/Legends|Mon Mothma]]. He fought Darth Vader in the corridor leading to Sidious' Observation Chamber. He severely injured the Sith Lord and Palpatine urged Galen to kill Vader. Galen instead attacked Sidious himself. The pair dueled viciously with the force and lightsaber combat. Galen sacrificed his life in an explosion which allowed the Rebels to escape. He was honored by the Alliance when his family crest was used as their symbol. |
||
| − | Just after construction was completed, the other set of Death Star plans was discovered by Rebel spies on a secret signal interceptions asteroid outpost, [[AX-235]]; the Rebellion moved on and in the borders of [[Operation Skyhook]], a copy of the plans was stolen by [[Kyle Katarn]] from [[Danuta]] and finally reached [[Leia Organa Solo|Leia Organa]]. Later, while attempting to recruit [[Obi-Wan Kenobi/Legends|Obi-Wan Kenobi]] to the rebel cause, Leia's vessel, |
+ | Just after construction was completed, the other set of Death Star plans was discovered by Rebel spies on a secret signal interceptions asteroid outpost, [[AX-235]]; the Rebellion moved on and in the borders of [[Operation Skyhook]], a copy of the plans was stolen by [[Kyle Katarn]] from [[Danuta]] and finally reached [[Leia Organa Solo|Leia Organa]]. Later, while attempting to recruit [[Obi-Wan Kenobi/Legends|Obi-Wan Kenobi]] to the rebel cause, Leia's vessel,[[Tantive IV/Legends|''Tantive IV'']] was attacked by the [[Imperial I-class Star Destroyer/Legends|Star Destroyer]] [[Devastator/Legends|''Devastator'']] above [[Tatooine/Legends|Tatooine]]. Leia, before being captured, transmitted the plans in [[R2-D2/Legends|R2-D2]] and sent them to [[Obi-Wan Kenobi/Legends|Obi-Wan Kenobi]] on Tatooine. Upon arriving at Alderaan, which had been [[Destruction of Alderaan|destroyed by the Death Star]], [[Han Solo/Legends|Han Solo]], [[Luke Skywalker/Legends|Luke Skywalker]], Kenobi, and [[Chewbacca/Legends|Chewbacca]] mistook the station for a small moon while following a lone [[TIE/LN starfighter]]. |
| − | The quartet was soon captured, but after escaping from the Death Star with Leia, the plans to the station were transported by Princess Leia with their help to Rebel leaders on [[Yavin 4/Legends|Yavin IV]]. Soon after, the Death Star arrived to destroy the rebel base, having located it via a transmitter placed on the |
+ | The quartet was soon captured, but after escaping from the Death Star with Leia, the plans to the station were transported by Princess Leia with their help to Rebel leaders on [[Yavin 4/Legends|Yavin IV]]. Soon after, the Death Star arrived to destroy the rebel base, having located it via a transmitter placed on the [[Millennium Falcon/Legends|''Millennium Falcon'']]. After softening the defenses by destroying some of the Deflection Towers,<ref name="Rogue Leader">''Star Wars: Rogue Squadron II: Rogue Leader''</ref> Luke Skywalker piloted a [[T-65 X-wing starfighter/Legends|T-65 X-wing starfighter]] through a minor trench on the surface of the Death Star, then Vader followed him in, and during his evasion of [[Anakin Skywalker/Legends|Darth Vader]], he heard Obi-Wan call to him, telling him to use [[The Force/Legends|the Force]], not his targeting computer. Luke switched off his computer, to the concern of the Rebels in the base, then fired two [[Proton torpedo/Legends|proton torpedoes]] into the "reactor core". This caused a chain reaction that destroyed the battle station just before it could fire on the Rebel base.<ref name="Star Wars Episode IV: A New Hope">[[Star Wars: Episode IV A New Hope|''Star Wars'': Episode IV ''A New Hope'']]</ref> Ironically, shortly before Luke's destruction of the Death Star, Palpatine had ordered for the creation of a second Death Star.<ref name="EGW" /> |
[[File:DeathStarII-BotF.jpg|thumb|right|230px|The incomplete [[Death Star II/Legends|Death Star II]].]] |
[[File:DeathStarII-BotF.jpg|thumb|right|230px|The incomplete [[Death Star II/Legends|Death Star II]].]] |
||
| − | Nearly four years later, [[Bothan/Legends|Bothan]] spies stole the plans of the second Death Star, unaware that their theft was orchestrated by [[Galactic Emperor/Legends|Emperor]] [[Palpatine/Legends|Palpatine]], having agreed to a suggestion personally made to him by [[Black Sun/Legends|Black Sun]] leader [[Prince/Legends|Prince]] [[Xizor]]. [[General/Legends|General]] [[Crix Madine/Legends|Crix Madine]] and [[Admiral/Legends|Admiral]] [[Gial Ackbar/Legends|Gial Ackbar]] devised a plan for the destruction of the new Death Star. [[Han Solo/Legends|Han Solo]] led a team to the [[Endor/Legends|forest moon of Endor]] to destroy the shield generator there. The plan called for a group of fighters and the |
+ | Nearly four years later, [[Bothan/Legends|Bothan]] spies stole the plans of the second Death Star, unaware that their theft was orchestrated by [[Galactic Emperor/Legends|Emperor]] [[Palpatine/Legends|Palpatine]], having agreed to a suggestion personally made to him by [[Black Sun/Legends|Black Sun]] leader [[Prince/Legends|Prince]] [[Xizor/Legends|Xizor]]. [[General/Legends|General]] [[Crix Madine/Legends|Crix Madine]] and [[Admiral/Legends|Admiral]] [[Gial Ackbar/Legends|Gial Ackbar]] devised a plan for the destruction of the new Death Star. [[Han Solo/Legends|Han Solo]] led a team to the [[Endor/Legends|forest moon of Endor]] to destroy the shield generator there. The plan called for a group of fighters and the [[Millennium Falcon/Legends|''Millennium Falcon'']] piloted by [[Lando Calrissian/Legends|Lando Calrissian]] to attack the Death Star upon destruction of the shield generator. The fighters flew into the center of the station through a narrow maze of pipes to destroy the reactor directly and rushed out in just enough time to escape the ensuing explosion before the station could carry out its final order: destroying the Sanctuary Moon of Endor. A few moments prior to its destruction, an evacuation order for all non-essential personnel was also called.<ref name="Star Wars Episode VI: Return of the Jedi">[[Star Wars: Episode VI Return of the Jedi|''Star Wars'': Episode VI ''Return of the Jedi'']]</ref> |
At some point after the [[Battle of Endor/Legends|Battle of Endor]], a [[Death Star III|third Death Star]] was being constructed in orbit around the forest moon of Endor which was escorted by a fleet of [[Imperial-class Star Destroyer/Legends|''Imperial''-class Star Destroyers]] but was destroyed by the [[New Republic/Legends|New Republic]] while still undergoing construction. Its weakness was a hole similar to the [[Thermal exhaust port/Legends|thermal exhaust port]] of the first Death Star. |
At some point after the [[Battle of Endor/Legends|Battle of Endor]], a [[Death Star III|third Death Star]] was being constructed in orbit around the forest moon of Endor which was escorted by a fleet of [[Imperial-class Star Destroyer/Legends|''Imperial''-class Star Destroyers]] but was destroyed by the [[New Republic/Legends|New Republic]] while still undergoing construction. Its weakness was a hole similar to the [[Thermal exhaust port/Legends|thermal exhaust port]] of the first Death Star. |
||
| Line 166: | Line 165: | ||
==Behind the scenes== |
==Behind the scenes== |
||
| − | According to the ''[[Star Wars: Incredible Cross-Sections]]'' fact book, the first Death Star in |
+ | According to the ''[[Star Wars: Incredible Cross-Sections]]'' fact book, the first Death Star in [[Star Wars: Episode IV A New Hope|''A New Hope'']] was 160 kilometers in diameter. [[The Making of Star Wars: The Definitive Story Behind the Original Film]] reproduces a sketch attributed to [[Ralph McQuarrie]] which shows 92 miles (148 kilometers). According to the ''[[Inside the Worlds of Star Wars Trilogy]]'' fact book and detailed scaling of the station in [[Star Wars: Episode VI Return of the Jedi|''Return of the Jedi'']], the second Death Star was 900 kilometers in diameter. Some [[Star Wars Legends|Expanded Universe]] sources state much smaller figures—120 kilometers for the first Death Star and 160 kilometers for the second—however, most of the evidence argues for the larger sizes. |
The Dalek Crucible in Doctor Who from series 4 in 2008 is said to be inspired by the Death Star, apart from the 'wings' on the side, the Crucible is very similar, but the eye is covered by a shield whereas on the Death Star it is not. |
The Dalek Crucible in Doctor Who from series 4 in 2008 is said to be inspired by the Death Star, apart from the 'wings' on the side, the Crucible is very similar, but the eye is covered by a shield whereas on the Death Star it is not. |
||
| Line 174: | Line 173: | ||
The Death Star is available as a cheat in ''[[Star Wars: Galactic Battlegrounds: Clone Campaigns]]''. It acts like an air cruiser unit, but is much slower. It more than makes up for its speed with excessive hit points, shielding, armor, and the most powerful attack in the game—any object on the map, even trees and rocks disappear after the Death Star fires. It is virtually impossible to destroy it. There is a limit on the number of Death Stars the player can conjure up at any time. |
The Death Star is available as a cheat in ''[[Star Wars: Galactic Battlegrounds: Clone Campaigns]]''. It acts like an air cruiser unit, but is much slower. It more than makes up for its speed with excessive hit points, shielding, armor, and the most powerful attack in the game—any object on the map, even trees and rocks disappear after the Death Star fires. It is virtually impossible to destroy it. There is a limit on the number of Death Stars the player can conjure up at any time. |
||
| − | A number of Death Star battle stations appear in sources of uncertain [[canon]]icity. The |
+ | A number of Death Star battle stations appear in sources of uncertain [[canon]]icity. The [[Star Tours (real-world)|''Star Tours'']] theme-park ride includes another battlemoon at Endor, clearly different than the one seen in [[Star Wars: Episode VI Return of the Jedi|''Return of the Jedi'']], while the French-language RPG Magazine ''[[Casus Belli 99]]'' includes another prototype, named the ''[[Nocturnô]]''. The former, however, was officially entered into continuity by [[Leland Chee]], the gatekeeper of the LucasFilm Holocron Continuity Database, with it being named the Death Star III. |
The Death Star has also influenced popular culture, a tribute to the Death Star, the "Death Egg" making an appearance in the Sonic the Hedgehog series (1992). |
The Death Star has also influenced popular culture, a tribute to the Death Star, the "Death Egg" making an appearance in the Sonic the Hedgehog series (1992). |
||
| Line 189: | Line 188: | ||
===White House petition=== |
===White House petition=== |
||
| − | In late 2012, a petition was submitted to the White House website urging that the United States government build a real Death Star as an economic stimulus and a means to ensure people got back to work again, and wanted its completion by 2016 at the earliest. The petition gained more than 25,000 signatures, ensuring that an official response be supplied. In early 2013, the proposal was rejected (in a tongue-and-cheek manner), citing that the overall cost of the Death Star's construction would amount to a cost exceeding $852 quadrillion, and would take 833,000 years before it could even be ready for construction due to the rate of steel production. Another reason for the rejection was also because the Government "did not support blowing up planets."<ref name="Petition">{{ |
+ | In late 2012, a petition was submitted to the White House website urging that the United States government build a real Death Star as an economic stimulus and a means to ensure people got back to work again, and wanted its completion by 2016 at the earliest. The petition gained more than 25,000 signatures, ensuring that an official response be supplied. In early 2013, the proposal was rejected (in a tongue-and-cheek manner), citing that the overall cost of the Death Star's construction would amount to a cost exceeding $852 quadrillion, and would take 833,000 years before it could even be ready for construction due to the rate of steel production. Another reason for the rejection was also because the Government "did not support blowing up planets."<ref name="Petition">{{Cite_web|url=https://petitions.whitehouse.gov/response/isnt-petition-response-youre-looking|title=This Isn't the Petition Response You're Looking For|accessdate=2013-01-16|format=|work=White House}}</ref> As such, the [[Star Wars Blog]], in response to it, created a light-hearted, in-universe reply from the [[Galactic Empire Public Relations|Galactic Empire's Public Relations department]] where the Empire, with official statements from Admiral Conan Antonio Motti and Governor Wilhuff Tarkin, shrugged off the criticisms by the planet Earth's leaders regarding the design of the battlestation. In addition, in the same source, it also denounced the planet for grossly overestimating the cost of designing the Death Star, as well as commenting the overall lack of production methods of the planet in comparison of the Galactic Empire, even implying that the planet's leaders were cowardly in their decision.<ref name="blog">{{SW|url=news/planet-earth-abandons-death-star-project-in-face-of-superior-galactic-imperial-power|text=Planet Earth Abandons Death Star Project In Face Of Superior Galactic Imperial Power|archivedate=20170806135255}}</ref> |
==Translations== |
==Translations== |
||
| Line 210: | Line 209: | ||
*''[[Star Wars: The Force Unleashed]]'' |
*''[[Star Wars: The Force Unleashed]]'' |
||
*''[[Rebel Dawn]]'' {{Imo}} |
*''[[Rebel Dawn]]'' {{Imo}} |
||
| − | * |
+ | *[[Death Star (novel)|''Death Star'']] |
*''[[Star Wars: Lethal Alliance]]'' {{C|Death Star I}} |
*''[[Star Wars: Lethal Alliance]]'' {{C|Death Star I}} |
||
*''[[Dark Forces: Soldier for the Empire]]'' / [[Dark Forces: Soldier for the Empire audio drama|audio]] {{Mo}} |
*''[[Dark Forces: Soldier for the Empire]]'' / [[Dark Forces: Soldier for the Empire audio drama|audio]] {{Mo}} |
||
| Line 223: | Line 222: | ||
*''[[Scavenger Hunt]]'' {{Mo}} |
*''[[Scavenger Hunt]]'' {{Mo}} |
||
*''[[Crisis on Cloud City]]'' {{Mo}} |
*''[[Crisis on Cloud City]]'' {{Mo}} |
||
| − | * |
+ | *[[Black Ice (adventure)|''Black Ice'']] {{Mo}} |
*''[[Graveyard of Alderaan]]'' {{Mo}} |
*''[[Graveyard of Alderaan]]'' {{Mo}} |
||
| + | *{{WEGCite|story=Graveyard of Alderaan|book=Classic Adventures: Volume Two}} {{Mo}} {{C|Reprint}} |
||
*{{Journal|6|Swoop Gangs}} {{Mo}} |
*{{Journal|6|Swoop Gangs}} {{Mo}} |
||
| + | *{{Journal|9|Death-Hunter}} {{Hologram}} |
||
*''[[Star Wars: Galactic Battlegrounds: Clone Campaigns]]'' {{C|As a cheat}} |
*''[[Star Wars: Galactic Battlegrounds: Clone Campaigns]]'' {{C|As a cheat}} |
||
*''[[Star Wars Galaxies]]'' |
*''[[Star Wars Galaxies]]'' |
||
| Line 238: | Line 239: | ||
*[[Star Wars: Episode V The Empire Strikes Back|''Star Wars'': Episode V ''The Empire Strikes Back'']] {{Mo}} |
*[[Star Wars: Episode V The Empire Strikes Back|''Star Wars'': Episode V ''The Empire Strikes Back'']] {{Mo}} |
||
*''[[Star Wars: Empire at War: Forces of Corruption]]'' {{C|Remains of Death Star I; Death Star II}} |
*''[[Star Wars: Empire at War: Forces of Corruption]]'' {{C|Remains of Death Star I; Death Star II}} |
||
| − | * |
+ | *[[Star Tours (real-world)|''Star Tours'']] {{C|[[Death Star III]]}} |
*[[Star Wars: Episode VI Return of the Jedi|''Star Wars'': Episode VI ''Return of the Jedi'']] {{C|Death Star II}} |
*[[Star Wars: Episode VI Return of the Jedi|''Star Wars'': Episode VI ''Return of the Jedi'']] {{C|Death Star II}} |
||
*{{WEGCite|book=Twin Stars of Kira|text=''Twin Stars of Kira''|story=Den of Spies}} |
*{{WEGCite|book=Twin Stars of Kira|text=''Twin Stars of Kira''|story=Den of Spies}} |
||
| Line 262: | Line 263: | ||
*''[[Star Wars: Jedi Knight II: Jedi Outcast]]'' {{Gamecameo}} |
*''[[Star Wars: Jedi Knight II: Jedi Outcast]]'' {{Gamecameo}} |
||
*''[[Soulcalibur IV]]'' |
*''[[Soulcalibur IV]]'' |
||
| − | * |
+ | *[[Star Wars: Rebellion (video game)|''Star Wars: Rebellion'']] |
*''[[LEGO Star Wars II: The Original Trilogy]]'' {{C|Death Stars I and II}} |
*''[[LEGO Star Wars II: The Original Trilogy]]'' {{C|Death Stars I and II}} |
||
*''[[LEGO Star Wars: The Complete Saga]]'' {{C|Death Stars I and II}} |
*''[[LEGO Star Wars: The Complete Saga]]'' {{C|Death Stars I and II}} |
||
| Line 270: | Line 271: | ||
{{Scroll box|content= |
{{Scroll box|content= |
||
*[[Star Wars (toy line)|''Star Wars'' toy line]] |
*[[Star Wars (toy line)|''Star Wars'' toy line]] |
||
| + | *''[[Star Wars Word Puzzles]]'' |
||
*''[[A Guide to the Star Wars Universe]]'' |
*''[[A Guide to the Star Wars Universe]]'' |
||
| − | * |
+ | *[[Star Wars: The Roleplaying Game (first edition)|''Star Wars: The Roleplaying Game'']] |
*''[[Star Warriors: Starfighter Combat in the Star Wars Universe]]'' |
*''[[Star Warriors: Starfighter Combat in the Star Wars Universe]]'' |
||
*''[[The Star Wars Sourcebook]]'' |
*''[[The Star Wars Sourcebook]]'' |
||
| + | *{{InsiderCite|5|Collections|Collections: Foreign ''Star Wars'' Collectibles}} |
||
*''[[Galaxy Guide 1: A New Hope]]'' |
*''[[Galaxy Guide 1: A New Hope]]'' |
||
*''[[The Star Wars Rules Companion]]'' |
*''[[The Star Wars Rules Companion]]'' |
||
| Line 282: | Line 285: | ||
*''[[Galaxy Guide 5: Return of the Jedi]]'' |
*''[[Galaxy Guide 5: Return of the Jedi]]'' |
||
*''[[Galaxy Guide 6: Tramp Freighters]]'' |
*''[[Galaxy Guide 6: Tramp Freighters]]'' |
||
| − | *''[[Rebel Alliance Sourcebook]]'' |
+ | *''[[The Rebel Alliance Sourcebook]]'' |
*''[[Death Star Technical Companion]]'' |
*''[[Death Star Technical Companion]]'' |
||
| − | * |
+ | *[[Cracken's Rebel Field Guide (sourcebook)|''Cracken's Rebel Field Guide'']] |
| − | * |
+ | *[[Star Wars Miniatures Battles (first edition)|''Star Wars Miniatures Battles'']] |
*''[[Heir to the Empire Sourcebook]]'' |
*''[[Heir to the Empire Sourcebook]]'' |
||
*[[Star Wars: The Roleplaying Game, Second Edition|''Star Wars: The Roleplaying Game'', Second Edition]] |
*[[Star Wars: The Roleplaying Game, Second Edition|''Star Wars: The Roleplaying Game'', Second Edition]] |
||
| Line 303: | Line 306: | ||
*[[Star Wars Miniatures Battles (Second Edition)|''Star Wars Miniatures Battles'', Second Edition]] |
*[[Star Wars Miniatures Battles (Second Edition)|''Star Wars Miniatures Battles'', Second Edition]] |
||
*''[[The Last Command Sourcebook]]'' |
*''[[The Last Command Sourcebook]]'' |
||
| − | *[[Rebel Alliance Sourcebook (Second Edition)|''Rebel Alliance Sourcebook'', Second Edition]] |
+ | *[[The Rebel Alliance Sourcebook (Second Edition)|''The Rebel Alliance Sourcebook'', Second Edition]] |
*[[Galaxy Guide 6: Tramp Freighters (Second Edition)|''Galaxy Guide 6: Tramp Freighters'', Second Edition]] |
*[[Galaxy Guide 6: Tramp Freighters (Second Edition)|''Galaxy Guide 6: Tramp Freighters'', Second Edition]] |
||
*{{Journal|2|The Free-Trader's Guide to Sevarcos}} |
*{{Journal|2|The Free-Trader's Guide to Sevarcos}} |
||
| Line 318: | Line 321: | ||
*{{Journal|7|The History of R-Series Astromech Droids}} |
*{{Journal|7|The History of R-Series Astromech Droids}} |
||
*{{Journal|7|Into the Core Worlds}} |
*{{Journal|7|Into the Core Worlds}} |
||
| + | *''[[Galaxy Guide 12: Aliens — Enemies and Allies]]'' |
||
| ⚫ | |||
| + | *[[Galaxy Guide 1: A New Hope (Second Edition)|''Galaxy Guide 1: A New Hope'', Second Edition]] |
||
| + | *[[Galaxy Guide 5: Return of the Jedi (Second Edition)|''Galaxy Guide 5: Return of the Jedi'', Second Edition]] |
||
*[[Star Wars: The Power of the Force (1995 toy line)|''Star Wars: The Power of the Force'' (1995)]] |
*[[Star Wars: The Power of the Force (1995 toy line)|''Star Wars: The Power of the Force'' (1995)]] |
||
| + | *''[[The Truce at Bakura Sourcebook]]'' |
||
| + | *{{Journal|9|Repulsortank Battlefield}} |
||
| + | *{{Journal|9|ISB Intercepts}} |
||
| + | *''[[The Jedi Academy Sourcebook]]'' |
||
| + | *{{WEGCite|book=The Best of the Star Wars Adventure Journal, Issues 1-4|text=''The Best of the Star Wars Adventure Journal, Issues 1-4''|story=The Free-Trader's Guide to Sevarcos}} {{C|Reprint}} |
||
*''[[The Essential Guide to Vehicles and Vessels]]'' |
*''[[The Essential Guide to Vehicles and Vessels]]'' |
||
*{{Journal|10|Cracken's Rebel Operatives (article)|Cracken's Rebel Operatives}} |
*{{Journal|10|Cracken's Rebel Operatives (article)|Cracken's Rebel Operatives}} |
||
| Line 325: | Line 335: | ||
*''[[Shadows of the Empire Sourcebook]]'' |
*''[[Shadows of the Empire Sourcebook]]'' |
||
*{{SOTE|cardname=Xizor is Lurking|link=http://www.rebelscum.com/photo.asp?image=/sote/soteTC001.jpg|archiveurl=https://archive.is/SjRh}} |
*{{SOTE|cardname=Xizor is Lurking|link=http://www.rebelscum.com/photo.asp?image=/sote/soteTC001.jpg|archiveurl=https://archive.is/SjRh}} |
||
| − | *{{SOTE|cardname=Leia and Chewie Go Underground|link=http://www.rebelscum.com/photo.asp?image=/sote/soteTC040.jpg}} |
+ | *{{SOTE|cardname=Leia and Chewie Go Underground|link=http://www.rebelscum.com/photo.asp?image=/sote/soteTC040.jpg|archiveurl=https://archive.fo/0Bmq}} |
*{{KennerCite|set=Star Wars: Shadows of the Empire (toy line){{!}}Star Wars: Shadows of the Empire|pack=Darth Vader vs. Prince Xizor|link=soteKxizor-vader.asp|archiveurl=https://web.archive.org/web/20180213111100/www.rebelscum.com/soteKxizor-vader.asp}} |
*{{KennerCite|set=Star Wars: Shadows of the Empire (toy line){{!}}Star Wars: Shadows of the Empire|pack=Darth Vader vs. Prince Xizor|link=soteKxizor-vader.asp|archiveurl=https://web.archive.org/web/20180213111100/www.rebelscum.com/soteKxizor-vader.asp}} |
||
| − | *{{Galoob|set=Star Wars: Shadows of the Empire Micro Machines|text=''Star Wars: Shadows of the Empire'' Micro Machines|pack=Collection III|link=soteMM3.asp}} |
+ | *{{Galoob|set=Star Wars: Shadows of the Empire Micro Machines|text=''Star Wars: Shadows of the Empire'' Micro Machines|pack=Collection III|link=soteMM3.asp|archiveurl=https://archive.fo/Xr04q}} |
| + | *''[[The Thrawn Trilogy Sourcebook]]'' |
||
| + | *[[Galaxy Guide 3: The Empire Strikes Back (Second Edition)|''Galaxy Guide 3: The Empire Strikes Back'', Second Edition]] |
||
| + | *''[[Live-Action Adventures]]'' |
||
| + | *''[[Star Wars: The Roleplaying Game, Second Edition, Revised and Expanded]]'' |
||
| ⚫ | |||
*''[[Star Wars: The Art of the Brothers Hildebrandt]]'' |
*''[[Star Wars: The Art of the Brothers Hildebrandt]]'' |
||
*{{InsiderCite|35|The Horse's Mouth|Straight from the Horse's Mouth}} |
*{{InsiderCite|35|The Horse's Mouth|Straight from the Horse's Mouth}} |
||
| Line 341: | Line 356: | ||
*''[[Star Wars: The Action Figure Archive]]'' |
*''[[Star Wars: The Action Figure Archive]]'' |
||
*''[[Star Wars: Power of the Jedi]]'' |
*''[[Star Wars: Power of the Jedi]]'' |
||
| + | *''[[The Dark Side Sourcebook]]'' |
||
*{{WizardsCite|url=default.asp?x=starwars/article/sw20041216b|text=Furry and Fury|int=Furry and Fury|archivedate=20090603071648}} |
*{{WizardsCite|url=default.asp?x=starwars/article/sw20041216b|text=Furry and Fury|int=Furry and Fury|archivedate=20090603071648}} |
||
| + | *{{WizardsCite|url=default.asp?x=swminis/article/universepreview8|text=''Universe'' Preview 8|int=Universe Preview 8|archivedate=20100119071953}} |
||
| + | *{{WizardsCite|url=default.asp?x=starwars/article/AEPreview4|text=''Alliance and Empire'' Preview 4|int=Alliance and Empire Preview 4|archivedate=20090901074242}} |
||
*''[[Star Wars: The Official Figurine Collection 53]]'' {{C|High-Speed Travel: Hyperspace Routes}} |
*''[[Star Wars: The Official Figurine Collection 53]]'' {{C|High-Speed Travel: Hyperspace Routes}} |
||
*{{Hyperspace|url=fans/hyperspace/source/feature20081201.html|text=Castaways of Endor|int=Castaways of Endor}} |
*{{Hyperspace|url=fans/hyperspace/source/feature20081201.html|text=Castaways of Endor|int=Castaways of Endor}} |
||
| + | *''[[Star Wars Fandex Deluxe Edition]]'' |
||
*''[[The Complete Star Wars Encyclopedia]]'' |
*''[[The Complete Star Wars Encyclopedia]]'' |
||
*{{SWGTCG|set=Champions of the Force (SWGTCG)|text=Champions of the Force|cardname=Death Star Hologram}} |
*{{SWGTCG|set=Champions of the Force (SWGTCG)|text=Champions of the Force|cardname=Death Star Hologram}} |
||
*{{SWGTCG|set=The Shadow Syndicate|cardname=Tarkin Doctrine}} |
*{{SWGTCG|set=The Shadow Syndicate|cardname=Tarkin Doctrine}} |
||
| − | *{{Hyperspace|url=hyperspace/source/praji/20090205.html|text= |
+ | *{{Hyperspace|url=hyperspace/source/praji/20090205.html|text=Tinker, Tailor, Soldier, Praji|int=Tinker, Tailor, Soldier, Praji}} |
*''[[Star Wars: Empire at War: Prima Official Game Guide]]'' |
*''[[Star Wars: Empire at War: Prima Official Game Guide]]'' |
||
*{{InsiderCite|106|Han Solo: The Early Years}} |
*{{InsiderCite|106|Han Solo: The Early Years}} |
||
| Line 396: | Line 415: | ||
*{{FFGXW|A-Wing Expansion Pack|cardname=Arvel Crynyd—A-wing}} {{Po}} |
*{{FFGXW|A-Wing Expansion Pack|cardname=Arvel Crynyd—A-wing}} {{Po}} |
||
*{{FFGXW|TIE Interceptor Expansion Pack|cardname=Alpha Squadron Pilot—TIE Interceptor}} {{Po}} |
*{{FFGXW|TIE Interceptor Expansion Pack|cardname=Alpha Squadron Pilot—TIE Interceptor}} {{Po}} |
||
| − | * |
+ | *[[Star Wars: Edge of the Empire Core Rulebook|''Star Wars: Edge of the Empire'' Core Rulebook]] |
*{{FFGTCG|set=Edge of Darkness|cardname=Alderaanian Artist}} {{Po}} |
*{{FFGTCG|set=Edge of Darkness|cardname=Alderaanian Artist}} {{Po}} |
||
*''[[Star Wars: Force Collection]]'' {{C|Card: Admiral Motti}} |
*''[[Star Wars: Force Collection]]'' {{C|Card: Admiral Motti}} |
||
| Line 415: | Line 434: | ||
*''[[Star Wars: Force Collection]]'' {{C|Card: Luke Skywalker (Special)}} |
*''[[Star Wars: Force Collection]]'' {{C|Card: Luke Skywalker (Special)}} |
||
*''[[Star Wars: Force Collection]]'' {{C|Card: Han Solo (Special)}} |
*''[[Star Wars: Force Collection]]'' {{C|Card: Han Solo (Special)}} |
||
| − | *{{ |
+ | *{{SW|url=news/planet-earth-abandons-death-star-project-in-face-of-superior-galactic-imperial-power|text=Planet Earth Abandons Death Star Project In Face Of Superior Galactic Imperial Power|archivedate=20170806135255}} |
*{{FFGXW|B-Wing Expansion Pack|cardname=Proton Torpedoes}} {{Po}} |
*{{FFGXW|B-Wing Expansion Pack|cardname=Proton Torpedoes}} {{Po}} |
||
*{{FFGTCG|set=Balance of the Force|cardname=Blue Leader}} {{Po}} |
*{{FFGTCG|set=Balance of the Force|cardname=Blue Leader}} {{Po}} |
||
| Line 430: | Line 449: | ||
*{{FFGTCG|set=Balance of the Force|cardname=Red Five}} {{Po}} |
*{{FFGTCG|set=Balance of the Force|cardname=Red Five}} {{Po}} |
||
*{{SW|url=news/the-imperial-warlords-despoilers-of-an-empire-part-2|int=The Imperial Warlords: Despoilers of an Empire|text=The Imperial Warlords: Despoilers of an Empire, Part 2|archivedate=20170614173909}} |
*{{SW|url=news/the-imperial-warlords-despoilers-of-an-empire-part-2|int=The Imperial Warlords: Despoilers of an Empire|text=The Imperial Warlords: Despoilers of an Empire, Part 2|archivedate=20170614173909}} |
||
| + | *''[[Dangerous Covenants]]'' |
||
*{{FFGXW|Imperial Aces Expansion Pack|cardname=Targeting Computer}} {{Po}} |
*{{FFGXW|Imperial Aces Expansion Pack|cardname=Targeting Computer}} {{Po}} |
||
*{{FFGTCG|set=Heroes and Legends|cardname=General Mohc}} |
*{{FFGTCG|set=Heroes and Legends|cardname=General Mohc}} |
||
| Line 437: | Line 457: | ||
*{{SWE|groups|rebel-pilots|Rebel Pilots}} |
*{{SWE|groups|rebel-pilots|Rebel Pilots}} |
||
*{{SWE|technology|xwing|X-wing fighter}} |
*{{SWE|technology|xwing|X-wing fighter}} |
||
| − | * |
+ | *[[Star Wars: Age of Rebellion Core Rulebook|''Star Wars: Age of Rebellion'' Core Rulebook]] |
*{{FFGTCG|set=Between the Shadows|cardname=General Tagge}} |
*{{FFGTCG|set=Between the Shadows|cardname=General Tagge}} |
||
*{{FFGTCG|set=Between the Shadows|cardname=Security Task Force}} |
*{{FFGTCG|set=Between the Shadows|cardname=Security Task Force}} |
||
| Line 457: | Line 477: | ||
==Notes and references== |
==Notes and references== |
||
| − | {{Reflist |
+ | {{Reflist}} |
{{Interlang |
{{Interlang |
||
Revision as of 20:21, 9 December 2019
| | |
Warning: This infobox has missing parameters: coord, xyz, type and unrecognized parameters: class
- "Don't be too proud of this technological terror you've constructed. The ability to destroy a planet is insignificant next to the power of the force."
- ―Darth Vader
A Death Star was a moon-sized Imperial military battlestation armed with a planet-destroying superlaser.
The Death Stars, whose concept had been explored even before the Clone Wars, were the first in a long series of superweapons developed to execute the Tarkin Doctrine. The Death Star was designed to allow Emperor Palpatine to more directly control the Galactic Empire through fear. In most instances, a Death Star was to be commanded by a Moff.
One Death Star was completely built by the Empire, with a second and third one never reaching full completion, as well as a prototype being in existence. In addition, a scaled-down version, the Tarkin, and a Hutt knockoff, the Darksaber, would be created by the Empire and Durga the Hutt, respectively.
Both Death Stars were destroyed by the Rebel Alliance shortly after they became operational. The first Death Star was destroyed by Luke Skywalker, with the help of Han Solo, and the second Death Star was destroyed by Wedge Antilles and Lando Calrissian. Prior to the second Death Star being built, the Galactic Empire tested out a planetary superlaser for protecting its installations on the planet of Dubrillion. At some point after the second's destruction, the Rebel Alliance also attacked and destroyed a third Death Star. Following their destruction, other planet-devastating superweapons followed, including the Galaxy Gun, the Darksaber, the Sun Crusher, and the World Devastators.
Description
- Bail: "Surely there's nothing new about a space fortress."
- Tion: "I don't mean a mere orbital gun platform, Your Majesty. This is a machine of war such as the universe has never known. It's colossal, the size of a class-four moon. And it possesses firepower unequaled in the history of warfare."
- Leia: "And this, this flying pillbox is going to make you a member of the Imperial elite?"
- Tion: "More than a pillbox, Princess. It boasts a Prime Weapon capable of destroying entire planets."
- ―Bail Organa, Tion and Leia Organa[src]
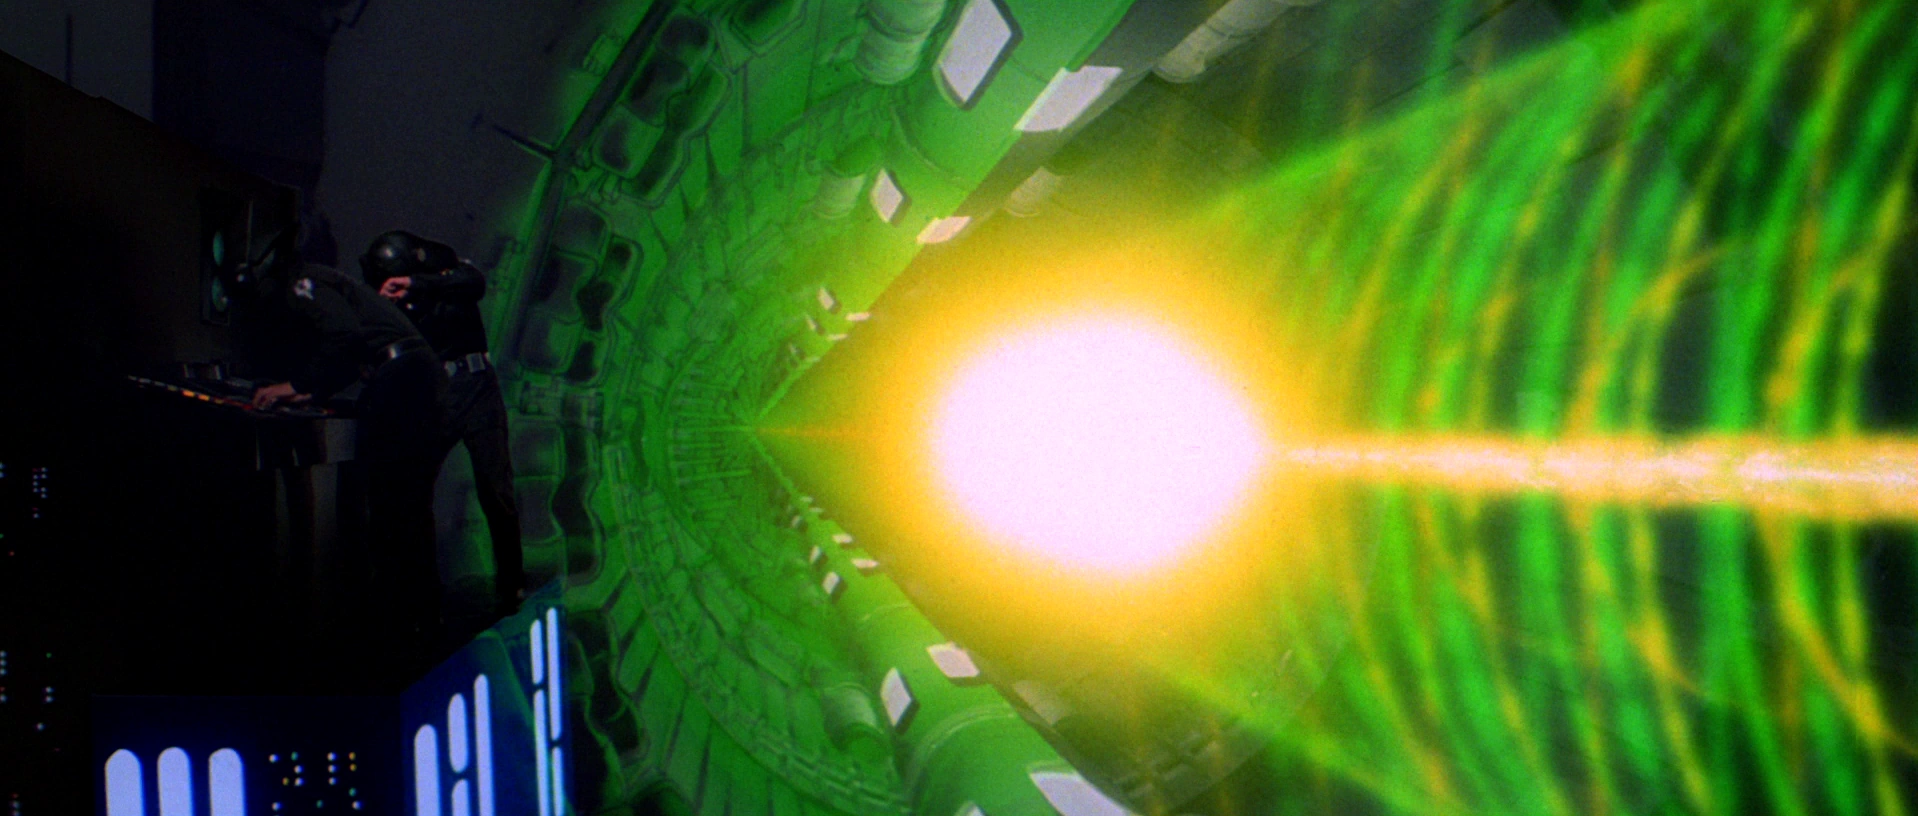
The first Death Star fires its superlaser.
The Death Stars, the Galactic Empire's ultimate terror weapons, were battle stations several hundred kilometers in diameter and mounting a directed energy superlaser capable of completely destroying a planet with a single shot along with 15000 lasers, ion, turbolasers batteries, and heavy turbolasers in all plus an additional 768 tractor beam emplacements. However, the first Death Star's defenses were not tight enough to stop starfighters from penetrating them.
The first Death Star was 120 kilometers in diameter,[1][2] while the second Death Star was 160 kilometers in diameter.[3] Much of its interior space was devoted to systems required to maintain its massive superlaser and power plant. At the heart of each Death Star was a gigantic hypermatter reactor, which possessed an output equal to that of several main-sequence stars. Within this chamber burned a reaction of prodigious proportions, fed by stellar fuel bottles lining its periphery.
Splitting the station into two equal hemispheres was a huge equatorial trench approximately 503 kilometers in length for the first Death Star and 2,827 kilometers for the second Death Star. This area of the station housed most of the major landing bays, drive thrusters, sensor arrays and tractor beam systems. Halfway between the equator and each pole were two supplementary trenches. The Death Star was divided into 24 zones, 12 per hemisphere, each controlled by a "bridge". To further organize the immense amount of activity aboard, there were specific "sectors" denoting function. These included the General, Command, Military, Security, Service, and Technical sectors.
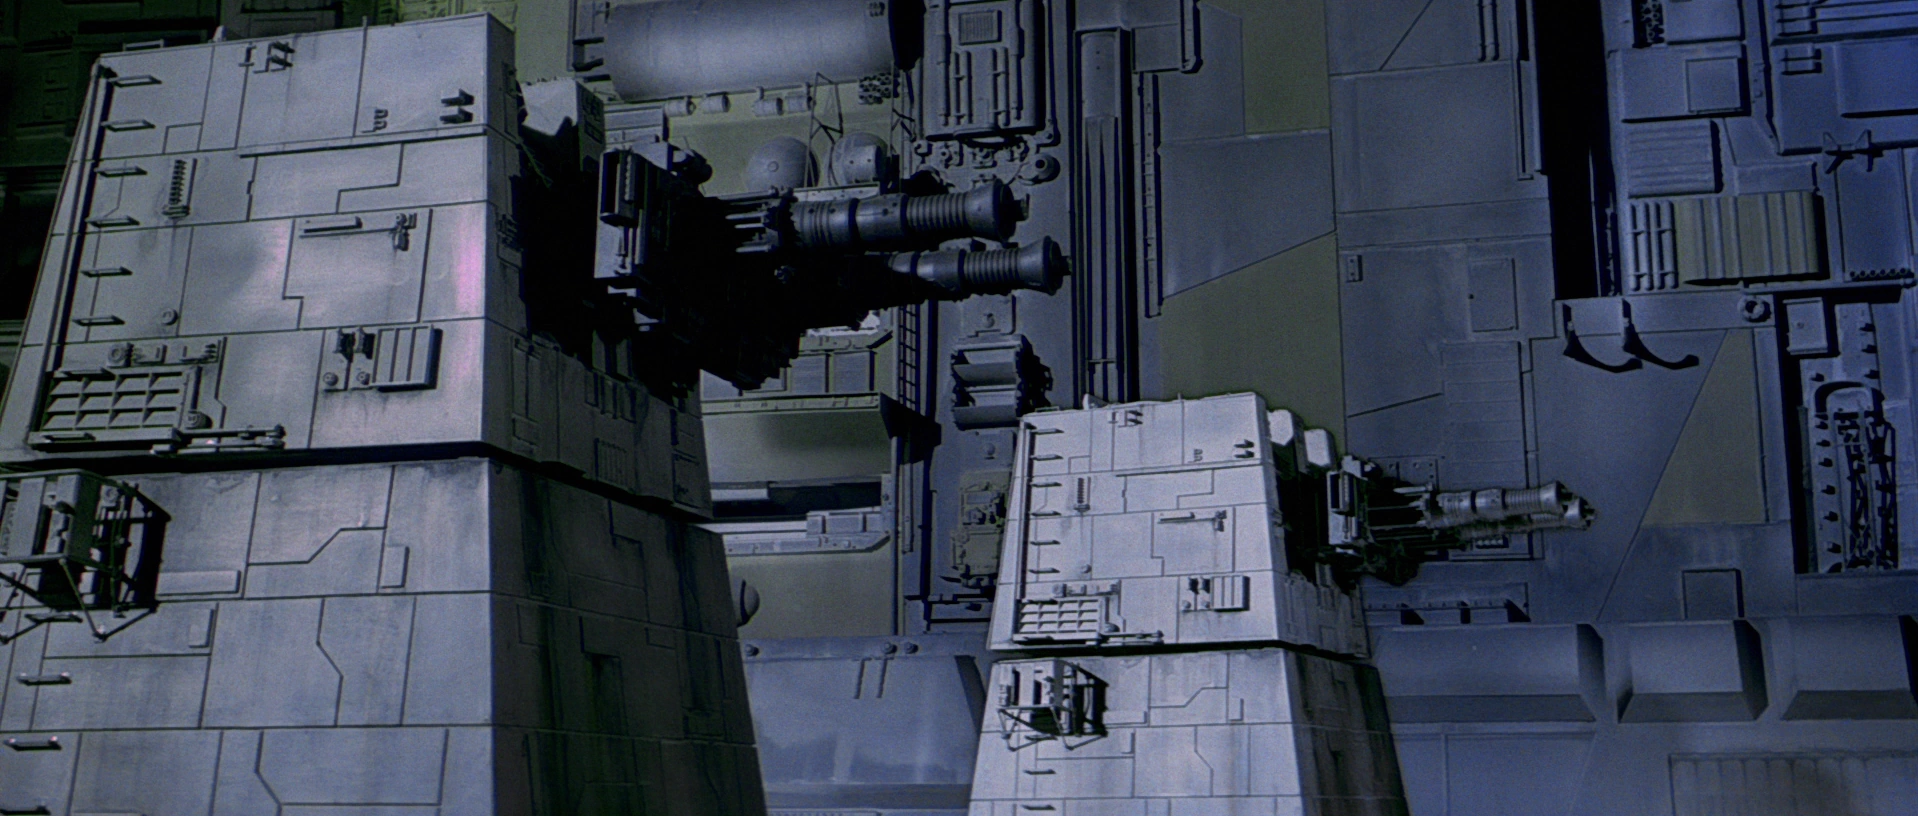
A drydock on one of the Death Stars
Since service onboard the Death Star was a long-term affair, the station maintained a number of civilian amenities to make the time aboard a deep space station more comfortable. Parks, shopping centers, recreation areas, and taverns such as the Hard Heart Cantina could be found in the general sectors of the station.[4]
Facilitating the Death Star's realspace propulsion were a network of powerful ion engines that transformed reactor power into needed thrust. In order for the Death Star to be a deadly threat, it needed to be mobile. Using linked banks of 123 hyperdrive field generators tied into a single navigational matrix, the Death Star could travel across the Galaxy at superluminal velocities. The incredible energies harnessed by the station combined with its great mass gave the Death Star magnetic and artificial gravitational fields equal to those found on orbital bodies many times greater in size.
The Death Star's superlaser derived power directly from the hypermatter reactor. Its faceted amplification crystal combined the destructive power of eight separate tributary beams into one single blast with the intensity of a stellar core. After firing a blast, though, the Imperial engineers had to recharge the reactor, which took at least 24 standard hours. Though the energy output of this blast could be scaled to fire at smaller targets such as capital ships, as was the case during the Rebel assault on the second Death Star, the two major instances in which the superlaser was fired were at full power at planetary bodies.
The Death Star's interior followed two orientations. Those areas closest to the surface were built with concentric decks with gravity oriented towards the Death Star's core. Past this shell of surface "sprawls", the Death Star's interior had stacked decks with gravity pointing toward the station's southern pole.
History
Design
- "Whatever the Empire plans for this battle station, it cannot bode well for the galaxy at large."
- ―Rahm Kota


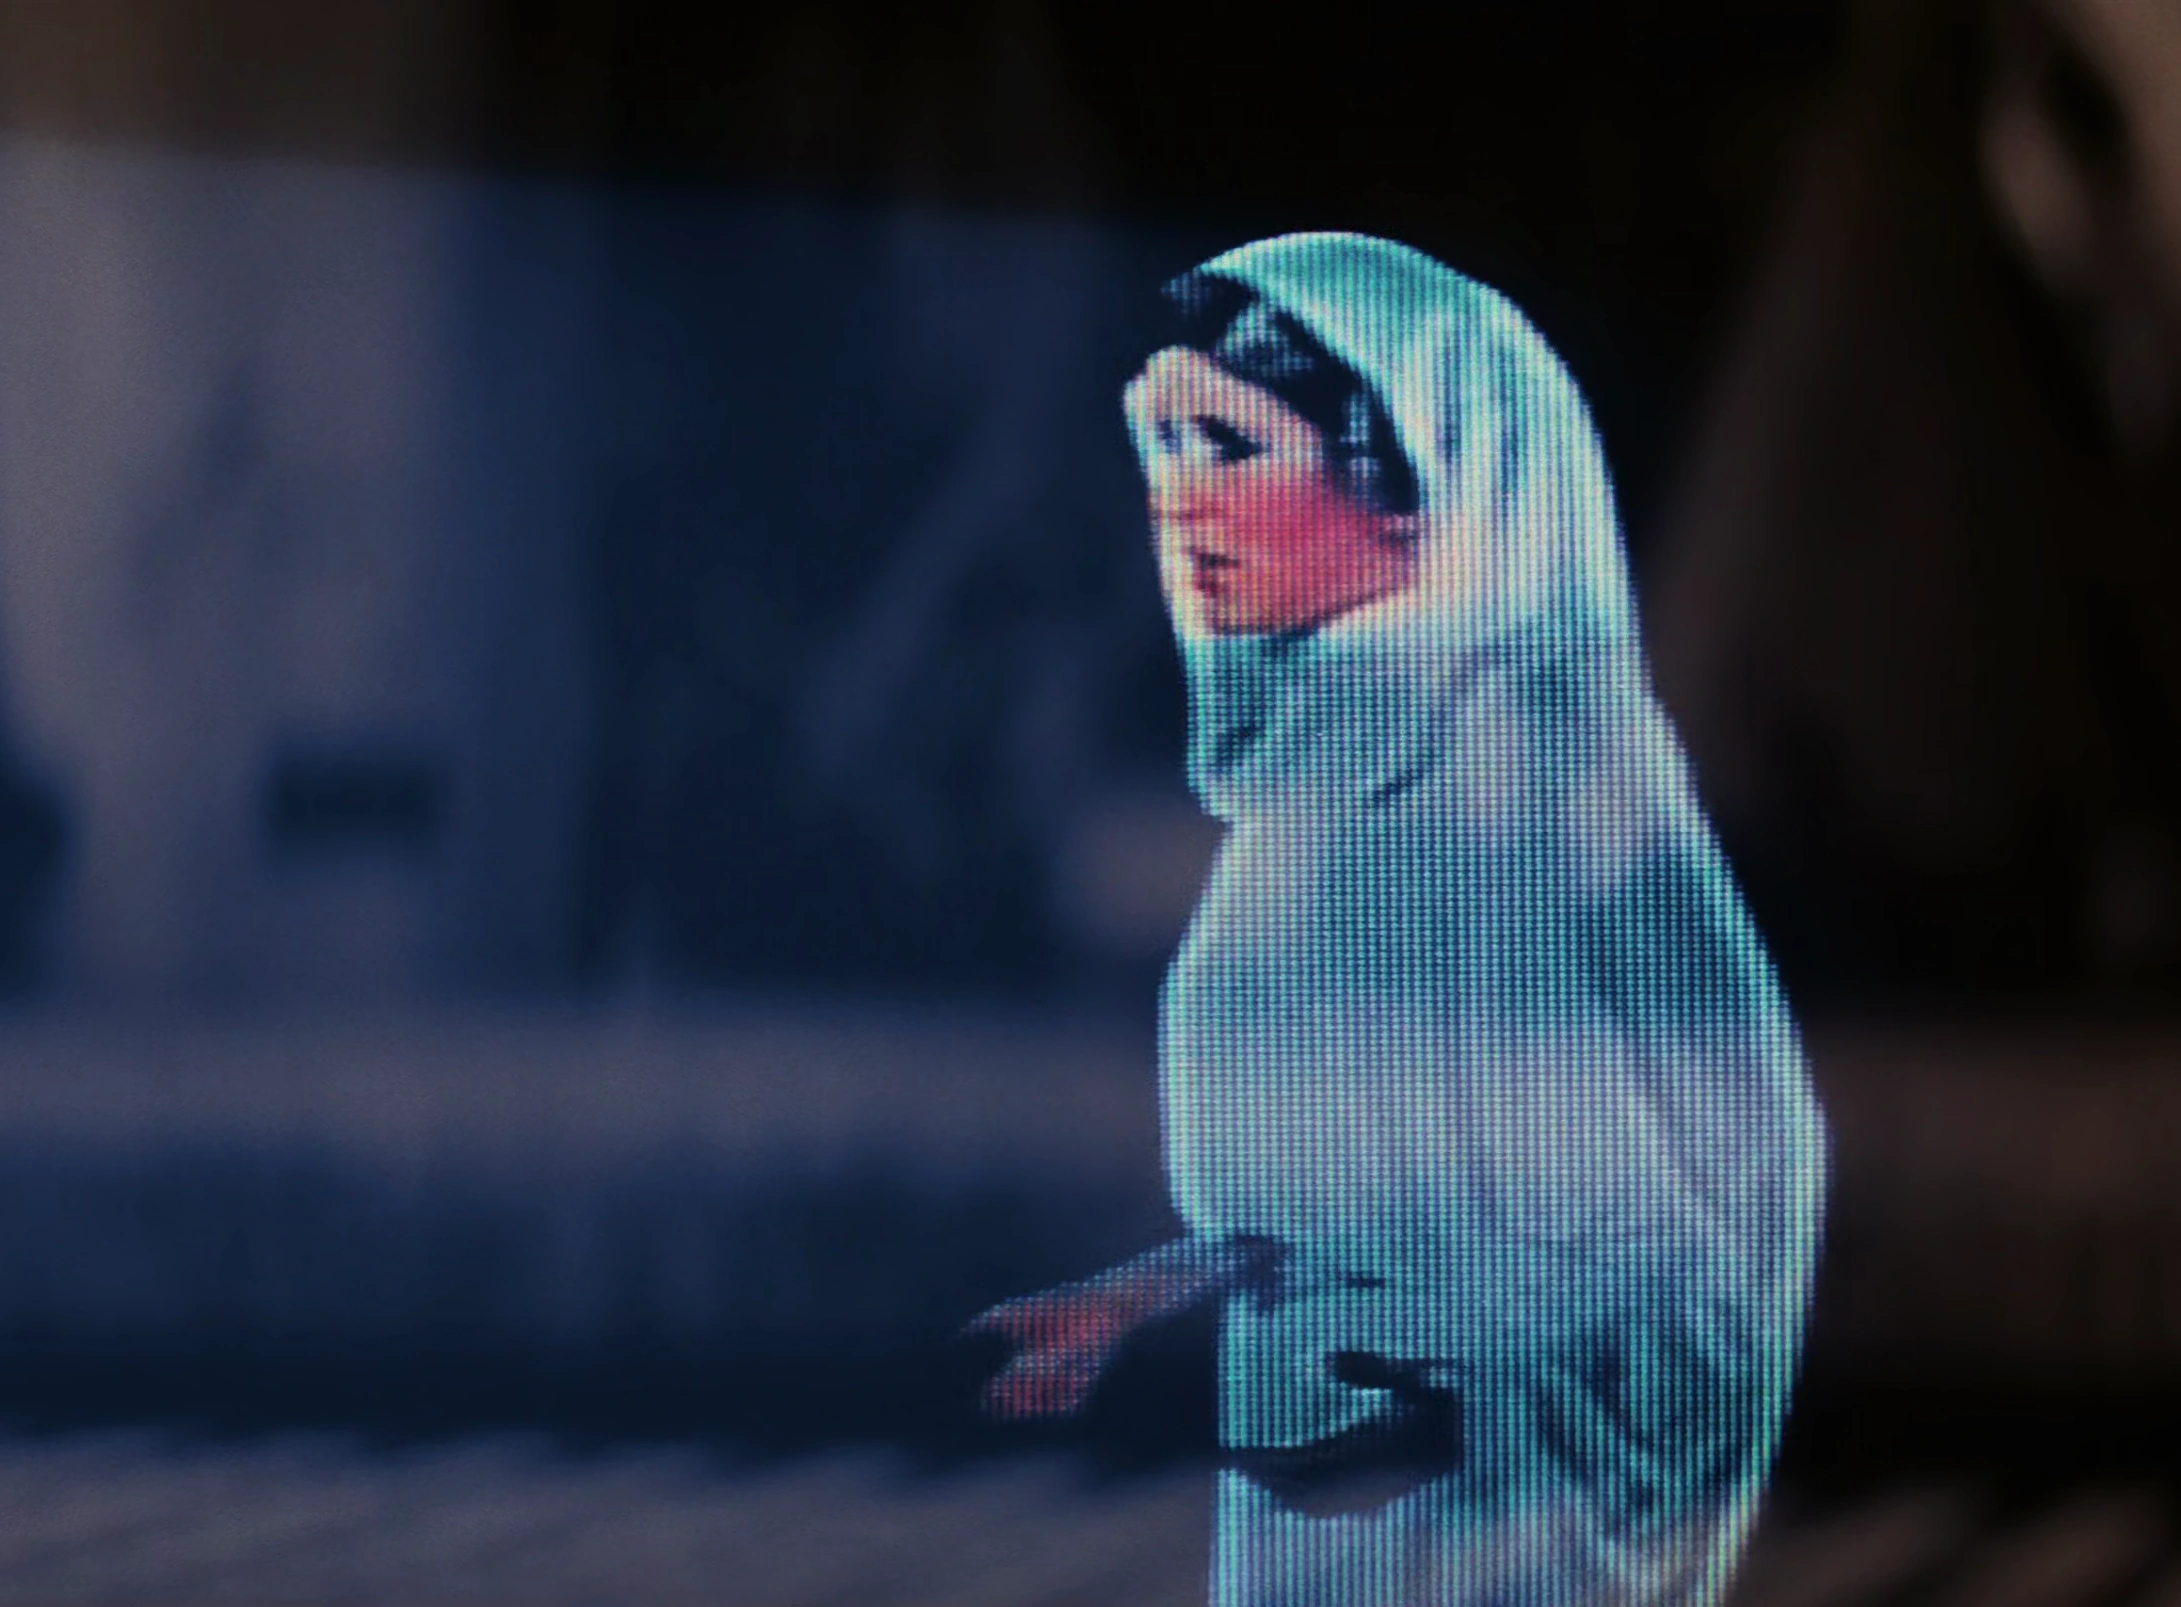
The plans for the Ultimate Weapon, which would become the Death Star, given to Count Dooku.
The Death Star was born in the mind of Raith Sienar, who had conceived of it as an Expeditionary Battle Planetoid, although he believed the design was impractical. He shared his idea with his friend Wilhuff Tarkin, who presented it to Supreme Chancellor Palpatine, having been impressed enough about the design to champion it in spite of Sienar's doubts about its practicality. Palpatine then turned Sienar's idea to Bevel Lemelisk and ordered him to pursue the needed advances in hypermatter science with the Geonosian hives led by Poggle the Lesser, to which he succeeded in doing so with the Twi'lek scientist Tol Sivron, although the plans ended up falling into enemy hands when the Geonosians joined the Separatists.[5] In actuality, Palpatine, as Sith Lord Darth Sidious, arranged for the designs to be supplied to the Separatists, led by his apprentice, Separatist leader Count Dooku, with Lemelisk being unaware of this. Dooku then had Geonosian Industries accomplish further technical modifications to the original plans.
During the Battle of Geonosis, Archduke Poggle the Lesser, leader of the Geonosians, returned the top-secret designs to Count Dooku to prevent it from falling into the hands of the Jedi. Dooku took the designs back to Coruscant and gave them to Darth Sidious, his dark master.[6] The Separatists then continued to build their superweapon in the Geonosis system.[7]
The 501st Legion was sent to Mygeeto during the Clone Wars to collect an ancient Mygeetan crystal which was an experimental power source that the Chancellor required for a top-secret tributary laser-stream project codenamed "Hammertong," which would be used on the first Death Star.
Darth Sidious later ordered the Death Star's construction after the Galactic Empire was formed, in order to secure his new-formed absolute power. Wilhuff Tarkin was appointed to mastermind the secret development project, though other stories have it that Raith Sienar was the superweapon's creator. Tarkin's creative work and thought resulted in the realization of the Death Star as the Empire's ultimate weapon.
After the beginning of the Great Jedi Purge, an assault was led on the planet Kashyyyk to enslave the native Wookiees for the Death Star's construction. Various prison planets were also known to have their captives unwittingly construct various sections of the station. The Empire also had Mrlssi scientists working on some of the technology that would go into the station.[8]
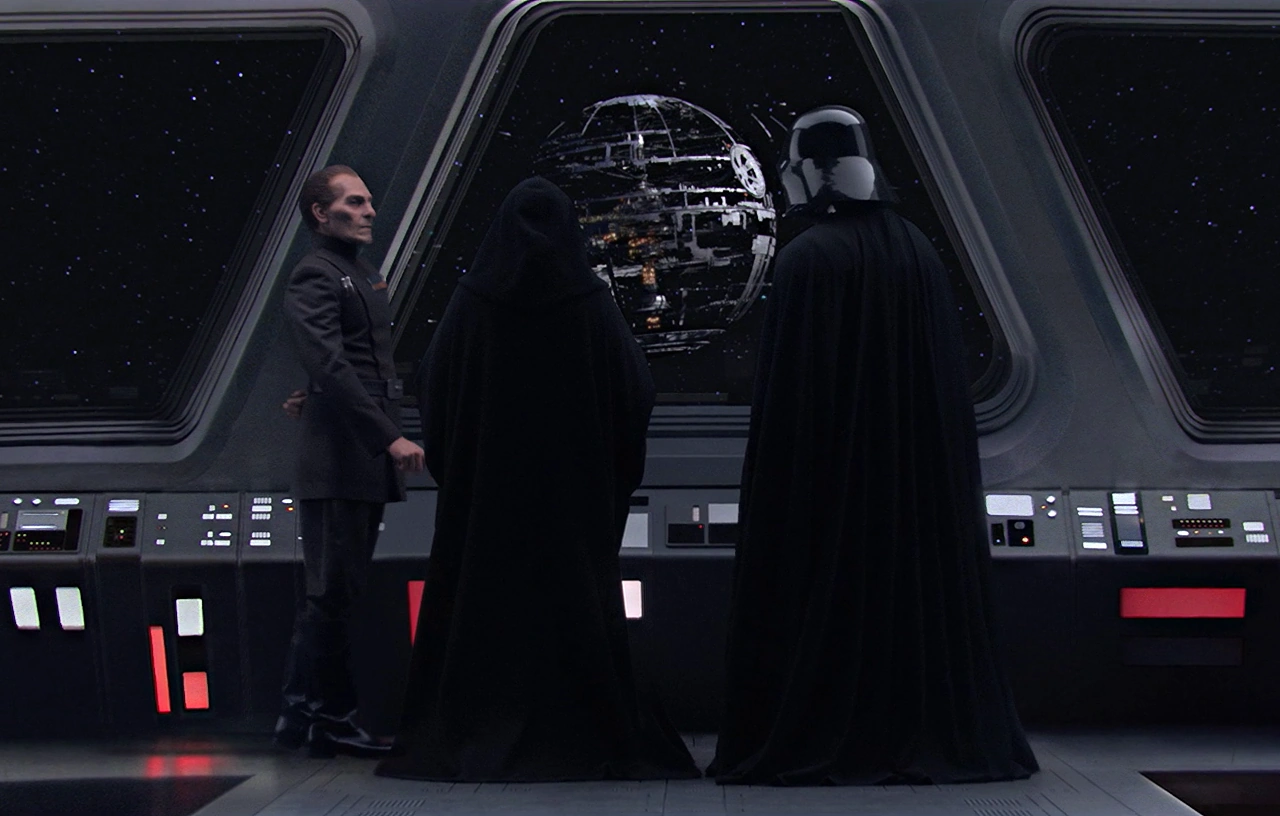
Wilhuff Tarkin with Emperor Palpatine and Darth Vader in 19 BBY overlooking the construction of the first Death Star.
Nevertheless, the project nearly ended before it began. Because much of the technology of the Death Star was impressive, actually building it proved to be more difficult than anyone imagined. Efforts were not helped by repeated (and often unsuccessful) attempts to sabotage construction. In addition, spies belonging to Gentis were also planted on the development team in charge of the Death Star since a few weeks after the creation of a New Order, which factored into his military coup against Palpatine a few months afterwards.
Implementation
- "The cost of maintaining order is high - some would say too high - but to preserve peace and stability, difficult choices must be made. Yes, the destruction of Alderaan was regrettable, but so was the destruction of the Death Stars. Are the death of millions of Alderaanians - who conspired to overthrow the government - more tragic than the deaths of the millions of Imperial soldiers who laid down their lives to defend our way of life? I think not."
- ―Imperial High Inquisitor Antinnis Tremayne
Of particular concern was the technology required to create the massive superlaser, the heart of the weapon, which was derived from the long-running Hammertong Project. The Superlaser cannon was initially going to be placed in the equator, but for reasons unspecified was later moved to the dorsal hemisphere. In addition, the tributary lasers required fine-tuning and perfect alignment during development, otherwise it would result in the central beam misfocusing and dissipate in a flurry of backscatter that ended up being far more dangerous to the superlaser housing than to any target. As the superlaser at that time required a significant amount of power generation to maintain, and it was powered primarily by the station's hypermatter reactor, it also had to disable all other functions of the ship, including shields and life support, were knocked offline when it was in use. Lastly, the firing process also generated magnetic flux and gravitational flux, which also needed to be dissipated in fear of either misaligning the crystals or, in the worst case scenario, tear the station apart.[5] To this end, Tarkin brought together some of the most brilliant minds of the Galaxy, including Tol Sivron, Qwi Xux, and Bevel Lemelisk, and built a proof-of-concept model at the Maw Installation. This model would eventually become known as the Death Star prototype. These scientists also found and corrected several flaws in the Geonosian blueprints, which had been used in that phase of construction. Renowned physicist Rorax Falken worked with the Empire at some point during the construction of the Death Star, though he was not aware that his ideas and knowledge were being used for a battlestation.[8] During this time, the Death Star construction also frequently relocated, from Geonosis to Seswenna to Patriim to Horuz, the latter location being the location when the battle station was starting to become a reality.[5]
With the concept completed and the plans finalized, Lemelisk took the plans to Despayre, where construction would finally be completed after twenty years of hard work and the death of many individuals. In celebration, the Death Star turned its massive weapon on Despayre itself, completely destroying it.[9] After the completion of the first Death Star, codenamed the DS-1 Orbital Battle Station, Lemelisk and the IDMR have explored two potential concepts for the Death Star's future: Either having various factory worlds switch their output to the production of assembly-line duplicates of the current DS-1 model, or have the Empire build an even larger and more dangerous Death Star reaching 160 km in diameter.[10] The Empire would ultimately opt with the latter concept.
During its construction, the Death Star was home to countless prisoners of the Empire, from political opponents to pirate gangs to Rebel saboteurs. These prisoners managed to break out and riot in the Death Star, but were put down by the 501st Legion. However, some managed to escape with a partial set of the plans and some Imperial data.[11]

The first Death Star's superlaser hits Alderaan.
Galen Marek traveled to the Death Star to free Bail Prestor Organa, Rahm Kota, and rest of the founders of the Rebel Alliance including Mon Mothma. He fought Darth Vader in the corridor leading to Sidious' Observation Chamber. He severely injured the Sith Lord and Palpatine urged Galen to kill Vader. Galen instead attacked Sidious himself. The pair dueled viciously with the force and lightsaber combat. Galen sacrificed his life in an explosion which allowed the Rebels to escape. He was honored by the Alliance when his family crest was used as their symbol.
Just after construction was completed, the other set of Death Star plans was discovered by Rebel spies on a secret signal interceptions asteroid outpost, AX-235; the Rebellion moved on and in the borders of Operation Skyhook, a copy of the plans was stolen by Kyle Katarn from Danuta and finally reached Leia Organa. Later, while attempting to recruit Obi-Wan Kenobi to the rebel cause, Leia's vessel,Tantive IV was attacked by the Star Destroyer Devastator above Tatooine. Leia, before being captured, transmitted the plans in R2-D2 and sent them to Obi-Wan Kenobi on Tatooine. Upon arriving at Alderaan, which had been destroyed by the Death Star, Han Solo, Luke Skywalker, Kenobi, and Chewbacca mistook the station for a small moon while following a lone TIE/LN starfighter.
The quartet was soon captured, but after escaping from the Death Star with Leia, the plans to the station were transported by Princess Leia with their help to Rebel leaders on Yavin IV. Soon after, the Death Star arrived to destroy the rebel base, having located it via a transmitter placed on the Millennium Falcon. After softening the defenses by destroying some of the Deflection Towers,[12] Luke Skywalker piloted a T-65 X-wing starfighter through a minor trench on the surface of the Death Star, then Vader followed him in, and during his evasion of Darth Vader, he heard Obi-Wan call to him, telling him to use the Force, not his targeting computer. Luke switched off his computer, to the concern of the Rebels in the base, then fired two proton torpedoes into the "reactor core". This caused a chain reaction that destroyed the battle station just before it could fire on the Rebel base.[13] Ironically, shortly before Luke's destruction of the Death Star, Palpatine had ordered for the creation of a second Death Star.[5]
The incomplete Death Star II.
Nearly four years later, Bothan spies stole the plans of the second Death Star, unaware that their theft was orchestrated by Emperor Palpatine, having agreed to a suggestion personally made to him by Black Sun leader Prince Xizor. General Crix Madine and Admiral Gial Ackbar devised a plan for the destruction of the new Death Star. Han Solo led a team to the forest moon of Endor to destroy the shield generator there. The plan called for a group of fighters and the Millennium Falcon piloted by Lando Calrissian to attack the Death Star upon destruction of the shield generator. The fighters flew into the center of the station through a narrow maze of pipes to destroy the reactor directly and rushed out in just enough time to escape the ensuing explosion before the station could carry out its final order: destroying the Sanctuary Moon of Endor. A few moments prior to its destruction, an evacuation order for all non-essential personnel was also called.[14]
At some point after the Battle of Endor, a third Death Star was being constructed in orbit around the forest moon of Endor which was escorted by a fleet of Imperial-class Star Destroyers but was destroyed by the New Republic while still undergoing construction. Its weakness was a hole similar to the thermal exhaust port of the first Death Star.
Years later, when Han Solo first encountered the Yuuzhan Vong and their colossal worldships, he would comment: "Why isn't there a Death Star lying around when you need one?"
Additional information
Around the same time the Geonosians were designing their Ultimate Weapon, Raith Sienar was designing a battlestation (apparently without a superlaser) of similar size and prestige. The best elements of both were apparently merged together with final detail work taking place in the secret Maw Cluster near Kessel. This laboratory completed a scaled-down prototype that was later destroyed by the New Republic.
Additional Defenses
Two of thousands of turbolasers on the first Death Star
Both Death Stars were defended by hundreds of shield projectors (including Deflection towers), and thousands of turbolasers, ion cannons and laser cannons. The first one contained a complement of seven to nine thousand TIE fighters, along with tens of thousands of support craft, bombers, and gunships. Massive docking bays provided several Star Destroyers with dry docks, and more than a million Imperial personnel were on board both battle stations.
Design flaws
One drawback of the original design was the power systems. Twenty-four hours were required to fully charge the laser. However, even low power shots were capable of massive destruction on a planetary scale. The second Death Star had redesigned systems and was capable of firing the superlaser once every three minutes. It also had improved targeting computers, allowing it to fire the weapon accurately at capital ships.
There were small gaps in the shields of the first Death Star; the Empire believed that this was harmless since only small ships could wiggle through the gaps. The shields of the second Death Star would have had no such gaps.
The second Death Star also corrected several other flaws in the original design. The two-meter exhaust vent that doomed the first station was replaced with millions of millimeter wide tubes, each designed to seal if excess energy was detected. The second station also boasted far more turbolaser batteries with redesigned targeting systems, allowing them to target starfighters more easily. The greatest concentration of turbolasers was located near the Emperor's throne tower.
Darksaber
Durga the Hutt also built a small version with only the central laser core and a small living quarters, which was destroyed in the asteroid field around Hoth. This was known as the Darksaber, but shoddy construction techniques and substandard components meant that this attempt was an abject failure even before its destruction.
Behind the scenes
According to the Star Wars: Incredible Cross-Sections fact book, the first Death Star in A New Hope was 160 kilometers in diameter. The Making of Star Wars: The Definitive Story Behind the Original Film reproduces a sketch attributed to Ralph McQuarrie which shows 92 miles (148 kilometers). According to the Inside the Worlds of Star Wars Trilogy fact book and detailed scaling of the station in Return of the Jedi, the second Death Star was 900 kilometers in diameter. Some Expanded Universe sources state much smaller figures—120 kilometers for the first Death Star and 160 kilometers for the second—however, most of the evidence argues for the larger sizes.
The Dalek Crucible in Doctor Who from series 4 in 2008 is said to be inspired by the Death Star, apart from the 'wings' on the side, the Crucible is very similar, but the eye is covered by a shield whereas on the Death Star it is not.
Several of the Star Wars games are concerned with the Death Star's destruction, or the theft, protection, and transmission of its plans until reaching Tantive IV. Some games also focus on the immediate aftermath, such as Rogue Squadron III: Rebel Strike.
The Death Star is available as a cheat in Star Wars: Galactic Battlegrounds: Clone Campaigns. It acts like an air cruiser unit, but is much slower. It more than makes up for its speed with excessive hit points, shielding, armor, and the most powerful attack in the game—any object on the map, even trees and rocks disappear after the Death Star fires. It is virtually impossible to destroy it. There is a limit on the number of Death Stars the player can conjure up at any time.
A number of Death Star battle stations appear in sources of uncertain canonicity. The Star Tours theme-park ride includes another battlemoon at Endor, clearly different than the one seen in Return of the Jedi, while the French-language RPG Magazine Casus Belli 99 includes another prototype, named the Nocturnô. The former, however, was officially entered into continuity by Leland Chee, the gatekeeper of the LucasFilm Holocron Continuity Database, with it being named the Death Star III.
The Death Star has also influenced popular culture, a tribute to the Death Star, the "Death Egg" making an appearance in the Sonic the Hedgehog series (1992).
Besides its role in Star Wars: Rogue Squadron III: Rebel Strike, both in the main campaign and its appearance in the co-op mode for the game (based on Rogue Squadron II: Rogue Leader), the Death Star also had an appearance in the game's opening and arcade mode, as a disco ball.
In the eleventh issue of Star Wars Adventure Journal, under the Fragments from the Mind's Eye section, the Death star was sold as a discount superweapon at B'hob's Discount Superweapons. Its tagline, "Only Exploded Twice", was a humorous reference to how both the original Death Star and the Death Star II were destroyed.
Mimas
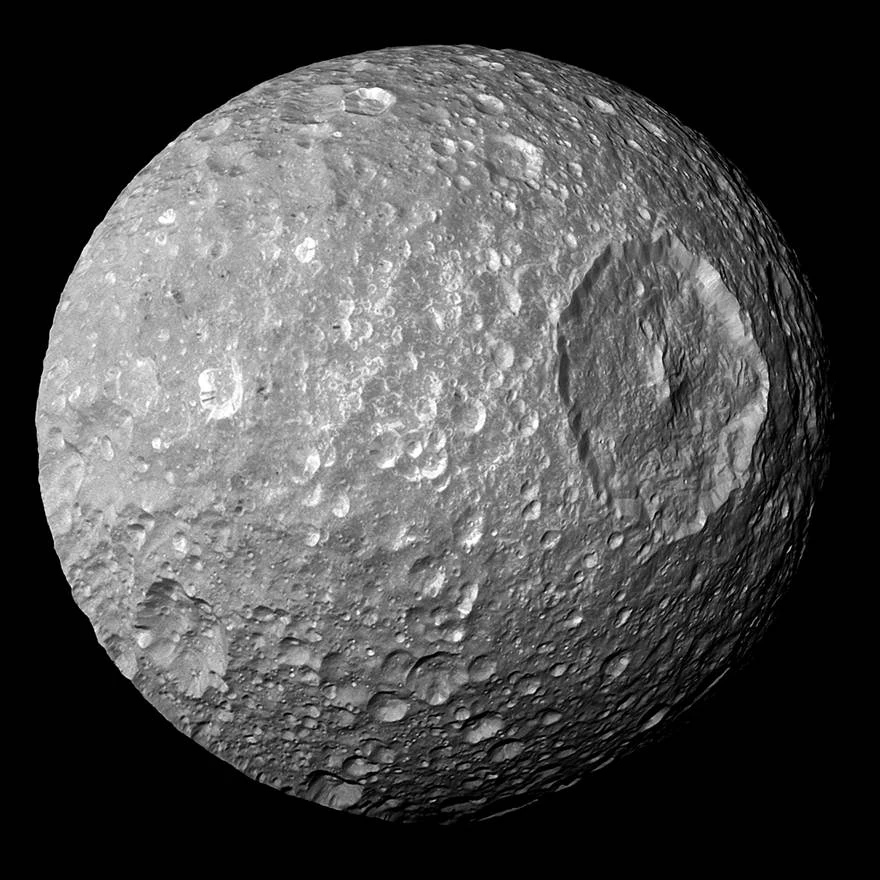
That's no space station; it's a moon.
Mimas, the smallest and innermost of seven major moons orbiting the planet Saturn, is notable for a single enormous impact crater called Herschel. The appearance of Mimas and Herschel in pictures taken during the space probe Voyager 1's 1980 flyby of the Saturn system showed a similarity to the first Death Star, with Herschel appearing as the superlaser disc, as remarked upon in the scientific press.[15] This resemblance became one of Mimas's most notable characteristics in astronomy and popular culture.[16]
During the Cassini orbiter's visit to the Saturn system in 2004, the resemblance was noted again in the official press releases[17] and by the scientific press.[18] However, Cassini's more recent images of Mimas do not all resemble a Death Star orbiting Saturn, as the moon is more egg-shaped than the battlestation.[19]
White House petition
In late 2012, a petition was submitted to the White House website urging that the United States government build a real Death Star as an economic stimulus and a means to ensure people got back to work again, and wanted its completion by 2016 at the earliest. The petition gained more than 25,000 signatures, ensuring that an official response be supplied. In early 2013, the proposal was rejected (in a tongue-and-cheek manner), citing that the overall cost of the Death Star's construction would amount to a cost exceeding $852 quadrillion, and would take 833,000 years before it could even be ready for construction due to the rate of steel production. Another reason for the rejection was also because the Government "did not support blowing up planets."[20] As such, the Star Wars Blog, in response to it, created a light-hearted, in-universe reply from the Galactic Empire's Public Relations department where the Empire, with official statements from Admiral Conan Antonio Motti and Governor Wilhuff Tarkin, shrugged off the criticisms by the planet Earth's leaders regarding the design of the battlestation. In addition, in the same source, it also denounced the planet for grossly overestimating the cost of designing the Death Star, as well as commenting the overall lack of production methods of the planet in comparison of the Galactic Empire, even implying that the planet's leaders were cowardly in their decision.[21]
Translations
- In Italian the Death Stars are called Morte Nera, in Italian "morte nera" is synonymous with "bubonic plague".
- In the Angry Birds franchise, the Death Stars are called Death Eggs.
- In some comics the Death Star is called Justice Star.
Appearances
Non-canon appearances
- Star Wars: Jedi Knight II: Jedi Outcast (Appears only in non-storyline event)
- Soulcalibur IV
- Star Wars: Rebellion
- LEGO Star Wars II: The Original Trilogy (Death Stars I and II)
- LEGO Star Wars: The Complete Saga (Death Stars I and II)
- Angry Birds Star Wars (Pig version)
Sources
.JPG)
.JPG)
.JPG)
See also
External links
- Michael Wong's analysis of Death Star firepower
- Technical commentaries on the Death Stars
- How the Death Star Works - Article at Howstuffworks.com
- The Fanatical Guide to Death Stars
Notes and references
- ↑ Star Wars: Incredible Cross-Sections
- ↑ Death Star (novel)
- ↑ Star Wars: Complete Locations
- ↑ Death Star Designer
- ↑ 5.0 5.1 5.2 5.3 The Essential Guide to Warfare
- ↑ Star Wars: Episode II Attack of the Clones
- ↑ The Essential Atlas
- ↑ 8.0 8.1 Star Wars: X-Wing Rogue Squadron: The Phantom Affair
- ↑ Death Star (novel)
- ↑ Star Wars: Imperial Handbook: A Commander's Guide
- ↑ Star Wars: Battlefront II
- ↑ Star Wars: Rogue Squadron II: Rogue Leader
- ↑ Star Wars: Episode IV A New Hope
- ↑ Star Wars: Episode VI Return of the Jedi
- ↑ G. E. Hunt, "`Voyager' to Jupiter and Saturn: The Journey of a Lifetime - II.", Journal of the British Astronomical Association, vol.93, no.3., page 107. (full text)
- ↑ Phil Plait, Bad Astronomy: Saturn's Moon Mimas and the Death Star March 17, 1997
- ↑ Cassini Flies by Saturn's Tortured Moon Mimas, NASA-JPL press release, August 5, 2005
- ↑ Kelly Young, Saturn's Moon is Death Star Twin, New Scientist, 11 February 2005
- ↑ See, for example, this image.
- ↑ This Isn't the Petition Response You're Looking For on White House (backup link not verified!)
- ↑
 Planet Earth Abandons Death Star Project In Face Of Superior Galactic Imperial Power on StarWars.com (backup link)