Warning: The following parameters in the infobox are unrecognized: color, era
- "Sana. Honey. Let's talk. We really need to talk. Put the gun down and we'll talk, okay?"
- ―Han Solo, to Sana Starros
The EE-4 carbine rifle, also known as the EE-4 blaster rifle, was a powerful medium-ranged blaster carbine model that was manufactured by BlasTech Industries during the reign of the Galactic Empire. Successor to the EE-3 carbine rifle, the EE-4's shorter and stubbier barrel allowed the blaster rifle to fire more effectively at close range with spread shots but at the cost of a reduced accuracy at range compared to its predecessor.
The two-handed EE-4 carbine rifle was favored by Sana Starros, a bounty hunter and smuggler who later joined the Rebel Alliance. Starros wielded the blaster on multiple occasions, including selling the lightsabers of Darth Atrius on Hradreek, confronting fellow smuggler Han Solo in the Monsua Nebula, and rescuing the Jedi Luke Skywalker on Nar Shaddaa.
Description

The EE-3 carbine rifle was the EE-4 carbine rifle's predecessor.
Manufactured by BlasTech Industries, the EE-4 carbine rifle,[1] or the EE-4 blaster rifle,[2] was a powerful type of blaster that was capable of discharging red-colored bolts with a medium range.[6] Distinguished for its two-round spread burst fire, the weapon was the successor to the EE-3 carbine rifle. While the EE-3 focused on precision and range, the EE-4 was built to be more effective at close range and had a superior rate of fire with its shorter and stubbier barrel,[2] which was designed as a hybrid between a rifle and a pistol.[7] On the other hand, these alterations caused a reduction in the blaster's accuracy at range and cooling power in comparison to its predecessor.[2]
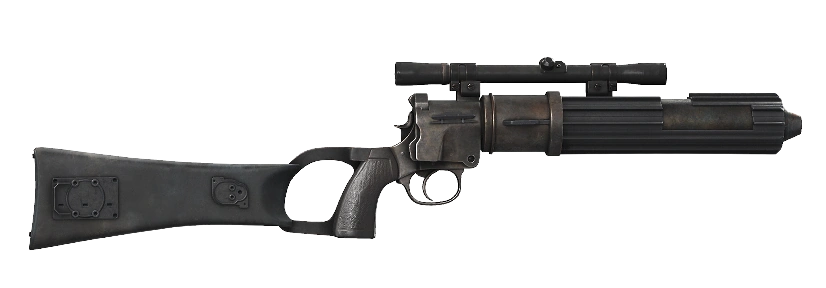
The black-colored EE-4 consisted of a short barrel that contained cooling vents, along with two vertical grips attached beneath it, which allowed the wielder to hold the weapon with two hands. One of the grips was located in the middle of the rifle, with the other being at the backside, as the blaster lacked a long stock, unlike its predecessor. In addition to the rifle's main scope, which was visually identical to the EE-3's electronic scope, the EE-4 was equipped with four smaller scopes, two positioned on either side of the weapon's frame. The rifle also contained a guard that surrounded the trigger.[2]
History
Masse Goskey's weapons business
- "I've got to move this merch because everything we picked up on Nar Shaddaa is illegal in sixty-six sectors. That means we've gotta sell this stuff to the syndicates: Crymorah, Black Sun, you know."
- ―Masse Goskey


The EE-4 carbine rifle, weapon of choice for Sana Starros
Sometime between 19 BBY and 10 BBY,[8] Masse Goskey, the proprietor of Masse Goskey's Arms Emporium and Explosives Mart[1] in Mos Eisley spaceport on the planet Tatooine,[9] and his associate Ephant Mon bought some weaponry on the moon of Nar Shaddaa, including an EE-4 carbine rifle that came at a price of 850 credits. A complete inventory of the merchandise was recorded in a book that would eventually be known as the Smuggler's Guide. According to Goskey's note in the book, all the weapons they picked up on Nar Shaddaa were illegal in sixty-six sectors, compelling them to sell the arms to crime syndicates such as the Crymorah syndicate and the Black Sun.[1]
Skirmish on Hradreek
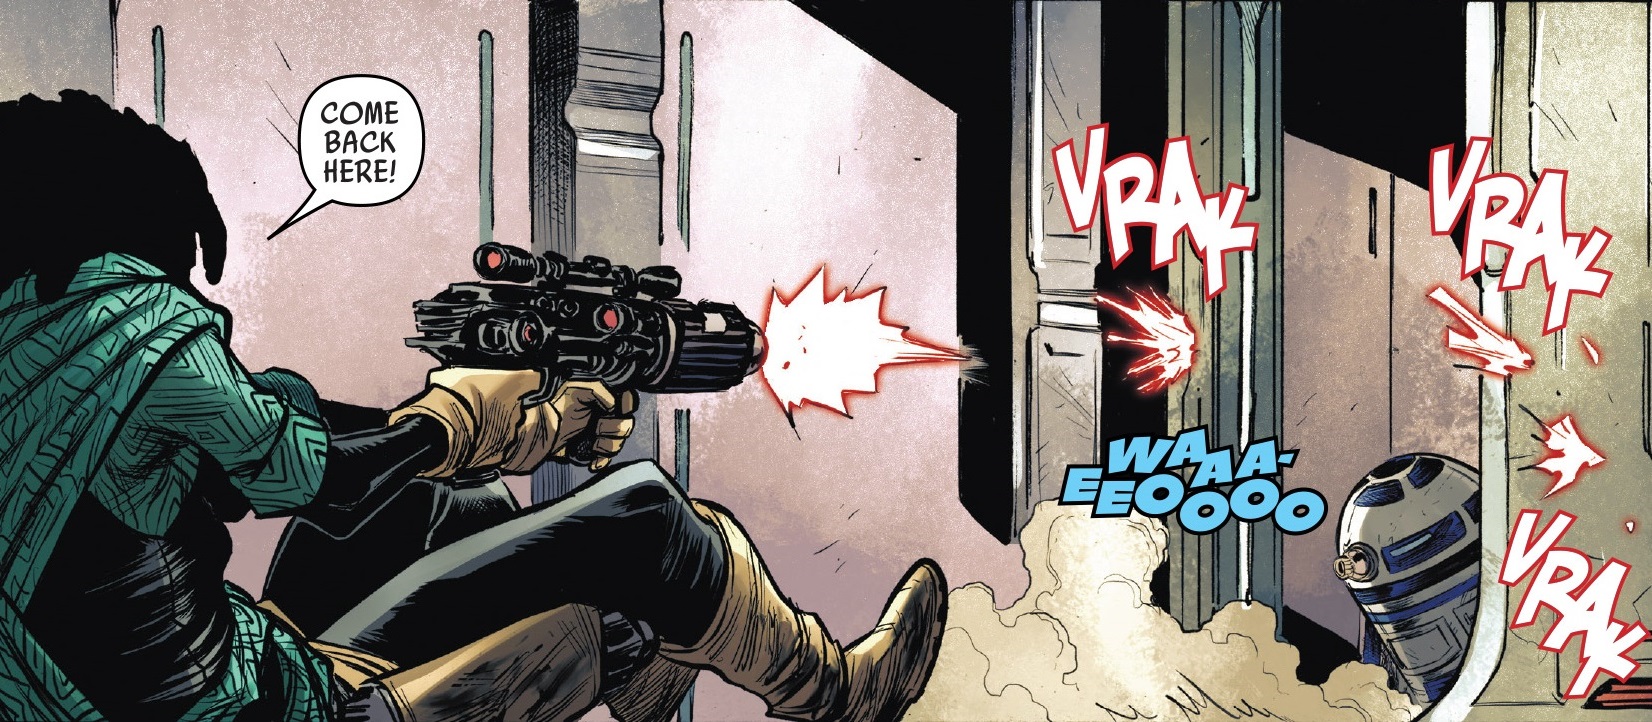
- "Come back here!"
- ―Sana Starros, while firing upon R2-D2
The EE-4 carbine rifle[1] was used by Sana Starros, a human female[5] bounty hunter and smuggler active during the reign of the Galactic Empire.[10] Sometime after the Battle of Yavin, Starros carried her EE-4 in a holster when she traveled to Hradreek to sell a pair of ancient lightsabers that were once wielded by the Sith Darth Atrius. Although she had promised them both to the Empire and an alien crime boss at the same time, Starros only delivered one of the lightsabers to each of her buyers.[3]

Sana Starros fires upon R2-D2 with her EE-4 carbine rifle.
When the Dark Lord of the Sith Darth Vader realized the smuggler's deception, he ordered stormtroopers to locate her and the other lightsaber. Soon after, Vader himself found Starros, who fired on the Sith Lord with her EE-4 carbine rifle. However, Vader deflected the blaster bolts with his hand by using the Force. Starros eventually escaped the Sith Lord by activating a bomb hidden next to him.[3]
Due to the same explosion, the Jedi trainee Luke Skywalker, who was also coincidentally on Hradreek to retrieve funds for the Rebel Alliance, dropped his cred stick and was separated from his astromech droid, R2-D2. Shortly after, Starros came across the credit chip lying on the ground and picked it up. The droid thereupon attacked Starros, caused her to fall to the ground, and took the credits back. She then fired upon R2-D2 with the EE-4 in anger, but the astromech escaped.[3]
Hunting Han Solo
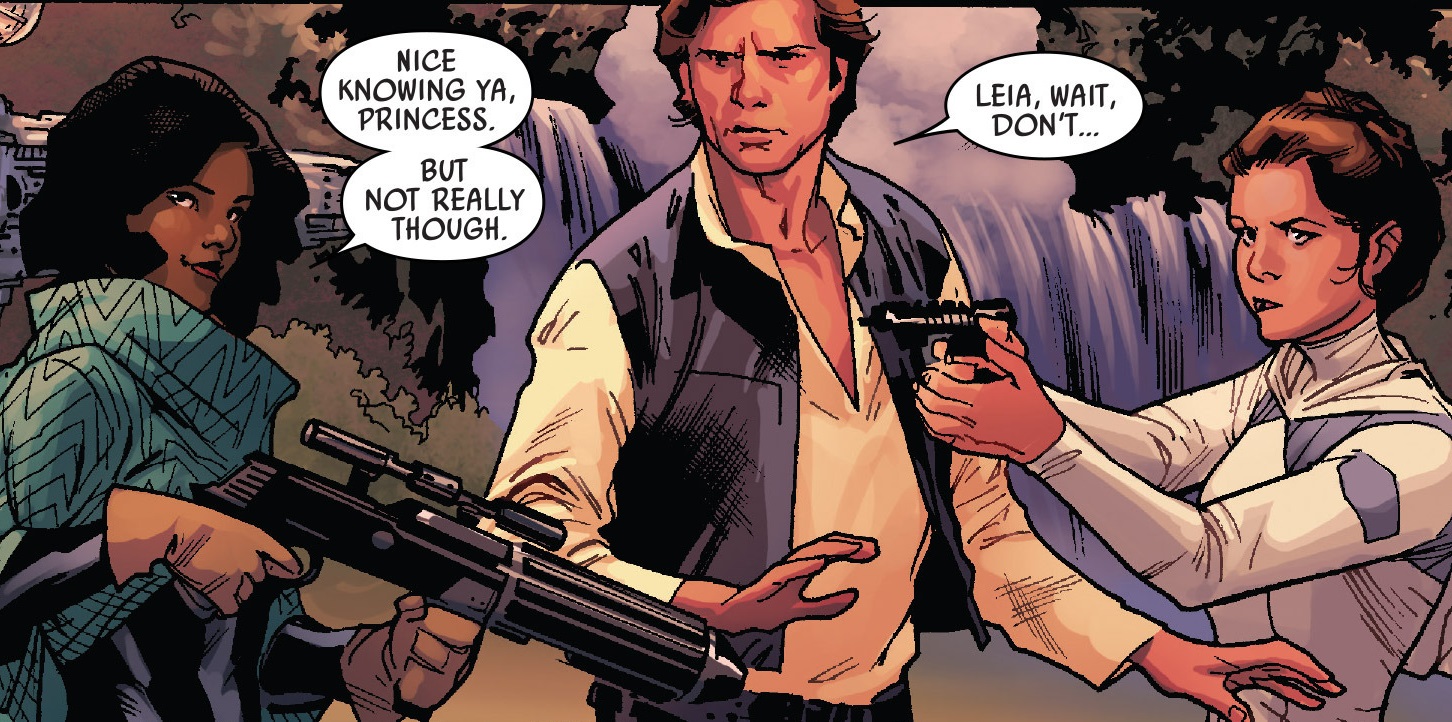
- "…why is your wife pointing a gun at me?"
"She's not my wife!" - ―Leia Organa and Han Solo, on Sana Starros

Starros wielded her EE-4 when she confronted Han Solo and Leia Organa in the Monsua Nebula.
Later, Sana Starros began searching for Han Solo, a fellow smuggler who had taken her cut after the two pulled off a robbery disguised as their "wedding." Starros's quest came to an end on an unnamed planet near the Monsua Nebula, where Solo was on a mission for the Rebellion along with Princess Leia Organa. By using her EE-4, Starros initially drew a bead on both rebels, alerted Imperials to claim the bounty issued for Organa, and forced Solo to come with her.[11]
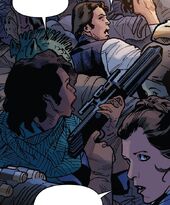
However, she had a change of heart upon learning that Solo had become a rebel and that the Empire would arrest him as well.[12] With Starros's starship, the Volt Cobra, the trio escaped from the Imperial forces.[13]
Rescue of Luke Skywalker
- "Shoot it!"
"Blasters don't work…" - ―Leia Organa and Sana Starros, on Kongo the Disemboweler

Starros's EE-4 was disabled by Grakkus the Hutt's electromagnetic pulse.
After losing the Imperials, Organa made a deal with Starros to transport their group to Nar Shaddaa to rescue Luke Skywalker, who had been abducted by the Hutt crime lord Grakkus.[13] By the time the trio reached Grakkus's palace, Skywalker was forced to fight an arena match against[5] a roggwart creature[14] known as Kongo the Disemboweler.[15]
Confronted by the rescue party, Grakkus activated a local electromagnetic pulse that disabled Kongo's shock collar as well as all nearby blasters, including Starros's EE-4 carbine rifle, rendering her unable to fire upon the ravenous beast when it charged the rebels. Nonetheless, the rebels successfully rescued Skywalker,[5] and Starros later allied herself with the Rebel Alliance.[16]
Behind the scenes
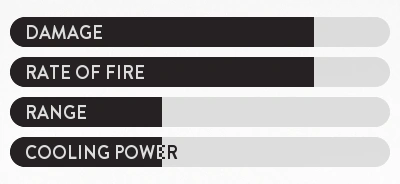
- "While its predecessor — the EE-3 — focuses on precision and range, the EE-4 was constructed with a short and stubby barrel to allow it to fire more effectively at a closer range with spread shots. Despite the reduction in accuracy at range, the blaster makes up for it with a greater rate of fire."
- ―The EE-4 blaster rifle's description in Star Wars Battlefront
The EE-4's weapon statistics in Star Wars Battlefront
The EE-4 carbine rifle first appeared, albeit unnamed, in the 2015 Marvel comic book Star Wars 6: Skywalker Strikes, Part VI, written by Jason Aaron with art by John Cassaday.[4] It was initially identified as the EE-4 blaster rifle in the video game Star Wars Battlefront, as part of the Bespin expansion pack released in 2016,[7] while the 2018 reference book Star Wars: Smuggler's Guide, written by Daniel Wallace, later introduced the name EE-4 carbine rifle.[1] In Star Wars Battlefront, the rifle was unlockable via an in-game challenge called "Sana's Legacy,"[2] referring to Sana Starros, who wields the weapon in Marvel's Star Wars comic-book series.[7]
The EE-4 also appeared in the game's 2017 sequel, Star Wars Battlefront II, as part of the "infiltration" ability for the specialist trooper class—such as security battle droids, clone sharpshooters, and Imperial scout troopers—rather than a full-fledged blaster option. In both games, the rifle can be used by troopers from all factions, including the Galactic Republic, the Separatist Alliance,[6] the Galactic Empire, the Rebel Alliance, the New Republic,[2] the First Order, and the Resistance.[6]
Appearances
- Star Wars Battlefront II
- Star Wars Battlefront (DLC) (First identified as EE-4 blaster rifle)
- Star Wars Annual 4
- Star Wars 6: Skywalker Strikes, Part VI (First appearance)
- Star Wars 8: Showdown on the Smuggler's Moon, Part I
- Star Wars 9: Showdown on the Smuggler's Moon, Part II
- Star Wars 12: Showdown on the Smuggler's Moon, Part V
- Star Wars 42: The Ashes of Jedha, Part V (Variant cover only)
Sources
- Star Wars Battlefront Companion
 "Jedi Master's Quiz" — Star Wars Insider 175 (Picture only)
- Han and Chewie Get Into Some Bounty Hunter Trouble – Thanks to Sana Starros – in This Last Shot Excerpt on StarWars.com (backup link) (Picture only)
- Knights of Fate (Picture only)
- Star Wars: Women of the Galaxy (Picture only)
- Star Wars: Smuggler's Guide (First identified as EE-4 carbine rifle)
Notes and references
- ↑ 1.0 1.1 1.2 1.3 1.4 1.5 1.6 1.7 Star Wars: Smuggler's Guide
- ↑ 2.0 2.1 2.2 2.3 2.4 2.5 2.6 2.7 2.8 2.9 Star Wars Battlefront
- ↑ 3.0 3.1 3.2 3.3 Star Wars Annual 4
- ↑ 4.0 4.1 Star Wars 6: Skywalker Strikes, Part VI
- ↑ 5.0 5.1 5.2 5.3 Star Wars 12: Showdown on the Smuggler's Moon, Part V
- ↑ 6.0 6.1 6.2 6.3 Star Wars Battlefront II
- ↑ 7.0 7.1 7.2 Bespin - New Weapons & Star Cards, published by Electronic Arts on Star Wars™ Battlefront - Star Wars - Official EA Site (June 20, 2016) (archived from the original on October 15, 2018)
- ↑ According to Star Wars: Smuggler's Guide, Masse Goskey and Ephant Mon's weapons purchase took place some time after the formation of the Galactic Empire, which Star Wars: Galactic Atlas dates to 19 BBY. Mon also mentioned Goskey's death in the in-universe Smuggler's Guide, which later came into possession of Dryden Vos, meaning Goskey died before Vos did. Solo: A Star Wars Story The Official Guide places the events of Solo: A Star Wars Story, including Vos's death, in the ninth year after the formation of the Empire; therefore, the weapons purchase must have occurred between 19 BBY and Vos's death in 10 BBY.
- ↑ Star Wars: Complete Locations
- ↑ Star Wars 34: The Thirteen Crates
- ↑ Star Wars 8: Showdown on the Smuggler's Moon, Part I
- ↑ Star Wars 9: Showdown on the Smuggler's Moon, Part II
- ↑ 13.0 13.1 Star Wars 10: Showdown on the Smuggler's Moon, Part III
- ↑ Star Wars: Galactic Atlas
- ↑ Star Wars 11: Showdown on the Smuggler's Moon, Part IV
- ↑ Star Wars 16: Rebel Jail, Part I
External links
- Star Wars Battlefront - Bespin Launch Trailer on the EA Star Wars YouTube channel (backup link (H5HMUAlxkws) not verified!)
- EE-4 Blaster Rifle on the Star Wars Battlefront Wiki