m (5.2 Corrected tense) |
m (5.1 Corrected spelling/grammar) |
||
| Line 139: | Line 139: | ||
[[File:Battle on Death Star I.jpg|thumb|left|230px|Marek confronts Vader on the Death Star in order to rescue the Alliance leaders.]] |
[[File:Battle on Death Star I.jpg|thumb|left|230px|Marek confronts Vader on the Death Star in order to rescue the Alliance leaders.]] |
||
| − | From the very start the Alliance was vastly outmanned and outgunned by the well-organized and powerful [[Imperial Military]]. Sporting a vast [[Imperial Navy|Fleet]] supplied by such companies as [[Kuat Drive Yards]]<ref name="Imperial Sourcebook" /> and an [[Imperial Army|Army]] and [[Stormtrooper Corps]] that numbered in the billions, the Empire secured a stranglehold on the galaxy. After the [[Second Battle of Mon Calamari (Imperial Era)|liberation of]] [[Dac]], Calamari [[Mon Calamari Star Cruiser|warships]] were added to the Alliance arsenal. This helped the Alliance's chances of survival, but it was still too |
+ | From the very start the Alliance was vastly outmanned and outgunned by the well-organized and powerful [[Imperial Military]]. Sporting a vast [[Imperial Navy|Fleet]] supplied by such companies as [[Kuat Drive Yards]]<ref name="Imperial Sourcebook" /> and an [[Imperial Army|Army]] and [[Stormtrooper Corps]] that numbered in the billions, the Empire secured a stranglehold on the galaxy. After the [[Second Battle of Mon Calamari (Imperial Era)|liberation of]] [[Dac]], Calamari [[Mon Calamari Star Cruiser|warships]] were added to the Alliance arsenal. This helped the Alliance's chances of survival, but it was still too small to engage in a direct confrontation with the might of the Imperial Navy. Thus, the Alliance was relegated to hit-and-run tactics, designed to harass Imperial shipping and operations,<ref name="Rebel Alliance Sourcebook" /> while diplomatic efforts were made by such rebel leaders as [[Leia Organa Solo|Leia Organa]] to win the hearts and minds of species across the galaxy to add to the rebel cause, conducting her missions under secrecy aboard the ''[[Tantive IV]]'' and as a member of the Imperial Senate. |
As the Rebellion grew, so too did the ferocity with which it was hunted. Entire sectors were set upon by Imperial forces, whenever they were identified as hotbeds for Rebel activity. The pacification of the [[Nembus sector]] and the [[Kwymar Suppressions]] exemplified this brutal approach to stifling dissent in the Empire.<ref name="Imperial Sourcebook" /><ref name="Hunt">''[[The Hunt Within: Valance's Tale]]''</ref> |
As the Rebellion grew, so too did the ferocity with which it was hunted. Entire sectors were set upon by Imperial forces, whenever they were identified as hotbeds for Rebel activity. The pacification of the [[Nembus sector]] and the [[Kwymar Suppressions]] exemplified this brutal approach to stifling dissent in the Empire.<ref name="Imperial Sourcebook" /><ref name="Hunt">''[[The Hunt Within: Valance's Tale]]''</ref> |
||
Revision as of 16:45, 8 June 2013
| | |

Warning: This infobox has missing parameters: prev, date and unrecognized parameters: previous, imageBG, BG2, width
- "We agree that the time for diplomacy and politics has passed. It is now time for action… Therefore let this be an official declaration of rebellion! Today, we all vow to change the galaxy, and one day the galaxy will indeed be free! "
- ―Bail Organa, during the Declaration of Rebellion
The Galactic Civil War, known as the First Galactic Civil War by the year 43 ABY, was a major galactic conflict fought primarily between the Galactic Empire and the Alliance to Restore the Republic. The Alliance was a rebel faction dedicated to the restoration of the Galactic Republic, the government that the Empire had supplanted at the culmination of the Clone Wars in 19 BBY.
Origins of the conflict could be traced to the Galactic Senate during the final days of the Old Republic, sometime after the end of the Clone Wars, where dissenting and prominent Senators, such as Bail Organa and Mon Mothma, secretly opposed the powers and authority that Supreme Chancellor Palpatine continued to accumulate under the guise of security and war-time measures.
The war did not begin in its real sense, that of an Alliance against the Empire with its goals and ideals laid out for the galaxy, until nearly two decades after the rise of the Empire, when various Rebel leaders signed the Corellian Treaty and issued the Declaration of Rebellion. Likewise, several Imperial citizens, despite the Empire's atrocities, ended up siding with the Empire as they were reluctant to join a group similar to the Separatists from the Clone Wars. Initially, the Empire, especially Palpatine, did not consider the Alliance a threat, but rather as a political tool to further consolidate power that would eventually lead to the Dissolution of the Imperial Senate and a massive, unprecedented military build-up. It would not be until the fateful Battle of Yavin, when rebel Luke Skywalker destroyed the first Death Star, that the threat posed by the Alliance became real to the Empire and more serious measures were drafted to restore Imperial control over the galaxy.
The decisive moment came at the Battle of Endor, when the Alliance, against overwhelming odds, defeated the Imperial Military and destroyed the second Death Star, killing Emperor Palpatine, Darth Vader and some of the best minds in the Imperial High Command. From there, the Empire began to gradually decay and fragment, until it was reduced to a mere remnant of its former-self, while the Alliance evolved and grew into the New Republic. Peace between the two warring factions was realized in 19 ABY with the signing of the Pellaeon–Gavrisom Treaty, ending over two decades of constant struggle. The Empire continued to exist as autonomous entity in the years succeeding war's end, and would eventually enter into an alliance with its former enemy during the Yuuzhan Vong War, and emerge as the galaxy's leading government over one hundred years later, seemingly bringing history back full-circle; however, the exploits of the Alliance and the New Republic were not forgotten, and the galaxy was still very different from what it had been during the Empire's reign.
Origin of the Galactic Civil War
Disturbance in the Senate
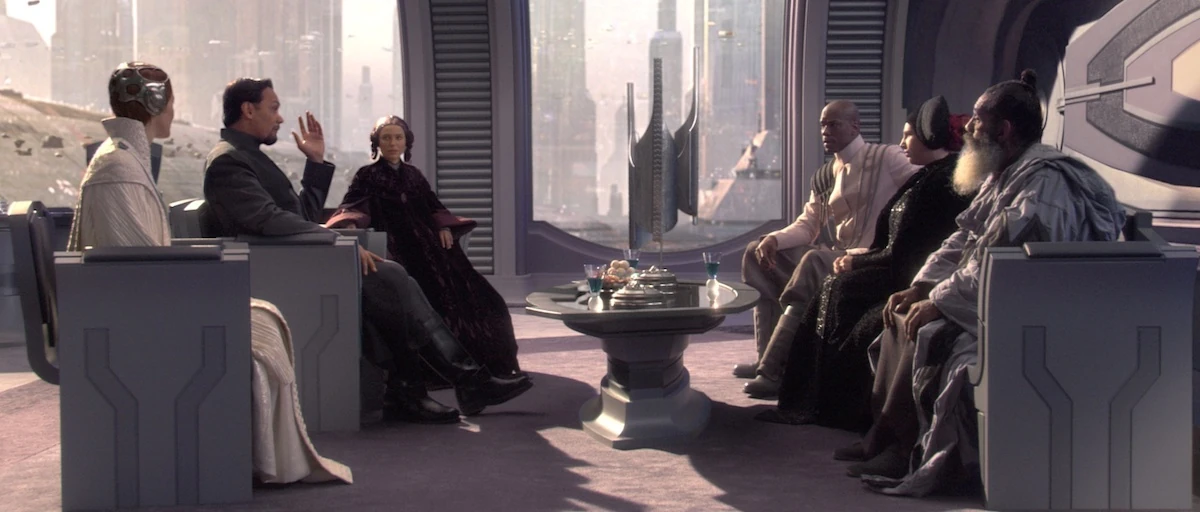

Mon Mothma and Bail Organa, among others, discuss the formation of the Alliance to Restore the Republic.
- "Some things are better left unsaid."
- ―Padmé Amidala
The emergence of the Galactic Empire was brought about by decades of engineering, manipulation, and deceit, masterminded by the cunning and elusive Dark Lord of the Sith, Darth Sidious, and carried out by his various apprentices and willing (and not-so-willing) agents and puppets. Under the guise of the charismatic Senator Palpatine from Naboo, Sidious took full-advantage of the corruption and inefficacies in the Republic bureaucracy to have himself elected Supreme Chancellor.[51] Once in office, Palpatine proceeded to engineer the galaxywide Clone Wars as a means to further draw powers to his office, citing special emergency war-time powers and mandates required to maintain security against the Separatist threat.[52] Palpatine did not relinquish his powers; instead, instigating the Jedi Rebellion, Palpatine declared a New Order and announced the creation of the Galactic Empire to much applause from the Senate.[53]

The newly self-declared Emperor Palpatine speaks before the Galactic Senate, announcing the formation of the Galactic Empire.
Taking the title of Galactic Emperor, Palpatine set out to establish his totalitarian regime and accomplish his Order's millennia-old strife with the Jedi Order: the total annihilation of the Jedi. Palpatine used the "Jedi Rebellion" as his means of turning public opinion against the Jedi, thus allowing him to enact Order 66. Of the several thousand Jedi, very few survived the implementation of Order 66 and the subsequent beginning of the Great Jedi Purge in 19 BBY, most notably Jedi Masters Obi-Wan Kenobi and Yoda.[53]
During this tumultuous time, two children, the offspring of Anakin Skywalker and Padmé Amidala, were born. Luke and Leia Skywalker would grow up to lead the Alliance against the Empire and become heroes on their own right; at the time, however, they were split at birth and fostered to escape the wrath of their father, Anakin, who had transformed into Palpatine's third apprentice, Darth Vader.[53] Vader became Palpatine's chief enforcer and carried out his will with terrifying results; he hunted down and killed the remaining Jedi, all the while unaware that his children were alive, assuming they had died with his wife on Mustafar.[54] Leia was adopted by Bail Organa, and Luke was cared for by his family on Tatooine, Beru and Owen Lars.[53]
With the Empire firmly established, Imperialization began throughout the galaxy. The Senate was reorganized into the Imperial Senate, its powers and influence reduced as to become nothing more than a rubber-stamp assembly.[55] Many Senators were all too willing to allow the Empire to come to pass, many under Palpatine's influence or seeing it as necessary to secure galactic peace after the events of the Clone Wars. Some, however, began to sow the seeds of dissent that would grow into the Rebel Alliance in the years to come; Bail Organa and Mon Mothma were some such Senators, including the late Amidala, who urged patience in defying Palpatine's regime. If they acted too quickly, too overtly, Palpatine would crush them.[54] It would take nearly twenty years for organized resistance against the Empire to be realized; during that time Palpatine and his cabal had nearly free-reign in instituting the various new changes to the galaxy. Human-centric policies became prominent, advocating human supremacy.[8] Some species, such as the Wookiees, Mon Calamari, Yuzzem, and Lurrians were reclassified as non-sentient and subjected to slavery (or domestication, as Imperial policy officially stated). State-sponsored terrorism soon became a policy of the Empire, with such notions as the Tarkin Doctrine and the concept of rule through fear, popularized through then-Moff Wilhuff Tarkin's Doctrine.[23][55] Examples such as the Ghorman Massacre and the very concept of the Death Star made clear that the Empire was willing to use any means necessary to maintain its power and control over the galaxy, with no regard towards sentient rights. But the Empire's own disregard for its citizens and use of the Tarkin Doctrine would prove to be its own undoing; many citizens became enraged by the sheer oppressiveness of the Imperial regime, and dissent began to spread like wildfire.
Beginning of the Alliance
Ferus Olin's adventures
When the Empire subjugated the Core World Bellassa in 17 BBY, former Jedi Padawan Ferus Olin started an underground resistance movement by forming the group known as The Eleven. Eventually, Imperial forces captured Olin and his business partner Roan Lands and imprisoned them in the Empire's garrison/prison facility in Ussa. But Olin managed to escape to go into hiding. The resistance movement had such an impact on the Bellassans that nearly all of Ussa became devoted to protecting him, a fact that greatly displeased Inquisitor Malorum, the chief of security in Ussa.
Obi-Wan Kenobi eventually tracked down Ferus and decided to help him. Not long after Obi-Wan located Ferus, Malorum issued Contingency Order 37. Mass arrests were made in Ussa when this order was issued and an ultimatum was issued over the HoloNet: if Ferus wasn't turned in within 48 hours after Order 37 was issued, all of the civilians would be executed. Though Ferus planned to give himself up, his safehouse was discovered by Boba Fett and D'harhan, a pair of bounty hunters in Malorum's employ. Ferus and Obi-Wan managed to evade the bounty hunters and return to Ussa to devise a plan to rescue to civilians with the other members of the Eleven. The plan succeeded, but Obi-Wan and Ferus were exposed, and they, along with a boy named Trever Flume, fled Bellassa.
Ferus and Obi-Wan eventually split up. After his association with the Jedi Master, Ferus decided to return to the Jedi Order and locate Jedi that survived Order 66, creating a safehouse for Jedi on an uncharted asteroid in the middle of an atmospheric storm.
During his search for Jedi refugees from the Empire, he was blackmailed into aiding Emperor Palpatine, but would act as a double-agent, seeking information and attempting to undermine the Empire from the inside, eventually confronting Darth Vader himself. His resistance movement spanned the galaxy from Bellassa, Acherin, Coruscant, Naboo, and Samaria to Alderaan as well as other planets. This lasted until the Empire thwarted his plans for early rebellion by destroying his secret asteroid base. He eventually accepted a mission from Obi-Wan to watch over Princess Leia Organa on Alderaan, where he would reside for many years. He would ultimately end up sacrificing himself to save Leia and her brother Luke from Vader, dying at the hands of the latter.
Starkiller's mission
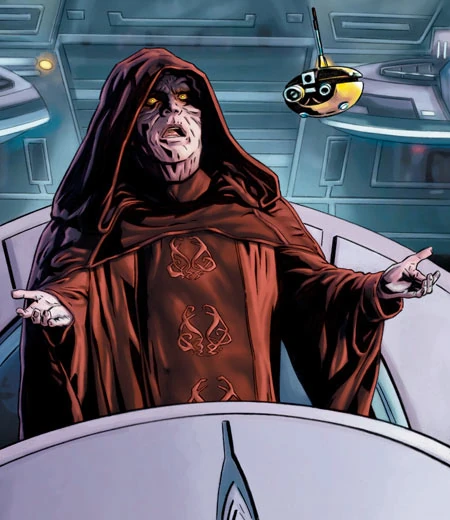
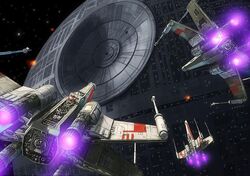
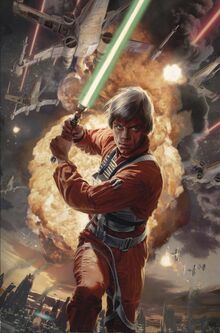
Around 2 BBY, the Emperor decided to use Vader's secret apprentice Galen Marek (also known as Starkiller) to round up senators and leaders that wanted to form a rebellion. He proved that something could be done against the Empire by destroying a shipyard on Raxus Prime and gathered Senators such as Bail Organa, Bail's daughter Leia, Garm Bel Iblis, and Mon Mothma, as well as Jedi Master and General Rahm Kota, on Corellia who formed the Alliance to Restore the Republic[20] by signing the Corellian Treaty with other rebel organizations and organizing into one Alliance.[21] However, Vader, along with Imperial forces, raided the meeting, captured the rebels, and revealed to Marek that he had only been used to rally the Empire's enemies. Marek tracked the Dark Lord and the Alliance leaders to the Death Star, a massive superweapon on which he dueled both Vader and Sidious. The former Sith apprentice sacrificed himself, allowing the rebels to escape. The senators, inspired by what he had done, continued with the Rebellion he had started, and took the Marek family crest as their symbol.[20] They later issued the Declaration of Rebellion and the war that would last two decades and see the loss of billions of lives began.[21][8]


Marek confronts Vader on the Death Star in order to rescue the Alliance leaders.
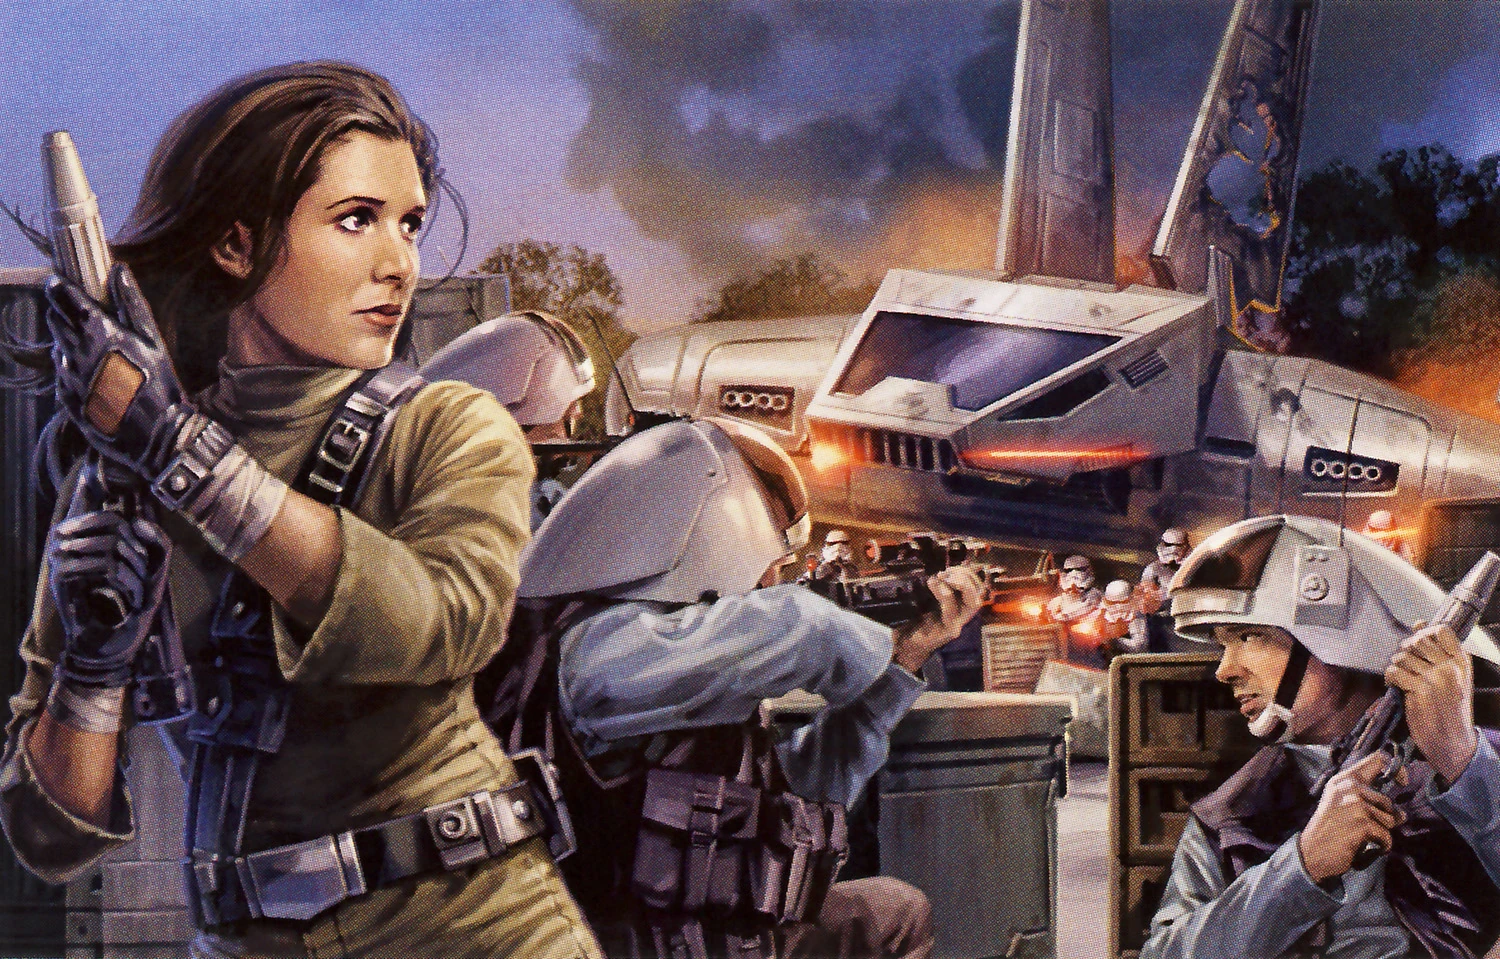
From the very start the Alliance was vastly outmanned and outgunned by the well-organized and powerful Imperial Military. Sporting a vast Fleet supplied by such companies as Kuat Drive Yards[55] and an Army and Stormtrooper Corps that numbered in the billions, the Empire secured a stranglehold on the galaxy. After the liberation of Dac, Calamari warships were added to the Alliance arsenal. This helped the Alliance's chances of survival, but it was still too small to engage in a direct confrontation with the might of the Imperial Navy. Thus, the Alliance was relegated to hit-and-run tactics, designed to harass Imperial shipping and operations,[21] while diplomatic efforts were made by such rebel leaders as Leia Organa to win the hearts and minds of species across the galaxy to add to the rebel cause, conducting her missions under secrecy aboard the Tantive IV and as a member of the Imperial Senate.
As the Rebellion grew, so too did the ferocity with which it was hunted. Entire sectors were set upon by Imperial forces, whenever they were identified as hotbeds for Rebel activity. The pacification of the Nembus sector and the Kwymar Suppressions exemplified this brutal approach to stifling dissent in the Empire.[55][56]
History
Early Strikes
- "There may be a rebellion yet."
- ―Rahm Kota

Opening Moves
With the war still in its infancy, the Alliance and Empire both fought each other across an ever-widening playing field. The Alliance could not hope to make a direct stand against the Empire and thus spread out across the galaxy, planting cells and sowing dissent amongst population centers. The Empire, with its vast resources, fought to keep up and hunt the Alliance down. Alliance outposts, such as one on Kashyyyk, were located and destroyed.[57]
Soon after, a pivotal moment would occur when the Empire nationalized the Incom Corporation. This caused a stir throughout the corporation that led designers and staff to offer their help to the Alliance. Through this, the Alliance learned of the T-65 X-wing starfighter and a holding facility on Fresia where four prototypes of the starfighter were held. Seeking to replace the aging Z-95 Headhunters, Alliance Command attempted to steal the prototypes in hopes of eventually mass-producing the starfighter for use against the Empire. Led by Raymus Antilles, a diversionary assault was made on Kuat to drive the Imperial forces away from Fresia. The Alliance was then able to make a landing on Fresia and in the battle that followed succeeded in capturing the prototypes. With this key success, the Alliance was able to start mass-production of the X-wing, a starfighter that would prove invaluable to the Alliance.[57]
With the X-wing in possession, the Alliance was able to defeat Imperial units at the Battle of Turkana; surprised by the Alliance's "secret weapon," the X-wing, the Imperial forces were destroyed. The Empire retaliated with Operation Strike Fear, an offensive operation intended to pacify rebel systems. Rudrig, Brigia, and Orion IV were swept away during the operation, which only came to an end when Crix Madine, newly defected from the Empire, took charge and, together with a newly forged alliance with the Sullustans, destroyed the Star Destroyer Invincible, flagship of the operation.[58]
At the same time, the Empire had become embroiled in internal strife; one Moff Kalast had become one of the first of many who dared to take on the Imperial Throne, slipping information to the Bothans and the Alliance at large from his Star Destroyer. Kalast hid on Thyferra, and Vader was personally assigned the task of hunting down and bringing the treacherous Moff to Imperial justice. From a failed attempt at Thyferra, to an uprising on Fondor, and to a battle on Jabiim, Vader conducted his hunt with precision. With information obtained from Jabiim, Vader learned that Kalast had fled to his base on Atzerri. An assault was made on Kalast's stronghold, but the elusive Moff managed to escape. Enraged at yet another failure, Vader established a task force complete with newly minted Immobilizer 418 cruiser to scour the galaxy and find Kalast. From Shola to Dantooine and Nal Hutta, the search was on; after perhaps months of actively pursuing the traitor, Vader was able to finally pin Kalast down and apprehend him. Kalast was brought before Palpatine and executed after he was forced to divulge his dealings with the Bothans, which led to the deaths of many Bothans.[57]
Disappearance of the Death Star plans
- "Several transmissions were beamed to this ship by Rebel spies. I want to know what happened to the plans they sent you."
- ―Darth Vader to Princess Leia Organa
The Star Destroyer Devastator chases down the Tantive IV.
The Rebel Alliance operated an efficient and widespread intelligence network of Bothan spies. Through this network, the Alliance learned of the construction of the Death Star, an extremely powerful space station capable of annihilating planets with its superlaser.[23]
The hunt was on for means to destroy this fearsome weapon. All resources were poured into the effort; if such a weapon was unleashed upon the galaxy, it would spell certain doom for the Alliance. Construction of the Death Star had thus far taken many years; supervised by Tarkin, the project had hit many standstills, some of which included a shortage of labor, which was alleviated through the Subjugation of Geonosis.[57] Soon after, a riot erupted aboard the Death Star, led by Rebel prisoners. They managed to steal a technical readout of the battle station; while many of the rioters were killed, some were able to escape to bring the readout to the proper authorities.[59]
Combined with another set of plans acquired by Kyle Katarn,[60] and the set retrieved during the Battle of Toprawa,[8] the Alliance was able to conceive a full technical readout of the Death Star that could be analyzed for weaknesses. The complete plans were beamed to the Tantive IV under Leia Organa's care[23] from Polis Massa, which was under attack by Vader and the 501st Legion as they followed up on the riot on the Death Star, having pursued the rebels in an attempt to reclaim the Death Star data. The attack turned up empty for the Empire, despite wiping out the Alliance base and eliminating all resistance.[59] The Signal branch of Imperial Intelligence's Analysis Bureau discovered that the plans had been sent to the Tantive IV by analyzing the un-shielded ELEL (Extremely Low Energy Level) transmissions. This allowed Vader to track the Tantive IV to Tatooine.[55]
Hoping to enlist the help of Obi-Wan Kenobi, Leia Organa rushed towards Tatooine with the plans in hand; however, Vader was able to catch up and captured the Tantive IV in a short space battle. As Vader's forces entered her ship, Leia Organa made a last desperate gamble and hid the plans of the Death Star aboard the astromech droid R2-D2. R2-D2, along with C-3PO, a protocol droid on the ship, used an escape pod to travel to Tatooine, where they were purchased from the Jawa scavengers who found them by Owen Lars, uncle of Luke Skywalker.[23]
Skywalker soon discovered a portion of the message in R2-D2 and became interested. However, R2-D2, operating under programming included with the plans, escaped and tried to find Obi-Wan Kenobi. Skywalker, who conveniently met up with Kenobi in the Dune Sea, tracked him down. R2-D2 then played back for them Leia Organa's desperate plea for help. The two discovered that Imperial stormtroopers had attacked the Jawas who had sold them the two droids in a search for the plans. Luke returned to his home to find his aunt and uncle slaughtered at Imperial hands. He then accompanied Kenobi to Mos Eisley, where, after evading Imperial troops, the two negotiated with smuggler Han Solo and his first mate Chewbacca to take them and the plans to Alderaan aboard the Millennium Falcon.[23]
In the meantime, Palpatine used the ongoing war as a pretext for dissolving the Imperial Senate.[23][55]
Leia Organa was transferred to the Death Star by Vader and interrogated for the location of the Alliance's hidden base. Leia refused to yield to torture, but was forced into a difficult position when Tarkin threatened to destroy Alderaan, her homeworld, if she did not reveal the base's location. Fearing the loss of Alderaan, but understanding she could not betray her allies on Yavin 4, Leia lied to Tarkin and declared that the base was on distant Dantooine, isolated from the galaxy at-large. A smirking Tarkin, confident in his victory, continued with the operation to destroy Alderaan regardless, stating that Dantooine was "far too remote for an effective demonstration." Thus, Alderaan was destroyed by a single blast from the Death Star, an event that killed billions of sentients and sealed the fate of the Empire.[23]
Tarkin still had matters with the Rebel base; a scout team was sent to Dantooine to ascertain whether or not there was indeed a base there. Meanwhile, the Millennium Falcon arrived in-system, carrying Luke Skywalker, Obi-Wan Kenobi, and R2-D2, who still had the Death Star's technical readouts. Trapped aboard the Death Star due to the massive array of tractor beams, Luke sought to rescue Leia while Obi-Wan went alone to disable the tractor beam generator and confront Darth Vader.[23]
Tarkin ordered Leia's execution when he learned of her deceit; however, before the order could be carried through, she was rescued by Luke. A daring escape through the Death Star's corridors commenced. As they made it to the hangar to escape aboard the Falcon, a concerned Luke watched as Obi-Wan Kenobi faced off against his former apprentice, Darth Vader. With a knowing smile, Obi-Wan purposefully let down his guard and allowed himself to be cut down by Vader's lightsaber, immediately becoming one with the Force as his physical form disappeared.[23]
Battle of Yavin
- Princess Leia: "Some day you'll learn that it's people and not things that decide history."
- Han Solo: "Better teach that to the Empire, first."
- Luke Skywalker: "That's the whole idea, Han."
- ―Conversation before the Battle of Yavin[src]
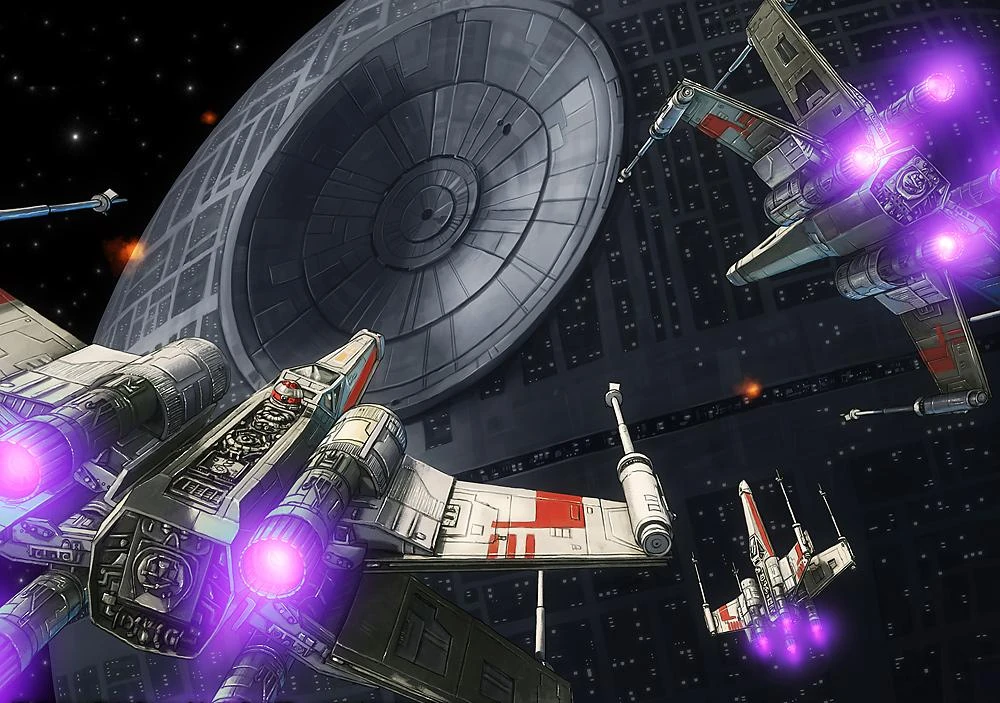
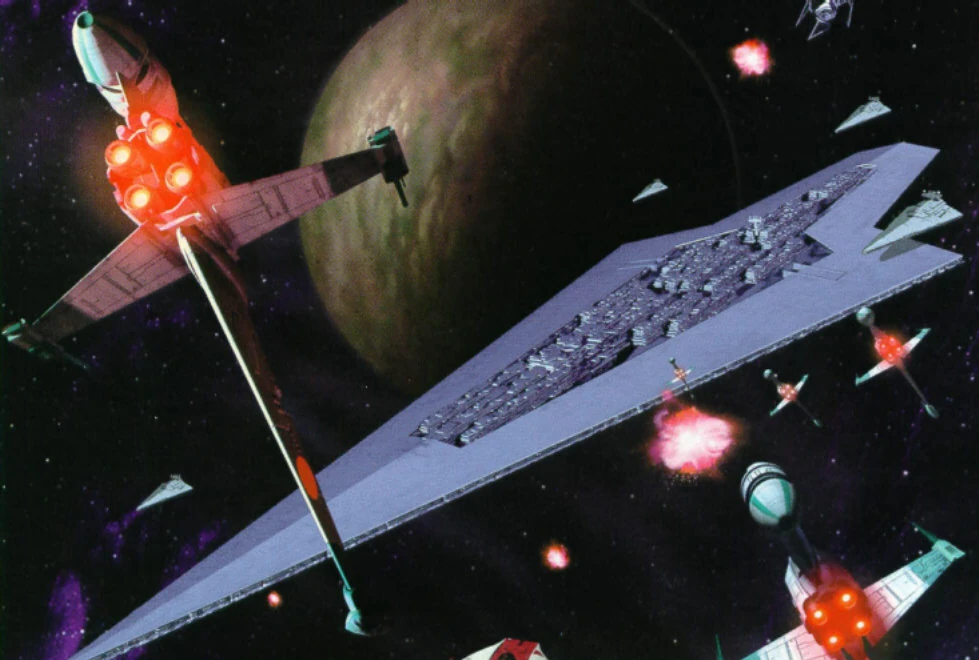
The attack on the Death Star.
The Millennium Falcon escaped soon after, pursued by several TIE Fighters but ultimately allowed to escape by Tarkin, as he hoped that the Falcon would lead straight to the Rebel's hidden base. His plan proved effective; with a homing beacon secured aboard the ship, the Empire learned that the rebels were hiding on Yavin 4. After sending a platoon of Stormtroopers to the moon to confirm Rebel activity,[61] all courses were set to the Yavin system to destroy the Alliance.[23]
In the Great Temple, the technical readouts were analyzed and an attack plan was conceived by Jan Dodonna. With the Death Star looming overhead and entering into range to unleash its superlaser, Rebel ships took off in a desperate attempt to destroy the behemoth battle station. The plan called for cutting across the Death Star's equatorial trench and following it down to a small thermal exhaust port, where a single proton torpedo would be able to reach the Death Star's main reactor and set off a chain reaction, should it hit. In an intense battle, Rebel pilots attempted to stave off Imperial starfighters while attack runs were made against the exhaust port. Tarkin, underestimating the Alliance's chances, refused to send out more than a squadron of starfighters to deal with the Rebel problem; he ignored Chief Moradmin Bast's warnings of a threat to the exhaust port and continued with his descent upon Yavin IV.[23]
As Rebel pilots continued to be destroyed one-by-one by Darth Vader and other Imperial pilots, Luke Skywalker, Biggs Darklighter, and Wedge Antilles made one last run against the trench. Vader killed Biggs and forced Wedge to retreat, and was moments away from shooting down his son, Luke, before Han Solo entered the fight with the Millennium Falcon. Solo managed to drive Vader out of the battle, giving Luke one shot at the thermal port. The attack succeeded, and moments later the Death Star exploded, taking with it millions of Imperial lives. Yavin 4, and the Alliance, was saved.[23]
This pivotal moment secured Luke Skywalker's journey towards being a Jedi Knight, and marked a major turning point in the galactic war against the Empire. From then on, the Empire no longer took the Rebellion for granted; Palpatine issued directives to drastically increase the size of the military, expanding the armed forces to unprecedented levels to counter the threat of the Alliance and growing dissent across the galaxy.[21][55]
After Yavin
The Battle of Yavin gave the Rebel Alliance credibility as a legitimate military threat to the Empire. However, the Rebel commanders knew that their celebrations would be short-lived. Because of the destruction of the Death Star, the Empire would focus all of its military might into destroying the Rebels. The Alliance began to evacuate the planet—complicated by an Imperial blockade.[8]
Capture of Yavin base
Massassi Station under the occupation of the Empire
- "By the time we landed on Yavin, whatever shock we'd felt at the destruction of the Death Star had been replaced by anger. For months we'd treated the Rebellion like a disobedient child, only to be repaid for our tolerance with treachery on an unimaginable scale. Frankly, I don't remember much of the fighting. I guess we won."
- ―Entry from the Journal of the 501st detailing the Imperial attack.
Preparations were made immediately for a full-scale evacuation of Yavin base and relocation to another secure hideout. Jan Dodonna supervised evacuation efforts as a blockade was established around the system, led by Darth Vader and his newly minted Star Dreadnought, Executor. The 501st Legion descended upon the planet with elements of the Imperial Army and began a siege of the Alliance temple and headquarters; during a series of skirmishes that lasted some time, many Alliance commanders and personnel were killed and Dodonna himself was captured, and presumed killed by the surviving Alliance personnel who managed to escape through the Imperial blockade.[8][59]
During the siege, Luke Skywalker, and other Rebel pilots, were successful in slipping through the blockade to perform covert missions and attempt to find a suitable planet to relocate from Yavin. One such mission took Luke to Fondor where he was able to see the final stages of the Executor's construction before its departure to Yavin;[62] a subsequent mission saw Luke stumbling upon Hoth after an accident with a comet, which he reported back to Alliance Command as the perfect spot to relocate after Yavin was evacuated.[62]
In order to help evacuation efforts, Ackbar led a fleet of Rebel cruisers in a diversionary assault on the nearby Vallusk Cluster; the assault was a success, with a significant portion of the Imperial fleet diverting its resources to dealing with Ackbar.[62] However, the assault showed to Mon Mothma and other Alliance commanders the need for a stronger and unified fleet. Ackbar was promoted to Supreme Commander of the Rebel Fleet and military, and efforts were made to increase the size of the standard military.
Yavin 4 was fully subjugated by the Empire; survivors of the Rebel base dispersed, with most relocating to Hoth. The war continued.
Reytha campaign
After the capture of Yavin, Darth Vader managed to extract information from General Dodonna about a Rebel operation on Reytha. Vader dispatched his Fleet to the Reytha system where contact was made with Governor Antes Belladar, who sought help against the Rebel forces. Vader was suspicious of the Governor, but nonetheless proceeded to annihilate the Rebel outpost. After the last of the Rebels were routed, Vader killed Belader and installed a new Governor.[13]
Renegade Squadron's Exploits
- "It didn't matter what they'd been before. All that mattered was that they were willing to fight--and maybe die--for the Alliance. I tracked them down and offered them whatever it took. In the end, I found enough of what I was looking for."
- ―Col Serra

Ackbar is rescued over Kessel.
Renegade Squadron was originally created by Han Solo shortly after the Battle of Yavin, but many of its exploits occurred after the Evacuation of Yavin 4. During that battle, Renegade Squadron was instrumental in helping many members of the Alliance escape. Next, they travelled to The Graveyard, the remains of what used to be Alderaan, in order to collect a holocron made by Bail Organa and encased in phrik, one of the strongest substances in the galaxy, strong enough even, to survive the destruction of Alderaan. The holocron had a list of potential bases for the Rebel Alliance, in the case of the evacuation of the base on Yavin IV. After retrieving the holocron and escaping into hyperspace, they met up with Solo on Ord Mantell. Renegade Squadron fought off Imperial forces and IG-88 while Han worked on the Millennium Falcon, escaping with their lives.
Afterwards, Renegade Squadron rescued Commander Gial Ackbar over Kessel. Ackbar told the squadron that he had been investigating Boz Pity, a cemetery world, as a location for a Rebel base, but that Boba Fett had then boarded the ship, handed over Ackbar to the Imperials, and sold his ship, crew, and droids on Tatooine. They then went to Tatooine in order to find the soldiers who had been captured with Ackbar.
The squadron headed back to their base on Boz Pity, but they were unaware that Boba Fett had put a tracker in one of their droids. Fett discovered their base, and a few hours after Renegade Squadron landed on Boz Pity, an Imperial planetary strike force, with an AT-AT, attacked. During the battle, the Squadron learned that Ackbar had been wounded during the battle, and they saved his life by bringing him a bacta tank. Soon after, they successfully evacuated, still looking for a new base.
Rogue Squadron
- "Well, you know the Rogues. All we need is a ship and rock to land it on."
- ―Wedge Antilles
Months after the Battle of Yavin, two of its famous survivors, Luke Skywalker and Wedge Antilles, formed an X-wing squadron that would arguably become the most famous in the galaxy—Rogue Squadron.[8] The squadron's origins laid within Red Squadron, then under the command of Arhul Narra, as Rogue Flight, working in tandem with Renegade Flight. Rogue Flight's early missions included aiding evacuation efforts at Yavin 4 and assisting Tycho Celchu defect to the Alliance on Dantooine.[38] However, during a convoy escort, relocating supplies to the Hoth base, an ambush by Imperial forces all but wiped out Renegade Flight in the Ison Corridor.[63] As a result, Rogue Flight was transformed into Rogue Squadron and Luke Skywalker was given full command over the squadron.
Early victories on planets such as Tatooine, Barkhesh, and Chorax earned the Rogues a quick reputation amongst Alliance and Imperial pilots alike, going as far as to convince Kasan Moor, commander of the 128th TIE Interceptor Squadron to defect. Moor's defection led to vital raids on Imperial production facilities, including Balmorra and Kile II. These victories did not come without a price, however; Moff Kohl Seerdon took note of the Rogue's performance and personally took interest in seeing the Squadron's destruction after their attack on Fest, site to Seerdon's research facility. Seerdon launched attacks on Chandrila and Thyferra in retaliation, but his plans were foiled by Rogue Squadron; over the skies of Thyferra, Seerdon's personal attack craft was shot down by Rogue Squadron, ending his reign of terror.[64]
Operation Grain Snatch
Some months after the fall of Yavin 4, Imperial Overlord over the Greater Plooriod Cluster, Ghorin, contacted Rebel cells and offered his defection and aid, by supplying them with grains and other resources. However, Ghorin had no intentions of defecting; his grains were poisoned and he intended to betray the Alliance. Unfortunately for Ghorin, the Alliance discovered his plan, and through Operation Grain Snatch turned the tables on the Imperial Overlord. Through careful manipulation by the Alliance, Ghorin was seen as a traitor to the Empire; after the success of the operation, Vader paid a visit to Ghorin and, taken in by the Alliance ruse, killed the Overlord.[58]
The Evacuation of Ralltiir
On Ralltiir, a team of scientists working with the Alliance were discovered by Imperial agents. The scientists were able to activate a shield around the city, thus temporarily saving them from Imperial reprisal. Two Imperial Star Destroyers in orbit began to open fire on the shield as ground units, including AT-ATs, descended upon the planet to shut down the shield and capture the scientists. Rogue Squadron was dispatched to Ralltiir to rescue the scientists; led by Skywalker, the Rogues utilized tow cables to destroy the walkers and halted the Imperial offensive. Using explosives constructed by the scientists, the bridges connected to the city were destroyed, thus cutting off Imperial forces from reinforcements to temporarily buy time to escape.

Rebel troops on Restuss
During the rescue, Sarkli, a disgruntled Rogue pilot and nephew to Imperial Admiral Firmus Piett, defected to the Empire, taking with him one of the scientists. Despite the last minute surprise defection, the Rebels were able to escape with the surviving scientists.[38]
Dark Troopers
The Dark Trooper Project was a secret Imperial weapons program developed by Rom Mohc to create the Empire's next-generation of Stormtroopers. The Dark Trooper was a highly-advanced battle droid that would, in time, succeed the Stormtrooper as the main fighting unit of the Imperial Military.
The Project was run from Mohc's production facility, the factory ship Arc Hammer. After a devastating attack on Talay, which saw the destruction of Tak Base, the Dark Troopers proved their effectiveness in their first combat operation. Kyle Katarn and Jan Ors, mercenaries under the Alliance's employment, made famous for their previous efforts at collecting the data for the Death Star, were assigned by Mon Mothma to investigate the Dark Trooper Project and stop it at all costs.
Katarn and Ors were successful in their mission; infiltrating the Arc Hammer through Vader's Executor, Katarn killed Mohc in a fierce confrontation and then destroyed the factory ship with several thermal detonator charges. With the Arc Hammer destroyed and Mohc dead, the project was a disaster; so furious was Palpatine that so many credits and resources were wasted on the failed project that he canceled the project entirely. The threat of the Dark Troopers ended.[60]
Crix Madine's defection
After his help during Operation Strike Fear, Crix Madine decided to fully leave the Empire after the release of the Candorian plague on Dentaal.[8] He provided Kyle Katarn with help during his mission to destroy the Dark Troopers, but was later captured by the Empire and held on Orinackra, scheduled for execution. The timely arrival of Katarn saw Madine rescued.[60] Madine returned to Corellia, where he was scheduled to meet with Carlist Rieekan to finalize his defection to the Alliance. However, the meeting was ambushed by the Empire, but due to the intervention of Rogue Squadron and the Millennium Falcon, Madine was saved and shuttled off the planet.[64]
Madine's intimate knowledge of Imperial tactics and operations earned a spot on the Rebel Alliance Advisory Council and role as Supreme Commander of Alliance Special Forces.[21][65]
Blockade of Kashyyyk
As the Wookiees of Kashyyyk prepared for Life Day, Han Solo and Chewbacca were intercepted by Imperial Star Destroyers after a routine mission to Tatooine. The Millennium Falcon was able to elude its pursuers into hyperspace, but the Star Destroyers, under orders from Vader himself, were able to track the Falcon to its destination, Kashyyyk.
With Vader apprised of the situation, he ordered a blockade of the Wookiee homeworld. A curfew was established on the planet and Stormtrooper patrols scoured the planet for the Rebels. However, after extensive searching, the Imperials failed to turn up the Rebel agents. Together with his family, Chewbacca, Han Solo, and friends celebrated Life Day.[66]
Imperial repercussions
The Rebellion Grows
Inspired by the victory at Yavin IV, many worlds began to pledge their allegiance—openly or behind closed doors—to the Alliance cause. Some planets, such as Zaloriis, instead fought for their own independence from Imperial rule. After the Zaloran declaration of independence, they battled against their Imperial rulers, capturing Imperial Maximilian Veers in the process. Vader himself descended upon Zaloriis and enacted swift devastation upon the populace; during the battle, Veers was rescued and, after analysis of the Zaloran archives, the Empire discovered that the new Rebel base was located near Elrood.[13]
With this new information in hand, Vader, at the head of the Imperial Death Squadron, intensified his search for the Rebel base and his prize, Luke Skywalker.
Assault on Hoth
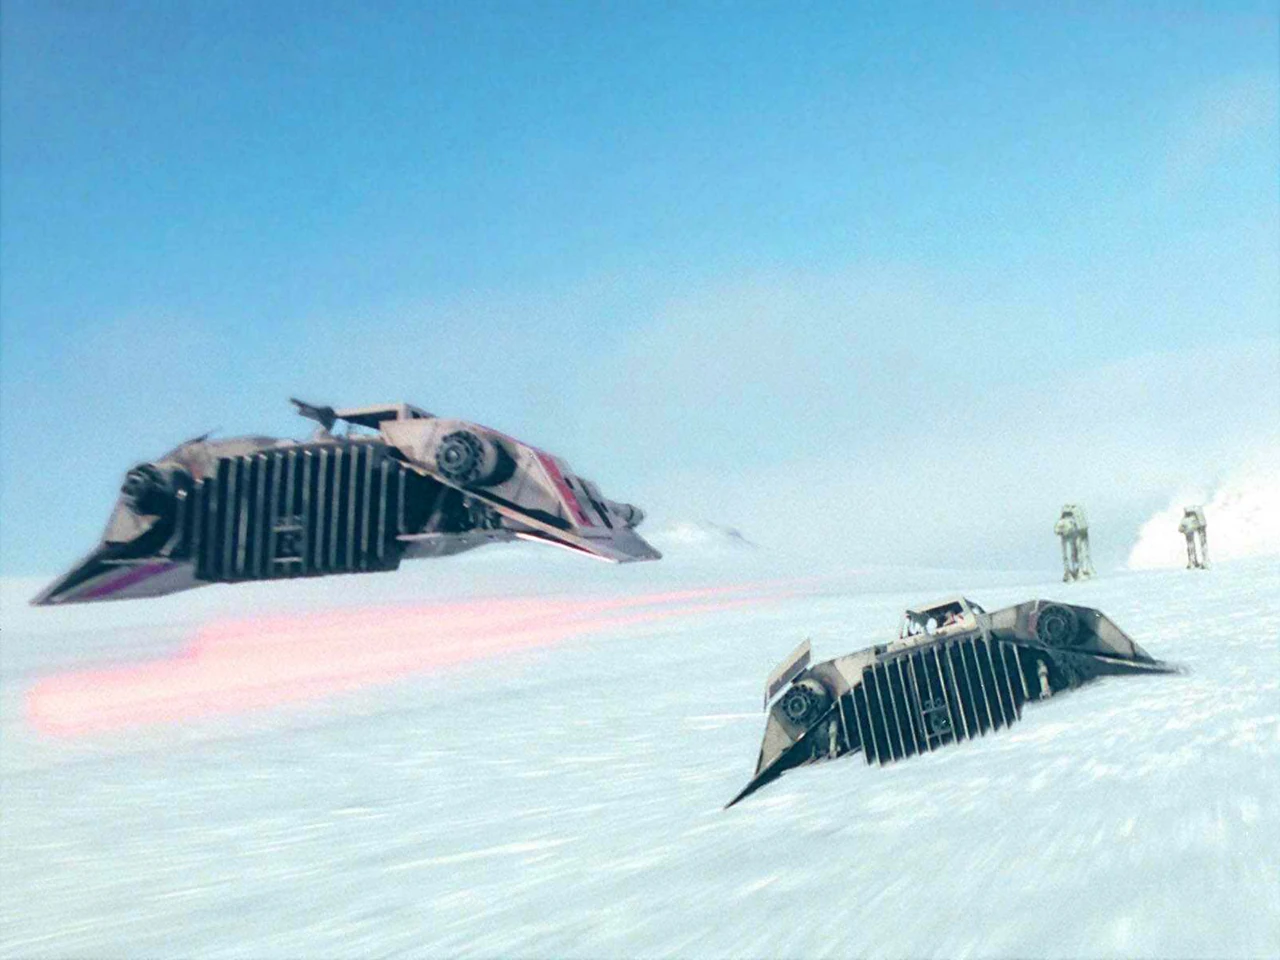

Rebel snowspeeders approaching Imperial AT-ATs during the Battle of Hoth
Imperial probe droids were dispatched throughout the galaxy in an attempt to discover the Rebel base. Reports came in daily from the Imperial probe droids, and many were filtered through, turning up nothing of value. However, then-Captain Piett of the Executor came upon one report from the Hoth system; after analysis of the feed by Piett, and then Vader, Hoth was confirmed as the Rebel base.[26]
The Battle of Hoth commenced soon after, with the Rebels fighting a stalling effort to allow base personnel and command to evacuate with as many supplies as possible and regroup with the main Alliance fleet. If Imperial Admiral Kendal Ozzel, who was soon relieved as commander of Darth Vader's Death Squadron for his error, had not come out of hyperspace so close to the Hoth system, the Rebels could have been caught unaware and bombarded from orbit, but instead they managed to erect a small planetary shield. Vader ordered General Maximilian Veers to lead a walker assault on Echo Base, which the Rebels could not effectively counter. The Rebel base was overrun and destroyed, seventeen of thirty escaping Rebel medium transports were totally destroyed as they attempted to traverse the Imperial blockade, and an intense pursuit of the escaping Millennium Falcon through the Hoth asteroid field was conducted on Vader's seemingly erratic orders. Despite much Imperial effort, the Falcon escaped to Cloud City on Bespin, seeking asylum from Han's old friend, Lando Calrissian. Unknown to Solo and his companions, the Empire had forced Calrissian into cooperating with its efforts to capture the Falcon's outlaw crew. Vader, bounty hunter Boba Fett, and a squadron of stormtroopers apprehended the Rebels and prepared a trap for Luke Skywalker, whom Vader knew would come to investigate.[26]


The space battle over Hoth
Meanwhile Luke, under the advice of the Force ghost of Obi-Wan Kenobi, had traveled to Dagobah and had become a Jedi apprentice to Jedi Master Yoda. Through the Force, Luke became aware of his friends' suffering and, despite the pleas of Yoda and Kenobi to stay and complete his Jedi training, left Dagobah for Cloud City in an attempt to save his friends, who ended up saving him after he confronted Darth Vader. Vader also revealed to Luke in their battle that he was his father. At the last second, the friends escaped aboard the Millennium Falcon, though Han Solo was taken in carbonite to Jabba the Hutt on Tatooine by the bounty hunter Fett.[26]
TIE Phantom threat
A short time after the Battle of Hoth, production of a new series of TIE starfighters began; the TIE Phantom, brainchild of Grand Admiral Martio Batch, utilized cloaking technology developed from Stygium crystals.[67] Vader was impressed by the Phantom's demonstration in the Dreighton Nebula, and mass-production of the starfighter began at a factory attached to Imdaar Alpha. However, Ru Murleen and Rookie One were able to steal a TIE Phantom and infiltrate the Star Dreadnought Terror; through their actions they destroyed the Terror and the TIE Phantom production facility, putting an end to the short-lived Phantom project. At the conclusion of the mission, the Alliance sought to mass-produce their own Phantoms based on the starfighter retrieved by Rookie One; however, this plan was quickly eliminated, as Vader activated the self-destruct on all remaining TIE Phantoms, thus ensuring the end to the TIE Phantom line.[68]
Mission to Endor
After the destruction of the first Death Star, Palpatine ordered a new one to be designed, eliminating the fatal flaw present in its predecessor. Construction began almost immediately, but first a site was needed for construction to commence. Since Despayre had been destroyed as the first Death Star's test,[8] another isolated planetary body was needed; Brenn Tantor, a General in the Imperial Army, was ordered to scout out a new world for the Empire to occupy for construction of a secret project. Tantor settled on Endor, leading a light scout force to the planet's moon. However, the mission went astray from the start; native Ewoks assaulted the scout force. Tantor was reluctant to engage, as he did not know if they were indeed hostile or just nervous natives defending their territory. But Tantor was overruled by his superior, Grand General Malcor Brashin, and Tantor eliminated the Ewok threat and secured a site for Imperial engineers that would serve as the shield generator of the Death Star II and base for the Empire.[69]
Sepan campaign
The Sepan campaign was a series of battles initiated by the Empire in 3 ABY with the objective to bring an end the Sepan Civil War, which had raged for nearly three decades between the Ripoblus and Dimok. Imperial forces, led by Admiral Harkov, started by intercepting both Dimok and Ripoblus attack forces, halting their attacks on one another. Unfortunately for the Empire, the result was that both the Ripoblus and Dimok aligned and declared war on the Empire, an ironic turn of events. After a series of battles, the Empire defeated the Sepan forces and forced a peace treaty upon the two, ending the civil war. Harkov urged cooperation with the Empire for greater prosperity for all.[14] Under Imperial rule, hostilities on Sepan ended, but in 40 ABY, with the ongoing strife brought upon by the Second Galactic Civil War, tensions flared up once more, and Sepan would find itself in civil war again.[70]
Spreading the Rebellion

Task Force Vengeance attacked by Rebel forces.
After the formation of Task Force Vengeance, the Rebel Alliance was forced to give up its permanent assets in the Elrood sector in favor of the more remote and less strictly controlled Airam sector. In the opening battle of the campaign, many assets in Elrood sector were evacuated, most notably XQ5 Platform-turned-hospital Hormuuz in the Gelgelar system. Most places were able to avoid Imperial attention, but Hormuuz attracted the attention of Admiral Wooyou Senn, who deployed a strike team to capture any Rebels in the system. Although the Rebels, who had learned to react quickly after losing over half of its Echo Base assets to Death Squadron in the Hoth system, succeeded in avoiding major losses, many Z-95 starfighters were sacrificed to cover the escape of base staff and several vital cargo containers were left floating in space.
After stocking up on consumables and warheads, the Alliance went on to find out their enemies strength—a reconnaissance mission was flown by Rogue Squadron in order to scan the ships of Task Force Vengeance and destroy any freighter carrying warhead supplies. This culminated in a diversionary strike by the Calamari Cruiser Liberty herself, intended to lure away some of the Imperial warships into an ambush set in the Goff system. Rogue Squadron led a strike team to capture an Imperial interdictor while it was undergoing repairs. The attempt was successful, and despite the Empire's attempts to scuttle the Compellor, the Rogues were able to bring the ship safely to the Mobetta system. By maintaining tight patrols around the factory, Gallofree, the Rebels managed to keep the modifications performed on the Strike-class cruiser Peregrine a secret, prepping the Compellor for its final mission as well. The baptism of fire for the Peregrine came shortly thereafter in the Derilyn system, where it assisted Liberty in pinning down and destroying a reinforcement and resupply fleet headed for Task Force Vengeance. Meanwhile, an Imperial strike force located the Compellor—which blew up in full view of the Star Destroyers Titan and Juggernaut, according to the Rebels' plan, leading the Imperials to believe that neither they nor the Alliance had access to gravity well technology anymore.
In the closing days of the campaign, Task Force Vengeance was already showing the effects of raids against their supply lines. In a last-ditch effort, Senn tried to acquire supplies from the traitorous Airam clan leader Ilay, but was foiled by the efforts of Rogue and Green Squadrons. The Alliance, intent on wearing down the remainders of the Imperial task force slowly but steadily, did not expect Admiral Senn to know the location of their most crucial asset in the Airam sector by this time: the shipyard Calenz. The Super Star Destroyer Vengeance, accompanied by the Star Destroyer Rage, attacked the shipyard directly. Not even the valiant efforts of Rogue and Green Squadrons, the Calamari Cruiser Liberty and an Airam kamikaze armada could prevent the destruction of Calenz at the Battle of Nocto, but despite the hefty blow to its Airam sector infrastructure, the Rebel fleet did succeed in destroying the last remnants of Task Force Vengeance, including the titular Star Dreadnought, and killing Admiral Senn.[71]
The Alliance Regroups
Following the Occupation of BespinSubjugation of Bespin, the Rebel Alliance set out to save any Rebel prisoners from the Battle of Hoth. Rogue Squadron besieged a small Imperial detention facility in the Maw system, freeing all captives. A distress transmission was intercepted coming from a group of captive scientists from a Bakura orbiting detention facility. Besieging the center, Rogue Squadron lost a group of scientists who were abducted by a rogue escort carrier. After being tracked to Geonosis, the attacker revealed himself to be Sarkli, a former Rebel. During the ensuring battle, he and Wedge ended up on the planet's surface. He was thought dead after Wedge Antilles shot his LAAT gunship down.[38]
Mission to the Maw
On patrol at the Maw, Rogue Squadron found an Imperial prison center with prisoners from Hoth. Wedge Antilles sent his fighters to attack the TIE squadrons while he in his Y-wing bombed the turrets and destroyed the prison. During the escape the prisoners planted a number of explosive charges along the train track, destroying the facility.[63]
Operation Earplug
This campaign was for the Rebels to destroy the potential threat of the Teezl, a creature capable of greatly enhancing Imperial communications and coordination. The first part of the plan concerned the procurement of four black-market TIE Fighters, which would be modified into hyperspace-capable starfighters and used by the Flying Bantha Squadron in subsequent missions. As part of their test-run, the squadron's TIE fighters were used in an attack on Spindrift Station, an Imperial outpost said to hold the route coordinates for the massive fleet transporting the Teezl. With the coordinates secured, the entrance codes to the armada were next. These would be secured in an ambush on a TIE patrol, near the Imperial fleet's flight-path. They assigned four Flying Bantha Squadron pilots to perform the final task of the operation: an almost certain suicidal infiltration mission that would culminate in the destruction of the Teezl. Gaining access, the Rebel TIEs split off, chose random ships to target, and begun the mayhem and confusion which would spread throughout the Imperial fleet. The commanders of the damaged vessels followed standard procedure and counterattacked, but since it was unclear which ships had hit the targets, the warships lashed out at random, hitting dozens of TIE fighters and even other capital ships. Admiral Giel quickly realized the Rebel attack plan, and thus ordered the Teezl to be used to fill all available comm channels with static, to prevent further communication between the Rebels. The Teezl's jamming forced Luke Skywalker to rely only on the Force to identify friend from foe, as he finally reached the area of Giel's vessel where the Teezl was located. Being fired upon by defensive guns, he noticed a TIE fighter between him and the flagship. Using the Force to identify the pilot as an enemy, he fired on it and cleared the way for the main, powered-up shot. It struck the vessel, smashing through the hull and killing the Teezl instantly.
After the battle, Luke fled the area, using a patrol ship as a temporary shield from pursuing enemy fighters before escaping into hyperspace.
As a result of the loss of the Teezl, Admiral Mils Giel was demoted to lieutenant and reassigned. His ship was presumably led to a dock for repairs.[72]
The Battle of Gall
The Battle of Gall
Dash Rendar confronted IG-88 on Ord Mantell and learned the whereabouts of Boba Fett, who had Han Solo as a captive; he was repairing his ship on Gall. Rogue Squadron and Rendar attacked the Imperial Enclave situated on the moon. However, this rescue mission was confounded by the presence of an Imperial Enclave, with two Star Destroyers on patrol. Luke concocted a risky plan, utilizing the combat skills of the Rogues to keep the Enclaves' fighter complement at bay while counting on the piloting ability of Dash to lead Lando and Leia to Fett's ship. Despite the obvious danger of thirteen T-65 X-wing starfighters taking on a hundred and forty four TIE Fighters, it was, as Luke pointed out, the only plan they had.
The rescue attempt was launched, with the Rogues flying in on a strafing run against the day-side Star Destroyer. Only twenty fighters were scrambled to meet the threat—the pilots no doubt thinking it was only a drill—though an additional squadron was soon launched. The Rogues did an impressive job of keeping the fighters away from the Grand Trench—where Rendar's Outrider was leading Millennium Falcon towards the spaceport city—only losing one pilot when Will Scotian was forced to return to base after sustaining damage to his craft.
The Rogues' luck could not last, however. Another wave of TIEs approached—among them several TIE Interceptors, and Rogue Six was destroyed in the battle. Worse, the second Star Destroyer joined the battle, launching its own fighters into the fray. Fortunately, the Falcon reached the spaceport after a harrowing run through the Grand Trench, though Dash decided to leave the Rebels to face Fett alone—as he later remarked, he was paid only to guide, not shoot. And with a dozen TIE Fighters on their tail, the crew of the Falcon was in dire need of help.
Over the Enclave base, the Rogues, like Dash, decided to cut and run, preparing for a mock hyperspace jump to fool their pursuers into believing they had left the system. Plotting a course towards their base on the moon of Kile, the Rogues were shocked to see Wes Janson's X-wing firing on Luke. The frantic Wes realized his astromech droid had taken control of his ship, and Luke was forced to disable his fellow pilot's fighter, before towing him back to base. There, in a disturbing development, Luke found that the astro-droid had been programmed to kill him. Fett escaped, and the mission failed.[3]
First Battle of Bakura
When the Rebels found a group of scientists captured by the Empire the Rebels sent Rogue Squadron to rescue them. After further prisoner rescue, a TIE Fighter disabled Hobbie Klivian's X-wing, sending him crashing on the surface of the planet. Wedge journeyed down onto the planet in a stolen TIE Bomber to pick him up. However, hundreds of Bakura surface heavy missile batteries littered the surface. Using his bomber's lock on concussion missiles, Wedge managed to break through the defenses and saved Hobbie. Upon arrival back in orbit, he noticed that debris littered the area. Crix Madine informed him that an Imperial vessel made off with a batch of scientists and destroyed the rest of the transports, and it seemed he was headed toward Geonosis.
Battle of Fondor
The Rebellion managed to steal a Imperial TIE Hunters in order to destroy an Executor-class Star Dreadnought. The plan was to use an empty rebel transport and have ram it into one of the shield generator command deck. The Empire found out the transport was a decoy and sent Tie Fighters to destroy it but unfortunately it didn't work. The frigate Redemption and several other squadrons, and 2 CR90 corvettes arrived to cover the attack on the generator. The generator was deactivated by Wedge’s ion cannons, but he abandoned his TIE for a more stable A-wing. Wedge destroyed the shield generator and destroyed the Super Star Destroyer. Though this was a clear victory, the Emperor believed it would make the Rebels overconfident in the upcoming battles. Even then, the Rebels were being lured into a trap.[38]
Battle of Kothlis
A Rebel CR90 corvette carrying Imperial Data was ambushed by a Star Destroyer. The timely appearance of Rebel fighter squadrons and the Redemption turned the tide around, and an attack on the Star Destroyer commenced.
Rogue Squadron managed to take down the shields and destroy the bridge. The Star Destroyer crash landed on the planet. As the Star Destroyer crashed into the surface, an Alliance GR-75 transport carrying Crix Madine and a company of soldiers arrived to secure Razor's computer core. Rogue Squadron escorted the transport to the crash site and was surprised to find a portion of the Star Destroyer's ground forces had survived the crash.
A Rebel Transport managed to land on the plant with a task force to capture the data, but an Imperial AT-AT managed to survive the crash. Wedge and the rest of Rogue Squadron entered with Rebel Snow fighters and destroyed the walkers. After neutralizing any remaining functional batteries and destroying the Imperial armor, Rogue Squadron covered Madine's charge to the Star Destroyer. Madine succeeded in retrieving the data from Razor, returned to his transport and fled Kothlis while Rogue Squadron engaged pursuing TIE fighters. Madine and his team finished decoding the data and realized why the Empire wanted it so badly—it was the technical readout for the second Death Star.[63]
Renegade Squadron's Missions

In the leadup to the Battle of Endor, Renegade Squadron traveled to the Sith burial world of Korriban in order to ambush Emperor Palpatine. They were able to capture vital command posts on the world, temporarily trap Palpatine inside one of the tombs, and steal information regarding the new Death Star. The Renegades then traveled to the caves of Sullust in order to perform a diversionary raid and distract the Imperials. The strategy seemed to work; however, Palpatine had seen through all of this, and planned a trap for the Rebels at Endor. The stage was set.[73]
Battle of Bespin
Before the Battle of Endor the Rebel Alliance attacked Bespin. The battle raged both in the air and on the floating settlements of the gas-giant, starting at the de-facto capital of Cloud City, and moving outwards across the various gas-refineries as the Rebels continued to gain ground.
A point of confusion during the battle was the use of cloud cars on both sides, which led to several incidents of friendly fire. Wedge Antilles and Rogue Squadron led an aerial assault, their primary objective being to secure as many tibanna gas platforms as possible. After destroying a large majority of the Empire's control systems, the squadron provided aerial support for those fighting on the ground, by disabling the city's power generators, which in turn deactivated the Imperial turbolasers, gun turrets, and communications.
Down on the ground, Rebel soldiers captured the main carbon freezing chamber and secured their command posts in the vicinity. After the combined effort of the SpecForce and Rogue Squadron, the SpecForce moved on to capture the main Imperial mining platform. The Rebel forces landed and secured the gas extractor, and pushed the Imperials back to the other side of the platform. The Rebel forces moved in and captured the Imperial docks and landing platforms, trapping them in the main command center. Y-wings bombed the building, X-wings destroyed starfighters before they could lift off, and the enemy numbers dwindled. Teams of SpecForce soldiers moved in on the command building and secured it.[61]
Mission to Prefsbelt IV
General Madine, after their initial attempt at stealing the Tydirium backfired and resulted in it being confiscated by the Imperials, ordered Wedge Antilles to go to the Imperial Academy on Prefsbelt IV and steal the shuttle. Wedge neutralized/evaded all the Imperial scanners and made his way to the Imperial airbase. Wedge infiltrated the base and stole the Imperial Shuttle. He blew his cover at the shuttle's hangar, and later made a rendezvous with reinforcements who escorted the stolen Tydirium to safety.[63]
The Rebels triumph
- "The Emperor has made a critical error and the time for our attack has come."
- ―Mon Mothma


The Battle of Endor rages on in space.
After freeing Han Solo on Tatooine, Luke Skywalker, Leia Organa, Chewbacca, and Lando Calrissian (along with the droids R2-D2 and C-3PO) met up with the Rebel Alliance near the system of Sullust. The Rebels were amassing their entire fleet for a new strike. Admiral Gial Ackbar, the commander of the Rebel fleet, along with General Crix Madine, developed the plans for the battle. The Bothan spies had reported that the Empire has begun construction on a new space station, the Death Star II, which would be much larger and much more powerful. The Rebels had determined to destroy it by launching an all-out attack against it before it could be completed. The sense of urgency was heightened by the fact that the Emperor himself would be aboard the station, making a shot at the head of the Empire himself possible.[2]
The Death Star was protected by a force field generated from the forest moon of Endor. Han Solo, Chewbacca, Leia Organa, Luke Skywalker, R2-D2, and C-3PO led an expedition to disable the shield and allow the attack to occur. Once on Endor however, Luke turned himself in to Darth Vader, his father, hoping to rescue him from the clutches of the Emperor and the dark side of the Force.
Vader took him aboard the uncompleted Death Star and before the Emperor, who attempted to lure him to the Dark Side by placing him in combat with Vader, whom he defeated. However, instead of killing Vader, he renounced the Dark Side by declaring himself a Jedi, like his father before him. Palpatine then attempted to kill him with a shower of deadly Force lightning, but Darth Vader, becoming Anakin Skywalker once again, threw him into a reactor core shaft, killing the Emperor. At this same moment, the Rebels managed to deactivate the shield by destroying the entire shield bunker with sequencer charges. The resulting Battle of Endor led to the destruction of the Death Star, although Skywalker escaped with Anakin's body. The Emperor was dead and the main Imperial fleet was defeated. Despite this tremendous victory, many long years would go by before the Galactic Empire truly surrendered.[2]
Incident at Bakura
Like in most rebellions, the last battle did not end the civil war. Just one day after the Battle of Endor, an Imperial Emissary Droid Ship arrived in the Forest Moon carrying a message from the Imperial outpost of Bakura. Bakura was under attack by an unknown species from the Unknown Regions. Since the Emperor's fleet had been defeated, no Imperial troops were available to come to the aid of Bakura. In response, Mon Mothma gathered a small Rebel fleet to come to the defense of Bakura. Skywalker, still reeling from his battle with the Emperor, received a visit from the ghost of his mentor Kenobi. Kenobi commanded Skywalker to go to Bakura.[10]
Thus, Luke Skywalker was named the commander of a fleet of five Corellian gunships, one modified bulk cruiser Flurry, 20 starfighters, and the Millennium Falcon. Upon arriving, they discovered that the attackers were an unknown reptilian species called the Ssi-ruuk. The Ssi-ruuk practiced entechment, which involved transferring the life energies of a captive into a battle droid, starship or computer. At Bakura, the Rebel fleet signed a truce with the local Imperial garrison under Wilek Nereus. The Rebels and Imperials then fought to defend Bakura from the reptilian invaders. It was during this time that Leia received a visit from the ghost of her father Anakin Skywalker, who had been the infamous Darth Vader. She had only recently learned of her parentage and was unable to forget that Darth Vader had committed many atrocities including the destruction of Alderaan. The ghost vanished and never appeared to Leia again.
On the Ssi-ruuvi flagship Shriwirr, Admiral Ivpikkis prepared for battle. One of his officers owned a brainwashed Force-sensitive Human slave named Dev Sibwarra, who sensed the presence of Luke and alerted his masters. The Ssi-ruuk had intended to use his Force abilities to entech beings by proxy. To do this, Dev Sibwarra secretly contacted the Imperial governor Nereus and offered to leave Bakura alone if they handed Skywalker over. So, Skywalker was captured by the Ssi-ruuk and brought to a laboratory where they intended to entech him. However, he broke free of the entechment lab aboard the Shriwirr and together with Dev Sibwarra, the duo defeated the Ssi-ruuk aboard the ship.
The Ssi-ruuk then abandoned the Shriwirr rather than face the Jedi Knight in battle and the Shriwirr was then captured by the Rebel forces who refitted it and made part of their fleet. The Ssi-ruuk were defeated and then the Imperial Commander Pter Thanas under orders from the Nereus, turned the turbolaser batteries of his flagship the Dominant on the Rebel Alliance ship Flurry, destroying it along with several Rebel starfighters.
The Bakuran resistance cells, however, under leadership of Eppie Belden, overthrew their Imperial rulers (in what was referred to as the Bakuran Revolution) and the Governor was slain. The Imperial garrison in Bakura then surrendered to the Rebel Alliance and Bakura became a member of the fledgling Alliance of Free Planets. New Republic Intelligence later referred to the battle as the "Bakura Incident", and believed that it would be best if the New Republic attempted to prevent widespread public knowledge of the Ssi-ruuk - advise that was taken controversially at best.[10]

Luke Skywalker during the Battle of Mindor
The Alliance also sent a fleet consisting of Nebulon-B frigates and other smaller vessels under the captured Shriwirr which had been renamed Sibwarra. Upon arriving in the Ssi-ruuk Star Cluster, they discovered that the Ssi-ruuk had been attacked by an unknown foe, later revealed to be the Chiss Ascendancy. During an assault on the Ssi-ruuvi capital of Lwhekk, the Alliance fleet engaged Ivpikkis's fleet though both sides eventually reached a standstill. Seeing a weakened foe, the fleet retreated and assisted in the liberation of Clak'dor VII. It would be years until the Yuuzhan Vong War that the Ssi-ruuk resurfaced.
The Empire fragments
Following the Rebel Alliance's victory at the Battle of Endor and the death of Emperor Palpatine and Darth Vader, riots and uprisings took place on a multitude of Imperial-held worlds, as the news spread across the galaxy. Even Palpatine's homeworld of Naboo could not escape a liberation struggle. What remained in Imperial hands would quickly begin to disintegrate into sectors controlled by rival warlords.
On Coruscant, billions reveled in their newfound freedom, and riots broke out from the non-Human-dominated sectors in which all Imperial patrols were attacked in the streets, statues of Palpatine were toppled and other Imperial symbols were desecrated.
In the midst of all the celebrating and rioting, Imperial authorities ordered a massive crackdown on the rebellious elements in the city-planet's population and gave full power to the local military force to end the uprising and restore order to the system. The military retaliation was horrendous and the death-tolls rose as the Empire struck down the insurrectionists and brought the populace back under its control. Following this, Grand Vizier Sate Pestage assumed control over Coruscant. However, various members of the Inner Circle opposed his reign and he would later be betrayed by the Director of Imperial Intelligence Ysanne Isard.
Strike on the Eclipse
Crime lord Tyber Zann, desiring the data to the Emperor's treasure vaults, made a massive strike on the Kuat Drive Yards. His fleet encountered a Rebel fleet wanting to raid the system and agreed on a temporary truce with the Alliance in order to destroy three Cardan-class space stations. This truce did not last long for they attacked Zann's forces once the Consortium got the Eclipse and the Rebels were also out to destroy it. After he took over the Eclipse he was now fighting the Empire and the Rebels. Utilizing the semi-stable superlaser cannon of the Eclipse, Zann's forces gained the upper hand. However, the superlaser malfunctioned soon after, and the Annihilator, captained by Admiral Gaarn, turned up. Regardless, the Consortium brought down the Annihilator and mopped up the rest of the Imperials as the superlaser on the Eclipse came back online. The Zann Consortium won, but at the cost of many lives on all three sides.[1]
After the battle, Tyber Zann would use the treasures from the Emperor's vaults to spread his organization across the galaxy. He abandoned the Eclipse after obtaining the information he wanted.
The Second Battle of Kashyyyk
A few months after the Battle of Endor Imperial officer Moff Hindane Darcc made a deal with Trandoshan leader Pekt to eliminate the Wookiee population of Kashyyyk. Since the New Republic would not send a fleet to help Han Solo and Chewbacca went to Kashyyyk themselves and tried to stop the Imperials. Han Solo and Chewbacca tried to contact the New Republic for help. But betraying the Wookiee resistance, Weebacca told Solo and Chewbacca that the communications jammers were in Okikuti. Upon entering the city, they realized it was a trap, as Darcc's forces advanced on the Okikuti's gates while there was no exit. They cut through the trees to the nearby river and built sea ships to escape to Chenachochan. Destroying several Imperial sea frigates, they stole Imperial walkers from Tunnatutikan and met up with Shoran. Together, they destroyed the signal jammers and sent a transmission to the Rebel Alliance, which was received by Lando Calrissian. The Wookiees went to the Avatar Orbital platform above Kashyyyk, where they managed to kill the moff and the Trandoshan.[13]
During that battle, a Rebel fleet under Admiral Ackbar and an Imperial fleet under Grand Admiral Peccati Syn squared off in orbit. Syn was killed when his ship was vaporized due to his underestimating Ackbar's tactics.
The New Republic captures Coruscant
In 7 ABY, the New Republic would seize Coruscant from Imperial rule.[8] The New Republic realized the importance of Coruscant as "000" in galactic charts, the center of the galaxy. To control the galaxy, one needed to control its capital. The New Republic decided to capture the planet in order to eliminate the Empire and began capturing strategic worlds near Coruscant, including Borleias.
However, Coruscant was protected by a powerful energy shield. Before the attack would begin, the shields would have to fall. So, Wedge Antilles and Rogue Squadron were sent undercover into Imperial City to sabotage the shield generator. Sixteen of the galaxy's worst criminals were also freed from the prison colony of Kessel and loosed on Imperial City so that they could create trouble. The government would later regret this, since these criminals would later resurrect Black Sun. These criminals included former Moff Fliry Vorru and gangster Zekka Thyne.
Meanwhile, Rogue Squadron decided that if they could condense a large amount of water and create a super storm, they could destroy the energy shield protecting Coruscant with lightning strikes. So, the Rogue operatives hijacked a Construction droid to take them to the command building. There, they took remote control of one of the orbiting solar mirrors. The tightly focused light beam from the solar mirror rapidly boiled one of the planet's reservoirs. This caused a huge storm and the shields soon collapsed.
With the shields down, a New Republic force led by Admiral Ackbar entered the Coruscant system. This task force easily overwhelmed the Imperial force, since Ysanne Isard kept only a few Imperial-class Star Destroyers to defend the capital world. Very soon, Coruscant was in the hands of the New Republic. However, Isard was not to be found in the Imperial Palace. Worse, the planet's alien population was being killed by an artificial virus called the Krytos virus. The virus was Isard's final attempt to undermine the Human leadership of the New Republic.
Post-Coruscant
Though the New Republic had taken Coruscant, the Empire was not finished. Many Imperial leaders became independent warlords; even Isard fled to Thyferra to continue her struggle with the New Republic.
Bacta War
Ysanne Isard managed to escape Coruscant after the New Republic managed to capture it. On Thyferra, the bacta-manufacturing world, Isard supported a coup and was elected Head of State of that organization. Rogue Squadron resigned from the new Republic fleet. Rogue Squadron made it their goal to capture Isard and destroy her Super Star Destroyer Rogue Squadron attacked Thyferra and managed to beat most of her forces. Isard was believed killed when her escape shuttle was destroyed. She engineered the incident to cover her tracks. She spent the next few years in hiding and putting herself together mentally and she would not strike again until the Thrawn campaign.[28]
Warlordism
After the Bacta War the Imperial Warlord Zsinj fought against the New Republic with his empire in the Outer Rim. Zsinj was one of the most powerful warlords in the history of the Empire. On a Mon Calamari ship Han Solo probed the borders of Zsinj's empire. In a attempt to destroy Zsinj, the New Republic made a loose alliance with the Empire. Zsinj had obtained an orbital nightcloak, a string of satellites that absorbed all visible light. During the Battle of Dathomir the New Republic won and Zsinj was killed by Han Solo. With Zsinj defeated at the Battle of Dathomir, the grateful planet quickly joined the New Republic. Shortly thereafter, Leia married Han Solo. Prince Isolder took a Dathomir native, Teneniel Djo, as his wife, but he still entered into a limited alliance with the New Republic.
Though his reign lasted a mere four years, Zsinj's death had widespread repercussions. The greatest single threat to the New Republic was eliminated, but Zsinj's death also left the Empire free to return their focus to the New Republic. Even worse, Zsinj's forces remained active, but lacked direction. Much of his fleet was claimed by a number of independent warlords, most notably Teradoc.
In the fighting that followed, the New Republic lost a significant portion of their military forces. Crynyd, Rebel Dream, and other Star Destroyers were either destroyed or recaptured by the Empire. The New Republic took Kuat, but the yards were heavily damaged and rife with Imperial partisans. Further, the New Republic lost the core KDY design team when they leapt to the Deep Core with the half-completed Eclipse. Eventually, Rogriss and the Imperial forces began to back down from fighting the New Republic, and Teradoc and other warlords retreated into their pocket empires.
Within a year from Zsinj's defeat, the galactic situation was more stable, with the New Republic in control of three-quarters of the known galaxy. The stage was set for the next great conflict, and the reemergence of the last Grand Admiral.
Picking up the pieces
The sudden defeat of Zsinj's domain meant that the New Republic was free to seize the late warlord's territories. The coalition of Imperial advisers that had supplanted Isard had worked just as furiously as the New Republic to destroy Zsinj however, and hostilities between the two factions recomeenced. Making the first move, Admiral Teren Rogriss and other Imperial commanders moved to take control of Zsinj's territories and oppose the New Republic's own attempts. A fleet under Admiral Ackbar confronted Rogriss's fleet, but ran directly into a third fleet: that of Warlord Teradoc, self-proclaimed High Admiral of the Mid Rim. During the relentless battles the Empire and the New Republic had suffered appalling fleet losses. With the Kuat shipyards almost completely destroyed by KDY itself, both sides were forced to either capture each other's ships or rely on lesser, overstreched shipyards. Given the scale of the fighting and the Empire's ever increasing fragmentation, a speedy recovery was unlikely any time soon.
The Thrawn Campaign
- "Let's remind the Rebellion what war is all about."
- ―Grand Admiral Thrawn
In 9 ABY, approximately two years after the capture of Coruscant, reports started to reach the New Republic of a Grand Admiral commanding the Imperial fleet. This man was Mitth'raw'nuruodo, a Chiss better known by his core name, Thrawn. Returning from the Unknown Regions, Thrawn had taken control of the Galactic Empire, and started a new campaign against the New Republic.
Thrawn's plan to defeat the Republic needed three things—the locations of which were provided by a raid on the library world of Obroa-skai. The raid gave Thrawn the location of Wayland, a trophy planet for Palpatine. Arriving on Wayland, Thrawn was confronted by Joruus C'baoth, a clone of the Jedi Master Jorus C'baoth. Thrawn persuaded C'baoth to help him by promising C'baoth the Force-sensitive Skywalker twins, along with Leia's soon-to-be-born twins.
Thrawn's first strike against the Republic were the shipyards at Sluis Van. Using stolen mole miners cloaked using a cloaking shield found at Wayland, Thrawn attempted to steal the capital ships in drydock. He was prevented by the timely intervention of Lando Calrissian and Luke Skywalker. Thrawn, however, planned for his loss at Sluis Van. Through Imperial Intelligence, he planted data that incriminated Admiral Ackbar, leading to Ackbar's removal from command. This led his political rival, Borsk Fey'lya to take control of the government, polarizing the Senate and stalling a large-scale response to Grand Admiral Thrawn.
Meanwhile, Noghri Commando teams were ordered by Grand Admiral Thrawn to capture Leia Organa Solo. A failed raid on Kashyyyk led to the capture of one of the Noghri, who identified Leia as the heir of Darth Vader. After traveling to Honoghr, the Noghri homeworld, she exposed the Imperial attempts to keep the planet environmentally damaged, leading the Noghri to become supporters of the New Republic.
Thrawn's campaign intensifies
- "None of you needs to be reminded that in the past few weeks our war against the remnants of the Empire has changed from what was once called a mopping-up exercise to a battle for our very survival."
- ―Admiral Gial Ackbar
With the government stalled and polarized, Luke Skywalker and Han Solo led an unofficial mission to capture the long-lost Katana fleet. During the search, Solo and Calrissian met with the former Rebel leader Garm Bel Iblis. When the location of the Katana fleet was found, a small Republic force was sent to capture it. They met an Imperial force which had already taken the majority of the Dreadnoughts. However, with the help of Bel Iblis and Talon Karrde, the Republic force managed to escape. The battle, however, revealed the source of Thrawn's forces.
On Wayland, Thrawn found an array of Spaarti cloning cylinders taken from Cartao during the Clone Wars. Using Force-blocking ysalamiri from Myrkr, Thrawn was able to create a new clone in a matter of days. The revelation that Thrawn was using a clone army changed the Republic's first priority in the war - find Thrawn's cloning facility.


The New Republic was unable to mount such a mission, however. Thrawn's continued attacks on Republic worlds, such as the agricultural world of Ukio and the base at Ord Pardron, kept their fleets busy. These strikes culminated in a space battle over the New Republic capital, Coruscant. Using cloaked asteroids, Thrawn effectively kept the city-world under siege, thus crippling the New Republic. The New Republic organized a plan to end the siege—the capture of a CGT array in the Imperial shipyard of Bilbringi.
Meanwhile, the search for the source of the clone army was held by Luke Skywalker. He found help in Talon Karrde, who organized the Smuggler's Alliance to help track down the source. The information didn't come from the work of Skywalker or Karrde, but from the knowledge of Mara Jade, former Emperor's Hand. When the location of Wayland was discovered, Luke Skywalker, Han Solo, Lando Calrissian and Mara Jade led an expedition that ended with the destruction of the cloning center and the defeat of Joruus C'baoth.
The Battle of Bilbringi started badly for the Republic, with Interdictor cruisers pulling the Republic forces out of hyperspace. Help arrived in the Smuggler's Alliance, who aided the New Republic in the battle. Republic forces had just breached the shipyard when Grand Admiral Thrawn was killed by his Noghri bodyguard, Rukh. Captain Pellaeon, once again leader of the Imperial forces, ordered his second retreat.
Isard's return
- "But…. It was so artistically done."
- ―Grand Admiral Thrawn's last words
After the death of Thrawn the New Republic Provisional Council decided to make a quick move against local warlords to show that they had not been as hamstrung by the Grand Admiral as might have appeared. Delak Krennel was chosen due to his murder of Grand Vizier Sate Pestage several years earlier, and had continued to support his reign by bloody purges and repressing non-humans. The choice was seen as controversial by many, as Krennel had been relatively quiet since his rise to power and had not attempted to move outside the Hegemony. Aided by Ysanne Isard's clone, Krennel had helped this image by speaking out against superweapons, apologizing for the destruction of Alderaan, admitting the Empire had committed many wrong acts, and offering a refuge to Humans displaced by the New Republic's policies of reversing Imperial High Human Culture. As the policy continued, they were approached or had been approached by a number of refugee groups and other former Imperials, including Alderaanian refugees. They also had sent word to Gilad Pellaeon about bringing Thrawn's fleet into the Hegemony. However, the tide began to turn against them after the discovery of the plans for the Pulsar Station, a Death Star-like superweapon. In reality, the plans were false and had been planted by the real Ysanne Isard, who helped a New Republic force led by Rogue Squadron liberate the Hegemony and kill Krennel.
Imperial Civil War

The resurrected Emperor Palpatine
In 10 ABY, the surviving Imperial warlords, encouraged by what Grand Admiral Thrawn had so recently accomplished with so little and in such a short time, agreed to organize under the Imperial Ruling Council for an offensive thrust into the Galactic Core. The New Republic could not match the military might of the re-unified Empire and after a short, decisive campaign the Empire had retaken the former Imperial Center in the Fourth Battle of Coruscant.[30]
Having taken Coruscant, the Ruling Council decided the time had come to elect a new Galactic Emperor for whom they would serve as a new Imperial Senate. The governors, Moffs, and Grand Moffs agreed but with the requirement that they too would be granted seats in the Senate and that their votes would be weighted for the number of worlds they controlled. The Councilors, however, refused as this would in effect decentralize power and share it among local rulers. Matters quickly fell apart.
The Imperial military sought to take power itself but a split between the Army and the Navy occurred. The latter insisted that it alone could choose a new Supreme Commander. Then the bureaucrats and COMPNOR attempted a coup, claiming that any change to the New Order would invalidate the Empire's existence. The ISB and Imperial Intelligence, in turn, embarked on a campaign of assassinations against each other. The Dark Side Adepts alone kept out of this inter-factional maneuvering.
An armed conflict soon broke out amongst the various Imperial factions on Coruscant. It laid much of the planet to waste and ended only when the reborn Emperor Palpatine declared his return several months later. While most of the rank-and-file returned to loyal service, few of the warlords did likewise. Most instead chose to flee for their lives as the Emperor was not expected to take kindly to their usurping of his throne. The New Republic involved itself by stirring up regional hatred with attacks using captured Imperial starships on rival factions.[30]
An old enemy returns
- "You've grown very strong in the Force since we last met…. but then, so have I!"
- ―Palpatine to Luke Skywalker
The defeat of Thrawn would not be the end of Imperial incursions into New Republic territories. Emboldened by Thrawn's victories, Imperial forces attacked Coruscant in 10 ABY, ousting the New Republic from its capital. However, infighting amongst the different Imperial factions led to an Imperial Civil War, while the New Republic sent its soldiers on covert missions there. It was on one of these missions that Luke Skywalker was swept up in a powerful Force storm, which brought him to the Deep Core world of Byss. It was there where Skywalker met the man whose demise led to the Rebellion's victory at Endor—a resurrected Emperor Palpatine.[30]
A resurgent Empire
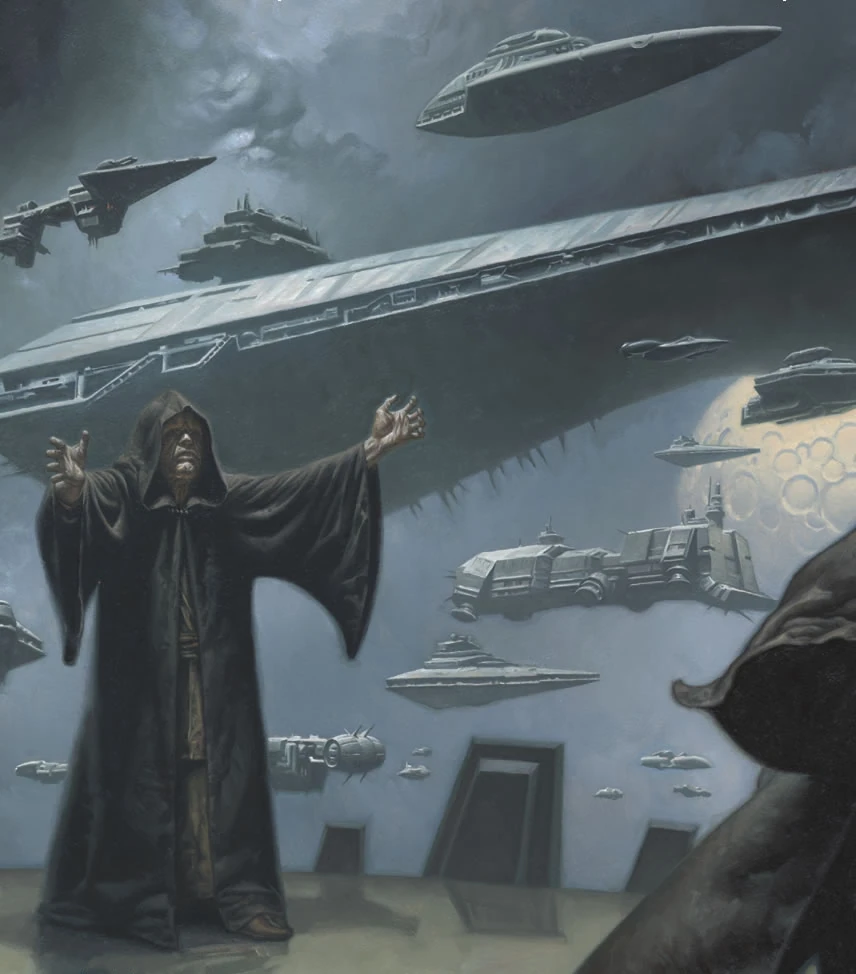

The reborn Palpatine with his fleet.
Faced with a resurrected Emperor, Skywalker decided to do what many had tried in the past—to destroy the dark side from within. He agreed to become the Supreme Commander of the Imperial Fleet, and lead the new attack on the Republic. Using new weaponry, such as the World Devastators and the Eclipse-class Star Dreadnought, the Empire attacked the temporary Republic capital-world of Dac. Skywalker attempted to sabotage the Imperial war effort from his position as Supreme Commander, but was foiled quietly by Palpatine. Soon, Skywalker found himself unable to free himself from the grasp of the Emperor. It was only with the help of his sister, Leia Organa Solo, that Luke Skywalker managed to free himself over the moon of Da Soocha V. The Skywalker twins then defeated the Emperor, turning the Emperor's Force storm against himself, destroying both him and his flagship, the Eclipse.[30]
Operation Shadow Hand
- "They will return to Pinnacle Base and boast to their friends…. They have, at best, a few hours to celebrate before they all die! It is time to show the Rebel Alliance its day is ended! Prepare to fire the Galaxy Weapon!"
- ―Emperor Palpatine
Although Luke Skywalker was once again working with the New Republic, Palpatine was reborn in another clone body in 11 ABY. Imperial forces under the command of Executor Sedriss, a Dark Side Adept, invaded the planet of Balmorra, an important Imperial factory world sympathetic with the Republic. This battle was fought to a stalemate, and persuading the Governor of Balmorra to aid the New Republic, if only in secret. Sedriss also invaded the planet of Ossus, but was beaten by the indigenous Ysanna aided by Luke Skywalker and Kam Solusar. Sedriss himself was killed by the Neti Ood Bnar, who had survived in his tree-like form since the time of Exar Kun.
In response to the near-continuous attacks by the Empire, the New Republic devised a counterattack on the Emperor's throne world of Byss. Using X-1 Viper Droids given to them by the Governor of Balmorra, they would attack the Emperor's Citadel. The battle on the planet started well for the Republic, with the Vipers destroying almost all Imperial opposition. Only the arrival of Rancors mutated by Sith alchemy turned the tide of the battle against the Republic. The surviving Republic forces were quickly extracted off-planet by smugglers friendly to the Republic.
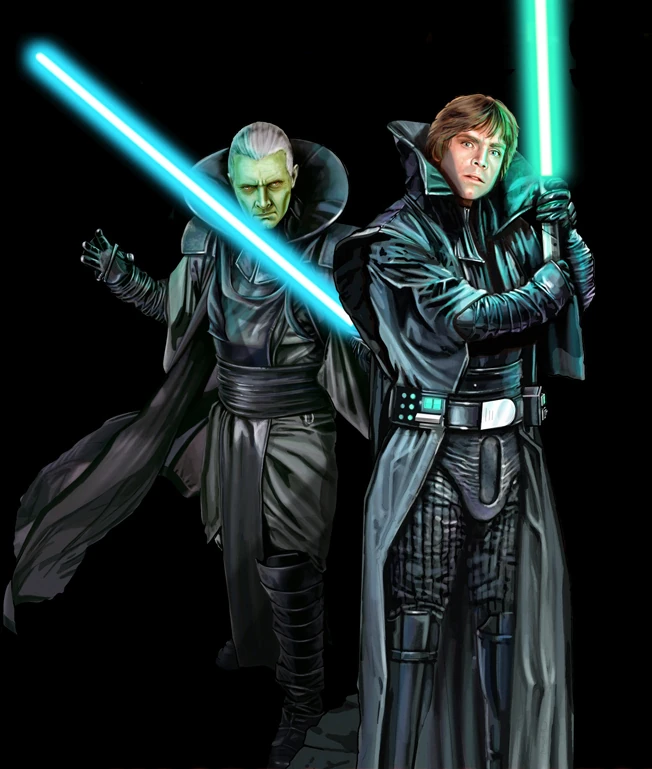

Luke Skywalker serving the reborn Emperor Palpatine as Supreme Commander of the Imperial Fleet.
In retaliation for this Rebel attack, Palpatine unleashed his newest superweapon, the Galaxy Gun. Capable of firing hyperspace-capable missiles that were capable of destroying an entire planet, Palpatine used the Galaxy Gun to destroy Da Soocha V.
Palpatine's final defeat
- "You see, my friend, flesh does not easily support this great power."
- ―Emperor Palpatine
With the new Galaxy Gun, Palpatine was able to force many more planets to submit to Imperial Rule. Yet despite his growing Empire, Palpatine's power in the dark side was slowly causing his clone bodies to degenerate. Also, the genetic material to make his clone bodies was being tampered with by a traitorous Royal Guard named Carnor Jax, who wished to become Emperor in Palpatine's stead. Faced with this situation, Palpatine traveled to Korriban to consult the spirits of the Sith Lords there, who advised him to enter the body of Leia Organa Solo's newest son, Anakin.
Palpatine brought his newest flagship, Eclipse II to the planet of Onderon to capture Anakin Solo. When the flagship engaged New Republic forces over Onderon, a team of Jedi led by Luke Skywalker boarded the ship to find the Emperor, but were too late, as the Emperor had already traveled to the surface of the planet to find Anakin. However, Lando Calrissian and R2-D2 had hijacked the hyperspace controls for the flagship, and sent it to the same co-ordinates as the Galaxy Gun over Byss. When the Eclipse II left hyperspace, the two superweapons collided, and the Galaxy Gun's final missile was pulled into Byss by the planet's own gravity, leading to its destruction.[30]
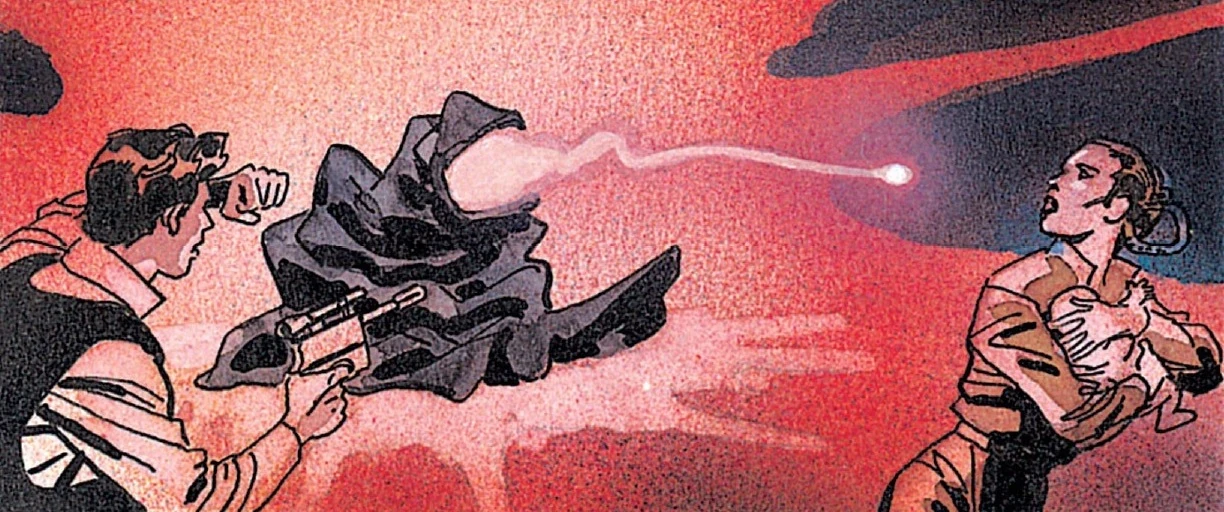

Palpatine tries to enter the body of Anakin Solo.
On the surface of Onderon, Palpatine battled with Leia Organa Solo over her son, Anakin. The arrival of Luke Skywalker with two other Jedi, Rayf Ysanna and Empatojayos Brand, eased Leia's burden, but Palpatine continued to better the Jedi, mortally wounding Ysanna and Brand. Palpatine was not defeated by either of the Skywalker twins however, but by Han Solo, who shot Palpatine in the back. Still, it was not over for Palpatine. As his last clone body died, his spirit flew towards Anakin Solo's body. However, the fatally-wounded Empatojayos Brand jumped in front of Anakin, shielding him from Palpatine. As Brand became one with the Force, he dragged down Palpatine's spirit with him into the depths of the Force. Palpatine, leader of the Empire, Dark Lord of the Sith, and scourge of the galaxy, was finally dead.[30]
Post-Palpatine
After the death of Palpatine, the Warlords and high Imperial Officers began to fight each other again. An Imperial Interim Ruling Council was set up to keep the Empire intact, but it didn't do any good. Indeed, treachery, intrigue, and vengeance would keep the Empire in perpetual civil war until 12 ABY.
Revenge of the Guard and the Council of Blood
With the destruction of Byss, and the final death of Palpatine, a temporary ruling council had been formed to keep the Empire intact. One of Palpatine's Imperial Royal Guards, Carnor Jax, who used funds from the Council in order to bribe some of the Emperor's physicians to tamper with Palpatine's clones, proclaimed himself ruler of the Empire and head of the Council. In order to keep his rule he ordered his stormtroopers to kill all remaining members of the Royal Guards. One guard managed to escape: Kir Kanos. Carnor Jax used all his strength and resources to find Kanos. On the planet Yinchorr, Jax managed to find Kanos. When they met, the former men of Palpatine's Royal Guard began to duel. Kanos won, killing Jax, and removed his helmet, saying he was not fit to wear it.[74]
After the battle Kanos was on the move again, as Black Sun was trying to sabotage the Council. A member of the council, Xandel Carivus, decided to disband the council and rule as Emperor alone. Baron D'Asta, a pro-Imperial business leader, attacked the Council headquarters on Ord Cantrell, forcing "Emperor" Carivus to sue for peace. He was soon killed by Kanos. When the Imperial Ruling Council was eliminated by Kir Kanos, the Warlords formed allegiances with several Deep Core planets and carved fiefdoms there.[75] The New Republic left most of the Imperial fortress worlds alone, believing that a lack of trade would force their surrender.
Reunification
A few days after the death of Carnor Jax, the Empire was once again in civil war. But one person did not stand for it; Admiral Daala asked for all the Imperial Warlords to meet at Tsoss Beacon. However they would not agree about anything so she executed all the Warlords and made herself Supreme Commander of the Empire. Following the warlords' deaths, Daala took command of their forces, consolidating fleets of Victory-class and Imperial-class Star Destroyers, Skipray Blastboats, and even a single Executor-class Star Dreadnought, Knight Hammer, taken from "Superior General" Delvardus. Additionally, Daala instituted societal reforms in the Imperial military, ending decades of oppression against women and non-humans.[47]
Second Battle of Mon Calamari
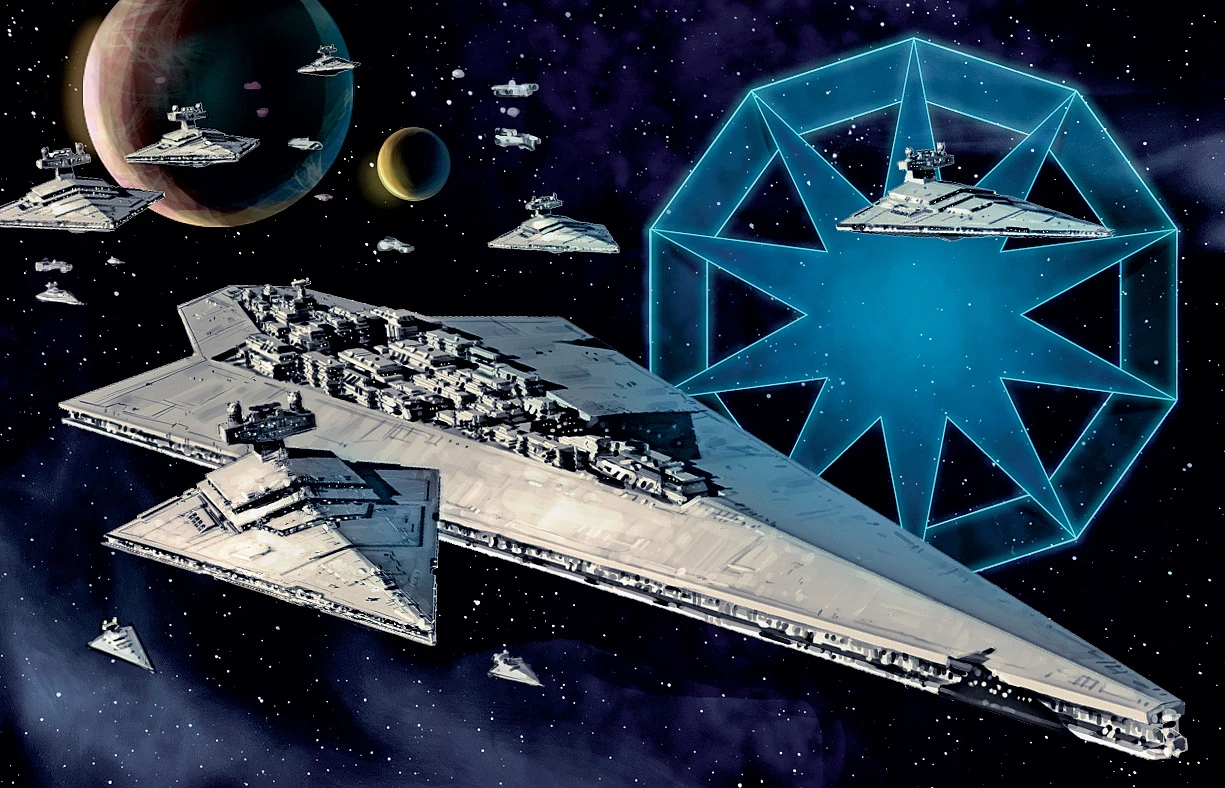

The Reaper as part of the Imperial fleet
In order to weaken the New Republic, Admiral Daala launched an attack on Dac. The Imperial entered out of hyperspace, and her fleet caught the Mon Calamari defenses off guard. TIE Bombers were dispatched to bombard the planet. However, the Mon Calamari retaliated when Admiral Ackbar's leadership resulted in the destruction of one of Daala's Imperial-class Star Destroyers, the Manticore. Daala, angered at the loss of a starship, pressed the attack, committing her TIE Fighters to close range strafing attacks. When a New Republic fleet responded to the Mon Calamari distress call, Daala recalled her forces and fled the system.
Battle of the Jedi Praxeum
In order to defeat the New Republic Admiral Daala decided to attack the Jedi Praxeum in order to get rid of the Jedi once and for all. Prior to the battle, Kyp Durron and Dorsk 81 arrived back at the Praxeum to warn of Daala's assault fleet. They hardly had time to warn them, as within moments, Pellaeon had arrived with a fleet of 17 Star Destroyers with orders to destroy the Praxeum. Daala was only hours behind the vanguard fleet in her mighty jet-black Super Star Destroyer Knight Hammer. Despite Luke Skywalker being absent, the Jedi Knights defended against the larger enemy force valiantly. Kyp, Dorsk 81, Kam Solusar, Tionne, and the many other Jedi trainees would fight individual battles with the Imperial forces. However, they realized that they could not hold out forever against such a massive force. Having gathered for a last stand at the Great Temple, Dorsk 81 suggested to his fellow Jedi that they combine their Force powers similar to what they had done with the spirit of the vile Dark Lord Exar Kun. The Jedi Knight Callista Ming set off charges on Admiral Daala's ship, destroying several critical systems.


Having ordered an immediate mass evacuation, Daala rushed to the executive command pods to escape where she was confronted by a lightsaber-wielding Callista. Despite her useless intense exercise to regain her Force abilities, Callista's growing anger allowed her to tap into the Force again. However, it was the dark side. She could have used her regained abilities, though she loved Skywalker and had promised never to fall to the dark side. Her hope of stopping Daala met with failure, however. The Imperial incapacitated her with a stun blast, and escaped the dying Knight Hammer. The New Republic pushed back the Imperial fleet. After that Daala gave Vice Admiral Gilad Pellaeon the full rank of Admiral and made him Supreme Commander of the Empire.
Continuing war
After the Daala campaign, the Galactic Empire became the Imperial Remnant under the rule of Admiral Gilad Pellaeon. He moved most of the Imperial forces away from the Core and into the Outer and Mid Rims. A mere six months after Daala's resignation, Pellaeon, now commanding from the bridge of the Reaper, decided to campaign for the conquest of the planet of Orinda in the Mid Rim. The New Republic responded by sending a fleet under the command of General Wedge Antilles and Lusankya, but it proved too late. Though a month of fighting succeeded in pushing Pellaeon back, the campaign proved a relative success for the Empire.
The New Republic's defeat came at the Battle of Orinda where the fleet carrier Endurance was destroyed with the majority of its fighter complement on board. Soon after, a second Imperial victory came at the Battle of Gravlex Med where the Imperial forces successfully reacquired the symbolically important Star Destroyer Chimaera. After this, the battle lines along the Mid Rim would come to a stalemate as both sides fortified their acquisitions. Soon all of the Imperial Remnant fortune was about to change when the Empire Reborn Campaign started.
Strike on the Jedi Academy
In 12 ABY, New Republic mercenary Kyle Katarn and his Partner Jan Ors picked up an Imperial transmission from Kejim and went to investigate. What they found were Artusian crystals—Force-sensitive objects. These crystals came from the planet Artus Prime. Kyle Katarn freed the prisoners there, but Jan Ors was captured by a Chistori named Desann. Kyle Katarn went back to the Valley of the Jedi and got back his Force powers. While on Bespin he fought Desann's apprentice Tavion Axmis. He defeated her and went on a transport to the Carin Installation. While there, he found out that the Imperial Remnant was going to attack Yavin IV. The assault was to be launched from the Reborn's flagship, Doomgiver, showering hundreds of assault ships onto the moon. Each assault ship was to contain troops and AT-STs. However, the assault turned into an unmitigated disaster. Kyle Katarn had managed to infiltrate the ship just before it set out from Cairn Installation. During the hyperspace leap, he confronted Galak Fyyar, who was armored in a unique shielded-suit, and killed him. Coming out of hyperspace, he rescued his partner Jan Ors, and alerted Rogue Squadron to the ship's location. Bringing down the shields, he enabled the elite fighter squadron to destroy the ship, including many of the full but undeployed assault ships. This drastically cut the invasion force of the Empire Reborn.
Those Reborn already on the jungle moon, were soon outclassed by the more heavily trained Jedi. Escaping from the Doomgiver, Kyle finally caught up to Desann in the heart of the Great Temple. Despite mutual attempts to turn their opponent, a duel ensued. With both combatants empowered by the Valley of the Jedi, they were closely matched but Katarn finally prevailed, killing Desann. This dramatic entry into galactic affairs, envisaged by Imperial Procurator of Justice Lord Hethrir and his cohorts, was in ruin. But even with his two main lieutenants killed, Hethrir was not prepared to give up on his dream; he would just have to resort to more drastic and radical plans.[76]
The Power of Waru
After the Reborn plan failed, Lord Hethrir decided to kidnap Han and Leia Solo's children. Han and Luke Skywalker were on Crseih investigating the reports of strange happens there. After the Solo children were kidnapped, Leia along Chewbacca were able to track Hethrir through the Force. They discovered a cluster of twenty-four sleeper ships, including one containing the Jedi Healer Rillao, the former mate of Hethrir. She, along with many other Firrerreo had been imprisoned on the ship in a web-like torture device by Hethrir five years earlier as a sign of loyalty to the Emperor. Joining Leia and Chewbacca, Rillao led them to the Indexers of Chalcedon; a rival in the slave trade to Hethrir's own Asylum Station.[36]
Rillao revealed that Hethrir had stolen their son Tigris from her, hoping that he would succeed Hethrir as leader of his Empire Reborn. Upon realizing Tigris had no Force-potential, Hethrir had not even revealed his parentage to the boy, but kept him around as his personal servant. Also on Crseih Station, Han Solo and Luke Skywalker were investigating reports of a lost Jedi, leaked by con-artist and former acquaintance of Solo, Xaverri. Xaverri had been on the station for a number of years and was deeply concerned about the "healer" Waru, and wanted them to investigate. Luke, however, seemed to be taken by the strange being, his judgment and Force ability crippled by the resonance of the nearby crystallizing star. He became distrustful of Han and Xaverri and convinced he needed Waru's help and healing.[36]
Crseih Station
Arriving at the worldcraft, Leia, Chewbacca, and Rillao rescued Jacen, Jaina and the other children in the Alderaan. However they were too late to rescue Anakin as Hethrir had already departed for Crseih Station intending to relaunch the Empire Reborn and sacrifice Anakin in the temple of Waru. After following Hethrir to the Crseih Station, Leia and her party met up with Luke, Han, and Xaverri at the temple of the Waru. In a grand ceremony surrounded by all his supporters, Lord Hethrir planned to sacrifice Anakin on the altar of Waru. The newly arrived Rillao revealed to her son the truth about his father and, Tigris, realizing the infant Anakin had no choice in being “purified”, turned on Hethrir, preventing the sacrifice. Luke, effected by the nearby crystallizing star, dove into the altar in Anakin's place, forcing Han and Leia to follow. Hethrir, realizing that Luke was a better sacrifice than Anakin anyway, believed his plans were finally coming to fruition. Rillao, however, launched herself onto Hethrir in a furious attack.[36]
Inside the golden ichor of Waru, Han and Leia manage to draw Luke back, aided by the cries of the Solo children. Enraged by the missed opportunity and Hethrir's failure to fulfill his bargain, Waru consumed Hethrir instead. With Hethrir's Force power the being returned to its home dimension, presumably killing Hethrir.[36]
Finally, Hethrir's dream of a resurgent Empire would never be realized with the Imperial Remnant driven back to a paltry number of sectors in the Outer Rim Territories. It would later sign a treaty with the New Republic, the Bastion Accords, bringing to an end the long Galactic Civil War.
Final campaigns
The period that followed the collapse of the Empire Reborn movement was marked by relative peace between the Galactic Civil War's belligerents. While Admiral Pellaeon assumed control of the Imperial Remnant, the New Republic faced a string of new threats.
As the New Republic sought to expand its diplomatic and economic relations, it entered negotiations with the Duskhan League, which represented the Koornacht Cluster, which the local Yevetha seized from their Imperial taskmasters in 4 ABY. During the meetings, Viceroy Nil Spaar maniuplated New Republic politics to sow internal chaos while he initiated the xenocidal Great Purge. When confirmation reached Coruscant,Chief of State Organa Solo extended her executive powers to send New Republic forces into the Cluster. The war in the Koornacht Cluster saw the deployment of the New Republic Defense Force's Fifth Fleet, the first wholly composed of New Class vessels. Despite Yevethan home advantage, unique thrustship technology and willingness to use civilians as living shields, the New Republic defeated the Yevethan fleet, aided by a group of Imperial military personnel held hostage by the Yevetha. At the conclusion of the Battle of N'zoth, Major Sil Sorannan commanded the Imperial ships seized by his men into the Deep Core, presumably to join the Imperial Remnant.
On the heels of the Black Fleet Crisis, a pair of Dark Jedi, Kueller and Brakiss, staged the Almanian Uprising, using droid bombs to kill entire planetary populations in an attempt to seize control of the New Republic. Like the Yevethan plot before them, the Dark Jedi applied pressure to the fragmented political state of the New Republic, using Organa Solo as a wedge to drive the state apart. While their plot was foiled by a combination of Jedi and New Republic Defense Force efforts, it succeeded in driving Organa Solo from office, who resigned from her post despite surviving her second vote of no confidence.
While the New Republic rebuilt, Admirals Pellaeon and Daala, saw the bewildered New Republic as ripe for picking. They launched a string of attacks, but found the New Republic Defense Force resolute and ready to fight. Losses left the Imperial Remnant in tatters across the Deep Core and Outer Rim Territories; they were now an overlooked backwater.
Caamas Document crisis
In 19 ABY, the New Republic enlisted the aid of the smuggler Booster Terrik for the raid on Yaga Minor. Terrik's vessel, the Imperial-class Star Destroyer Errant Venture, was parked in the outer Mrisst system. Bel Iblis, together with two hundred New Republic personnel to partially refit the vessel and supplement the crew, took control of the vessel, leaving Terrik in the captain's chair. A small task force of New Republic capital ships, led by the Peregrine under Captain Tre-na, also gathered in the Mrisst system. Rogue Squadron, under the command of Wedge Antilles, was also part of the task force.
Bel Iblis' plan was for the Errant Venture to impersonate an Imperial vessel on the run from a New Republic task force. This task force, led by the Peregrine, would jump out of hyperspace soon after, engaging the base's perimeter defenses. While the Imperials were distracted, a slicer team would be sent in to the orbiting Ubiqtorate station to download the Caamas Document. If the deception was uncovered, the Errant Venture would try to hold off the Imperial forces just long enough to transmit a copy of the document to the New Republic forces in the perimeter and surrender.


The Caamas Document Crisis was the last major campaign of the Galactic Civil War.
It should be noted that the raid on Yaga Minor and Talon Karrde's mission to the Kathol Sector were not the only New Republic attempts to gain a copy of the Caamas Document. Soon after Bel Iblis left on his mission, Han Solo and Lando Calrissian were returned from a covert mission to the Imperial capital world Bastion. Unknown to Bel Iblis, the slicer Zakarisz Ghent was on board the Yaga Minor base during the battle, having infiltrated it with help from Admiral Pellaeon after Pellaeon's secret peace negotiations with Elegos A'Kla and Leia Organa Solo, and could have died had Bel Iblis been successful. Both the Bastion and Yaga Minor copies had been secretly altered under Disra and Tierce's orders, and would turn out to be useless to the New Republic. However, Luke Skywalker, Mara Jade, and R2-D2's raid on the Hand of Thrawn fortress on Nirauan would recover an unaltered copy.
Early in the Caamas Document crisis, the resurrected "Grand Admiral Thrawn" (really the con-artist Flim) sent three Imperial-class Star Destroyers to the Both system. The lead vessel was the Tyrannic under the Kuati Captain Nalgol. The Obliterator under Captain Trazzen and the Ironhand under Captain Argona were also deployed, together with a few small scout vessels in civilian disguise. All three Star Destroyers were assigned to moor themselves to a comet and lie in wait, with their cloaking devices engaged. When Imperial saboteurs caused a failure in Bothawui's planetary shields and instigated a battle between pro- and anti-Bothan forces in Bothawui orbit, they would then be ready to destroy both fleets and devastate the surface of Bothawui.
Soon, over fifty-six vessels had arrived in the Both system, either to threaten or to defend the Bothans. This number would quickly increase: by the time of the final battle, the combined pro- and anti-Bothan forces contained nearly two hundred capital ships. The New Republic only had a token force in-system to keep the two fleets apart. They were assisted by a handful of neutral vessels, including an Action II transport from Pakrik Minor commanded by Carib Devist. (Devist was a clone of the Imperial war hero Soontir Fel, and a former member of an Imperial sleeper cell, but he had recently defected to the side of the New Republic.) A larger New Republic force, commanded by General Garm Bel Iblis, was supposedly near Kothlis, but this force was really massing in the Mrisst system for the raid on Yaga Minor.
The New Republic suspected that the Imperial Remnant was manipulating these tensions. Correctly assuming that the Imperials intended to sabotage Bothawui's shields to allow the anti-Bothan forces to bombard the planet, General Garm Bel Iblis sent Wedge Antilles and Corran Horn to go undercover to investigate and forestall possible Imperial sabotage. In the city of Drev'starn, they were joined by Moranda Savich, an agent of the smuggler Talon Karrde on a similar mission. Navett's team—himself, Klif, Pensin, and Horvic—was rattled by their activities. This led to constant changes in the timetables for attack that Navett would send to Captain Nalgol via the disguised support vessels. However, Antilles and Horn were called away to join Bel Iblis' raid on Yaga Minor, and Savich was unable to contact Bothan authorities due to her criminal status.
Bastion Accords

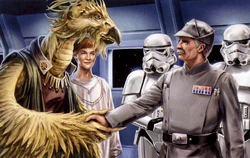
The Galactic Civil War finally ends.
- "After more than two decades, the galaxy's most devastating war ended with the muted scratch of a writing stylus."
- ―Voren Na'al
The Pellaeon–Gavrisom Treaty was the treaty of peace signed by the Imperial Remnant's Supreme Commander of the Imperial Fleet, Fleet Admiral Gilad Pellaeon, and the New Republic's Acting Chief of State, Ponc Gavrisom, in 19 ABY, marking the formal end of the Galactic Civil War.
The treaty did not outline a surrender of any sort on the side of the Imperial Remnant; it instead put forth terms that would leave what remained of the Galactic Empire intact but with an end of hostilities between the two rival parties. It additionally opened the Imperial Remnant to trade and commerce with the New Republic, and put forth limitations on smuggling for both nations to enforce. The Galactic Civil War was finally over.[25]
Legacy of the Galactic Civil War
- "Oh, it's just like old times. We're all back in harness, reprising the glory days of our youth. Myself, Princess Leia and young Skywalker, Master Fett…. and now little Lord Vader."
- ―Grand Admiral Gilad Pellaeon
The Rebels formed the New Republic after the Battle of Endor, which eventually encompassed much of the galaxy. It included a new Senate and a more powerful chief executive, the first of which was Mon Mothma. However, it was hampered by both fear of dictatorship and corruption, proving that the Galactic Civil War had not completely succeeded in its quest to restore the Old Republic, but did succeed in other areas, such as promoting democracy and restoring hope. The New Republic ended with the invasion of the alien Yuuzhan Vong, when it was reorganized into the Galactic Federation of Free Alliances, which in a way completed the original goals of the Rebel Alliance.
A more negative legacy was revealed during the time of the Second Galactic Civil War, with the establishment of the Galactic Alliance Guard, a secret police organization aimed at spying on possible Corellian subversives. Its brutal methods and hard-line views made it comparable in some respects to the Stormtrooper Corps of decades past.
The damage wrought by the Galactic Civil War, along with the further ravages of the Yuuzhan Vong War, also inspired the Sith Lord Darth Krayt into planning the eventual rise of a new Sith Empire, with himself as Emperor. Krayt believed this would prevent further destabilization of the galaxy like the one he had experienced while growing up.
Politics of the Civil War
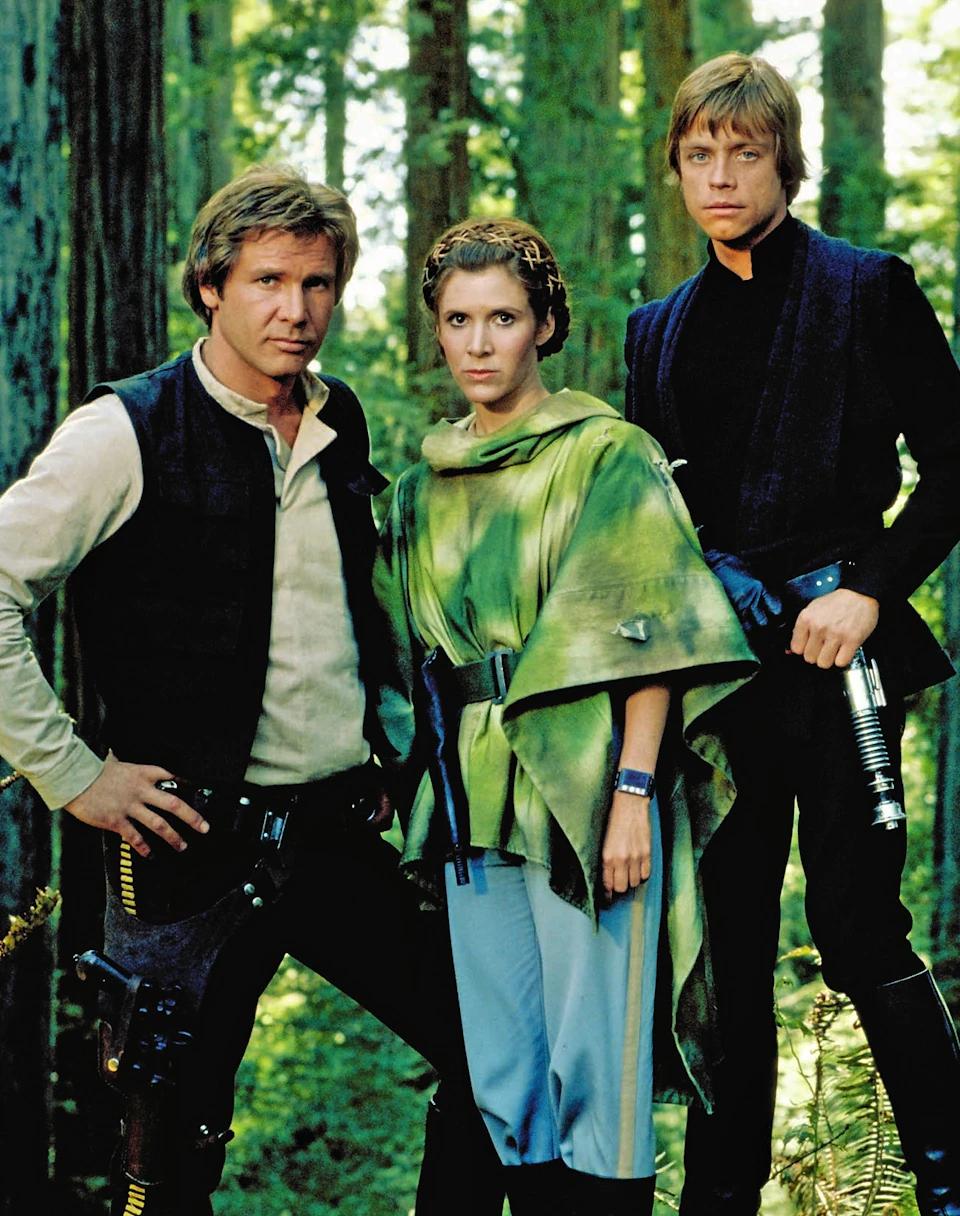

Left to right: Han Solo, Leia Organa, and Luke Skywalker, three of the most important Alliance figures.
Many different species and planets supported the Rebel Alliance's bid to overthrow the Emperor, including the Mon Calamari and Bail Organa's own home planet of Alderaan. Although early on the Rebels used positions in the Imperial Senate to gain influence and took advantage of the diplomatic immunity provided, the Senate was abolished in 0 BBY and many Rebel Senators were discovered. Mon Mothma, leader of the Rebel Alliance, barely escaped capture by the Imperial Security Bureau, the Empire's ruthless secret police force.
Unfortunately, planets could only rarely support the Rebellion openly, aside from small (usually uninhabited except by secret rebel bases) planets outside the usual scope of the Empire. Goods had to be produced secretly, either in factories built away from their usual areas or through bureaucratic trickery, although piracy was a common means of funding the Rebellion. Not until around the time of Endor and afterwards, when the Rebellion possessed enough support to challenge the Imperial Navy conventionally, could planets openly declare without fear of orbital razing or a firm put down by ruthless Stormtroopers.
The Empire continued to erode freedoms during this period, using the conflict as an excuse. Under Tarkin's suggestion, the Emperor mandated the Tarkin Doctrine, which stated that the Empire would use fear of force rather than force itself to control dissent. This culminated in the construction of the first Death Star. Its use at Alderaan was to be one of its only uses; its purpose was to demonstrate Imperial power, not to eliminate countless worlds. The Emperor also began to come under the influence of what became known as his Inner Circle. These men, including the devious Sate Pestage, eventually took control of the day-to-day operations of the Empire. Although evil enough in his own right, Palpatine allowed his bureaucracy to grow exceedingly large and corrupt under the influence of these men.
Inter-species politics
- "You refer to us as 'alien', and the Princess calls us 'nonhuman'. Why are we defined by you and in comparison to you?"
- ―Borsk Fey'lya, 7 ABY
Prejudice towards alien species was common under the Human-dominated Galactic Empire. The Inner Council practiced Human High Culture, which denied nonhumans entry into formal Imperial organizations like the government or the military. They were also often the target of exclusionary policies, perhaps as a result of the stigma surrounding the alien-based Confederacy of Independent Systems. Several pro-Human organizations like the Commission for the Protection of the Republic and its chapter SAGroup had also originated on Coruscant and other Human worlds during the Clone Wars.

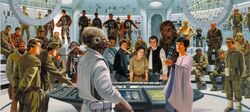
Many nonhuman species fought for the Rebel Alliance.
Other species were enslaved because of their strength or their talents. Examples of these enslaved species include the Mon Calamari, who were enslaved for their prowess in shipbuilding skills, and the Wookiees of Kashyyyk, who were enslaved for their strength and were used as laborers for various Imperial projects including the Death Star and the Maw Installation. In some cases, sentient aliens had been virtually exterminated by the Empire (infamously, the Empire occasionally used an ecological act permitting the eradication of dangerous species to justify military operations against sentient species).
The discrimination against nonhumans encouraged many species to join the Rebel Alliance. Many of the Rebel's strongest supporters were of the alien species who were enslaved by the Empire including the Mon Calamari, the Wookiees and the Sullustans. Two of the Rebel Alliance's greatest heroes—Admiral Ackbar and Chewbacca—had escaped from Imperial slavery. However, the early Rebel Alliance was mostly made up of Humans, and the commanders that led the Rebels into battles against the Empire were almost always Human.
As the Rebel Alliance grew into the New Republic, more and more species became its allies. There was, however, tensions arising between the Human and alien members of the New Republic. Non-Humans were disappointed at how many of the New Republic's top government positions were given to Humans, notably Mon Mothma and Leia Organa Solo. Many began to suspect that the New Republic was practicing its own form of 'Human High Culture' while many more remembered the prejudice practiced by the Empire. Both Ysanne Isard and Warlord Zsinj tried to exploit these tensions. Ysanne Isard used the Krytos virus - a bio-engineered disease that affected only non-human species - to cause a split within the New Republic between alien species, and the immune humans. Warlord Zsinj started Project Funeral, a brainwashing scheme whose purpose was to cause distrust towards some of the New Republic's trusted non-human species, including Twi'leks, Gotals and Sullustans. However, both schemes were defeated before they achieved the desired effect. Late into the Galactic Civil War, an alien paramilitary group called the Diversity Alliance was formed, whose aim was to eliminate all Humans in the galaxy. Although their public face was as an alien-rights movement, investigation by the New Jedi Order in 24 ABY confirmed it to be otherwise, and was subsequently defeated by the New Republic.
As the Galactic Civil War moved into its final stage, many of the inter-species tensions on both sides of the conflict were loosened. The New Republic elected the Calibop Ponc Gavrisom as Interim Chief of State, the first nonhuman to fill the post. The crisis with the Diversity Alliance led to the formation of the Cooperative Council of Independent Planetary Governments—a group committed to improving relations between the various species of the New Republic. However, the biggest reform came from the Galactic Empire. When Admiral Daala took charge of the Imperial Remnant, she allowed both women and nonhumans to join the Empire's military forces, thus ending over thirty years of Human High Culture.
Timeline of battles
Behind the scenes

The Galactic Civil War has been for decades the titular Star Wars that defines the saga. Most of the fiction created in Star Wars was, for years, set during the Galactic Civil War. Even with the Expanded Universe moving into conflicts that happened after it, or long before it, it still remains the most well known plot point.
Appearances
Non-canon appearances
- "A Day in the Life" — Star Wars Tales 12
- LEGO Star Wars II: The Original Trilogy
- LEGO Star Wars: The Complete Saga
- LEGO Star Wars: The Han Solo Affair
- LEGO Star Wars: The Empire Strikes Out
- Star Wars Infinities: A New Hope
- Star Wars Infinities: The Empire Strikes Back
- Star Wars Infinities: Return of the Jedi
- Tag & Bink Are Dead
- The Return of Tag & Bink: Special Edition
- "Do or Do Not" — Star Wars Tales 15 Template:Am (Mentioned only)
Sources
Notes and references
External links
 Galactic Civil War on the SWG Wiki