| | |

Warning: This infobox is missing the following parameters: restored
The Galactic Republic Navy, also known as the Galactic Republic fleet, Clone Starfleet, or Republic starfleet, was the navy of the Republic Military of the Galactic Republic during the Clone Wars against the Confederacy of Independent Systems. Consisting of an abundance of warships of large variety, the Republic Navy served to transport the Grand Army of the Republic across the galaxy, while also engaging in ship-to-ship combat with the Confederacy navy, maintaining security for Republic supply lines, and defending the Core Worlds.
With the onset of the Clone Wars, the Galactic Republic's starship assets were absorbed into the newly created Republic Navy while also received donated ships from Republic worlds until shipyards could begin producing vessels for the Republic Navy. The Republic starfleet was part of many pivotal battles during the war, including the First Battle of Geonosis, the Malevolence campaign, the Battle of Ryloth, the Battle of Sullust, the blockade of the Quellor sector, the Battle of Coruscant, and the Outer Rim Sieges.
Following the end of the war, the execution of Order 66 and Great Jedi Purge, and the formation of the First Galactic Empire, the remnants of the Republic Navy were transformed into the Imperial Navy.
Organization
Administration
The Galactic Republic Navy was led by Republic High Command and, due to an agreement between the Jedi Order and the Supreme Chancellor, the Jedi High Council. This gave Jedi officers overall command of both naval and army units, and although it annoyed many career spacers, many were satisfied that the joint operations allowed for a clear command chain. The admiralty was also a command unit of the navy, and one of its responsibilities was providing war material for the navy.[5] The Republic Naval Intelligence was the Navy's premier intelligence agency.[7] Additionally, the Republic Navy maintained a naval corps, of which Republic officers were a part of.[6]

Vessels of the Open Circle Armada at Ringo Vinda.
The Department of Naval Procurement of the Republic Defense Procurement Office was responsible for obtaining starships, supplies, and new technology for the Republic Navy, and fell under the oversight of the Naval Subcommittee's Procurement Panel in the Galactic Senate. Since the beginning of the Clone Wars, the Procurement Panel accepted designs and contracts from several corporations including Sienar Fleet Systems, Kuat Drive Yards, Rendili StarDrive, Corellian Engineering Corporation, Subpro Corporation, Incom Corporation, and Cygnus Spaceworks, and was responsible for allocating resources and other equipment, with many projects being in the prototype stage from the start of the war,[5] including the Ascendant personal stealth flyer, although the project was scrapped with the destruction of one of the vessels above Christophsis.[14] During the war, the military of the Republic had the production output of a thousand worlds.[5] During the war by the time of the Battle of Malastare, the Republic Navy began a late-war modernization program which saw the widespread introduction of the ARC-170 starfighter, the Eta-2 interceptor, and the V-wing starfighter.[9]
For wartime efforts, the Republic Navy had three primary goals: defend the Core Worlds, maintain security for supply lines, and provide troop deployment and extraction for the Grand Army of the Republic. Due to the Republic Navy's focus on military operations rather than law enforcement, it lacked far-reaching system security capabilities allowing criminals, smugglers, crime syndicates and bounty hunters to conduct interplanetary jobs with more ease and have larger freedom.[5]
A force of clone navigation officers assisted in crewing the Navy's arsenal of warships.[2] As part of a wartime bargain between the Office of the Chancellor and the Jedi Order, a cadre of non-clone veteran officers were assigned to work alongside the newly-appointed Jedi Generals.[15]
Order of Battle
Overview

The Republic Navy defended the galactic capital during the Battle of Coruscant.
As part of the Military Creation Act, the Republic Navy was allowed to conscript the vessels and crew of Republic worlds for the war effort in the early days of the Clone Wars. As such, some Republic systems donated dreadnoughts and cruisers, although most only had small corvettes and gunships that they could offer.[5]
Regardless, these donations supplemented the Republic Navy's Consular-class space cruisers from the Judicial Forces as well as the Venator-class Star Destroyers and Acclamator-class assault ships provided by the Kaminoans.[5]
After the Battle of Geonosis, Kuat Drive Yards and Rothana Heavy Engineering combined their shipyards, which drastically increased production of capital ships and smaller vessels, allowing the Republic Navy to return borrowed ships, although the crews usually remained with the Republic Navy in the hopes for better chances of advancing their careers.[5] The Corellian Engineering Corporation also manufactured warships for the fleets of the Republic Navy.[16]
Republic Navy vessels ferried supplies and troops to perform their missions for months without logistical support. Strongly defended Republic worlds and well protected space stations such as Regalia Station served as ordnance and supply depots for the Republic Navy, and were available for resupply when needed. Privately contracted corporations that usually specialized in bulk hauling typically resupplied the Republic's space stations. When it came to transportation of supplies and cargo, caravans of small vessels were composed. For large convoys and high value shipments, a military escort was assigned, often a cruiser or support ships returning to the theater of war after finishing their reserve duty.[5]
Republic warships resupply via a Haven-class station.
Cruisers served as the backbone of the Republic Navy, although instead of indicating a specific class of starship, the Republic Navy used the term "cruiser" as an umbrella term for warships that were classified as corvettes, frigates, and cruiser-sized vessels[5] such as Star Destroyers.[17] Pelta-class frigates served as the backbone of fleet logistics and support, and served in a multitude of roles including medical transport, supply, and escort.[9]
Starfighter structure
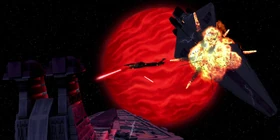
The Republic Navy worked in concert with the Republic Starfighter Corps sub-branch as it often relied on starfighter screens to defend against enemy bombers as well as to conduct patrols and reconnaissance missions, escort landing craft, and launch attacks against hostile vessels and positions. For starfighters, formations were organized into squadrons, fighter wings,[5] and flight groups,[18] and were assigned to naval formations.[19] A single Venator-class Star Destroyer carried four full fighter wings, which amassed to more than 400 starfighters. Although officially part of the Republic Navy,[5] the Starfighter Corps was seen as an independent military branch.[1] Despite this, Grand Army of the Republic ground units such as the 501st Legion jointly maintained their own starship units concurrent with the Starfighter Corps.[20] If starfighter units needed to fly in a single-file formation, they could be ordered into a Bantha formation.[21]
Fleet formations
Republic Navy forces above Coruscant's surface.
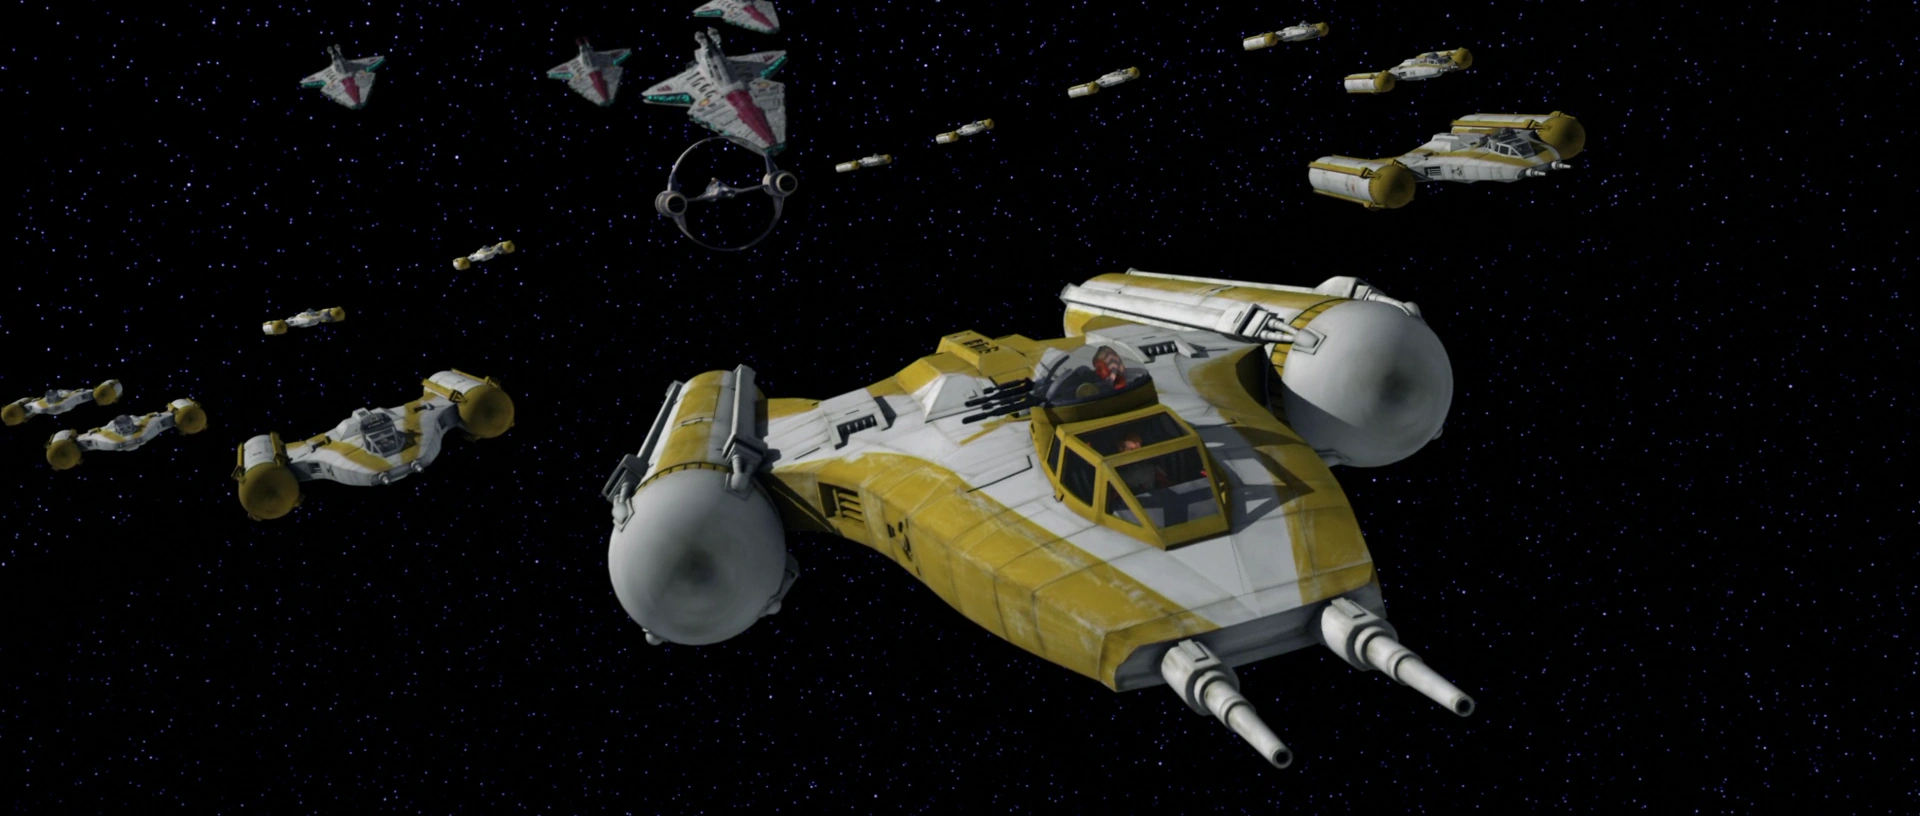
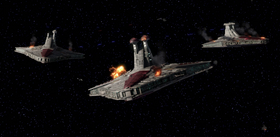
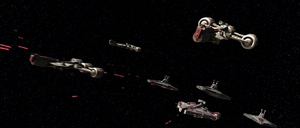
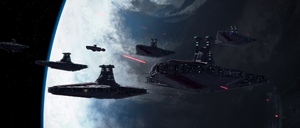
The Republic Navy was made up of twenty central fleets, such as the 2nd Fleet, each attached to a Sector Army, with six of these fleets located in the Core Worlds acting as defense and reserve. Units of these six defense and reserve fleets were often swapped out for battle-weary units that saw heavy fighting. The remaining fourteen main fleets saw heavy combat throughout the galaxy, saving the Core Worlds fleets from taking the brunt of the war, although operational and jurisdictional lines were blurred. Typically, ships deployed for six months before returning for three months to keep vessels and its crew healthy and alert, although combat rarely allowed it.[5] The Seventh Fleet was another numbered fleet within the navy.[22] Also within the Republic Navy was the Open Circle Armada, an expansive fleet of many warships and sub-units led by Jedi High Council member General Obi-Wan Kenobi,[18] which included smaller battle groups and task forces such as[8] the defensive blockade of Kamino,[23] Admiral Dao's fleet,[24] Admiral Wurtz's fleet,[2] Plo Koon's fleet,[25] and as well as his second fleet.[26] The Fifth Fleet was part of the Armada,[27] and itself contained the invasion fleet of Ryloth,[28] and Obi-Wan's fleet.[29]
The Republic Navy also deployed the Bright Nebula Fleet,[7] as well the Coruscant Home Defense Fleet,[4] a Republic fleet at Bestine IV,[30] Kit Fisto's fleet,[31] and a reserve fleet that would be entirely compromised if Anaxes fell to the Separatists,[32] Without massive fleets, the Republic would not have been able to hold back the destructive forces of the Separatist navy.[5] The Republic Navy also had sector fleets within its structure, with one such fleet being active in the Ferra sector.[33]
Task force formations

Republic Navy forces above Coruscant during the Clone Wars.
The Republic Navy was furthermore composed of task forces, sometimes referred as fleets or battle groups as well. Venator-class Star Destroyers served as the anchors of task forces. Several of these task forces were part of the Open Circle Armada, with units being Anakin Skywalker's task force,[8] Aayla Secura's task force,[34] Obi-Wan Kenobi's task force,[35] a task force dispatched to Lola Sayu,[36] and another task force that rescued General Kenobi after the destruction of his own task force.[37] Yoda's Republic taskforce was also part of the Republic Navy.[27]
Battle group formations
Battle groups,[8] also referred to as fleet groups,[18] were also included in the order of battle of the Republic Navy, with one unit being the battle group stationed at Falleen prior to its destruction[8] a group led by Jedi General Luminara Unduli,[38] and another group being led by Captain Wilhuff Tarkin and General Even Piell.[18] A fleet group that was composed of Skywalker and Kenobi's forces was active towards the end of the war.[39] Due to the Venator-class Star Destroyer's emphasized role as a carrier, carrier battle groups were formed around these ships and were considered fatal to Confederacy navy operations. With the capabilities of Venators, they were considered the backbone of the navy's carrier force.[5] An individual with the rank of captain could serve as the commander of a battle group.[18]
Convoys and caravans were employed by the Republic Navy as well,[5] with one particular convoy being active during the Malevolence campaign.[35] Flotillas were also deployed by the Republic Navy, with one such flotilla defending the construction of the DS-1 Death Star Mobile Battle Station in orbit above Geonosis. Flotillas could be led by an individual with the rank of captain.[7]
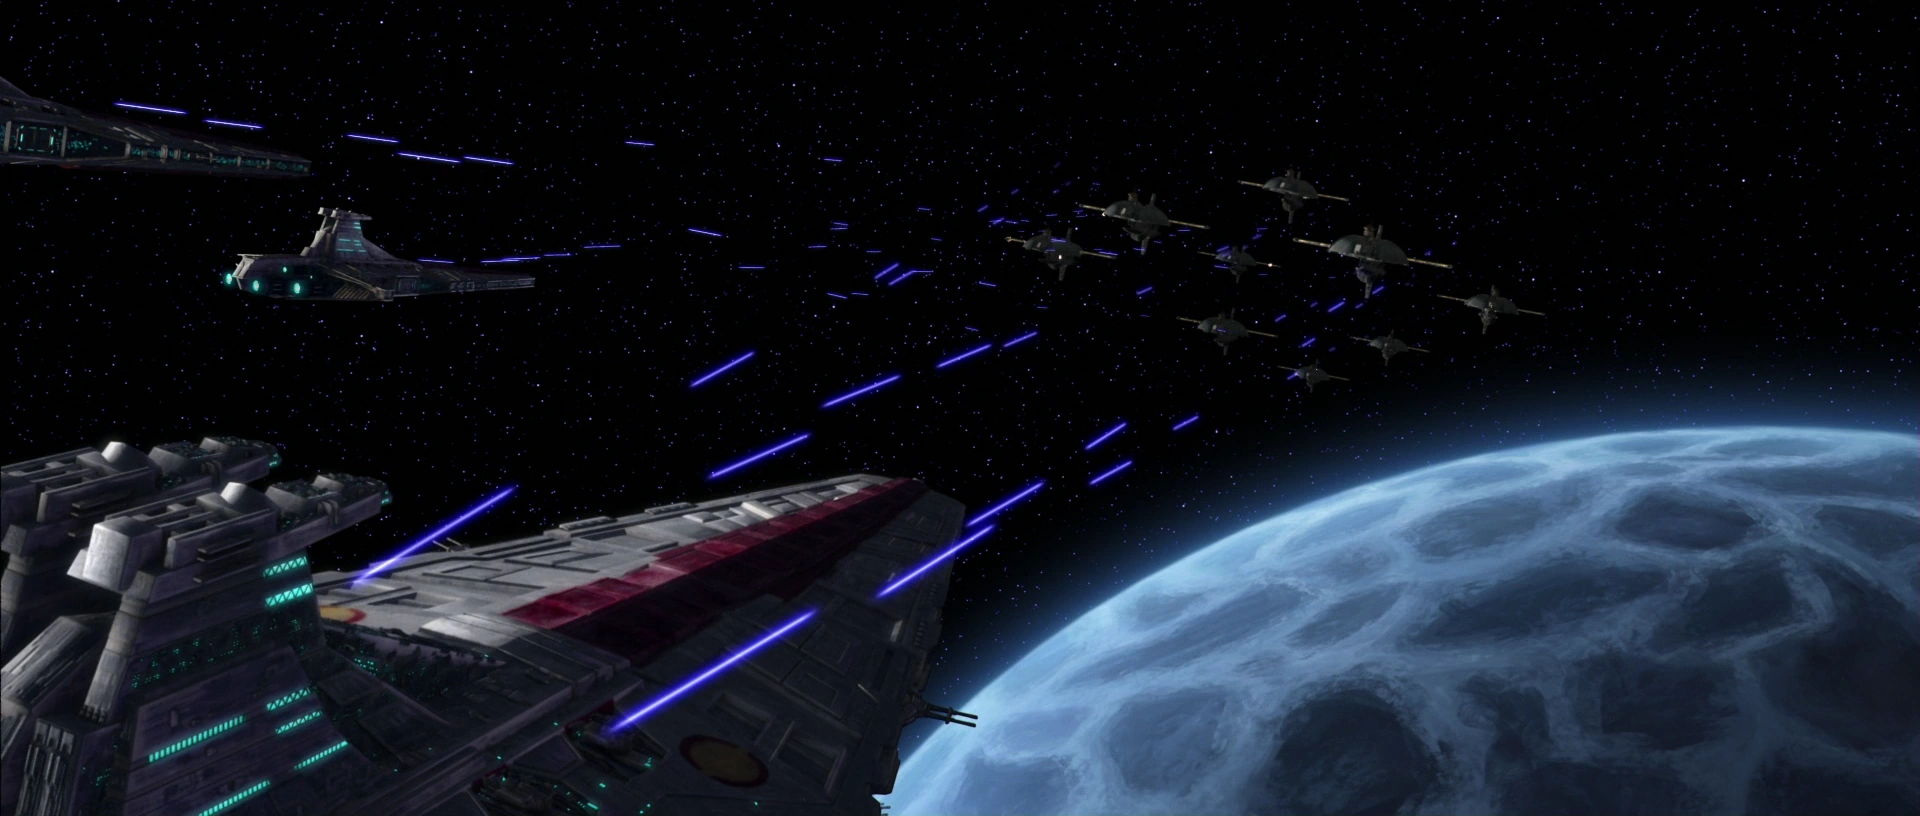
Additionally, naval squadrons were deployed by the Republic Navy, and were its fundamental combat unit. Squadrons utilized different formations during operations. Attack formation was when naval squadrons concentrated their fire on to breakthrough even the thickest defenses. Evasive maneuvers were used to juke along a wide path while maintaining a general direction, confusing target locks and manual firing. Running dark referred to when squadrons disabled transmitters, transponders, active sensors, and running lights to avoid detection. Sensor sweep was a formation used so that ships of the squadron separated in a wide area so that each vessel could scan to a unique arc to effectively sense all directions, while a screen formation was a tactic used by squadrons to arrange themselves in a tight formation in order to make full use of deflector shields and armor.[5]
Personnel
Command
- "Of all the Jedi, why did I have to end up with Skywalker?"
- ―Admiral Wullf Yularen, on Jedi General Anakin Skywalker


A Clone Wars-era Republic Naval Officer
From the onset of the Clone Wars, the Republic Navy consisted of personnel from planetary defense forces of various Republic star systems as well as members of the Judicial Forces. Because the Jedi and Galactic Senate were not experienced in conducting a war, they drew from the expertise of naval officers from the isolated planetary defense forces dispersed throughout the Republic, which resulted in a very diverse pool of military commanders with an abundance of varying skills, approaches, experiences, and skills.[5]
Despite these differences, a core trait that naval officers shared was their excellent sense of strategy and tactics. They were capable of outmaneuvering a single menacing warship as well as organizing the defense fleet of an entire star system. In due part thanks to many officers having to outwit pirates before the war, Republic Navy officers were also very familiar with hyperspace routes and were able to operate along dangerous obstacles that would trouble less experienced navigators. During the war, Republic Navy officers were a symbol to the crews they commanded, whether it was captaining a single starship or coordinating the attack of an entire armada. The successful naval officers not only ensured victory in orbital space battles, but they also paved the way for clone troopers to travel between worlds and undertake successful ground strikes.[5]
Jedi officers worked closely Republic Navy officials to lead naval units. Although a non-Jedi officer was officially outranked by a Jedi officer, the naval officer's military experience allowed them to serve more as mentors rather than subordinates, and naval strategies were often developed by both working together. Additionally, Jedi officers usually directed ground assaults or led starfighter engagements, leaving command of orbital or interplanetary forces to naval commanders.[5]
Clone navigation officers served a multitude of roles and positions within the Republic Navy. In many situations, navigation officers served as the standard bridge and control crew, operating turbolaser controls, tracking incoming transmissions,[2] capital ship pilots,[40] serving as aides to a higher ranking officer,[2] intelligence officers,[23] and additionally served as the commanding officer of light warships[41] or standard capital ships.[40]
Crews

A clone gunner aboard a Republic Navy craft.
Clone troopers were allocated and inducted into the Republic Navy to serve as crew members and security,[2] and shuttles and transports in the Republic Navy were sometimes piloted by clone trooper pilots but were just as often piloted by individuals drawn from the Judicial Department or local planetary defense forces. All in all, the Republic Navy's personnel consisted of millions of clones, droids, and other sentient beings, and was considered that the Republic thrived thanks to their professionalism and dedication to their duties.[5]
Clone trooper flight crews operated the capital ships of the Republic, as well as provide maintenance to starships[19] and assist with vehicle traffic control.[42] If needed, these flight crews also provided a line of defense for their starships when boarded by hostile forces, and effectively used personal weaponry.[43] Standard clone troopers while stationed aboard Republic Navy vessels were also assigned to stations and conduct standard crew operations.[44] Clone gunners served as the gunnery crews aboard Republic starships, and were tasked with repelling starfighter assaults.[45]
Equipment
The Republic Navy adopted the CF-9 Republic Naval Flight Suit to outfit clone pilots that operated starfighters, combat airspeeders and similar vehicles. The flight suit was an attempt to offer what the pilot needed for missions without worsening the already substantial cost of supplying fighter wings. The project was a mixed success on both objectives, but satisfied the Galactic Senate.[5] Clone pilots were equipped with survival kits which typically packed a DC-17 hand blaster.[9]
Honors

Clone troopers CT-1409 and CT-5555 are honored for their service aboard a Star Destroyer.
As with others who served in the armed forces of the Republic, members of the Republic Navy who served with distinction in theaters of combat may be nominated for awards that recognized their valor and service. Unlike the highest honors that had to be ratified by the Galactic Senate, combat medals and service insignia were granted by military commanders promptly to recognize exceptional service. Republic Seal of Service referred to a number of similar awards that were given to individuals who proved themselves exemplary of the Republic's ideals and epitome of duty and service. One such award was the Star of Coruscant.[5]
Ranks
Rank on officers, including clone navigation officers, in the Republic Navy was demonstrated by a rank insignia plaque worn on their military uniforms. The rank of Admiral was used, and had the abilities of leading entire fleets.[2] Rear Admiral was similarly used,[46] as was the rank of Commander[7] and its clone counterpart, Clone Commander. Clone Commanders in the Republic Navy were capable of commanding a Star Destroyer.[31] Captains also served in the Republic Navy, and could serve as the commanding officers of battle groups[18] and flotillas,[7] as well as individual capital ships.[47] Clone Captains served aboard capital ships, but could also command sub-capital ships such as frigates[48] and light cruisers.[49] The rank of Lieutenant was also used by the Republic Navy,[50] as was the rank of Clone Corporal.[51]
Training
The Republic Navy had several naval academies, including the Carida Academy[52] and the Prefsbelt Fleet Camp.[46] Additionally, a flight academy on Coruscant provided additional training to clone squadron commanders.[18] Young clone cadets could at times conduct tours of capital ships as part of their training and to understand how naval vessels operated. One of the activities as part of the tour included target practice with one of a Star Destroyer's manned turrets.[17]
The various starships in the Galactic Republic Navy's arsenal served as the Galactic Republic's primary force projection mechanism. At the start of the Clone Wars, the Republic Navy found itself in possession of capital ships and sub-capital ships that were many years old.[5]
Capital ships
Battlecruisers, battleships, carriers, and dreadnoughts


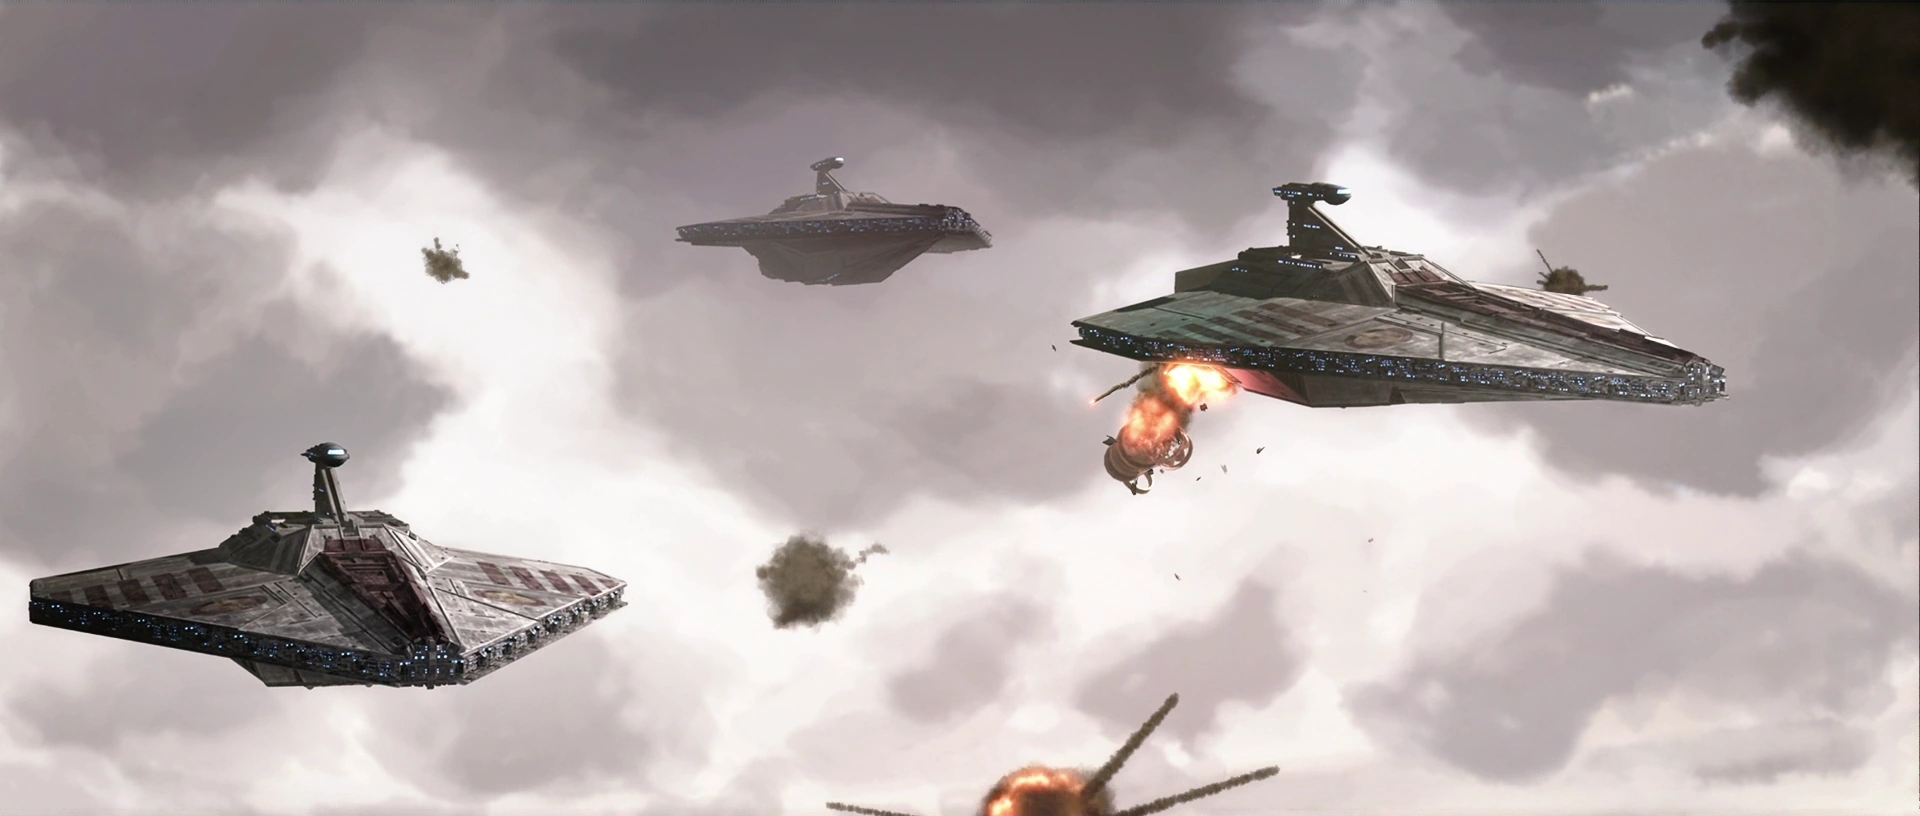
The Republic Navy on Anaxes.
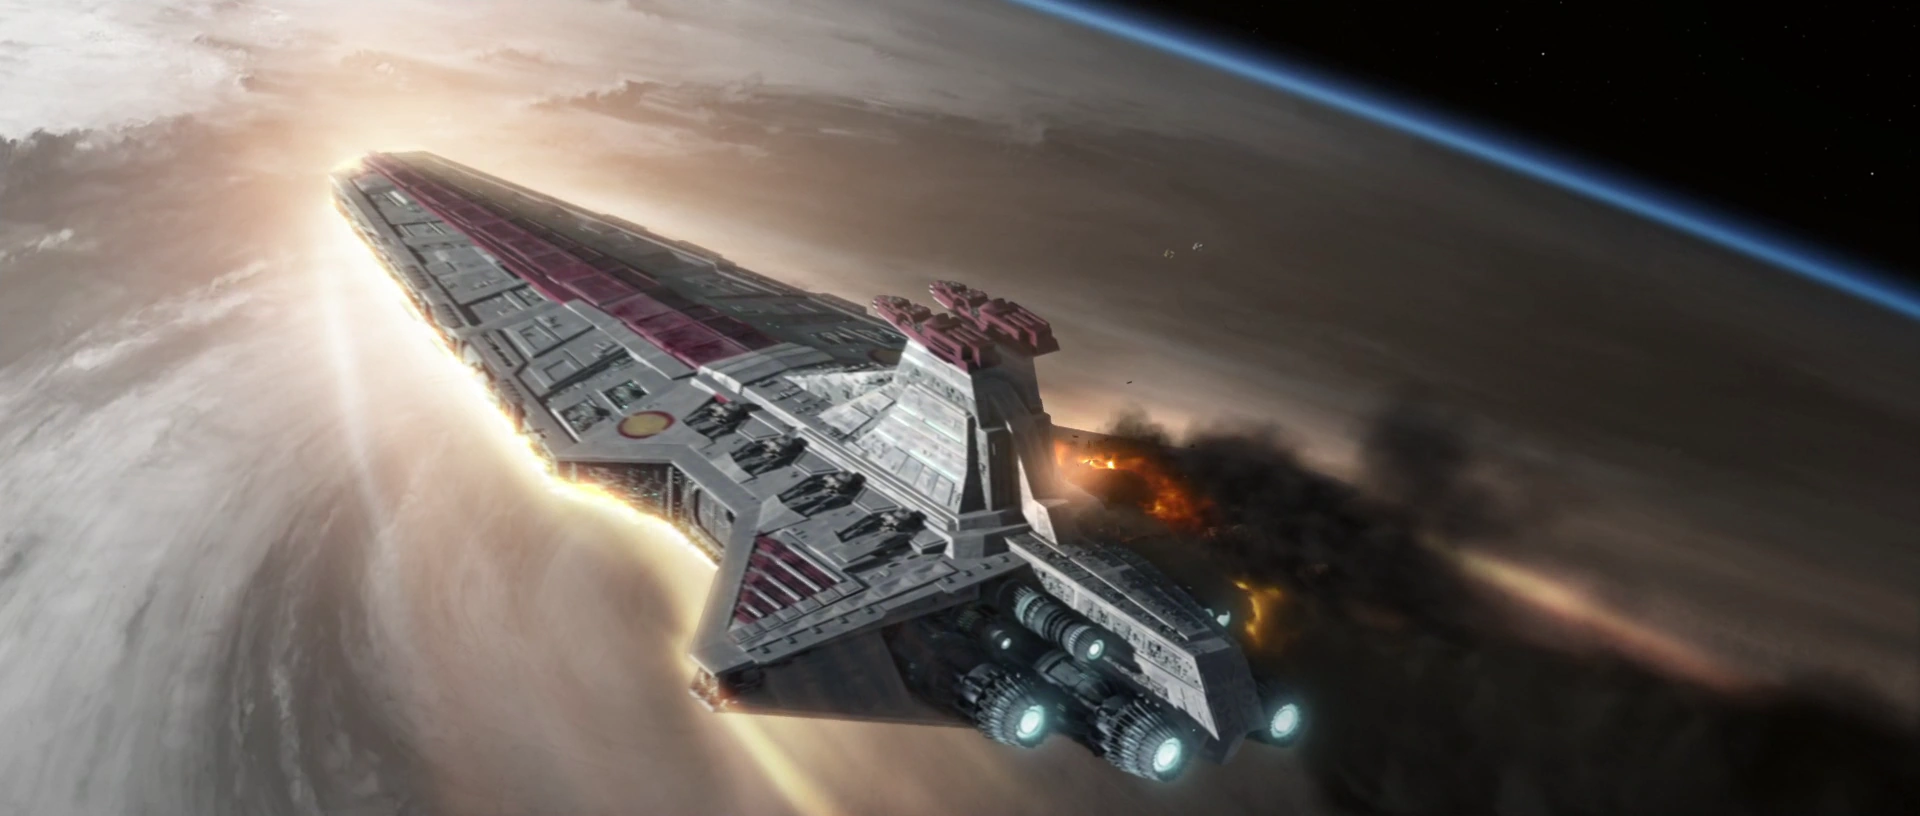
During its active history, the Galactic Republic Navy made use of several types of capital ships. Dreadnoughts served within the Republic Navy, as did several classes of carriers, battleships, and Star Destroyers.[5] Maelstrom-class battle cruisers of the proto-Star Destroyer family of ships were introduced early in the war, and at the moment of their introduction, were the largest ships within the navy.[53] Venator-class Star Destroyers assumed the role of a starfighter carrier and due to their capabilities, they were given unparalleled tactical and strategic flexibility, a trait that conformed with the Republic Navy's combat style. Dreadnoughts also served within the Republic Navy.[5]
Heavy cruisers and cruisers
Victory-class Star Destroyers were also deployed by the Republic's naval branch at the height of the war effort as an all-purpose heavy line-of-battle ship, although they were rushed into service due to delays and had many design flaws. As such, ships pertaining to the Victory-class were seen as "space coffins" by their crew members. Gladiator-class Star Destroyers were designed by Walex Blissex, although they would not see service before the end of the Clone Wars.[16]
Other starships included cruisers such as the Acclamator-class transgalactic military assault ships,[54] and the Acclamator I-class[55] and Acclamator II-class Assault Ships,[56] which were the navy's primary heavy armed transport craft. The Acclamator-class allowed for naval assets to deploy large ground units across the galaxy, providing unparalleled mobility for the Republic Navy.[9] Other cruisers also saw service in the Republic's naval branch,[5] including heavy cruisers such as the Dreadnought-class heavy cruiser, which was already in use throughout the galaxy and considered old and antiquated by the time of the Clone Wars.[16]
Sub-capital ships
Frigates
Frigates saw wide service by the Republic Navy. Pelta-class frigates were used in a wide range of roles, including as medical transports and supply ships.[5] As the workhorse of the Republic Navy's sub-capital fleet, the frigates formed the backbone of fleet logistics and filled a plethora of military roles. During the war, it was commonly stated that while the Acclamators and Venators won battles, it was the Pelta-class that was winning the war. Configurations and variants of the Pelta-class included the Pelta-class strike frigate,[9] the Pelta-class Medical Frigate,[57] and the Pelta-class Transport Frigate.[58] In addition, MedStar-class frigates were deployed by the Republic Navy to serve as hospital ships.[5]
Light cruisers

The Arquitens-class light cruiser was rushed into service.
Arquitens-class light cruisers were rushed into service and introduced during the Clone Wars, filling an all-purpose capacity in the navy. Arquitens-class light cruisers were able to escort convoys, support capital ships, serve as cruise pickets, provide protection for carriers, screen for starfighters, and serve in many different capacities that required small size and high maneuverability. Since their introduction into the navy, they were deemed as an excellent addition to the Republic Navy's inventory and were highly respected by its crews and the crews of enemy vessels. Arquitens-class cruisers also frequently served as protection for naval carrier battle groups. Charger c70 retrofitted Consular-class cruisers[5] and Consular-class Armed Cruisers[59] were born from the standard Republic Diplomatic Corps' Consular-class space cruisers when the navy required the haste need to supplement its navy in the beginning of the war. These retrofitted Consular-class cruisers served as excellent scout and picket ships during the war.[5]
Corvettes


A Republic Judiciary CR90 Corvette during the Clone Wars.
IPV-2C Stealth Corvettes were in its prototype stage in the start of the Clone Wars, but were nevertheless inducted into naval service, with one serving in the Battle of Christophsis early in the war. The IPV-2C allowed for stealth operations to conduct attack and supply missions. In the beginning of the war, Republic member worlds donated small Corellian corvettes and gunships as part of the military's conscription of vessels, though they were later returned when the navy's ship production expanded.[5]
Some of the Corellian warcraft were DP20 Gunships, which were deployed as a single-purpose ship for the Republic's fleets to counter the threat of droid starfighters and bands of pirates by CEC.[16] The Republic utilized Corellian CR90 corvettes in striking red livery from the Judicial Department and other small, swift warcraft to rapidly respond to Separatist incursions throughout the galaxy.[60] The Paladin-class corvette, although considered ancient by the time of the Clone Wars, was used by the Jedi Order for missions during the war.[61] The Marauder-class Assault Corvette produced by Republic Sienar Systems, was initially manufactured for use by the Republic Navy and envisioned as a fast patrol and escort ship, but the Republic Navy ultimately decided against using it and its production rights were sold to Corporate Sector Authority.[16]
Light craft
A G9 Rigger-class light freighter named the Twilight was also part of the naval forces of the Republic.[2] CSS-1 Corellian Star Shuttles, although aging, were used for bulk transportation and typically operated in caravans.[5] Spacetugs were also used by the Republic Navy, with two such models being the TUG-314[62] and the Republic space tug.[63] GX1 short haulers were used as military transports early in the Clone Wars.[16]
The Republic Navy utilized several types of gunships, including LAAT/i gunships, space gunships,[36] and LAAT/c assault carriers.[41] LAAT craft were crucial for insertion, resupply, and extraction missions. As such, they formed the backbone of military resupply. Nu-class transports were mostly used for cargo and personnel transfers, and was seen as a remarkable success by the Republic Navy due to its long-range capabilities and flexibility. The Nu-class could also be retrofitted with a modular cargo pod that allowed for various uses, including assuming a medical role.[5] These medical variants of the Nu-class were designated as Republic medical shuttles.[64] Nu-class transports and LAAT/i gunships were considered to be the core of the Republic Navy's smaller transport craft.[5]
Eta-class shuttles were used to transport higher valued individuals, and were originally for the Republic Ambassadorial Corps and the Galactic Senate before being pressed into service. A variant of the Eta-class was outfitted with secret weapons and stealth systems for black ops usage. T-6 shuttles were requisitioned by Jedi for missions when deemed more practical.[5] Theta-class T-2c shuttles saw use late in the Clone Wars.[3] Util-313 shuttle buses were used by the Republic, and were painted in Republic colors.[51] The Republic Navy also used escape pods, including salon pods[61] and Republic escape pods.[25] The Ascendant personal stealth flyer saw only prototype use from Sienar early during the war.[14]
Starfighters

Starfighters of the Republic Navy.
The Republic Navy deployed a variety of starfighters during its active service. V-19 Torrent starfighters were in service shortly prior to the eruption of the Clone Wars, and throughout the war quickly gained a favorable reputation.[9] By their introduction the V-19 Torrent starfighters were considered the best in the navy.[18] ARC-170 starfighters were also deployed during the war, and became the Republic Navy's premier heavy starfighter.[9] They were able to bolster the navy's presence in any battle when they were deployed.[65] Republic Clone Z-95 Headhunters[66] were introduced during the war and designed to make full use of of the physical and mental capabilities of clone pilots. Z-95s as such were the Republic Navy's primary multi-role starfighter.[5]
Cord-class starfighters were also used, as were combat airspeeders.[5] The Republic Navy also deployed a pool of bombers, with BTL-B Y-wing fighter-bombers being introduced in prominence,[5] having been activated within the navy since before the outbreak of the war and performing throughout the entire conflict.[9] Commonly used by the Republic in the Outer Rim, NTB-630 naval bombers and PTB-625 planetary bombers were jointly produced by Incom and Subpro Corporations and were notable cousins of the ARC-170 starfighter.[27]
The Republic Navy's starfighter arsenal also included a variety of interceptors from the Delta-series, including Delta-7 Aethersprite-class light interceptors[12] and Delta-7B Aethersprite-class light interceptors.[2] These were later complemented by Eta-2 Actis-class light interceptors and Alpha-3 Nimbus-class V-wing starfighters, which were both part of the navy's modernization program during the war.[9] The Alpha-3 Nimbus-class additionally had at least two sub-models, the Alpha-3B "Besh"[67] and the Alpha-3E "Esk."[68]
Space stations
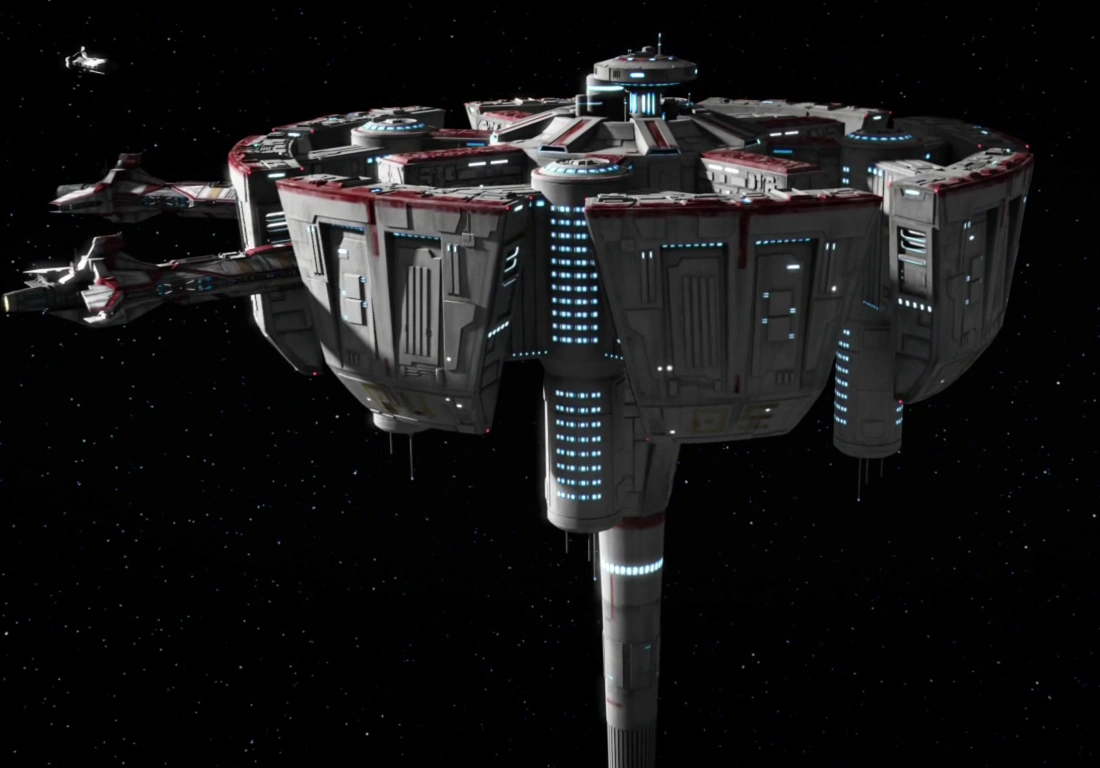
A Haven-class medical station resupplies the forces of the Republic Navy.
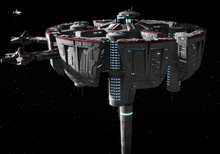
Space stations also saw commission by the naval forces of the Galactic Republic. Such stations included supply depots,[16] such as Supply and Waystation 5346[69] as well as hospital facilities such as Haven-class medical stations[2] like the Kaliida Shoals Medical Center[35] and Felucia Medical Station HCTFF2.[9] Regalia Station[7] was used as a naval ordnance and supply depot,[5] while Space Station Valor was used notably for Republic strategy conferences.[63]
Defense platforms and stations were also deployed by the Republic Navy. The FireStar II-class Orbital Defense Platform, which was the successor of the FireStar-class Orbital Defense Platform, saw extensive Republic naval usage.[69] The Golan I Space Defense Platform was deployed by the Republic Navy to free up naval assets for the war effort.[16] The DS-1 Death Star Mobile Battle Station was a battle station that was under construction during the war.[7]
History
Old Republic
The Galactic Republic Navy held a proud naval tradition that dated back thousands of years prior to the Galactic Civil War to the foundation of the Old Republic,[1] which was formed at around 25,000 BBY.[70] During this time, the Republic Navy participated in a battle on the planet Ithor against a vicious band of pirates who were fighting against the Jedi Master Oorrl Morm. Following Morm's sacrifice, which delayed the attacks of the pirates, a Republic Navy warship arrived and took the criminals into custody.[71]
Eventually, after a war in which the Sith, ancient dark side-wielding enemies of the Republic and Jedi Order, were believed to have been destroyed, the Republic was reorganized through the Ruusan Reformations, and the Republic Navy was dissolved, approximately one thousand years before the Invasion of Naboo.[9][10]
Period of dormancy
Republic Defense Coalition & Republic Rescue Fleet

The Republic Defense Coalition responds to the Great Hyperspace Disaster.
The Republic would not maintain a standing navy again[5] until the onset of the Clone Wars[12] in 22 BBY,[11] during which member worlds managed their own orbital defense.[5] Regional military forces also sprung up, such as the Malastare-Sullust Joint Task Force.[72] During the High Republic Era, which began in approximately 300 BBY,[73] the Galactic Republic maintained the Republic Defense Coalition, which was a small peacekeeping fleet that received support from member worlds of the Republic. These worlds received ships from the Republic that were a product of the Great Works, such as the Salvation-class Republic medical frigate. Additionally, worlds of the Republic Defense Coalition deployed Republic Pacifier-class sector patrol cruisers.[72]
The Republic Defense Coalition's standard forces included a Emissary-class Republic Cruiser, Longbeams, and Z-28 Skywings. In 232 BBY,[74] The Republic Defense Coalition was tested during the Great Hyperspace Disaster and subsequent Emergences, during which the Emissary-class Third Horizon led by Republic Admiral Pevel Kronara and Jedi Master Avar Kriss, and the Salvation-class Panacea, were participants of. Subsequently, the Republic Defense Coalition participated in the Battle of Kur alongside the Jedi and the Eriaduan flotilla against the Nihil. The battle included five Pacifier-class sector patrol cruisers, of which two, the Marillion of Alderaan and the Yekkabird of Corellia, were destroyed.[72]
Also active during this time, the Republic rescue fleet was another fleet of the Galactic Republic that was dispatched to Trymant IV following a Nihil attack and Emergence. The Republic rescue fleet consisted of a Pelta-class frigate, another medical frigate, and Jedi Vectors. The fleet was attacked by a Nihil Spider Cruiser, resulting in the medical frigate being seriously damaged and a Vector destroyed.[75]
Republic Diplomatic Fleet

The Judicial Forces, also known as the Republic Diplomatic Fleet, arrives on Carnelion IV.
The Republic Department of Justice served as the primary law enforcement of the Galactic Republic and had several different organizations structured under the Department's jurisdiction. One of these organizations was the Judicial Forces, the premier-military trained peacekeeping forces of the Galactic Republic.[5] The Judicials were split into ground forces and a small fleet,[76] which was known as the Republic Diplomatic Fleet. The fleet[77] included CR90 corvettes,[60] Consular-class space cruisers, CSS-1 Corellian Star Shuttles,[78] and Republic landers.[79]
By circa 42 BBY, the Republic's naval assets included some Venator-class Star Destroyers. Before the Clone Wars, Galactic Republic naval assets included capital ships and sub-capital ships that were decades and sometimes centuries old.[5] Additionally, the Republic Special Weapons Group oversaw plans to develop several projects after the Invasion of Naboo[7] in 32 BBY,[11] including the automated battlemoon asteroid and the Torpedo siege platform. The projects were ultimately not developed due to the pacifist leanings of the government and lack of funds.[7] Around this time,[80] the Coruscant Home Defense Fleet was active and under the command of Honor Salima.[81]
Rebirth
Near the end of the Separatist Crisis[5] in 22 BBY,[11] the Republic Navy was recreated by the Military Creation Act, along with the Grand Army of the Republic as part of the Republic Military, with Supreme Chancellor Sheev Palpatine, secretly the Dark Lord of the Sith Darth Sidious, as its overall leader. Due to the Republic not having maintained a standing navy for a millennium, Republic star systems donated what starships they could to the impromptu navy to reinforce the Venator-class Star Destroyers, already under Republic ownership and those supplied by Kamino, as well as the Acclamator-class assault ships that were also supplied by Kamino.[5] With BTL-B Y-wing fighter-bombers and older starfighters already in the navy's stock as force projection, the V-19 Torrent starfighter that was already developed after a lengthy design process was commissioned in order to supplement it. A squadron of V-19 Torrent starfighter prototypes were quickly dispatched to the Republic Navy at the onset of war.[9] The Coruscant Home Defense Fleet that protected the Republic capital world of Coruscant was transferred to the Republic Navy and received access to new technology.[82]
The Clone Wars erupt

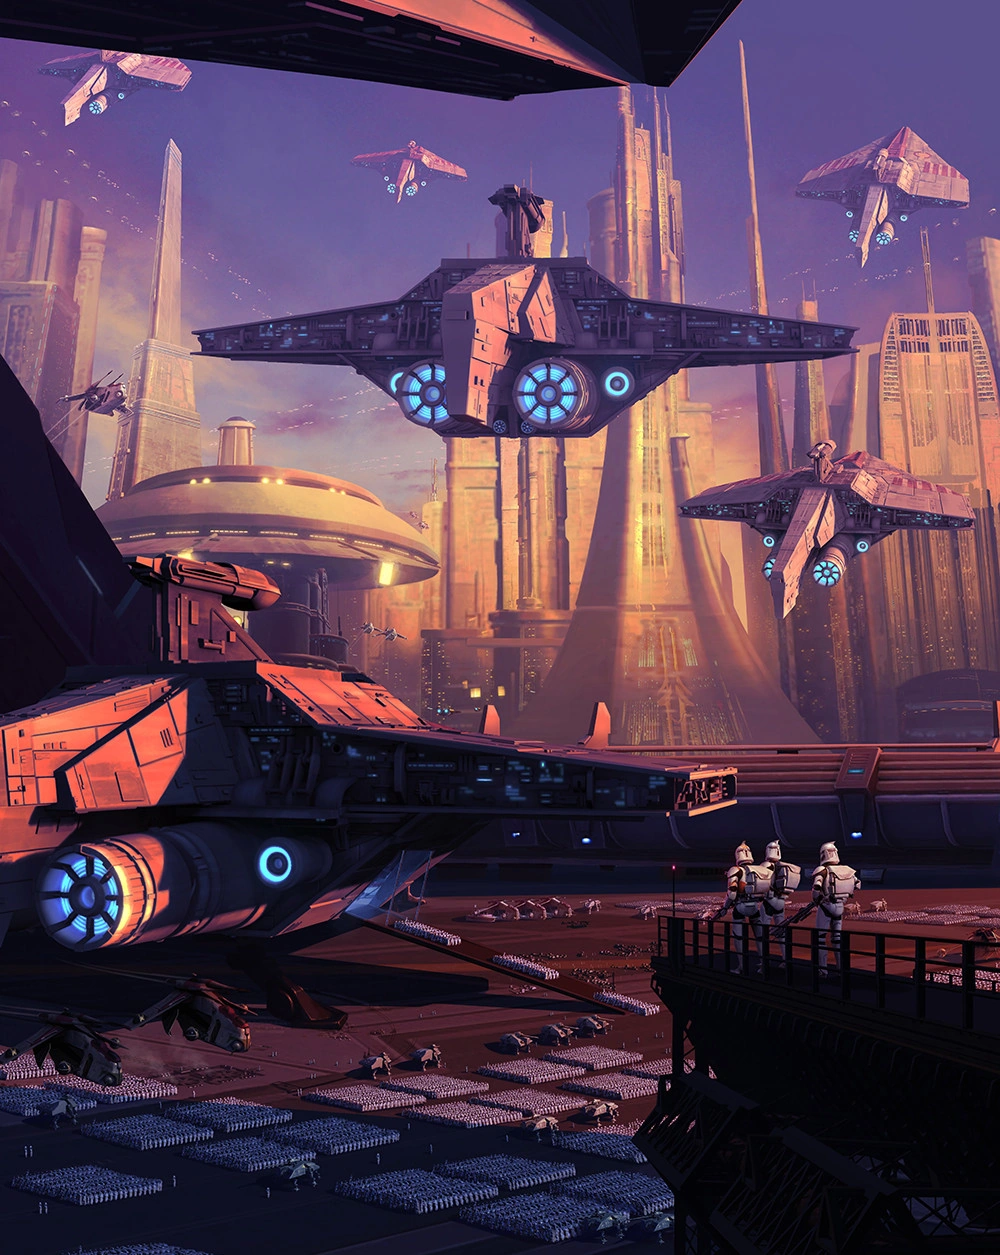
The Republic Navy deployed the Grand Army of the Republic from Coruscant to the rest of the galaxy after the Battle of Geonosis.
Battle of Geonosis
Twelve of these Acclamator-class assault ships supplied by Kamino were loaded with two Sector Armies[83] and were dispatched to Geonosis by the Republic Navy to shut down the newly established Separatist Droid Army of the Confederacy of Independent Systems and rescue Senator Padmé Amidala, Jedi Knight Obi-Wan Kenobi and Jedi Padawan Anakin Skywalker. After a Jedi assault team failed to rescue the prisoners and were defeated, LAAT/i gunships rescued the survivors and attacked Separatist positions as the Acclamator-class assault ships landed nearby, resulting in the First Battle of Geonosis and the eruption of the Clone Wars.[9] The Republic established an orbital cordon, which held back Corporate Alliance ground reinforcements.[27]
During the battle, the Acclamator-class assault ships deployed Republic forces, while the Republic Navy's squadron of prototype V-19 Torrent starfighters were used to their full capabilities.[9] LAAT/i gunships strafed Separatist ground forces and provided support to Republic units, and the battle ended with a Separatist retreat off the planet.[12] During the retreat, several CIS warships, including a contingent of four Hardcell-class interstellar transports, engaged in a battle in the orbit of Geonosis, which resulted in the destruction of one CIS transport and the damage of others.[84] Shortly after the Republic victory on Geonosis, the Grand Army of the Republic and the Republic Navy assembled on Coruscant to Supreme Chancellor Sheev Palpatine and several members of the Galactic Senate, who witnessed the deployment of the Republic Military.[12] Eventually, the Republic largely withdrew from Geonosis in order to commit troops to other parts of the galaxy.[5]
Preparation for a wider war

Republic Open Circle Armada ships above Coruscant.
With the outbreak of war, the Republic Navy had a void of small warships, which forced the navy to induct diplomatic and civilian vessels such as the Republic Diplomatic Corps and Judicial Forces' Consular-class space cruiser into service, along with the Republic Ambassadorial Corps' Eta-class shuttle and other craft. The admiralty recognized this as a temporary resolution and began a campaign to obtain the necessary war material. The Military Creation Act allowed the Republic Navy to conscript starships and personnel from member worlds, and although some donated dreadnoughts and cruisers, most were small Corellian corvettes and gunships. Also at this time, in the immediate aftermath of the Battle of Geonosis, capital ship production was significantly increased as Kuat Drive Yards and Rothana Heavy Engineering combined their shipyards which allowed the shipyards to produce Pelta-class frigates and Arquitens-class light cruisers.[5] At the onset of the war, Maelstrom-class battle cruisers were deployed and at the time of their introduction, were the largest vessels launched by the Republic Navy.[53] GX1 short haulers were retrofitted from diplomatic envoys to military transport as an improvisation in the early moments of the Clone Wars.[16]
Due to this, the navy was able to slowly return borrowed vessels. The Republic Navy also had several major projects in the prototype stage from the start of the war, some of which were the IPV-2C Stealth Corvette, the Eta-2 Actis-class light interceptor, the Theta-class T-2c shuttle, the Alpha-3 Nimbus-class V-wing starfighter, the Victory project, and Project Supercharger.[5] With the V-19's performance during the Battle of Geonosis, the fighters were adopted into the Republic Navy's arsenal and launched into immediate production.[9]
First actions of the Clone Wars
Early battles, Christophsis, and the Hutts
- "The Hutts control the Outer Rim, and we'll need their space lanes to move our troops."
- ―Supreme Chancellor Palpatine, to the Jedi on the subject of creating an agreement with the Galactic Republic and the Hutt Clan

Republic naval forces locked in combat above Christophsis.
Sometime shortly after the Battle of Geonosis, a contingent of ARC-170 starfighters and LAAT/i gunships supported an operation on Quarmendy by the Republic 104th Battalion.[85] Around that time, a mission to Krystar was launched by Jedi General Obi-Wan Kenobi and the 7th Sky Corps via an Eta-class shuttle from their flagship, the Venator-class Star Destroyer Negotiator.[86] After that, gunships took part in a siege on Hisseen between the Republic's 104th Battalion, 501st Legion, and 212th Attack Battalion against Separatist forces.[87]
The Open Circle Armada and its sub-unit, the Fifth Fleet, was established and became active. The Fifth Fleet and the Open Circle Armada at large went on to participate in many conflicts throughout the Clone Wars, and included many ships and sub-units. Following Geonosis, the Republic flagship Resolute was located in the Corvair sector, and its starfighters engaged Separatist forces in a victorious battle there. Afterwards, Republic Intelligence intercepted information that the Kudon had joined the Separatist and were building battle droids. As a result, Admiral Wullf Yularen,[88] who became the youngest admiral in the naval corps after his promotion and induction into the Republic Navy,[6] advised for a surgical orbital bombardment of the droid foundry on Kudo III. Jedi General Anakin Skywalker was skeptical, disagreeing with Yularen and deciding to embark on a mission to Kudo III. After investigating, Skywalker deduced that the Kudon were slaves and neutral in the war. After instigating an uprising that successfully rendered the foundry offline and returning to the Resolute, Skywalker learned along with Yularen and Jedi General Obi-Wan Kenobi that the Separatist leaked information of the foundry in order to coerce the Republic into massacring a neutral population and persuade star systems to join the Separatist Alliance.[88]
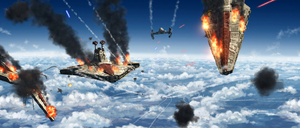
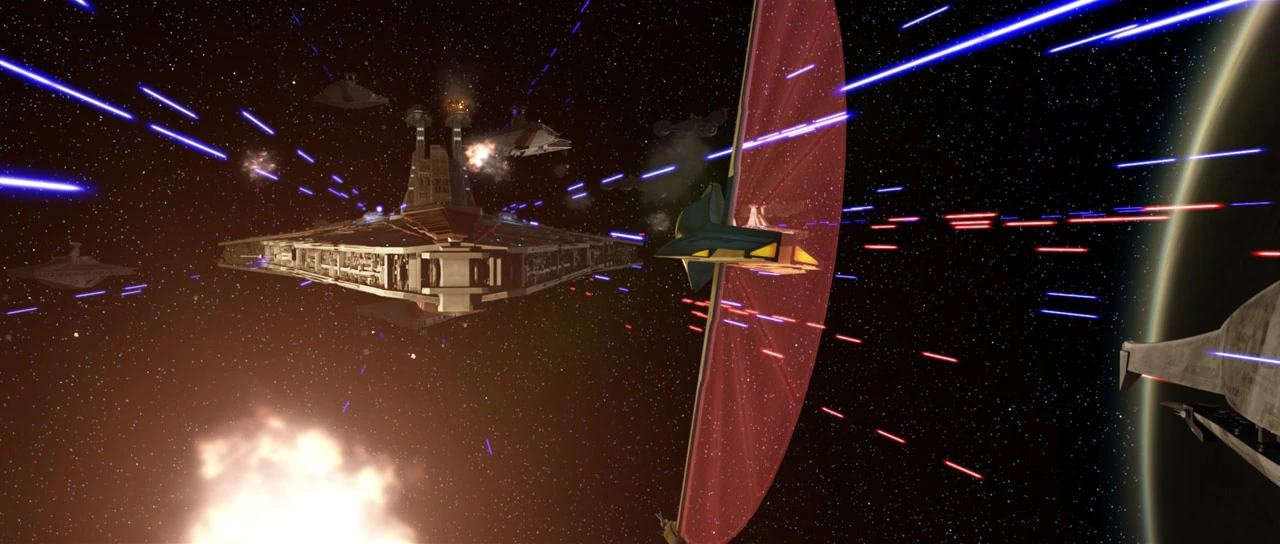
Several months after the Battle of Geonosis, by the Battle of Christophsis,[9] the Republic Navy was already engaged and had lost several ships, including The Righteous and Swift Return.[89] The Swift Return had previously traveled through an asteroid and fired its weapons at a target prior to its destruction.[90] During this critical time soon after the outbreak of war, the CIS Navy had strategically captured important hyperspace routes throughout the galaxy, cutting off the Republic from the majority of the Grand Army of the Republic. Due to the lack of ground forces, Republic forces led by the Jedi Order could not gain a foothold in the Outer Rim Territories all while more star systems joined the Separatist Alliance.[2] These Separatist offensives originated in the Corellian Run in the Trailing Sectors, and early regional Separatist efforts included the Abrion sector, the Andoan Free Colonies, Kerkoidia, and Rodia.[5] One planet that was targeted was the mineral-rich Christophsis.[2]
During the Battle of Christophsis, Jedi General Skywalker and Admiral Yularen commanded their task force of Venator-class Star Destroyers and Pelta-class frigates from the Resolute to resupply Senator Bail Organa that was trapped on the surface of the planet at his refugee camp along with a clone escort. Although ordered not to engage the Separatist naval blockade, Skywalker did anyway and his task force sustained damage, including the destruction of a frigate. Kenobi arrived with the Negotiator and an IPV-2C Stealth Corvette prototype. The stealth ship was tested in the battle and managed to destroy Separatist Admiral Trench's flagship, the Invincible, forcing the Separatist blockade to temporarily retreat and Kenobi commanding naval forces to engage them.[89]
Republic naval reinforcements arrive above Christophsis.
The battle for Christophsis resulted in subsequent naval engagements, with varying forces. An Acclamator-class ship joined the battle while Republic naval forces led by Kenobi and Skywalker attacked Separatists ships, and eventually Republic support ships were all destroyed.[2] After landing troops on the surface and skirmishes against Separatist ground units occurred, sabotage by clone traitor Slick left little military equipment to fight. The Negotiator eventually left the battle,[91] Anakin's task force and the Negotiator retreated to resupply while a fierce ground battle ensued. After the Resolute returned to drop a messenger, Ahsoka Tano, from the Jedi Council, the Resolute was forced to retreat once again.[2] Sometime during the events of Christophsis, a stealth corvette-sized version of the Ascendant personal stealth flyer was destroyed, leading to the dissolution of the project.[14] Ultimately, the Battle of Christophsis ended when Republic reinforcements arrived with the fleet of Admiral Wurtz and Jedi General Yoda and decisively defeated Separatist naval forces before troops were landed. At the same time, the Republic cautiously agreed to rescue Hutt Clan crime lord Jabba Desilijic Tiure's son, Rotta, in order to use the hyperspace routes in Hutt Space that would allow the Republic Military to regroup and move in to the Outer Rim.[2]
Soon after the Battle of Christophsis, the Republic Navy used an Acclamator-class assault ship to transport the 501st Legion to Teth for the mission to rescue Rotta that culminated in the Battle of Teth, and saw the deployment of additional Republic naval forces in the form of a Venator-class and squadrons of V-19 Torrent starfighters.[2] By this time, Clone Flight Squad Seven was active, as was the flight academy on Coruscant.[18] Ultimately, the rescue was successful, and Jabba agreed to let Republic forces move through Hutt territory.[2]
Initial Ryloth engagements
- Obi-Wan Kenobi: "Senator, the fleet protecting Ryloth has been destroyed, and the supply lines have been cut. The troops are out of food, fuel, ammunition. And the civilian population is starving."
- Bail Organa: "That is grim news."
- Mace Windu: "Our blockade runners should be able to penetrate the Separatist lines and drop relief supplies. But they do not have the range to reach Ryloth."
- ―Jedi Generals Obi-Wan Kenobi and Mace Windu confer with Senator Bail Organa[src]
In a bid to seize the resources of the planet Ryloth,[92] the Separatists launched a massive invasion which cut off the Outer Rim garrison from Republic support. With the Battle of Ryloth in full conflict, a relief and support fleet commanded by Admiral Dao attempted to break the Ryloth blockade but were then faced with low fuel and ammunition. Although a message for assistance was sent to the Jedi Council, Dao was killed mid-transmission and his fleet protecting Ryloth was destroyed. With Republic and Twi'lek Resistance forces in need of support, the Jedi Council dispatched Republic Senator Bail Organa to Toydaria, as Republic support ships did not have the range to reach Ryloth unless they used Toydaria as a staging ground and since the planet was 2,000 parsecs closer than the nearest Republic fleet. Three Pelta-class frigates were sent to Toydaria, and after facing the Trade Federation a heated political debate, the frigates launched and broke through the blockade on Ryloth, sending critically needed supplies to Twi'lek forces, although the Republic security force was annihilated in a last-stand.[24]
With this, Toydarian King Katuunko was open to joining the Republic war effort.[24] Master Yoda was transported to the meeting place on Rugosa by a Consular-class cruiser, but was ambushed by Separatist forces. Despite a skirmish breaking out on the surface, Separatist ground units were defeated, and the Toydarian Royal Delegation and Jedi delegation were rescued by a Venator-class Star Destroyer.[49]
The Malevolence campaign
- "As the bulk of our fleets are engaged on the frontlines we'll be on our own."
- ―Admiral Yularen
The Malevolence attacked and destroyed dozens of warships, crippling the entire Republic Navy.
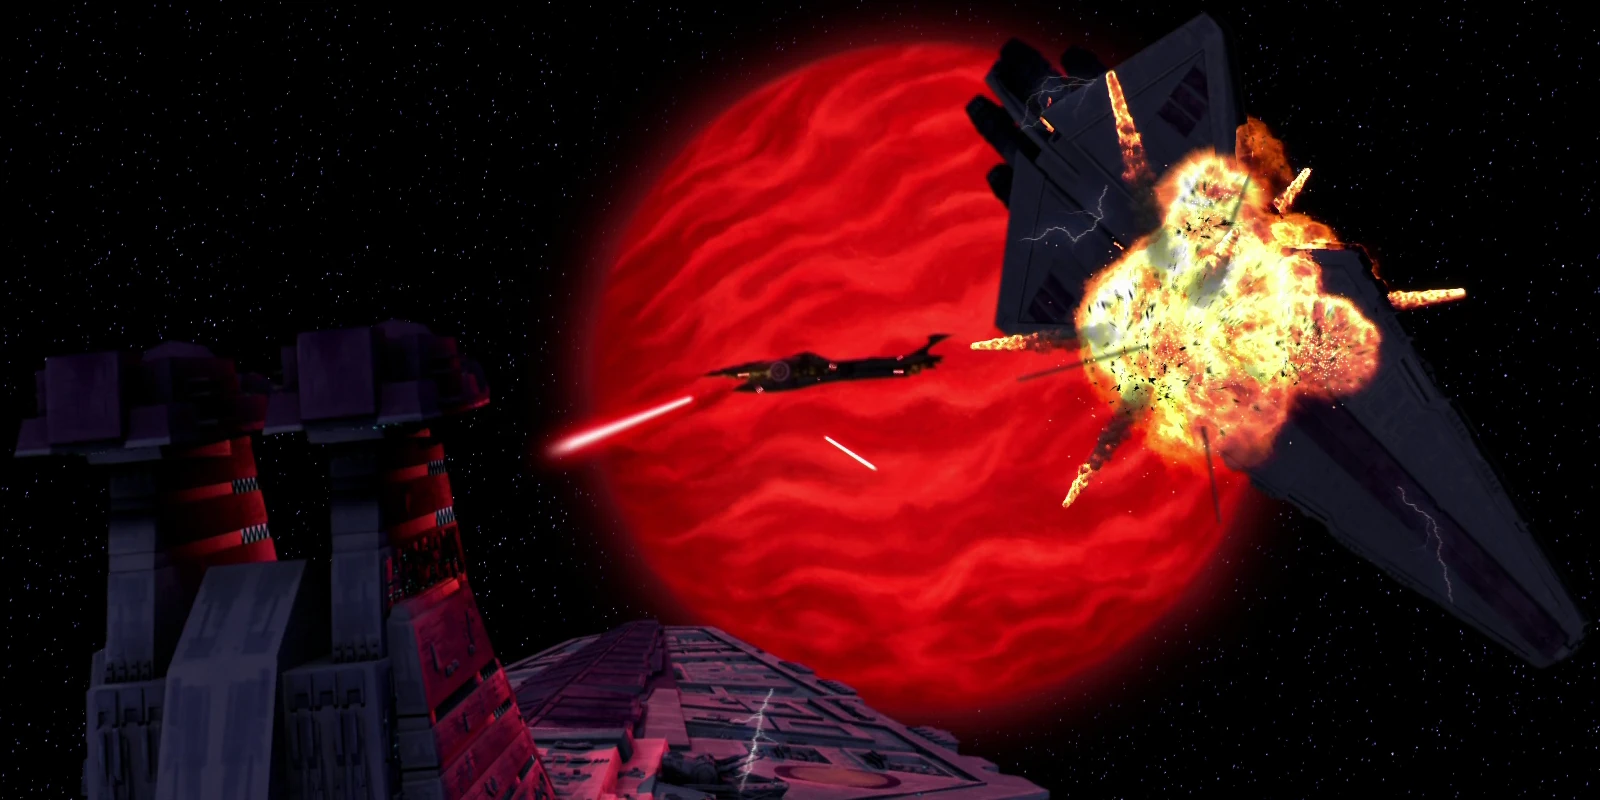
By this time, the Republic Navy came under siege when dozens of warships were ambushed and destroyed with no survivors. Word quickly spread of a new Separatist superweapon, and Republic naval forces took a defensive position to protect Republic supply lines. The Separatist weapon struck a dozen star systems and left no trace. As a result, the Jedi High Council dispatched Jedi General Plo Koon and his starfleet to hunt down the menace. Eventually, General Plo Koon tracked the superweapon to the Abregado system, and was revealed that the superweapon was the Subjugator-class heavy cruiser Malevolence, captained by Supreme Commander of the Droid Army General Grievous and Head of State of the Confederacy Count Dooku. The Malevolence had embarked on a campaign of destroying naval units in order to cripple the Republic Military.[25]
At the time of the discovery, Skywalker's task force was given strict orders to defend a staging area in the Bith system along with Kenobi's task force. Skywalker was contacted by Koon for reinforcements, although they were ultimately not sent. General Koon and his fleet then participated in the Battle of Abregado but the fleet was quickly annihilated with a few survivors, with the wreckage of the fleet creating the Abregado debris field. With the destruction of yet another Republic naval unit, Generals Mace Windu, Yoda, and Supreme Chancellor Palpatine ordered that all remaining units were to be moved to guard the Republic Military's supply convoys, including Skywalker's. Not wanting to risk anymore losses, a rescue mission was not authorized, but Skywalker and his Padawan Ahsoka Tano managed to rescue the survivors after a heated escape with their personal ship, the freighter Twilight. General Koon, Clone Commander CC-3636, and two clone troopers of the 104th Battalion were the only survivors of the entire task force.[25]
In need of a counterattack but with the majority of Republic Navy fleets engaged in the front lines, the Galactic Senate commissioned a Republic Navy strike force that consisted of Skywalker and Kenobi's task forces. From that strike force, Jedi General Anakin Skywalker brought in a squadron of BTL-B Y-wing fighter-bombers, Shadow Squadron, with the purpose of destroying the Malevolence. When it was learned that the Malevolence was set to attack the Kaliida Shoals Medical Center that held 60,000 injured clones after it destroyed a convoy in the Ryndellia system, Shadow Squadron was deployed while the Negotiator and other Republic capital ships took the longer route to the center. The planet Naboo dispatched support, and Republic Navy Pelta-class frigates arrived in scores to evacuate the wounded.[35]

Shadow Squadron deploys from a Republic fleet.
Despite the efforts of the Republic Navy, the Malevolence arrived and destroyed the Republic frigates that were in the vicinity and attempting to escape. Shadow Squadron made a bombing run on the Malevolence, but with Vulture droids attacking as well as the Malevolence itself, the squadron suffered heavy casualties. After changing the target from the bridge to the mega-ion cannons of the Malevolence, the squadron managed to severely cripple the ship. Ship damage included the destruction of both cannons as well as the hyperdrive. The Negotiator and Republic reinforcements soon arrived and engaged the Separatist ship as it fled.[35]
After a brief hiatus so his men could recover, Skywalker led his task force in following the Malevolence along with Generals Koon and Kenobi. Skywalker called for reinforcements from General Luminara Unduli, but her forces were occupied engaging a Separatist fleet meant to reinforce the Malevolence. After a Separatist trap ensnared Senator Padmé Amidala and brought her aboard the Malevolence, Kenobi and Skywalker undertook a boarding mission to rescue her and destroy the ship. The mission was successful, and the Malevolence was destroyed when it attempted to jump to hyperspace, although General Grievous managed to escape and flee Republic forces.[93]
On the hunt for Grievous
- "Among our most recent losses was the battlegroup at Falleen. The Separatist fleet commanded by General Grievous is headed your way."
"Seems like that coward always knows when and where to attack us."
"You're heavily outnumbered, Anakin. I advise retreat."
"If we run, the Separatists will take control of this sector. I can't let them do that." - ―Jedi Generals Obi-Wan Kenobi and Anakin Skywalker discuss Separatist General Grievous' advances

Skywalker and Kenobi's task forces engage the Separatist fleet led by Grievous in a battle over the Rishi moon.
At some point following the Malevolence campaign, Clone Intelligence spotted Grievous in the Balmorra system, but weeks later he could not be located. In an effort to find Grievous, Skywalker and Kenobi's task forces linked up, and dispatched their clone trooper officers, Marshal Commander CC-2224 and Clone Captain CT-7567 to conduct checkups of bases in the area. After hours of no contact and the all-clear signal turning off with the Rishi Station's destruction, the combined fleet of six Venators and three Consulars arrived and attacked the Separatist fleet led by Grievous, forcing it to retreat.[94]
Afterwards, Skywalker's task force was dispatched to defend Bothawui, and positioned his task force of three Venators between the planet and its asteroid field. At this time, General Grievous had embarked on a campaign in the Outer Rim, ambushing Republic fleets and inflicting yet more losses for the Republic Navy. Among those losses was the battle group at Falleen, and Republic intelligence predicted that Skywalker's naval task force was next. After refusing to pull back and retreat, Skywalker's forces participated in the Battle of Bothawui against a Separatist fleet led by Grievous. The Separatists attacked first, and damaged a Venator-class. After luring Separatist forces to maneuver through the asteroids, Skywalker outflanked the Separatists with All Terrain Tactical Enforcers that were deployed on the asteroids and attacked the Separatist force from the rear. With incoming fire at the front and the back, Grievous was forced to retreat in his Belbullab-22 heavy starfighter, Soulless One, as his fleet was annihilated.[8]
Due to Separatist actions, it became apparent to Republic intelligence forces that General Grievous' spies were intercepting Republic military transmissions. They were furthermore able to deduce that there must be a listening post, which they believed explained how General Grievous and the CIS Navy was able to ambush Republic fleets. As a result, General Skywalker's task force split its starfighter squadrons for patrols in efforts to locate the listening station, while General Skywalker embarked on a mission to an outer corridor of space.[8] After the mission, Skywalker's forces aboard the Twilight were able to detect a transmission from Skywalker droid companion, R2-D2, who was believed to be destroyed in the Battle of Bothawui but was instead captured by Separatist spies. They managed to track the transmission to the Ruusan moon in the Mid Rim.[95]
R2-D2 was brought to the Separatist listening post, Skytop Station, where he managed to see that Separatist analysts were viewing information regarding Republic Navy starships. While being disected for information, General Grievous discovered that R2-D2's memory banks were never erased, and as such, contained critical Republic Navy and Army data and formations. Meanwhile, Skywalker reported Skytop Station's location to General Kenobi, who suggested sending two mainline cruisers to destroy the listening post. Skywalker, however, was able to convince Kenobi to let him and his forces infiltrate the base and locate R2. In the ensuing mission to Skytop Station, R2-D2 was rescued without having his memory banks plundered and the listening station was destroyed, preventing Separatist forces from ambushing Republic fleets.[95]
Rodia, Vanqor, and Quell
- "General, Skywalker's here."
"And none too soon. We're entering the atmosphere." - ―A clone officer, and Jedi General Aayla Secura during the Battle of Quell

The Republic task force commanded by Secura is annihilated during the Battle of Quell.
In the conclusion of the mission to Rodia undertaken by Senator Amidala, her personal droid C-3PO contacted Republic reinforcements which summoned the Venator-class Star Destroyer Tranquility and a Consular-class. Green Company of the 41st Elite Corps deployed in gunships and arrested Viceroy of the Trade Federation Nute Gunray. In orbit above Rodia, Gunray was transferred from the Consular to the Tranquility and secured by the Senate Guard. A Separatist rescue on the Tranquility caused extensive damage to the vessel and the hijacking of the Consular by Gunray and Separatist agents. The fleet of Jedi General Kit Fisto was near Gunray's last tracked location and was contacted in order to attempt to re-secure the Viceroy.[31] During this attempt, a Republic fleet was located on Bestine IV, and were to be called in as reinforcements by Clone Commander Fil forces before they were prevented from doing so by Separatist forces.[30]
Afterwards, Skywalker allowed himself to be captured by Separatist forces and was held on a Munificent-class star frigate to verify Dooku's presence. After confirmation, Kenobi infiltrated and called reinforcements in the form of the Resolute, which engaged the frigate and later rescued Kenobi and Skywalker from the surface of Vanqor after Dooku escaped and crashed on the planet.[96] Meanwhile, Skywalker's task force remained stationed above Bothawui as the war progressed.[97]
Eventually, the task force commanded by Jedi General Aayla Secura was attacked on Quell by four Separatist frigates. Sustaining heavy damage, Secura called Skywalker for reinforcements who arrived in the Resolute and had a Consular-class dock with Secura's flagship. During the Battle of Quell, Secura's task force was utterly annihilated as the Resolute engaged Separatist forces. After boarding Secura's vessel to rescue her and some of her forces, Skywalker and Secura's forces evacuated on the Consular-class, but sustained hyperdrive damage while escaping. Forced to take evasive action, the cruiser was inadvertently launched into hyperspace. Admiral Yularen, commanding the remaining Republic forces from the Resolute, ordered that they would begin a search after finishing the battle. After Skywalker, Secura, and their forces crash landed on Maridun and participated in a skirmish against the Separatists, a trio of three Venators arrived and rescued them.[98]
Battle of Ryloth concludes
- "Your forces have been cut in half, Skywalker. If you can't break that blockade before the next planetary rotation, we'll have to postpone the invasion."
- ―Jedi General Mace Windu, to Jedi General Anakin Skywalker during the Battle of Ryloth

Skywalker's task force suffers heavy casualties during the Battle of Ryloth.
After Skywalker and Tano regrouped with their task force, they were eventually assigned a new mission, which was to destroy the Separatist blockade over Ryloth to pave the way for a Republic landing. The Separatist blockade of one Lucrehulk-class Battleship and two Munificent-class star frigates had remained over Ryloth after the destruction of Admiral Dao's fleet in the beginning of the war, and the population of Ryloth was under a fierce occupation. Skywalker's task force consisted of the flagship Resolute, the Defender, and the Redeemer exited hyperspace and began preparations for the battle. The Resolute's Blue Squadron and its sub-unit Group Two launched and was commanded by Jedi Commander Tano.[19]
Tano led Blue Squadron against Separatist vulture droids in order to clear a path for Republic forces, and then proceeded to make a run against the Separatist flagship. After an ambush was sprung and four more Separatist star frigates joined the blockade, Tano refused to retreat. With the task force left defenseless, Vulture droids infiltrated the Republic's naval picket lines and ran strafing and suicide runs on the Republic Star Destroyers. Tano retreated after being ordered to do so several times, but her squadron sustained heavy casualties in the retreat. The Resolute was damaged, while the Redeemer was destroyed and the Defender was critically crippled. With mounting losses and Admiral Yularen being wounded after an attack, General Skywalker ordered all ships to enter hyperspace and retreat.[19]
After assessing their losses and coordinating with Generals Windu and Kenobi, Skywalker devised a new strategy to break through the blockade. He evacuated the Defender and transferred its crew and supplies to the Resolute. After doing so, he left Commander Tano in charge of their remaining forces while he and his personal droid, R2-D2, commandeered the Defender and piloted it in a suicide run against the Separatist flagship but ejecting before impact. After Tano spend some time conversing with her clone officers, she devised a new naval strategy which she later dubbed the Marg Sabl. The tactic called for the Resolute turning its ventral hull against the Separatist warships after the destruction of the Separatist flagship, leaving the Republic ship's bridge and hangar intact.[19]

The Ryloth invasion fleet sustains heavy damage.
This would draw in the Separatist frigates and Republic starfighter would then launch and outflank Separatist forces. Although the officers expressed doubt, she was supported by Yularen, who had recuperated from his injuries. After some time while the Defender had returned to battle and tricked Separatist blockade commander Captain Mar Tuuk in order to get the ship closer, the Resolute arrived in orbit allowing Skywalker to pilot the Defender into the Separatist ship. Skywalker and R2-D2 ejected as the Separatist blocked fired all cannons, but the Separatist battleship was destroyed. Tano then began her Marg Sabl maneuver, and with the loss of the command ship, the remaining six Separatist frigates moved in and attacked. Tano led the flanking bomber squadron, and overwhelmed the Separatist ships, eventually destroying the entire blockade just as the invasion fleet led by Windu and Kenobi arrived.[19]
With the blockade destroyed, the invasion fleet of three Acclamator-class assault ships began landing operations, but soon encountered Separatist anti-ship fire from J-1 proton cannons in the area near the city of Nabat. Kenobi and his Ghost Company deployed from one of the ships and headed towards the city in order to claim it as a landing area, but took fire from the cannons. The Separatist barraged penetrated the fleet's shields, and one Acclamator-class was catastrophically hit in the engines and began losing altitude. With only two assault ships remaining in active combat, they were forced to retreat and wait for Kenobi's forces to destroy the cannons. After a battle in the city, the cannons were eventually destroyed and the two assault ships landed in the city's outskirts and deployed ground forces from the 7th Sky Corps and the 91st Mobile Recon Corps.[28]
As Windu and Kenobi captured more and more areas of the planet from Separatist control, Skywalker and his forces cleared the space around the planet and engaged Separatist forces in the atmosphere. When a fire-bombing campaign by the Separatists was implemented, Skywalker and his starfighter forces engaged the bombers, and later destroyed all Separatist bombers in the final engagement of the Ryloth campaign when Republic and Twi'lek forces stormed the capital city of Lessu. After Separatist and Techno Union forces surrendered, a Consular-class cruiser landed in the city as celebrations began with Republic and Twi'lek leadership and forces.[92]
Felucia, Devaron, and other conflicts
- "They made it through the first wave. Concentrate all fire on the cruiser on the left."
- ―Commander CC-3636, commanding Republic naval forces during the first battle of Felucia.
Republic rescue forces launch from a Venator during the First Battle of Felucia.
Following the Battle of Ryloth, Republic forces led by Generals Kenobi, Skywalker, and Commander Tano were pushed to the breaking point during the first battle of Felucia. At this time, General Plo Koon had taken command of another fleet following the loss of his first command with the Malevolence, and had regenerated his forces. With Republic forces trapped on the surface, Plo Koon's naval units attacked the Separatist blockade in the planet's orbit in order to punch a hole for evacuation gunships and their V-19 Torrent starfighter escorts. After destroying a Separatist frigate, and being nearly overrun on the surface, four gunships evacuated Republic forces and successfully escaped.[99]
In a mission orchestrated by Darth Sidious that led to the theft of a Jedi holocron, the bounty hunter Cad Bane was given command of four Separatist frigates from the Trade Federation fleet in order to capture the Keeper of the Kyber crystal Jedi General Bolla Ropal. The Battle of Devaron erupted when Separatist troops attacked the Republic's outpost and captured him. In a bid to stop the operation, General Skywalker in the Resolute attacked the four star frigates, destroying all but Bane's flagship. Using All Terrain Tactical Enforcers, members of Execute Battalion and Carnivore Battalion deployed from the Resolute and boarded the vessel in order to rescue Ropal, regain the crystal, and capture Bane. In the end, a self-destruction mechanism and Bane's wits prevented all objectives. Ropal was killed and his body was returned to the Resolute, the crystal was presumed destroyed, and Bane was thought dead. In actuality, Bane disguised himself as a clone trooper who boarded the Resolute, and managed to hijack a Torrent starfighter and escape.[44]
Some time afterwards, Felucia was in Republic control and the Republic Navy deployed Felucia Medical Station HCTFF2 in the planet's orbit. The Haven-class medical station was later attacked by a group of Separatist ships, and was ultimately destroyed. In the aftermath, Kenobi, Skywalker, and Tano arrived in a T-6 shuttle but were shot down by Vulture droids.[100]
Sometime during the earlier period of the Clone Wars, the Republic 2nd Fleet was engaged with the Separatist Quellor sector fleet and Trade Federation Home Defense Legions as Republic forces blockaded the entire Quellor sector, which held the pro-Separatist Trade Federation's purse-worlds. Separatist forces ultimately held the Republic at bay with their expansive military fleet.[5] Also early during the Clone Wars, the Republic discovered a large Separatist force on the planet Xorrn which included factories and a flotilla. The Republic Navy dispatched many Acclamator-class assault ships to the planet in an effort to conquer the world, but after several battles on Xorrn, the Republic ships suffered heavy losses, including the Sentinel. Eventually, the Republic Navy decided to bombard Xorrn with the local sector fleet rather than waste any more resources, which effectively dissolved the Separatist presence on the planet. Despite the Republic victory, the surface and orbit of Xorrn was littered with Acclamator-class ships.[33]
At one time during the war, two Acclamator I-class Assault Ships participated in a naval engagement,[55] while an Acclamator II-class Assault Ship of the Republic Fifth Fleet flew over a terrestrial world.[56] At one point, a battle in the Ruusan system took place between the Republic and the Confederacy. Republic forces that were destroyed included a Venator, an Acclamator, and LAAT/i gunships. Separatist ships that were lost included at least one Lucrehulk-class Battleship.[101] Additionally, at one point during the war, the Acclamator-class assault ship Nevoota Bee deployed a contingent of V-19 Torrent starfighters above a terrestrial object.[102]
Clone Wars continues
Starfighters, including the new ARC-170s, are deployed against Separatist forces on Malastare.
By the time of the Battle of Malastare,[103] the ARC-170 starfighter was introduced widespread to the Republic Navy's arsenal as part of its late-war modernization program and became its premier heavy starfighter,[9] although a small contingent had been deployed at the start of the war.[85] Around this time, the program also introduced the Eta-2 Actis-class light interceptor and the Alpha-3 Nimbus-class V-wing starfighter. The V-wing was considered the newest interceptor in the Republic Navy's supply.[9] One ARC-170 starfighter of the Seventh Fleet was active.[22]
During the engagement on Malastare the Republic used many starfighters to bomb Separatist ground forces marching against them, consisting of Y-wings and ARC-170s. One Y-wing bomber deployed the newly created electro-proton bomb, securing a victory for the Republic albeit releasing a Zillo Beast from hibernation. Once the Zillo Beast was controlled,[103] it was transported to Coruscant via an Acclamator-class assault ship and held captive at the Republic Science and Technical Center. When it escaped and rampaged throughout the Federal District, the weapons of LAAT/i gunships were ineffective and were later deployed with gas bombs. With the new armament, they were able to kill the Zillo Beast and end its destruction at the Senate Building.[104]
Dorin, the Second Battle of Geonosis, and Saleucami
- "Our ships are in position, and we're ready to begin our campaign against the Geonosians."
- ―Jedi General Obi-Wan Kenobi, briefing the Outer Rim Command
The Republic Navy invades Geonosis for a second time.
Geonosis, which the Republic had thought secure, eventually fell back under Separatist control and new droid factories were activated on the planet. After a battle near Dorin where the Separatists were routed by Republic forces, the Republic Navy amassed a contingent of six Venator-class Star Destroyers including the Resolute, eight Acclamator-class assault ships,[42] and at least four Consular-class cruisers.[105] After a briefing with the Outer Rim Command Center, Republic forces moved in and began the Second Battle of Geonosis, with Republic Acclamators and Venators entering the planet's atmosphere. Republic naval forces assisted various points in the planetary invasion, supplying Republic troops with supplies and reinforcements. Venators deployed squadrons of BTL-B Y-wing fighter-bombers to attack ground and air targets, while the Acclamators launched waves of LAAT/i gunships and LAAT carriers for ground invasion.[42]
After the initial assault destroyed the primary droid foundry, several Acclamators and Consulars landed on the surface and acted as command centers.[105] As the entire planet became secure, Pelta-class frigates were deployed to help the injured clone troopers. Republic forces utilized a Venator-class Star Destroyer to transport Geonosian Archduke Poggle the Lesser to Coruscant, while the Pelta-class frigate TB-73 was ordered to rendezvous at the Ord Cestus medical station and deliver supplies to weary Republic forces on Dantooine. TB-73 however became the victim of a Geonosian brain worm infection that nearly took control of the ship, but not before it was stopped by Ahsoka Tano and docked at the Ord Cestus medical station with the help of TUG-b13s.[62] By this time, the Acclamator-class vessel Implacable was destroyed in the atmosphere of Geonosis by heavy ground fire.[106]
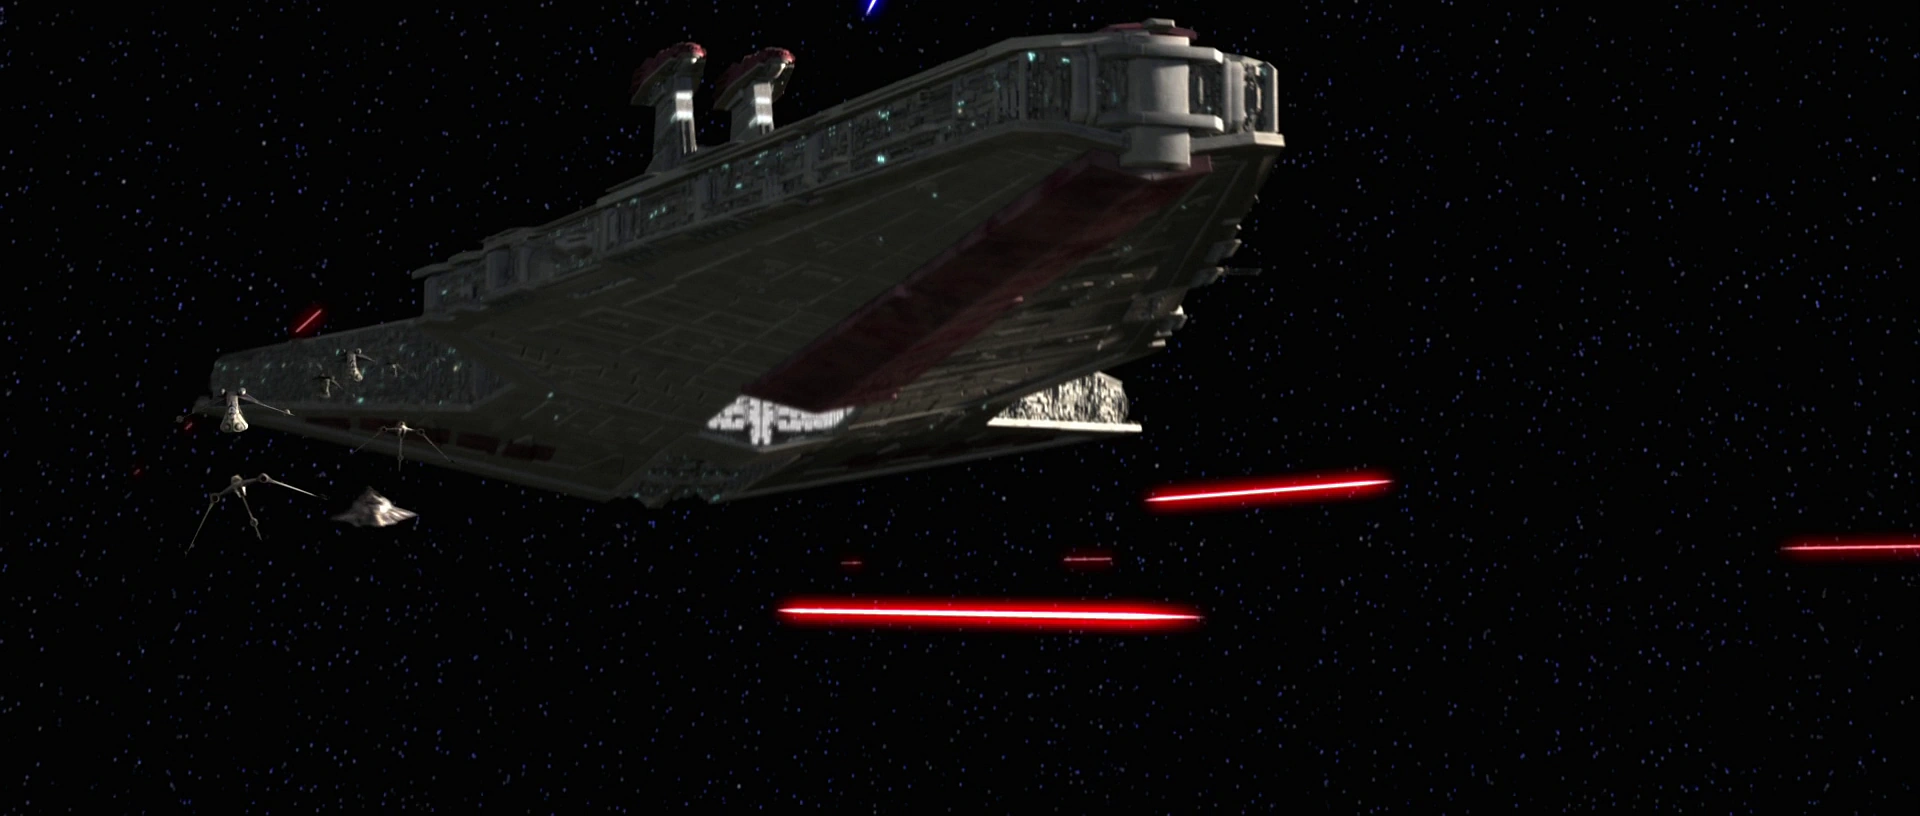
After the Second Battle of Geonosis, the Republic remained unable to halt Separatist advanced in the Outer Rim Territories despite that Republic victories outnumbered their losses. By this point, General Grievous remained elusive of the Republic and had thousands of droid armies at his command, resulting in the Republic not being able to ascertain where Grievous would strike. It was then that General Grievous and his fleet attacked the Republic flagship Steadfast and captured Jedi General Eeth Koth after a broadside and boarding. With Koth's capture, Grievous contacted the Jedi High Council of his victory and plans for Koth which forced the Jedi to assemble a strike group after deducing Grievous's location. A naval group of three Venator-class Star Destroyers and three Consular-class cruisers were led by Admiral Yularen, a newly inducted Arquitens-class light cruiser was commanded by General Kenobi, and an Eta-class shuttle was piloted by General Skywalker and Jedi General Adi Gallia.[41]
The Republic Navy engages the Separatists above Saleucami.
The Republic strike force arrived above Saleucami and made contact with Grievous' fleet of three Munificent-class star frigates and single Recusant-class light destroyer. After a brief dialogue between the two sides, the three Consulars moved in and engaged the Separatist fleet at close range while the Venators attacked from afar. Kenobi's Arquitens moved in as bait to bring Grievous aboard their ship and trap him there and was successful in getting locked by a Separatist tractor beam. After sending the coordinates of the Separatist flagship to Skywalker and Gallia, the shuttle arrived in the battle and infiltrated the capital ship. After Koth was rescued and the Arquitens was destroyed, Grievous boarded a C-9979 landing craft and deployed to the surface of the planet, but not before his craft was damaged and crashed. While Skywalker commanded the naval forces in orbit,[41] Kenobi took command of the Republic ground forces and landed in an Acclamator-class ship. Despite tracking down all Separatist escape craft and engaging General Grievous, the Republic was not able to stop the Separatist General from escaping the planet's surface.[107]
Mandalore, the Endurance, Balith, and Kamino
- "I wish our arrival wasn't under such circumstances. We believe Grievous is planning a Separatist attack on Kamino."
"But the Republic blockade is far too strong. They would not dare." - ―General Kenobi and Kaminoan Prime Minister Lama Su, shortly prior to the Battle of Kamino
As the war continued, more sections of the galaxy became involved. The Mandalorian terrorist group known as Death Watch allied themselves briefly with the Separatists and attacked a Republic cruiser.[108] With Mandalore on the edge of being plunged into the war, Duchess Satine Kryze managed to dissuade the Republic Military from occupying Mandalore.[109] Independent individuals also began targeting Republic assets during the war. Boba Fett, the clone "son" of the clone template and bounty hunter Jango Fett, managed to infiltrate[17] a squad[110] of the Clone Youth Brigade while they were sent on a tour to the Venator-class Star Destroyer Endurance,[17] which was assigned to host a training exercise for the cadets, which were cgoing to be inducted into the Republic Navy.[110] Once the Consular-class cruiser transporting the brigade docked with the Endurance, the clone cadets were sent on a tour throughout the ship. During the tour, Boba Fett managed to plant a bomb on Jedi General Mace Windu's quarters, but failed to kill the Jedi when the bomb exploded.[17]

The Endurance enters Vanqor's atmosphere.
With clone forces conducting a sweep of the vessel, Boba sabotaged the flagship's main reactor resulting in catastrophic damage. With the Endurance set to crash on the surface of Vanqor, the abandon ship order was given and a distress signal was sent out. Although most managed to escape, several command staff such as Clone Commander CT-411 "Ponds" decided to remain on the ship along with Admiral Kilian.[17] After the Endurance crashed on the surface, survivors were taken prisoner by Boba Fett and his crew while those in escape craft were rescued by a Pelta-class frigate. Although a skirmish trapped Windu and Skywalker in their search for survivors, they were rescued by the 104th Battalion in LAAT/i gunships[48] and after a mission to Florrum, the surviving Republic officers were rescued.[111]
When a large-scale civil war erupted on Balith, General Skywalker used a Venator-class Star Destroyer to travel there and take command of the Third Legion.[112] Afterwards, Generals Skywalker and Kenobi intercepted a hologram transmission between General Grievous and Asajj Ventress aboard a Venator-class Star Destroyer. With clone officers breaking the code, Republic forces were able to determine that the Separatists planned to attack the strategic clone homeworld of Kamino and shut down the production of clones.[23]
Securing Kamino, a blockade was established and the 501st Legion was dispatched aboard an Acclamator-class assault ship to add to the defense of the planet. When the Separatist fleet led by Grievous arrived, it met a force of over ten Venator-class Star Destroyers, two Acclamator-class assault ships, and two Arquitens cruisers. The engagement resulted in the Battle of Kamino, which began with the Separatists attacking and the Republic dispatching starfighter forces from the Tipoca City Military Complex on the planet along starfighters from Republic ships. As Skywalker spearheaded the starfighter assault along with Shadow Squadron, Admiral Yularen aboard the Resolute led the capital ship defense.[23]

The Kamino blockade battles against the Separatist fleet.
While Republic forces were inflicting damage on the Separatist fleet, wreckage from the ships crashed on Kamino's surface. As Skywalker was ready to press the Republic attack, he was ordered not to as Kenobi was suspicious of the wreckage. After investigating the ocean with a submersible, Trident-class assault ships emerged from the wreckage and attacked Tipoca City. Skywalker retreated back to the surface as an answer to Kenobi's call for help while Republic orbital defenses continued to hold the Separatist fleet at bay. Eventually, droid forces spread themselves too thin and were ultimately defeated.[23]
Sullust, Mortis mystery, and the Nexus Route
Afterwards, the Republic Navy and Separatist fleet engaged in a fierce engagement at the Battle of Sullust when the combined naval forces under the command of Jedi Generals Skywalker and Kenobi which included five Venators, one Acclamator, one Arquitens, and three Consulars confronted the fleet led by Asajj Ventress above Sullust's surface. Fierce engagements took place during the battle, with many warships attacking at close range and sustaining heavy damage. Both Republic and Separatist starfighters played a pivotal role in the battle, with Separatist squadrons Trident group one and Trident group two destroying the Republic flagship Resolute. Skywalker and Kenobi utilized their Delta-7Bs to land aboard the Separatist flagship and confront Ventress. Through an act of betrayal, Dooku ordered Separatist forces to destroy the Separatist command ship and kill Ventress. With the loss of the flagship and the supposed death of Commander Ventress, Separatist naval units were forced to retreat.[113]

Ventress attacks the Republic fleet during the Battle of Sullust.
Sometime later, Rear Admiral Nils Tenant aboard a Venator patrolled the Chrelythiumn system when they intercepted a mysterious transmission that contained a Jedi distress signal that was more than 2,000 years old. With the Jedi High Council involved, Skywalker, Kenobi, and Tano were dispatched to investigate. The Jedi team was set to rendezvous with a Venator for fears of a Separatist attack, but when both parties reached the coordinate, they were not able to detect each other. At this moment, the Jedi team aboard an Eta-class shuttle encountered a monolith which pulled the shuttle within and transported them to the mysterious land of Mortis.[114] After the Jedi managed to leave Mortis, their shuttle was in the previous coordinates they were planning to arrive at, and managed to make contact with the Venator. They then discovered that they had only vanished for mere moments.[115]
After discovering the coordinates of the Nexus Route, a strategic hyperspace route that led to Republic and Separatist homeworlds including Coruscant, Jedi General Even Piell was captured after Separatist naval warships intercepted, attacked, and boarded his Venator.[47] By this time, Piell commanded a fleet group.[18] Along with Jedi General Piell, Captain Wilhuff Tarkin and clone naval officers were also taken prisoner, and were all sent to the Citadel prison on the shattered planet of Lola Sayu. A Republic infiltration team led by Skywalker and Kenobi was soon assembled, and managed to infiltrate the maximum security site,[47] although they became trapped when their escape shuttle was destroyed.[116]
With the infiltration turing into the Battle of Lola Sayu and the Republic team trapped on the planet, a naval task force consisting of four Venators and led by Jedi Generals Adi Gallia, Saesee Tiin, Plo Koon, Kit Fisto, and Admiral Barton Coburn was formed in order to rescue Republic forces. After arriving above Lola Sayu, all vessels deployed a squadron of ARC-170 starfighters to engage the Separatist defense fleet along with an extraction LAAT/i gunship transporting Koon. During the space battle, the ARC-170s engaged Separatist starfighters and capital ships, while droid Hyena-class Droid Bombers made bombing runs on the Venators. On one occasion, a contingent of droid bombers managed to slip past Republic defenses and bomb a Venator, resulting in significant enough damage that forced it to withdraw from the battle.[36]
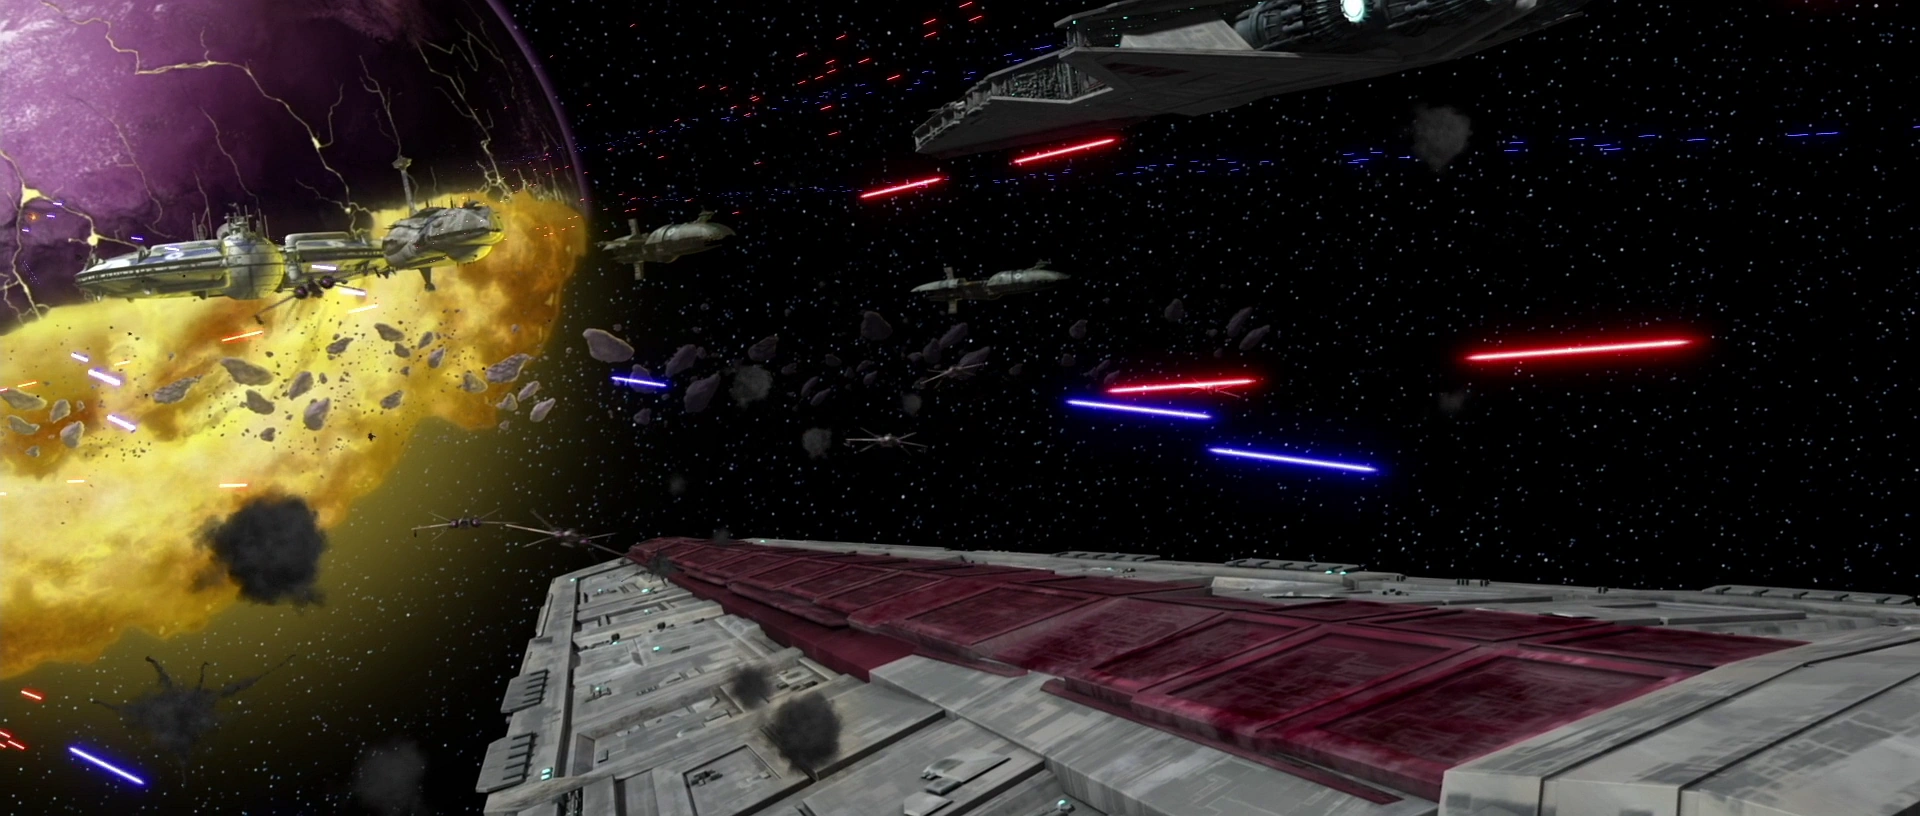
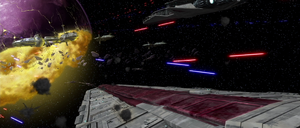
The Republic task force engages the Separatist defense fleet.
Not being able to pierce through the Separatist defenses, Koon ordered the other Jedi Generals to punch a hole through the defense fleet. Once a breach was made, the gunship raced to the surface and arrived at the extraction point, just as the Republic infiltration team was being overwhelmed. With all Republic personnel onboard except several casualties including General Piell, the gunship and its escort fighters returned to space. Despite being engaged by droid fighters, the Jedi Delta-7Bs managed to repel them. Once all forces were accounted for, Admiral Coburn ordered that the task force jump to hyperspace and the coordinates for the Nexus Route were intact.[36]
Felucia, Mon Cala, Aleen, and Patitite Pattuna
Republic naval assets participated in the Second Battle of Felucia, where Republic starfighters provided air support for ground units.[117] Afterwards, the planet of Mon Cala was faced with civil unrest with the death of King Yos Kolina, as the Quarren population did not have faith in the successor, Prince Lee-Char. In order to provide aide, a Consular-class cruiser transporting Senator Padmé Amidala and General Skywalker was dispatched to the water world. After negotiations broke down with the presence of Separatist ambassador and Commander Riff Tamson, Amidala and Skywalker returned to the Consular which was hovering above the surface of the water to report the situation to the Jedi High Council. General Windu confirmed that Republic reinforcements were being dispatched, and Amidala and Skywalker returned to the underwater Mon Cala city.[118]


A Venator arrives at Mon Cala bringing Gungan reinforcements.
After the Battle of Mon Cala commenced with a combined Quarren Isolation League and Separatist military attack on the city, the Mon Cala planetary defense services were deployed to defend the area. After fierce fighting, a Venator-class Star Destroyer arrived above the surface of the water and deployed LAAT/i gunships carrying a company of Clone SCUBA troopers and their equipment, as well as Commander Tano and General Fisto. After deploying, Republic vessels departed the area,[118] although the Consular remained.[source?]
Despite Republic reinforcements, the Quarren and Separatists managed to overwhelm the Mon Calamari and Republic reinforcements. Pushed to the coral below the city, the remaining Republic and Mon Calamari forces that were not captured attempted to escape via the Consular, but the vessel was destroyed in a fierce explosion and ambush. Using the cruiser's wreckage to escape Separatist forces, the survivors split into two teams. The Republic once more dispatched reinforcements to the crucial Republic world in the form of another Venator-class Star Destroyer. The Venator arrived above the surface of the ocean and deployed the Gungan Grand Army, soon turning the tide of the battle. Despite this, Separatist reserve forces regained the upperhand, until the Quarren defected and rejoined the Republic. With the combined Republic, Gungan, Mon Calamari, and Quarren forces together, they managed to eliminate the Separatist presence on Mon Cala.[119]


Republic Navy ships arrive over Aleen for a mercy mission.
After devastating groundquakes wreaked havoc on the Republic world of Aleen, a relief mission was dispatched to provide assistance. Three Peltas and one Acclamator led by Commander Wolffe from the fleet of General Plo Koon was dispatched, to provide support and supplies. The contingent of vessels were originally en route to provide reinforcements to Plo Koon's forces, and as such were ordered to quickly aide the Aleena and continue bound for Koon's forces. After LAAT/i gunships and Peltas landed with supplies, they soon departed once systems were reestablished.[120]
After the mission, the flagship of General Adi Gallia came under attack by a trio of Separatist warships led by General Grievous near Patitite Pattuna. The surprise attack quickly destroyed the Venator's reactor and Gallia quickly ordered the crew to abandon ship. As gunships and starfighters escaped from the doomed vessel, Separatist boarding forces led by Grievous infiltrated the starship and confronted Gallia and the clone troopers of the 91st Mobile Recon Corps. The Battle of Patitite Pattuna resulted in the Venator being destroyed and Adi Gallia captured. After a brief period of time, however, five Venators from the fleet of Plo Koon arrived and attacked Grievous' sole vessel in an attempt to rescue Gallia. As Republic ARC-170 starfighters attacked the Separatist warship, General Plo Koon led a boarding mission which ultimately succeeded in rescuing Gallia as well as two stowaway Republic droids owned by Senator Amidala and General Skywalker, R2-D2 and C-3PO.[26]
Umbara, Kiros, Kadavo, Sertar sector, and Naboo
As the Clone Wars progressed, the war erupted in the Expansion Region when the Separatist Alliance reinforced their control over the isolated but vital supply hyperspace routes.[121] With the supply lines threatened,[18] the Republic Navy launched a lightning strike in the Ghost Nebula sector and the planet of Umbara, which had defected to the Separatist cause. A group of at least three Venators and three Acclamators were dispatched to conquer the strategic world, and encountered the Separatist blockade. After the Battle of Umbara commenced with the Republic attacking the blockade with capital ships and starfighters, the Republic managed to break a gap in the Separatist defenses and bring forth an Acclamator to within the planet's atmosphere. By this time, Clone Z-95 Headhunters were in the Republic Navy's arsenal, and escorted LAAT/i gunships to the surface of the planet. With intense fighting on the ground between the Umbaran Militia and the Republic force that consisted of units from the 501st Legion, 7th Sky Corps, and units led by Jedi Generals Tiin and Pong Krell, air support was used various times, including bomber support provided by Clone Flight Squad Seven.[121]

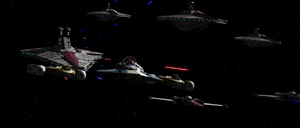
The Republic Navy attacks Umbara.
After the Republic captured an Umbaran airbase and cutoff Umbaran and Separatist supply lines, the Separatist fleet still above the planet deployed a DH-Omni Support Vessel to continue supplying the Umbarans. Despite the Separatist fleet outnumbering Republic naval assets, Republic starfighters attempted to break through Separatist naval defenses and destroy the support vessel, but to no avail. With ferocious starfighter combat in the atmosphere of the planet, a trio of clone troopers of the 501st Legion commandeered Zenuas 33 Umbaran starfighters and infiltrated the Separatist fleet, destroying the support vessel and once again cutting off hostile supply lines.[122] After several more engagements on the surface, the Republic managed to claim victory on Umbara and LAAT/i gunships were dispatched to provide support.[123]
Following the Battle of Umbara, the Separatists invaded the Artisan colony on Kiros and abducted the colonists, forcing them into slavery with aid from the Zygerrian Slave Empire. Shortly prior to the abduction, Governor Gupat Roshti of the colony managed to send a call for help to General Yoda although Republic reinforcements arrived too late. A Venator-class, two Arquitens-class light cruisers, and a Consular led by Skywalker, Kenobi, and Tano, arrived ten rotations after Yoda's transmission. After determining there were no Separatist craft in the Kiros system, an Acclamator arrived and hovered above the colony and deployed several gunships and carriers to the city in order to deploy Republic ground forces consisting of the 501st Legion and 7th Sky Corps. After fighting against Separatist ground forces led by Zygerrian Commander Darts D'Nar in the Battle of Kiros, Admiral Yularen conducted a planetary scan that revealed that the colonists were no longer on the planet.[124]
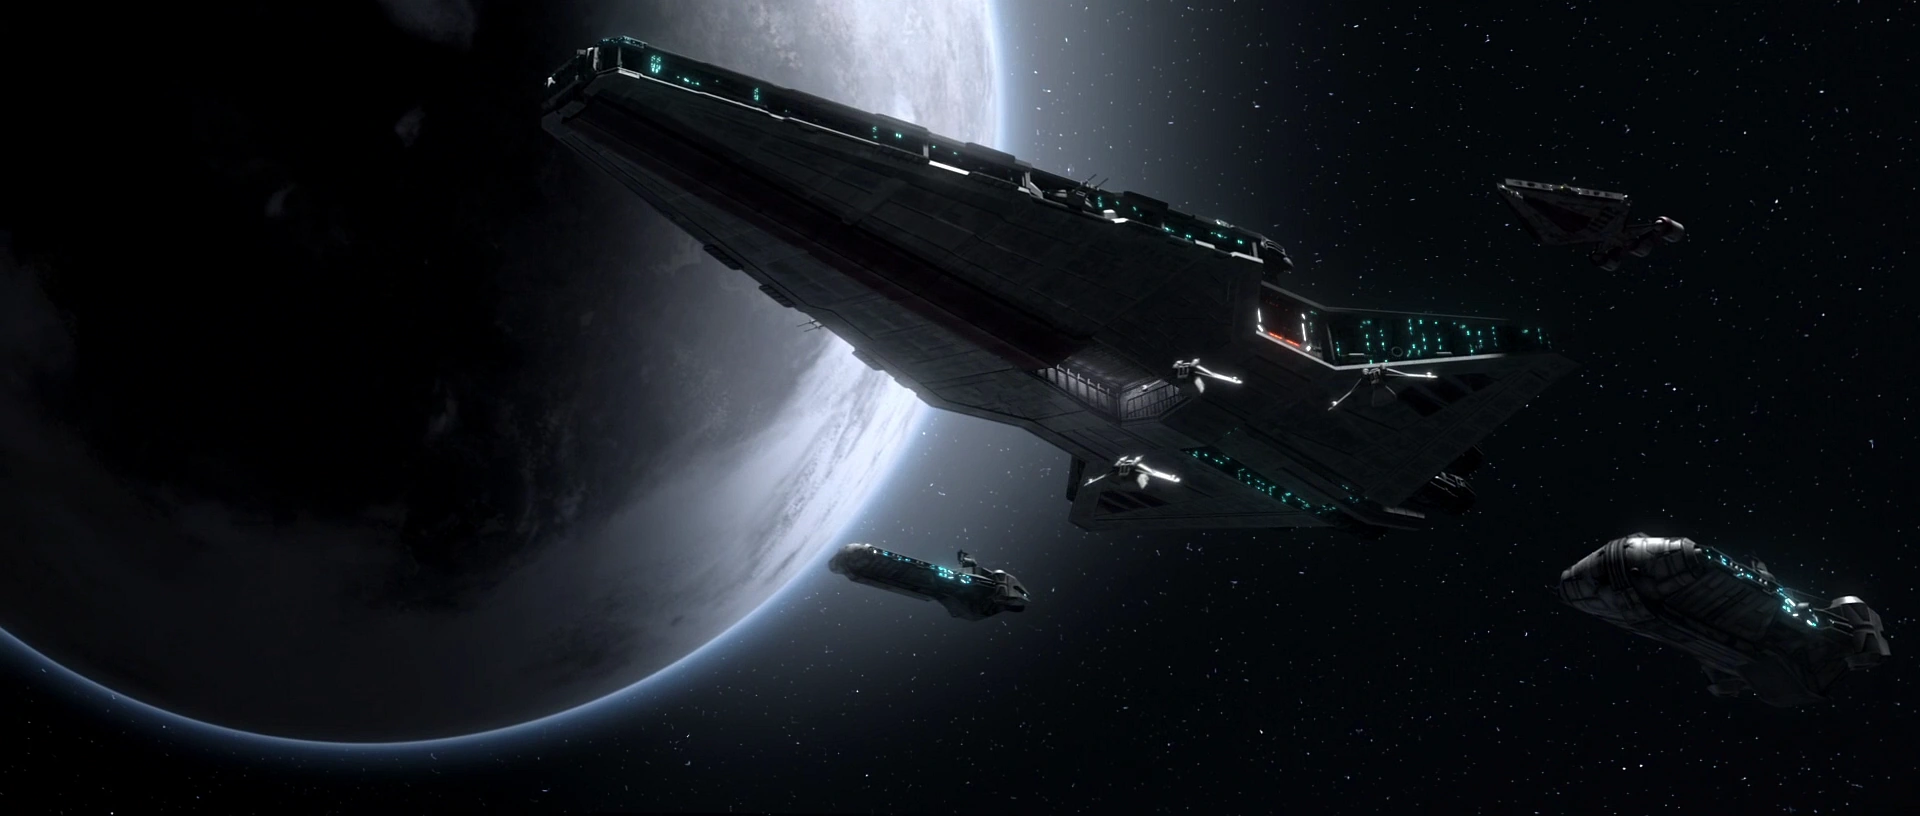

The Republic Navy above Kadavo after the battle there.
After an infiltration mission to Zygerria that resulted in Kenobi's enslavement at the slave processing facility on Kadavo along with dozens of colonists, Skywalker and Tano arrived to rescue him and the colonists after they escaped Zygerria. Outnumbered, Skywalker called for Republic reinforcements, which later arrived in the form of a Venator and an Arquitens from Koon's fleet. The Arquitens moved in near the facility while a contingent of LAAT/i gunships, Z-95 Headhunters, and Plo Koon in his Delta-7B attacked Zygerrian ground and air defenses with the start of the Battle of Kadavo. Despite the loss of a gunship, the gun turrets at the facility were eventually destroyed, allowing the light cruiser to move in closer. After Tano deduced that there was no method of moving the colonist from their holding cells to the evacuation areas, Tano advised Admiral Coburn inside the Arquitens to move the ship underneath the facility. Clone troopers of the 104th Battalion equipped with jetpacks and cables then rescued the colonists and brought them onboard. In the aftermath of the battle, the two Peltas from Koon's fleet later arrived and escorted the other two vessels in orbit.[125]
Sometime after, the task force of Obi-Wan Kenobi was patrolling in relative proximity to the planet Florrum in the Sertar sector. Shortly after receiving a distress call from the Jedi Paladin-class corvette Crucible, the task force came under surprise attack by a Separatist fleet led by Grievous. The three Venators, including the flagship Negotiator, maintained their distance while they launched all of their starfighters. Meanwhile, four Arquitens and two Consulars moved in closer to the Separatist fleet. With intense naval combat transpiring, one Venator moved in closer as Republic starfighters scrambled in battle with droid starfighters. Although the Separatist fleet sustained some damaged, several of its frigate broke through Republic lines and moved in to close range.[43]
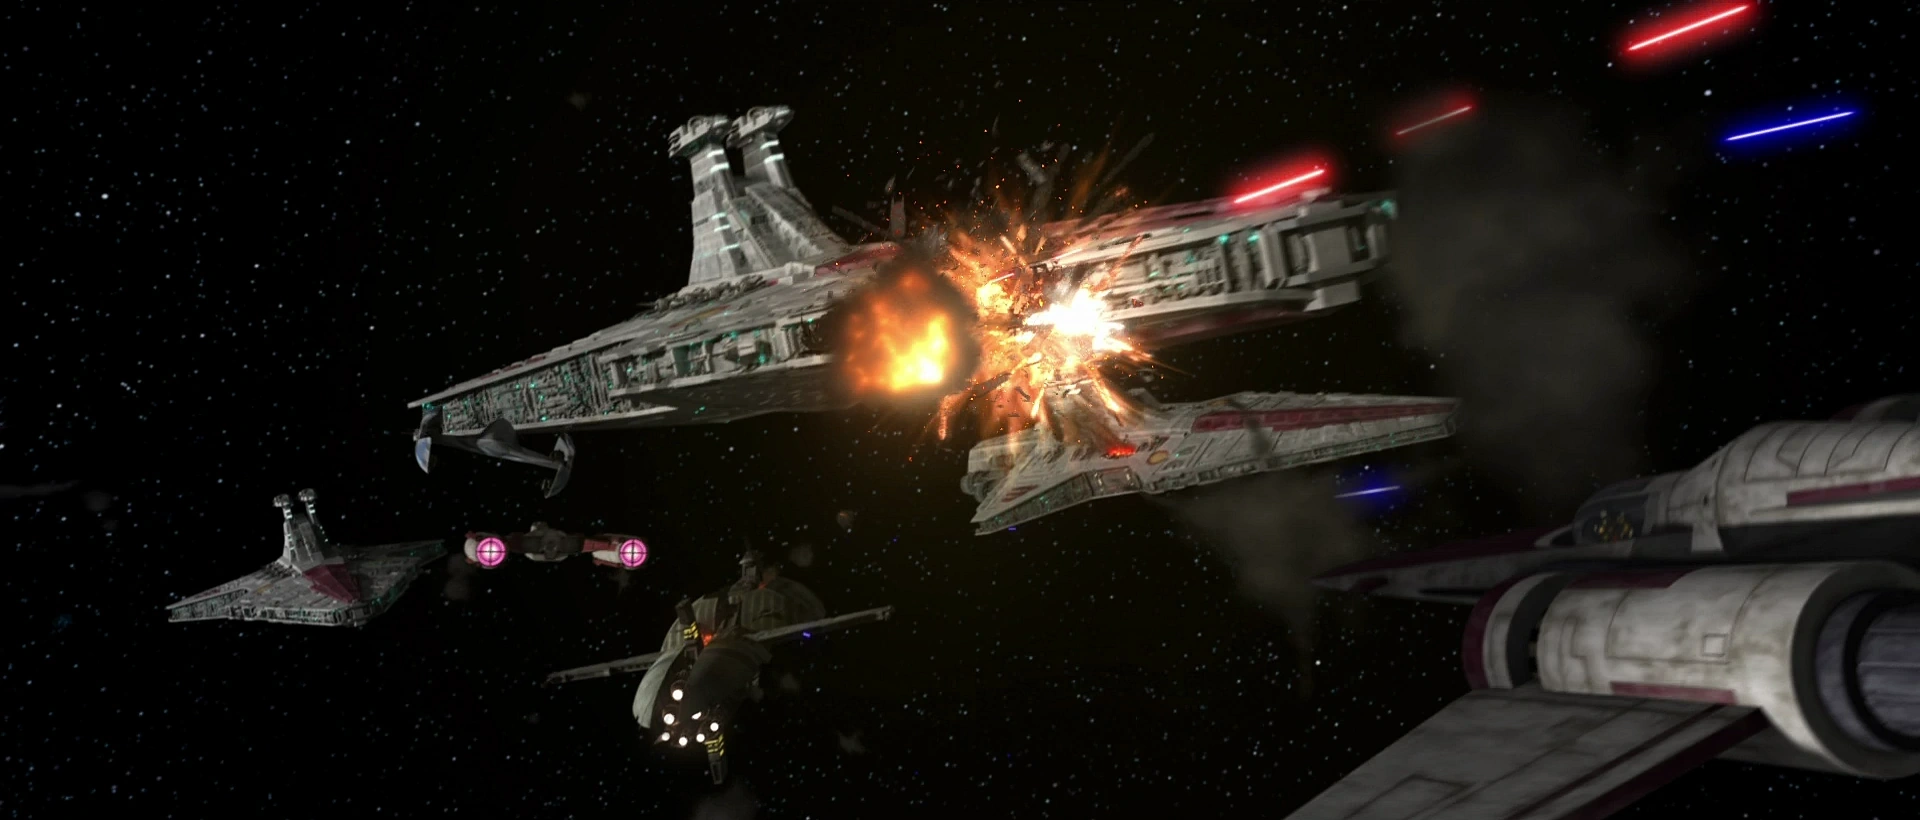

The task force of Obi-Wan Kenobi is ambushed.
A second Venator moved up closer to the Separatist fleet, so that both escorting Venators provided a defense for the Negotiator. Eventually, several Republic starfighters retreated, just as a Consular and an Arquitens were both quickly destroyed in the midst of battle. After a barrage crippled a Venator and Republic starfighters continued to retreat, the Separatists broke through Republic lines and dispatched boarding parties to the Negotiator. A group of two Z-95 Headhunters and a Y-wing en route back to the Negotiator were shot down, just as one of the escorting Venators was destroyed in a fierce explosion. The Y-wing then crashed inverted into the Negotiator's open hangar, and a large Separatist boarding party landed thereafter. With heavy combat onboard the Negotiator, Kenobi's 7th Sky Corps forces were pushed back further into the ship.[43]
While fighting was taking place aboard the Negotiator, the other remaining Venator succumbed to another crippling barrage. Two Arquitens were destroyed during the battle, and droid starfighters that had swarmed the remainder of the Republic fleet attacked and destroyed the remaining Consular cruiser. By this time, an Arquitens remained operational, and Kenobi had ordered the personnel aboard the Negotiator to abandon ship and initiate the vessel's self-destruct mechanism. After Grievous took control of the flagship's bridge, Kenobi and his forces launched from escape pods, and watched as the Negotiator was destroyed by a massive explosion.[43] After the battle, Kenobi and the survivors of his task force were rescued by another task force that consisted of one Venator, three Peltas, and one Arquitens. The task force then later received the remnants of the Ohnaka Gang who had transported the crew of the Crucible to the task force.[37]
Sometime following the destruction of Kenobi's task force, he went undercover as the bounty hunter Rako Hardeen in order to infiltrate a Separatist plot to kidnap the Chancellor during the Festival of Light on Naboo. Accompanying Chancellor Palpatine was a contingent of Republic ships for security, which included an Acclamator-class assault ship and at least four Consulars. Following a skirmish in Theed and the apparent end of the plot, the Supreme Chancellor waived his security detail away as the threat was over.[126]
Valor, Cato Neimoidia, Ringo Vinda, and Scipio

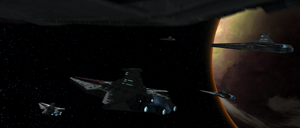
A group of Republic Navy Venators shortly prior to being attacked.
Following the destruction of Kenobi's naval forces,[37] a contingent of six Venators were attacked by a Separatist task force and Skywalker, Kenobi, and a group of Republic Intelligence officers intercepted a secret transmission from Grievous himself while situated in their naval group. Despite their attempts, however, the clone intelligence officers failed to crack the new Separatist encryption code and fears escalated that the Separatists may be ready to launch a major offensive. By this time, the CIS Navy introduced their modified Gozanti-class cruisers,[127] and the Republic Navy was on high alert whenever Gozanti-class cruisers were spotted as they could either be Separatist warships or smuggling vessels from the Black Sun crime syndicate.[128]
The source of the transmission was eventually located in deep Separatist space, and so the Jedi High Council and Republic High Command commissioned the activation of D-Squad, a squad of exceptional astromech droids and a DUM-series pit droid led by High Command Colonel Meebur Gascon. After the briefing, Gascon led D-Squad in a stolen Separatist Maxillipede shuttle to the encryption module's detected location, which was aboard the flagship of Separatist droid officer Aut-O and protected by a large fleet.[127] After infiltrating the flagship and successfully recovering the encryption module, D-Squad's shuttle was damaged in their return to the Republic by a comet storm, and crashed on the planet of Abafar.[129]
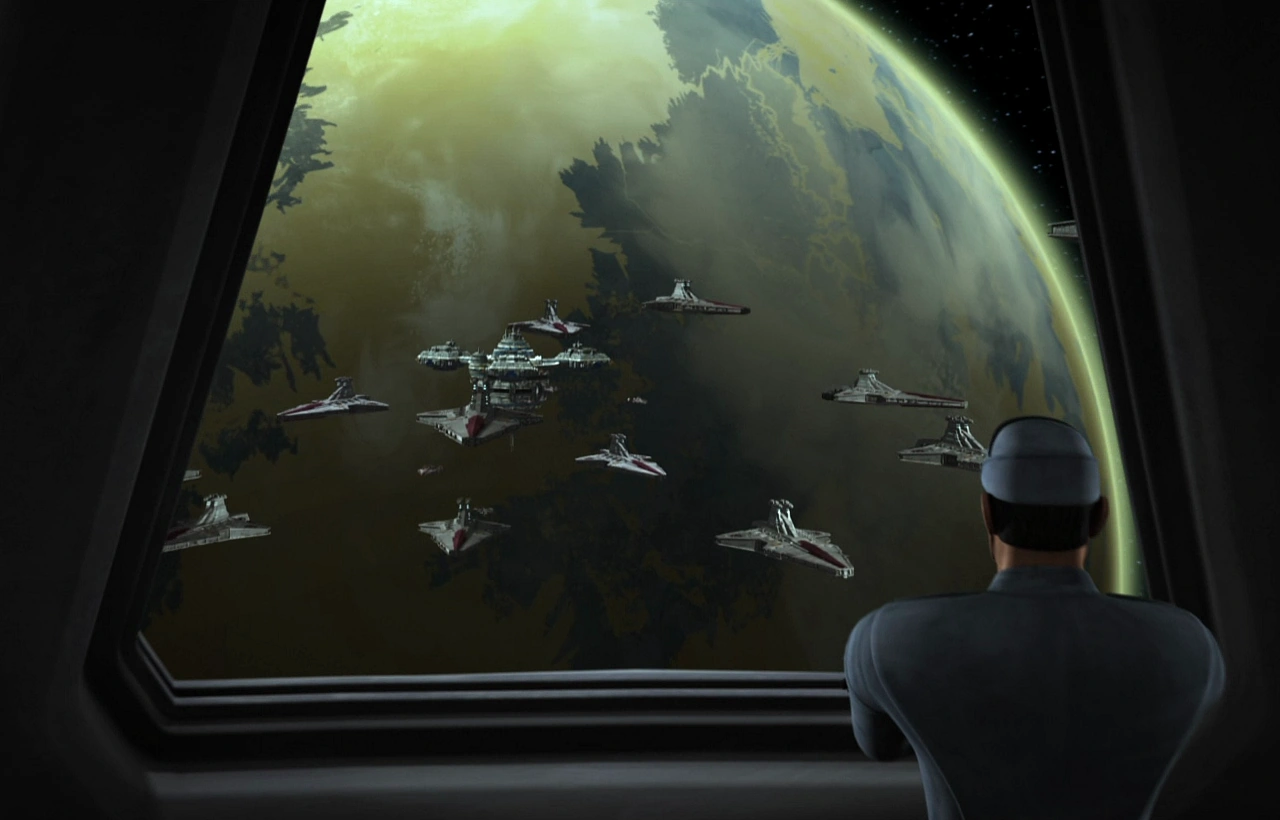

A hologram of a clone naval officer overlooks the Republic Navy from the Separatist-controlled Venator.
D-Squad managed to survive the crash intact, but became lost in The Void, an endless desert that covered the entire surface of the planet. After splitting into two teams, the squad rallied together at the city Pons Ora and recuperate.[129] There, the squad uncovered a Separatist mining operation with a Nu-class transport in the landing pad, as well as a Republic Venator in orbit. After gathering information from Borkus and discovering the lost clone commando, Clone Captain CC-5576-39 "Gregor," the squad deduced that the Separatists stole the shuttle and were planning to destroy the Venator with the mined Rhydonium as the explosives. In an effort to reach their Republic comrades and end the Separatist plot, Gregor moved in and engaged the Separatist forces while the rest of the squad made way towards the transport. After rescuing Colonel Gascon who was briefly impaired, Gregor became trapped and surrounded. Gregor ordered the others to leave while he covered their escape, and promised to return to the Republic. The mining installation was then destroyed in large explosions after Gregor detonated Rhydonium-filled canisters.[130]
D-Squad then landed their Nu-class transport inside the hangar of the Venator in orbit but were surprised to discover that it was seemingly deserted, despite jumping to hyperspace. After the squad made their way to the bridge, the discovered a large cadre of clone naval officers roaming the area, but soon found that they were holograms and encountered Separatist battle droids and a super tactical droid. In their escape, D-Squad located a group of Republic droid survivors that recounted that the Separatists boarded and hijacked the Star Destroyer. After making their way to the main hangar's command room, the squad discovered that the entire ship was packed with explosive Rhydonium-filled canisters, turning the entire kilometer long capital ship into a bomb. Before the Republic force could create a plan, they discovered that they were being tracked by a Separatist Pistoeka sabotage droid and chased it to a room of gun batteries. There, they were ambushed by a large swarm of the sabotage droids, but were saved when M5-BZ sacrificed themselves by opening the airlock, sending itself and the Separatist droids into the tunnel of hyperspace. Colonel Gascon then created a plan to escape on the transport while R2-D2 reprogrammed the detonator.[63]
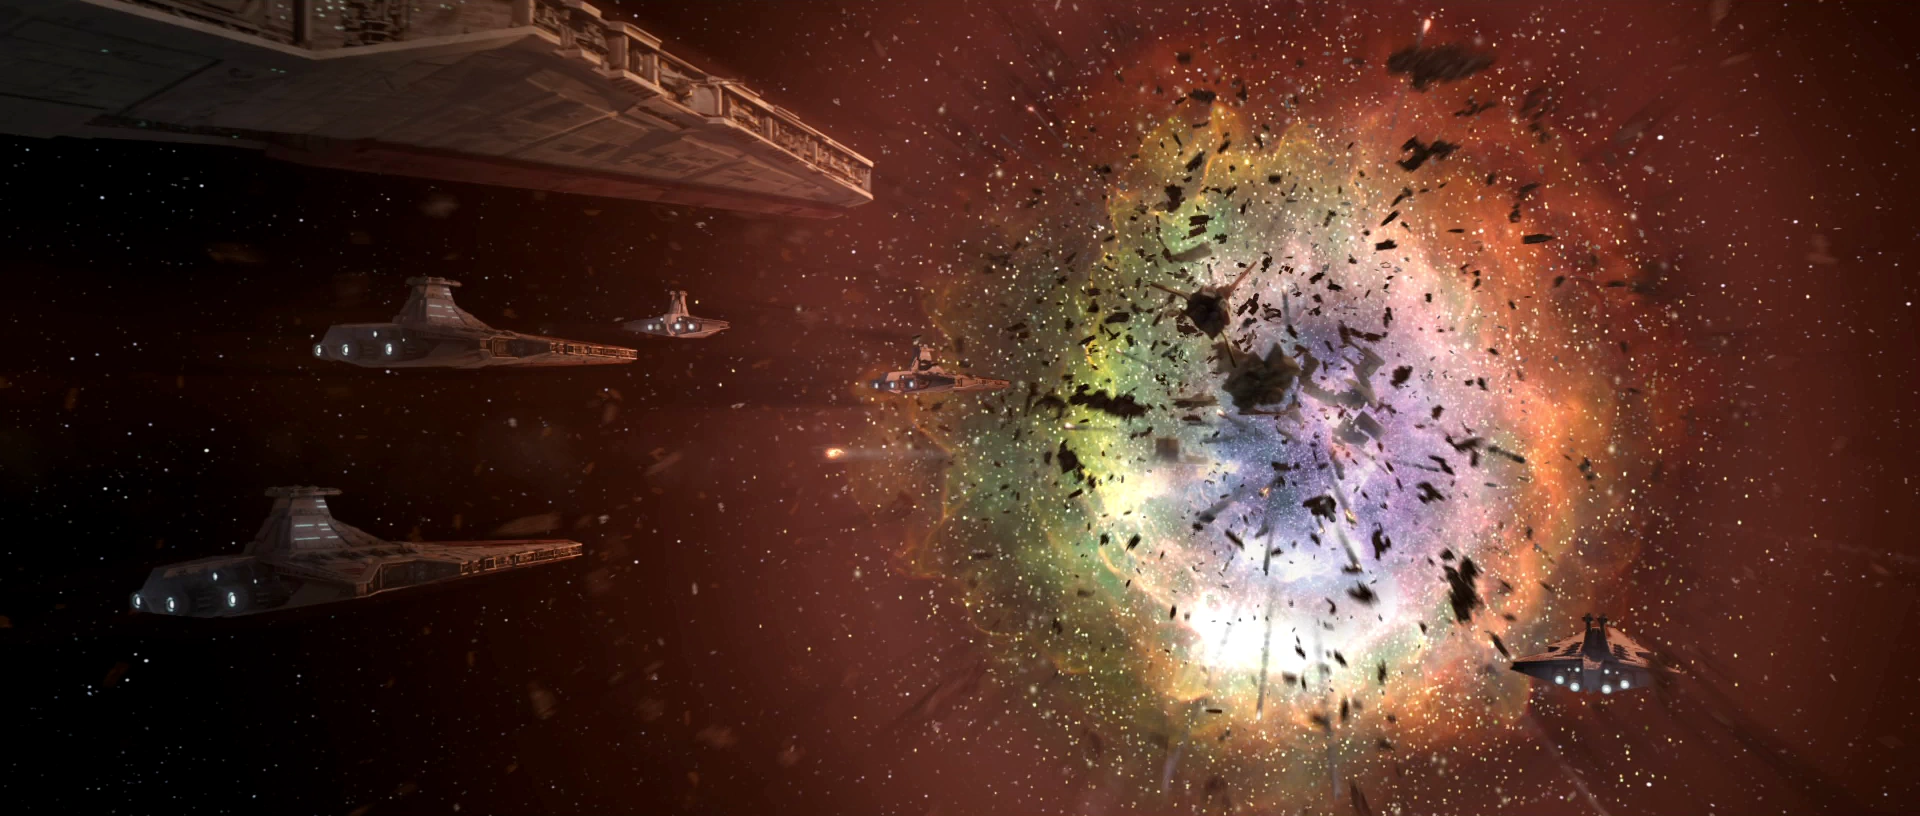
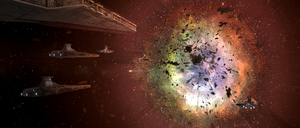
The Valor and Republic Navy is attacked.
The Star Destroyer then exited hyperspace and arrived in the Carida system, which was currently hosting the Republic strategy conference aboard the Republic space station Valor and bringing together a large contingent of Republic vessels, including at least seventeen Venators, at least five Arquitens, and at least three Consulars. As the Star Destroyer arrived and accelerated to ramming speed, General Skywalker conversed with General Kenobi aboard the space station on how boring the conferences were, while Kenobi responded that with the final ship arriving the conference could finally begin. As Skywalker noted that the Star Destroyer was moving at a high rate of speed, D-Squad was engaging Separatist forces in the hangar and extracting on the transport.[63]
By this time, Republic officers onboard the Valor could not establish contact with the Venator and discovered that the ship was in actuality a bomb. R2 then encountered the super tactical droid, and after D-Squad accidentally left him behind and having a brief fight against the tactical droid, began the detonation sequence prematurely. The Venator then erupted in a large explosion, that was followed by a secondary yet larger shockwave that pummeled the Republic Navy vessels and the station, destroying at least one Arquitens and damaging all other craft. Following the explosion and D-Squad's contact with the rest of Republic forces, salvage teams aboard Republic space tugs successfully searched the wreckage for R2, and were able to repair him and praise the droid as a hero.[63]

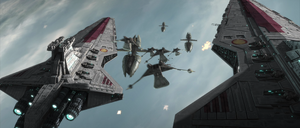
Skywalker's task force engages the Separatists in the defense of Cato Neimoidia.
Subsequent to the Carida incident, Cato Neimoidia was a front in the war. As one of the Trade Federation's purse-worlds, Skywalker's naval forces participated in the defense of the world after Separatist fleet forces arrived into the world and secured it. During the battle, at least three Venators and at least one Consular of Skywalker's task force partook in the battle, while Skywalker and Tano led starfighter forces to the planet's surface to deploy aerial ground forces from gunships. The battle, however, was interrupted by a bombing of the Jedi Temple hangar, and Skywalker and Tano were recalled to Coruscant.[45] After an investigation, Tano was framed for the bombing of the hangar and escaped from the Republic Center for Military Operations. At this time, many Republic Navy warships of varying class were stationed on in the area, including during her trial when she was found innocent.[131]
Sometime afterwards, a Separatist fleet commanded by the resurfaced Admiral Trench retained control of the planetary-wide space station surrounding Ringo Vinda, and a formation from the Open Circle Armada of at least twenty Venators, several Acclamators, and several Consulars, including the forces that were part of Skywalker's task force, engaged the Separatist in the Battle of Ringo Vinda. The campaign lasted for several rotations, with neither side gaining a foothold aboard the station. As Republic Army forces led by Jedi Generals Skywalker, Tiplee and Tiplar launched an assault in one instance, Republic capital ships and starfighter forces engaged Separatist naval groups around the station, and the station itself was the victim of several attacks by Republic Navy forces. After a friendly-fire incident occurred and caused the death of General Tiplee, Republic troops were forced to withdraw to their original staging area aboard the station.[132]
After the Republic withdrew, Republic Navy forces retreated to another area of the planet's orbit. The clone trooper, CT-5385 "Tup", who killed Tiplee in a case of friendly fire, was brought aboard a navy vessel for further examination, but it was deemed necessary to transport him to Kamino. A Republic medical shuttle with an escort of four ARC-170s departed Skywalker's flagship, but were attacked by Separatist forces before their jump to hyperspace. The fighter escort was neutralized, and a boarding party captured Tup and eliminated the shuttle. An Eta-class shuttle carrying Skywalker and his clone officers investigated the wreckage of the shuttle, and after boarding a Separatist shuttle carrying Tup, managed to secure him. He was then transported to Kamino aboard medical frigate 517 and another ARC-170 escort,[132] and they eventually reached Kamino. At this time, several Republic Star Destroyers were stationed on Kamino.[133]
Skywalker's fleet then participated in the invasion of Scipio, when the Republic delegation led by Senator Amidala and Clone Commander Thorn was attacked by Separatist forces commanded by Count Dooku himself in order to secure the InterGalactic Banking Clan. After a brief naval battle, the Separatist flotilla retreated and Republic starfighters and gunships moved to Scipio's surface in order to secure the world and rescue the Senator. After the invasion, the Banking Clan was placed under the control of the Supreme Chancellor.[134]
End of the Clone Wars
War continues to intensify
By this time in the Clone Wars, the Galactic Republic had begun construction on the DS-1 Death Star Mobile Battle Station from Project Stardust in orbit above Geonosis and was defended by a flotilla of ships. The flotilla participated in a failed attempt to suppress riots on Geonosis and the escape of Geonosian Separatist leader Archduke Poggle the Lesser. In the last four months of the war, the Republic and Separatists were locked in the battle on Lokori, where Separatist naval forces were attempting to break the lunar picket lines of the Republic Bright Nebula Fleet. In the course of the battle, the Separatist navy was able to launch several periodic attacks on Lokori's surface.[7] By the rushed[16] introduction of the Victory-class Star Destroyer[53] at the height of the conflict despite the delays and politics,[16] and at the final phase of the war, most Maelstrom-class battle cruisers were phased out as they proved too costly to operate. Despite most of the ships not participating in combat, the lead ship of the class, the Maelstrom fought with distinction in the Battle of Kromus and the Battle of Cularin while under the command of Jedi General Darrus Jeht.[53] Victory-class Star Destroyers were already used extensively by the Republic Navy, with one deploying the original structures of Sentinel Base.[46] Eventually, however, Victory-class Star Destroyers were seen as space coffins due to their many design flaws and constant maintenance.[16]
Golan I Space Defense Platforms were deployed by the Republic Navy to free up naval assets, and DP20 Frigates were deployed to combat Separatist pirate groups and droid starfighters.[16] By the closing stages of the war, the Separatists launched an attack on Mahranee, which resulted in the Mahran to appeal for Republic aid. Jedi General Chubor and a task force of Republic forces were deployed, although they were too late from preventing the destruction of the Mahranee capital city. As Republic forces helped evacuate the survivors, the evacuating ships fell under attack by Separatist forces, resulting in the annihilation of Chubor and his entire Republic force, including at least one Consular-class cruiser aiding in the evacuation, along with the deaths of thousands of Mahran and the destruction of their ships.[135] In one instance, the Separatist droid tri-fighter DIS-T81 flew near wreckage in space and a Republic Consular-class Charger c70 light cruiser alongside other droid tri-fighters.[136]
Some time after, Republic forces in gunships led by Generals Kenobi, Windu, Tiplee, and Secura assaulted the Shadow Collective Vizsla Keep 09 in an attempt to capture Darth Maul, Count Dooku, and Separatist General Grievous. Dooku and Grievous were held captive by Maul, who all managed to escape the Republic attack.[137] After the Jedi Quinlan Vos secretly turned to the dark side of the Force and joined the Separatists, Vos, Kenobi, Skywalker, and Jedi Knight Akar-Deshu led a Republic force to capture a Separatist supply storage base. After neutralizing a small Separatist starfighter contingent, Akar-Deshu returned to an Arquitens and informed Commander Cody to deploy three transports to capture the supplies. The supply base then exploded, destroying much of the materials that were stored there. Kenobi ordered Akar-Deshu to remain with a transport and salvage any remaining supplies.[135]
Following the destruction of the supply base, Vos was awarded by leading a Republic attack on a Separatist Vanqor listening post. Vos secretly informed Dooku of the Republic operation, allowing Separatist forces to evacuate well before Republic forces arrived. Vos was accompanied by Kenobi and Skywalker, who deployed with Kenobi's Star Destroyer Vigilance, commanded by Admiral Block. When the Vigilance arrived, it launched twenty-four ARC-170 starfighters as a first wave which accompanied the Jedi in their fighters. Not encountering any resistance, the Jedi conducted a strafing run which destroyed the post, but did not reveal any Separatist presence. The Jedi landed at the post and linked up with Commander Cody, and deduced that there was a traitor in their midst that was leaking information to the Separatists.[135]

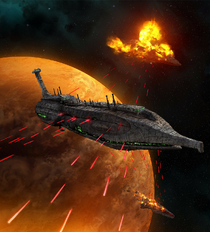
A Separatist Providence-class Dreadnought attacks Republic Star Destroyers.
After eventually discovering that Vos was the traitor, the Jedi Council dispatched him to kill Dooku in order to test his loyalty. Accompanied by his lover, Asajj Ventress, Vos traveled to Dooku's Separatist dreadnought in orbit above Christophsis and were tracked by Kenobi and Skywalker. After a brief duel, Kenobi and Skywalker managed to capture Vos and Dooku and secure them aboard the Vigilance. Despite being secured by Akar-Deshu and Jedi Kav Bayons and clone forces, Vos and Dooku managed to kill all resistance except for Commander Cody and escape the Star Destroyer. The Vigilance, however, fired on their escape craft, Ventress' Banshee, resulting in a crash landing on the surface of Christophsis. Kenobi and Skywalker arrived at the crash site to discover that the three all survived and discovered that they had traveled to a Separatist tower. Republic starfighter forces began bombarding the tower and deployed clone troopers in order to kill the fugitives, culminating in a second battle on the planet. By the end of the battle, Ventress was killed, Dooku escaped, and Vos was captured after he returned to the light side of the Force. Vos was taken prisoner aboard the Vigilance, and Ventress' body was kept in stasis aboard the ship. Eventually, due to the Council's actions that drove Vos to the dark side as well as the events surrounding Ventress' involvement, Vos was accepted as a Jedi.[135]
At one point during the war, a Providence-class Dreadnought engaged and annihilated two Venator-class Star Destroyers.[9] Also during the war, Separatist Admiral Pors Tonith had a consistent record of victories against the Republic and Separatist privateers and encouraged pirates attacked Republic Navy supply lines. The Separatist-affiliated Nebula Raiders utilized their gun tugs and Z-95 Headhunters to raid Republic supply convoys.[5] During the Clone Wars, the Vensenor participated in the conflict, with Captain Bythen Forral serving aboard as a starfighter ace.[1]
Outer Rim Sieges commence
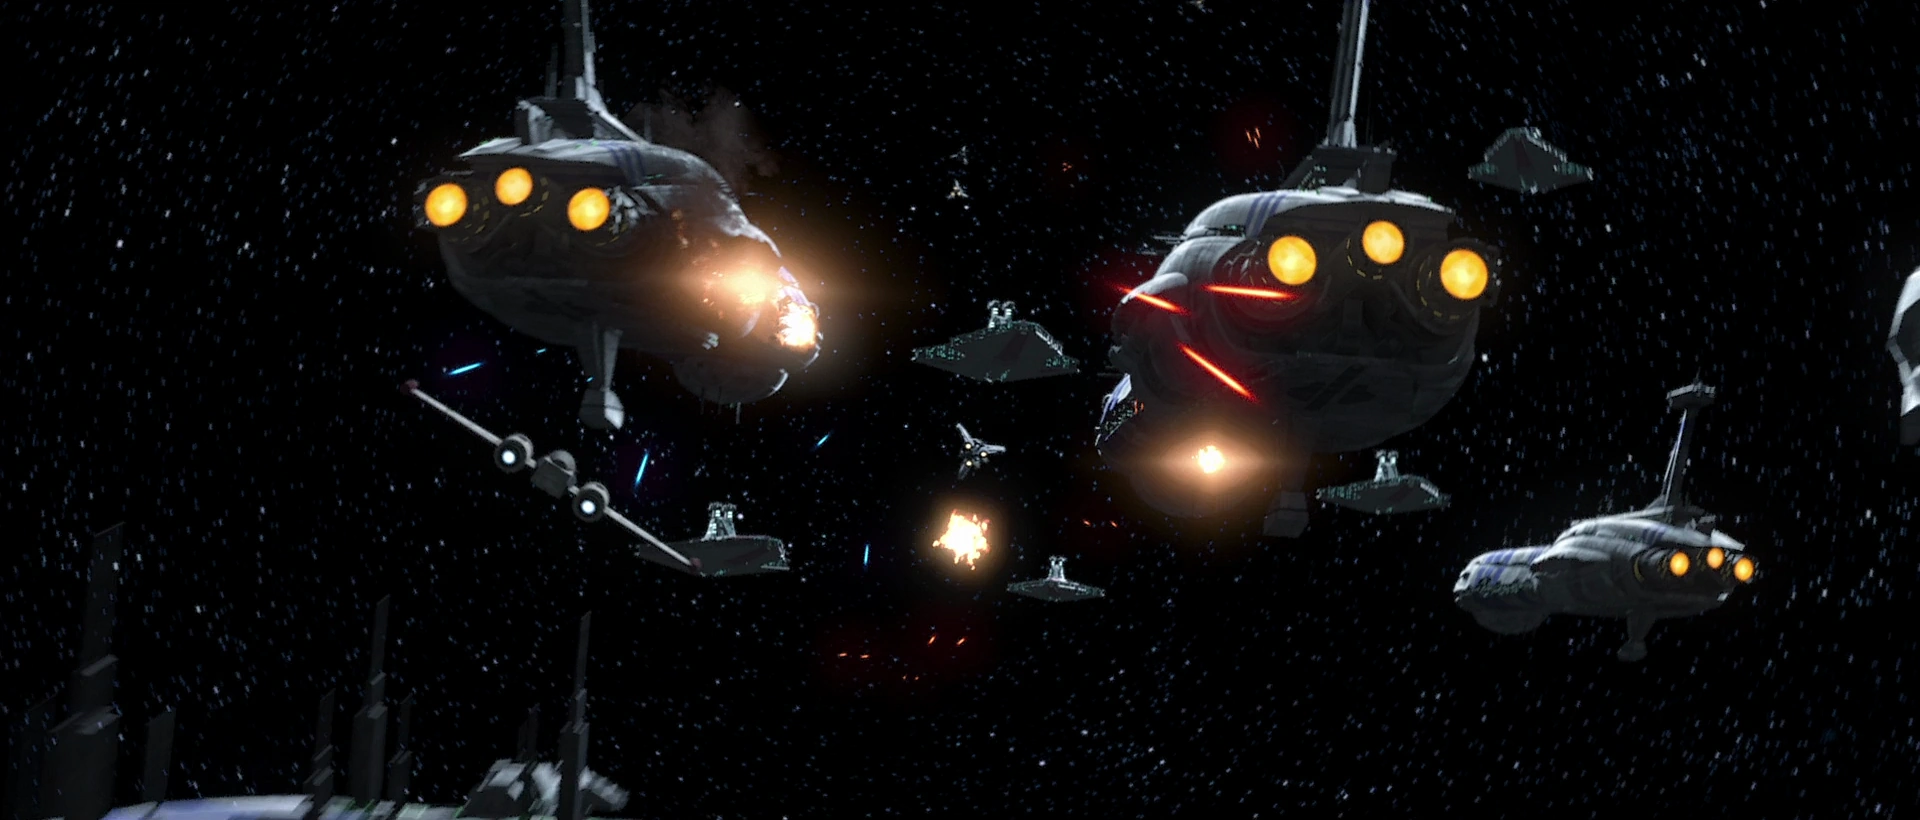
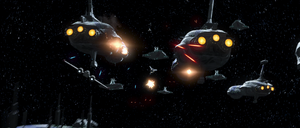
The Separatists initiate a bold offensive against the Galactic Republic.
By the closing stages of the war, Separatist military forces under the command of General Grievous launched a massive offensive in the Outer Rim Territories that pushed the Galactic Republic to the breaking point. Responding to the overwhelming Separatist attack, the Jedi High Council dispatched its Jedi Generals from the Core Wolds to reinforce clone forces, commencing the Outer Rim Sieges. One battle within the campaign was a battle between a Republic and Separatist fleet, where six Venators and several Republic starfighters fought against six Separatist dreadnoughts and their starfighter forces. Republic naval forces under Jedi General Plo Koon, including several Star Destroyers and starfighters, fought against a trio of Separatist dreadnoughts during the Battle of Cato Neimoidia[20] along with Clone Flight Squad Seven.[138]
During the Separatist offensive, the Core World planet of Anaxes and its massive shipyards,[32] which were once the largest in the Republic[139] and were instrumental to the Republic's war effort and capital ship production, fell under attack by Admiral Trench's forces. Jedi Generals Anakin Skywalker and Mace Windu led a two-pronged attack, with Skywalker commanding air forces and Windu leading the ground assaults. After several weeks of fierce fighting, the Republic had suffered devastating losses and were in danger of losing Anaxes to the Separatist forces. During that time, heavy fighting occurred above the main shipyard production plant, with Consular-class cruisers, Arquitens-class light cruisers, Venator-class Star Destroyers, and starfighters engaging Trench's Separatist fleet and many Republic ships suffering critical damage. Eventually, Separatist forces gained control of the main production facility, marking another step for a Republic defeat. Due to the status of Anaxes, a Republic defeat would result in an entire reserve fleet being compromised.[32]
At this time, Captain Rex and Marshal Commander Cody briefed the Jedi Generals about the likelihood that the Separatists were using Rex's strategies and battle plans. After undertaking a covert mission with Clone Force 99 behind enemy lines to a Cyber Center and deducing that the Republic ARC trooper CT-1409 "Echo" was still alive,[32] having been presumed dead during the Battle of Lola Sayu,[116] the Republic special forces undertook a mission to Skako Minor to rescue their comrade. After returning, the dwindled Republic naval forces gathered for an attack on the main production facility, and dispatched a contingent of gunships, starfighters, two Consular-class cruisers, and a Venator-class Star Destroyer for the assault while Clone Force 99 infiltrated Trench's flagship.[140]
Final campaigns
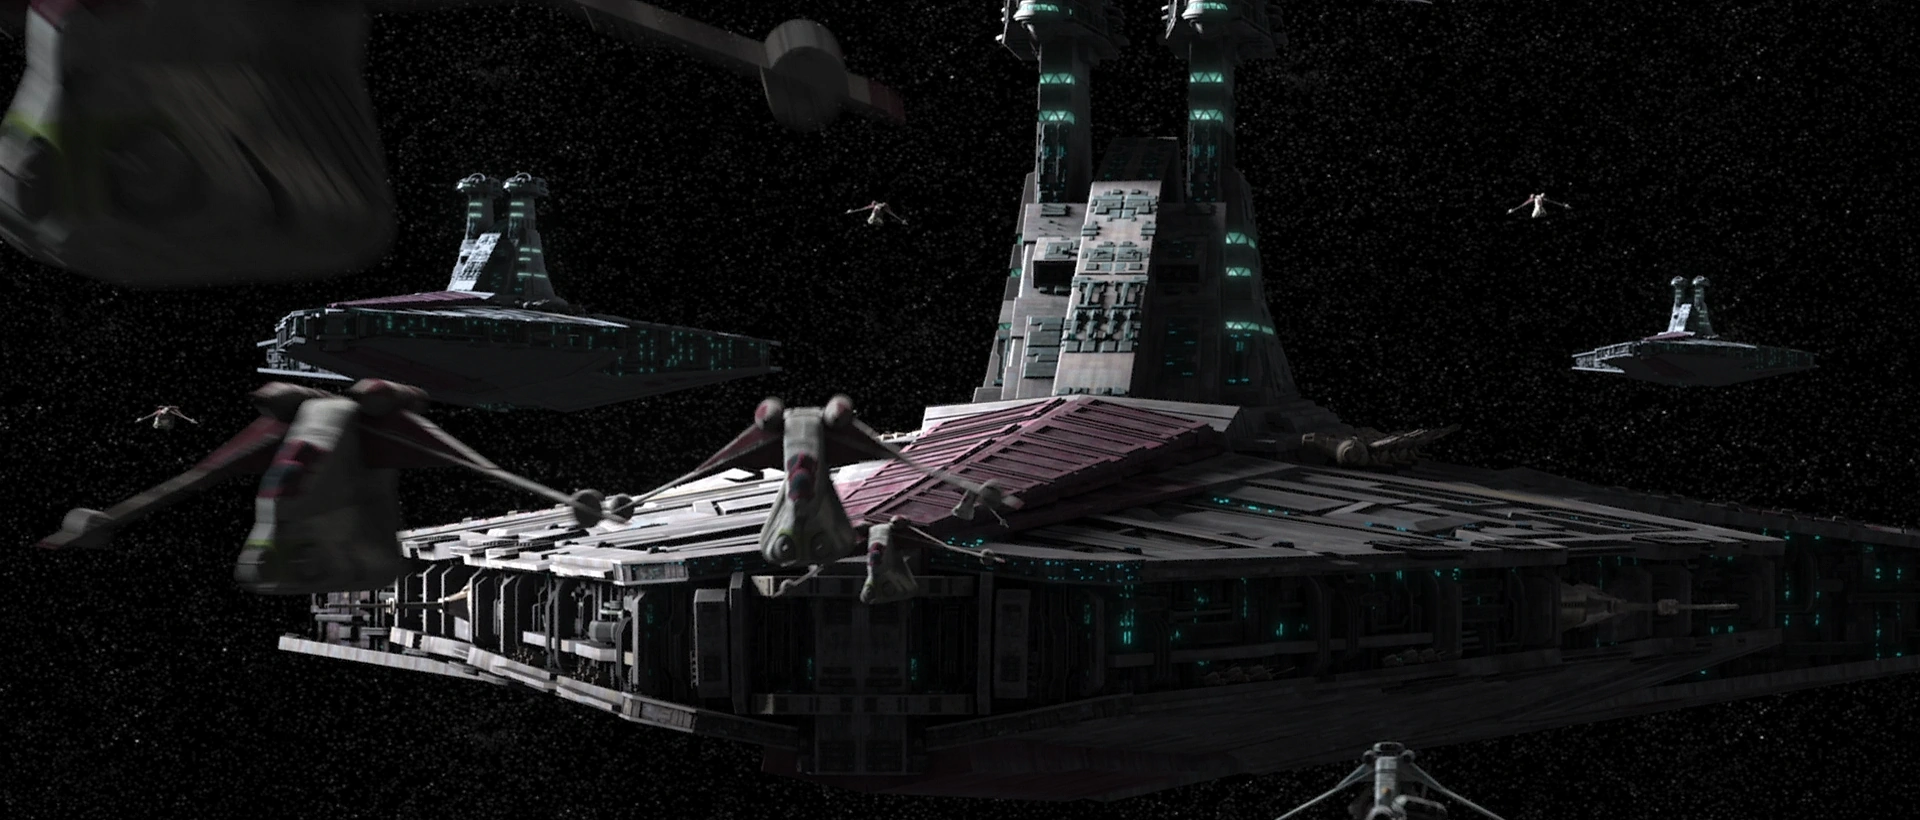
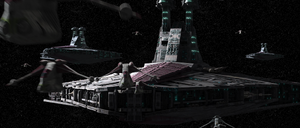
The Republic Navy deploys above Mandalore.
During the Mygeeto Campaign, which took place throughout the war, Republic gunships participated in the Third Battle of Mygeeto alongside Skull Squadron. Additionally during the campaign, an Alpha-3B "Besh" conducting strafing runs.[67] A contingent of five Venators along with their starfighter and gunship forces participated in the Battle of Yerbana.[20] When the Separatist fleet attacked Coruscant, the Coruscant Home Defense Fleet moved in to block them from retreating. Republic High Command called for reinforcements, and Republic vessels from the galaxy fell back to defend Coruscant and the kidnapped Supreme Chancellor.[82] The Battle of Coruscant was one of the largest naval engagements in the war. Generals Kenobi and Skywalker had arrived above Coruscant with their own battle group, and launched along with Clone Flight Squad Seven from the Ro-ti-Mundi to the CIS Navy flagship, Invisible Hand, to rescue the Chancellor, successfully doing so.[39] After the Republic victory, a task force of Republic ships departed and participated in the Battle of Kashyyyk, where they destroyed Separatist ships in orbit and subsequently landed troops on the surface, with one Venator landing at Kachirho City.[3] Around this time, a Republic Venator, the Albedo Brave, was involved in the Bracca Invasion,[141] and General Plo Koon patrolled the skies of Cato Neimoidia with an ARC-170 starfighter contingent.[3]
Following the Battle of Coruscant, Republic Navy forces deployed the 332nd Division which participated in the Siege of Mandalore in order to capture Darth Maul.[20] When General Grievous was located on Utapau, Obi-Wan's fleet of at least two Venators launched an ambush in Pau City, initiating the Battle of Utapau.[3] At this time, the Separatist fleet units that were locked in combat with the Bright Nebula Fleet for four months finally managed to break through on Lokori.[7] Jedi General Chiata and her Venator participated in a battle against a Separatist dreadnought and, despite victory, were forced to crash on Zeffo following substantial damage.[141] Once Maul was captured on Mandalore, Ahsoka Tano and the division used the Tribunal, a Venator that had remained in orbit to transport him to Coruscant.[142]
The Great Jedi Purge
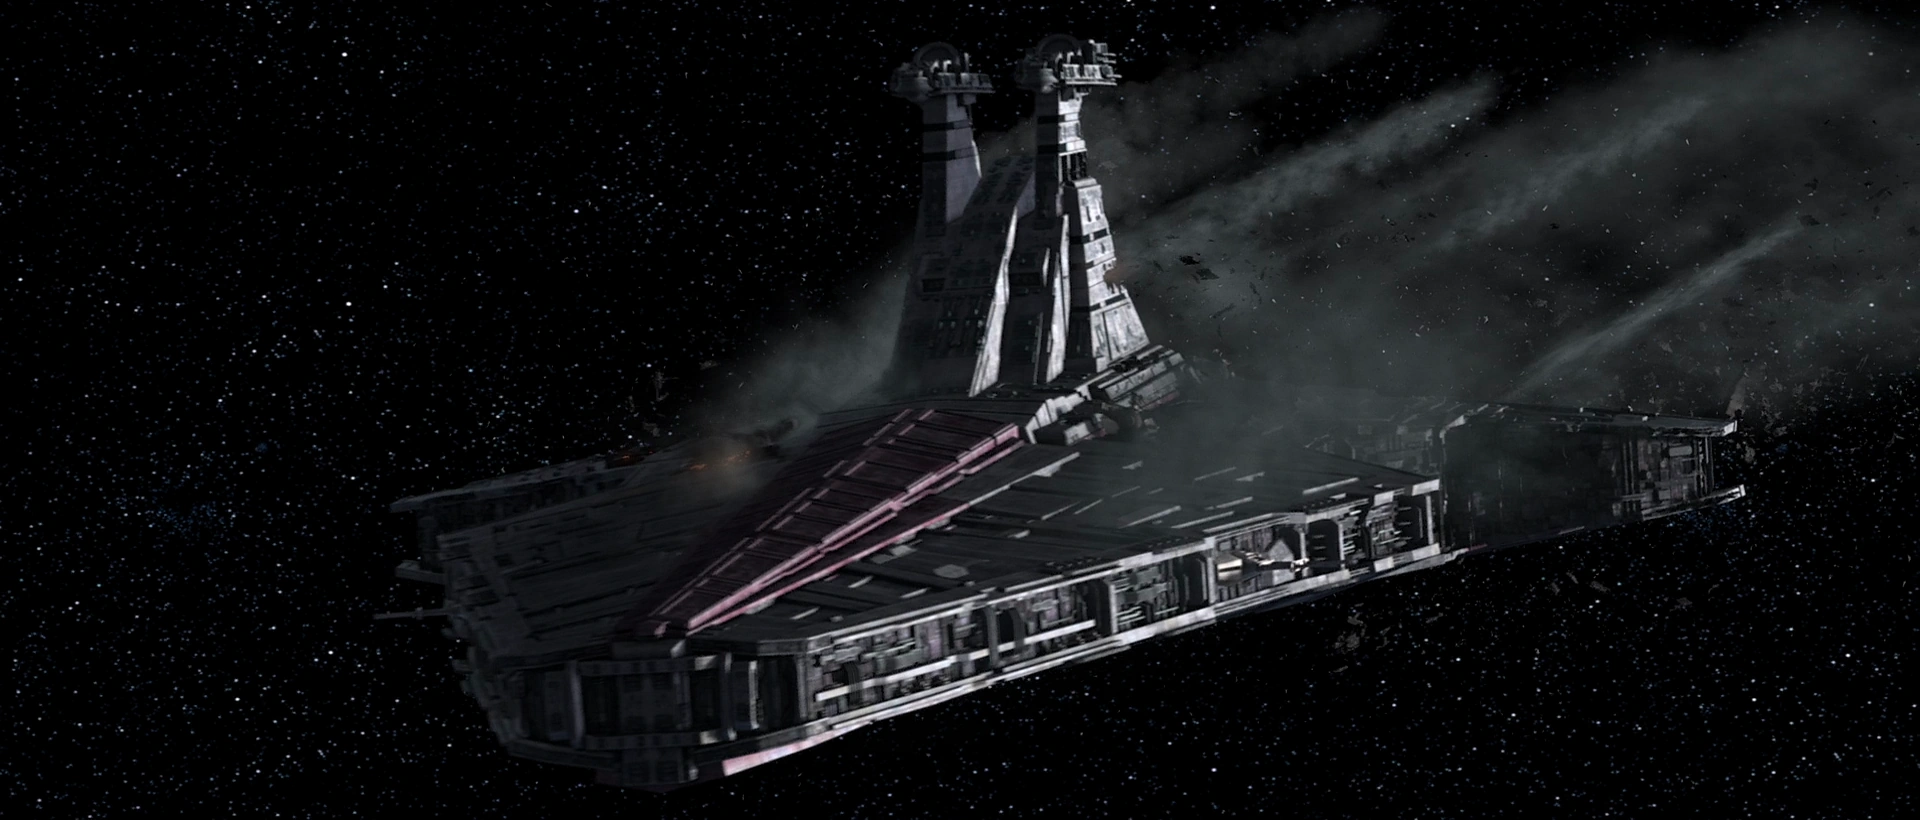
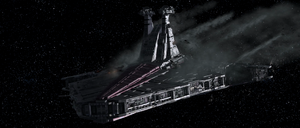
The Tribunal is ripped out of hyperspace during the implementation of Order 66.
While various engagements were occurring, Supreme Chancellor Palpatine revealed himself as the Dark Lord of the Sith Darth Sidious and massacred a Jedi team led by Mace Windu, managing to turn Anakin Skywalker to the dark side of the Force during the duel. Skywalker, now christened as the Sith Lord Darth Vader, marched with a detachment of the 501st Legion under his command to begin the Siege of the Jedi Temple, while Sidious contacted various clone officers throughout the galaxy and implemented Order 66.[3]
When the order was executed, Chiata's unit turned on her and her Padawan inside the wreckage of their Venator, resulting in a skirmish that killed the Jedi and eventually all the clone troopers.[141] Another skirmish took place aboard the Tribunal, beginning when the division of 501st troops and a security detail of shock troopers turned on her while in hyperspace. The clone troopers attacked Tano on the bridge, although she managed to escape and free Maul as a diversion. Going their separate ways, Tano eventually managed to capture Commander Rex and conduct a surgery to remove his inhibitor chip, freeing him from Clone Protocol 66. Fighting broke out throughout the vessel when they looked for a means of escape, during which Maul sabotaged the ship's hyperdrive. This forced it out of hyperspace, sending the ship plummeting towards a moon. After Maul fought through clone forces and escaped on a shuttle, Tano and Rex managed to escape in a Y-wing after a prolonged confrontation in the hangar. Eventually, the ship crashed on the moon's surface, killing the remains of the entire clone division.[40]

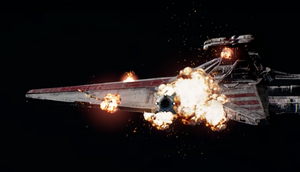
The Albedo Brave is destroyed above Bracca during the implementation of Order 66.
Onboard the Albedo Brave, the 13th Battalion ambushed Jedi General Jaro Tapal and his Padawan, Cal Kestis in orbit above Bracca. The two separated and headed for the escape pods, and Tapal fought and eliminated many squads while Kestis maneuvered through maintenance hallways. During the escape, Tapal managed to sabotage the Albedo Brave, but when they both reached the escape pod bay, they were confronted by a large group of clone troopers. After a brief firefight, Kestis and a fatally wounded Tapal managed to board an escape pod and launch towards Bracca, with the Albedo Brave self-destructing moments later.[141] Jedi General Plo Koon was shot down by his ARC-170 escorts while in the skies of Cato Neimoidia following the battle there, and his fighter crashed into several buildings in a city.[3] Clone troopers were eventually dispatched alongside a contingent of ARC-170s to the Brighthome, a Jedi space station in the Mid Rim, to secure it.[143]
Legacy
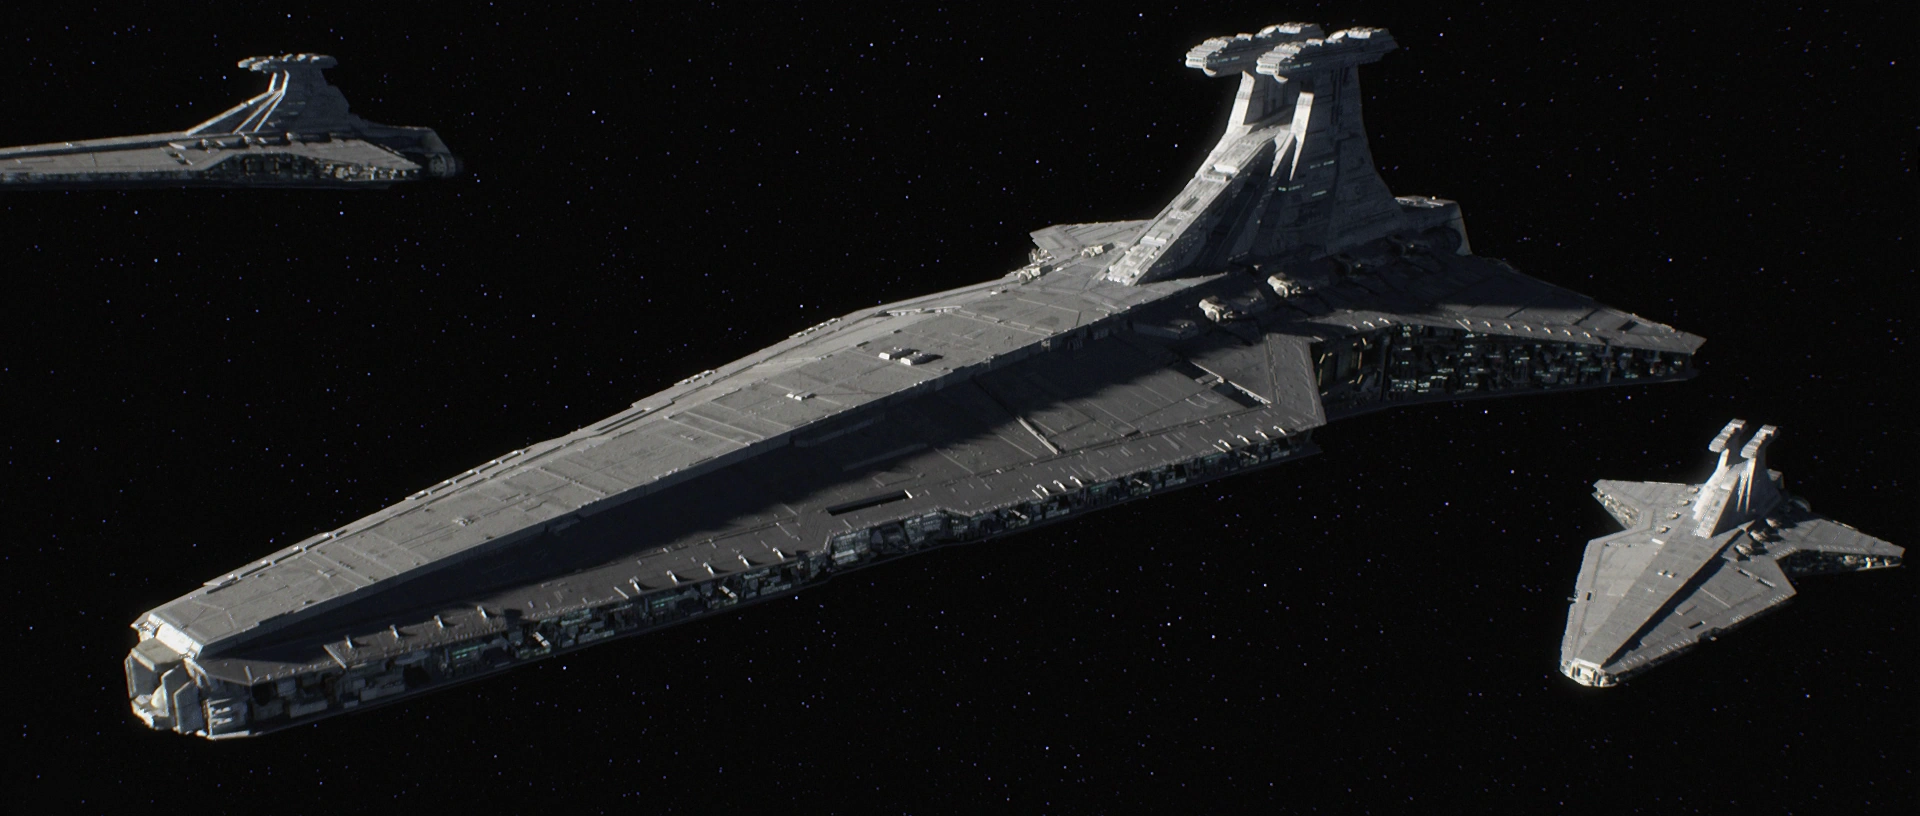
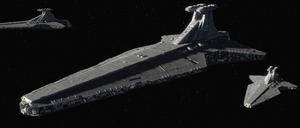
After the conflict, Republic naval assets were absorbed by the Galactic Empire.
With the end of the Clone Wars, the Galactic Republic was transformed into the Galactic Empire by Supreme Chancellor Palpatine, who appointed himself as the Galactic Emperor. Acting quickly, Palpatine consolidated his authority to ensure stability with his new position and set to reorganize the remnants of the Republic Navy and the Grand Army of the Republic under Imperial control. As such, the Republic Navy transitioned into the Imperial Navy, which eventually adopted the Tarkin Doctrine.[1] Early in the Imperial Era, Venators were still used by Imperial naval forces, as were V-wing starfighters,[3] ARC-170 starfighters,[143] and Theta-class T-2c shuttles,[3] but the process of adopting new craft began early into the Empire's reign. During these early months, Lieutenant Commander Orson Callan Krennic met with Admiral Tarkin aboard his Imperial-class Star Destroyer at a shipyard that had been ravaged during the Clone Wars. Also at the shipyard, which was in orbit over the also ravaged Kartoosh, in the docks that were still intact, Venator-class Star Destroyers and other superseded starships were retrofitted or dismantled.[7]
The Gladiator-class Star Destroyer that was designed for the Republic Navy by Walex Blissex as an escort in heavy battle lines was eventually introduced as part of the Imperial Navy. The Secutor-class Star Destroyer was rooted on the carrier roles emphasized by Venators deployed by the Republic starfleet,[16] and Arquitens-class light cruisers were serviced by the Imperial naval branch,[144] although they were supplemented by Arquitens-class command cruisers.[145] With the end of the Clone Wars, Separatist holdouts were created throughout the galaxy. With some holdouts being well-defended, the Onager-class Star Destroyer was produced in order to swiftly defeat the Separatist remnants and enforce Imperial rule.[16] The Republic Venator-class Star Destroyer Vensenor was decommissioned and placed in orbit above Arkanis and hosted the the Imperial Vensenor Flight Academy, led by Commandant Bythen Forrel, a former Republic starfighter ace.[1] Maelstrom-class battle cruisers that remained in service following the Imperial Navy's reorganization were either broken up, used as technology test beds, or were laid up in mothballs.[53] GX1 short haulers were no longer needed by the Imperial Navy and were mostly all quickly sold off.[16]
The Victory-class Star Destroyer was given a life extension program in an attempt to fix its many issues, eventually becoming the Victory II program that created the Victory II-class Star Destroyer. The program, however, was not able to fix several flaws and the Imperial Navy, now bolstered by the Imperial-class Star Destroyers, rendered the Victory II-class obsolete. Republic Golan I Space Defense Platforms were continued to be used by the Imperial Navy, as well as the Imperial Office of Customs, although the Golan II and Golan III were developed to replace the aging Golan Is.[16]
The Republic Center for Military Operations, a major fortress on Coruscant that hosted countless Republic Navy craft and was near a staging area for Republic cruisers, became the Naval Intelligence Agency headquarters of the Imperial Navy.[7] The early Imperial Starfighter Pilots that served in the Imperial Navy were clone pilot veterans of the preceding Republic.[146]
Forgotten relics


Republic craft litter many worlds in the years following the Clone Wars during the Imperial Era.
Due to the pan-galactic nature of the Clone Wars, remains of Republic Navy craft were scattered throughout many locations. On Bracca, many decommissioned Republic Navy warships, including Venator-class Star Destroyers, were hauled to the planet and released from tractor beams, littering the surface of the world. The Scrapper Guild then worked to disassemble and scrap the vehicles so that they could sell the parts to the Galactic Empire and fuel their war machine. Kashyyyk was one such battleground where the remnants of Republic starships could be found years after the end of the conflict. On Zeffo, the wreckage of a Venator was present, left over from the war and the Great Jedi Purge. The wreckage became covered in native wildlife, and deteriorated into the terrain.[141]
The Venator that had carried Ahsoka Tano prior to Order 66 remained on the moon it had crashed into, littering the surrounding area. After a certain time, the Venator was covered in snow, and began to settle into the surface. Eventually, an Imperial contingent located the crash site and Darth Vader personally inspected the wreckage, finding one of his former apprentice's lightsabers.[40] Many years after the battles on Xorrn, its surface and orbit were dotted with many Republic Acclamators that had succumbed to the conflict, with one Acclamator-class in orbit becoming the Ferra Sector Shipyard after the wreckage was heavily modified.[33] In a desert world, destroyed Republic starfighters and gunships were scattered across the site of a battlefield.[147] Other Republic Navy assets were simply abandoned, including a Haven-class medical station which became derelict and stranded.[148] In another instance, individuals simply acquired naval assets for their own use, including the Ithorian Jho from Lothal who acquired the LAAT/i gunship Crumb Bomber and used it as decoration for his bar in Jhothal.[149]
Rebellion and a New Republic
- "This wreckage is from a battle between Separatists and the Republic during the Clone Wars—"
- ―T'onga, to Valance on the wreckage within the Ruusan system
During the Galactic Civil War[53] between the Empire and the Alliance to Restore the Republic, a faction of rebellious cells and resistance groups that joined together in an attempt to restore the Old Republic,[1] a handful of Maelstrom-class battle cruisers existed, with at least one former Republic and Imperial battle cruiser, the Simoom, deployed in the Alliance Fleet.[53] Rebel troopers traveled through a desert world with the wrecks of Republic craft at one point.[147] By 14 BBY, Cal Kestis worked as a Scrapper on Bracca, disassembling ships with his friend Prauf. After an incident forced him to reveal his connection to the Force, members of the Imperial Order of Inquisition traveled to Bracca and fought with him. Kestis fought on the wreckage of a Venator, until he was rescued by the Stinger Mantis. Kestis then embarked on a secret mission to rebuild the Jedi Order, eventually conducting a mission to Zeffo. While there, Kestis traveled through the wreckage of Chiata's Venator, fighting Imperial forces and local fauna while discovering clues of the personnel aboard. Next, Kestis eventually did a mission to Kashyyyk, where he swam through wrecked Republic gunships and craft. During the mission to Kashyyyk, the resistance group known as the Partisans used old Republic gunships in their fight against Imperial forces on the planet. Kestis while on Dathomir experienced a Force vision, which made him recollect his experience of Order 66 aboard the Republic ship Albedo Brave.[141] Old Jho's Pit Stop Crumb Bomber wreckage, Fort Anaxes mission gunship wreckage, Empire Day, Rescue of Tseebo gunship wreckage, Skirmish aboard a Republic medical station, Republic shuttle during the mission to Ryloth, Hera remembers watching Republic ships on Ryloth during the blockade of Ibaar, Republic codes during the Rescue on the Imperial Interdictor,Mission to Reklam Station Y-wings.
During the Galactic Civil War, a Dreadnought-class heavy cruiser that bore the markings of the Galactic Republic emerged from hyperspace near an abandoned Galactic Republic supply depot. The heavy cruiser was damaged and broadcasted a distress signal for any Republic forces and was crewed by young clone troopers who were unaware of the Galactic Empire's existence.[16] Following the Duel on Cloud City, Beilert Valance flew to a 720 light freighter owned by the bounty hunter Nakano Lash that was attached to wreckage from a Clone Wars-era battle between the CIS Navy and the Republic Navy[101] in the Ruusan system.[150] The wreckage included LAAT/i gunships, at least one Venator, at least one Acclamator, and other craft.[101]

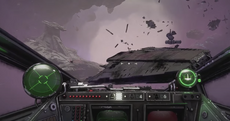
A Republic Venator-class Star Destroyer in the Zavian Abyss
By the rise of the New Republic, the successor faction of the Rebel Alliance, the Lodestar, a Galactic Republic Acclamator-class, was inducted into the New Republic Defense Fleet and served as the flagship of the Barma Battle Group under the command of General Hera Syndulla. It participated in a campaign in the Cerberon system against Imperial holdouts, until it was destroyed by the 204th Imperial Fighter Wing.[151]
In 4 ABY,[152] the New Republic's Vanguard Squadron came across the wreckage of a Republic Venator-class while escorting three GR-75 medium transports from a convoy, before coming into contact with the Imperial II-class Star Destroyer Overseer and Titan Squadron. The resulting battle in the Zavian Abyss was part of a New Republic ambush in the Zavian Abyss where they revealed their prototype Starhawk battleship. The battle took place partly near the Venator-class when the convoy first came under attack.[153]
Behind the scenes
The Republic Navy first appeared in the 2002 Star Wars saga film Star Wars: Episode II Attack of the Clones, the second installment in the prequel trilogy.[12] It was first identified as the Republic Navy in the 2014 reference book by Adam Bray Star Wars Rebels: The Visual Guide.[154]