| | |
- "Almost there…"
- ―Garven Dreis
Garven "Dave" Dreis was the commander of Red Squadron as a T-65 X-wing starfighter pilot for the Alliance to Restore the Republic. The favorite pilot of his homeworld Virujansi, Dreis served with its Rarefied Air Cavalry during the Clone Wars of 22 BBY–19 BBY. He battled Separatists alongside the Republic hero Anakin Skywalker, whose superior piloting skills in Virujansi's borecrawler caves gained Dreis' awe and respect. In the wake of the war and the subsequent founding of the Galactic Empire, Dreis joined the Rebellion after seeing the Imperial regime commit atrocities on his homeworld.
Dreis served the Alliance in numerous battles, adopting an almost fatherly approach to commanding his men and supervising the instruction of new recruits personally. He was posted at the Alliance's base on Dantooine, leading Dantooine Squadron before being transferred to Yavin 4's Great Temple. Placed in command of Red Squadron, Dreis took the call sign "Red Leader." In 0 BBY, he inducted bush pilot Luke Skywalker into the squadron, and soon afterward a joint force of Dreis' Red Squadron X-wings and Jon Vander's Gold Squadron Y-wings launched a desperate attack on the Empire's Death Star superweapon, which was moving to destroy the Alliance base.
As per General Jan Dodonna's instructions, Dreis' "Red Boys" provided cover fire for Gold Squadron, who mounted an attack run on the battlestation's vulnerable thermal exhaust port. Despite the pilots' efforts to watch out for each other, many X-wings fell victim to laser fire from the station surface and enemy TIE fighters during dogfights. Nevertheless, Dreis' guidance helped reassure the newcomer Luke Skywalker.
When the Y-wings were eliminated by Imperial defenses during their attack run, Dreis was forced to make his own attempt. Assisted by a targeting computer, his proton torpedoes almost entered the Death Star's exhaust port, but they fell short of a precise hit. Red Leader was then shot down by the Dark Lord of the Sith Darth Vader; accepting his fate, Dreis instructed Luke Skywalker to lead Wedge Antilles and Biggs Darklighter on a final attack run, which successfully obliterated the Death Star.
Biography[]
Flying with Skywalker[]
Garven Dreis flew alongside Anakin Skywalker (pictured) during the Clone Wars.
Home to the[1] Inner Rim[5] planet Virujansi, Garven Dreis grew up flying through its twisting borecrawler caves, coming to know every part of his family farm.[1] During the three-year-long Clone Wars (22 BBY–19 BBY), which was waged between the Galactic Republic and the Separatist Alliance,[6] Dreis was pressed into service with the Rarefied Air Cavalry to repel Separatist droid infiltrators from Virujansi. At the time, "Dave" Dreis was a youth who had only just graduated from flying T-16 skyhoppers to Z-95 Headhunters, but he was considered Virujansi's best and most popular pilot—second only to the Republic's "Hero With No Fear," Jedi Knight Anakin Skywalker.[1]
When Skywalker arrived at Virujansi in a Delta-7 interceptor to lead the effort against the Separatists, Dreis flew in lead position for the Republic hero's first venture into the caverns, and for two minutes he trailed Dreis' left wing by a meter. While Dreis was curious as to how long Skywalker would be able to keep up, the Jedi suddenly snap-rolled his interceptor and took over the lead. Dreis struggled to keep up, and his astonishment at Skywalker's feat was acknowledged back at base by a grin from the Jedi.[1] Virujansi was eventually liberated thanks to the efforts of the Rarefied Air Cavalry and the Republic Navy,[7] and Dreis held Anakin Skywalker in great esteem later in his life.[4]
Leading Rebels[]
With the rise of the Galactic Empire following the Clone Wars' end, Dreis remained on Virujansi and bore witness to several Imperial atrocities: his own fields and village were torched by the Empire and TIE fighters destroyed transports with only the bare minimum of reasons, leaving hapless passengers in space with their mouths futilely agape. Eventually, Dreis decided to take a stand against the Empire and joined the Alliance to Restore the Republic, serving as a starfighter pilot. He served in numerous campaigns flying X-wings, Y-wings, and R-22 Spearheads, and he outlived hundreds of pilots whose lives were lost in the fight against the Empire, recruiting and sending many of them to their deaths.[1]

The planet Dantooine, where Dreis served as a Rebel squadron leader
In his work, Dreis participated in the recruitment of new pilots for squadrons other than his own, such as Ryle Torsyn of Gold Squadron.[8] In addition to his use of the T-65, Dreis amassed over a thousand hours of experience in an Incom skyhopper, which featured similar controls to the X-wing.[4] At one point, he was assigned to the Alliance base on the world of Dantooine,[9] where he commanded Dantooine Squadron. On Dantooine, Dreis went on numerous missions with the Ord Mantellian former smuggler Theron Nett as his wingman[1] and was joined by an old comrade, Davish Krail of Gold Squadron.[4] The Rebels were forced to abandon the base when Torsyn discovered a hidden Imperial tracking device[8] in 0 BBY, with all personnel relocating to the moon Yavin 4's Great Temple as a result.[6]
On Yavin 4, Red Squadron was hastily assembled from pilots from Dantooine Squadron, the Tierfon Yellow Aces, and the Griffon Flight Wing.[1] Dreis was assigned to command the new squadron,[10] flying the lead X-wing starfighter under the call sign of "Red 1"[9] or "Red Leader."[3] Most of the pilots in his squadron had been trained by the experienced Dreis,[11] who, along with his pilots, was tasked with the protection of Alliance High Command. When commanding Red Squadron—or as he referred to them, "Red Boys"—he adopted an almost fatherly approach and was well respected for it.[12] He was also called "Boss" or "Chief" by his squadron,[13] but the younger pilots did not know of the man's name.[4]
Battle of Yavin[]
Preparations[]
- "Cheer up; that's surprisingly good, since Biggs was tossing the whole starfleet at you. You know the techniques, and your body can stand the strain. Looks like you've got yourself a bird."
- ―Dreis, to Luke Skywalker
Soon afterward,[6] when Princess Leia Organa delivered the plans of the Empire's planet-destroying Death Star battlestation to Alliance High Command's General Jan Dodonna on Yavin 4,[3] preparations were made for a decisive strike against the superweapon that would totally obliterate it. Accompanying Organa was Luke Skywalker—the son of Dreis' former Clone Wars comrade Anakin Skywalker.[3]

General Dodonna discusses the Death Star attack plan with Dreis (far right) and other squadron leaders.
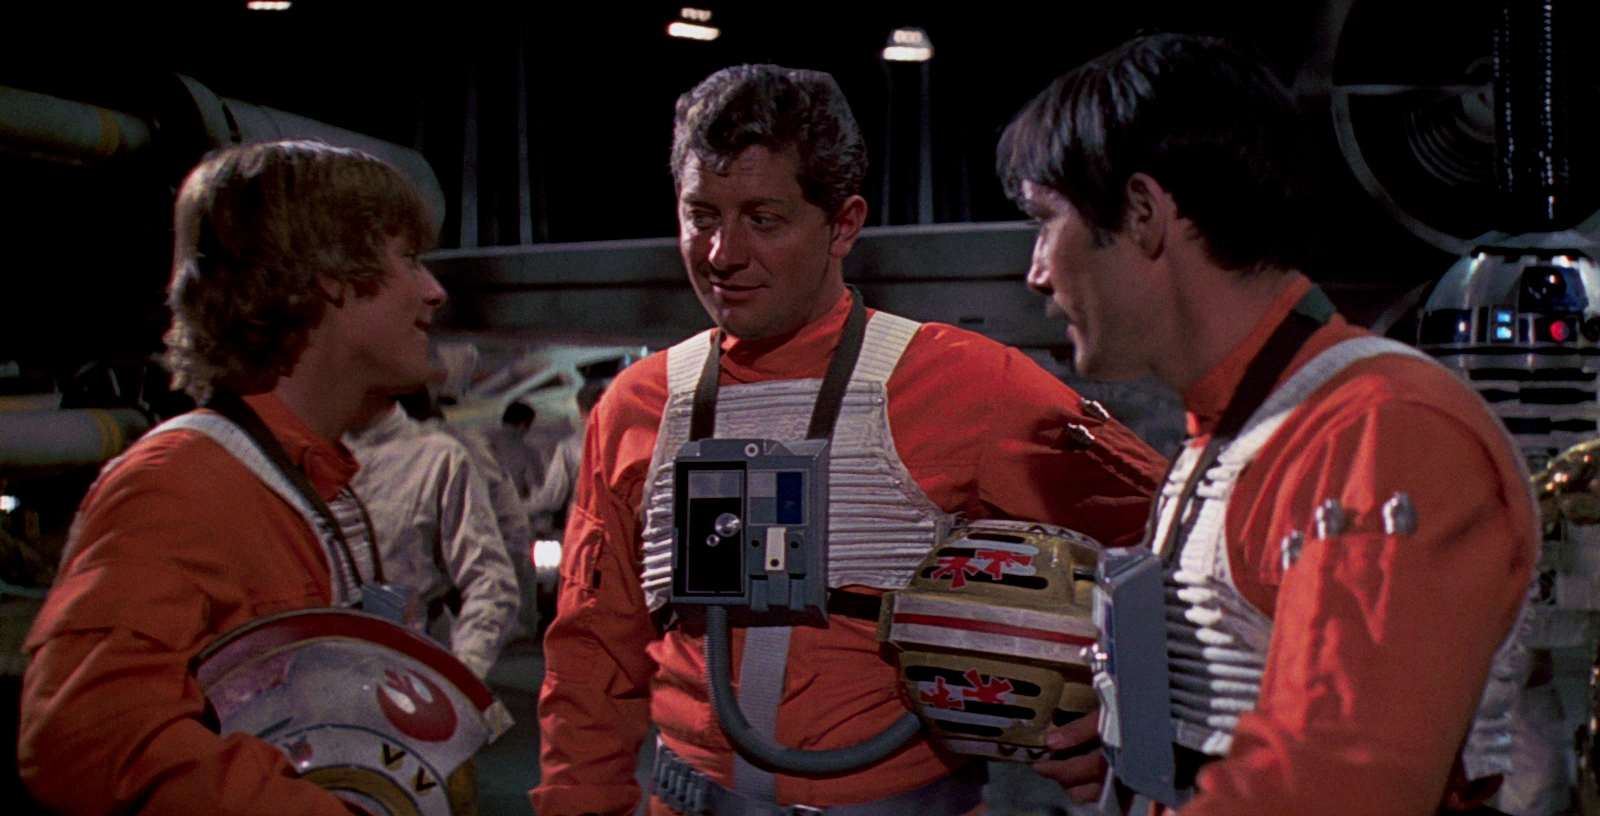
Luke Skywalker ran a flight simulator, and his results were presented by "Red Three" Biggs Darklighter to Dreis and Commander Vanden Willard. Red Leader approached Skywalker,[15] who was accompanied by Darklighter and Princess Organa,[14] and told the boy how impressed he was that he had only been shot down twice despite being opposed by an entire starfleet. The squadron leader subsequently accepted him into Red Squadron under the call sign "Red Five."[15]
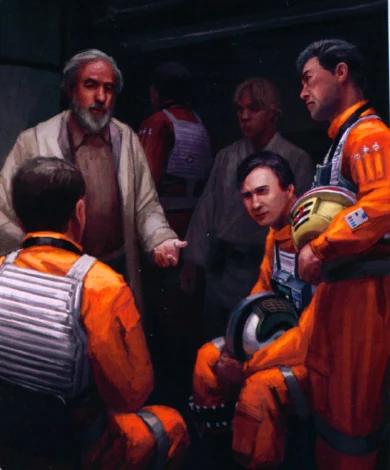
After leaving Organa, Red Leader and his men attended Dodonna's briefing in the Rebel base a few minutes later.[14] The plan was to launch snubfighters against the gargantuan weapon and subsequently fire proton torpedoes down a two-meter-wide thermal exhaust port that was situated at the end of the long and narrow meridian trench. The torpedoes would then travel down the port and cause a chain reaction, destroying the Death Star's main reactor and thus the entire station.[3]
To that end, Gold Squadron would aim to deploy the fateful shot while Red Squadron flew interference, keeping any Imperial resistance at bay during the run.[15] To distract the Imperials from the exhaust port strikes, Blue and Green Squadrons would mount attacks on the Death Star superlaser.[1] Making the situation more dire was the fact that the Death Star had entered the Yavin system and was already moving against the fourth moon itself. Following the briefing, the pilots began making their final preparations,[3] with Red Leader telling Skywalker and Darklighter to don their flight suits before meeting him in the Great Temple's hangar.[14]
Enter Luke Skywalker[]
- "Skywalker! You sure you can handle this ship?"
"Sir, Luke is the best bush pilot in the Outer Rim Territories."
"You'll do all right." - ―Garven Dreis greets Luke Skywalker, whose skills are vouched for by Biggs Darklighter
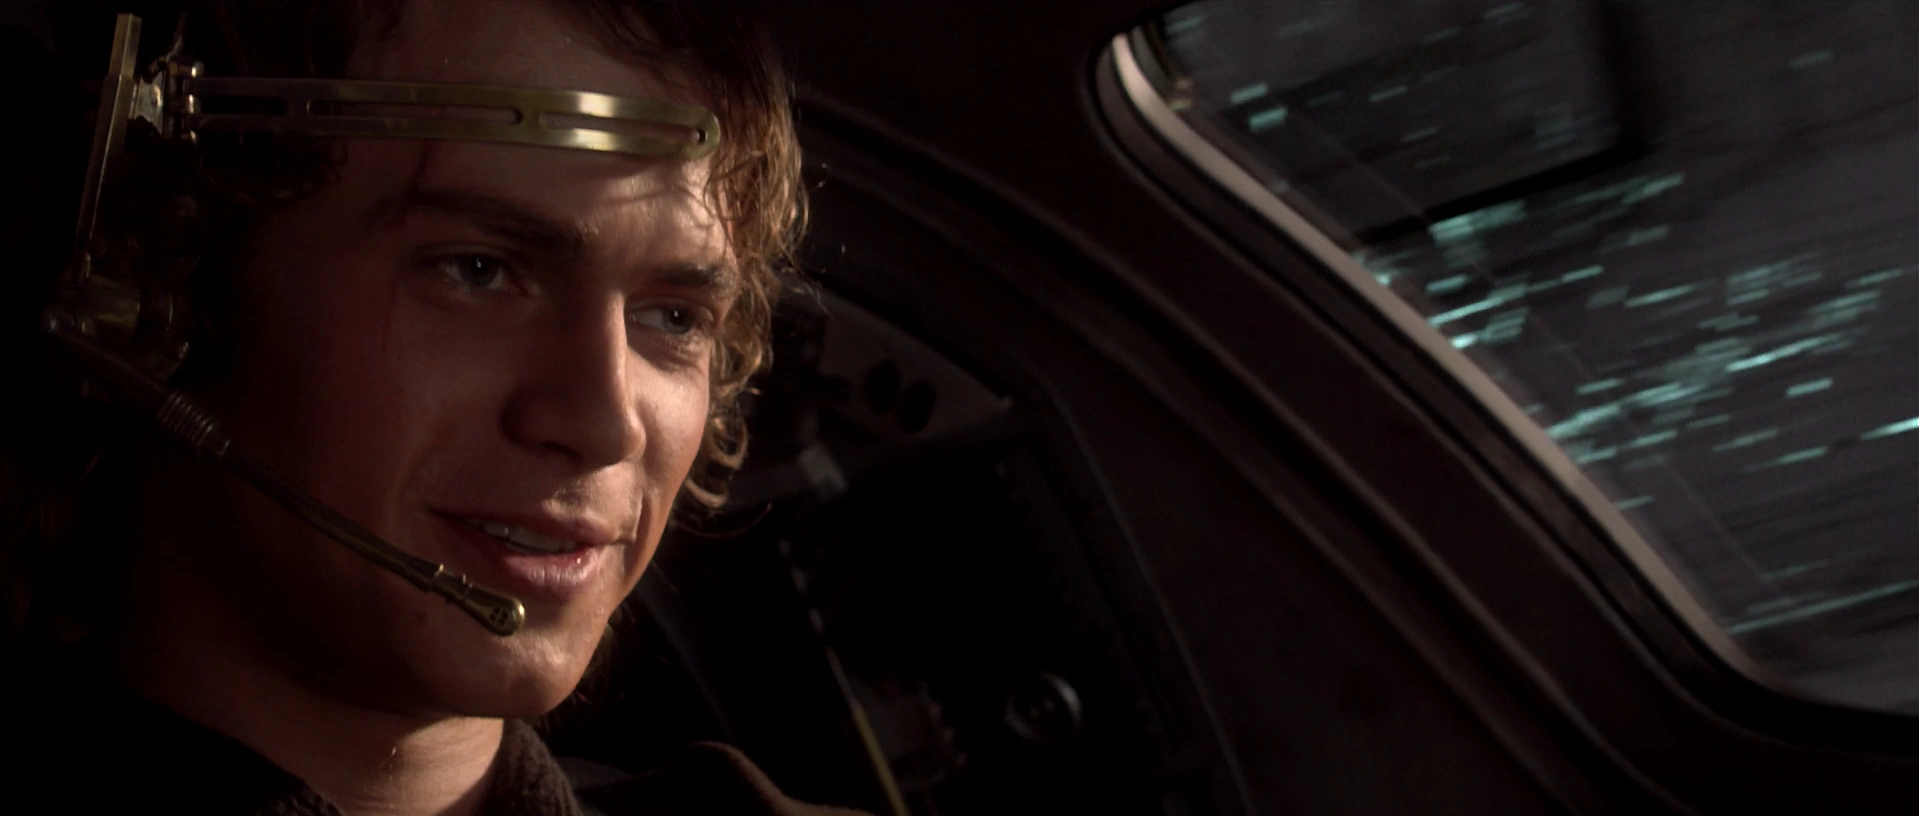
Dreis chats with Luke Skywalker and Biggs Darklighter before the pivotal assault.
Moving through the hangar with his helmet[1] and gloves[3] in hand, Red Leader registered anxiety and fear among the pilots there, but neither panic nor hopelessness. Having been reminded of his own Clone Wars Virujansi ventures with Anakin Skywalker by the name of his squadron's newcomer, Luke Skywalker, Dreis approached the young boy, who was paired with Biggs Darklighter[1] beside his new X-wing.[3] Even after the simulator run,[15] Dreis was not entirely sure that Skywalker was up to the task.[1] Darklighter, however, was a childhood friend of Skywalker's, so he vouched for the newcomer's skills;[3] the claim that Skywalker was the best bush pilot in the Outer Rim Territories, coupled with Skywalker's name, led Dreis to realize that he had met the boy's father,[16] Anakin, which he took as a good omen.[1]
Affirming his belief that the young Skywalker would do well as a pilot, Dreis opined that the galaxy would improve when he, as a son of the original Jedi Knights, returned to action.[16] As they studied the youth's new craft, Dreis patted Luke Skywalker on the back and reassured him that skyhoppers and T-65 X-wings were similar in terms of operation, beside the obvious caveat that their payloads were different. Bearing a ferocious smile, Dreis then departed Skywalker and Darklighter's company and hurried toward his own ship, leaving Skywalker with many questions unasked.[4]
Do or die[]
- "I'm going to cut across the axis and try and draw their fire."
- ―Garven Dreis
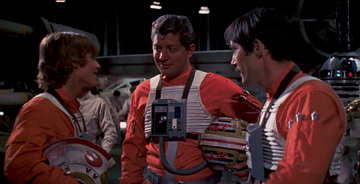
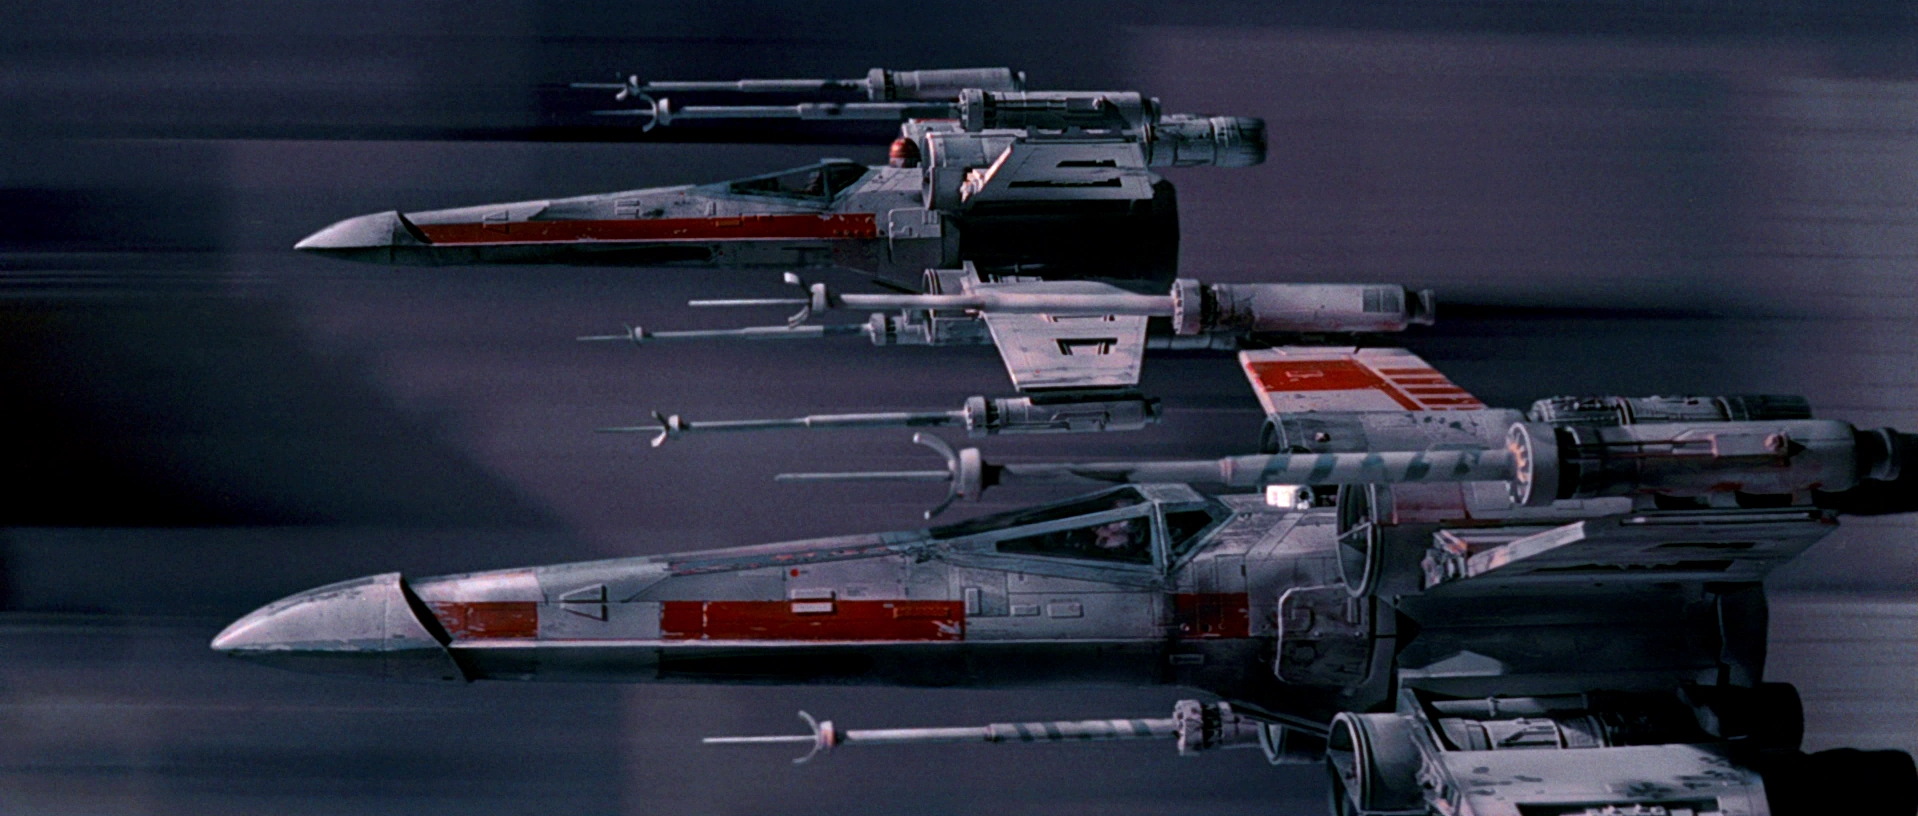
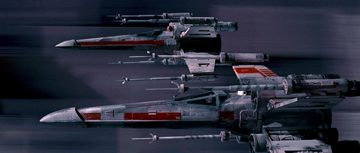
As Luke Skywalker entered his own craft, the novice spied Red Leader signaling to his ground crew from the seat of his X-wing,[4] which also had Dreis' astromech droid, R5-K6, aboard.[17] Without further ado, Red Squadron,[4] which Dreis signaled for liftoff[14] via comm-unit,[18] launched from Yavin 4's hidden fortress[4] alongside Gold Leader Jon "Dutch" Vander's Y-wing Gold Squadron.[19] The Rebel ships slowly assumed attack formations and rounded the gas giant Yavin Prime as the Death Star came into view.[3]

Red Squadron speeds toward the Death Star.
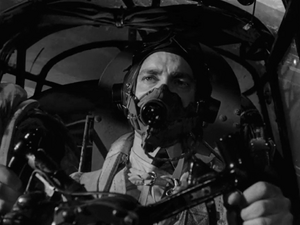
With only about fifteen minutes to spare before the Rebel moon would come into range of the battlestation,[3] Red Leader lowered his glare visor, fine-tuned his targeting computer, and ordered his pilots to adjust their selectors and report in. Observing the looming Death Star, the man harkened back to the suffering and injustices perpetuated by the Imperial government,[4] noted that they were approaching the battlestation at 1.3 parsecs, and exclaimed that the ordeal was do or die.[16] When Red Leader noticed that Wedge Antilles, operating as "Red Two," had strayed from the group, he told the pilot to tighten formation. As he did so, the wayward Antilles noted an issue with his targeting computer, which Dreis acknowledged, advising Red Two to take caution. After all of his squadron had reported in, Dreis called for them to lock S-foils in attack position and execute their assault.[4]
As Red Squadron flew through the station's magnetic field, Dreis advised his men to lock down their control units and set their deflector shields to double front,[16] and he then reprimanded a particularly informal Antilles for extraneous chatter.[3] Leading the assault, Dreis ordered Red Squadron to keep their comm channels quiet until they reached the surface[16] and accelerate to attack velocity. Soon afterward, Red Leader received word from Vander that Gold Squadron was moving to make their run on the Death Star's trench,[3] and Dreis expressed his wish that the Force would be with them.[4]

Dreis during the Battle of Yavin
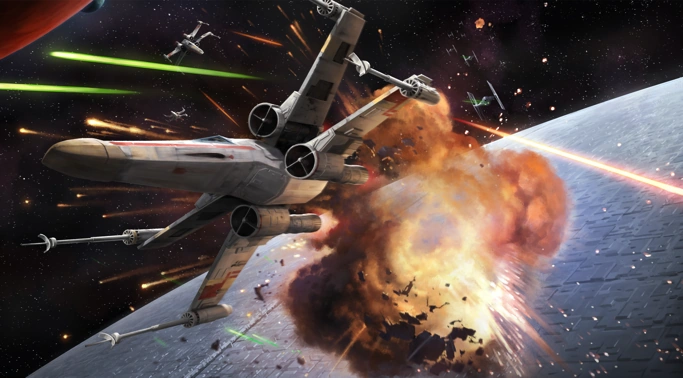
In order to draw the station's defensive fire away from the Y-wings, Dreis and three other X-wing pilots, including his wingman,[20] "Red Twelve"[21] Puck Naeco,[1] flew across the Death Star's axis. The rest of Red Squadron followed suit, prompting Imperial laser cannons and turbolasers to open fire, which began the first exchange of the Battle of Yavin. Enduring crossfire, Dreis instructed his men to stay low,[3] and when Luke Skywalker's craft was seared by his own nose dive attack attempt, the veteran sternly warned him to give himself more lead time.[4]
Under Dreis' command, Red Squadron targeted the Death Star's deflection towers,[22] with the squadron leader smoothly maneuvering close to the station's superstructure and through a rain of[3] heavy flak[20] and fire while requesting Skywalker to destroy one of them, alerting to heavy fire originating from the tower's right side.[4] Red Squadron sustained its first casualty when "Red Six" Jek Tono Porkins perished after striking a deflection tower. Soon afterward, they were contacted by the Rebel Del Goren, who was at the Great Temple monitoring the battle alongside Rebel leaders including General Dodonna, Commander Willard, and Princess Organa. Goren advised squadron leaders that enemy fighters were moving to intercept them.[3]
When Skywalker protested, claiming that there was no indication of enemy fighters on his scope, Dreis quickly directed his men to pick up their visual scanning.[3] The squadron leader was the first to observe[20] TIE/LN starfighters of Black Squadron entering the fray, proceeding to engage Red Squadron in dogfights.[3]

Red Squadron was intercepted by fire from both the Death Star's weapon emplacements and TIE fighters.
Dreis congratulated[4] "Red Four" John D. Branon[1] for successfully shooting down one of the TIE fighters,[4] but he then looked down toward his own port side[3] and promptly warned about another TIE behind Branon. The Rebel was soon gunned down far above and to one side of Red Leader, who remained largely stoic and focused on the task at hand. Dreis told Antilles to tighten up and beware of towers and called for the X-wings to pull in.[4] When he lost track of Skywalker, Red Leader, under the strain of combat, requested Red Six to locate Red Five.[20] "Red Ten" Theron Nett observed that Skywalker was in a heavy fire zone; indeed, he was being chased by a TIE fighter until Antilles came to his rescue.[3]
The Gold Squadron trio, in which Gold Leader Vander and Tiree served as the wingmen of[20] Dreis' old friend Davish Krail,[1] started their trench run with little more than five minutes to spare. Red Leader acknowledged the Y-wings' attack run,[3] commanding Red Squadron to provide cover, but the Y-wings were pursued inside the trench by an unexpected guest: the Sith Lord Darth Vader, who arrived in his prototype TIE Advanced x1 with two TIE/LN wingmen.[4]
In quick succession, Vader vanquished Vander, Tiree, and Krail—as Krail plummeted to the Death Star's surface, he explained to Red Leader that TIE fighters had come from the rear and that there was no room to maneuver.[4] Red Leader acknowledged the new Gold Leader,[20] who apologized for Gold Squadron's failure and, stating that the mission fell to Dreis, bade farewell using his nickname, Dave.[4]
Downed by Darth Vader[]
- "It's away!"
- ―A triumphant Garven Dreis
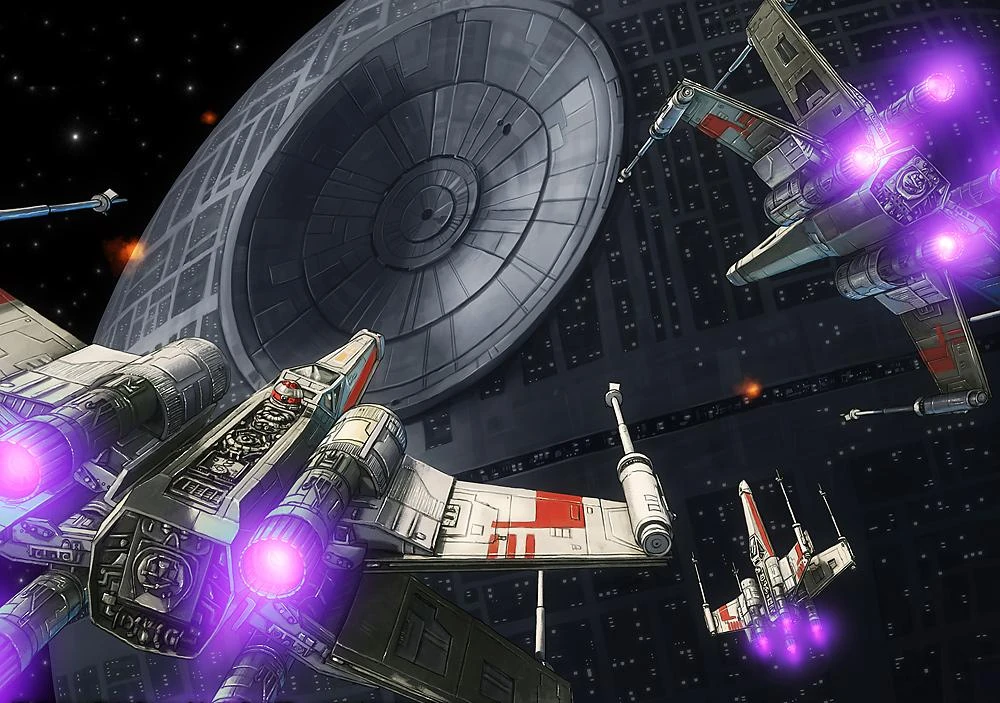
The veteran Red Leader kept his cool while conducting the trench run.
In the wake of his old friend's death,[4] Dreis had his men regroup—they had less than three minutes before the Death Star could destroy Yavin IV. He then received orders from General Dodonna to keep half of his group in reserve and make an attack run on the trench. With only six pilots left at their designated rendezvous, Dreis ordered Skywalker to lead Darklighter and Antilles to wait behind until they were given the signal to start their own attack,[3] should he fail.[20] Having ensured that his wingmen were in the correct positions[4] and seeing no sign of the TIE trench trio,[20] Dreis entered the trench with Theron Nett to his port side and Puck Naeco flanking his starboard wing.[3] As instructed by Dodonna and Dreis, the wingmen held back from a distance until they could spot incoming TIEs.[4]
The Rebels were initially alarmed by the absence of any defensive fire, with Dreis checking over his instruments—which he thought were faulty due to the heavy disruption of signal at the trench—and casting doubts over whether they had entered their target trench. They were suddenly met with close calls with turbolaser fire, particularly those from a tower at the trench's far end. Dreis planned to call his wingmen forward, but the fire stopped just as abruptly as it had begun. Dreis thus cautioned his wingmen to watch out for Imperial fighters.[4]
Sure enough, Skywalker informed Dreis' group that the three TIEs were moving to intercept. Before the Imperials had the opportunity to begin harassing the half of Red Squadron that was making the run, Dreis came within range and began using his targeting computer as he bore down on the exhaust port. As they hurtled down the trench, Vader swiftly picked off Naeco, while another Imperial shot down Nett.[3] The sacrifice of Red Leader's pilots bought him time to fire his proton torpedoes at the exhaust port before rapidly climbing up from the trench.[20]
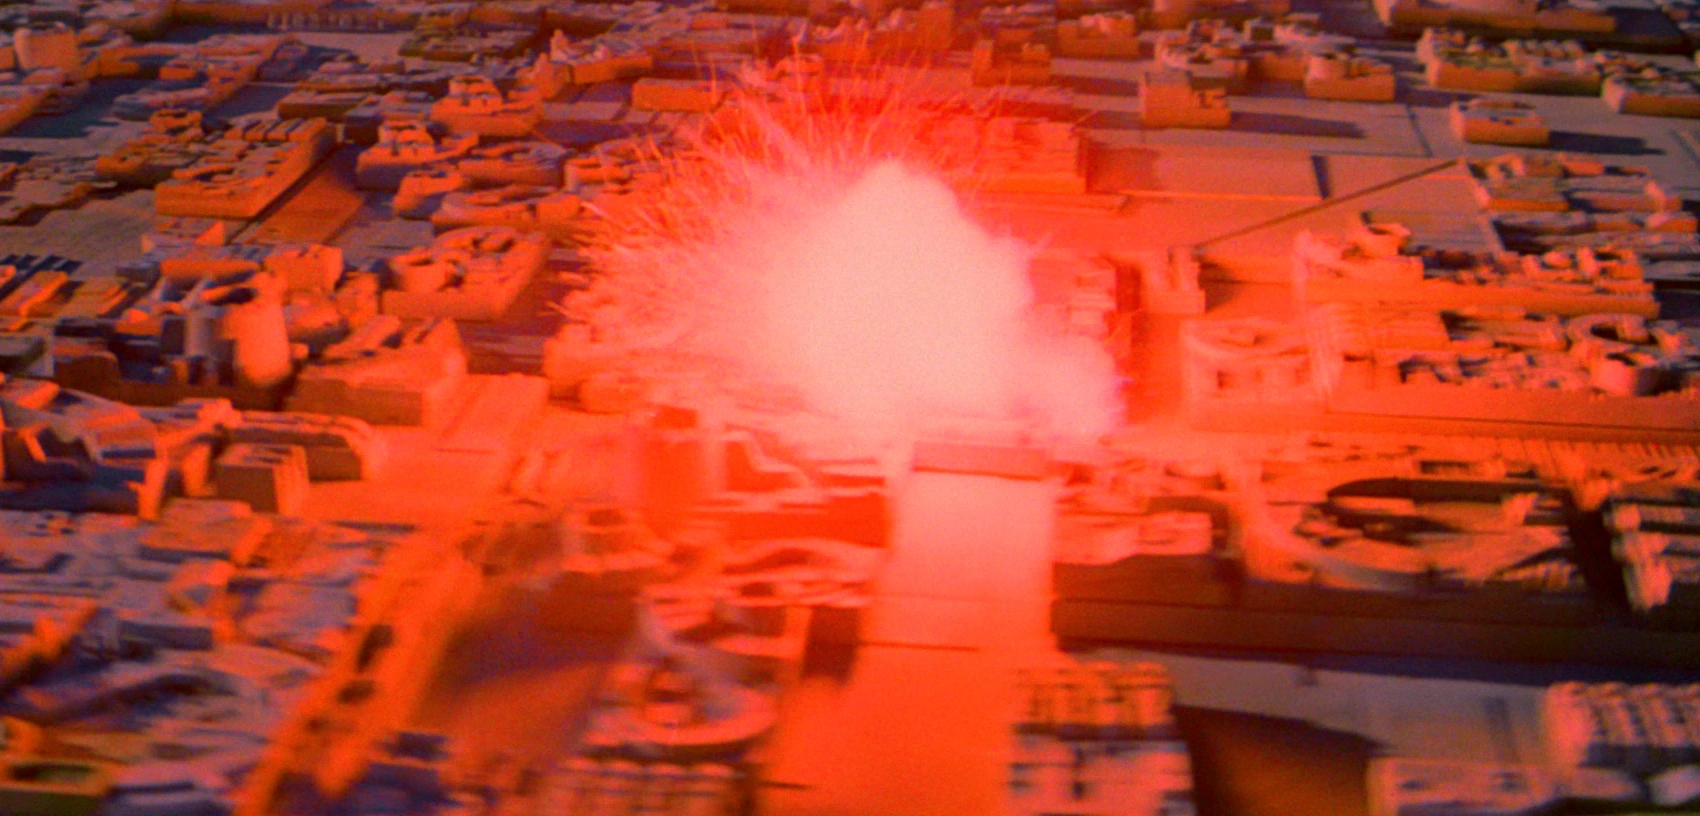
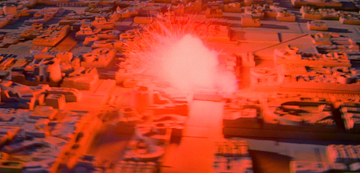
Dreis triumphantly announced the firing of the warheads,[3] and "Red Nine"[20] Nozzo Naytaan celebrated the score as the Death Star's hallways were rocked by the huge explosion Dreis that caused at the trench. Dreis soon realized, however, that the torpedoes had merely impacted on the battlestation's surface and had failed to enter the exhaust port.[3] As TIE fighters continued to pursue Red Leader out of the trench, the news shocked the Rebels at the Great Temple[20]—grim, yet defiant as ever, Princess Organa wished that Dreis' shot at least knocked the presiding battlestation commander, Grand Moff Tarkin, off his feet.[23] Multiple Death Star troopers and stormtroopers in the station's corridors were rocked by the blast.[3]
Dreis' fighter crashes into the Death Star.
Sighted by Skywalker, Dreis was offered cover by the youth, but the squadron leader reported the loss of his starboard engine—R5-K6's efforts to repair the damaged machinery were futile—and insisted that the remaining pilots should ready themselves for their own attack run instead. Tailed by the lead TIE craft,[3] Red Leader accepted his fate[14] as his starfighter was caught in a web of laser fire and plummeted downward, impacting the battlestation's surface.[3] What Dreis never realized was that the Imperial who had shot him down, Darth Vader, was once his Clone Wars comrade and the father of Luke Skywalker, Anakin Skywalker.[6]
Legacy[]
Despite also being harried by Vader and with barely a minute left, Luke Skywalker chose to forgo the targeting device that had failed to guide Red Leader's torpedoes and, trusting in the Force, fired the shot that successfully destroyed the Death Star. With the Rebellion saved,[3] the Rebels who perished at the battle were the first to receive the Kenobi Medallion, awarded posthumously for their gallant sacrifice and hung in the pilot's lounge at the Rebel base on the planet Tierfon.[24] A holographic memorial dedicated to the fallen pilots was also installed at the Great Temple.[25] The vacancy left by Dreis' death was filled by Commander Arhul Narra of Renegade Flight, and leadership of the squadron eventually fell to[10] Skywalker and Antilles—the only Red Squadron combatants who survived the Battle of Yavin—who reformed it into the elite Rogue Squadron.[26] Skywalker and Leia Organa later documented their accounts of the Battle of Yavin, including the actions of the late Red Leader, in their own respective journals.[15][23]

Luke Skywalker and Wedge Antilles, survivors of Red Squadron's Death Star assault
For the majority of the time after the Battle of Hoth in 3 ABY, leadership of Rogue Squadron would fall to Antilles. For the Battle of Endor in 4 ABY, however, in which the Rebellion destroyed the Death Star II, Rogue Squadron was called "Red Squadron" once more in honor of those who had perished at Yavin.[10] The Rebel pilot "Green Four" Nichos Panib, a noble from Dreis' homeworld, was stationed at Echo Base on the planet Hoth prior to the battle there. The fallen pilot had been an old friend of Panib's mother's family, and Panib painted his own helmet to match Dreis' in order to honor him.[27]
Personality and traits[]
Personal qualities[]
- "Just hold them off for a few seconds."
- ―Red Leader, to his wingmen
Dreis was a fair-skinned male Human with brown hair[3] and a deep voice who, by the time of the Battle of Yavin, had a wrinkled complexion. Garven Dreis was inspired to fight the Empire with an intense passion as he had borne witness to and suffered through great injustice over the years. Although committed to the cause of the Alliance, his prior experiences were the more apparent catalyst for his actions, rather than the fervor of rebellion. Unlike his old friend Gold Leader Jon Vander, Garven Dreis had a look of confidence and was stout and tall in stature.[4]

Garven Dreis was a proficient X-wing pilot who kept his cool while leading Rebel fighters.
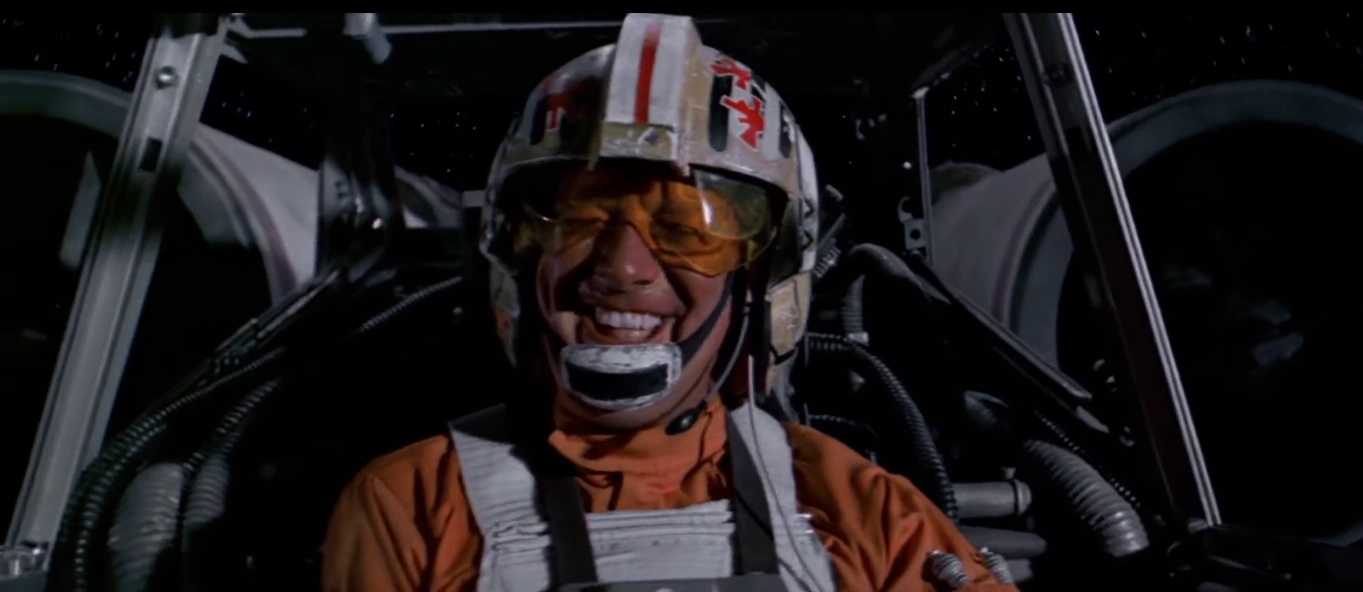
Preparing for the Battle of Yavin, Dreis was desperately eager to begin the engagement, but he did not let it show to his pilots.[4] Red Leader kept his cool as he and his squadron strafed the Death Star and battled TIEs in dogfights. While Dreis was tense and nervous when beginning his trench run, sweating profusely, he was surprised at his own calmness as he waited for[4] the two lines on his targeting computer to converge and indicate the precise moment to strike the port;[3] his concentration on the display's small and abstract images helped the pilot exclude the inimical surroundings from his awareness.[4]
Red Leader was wary of Imperials listening in on the Rebel transmissions in the heat of battle, and when "Gold Five" Davish Krail hailed him and reported Gold Leader's death by referring to the latter's nickname, "Dutch," Red Leader considered the implications of the Empire learning of a squadron leader's death. Coupled with the automatic advancement of rank for Krail, Dreis was apt to respond by referring to Krail as "Gold Leader."[20] Dreis triumphantly declared that he had let loose his proton torpedoes as he pulled out of the Death Star trench, but spoke bitterly in disappointment when he realized the load had merely impacted on the station surface. When he himself was shot down, Red Leader let out a roar as he perished in flames.[3]
Relationships with fellow pilots[]
- "This is it, boys!"
- ―Dreis leads Red Squadron at the Battle of Yavin

Dreis and his fellow Red Squadron pilots before the fateful Battle of Yavin
Garven Dreis was a long-time friend of the Rebel pilot Davish Krail, nicknamed "Pops,"[1] who called Dreis by the name of "Dave" in his dying words at the Battle of Yavin—upon Krail's death, Dreis struggled to keep his tone dry.[4] While Krail ran a tight ship and told his own pilots off as a form of discipline, Dreis considered the heat of combat to be enough to set his own pilots straight.[1] Indeed, Red Leader took an affectionate, almost paternal approach to commanding his "Red Boys."[12] Prior to his final battle, Dreis forced a smile onto his face to reassure the Red Squadron newcomer, Luke Skywalker. The avuncular Dreis[1] was a steadying influence[28] on his "boys," and he did not allow them to risk their lives for him when in mortal danger at the Death Star.[3]
When Red Squadron entered the Death Star's magnetic field, Dreis' calming voice curbed Skywalker's uncertainty. Dreis encouraged John D. Branon when the pilot shot down a TIE fighter and quickly[4] shouted[20] about another approaching TIE, but the loss of the Rebel soon afterward had only a slight effect on the squadron leader, who focused more on their mission. Dreis continued to look out for his pilots, warning them of potential threats and expressing concern for the more hotheaded Luke Skywalker in particular.[4]
As with General Dodonna, the squadron commander admired his subordinate Wedge Antilles' adaptability and skills as a pilot, but he found Antilles lacking in experience. Both Dreis and Dodonna considered Nozzo Naytaan to be the most promising member of the squadron, but they were wary of his recklessness. Dreis further mentored the younger Theron Nett,[1] who served as his long-time wingman.[29]
Skills and abilities[]
- "Heavy fire, Boss. Twenty-three degrees."
"I see it. Pull in, pull in. We're picking up some interference." - ―Wedge Antilles and Garven Dreis exchange advice mid-battle


Garven Dreis firing his torpedoes at the Death Star exhaust port
In his youth, Garven Dreis was one of the best fighter pilots on Virujansi and was proficient in navigating its caverns.[1] He was later a capable and well-respected veteran pilot of the Rebellion.[4] Between his time in service to Virujansi's Rarefied Air Cavalry and the Rebel Alliance, Dreis amassed experience in flying T-16 skyhoppers, Z-95 Headhunters, X-wings, Y-wings, and R-22 Spearheads.[1]
As the commander of the X-wing Red Squadron and a teacher of some of its members,[1] Dreis was able to assess the state of his pilots and give them advice in the midst of dogfights.[4] General Dodonna trusted that the seasoned pilot, as first flight's leader, would be able to keep his cool despite heavy fire in the narrow trenches of the Death Star.[1] While Red and Gold Leaders were well matched in their skills and dedication,[4] the general, even having considered the potential of Gold Squadron's Y-wings in accomplishing the attack run, placed his hopes on Dreis.[1] Indeed, Red Leader was able to concentrate on his targeting computer's display and simultaneously operate his craft through the canyon for his attack run.[4]
Equipment[]
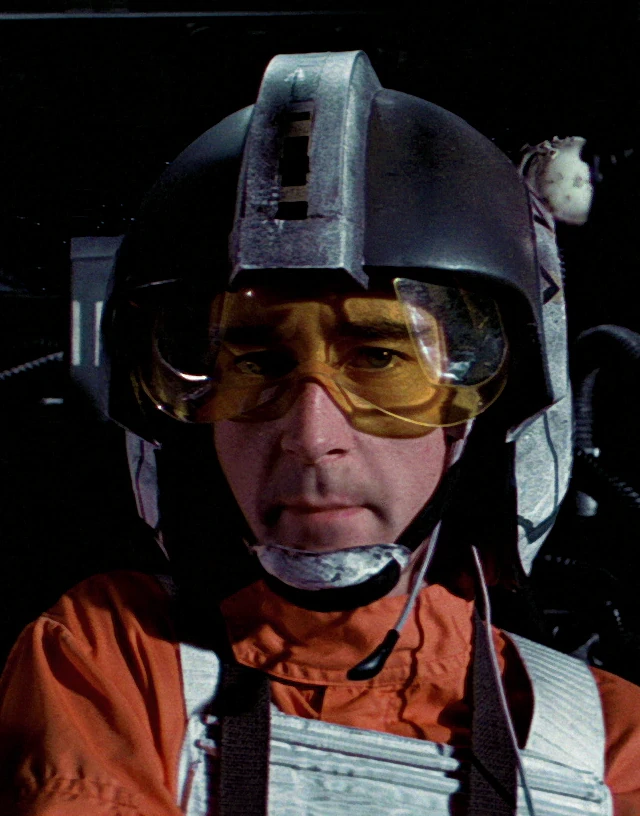
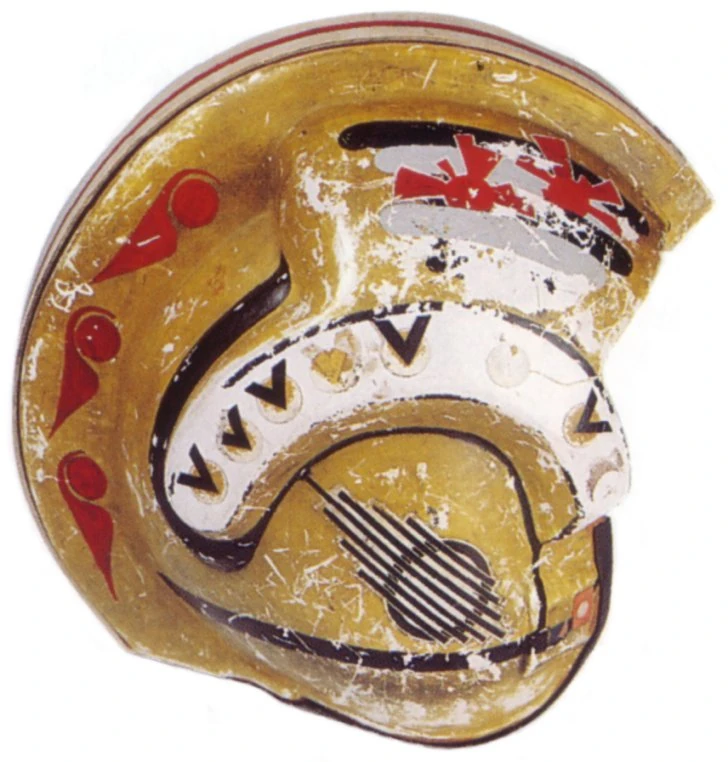
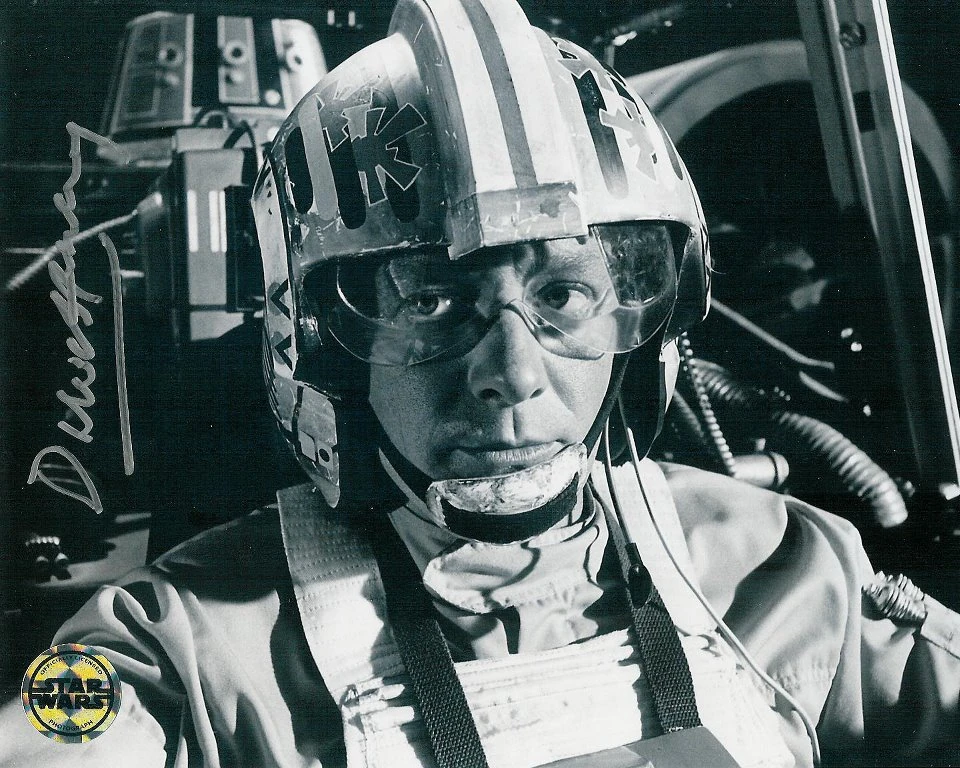
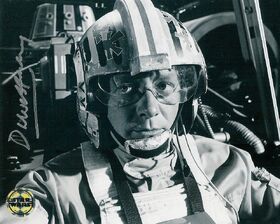
Dreis' helmet during the Battle of Yavin
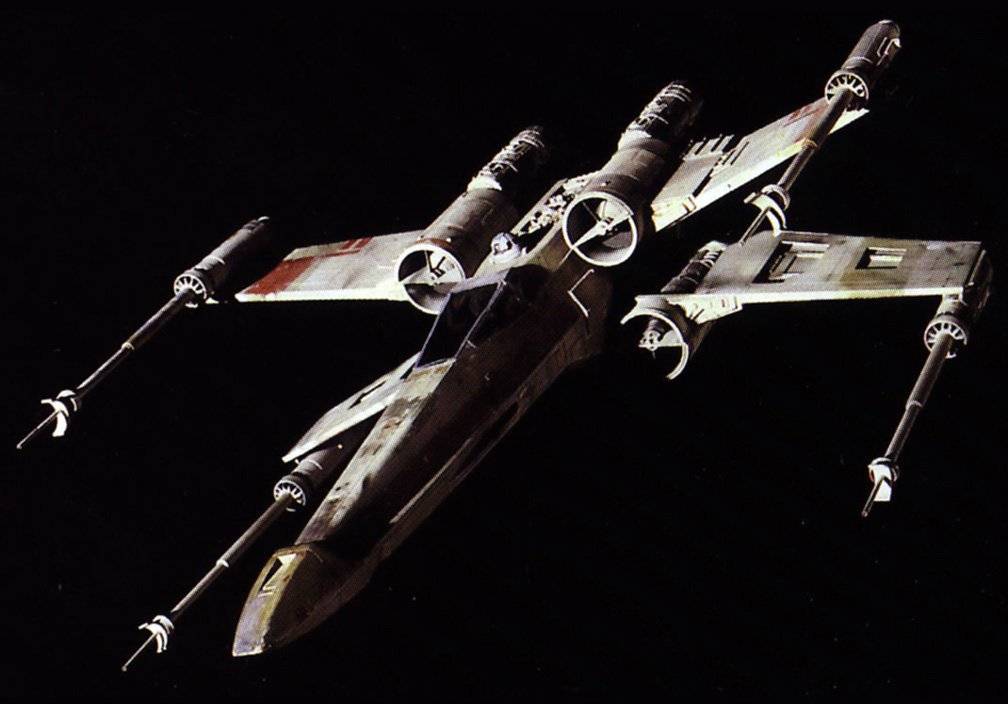
Garven Dreis donned an orange flight suit with a white flak vest during the Battle of Yavin, where he flew a T-65 X-wing starfighter[3] with his personal R5-series astromech droid, R5-K6. He additionally carried a DL-44 heavy blaster pistol and wore black gloves.[17]
The Rebel's battered white flight helmet,[30] which contained a headset[20] comm-unit,[18] had a gold paint that was decorated with curving black lines and round red symbols. A red line ran along the reinforced midrib of the helmet,[30] and both sides of[3] the headpiece protecting the forehead were adorned with a cluster of black and grey stripes lined with irregular red patterns that were pre-Rebellion squadron insignia.[30] Each of the helmet's bulbous sides[3] featured a Rebel unit marking—a black circle with thin lines of the same color streaking through it—and were crested with numerous black-and-gold "V"-shaped symbols.[30]
Behind the scenes[]
Naming[]
- "Red Leader, a rugged handsome man in his forties, comes up behind Luke and Biggs. He has the confident smile of a born leader."
- ―The revised fourth draft of A New Hope refers to Dreis' character as "Red Leader"
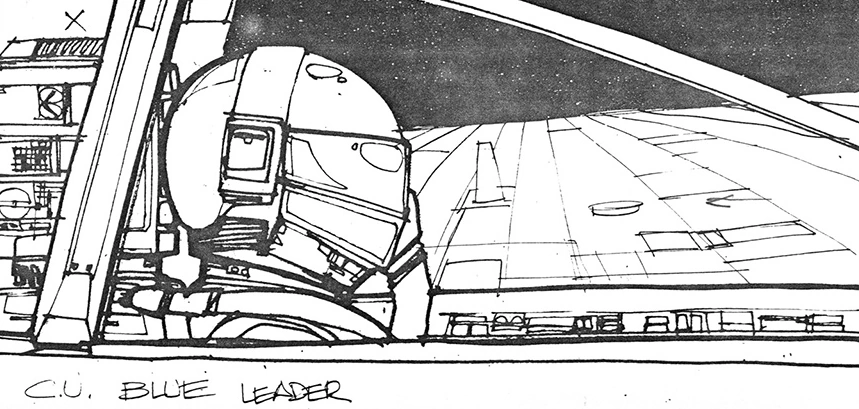
Dreis' character was originally designated "Blue Leader."
Created for George Lucas'[3] May 1977[32] original trilogy film, Star Wars: Episode IV A New Hope, Garven Dreis was first visually depicted in the film and credited as "Red Leader,"[3] but the character made his first appearance in Alan Dean Foster's[4] November[33] 1976 novelization of the film, in which he is named "Dave." Both Foster's novelization[4] and the fifth issue of Roy Thomas' Star Wars comic adaptation,[16] which was published by Marvel Comics on August 10, 1977,[34] identify the film's Red Squadron as "Blue Squadron," and as such Dreis' character was also known as "Blue Leader."[4][16] A New Hope's May 1974 rough draft names the pilot leader of the starfighter attack on the Death Star Mace,[35] and the second issue of Jonathan W. Rinzler's comic adaptation of the rough draft, which was published on October 2, 2013,[36] elaborates on the attack, giving Mace the designation "Devil Leader."[37]
Raymond L. Velasco's 1984 reference title A Guide to the Star Wars Universe established "Dave" as the character's first name and erroneously gave his nom de guerre as "Blue Leader" as well,[38] but the character was identified as "Garven Dreis" by the Premiere Limited set of the Star Wars Customizable Card Game later in 1995,[39] with the 1998 reference book Star Wars Encyclopedia clarifying that "Dave" was a nickname instead.[40] 2009's Rebellion Era Campaign Guide, a Wizards of the Coast supplement to the Star Wars Roleplaying Game Saga Edition Core Rulebook, misspells the name as "Garvin Dreis."[41]
Conception and development[]
- "I'll fly across the dam as you make your run and try and draw their flak off you."
- ―Guy Gibson in The Dam Busters

Guy Gibson, as portrayed in The Dam Busters (1955)
Initially designated "Blue Leader" as the leader of "Blue Squadron," Dreis' designation and squadron were respectively changed to "Red Leader" and "Red Squadron" since the use of bluescreens for the X-wing models meant they could not be painted blue as originally intended. The climatic Death Star assault had been inspired by documentaries and war films based on World War II, from which Lucas cut together a 16 mm eight-minute-reel of dogfights for storyboard artist Joe Johnston and the Industrial Light & Magic (ILM) visual effects crew's reference in the making of Star Wars. Lucas himself took reference from the reel while writing the end battle in the fourth draft of A New Hope in December 1975.[35]
In particular, Red Leader has matching dialogue and actions in battle that mirror those of Wing Commander Guy Gibson in the 1955 film The Dam Busters[42] and Wing Commander "Blue Leader" Roy Grant in the 1964 film 633 Squadron.[43] The Dam Busters footage was intercut with footage of Drewe Henley as Garven Dreis in the rough cut that Lucas screened to his filmmaking friends[44] in mid-February, 1977 since the special effects had not yet been completed. Indeed, the distributor of A New Hope, 20th Century Fox, initially wanted to cut out the entirety of the battle sequence, but efforts by ILM and film editors Richard Chew, Paul Hirsch, Marcia Lucas, and George Lucas himself persuaded Fox otherwise.[35]
As with all Rebel pilots at the Battle of Yavin, the film's conceptual sketches—which were done by Joe Johnston for the fourth draft—present the character as wearing a helmet and breath mask that fully covers the head. The storyboards also show Y-wings leading the X-wings of "Blue Leader" on the initial approach to the Death Star's surface,[35] whereas the both the revised fourth draft[31] and the film itself depict him and his X-wings diving down across the battlestation's axis while the Y-wings remain in high altitude.[3] For Dreis' X-wing trench run, the boards present two of them leading at the front of the formation while another one is flying further back,[45] while the film shows Dreis' starfighter in the lead, flanked by two other X-wings.[3]

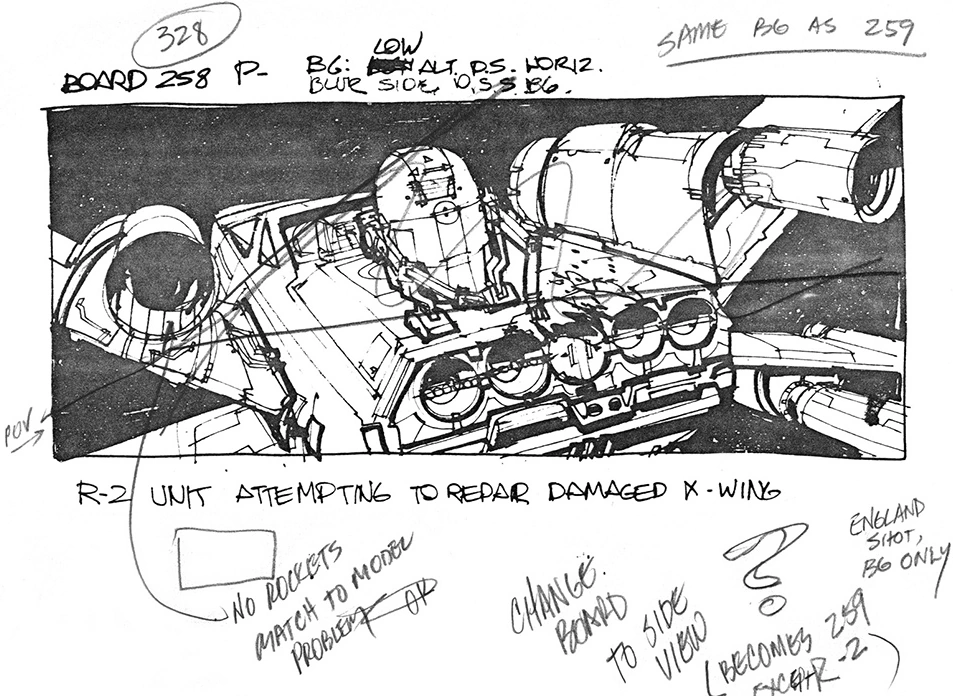
A storyboard shows Dreis' astromech droid attempting to repair his X-wing.
Another storyboard shows an "R-2 unit" attempting to repair the pilot's X-wing after it was damaged by Vader's fire, but the board was crossed out;[35] the scene is included in the 1976 novelization[4] but not in the revised fourth draft, dated to January 1976.[31] Later boards detail "Blue Leader" crashing into a tower on the Death Star but remaining semi-intact, before continuing to fly into the Death Star's surface and exploding. The scene initially features only an X-wing model, but the tower scene was changed to a point-of-view shot on December 22, with the combined crash being scheduled to take just under six and a half seconds of screentime.[35] A process plate shows a close-up of "Red Leader" in his X-wing in the lead-up to the battle, with the cockpit exterior bearing kill markings of three TIE fighters and an airplane.[46]
The revised fourth draft describes "Red Leader" as a burly and good-looking natural-born leader in his forties.[31] Both it and the 1981 Star Wars radio drama attributes a warning to Biggs Darklighter about a tailing TIE during the dogfights to Red Leader,[14][31] whereas both the film and its novelization attributes the line to Luke Skywalker instead.[3][4]
Portrayal[]
- "Having read the part and studied it before I came in, I'd seen the Red Leader being the older man with more experience and responsibility, and I didn't think he would demonstrate, or allow to be seen, too much degree of excitement—he needed to be very cool for the younger pilots' sakes."
- ―Drewe Henley's thoughts on Garven Dreis
The character was portrayed by the British actor Drewe Henley, who was mistakenly credited as "Drewe Hemley."[47] The cockpit scenes were shot on Stage 8 at Elstree Studios[35] for two weeks starting from June 28, 1976.[32] Henley interpreted the character as an experienced one, so he decided to play Red Leader as a man who did not give away his excitement in his voice. Lucas wanted the character to convey more of a sense of excitement, however, leading the actor and director to come to a compromise—Red Leader would at first be more relaxed and confident, speaking like the actor John Wayne, and then as the battle progressed, would become more and more enthused.[47]
Garven Dreis was portrayed by Drewe Henley.
Henley realized that his performance would be almost entirely in his voice. This was due to the fact that he would not be given the opportunity for much physical movement, since he was in a relatively small space for most of his scenes. Henley found it difficult to act in the "cockpit" scenes, for he was totally isolated from the rest of the actors and could not interact with them. Unlike many of the actors in A New Hope, Henley's performance was not dubbed over by another actor in post-production, performing with an American accent.[47]
The performance would prove to be Henley's final one on film as he was diagnosed with[47] bipolar disorder[48] shortly after shooting had finished and decided to retire from acting. Henley would later reflect upon A New Hope as the most interesting film he had ever been involved with.[47] Archive film of Henley as Red Leader that was not used in the 1977 film was held at Lucasfilm's Skywalker Ranch,[49] including the line "Stay close, Red Five! Where are you going?"[50]
Cut scenes[]
- "I met your father once when I was just a boy, he was a great pilot. You'll do all right. If you've got half of your father's skill, you'll do better than all right."
- ―Garven Dreis, in a scene cut from A New Hope
The 1997 Special Edition release of A New Hope featured several scenes that had been cut from the original theatrical version of the film. Henley was pleased with the inclusion of the scene where he, as Red Leader, talks briefly with Luke Skywalker and Biggs Darklighter, played by Mark Hamill and Garrick Hagon, respectively.[47] Another take of the scene, in which Red Leader says he knew Anakin Skywalker in the middle of the sequence, was not used in any release of the film,[51] but the line was featured and expanded upon in both Foster's A New Hope novelization and the Marvel Comics adaptation.[4][16]
Helmet prop[]
A part of the decor on Garven Dreis' helmet
Dreis' helmet used in A New Hope was carried by the pilot Nichos Panib on Hoth in 1980's Star Wars: Episode V The Empire Strikes Back and by another pilot on the cruiser Home One in 1983's Star Wars: Episode VI Return of the Jedi.[52] The film prop was also reused for the character Ina Rece and an unnamed female pilot in the 1995 video game Star Wars: Rebel Assault II: The Hidden Empire.[53]
Discrepancies[]
A New Hope novelization[]
- "Stick close, Blue Five. Where are you going?"
"I've picked up what looks like a lateral stabilizer. I'm going to try for it."
"Watch yourself, Blue Five. Heavy fire in your area." - ―"Blue Leader" and "Blue Five" Luke Skywalker, in Foster's novelization
Among the discrepancies between Foster's 1976 novelization of the 1977 film A New Hope are variations in dialogue throughout the span of the entire story, which are not documented in this article. There are, however, several factual contradictions between the two sources.[3][4]
In the film, Red Leader asks Red Six if he could see the missing Red Five, Luke Skywalker, after the death of Jek Porkins, who served as Red Six.[3] While the 1976 novelization shows Dreis asking Red Two Wedge Antilles instead if he could see Red Five,[4] Ryder Windham's 2004 junior novelization of A New Hope clarifies that Red Leader was under the strain of combat when directing a question to the fallen Red Six.[20] The film also shows Luke Skywalker being chased by a TIE fighter in the same sequence,[3] which contradicts the novel, in which Red Squadron pilots urge an unresponsive Skywalker to break off his pursuit of a target.[4] This article assumes that Skywalker was being pursued, as shown in the film.[3]

Wedge Antilles manoeuvring his X-wing to save Luke Skywalker.
The novel also shows Skywalker eventually breaking off his pursuit and resurfacing, upon which Dreis tells him to stay close and warns about heavy fire again, but Red Five ignores the advice and tells Dreis his intention to destroy a lateral stabilizer, successfully obliterating one before having to be saved from a TIE fighter by Antilles.[4] The film simply shows Antilles saving Skywalker from the same TIE fighter that was pursuing him when asked by Dreis if he coud see the missing Red Five, so this article does not incorporate the novel's depiction of this part of the battle.[3]
In addition, the A New Hope novelization shows various events in different order from the final cut of the film—the film's orders take precedence in this article. The novel shows Dreis ordering his pilots to lock S-foils in attack mode before they reported in,[4] whereas the order of the two events is reversed in the film itself. Contrary to the film again,[3] the novel places Antilles' extraneous chatter after Dreis' order that the comm channels be kept quiet. Similarly, Antilles' warning about heavy fire at twenty-three degrees occurs subsequent to John D. Branon's death in the novel,[4] but the warning in the film comes just after the Imperials begin to fire back at Red Squadron.[3]
Later sources[]
- "You're going to need some replacement pilots for the Death Star assault. I've got a new man for you—has his own R2 unit, too. Maybe you know him, Biggs."
"Maybe I do. Who is he?"
"His name's Luke Skywalker. Ever heard of him?" - ―Garven Dreis introduces Luke Skywalker to Biggs Darklighter
While Garven Dreis refers to Gold Five Davish Krail as "Gold Leader" just before the latter's death in A New Hope,[3] Dreis refers to him as "Gold Five" in the 1981 radio drama,[14] while the 1976 novelization features Dreis referring to him as "Red Five." Just as the novelization refers to Red Squadron as Blue Squadron, the film's Gold Squadron is referred to as Red Squadron, with call signs for each squadron being adjusted accordingly.[4] This article treats both the radio drama and the novelization as being in error since 2004's A New Hope junior novelization elaborates that Dreis deliberately chose to refer to Krail by the title "Gold Leader."[20]
Garven Dreis braces for his X-wing to crash, having been struck down by Vader.
The sixth issue of the 1977 Marvel Comics Star Wars adaptation specifies that Dreis was killed by Vader just after he let loose his proton torpedoes,[55] rather than sometime after the Rebel reports his missed shots as shown in the film.[3] The comic's narrator suggests that it is perhaps a mercy that the pilot would never know his payload had narrowly missed the target.[55]
The February 1, 1997[56] issue ½ of the Star Wars: X-Wing Rogue Squadron comic series, which was co-written by Michael A. Stackpole and Mike W. Barr, features Dreis greeting the pilots Wedge Antilles, Biggs Darklighter, and Jek Porkins in Yavin 4's Great Temple hangar. The latter three had just returned from a mission in time for their Death Star assault, and Dreis promptly introduced them to their new squadron-mates: Luke Skywalker and his droid, R2-D2.[54] Given that both the Star Wars radio drama and the 1998 junior novel Star Wars Journal: The Fight for Justice establish that Dreis admitted Skywalker into Red Squadron after being introduced to the boy by Darklighter, this article treats the X-Wing Rogue Squadron meeting as non-canonical[14][15] with respect to the Star Wars Legends continuity.[57]
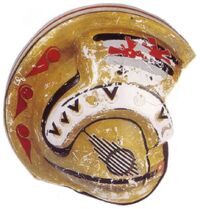
The April 2, 1997 fourth issue of the Star Wars: A New Hope - The Special Edition comic series, which was illustrated by Eduardo Barreto,[58] depicts a different design for Dreis' helmet. The red line along its midrib is missing, and each side of the front of the helmet features two black lines flanking a single red line which, toward its bottom, is marked with red spokes. Additionally, the numerous "V"-shaped symbols cresting the helmet's sides are colored red instead of black and gold.[30][59]
Video game cameos[]
- "Look at the size of that thing!"
"Cut the chatter. Wedge. Hold 'em off as best you can. Rogues. We're gonna have company real soon!" - ―Wedge Antilles and Luke Skywalker in a bonus level of Star Wars: Rogue Squadron
In the Death Star Trench Run bonus level of the 1998 video game Star Wars: Rogue Squadron video game, in which Luke Skywalker leads Rogue Squadron in assaulting the Death Star, Dreis' line from A New Hope in response to Wedge Antilles' off-topic chatter is instead spoken by Skywalker. Since the level can be played independent of the game's storyline, its events are non-canonical[60] with respect to the Star Wars Legends continuity.[57]
Similarly, Dreis appears in his X-wing in both the 2001 video game Star Wars: Rogue Squadron II: Rogue Leader, where he was voiced by Bob Machray,[22] and the 2006 video game Star Wars: Empire at War, as a part of the Red Squadron unit. Given that the unit appears independent of the games' plot, Dreis' presence is non-canonical[61] with respect to the Star Wars Legends continuity.[57]
Backstory[]
- "It was great fun to imagine a hotshot farmboy pilot's reaction to Anakin Skywalker, to partially restore the now-edited-away reference to Red Leader having flown with Luke's father, and to give some depth to the briefly, nicely sketched friendship between Red Leader and Gold Five, AKA Dave and Pops."
- ―Jason Fry
Dreis' encounter with Anakin Skywalker prior to his transformation into Darth Vader was elaborated upon by Abel G. Peña in the article "Vader Tech," included in the 2005 magazine Vader: The Ultimate Guide,[63] and by co-author Jason Fry in the 2012 reference title The Essential Guide to Warfare.[1] For the book, Fry wrote a war portrait as if it were a missing page from Foster's A New Hope novelization, and he was particularly happy with detailing Dreis' encounter with Anakin Skywalker and his friendship with Davish Krail.[62]
Appearances[]
|
Non-canon appearances[]
- LEGO Star Wars II: The Original Trilogy (Starfighter only)
- LEGO Star Wars: The Complete Saga (Starfighter only)
- "Perfect Evil"
Sources[]
Notes and references[]
External links[]
 Star Wars (@starwars) on Twitter (November 26, 2019) (backup link)