| | |


Warning: This infobox is missing the following parameters: parents, pronouns, children, siblings, partners, families, feathers
- "I'm no errand boy. And I'm not in this war for Dooku's politics. I am the leader of the most powerful droid army the galaxy has ever seen!"
- ―General Grievous, to Obi-Wan Kenobi
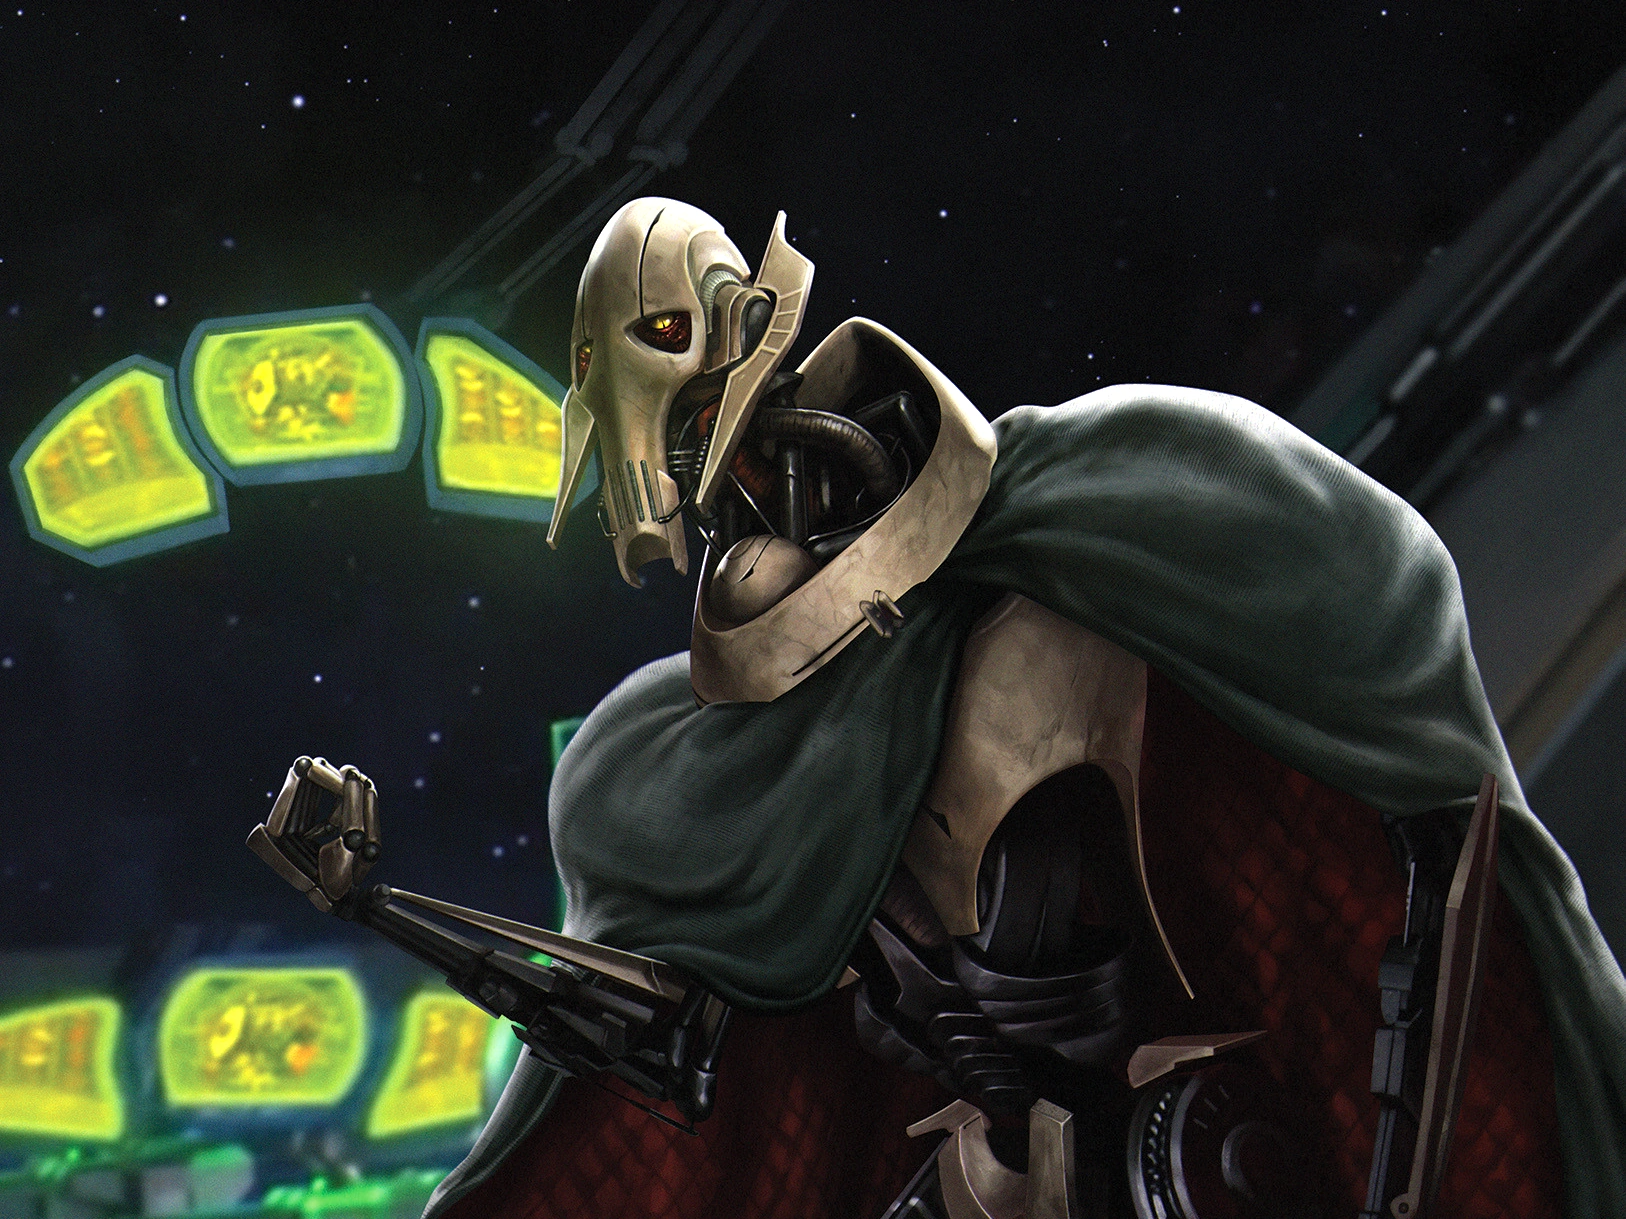
Grievous, formerly known as Qymaen jai Sheelal, was a Kaleesh male warlord who served as a commanding officer in the military forces of the Confederacy of Independent Systems during the last years of the Galactic Republic. Although he was known by his rank as a general, Grievous was the Supreme Commander of the Separatist Droid Army that engaged the Grand Army of the Republic throughout the pan-galactic conflict of the Clone Wars. Noted for his ruthlessness and extensive cybernetic enhancements, Grievous inspired fear as he traveled across the galaxy, invading entire worlds and engaging the Jedi Knights of the Republic.
A native of the planet Kalee, Grievous sustained severe injuries that required extensive repair by the time of the Clone Wars. Willingly submitting to a procedure that rendered him more mechanical than organic, he became a living weapon, granting him lightning-quick reflexes and devastating strength. Although he was neither Jedi or Sith, nor even sensitive to the power of the Force, Grievous was a skilled lightsaber duelist, having trained in the art of the lightsaber under the fallen Jedi Master-turned-Sith Lord Count Dooku. Known for his hatred of the Jedi Order, Grievous killed Jedi over the course of the war, and would claim their lightsabers both as trophies and weapons to be used against other opponents, be they Jedi or clone troopers.
In addition to his combat skills, Grievous was a brilliant military strategist who oversaw multiple campaigns throughout the Clone Wars—from the Battle of Kamino, where he failed to halt the production line of clone troopers; to the Battle of Dathomir, where his battle droids massacred the Nightsisters led by the witch Mother Talzin. In 19 BBY, Grievous launched a daring raid on Coruscant, the Republic capital world, resulting in the abduction of Supreme Chancellor Sheev Palpatine. However, the Jedi succeeded in rescuing the Chancellor while driving back the Separatist invaders. Following the loss of Dooku, Grievous and his army went into hiding in the Outer Rim Territories. Unknown to Grievous, his master, the Sith Lord Darth Sidious, betrayed the general's location to the Jedi Order, allowing them to invade the planet Utapau in an effort to bring a swift and decisive conclusion to the war. As a result, Grievous was ultimately slain by his nemesis, Jedi General Obi-Wan Kenobi, whose 212th Attack Battalion went on to secure Utapau even as Order 66 went into effect, marking the fall of the Republic and the rise of the Galactic Empire.
Biography
Early life
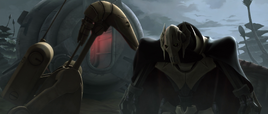
- "Sometimes I wonder why you submitted to the changes."
"Improvements! I submit to no one! I chose them!" - ―EV-A4-D and Grievous
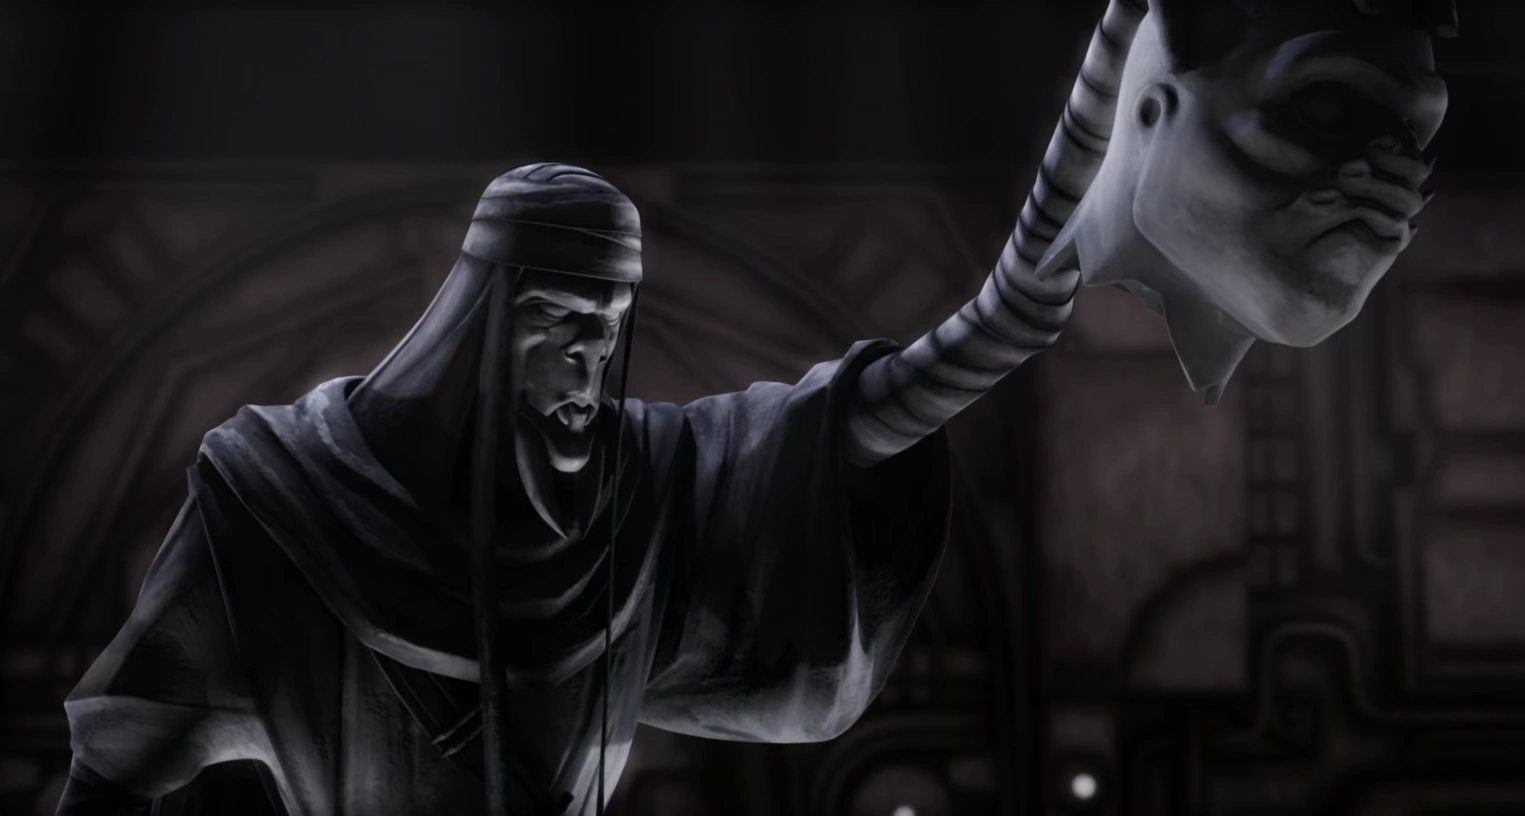
A statue of Grievous in his original Kaleesh form before he became a cyborg.
The son of a Kaleesh mother and father,[5] Grievous, then known as Qymaen jai Sheelal,[6] was a feared warlord[7] and warrior from the planet Kalee.[8] Grievous learned battle tactics and warfare during the Kalee's war against the Yam'rii of Huk, and eventually developed a personal vendetta against the Galactic Republic, as the government had supported the Yam'rii.[9] At some point in his life, Grievous became a cyborg following a shuttle crash that almost killed him[10] and destroyed most of his body.[11] He chose to receive extreme cybernetic upgrades[12] to increase his skills in combat,[8] becoming an even more threatening and fearsome warrior.[12] With his living Kaleesh flesh traded for cyborg implants, Grievous claimed that[8] his changes were improvements.[13] According to one legend, Grievous's transformation had occurred over time, initially only making simple enhancements before moving onto more extreme changes. The legend said Grievous transformed himself because he admired the logic of droids and wanted to mirror their infallibility, strength, and power.[14]
While Grievous claimed his old form was no more than weak flesh,[15] Grievous had several reminders of his past life. As a cyborg, Grievous wore a Kaleesh cloak, which was a vestige of his past identity, as well as a fearsome mask that was often worn by Kaleesh warriors.[12] By the time he owned his fortress on Vassek 3,[13] Grievous had several statues that depicted his progression from his organic life into that of a cyborg.[16] After Grievous's reconstruction, all that remained of his original body were his brain, eyes, several vital organs,[12] spinal cord,[source?] and a small amount of red Kaleesh flesh that could still be seen around his eyes. Grievous's armor[12] and synthskin gut-sack protected his remaining vital organs,[8] but his organic lungs were irritated by their implants. This gave Grievous a persistent cough[12] for the rest of his life.[3]
The Clone Wars
Early efforts
- "The droid general, Grievous, has our forces spread thin."
- ―Mace Windu
After Grievous received his cybernetic enhancements[13] and was trained in lightsaber combat by Count Dooku, he became the Supreme Commander of the Droid Army and gained the rank of general in the military of the Confederacy of Independent Systems.[7] The CIS and Republic were launched into the galactic conflict known as the Clone Wars with the Battle of Geonosis,[17] which Grievous took part in. While it was entirely by accident, the now-cyborg Grievous's first clash against members of the Jedi Order came during the battle. He was in the[18] Geonosian[17] Stalgasin hive's catacombs when the battle began, and the cyborg fought a number of Jedi during his retreat. Grievous left none of the Force-sensitives he encountered alive, meaning his involvement in the[18] war's opening battle[17] was not discovered until much later.[18] The war proceeded to spread throughout the galaxy,[19] so Grievous and his forces engaged the Grand Army of the Republic, and, under his command, the Separatist Droid Army attacked Republic planets.[20] As the Separatist Army's leader, Grievous would cause fear throughout the Republic,[21] although the Confederate populace were not told the stories of the General's onslaughts.[22] Ultimately, as a number of Republic citizens—as well as some citizens in CIS territory—saw Dooku as noble yet misguided, many came to see Grievous as the true face of the Confederacy.[23]

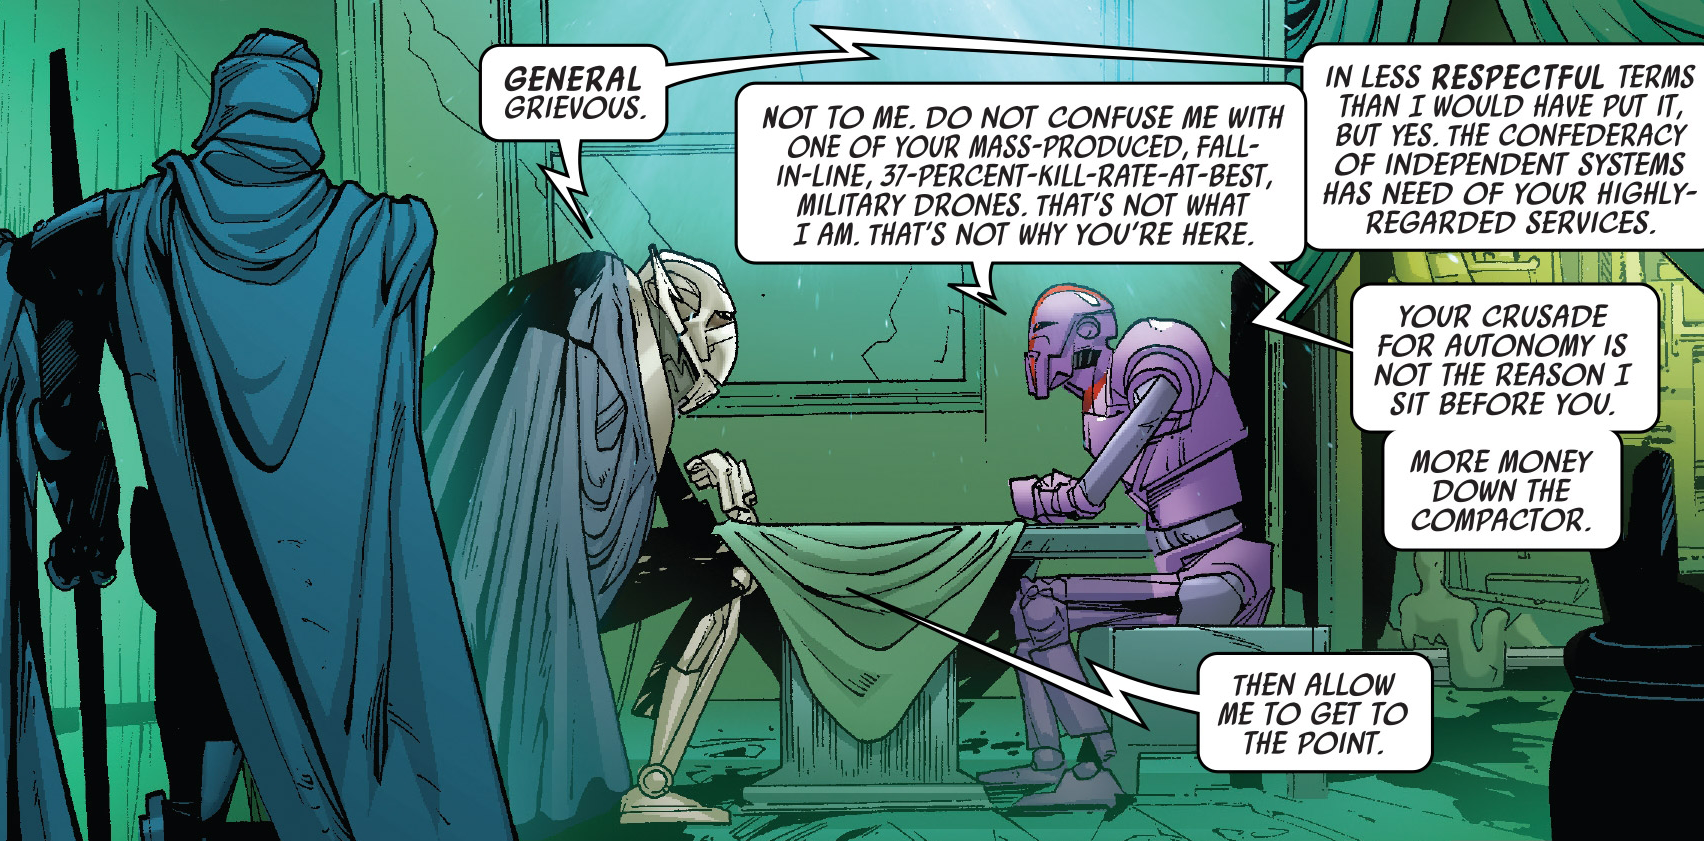
Grievous and AD-W4
In the early days of the Clone Wars, Grievous hired the droid mercenary AD-W4 to oversee the Separatists' operations on the planet Hissrich. Grievous admitted that he would have liked to do so himself, but could not as he had the entire Separatist Droid Army to command. AD-W4 was skeptical, but after seeing the payment left to fulfill its job. AD-W4 served as commander of the droid forces on the planet, and battled with Jedi Master Mace Windu and his Jedi squadron. Grievous later checked in via hologram to see the progress of AD-W4, and the droid claimed to have killed Windu, however Grievous demanded the Jedi's lightsaber as evidence.[24] Ultimately, the droid was defeated and Hissrich was lost to the Republic.[25] Around the time of the Battle of Christophsis, Grievous had already spread Republic forces thin.[19] Grievous shared his name with The Grievous Legion, a battle group that included at least one vulture droid.[26]
While the war against the Yam'rii had given Grievous a vendetta against the Republic,[9] Grievous had changed by the Clone Wars. Grievous now was indifferent to the Republic, and his main goal was to see the extermination of the Jedi Order.[27] Grievous fought against numerous Jedi during the war, defeating and killing many of the Order's members,[21] which let the general collect lightsabers and other trophies.[13] Jedi Anakin Skywalker considered him a monster that needed to be stopped,[27] but Skywalker and Grievous would not meet face-to-face until the war had nearly reached its conclusion.[3] However, Grievous did encounter the Jedi Master Obi-Wan Kenobi, and the two fought each other numerous times throughout the war.[27] During the war, Grievous and Jedi Knight Pablo-Jill had a duel over the world of Duro in a collapsing satellite city. Jill was ultimately left injured and lost his lightsaber to Grievous.[28] Before his duel on Utapau, Grievous killed Jedi Master Jmmaar and took his green-bladed lightsaber in order to add to his own collection.
The Malevolence campaign
- "Do not compound your failure this day by allowing our prized warship to fall."
"My lord, they will never capture me or this ship." - ―Count Dooku and Grievous

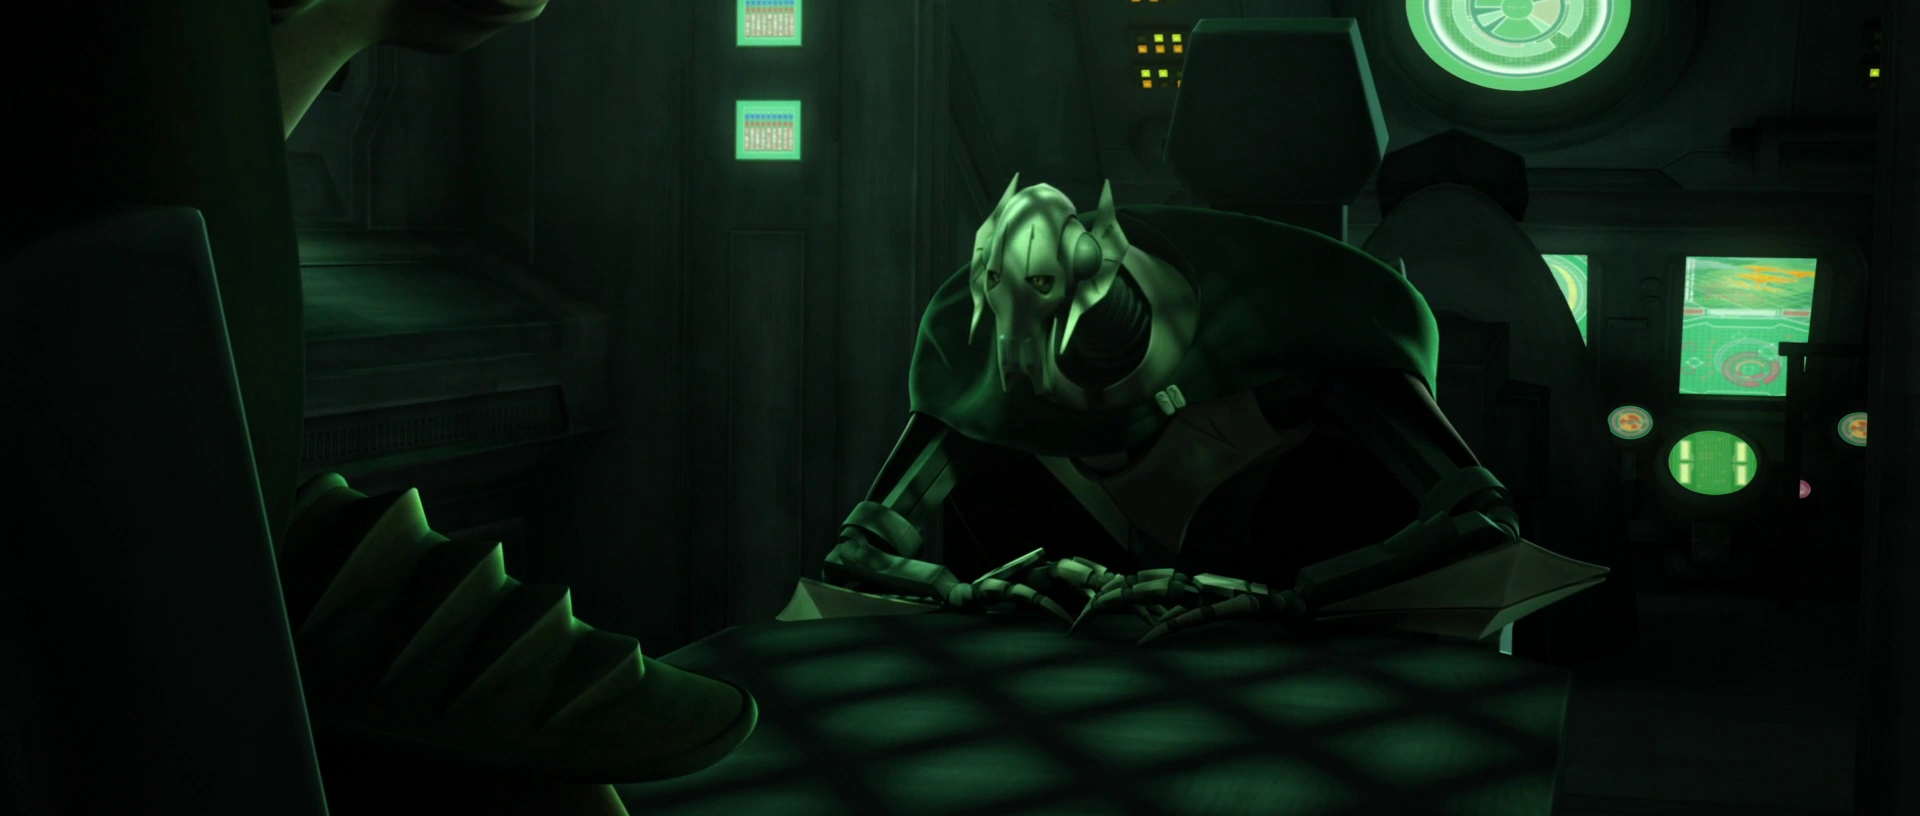
Grievous giving orders on the Malevolence bridge.
As he was leading the Separatist forces in the Clone Wars, Grievous gained the Subjugator-class heavy cruiser, Malevolence,[29] as his flagship. From the Malevolence's bridge, Grievous could command millions of battle droids,[12] and he used his new warship in the Malevolence campaign,[30] where he executed attacks on Republic fleets that left no survivors. While stationed in the Abregado system with Count Dooku aboard, a Republic fleet led by Jedi Master Plo Koon and Clone Commander "Wolffe" aboard the Venator-class Star Destroyer Triumphant arrived in the system to engage the warship. The mega-ion cannons of the Malevolence disabled the Republic fleet's deflector shields, and fired on the defenseless ships, leading to the destruction of the entire fleet, although a few individuals managed to survive by launching away from the vessels inside escape pods, but Dooku ordered a pod hunter to go out and destroy the pods, which held signs of living witnesses of the Malevolence. Plo Koon, Commander Wolffe, and the two clone troopers, sergeant Sinker and Boost, were the only survivors. They destroyed the pod hunter and were finally rescued by Anakin Skywalker and Ahsoka Tano who were on the Twilight. As a result of the escape of some survivors, Dooku's trust in Grievous was shaken, and the Sith Lord left to discuss plans with his master, Darth Sidious.[29]
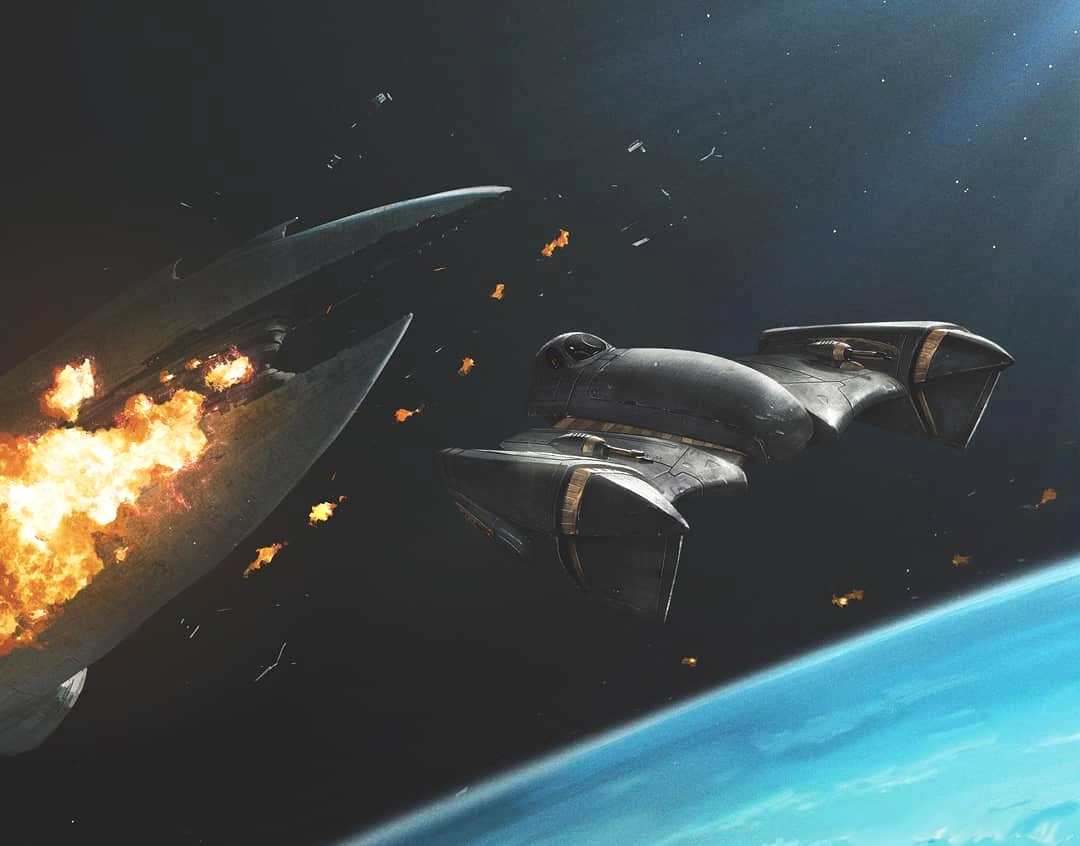

Grievous flees the critically-damaged Malevolence aboard Soulless One
After destroying the Republic convoy in the Ryndellia system, Grievous, as instructed by Count Dooku via hologram, took the Malevolence to destroy a Republic medical facility that was treating over 60,000 wounded clones. In order to reach the target, the Malevolence had to navigate around the Kaliida Nebula. However, Anakin Skywalker led a small strike force of fighters which disabled the ion cannons of the Malevolence. After this, a Republic fleet led by Obi-Wan Kenobi aboard his flagship the Negotiator arrived and attacked Grievous' crippled ship.[31] Grievous was forced to retreat, but Dooku came up with a new plan: taking Senator Padmé Amidala hostage. After Senator Amidala's ship was captured, the Republic fleet stopped firing, and a team was sent to board the Malevolence led by Obi-Wan Kenobi and Anakin Skywalker. Grievous fought Obi-Wan Kenobi briefly and overpowered him, but the two Jedi managed to escape with Padmé and C-3PO. Grievous pursued the Twilight in his personal starfighter, the Soulless One, but Skywalker had sabotaged the navigation system of the Malevolence so that when the ship engaged its hyperdrive, it crashed directly into the nearby Dead Moon of Antar. Grievous escaped in his starfighter, but he had personally disconnected a transmission with Count Dooku.[32]
With the loss of the Malevolence, Grievous took the Providence-class dreadnought Invisible Hand to fill the role of his flagship,[8] but the cyborg would also use other vessels as his command ship during the war.[33]
Attack on Rishi Station
- "All the preparations for your invasion are in order."
"Good. Our fleet is approaching the system. We are almost at the rendezvous point."
"Very good, my lord. I will await your arrival."
"The destruction of Kamino will stop their production of clones for good." - ―Asajj Ventress informs Grievous that the preparations for his invasion of Kamino are in order
The Republic would make efforts to locate Grievous, but, even after Clone Intelligence spotted him in the Balmorra system, the general remained out of the Republic's sight. Several standard weeks after his sighting in the Balmorra system, Anakin Skywalker was losing sleep while searching for the cyborg, but he denied himself his needed rest until Grievous was found. While Obi-Wan Kenobi believed that they would know if Grievous entered their current quadrant, the general was currently preparing to launch an attack on Kamino. Under the Separatist invasion plan, Grievous would be able to remain undetectable, as he was to take over the Rishi Station.[34]

Grievous speaks with Ventress via hologram aboard his warship.
Grievous, determined to stop the clone production on Kamino, sent a team of BX-series droid commandos to seize Rishi Station from the clone troopers stationed there. After the commando droids had taken control of the station, Grievous was contacted by their captain aboard his Munificent-class star frigate, who informed him that the outpost was secure, and that they managed to disable the alarm and activate the all-clear signal. Grievous ordered him to keep the signal activated, so as not to draw the Republic's attention and lose the element of surprise. With the all-clear signal still broadcasting, Republic forces would assume Kamino was still secure, meaning Grievous's fleet could launch a surprise assault on the planet.[34]
After ending the transmission, a battle droid informed the general that their spy on Kamino, Asajj Ventress, was contacting him. Ventress assured Grievous that everything was ready for their invasion. Pleased, the general informed her that he had almost reached their rendezvous point. However, the station was soon visited by Clone Captain "Rex" and Clone Commander "Cody," who were inspecting the station as part of a security checkup. These two Clone Officers soon discovered the outpost had been taken. They then met with the survivors and retook the station from the commando droids. When communication with the droids was abruptly cut off, Grievous sent a battalion of droids to inspect the station. He was then informed that there were clones in the station. One of the clone troopers, "Hevy," sacrificed himself to destroy the base, which angered Grievous as he believed that the droids had blown it up instead. This alerted the Republic fleet to their location, and immediately realized that his forces were heavily outgunned, proceeding to order his fleet to make a full retreat out of the system, therefore postponing the invasion.[34]
Fighting in the Outer and Mid Rim
- "Our intelligence has confirmed that Grievous's spies have been intercepting our transmissions."
"He must have some sort of secret listening post out there somewhere."
"That would explain how he's been able to ambush our fleets." - ―Obi-Wan Kenobi, Ahsoka Tano, and Anakin Skywalker

General Grievous during his campaign in the Outer Rim.
Grievous launched a campaign in the galaxy's Outer Rim Territories while using[33] the newly created Skytop Station, a Separatist battlesphere that served as a listening post,[35] to locate and ambush Republic fleets to attack. General Grievous moved his forces against the Republic's forces in the Outer Rim, and, due to the victories he gained, the Republic's foothold in the Outer Rim began to slip from their disastrous losses. Anakin Skywalker and his battle group fought against Grievous's forces in the campaign, but failed to stop Grievous's advance. After the Republic battle group at Falleen was wiped out, the fleet under the command of Grievous prepared to take the planet of Bothawui, which was of high strategic value and was currently being protected by Skywalker and a weary fleet of Republic cruisers.[33]
Grievous moved his fleet to[33] the Mid Rim[36] world of Bothawui to attack Jedi General Anakin Skywalker's fleet with information from his spies. Realizing that attacking from above would put them at a disadvantage, Grievous moved the fleet through the asteroid field to engage Skywalker's fleet, knowing that the asteroids would protect him from any surprise attacks.[33]

General Grievous at the Battle of Bothawui.
Skywalker then deployed into the Gold Squadron from his flagship, the Resolute, to try and draw out the general. As Grievous' fleet exited the asteroid field, it was able to severely damage one the Republic cruisers, but was quickly outflanked by All Terrain Tactical Enforcers hidden on the asteroids. Grievous was shocked and angered that Skywalker knew what he was planning to do, and ordered an immediate retreat. However, the battle droid commander was dumbfounded as to where to go, so Grievous abandoned his flagship and the droids in annoyance. He was soon spotted by Skywalker, who attempted to pursue him in his Delta-7B Aethersprite-class interceptor but was soon sent spinning out of control as a result of the damage his fighter had sustained earlier in the fight. Meanwhile, Grievous had managed to power up the Soulless One's hyperdrive, allowing him to jump into hyperspace. The rest of Grievous' fleet however, was destroyed.[33]
Following his loss at Bothawui, Grievous contacted the Trandoshan salvager Gha Nachkt, and requested that he search the debris field for an astromech droid,[33] telling him to rendezvous at Skytop Station on Ruusan's moon once the droid was located. The droid in question was R2-D2, the astromech droid of General Skywalker, with Grievous suspecting that he held vital military secrets within his memory banks that could aid the Separatists.[35]
Trapping Skywalker
- "Ah! There's our Jedi tracking beacon. Skywalker, now you have fallen into my trap."
- ―Grievous, after R3-S6 activated the tracking beacon on Skywalker's Jedi Starfighter
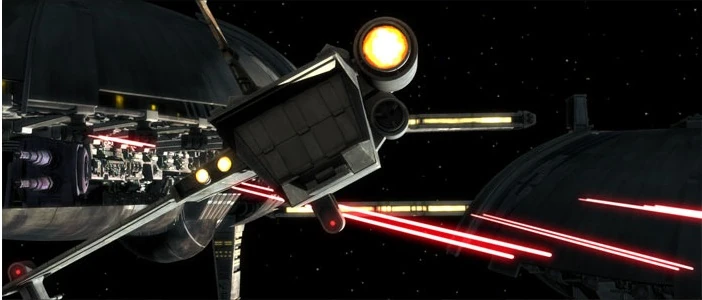
Grievous' Munificent-class star frigates attempt to block the Twilight's escape
Later, Grievous was contacted by the Nachkt, who informed him that he had the droid in his possession and was en route to their rendezvous point. He also revealed that Skywalker had boarded his ship looking for it, and believing it to be valuable, requested more money than they had previously agreed upon. However, Grievous threatened him, telling Nachkt to not anger him and to arrive as fast as he could, or else there would be consequences.[33]
Not soon after, Grievous detected Skywalker's fighter's beacon, which had been activated by R3-S6, Skywalker's replacement astromech droid, who in reality was a Separatist spy. Having fallen into his trap, Grievous aboard his new command ship suddenly dropped out of hyperspace and attacked, destroying his hyperspace transport ring, preventing his escape, proceeding to launch an entire squadron of vulture droids to kill the Jedi, and ordered his cruisers to move in. However, Skywalker was rescued by the timely arrival of his apprentice Ahsoka Tano and the Twilight, Skywalker's freighter. The General then ordered his ships to prevent their escape, but the Twilight was able to navigate between the two battleships, causing them to collide with each other, destroying the vulture droids. The Jedi's ship then jumped to hyperspace. In his anger, Grievous physically decapitated an unfortunate battle droid who had pointed out to him that the Jedi had escaped.[33]
Encounter on Skytop Station
- "Sorry to interrupt your playtime, grumpy, but wouldn't you prefer a challenge?
"That wouldn't be you!" - ―Ahsoka Tano and Grievous, after the latter attempts to kill the unconscious Captain Rex
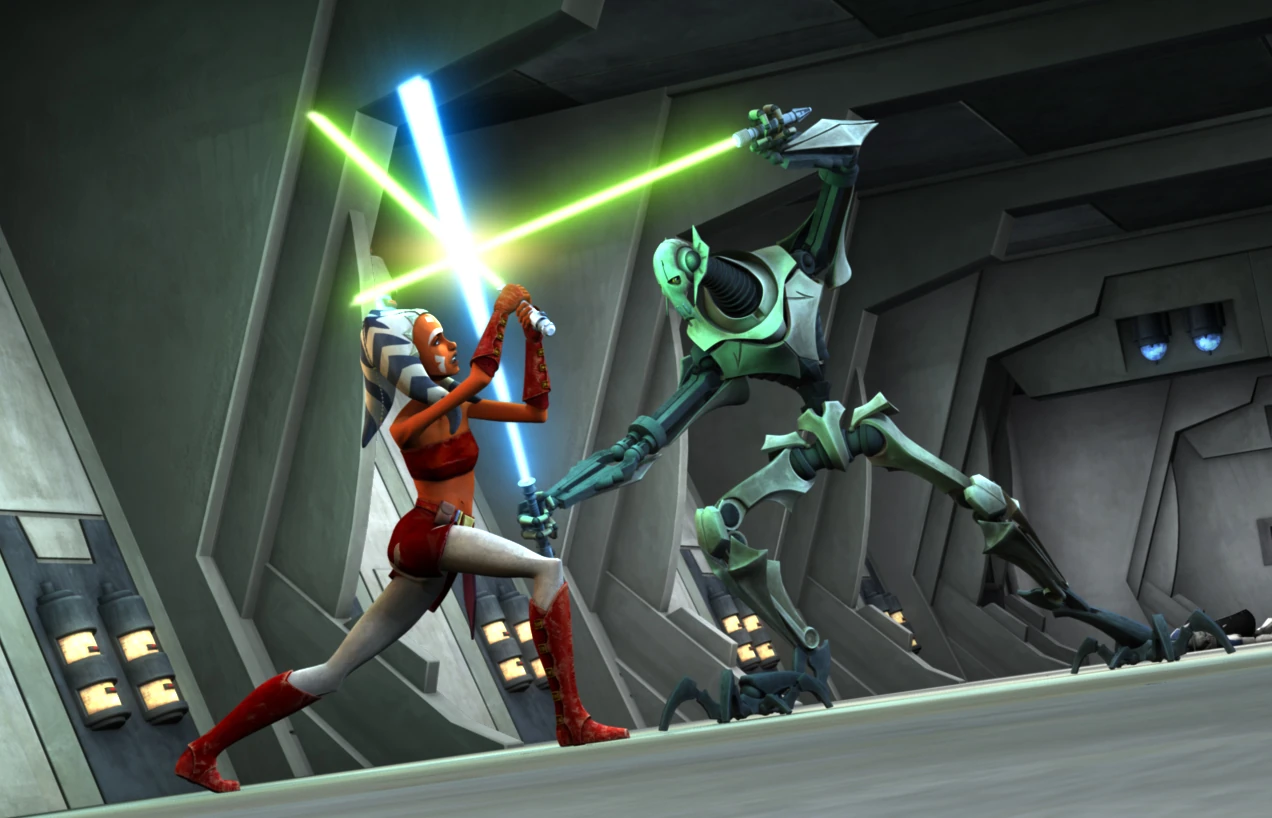

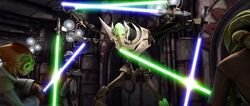
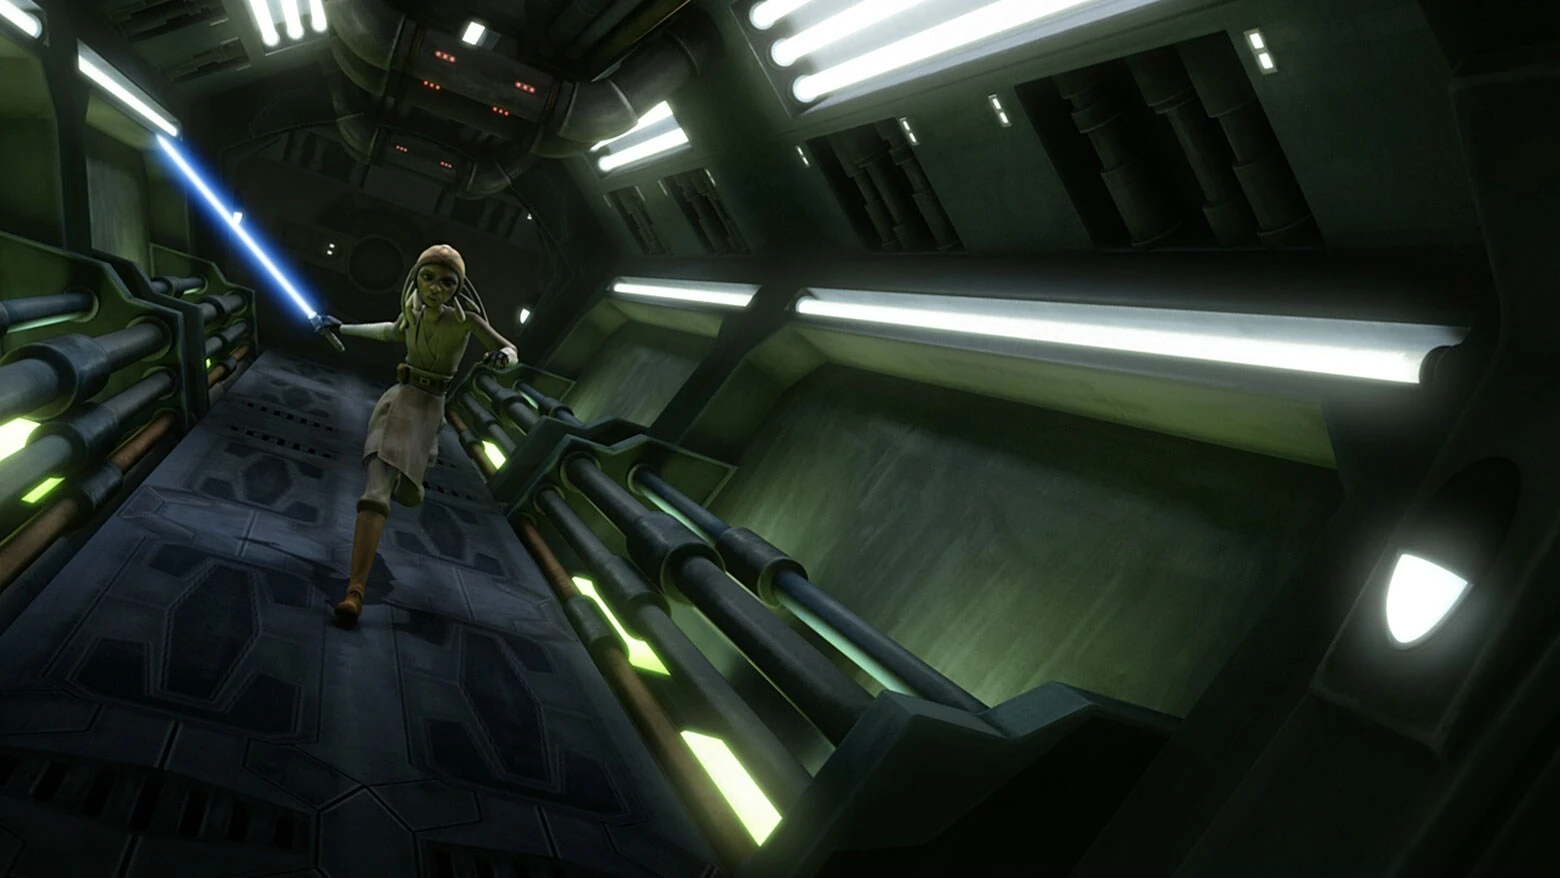
Grievous duels Ahsoka Tano aboard Skytop Station.
Nachkt soon arrived at Skytop Station with R2-D2, and proceeded to disassemble the astromech droid and sift through his memory banks for any vital information. Grievous listened as Nachkt revealed that the data within the astromech had never been erased and contained a wealth of information that they could exploit. Trying to use this to his advantage, Nachkt demanded double the agreed price, but Grievous, having grown tired of his incompetence, proceeded to impale him with his lightsaber, killing him with Grievous cackling in his death. He was then informed by the spy R3-S6 that the Jedi had infiltrated the station in order to rescue the droid. Grievous ordered R3 to distract them until he arrived, and tasked his IG-100 MagnaGuards with taking care of the astromech while he confronted the Jedi.
Grievous then found Skywalker's apprentice, Ahsoka Tano, along with Captain Rex and a squad of clone troopers. He engaged them in combat and managed to kill all of the clones except Rex and "Denal," who were saved by the timely intervention of Ahsoka. As she confronted the general, she was quickly overpowered and forced to retreat further into the station, with Grievous and R3 giving chase after her. While searching one of abandoned spare parts rooms for her, Grievous was informed that Skywalker had gone to rescue his astromech. He then had R3 go to the hangar and ensure that Skywalker would not escape. Hanging from the ceiling, Grievous found Tano and clamped a metal hand around the Padawan's throat, examining her fallen lightsaber with his free hand. Believing he had won, Grievous taunted his prisoner, saying Skywalker would be next after he eliminated her. Despite Tano's claims that her Master would destroy Skytop Station, Grievous believed otherwise. However, Tano's beliefs proved true when the Republic squad detonated the explosives in the reactor room, crippling the listening post's repulsorlift systems. As the station shook from the impact, Tano managed to use her lightsaber to sever the hand clamped around her throat. Although Grievous attempted to slash her with one of his lightsabers, Tano retrieved her weapon and escaped through an air duct. Their objective complete and R2-D2 safely back with Skywalker, the Jedi made their escape. Grievous then retreated aboard the Soulless One as the station collapsed around him.[35]
Gaining the lightsaber of Master Neebo
At some point prior to the discovery of his lair by the Jedi, Jedi Master Neebo was on the moons of Sanjin. Neebo was attempting to protect refugees on the moons, but she was presumed missing.[37] However, Jedi Master Kit Fisto and his former apprentice Nahdar Vebb later found her lightsaber among the trophies of the Jedi Grievous had murdered, and Vebb believed that what was in the room were trophies from the Jedi Grievous had killed.[13]
Proving his competence
- "You might have been a proud warrior once, but now you are just a pawn in Dooku's game!"
"I wield great power, Jedi fool!"
"That power will only consume you." - ―Kit Fisto and Grievous during their duel

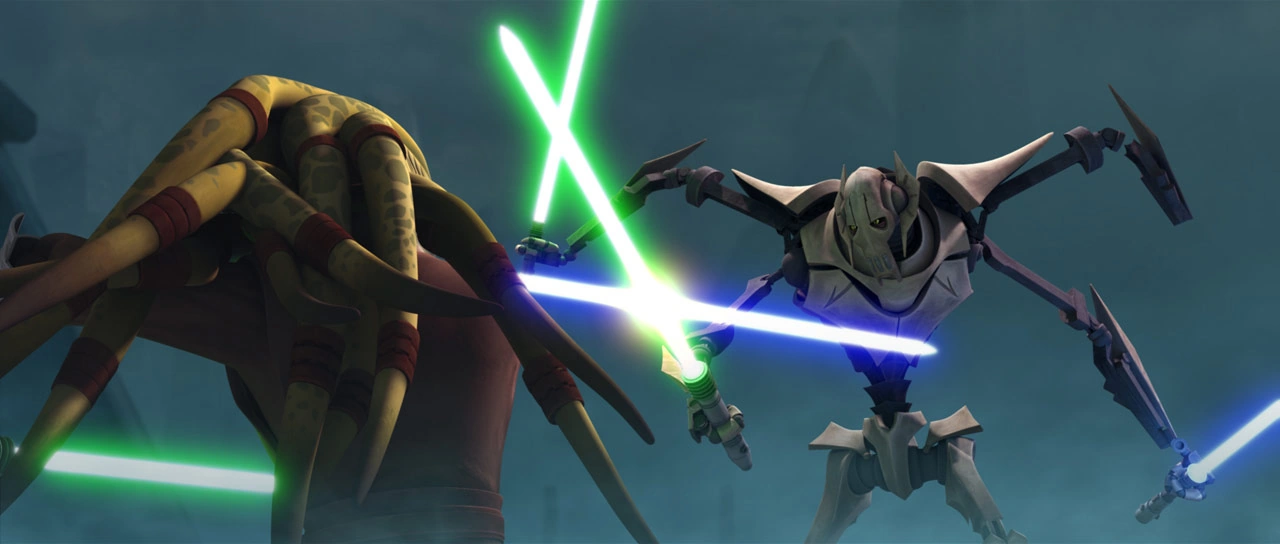
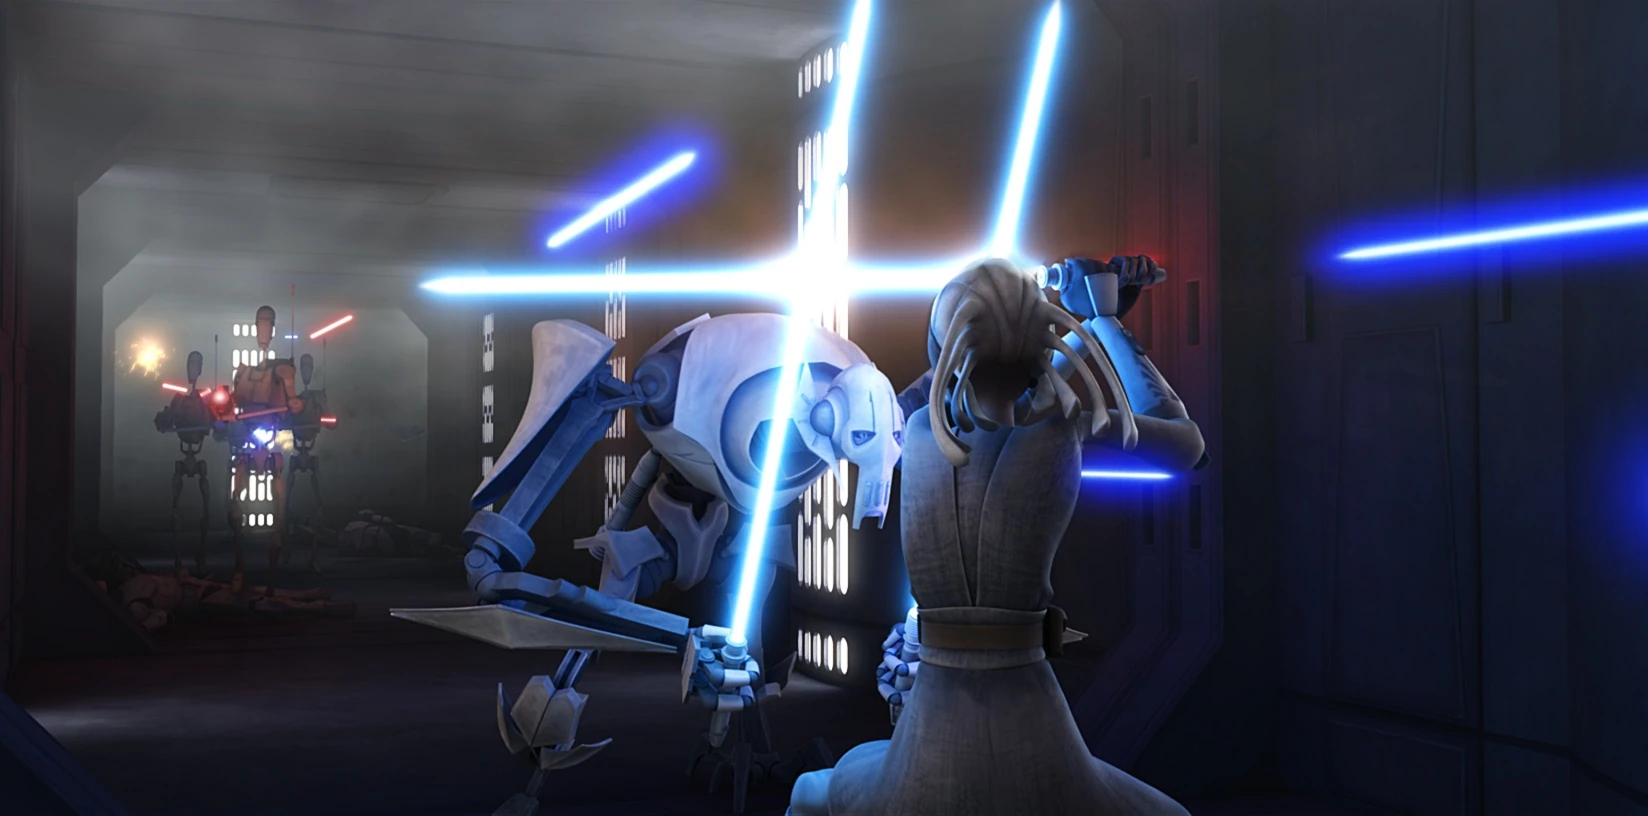
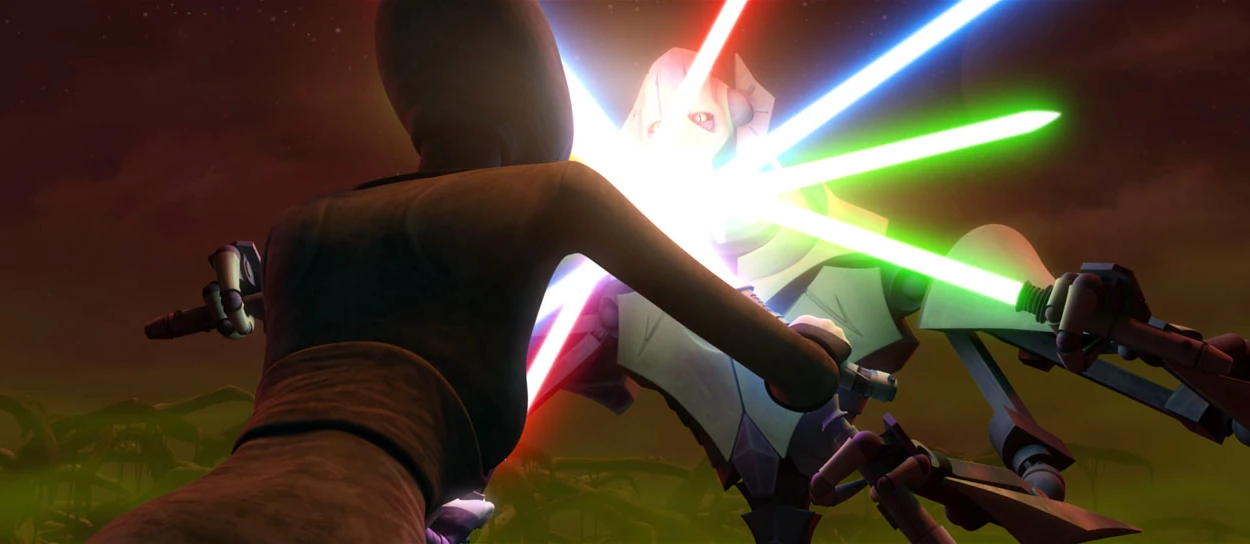
Grievous activates two more of his lightsabers during combat with the Jedi.
Later in the war, Grievous was instructed by his master to return to his fortress on the third moon of Vassek. When he arrived, he found that his MagnaGuards had been deactivated. Count Dooku, having laid a trap for the general in order to test his abilities, lured the Jedi and clones to Grievous's fortress. With the Jedi having infiltrated the base and with his bodyguards deactivated, the Count had hoped to punish Grievous for his recent failures. In the fight that ensued, Grievous was damaged and his pet roggwart Gor, was killed. However, he was soon repaired by his droid EV-A4-D, and continued on his hunt for the Jedi. Grievous eventually caught up with them and dispatched the remaining clone forces. Grievous then engaged Padawan Nahdar Vebb in a fierce duel; due to his multiple limbs, Grievous easily killed Vebb with a dirty, but well-timed blaster shot. Fisto saw the duel and his former apprentice's death on video, along with Grievous threatening and intimidating him.[13]

Grievous and Fisto engage in battle.
The cyborg General then went on to fight against Jedi Master Kit Fisto. After a lengthy duel in which Grievous's MagnaGuards arrived to assist him, Fisto fled aboard his ship and escaped the planet. Shortly thereafter, Grievous contacted Dooku and told him that he had defeated the Jedi, but that Fisto had escaped. Dooku congratulated Grievous on his victory but stated that he could have done better and that there was still room for improvement.[13]
The secrets of Ledeve
- "You seek to destroy a power you don't comprehend."
"You have carved away your own connection to it. Replaced it with parts whose strength you believe you understand."
"But your understanding is not strength."
"It is small."
"You are small. That is all you will ever be." - ―Voices heard by Grievous in the Ledeve Jedi Temple


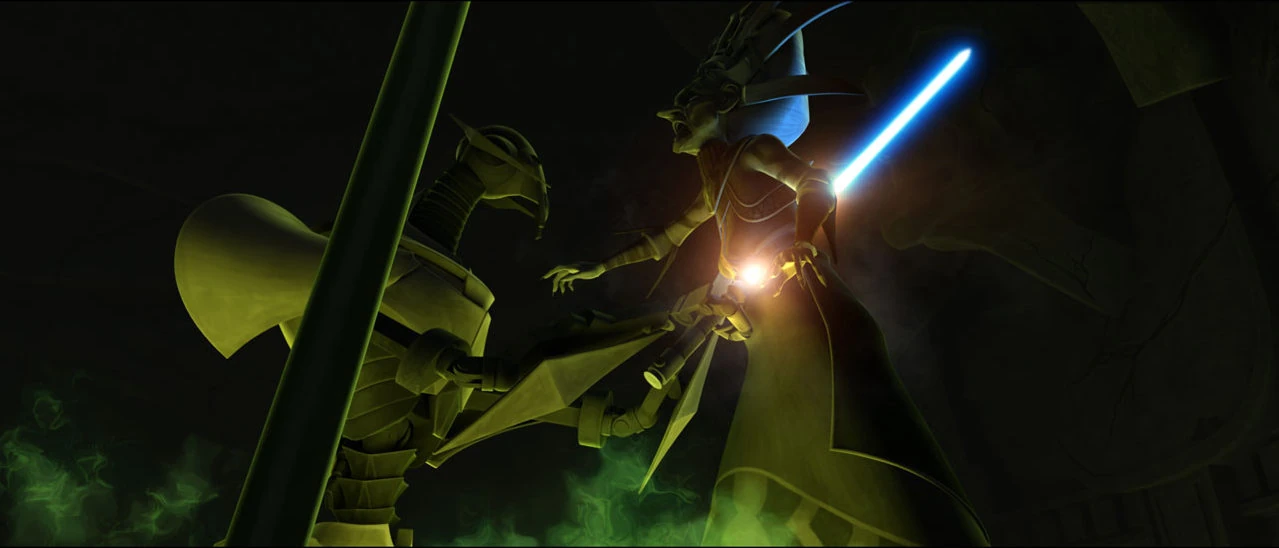
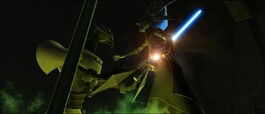
Grievous confronts the Jedi Padawan atop their T-6 shuttle.
At some point after the Jedi infiltrated his lair,[38] Grievous hunted two Jedi on Ledeve. He and killed a Mikkian Jedi in the forest, collecting her lightsaber from her body, and tracked down her Padawan, waiting for him atop his T-6 shuttle. Grievous ignited all four blades and leaped at the apprentice, killing him. He obtained the boy's lightsaber, as well as a datapad revealing the location of the Jedi Temple. Pleased with his find, Grievous set out through the jungle to find the ancient structure,[15] and this was repaying them for breaking into his home by entering theirs.[38]
Grievous scaled the temple and entered it, discovering a hallway of Jedi statues. Reminded of his own statues on Vassek, believing those to have been earned where the Jedi were not, Grievous reduced the statues to rubble before moving on. He evaded several traps set within the temple, climbing the ceiling to avoid a pit of lava and dodging spikes, and eventually came to the central chamber. Believing the temple's secrets to be his, Grievous reached into a waterfall in an effort to obtain a shining sigil from within, but was unable to grasp it. Blaming a sensor error, Grievous kept trying to grab the image until he grew angry enough to fling himself into the raging water.[15]

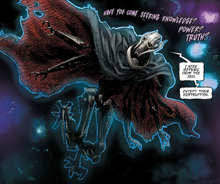
General Grievous floating in the cosmic landscape as the voices begin to talk to him.
The general found himself floating in a strange, cosmic landscape, and was addressed by ephemeral voices that mocked his quest for knowledge and his own cybernetic upgrades. Grievous then was made to appear as he once was, in his original Kaleesh body, as the voices accused him of seeking to destroy a power he did not understand. Grievous felt his limbs detaching from his body, watching in shock as he was unmade, and was left as little more than a collection of bodily organs floating in the void, the voices still mocking him for being "small." Grievous emerged from the waterfall unscathed, and attacked the flow with his blades, but was unable to cause any damage to the shining entity within. Disgusted, Grievous left the temple and sent its coordinates to a Providence-class dreadnought in orbit. He ordered the ship to fire, and the ensuing laser strike obliterated the entire temple, leaving only a smoldering crater that Grievous observed until nightfall. Secure in the belief that he had burned the entity he encountered, Grievous departed—missing the sight of a glowing sigil amidst the devastation.[15]
Capture of Eeth Koth
- "Listen to me, Jedi. I do not care about your politics. I do not care about your Republic. I only live to see you die!"
- ―General Grievous's message to the Jedi Order
At some point during the war, General Grievous managed to ambush Jedi Master Eeth Koth's flagship. Grievous boarded the vessel with a force of battle droids and confronted Koth on the ship's bridge, where he revealed he had been looking forward to meeting the Jedi Master. Koth noted that Grievous's reputation, that of a murderer and coward, preceded him, Grievous disagreed and asked whether it was murder to kill the Jedi before kicking Koth back. The two began a brief, but intense duel, and, after Koth managed to Force push Grievous into a viewport, the General's MagnaGuards shocked Koth. Attacked from Grievous in the front and from the MagnaGuards from behind, Koth was defeated.[27]
General Grievous tortures Eeth Koth in a transmission to the Jedi.
Grievous then sent a message to the Jedi Council, showing himself torturing Koth and promising to kill the Jedi Master, as he knew that it would be painful to the other members of the Order. He promised he would hunt down and eliminate the remaining Jedi.[27]
Saleucami conflict
- "An army with no loyalty, no spirit, just programming. What have you to show for all your power? What have you to gain?"
"The future. A future where there are no Jedi!"" - ―Obi-Wan Kenobi and General Grievous, after Grievous stated he was not a errand boy and was the leader of the droid army

Grievous engaging Kenobi in combat.
Unbeknownst to Grievous however, Eeth Koth had managed to communicate a secret message to the Council through the use of hand signals, telling them that he and Grievous were stationed in the Saleucami system. In response, the Council sent the Jedi Obi-Wan Kenobi, Anakin Skywalker, and Adi Gallia to rescue the Jedi Master. Once they arrived, Kenobi sought out and engaged Grievous in an effort to distract him, while Skywalker and Gallia snuck aboard Grievous' ship to rescue Koth. However Grievous, having earlier deduced that he was being tricked, had laid a trap for the Jedi. Nonetheless, his attempts to stop them were futile and Skywalker and Gallia were able to successfully rescue Koth. Meanwhile, Grievous had managed to gain the upper hand in his duel with Kenobi, but his Commando Droids on his ship had been overwhelmed by Skywalker and Gallia. Unfortunately, his Recusant-class light destroyer, which had served as his flagship in the battle that had broken out, was taking heavy fire from Skywalker's trio of Star Destroyers, and was nearly destroyed. Forced to withdraw from his duel and flee, the general attempted to land on the planet of Saleucami in a Trade Federation landing ship. However, the craft malfunctioned,[27] and Grievous and the droids were forced to evacuate into escape pods.[39]
However, Obi-Wan Kenobi followed Grievous to Saleucami in an attempt to capture the cyborg general. Grievous recognized that he[39] and his squad[40] of B1-series battle droids needed to escape before they were located, only to then see Kenobi's Acclamator-class assault ship overhead. One of Grievous's battle droids reported that their escape pod's transmitter was destroyed, making it impossible to contact the fleet as Grievous had ordered. When the B1 stated that there was only one surviving escape pod, Grievous responded that they needed to reach it as fast as possible, as its transmitter could still be functional, and ordered for his units to find him a form of transportation. With Grievous using a reek for transport[39] through the underbrush and having appropriated several eopies to be their pack animals,[41] Grievous and his droids moved towards the escape pod[39] in the wetlands.[42] However, the General did not allow for his battle droids to ride on creatures for transport, draining the B1's power cells. The droids verbally complained about their low power, to Grievous's clear annoyance, but Grievous continued their march despite being told about their situation. Eventually, a B1 brought their situation up once more, but Grievous responded by using his green lightsabers to cut down the unit. Now scared, two other B1s said they had no more complaints, and their march continued into the later hours of Saleucami's day. However, Kenobi and his forces, having performed a robolobotomy on a B1 found at the landing craft's crash site, were able to locate Grievous's initial pod. Kenobi deduced they were heading for another pod and spoke with the clone trooper CT-5597 "Jesse." The Jedi General reported that Grievous was on the move and ordered for Jesse and[39] his squad[43] to move towards the final pod, so that way the Republic could have all their possible firepower when confronting Grievous. Kenobi and his forces then moved to the west to catch the cyborg general.[39]


Grievous and Kenobi briefly dueled on Saleucami.
Elsewhere, Grievous was frustrated that they had not reached the pod. One of his B1s, which were now running very low on power, responded that they were nearly there, although the unit's low power caused it to mix the sentence's words into the wrong order. Another B1 was able to clarify they were only a kilometer away, but both these droids ran out of power and closed down. Grievous and his remaining droids did make it to the pod, but the incoming Republic forces had come close enough to get a visual. Grievous immediately asked a B1 if their transmitter was working, knocking the B1 to the ground after hearing the unit did not know and had yet to use it. Grievous ordered another B1, who was surprised that Grievous had reached them, to send a signal to the fleet, but this droid then told Grievous that multiple life-forms were closing in. After hearing this, Grievous ordered for the droids to take up battle positions. One B1 fired a missile directly at the All Terrain Tactical Enforcer Kenobi was riding on, but the Jedi Master was able to jump off before it was hit and charged forward with his clone soldiers. As the battle raged, Grievous questioned where his shuttle was, but his answer eventually came when a Sheathipede-class transport shuttle flew overhead,[39] which the General was relieved to see.[44] Kenobi ordered for an AT-TE to take the shuttle down, but, during its second landing attempt, a clone gunner reported that the mass-driver cannon was overheated. Kenobi ran in stop Grievous himself, but, after a B1 alerted Grievous that the Jedi was behind him, Grievous was able to block Kenobi's lightsaber. Engaging in a brief duel, Kenobi was able to disarm Grievous of one of his lightsabers, but the cyborg kicked Kenobi away. Climbing to the top of the escape pod, Grievous told the shuttle's B1 pilots to not land, and instead he fired an ascension cable to the bottom of the starship. The shuttle was then able to fly away from the Republic Army,[39] leaving Kenobi crestfallen.[44] While Kenobi told Clone Commander Cody to tell their cruisers to stop the shuttle,[39] General Grievous was ultimately able to escape and continue to serve in the war.[45]
Battle of Kamino
- "All is ready, General"
"Good. We will attack Tipoca City first."
"I have the exact locations of both the clone DNA room and the clone trooper barracks."
"Both shall be annihilated under my hand."
"Our hands, General. Count Dooku assigned us both this task."
"But of course, assassin. I look forward to meeting you." - ―Asajj Ventress reports to Grievous that they are ready to attack Kamino

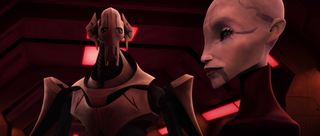
Grievous and Ventress meet in person for the first time
Despite the failure of their first attempt,[34] Grievous and Ventress planned to launch another invasion of Kamino. However, a transmission between the two was intercepted by the Galactic Republic, and as a result the 501st Legion was deployed to Kamino in preparation for the impending attack. As the two conferred before the battle, Grievous decided to start their initial assault on Tipoca City, home of the Republic's cloning facilities. As Grievous engaged the Republic blockade, Ventress, with her Trident-class assault ships and aqua droids, attacked the city. After the initial struggle, Grievous managed to break through the blockade and land on the planet with the remainder of his forces. Once there, he proceeded to speak with Ventress about their objectives: Grievous would assault the clone trooper barracks while Ventress would get a sample of Jango Fett's DNA. During the assault, Ventress managed to acquire the DNA sample but her escape was prevented by Skywalker, and in the ensuing fight the sample was lost. Elsewhere, Grievous was confronted by Kenobi and the two engaged in a heated battle until a Trident ship destroyed the pier they were fighting on. Grievous, thinking Kenobi had been killed in the explosion, made his escape aboard a flight pod. He then rescued Ventress from Skywalker and the clones.[45]
Obstructing peace
- "There is a problematic situation brewing in the Senate. We must ensure that everything my master has set in motion does not unhinge. My representatives in the Republic are relying on you, General. See that your droids complete their mission."
"But of course, Count. They will not fail." - ―Count Dooku orders Grievous to bomb the power generator on Coruscant
Dooku, at the behest of his master, ordered Grievous to arrange an attack on Coruscant. Grievous managed to accomplish this by assigning several Demolition droids disguised as cleaning droids. The demolition droids managed to sabotage Coruscant's Central power distribution grid, disabling power to the area while the Galactic Senate was voting on the Confederate–Republic peace initiative, effectively ending the initiative.[46]
Skirmish on Naboo
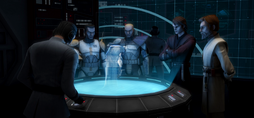
- "This turn of events is unfortunate. General Grievous is a critical part of my plan for the Clone Wars. He must not remain captive."
- ―Darth Sidious, to Count Dooku

Grievous on Naboo
Later during the Clone Wars, Grievous suffered a defeat when he attempted to invade Naboo. Jar Jar Binks (posing as Gungan Boss Lyonie) distracted Grievous in a series of negotiations long enough for the Gungan Grand Army to shut down Grievous's invasion force. As Grievous pursued Jar Jar, he was faced with his shut down forces and surrounded by the militiagungs. Grievous killed several militiagungs, but General Roos Tarpals intervened and engaged him in a duel. Although he was mortally wounded by the cyborg, Tarpals impaled Grievous through his chest, which allowed the Gungan Army to bombard the injured general with energized projectiles and capture him. Fortunately for Grievous, Dooku captured Skywalker and forced Padmé Amidala to agree to a prisoner exchange.[47]
Capturing Adi Gallia
- "General, we've come across what appears to be a pirate ship."
"Use that ship for target practice. Open fire!"
"All forward cannons, open fire!" - ―General Grievous orders the destruction of the Marauder
Grievous dueled and defeated Gallia
Following his release, Grievous and his fleet attacked the flagship of Jedi Council member Adi Gallia. Grievous and his forces quickly boarded the ship and engaged the 91st Recon Corps. Grievous captured Gallia after a brief, but intense duel with the Council member. Sometime later, the General attacked and destroyed a pirate ship for target practice. However, Grievous's ship was then boarded by Jedi Master Plo Koon and his forces, who rescued Gallia and forced Grievous to flee.[48]
Massacre on Dathomir
- "Wipe the witches out. All of them."
- ―Count Dooku ordering Grievous to attack the Nightsisters
After the failed assassination attempt on his life by his former apprentice Asajj Ventress, who had been aided by Mother Talzin and the Nightsisters from Dathomir, Dooku summoned Grievous. Dooku ordered him to attack Dathomir and wipe the Nightsisters out.[49]

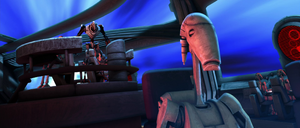
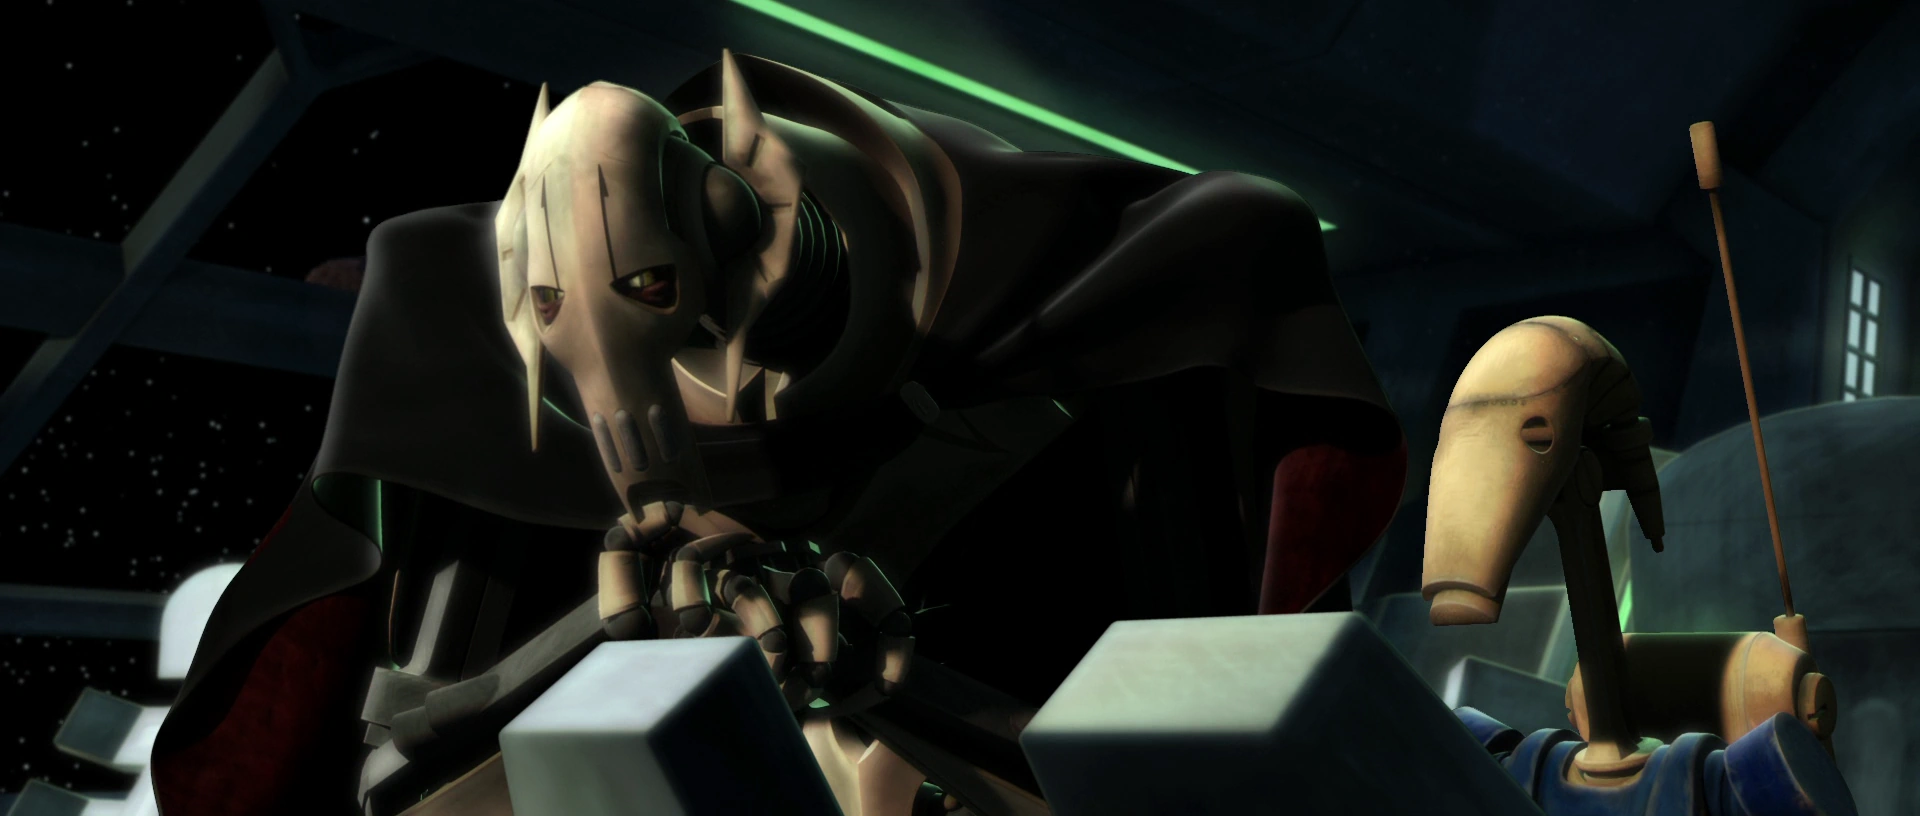
Dooku orders Grievous to attack Dathomir.
Grievous then took a Separatist fleet to Dathomir and landed his forces on the planet. He had his Hyena-class bombers launch an airstrike on their village, before sending in his ground troops to attack them. Despite being severely outnumbered and outgunned, the Nightsisters were initially able to hold their ground.[49] This prompted Grievous to deploy several of his Armored Assault Tanks, which escorted a lone Defoliator Deployment Tank in order to burn the forest, which successfully managed to drive the Nightsisters back. Unfortunately, Talzin had sought the assistance of Old Daka, the eldest of the Nightsisters, who used her magic to raise the Army of the Dead as reinforcements. With Ventress leading the charge, the Nightsisters pushed forward, destroying the Defoliator Tanks and fighting their way to the open field from where Grievous was commanding his troops. Both armies halted their positions opposite one another.[49]

Grievous fights Asajj Ventress on Dathomir.
Ventress then challenged Grievous to a duel, proposing that if he won then Nightsisters would surrender to him, but if she won then Grievous and his army would leave Dathomir.[49] The two then engaged in a fierce lightsaber duel and initially seemed equally matched, until Ventress severed one of Grievous' four mechanical arms and knocked him to the ground. Holding all the cards militarily, with no intention of honoring the result of the duel, and no longer entertained by the sport of it, Grievous ordered his battle droids to kill her. Ventress tried to fight them off, but was shot in her shoulder. As Grievous attempted to finish her off, a large wave of Nightsister zombies attacked him, with both armies once again engaging each other in combat. With the assistance of one of her fellow Nightsisters, Ventress was able to escape in the ensuing chaos.[49]
Grievous slays Old Daka.
Whilst cutting down the attacking zombies, Grievous was contacted by Dooku, who was being magically attacked by Mother Talzin. Dooku ordered Grievous to follow the Nightsister magic to its source and kill Talzin before she could torture him to death. Grievous followed the green magic trail to the Nightsister village and a secret cave where both Talzin and Daka where performing their magic rituals, killing several Nightsisters on the way.[49] Grievous then ordered one of his commando droids to create an entrance to the cave, where he violently murdered Daka, and prevented Talzin from further torturing Dooku, but had failed to kill Talzin in the end, who fled the battle.[49] With Daka's death, all the arisen Nightsisters returned to the grave, leaving the rest outnumbered, and eventually massacred by Grievous' army. Unbeknownst to Dooku and Grievous however, Ventress had managed to survive the battle.[49]
Sometime after the battle, Dooku told Grievous that with the Nightsisters dead, there was no one to control the rogue Savage Opress, whose powers he felt growing, to which Grievous simply mocked Dooku's notion that Opress could pose a threat to them.[50]
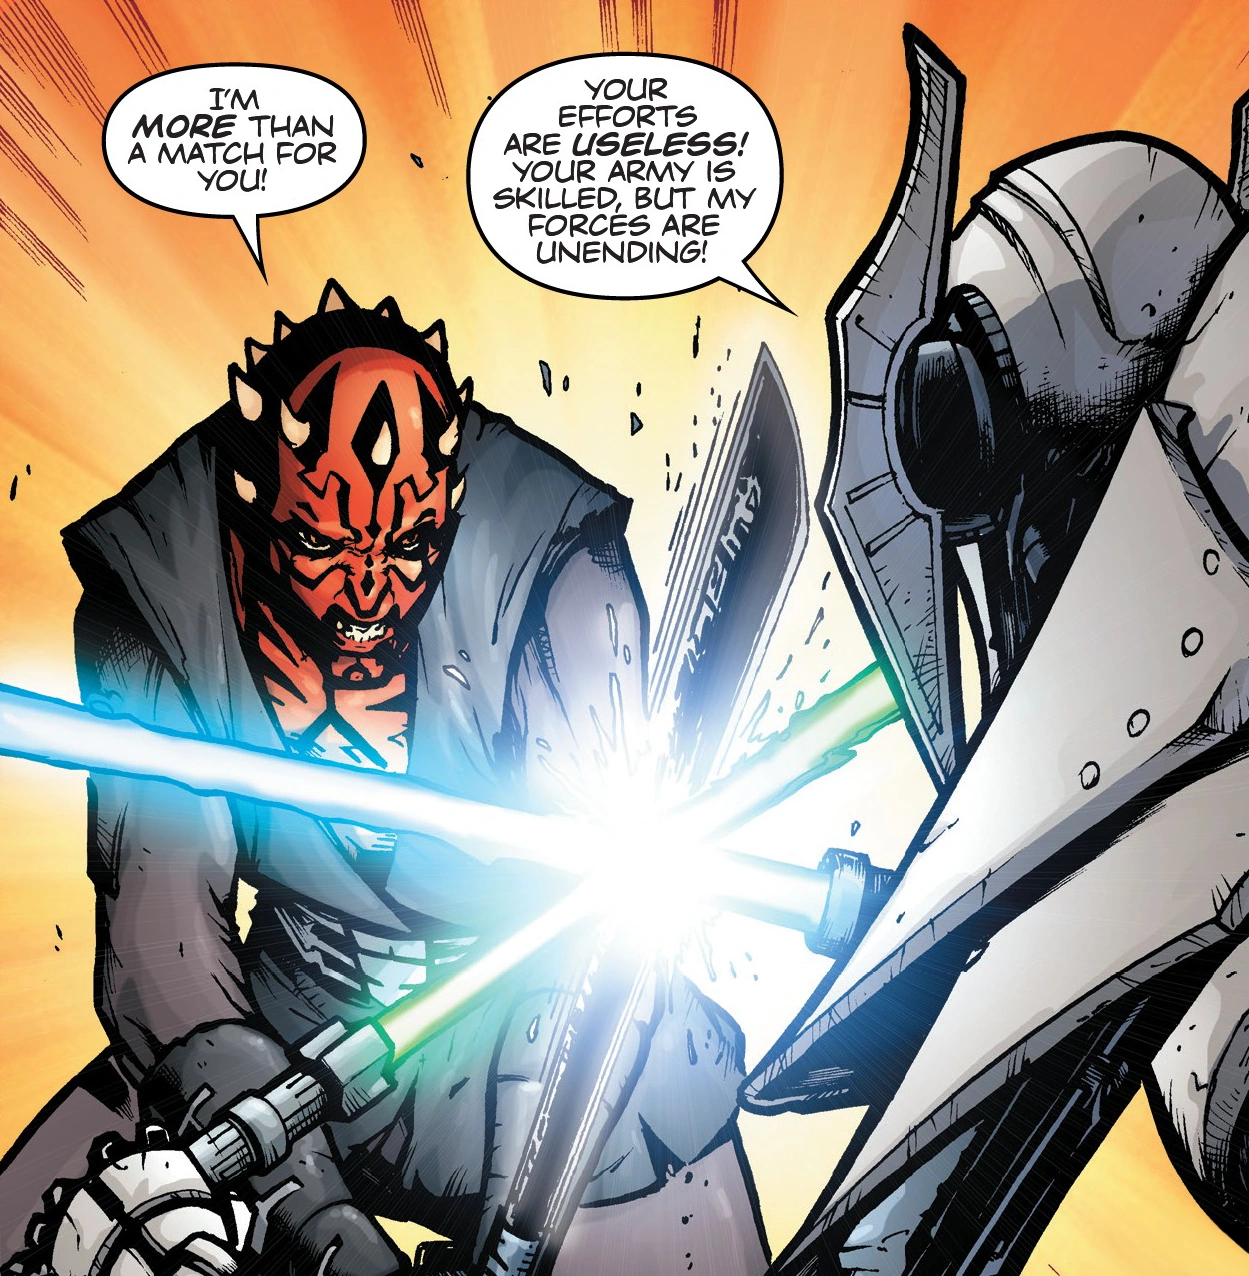
Battle with Kenobi and Invasion of Florrum
- "Hondo."
"General Grievous, I presume? What a surprise. Have a seat. What, may I ask, is the honor?"
"You can dispense with the pleasantries, pirate. This planet is now under Separatist control!"
"Ah ha... and, what do you suppose that means?"
"It means you have a new master, pirate scum." - ―General Grievous and Hondo Ohnaka

Grievous and two IG-100 MagnaGuards on Florrum
Grievous later attacked and boarded Obi-Wan Kenobi's command ship. He tore through the clone trooper ranks until he made his way to Kenobi, whom he proceeded to duel and overpower. However, Kenobi managed to escape and abandon his ship, but not before rigging it to self-destruct, forcing Grievous to retreat and abandon all the useful information in the ship's memory banks.[51] Sometime later, Grievous landed on the planet Florrum and took over pirate Captain Hondo Ohnaka's base in retaliation for Ohnaka's previous capture of Dooku. Grievous was soon informed that Ahsoka Tano, her fellow Jedi younglings, and a group of pirates had freed Ohnaka. He then ordered his tanks to level the prison section. As they were escaping, Grievous and STAPs pursued them and boarded their tank. Grievous then fought Tano and though she proved to be a much more formidable opponent than in their previous encounter, Grievous was still more than a match for her. Ohnaka then arrived in Slave I, rescued Tano and opened fire on Grievous, but was forced to retreat when Armored Assault Tanks arrived, leaving Grievous to laugh in victory.[52] At some point afterwards, Grievous and his droids demolished the remains of Ohnaka's base and left Florrum.[source?]
Secret transmission

Grievous's transmission to other Separatist forces was located by the Republic, but they were unable to understand it due to the new encryption.
Sometime later, Grievous sent an encoded transmission to other members of the Confederacy, but the transmission was also intercepted by the Jedi Council. However, Republic Intelligence was unable to break the new encryption technology used in the transmission, and the Republic feared this was leading to an upcoming major attack. In order to understand the transmission the Republic sent D-Squad, a group of Republic droids, to a Separatist dreadnought to retrieve an encryption module.[53]
Crystal conspiracy
- "They won't have a problem getting it back from the Jedi? Do you think I'm an idiot? My guards just reported back to me that the crystal is in possession of Skywalker and Kenobi. [...] If you don't have the crystal then there's no reason to deal with you! Deal's off! [Grievous kills Edente and throws his body aside] I will handle this myself."
- ―General Grievous, to Edente as the Sugi panicked for his life before being killed
Near the end of the war, Dooku and Grievous were involved in a weapons deal to acquire a massive kyber crystal from Sugi arms dealers led by Endente. The deal was to take place on the planet Utapau,[54] with local Amani being used as bodyguards. At least two Magnaguards were present in the early days of the event,[55] and more of them, as well as other droids, arrived later with Grievous.[56] The Jedi Anakin Skywalker and Obi-Wan Kenobi learned of the arms deal when they came to the planet to investigate the mysterious death of Jedi Master Tu-Anh.[55] They tracked down the crystal and stole it from those who were trafficking in it, but Grievous's forces were then able to claim it. They, however, continued their mission, following the crystal[56] to the space above Utapau.[57]

Obi-Wan Kenobi is defeated by General Grievous.
The pair of Jedi chased the ship carrying the crystal, but the pair themselves were being chased by Grievous in his fighter and several droid fighters. The crystal was brought to a Separatist supply ship, which the pair crashed their ship into the hyperdrive of. They abandoned their craft in escape pods, but boarded the supply ship in different hangars. While Skywalker did not encounter resistance, only seeing one unarmed OOM pilot battle droid which he scared off, Kenobi was forced to deal with the crystal's droid escort. After Kenobi cut down several battle droids, Grievous and two vulture droids entered the hangar. Kenobi demanded that his nemesis surrender, and the two engaged in a brief duel, with Grievous quickly overpowering Kenobi, resulting in Obi-Wan's capture. While Grievous prepared an execution chamber for Kenobi, battle droids secured the crystal, with it eventually being taken to the ship's vault. Skywalker was able to eventually free Kenobi and the pair eventually reclaimed the crystal. The pair learned that the crystal could fire back energy, such as laser fire, which they used to fight their way to the hangar. When they had secured a ship, Obi-Wan made several AATs fire at the crystal, causing it to overload. While the crystal's explosion destroyed the ship, Grievous chased after the Jedi in his fighter. The pair ultimately escaped into hyperspace while the explosion grew, destroying the Separatist fleet above the planet, and Grievous was flung into space in his starfighter.[57]
Protecting Dooku
Grievous was later seen with Dooku on the Separatist capital planet of Raxus Secundus where Dooku was receiving the Raxian Humanitarian Award. Grievous was in charge of security, and he briefly fought Quinlan Vos, who was there on orders of the Jedi Council to kill Dooku. In the end, Vos' partner in the assassination, Ventress, escaped but Vos was captured.[58]
Campaign against the Shadow Collective
Destroying Maul's forces
- "We are not fighting clones this time. These are Mandalorian warriors...The odds are stacked against us!"
- ―Grievous estimating their chances of winning the battle
Sometime after the Battle of Dathomir, Grievous was ordered by his master Count Dooku to hunt down Darth Sidious' former apprentice—the Zabrak Nightbrother Maul. Sidious had tracked Maul to the Death Watch controlled moon of Zanbar after he had escaped from Sidious— although that was ultimately the Sith Lord's plan. Dooku then ordered him to direct his entire droid fleet at Maul's recently formed crime syndicate—the Shadow Collective and ordered him to destroy his army and wound his pride, but not to kill him. This was in order for him to draw out Mother Talzin, Maul's mother and one of the most powerful beings in the galaxy. Grievous thought it foolish to keep Maul alive, but Dooku reminded Grievous that it was not wise to question the plans of Darth Sidious, and that he as Dooku's apprentice would carry out his orders to the fullest degree. Grievous then moved his fleet to Zanbar and launched several landing craft to destroy the Mandalorian warriors, starting off the Battle of Zanbar. Grievous knew from personal experience that the chances of his droid army gaining a victory in this battle were unlikely, as the Mandalorians were no mere clones. During the battle, Grievous spotted Maul on the battlefield and sent out four of his IG-100 MagnaGuards to "soften him up."[59]

Maul and Grievous engage in battle.
Grievous emerged from his ship and engaged at least one Mandalorian super commando in battle, easily killing him with his lightsabers. Maul disposed of the Magnaguards and turned his attention to the cyborg general and engaged Grievous in single combat. Neither Maul nor Grievous was able to gain the upper hand in the duel, but Grievous, per his orders, taunted Maul, telling him that the battle was lost. However, Maul had held several Gauntlet fighters in reserve and ordered them to drop firebombs onto the battlefield. This left both factions' resources almost depleted. Maul, realizing Zanbar was lost, fled into a Gauntlet fighter and retreated from Grievous. Grievous then contacted Count Dooku via hologram and informed him he had fulfilled his master's wishes; Maul was on the run. Dooku then congratulated Grievous. Maul now believed the Sith were out to destroy him and his Syndicate, but would not learn of their true intentions until it was too late. Grievous knew their goal was the witch Talzin, but did not understand what value Maul held for the Witch. Dooku told him all would be revealed as their plans unfolded.[59]
Captured by Maul
- "Once our droids take control of the city, Maul's forces will be insects under our heels!"
- ―Grievous during the battle
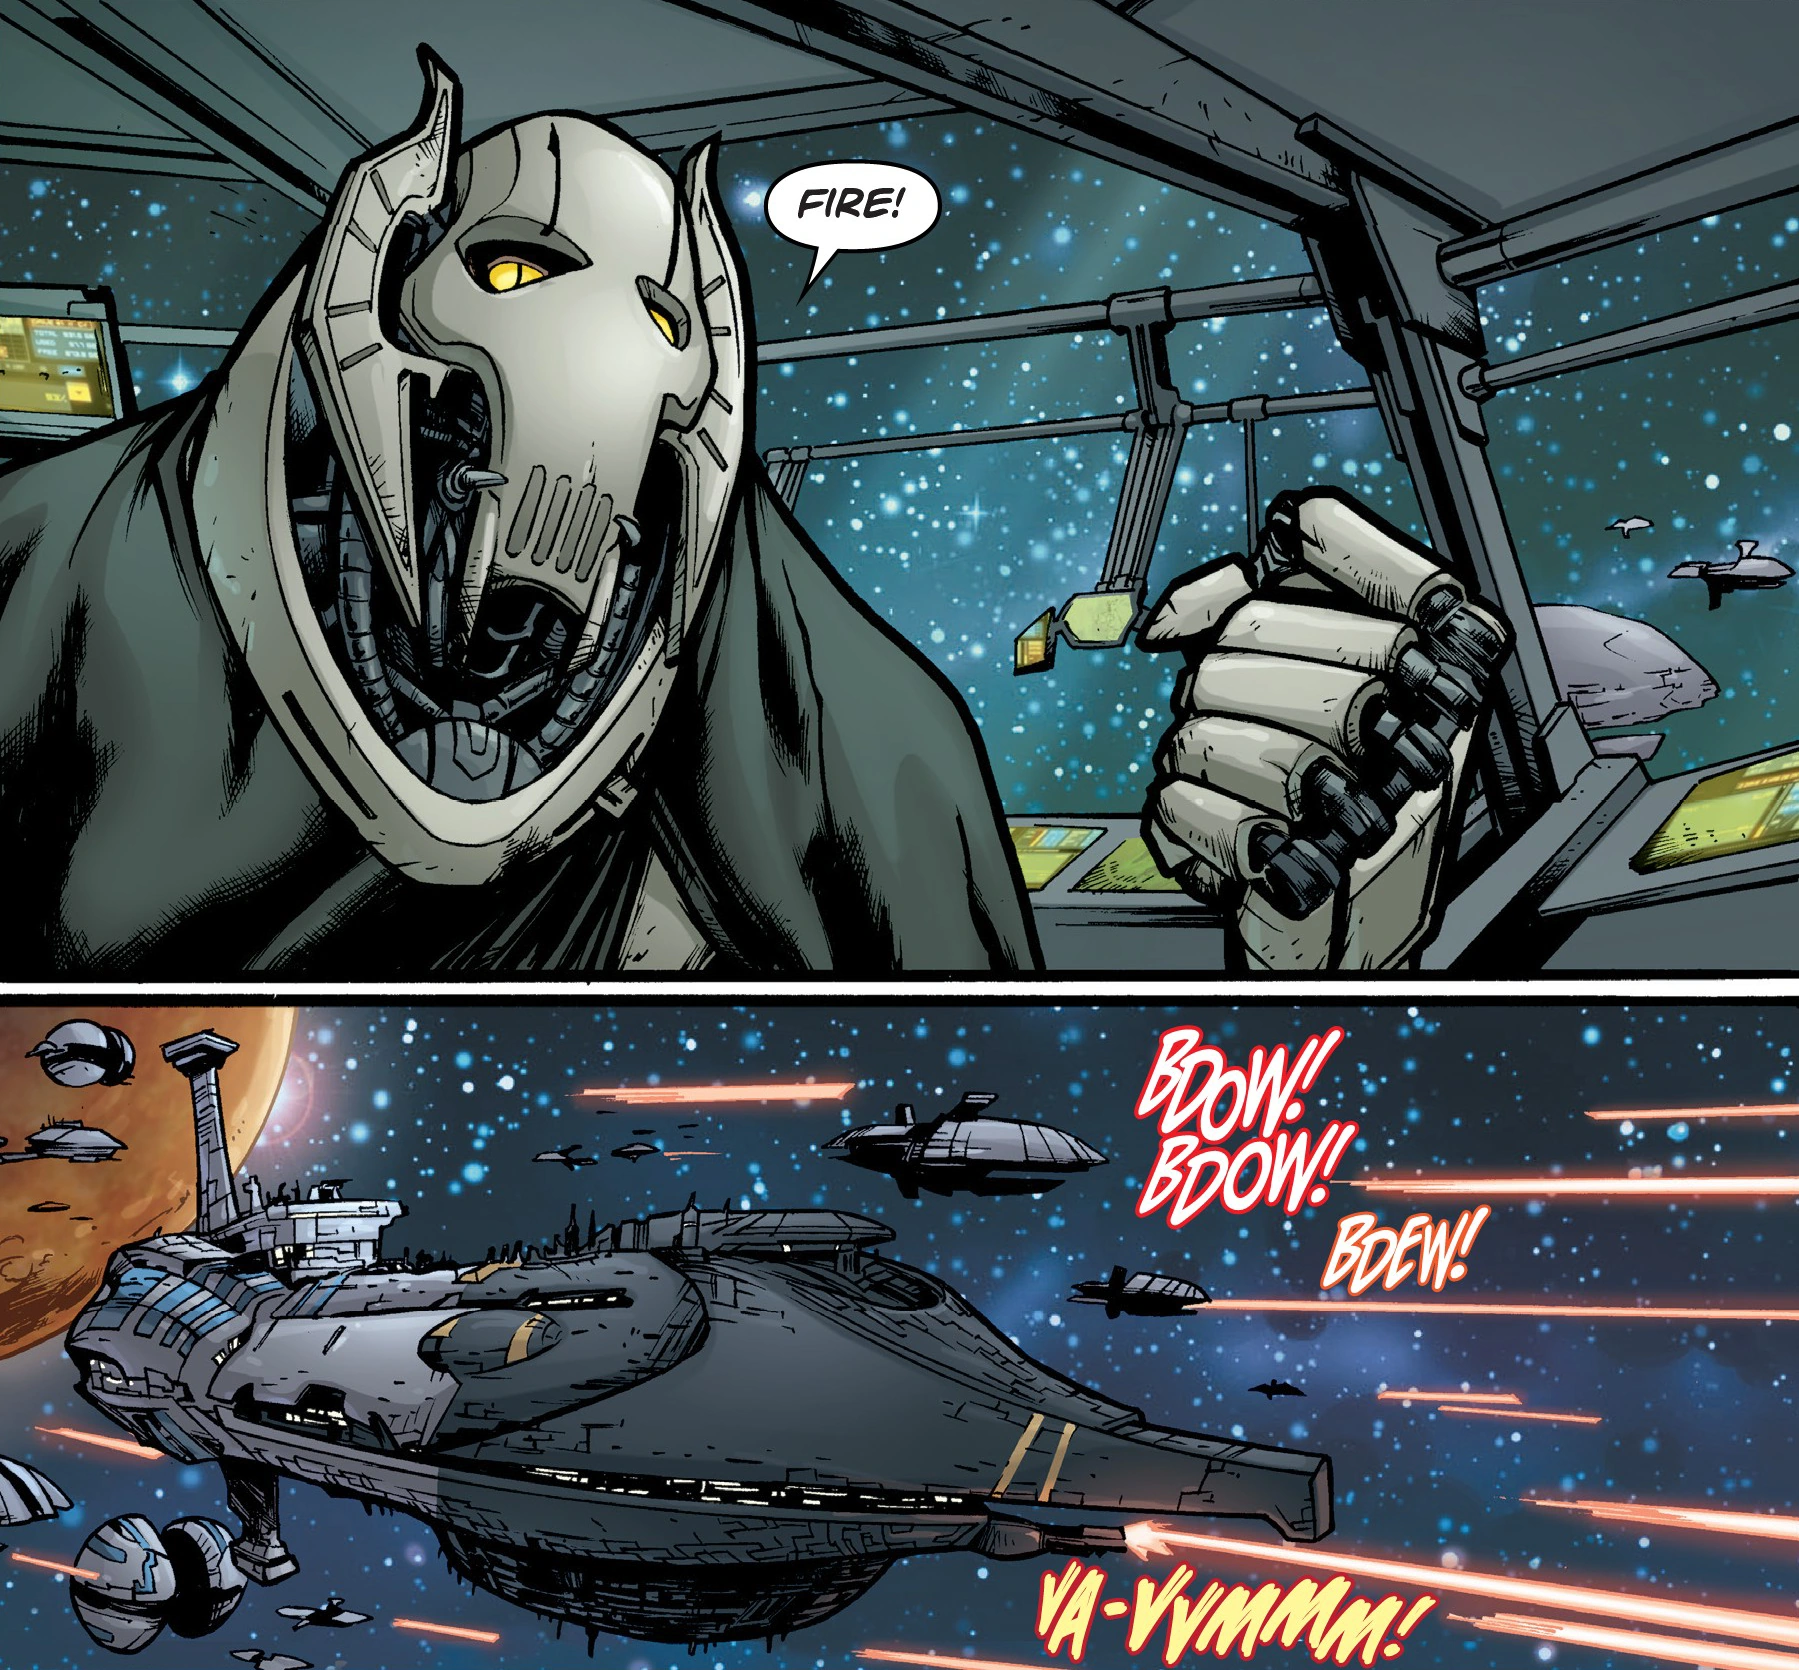

Grievous ordered for his ships to fire.
After leaving Zanbar, Dooku rendezvoused with Grievous, gathering the fleet after Separatist spies reported that Mandalorian warships were amassing on the planet of Ord Mantell, confirming Maul was in league with the Black Sun who controlled the planet. Grievous once again questioned the Dark Lord's obsession with destroying Mother Talzin; Dooku explained to Grievous that Talzin was an older and fouler creature than Grievous understood, and that she would have to be destroyed before she disrupted Darth Sidious' plans. Grievous' super tactical droid Tey-Zuka reported to the cyborg general that a lone transport shuttle had left Dathomir moments ago, with Ord Mantell being a possible destination. Dooku believed Talzin was aboard and ordered the fleet to move to Ord Mantell. Soon they arrived and Grievous ordered the fleet to begin bombarding the city from orbit. With the city now in ruins, the landing crafts began their assault. Grievous believed Maul's forces would soon be on the run but became suspicious when he realized he had not seen any Mandalorian warships. Tey-Zuka calculated that they had been destroyed before they could lift off but Grievous knew better—they were planning a sneak attack. The Gauntlet fighters appeared from behind Ord Mantell's moon, attacking the Separatist fleet. Grievous had been lured into a trap. Tey-Zuka reported a fighter had attached itself to the hull of Grievous' Providence-class dreadnought—but before the droid could finish, Maul interrupted. He gave Grievous an ultimatum; either he shut down the battle droids that were killing his troops—or he would die. With the General dismissing his threats, Maul then charged Grievous, tackling him into a transparisteel viewport. Dooku had also been captured as well and brought aboard the ship, where Maul contacted Sidious via hologram and threatened to kill them both unless he met Mother Talzin's demands. Sidious refused, instead stating he had no further use for them. Maul decided not to kill them, but ordered Grievous to the brig. Grievous told Dooku that it would be unfortunate if the next time they met he would have to add Dooku's lightsaber to his collection.[60]
Dooku, who was still on the bridge of the ship, later used the Force to unlock Grievous' cell. Grievous escaped, killing the Mandalorians that were guarding him and several more while searching for a way off the ship. He soon found an escape pod, ejecting from the carrier and escaping from Maul.[61]
Confronting Talzin
- "It is just as you predicted my Lord...we've traced Count Dooku's signals to Dathomir's surface. What is your command?"
- ―Grievous to Darth Sidious, just before the battle


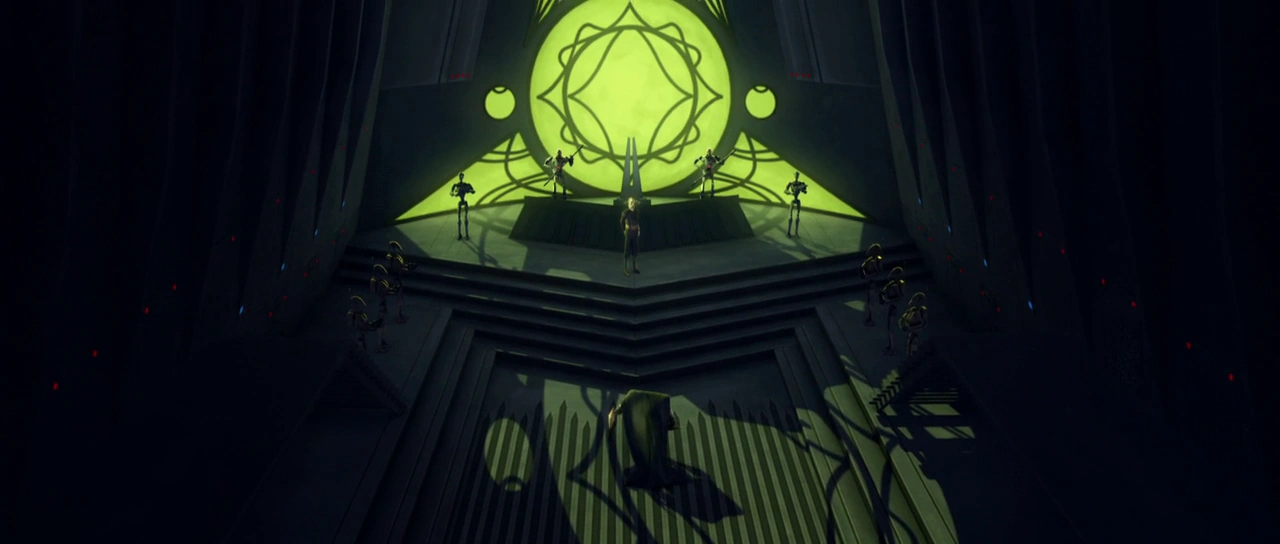
Grievous executes Talzin.
Shortly afterward, Grievous regrouped with Darth Sidious aboard the Scimitar; which was originally Maul's personal starship; and they made their way to Dathomir where Dooku's signals were emanating from; just as Sidious predicted. Sidious ordered Grievous to cloak the ship from view and make their way to Dathomir's surface. They landed and the pair approached a chamber said to hold a stone column that was the heart of Mother Talzin's power. The chamber was located very near the Nightbrother village where Maul was born.[62]
Grievous blew an opening in the wall of the chamber, entered and stated he was about to kill Maul. Sidious followed, stating only the Dark Lord's plan shall rule the galaxy. Dooku appeared, though he was now possessed by Talzin, who at the time was still unable to take physical form. The four engaged in lightsaber combat; Grievous attacked Maul while Sidious freed his apprentice from Talzin with the use of Force lightning. Talzin returned in the flesh while Sidious told her she was going to die here. Maul took advantage of this distraction and used the Force to shove Grievous through the opening the explosion had created. Sidious attacked Talzin with a Force lightning barrage while Talzin defended Maul and herself with magick. Grievous reentered the chamber calmly striding towards the now beaten Talzin; Grievous then ignited his lightsabers and plunged them through the witch's chest. The retreating Maul looked on in horror as Talzin's body turned to stone. Darth Sidious took a moment to congratulate Dooku and Grievous; Maul's future had been erased while theirs was more certain than it had ever been.[62]
Fighting Billaba
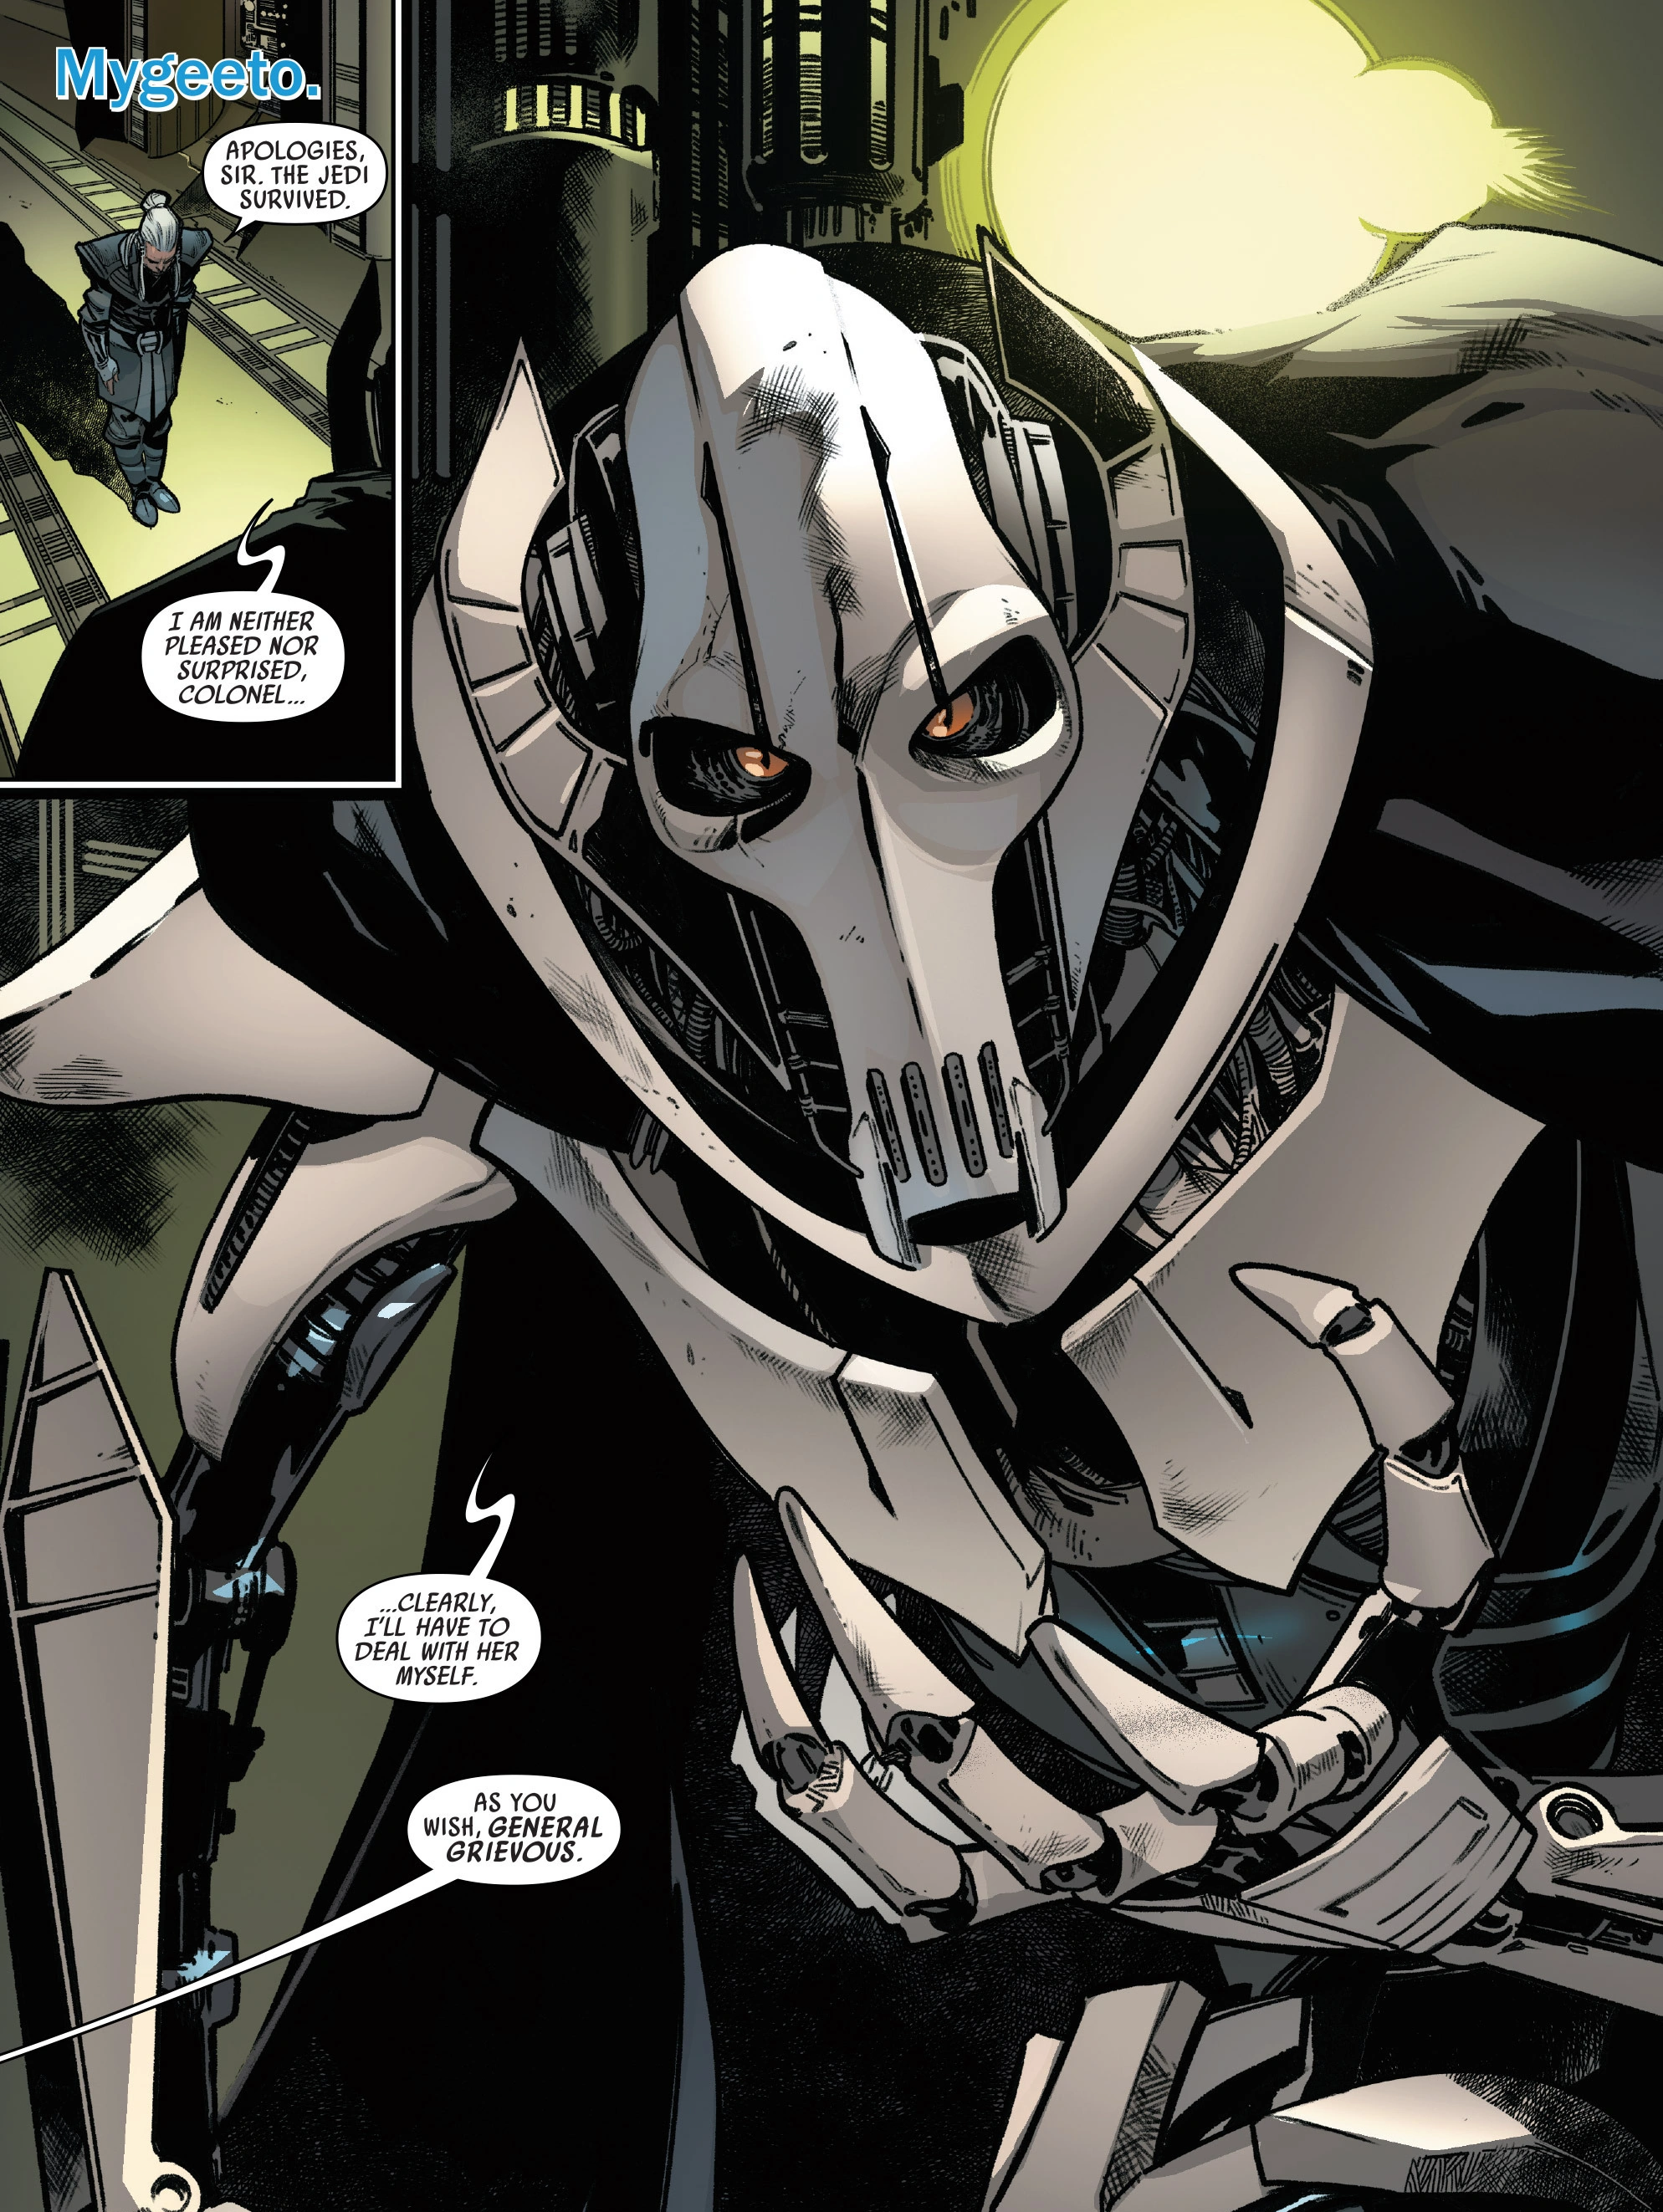

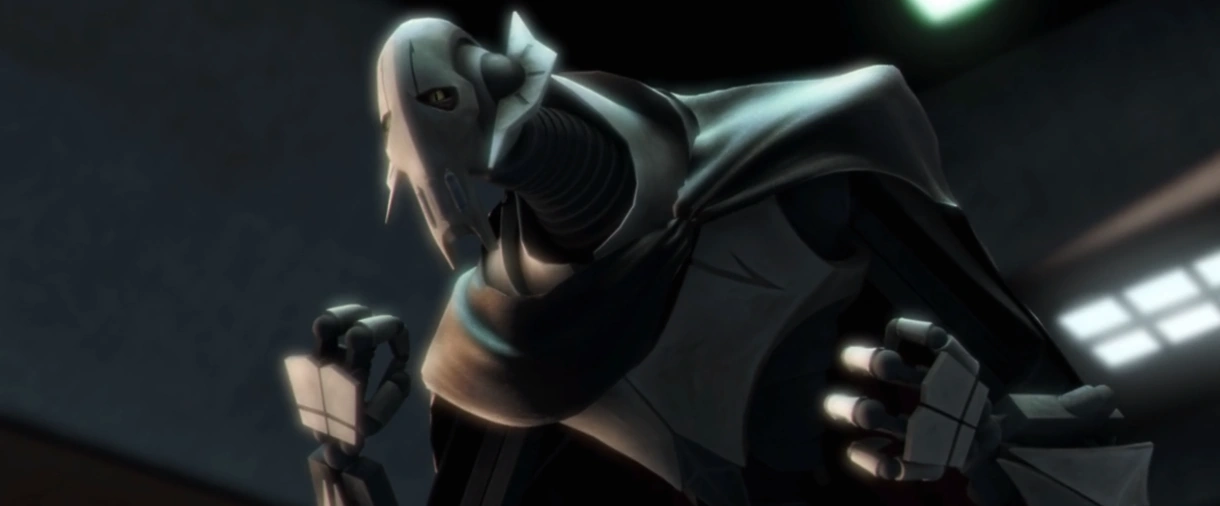
Grievous realized he would need to deal with the Jedi himself.
Grievous fought Jedi General Depa Billaba on Haruun Kal. There his troops decimated her clone troops, while he personally engaged the Jedi Master in a duel and almost ended her life.[63] Six months after his victory over Billaba, he and General Kleeve then sent in their top explosives expert, Captain Rackham Sear to carry out a bombing on the Jedi Temple.[64] After Captain Sear's mission failure, Grievous then went to Kardoa with Kleeve and Sear's brother, Colonel Coburn Sear. There, Grievous saw Billaba leading the Republic forces. Grievous then demanded that she must die. However, Kleeve saw his obsession with killing Jedi as a distraction and warned against attacking before he left for Kaller. Grievous left as well for Mygeeto. However, he left Colonel Sear to deal with Billaba and her forces.[63]
Grievous then waited for Billaba and her forces to come to Mygeeto. There, he and Colonel Sear confronted Billaba and her apprentice, Caleb Dume. The General was able to duel her again during the Third Battle of Mygeeto and was able to get the upper hand in the fight. However, he was forced to flee when Billaba's clone troopers surrounded him. He told her that he regretted letting her live.[65]
The final days
Battle of Coruscant
- "Your lightsabers will make a fine addition to my collection."
- ―General Grievous

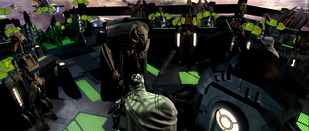
Grievous aboard the Invisible Hand
Ultimately, the Republic held all the momentum for the third year of the war. The Separatists were pushed to the Outer Rim Territories, and, in the campaign known as the Outer Rim Sieges, the Republic Military kept up the pressure. Towards the end of the war, a Separatist surrender seemed as though it would come in due time,[66] but the sieges also encompassed when Grievous launched a massive offensive, pushing the Republic to the brink. At one point during the sieges, Grievous was aboard the bridge of a starship.[67]
With the Republic Military occupied in the galaxy's spiral arms, the capital of Coruscant was left with fewer defenses. Republic strategists were not worried,[66] but Sidious arranged for Grievous to launch a massive assault to capture[68] Sidious's alter ego, Supreme Chancellor Sheev Palpatine.[3] The Coruscant Home Defense Fleet was caught off guard,[66] and, with the chaos[68] and Confederacy navy providing cover, Grievous and a strike team could land on Coruscant's surface. Grievous landed in the Executive District[66] and fought his way through layers of security forces and Jedi to secure Palpatine, killing Jedi Roron Corobb and knocking out Master Shaak Ti with electrified cables and stealing her lightsaber in the process.[28]
Grievous then took the Chancellor aboard his flagship the Invisible Hand. Jedi Knights Anakin Skywalker and Obi-Wan Kenobi boarded the Invisible Hand to rescue the Chancellor. They first defeated Count Dooku and were escaping with the Chancellor when Grievous captured them, meeting with Skywalker face to face for the first time. The Jedi broke free of their bonds, and after destroying IG-101 and IG-102, the pair cornered Grievous. Too wounded to fight, the General had to shatter the front window of the cruiser with an electrostaff. Kenobi, Skywalker and the Chancellor managed to stay in the ship, but Grievous was sucked into space. Protected from exposure to vacuum, the general survived and used a grappling hook installed in his arm to latch onto the hull of the ship.[3]
After ejecting the rest to trap the Jedi and the Chancellor inside, Grievous fled in one of his dying flagship's escape pods, and later headed for the secured planet of Utapau in the Outer Rim Territories, where the Separatist Council was hiding.[3] With Count Dooku's death, Grievous succeeded him as Head of State of the Confederacy of Independent Systems.[66] Under the direct order of Dooku's Master, Darth Sidious, Grievous was to relocate the Council to the planet Mustafar.[3]
Return to Utapau and duel with Kenobi
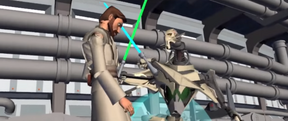
- "Back away. I will deal with this Jedi slime myself!"
"Your move."
"You fool. I've been trained in your Jedi arts by Count Dooku." - ―Grievous and Obi-Wan Kenobi before their duel on Utapau

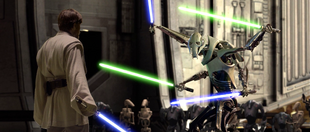
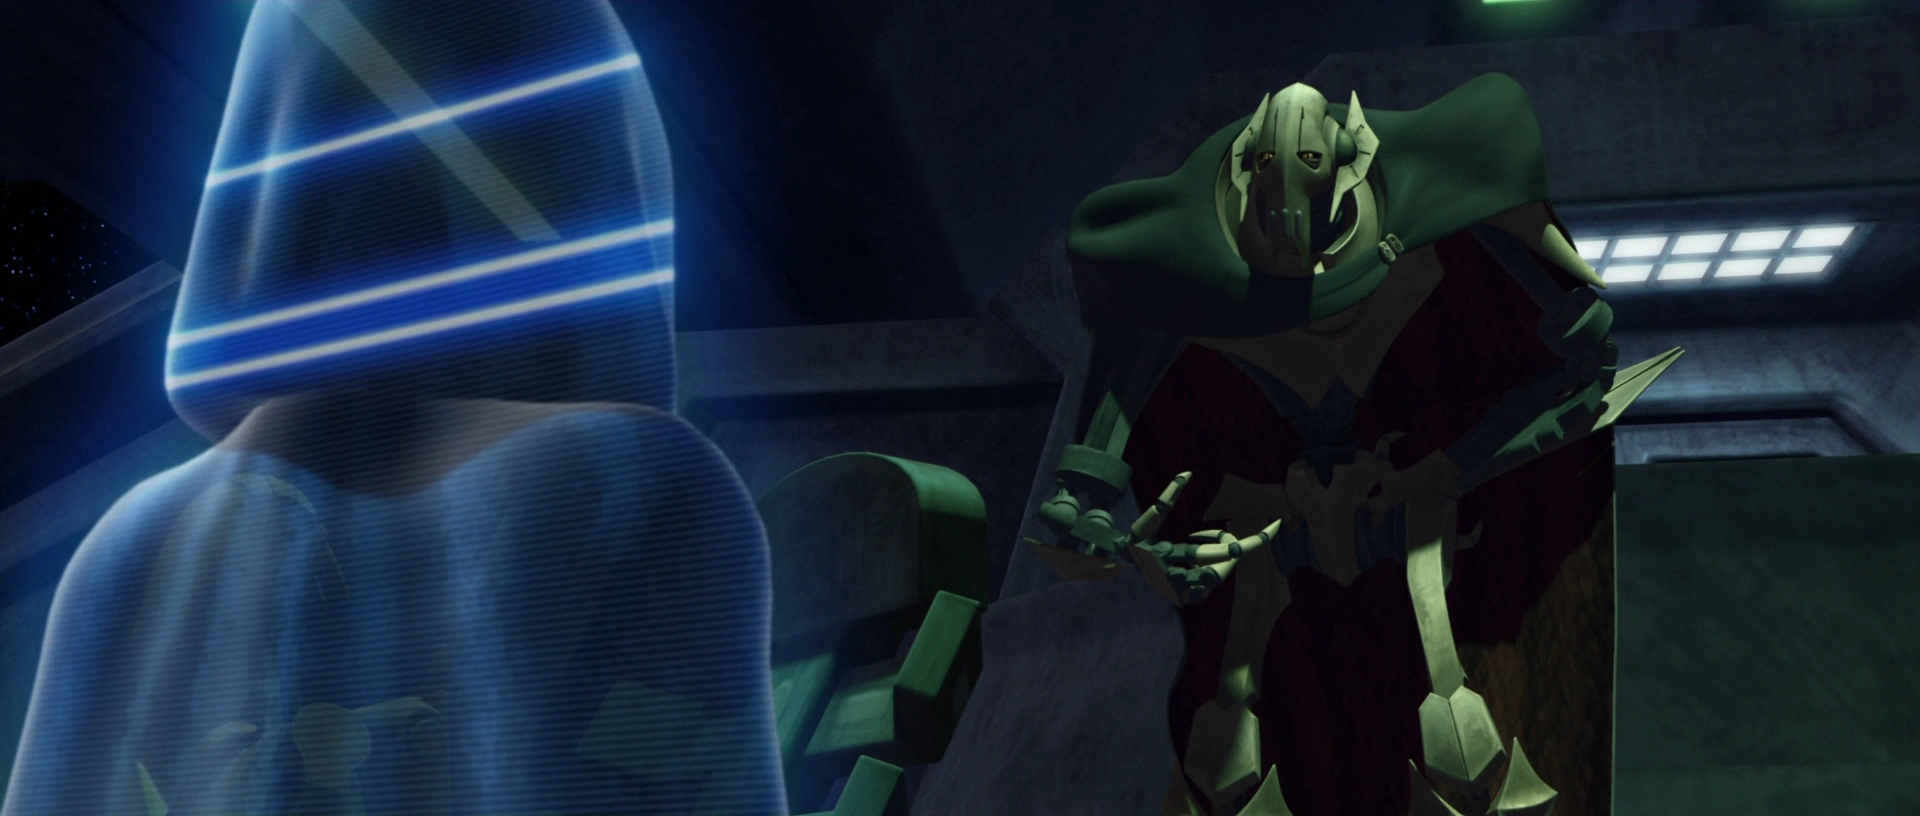
Grievous faces Kenobi on Utapau.
After the Republic received word that Grievous was hiding on Utapau, General Kenobi was sent to defeat him. After learning the cyborg was based on Level 10, Kenobi watched as Grievous spoke to the Separatist Council, and though Nute Gunray doubted Grievous' ability to keep them safe, they followed his orders and left just moments before Kenobi would jump down to Grievous.[3]
Kenobi jumped down from a bar above and greeted Grievous, who applauded his audacity before ordering his bodyguards to kill the Jedi Master. After Kenobi handily defeated Grievous' bodyguards, the droid army prepared to open fire. However, Grievous ordered them to back away as he decided to engage Kenobi himself. He immediately split his arms in four and attacked the Jedi Master in one last duel. But the injuries to his left side had not yet been treated and, as a consequence to either his negligence or a lack of spare parts, he was apparently unable to fight as well as he used to. Grievous lost two of his hands to Kenobi before Clone Commander "Cody" and the 212th Attack Battalion arrived, ambushing the droid army. Fighting broke out all over Pau City between droid and clone forces. Grievous continued to threaten Kenobi, but Kenobi ended the initial duel with a tremendous Force push that disarmed the general. Grievous fled on his wheel bike.[3]
Death
| The Death of General Grievous (info · help) | |
| Listen to Grievous's death cry |
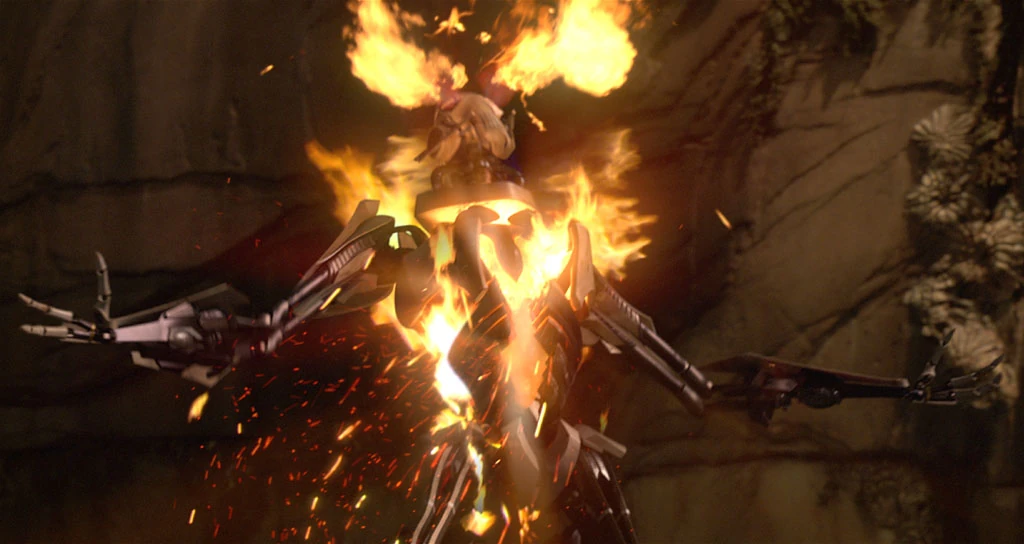

General Grievous bursts into flames after being shot by Kenobi
Pursued by Kenobi on a varactyl named Boga, after a prolonged chase and running duel, the two soon crashed onto Grievous' private landing platform, where the Soulless One was docked. As they fought hand-to-hand, Grievous made use of his mechanical body's superior strength. However, Kenobi managed to rip open Grievous' chest plates, revealing Grievous' gut-sack. Angered, Grievous tossed Kenobi off the platform, but the Jedi manipulated his position via Force and caught hold of the edge. Grievous charged Kenobi with an electrostaff, preparing to finish off his old adversary. However, Kenobi used the Force to summon Grievous' blaster, shooting Grievous five times in his exposed gut-sack. Grievous' remaining biological components ignited, incinerating the famed cyborg from the inside and finally destroying him.[3]
Legacy
- "I was a great admirer of the late General Grievous. An interesting design, but very much a first step. Commander Karbin is the next."
- ―Cylo, on the design of Karbin's cybernetic body

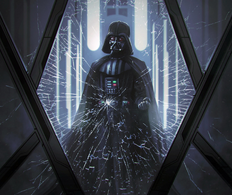
By five years into the Imperial reign, Darth Vader was rumored to be a counterpart to Grievous.
In the aftermath of Order 66, in which the Jedi Order was betrayed by the clone troopers under the Supreme Chancellor's orders, Sidious, using his alter ego of Chancellor Palpatine, transformed the Republic into the First Galactic Empire. He had also managed to turn Anakin Skywalker to the dark side of the Force, making him the Sith Lord Darth Vader.[3] By 14 BBY,[69] five years after the Empire took power, it was rumored that Vader was a counterpart to Grievous that Palpatine had been holding in reserve. Also during that year, Moff Wilhuff Tarkin returned to Coruscant to meet with Emperor Palpatine. While in the Imperial Palace, Rear Admiral Nils Tenant reunited with Tarkin and asked if he had been in the Western Reaches. Tarkin, who had actually been stationed at Sentinel Base as part of Project Stardust, claimed he had and was still hunting Grievous's former allies.[26]
In the aftermath of Order 66, fallen Jedi Taron Malicos lied to the Nightsister Merrin about Grievous' massacre of the Nightsisters in an attempt to manipulate her into teaching him magick. Malicos claimed that the Jedi had been the ones who ordered the massacre. It wasn't until five years after Order 66 that Merrin learned the truth from Cal Kestis.[70]
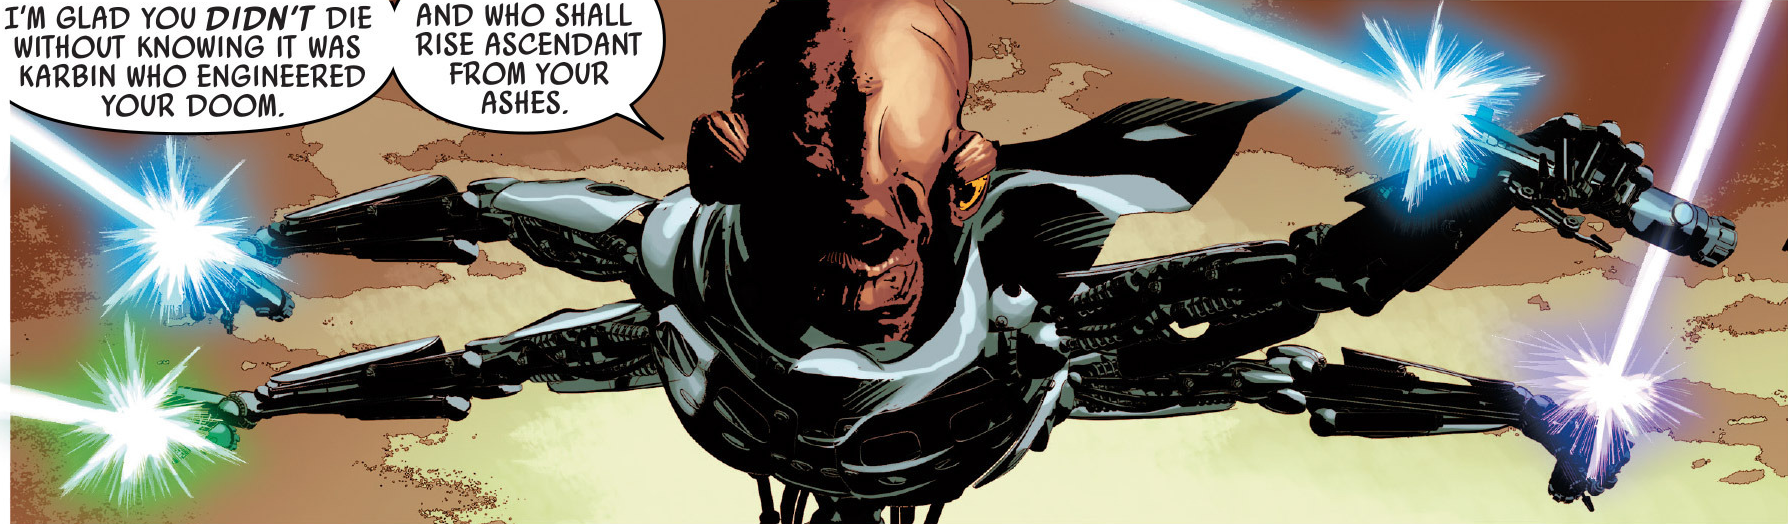

Karbin's cybernetics were said to have been inspired by the late Grievous.
Years after Grievous' death, an Imperial researcher named Cylo began working on the creation of cybernetically-enhanced individuals; these individuals were designed to be possible replacements for Darth Vader as the Emperor's apprentice. One such individual, Karbin, had a cybernetic body installed by Doctor Cylo, who claimed to have been inspired by the body of Grievous.[71]
Some time after the Battle of Endor, Temmin Wexley implied that he had downloaded some of Grievous' old programming into Mister Bones, his robotic bodyguard.[72] Among Bone's memories was one of wielding four lightsabers with four hands and the blades spinning,[73] like how Grievous had once dueled.[3] After the Battle of Starkiller Base[74] in 34 ABY,[2] Grievous's old enemy[52] Hondo Ohnaka featured Coruscant in his book Galactic Explorer's Guide and, due to his role in the Battle of Coruscant, included Grievous in the "Rogue's Gallery" section for the planet.[74]
Personality and traits
- "The general's description of your tactics have been 100 percent accurate today. Very impressive, even by my standards."
- ―TV-94, impressed by Grievous's military tactics
Grievous was a brilliant and unforgiving strategist who led the army of the Separatist Alliance in overwhelming victories against the Republic in the Clone Wars.
Grievous was a Kaleesh warlord,[7] and stood 2.16 meters[4] tall with red skin and slit-pupiled golden eyes.[3] He had an elongated face with slit-like nostrils and four spiky growths protruding from his chin.[15] As a cyborg, he had clawed feet, two arms which could split into four, and a skull-like[58] Kaleesh mask[12] which his eyes peered through.[58] During the Clone Wars, Grievous was equipped with at least two distinct sets of cybernetic armor, with some differences between the two. Besides minor aesthetic differences such as color distribution and shoulder pad size, the general's first armor featured eight fingers in total, a thin waist, three vocabulator slits, solid thighs, and a completely hidden gutsack,[13] while his later armor had a total of twelve fingers, a more substantial waist, four vocabulator slits, divided thighs, and a partially visible gutsack.[3]
Grievous was known for his cruelty and ruthlessness[23] and was seen as the Separatists' best general.[13] Given his reputation, Grievous was feared throughout the galaxy as a strategic genius and for his hunting prowess.[75]
Grievous had little understanding of the Force, though he believed the improvements made to his own body gave him a greater power than that of the Jedi he hunted. This left him with little knowledge of the Force and a severed connection to its energy, which he replaced with an appetite for destruction, especially of the power he did not truly comprehend.[15] However, transforming his body into a fighting machine left Grievous' organic anatomy weak inside his armor.[75]

Grievous had a low opinion of his B1 battle droids.
Grievous' hatred for the Jedi was well known throughout the galaxy and was stated by him on many occasions. A feared Jedi hunter, Grievous was especially known for his brutality and ruthlessness. However, he was also quick to run from a fight when the tide was turned against him. This tactic worked, until his final encounter with his nemesis, Jedi master Obi-Wan Kenobi.[21] Grievous always insisted on fighting the Jedi personally when possible, displaying a mild form of recklessness as well as restlessness despite suffering injuries. This was displayed by refusing to heed EV-A4D's advice to recuperate after his first bout with Kit Fisto and Nahdar Vebb.[13] He later displayed this again when he fought Obi-Wan on Utapau.[3] Although Grievous killed many Jedi during the Clone Wars, his greatest lightsaber prizes were those of Pablo-Jill, Eeth Koth, Roron Corobb, and Shaak Ti.[28] At one point, Grievous gained the lightsaber of Jedi Master Jmmaar.[76]
Grievous also had a disdain for the battle droids, as shown when he decapitated a B1 battle droid aboard the Malevolence out of frustration[31] and when he did the same to another battle droid on the bridge of a Munificent-class star frigate.[33] He considered that the droids he commanded were created only to follow orders, and he believed they were not made to question him.[15]
Skills and abilities
- "You fool! I've been trained in your Jedi arts by Count Dooku!"
- ―Grievous, to Obi-Wan Kenobi

Grievous was very skilled with lightsabers, which allowed him to defeat and kill several great Jedi duelists.
Despite his lack of Force-sensitivity, Grievous was highly skilled in lightsaber combat, in which he was trained by Count Dooku. With his cybernetic enhancements, Grievous relied on strength and agility when in combat with a Jedi. He was a master of many of the classic forms of Jedi arts, and was able to adapt quickly to an opponent's fighting style.[8] Grievous chose a very unorthodox style while contending with the Jedi, using his four arms to his advantage. Sometimes he would surprise his opponent by taking out one of his extra arms to subdue them. The General did this when he blocked Nahdar Vebb's lightsaber with his own while he disconnected his own arm and grabbed a blaster, allowing him to shoot Vebb several times in the torso.[13]
Grievous was very durable due to his cybernetics, and could even resist explosions from fuel barrels.[51] Grievous was also very fast as he was able to use his cybernetics to crawl on the floor and make a quick escape if he needed to. Not only was he fast, but he also had enhanced strength as he was able to crush,[51] lift, throw, smash, and choke his opponents.[3]
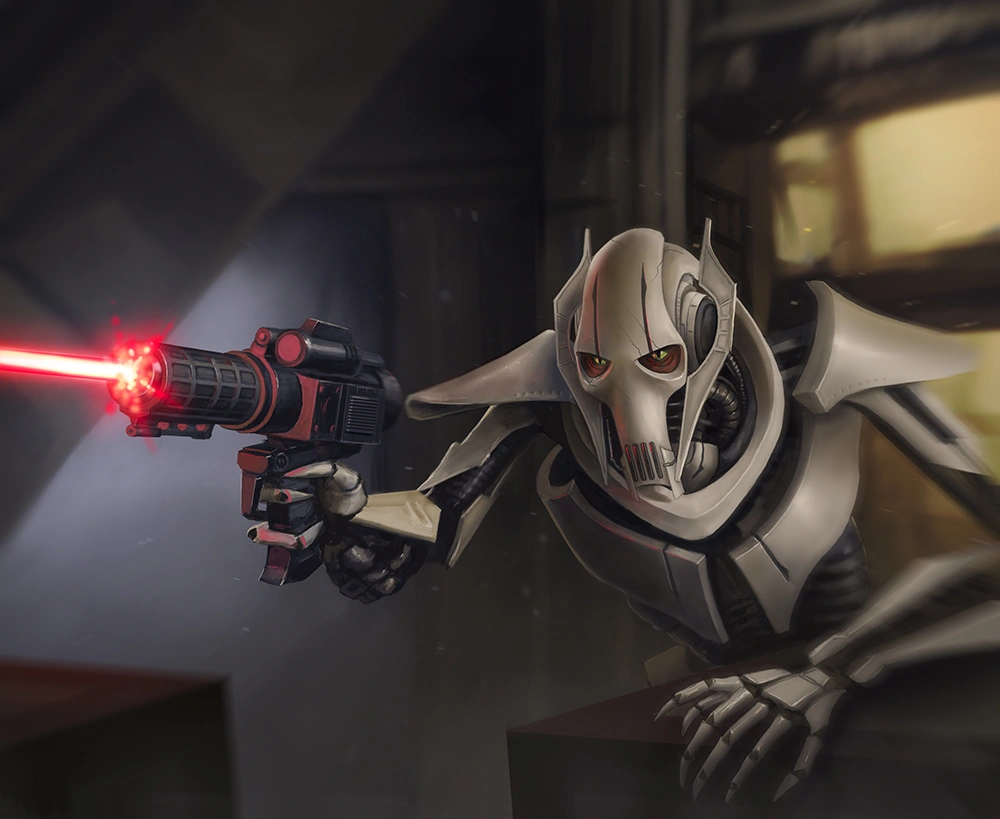
Grievous firing his DT-57 "Grievance Striker"
Grievous was also a competent strategist as he put his massive army to good use by overwhelming his opponents.[49] He was able to correctly anticipate the Republic's movements during the Battle of Saleucami.[27] He was also able to fool the Republic forces during the Battle of Kamino with his ships taking heavy casualties, but the only person that could figure out his plan was his rival, Obi-Wan Kenobi.[45] He was also able to recognize that Maul had yet to deploy warships during the Battle on Ord Mantell. Tey-Zuka calculated that the enemy ships had been destroyed, but then, their dreadnaught was then hit, and Grievous recognized that they had been lured into a trap.[61]
Grievous was not only skilled in lightsaber combat, as he also owned a custom DT-57 "Annihilator" blaster pistol[3] called the "Grievance Striker."[77] The General was also a talented flier and piloted a customized Belbullab-22 starfighter known as the Soulless One. He was skilled enough to avoid and escape Anakin Skywalker's starfighter.[33]
Behind the scenes
- "With General Grievous, I wanted somebody who was reminiscent of what Anakin is going to become, which is a half man, half robot. In this case, Grievous is sort of 20% alien and 80% robot."
- ―George Lucas on the creation of Grievous
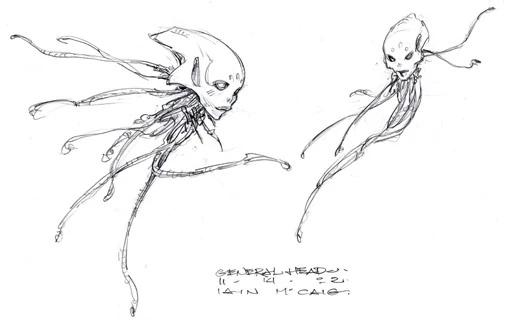
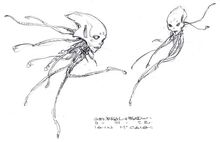
Concept art of Grievous
Grievous was developed for the 2005 movie Star Wars: Episode III Revenge of the Sith as a powerful new villain on the side of the Confederacy. He was introduced in "Chapter 20" of the animated series Star Wars: Clone Wars, which aired over a year before the film's release, but his appearances in that series have been relegated to the Legends continuity. In Revenge of the Sith and the second The Clone Wars animated series, he was voiced by Matthew Wood.
Before Matthew Wood was cast in the role of Grievous, producer Rick McCallum suggested British actor Gary Oldman for Grievous' role. However, at the end, Oldman didn't accept the role and Wood was cast instead.[78]
Appearances
Non-canon appearances
- Disney Infinity 3.0
- Revenge of the Sith: Episode III (LEGO Star Wars)
 LEGO Star Wars: Droid Tales — "Exit from Endor" (In flashback(s))
- LEGO Star Wars: Droid Tales — "Crisis on Coruscant" (In flashback(s))
- LEGO Star Wars: The Force Awakens (DLC)
- LEGO Star Wars: All-Stars — "Lo, I am Manufactured" (In flashback(s))
- LEGO Star Wars: The Skywalker Saga