Tag: Visual edit |
|||
| Line 127: | Line 127: | ||
When Ezra was later captured by the Imperial [[Viceroy]] [[Gar Saxon]] during a [[Mission to the third moon of Concord Dawn|mission]] to the [[Third moon of Concord Dawn|third moon]] of [[Concord Dawn]], Ezra claimed that he worked as part of Hondo's scavenging party. However, Saxon was not fooled and continued interrogating his prisoner.<ref name="ISC">{{Rebels|Imperial Super Commandos}}</ref> |
When Ezra was later captured by the Imperial [[Viceroy]] [[Gar Saxon]] during a [[Mission to the third moon of Concord Dawn|mission]] to the [[Third moon of Concord Dawn|third moon]] of [[Concord Dawn]], Ezra claimed that he worked as part of Hondo's scavenging party. However, Saxon was not fooled and continued interrogating his prisoner.<ref name="ISC">{{Rebels|Imperial Super Commandos}}</ref> |
||
| + | ====Theft of the Argora==== |
||
| + | [[Image:Hondo & Argora.jpg|thumb|275px|left|Hondo with the Argora as he meets up with the Spectres]] |
||
| + | Hondo then tipped off Ezra about the rare creature, the [[Argora]], being held a [[Class four container transport|Class ''four'' container transport]] that acted as the Emperor's [[Emperor's personal zoo|personal zoo]]. Hondo then boarded the transport where he found the Argora. Unfortunately, Hond did not know which crate the Argora was in and inadvertently released the other captive creatures. As Hondo made his way to escape the creatures, he ran into the Spectres. At first, Hondo refused to hand the Argora over to them and told them that they had other things to worry about than stormtroopers.<ref name="Endangered 1">{{IDWAdventuresCite|7|[[Endangered, Part 1]]}}</ref> |
||
| + | As the creatures approached both Hondo and the Spectres, he then tried to make his escape. Hondo was then chased by Ezra, who demanded Hondo to surrender the Argora. Unfortunately, Hondo and Ezra were then confronted by stormtroopers under Dr. [[Hazlekk]] and Captain [[Zarda]]. As the stormtroopers prepared to fire, Hondo again made his escape when the rest of the Spectres arrived. Hondo and Ezra then worked together in trapping Hazlekk, Zarda and their stormtroopers behind a [[force field]]. Hondo then tried to make off with the Argora, but Ezra released it. Hondo then came under attack from it and decided to give it to the rebels. Hondo then boarded the [[Last Chance|''Last Chance'']] and left.<ref name="Endangered 2">{{IDWAdventuresCite|8|[[Endangered, Part 2]]}}</ref> |
||
====Treasure hunting on Wynkahthu==== |
====Treasure hunting on Wynkahthu==== |
||
| − | [[File:Wynkahthu recovery team.jpeg |
+ | [[File:Wynkahthu recovery team.jpeg|275px|thumb|Hondo, Melch, Azmorigan, and the Spectres]] |
Later, Hondo struck a business partnership with the [[Jablogian]] [[crime lord]] [[Azmorigan]], who had acquired the flight plan for an [[Class four container transport|Imperial cargo ship]]. Azmorigan had learned that the cargo ship was carrying treasures and [[proton bomb]]s. The two partners and Hondo's Ugnaught crew ambushed the cargo ship near the planet [[Wynkahthu]]. However, the cargo ship drifted into the planet's stormy upper atmosphere. Hondo sent his Ugnaught crew to board the ship but most of them were lost due to the dangerous windy conditions. Only [[Melch]] survived the boarding and Hondo abandoned his last crew member to his fate.<ref name="The Wynkahthu Job">{{Rebels|The Wynkahthu Job}}</ref> |
Later, Hondo struck a business partnership with the [[Jablogian]] [[crime lord]] [[Azmorigan]], who had acquired the flight plan for an [[Class four container transport|Imperial cargo ship]]. Azmorigan had learned that the cargo ship was carrying treasures and [[proton bomb]]s. The two partners and Hondo's Ugnaught crew ambushed the cargo ship near the planet [[Wynkahthu]]. However, the cargo ship drifted into the planet's stormy upper atmosphere. Hondo sent his Ugnaught crew to board the ship but most of them were lost due to the dangerous windy conditions. Only [[Melch]] survived the boarding and Hondo abandoned his last crew member to his fate.<ref name="The Wynkahthu Job">{{Rebels|The Wynkahthu Job}}</ref> |
||
Revision as of 20:30, 30 April 2018
| | |

Warning: This infobox has missing parameters: parents, pronouns, children, siblings, partners, families, feathers and unrecognized parameters: era
- "But you know what I always say: Speak softly, and drive a big tank."
- ―Hondo Ohnaka
Hondo Ohnaka was a male Weequay pirate who led the Ohnaka Gang on the Outer Rim world of Florrum during the Clone Wars. His gang was dissolved with the rise of the Galactic Empire, and Hondo cast adrift as a small-time pirate and smuggler. Ultimately, he would indirectly aid the growing rebellion against the Empire, providing critical aid and intelligence at pivotal moments. Decades later, a text known as the Book of Hondo would be attributed to the famous pirate.
Biography
Background
- "As my sweet mother always said, 'son, if one hostage is good, two are better, and three, well, that's just good business!'"
- ―Ohnaka about what he learned from his mother.
A male Weequay[2] from Sriluur,[1] Hondo Ohnaka was the leader of a pirate gang called the Ohnaka Gang which operated a base on the planet Florrum. He also had a pet Kowakian monkey-lizard named Pilf Mukmuk.[3] At some point prior to the Clone Wars, Hondo had a romantic relationship with the bounty hunter Aurra Sing but the two later separated. He was also friends with Jango Fett, whom Hondo saw as an honorable man.[4]
At some point prior to the Invasion of Naboo, Hondo attended an auction hosted by Xev Xrexus in the Drazkel system, which offered assorted illicit goods to invited buyers. The items available for purchase included several Droidekas and a captured Padawan.[5]
The Clone Wars
Capturing Dooku
- "What to do, what to do, what to do. I don't want to kill you... per se. In fact, you seem like decent fellows, even you Count. This is just business, and once I get my money, we can go back to being friends. It's very simple. Now try not to complicate things by breaking out again."
- ―Hondo Ohnaka to Anakin Skywalker, Obi-Wan Kenobi and Count Dooku

Ohnaka converses with Anakin Skywalker and Obi-Wan Kenobi.
During the Clone Wars, Hondo and his gang encountered Count Dooku, the leader of the Confederacy of Independent Systems and a Sith Lord. Dooku was on the run from the Jedi Knights Obi-Wan Kenobi and Anakin Skywalker and had crash-landed his solar sailer on the planet Vanqor, which lay a few parsecs away from Florrum. Dooku encountered Hondo and his gang salvaging his wrecked solar sailer. When Hondo offered to provide him passage offworld, Dooku accepted his offer, claiming he was above material wealth.[3]
Ohnaka then transported Dooku to his base on Florrum. However, during the journey Ohnaka arranged for his Kowakian monkey-lizard Pilf to steal Dooku's lightsaber, as well as Skywalker's lightsaber, which Dooku had acquired during an earlier skirmish on Vanqor. Ohnaka and his men then took Dooku captive. Realizing that Count Dooku was an important Separatist leader, Ohnaka hoped that he could make a lot of money by selling Dooku to the Republic. Hondo contacted the Republic via hologram and displayed the captive Count to Supreme Chancellor Palpatine while demanding a ransom of one million credits worth of spice. Palpatine accepted Ohnaka's price and dispatched Kenobi and Skywalker to Florrum in order to verify the pirate's claims.[3]
Ohnaka during the Clone Wars.
Kenobi and Skywalker arrived at Ohnaka's pirate base and were able to verify Dooku's identity. Having completed the transaction, Hondo invited his Jedi guests to banquet with his pirates. However, he drugged the two Jedi's drinks, causing them to fall unconscious.[3] Ohnaka then took his Jedi guests hostage and imprisoned them in the same cell as Dooku. He wanted to ransom Kenobi and Skywalker so that he could triple the ransom. Unaware of the recent developments on Florrum, the Republic dispatched Senator Kharrus and the Gungan Representative Jar Jar Binks and a detachment of clone troopers to deliver the spice ransom to Hondo's gang and collect Count Dooku.[6]
However, unknown to Hondo, one of his pirates Turk Falso decided to double-cross his captain and steal the spice ransom for himself. Turk ordered his men to shoot down the Republic emissaries' shuttle, causing it to crash in the Doshar fields. Senator Kharrus and the Clone pilots were killed during the crash but Representative Binks and several Clone troopers survived. While Turk's band hunted down the Republic emissaries, Turk misled Hondo by claiming that the Republic ship had been delayed. Turk's forces were later slaughtered by Binks' clone troopers, who had managed to tame several local skalders. Turk alone survived and falsely reported to Hondo that the Republic forces had sent an army instead of the ransom. Believing Turk's lies, Hondo sent several tanks to destroy the clone troopers.[6]
Meanwhile, Hondo had to deal with Count Dooku and his two Jedi captives who had made three escape attempts. Following the third attempt, he held Kenobi and Skywalker with electricity. On the battlefield, Hondo's tanks were defeated after Jar Jar Binks entered one of the tanks to negotiate with Turk. However, he accidentally caused the tanks to ram into each other and knock out the power grid. This caused a black-out at Hondo's pirate base which allowed his three captives to escape. Dooku killed Turk and several other pirates before fleeing in one of Hondo's starships.[6]
Meanwhile the Weequay pirate captain himself was captured by Kenobi and Skywalker. Despite their unpleasant experiences with Ohnaka, Kenobi ordered his former Padawan Skywalker to release Hondo since they did not want any more problems with the Ohnaka pirate gang. As a gesture of respect, Hondo ordered his forces to stand down. Praising the Jedi for their nobility, he allowed the Jedi and their clone troopers to leave his pirate base in peace. However, Kenobi warned Ohnaka that Count Dooku knew the location of his base and was not as forgiving as the Jedi.[6]
Trouble on Felucia
- "This effort is no longer... profitable!"
- ―Hondo as he retreats from Felucia

Ohnaka invades a Felucian village.
Following his encounter with Count Dooku and the Jedi, Hondo and the Ohnaka Gang began raiding the fungi-covered planet of Felucia. They routinely raided a nysillin spice village, prompting the Felucian villagers to hire a band of four bounty hunters for their protection. These four bounty hunters were named Sugi, Embo, Rumi Paramita, and Seripas. Shortly later, Hondo's old Jedi adversaries Obi-Wan Kenobi, Anakin Skywalker, and his Padawan Ahsoka Tano visited the same village to investigate the disappearance of a Republic medical station orbiting the planet. The Jedi's arrival coincided with one of the Ohnaka gang's routine visits to the village.[7]
Hondo began demanding that the villagers deliver a portion of their nysillin by the following morning. While visiting the village, he also attempted to buy-out the bounty hunters but Sugi rejected the offer. Ohnaka then discussed a "business deal" with the Jedi Knight Kenobi, who offered to pay the Ohnaka gang to take him and his Jedi companions to a Republic outpost. However, Ohnaka declined the venture on the grounds that he did not want any Republic Credits. After issuing his ultimatum to the villages, Hondo left the village to regroup with his pirate forces. Meanwhile, the Jedi and the bounty hunters worked together to train the Felucian villages to resist Hondo and his pirate gang.[7]

Ohnaka fights Skywalker in a duel.
Hondo sent one of his scouts to spy on the villages but the scout was killed by Embo. After the scout failed to return, Ohnaka and his pirates assaulted the village. While Hondo led the assault from the cockpit of a tank, the rest of the gang charged the village on their speeder bikes. During the ensuing skirmish, Hondo used his tank to blast the village from atop a cliff, wounding Embo and killing the bounty hunter Rumi. Skywalker then engaged the Weequay pirate in a duel with his lightsaber, prompting Hondo to brandish his electrostaff in defense.[7]
The Jedi eventually gained the upper hand and nearly kicked Hondo off the cliff. But Hondo managed to survive by clinging onto the ledge. Feigning submission, Ohnaka tricked Anakin into pulling him up. However, Ohnaka then attacked Skywalker and pushed him into the way of the repulsor tank's turret. While Skywalker managed to survive by jumping off the cliff before the shot hit, Hondo was able to take advantage of the chaos to make his escape, fleeing the planet and village along with his pirate gang.[7]
Reunion with Aurra Sing
- "Couldn't handle her, could you? Well, don't be ashamed. You're not the first man to bail out from under her command."
- ―Hondo, to Castas, about Aurra Sing
Ohnaka is reunited with a kiss from his ex-girlfriend, Aurra Sing.
Later, Hondo was revisited by his former lover, the bounty hunter Aurra Sing along with her confederates Boba Fett, Bossk, and Castas. Aurra had become Boba's mentor and was helping the youth to hunt down and kill the Jedi Master Mace Windu, who had killed his father Jango Fett during the Battle of Geonosis. She had come to seek aid and refuge from Hondo. In addition, Aurra wanted to drop off Castas on Florrum because the bounty hunter wanted to abandon the job since it had become too risky. While Hondo took his guests to a bar for drinks, Ohnaka refused to assist her and Boba with their quest but offered them indefinite stay on Florrum. Hondo was also present when Aurra executed Castas for disclosing their whereabouts to other bounty hunters.[4]
Aurra's visit was followed by the arrival of the Jedi Master Plo Koon and Anakin's apprentice Ahsoka Tano, who had been tracking Boba Fett and his associates. Hondo informed the two Jedi that Aurra and Boba were waiting in a bar and had set trap for them. Following a brief skirmish, Aurra fled the bar in an airspeeder and was pursued by Ahsoka. After the Jedi had managed to disarm and capture Boba, Hondo managed to convince the young Fett to reveal the location of the Republic hostages Admiral Shoan Kilian and a Clone officer knowing his father would want him to. Fett complied and the Jedi were able to rescue the Republic hostages and capture Bossk. Meanwhile, Aurra attempted to escape on Boba Fett's starship Slave I. However, Ahsoka damaged the starship's wing, causing it to crash.[4] While Aurra was presumed dead by the Jedi, Hondo secretly rescued her[8] and took possession of Slave I in lieu of Boba's incarceration.[9]
Delivery to Onderon
Later in the war, Ohnaka—at the behest of the Jedi General Anakin Skywalker—delivered several rocket launchers to rebel forces on Onderon who were fighting the Separatist occupation of their planet. Hondo managed to deliver the weapons to the Onderon rebels' base known as the nest. He then made a discreet retreat after Separatist droid forces showed up.[10]
Trouble with the Jedi and Grievous
- "Hondo."
"General Grievous, I presume? What a surprise... have a seat."
"You may dispense with pleasantries, pirate. This planet is now under Separatist control!"
"Aha... And what do you suppose that means?"
"It means you have a new master, pirate scum!" - ―Grievous and Hondo Ohnaka

Grievous tosses Ohnaka onto the floor.
Later during the Clone Wars, Ohnaka and his pirate gang's Corona-class armed frigate intercepted and boarded the Jedi training cruiser Crucible, which was carrying the Padawan Ahsoka Tano, the architect droid Huyang, the astromech droid R2-D2, and six Jedi younglings Petro, Gungi, Katooni, Ganodi, Byph, and Zatt. These younglings had recently completed an initiation rite on Ilum. The Ohnaka Gang wanted to take the youngling's Kyber crystals, which were highly prized on the black market. During the raid, Ohnaka and his pirates used a docking tube to board the Crucible. Following a struggle Huyang, R2-D2, and the younglings managed to break their ship free of the pirates and escape into space. However, Tano was sucked into the docking tube during the escape attempt and captured by Ohnaka, who regarded her as a valuable hostage.[11]
Following the raid, Ohnaka and his gang took Ahsoka Tano to their base on Florrum. There, he taunted the suspended Tano, and revealed that he intended to sell her to an underworld "businessman" who would pay "handsomely" for a female Jedi. He also threateningly claimed that the so-called "businessman" did not care whether Tano was delivered to him dead or alive. Later, the Ohnaka Gang was visited by a traveling carnival troupe led by the Dug manager Preigo. Unknown to Ohnaka, the six Jedi younglings had passed themselves as junior acrobats. The younglings managed to impress Ohnaka and his pirates during an entry act and subsequently convinced the drunken pirate captain to take part in the second act. While Hondo and his pirates were distracted, the youngling Katooni managed to free Tano and recover her lightsabers. When his pirates spotted the Jedi escaping and gave chase, Ohnaka was too intoxicated to take part in the pursuit.[12]
Hondo Ohnaka stayed at his pirate base while his pirates recaptured Ahsoka and her younglings in the wilderness The pirate captain was subsequently visited by the Separatist military leader General Grievous and a droid army. Grievous opened a holo-communications channel with Count Dooku, who conferred with Hondo. In retaliation for his imprisonment during their first encounter, the Separatist leader had come to take over Florrum and to dismantle Ohanaka's arsenal. Despite his protests, Hondo was incarcerated by the Separatists who proceeded to dismantle his base and vehicles.[9]
Meanwhile, Ahsoka Tano and the younglings joined forces with the Ohnaka gang to rescue Hondo and to fight the Separatists. While R2-D2 distracted the Separatist droids with the pirate's tank, Ahsoka and several of the younglings and pirates made their way into the pirate base and found Hondo's cell. With the encouragement of Hondo, the youngling Katooni managed to correctly assemble her lightsaber and free Hondo from his cell. After freeing the remaining pirates, Hondo and his Jedi rescuers managed to escape the prison section before it was levelled by Separatist tanks.[9]
During their escape, Ohnaka and his pirates were separated from their Jedi allies. Hondo attempted to flee into a hidden hangar bay and fly away, but the youngling Katooni managed to appeal to his sense of honor. Flying the repaired Slave I, Hondo managed to rescue Ahsoka and the remaining younglings from General Grievous. Together, the surviving pirates and the Jedi escaped to a nearby Republic cruiser, where they were picked up by General Kenobi. When confronted by Kenobi about the attack on the Crucible, Hondo claimed that it was a rescue mission. Kenobi decided not to punish Hondo and the Ohnaka gang due to the assistance they had provided Tano and the younglings. Hondo departed but not before giving Katooni a final nod of approval for her actions on Florrum.[9]
Attack of the Nightbrothers
- "Filth, you will pay for your insolence."
"Insolence! We are pirates! We don't even know what that means. Open fire!" - ―Darth Maul and Hondo Ohnaka


Hondo and Pilf Mukmuk during their skirmish with Darth Maul and Savage Opress.
Hondo encountered a new challenge in the form of the resurgent Sith Lord Darth Maul and his brother Savage Opress, who attempted to recruit Ohnaka's gang into an army that would serve the brothers. The Nightbrothers managed to lure several of the Ohnaka Gang aboard their starship and managed to bribe two captains into flipping sides. Those that remained loyal to Hondo including one captain were executed by the two Nightbrothers. Hondo witnessed the execution via hologram. Under the leadership of Darth Maul and Savage Oppress, the turncoat pirates then launched an attack on Ohnaka's base on Florrum and claimed it for their own.[13]
Ohnaka and his gang open fire against the Nightbrothers.
Fortunately for Hondo, he received reinforcements in the form of the Jedi Knight Obi-Wan Kenobi and the Jedi Master Adi Gallia. Together with these Jedi reinforcements, Hondo and his pirates resisted the Nightbrothers' onslaught. During the fighting, Gallia was killed by Opress. Outnumbered, Hondo, his pirates, and Kenobi were forced to retreat back to the base. Under Kenobi's orders, Hondo and his men collapsed a section of a tunnel with explosives to separate Kenobi and the Nightbrothers from the pirates. While being pursued by the turncoat pirates, Hondo used a large blaster cannon to convince his former associates to renounce their alliance with the Sith and to join forces in driving Maul and Opress offworld. Together, they forced the two Nightbrothers into a retreat and destroyed their ship. However, the two Sith managed to escape into space on an escape vessel. In the aftermath of the skirmish, Hondo and his men pillaged the wreckage of Maul and Opress' starship.[13]
Age of the Empire
Fall of the Ohnaka Gang
At some point after the rise of the Galactic Empire and the fall of the Republic, the Imperials broke up the Ohnaka Gang as punishment for sympathizing the Jedi, forcing Hondo Ohnaka to continue his life of piracy alone. At some unknown point, Ohnaka antagonized the Rang Clan, causing the clan to place a bounty on his head.[14]
Meeting the Spectres
- "You lied to me? I knew I liked you!"
- ―Hondo Ohnaka to Ezra Bridger
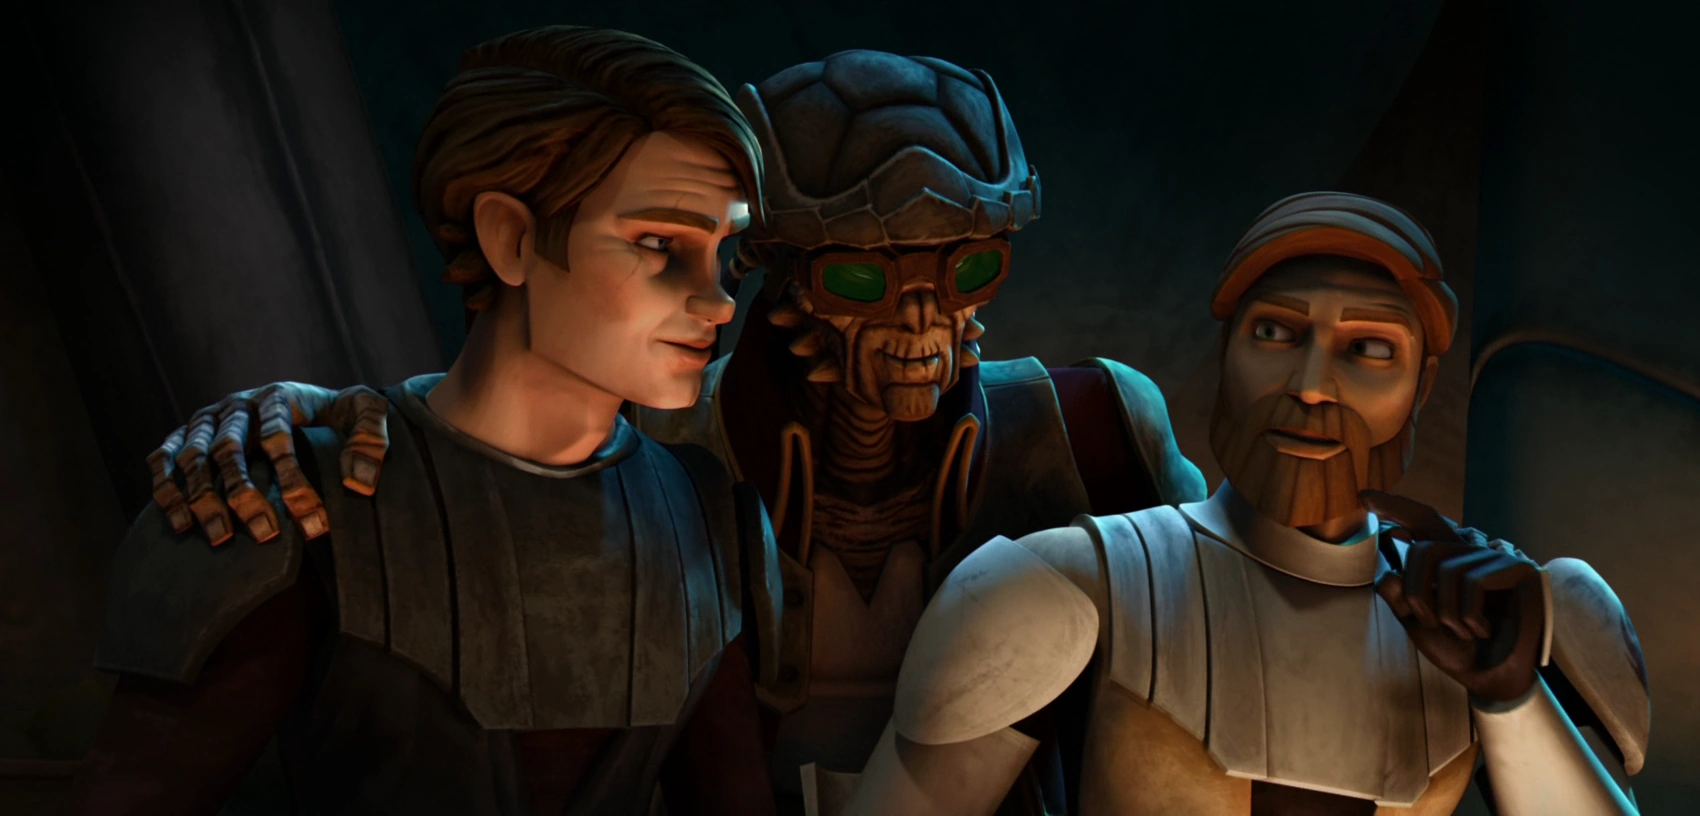
In 4 BBY, Hondo Ohnaka took over the Devaronian crime lord Cikatro Vizago's starship, the Broken Horn. During the struggle, Ohnaka managed to disable Vizago's bodyguard droids by stealing his droid controller and imprisoned the Devaronian in a cell aboard the ship's brig. However, Vizago managed to send a distress signal before his capture that was picked up by Ezra Bridger and the astromech droid Chopper, who were members of the Spectres. The two rebels were cleaning the rebel starship Ghost which was parked on the planet Garel. Hearing Vizago's distress, Ezra and Chopper traveled on the Phantom and found the Broken Horn in orbit above Garel.[14]

Ohnaka works alongside Ezra Bridger.
The two rebels boarded the Broken Horn and encountered Ohnaka in the ship's bridge. When questioned by Ezra, Hondo claimed that he had won the Broken Horn in a game of sabacc with Vizago. Not wanting to reveal his true identity, Ezra introduced himself as the smuggler and galactic entrepreneur Lando Calrissian. Shortly later, the Broken Horn was spotted and attacked by an Imperial warship. However, Ohnaka and his new-found rebel partners managed to escape due to the quick actions of Ezra and Chopper, who managed to power up the engines and make a jump into hyperspace. Impressed, Hondo offered Ezra the chance to assist him in selling five power generators at extortion rates. In the end, the two partners agreed to split their profits and to give Ezra two of the power generators. Not trusting Ohnaka fully, Ezra stole the pirate's droid controller and secretly handed it to Chopper for safekeeping.[14]
Hondo and his new-found partners traveled to the frigid planet Nixus where they planned to sell the power generators to an unknown buyer at Nixus Hub 218. Upon landing at Nixus Hub 218, Ohnaka and Ezra discovered that their buyer was the Jablogian crime lord Azmorigan. Azmorigan was aware that the Rang Clan had placed a bounty on Ohnaka's head and he also recognized Ezra as one of the rebels who had helped Calrissian. Seeking revenge against both Hondo and Ezra for past wrongs, Azmorigan had them hoisted onto a loading dolly which would then catapult them into space. Azmorigan also planned to seize their power generators for himself. Before Azmorigan could exact his revenge, he was foiled by Chopper, who attacked him and his men. During the ensuing skirmish, Oanaka and his rebel allies managed to turn the tables on Azmorigan and escape offworld with the generators and several stolen credits. Hondo also realized that Ezra was a Jedi after the youth wielded a lightsaber and used the Force to stop the dolly from hurling him into space.[14]
After escaping Nixus, Hondo and his rebel partners traveled back to Garel on the Broken Horn with the generators. When Ezra revealed his true identity and confided that he was feeling overwhelmed by his responsibilities to the rebellion and his Jedi training, Ohnaka suggested that the boy could become a "pirate Jedi." Shortly later, Ezra and Chopper traveled down to the ship's brig where they discovered a captive Vizago. Vizago revealed that Hondo had actually shot him in the back with a stun gun and disabled his droids before seizing control of his ship. The two rebels freed Vizago and together they confronted Ohnaka on the bridge. While Ezra proposed that the two criminals split their profits and let him keep the generators, Vizago took the opportunity to snatch back his droid controller and order his droids to attack the intruders. Ohnaka managed to flee on the Phantom, taking the five power generators with him.[14]
Unknown to Hondo, the Phantom's autopilot had already been programmed to return to her mothership, the Ghost. Hondo landed in a spaceport in Garel City where he was surrounded by the other crew of the Ghost including the ship's captain Hera Syndulla and Ezra's master Kanan Jarrus. Shortly later, Ohnaka was rejoined by Ezra and Chopper, who had returned to Garel in an escape pod. The rebels allowed Hondo to keep his credits but seized the five power generators, which were used to alleviate an energy crisis on the planet Rinn.[14]
The Lasat refugees
In 3 BBY, Hondo contacted Ezra via a transmitter and told him to travel to Nixus Hub 218, where the Empire had captured two refugees. Ezra and the crew of the Ghost traveled to Nixus where they discovered that these two refugees were Lasat who has survived the fall of Lasan. The rebels managed to overpower their Imperial captors and rescue the refugees, who introduced themselves as the former Lasan High Honor Guard Gron and the female mystic Chava the Wise. This development both delighted and unnerved Garazeb Orrelios, the sole Lasat member of the crew of the Ghost who had believed that he was the last of his species. After the rescue, Ohnaka introduced himself as Ezra's mysterious contact and revealed that he had also tipped off the Empire to the refugees' arrival knowing that the rebels would arrive to save the day.[15]
Ohnaka speaks to the Ghost Crew through a hologram after being captured by the Empire.
With Imperial reinforcements bound to show up, the rebels began their return trip to the Ghost. When Ohnaka demanded the payment that he was owed, Ezra refused, making the Weequay pirate very proud of his young friend. After the rebels had left, Hondo was cornered by several stormtroopers. Always one to make a profit and double-cross his friends to save himself, Ohnaka led the Imperial troopers to the rebels, who were making their way through the halls of Hub 218. These stormtroopers were serving under the Imperial Security Bureau Agent Kallus, a perennial foe of the Spectres, who ordered his men to seize them alive. Before the Imperials could capture the rebels, Ohnaka secretly contacted Ezra and warned him of the approaching Imperials.[15]
The stormtroopers engaged the crew of the Ghost in a fire fight within the halls of Nixus Hub 218. To help his rebel partners, Hondo secretly sealed several of the doors, preventing many of the stormtroopers from pursuing the rebels. Ohnaka's actions enabled the rebels to flee aboard the Ghost and escape into hyperspace. However, Hondo was not so lucky and he was captured by the stormtroopers. Ohnaka was then forced to help the Kallus and Admiral Kassius Konstantine hunt down the rebels. Due to a tracker planted in the transmitter which he had used to contact Ezra, the Imperials were able to track down the rebel ship Ghost to an unstable star cluster in Wild Space.[15]
When the Ghost began penetrating the unstable star cluster, Hondo marveled that the rebels were trying a dangerous feat. This prompted Kallus to respond that they believed that they could. With Kallus' Imperial cruiser unable to follow the Ghost into the star cluster, Hondo remarked that Kallus should wait to catch them the next time. Kallus then responded that the rebels would be destroyed by the gravitational pull of the star cluster. Despite the odds, the rebels and the Lasat refugees managed to navigate safely through the maze due to Zeb's bo-rifle. They then rediscovered the legendary Lasat homeworld of Lira San, which was already populated by millions of Lasat and became a refuge for the two Lasat refugees.[15]
Heist at Reklam Station
Hondo gives the Phoenix and Spectres Reklam Station
Following the events on Nixus Hub 218, Hondo was imprisoned by the Empire at the Imperial prison on Naraka. He shared his cell with the Ugnaught laborer Terba, who had been imprisoned for trying to escape the Imperial junkyard Reklam Station inside the planet Yarma. Reklam Station was being used to dismantle several decommissioned Republic starfighters including Y-wing starfighters. Seeking pecuniary reward and to escape the prison, Terba related the information to Hondo. Hondo then convinced the Spectres particularly his former one-time partner Ezra Bridger to rescue him in return for disclosing this valuable information. In 2 BBY, Ezra and his fellow rebels staged a rescue and managed to evacuate Hondo. However, Terba was killed during the escape attempt when he separated from the rebels after Hondo refused to give him a double share.[16]
After his escape, Hondo accompanied the Spectres back to Chopper Base on the planet Atollon. There, he tried to convince Hera to sell him the Ghost but was rebuffed by the rebel captain. Hondo then reiterated his demand for a ship equipped with a hyperdrive, detachable cargo bay, shield generator, and a crew. In response, the Phoenix Cell's Commander Jun Sato reminded the pirate that he would be paid only if his information was useful. Hondo then informed the rebels about Reklam Station and the Y-wings being dismantled there. At the urging of the former Clone Captain Rex and Ezra, Hera agreed to send a reconnaissance mission there to investigate Hondo's claims.[16]
Hondo and Ezra's team including Rex traveled to Yarma in the assault shuttle Phantom. Since they could not travel there directly the Phantom exited hyperspace at Sereeda Waypoint. Hondo warned them that it was not a good idea since Sereeda was located in Mining Guild space. As Hondo had forewarned, the Phantom was intercepted by a Mining Guild patrol. Following a brief dogfight, the rebels fled into hyperspace and reached Yarma. Hondo then guided Sabine to Reklam Station, which lay inside the gassy planet's atmosphere. On the way, the rebels were ambushed by two DTS-series Dismantler Droids but managed to shoot them down. Despite being hit, Sabine managed to land the Phantom beneath one of the orbital station's platforms.[16]
After boarding the station, Hondo and the rebels encountered several Ugnaught laborers including Melch. While Ezra wanted to ignore them, Hondo spoke to the Ugnaughts and told them that he was Terba's friend and that the rebels had come to liberate them. Ezra then asked Hondo to convince Melch to shut down the conveyor belt. Following a skirmish with Imperial stormtroopers and dismantler droids, the rebels, Hondo and the Ugnaughts managed to steal five Y-wings. Hondo and the Ugnaughts followed Ezra to the command center but stopped to guard an Imperial landing craft in the hangar. After the station began to collapse, Hondo and his Ugnaught allies took the shuttle and fled offworld. Before leaving, Hondo contacted Ezra to thank him and his friends for rescuing him.[16]
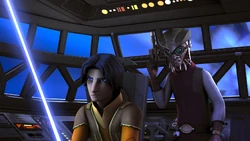
When Ezra was later captured by the Imperial Viceroy Gar Saxon during a mission to the third moon of Concord Dawn, Ezra claimed that he worked as part of Hondo's scavenging party. However, Saxon was not fooled and continued interrogating his prisoner.[17]
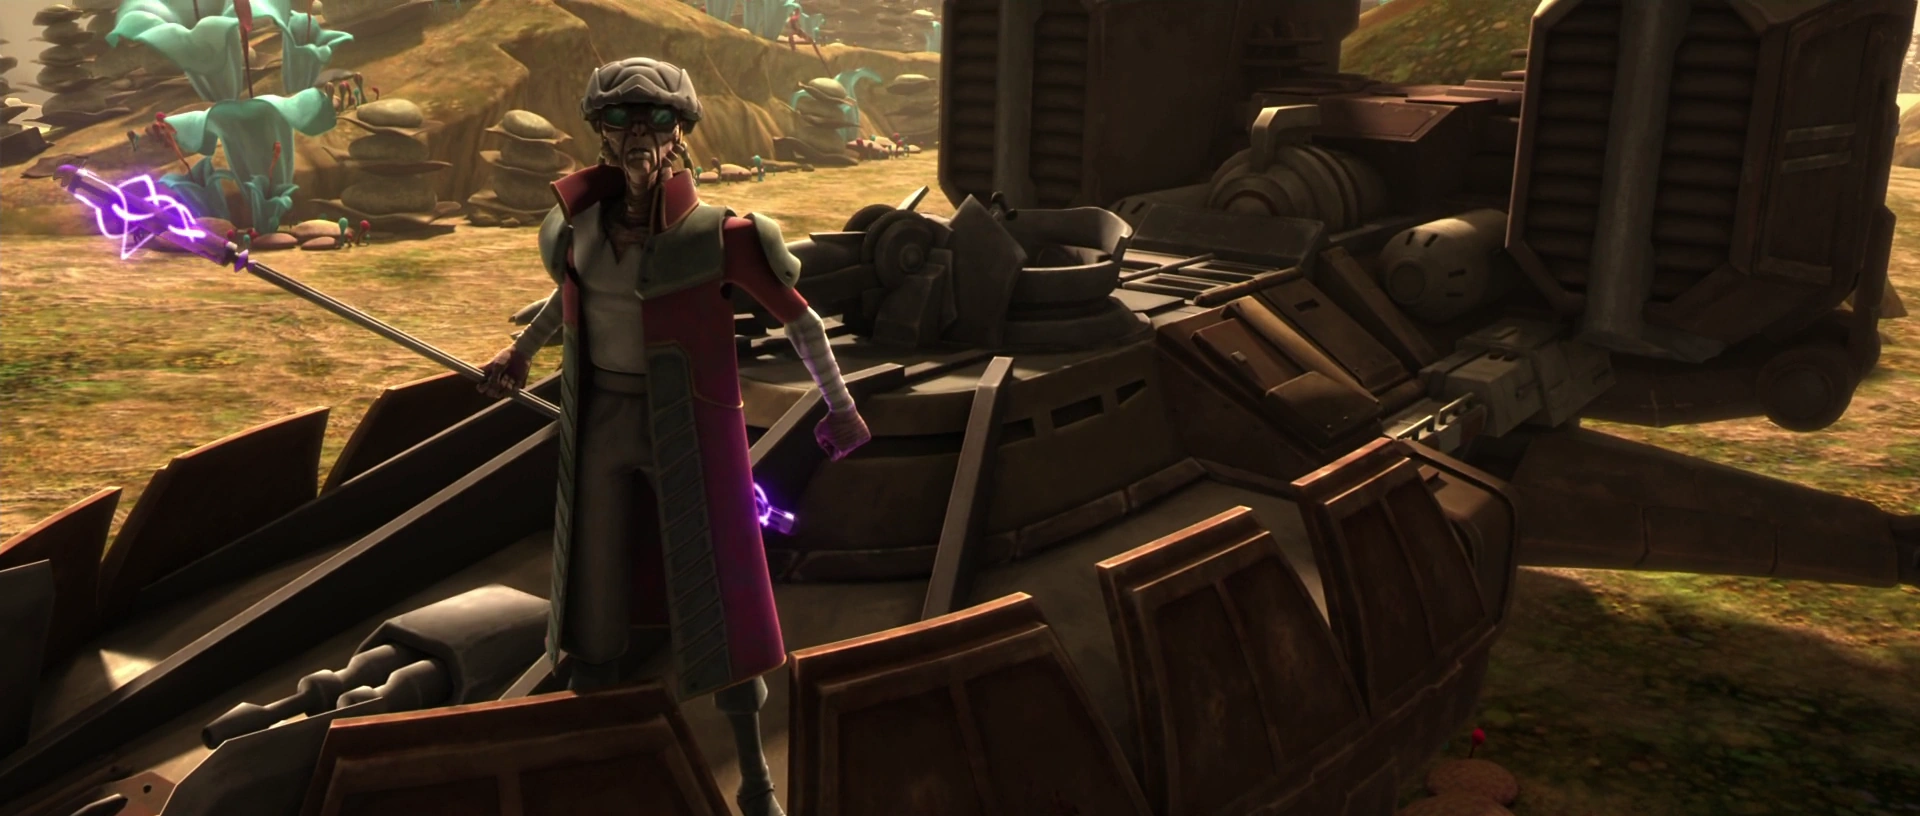
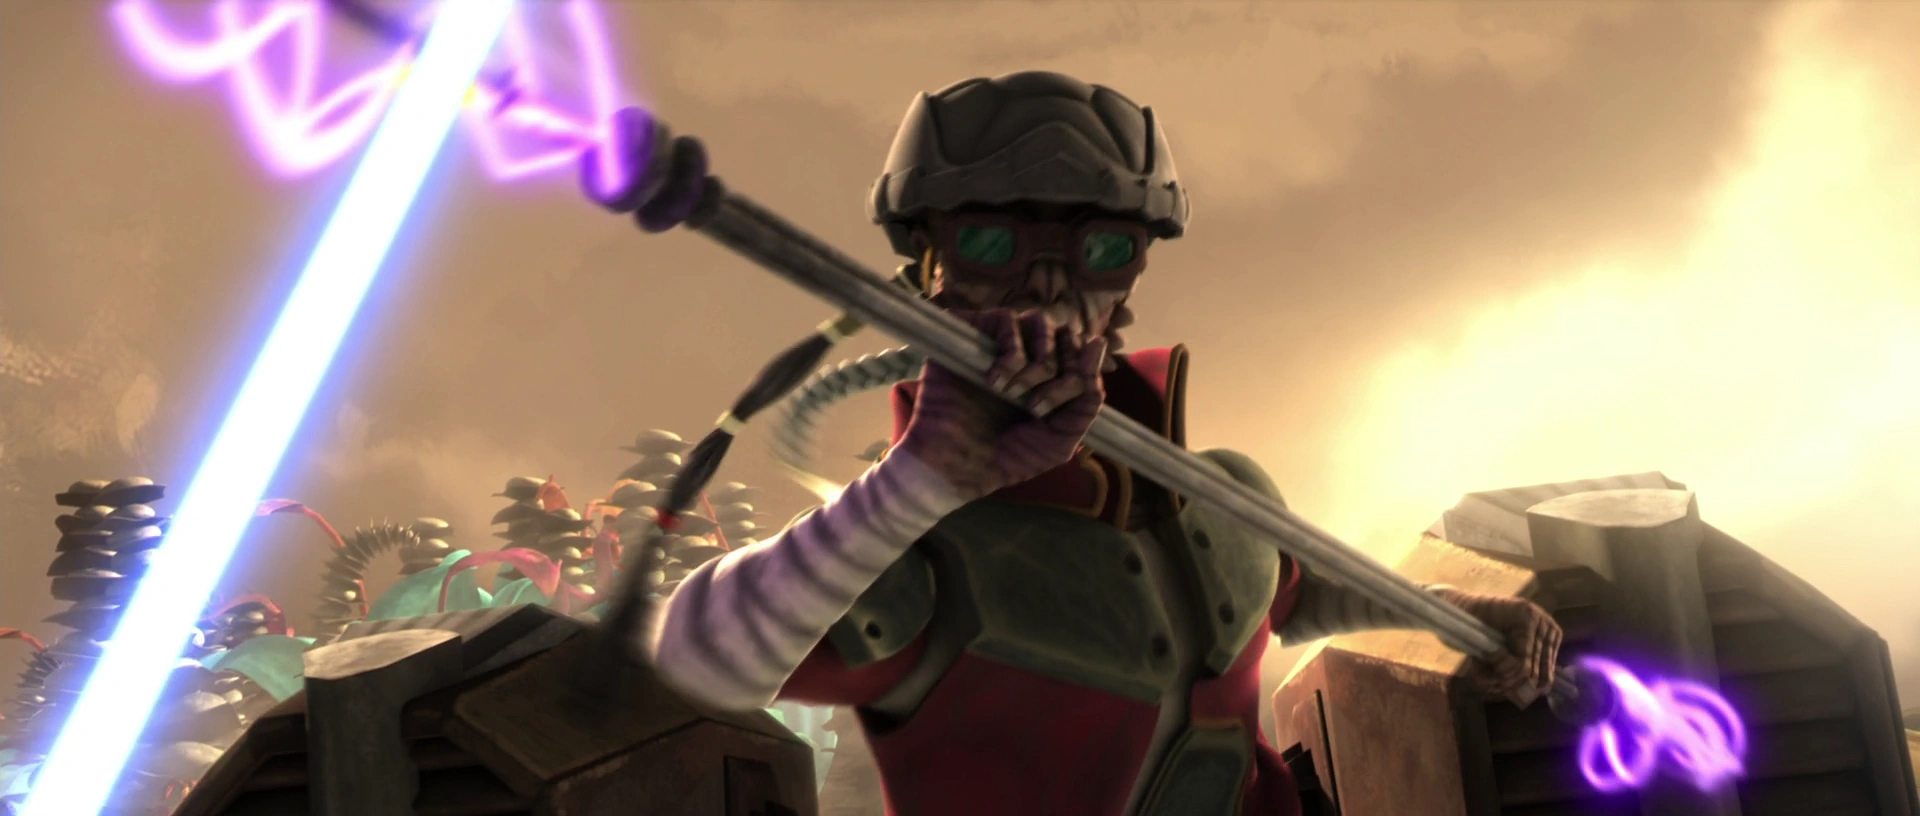
Theft of the Argora
Hondo with the Argora as he meets up with the Spectres
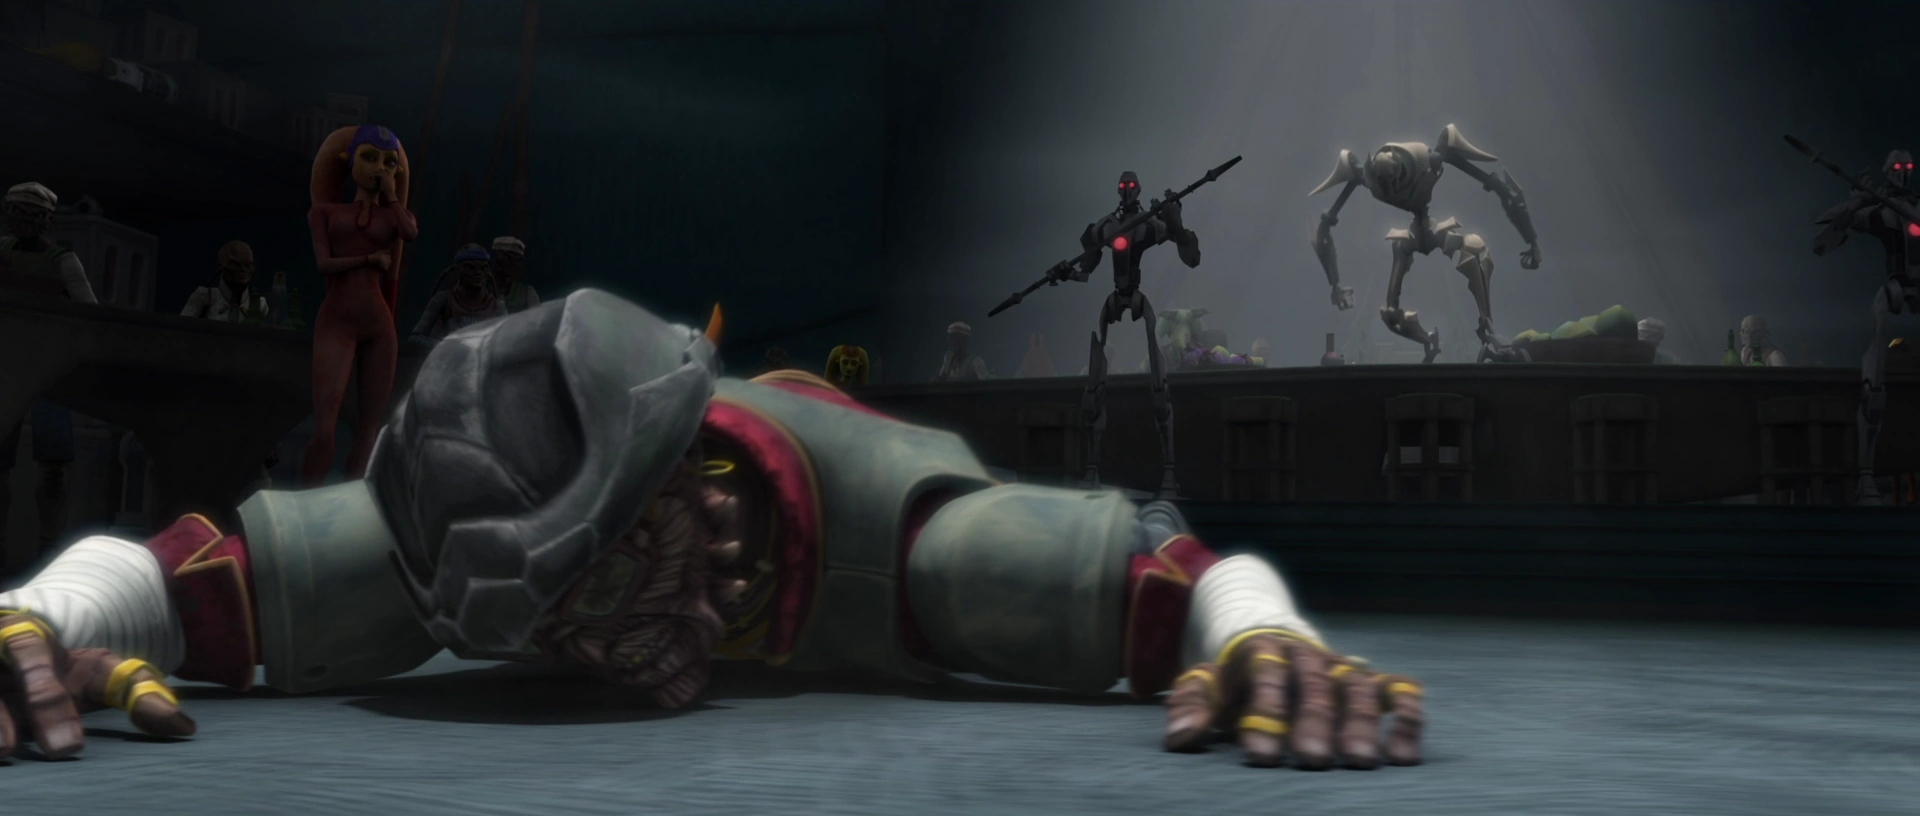
Hondo then tipped off Ezra about the rare creature, the Argora, being held a Class four container transport that acted as the Emperor's personal zoo. Hondo then boarded the transport where he found the Argora. Unfortunately, Hond did not know which crate the Argora was in and inadvertently released the other captive creatures. As Hondo made his way to escape the creatures, he ran into the Spectres. At first, Hondo refused to hand the Argora over to them and told them that they had other things to worry about than stormtroopers.[18]
As the creatures approached both Hondo and the Spectres, he then tried to make his escape. Hondo was then chased by Ezra, who demanded Hondo to surrender the Argora. Unfortunately, Hondo and Ezra were then confronted by stormtroopers under Dr. Hazlekk and Captain Zarda. As the stormtroopers prepared to fire, Hondo again made his escape when the rest of the Spectres arrived. Hondo and Ezra then worked together in trapping Hazlekk, Zarda and their stormtroopers behind a force field. Hondo then tried to make off with the Argora, but Ezra released it. Hondo then came under attack from it and decided to give it to the rebels. Hondo then boarded the Last Chance and left.[19]
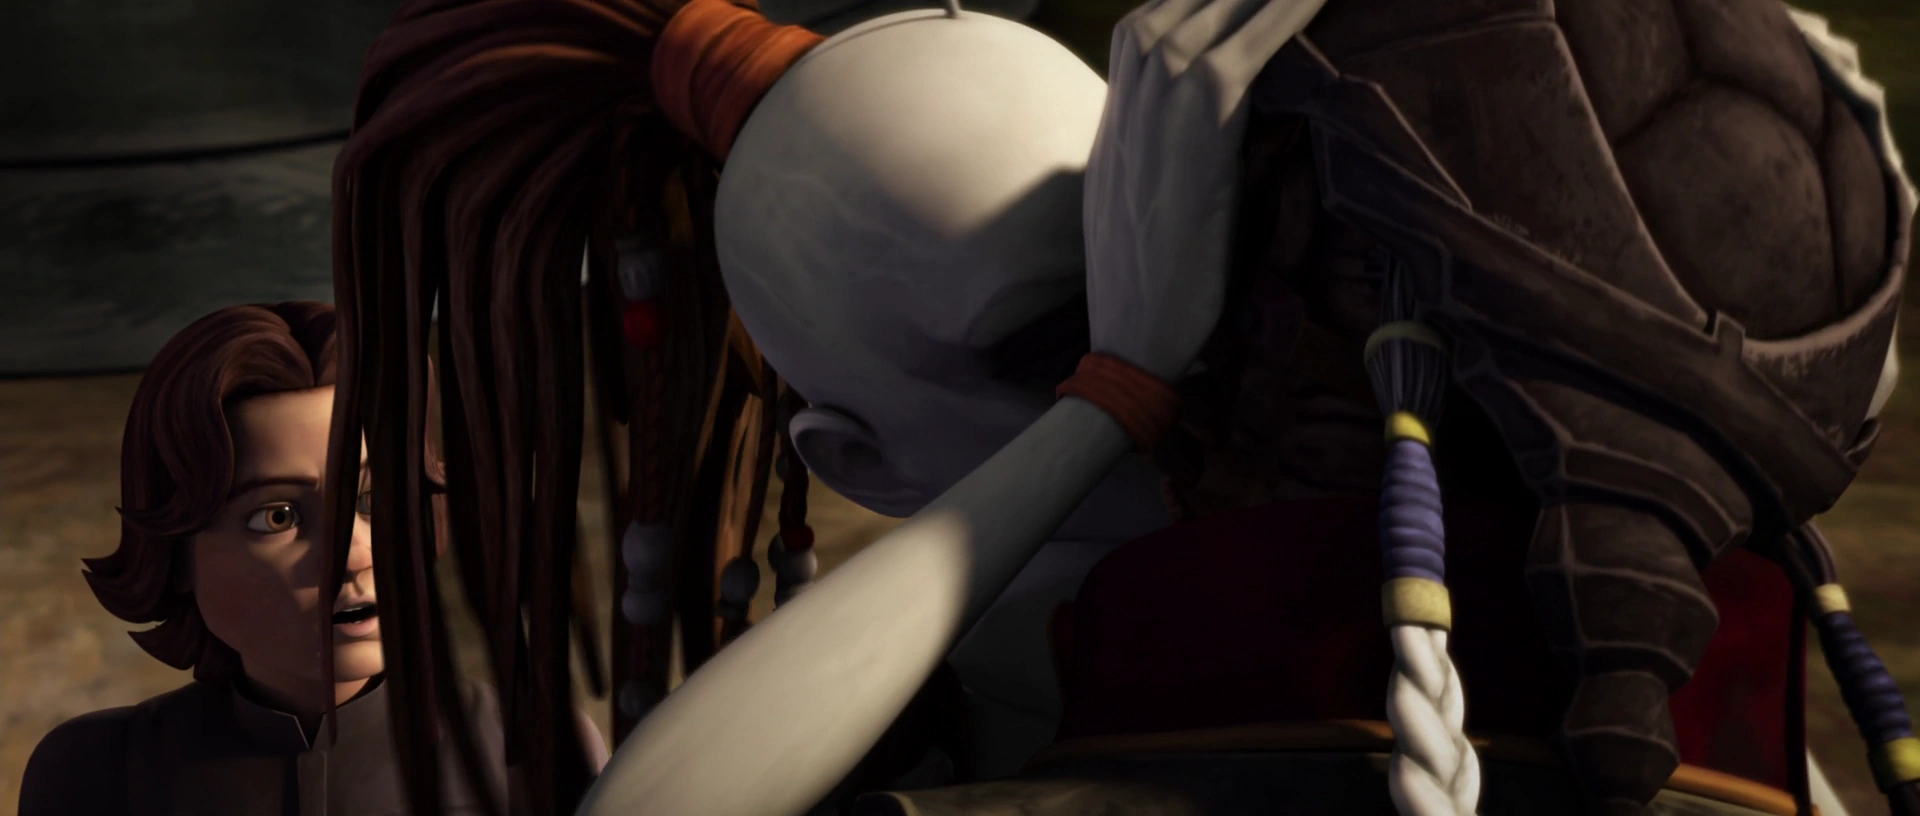
Treasure hunting on Wynkahthu
Hondo, Melch, Azmorigan, and the Spectres
Later, Hondo struck a business partnership with the Jablogian crime lord Azmorigan, who had acquired the flight plan for an Imperial cargo ship. Azmorigan had learned that the cargo ship was carrying treasures and proton bombs. The two partners and Hondo's Ugnaught crew ambushed the cargo ship near the planet Wynkahthu. However, the cargo ship drifted into the planet's stormy upper atmosphere. Hondo sent his Ugnaught crew to board the ship but most of them were lost due to the dangerous windy conditions. Only Melch survived the boarding and Hondo abandoned his last crew member to his fate.[20]
With their plan in tatters, Hondo contacted his old friend Ezra Bridger and solicited the help of his rebel cell. While Hera was opposed to working with Hondo and Azmorigan due to their negative past encounters, she agreed to commit her crew and ship Ghost after learning that the cargo ship contained proton bombs, which the rebellion desperately needed. Following some discussion, Hondo and Azmorigan agreed to split the treasure while the rebels obtained the proton bombs. After assessing the situation, the rebels decided to board the cargo ship by leaping on its hull and then opening the cargo bay. They would load the cargo onto the ship by firing grappling guns.[20]
When the rebel recovery team assembled in the Ghost's cargo bay, Hondo tried to dissuade Azmorigan from coming by claiming that the recovery mission was too arduous for the frail Jablogian. However, Azmorigan insisted on coming along and threatened not to let the mission go ahead unless he came. After leaping onto the hull, Hondo, Azmorigan and the Spectres led by Zeb managed to find a manhole which led inside the ship. Hondo soon encountered Melch, who attacked him for abandoning him. At the urging of Zeb, Hondo admitted that he had contracted the rebels after losing his Ugnaught crew. Hondo managed to win Melch over by offering him a two percent share of the treasure.[20]
While Zeb was angry at Hondo's deception, Ezra tried to defend him by claiming he at least told half the truth. Hondo, Azmorigan, and the rebels managed to enter the cargo bay with the help of Chopper and Ezra. Once inside, Hondo and Azmorigan squabbled over the treasure while the rebels began preparations to load the proton bombs aboard the Ghost. Using grappling guns, they managed to fire two cables onto the Ghost. The rebels used the cables to tow the proton bombs aboard the Ghost.[20]
After Hondo tried to load one of his treasures with Ezra's help, Zeb objected and reminded Hondo that the rebels got to load their weapons first. After Azmorigan disappeared and Zeb vanished while trying to find him, Ezra tried to ask Hondo for help but the Weequay pirate was more concerned about his share of the treasure. Hondo also told Ezra that Azmorigan was his business partner and acquaintance. As a result, Ezra realized that Hondo only cared for himself. Ezra subsequently discovered that Zeb and Azmorigan had been locked in the brig by an Imperial sentry droid. He managed to free them but the rebels and Azmorigan were pursued by more sentry droids.[20]
When Ezra and the others returned to the cargo bay with sentry droids behind them, Hondo and Melch were attempting to load a crate onto the cables. Ezra told them to get ready to leave but Hondo insisted on taking the treasure. Amidst the confusion, Melch hid inside a crate; not trusting Hondo to save him. Hondo was unconcerned about Melch's disappearance and claimed that he had fallen to his death. Hondo and Azmorigan raced each other on the cables back to the Ghost while clutching to their cargo. Chopper, Ezra, and Zeb followed soon. The Imperial cargo ship then fell into the vortex and exploded, destroying everything aboard.[20]
Back aboard the Ghost, Hondo and Azmorigan fought over a chest only to discover a hidden Melch inside. While Hondo was disappointed at not getting his share of the treasure, he claimed to have learned the value of friendship. Melch punched him in the chest to indicate that he did not trust Hondo's words. Hera then ordered Hondo and his associates to continue their conversation on their stolen Imperial landing craft.[20]
Galactic Civil War


Hondo Ohnaka, during the Galactic Civil War
Sometime after the Battle of Yavin, Saponza, together with his partner, accepted a contract with Hondo, who had been watching Saponza's partner's work. The business venture involved undertaking various important jobs for a means of profit.[21]
Cold war
During the era of the cold war between the First Order and the Resistance, Hondo made a deal with Chewbacca on the planet Batuu to use the Millennium Falcon in his latest endeavor.[22]
Legacy
- "Do not wait for opportunity to strike. Steal it instead!"
- ―From the Book of Hondo
Decades after the Battle of Endor, the Book of Hondo would be attributed to the pirate.[23]
Personality and traits
- "You don't survive in the Outer Rim by being stupid!"
- ―Hondo Ohnaka
Hondo Ohnaka was a self-centered, avaricious pirate who was solely concerned with getting the best business deal for himself. His avarice led him to kidnap and ransom several high profile prisoners during the Clone Wars including Count Dooku, and the Jedi Anakin Skywalker, Obi-Wan Kenobi, and Ahsoka Tano. These characteristics occasionally brought him into trouble with the Jedi, the Republic, the Separatists, and even his own men who attempted to emulate his behavior to advance their own interests.[3][6][11] Ohnaka carried his avaricious and treacherous nature into the Age of the Empire by exploiting and betraying several "business partners" he collaborated with including Cikatro Vizago, Ezra Bridger, and the Lasat refugees Chava and Gron.[14][15]


Hondo makes a deal with Chewbacca
Despite his avarice and treacherous nature, Ohnaka was still capable of honor and courage.[4] On one occasion, he successfully convinced the young bounty hunter Boba Fett to reveal the location of two Republic hostages by telling Boba that it was the honorable thing to do, and what Jango would have done. On a later occasion, he joined forces with his former Jedi prisoner Ahsoka and several Jedi younglings to fight off General Grievous and his droid forces. Ohnaka admired the courage and devotion of the Jedi younglings particularly the youngling Katooni.[9] Ohnaka also had a reputation as a reliable businessman who kept his word. He honored his promise to deliver several rocket launchers to General Skywalker's beleaguered Republic forces on Onderon.[10] And, despite selling out the Rebels for a profit, Ohnaka didn't run off immediately. He warned Ezra of the incoming stormtroopers and helped the Rebels escape. This showed that even though Ohnaka wanted to make a profit, he still didn't want any harm to come to Ezra.[15]
A portrait of Hondo in Maz Kanata's castle on Takodana
Hondo Ohnaka also had a romantic relationship with the bounty hunter Aurra Sing, whom he secretly rescued after her ship had been shot down by Jedi forces.[4] In addition, Hondo could speak Ugnaught which helped him to befriend several Ugnaught laborers including Terba. He used his command of the Ugnaught language to convince the Ugnaught laborers at Reklam Station to help the rebels steal Y-wing starfighters and to accept him as their leader. Ohnaka was also skilled at linking other people's interests to his own goals and ambitions. He sold the Phoenix Group information about Y-wing starfighters at Reklam Station in return for gaining a ship and crew. In the end, the rebels did not have to pay Hondo directly because he found a ship and crew at Reklam Station himself.[16]
Ohnaka was also known for his flowery rhetoric and liked to refer to his Ugnaught crew as his "short, fragrant family." While he claimed to regard his Ugnaught crew as his family, Ohnaka was not above abandoning them when danger arose. Ohnaka's betrayal angered Melch, who attacked him. However, Ohnaka managed to placate the Ugnaught by offering him a two percent share of the treasure. While Bridger respected Ohnaka as a tricky but friendly business partner, Hera Syndulla and Kanan Jarrus regarded him as a slippery and untrustworthy character. While Ohnaka claimed to care for his "partners", he was known to put his pecuniary interests ahead of others; as exemplified by his exploitative attitude towards Azmorigan.[20]
By 2 BBY, Hondo Ohnaka was aging and his hair had turned gray.[20]
Skills and abilities
Hondo Ohnaka was a competent and able leader who was able to keep his men in check and to lead the Ohnaka Gang on salvaging and raiding expeditions. During a skirmish on Felucia, Hondo showed a reasonable understanding of battle tactics. He was also skilled enough to handle an electrostaff in combat and managed to put up a decent fight against the Jedi Knight Anakin Skywalker, though he was ultimately outfought.[7] In addition, Ohnaka was also able to take on numerous opponents and fought several battle droids with a blaster and cutlass.[13] On a later occasion, Ohnaka managed to outwit the crime lord Vizago and his body guards and seize control of his ship, the Broken Horn.[14]
Behind the scenes


Hondo in The Freemaker Adventures
Hondo Ohnaka first appeared in the Cartoon Network The Clone Wars television episode "Dooku Captured", which first premiered on January 2, 2009. He was voiced by Jim Cummings, who later reprised his role in several The Clone Wars episodes and the Disney XD television series Star Wars Rebels. In addition, he has also appeared in other canon literature like Christie Golden's short story "Kindred Spirits". Cummings has also voiced Hondo in the non-canon LEGO Star Wars: The Freemaker Adventures episode "The Test", which premiered on July 25, 2016.
At Disney's 2017 D23 Expo, it was revealed that Hondo would be a part of the Star Wars: Galaxy's Edge park area. Artwork depicted Hondo and Chewbacca making a deal involving the Millennium Falcon, providing the back story for the attraction that will allow guests to fly on board the freighter.[24]
Appearances
Non-canon appearances
 LEGO Star Wars: The Freemaker Adventures — "The Test"
- LEGO Star Wars: The Freemaker Adventures — "The Storms of Taul"
- LEGO Star Wars: The Force Awakens (DLC)
- Star Wars: Galaxy's Edge
Sources
Notes and references
- ↑ 1.0 1.1 Ultimate Star Wars
- ↑ 2.0 2.1 2.2 2.3
 Hondo Ohnaka in the Encyclopedia (content now obsolete; backup link)
- ↑ 3.0 3.1 3.2 3.3 3.4 3.5 3.6 3.7 3.8 Star Wars: The Clone Wars — "Dooku Captured"
- ↑ 4.0 4.1 4.2 4.3 4.4 Star Wars: The Clone Wars — "Lethal Trackdown"
- ↑ Darth Maul, Part II
- ↑ 6.0 6.1 6.2 6.3 6.4 Star Wars: The Clone Wars — "The Gungan General"
- ↑ 7.0 7.1 7.2 7.3 7.4 Star Wars: The Clone Wars — "Bounty Hunters"
- ↑ Star Wars: The Clone Wars — "Assassin"
- ↑ 9.0 9.1 9.2 9.3 9.4 Star Wars: The Clone Wars — "A Necessary Bond"
- ↑ 10.0 10.1 Star Wars: The Clone Wars — "Tipping Points"
- ↑ 11.0 11.1 Star Wars: The Clone Wars — "A Test of Strength"
- ↑ Star Wars: The Clone Wars — "Bound for Rescue"
- ↑ 13.0 13.1 13.2 Star Wars: The Clone Wars — "Revival"
- ↑ 14.0 14.1 14.2 14.3 14.4 14.5 14.6 14.7 Star Wars Rebels — "Brothers of the Broken Horn"
- ↑ 15.0 15.1 15.2 15.3 15.4 15.5 Star Wars Rebels — "Legends of the Lasat"
- ↑ 16.0 16.1 16.2 16.3 16.4 Star Wars Rebels: Steps Into Shadow
- ↑ Star Wars Rebels — "Imperial Super Commandos"
- ↑ "[[Endangered, Part 1]]" — Star Wars Adventures (2017) 7
- ↑ "[[Endangered, Part 2]]" — Star Wars Adventures (2017) 8
- ↑ 20.0 20.1 20.2 20.3 20.4 20.5 20.6 20.7 20.8 Star Wars Rebels — "The Wynkahthu Job"
- ↑ Star Wars: Commander
- ↑ Star Wars: Galaxy's Edge
- ↑ "The Crimson Corsair and the Lost Treasure of Count Dooku"
- ↑ Star Wars: Galaxy's Edge name, details announced for Walt Disney World, Disneyland - D23 Expo 2017 by Inside the Magic, published by YouTube on youtu.be (July 16, 2017) (backup link not verified!)