mNo edit summary |
m (Bot: Automated text replacement (-''Princess Leia 4'' +''Princess Leia'' 4, -''Princess Leia 3'' +''Princess Leia'' 3, -''Princess Leia 5'' +''Princess Leia'' 5, -''[[Princes...) |
||
| (84 intermediate revisions by 18 users not shown) | |||
| Line 12: | Line 12: | ||
*[[General Staff]]<ref name="Dawn">''[[Dawn of Rebellion]]''</ref> |
*[[General Staff]]<ref name="Dawn">''[[Dawn of Rebellion]]''</ref> |
||
|staff= |
|staff= |
||
| − | |subunit=*[[ |
+ | |subunit=*[[Administration]]<ref name="Dawn" /> |
| − | *[[Administration]]<ref name="Dawn" /> |
||
*[[Army Air Corps]]<ref name="Dawn" /> |
*[[Army Air Corps]]<ref name="Dawn" /> |
||
*[[Army Engineering Corps]]<ref name="Dawn" /> |
*[[Army Engineering Corps]]<ref name="Dawn" /> |
||
| + | *[[Assault Armor Division]]<ref name="JFO">''[[Star Wars Jedi: Fallen Order]]''</ref> |
||
*[[General maintenance]]<ref name="Dawn" /> |
*[[General maintenance]]<ref name="Dawn" /> |
||
*[[Imperial Armor Corps]]<ref name="Dawn" /> |
*[[Imperial Armor Corps]]<ref name="Dawn" /> |
||
| Line 56: | Line 56: | ||
==History== |
==History== |
||
===Formation=== |
===Formation=== |
||
| − | [[File:We Fight We Win.png|thumb|right|175px|An Imperial Army officer on the recruitment |
+ | [[File:We Fight We Win.png|thumb|right|175px|An Imperial Army officer on the recruitment poster ''[[We Fight, We Win]]'' by [[Stassen Bine]].]] |
The [[Galactic Empire|Imperial]] Army originated from the [[Grand Army of the Republic|Grand Army]] of the [[Galactic Republic]], and served as the Empire's ground forces for maintaining control of the countless worlds under the [[New Order]].<ref name="Rebels Visual Guide">''[[Star Wars Rebels: The Visual Guide]]''</ref> The Emperor's policy of military expansion saw the continued growth of the Imperial Army under the guise of combating remaining [[Separatist holdouts]].<ref name="Dawn" /> |
The [[Galactic Empire|Imperial]] Army originated from the [[Grand Army of the Republic|Grand Army]] of the [[Galactic Republic]], and served as the Empire's ground forces for maintaining control of the countless worlds under the [[New Order]].<ref name="Rebels Visual Guide">''[[Star Wars Rebels: The Visual Guide]]''</ref> The Emperor's policy of military expansion saw the continued growth of the Imperial Army under the guise of combating remaining [[Separatist holdouts]].<ref name="Dawn" /> |
||
| Line 64: | Line 64: | ||
In [[14 BBY]], Imperial Army forces were garrisoned on the Imperial [[Protectorate (government system)|protectorate]] of [[Ryloth]], which was in reality under Imperial occupation. [[Colonel]] [[Belkor Dray]] served as [[Governor]] [[Moff]] [[Delian Mors]]' second-in-command and commanded the Imperial Army forces on Ryloth. The stormtroopers on Ryloth operated outside the Imperial Army command structure and answered directly to the Empire. He used his senior position within the Imperial government and military on Ryloth to [[spy]] for [[Cham Syndulla]], the leader of the [[Free Ryloth movement]]. Other elements of the Imperial Army were stationed at the [[Equatorial Communications Hub]], which was commanded by [[Major]] [[Steen Borkas]]. Though their base was attacked, Borkas' forces including stormtroopers assisted Moff Mors in rescuing [[Galactic Emperor|Emperor]] [[Darth Sidious|Palpatine]] and [[Anakin Skywalker|Darth Vader]] and foiling Dray and Syndulla's [[Mission to Ryloth|plot to assassinate]] the Empire's leadership. Following the failed assassination attempt, the Imperial authorities embarked on a crackdown on Ryloth and strengthened the stormtrooper presence on the planet.<ref name="LotS" /> |
In [[14 BBY]], Imperial Army forces were garrisoned on the Imperial [[Protectorate (government system)|protectorate]] of [[Ryloth]], which was in reality under Imperial occupation. [[Colonel]] [[Belkor Dray]] served as [[Governor]] [[Moff]] [[Delian Mors]]' second-in-command and commanded the Imperial Army forces on Ryloth. The stormtroopers on Ryloth operated outside the Imperial Army command structure and answered directly to the Empire. He used his senior position within the Imperial government and military on Ryloth to [[spy]] for [[Cham Syndulla]], the leader of the [[Free Ryloth movement]]. Other elements of the Imperial Army were stationed at the [[Equatorial Communications Hub]], which was commanded by [[Major]] [[Steen Borkas]]. Though their base was attacked, Borkas' forces including stormtroopers assisted Moff Mors in rescuing [[Galactic Emperor|Emperor]] [[Darth Sidious|Palpatine]] and [[Anakin Skywalker|Darth Vader]] and foiling Dray and Syndulla's [[Mission to Ryloth|plot to assassinate]] the Empire's leadership. Following the failed assassination attempt, the Imperial authorities embarked on a crackdown on Ryloth and strengthened the stormtrooper presence on the planet.<ref name="LotS" /> |
||
| + | [[File:Solo & Staz.jpg|thumb|left|The 224th Imperial Armored Division of the Imperial Army was engaged in a campaign for the planet Mimban.|217x217px]] |
||
| − | During [[10 BBY]], the mighty Imperial Army focused its sights on the swampy world of [[Mimban]], a planet known for its abundance of natural resources. At the behest of [[Grand Moff]] [[Wilhuff Tarkin]], all regional governors were required to immediately increase production of materials |
+ | During [[10 BBY]], the mighty Imperial Army focused its sights on the swampy world of [[Mimban]], a planet known for its abundance of natural resources. At the behest of [[Grand Moff]] [[Wilhuff Tarkin]], all regional governors were required to immediately increase production of materials benefiting the Imperial cause. [[Bin Essada]], governor of the [[Circarpous sector]] within the [[Expansion Region]], ordered all necessary resources to be stripped from Mimban at once, disregarding the [[Mimbanese|indigenous population]]. The combined forces of the Imperial Army and [[Imperial Navy]] promptly invaded the planet, launching the [[Mimban campaign]] and initiating a bloody conflict between the [[Trench warfare|entrenched]] Mimbanese and Imperials. The Imperial Army utilized its army soldiers in tandem with the more elite [[Wet-weather gear stormtrooper|Stormtroopers]], along with [[All Terrain Defense Turret]]s, [[Y-45 armored transport hauler|AT-haulers]] and air support provided by naval [[TIE/ln space superiority starfighter|TIE fighters]] to pacify the stubborn Mimbanese guerillas. Among the battered army soldiers was a young [[Han Solo]], serving as a [[corporal]] within the [[224th Imperial Armored Division|224th Imperial Armored Division.]] Solo initially attended the [[Carida Academy]] in the hopes of one day becoming an [[TIE fighter pilot|Imperial pilot]] and returning to his homeworld of [[Corellia]]. However the maverick prospect was eventually transferred to infantry duty on Mimban following multiple instances of insubordination and recklessness. Though the seizure of resources was the military's primary goal during the campaign, they also sought to establish a regime that fell under the direct jurisdiction of the Galactic Empire. |
By [[5 BBY]], [[Lothal]]'s [[Academy for Young Imperials]] was training [[Imperial cadet]]s for both the Imperial Army and Stormtrooper Corps. Cadets selected for the stormtrooper program received a more rigorous program than those training for the Army track.<ref name="EotG">''[[Servants of the Empire: Edge of the Galaxy]]''</ref> Cadets training as Imperial Army officers including [[Zare Leonis]] underwent a series of grueling training exercises including multiple sessions in a simulated combat chamber called [[The Well (Imperial Academy)|The Well]].<ref name="RitR">''[[Servants of the Empire: Rebel in the Ranks]]''</ref> Promising Army officer cadets also underwent training at the [[Arkanis Academy]], which was run by the charismatic [[Commandant]] [[Brendol Hux]],<ref name="TSA">''[[Servants of the Empire: The Secret Academy]]''</ref> the architect of the [[First Order]]'s [[Stormtrooper (First Order)|stormtrooper]] program.<ref name="TFATVD">''[[Star Wars: The Force Awakens: The Visual Dictionary]]''</ref> |
By [[5 BBY]], [[Lothal]]'s [[Academy for Young Imperials]] was training [[Imperial cadet]]s for both the Imperial Army and Stormtrooper Corps. Cadets selected for the stormtrooper program received a more rigorous program than those training for the Army track.<ref name="EotG">''[[Servants of the Empire: Edge of the Galaxy]]''</ref> Cadets training as Imperial Army officers including [[Zare Leonis]] underwent a series of grueling training exercises including multiple sessions in a simulated combat chamber called [[The Well (Imperial Academy)|The Well]].<ref name="RitR">''[[Servants of the Empire: Rebel in the Ranks]]''</ref> Promising Army officer cadets also underwent training at the [[Arkanis Academy]], which was run by the charismatic [[Commandant]] [[Brendol Hux]],<ref name="TSA">''[[Servants of the Empire: The Secret Academy]]''</ref> the architect of the [[First Order]]'s [[Stormtrooper (First Order)|stormtrooper]] program.<ref name="TFATVD">''[[Star Wars: The Force Awakens: The Visual Dictionary]]''</ref> |
||
===Battling the Rebellion=== |
===Battling the Rebellion=== |
||
| − | [[File:Atathoth.jpg|thumb| |
+ | [[File:Atathoth.jpg|thumb|right|250px|Imperial AT-AT walkers during the Battle of Hoth.]] |
During both the [[Early rebellion against the Galactic Empire|early rebellion]] and the [[Galactic Civil War]], the Imperial Army saw action against various rebel forces including the [[Spectres]],<ref name="Spark of Rebellion">''[[Star Wars Rebels: Spark of Rebellion]]''</ref> the [[Phoenix Cell]],<ref name="Legacy">{{Rebels|Legacy (episode)|Legacy}}</ref> [[Saw Gerrera]]'s [[Partisans]], and the [[Alliance to Restore the Republic]].<ref name="Rogue One" /> The Imperial Army was deployed on many worlds across the galaxy including [[Tatooine]]<ref name="ANH" /> and saw action on multiple locations including [[Hoth]]<ref name="TESB">[[Star Wars: Episode V The Empire Strikes Back|''Star Wars'': Episode V ''The Empire Strikes Back'']]</ref> and [[Endor]].<ref name="ROTJ">[[Star Wars: Episode VI Return of the Jedi|''Star Wars'': Episode VI ''Return of the Jedi'']]</ref> During the [[Battle of Hoth]], [[General]] [[Maximillian Veers]] commanded the Imperial ground assault on [[Echo Base]].<ref name="TESB" /> At the [[Battle of Endor]], Imperial Army forces and stormtroopers defended the [[Death Star II|second Death Star's]] [[Death Star's shield generator|shield generator]]. Despite dogged resistance, the Imperial forces on Endor were defeated by the rebels and their local [[Ewok]] allies.<ref name="ROTJ" /> |
During both the [[Early rebellion against the Galactic Empire|early rebellion]] and the [[Galactic Civil War]], the Imperial Army saw action against various rebel forces including the [[Spectres]],<ref name="Spark of Rebellion">''[[Star Wars Rebels: Spark of Rebellion]]''</ref> the [[Phoenix Cell]],<ref name="Legacy">{{Rebels|Legacy (episode)|Legacy}}</ref> [[Saw Gerrera]]'s [[Partisans]], and the [[Alliance to Restore the Republic]].<ref name="Rogue One" /> The Imperial Army was deployed on many worlds across the galaxy including [[Tatooine]]<ref name="ANH" /> and saw action on multiple locations including [[Hoth]]<ref name="TESB">[[Star Wars: Episode V The Empire Strikes Back|''Star Wars'': Episode V ''The Empire Strikes Back'']]</ref> and [[Endor]].<ref name="ROTJ">[[Star Wars: Episode VI Return of the Jedi|''Star Wars'': Episode VI ''Return of the Jedi'']]</ref> During the [[Battle of Hoth]], [[General]] [[Maximillian Veers]] commanded the Imperial ground assault on [[Echo Base]].<ref name="TESB" /> At the [[Battle of Endor]], Imperial Army forces and stormtroopers defended the [[Death Star II|second Death Star's]] [[Death Star's shield generator|shield generator]]. Despite dogged resistance, the Imperial forces on Endor were defeated by the rebels and their local [[Ewok]] allies.<ref name="ROTJ" /> |
||
| − | Following the death of the Emperor and Darth Vader at Endor, the Imperial Army and other branches of the Imperial Military fought against the [[New Republic]] on multiple worlds and fronts including the [[Wretch of Tayron]]<ref name="SE III">''[[Shattered Empire |
+ | Following the death of the Emperor and Darth Vader at Endor, the Imperial Army and other branches of the Imperial Military fought against the [[New Republic]] on multiple worlds and fronts including the [[Wretch of Tayron]],<ref name="SE III">''[[Shattered Empire 3]]''</ref> [[Naalol]], [[Akiva]], and [[Sevarcos]].<ref name="Aftermath">''[[Aftermath]]''</ref> By [[5 ABY]], elements of the Imperial Army on [[Kashyyyk]] came under the command of [[Grand Moff]] [[Lozen Tolruck]]. Several Imperial Army personnel were stationed at [[Lozen Tolruck's island fortress]] including [[Forest trooper]]s. Many Imperial personnel were killed when [[Han Solo]], [[Chewbacca]] and their associates staged a successful [[Liberation of Kashyyyk|Wookiee slave uprising]] against the Empire.<ref name="ALD">''[[Aftermath: Life Debt]]''</ref> |
| + | [[File:Battle of Jakku OFL.png|thumb|left|217x217px|New Republic and Imperial forces engaged in a final decisive battle on the desert world of Jakku.]] |
||
After [[Fleet Admiral]] [[Gallius Rax]] took control of most of the Imperial remnants, his forces on [[Jakku]] included elements of the Imperial Army and Stormtrooper Corps. The [[Clone Wars]] veteran General [[Hodnar Borrum]] commanded the Imperial ground forces during the cataclysmic [[Battle of Jakku]], which saw the defeat of the Empire and the triumph of the New Republic. The [[Galactic Concordance]] stipulated the dissolution of the Empire including its vast military. While civilian functionaries were given conditional pardons, all Imperial officers were designated as war criminals.<ref name="Empire's End">''[[Aftermath: Empire's End]]''</ref> |
After [[Fleet Admiral]] [[Gallius Rax]] took control of most of the Imperial remnants, his forces on [[Jakku]] included elements of the Imperial Army and Stormtrooper Corps. The [[Clone Wars]] veteran General [[Hodnar Borrum]] commanded the Imperial ground forces during the cataclysmic [[Battle of Jakku]], which saw the defeat of the Empire and the triumph of the New Republic. The [[Galactic Concordance]] stipulated the dissolution of the Empire including its vast military. While civilian functionaries were given conditional pardons, all Imperial officers were designated as war criminals.<ref name="Empire's End">''[[Aftermath: Empire's End]]''</ref> |
||
===Legacy=== |
===Legacy=== |
||
| − | The remnants of the Empire subsequently relocated to the [[Unknown Regions]] where they reestablished themselves as the First Order, a military junta dedicated to restoring the "Old Empire."<ref name="TFATVD" /> The First Order's [[First Order army|army]] was established from the remants of the former Imperial Army.<ref name="Before the Awakening" /> Brendol Hux's son [[Armitage Hux]] became a high-ranking general in the First Order's army. Nearly a generation later, the surface of Jakku was still littered with wreckage including Imperial Army AT-AT walkers, [[Hellhound Two|one of which]] became the home of the [[Force-sensitive]] scavenger [[Rey]].<ref name="TFATVD" /> |
+ | The remnants of the Empire subsequently relocated to the [[Unknown Regions]] where they reestablished themselves as the First Order, a military junta dedicated to restoring the "Old Empire."<ref name="TFATVD" /> The First Order's [[First Order army|army]] was established from the remants of the former Imperial Army.<ref name="Before the Awakening" /> Brendol Hux's son [[Armitage Hux]] became a high-ranking general in the First Order's army. Nearly a generation later, the surface of Jakku was still littered with wreckage including Imperial Army AT-AT walkers, [[Hellhound Two|one of which]] became the home of the [[Force-sensitive]] scavenger [[Rey Skywalker|Rey]].<ref name="TFATVD" /> |
==Groups== |
==Groups== |
||
| Line 96: | Line 98: | ||
===[[Division]]s=== |
===[[Division]]s=== |
||
| − | *[[Barokki's division]]<ref name="Dying Light II">''[[Darth Vader: Dark Lord of the Sith 8 |
+ | *[[Barokki's division]]<ref name="Dying Light II">''[[Darth Vader: Dark Lord of the Sith 8]]''</ref> |
*[[Maritime Division]]<ref name="Dawn" /> |
*[[Maritime Division]]<ref name="Dawn" /> |
||
*[[Unidentified armored division]]<ref name="Zero Hour">{{Rebels|Zero Hour}}</ref> |
*[[Unidentified armored division]]<ref name="Zero Hour">{{Rebels|Zero Hour}}</ref> |
||
| − | *[[224th Imperial Armored Division]]<ref name="TOG" |
+ | *[[224th Imperial Armored Division]]<ref name="Solo TOG" /> |
===[[Garrison]]s=== |
===[[Garrison]]s=== |
||
*[[975th stormtrooper garrison]]<ref name="Visual Guide" /> |
*[[975th stormtrooper garrison]]<ref name="Visual Guide" /> |
||
| − | *[[Fortress Vader Imperial garrison]]<ref name="Dark Lord 23">''[[Darth Vader: Dark Lord of the Sith 23 |
+ | *[[Fortress Vader Imperial garrison]]<ref name="Dark Lord 23">''[[Darth Vader: Dark Lord of the Sith 23]]''</ref> |
*[[Scarif garrison]]<ref name="Rogue One" /> |
*[[Scarif garrison]]<ref name="Rogue One" /> |
||
*[[Imperial Garrison (Tatooine)|Tatooine Garrison]]<ref name="Commander" /> |
*[[Imperial Garrison (Tatooine)|Tatooine Garrison]]<ref name="Commander" /> |
||
*[[Imperial Garrison (Garel)|Garel Garrison]]<ref name="Droids in Distress">{{Rebels|Droids in Distress}}</ref> |
*[[Imperial Garrison (Garel)|Garel Garrison]]<ref name="Droids in Distress">{{Rebels|Droids in Distress}}</ref> |
||
| − | *[[Imperial Garrison (Plateau City)|Plateau City Garrison]]<ref name="Kanan 4">[[Kanan 4 |
+ | *[[Imperial Garrison (Plateau City)|Plateau City Garrison]]<ref name="Kanan 4">[[Kanan 4]]</ref> |
*[[Imperial Garrison (Lothal)|Lothal Garrison]]<ref name="The Siege of Lothal">''[[Star Wars Rebels: The Siege of Lothal]]''</ref> |
*[[Imperial Garrison (Lothal)|Lothal Garrison]]<ref name="The Siege of Lothal">''[[Star Wars Rebels: The Siege of Lothal]]''</ref> |
||
*[[Imperial garrison (Mantooine)|Mantooine Garrison]]<ref name="Rebels Visual Guide" /> |
*[[Imperial garrison (Mantooine)|Mantooine Garrison]]<ref name="Rebels Visual Guide" /> |
||
| Line 118: | Line 120: | ||
*[[Imperial Ninety-Seventh Stormtrooper Legion]]<ref name="Twilight Company">''[[Battlefront: Twilight Company]]''</ref> |
*[[Imperial Ninety-Seventh Stormtrooper Legion]]<ref name="Twilight Company">''[[Battlefront: Twilight Company]]''</ref> |
||
*[[One-Oh-Seventh Stormtrooper Legion]]<ref name="Twilight Company" /> |
*[[One-Oh-Seventh Stormtrooper Legion]]<ref name="Twilight Company" /> |
||
| − | *[[291st Legion]]<ref name=" |
+ | *[[291st Legion]]<ref name="EotG" /> |
| − | *[[481st Legion]]<ref name="Nexus" /> |
+ | *[[481st Legion]]<ref name="Nexus">''[[Nexus of Power]]''</ref> |
*[[501st Legion]]<ref name="Twilight Company" /> |
*[[501st Legion]]<ref name="Twilight Company" /> |
||
| Line 131: | Line 133: | ||
*[[Squad two (Crawler 413-24)]]<ref name="Crawler Commandeers">{{Rebels|Crawler Commandeers}}</ref> |
*[[Squad two (Crawler 413-24)]]<ref name="Crawler Commandeers">{{Rebels|Crawler Commandeers}}</ref> |
||
*[[Squad Three (Lothal)|Squad Three]]<ref name="Ezra's Gamble">''[[Ezra's Gamble]]''</ref> |
*[[Squad Three (Lothal)|Squad Three]]<ref name="Ezra's Gamble">''[[Ezra's Gamble]]''</ref> |
||
| − | *[[Squad four]]<ref name="Dark Lord 24">''[[Darth Vader: Dark Lord of the Sith 24 |
+ | *[[Squad four]]<ref name="Dark Lord 24">''[[Darth Vader: Dark Lord of the Sith 24]]''</ref> |
| − | *[[Squad five]]<ref name=" |
+ | *[[Squad five]]<ref name="Spark of Rebellion" /> |
*[[Squad Five (Lothal)]]<ref name="Ezra's Gamble" /> |
*[[Squad Five (Lothal)]]<ref name="Ezra's Gamble" /> |
||
*[[Squad six]]<ref name="Dark Lord 24" /> |
*[[Squad six]]<ref name="Dark Lord 24" /> |
||
*[[Squad Seven (Lothal)|Squad Seven]]<ref name="Ezra's Gamble" /> |
*[[Squad Seven (Lothal)|Squad Seven]]<ref name="Ezra's Gamble" /> |
||
| − | *[[Squad eight]]<ref name="Spark" /> |
+ | *[[Squad eight]]<ref name="Spark of Rebellion" /> |
| − | *[[Team Nine]]<ref name="Star Wars 36">''[[Star Wars 36 |
+ | *[[Team Nine]]<ref name="Star Wars 36">''[[Star Wars 36]]''</ref> |
*[[Team Twelve (Galactic Empire)|Team Twelve]]<ref name="Star Wars 36" /> |
*[[Team Twelve (Galactic Empire)|Team Twelve]]<ref name="Star Wars 36" /> |
||
===Specialized units=== |
===Specialized units=== |
||
| − | *[[Task Force 99]]<ref name="Star Wars 19"> |
+ | *[[Task Force 99]]<ref name="Star Wars 19">[[Star Wars (2015) 19|''Star Wars 19'']]</ref> |
===Unspecified=== |
===Unspecified=== |
||
| Line 151: | Line 153: | ||
==Organization== |
==Organization== |
||
===Drivers and pilots=== |
===Drivers and pilots=== |
||
| − | [[File:ImperialArmyEndor-SWBdice.jpg|thumb|right|250px|The Imperial |
+ | [[File:ImperialArmyEndor-SWBdice.jpg|thumb|right|250px|The Imperial ground forces on the forest moon of Endor]] |
As the Imperial Army used a large variety of vehicles, they deployed different variants of the [[Imperial combat driver]].<ref name="ICD Databank">{{Databank|imperial-combat-drivers|Imperial Combat Drivers}}</ref> Several variants included [[AT-ACT driver]]s,<ref name="Visual Guide" /> [[AT-AT pilot]]s,<ref name="TESB" /> [[AT-ST driver]]s,<ref name="ROTJ" /> [[Imperial combat assault tank commander]]s,<ref name="DB 2">{{Databank|imperial-combat-assault-tank-commander|Imperial combat assault tank commanders}}</ref> and [[Imperial combat assault tank pilot]]s.<ref name="DB 1">{{Databank|imperial-combat-assault-tank-pilots|Imperial combat assault tank pilots}}</ref> As part of the Imperial Army, the Army Air Corps<ref name="Dawn" /> utilized TIE fighter pilots.<ref name="LCZA" /> |
As the Imperial Army used a large variety of vehicles, they deployed different variants of the [[Imperial combat driver]].<ref name="ICD Databank">{{Databank|imperial-combat-drivers|Imperial Combat Drivers}}</ref> Several variants included [[AT-ACT driver]]s,<ref name="Visual Guide" /> [[AT-AT pilot]]s,<ref name="TESB" /> [[AT-ST driver]]s,<ref name="ROTJ" /> [[Imperial combat assault tank commander]]s,<ref name="DB 2">{{Databank|imperial-combat-assault-tank-commander|Imperial combat assault tank commanders}}</ref> and [[Imperial combat assault tank pilot]]s.<ref name="DB 1">{{Databank|imperial-combat-assault-tank-pilots|Imperial combat assault tank pilots}}</ref> As part of the Imperial Army, the Army Air Corps<ref name="Dawn" /> utilized TIE fighter pilots.<ref name="LCZA" /> |
||
| Line 158: | Line 160: | ||
===Stormtroopers=== |
===Stormtroopers=== |
||
| − | In the early [[Imperial Era|rule]] of the Empire, the Imperial Army continued to utilize [[Cloning|clones]], as well as [[Imperial shock trooper]]s<ref name="Episode III" /> [[Purge Trooper]]s, elite clones that served under the [[Inquisitorius]] in [[18 BBY]], were from the very last production line.<ref name="Dark Lord 13">''[[Darth Vader: Dark Lord of the Sith 13 |
+ | In the early [[Imperial Era|rule]] of the Empire, the Imperial Army continued to utilize [[Cloning|clones]], as well as [[Imperial shock trooper]]s.<ref name="Episode III" /> [[Purge Trooper]]s, elite clones that served under the [[Inquisitorius]] in [[18 BBY]], were from the very last [[Kamino]] production line.<ref name="Dark Lord 13">''[[Darth Vader: Dark Lord of the Sith 13]]''</ref> As the Empire grew older, its military forces transitioned from clones to [[Reproduction|birth]]-born [[human]] recruits and conscriptions and were re-designated as stormtroopers.<ref name="Stormtrooper DB">{{Databank|stormtroopers|Stormtroopers|archivedate=20170803123953}}</ref> [[Stormtrooper commander]]s were stormtrooper [[officer]]s that commanded groups of other stormtroopers. Their rank was denoted by the colored [[pauldron]] they were equipped with.<ref name="AbEverything" /> Imperial officers who led contingents of stormtroopers aboard a [[capital ship]] were also referred to as stormtrooper commanders.<ref name="Thrawn">[[Thrawn (novel)|''Thrawn'']]</ref> |
====Elite units==== |
====Elite units==== |
||
| − | The Imperial Army used special and elite stormtroopers for a number of operations. [[Special Commando Advanced Recon trooper]]s were used for special missions,<ref name=" |
+ | The Imperial Army used special and elite stormtroopers for a number of operations. [[Special Commando Advanced Recon trooper]]s were used for special missions,<ref name="Star Wars 19" /> [[Storm Commando]]s were [[special forces]] that were efficient in close-combat tactics,<ref name="Galactic Defense">''[[Star Wars: Galactic Defense]]''</ref> [[Purge Trooper (Anoat sector)|Purge Troopers]] were special units deployed in the [[Anoat sector]],<ref name="Uprising">''[[Star Wars: Uprising]]''</ref> [[shadow trooper]]s were elite units with experimental armor,<ref name="Planets">{{Cite_web|url=http://starwars.ea.com/starwars/battlefront/planets|title=The Planets of ''Star Wars Battlefront''|publisher=ea.com|date=November 5, 2015|accessdate=November 5, 2015}}</ref><ref name="Black Series">{{HasbroCite|set=Star Wars: The Black Series|pack=Entertainment Earth Exclusive|link=hasbro-the-black-series-6-inch-imperial-forces-entertainment-earth-exclusive-multipack.asp}}</ref> and [[Imperial Shock Trooper|Imperial shock troopers]] were used as heavy frontline troops as well as [[bodyguard]]s for Emperor Palpatine himself<ref name="Black Series Shock Trooper">{{Cite_web|url=https://www.ordersixtysixtoys.co.uk/products/Star-Wars-Black-Series-6%22-%252d-Battlefront-Imperial-Shock-Trooper.html|title=Star Wars Black Series 6" - Battlefront Imperial Shock Trooper|accessdate=2015-10-24}}</ref> and as heavy weapons specialists.<ref name="Commander" /> At times, the experimental [[phase II dark trooper]]s were also used by the Imperial Army.<ref name="Commander" /> |
====Environment==== |
====Environment==== |
||
| − | The various environments in the galaxy called for a variety of stormtroopers that specialized in different surroundings. [[Swamptrooper]]s were specialized for operations on [[swamp]]ed worlds,<ref name="Dawn" /> [[seatrooper]]s were equipped for underwater combat,<ref name="RitR" /> [[magma trooper]]s and [[Crimson Stormtrooper]]s specialized in activities on [[Volcano|volcanic]] environments,<ref name="Planets" /> [[cold weather assault stormtrooper]]s for sub-zero combat,<ref name="Snowtroopers Databank">{{Databank|snowtroopers|Snowtroopers}}</ref> [[sandtrooper]]s and their sub-variant, the [[dewback trooper]], were utilized for desert operations,<ref name="Sandtroopers Databank">{{Databank|sandtroopers|Sandtroopers}}</ref><ref name="Stormtrooper DB" /> [[spacetrooper]]s for operations in vacuum environments such as [[Realspace|space]],<ref name="ANH" /> [[coastal defender stormtrooper]]s for tropical environments,<ref name="Commander" /> forest troopers for densely forested conditions,<ref name="ALD" /> and the [[wet-weather gear stormtrooper]]s, which were used on the |
+ | The various environments in the galaxy called for a variety of stormtroopers that specialized in different surroundings. [[Swamptrooper]]s were specialized for operations on [[swamp]]ed worlds,<ref name="Dawn" /> [[seatrooper]]s were equipped for underwater combat,<ref name="RitR" /> [[magma trooper]]s and [[Crimson Stormtrooper]]s specialized in activities on [[Volcano|volcanic]] environments,<ref name="Planets" /> [[cold weather assault stormtrooper]]s for sub-zero combat,<ref name="Snowtroopers Databank">{{Databank|snowtroopers|Snowtroopers}}</ref> [[sandtrooper]]s and their sub-variant, the [[dewback trooper]], were utilized for desert operations,<ref name="Sandtroopers Databank">{{Databank|sandtroopers|Sandtroopers}}</ref><ref name="Stormtrooper DB" /> [[spacetrooper]]s for operations in vacuum environments such as [[Realspace|space]],<ref name="ANH" /> [[coastal defender stormtrooper]]s for tropical environments,<ref name="Commander" /> forest troopers for densely forested conditions,<ref name="ALD" /> and the [[wet-weather gear stormtrooper]]s, which were used on the swamp planet [[Mimban]].<ref name="GizmodoAu">{{Cite_web|url=https://www.gizmodo.com.au/2018/02/all-the-amazing-new-star-warstoys-from-toy-fair/|title=All The Amazing New Star Wars Toys From Toy Fair|last=Whitbrook|first=James|date=2018-02-19|work=Gizmodo AU}}</ref> |
====Specialized==== |
====Specialized==== |
||
| − | The Imperial Army had a wide array of stormtroopers that specialized in a type of combat or weapon. There were several variants of the [[Heavy Weapons Stormtrooper]], which included the [[Heavy Sandtrooper]], the [[Heavy Snowtrooper]], and the [[Heavy Shoretrooper]],<ref name="Commander" /> and also used was the [[Imperial Heavy Trooper]].<ref name="Galactic Defense" /> The Army also made use of [[Jumptrooper]]s, which had several variations as well. They included [[Arctic Jumptrooper]]s, [[Desert Jumptrooper]]s, and [[Forest Jumptrooper]]s.<ref name="Commander" /> [[Stormtrooper sniper]]s,<ref name="Recon Missions">''[[Star Wars Rebels: Recon Missions]]''</ref> [[sniper trooper]]s, and [[scout trooper]]s were used as recon and sniper units.<ref name="Commander" /> [[Demolition Trooper]]s,<ref name="Battlefront">''[[Star Wars Battlefront]]''</ref> [[rocket stormtrooper]]s,<ref name="Recon Missions" /> and [[stormtrooper grenadier]]s used heavy ordnance,<ref name="Recon Missions" /> while [[Flametrooper (Galactic Empire)|flametroopers]] utilized [[flamethrower]]s.<ref name="Lost Stars">''[[Lost Stars]]''</ref> Other specialized stormtroopers used by the Imperial Army included the [[riot control stormtrooper]]s,<ref name="Battlefront II" /> the [[patrol trooper]]s,<ref name="Patrol trooper">{{Databank|imperial-patrol-troopers|patrol troopers|archivedate=20190318153437}}</ref> and the [[Range trooper]].<ref name="TOG" /> |
+ | The Imperial Army had a wide array of stormtroopers that specialized in a type of combat or weapon. There were several variants of the [[Heavy Weapons Stormtrooper]], which included the [[Heavy Sandtrooper]], the [[Heavy Snowtrooper]], and the [[Heavy Shoretrooper]],<ref name="Commander" /> and also used was the [[Imperial Heavy Trooper]].<ref name="Galactic Defense" /> The Army also made use of [[Jumptrooper]]s, which had several variations as well. They included [[Arctic Jumptrooper]]s, [[Desert Jumptrooper]]s, and [[Forest Jumptrooper]]s.<ref name="Commander" /> [[Stormtrooper sniper]]s,<ref name="Recon Missions">''[[Star Wars Rebels: Recon Missions]]''</ref> [[sniper trooper]]s, and [[scout trooper]]s were used as recon and sniper units.<ref name="Commander" /> [[Demolition Trooper]]s,<ref name="Battlefront">''[[Star Wars Battlefront]]''</ref> [[rocket stormtrooper]]s,<ref name="Recon Missions" /> and [[stormtrooper grenadier]]s used heavy ordnance,<ref name="Recon Missions" /> while [[Flametrooper (Galactic Empire)|flametroopers]] utilized [[flamethrower]]s.<ref name="Lost Stars">''[[Lost Stars]]''</ref> Other specialized stormtroopers used by the Imperial Army included the [[riot control stormtrooper]]s,<ref name="Battlefront II" /> the [[patrol trooper]]s,<ref name="Patrol trooper">{{Databank|imperial-patrol-troopers|patrol troopers|archivedate=20190318153437}}</ref> and the [[Range trooper]].<ref name="Solo TOG" /> |
===Other=== |
===Other=== |
||
| − | Although the core of the Imperial Army was composed of stormtroopers and combat drivers, the Imperial Army also used [[Kubaz Invader]]s, [[Ongidae Oppressor]]s, and [[Rodian Recon Sniper]]s as part of their forces, different from mercenaries,<ref name="Commander" /> as well as [[Imperial Army soldier]]s such as [[swamp trooper]]s, which were also used on the world Mimban.<ref name="TOG" /> For black-ops missions, the Army deployed the deadly [[Imperial Army Special Missions trooper]]s that were able to effectively act as [[saboteur]]s, infiltrators, [[assassin]]s, [[commando]]s, and [[slicer]]s. [[Engineer]]s were also frequently used by the Army, and were part of the Army Engineering Corps.<ref name="Dawn" /> |
+ | Although the core of the Imperial Army was composed of stormtroopers and combat drivers, the Imperial Army also used [[Kubaz Invader]]s, [[Ongidae Oppressor]]s, and [[Rodian Recon Sniper]]s as part of their forces, different from mercenaries,<ref name="Commander" /> as well as [[Imperial Army soldier]]s such as [[swamp trooper]]s, which were also used on the world Mimban.<ref name="Solo TOG" /> For black-ops missions, the Army deployed the deadly [[Imperial Army Special Missions trooper]]s that were able to effectively act as [[saboteur]]s, infiltrators, [[assassin]]s, [[commando]]s, and [[slicer]]s. [[Engineer]]s were also frequently used by the Army, and were part of the Army Engineering Corps.<ref name="Dawn" /> |
==Vehicles and machinery== |
==Vehicles and machinery== |
||
| − | As the ground forces of the Galactic Empire, the Imperial Army possessed a vast arsenal of ground and surface vehicles. Part of the Imperial Army, the Imperial Armor Corps made use [[combat speeder]] |
+ | As the ground forces of the Galactic Empire, the Imperial Army possessed a vast arsenal of ground and surface vehicles. Part of the Imperial Army, the Imperial Armor Corps made use of [[Imperial combat speeder|combat speeders]] and [[infantry fighting vehicle]]s.<ref name="Dawn" /> |
===Artillery=== |
===Artillery=== |
||
| Line 179: | Line 181: | ||
===Nautical vehicles=== |
===Nautical vehicles=== |
||
| − | The Maritime Division of the Imperial Army used several [[Boat|surface ships]], including [[aircraft carrier]]s, [[submarine]]s, and [[waveskimmer]]s.<ref name="Dawn" /> The Imperial Army also utilized [[One Man Submersible Devilfish|OMS Devilfish subs]] and [[Imperial submarine|another type of submarine]].<ref name="Dark Lord 15">''[[Darth Vader: Dark Lord of the Sith 15 |
+ | The Maritime Division of the Imperial Army used several [[Boat|surface ships]], including [[aircraft carrier]]s, [[submarine]]s, and [[waveskimmer]]s.<ref name="Dawn" /> The Imperial Army also utilized [[One Man Submersible Devilfish|OMS Devilfish subs]] and [[Imperial submarine|another type of submarine]].<ref name="Dark Lord 15">''[[Darth Vader: Dark Lord of the Sith 15]]''</ref> |
===Repulsorcraft and wheeled=== |
===Repulsorcraft and wheeled=== |
||
| − | While the Imperial Army commonly used walkers, they also made use of wheeled and [[repulsorcraft]] vehicles. Wheeled vehicles included the [[HAVw A6 Juggernaut]],<ref name="Twilight Company" /> the treaded [[MTV-7 light vehicle]],<ref name="Commander" /> the [[HCVw A9 turbo tank]],<ref name="Rogue One" /> and the |
+ | While the Imperial Army commonly used walkers, they also made use of wheeled and [[repulsorcraft]] vehicles. Wheeled vehicles included the [[HAVw A6 Juggernaut]],<ref name="Twilight Company" /> the treaded [[MTV-7 light vehicle]],<ref name="Commander" /> the [[HCVw A9 turbo tank]],<ref name="Rogue One" /> and the [[TX-225 Occupier|TX-225 Occupier combat assault tank]] line.<ref name="Visual Guide" /> The larger models of repulsorcraft deployed by the Imperial ground forces consisted of the 2-M Hover Tank, the [[INT-4 Interceptor]],<ref name="Commander" /> the [[assault tank]],<ref name="Star Wars 3">[[Star Wars (2015) 3|''Star Wars'' 3]]</ref> the ''Imperial''-class 1-H repulsortank,<ref name="Rebel Files" /> the [[RX-200 Falchion-class assault tank|RX-200 ''Falchion''-class assault tank]],<ref name="Knights of Fate" /> the [[Imperial combat speeder]],<ref name="Star Wars 4">[[Star Wars (2015) 4|''Star Wars'' 4]]</ref> the [[Imperial Troop Transport]],<ref name="Shroud of Darkness">{{Rebels|Shroud of Darkness}}</ref> and the [[TX-225 GAVr "Occupier" combat assault tank]].<ref name="Occupation" /> |
| − | The Empire maintained several models of [[speeder bike]]s. These included the [[74-Z speeder bike]],<ref name=" |
+ | The Empire maintained several models of [[speeder bike]]s. These included the [[74-Z speeder bike]],<ref name="SE III" /> the [[614-AvA speeder bike]],<ref name=Hera's Heroes">{{Rebels|Hera's Heroes}}</ref> [[C-PH patrol speeder bike]],<ref name="Solo TOG" /> and the [[BARC speeder]] in the early rule of the Empire.<ref name="Episode III" /> |
===Starships=== |
===Starships=== |
||
| Line 190: | Line 192: | ||
===Walkers=== |
===Walkers=== |
||
| − | The Imperial Army used walkers to achieve various objectives on the battlefield. Early in the Imperial Army's operations, it utilized the Clone Wars-era walkers that were later retired such as the All Terrain Recon Transport,<ref name="Darth Vader 8">''[[Darth Vader 8 |
+ | The Imperial Army used walkers to achieve various objectives on the battlefield. Early in the Imperial Army's operations, it utilized the Clone Wars-era walkers that were later retired such as the All Terrain Recon Transport,<ref name="Darth Vader 8">''[[Darth Vader 8]]''</ref> the [[All Terrain Tactical Enforcer]],<ref name="Blade Squadron: Kuat">{{InsiderCite|168|Blade Squadron: Kuat}}</ref> and the [[All Terrain Open Transport]].<ref name="Galactic Defense" /> Later walkers used were the All Terrain Armored Transport,<ref name="Star Wars 1">[[Star Wars (2015) 1|''Star Wars 1'']]</ref> which consisted of two variants, one model of [[All Terrain Armored Transport (early rebellion against the Empire)|All Terrain Armored Transport]] was notably used during the early rebellion against the Galactic Empire,<ref name="Relics">{{Rebels|Relics of the Old Republic}}</ref> and another [[All Terrain Armored Transport (Galactic Civil War)|All Terrain Armored Transport]] used throughout the Army's operational history.<ref name="Star Wars 1" /> The [[Elite AT-AT]] was a more upgraded version of the standard AT-AT,<ref name="Commander" /> while the [[All Terrain Armored Cargo Transport]] was used for the [[transport]]ation of equipment and supplies.<ref name="Rogue One" /> |
| − | Other walkers used by the Imperial Army was the [[All Terrain Defense Pod]],<ref name="Breaking Ranks">{{Rebels|Breaking Ranks}}</ref> the [[All Terrain Scout Transport]],<ref name="Star Wars 2"> |
+ | Other walkers used by the Imperial Army was the [[All Terrain Defense Pod]],<ref name="Breaking Ranks">{{Rebels|Breaking Ranks}}</ref> the [[All Terrain Scout Transport]],<ref name="Star Wars 2">[[Star Wars (2015) 2|''Star Wars 2'']]</ref> the [[AT-ST Mark III]], the [[Cold-weather AT-ST Mark III]],<ref name="Commander" /> the [[All Terrain Missile Platform]],<ref name="Recon Missions" /> the [[AT-MP Mark III]], the [[Enhanced AT-MP Walker]], the [[Enhanced AT-ST Walker]], the [[Umbaran mobile heavy cannon|Mobile Heavy Cannon]], the [[Cold-weather Mobile Heavy Cannon]],<ref name="Commander" /> the [[AT-PT]],<ref name="Galactic Defense" /> and the [[All Terrain Defense Turret]].<ref name="Commander" /> |
==Weapons and equipment== |
==Weapons and equipment== |
||
| Line 199: | Line 201: | ||
===Republic-era equipment=== |
===Republic-era equipment=== |
||
| − | Shortly after the transformation of the Republic into the Empire, the Imperial Army used |
+ | Shortly after the transformation of the Republic into the Empire, the Imperial Army used clone wars-era weapons like the [[DC-15A blaster]], the [[DC-17 hand blaster]], the [[DC-15 blaster rifle]], [[RPS-6 rocket launcher]] and [[Z-6 rotary blaster cannon]]. Many were retired with only a limited number [[Second mission to Ryloth|seeing]] any [[Purge Trooper|future]] service.<ref name="JFO" /><ref name="Thrawn 1">''[[Thrawn 1]]''</ref><ref name="Commander" /> |
===Infantry weapons=== |
===Infantry weapons=== |
||
| − | It later came to use the [[E-11 blaster rifle]], the [[E-10R blaster rifle]], [[E-10 blaster rifle]],<ref name="TOG" /> the [[E-22 blaster rifle]],<ref name="Rogue One" /> the [[EE-3 carbine rifle]],<ref name="Battlefront" /> [[SX-21 scatterblaster|SX-21 blaster rifle]],<ref name="Databank">{{Databank|SX-21-blaster-rifle|SX-21 blaster rifle}}</ref> and the [[TL-50 Heavy Repeater]],<ref name="Battlefront II" /> as well as larger weapons like the [[RT-97C heavy blaster rifle]], the [[DLT-19 heavy blaster rifle]] and the [[T-21 light repeating blaster]].<ref name="ANH" /> |
+ | It later came to use the [[E-11 blaster rifle]], the [[E-10R blaster rifle]], [[E-10 blaster rifle]],<ref name="Solo TOG" /> the [[E-22 blaster rifle]],<ref name="Rogue One" /> the [[EE-3 carbine rifle]],<ref name="Battlefront" /> [[SX-21 scatterblaster|SX-21 blaster rifle]],<ref name="Databank">{{Databank|SX-21-blaster-rifle|SX-21 blaster rifle}}</ref> and the [[TL-50 Heavy Repeater]],<ref name="Battlefront II" /> as well as larger weapons like the [[RT-97C heavy blaster rifle]], the [[DLT-19 heavy blaster rifle]] and the [[T-21 light repeating blaster]].<ref name="ANH" /> |
===Heavy weapons=== |
===Heavy weapons=== |
||
| Line 211: | Line 213: | ||
===Pistols and melee weapons=== |
===Pistols and melee weapons=== |
||
| − | The Imperial Army issued several type of [[blaster pistol]]. Imperial personnel equipped with blaster pistol would either carrier the blaster in question as a secondary weapon or for personal defense. |
+ | The Imperial Army issued several type of [[blaster pistol]]. Imperial personnel equipped with blaster pistol would either carrier the blaster in question as a secondary weapon or for personal defense. Among these weapons was the [[SE-14C blaster pistol]],<ref name="ANH" /> the [[SE-14r light repeating blaster]],<ref name="Rogue One" /> and the [[RK-3]].<ref name="The Siege of Lothal" /> |
| − | |||
| − | Among these weapons was the [[SE-14C blaster pistol]],<ref name="ANH" /> the [[SE-14r light repeating blaster]],<ref name="Rogue One" /> and the [[RK-3]].<ref name="The Siege of Lothal" /> |
||
Scout troopers used [[EC-17 hold-out blaster]] as a close-quarters alternative to their standard service rifle.<ref name="ROTJ" /> |
Scout troopers used [[EC-17 hold-out blaster]] as a close-quarters alternative to their standard service rifle.<ref name="ROTJ" /> |
||
| − | The |
+ | The riot troopers was the main melee specialist in the Imperial Army and as such was equipped with melee weapons including [[baton]].<ref name="Battlefront II" /> [[electrobaton]],<ref name="JFO" /> [[electrostaff]]s,<ref name="Galactic Defense" /.<ref name="JFO" /> [[electrohammer]]<ref name="JFO" />. |
===Grenades and launchers=== |
===Grenades and launchers=== |
||
| Line 223: | Line 223: | ||
===Droids and other equipment=== |
===Droids and other equipment=== |
||
| − | Equipment used by the Imperial Army included suits and heated breather masks powered by a battery pack that could last up to two [[standard week]]s, ice boots, and an insulated belt [[kama]].<ref name="Character Encyclopedia">''[[Star Wars Character Encyclopedia: Updated and Expanded]]''</ref> The army also used the [[ |
+ | Equipment used by the Imperial Army included suits and heated breather masks powered by a battery pack that could last up to two [[standard week]]s, ice boots, and an insulated belt [[kama]].<ref name="Character Encyclopedia">''[[Star Wars Character Encyclopedia: Updated and Expanded]]''</ref> The army also used the [[DT-series sentry droid]] and the [[KX-series security droid]] for defense as well as combat.<ref name="Commander" /> |
| − | |||
| − | In terms of [[probe droid]]s, the Imperial Army used the [[ID10 seeker droid]],<ref name="Inferno Squad">''[[Battlefront II: Inferno Squad]]''</ref> the [[Viper probe droid]]<ref name="Updated and Expanded">''[[Star Wars Character Encyclopedia: Updated and Expanded]]''</ref> and its two variants: the [[11-3K viper probe droid]]<ref name="Databank Viper probe droid">{{Databank|viper-probe-droid|Viper probe droid|archivedate=20180610012910}}</ref> and the [[Dwarf probe droid]]<ref name="Epic Battles">''[[Star Wars Rebels: Visual Guide: Epic Battles]]''</ref> and lastly [[DRK-1 Dark Eye probe droid]]s,<ref name="Commander" /> |
||
| − | Among [[medical droid]]s was the [[FX-series medical assistant droid]]<ref name="Episode III" /> and the [[2-1B surgical droid]]<ref name="Delta">''[[Star Wars: Uprising]]''—Crew Member: "2-1B Delta"</ref>. |
+ | In terms of [[probe droid]]s, the Imperial Army used the [[ID10 seeker droid]],<ref name="Inferno Squad">''[[Battlefront II: Inferno Squad]]''</ref> the [[Viper probe droid]]<ref name="Character Encyclopedia" /> and its two variants: the [[11-3K viper probe droid]]<ref name="Databank Viper probe droid">{{Databank|viper-probe-droid|Viper probe droid|archivedate=20180610012910}}</ref> and the [[Dwarf probe droid]]<ref name="Epic Battles">''[[Star Wars Rebels: Visual Guide: Epic Battles]]''</ref> and lastly [[DRK-1 Dark Eye probe droid]]s.<ref name="Commander" /> Among [[medical droid]]s was the [[FX-series medical assistant droid]]<ref name="Episode III" /> and the [[2-1B surgical droid]]<ref name="Delta">''[[Star Wars: Uprising]]''—Crew Member: "2-1B Delta"</ref>. |
===Arms suppliers=== |
===Arms suppliers=== |
||
| − | [[BlasTech Industries]] was perhaps the single biggest supplier of arms for the Imperial Army, but other companies like [[Merr-Sonn Munitions, Inc.]]<ref name="Rebels Visual Guide" |
+ | [[BlasTech Industries]] was perhaps the single biggest supplier of arms for the Imperial Army, but other companies like [[Merr-Sonn Munitions, Inc.]],<ref name="Rebels Visual Guide" /> [[Morellian Weapons Conglomerate]]<ref name="GotW" /> and even [[Sienar Fleet Systems]] also provided their fair share of weapons.<ref name="TP">{{TCW|Tipping Points}}</ref> |
===Legal restrictions=== |
===Legal restrictions=== |
||
| − | The Imperial Senate banned the use of antipersonnel [[disruptor]]s and [[battle droid]]s. In response, the Imperial Military, specifically the Army, circumvented these restriction by re-designating the object in question as something lawful; or by simply lying about the nature of the object.<ref name="Rogue One" /> Legally |
+ | The Imperial Senate banned the use of antipersonnel [[disruptor]]s and [[battle droid]]s. In response, the Imperial Military, specifically the Army, circumvented these restriction by re-designating the object in question as something lawful; or by simply lying about the nature of the object.<ref name="Rogue One" /> Legally speaking the Imperial sentry droid and KX-series security droid were [[security droid]]s and [[sentry droid]]s respectfully. In reality, they were fully functional battle droids.<ref name="Rogue One" /> |
| − | <ref name="Rogue One" /> |
||
| − | T-7 ion disruptor rifles were banned from use after the brutal [[Siege of Lasan]] |
+ | T-7 ion disruptor rifles were banned from use after the brutal [[Siege of Lasan]]. But this ban did not stop the army from trying to [[Mission to steal Imperial weapons|reacquire]] such weapons.<ref name="Rogue One" /> Eventually the imperial army managed to get their hands on designs for the newer [[T-8 disruptor]].<ref name="Empire Day">{{Rebels|Empire Day (episode)|Empire Day}}</ref> |
==Tactics== |
==Tactics== |
||
| Line 242: | Line 239: | ||
==Appearances== |
==Appearances== |
||
| − | {{ |
+ | {{Scroll_box|content= |
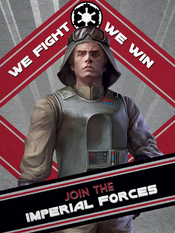
[[File:Join.jpg|thumb|right|200px|A propaganda poster for the Imperial Army.]] |
[[File:Join.jpg|thumb|right|200px|A propaganda poster for the Imperial Army.]] |
||
*''[[Star Wars: Galactic Defense]]'' |
*''[[Star Wars: Galactic Defense]]'' |
||
| Line 251: | Line 248: | ||
*''[[Catalyst: A Rogue One Novel]]'' |
*''[[Catalyst: A Rogue One Novel]]'' |
||
*[[Star Wars: Episode III Revenge of the Sith|''Star Wars'': Episode III ''Revenge of the Sith'']] |
*[[Star Wars: Episode III Revenge of the Sith|''Star Wars'': Episode III ''Revenge of the Sith'']] |
||
| − | *''[[Darth Vader: Dark Lord of the Sith 1 |
+ | *''[[Darth Vader: Dark Lord of the Sith 1]]'' |
| − | *''[[Darth Vader: Dark Lord of the Sith 2 |
+ | *''[[Darth Vader: Dark Lord of the Sith 2]]'' |
| − | *''[[Darth Vader: Dark Lord of the Sith 7 |
+ | *''[[Darth Vader: Dark Lord of the Sith 7]]'' |
| − | *''[[Darth Vader: Dark Lord of the Sith 8 |
+ | *''[[Darth Vader: Dark Lord of the Sith 8]]'' |
| − | *''[[Darth Vader: Dark Lord of the Sith 9 |
+ | *''[[Darth Vader: Dark Lord of the Sith 9]]'' |
| − | *''[[Darth Vader: Dark Lord of the Sith 10 |
+ | *''[[Darth Vader: Dark Lord of the Sith 10]]'' |
| − | *''[[ |
+ | *''[[Darth Vader: Dark Lord of the Sith 13]]'' |
| − | *''[[Darth Vader: Dark Lord of the Sith |
+ | *''[[Darth Vader: Dark Lord of the Sith 14]]'' |
| − | *''[[Darth Vader: Dark Lord of the Sith |
+ | *''[[Darth Vader: Dark Lord of the Sith 15]]'' |
| − | *''[[Darth Vader: Dark Lord of the Sith |
+ | *''[[Darth Vader: Dark Lord of the Sith 16]]'' |
| − | *''[[Darth Vader: Dark Lord of the Sith |
+ | *''[[Darth Vader: Dark Lord of the Sith 17]]'' |
| − | *''[[Darth Vader |
+ | *''[[Darth Vader Annual 2]]'' |
| − | *''[[ |
+ | *''[[Kanan 4]]'' |
| + | *''[[Kanan 5]]'' |
||
| − | *''[[Darth Vader Annual 2: Technological Terror]]'' |
||
| − | *''[[Kanan 4: The Last Padawan, Part IV: Catch]]'' |
||
| − | *''[[Kanan 5: The Last Padawan, Part V: Release]]'' |
||
*''[[Adventures in Wild Space: The Escape]]'' |
*''[[Adventures in Wild Space: The Escape]]'' |
||
*''[[Adventures in Wild Space: The Snare]]'' |
*''[[Adventures in Wild Space: The Snare]]'' |
||
| Line 277: | Line 272: | ||
*[[Tarkin (novel)|''Tarkin'']] |
*[[Tarkin (novel)|''Tarkin'']] |
||
*{{InsiderCite|166|TK-462 (short story)|TK-462}} |
*{{InsiderCite|166|TK-462 (short story)|TK-462}} |
||
| − | *''[[ |
+ | *''[[Jedi Fallen Order - Dark Temple 1]]'' |
| − | *''[[ |
+ | *''[[Jedi Fallen Order - Dark Temple 2]]'' |
| − | *''[[ |
+ | *''[[Jedi Fallen Order - Dark Temple 3]]'' |
| ⚫ | |||
| ⚫ | |||
| + | *''[[Age of Rebellion - Darth Vader 1]]'' |
||
| + | *''[[Darth Vader: Dark Lord of the Sith 20]]'' |
||
| + | *''[[Darth Vader: Dark Lord of the Sith 23]]'' |
||
| + | *''[[Darth Vader: Dark Lord of the Sith 24]]'' |
||
| + | *''[[Star Wars Jedi: Fallen Order]]'' |
||
*''[[Most Wanted]]'' |
*''[[Most Wanted]]'' |
||
| + | *''[[Beckett 1]]'' |
||
*''[[Solo: A Star Wars Story]]'' |
*''[[Solo: A Star Wars Story]]'' |
||
| ⚫ | |||
*''[[Solo: A Star Wars Story: Expanded Edition]]'' |
*''[[Solo: A Star Wars Story: Expanded Edition]]'' |
||
*''[[Solo: A Star Wars Story: Meet the Crew]]'' |
*''[[Solo: A Star Wars Story: Meet the Crew]]'' |
||
| Line 288: | Line 290: | ||
*''[[Solo: A Star Wars Story Adaptation 1]]'' |
*''[[Solo: A Star Wars Story Adaptation 1]]'' |
||
*''[[Solo: A Star Wars Story Adaptation 2]]'' |
*''[[Solo: A Star Wars Story Adaptation 2]]'' |
||
| + | *[[Han Solo - Imperial Cadet 1|''Han Solo - Imperial Cadet'' 1]] |
||
| − | *''[[Lando - Double or Nothing, Part I]]'' |
||
| − | *''[[Lando - Double or Nothing |
+ | *''[[Lando - Double or Nothing 1]]'' |
| − | *''[[Lando - Double or Nothing |
+ | *''[[Lando - Double or Nothing 2]]'' |
| − | *''[[Lando - Double or Nothing |
+ | *''[[Lando - Double or Nothing 3]]'' |
| − | *''[[Lando - Double or Nothing |
+ | *''[[Lando - Double or Nothing 4]]'' |
| − | *''[[ |
+ | *''[[Lando - Double or Nothing 5]]'' |
| ⚫ | |||
*''[[Rebel Rising]]'' |
*''[[Rebel Rising]]'' |
||
*[[Thrawn (novel)|''Thrawn'']] |
*[[Thrawn (novel)|''Thrawn'']] |
||
| − | *''[[Thrawn |
+ | *''[[Thrawn 1]]'' |
| − | *''[[Thrawn |
+ | *''[[Thrawn 4]]'' |
| − | *''[[Thrawn |
+ | *''[[Thrawn 6]]'' |
*{{Shortstory|story=Bottleneck|book=The Rise of the Empire}} |
*{{Shortstory|story=Bottleneck|book=The Rise of the Empire}} |
||
*''[[A New Dawn]]'' |
*''[[A New Dawn]]'' |
||
*''[[Lost Stars]]'' |
*''[[Lost Stars]]'' |
||
*[[Lost Stars (webcomic)|''Lost Stars'' webcomic]] |
*[[Lost Stars (webcomic)|''Lost Stars'' webcomic]] |
||
| − | *''[[Star Wars 28 |
+ | *''[[Star Wars 28]]'' |
*{{InsiderCite|154|The End of History}} |
*{{InsiderCite|154|The End of History}} |
||
*{{HoloNetNews|post/92683587916/holonet-news-special-report-lothal-jobless-rates|Special Report: Lothal Jobless Rates Hit All-time Low|int=HoloNet News Special Report: Lothal Jobless Rates Hit All-time Low}} {{Hologram}} |
*{{HoloNetNews|post/92683587916/holonet-news-special-report-lothal-jobless-rates|Special Report: Lothal Jobless Rates Hit All-time Low|int=HoloNet News Special Report: Lothal Jobless Rates Hit All-time Low}} {{Hologram}} |
||
| Line 336: | Line 339: | ||
*''[[Ezra's Duel with Danger]]'' |
*''[[Ezra's Duel with Danger]]'' |
||
*{{Rebels|Gathering Forces}} |
*{{Rebels|Gathering Forces}} |
||
| − | *''[[Kanan 9 |
+ | *''[[Kanan 9]]'' |
| − | *''[[Kanan 10 |
+ | *''[[Kanan 10]]'' |
| − | *''[[Kanan 11 |
+ | *''[[Kanan 11]]'' |
| − | *''[[Kanan 12 |
+ | *''[[Kanan 12]]'' |
*{{SWRMCite|7|Sabotaged Supplies}} |
*{{SWRMCite|7|Sabotaged Supplies}} |
||
*''[[Servants of the Empire: Imperial Justice]]'' |
*''[[Servants of the Empire: Imperial Justice]]'' |
||
| Line 384: | Line 387: | ||
*{{FOD|Newest Recruit}} |
*{{FOD|Newest Recruit}} |
||
*{{FOD|Hasty Departure}} |
*{{FOD|Hasty Departure}} |
||
| ⚫ | |||
*{{FOD|Accidental Allies}} |
*{{FOD|Accidental Allies}} |
||
*{{IDWAdventuresCite|7|[[Endangered, Part 1]]}} |
*{{IDWAdventuresCite|7|[[Endangered, Part 1]]}} |
||
| Line 414: | Line 418: | ||
*{{Rebels|A Fool's Hope}} |
*{{Rebels|A Fool's Hope}} |
||
*{{Rebels|Family Reunion – and Farewell}} |
*{{Rebels|Family Reunion – and Farewell}} |
||
| − | *{{Shortstory|story=The Sand Will Provide|book=Star Wars 37 |
+ | *{{Shortstory|story=The Sand Will Provide|book=Star Wars 37}} |
*''[[Rogue One - Cassian & K-2SO Special 1]]'' |
*''[[Rogue One - Cassian & K-2SO Special 1]]'' |
||
| ⚫ | |||
*{{IDWAdventuresCite|3|[[Tales from Wild Space: Adventures in Wookiee-Sitting]]}} |
*{{IDWAdventuresCite|3|[[Tales from Wild Space: Adventures in Wookiee-Sitting]]}} |
||
*''[[The Mighty Chewbacca in the Forest of Fear!]]'' {{Po}} |
*''[[The Mighty Chewbacca in the Forest of Fear!]]'' {{Po}} |
||
*{{IDWAdventuresCite|Free Comic Book Day 2019|Droid Hunters}} {{Flash}} |
*{{IDWAdventuresCite|Free Comic Book Day 2019|Droid Hunters}} {{Flash}} |
||
| + | *''[[Star Wars Adventures: Return to Vader's Castle 2]]'' {{Flash}} |
||
*''[[Star Wars: Secrets of the Empire]]'' |
*''[[Star Wars: Secrets of the Empire]]'' |
||
*''[[Vader Immortal: A Star Wars VR Series – Episode I]]'' |
*''[[Vader Immortal: A Star Wars VR Series – Episode I]]'' |
||
| + | *''[[Vader Immortal: A Star Wars VR Series – Episode III]]'' |
||
| + | *''[[Vader - Dark Visions 3]]'' |
||
| + | *''[[Vader - Dark Visions 4]]'' |
||
*''[[Vader - Dark Visions 5]]'' |
*''[[Vader - Dark Visions 5]]'' |
||
| − | *{{Shortstory|story=Crossing the Line|book=Star Wars Animation-Magazine 4}} |
+ | *{{Shortstory|story=Crossing the Line|book=Star Wars Rebels Animation-Magazine 4}} |
*[[Guardians of the Whills (novel)|''Guardians of the Whills'']] |
*[[Guardians of the Whills (novel)|''Guardians of the Whills'']] |
||
| ⚫ | |||
| ⚫ | |||
*{{Shortstory|story=The Long Game (Age of Rebellion)|sformatted=The Long Game|book=Age of Rebellion Special 1}} |
*{{Shortstory|story=The Long Game (Age of Rebellion)|sformatted=The Long Game|book=Age of Rebellion Special 1}} |
||
*{{Shortstory|story=Stolen Valor|book=Age of Rebellion Special 1}} |
*{{Shortstory|story=Stolen Valor|book=Age of Rebellion Special 1}} |
||
| Line 480: | Line 485: | ||
*''[[Han and the Rebel Rescue]]'' |
*''[[Han and the Rebel Rescue]]'' |
||
*[[Smuggler's Run (animated comic)|''Smuggler's Run'' animated comic]] |
*[[Smuggler's Run (animated comic)|''Smuggler's Run'' animated comic]] |
||
| − | * |
+ | *[[Princess Leia 2|''Princess Leia'' 2]] |
| − | * |
+ | *[[Princess Leia 3|''Princess Leia'' 3]] |
| − | * |
+ | *[[Princess Leia 4|''Princess Leia'' 4]] |
| − | * |
+ | *[[Princess Leia 5|''Princess Leia'' 5]] |
*''[[Age of Rebellion - Han Solo 1]]'' |
*''[[Age of Rebellion - Han Solo 1]]'' |
||
*{{InsiderCite|151|One Thousand Levels Down}} |
*{{InsiderCite|151|One Thousand Levels Down}} |
||
| − | * |
+ | *[[Chewbacca (2015) 1|''Chewbacca 1'']] |
| − | * |
+ | *[[Chewbacca (2015) 3|''Chewbacca 3'']] |
| − | * |
+ | *[[Chewbacca (2015) 4|''Chewbacca 4'']] |
| − | *''[[Chewbacca |
+ | *''[[Chewbacca 5]]'' |
*{{IDWAdventuresCite|4|[[The Trouble at Tibrin]]}} |
*{{IDWAdventuresCite|4|[[The Trouble at Tibrin]]}} |
||
*{{IDWAdventuresCite|5|[[The Trouble at Tibrin, Part II]]}} |
*{{IDWAdventuresCite|5|[[The Trouble at Tibrin, Part II]]}} |
||
| Line 502: | Line 507: | ||
*''[[The Weapon of a Jedi, Part 4]]'' |
*''[[The Weapon of a Jedi, Part 4]]'' |
||
*''[[Star Wars Annual 4]]'' |
*''[[Star Wars Annual 4]]'' |
||
| − | *''[[Han Solo |
+ | *''[[Han Solo 2]]'' |
| − | *''[[Han Solo |
+ | *''[[Han Solo 3]]'' |
| − | *''[[Han Solo |
+ | *''[[Han Solo 4]]'' |
| − | * |
+ | *[[Star Wars (2015) 1|''Star Wars 1'']] |
| − | * |
+ | *[[Star Wars (2015) 2|''Star Wars 2'']] |
| − | * |
+ | *[[Star Wars (2015) 3|''Star Wars'' 3]] |
| − | * |
+ | *[[Darth Vader (2015) 1|''Darth Vader 1'']] {{Flash}} |
| − | * |
+ | *[[Star Wars (2015) 4|''Star Wars'' 4]] |
| − | *''[[Darth Vader 2 |
+ | *''[[Darth Vader 2]]'' |
| − | *''[[Darth Vader 3 |
+ | *''[[Darth Vader 3]]'' {{C|Indirect mention only, in the opening crawl}} |
| − | * |
+ | *[[Star Wars (2015) 10|''Star Wars 10'']] |
| − | * |
+ | *[[Star Wars (2015) 11|''Star Wars 11'']] |
| − | * |
+ | *[[Star Wars (2015) 12|''Star Wars 12'']] |
| − | *''[[Darth Vader 7 |
+ | *''[[Darth Vader 7]]'' |
| − | *''[[Darth Vader 8 |
+ | *''[[Darth Vader 8]]'' |
| − | *''[[Darth Vader 9 |
+ | *''[[Darth Vader 9]]'' |
| − | *''[[Darth Vader 10 |
+ | *''[[Darth Vader 10]]'' |
| − | *''[[Darth Vader 11 |
+ | *''[[Darth Vader 11]]'' |
| − | *''[[Darth Vader 12 |
+ | *''[[Darth Vader 12]]'' |
*''[[Star Wars Annual 1]]'' |
*''[[Star Wars Annual 1]]'' |
||
| − | *''[[Darth Vader 14 |
+ | *''[[Darth Vader 14]]'' |
| − | *''[[Star Wars 14 |
+ | *''[[Star Wars 14]]'' |
| − | *''[[Darth Vader 15 |
+ | *''[[Darth Vader 15]]'' |
| − | * |
+ | *[[Star Wars (2015) 16|''Star Wars 16'']] |
| − | * |
+ | *[[Star Wars (2015) 19|''Star Wars 19'']] |
| − | *''[[Darth Vader 16 |
+ | *''[[Darth Vader 16]]'' |
| − | *''[[Darth Vader 17 |
+ | *''[[Darth Vader 17]]'' |
| − | *''[[Darth Vader 18 |
+ | *''[[Darth Vader 18]]'' |
| − | *''[[Darth Vader 19 |
+ | *''[[Darth Vader 19]]'' |
| − | *''[[Darth Vader 22 |
+ | *''[[Darth Vader 22]]'' |
| − | *''[[Darth Vader 23 |
+ | *''[[Darth Vader 23]]'' |
| − | *''[[Darth Vader 25 |
+ | *''[[Darth Vader 25]]'' |
| − | *''[[Star Wars 21 |
+ | *''[[Star Wars 21]]'' |
| − | *''[[Star Wars 22 |
+ | *''[[Star Wars 22]]'' |
| − | *''[[Star Wars 23 |
+ | *''[[Star Wars 23]]'' |
| − | *''[[Star Wars 24 |
+ | *''[[Star Wars 24]]'' |
| − | *''[[Star Wars 25 |
+ | *''[[Star Wars 25]]'' |
*''[[Star Wars Annual 2]]'' |
*''[[Star Wars Annual 2]]'' |
||
| − | *''[[Star Wars 26 |
+ | *''[[Star Wars 26]]'' |
| − | *''[[Doctor Aphra 2 |
+ | *''[[Doctor Aphra 2]]'' |
| − | *''[[Doctor Aphra 3 |
+ | *''[[Doctor Aphra 3]]'' |
| − | *''[[Doctor Aphra 4 |
+ | *''[[Doctor Aphra 4]]'' |
| − | *''[[Doctor Aphra 5 |
+ | *''[[Doctor Aphra 5]]'' |
| − | *''[[Doctor Aphra 6 |
+ | *''[[Doctor Aphra 6]]'' |
| − | *''[[Star Wars 33 |
+ | *''[[Star Wars 33]]'' |
| − | *''[[Doctor Aphra 11 |
+ | *''[[Doctor Aphra 11]]'' |
| − | *''[[ |
+ | *''[[Doctor Aphra 12]]'' |
| − | *''[[ |
+ | *''[[Doctor Aphra 13]]'' |
| − | *''[[Star Wars |
+ | *''[[Star Wars 34]]'' |
| − | *''[[ |
+ | *''[[Star Wars 35]]'' |
| + | *''[[Star Wars 36]]'' |
||
*''[[Star Wars Annual 3]]'' {{Flash}} |
*''[[Star Wars Annual 3]]'' {{Flash}} |
||
| − | *''[[Star Wars 37 |
+ | *''[[Star Wars 37]]'' |
| − | *''[[Doctor Aphra |
+ | *''[[Doctor Aphra 14]]'' |
| − | *''[[Doctor Aphra |
+ | *''[[Doctor Aphra 15]]'' |
| − | *''[[Doctor Aphra |
+ | *''[[Doctor Aphra 16]]'' |
| − | *''[[Doctor Aphra |
+ | *''[[Doctor Aphra 17]]'' {{Co}} |
| − | *''[[Doctor Aphra |
+ | *''[[Doctor Aphra 19]]'' |
| − | *''[[Doctor Aphra |
+ | *''[[Doctor Aphra 20]]'' |
| − | *''[[Doctor Aphra |
+ | *''[[Doctor Aphra 21]]'' |
| − | *''[[Doctor Aphra |
+ | *''[[Doctor Aphra 26]]'' {{C|Appears on viewscreen}} |
| − | *''[[Doctor Aphra |
+ | *''[[Doctor Aphra 30]]'' |
| − | *''[[Doctor Aphra |
+ | *''[[Doctor Aphra 31]]'' |
| − | *''[[ |
+ | *''[[Star Wars 38]]'' |
| − | *''[[Star Wars |
+ | *''[[Star Wars 39]]'' |
| − | *''[[Star Wars |
+ | *''[[Star Wars 40]]'' |
| − | *''[[Star Wars |
+ | *''[[Star Wars 42]]'' |
| − | *''[[Star Wars |
+ | *''[[Star Wars 43]]'' |
| − | *''[[Star Wars 43: The Ashes of Jedha, Part VI]]'' |
||
*''[[Star Wars: The Last Jedi – The Storms of Crait 1]]'' |
*''[[Star Wars: The Last Jedi – The Storms of Crait 1]]'' |
||
| − | *''[[Star Wars 44 |
+ | *''[[Star Wars 44]]'' |
| − | *''[[Star Wars 46 |
+ | *''[[Star Wars 46]]'' |
| − | *''[[Star Wars 47 |
+ | *''[[Star Wars 47]]'' |
| − | *''[[Star Wars 48 |
+ | *''[[Star Wars 48]]'' |
| − | *''[[Star Wars 49 |
+ | *''[[Star Wars 49]]'' |
| − | *''[[Star Wars 58 |
+ | *''[[Star Wars 58]]'' {{Imo}} |
| − | *''[[Star Wars 59 |
+ | *''[[Star Wars 59]]'' |
| − | *''[[Star Wars 60 |
+ | *''[[Star Wars 60]]'' |
| − | *''[[Star Wars 61 |
+ | *''[[Star Wars 61]]'' |
| − | *''[[Star Wars 62 |
+ | *''[[Star Wars 62]]'' |
| − | *''[[Star Wars 67 |
+ | *''[[Star Wars 67]]'' |
| − | *''[[Doctor Aphra 32 |
+ | *''[[Doctor Aphra 32]]'' {{Flash}} |
| − | *''[[Doctor Aphra 33 |
+ | *''[[Doctor Aphra 33]]'' |
| − | *''[[Doctor Aphra 34 |
+ | *''[[Doctor Aphra 34]]'' |
| + | *''[[Doctor Aphra 35]]'' |
||
| + | *''[[Doctor Aphra 36]]'' |
||
| + | *''[[Doctor Aphra 37]]'' |
||
| + | *''[[Doctor Aphra 38]]'' |
||
| + | *[[Doctor Aphra 40|''Doctor Aphra'' 40]] |
||
| + | *''[[Star Wars 71]]'' |
||
| + | *''[[Star Wars 72]]'' |
||
| + | *''[[Star Wars 73]]'' |
||
| + | *''[[Star Wars 74]]'' |
||
| + | *''[[Star Wars 75]]'' |
||
*''[[Target Vader 2]]'' |
*''[[Target Vader 2]]'' |
||
| + | *''[[Target Vader 3]]'' |
||
| + | *''[[Target Vader 4]]'' |
||
| + | *''[[Target Vader 5]]'' |
||
| + | *''[[Target Vader 6]]'' |
||
*''[[Age of Rebellion - Jabba the Hutt 1]]'' |
*''[[Age of Rebellion - Jabba the Hutt 1]]'' |
||
*''[[Star Wars: Commander]]'' |
*''[[Star Wars: Commander]]'' |
||
| − | *''[[Lando |
+ | *''[[Lando 1]]'' |
| − | *''[[Lando |
+ | *''[[Lando 3]]'' |
*{{InsiderCite|156|Last Call at the Zero Angle}} |
*{{InsiderCite|156|Last Call at the Zero Angle}} |
||
| − | *{{IDWAdventuresCite|22|[[A Matter Of Perception]]}} |
||
*{{InsiderCite|161|Inbrief}} |
*{{InsiderCite|161|Inbrief}} |
||
*''[[Battlefront: Twilight Company]]'' |
*''[[Battlefront: Twilight Company]]'' |
||
| + | *{{Shortstory|story=In Service to the Empire|book=Empire Ascendant 1|bformatted=''Empire Ascendant'' 1|manual=1}} |
||
| + | *{{Shortstory|story=Two Sides to Every Sortie|book=Empire Ascendant 1|bformatted=''Empire Ascendant'' 1|manual=1}} |
||
| + | *{{Shortstory|story=Epilogue|book=Empire Ascendant 1|bformatted=''Empire Ascendant'' 1|manual=1}} |
||
*[[Star Wars: Episode V The Empire Strikes Back|''Star Wars'': Episode V ''The Empire Strikes Back'']] |
*[[Star Wars: Episode V The Empire Strikes Back|''Star Wars'': Episode V ''The Empire Strikes Back'']] |
||
*{{Galaxy of Adventures|Luke vs. Imperial Walkers - Commander on Hoth}} |
*{{Galaxy of Adventures|Luke vs. Imperial Walkers - Commander on Hoth}} |
||
| Line 602: | Line 623: | ||
*''[[Use the Force!]]'' {{Vision}} |
*''[[Use the Force!]]'' {{Vision}} |
||
*''[[Captured on Cloud City]]'' |
*''[[Captured on Cloud City]]'' |
||
| + | *[[Star Wars (2020) 3|''Star Wars'' 3]] |
||
*{{Galaxy of Adventures|Darth Vader - Might of the Empire}} |
*{{Galaxy of Adventures|Darth Vader - Might of the Empire}} |
||
| − | *''[[TIE Fighter |
+ | *''[[TIE Fighter 3]]'' |
| − | *''[[TIE Fighter |
+ | *''[[TIE Fighter 4]]'' |
*''[[Moving Target: A Princess Leia Adventure]]'' |
*''[[Moving Target: A Princess Leia Adventure]]'' |
||
*''[[Leia and the Great Island Escape]]'' |
*''[[Leia and the Great Island Escape]]'' |
||
| Line 618: | Line 640: | ||
*{{FOD|Ewok Escape}} |
*{{FOD|Ewok Escape}} |
||
*{{InsiderCite|issue1=149|issue2=150|Blade Squadron (short story)|Blade Squadron}} |
*{{InsiderCite|issue1=149|issue2=150|Blade Squadron (short story)|Blade Squadron}} |
||
| − | *''[[Shattered Empire |
+ | *''[[Shattered Empire 1]]'' |
| − | *''[[ |
+ | *''[[TIE Fighter 5]]'' |
| − | *''[[Shattered Empire |
+ | *''[[Shattered Empire 2]]'' |
| + | *''[[Shattered Empire 3]]'' |
||
*{{InsiderCite|169|Turning Point (Jason Hough)|Turning Point}} |
*{{InsiderCite|169|Turning Point (Jason Hough)|Turning Point}} |
||
*{{IDWAdventuresCite|Annual 2019|[[Hare-Brained Heist]]}} |
*{{IDWAdventuresCite|Annual 2019|[[Hare-Brained Heist]]}} |
||
| Line 626: | Line 649: | ||
*''[[Aftermath]]'' |
*''[[Aftermath]]'' |
||
*''[[Star Wars: Uprising]]'' |
*''[[Star Wars: Uprising]]'' |
||
| − | *''[[Shattered Empire |
+ | *''[[Shattered Empire 4]]'' |
*''[[Aftermath: Life Debt]]'' |
*''[[Aftermath: Life Debt]]'' |
||
*{{InsiderCite|168|Blade Squadron: Kuat}} |
*{{InsiderCite|168|Blade Squadron: Kuat}} |
||
| Line 632: | Line 655: | ||
*''[[Aftermath: Empire's End]]'' |
*''[[Aftermath: Empire's End]]'' |
||
*{{InsiderCite|172|Blade Squadron: Jakku}} |
*{{InsiderCite|172|Blade Squadron: Jakku}} |
||
| − | *''[[The Mandalorian]]'' |
||
*[[Bloodline (novel)|''Bloodline'']] {{Imo}} |
*[[Bloodline (novel)|''Bloodline'']] {{Imo}} |
||
| − | *''[[Poe Dameron 8 |
+ | *''[[Poe Dameron 8]]'' {{Flash}} |
| − | *''[[Poe Dameron 9 |
+ | *''[[Poe Dameron 9]]'' {{Flash}} |
| − | *''[[Poe Dameron 10 |
+ | *''[[Poe Dameron 10]]'' {{Mo}} |
*''[[Join the Resistance: Escape from Vodran]]'' {{Mo}} |
*''[[Join the Resistance: Escape from Vodran]]'' {{Mo}} |
||
| + | *''[[Age of Resistance - Kylo Ren 1]]'' {{Flash}} |
||
*''[[Star Wars: The Last Jedi: Expanded Edition]]'' {{Mo}} |
*''[[Star Wars: The Last Jedi: Expanded Edition]]'' {{Mo}} |
||
*''[[Galaxy's Edge 2]]'' {{C|Appears as a toy}} |
*''[[Galaxy's Edge 2]]'' {{C|Appears as a toy}} |
||
| Line 651: | Line 674: | ||
==Sources== |
==Sources== |
||
| − | {{ |
+ | {{Scroll_box| |
*{{SWE|technology|atatwalker|AT-AT walker}} |
*{{SWE|technology|atatwalker|AT-AT walker}} |
||
*{{SWE|technology|atstwalker|AT-ST walker}} |
*{{SWE|technology|atstwalker|AT-ST walker}} |
||
| Line 682: | Line 705: | ||
*''[[Solo: A Star Wars Story The Official Guide]]'' |
*''[[Solo: A Star Wars Story The Official Guide]]'' |
||
*''[[Solo: A Star Wars Story: Tales from Vandor]]'' |
*''[[Solo: A Star Wars Story: Tales from Vandor]]'' |
||
| − | *''[[Star Wars: Geektionary: The Galaxy |
+ | *''[[Star Wars: Geektionary: The Galaxy from A - Z]]'' |
*{{SW|url=bespin-history-gallery|text=Bespin History Gallery|archivedate=20170814025341}} |
*{{SW|url=bespin-history-gallery|text=Bespin History Gallery|archivedate=20170814025341}} |
||
*{{Databank|at-at-pilots|AT-AT Pilots|archivedate=20180319103409}} |
*{{Databank|at-at-pilots|AT-AT Pilots|archivedate=20180319103409}} |
||
| Line 692: | Line 715: | ||
==Notes and references== |
==Notes and references== |
||
| − | {{ |
+ | {{Scroll_box|{{Reflist}}}} |
{{Interlang |
{{Interlang |
||
Revision as of 19:53, 21 January 2020
| | |

Warning: This infobox has missing parameters: restored and unrecognized parameters: members
- "Just wondering what our objective is, Lieutenant."
"Bring peace and prosperity to the galaxy, install a regime loyal to the Emperor and eradicate the hostiles." - ―Corporal Han Solo and Lieutenant Bolandin during the Mimban Campaign
The Imperial Army, also known as the Imperial Forces or Imperial ground forces, was the land-based branch of the Galactic Empire's military. As the ultimate evolution of the Grand Army of the Republic, the Imperial Army swiftly asserted dominance throughout the galaxy, making use of highly trained soldiers, mechanized walkers, and overwhelming numbers. The Imperial Army worked in tandem with the forces of the Imperial Navy, relying on the numerous fleets to transport legions of troopers across the far reaches of the galaxy. The most common soldiers of the Empire's ground forces were known as Imperial Army soldiers, the core infantry of the army tasked with establishing Imperial regimes and pacifying troublesome worlds. As the Imperials reinforced their grip on the galaxy, these units were gradually phased out in favor of stormtroopers, elite shock troops fanatically loyal to the Emperor himself.
Description
Structure
The Imperial Army served as the ground based strike force of the Galactic Empire.
As the branch of the Imperial Military that dealt with surface operations, the Imperial Army was composed of many sub-units and organizations, and utilized a vast array of vehicles to achieve its objectives.[5]
Leading overall Imperial Military strategy was the Supreme Commander, who was the head of Imperial High Command. The Supreme Commander was briefed daily by the Joint Chiefs, who themselves were subservient to the Galactic Emperor. The General Staff was responsible for making decisions for army operations and was itself a part of Imperial High Command. As stormtroopers were part of the Stormtrooper Corps, which itself was placed under the Army, they received their orders from the Stormtrooper Command subdivision of High Command.[5]
The Army Engineering Corps served to construct Imperial installations and demolish enemy fortifications. The Imperial Army also maintained its own Military Police, although they were overshadowed by the Stormtrooper Corps. Other divisions included the Maritime Division, Special Forces Command, and Imperial Army Intelligence.[7] No less important were the abundance of smaller organizations, including general maintenance and administration.[5]
The Imperial Army often favored the use of a tactic known as combined arms, in which both infantry and armored cavalry were used together against a target so the enemy would have to defend against both.[13] The Empire's armored cavalry consisted of many different types of walkers, such as the All Terrain Armored Transport, and tanks, such as the 2-M Hover Tank,[14] Imperial-class 1-H repulsortank,[13] and the TX-225 GAVw "Occupier" combat assault tank.[15] These were organized under the Imperial Armor Corps and Imperial Artillery Corps, a sub-unit of the Armor Corps.
The Imperial Army also maintained numerous TIE fighters for combat use in planetary atmospheres[16] as part of the Army Air Corps.[5] As a result, TIE fighter pilots in the Imperial Army were nicknamed ground-hogs unlike their Imperial Navy counterpart, the vac-heads. Since vac-heads maintained better public recognition through the HoloNet News, a bitter rivalry existed between the two branches, with each having their own anthem and bars at Imperial flight bases in order to avoid conflict. However the Bright Jewel Oversector Flight Base did not separate its bar between the branches, in one instance resulting in members of Nashtah Squadron to provoke other members of the Imperial Navy by singing the Ground-hog anthem.[16]
History
Formation

An Imperial Army officer on the recruitment poster We Fight, We Win by Stassen Bine.
The Imperial Army originated from the Grand Army of the Galactic Republic, and served as the Empire's ground forces for maintaining control of the countless worlds under the New Order.[17] The Emperor's policy of military expansion saw the continued growth of the Imperial Army under the guise of combating remaining Separatist holdouts.[5]
Many soldiers in the Imperial Army were members of local planetary defense forces who took up arms during the Clone Wars and were subsequently conscripted into Imperial service. Classified as infantry, Imperial Army soldiers were gradually upgraded and replaced with Stormtrooper forces, but would continue to serve side-by-side with stormtroopers to bolster their effectiveness for several years after the formation of the Empire.[18]
Imperial consolidation
In 14 BBY, Imperial Army forces were garrisoned on the Imperial protectorate of Ryloth, which was in reality under Imperial occupation. Colonel Belkor Dray served as Governor Moff Delian Mors' second-in-command and commanded the Imperial Army forces on Ryloth. The stormtroopers on Ryloth operated outside the Imperial Army command structure and answered directly to the Empire. He used his senior position within the Imperial government and military on Ryloth to spy for Cham Syndulla, the leader of the Free Ryloth movement. Other elements of the Imperial Army were stationed at the Equatorial Communications Hub, which was commanded by Major Steen Borkas. Though their base was attacked, Borkas' forces including stormtroopers assisted Moff Mors in rescuing Emperor Palpatine and Darth Vader and foiling Dray and Syndulla's plot to assassinate the Empire's leadership. Following the failed assassination attempt, the Imperial authorities embarked on a crackdown on Ryloth and strengthened the stormtrooper presence on the planet.[3]
The 224th Imperial Armored Division of the Imperial Army was engaged in a campaign for the planet Mimban.
During 10 BBY, the mighty Imperial Army focused its sights on the swampy world of Mimban, a planet known for its abundance of natural resources. At the behest of Grand Moff Wilhuff Tarkin, all regional governors were required to immediately increase production of materials benefiting the Imperial cause. Bin Essada, governor of the Circarpous sector within the Expansion Region, ordered all necessary resources to be stripped from Mimban at once, disregarding the indigenous population. The combined forces of the Imperial Army and Imperial Navy promptly invaded the planet, launching the Mimban campaign and initiating a bloody conflict between the entrenched Mimbanese and Imperials. The Imperial Army utilized its army soldiers in tandem with the more elite Stormtroopers, along with All Terrain Defense Turrets, AT-haulers and air support provided by naval TIE fighters to pacify the stubborn Mimbanese guerillas. Among the battered army soldiers was a young Han Solo, serving as a corporal within the 224th Imperial Armored Division. Solo initially attended the Carida Academy in the hopes of one day becoming an Imperial pilot and returning to his homeworld of Corellia. However the maverick prospect was eventually transferred to infantry duty on Mimban following multiple instances of insubordination and recklessness. Though the seizure of resources was the military's primary goal during the campaign, they also sought to establish a regime that fell under the direct jurisdiction of the Galactic Empire.
By 5 BBY, Lothal's Academy for Young Imperials was training Imperial cadets for both the Imperial Army and Stormtrooper Corps. Cadets selected for the stormtrooper program received a more rigorous program than those training for the Army track.[19] Cadets training as Imperial Army officers including Zare Leonis underwent a series of grueling training exercises including multiple sessions in a simulated combat chamber called The Well.[20] Promising Army officer cadets also underwent training at the Arkanis Academy, which was run by the charismatic Commandant Brendol Hux,[21] the architect of the First Order's stormtrooper program.[22]
Battling the Rebellion
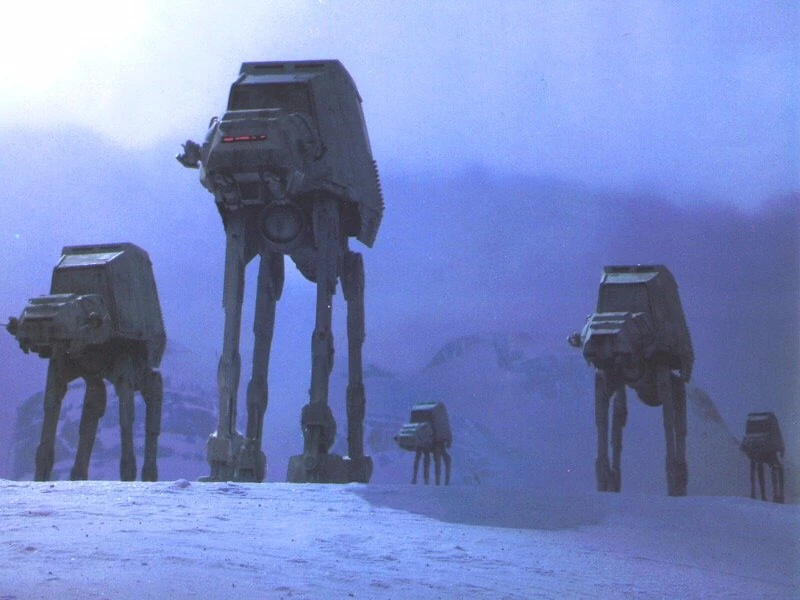

Imperial AT-AT walkers during the Battle of Hoth.
During both the early rebellion and the Galactic Civil War, the Imperial Army saw action against various rebel forces including the Spectres,[23] the Phoenix Cell,[24] Saw Gerrera's Partisans, and the Alliance to Restore the Republic.[15] The Imperial Army was deployed on many worlds across the galaxy including Tatooine[9] and saw action on multiple locations including Hoth[25] and Endor.[26] During the Battle of Hoth, General Maximillian Veers commanded the Imperial ground assault on Echo Base.[25] At the Battle of Endor, Imperial Army forces and stormtroopers defended the second Death Star's shield generator. Despite dogged resistance, the Imperial forces on Endor were defeated by the rebels and their local Ewok allies.[26]
Following the death of the Emperor and Darth Vader at Endor, the Imperial Army and other branches of the Imperial Military fought against the New Republic on multiple worlds and fronts including the Wretch of Tayron,[27] Naalol, Akiva, and Sevarcos.[28] By 5 ABY, elements of the Imperial Army on Kashyyyk came under the command of Grand Moff Lozen Tolruck. Several Imperial Army personnel were stationed at Lozen Tolruck's island fortress including Forest troopers. Many Imperial personnel were killed when Han Solo, Chewbacca and their associates staged a successful Wookiee slave uprising against the Empire.[29]
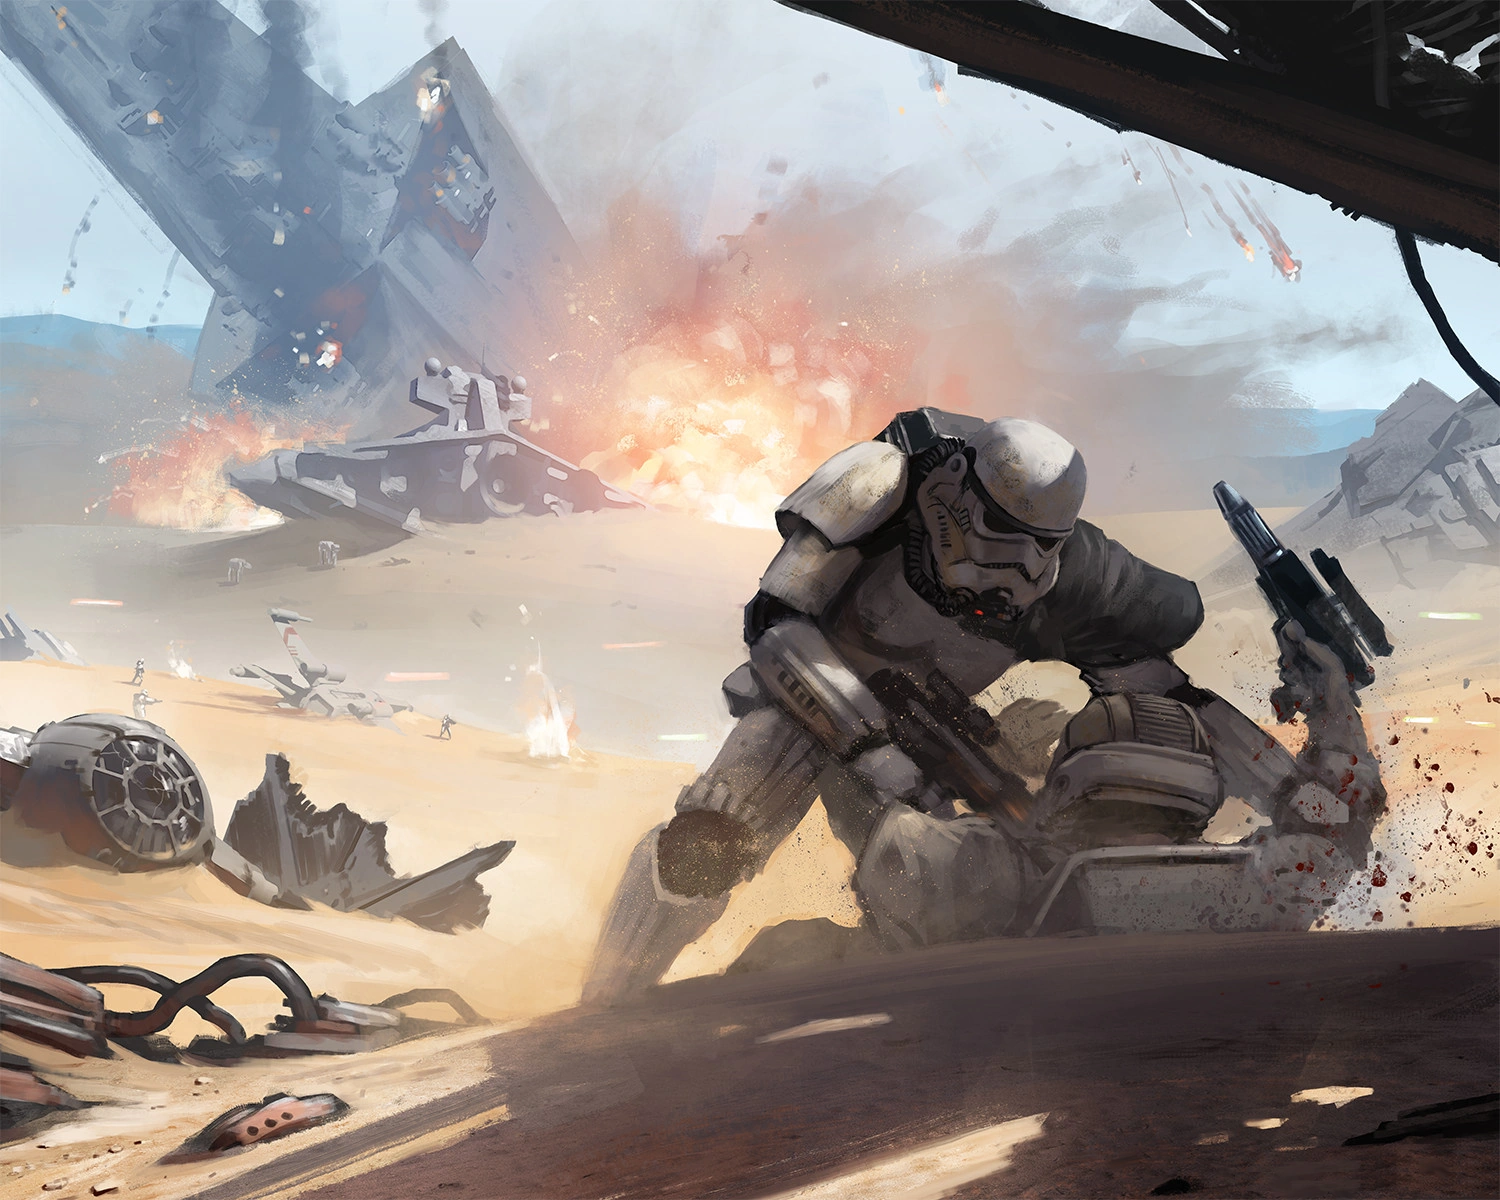

New Republic and Imperial forces engaged in a final decisive battle on the desert world of Jakku.
After Fleet Admiral Gallius Rax took control of most of the Imperial remnants, his forces on Jakku included elements of the Imperial Army and Stormtrooper Corps. The Clone Wars veteran General Hodnar Borrum commanded the Imperial ground forces during the cataclysmic Battle of Jakku, which saw the defeat of the Empire and the triumph of the New Republic. The Galactic Concordance stipulated the dissolution of the Empire including its vast military. While civilian functionaries were given conditional pardons, all Imperial officers were designated as war criminals.[30]
Legacy
The remnants of the Empire subsequently relocated to the Unknown Regions where they reestablished themselves as the First Order, a military junta dedicated to restoring the "Old Empire."[22] The First Order's army was established from the remants of the former Imperial Army.[12] Brendol Hux's son Armitage Hux became a high-ranking general in the First Order's army. Nearly a generation later, the surface of Jakku was still littered with wreckage including Imperial Army AT-AT walkers, one of which became the home of the Force-sensitive scavenger Rey.[22]
Groups
Brigades
Battalions
Corps
- 91st Mobile Reconnaissance Corps[34]
- Army Air Corps[5]
- Army Engineering Corps[5]
- Imperial Armor Corps[5]
- Stormtrooper Corps[9]
Divisions
- Barokki's division[35]
- Maritime Division[5]
- Unidentified armored division[36]
- 224th Imperial Armored Division[18]
Garrisons
- 975th stormtrooper garrison[32]
- Fortress Vader Imperial garrison[37]
- Scarif garrison[15]
- Tatooine Garrison[14]
- Garel Garrison[38]
- Plateau City Garrison[39]
- Lothal Garrison[40]
- Mantooine Garrison[17]
- Mataou Garrison[41]
- Winter's Edge stormtrooper garrison[42]
Legions
- First Legion[43]
- 68th Legion[14]
- Imperial Ninety-Seventh Stormtrooper Legion[44]
- One-Oh-Seventh Stormtrooper Legion[44]
- 291st Legion[19]
- 481st Legion[45]
- 501st Legion[44]
Platoons
Squads
- Foot Patrol 7[47]
- JN-093's squad[48]
- Squad two[49]
- Squad two (Crawler 413-24)[50]
- Squad Three[51]
- Squad four[52]
- Squad five[23]
- Squad Five (Lothal)[51]
- Squad six[52]
- Squad Seven[51]
- Squad eight[23]
- Team Nine[53]
- Team Twelve[53]
Specialized units
Unspecified
- Blizzard Force[4]
- Eadu Deployment[32]
- Hellhound attack force[55]
- Imperial Hammers Elite Armor Unit[32]
Organization
Drivers and pilots
The Imperial ground forces on the forest moon of Endor
As the Imperial Army used a large variety of vehicles, they deployed different variants of the Imperial combat driver.[56] Several variants included AT-ACT drivers,[32] AT-AT pilots,[25] AT-ST drivers,[26] Imperial combat assault tank commanders,[57] and Imperial combat assault tank pilots.[58] As part of the Imperial Army, the Army Air Corps[5] utilized TIE fighter pilots.[16]
Mercenaries
In addition to its own infantry forces, the Imperial Military also employed mercenaries to do their bidding. Dowutin Hunters, Fathier Riders, Tognath Marksmen, Twi'lek Incinerators, Luggabeast Munitioneers, as well as Gamorrean Warriors usually saw service with the Empire.[14]
Stormtroopers
In the early rule of the Empire, the Imperial Army continued to utilize clones, as well as Imperial shock troopers.[11] Purge Troopers, elite clones that served under the Inquisitorius in 18 BBY, were from the very last Kamino production line.[59] As the Empire grew older, its military forces transitioned from clones to birth-born human recruits and conscriptions and were re-designated as stormtroopers.[60] Stormtrooper commanders were stormtrooper officers that commanded groups of other stormtroopers. Their rank was denoted by the colored pauldron they were equipped with.[4] Imperial officers who led contingents of stormtroopers aboard a capital ship were also referred to as stormtrooper commanders.[61]
Elite units
The Imperial Army used special and elite stormtroopers for a number of operations. Special Commando Advanced Recon troopers were used for special missions,[54] Storm Commandos were special forces that were efficient in close-combat tactics,[62] Purge Troopers were special units deployed in the Anoat sector,[63] shadow troopers were elite units with experimental armor,[64][65] and Imperial shock troopers were used as heavy frontline troops as well as bodyguards for Emperor Palpatine himself[66] and as heavy weapons specialists.[14] At times, the experimental phase II dark troopers were also used by the Imperial Army.[14]
Environment
The various environments in the galaxy called for a variety of stormtroopers that specialized in different surroundings. Swamptroopers were specialized for operations on swamped worlds,[5] seatroopers were equipped for underwater combat,[20] magma troopers and Crimson Stormtroopers specialized in activities on volcanic environments,[64] cold weather assault stormtroopers for sub-zero combat,[67] sandtroopers and their sub-variant, the dewback trooper, were utilized for desert operations,[68][60] spacetroopers for operations in vacuum environments such as space,[9] coastal defender stormtroopers for tropical environments,[14] forest troopers for densely forested conditions,[29] and the wet-weather gear stormtroopers, which were used on the swamp planet Mimban.[69]
Specialized
The Imperial Army had a wide array of stormtroopers that specialized in a type of combat or weapon. There were several variants of the Heavy Weapons Stormtrooper, which included the Heavy Sandtrooper, the Heavy Snowtrooper, and the Heavy Shoretrooper,[14] and also used was the Imperial Heavy Trooper.[62] The Army also made use of Jumptroopers, which had several variations as well. They included Arctic Jumptroopers, Desert Jumptroopers, and Forest Jumptroopers.[14] Stormtrooper snipers,[70] sniper troopers, and scout troopers were used as recon and sniper units.[14] Demolition Troopers,[71] rocket stormtroopers,[70] and stormtrooper grenadiers used heavy ordnance,[70] while flametroopers utilized flamethrowers.[72] Other specialized stormtroopers used by the Imperial Army included the riot control stormtroopers,[31] the patrol troopers,[73] and the Range trooper.[18]
Other
Although the core of the Imperial Army was composed of stormtroopers and combat drivers, the Imperial Army also used Kubaz Invaders, Ongidae Oppressors, and Rodian Recon Snipers as part of their forces, different from mercenaries,[14] as well as Imperial Army soldiers such as swamp troopers, which were also used on the world Mimban.[18] For black-ops missions, the Army deployed the deadly Imperial Army Special Missions troopers that were able to effectively act as saboteurs, infiltrators, assassins, commandos, and slicers. Engineers were also frequently used by the Army, and were part of the Army Engineering Corps.[5]
Vehicles and machinery
As the ground forces of the Galactic Empire, the Imperial Army possessed a vast arsenal of ground and surface vehicles. Part of the Imperial Army, the Imperial Armor Corps made use of combat speeders and infantry fighting vehicles.[5]
Artillery
The Imperial Artillery Corps, a sub-unit of the Armor Corps, utilized several artillery pieces, including the fixed 1.4 FD P-Tower, and the mobile SP.9 and Self-Propelled Heavy Artillery Turbolaser.[5] The Imperial Army also utilized the All Terrain Attack Pod in an artillery capacity.[74]
Nautical vehicles
The Maritime Division of the Imperial Army used several surface ships, including aircraft carriers, submarines, and waveskimmers.[5] The Imperial Army also utilized OMS Devilfish subs and another type of submarine.[75]
Repulsorcraft and wheeled
While the Imperial Army commonly used walkers, they also made use of wheeled and repulsorcraft vehicles. Wheeled vehicles included the HAVw A6 Juggernaut,[44] the treaded MTV-7 light vehicle,[14] the HCVw A9 turbo tank,[15] and the TX-225 Occupier combat assault tank line.[32] The larger models of repulsorcraft deployed by the Imperial ground forces consisted of the 2-M Hover Tank, the INT-4 Interceptor,[14] the assault tank,[76] the Imperial-class 1-H repulsortank,[13] the RX-200 Falchion-class assault tank,[74] the Imperial combat speeder,[77] the Imperial Troop Transport,[78] and the TX-225 GAVr "Occupier" combat assault tank.[49]
The Empire maintained several models of speeder bikes. These included the 74-Z speeder bike,[27] the 614-AvA speeder bike,[79] C-PH patrol speeder bike,[18] and the BARC speeder in the early rule of the Empire.[11]
Starships
The Imperial Army's Starfighter Corps, the Army Air Corps, used airspeeders and TIE line starfighters to conduct army operations.[5] The Imperial Army also made use of aerial landing platforms that served as mobile staging grounds for occupation forces.[75]
Walkers
The Imperial Army used walkers to achieve various objectives on the battlefield. Early in the Imperial Army's operations, it utilized the Clone Wars-era walkers that were later retired such as the All Terrain Recon Transport,[80] the All Terrain Tactical Enforcer,[81] and the All Terrain Open Transport.[62] Later walkers used were the All Terrain Armored Transport,[82] which consisted of two variants, one model of All Terrain Armored Transport was notably used during the early rebellion against the Galactic Empire,[83] and another All Terrain Armored Transport used throughout the Army's operational history.[82] The Elite AT-AT was a more upgraded version of the standard AT-AT,[14] while the All Terrain Armored Cargo Transport was used for the transportation of equipment and supplies.[15]
Other walkers used by the Imperial Army was the All Terrain Defense Pod,[84] the All Terrain Scout Transport,[85] the AT-ST Mark III, the Cold-weather AT-ST Mark III,[14] the All Terrain Missile Platform,[70] the AT-MP Mark III, the Enhanced AT-MP Walker, the Enhanced AT-ST Walker, the Mobile Heavy Cannon, the Cold-weather Mobile Heavy Cannon,[14] the AT-PT,[62] and the All Terrain Defense Turret.[14]
Weapons and equipment

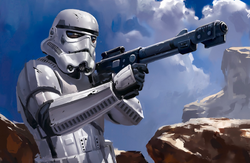
A stormtrooper wielding a T-7 ion disruptor rifle.
The Imperial Army had a vast range of infantry weapons to utilize, some of which dated back to the Clone Wars but most were of a newer design.[86]
Republic-era equipment
Shortly after the transformation of the Republic into the Empire, the Imperial Army used clone wars-era weapons like the DC-15A blaster, the DC-17 hand blaster, the DC-15 blaster rifle, RPS-6 rocket launcher and Z-6 rotary blaster cannon. Many were retired with only a limited number seeing any future service.[6][87][14]
Infantry weapons
It later came to use the E-11 blaster rifle, the E-10R blaster rifle, E-10 blaster rifle,[18] the E-22 blaster rifle,[15] the EE-3 carbine rifle,[71] SX-21 blaster rifle,[88] and the TL-50 Heavy Repeater,[31] as well as larger weapons like the RT-97C heavy blaster rifle, the DLT-19 heavy blaster rifle and the T-21 light repeating blaster.[9]
Heavy weapons
For heavier ordnance, the Army deployed the Z-6 rotary blaster cannon,[63] the MWC-35c "Staccato Lightning" repeating cannon,[42] the E-Web heavy repeating blaster cannon,[25] and the Reciprocating quad blaster cannon.[14]
Sniper rifles
For long range purposes, the Imperial Army made use of the T-21B heavy blaster,[71] the E-11s long-range blaster,[14] the DLT-19x targeting blaster,[31] and the DLT-20A laser rifle.[17]
Pistols and melee weapons
The Imperial Army issued several type of blaster pistol. Imperial personnel equipped with blaster pistol would either carrier the blaster in question as a secondary weapon or for personal defense. Among these weapons was the SE-14C blaster pistol,[9] the SE-14r light repeating blaster,[15] and the RK-3.[40]
Scout troopers used EC-17 hold-out blaster as a close-quarters alternative to their standard service rifle.[26]
The riot troopers was the main melee specialist in the Imperial Army and as such was equipped with melee weapons including baton.[31] electrobaton,[6] electrostaffs,[6] electrohammer[6].
Grenades and launchers
The Imperial Army also had an array of special weapons such as flamethrowers[72] and grenades such as the Class-A thermal detonator,[40] the N-20 Baradium-core thermal detonator,[9] the Sonic Imploder, the thermal imploder, the Flash grenade, the smoke bomb,[71] and the C-25 fragmentation grenade.[32] Heavy weapons included the T-7 ion disruptor rifle,[89] grenade launchers,[70] the RPS-6 rocket launcher,[90] the Smart Rocket, and the MPL-57.[71]
Droids and other equipment
Equipment used by the Imperial Army included suits and heated breather masks powered by a battery pack that could last up to two standard weeks, ice boots, and an insulated belt kama.[91] The army also used the DT-series sentry droid and the KX-series security droid for defense as well as combat.[14]
In terms of probe droids, the Imperial Army used the ID10 seeker droid,[92] the Viper probe droid[91] and its two variants: the 11-3K viper probe droid[93] and the Dwarf probe droid[94] and lastly DRK-1 Dark Eye probe droids.[14] Among medical droids was the FX-series medical assistant droid[11] and the 2-1B surgical droid[95].
Arms suppliers
BlasTech Industries was perhaps the single biggest supplier of arms for the Imperial Army, but other companies like Merr-Sonn Munitions, Inc.,[17] Morellian Weapons Conglomerate[42] and even Sienar Fleet Systems also provided their fair share of weapons.[96]
Legal restrictions
The Imperial Senate banned the use of antipersonnel disruptors and battle droids. In response, the Imperial Military, specifically the Army, circumvented these restriction by re-designating the object in question as something lawful; or by simply lying about the nature of the object.[15] Legally speaking the Imperial sentry droid and KX-series security droid were security droids and sentry droids respectfully. In reality, they were fully functional battle droids.[15]
T-7 ion disruptor rifles were banned from use after the brutal Siege of Lasan. But this ban did not stop the army from trying to reacquire such weapons.[15] Eventually the imperial army managed to get their hands on designs for the newer T-8 disruptor.[97]
Tactics
As noted by the Rebel General Pitt Onoran, the Imperial Army favored combined arms operations, which emphasized the deployment of infantry in concert with other military types, thus forcing the enemy to defend against one type of attack while leaving them vulnerable to another.[13]
Appearances
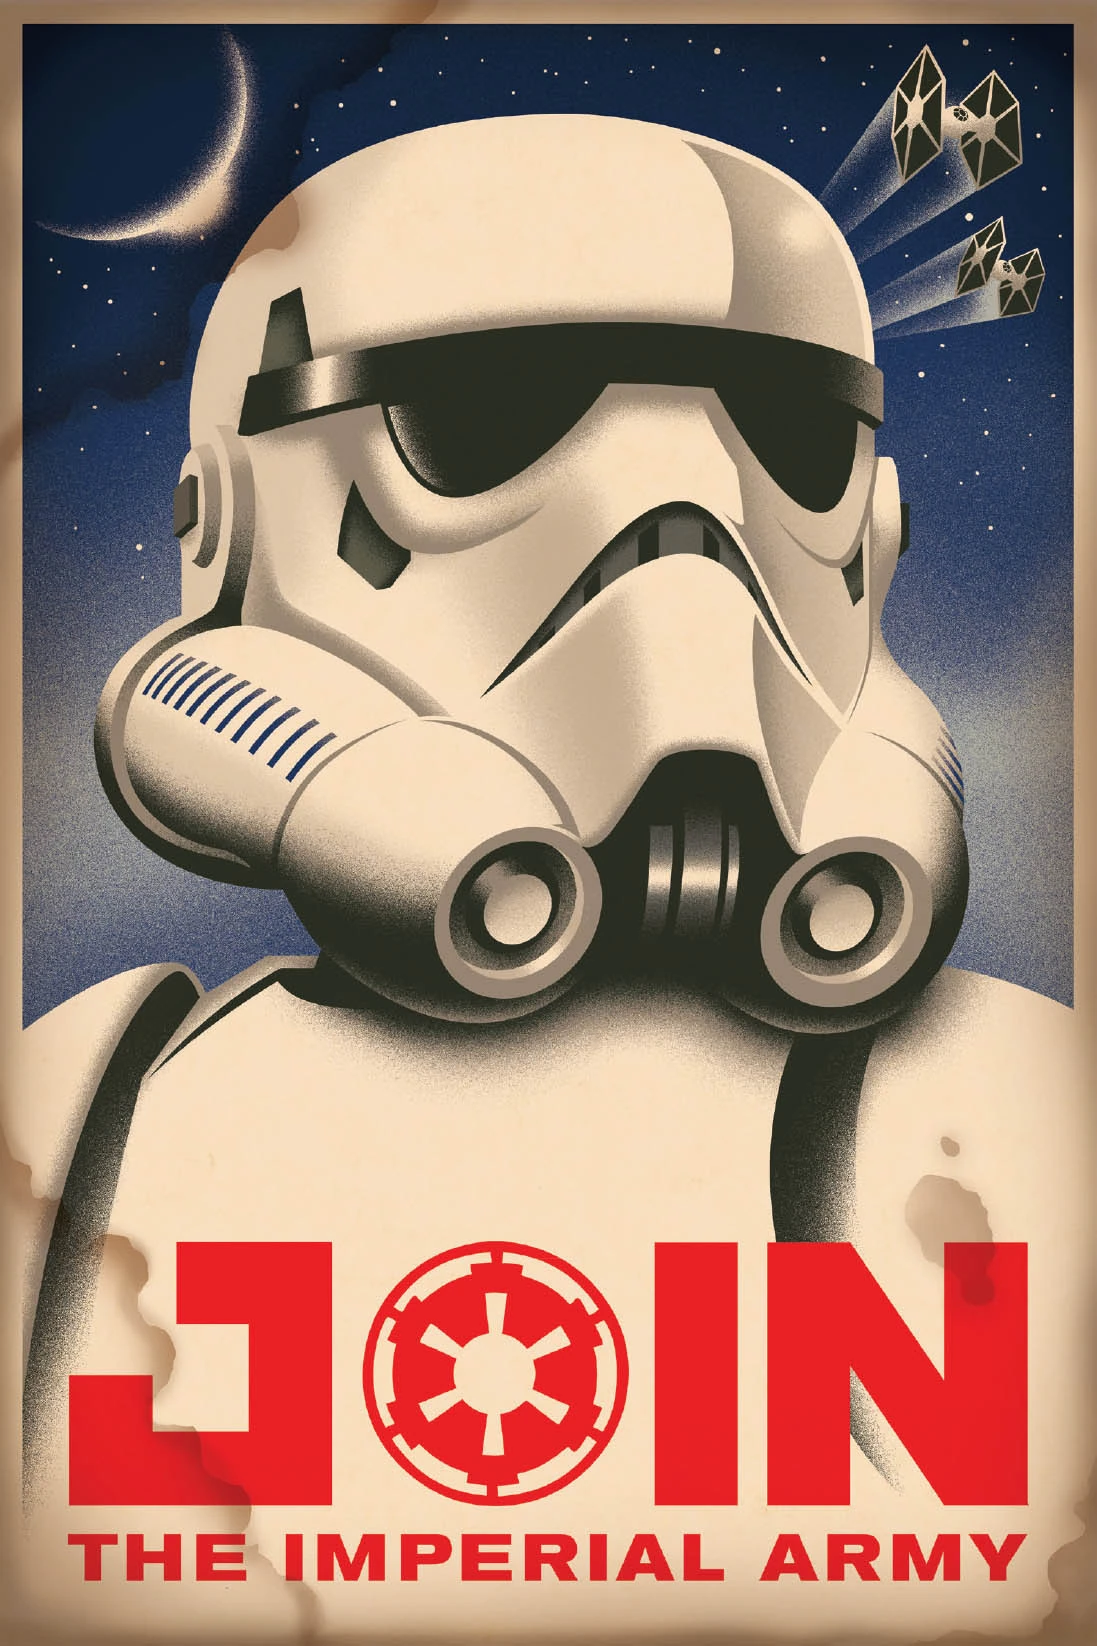

Non-canon appearances
- Star Wars Epic Yarns: A New Hope
- "Far Too Remote" — From a Certain Point of View
- Star Wars Epic Yarns: The Empire Strikes Back
- LEGO Star Wars: The Freemaker Adventures
- Star Wars Epic Yarns: Return of the Jedi