No edit summary Tag: sourceedit |
m (Cleanup and formatting fixes) |
||
| (4 intermediate revisions by the same user not shown) | |||
| Line 15: | Line 15: | ||
|skin=Brown<ref name="ITU" /> |
|skin=Brown<ref name="ITU" /> |
||
|cyber= |
|cyber= |
||
| − | |era=[[Rise of the Empire era]]<ref name="ITU" /> |
||
|affiliation=*[[Jedi Order/Legends|Jedi Order]]<ref name="ITU" /> |
|affiliation=*[[Jedi Order/Legends|Jedi Order]]<ref name="ITU" /> |
||
*[[Galactic Republic/Legends|Galactic Republic]]<ref name="ITU" /> |
*[[Galactic Republic/Legends|Galactic Republic]]<ref name="ITU" /> |
||
| Line 33: | Line 32: | ||
{{Quote|I am finished with war… Perhaps, if the Order one day rises from its ashes, I will once again take up my lightsaber. Until then, the galaxy will have to get along without my sword.|Kai Hudorra|Star Wars: Republic: Into the Unknown}} |
{{Quote|I am finished with war… Perhaps, if the Order one day rises from its ashes, I will once again take up my lightsaber. Until then, the galaxy will have to get along without my sword.|Kai Hudorra|Star Wars: Republic: Into the Unknown}} |
||
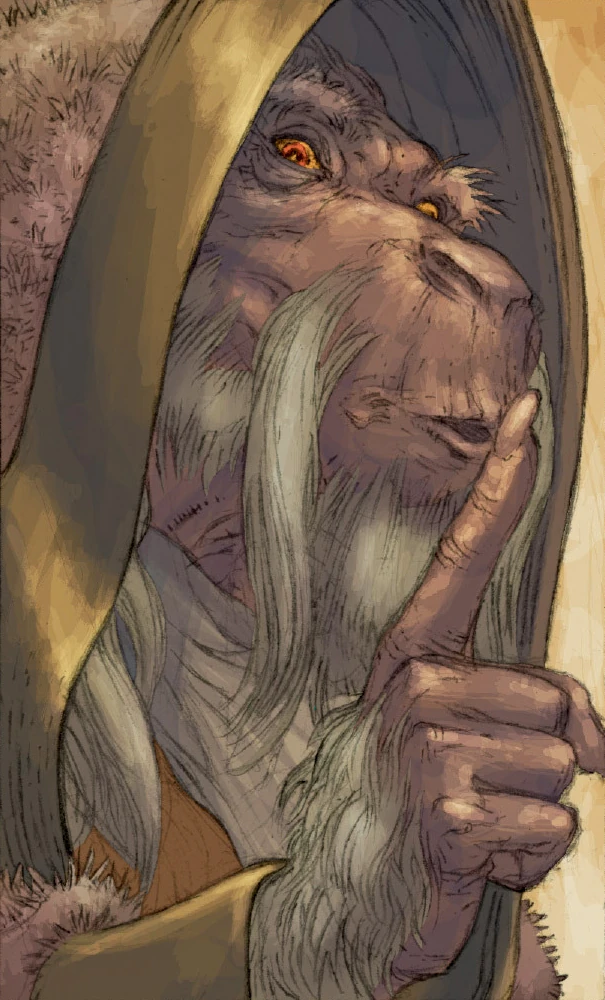
[[File:Hudorra1.jpg|thumb|right|150px|Master Hudorra hiding on [[Toola/Legends|Toola]].]] |
[[File:Hudorra1.jpg|thumb|right|150px|Master Hudorra hiding on [[Toola/Legends|Toola]].]] |
||
| − | Surviving until the final days of the war, Master Hudorra found himself assigned to the frozen world of [[Toola/Legends|Toola]], under the command of Master [[Simms]]. Along with Simms' Padawan [[Noirah Na]], the three rode [[motmot]]s as they led the charge against the [[Separatist Droid Army/Legends|Separatist Droid Army]]. During the [[Battle of Toola|fighting]] the Republic's [[Supreme Chancellor/Legends|Supreme Chancellor]], [[Palpatine]], betrayed the Jedi Order and issued [[Contingency Orders for the Grand Army of the Republic: Order Initiation, Orders 1 Through 150|Contingency]] [[Order 66/Legends|Order 66]] loyal clone commanders. Turning on their generals the clone troopers attacked the Jedi after the battle was ended. While Hudorra and Padawan Na escaped, Master Simms sacrificed her life. Riding aboard commandeered [[Single Trooper Aerial Platform/Legends|STAPs]], the two Jedi fled until they ran out of fuel and then hiked their way to [[Ithaqua Station]]. Leaving Na in an underused harborside warehouse, Hudorra made his way to the central market to learn why the clone forces had suddenly turned on them. Before learning anything more then the war was over, [[Senior clone commander|Commander]] [[Keller (clone commander)|Keller]] arrived in search of Hudorra, forcing the Bothan to flee once more.<ref name="ITU" /> |
+ | Surviving until the final days of the war, Master Hudorra found himself assigned to the frozen world of [[Toola/Legends|Toola]], under the command of Master [[Simms]]. Along with Simms' Padawan [[Noirah Na]], the three rode [[motmot]]s as they led the charge against the [[Separatist Droid Army/Legends|Separatist Droid Army]]. During the [[Battle of Toola|fighting]] the Republic's [[Supreme Chancellor/Legends|Supreme Chancellor]], [[Palpatine/Legends|Palpatine]], betrayed the Jedi Order and issued [[Contingency Orders for the Grand Army of the Republic: Order Initiation, Orders 1 Through 150|Contingency]] [[Order 66/Legends|Order 66]] loyal clone commanders. Turning on their generals the clone troopers attacked the Jedi after the battle was ended. While Hudorra and Padawan Na escaped, Master Simms sacrificed her life. Riding aboard commandeered [[Single Trooper Aerial Platform/Legends|STAPs]], the two Jedi fled until they ran out of fuel and then hiked their way to [[Ithaqua Station]]. Leaving Na in an underused harborside warehouse, Hudorra made his way to the central market to learn why the clone forces had suddenly turned on them. Before learning anything more then the war was over, [[Senior clone commander|Commander]] [[Keller (clone commander)|Keller]] arrived in search of Hudorra, forcing the Bothan to flee once more.<ref name="ITU" /> |
Hudorra and Na were eventually able to evade the [[Clone trooper/Legends|clones]] and even secure passage to [[Coruscant/Legends|Coruscant]]. While on the capital world, they made their way to the [[Jedi Temple]], where [[Unidentified Human Jedi (Jedi Temple)|a lone Jedi]] attempted to single-handedly take out an entire clone squad on the steps of the [[Jedi Temple Public Entrance|public entrance]]. Hudorra, realizing that the time of the [[Jedi/Legends|Jedi]] was over, watched as the man was cut down; immediately there after he discarded his and Na's lightsabers. At this point, Hudorra coldly cast Na aside, forcing her to adopt a new life apart from the Jedi, urging her to seek out a life of value and perhaps even a family.<ref name="ITU" /> |
Hudorra and Na were eventually able to evade the [[Clone trooper/Legends|clones]] and even secure passage to [[Coruscant/Legends|Coruscant]]. While on the capital world, they made their way to the [[Jedi Temple]], where [[Unidentified Human Jedi (Jedi Temple)|a lone Jedi]] attempted to single-handedly take out an entire clone squad on the steps of the [[Jedi Temple Public Entrance|public entrance]]. Hudorra, realizing that the time of the [[Jedi/Legends|Jedi]] was over, watched as the man was cut down; immediately there after he discarded his and Na's lightsabers. At this point, Hudorra coldly cast Na aside, forcing her to adopt a new life apart from the Jedi, urging her to seek out a life of value and perhaps even a family.<ref name="ITU" /> |
||
| Line 45: | Line 44: | ||
Several months after their previous meeting, Jennir arrived on Kestavel with [[Beyghor Sahdett]] and the crew of the ''[[Uhumele]]'', seeking an audience with Hudorra in their quest to assassinate [[Anakin Skywalker/Legends|Darth Vader]]. The massive Bothan, flanked by his bodyguards Kal and Urtsk, was not pleased to see them, but nevertheless allowed them into his casino and offered them access to its amenities at no cost. He, Jennir, Sahdett, [[Bomo Greenbark]], and [[H2]] met in his office privately to discuss their plan. However, like Jennir, the Bothan Jedi Master sensed Sahdett's true intentions. [[Telekinesis/Legends|Pulling]] a new lightsaber from H2 that Jennir had constructed for him, the two [[Duel on Kestavel|attacked]] the [[Verpine/Legends|Verpine]] Jedi. |
Several months after their previous meeting, Jennir arrived on Kestavel with [[Beyghor Sahdett]] and the crew of the ''[[Uhumele]]'', seeking an audience with Hudorra in their quest to assassinate [[Anakin Skywalker/Legends|Darth Vader]]. The massive Bothan, flanked by his bodyguards Kal and Urtsk, was not pleased to see them, but nevertheless allowed them into his casino and offered them access to its amenities at no cost. He, Jennir, Sahdett, [[Bomo Greenbark]], and [[H2]] met in his office privately to discuss their plan. However, like Jennir, the Bothan Jedi Master sensed Sahdett's true intentions. [[Telekinesis/Legends|Pulling]] a new lightsaber from H2 that Jennir had constructed for him, the two [[Duel on Kestavel|attacked]] the [[Verpine/Legends|Verpine]] Jedi. |
||
| − | Sahdett leaped out of the windows office, managing to push Hudorra into some gaming consoles, momentarily incapacitating him. Sahdett managed to kill Urtsk, Makall, and Jennir's companion [[Ko Vakier]] before nearly killing Jennir himself. Before he could strike the final blow, however, Hudorra managed to [[ |
+ | Sahdett leaped out of the windows office, managing to push Hudorra into some gaming consoles, momentarily incapacitating him. Sahdett managed to kill Urtsk, Makall, and Jennir's companion [[Ko Vakier]] before nearly killing Jennir himself. Before he could strike the final blow, however, Hudorra managed to [[Sun djem|slice]] Sahdett's lightsaber in half before slamming him into the wall with [[The Force/Legends|the Force]], ripping off his remaining wings and knocking him unconscious. |
| − | Hudorra expressed sadness that his prosperity had come to an end, but nevertheless remained focus on the task at hand. After receiving a casualty report from Bryti, he and Jennir interrogated a bound Sahdett, who told them how he was seduced by [[Palpatine |
+ | Hudorra expressed sadness that his prosperity had come to an end, but nevertheless remained focus on the task at hand. After receiving a casualty report from Bryti, he and Jennir interrogated a bound Sahdett, who told them how he was seduced by [[Palpatine/Legends|Palpatine's]] power and betrayed a [[Unidentified Human female Jedi|fellow Jedi]] to serve him. Informing them that the Empire had been alerted to their presence, Sahdett continued to taunt the pair as Hudorra ignited his lightsaber; however, instead of killing the fallen Jedi, the Bothan only sliced off his antennae before gagging him. |
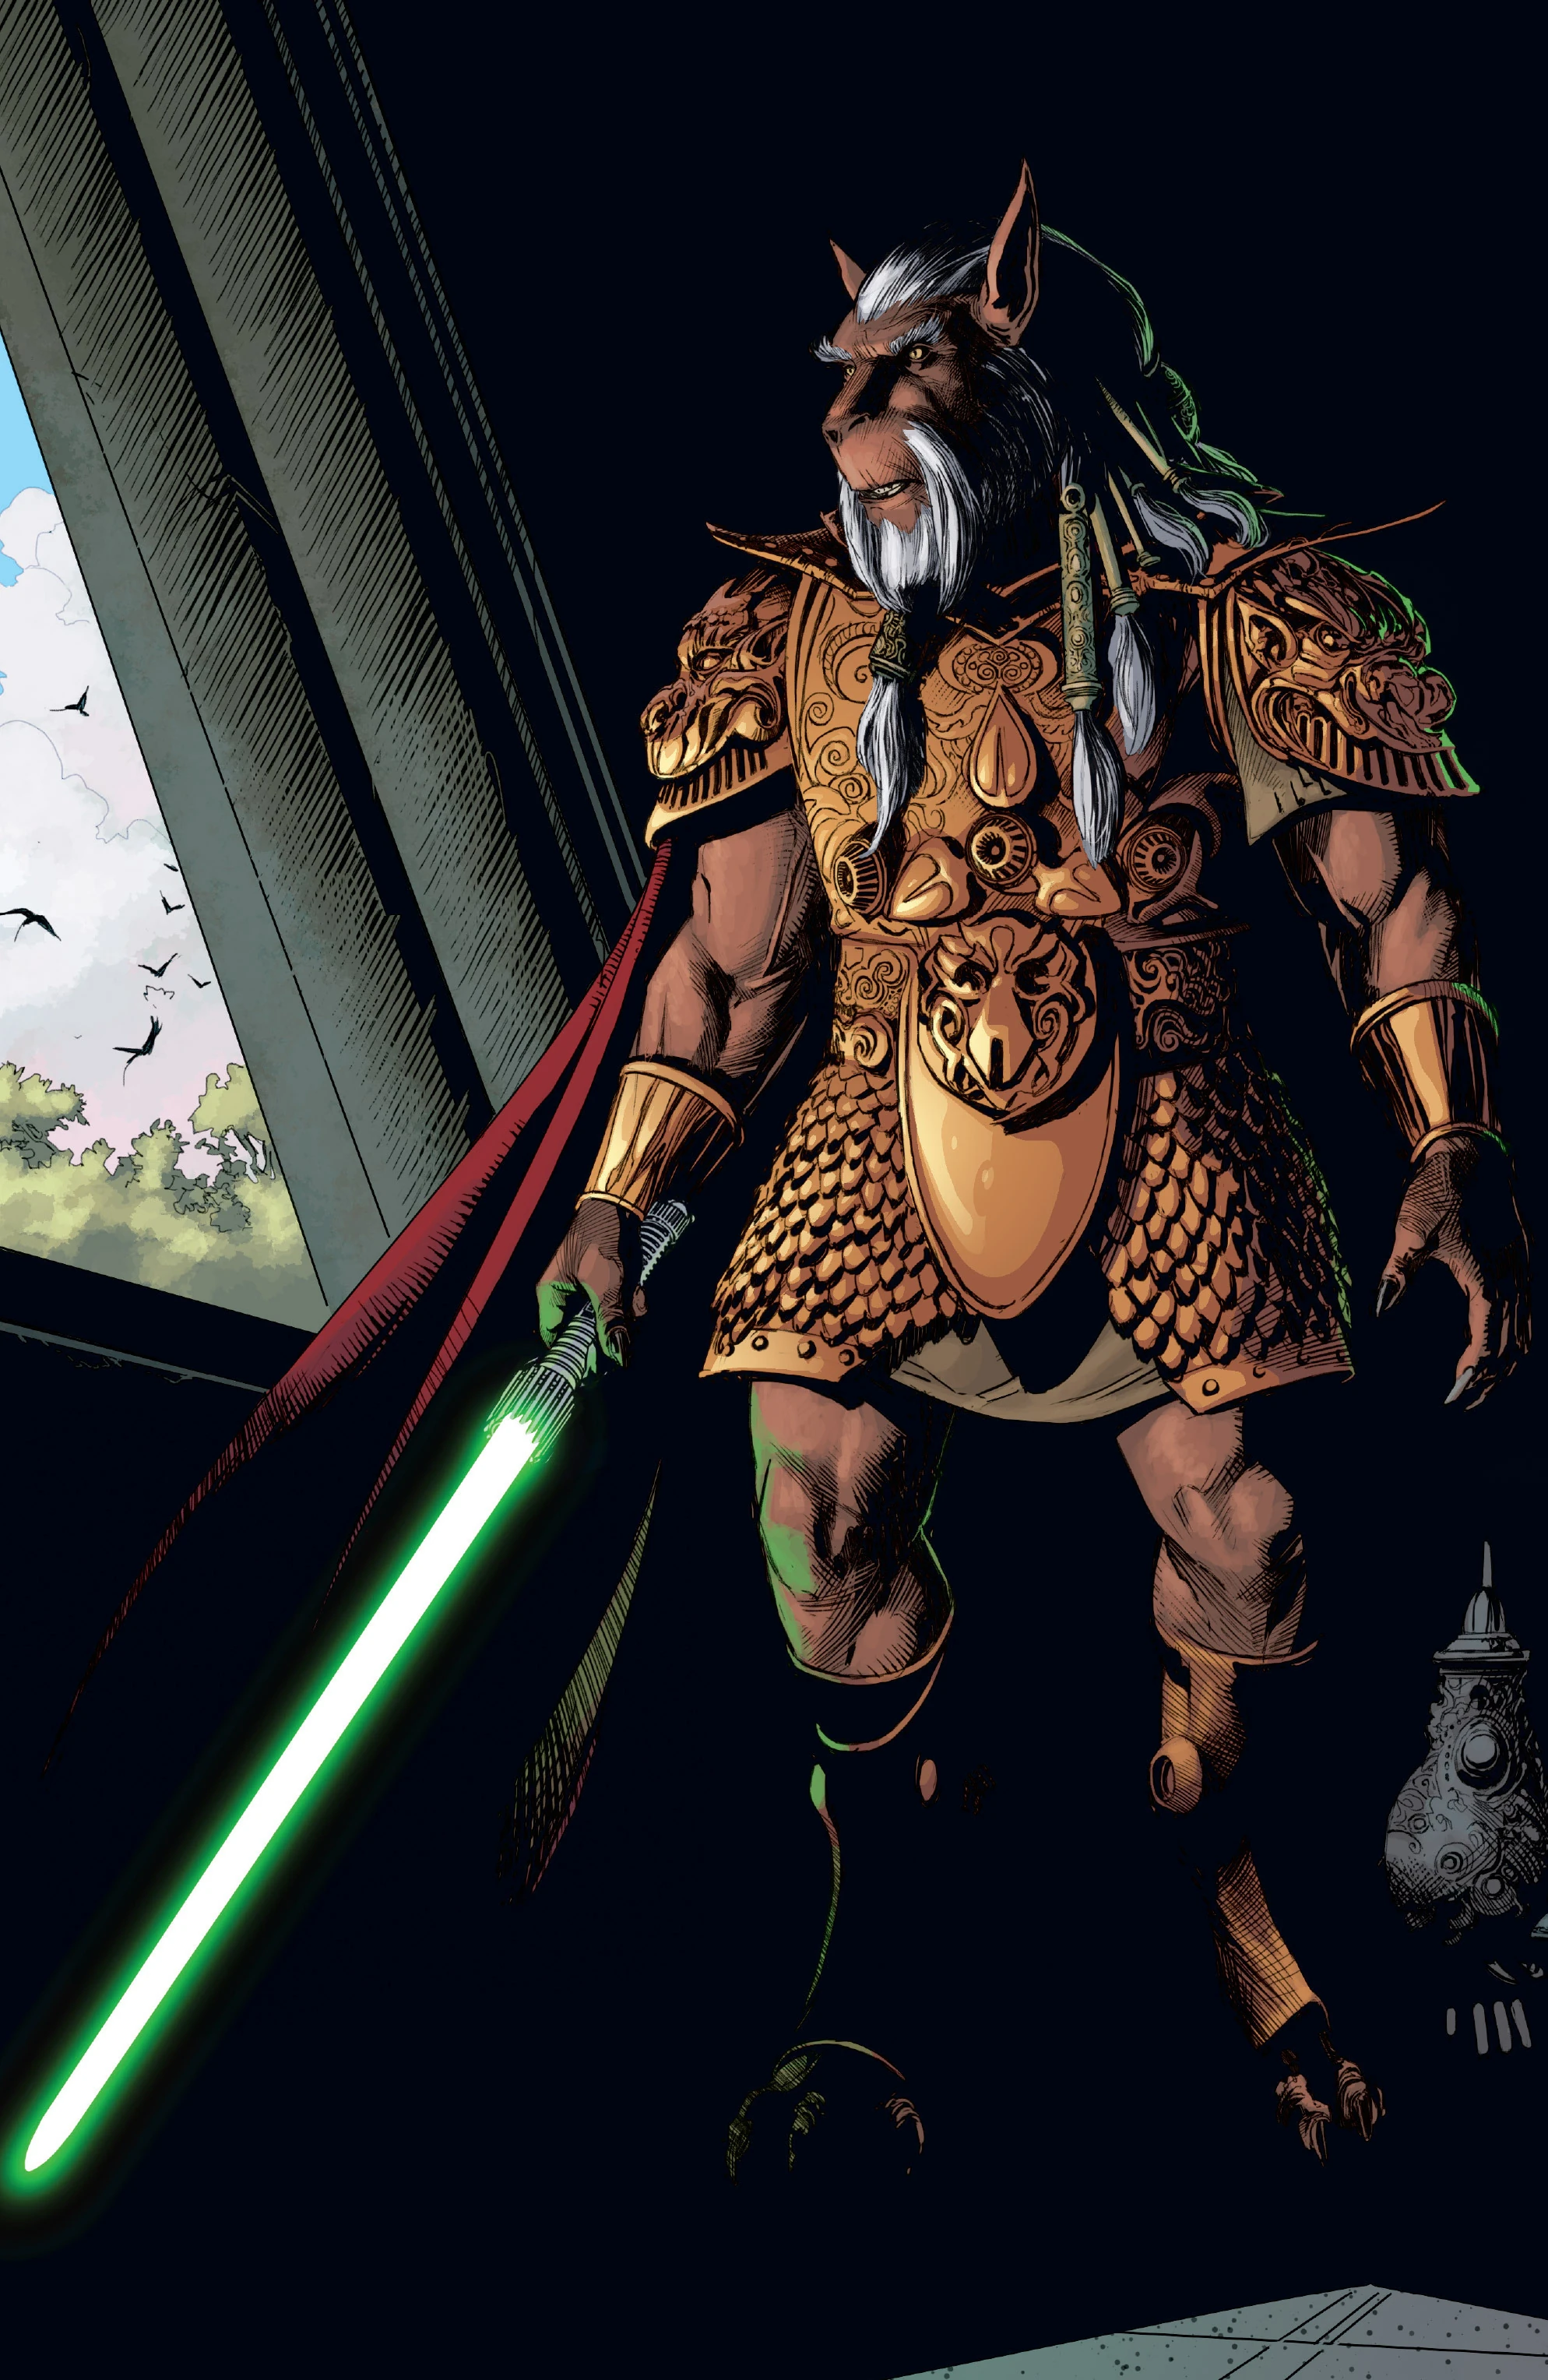
[[File:KaiHudorraBoss.jpg|thumb|225px|left|Kai Hudorra, lightsaber ready.]] |
[[File:KaiHudorraBoss.jpg|thumb|225px|left|Kai Hudorra, lightsaber ready.]] |
||
| Line 59: | Line 58: | ||
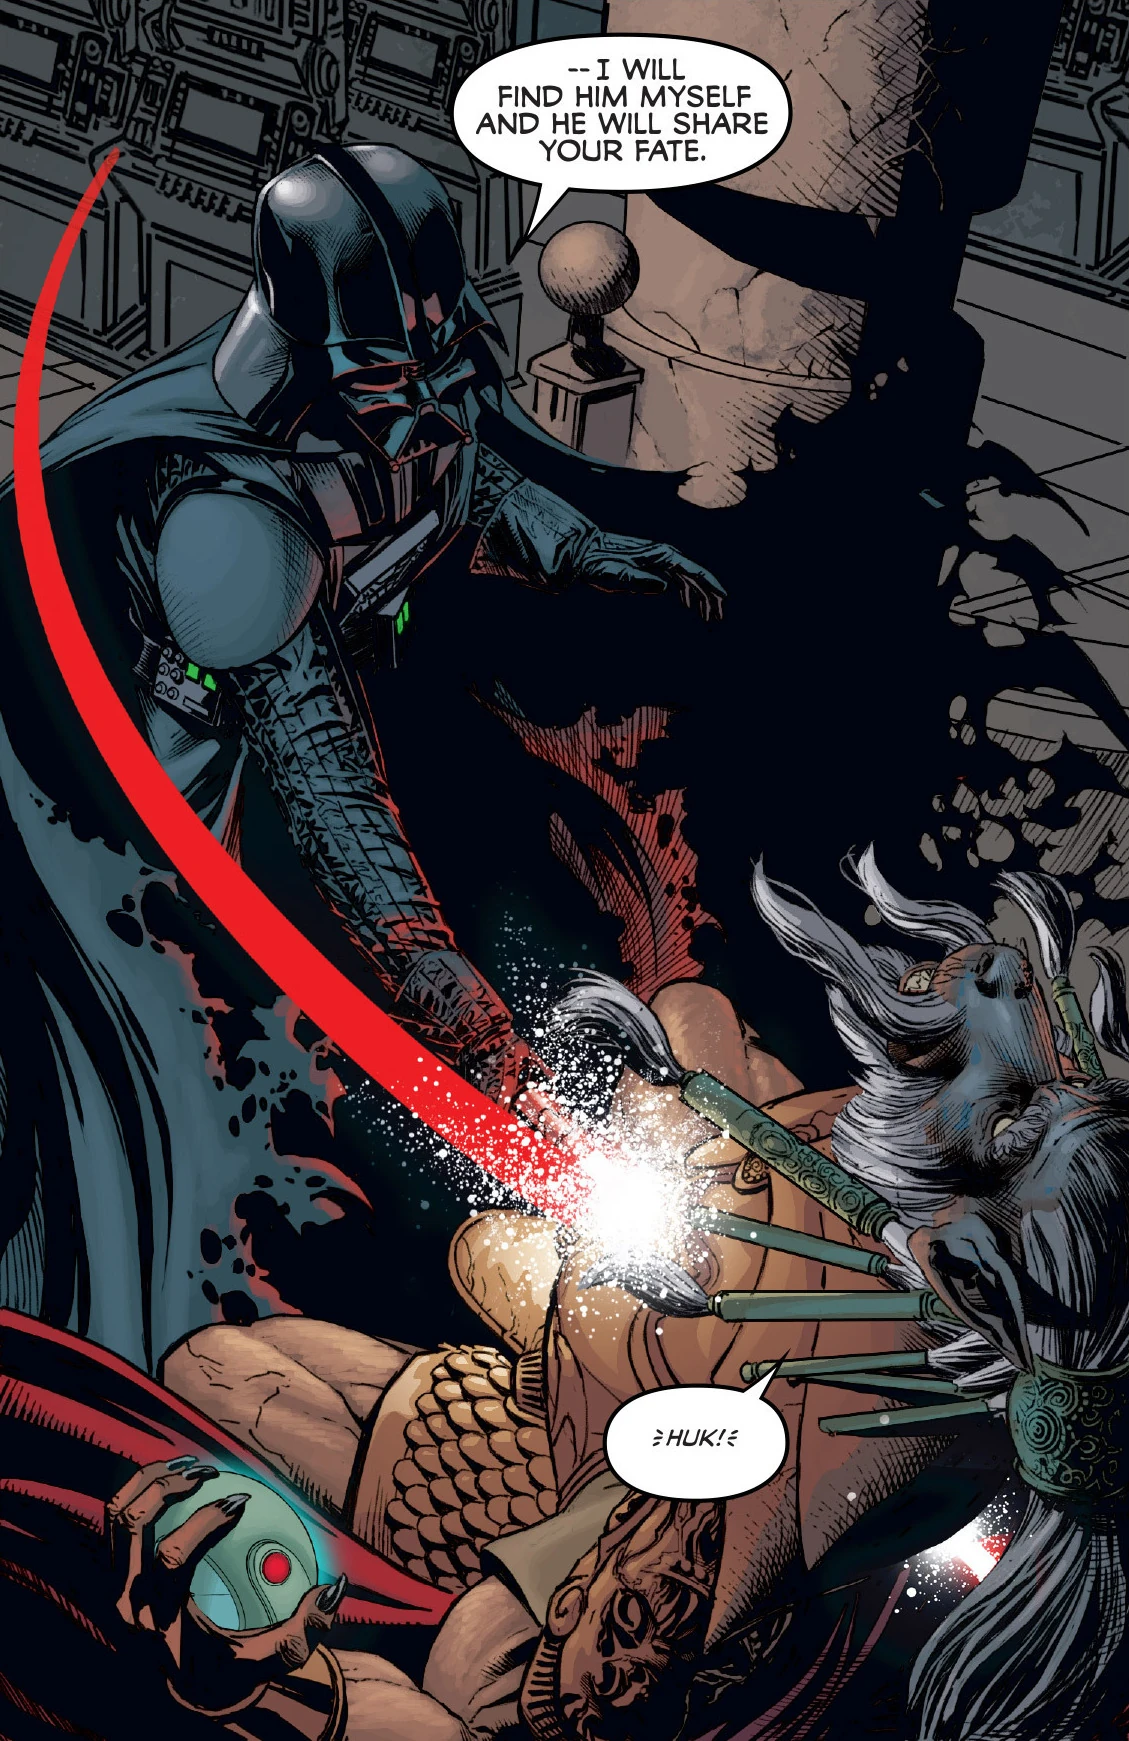
[[File:DeathofKaiHudorra.jpg|thumb|right|200px|Hudorra is killed by Vader.]] |
[[File:DeathofKaiHudorra.jpg|thumb|right|200px|Hudorra is killed by Vader.]] |
||
{{Quote|Go to Hell.|Kai Hudorra, to Darth Vader|Dark Times—A Spark Remains 5}} |
{{Quote|Go to Hell.|Kai Hudorra, to Darth Vader|Dark Times—A Spark Remains 5}} |
||
| − | As the Imperials crossed the bridge, Hudorra initiated the [[Ambush at Kestavel|ambush]]. Having survived the explosion that killed his [[Platoon/Legends|platoon]], the former Anakin Skywalker entered the Lucky Twi'lek. Hudorra emerged from the shadows to meet him. [[Lightsaber combat/Legends|Clashing blades]], Hudorra drew him further into the casino, throwing game machines at him and having sensed the injuries he had [[Duel on Mustafar/Legends|received]] on [[Mustafar/Legends|Mustafar]], taunted him about them. Hudorra attempted to press a [[Thermal detonator/Legends|thermal detonator]] that would trap both of them under the rubble, if not kill them outright. Vader, however, used the Force to stop the button from being pressed, catching the Jedi Master off guard. Vader then used this opportunity to [[Telekinesis/Legends#Saber Throw|throw]] his lightsaber at Hudorra, [[Cho mai|severing]] his weapon hand. Vader questioned him about Dass Jennir, but Hudorra refused to reveal Jennir's location; Vader then executed him by [[ |
+ | As the Imperials crossed the bridge, Hudorra initiated the [[Ambush at Kestavel|ambush]]. Having survived the explosion that killed his [[Platoon/Legends|platoon]], the former Anakin Skywalker entered the Lucky Twi'lek. Hudorra emerged from the shadows to meet him. [[Lightsaber combat/Legends|Clashing blades]], Hudorra drew him further into the casino, throwing game machines at him and having sensed the injuries he had [[Duel on Mustafar/Legends|received]] on [[Mustafar/Legends|Mustafar]], taunted him about them. Hudorra attempted to press a [[Thermal detonator/Legends|thermal detonator]] that would trap both of them under the rubble, if not kill them outright. Vader, however, used the Force to stop the button from being pressed, catching the Jedi Master off guard. Vader then used this opportunity to [[Telekinesis/Legends#Saber Throw|throw]] his lightsaber at Hudorra, [[Cho mai|severing]] his weapon hand. Vader questioned him about Dass Jennir, but Hudorra refused to reveal Jennir's location; Vader then executed him by [[Shiak|stabbing]] him through the chest.<ref name="DT32" /> |
Before he died, Hudorra entrusted [[Bryti]] with a [[holodisc]] containing his final farewell. A drugged Jennir reawakened on the ''Uhumele'', which had already fled the battle, and was given it by the butler. Jennir opened the message in the presence of the whole crew. In it, Hudorra informed them that he was dead, but had died with hope that the Jedi Order would survive, due to small sparks like Jennir, which had to be preserved. He ended by [[May the Force be with you/Legends|wishing that the Force be with them all]]. |
Before he died, Hudorra entrusted [[Bryti]] with a [[holodisc]] containing his final farewell. A drugged Jennir reawakened on the ''Uhumele'', which had already fled the battle, and was given it by the butler. Jennir opened the message in the presence of the whole crew. In it, Hudorra informed them that he was dead, but had died with hope that the Jedi Order would survive, due to small sparks like Jennir, which had to be preserved. He ended by [[May the Force be with you/Legends|wishing that the Force be with them all]]. |
||
| Line 96: | Line 95: | ||
[[Category:Gamblers]] |
[[Category:Gamblers]] |
||
[[Category:Jedi Generals]] |
[[Category:Jedi Generals]] |
||
| ⚫ | |||
[[Category:Jedi Purge victims]] |
[[Category:Jedi Purge victims]] |
||
[[Category:Males]] |
[[Category:Males]] |
||
| ⚫ | |||
Revision as of 02:43, 4 June 2019
Warning: This infobox is missing the following parameters: parents, pronouns, children, siblings, partners, families, feathers
- "We had seen so much bloodshed... Every Jedi we knew had been killed, and more were being hunted down every day. Prudence and survival seemed wisdom. In any case, that was the choice I made. But Master Jennir took a different route. Or, rather, I diverged while he remained on the path to which we had both originally been called. Now I see that his was the more noble decision."
- ―Kai Hudorra
Kai Hudorra was a male Bothan Jedi Master who served the Jedi Order and the Galactic Republic as a General in the Grand Army of the Republic during the Clone Wars. Surviving the traitorous Contingency Order 66 which effectively disbanded the Jedi Order, Master Hudorra discarded his lightsaber and went into hiding. Taking ownership of The Lucky Twi'lek on Kestavel, he managed to remain undetected by the Empire for several months until he was betrayed by the Sith-turned fallen Jedi, Beyghor Sahdett. He, his staff, fellow Jedi Dass Jennir, and the crew of the Uhumele attempted to assassinate Darth Vader, but Vader survived and slew the Bothan Jedi Master.
Biography
Jedi Master
A Force-sensitive Bothan, Kai Hudorra was trained in the ways of the Force by the Jedi Order; Hudorra was familiar with the teachings of Master Micah Giiett, a member of the Jedi High Council during his early life.
Eventually attaining the rank of Jedi Master after constructing a green-bladed lightsaber, Hudorra was serving the Order when the Republic went to war with the Confederacy of Independent Systems. Obeying the orders of the High Council, Hudorra took up the rank of General within the Grand Army of the Republic and led clone troopers in the Clone Wars.[2]
Fall of the Jedi
- "I am finished with war… Perhaps, if the Order one day rises from its ashes, I will once again take up my lightsaber. Until then, the galaxy will have to get along without my sword."
- ―Kai Hudorra
Master Hudorra hiding on Toola.
Surviving until the final days of the war, Master Hudorra found himself assigned to the frozen world of Toola, under the command of Master Simms. Along with Simms' Padawan Noirah Na, the three rode motmots as they led the charge against the Separatist Droid Army. During the fighting the Republic's Supreme Chancellor, Palpatine, betrayed the Jedi Order and issued Contingency Order 66 loyal clone commanders. Turning on their generals the clone troopers attacked the Jedi after the battle was ended. While Hudorra and Padawan Na escaped, Master Simms sacrificed her life. Riding aboard commandeered STAPs, the two Jedi fled until they ran out of fuel and then hiked their way to Ithaqua Station. Leaving Na in an underused harborside warehouse, Hudorra made his way to the central market to learn why the clone forces had suddenly turned on them. Before learning anything more then the war was over, Commander Keller arrived in search of Hudorra, forcing the Bothan to flee once more.[2]
Hudorra and Na were eventually able to evade the clones and even secure passage to Coruscant. While on the capital world, they made their way to the Jedi Temple, where a lone Jedi attempted to single-handedly take out an entire clone squad on the steps of the public entrance. Hudorra, realizing that the time of the Jedi was over, watched as the man was cut down; immediately there after he discarded his and Na's lightsabers. At this point, Hudorra coldly cast Na aside, forcing her to adopt a new life apart from the Jedi, urging her to seek out a life of value and perhaps even a family.[2]
Witness to this was fellow Jedi Master Dass Jennir, who had traveled to Coruscant as well. Unlike Hudorra, he believed the way of the Jedi could still stand against the Galactic Empire and returned to New Plympto to fight its Imperial occupiers. When asked what he would do with his life, Hudorra replied he planned to follow Master Giiett's wisdom stating that a Force user would make a good living as a gambler.[2]
Casino on Kestavel
- Dass Jennir: "You have done well for yourself, Master."
- Kai Hudorra: "I now regret telling you of my intentions, Jennir... But, yes—with the Force all things are possible."
- ―Dass Jennir and Kai Hudorra[src]
Hudorra's aspirations paid off, and he eventually became owner of The Lucky Twi'lek casino on Kestavel. He employed many employees, including Kal, Urtsk, Makall, Shaylai Veila, Dayn, Nira, and a butler, Bryti, and the majority, if not all held him in tremendously high regard. The wealth from his casino allowed him live in luxury, and he amassed an impressive wine collection and a suit of golden battle armor, reminiscent of those worn during the New Sith Wars.
Several months after their previous meeting, Jennir arrived on Kestavel with Beyghor Sahdett and the crew of the Uhumele, seeking an audience with Hudorra in their quest to assassinate Darth Vader. The massive Bothan, flanked by his bodyguards Kal and Urtsk, was not pleased to see them, but nevertheless allowed them into his casino and offered them access to its amenities at no cost. He, Jennir, Sahdett, Bomo Greenbark, and H2 met in his office privately to discuss their plan. However, like Jennir, the Bothan Jedi Master sensed Sahdett's true intentions. Pulling a new lightsaber from H2 that Jennir had constructed for him, the two attacked the Verpine Jedi.
Sahdett leaped out of the windows office, managing to push Hudorra into some gaming consoles, momentarily incapacitating him. Sahdett managed to kill Urtsk, Makall, and Jennir's companion Ko Vakier before nearly killing Jennir himself. Before he could strike the final blow, however, Hudorra managed to slice Sahdett's lightsaber in half before slamming him into the wall with the Force, ripping off his remaining wings and knocking him unconscious.
Hudorra expressed sadness that his prosperity had come to an end, but nevertheless remained focus on the task at hand. After receiving a casualty report from Bryti, he and Jennir interrogated a bound Sahdett, who told them how he was seduced by Palpatine's power and betrayed a fellow Jedi to serve him. Informing them that the Empire had been alerted to their presence, Sahdett continued to taunt the pair as Hudorra ignited his lightsaber; however, instead of killing the fallen Jedi, the Bothan only sliced off his antennae before gagging him.
Kai Hudorra, lightsaber ready.
Aware that Darth Vader was coming for them, Hudorra attempted to get his staff and the crew of the Uhumele to flee to safety. However, Hudorra's employees considered serving him an honor and were too loyal to abandon him. Furthermore, the crew of the Uhumele had come to Kestavel with the intention of confronting Vader, and Vakier's death meant there was no going back now.
The group made a plan to blow the bridges leading the casino using fuel from the Uhumele and trap Vader within the casino alone, where the two Jedi would deal with him. Hudorra was more concerned that the ship would not have enough fuel to escape, and both Jedi agreed that their people would avoid the confrontation, under the influence of a mind trick or not. Jennir apologized to Hudorra for bringing this problem to him, especially considering how well he had done for himself, but Hodurra had spoken to Ember Chankeli beforehand, who told him of all Jennir's selfless behavior and sacrifices for the good of his friends. The old Bothan praised him for continuing to honor the Jedi Way.
Finalizing reinforcements, the pair made their way upstairs where a huge feast had been prepared, as it was unlikely the food would be of any use the following day anyways. After everyone had been gathered, Hudorra raised an inspiring toast for the upcoming attack, their fallen comrades, and to Jennir, for never abandoning his Jedi past and continuing to live it throughout the dark times. Hudorra then revealed that only he and Jennir were to face Vader, and the rest would escape on the Uhumele and live. Greenbark attempted to protest, but was again mind tricked into subservience. Unbeknownst to Jennir, however, Hudorra had no intention of allowing him to participate either and had Bryti drug his wine. Following the feast, Hudorra donned his battle armor and awaited the Imperial attack.
Death and Legacy

Hudorra is killed by Vader.
- "Go to Hell."
- ―Kai Hudorra, to Darth Vader
As the Imperials crossed the bridge, Hudorra initiated the ambush. Having survived the explosion that killed his platoon, the former Anakin Skywalker entered the Lucky Twi'lek. Hudorra emerged from the shadows to meet him. Clashing blades, Hudorra drew him further into the casino, throwing game machines at him and having sensed the injuries he had received on Mustafar, taunted him about them. Hudorra attempted to press a thermal detonator that would trap both of them under the rubble, if not kill them outright. Vader, however, used the Force to stop the button from being pressed, catching the Jedi Master off guard. Vader then used this opportunity to throw his lightsaber at Hudorra, severing his weapon hand. Vader questioned him about Dass Jennir, but Hudorra refused to reveal Jennir's location; Vader then executed him by stabbing him through the chest.[1]
Before he died, Hudorra entrusted Bryti with a holodisc containing his final farewell. A drugged Jennir reawakened on the Uhumele, which had already fled the battle, and was given it by the butler. Jennir opened the message in the presence of the whole crew. In it, Hudorra informed them that he was dead, but had died with hope that the Jedi Order would survive, due to small sparks like Jennir, which had to be preserved. He ended by wishing that the Force be with them all.
Appearances
- Star Wars: Republic: Into the Unknown (First appearance)
- Dark Times 4: The Path to Nowhere, Part 4 (Mentioned only)
- Dark Times: Blue Harvest 0 (Mentioned only)
- Dark Times: Blue Harvest, Part 1 (Mentioned only)
- Dark Times—A Spark Remains 2
- Dark Times—A Spark Remains 3
- Dark Times—A Spark Remains 4
- Dark Times—A Spark Remains 5
Sources
- Star Wars: The Ultimate Visual Guide: Special Edition
- The Complete Star Wars Encyclopedia
- Star Wars: The Ultimate Visual Guide: Updated and Expanded