
Warning: This infobox is missing the following parameters: parents, pronouns, children, siblings, partners, families, feathers
- "I've always had a strong affinity with the Force. It's what set me on this path to begin with, led me to forge a certain alliance all those years ago."
- ―Lana Beniko
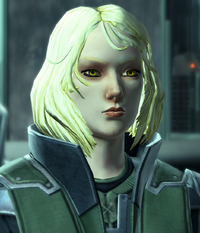
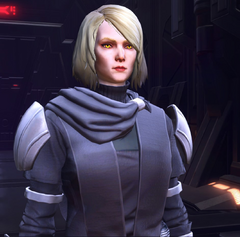
Lana Beniko was a female Human Sith Lord of the Sith Empire. During the Galactic War against the Galactic Republic she served as an advisor to Dark Council member Darth Arkous. Investigating Arkous' unusual activities in the wake of the Korriban Incursion, Beniko discovered that Arkous was a traitor secretly working for the Order of Revan. To expose Arkous, Beniko teamed up with unusual allies, including Republic SIS agent Theron Shan, a Wookiee smuggler named Jakarro, and other figures of importance on galactic scale. The group tracked Arkous and his Revanite ally Rian Darok to Rakata Prime, where both were killed, only for Revan himself to enter the scene and attempt to kill Beniko and her allies. Proclaimed a traitor to the Empire, Beniko was forced into hiding along with Theron Shan and Jakarro. The three eventually tracked the Revanites to Rishi and were able to expose the conspiracy to Darth Marr. To stop Revan from resurrecting Sith Emperor Vitiate, Beniko and Marr joined forces with Jedi Grand Master Satele Shan and traveled to Yavin 4, forming a temporary coalition between the Republic and the Empire. Beniko stood against Revan himself alongside Darth Marr, Satele and Theron Shan, Jakarro, and Shae Vizla . Though Revan was defeated, the Emperor nevertheless returned to life. Darth Marr appointed Beniko as the new head of the reformed Sith Intelligence. As the new Sith Intelligence Minister, Lana opposed Vitiate's resurgence on Ziost, working with her assistant Rane Kovach and her partners from the Yavin Coalition to stop the rampage caused by the former Emperor. Though Shan and Beniko were able to shock a large number of Vitiate's victims unconscious and remove Sixth Line Jedi Master Surro from the planet's surface, Vitiate still performed the ritual that wiped out all life on the planet.
Later that year, the galaxy was invaded by the Eternal Empire of Zakuul, which overwhelmed both the Republic and the Sith Empire within a single year. Sith Intelligence effectively ceased to exist, and Beniko ventured into Eternal Empire space, looking for her partner from the Revanite crisis, believing that person to be the galaxy's last hope of defeating the Eternal Empire. Over five years, Beniko made multiple contacts, such as former Knight of Zakuul Senya Tirall and exiled Zakuulan naval officer Koth Vortena, with whom she eventually managed to find and free the one Zakuulans had taken to calling the Outlander from being frozen in carbonite. While escaping pursuit, Beniko's group located and repaired the Gravestone - a legendary vessel capable of opposing the might of the Eternal Fleet. Beniko called her multiple contacts from the Sith Empire, the Republic, and the criminal underworld to converge on the remote planet Odessen, where she laid the foundations of an Alliance dedicated to defeating Eternal Emperor Arcann, becoming the right hand to her old associate, who became the Alliance Commander. In a bid to remove the advantage of Arcann's Eternal Fleet, the Alliance agreed to SCORPIO's plan to remotely take control of the GEMINI captains, but SCORPIO followed her own agenda and used that opportunity to claim the Eternal Throne for herself. In the resulting battle of Odessen, Beniko accompanied the Commander to their duel with Arcann, which ended with the Emperor defeated and taken away by his mother Senya Tirall. Arcann's sister Vaylin allied herself with SCORPIO and became the new Eternal Empress, and Beniko stood by the Commander's side as they battled her forces on Voss. An attempt by Vaylin to take control of the Gravestone led to the discovery of the hidden artificial world Iokath, which Alliance forces had to temporarily abandon when it was covered in deadly radiation. Beniko assisted in the mission to sabotage the Grand Festival of Empress Vaylin and accompanied the Commander on a mission to Nathema. Vaylin soon launched an assault on Odessen, in which Beniko fought on the front lines and which led to Vaylin's death at the Commander's hand. Alliance forces then traveled to Zakuul, where the Commander claimed the Eternal Throne and took control over the Eternal Fleet, transforming the Alliance from an anti-Zakuul insurgency into the Eternal Alliance.
As one of the highest-ranking members of a new galactic power, Beniko had to contend with new threats from the earliest hours of its existence. She identified and ordered the neutralization of several local uprisings against the Alliance and personally led a mission to Iokath once its radiation levels had subsided. Faced with both the Republic and the Sith Empire fighting over control of an Iokath superweapon, Beniko followed the Commander's decision to ally with one galactic power against another. Beniko soon discovered that the War on Iokath was orchestrated by an outside party that had leaked information to all three sides, hoping to start a war between them over control of Iokath. She began to search for a traitor within the Eternal Alliance, which led to the shadow world of Umbara. Lana Beniko, Theron Shan, and the Commander traveled there to intercept the traitor, only for Theron to reveal himself as the traitor and sabotage the hovertrain the Commander and Beniko were on. Escaping the train before the crash, Beniko and the Commander were unable to stop Theron before his shuttle left Umbara. They returned to Odessen, where Beniko began to search for Theron's whereabouts. After failing to apprehend him on the Chiss world of Copero, Beniko and the Commander eventually followed Theron and the Order of Zildrog to Nathema, where Theron revealed himself to be a double agent working for the Alliance the whole time. Together, they rushed to stop Vinn Atrius from awakening Zildrog, but were too late to prevent the complete destruction of the Eternal Fleet, the Gravestone, and the Eternal Throne. Though the Alliance lost its most powerful assets, Lana ensured the Commander that she would remain at their side through whatever would come. As the Third Galactic War approached, Beniko implored the Outlander to chose a side, promising to be loyal to them regardless.
Biography
Early life
- "No one survives the trials unmarked."
- ―Lana Beniko

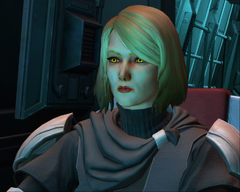
Beniko in her youth
Lana Beniko was the daughter of Kelsa and Jaren Beniko,[5] her parents being among the most celebrated entrepreneurs on Dromund Kaas. Her Force-sensitivity meant that by the laws of the Sith Empire, she had to undergo training in the Dark side of the Force, so Lana became an acolyte in the Sith Academy on Korriban. She trained under Overseer Harkun, who took sadistic pleasure in demeaning his acolytes. As part of her final trial, Beniko and acolytes Greck, Kagan, and Bensyn were sent into the Valley of the Dark Lords to retrieve the helm of Tulak Hord. Knowing that Harkun deemed the task impossible, Beniko told the other acolytes that they could only survive by working together. Upon entering the Tomb of Tulak Hord the group was overwhelmed by k'lor'slugs, which left Greck dead and Kagan severely wounded. Beniko eventually found Tulak Hord's helmet among the rubble, but before they could leave, Kagan was killed by an insane Zabrak acolyte. Beniko and Bensyn were the only two acolytes to survive the trial and leave the tomb alive.[1]
Lana became a Sith and in a short amount of time impressed many of her peers with her keen insights into the nature of the Force.[6] Sometime when the Treaty of Coruscant is in place, she was stationed on Hoth when an unexpected skirmish broke out between Republic and Imperial forces. Beniko called for an end to hostilities, but when an Imperial commander refused to obey, she responded by chopping off his right hand, then telling both sides to return to their bases and not reengage.[7] Beniko was eventually given the title of Sith Lord, though she never cared much for titles.[2]
In service of the Sith Empire
Advisor to Darth Arkous
- "I wanted to better understand war, so I asked to be posted with him. Over time, he came to trust my opinion."
- ―Lana Beniko

Lana Beniko and Darth Arkous
Beniko's passion for unraveling the truths and secrets behind the Jedi brought her to the attention of Darth Arkous,[6] a member of the Dark Council and the head of the Sphere of Military Offense since the death of Darth Arho during the Battle of Ilum in 3641 BBY. Beniko accepted the offer to become his advisor despite not being impressed with Arkous, her initial impression of him being that of a vain and pompous statesman. Her first military engagement in her new role was the Imperial invasion of Talay, a major Republic outpost and communications hub. Arkous' plan was to minimize resistance while maximizing confusion amongst the locals, but the Talay initiative was endangered when the Republic sent a team of Republic Strategic Information Service agents to infiltrate her ship as it departed from Dromund Kaas.[8]
Meditating aboard the ship, Beniko sensed four individuals using mind-shielding techniques commonly taught to spies and confronted one of them. The interrogation revealed to her their plan to slice all possible data and then detonate a hidden explosive device from the safety of an escape pod. Beniko informed only Arkous of the danger to avoid alerting the other three spies, and the Sith managed to silently eliminate two of them. The final SIS agent had surgical enhancements that allowed her to escape Beniko when the Sith found her priming the explosive device. Beniko sounded the alarm but had to stay behind to disarm the bomb, allowing the SIS agent to reach and launch the escape pod, from which she detonated a secondary device hidden inside the ship's electrical hub. Without weapons or jamming devices, the Imperials were unable to stop the agent from broadcasting their plans to the Republic, but Darth Arkous himself put on a spacesuit and rocketed towards the pod, where a single plunge of his lightsaber was enough to decompress it and kill the agent inside. That act made Beniko respect Arkous for his service to the Empire, no longer doubting her choice to become his advisor.[8]
Investigating the Dark Lord
- "There's something in the Force that I've never felt before. It exists nowhere and everywhere at once, writhing, growing. I think I sense this "growth" because I'm tied into it somehow."
- ―Lana Beniko
Beniko spent a considerable amount of time as Arkous' advisor, during which she had no reason to mistrust him. This changed in 3638 BBY, when she assisted Darth Arkous and Lord Goh in planning the Assault on Tython's Jedi Temple. Arkous recruited a prominent Imperial figure to lead the first wave of the attack. Beniko met them on Vaiken Spacedock and remotely guided them as they progressed from the landing point in the Gnarls to the Jedi Council chamber. Lord Goh stayed behind to search for additional hidden stores, and Beniko learned that the goal of their attack was to retrieve a Rakatan artifact from the Temple. The fact that Arkous hid the true objective from her made Beniko lose her trust in him, which was only compounded by a growing presence she felt in the Force. As Arkous' associate returned, he and Lana were informed by Sergeant Tarsten about the Korriban Incursion, in which the Republic forces took the Sith Academy and killed Dark Council member Darth Soverus. Furious, Arkous ordered a retaliatory strike and Beniko again guided her new acquaintance through the Lower Wilds of Korriban, barely hiding her anger at the audacity of the Republic's invasion.[2]
After the Dark Council Chambers were reclaimed, Beniko again congratulated the Imperial on their service, asking them to meet in private, away from Arkous' ears. There, she confided to her new ally her suspicions regarding Arkous' motive for the attack on Tython, revealing that in her mind the simultaneous timing of the two attacks was neither coincidence nor retaliation for one another, but instead planned from the beginning. Believing that Darth Arkous was involved in a conspiracy that could threaten the entire Sith Empire, Beniko put her trust in her new ally and revealed to them that she felt a growing presence in the Force, asking them to stay alert and promising to let them know about Arkous' activities.[2] Pretending everything was business as usual was not easy, as Beniko was concerned that the man she had once trusted was now lying to her, and she was no longer given a reason for why she was not privy to some of his activities. Eventually, her suspicions proved correct when Arkous made arrangements for a shuttle trip to Onderon, but traveled to Manaan instead.[8] Beniko secretly followed her superior to the planet's surface, where she learned from a Selkath customs official that Arkous had obtained a travel permit to the underwater Genetics Laboratory G-1.[9]
Revanite conspiracy revealed
- "The Order of Revan, as it stands now, doesn't wish to change the Empire from within. It aims to destroy us completely, and the Republic along with us."
- ―Lana Beniko


Lana and Theron meet their ally on Manaan
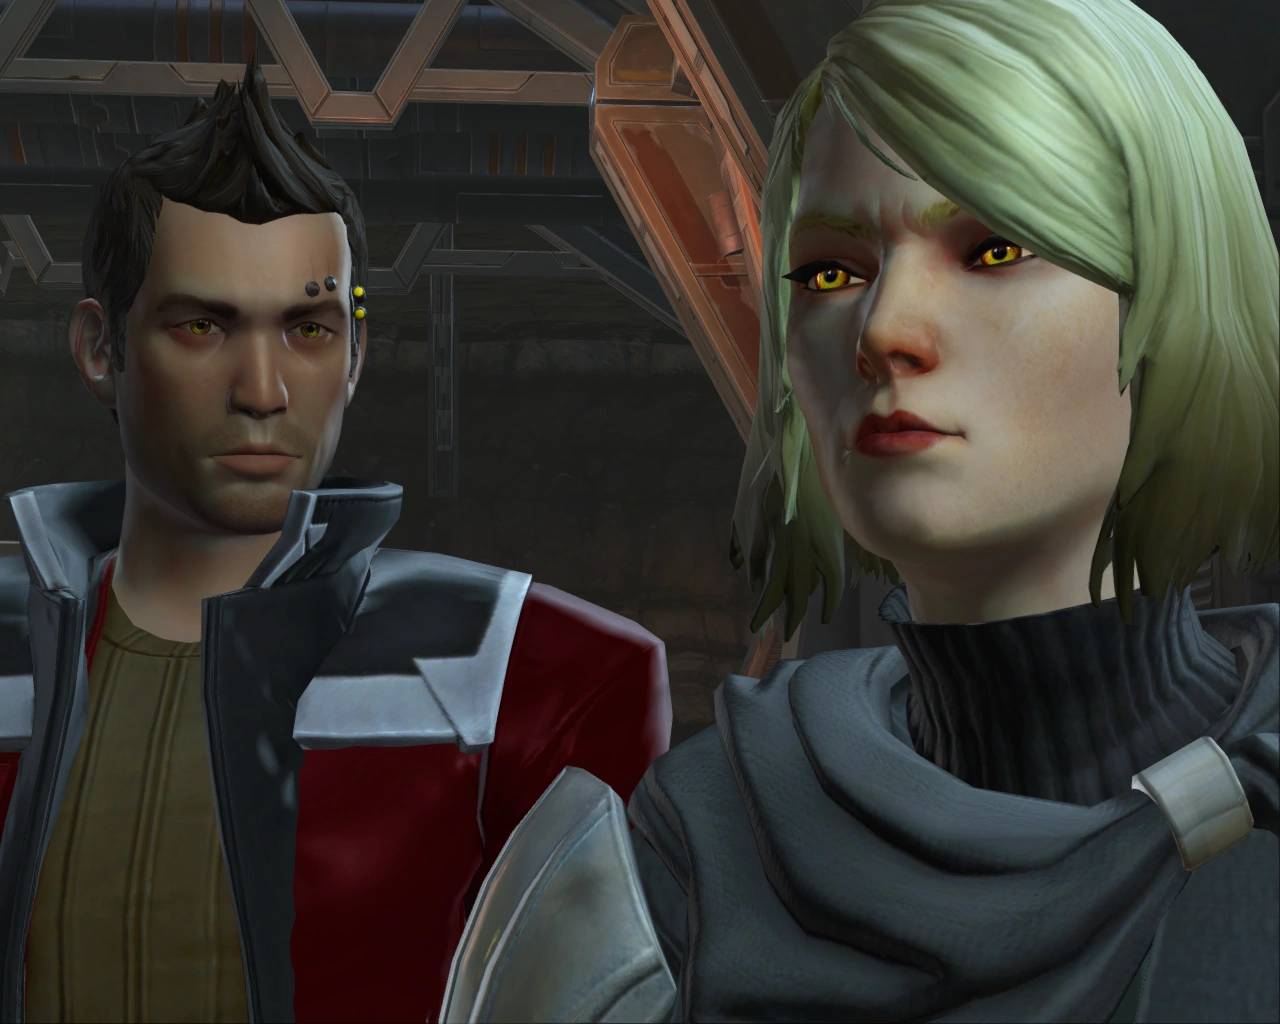
Beniko urged her astromech droid A7-M1 to alert their Imperial ally to the new development and join her on Manaan at once. Meeting at the Mercantile Plaza, Beniko revealed her discovery that Colonel Rian Darok, the Republic commander who had overseen the attack on Korriban, had traveled to the same facility as Arkous, and sent her ally to investigate. Meanwhile, Lana met with Republic SIS agent Theron Shan, who was investigating a similar ploy on the part of Darok. Shan alerted Beniko's associate to the location of Jakarro, a Wookiee smuggler imprisoned by the Selkath geneticist Gorima. The Imperial freed the Wookiee and his droid C2-D4 and together they discovered that Gorima had received Rakata technology from Arkous and Darok, and was using it to build self-repairing cyborg warriors for an "Infinite Army". Arkous and Darok revealed themselves to be working together and escaped in a submarine, detonating a bomb to sink and flood the facility, though Beniko's new allies managed to make it to the surface in an emergency pod. Meeting them alongside Shan, Beniko revealed their joint discovery that Arkous and Darok were both members of the Order of Revan, once believed to be a minor cult operating on Dromund Kaas, and now seeking to destroy both Republic and Empire to establish a new order. Unable to return to Arkous' side and lacking the evidence to expose him, Lana agreed to pursue leads within the Empire while Theron, Jakarro, and their ally went to pursue different leads.[10]

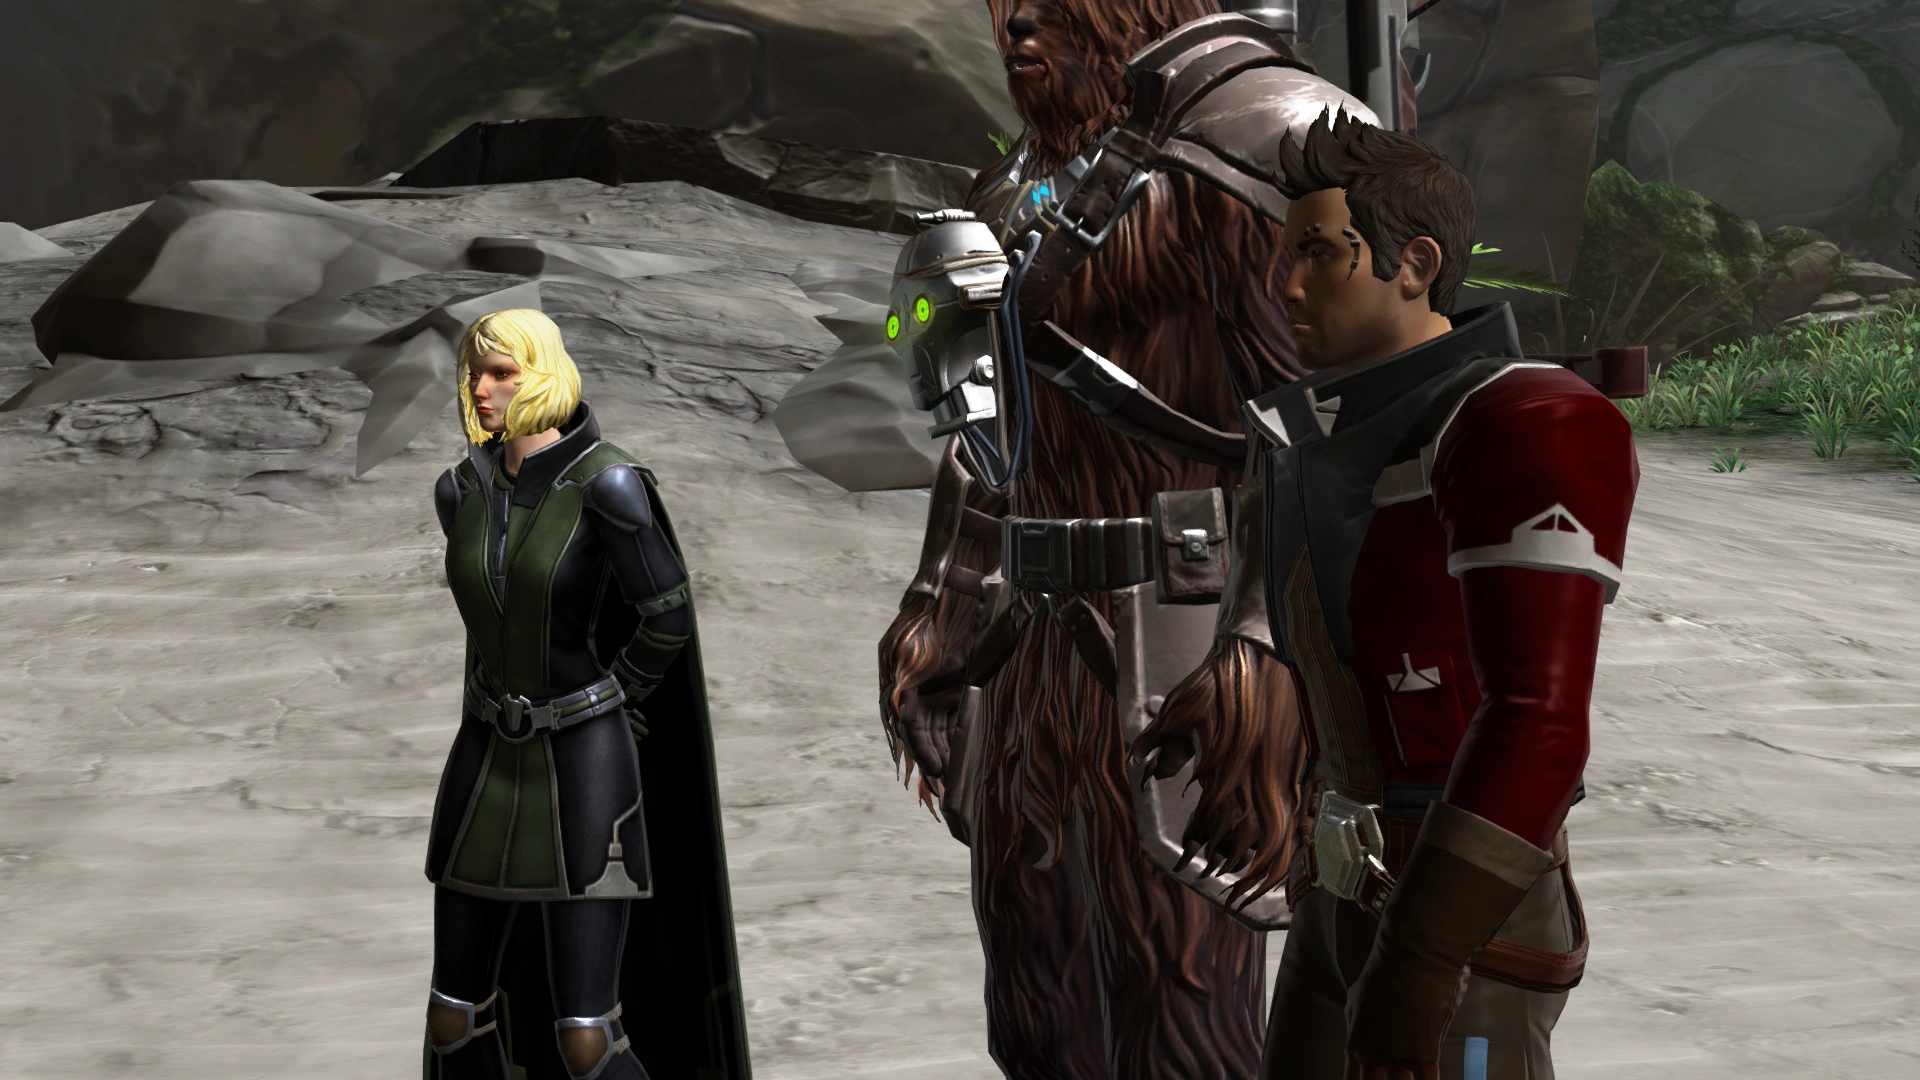
Lana, Theron and Jakarro on Rakata Prime
Beniko soon received a message from Arkous, who revealed that he had seen potential in her and had been planning to recruit her into the Order, changing his mind only when Beniko started investigating him. Continuing her collaboration with Shan, Jakarro, and C2-D4, Beniko uncovered several other Revanite traitors within the ranks of the Empire, while Shan and Jakarro tracked Arkous and Darok to Rakata Prime, the homeworld of the Rakata and former capital of their Infinite Empire. The Revanites were building their new Infinite Army there based on Gorima's research, and to stop them Shan and Beniko arranged for Jakarro and their other ally to assault the Temple of the Ancients, while they provided tactical intel from onboard Jakarro's XS stock light freighter. Asking Theron Shan to leave the cockpit and check the ship's sensors, Beniko asked her Imperial ally to secretly retrieve the data on the Infinite Army cyborgs from a Rakata console for further study. Jakarro and their ally confronted the Revanite leaders on the Temple roof and were forced to kill them when it became clear that they would not cooperate. It was then that the true leader of the conspiracy revealed himself to be none other than Revan, the "growth" in the Force that Beniko had sensed. Revan's Harrower-class dreadnought dropped out of Hyperspace and bombarded the Temple of the Ancients, though Beniko's allies made it out alive in Arkous' shuttle.[11]
Going off the grid
- "Jakarro's had twelve death sentences declared on him, Theron's been disavowed by the SIS... and the Empire placed a bounty on my head for the murder of Darth Arkous."
- ―Lana Beniko
Regrouping with her allies on Manaan, Beniko explained that the Revanites had used their influence in the Empire to place a bounty on her head for the murder of Darth Arkous, a charge she could not contest unless the Revanites were exposed, which it had become clear that their influence would not make easy. She was forced to go into hiding along with Shan and Jakarro, who faced similar charges. Beniko advised her Imperial ally to go on with their life, but to remain on the watch for the Revanites and above all avoid contacting her.[11] Trying to find lodging, Beniko and her companions traveled to Tatooine. However, Beniko sensed Imperial Agent Sharack Breev attempting to shadow her, and returned to Jakarro's XS stock light freighter to depart the planet.[12]
Eventually, the trio discovered that the Revanites had allied themselves with the Nova Blades pirate gang based out of Rishi, having them target key hyperlanes. Needing their ally to find out what the Revanites were up to without revealing themselves,[13] Beniko contacted Corellian Run Scoundrels leader Kai Zykken, using a mind trick to persuade him to spread rumors that their ally was the fearsome leader of a pirate gang, while Theron Shan remotely sliced their ally's ship navicomputer to draw them to Rishi.[14] After their associate followed the trail of breadcrumbs left by Lana and Theron to their safe house in Raider's Cove, the duo revealed themselves and explained that they needed to manually slice the files in the Nova Blades' base of operations while avoiding drawing the Revanites to themselves, hence the masquerade to make it look like a common pirate rivalry.[13]
Activities on Rishi
- "I stand by my decision not to impede in Theron's abduction--and I know Theron would, too. Now he's in a position to do what he does."
- ―Lana Beniko
Theron and Lana sent their ally, masquerading as the faux pirate gang leader, out to harass the Nova Blades, attacking their operations and slave camps, threatening the pirates' alliance with the Revanites.[15] Eventually, they targeted the Blades' base at the crashed ship Aggressor, killing Commodore Dael Margok and recovering intel on Revanite agents.[16] While Theron got busy decoding the intel, Lana sent their ally to meet with Shae Vizla, whose Mandalorian clan had been formerly allied with the Blades and Revanites, to acquire more information. Meanwhile, Lana joined Jakarro and Theron in infiltrating a Revanite safehouse in Raider's Cove, but their attempt went sour and Theron was spotted. Lana allowed Theron to be captured and restrained Jakarro from intervening and revealing them, judging that Shan could gain more information in captivity and wouldn't betray their secrets - she herself had previously probed his mind with the Force to no effect.[17]
When their ally returned, Beniko and Jakarro were told that the Revanites had a fleet waiting somewhere on the planet. Beniko then realized that by changing the hyperlanes the Revanites were drawing the Imperial and Republic fleets to Rishi, luring them both into an ambush. Thankfully, by that time C2-D4 had decoded that the Revanites were based on Sky Ridge Island nearby and suggested taking up lodging with the Rishii village based there. The trio traveled there and met with local Chieftain Arankau, who allowed them to stay in the village.[18] Beniko stayed behind to help with the slicing, sending her ally to scout the Revanite camps on the island. Learning that Theron Shan was being kept at their main base, Beniko's ally went on the rescue mission, though Shan was able to escape captivity by himself. Theron then revealed Revan's plan - upon both fleets' arrival at Rishi, Revanite sleeper agents on both sides would sabotage key systems while the signal jammer on the ground would prevent the fleets from coordinating, at which point the Revanite fleet would move in and massacre the survivors. With his plan exposed, Revan set his stronghold to self-destruct, but Lana was able to remotely abort the sequence thanks to the slicing tricks she had picked up from Theron.[19]
The Yavin Coalition
- "Our lives have been on the line before, but this is different somehow. It feels more immediate. More...final."
- ―Lana Beniko
With the signal jammer protected from slicing and aerial bombardment, Beniko's ally quickly moved in to deactivate it, enabling communication with the fleets and revealing to them the Revanite conspiracy. Theron Shan uploaded the identities of the double agents, resulting in their impromptu detainment.[20] Grand Master Satele Shan and Darth Marr, who commanded the fleets, agreed to meet in Raider's Cove to discuss a temporary truce so they could deal with the threat posed by Revan. With the Order exposed, Beniko's name was cleared and she once again answered directly to a Dark Council member. Both Republic and Imperial sides agreed to a temporary truce to stop Revan from resurrecting the Sith Emperor, who was intending to consume all life in the galaxy.[21] The Coalition made their way to Yavin 4, where Lana lamented that what trust she had in common with Theron was gone after he learned that she was the one who allowed him to be captured.[22]

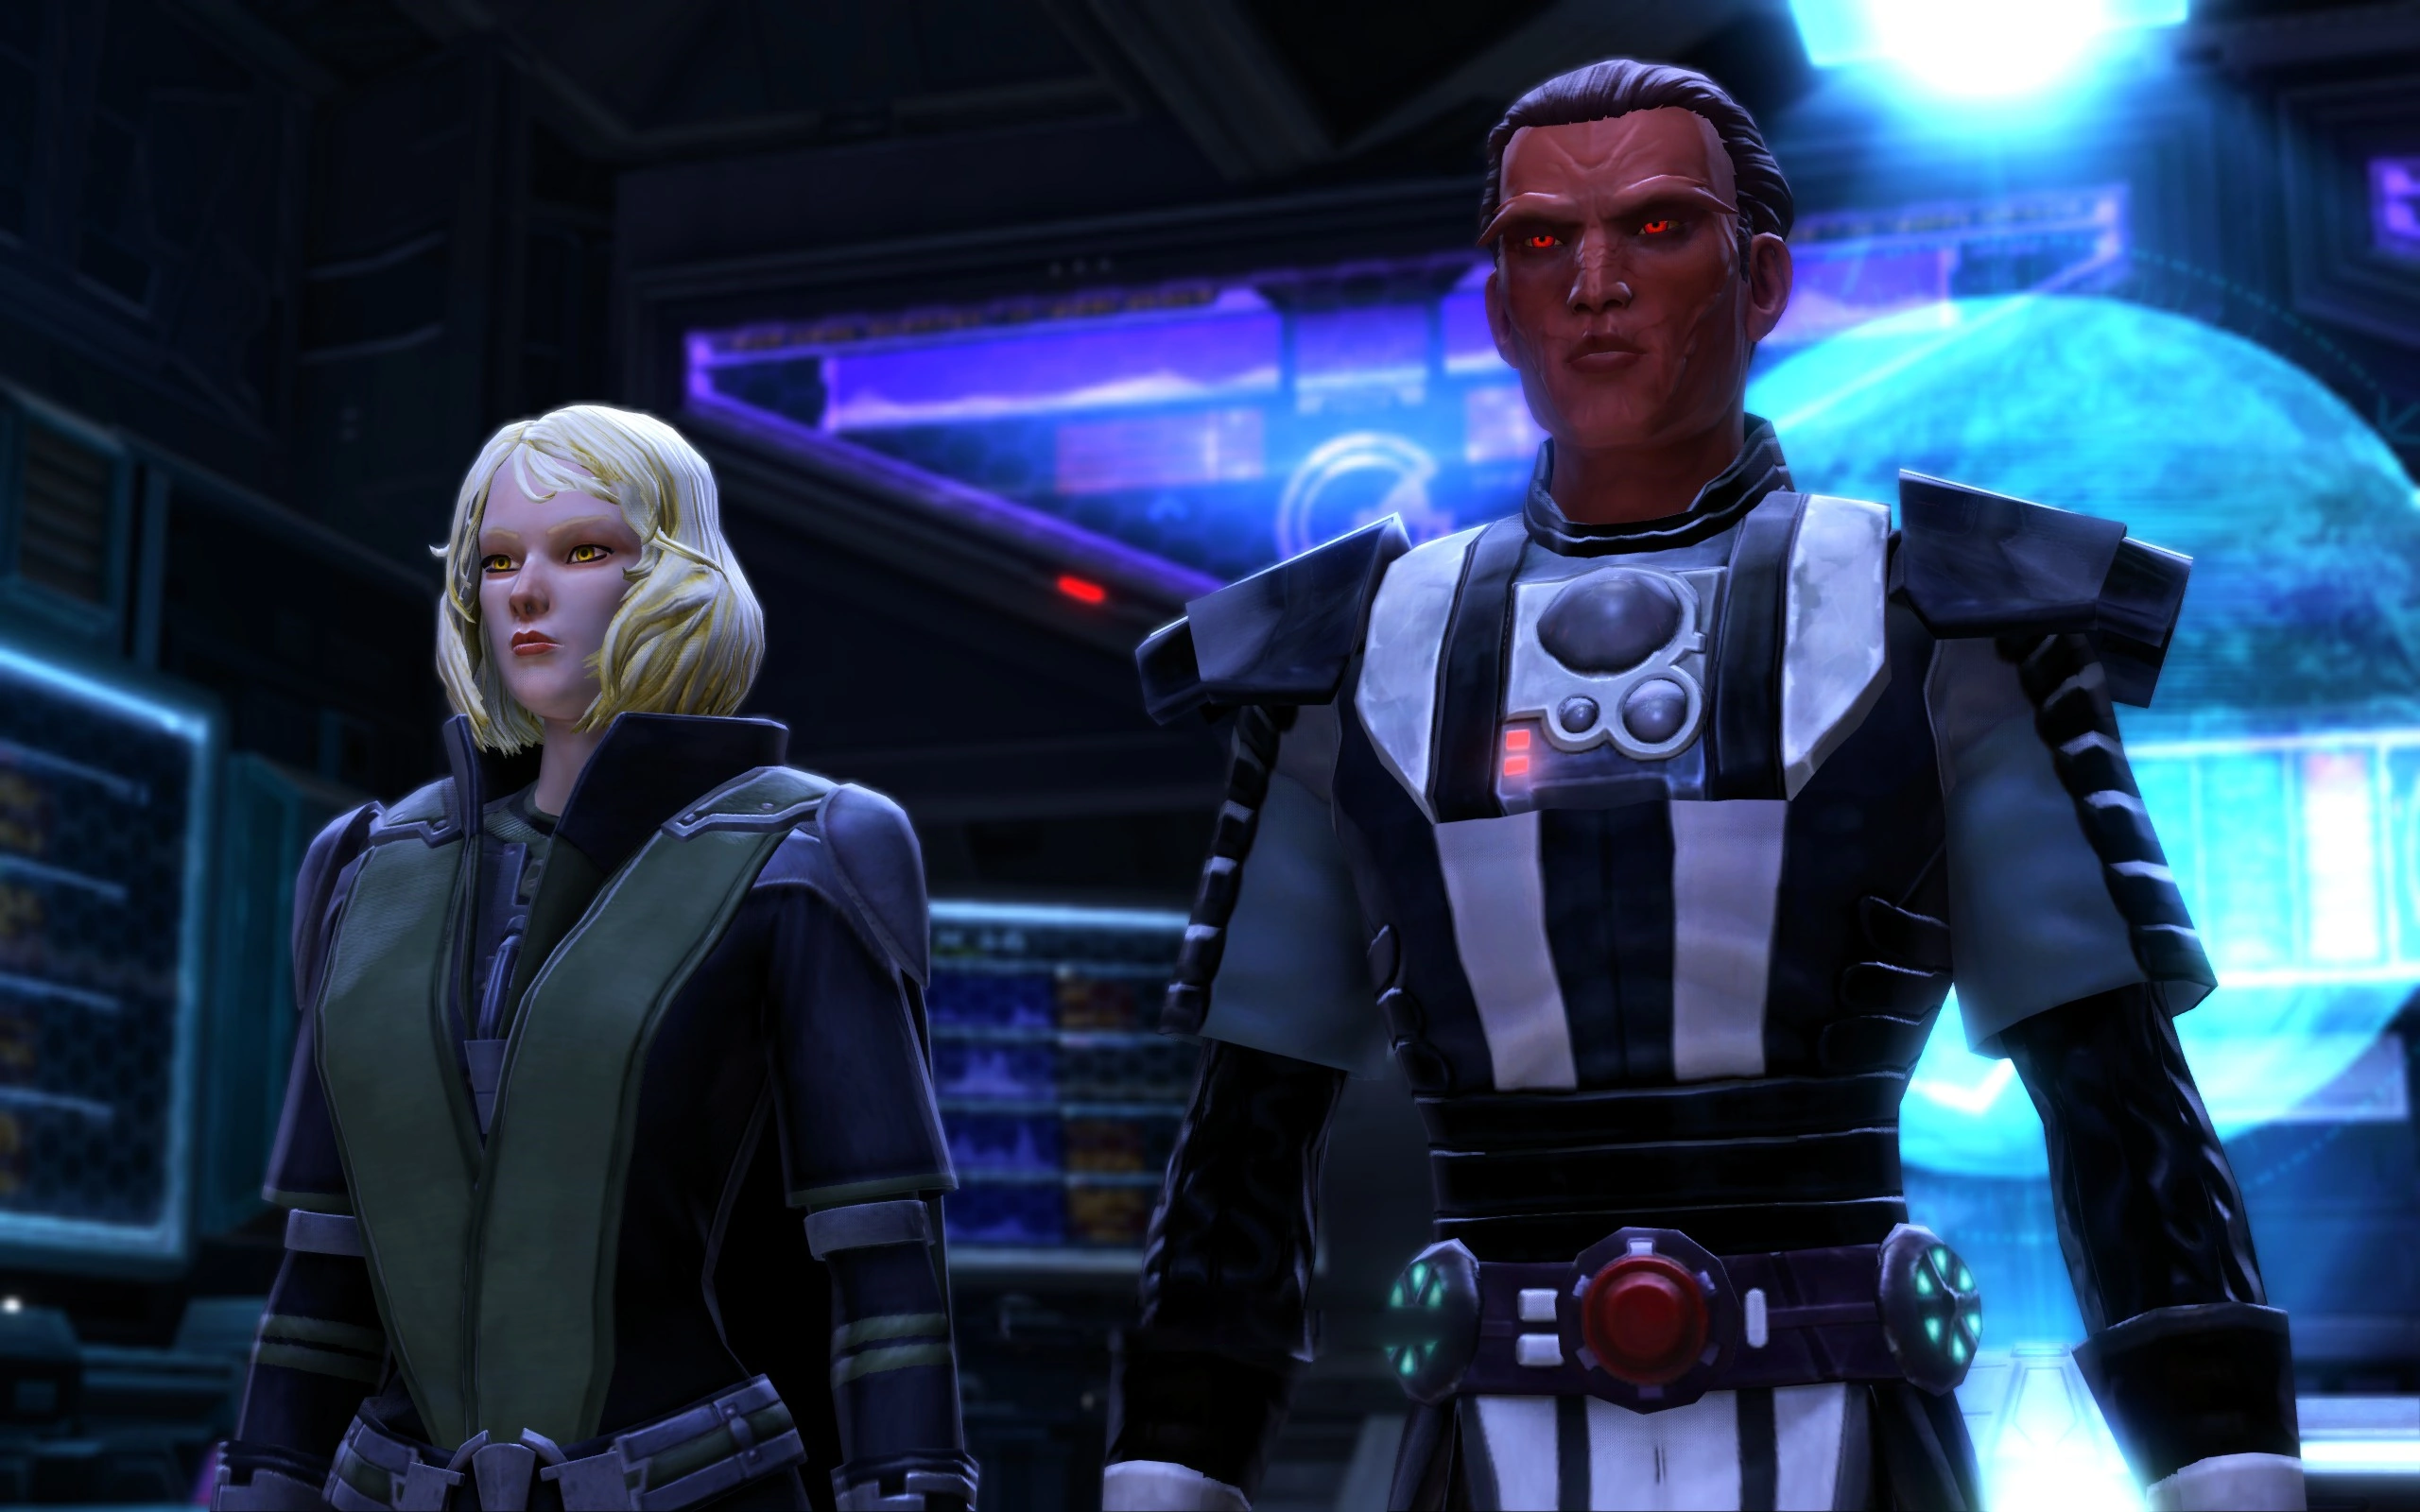
Lana on Yavin 4 with Darth Marr
The coalition forces established a staging area on Yavin 4 and were able to apprehend the Imperial Guard Commandant Iven,[23] who revealed to them that Revan was planning to use an articact within the Temple of Sacrifice to kill every living thing on the moon. This sacrifice would bring the Emperor back to life, and Revan believed he would then be able to finally kill him.[24] As their time drew to a close, the Coalition forces were able to overcome their vast differences and work together to storm the Temple of Sacrifice and stop Revan from performing his ritual. To deal with Revan himself, Beniko stood side by side with Darth Marr, Satele and Theron Shan, Jakarro, and Shae Vizla, confronting him at a forgotten temple terrace. After a prolonged fight, Revan was defeated, though the Sith Emperor was nevertheless able to return to life, feeding off the lives taken by Coalition forces during the fighting on Yavin 4. Once defeated, Revan finally became one with the Force, while to the confusion of Darth Marr, the Emperor left without possessing a body or taking physical form. In the aftermath of the battle, Darth Marr appointed Beniko as the new head of the reformed Sith Intelligence and she said goodbyes to Theron Shan, Jakarro, and her ally before departing the jungle moon alongside Marr. Beniko later sent a message to her ally, commenting on her new job as Sith Intelligence Minister.[3]
Leading Sith Intelligence
- "I wanted an understanding, not a place in the power structure. But that's where I am. I don't take the responsibility lightly. Whatever comes my way, I'll deal with it."
- ―Lana Beniko


Lana, the Sith Intelligence Minister, on Ziost
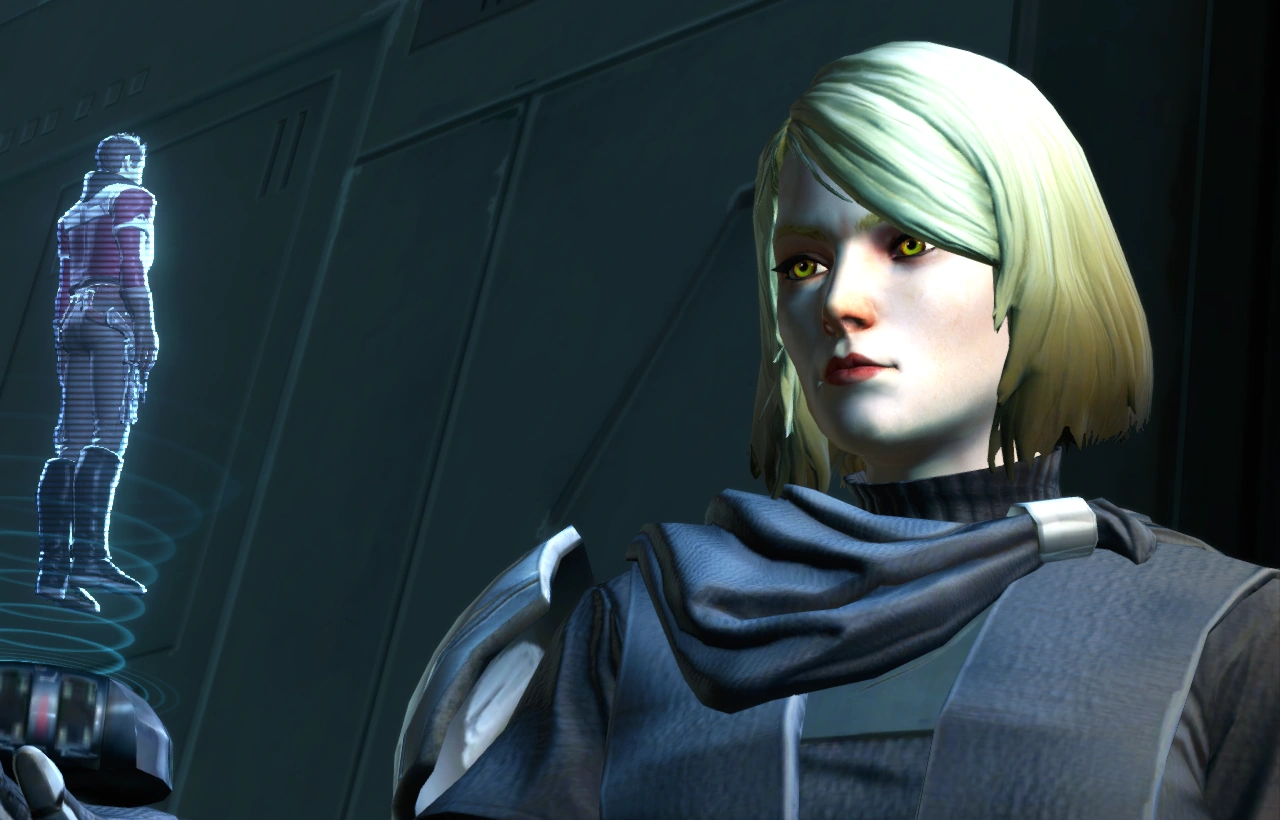
Beniko's responsibilities as Minister of Sith Intelligence were soon put to the test on Ziost. The now-former Emperor Vitiate resurfaced on the former Imperial capital and extended his influence across the globe, controlling the planet's population and feeding off of the chaos and death that his puppets caused. Despite possessing both Imperials and Sith alike, Vitiate gave up trying to possess Beniko due to her mental defenses, making her suspect that the former Emperor was not as strong as he once was. Beniko opposed Vitiate's chaos, working with her assistant from Intelligence Rane Kovach, and sent an emergency alert for her Yavin Coalition partner to arrive and meet her at the Ziost Analysis Services Center. Introducing her old associate to Kovach, Beniko went to deal with growing crisis in New Adasta,[25] where she became aware that Theron Shan was also onworld just as Republic Supreme Chancellor Leontyne Saresh launched an invasion of Ziost, giving Vitiate hundreds more puppets to control.[26]
After warning her ally about the emerging Sithspawn called the Monoliths, Beniko explained that she had a plan to hinder Vitiate's puppets.[27] Theron had previously discovered that shocking Vitiate's thralls into unconsciousness broke his control over them. They modified New Adasta's electrostatic gun, originally designed to counter major civil uprisings, to be non-lethal, then their ally taunted Vitiate over hologram, causing his puppets to swarm the People's Tower in New Adasta, where Theron shielded himself and his ally and fired the weapon, incapacitating all Vitiate's pawns except Jedi Master Surro, the Sixth Line commander. Using her as a puppet, Vitiate subdued both Lana and Theron, but was defeated by their ally, allowing the Jedi's mind to re-emerge. Lana and Theron then argued on how best to proceed, with Theron wanting to take Master Surro back to Tython for healing, while Lana insisted that the Jedi should be experimented upon to try and find a way to stop Vitiate's mind control.[28] A choice was made and Beniko evacuated Ziost before Vitiate performed his ritual that consumed all life on the planet. Despite failing her first major crisis as Sith Intelligence Minister, Beniko resolved to carry on.[29]
The Eternal Empire's invasion
- "Everyone who had felt the Sith Emperor's presence in the past...on Ziost, on Yavin Four...we all sensed what had happened."
- ―Lana Beniko
At the same time as Vitiate fled from Ziost towards Wild Space, a pair of twin conquerors of a mysterious faction launched an attack on Korriban before disappearing into the Unknown Regions.[30] Darth Marr led a joint Imperial-Republic fleet staffed with former members of the Yavin Coalition and accompanied by Beniko's ally into Wild Space in pursuit of Vitiate, unintentionally encroaching on the territory of the invaders, the Eternal Empire of Zakuul, and triggering the first skirmish with the Eternal Fleet.[31] Beniko felt Darth Marr's death through the Force, soon followed by a ripple felt by everyone who had encountered the former Sith Emperor,[32] who had secretly created and ruled the Eternal Empire under the name Valkorion until the assassination of his physical body. His son Arcann claimed his father's Eternal Throne and claimed that Beniko's ally, whom he called the Outlander, had assassinated his father. In retaliation, Arcann launched a full-scale invasion of the Core Worlds,[31] though Beniko, among others, discerned the truth of Arcann's treachery.[32] Within a year, both the Empire and the Republic surrendered to the Eternal Empire and were forced to pay heavy tribute to Zakuul. Most of the Dark Council was dead or in hiding, and Darth Acina assumed rule over the Sith Empire. Sith Intelligence effectively ceased to exist and Beniko ventured into Eternal Empire space, looking to find her ally from the Revanite crisis, believing that person to be the galaxy's last hope of defeating the Eternal Empire.[32]
Opposing the Eternal Empire
Years in Wild Space
- "If Darth Arkous could see me now."
- ―Lana Beniko

Lana during her years in Wild Space
Beniko spent the next several years travelling Wild Space, trying to learn the fate of her ally. Suspicious as to why the tribute demanded by Zakuul was more than necessary for the Eternal Empire, Beniko dedicated some of her resources to finding out Arcann's plans for it.[32] Early on, she met and exchanged information with Senya Tirall, a former Knight-Captain of the Knights of Zakuul, who resigned after Arcann ordered the massacre of the Scions of Zakuul, who used to serve alongside the Knights as brethren.[33] She later encountered exiled Zakuulan naval officer Koth Vortena, who defected along with his crew following the Occupation of Denon. Beniko and Vortena spent a lot of time opposing the Eternal Empire together, growing to trust each other during their shared experiences on planets such as Arron Prime and Altair 3.[32] Beniko also continued to build a network of contacts from both the Sith Empire and the Galactic Republic determined to oppose the tyranny of Zakuul, and obtained a bodyguard droid, HK-55, and an astromech droid, T7-O1.[34]
Rescue of the Outlander
- "The Empire and Republic have all but fallen to the man who imprisoned you. You're our last hope."
- ―Lana Beniko

Lana faces off against Zakuul Knights
Five years after their disappearance, Beniko was finally able to learn that her ally that had accompanied Darth Marr was frozen in carbonite and kept by Arcann in a secured vault that housed his most prized possessions. Beniko mounted a rescue mission, and in 3632 BBY she and T7-O1 infiltrated the Spire while Vortena and HK-55 waited in the shuttle that served as their escape route. Locating her old ally inside Arcann's vault and unfreezing them, Beniko quickly noted that the carbonite freezing process was imperfect and poisoning the Outlander, and administered an antidote just as her ally was thawed out. Almost immediately they were attacked by skytrooper guards, and with no time to explain the full situation, Beniko proceeded to escort her ally to the extraction point while T7-O1 went a separate route to generate false alarms in other sectors. Their escape discovered, the two here chased by High Justice Vaylin, Arcann's sister and an extremely powerful Force user. Attempting to cut off their escape route, Vaylin destabilized a Sun Generator, forcing Beniko and the Outlander to make their way through a Skytrooper factory. The generator threatened to explode and claim innocent lives, and the Outlander took a detour to disable it despite Beniko's protests. With Vortena having problems with their escape shuttle, Beniko and the Outlander had to hold their ground against a couple of Knights of Zakuul named Novo and Tanek, and were eventually cornered by Vailyn. Beniko prepared to sacrifice herself to buy the Outlander time for escape, but instead they were picked up just in time by HK-55 and Vortena in their shuttle.[34]
Vaylin caused damage to the shuttle as it escaped, which required Vortena to put it down, crashing in the Endless Swamp. Beniko stayed behind with Vortena to hide the evidence of their crash landing while the Outlander and HK-55 went ahead to investigate a large technological object the droid had picked up on his sensors. When Beniko and Vortena caught up to their companions, HK-55 informed them that the object was not native to Zakuul, and Vortena quickly identified it as the Gravestone, the legendary starship that had single-handedly stood up to the Eternal Fleet. Vortena was convinced that recent events were a sign that they would beat Arcann, though Beniko was not so certain. Leaving Vortena to work on the ship, Beniko and the Outlander ventured back into the swamp to locate fresh drinking water, and Beniko used this opportunity to bring her ally up to speed on the past five years of galactic events and the current state of its major organizations. She also confessed that she felt an unfamiliar presence within the Outlander, who shared the suspicion that Emperor Valkorion was still alive within his mind, an act of honesty which Beniko appreciated.[32]
The two then returned to the Gravestone and got working alongside Vortena to repair it, eventually restoring major systems to working conditions. At some point Beniko sent a message to Senya Tirall asking her to join them and provide backup, which proved helpful when their position was discovered by Skytroopers and Zakuulan Knights. HK-55 and Vortena rushed to get the ship airborne while Lana and the Outlander held their position at the vessel's entrance. Senya arrived to join them mid-fight, but the Knights used Zildrog's Wedge to isolate Beniko, managing to land a blow on her. Vortena arrived to finish off the last of Zakuulan forces and was immediately hostile toward Senya, as she had spent years hunting him down back in her days as Knight of Zakuul. With more Zakuulan forces on their way, the group set to getting the Gravestone off the ground, with Beniko, Tirall, and the Outlander using the Force to raise the ancient ship from the swamp. As everyone got on board and the ship left the atmosphere, the Eternal Fleet appeared to intercept them, only for the Outlander to fire the Gravestone's omnicannon, destroying more than two dozen Eternal Fleet warships in a single shot, and enabling the Gravestone to jump into hyperspace. Hostilities soon erupted on the bridge as Koth and Senya's past prevented them from working towards a common goal. Beniko used this time to test her strength and tend to her wound, asking the Outlander to seek common ground with both Vortena and Tirall. With the Gravestone still suffering serious damage, the group decided to make a stop at Asylum, a shadowport, for repairs.[33]
Asylum
- "That shadowport isn't on any chart. It's a haven for refugees fleeing Arcann's forces."
- ―Lana Beniko
Lana and Koth arrive at the Scion Enclave
The Gravestone managed to limp to the shadowport and dock at Asylum, where Vortena's crew of Zakuulan exiles joined him to work on the ship, while Beniko went to a contact her network by herself. On her way back to the Gravestone she found HK-55 wandering the streets with his most recent memories missing and brought him back to the ship, where Vortena informed her that the droid had been accompanying the Outlander to a rendezvous with Tirall's allies. He assumed that the turncoat Knight had betrayed them, but Beniko suspected that the mystery contacts were the real danger and asked HK-55 for his last location before the memory gap. She rallied Vortena and his crewmembers to that spot, locating a concealed entrance to a hideout of the Scions of Zakuul, where they found the Outlander and Tirall in a standoff with the Scion leader Heskal. Beniko demanded Heskal and his Scions put away their lightsabers, which they did as Heskal revealed to everyone that Valkorion still lived within the Outlander's mind. Vortena believed that Valkorion's survival meant hope for Zakuul and was excited, while Beniko replied that the Immortal Emperor was a threat to all life in the galaxy and vowed to find a way to extract him from the Outlander's mind. At this revelation, Senya Tirall confessed that she was Arcann and Vaylin's mother, which Beniko had been previously unaware of.[35]
Returning to the Gravestone, Koth again expressed hostility toward Senya for withholding information and proclaimed that restoring Valkorion to the Eternal Throne should be the group's primary goal, to which Beniko again countered that Valkorion was a world devourer. The argument was interrupted by HK-55, who relayed a message from T7-O1 on Zakuul, informing them that the information broker known as "Lady of Sorrows" wished to have a dialogue with the Gravestone's computers. Beniko deemed bringing the "Lady of Sorrows" over to their side worth the risk, and Senya Tirall volunteered to accompany the Outlander back to the Old World of Zakuul in a shuttle. Before they departed, Beniko asked the Outlander to act as an example for Koth and Senya to cooperate.[36]
Escaping the Eternal Fleet
- "One hour. If I don't hear from you, I'll rip that sanctuary apart."
- ―Lana Beniko to the Outlander
Vortena followed Tirall and the Outlander to provide backup, and the group successfully made it back from Zakuul, along with T7-O1 and the "Lady of Sorrows", who revealed herself to be SCORPIO, an advanced artificial intelligence who was familiar to Beniko from her past work for Imperial Intelligence. While SCORPIO set to work on the Gravestone, Beniko informed the Outlander of her Imperial and Republic contacts, who were willing to join their revolt against the Eternal Empire. The Outlander was then summoned by Heskal back to the Scions' hideout, and Beniko advised her ally to be cautious around Scions, calling the zealots unpredictable.[36]

Lana blasts the Skytroopers as the Gravestone takes off
It turned out that Heskal revealed the Outlander's location directly to Arcann in accordance with a prophecy that he had. The Eternal Fleet emerged from hyperspace and opened fire on the shadowport, and Beniko called the Outlander, who had just escaped a confrontation with Arcann himself in the hideout, to let them know. Beniko defended the Gravestone alongside Vortena's crew until the Outlander and T7-O1 returned, then informed them that Arcann's forces had taken control of the docking clamps keeping the Gravestone in place. The group was ambushed by Vaylin, but Senya Tirall intervened and engaged her daughter, allowing Beniko and the Outlander to retreat and reunite with Koth Vortena. Beniko volunteered to hold a choke point so that Vortena and the Outlander could reach the Control Spar and disable the docking clamps keeping the ship in place. There, the Outlander was confronted by Arcann again, who destroyed HK-55 seemingly beyond repair. Despite suffering a great physical toll, the Outlander managed to release the clamps and escape the confrontation with Arcann alive, returning to the Gravestone by shuttle just as the vessel was taking off. The ship escaped past the Eternal Fleet to hyperspace, but the Outlander collapsed from the injuries they'd sustained. Beniko was at her ally's side when they woke up and confirmed HK-55's fate, mourning his loss and threatening to deactivate SCORPIO for demeaning his sacrifice.[37]
The Alliance against Zakuul
Early victories
- "It's quite something, isn't it? So much more than the last Alliance we formed. What I suspected when we aligned with Theron, Satele, and Darth Marr has borne out."
- ―Lana Beniko
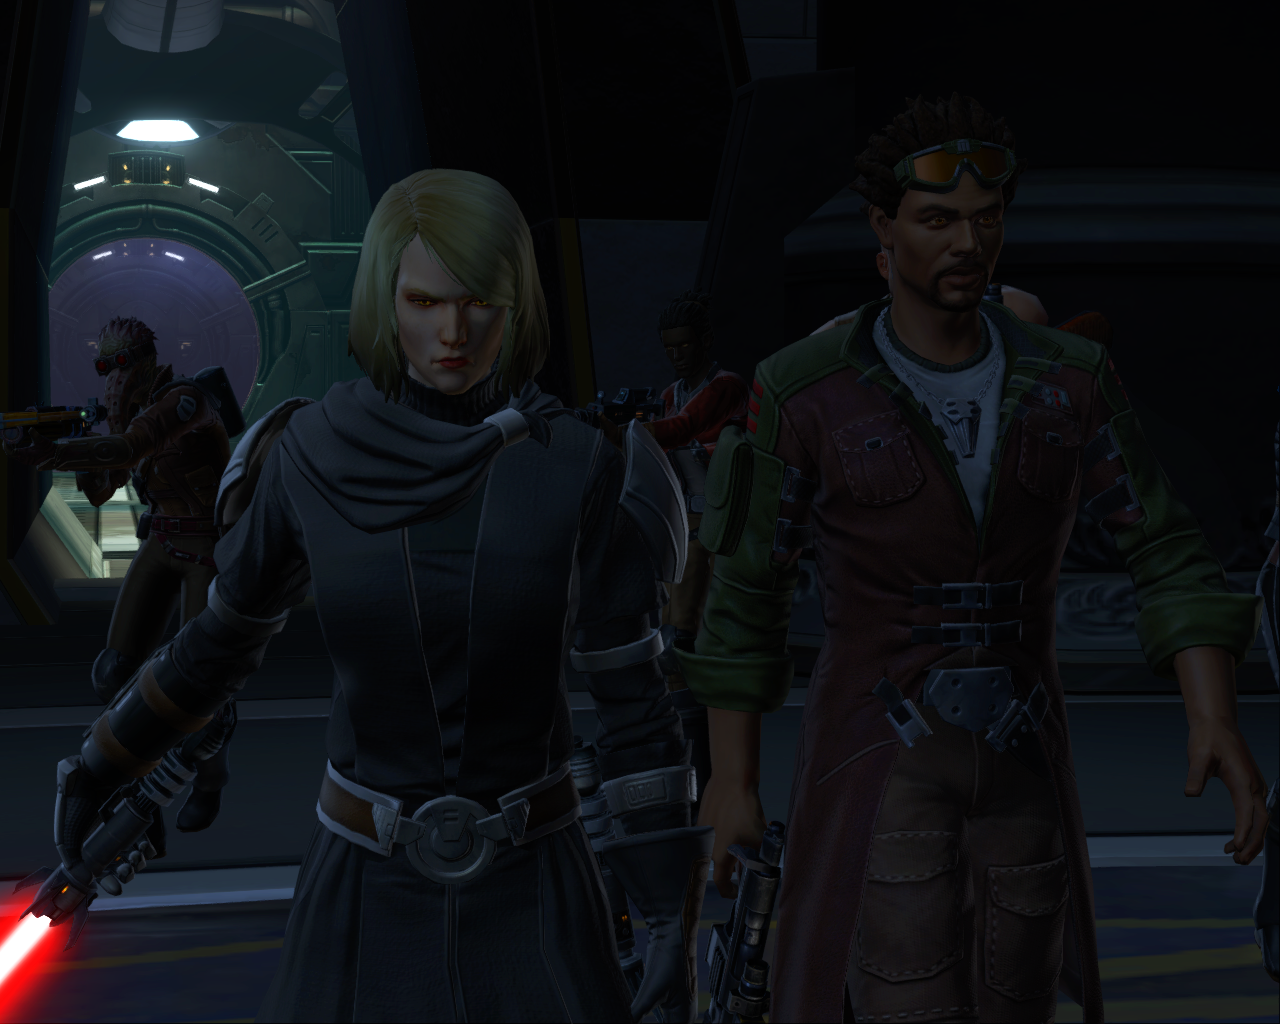
The Battle of Asylum served as a rallying cry for those who wished to oppose Arcann, and Lana called her multiple contacts from the Sith Empire, the Republic, and the criminal underworld to gather on the planet Odessen, a remote and unsettled world which she hand-picked herself for its strong connection to the Force. There she laid the foundation of an Alliance against the Eternal Empire, putting aside the past hostilities of the Galactic War to free the galaxy of Arcann's tyranny. Beniko publicly made the Outlander the Commander of the new Alliance, herself becoming the Commander's right hand and most trusted advisor. Some of the prominent faces who decided to join the new Alliance included former Republic Fleet Admiral Bey'wan Aygo, legendary smuggler Hylo Visz, Hutt scientist Juvard Illip Oggurobb, Sana-Rae of the Voss Mystics, and her old associate Theron Shan, who by that point had broken ties with the Republic SIS. Lana and Theron took time to reminiscence on their past together, with Theron jokingly offering to recruit the Order of Shasa, while Lana stated that she would rather let the galaxy fall than ally with Rishi's Corellian Run Scoundrels.[4] Lana later personally asked the new Commander to recruit Sith Empire Major Pierce, whose talents were wasted at his current posting at the Outreach Bureau on Dromund Kaas.[38] Doctor Oggurobb eventually managed to recover HK-55's destroyed chassis from Asylum and reassembled the droid, although he had to be refitted with a new memory core as his original one was destroyed beyond repair.[39]
The new Alliance made several bold strikes against the Eternal Empire, which attracted new members and volunteers. On Theron Shan's suggestion, the Commander recruited Kaliyo Djannis, an experienced anarchist known as "Firebrand", who survived on Zakuul for two years.[40] The Commander also assisted Republic Special Forces Division Havoc Squad under Major Aric Jorgan in wire-tapping a Zakuulan listening post in the Eternal Swamp, a mission for which Lana and other Alliance members provided a major distraction.[41] Combining the information from the new sources allowed SCORPIO to reveal the existence of the GEMINI frequency, by means of which Arcann controlled the Eternal Fleet. The Alliance planned an attack on the Hyperwave relay station hidden ten kilometers beneath the Spire on Zakuul and connecting the Eternal Throne to the Eternal Fleet, sending Havoc Squad and Kaliyo Djannis on the mission, one of them providing a diversion for the other's main objective. Before the Commander could depart to lead them, Beniko suggested they contact Valkorion on how to best infiltrate the facility he had built. Unfortunately, the Commander decided to do so in the Odessen wilderness, where Valkorion tested them for a prolonged period of time before the Commander could return to the Alliance base. The Alliance had no choice but to proceed with the mission regardless, and in the process contact with the infiltration team was lost, prompting the diversion team to attempt a rescue. At that point, the Spire went into full lockdown with no transmissions coming in or out, making any rescue attempt all but impossible and leaving the Alliance leadership no choice but to wait.[42]
The GEMINI plan is formed
- "We won't get a second chance at the hyperwave relay station. We'll just have to hope we find an alternative."
- ―Lana Beniko
Relaxing in the Alliance cantina, Lana Beniko engaged in a game of Holo-Sabacc with Theron Shan, Koth Vortena and Gault Rennow, a former partner of Hylo Visz. Beniko attempted to read the Devaronian's mind but he confused her with obscene imagery, enabling him to beat her at cards. Gault then approached the Alliance leadership with a proposition to raid the Gilded Star, an Eternal Empire treasury ship hiding in the atmosphere of the gas giant Vandin. Strained for funds, the Commander agreed to the plan and accompanied Gault to Vandin along with Lana Beniko, Theron Shan, Senya Tirall, and SCORPIO. Bringing in his partner Vette and an identity slicer named Dretcher, Gault outlined his plan to infiltrate the ship and place a missile warhead inside its reinforced vault, vaporizing its contents so that they could be siphoned away from the ship. The heist went mostly as planned, as Lana and Theron piloted the tanker ship and made a safe getaway with the stolen goods, while those aboard the Gilded Star itself were picked up by Hylo Visz. Returning to Odessen, Gault and Vette expressed their desire to join the Alliance, but the celebration was interrupted by the return of Aric Jorgan and Kaliyo Djannis, who managed to escape Zakuul with a database on the GEMINI droids, although four of Havoc Squad's six members were lost in the process. Hoping to salvage the fiasco, Beniko ordered SCORPIO to analyze the data archive. [43]
SCORPIO revealed to the Alliance's leadership that the GEMINI droids were produced from a template called GEMINI Prime in a weapons factory on Darvannis. Obtaining GEMINI Prime could be the key to taking over the GEMINI pilots and the Eternal Fleet, but Beniko noted that the factory had tunnels running kilometers deep and the Alliance did not yet have enough forces for a major assault. Theron Shan responded by calling in a favor from Shae Vizla, now holding the title of Mandalore the Avenger. Vizla's Mandalorian clan was itching for both payback against the Eternal Empire and a chance to re-arm themselves with the spoils from Darvannis factory, and provided enough distraction for the Commander to infiltrate the factory and retrieve GEMINI Prime. During the raid on Darvannis, Beniko contacted the Commander and passed on detailed schematics of the factory obtained by Theron to help with the assault, while also cautioning the Outlander regarding a long-term alliance with the Mandalorians, comparing them to wild animals craving violence.[44]
Taking on GEMINI
- "Our key takeaway is that these GEMINI droids are more powerful than we thought."
- ―Lana Beniko


Lana during the attempt to take over the GEMINI ship
With GEMINI Prime in her possession on Odessen, SCORPIO was able to analyze the template and easily crack the droid's internal protocols due to their similar designs. She explained that by plugging GEMINI Prime into the captain's console on any warship in the Eternal Fleet, she would be able to take control of the entire network, and with it the Eternal Fleet itself. Identifying a lone warship scheduled to recharge its hyperdrive as their target, the Alliance leaders moved to intercept it.[44] Koth Vortena piloted the Gravestone to the location of the warship, and SCORPIO confused its targeting systems while Theron Shan piloted a shuttle into its hangar. Inside, the GEMINI captain noted their presence and separated the Commander and SCORPIO from Lana, Senya, and Theron, forcing them to proceed to their rendezvous point separately.[45]
Along their way, Senya, Lana, and Theron found that the ship was transporting prisoners to Arcann for interrogation - Imperial Admiral Zasha Ranken, Republic Senator Tai Cordan, and Zakuulan holostar-in-exile Malita Tal. By the time the Commander rejoined them, SCORPIO had been apparently destroyed in her attempt to override the GEMINI captain. Lana and Theron escorted the freed prisoners to the escape pods, while Senya and the Commander confronted and defeated the GEMINI captain. However, the GEMINI revealed their sabotage to Emperor Arcann and transferred her consciousness into the GEMINI frequency, triggering the ship's self-destruct mechanism. One of three escape pods was destroyed, and the Alliance barely managed to escape the ship's destruction in time. As Arcann and Vaylin arrived with the Eternal Fleet, the Gravestone escaped into hyperspace. GEMINI Prime had completely shut down. SCORPIO then contacted the Alliance and revealed that she had faked her death, using the GEMINI network to transport herself to Zakuul, where she took control of the Eternal Throne.[45]
The Battle of Odessen
- "It is your destiny to defeat Arcann. Mine is to get you there."
- ―Lana Beniko
Returning to Odessen, the Alliance learned that a portion of the Eternal Fleet remained under Arcann's control and that SCORPIO had revealed to him the location of the Odessen base. With the Eternal Fleet on its way, the Commander left behind some forces in case of a ground assault, while taking the fight to Arcann from the Gravestone. As the battle of Odessen began, Beniko determined that the only way to ensure the safety of the Alliance was to annihilate Arcann's Eternal Flagship. Lana, Senya, and some others joined the Commander in their infiltration of the flagship, where Senya was separated from them by Vaylin. The Commander and Lana fought their way through skytroopers and Knights of Zakuul, defeating the Exarch Shernisa Varless, an experimental assault skytrooper KJ-931, and Knight Commander Dara Nadal. As they made their way to the bridge to confront Arcann, Lana was informed by Theron that the rest of the Eternal Fleet had turned on Arcann as well, targeting his flagship to eliminate both him and the Commander in one fell swoop, which Lana recognized as SCORPIO's true plan from the start. Reaching the bridge, Lana stayed behind to deal with a squad of Knights of Zakuul, leaving the Commander to confront Arcann alone.[46]

Lana pilots the shuttle during the battle of Odessen
By the time Commander informed her that Arcann was finished, Lana and the rest of the infiltration team were in the hangar prepared to leave, though there was no sign of Senya Tirall. As the ship was coming apart, Lana and the rest commandeered a Zakuul Dropship while the Commander narrowly escaped in a Zakuulan starfighter. On their way back to the Gravestone, Senya contacted them and revealed that she was alive and so was Arcann, and she was taking him away in the hopes of redeeming him. Then she escaped into hyperspace aboard Arcann's personal shuttle. With little time to focus on Senya's betrayal, Lana reminded everyoone that the Eternal Fleet was still their primary concern, at which point the Gravestone fired the omnicannon on the Eternal Flagship, creating a massive explosion that wiped out the Eternal Fleet ships present and won the battle for the Alliance. Back on Odessen, Lana assured the Commander that despite the betrayals they'd endured, the Battle of Odessen had become the rallying point the Alliance needed for all the forces seeking to oppose the Eternal Empire, swelling their ranks and giving them the capability to repel future invasions.[46] Sometime afterwards, a notorious criminal mastermind known as the Shroud infiltrated the Alliance base and planted bombs throughout intending to destroy it, but was stopped by the rebuilt HK-55, who was later debriefed by Lana about the incident.[47]
The fight against Vaylin
- "We'll touch down in the city and lead the liberation of Voss. But Vaylin won't make it easy for us."
- ―Lana Beniko
With Arcann gone, his sister Vaylin allied with SCORPIO and proclaimed herself the new Eternal Empress, carving a path of destruction across the galaxy in search of her family. Her search led her to Voss, where she launched an all-out attack to draw her family out of hiding. The Alliance fleet moved to intercept and engage the Eternal Fleet, while Lana piloted a Zakuulan shuttle carrying the Commander, Torian Cadera, and a squad of Mandalorian warriors down to the planet's surface to break the siege of the capital city of Voss-Ka. Landing in the Republic District, the Alliance and Mandalorian forces engaged the enemy while Theron contacted the Commander and Lana, asking them to assist the Alien Enclave. Lana and the Commander destroyed a massive PA-717 Planetary Assault Goliath and moved towards the northern plateau that housed the Imperial District, but the Eternal Fleet's bombardment completely obliterated it. Theron then directed them to a location where Voss Commandos provided access to a service tunnel that led the Commander and Lana to the Voss-Ka Cantina on the other side of the city. Theron met them right outside the entrance of the Tower of Prophecy.[48]
After defending their position from Vaylin's Horizon Guard, the group received a holotransmission from Senya, who was at the Shrine of Healing hoping that the Voss Mystics would heal her son's body and spirit. She pleaded for the Alliance's aid, believing Arcann would join their fight. Agreeing that Arcann had to be neutralized one way or another, Lana led the Mandalorians towards the Shrine while the Commander and Theron separately rode Torian's walker Storm Rider through the Old Paths. The Commander ordered Lana and the Mandalorians to protect the Shrine to buy Senya time, and by the time they reached Senya's position, she had already ordered the Mystics to use her own strength to heal her son in a Voss healing ritual, which left her comatose. The Commander and Lana chased Arcann to his shuttle, but were too late to stop his departure. By this point, Vaylin had ordered the Eternal Fleet to burn her family regardless of other casualties on Voss, but the battle was turned by the arrival of the Imperial Navy, which chased the Eternal Fleet away.[48]
Return to Dromund Kaas
- "I'm curious to see if things really have changed since I left. Whatever we find, this trip will be interesting."
- ―Lana Beniko
Sith Empress Acina then greeted the Alliance Commander and invited them to Dromund Kaas to discuss a potential alliance against Vaylin. Lana deemed that the trip should be interesting in any case, as she had been away from the Sith Capital for a number of years by this point.[48] On Dromund Kaas the Commander, Lana, and Theron were greeted by Gelmid Lorman, who introduced himself as the new Minister of Logistics after Lana addressed him by his old title of Moff. Lorman escorted them to Acina, who insisted on speaking with the Commander privately on her personal shuttle. The Commander agreed, leaving Lana and Theron behind to keep an eye on Lorman. Lana set about meditating while Shan sliced the Imperial databanks, warning him to stop when she sensed someone approaching. Lorman arrived and informed the two that the Empress's shuttle had crashed in the wilds and was presumed vaporized, since its emergency beacon was not responding. He concluded that both the Empress and the Commander were dead, which Lana declared to be impossible, and the two advisors decided to investigate the crash, though Lorman insisted that a hazardous storm in the vicinity of the crash would prevent that.[49]
Lana corners Leontyne Saresh
As they waited, Lana and Theron were contacted by former Republic Chancellor Leontyne Saresh, who expressed her condolences and offered to take over the leadership of the Alliance. Lana reminded the Twi'lek that her term as a Chancellor was already over, while Theron insisted that the Commander was still considered missing and thus refused her offer. After Saresh signed off, Lana decided to ignore the risk of traversing the storm and go in search of the Commander. On their way, she and Theron were informed by Bey'wan Aygo that Saresh had already arrived on Odessen, taking advantage of the disarray among the Alliance forces over the Commander's supposed demise. Leaving the turbolift, the two were held at blaster point by a trio of Imperial troops sent by Lorman to stop them, but Lana and Theron easily took care of them before answering the call from a holotransmitter on one of the troopers. On the other end was Lorman, who was working alongside Saresh and the GenoHaradan in an unsuccessful attempt to assassinate the Commander and the Empress, who by now had cornered their pursuers. After being informed about Saresh's machinations, Lana and Theron quickly followed the Commander to Odessen, where Saresh was already making a speech in front of Alliance personnel. Lana personally cut off her escape and the Commander ordered her imprisoned, to Theron's approval.[49]
Reclaiming the Gravestone
- "The hyperdrive is locked. We're on this journey to the bitter end."
- ―Lana Beniko
However, even though Saresh was neutralized, the chaos she had caused was used by SCORPIO and Vaylin to secretly board and take over the Gravestone. Koth Vortena escaped capture and sent his coordinates to the Alliance base, with the Alliance fleet moving to intercept. Lana accompanied the Commander to the Gravestone in a boarding pod and helped dispatch skytrooper patrols along their way to Koth, who revealed that Vaylin's forces had taken over the bridge and now risked triggering the quantum bomb that he had installed as a precaution against SCORPIO. Lana let Koth and the Commander disarm the bomb fuses, while she went to distract Zakuulan patrols throughout the ship. Figuring that Koth was not alone, Vaylin went ahead and cornered Lana in the Dark Sanctuary, but the Commander and Koth arrived in time to save Lana from Vaylin's lightsaber, though their fighting still triggered the bomb. About to strike the Commander, Vaylin suddenly turned and fled, giving Koth the necessary time to disarm the bomb.[50]

Lana on the bridge of the Gravestone as it arrives into Iokath system
Koth ordered his crewmembers to evacuate in the escape pods, just as Theron Shan brought Kaliyo Djannis, Aric Jorgan, Torian Cadera, and Vette in as reinforcements by landing an Alliance shuttle inside the hangar. At this point, SCORPIO took over control of the Gravestone, sending it towards an unknown location and locking the hyperdrive. Converging on the bridge, the Alliance forces witnessed as the vessel jumped out of hyperspace in an unknown system, surrounded by the entirety of the Eternal Fleet. SCORPIO left the Gravestone in her shuttle, and Vaylin threatened the lives of the crew again, but could do nothing before a blinding white light engulfed the ship.[51]
Escape from Iokath
- "We have no way of knowing when Iokath will be safe to explore again. When that changes, you'll be the first to know."
- ―Lana Beniko
Alliance members found themselves on the surface of the strange world that computers called Iokath, separated from each other and placed in scenarios that resembled combat simulations. Theron Shan managed to get his cybernetic implant working, contacting everyone and directing them to a structure called the Tributary, as they became aware that not only Vaylin, but every Zakuulan and GEMINI droid from the Eternal Fleet had found themselves in a similar situation. When every Alliance member from on board the Gravestone got back together, their position in the Tributary came under attack by local hostile droids, forcing them to find another way out of it.[51] The Commander and Vette went ahead, while the rest eventually followed, meeting them at a disabled colossus droid. There, Theron realized that even though he was unable to locate the Gravestone, he could still use his implant to remotely pilot the Alliance shuttle that had been left in its hangar, and get it to pick them up. To provide a distraction for the droids outside, the team repaired the colossus droid, leaving the Commander to pilot it against its much weaker but more numerous brethren. The distraction proved sufficient, and with everyone safely on board the shuttle, they took off.[52]
However, before they could leave, SCORPIO contacted the group and revealed that ARIES, the droid that controlled Iokath, had raised an energy shield that would destroy any vessel attempting to leave. With ARIES re-charging the weapon that had incapacitated them in the first place and promising to use it on a lethal setting, the only way out was to stop ARIES. SCORPIO revealed the location of ARIES base, and Theron dropped the Commander and Vette there to deal with ARIES while the rest of the group went to reclaim the Gravestone from the shuttle's last known location. SCORPIO herself arrived to help the Commander defeat ARIES, and the Commander repaid her by letting her merge her consciousness with Iokath, removing her from a list of galactic threats. However, the capacitors on ARIES' weapon overloaded, threatening to cover the entire world with a pulse of deadly radiation.[52]
Moving against Vaylin
- "She's entrenched in the Spire. Even with her conditioning, she remains a significant threat."
- ―Lana Beniko describes Vaylin
The Gravestone just barely managed to escape to hyperspace, as did Vaylin with most of the Eternal Fleet, but Iokath remained inaccessible for the time being due to high radiation levels. When they returned to the safety of Odessen, Lana assured the Commander that the Alliance was stronger than ever with the Gravestone secure and SCORPIO out of the picture, and with schematics SCORPIO had transmitted on further upgrading the Gravestone with Iokath technology. Alliance Intelligence continued to search for Arcann, but was unable to locate a solid lead amidst the numerous rumors. Lana also finally asked the Commander what exactly had caused Vaylin to flee from the Dark Sanctuary, to which the Commander replied that Valkorion had shared with them the code phrase "Kneel before the Dragon of Zakuul" that when spoken triggered Vaylin's mental conditioning and made her powerless to strike.[52]
An opportunity to use Vaylin's newfound weakness presented itself when Indo Zal, an Alliance sympathizer from Zakuul who had previously helped T7-O1, contacted the Alliance and informed them about the upcoming Grand Festival of Empress Vaylin, where the Empress planned to execute a host of Zakuulan rebels. Indo proposed he provide disguises for the Alliance to infiltrate the party, where they could cause a revolt among the prisoners, causing enough chaos for the Commander to get close to Vaylin and activate her conditioning. Theron Shan vouched for Indo and volunteered to accompany the Commander inside the Palace of the Eternal Dragon, while Lana and T7-O1 provided remote support from a shuttle that served as their getaway vehicle. The Commander's confrontation with Vaylin was interrupted by Arcann, who arrived with a group of his loyalists, intending to reclaim the Eternal Throne from his sister. However, the Commander found that Arcann had indeed been healed on Voss, and was no longer consumed by hate and anger. He offered to join the Alliance in an attempt to atone for his crimes. Though Vaylin escaped to her flagship and ordered the Palace bombarded to rubble, Lana arrived with the escape shuttle just in time to get the Commander, Theron Shan, and Arcann to safety.[53]
The Void of Nathema
- "It's worse here. The void--its hunger. It wants to devour me, mind and spirit. Annihilate every trace of my existence."
- ―Lana Beniko
Upon their return to Odessen, Arcann was initially treated as an enemy by the Alliance personnel, many of whom had suffered under his rule for years and had joined the Alliance to oppose him in the first place. However, the Commander insisted that having the former Eternal Emperor on their side was good for both morale and for putting additional pressure on Vaylin.[53] The Commander soon learned from Valkorion of Nathema, a dead world where Vaylin's mental conditioning had taken place and where she was now returning to break it. Theron and Lana accompanied the Commander to Nathema, where Lana began feeling the effects of the Void in the Force before even setting foot on the planet. Even Valkorion found his power diminished in this place, though he promised to shield the Commander and Lana from its worst effects. Making their way across the planet's surface, left lifeless ever since the Ritual of Nathema over a millennium ago, the Commander and Lana reached the Sanitarium, the only structure still showing signs of life on the planet, with Vaylin already inside.[54]

Lana in the Emperor's vault on Nathema
Dispatching several Horizon Guards, Nathema Zealots, and Keepers, the Commander and Lana explored the inner workings of the Sanitarium, learning about Vaylin's past there from holorecordings left by Anomid scientist Jarak. Meanwhile, the ritual to break Vaylin's bonds was spiraling out of control, with Vaylin's power vaporizing those in her vicinity, and Lana and the Commander came upon Jarak, who offered to take them to a place where they could take shelter. In the Sanitarium's lower levels, they entered the Immortal Emperor's vault, where Valkorion had stored artifacts even he deemed too dangerous. They barely managed to get inside in time before energy blasts ravaged the outside. With not even Valkorion having any power inside and with the door stuck, Lana and the Commander went deeper inside to activate the backup power generator, while Jarak was killed by a vault guardian. Inside, the two made the important discovery of Dramath's holocron, which still housed the essence of Valkorion's father, whom he had killed over 1300 years ago. Dramath told them that the holocron held the power to destroy Vitiate once and for all, but despite Lana's suggestion, the Commander elected to destroy it and let Dramath die.[54]
Assault on Odessen
- "If we hit the enemy forces from behind, we can buy the Gravestone some time."
- ―Lana Beniko
Eventually unlocking the door that trapped them inside, the Commander and Lana learned from Theron that Vaylin had already escaped the Sanitarium and left. They hurried outside so that Theron could pick them up. Before they could rest however, they learned from Bey'wan Aygo that Vaylin had launched another assault on Odessen.[54] Returning to Odessen, the Commander, Theron, and Lana found the battle already raging on multiple fronts. Theron volunteered to sneak behind the enemy's lines, while Lana and the Commander made their way to the Gravestone, which was still in dry dock, unable to take off until the Iokath upgrades were completed. Commandeering an Eternal Empire Walker, the two made their way through the front lines, eventually meeting Arcann and Senya Tirall, who had awoken from her coma, at the Gravestone, which was finally able to take off.[55]
Lana went to join the open battle, while the Commander, Senya, and Arcann proceeded to confront Vaylin at the Alliance base, where the Commander was able to land a killing blow on the Empress, though at the cost of one Alliance member's life. Zakuulan forces then surrendered en masse and the battle was over, but the war was not, as with the Eternal Throne empty the GEMINI captains had gone rogue, bombarding the capital worlds of Coruscant, Dromund Kaas, and Zakuul into rubble. With claiming the Eternal Throne the only way to stop the destruction, the Alliance leadership departed for Zakuul on the Gravestone.[55]
The Eternal Alliance
The end of Valkorion
- "Empress Vaylin has fallen. In her absence, the Eternal Fleet rampages across known space, threatening to wipe out all life in the galaxy. There's only one way to stop them: we must seize the throne."
- ―Lana Beniko

Lana and Theron after the final death of Valkorion
Dropping out of hyperspace, Lana and the rest witnessed the Spire blockaded by the Eternal Fleet, though Iokath upgrades allowed the Gravestone to breach it. Senya and Arcann volunteered to accompany the Commander, and the three traveled down to surface. Making their way to the Spire, they reached the Eternal Throne room, where the Commander claimed the Throne and pacified the Fleet. Valkorion attempted to take over the Commander's body, but with the help of Arcann and Senya he was defeated once and for all, putting an end to his millennia-long existence. The Commander then proclaimed the age of the Eternal Alliance, unifying the military of Zakuul and the Eternal Fleet with the cause of the Alliance under their leadership.[56]
The Eternal Alliance was now one of the strongest galactic powers, and as one of its highest-ranking members, Lana had to contend with new threats from the first hours of its existence. Anti-Alliance uprisings sprung across the galaxy, with Lana identifying and ordering the neutralization of such new threats as Renegade Sith Lords Adacin and Zanisk,[57] former Imperial Intelligence Major Korven,[58] and exiled Zakuulan Battalion Commander Tassar.[59]
Return to Iokath
- "The Sith Empire and the Republic. They're on Iokath--and they appear to be fighting for control over the superweapon."
- ―Lana Beniko

Lana contacts Theron from Iokath
When the radiation levels on Iokath had subsided, Beniko personally led an Alliance team to map and claim it for the Alliance. She contacted the Commander and Theron with a status report, which was interrupted by her discovery of Imperial and Republic forces on Iokath, who shot her droid C6-X and appeared to be fighting for control over a superweapon they'd been alerted about. Lana established a secure area at the Fleet Spire with the Alliance forces at her disposal and detained two emissaries sent by the Republic and the Empire - Captain Elara Dorne and Major Malavai Quinn. The Commander and Theron soon joined her on Iokath, though an unknown interference left the Eternal Fleet, now controlled from Odessen, unable to assist. Beniko welcomed the Commander back to Iokath and let her captives introduce themselves, before joining in a holoconference with Sith Empress Acina and Republic Supreme Commander Jace Malcom, Theron's father.[60]
Both sides had arrived on Iokath looking to claim the superweapon and both pleaded with the Alliance to join forces against the other. Lana followed the Commander in the decision they made and was ordered to guard the base while the Commander and Theron went on the offensive against their new enemy.[61] However, Beniko soon discovered that the ongoing War on Iokath had been orchestrated by an unknown outside party, which had leaked identical data regarding the superweapon to all three governments, hoping to lure them into the same place at the same time. Since the Eternal Throne's control over the Eternal Fleet could only be sabotaged by an Alliance member, Lana suspected a traitor in their ranks.[62] The Commander and Theron moved to prevent the superweapon activation, and though they were unsuccessful and the legendary Six Gods were awakened, their control over the Eternal Fleet was restored, allowing to push the first of the gods, Tyth, back,[63] and giving them time to destroy the rest.[64]
A traitor close to home
- "I don't understand. How did I not see this coming? Was I really that blind?"
- ―Lana Beniko
With no way to narrow down traitor suspects from almost half of Alliance personnel, Lana and Theron started to look for the traitor.[63] Eventually Lana found a trail that led to the shadow-world of Umbara, where a transmission with the same encryption as the one from Iokath was detected from a hovertrain with a large stockpile of Adegan crystals heading for Umbara's capital city. Lana, Theron, and the Commander traveled there and boarded the train to intercept and stop the traitor. After fighting through several soldiers and Umbaran Shadow Assassins, the three reached the empty cockpit of the train, where Theron revealed himself to be the traitor. He shot at Lana and locked her and the Commander inside the cabin, sabotaging the train to crash while escaping on a speeder bike. Managing to bail before the impact and survive the crash, the Commander and Lana chased Theron on foot, while fending off local wildlife and injured Umbaran soldiers. They caught up with Theron, but were unable to stop him before his shuttle left Umbara. After destroying an Umbaran Spider Tank and returning to Odessen empty-handed, the Commander ordered Lana to use every resource at the Alliance's disposal to locate Theron's whereabouts.[65]
Their message reached the right ears, and Aristocra Saganu of the Chiss Expansionary Defense Force arrived on Odessen to personally meet with Lana and the Commander. Saganu revealed that Theron was being sheltered on the Chiss world of Copero by the rogue Syndic Zenta of House Inrokini. To avoid a political conflict, Saganu asked the Alliance to deal with the traitor, sending Human Ensign Raina Temple with the Commander to keep an eye on Chiss Ascendancy interests. Though Theron escaped again, the Alliance learned that he had joined a group looking for a powerful superweapon. The Copero holomap that pointed to it was destroyed, but Lana put her best engineers into reassembling it.[66] The Alliance also intercepted a message from Theron to his new masters, revealing that he was now working for the Order of Zildrog.[67]
Chasing Zildrog
- "I recognize this encryption method. We developed it together years ago, on Rishi. Only two people know how to decrypt it. Me... and Theron."
- ―Lana Beniko
Smugglers working for Hylo Visz eventually intercepted a message to the Alliance from an Abandoned Listening Post and Lana joined the Commander to personally investigate it. They discovered that the abandoned station had served as the Order of Zildrog's base of operation for months, and that the Order had been able to watch the Alliance that whole time despite the regular security sweeps on Odessen. Holorecordings revealed that the Order was led by former Horizon Guard Vinn Atrius, who planned to awaken another superweapon from Iokath called Zildrog and use it against Odessen. However, a message entered just before their arrival also revealed a set of coordinates on Nathema, which Lana recognized as coming from Theron due to a unique encryption they had developed together on Rishi, indicating that Theron's true allegiance could still lie with them. Forced to flee as the self-destruct mechanism was activated and completely obliterated the station, Lana and the Commander returned to Odessen just as the work of restoring the holomap from Copero was finished, revealing a location on Nathema that matched the coordinates left by Theron.[67]
To stop the Order's plan and deal with Theron one way or another, the Commander and Lana traveled to Nathema, where they were shocked to see the once lifeless world overgrown with plant life, with no trace of the unsettling wrongness in the Force it had shown before. After dealing with several Nathema Zealots and escaped beasts from the Sanitarium, they reached the coordinates they'd been given, where Theron approached them and revealed himself to be secretly working for the Alliance's interests the whole time. Though Lana still did not trust him fully, everyone agreed that the Order should be stopped, and Theron led her and the Commander towards the Emperor's Vault under an ancient Sith Temple, where Zildrog was located. Along the way, Theron apologized to Lana for deceiving her, reminding her of the time she had similarly kept him in the dark on Rishi. Theron led the Commander and Lana to the Emperor's Vault, where Vinn Atrius and GEMINI 16 were already in the process of awakening Zildrog. Theron shot Atrius, but GEMINI 16 trapped the three of them in a force field and finished summoning Zildrog, allowing it to remotely take over the Gravestone that remained parked on Odessen.[67]
A blow to the Alliance
- "This goes without saying, but... I'm not going anywhere. The Alliance may be different now, but I'm here to stay."
- ―Lana Beniko
Controlling it from the Dark Sanctuary, Zildrog took the Gravestone into Odessen's orbit and proceeded to repeatedly fire the omnicannon at the Eternal Fleet, which sat defenseless in the abscence of orders from the Eternal Throne. Hylo Visz contacted the Commander and informed them of the crisis, but they, Lana, and Theron were unable to do anything to stop Zildrog from completely annihilating the Eternal Fleet. It then targeted Odessen itself, but needed to recharge before the next attack, forcing GEMINI 16 to engage the Alliance directly. Lana, Theron, and the Commander destroyed her, and Theron attempted to shut Zildrog down, but was stabbed in the back by Vinn Atrius with a lightsaber pike. Atrius then ordered Zildrog to augment him with its power and attacked Lana and the Commander with his new increased strength. They defeated Atrius and destroyed Zildrog, which also caused the self-destruct of the Gravestone and disabled the Eternal Throne. The Commander decided Atrius' fate while Lana tended to Theron's wounds, determining that he needed to be immediately brought to Odessen for treatment. The Commander agreed and the three of them returned to the base.[67]
Lana did an assessment of the incident and reported to Commander that although Odessen had suffered minimal damage with no casualties to Alliance personnel, the Gravestone and the Eternal Fleet, two of Eternal Alliance's greatest weapons, were gone.[67] Without them, the Alliance no longer possessed the military force to rival that of the Republic and the Sith Empire, who were redoubling their preparations for the inevitable renewal of open hostilities. Additionally, many Alliance members were choosing to leave and rejoin their original factions, their goal of toppling the Eternal Empire accomplished.[68] Lana however assured the Commander of her continued loyalty to them and the Alliance and the two of them welcomed back Theron, who apologized for keeping them in the dark and asked the Commander to allow him back into the Alliance.[67]
Personality and traits
- "You're unusual for a Sith. You don't even have a title."
"Knowledge, answers, truth, the Force: these are the things I hold dear. Titles don't interest me." - ―The Outlander and Lana Beniko
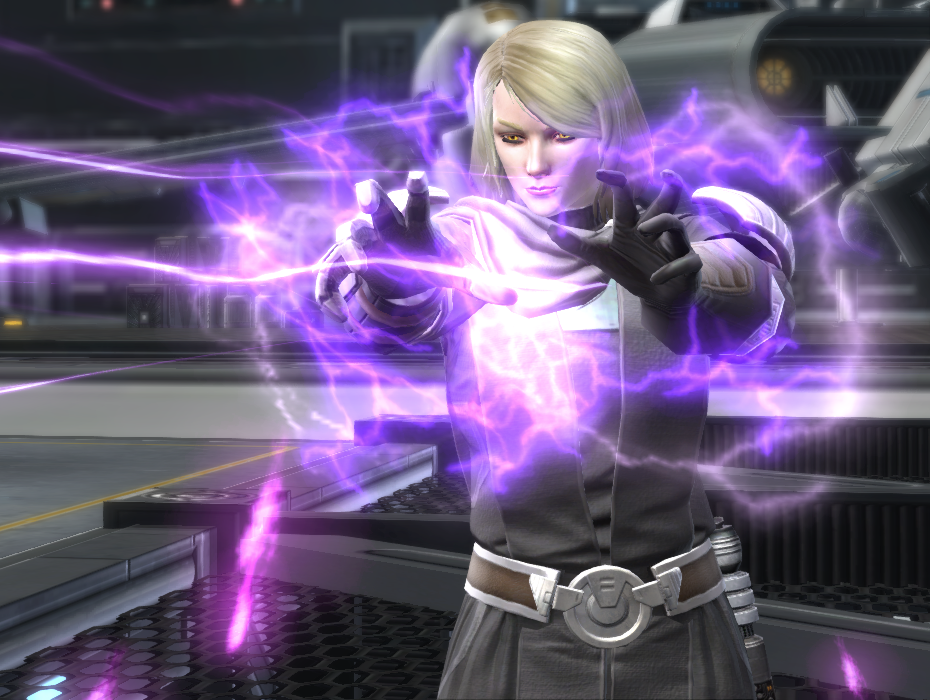
Lana Beniko had a very unusual personality for a Sith Lord. She spoke in a very serene and considerate manner, and possessed a keen mind with a preference for analyzing a problem rather than charging in head on. She was a patriot of the Sith Empire and seemed to care more about its safety than her own goals or achieving new titles. She frequently used the saying "May the Force ever serve you (serve you well)" when addressing people she respected. As advisor to Arkous, she felt bad when her suspicions of him turned out to be true,[2] and even years later would remember him, wishing that Arkous could see what she had become.[34] Her patriotism made her pragmatic enough to ally with unlikely individuals against threats to the Empire.[10] She genuinely grew to care for her friends on both sides and would show worry when they were in danger. Unlike many other Sith, Beniko held no disdain for non-Humans, people without Force-sensitivity, and even loyal citizens of the Galactic Republic; neither did she have the urge to remind them of their place. Her outward appearance showed little to no effect of Dark Side corruption apart from yellow eye irises, and she possessed a healthy sense of humor, free from the sadistic tendencies typical of Sith.[11] She easily fit in with unlikely companions for weeks, and it took the combined force of an extremely stressful situation and constant annoyance to get her to even raise her voice in a situation most Sith would choose to settle with either a Force-choke or their lightsaber.[41] Despite all this, Beniko was able to make hard decisions and remained a loyal Imperial even after she was branded a traitor, and refused an offer to defect to the Republic.[11] Beniko sincerely regretted when Theron lost his trust in her after Rishi, and she parted with him on good terms though she was already prepared to made his life difficult in her new role at Sith Intelligence. Her calm outward demeanor was also contrasted by her prowess in combat, and she had no qualms about using Force lightning against Revan during the fight.[3]
The stress of her new post as Sith Intelligence Minister combined with the power Vitiate displayed on Ziost took a toll on Lana, visibly wearing her out. She put her trust in Rane Kovach and when his betrayal was revealed to her, immediately ordered his death.[27] Though Theron still mistrusted her, she had no problem working with him to stop Vitiate. She became angry when he refused to let her experiment on Master Surro, though only because she believed sacrificing the Jedi's life could help save the entire galaxy from annihilation by Vitiate.[28] Despite being a patriot, she abandoned the Sith Empire after the Zakuul–Imperial treaty and went to search for her old ally in Wild Space, believing from their past efforts that they were the only person capable of stopping Arcann.[34] She made multiple friends and contacts during her years in Zakuulan space, enough that when called upon quite a few showed up to start the Anti-Zakuulan Alliance.[4] Lana worked alongside Koth Vortena for years, growing to genuinely like and trust him.[33] Although not violent or cruel by nature, she was prepared to sacrifice the innocent when she believed the fate of the entire galaxy at risk, at evidenced by her desire to experiment on Master Surro[28] and to let the Sun Generator on Zakuul explode to cover their escape.[34] Despite leaving the Sith Empire behind, she still thought of herself as Sith, taunting the Zakuulan Knight Tanek that the Knights were never taught to properly channel their anger like she was.[34] After becoming the master of HK-55, Beniko had become quite attached to the bodyguard droid and when SCORPIO insensitively labeled the HK-series droid inferior, she threatened to deactivate her. Beniko was initially saddened to see HK destroyed during the Battle of Asylum,[37] but happily embraced his ultimate reconstruction at the hands of Juvard Illip Oggurobb.[47]
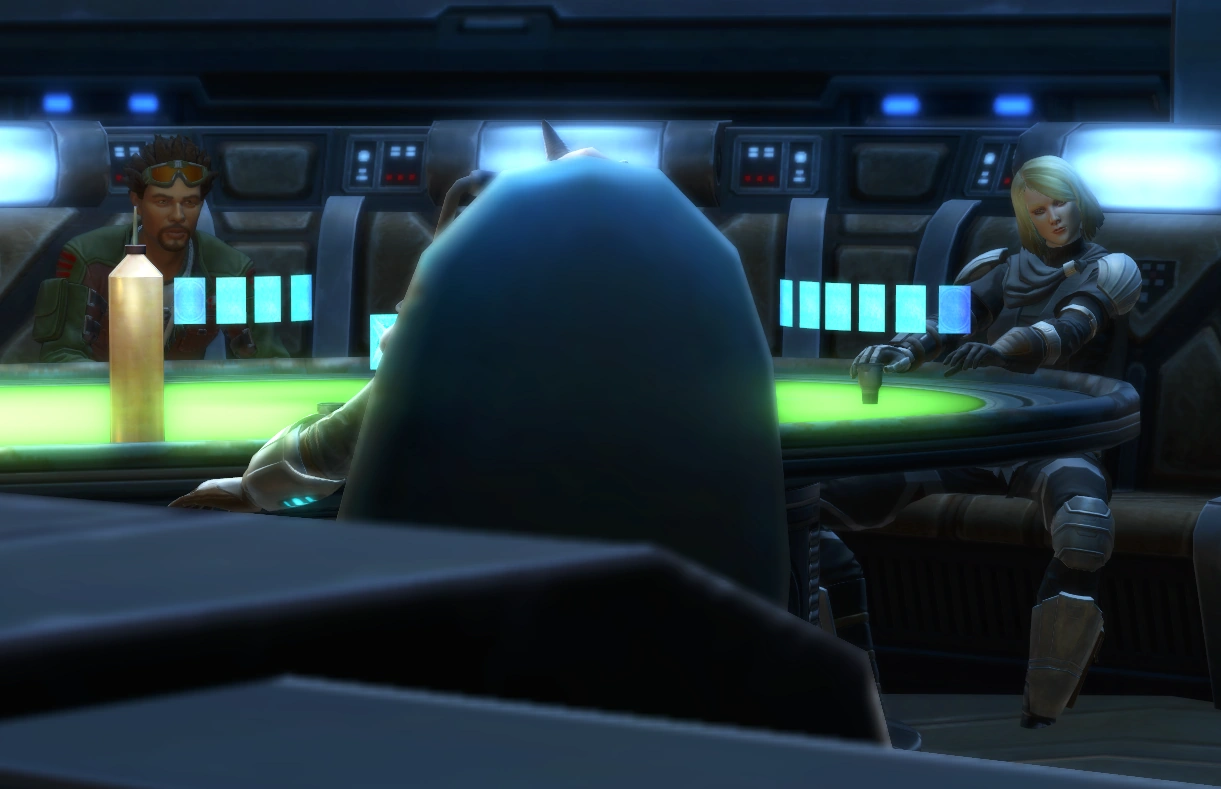
Lana plays holo-sabacc with Theron, Koth and Gault
In the early days of the Alliance, Lana acted as a voice of reason, trying to settle petty disputes and past grievances, such as those between Koth Vortena and Senya Tirall[42] or between Theron Shan and SCORPIO.[41] She was always wary of SCORPIO and showed no sign of sorrow at her supposed death, but was nevertheless unable to foresee the depth of SCORPIO's deception.[45] Putting her trust in the Commander, Beniko expected trust in return and did not take lightly to being lied to. Protective of the Commander, she promised to tear the Scion Sanctuary apart should something happen to them[35] and was extremely worried when the Commander was trapped in the Odessen wilderness by Valkorion.[42] When the Commander took harsh actions against traitors, Lana always stood by their side, even if she had brought the people in question in to begin with.[50] She tolerated ruthless decisions only if they were pragmatic, and was quick to point out when mindless violence only led to more problems down the line.[45] Lana was furious at Theron's supposed betrayal on Umbara and blamed herself for being unable to foresee it, vowing to use all of her efforts to hunt him down and make him pay.[65] Despite this, she was able to overcome her anger and work with him again, after Theron revealed himself to be a double agent who had had Alliance interests in mind the whole time.[67] Lana was extremely loyal to her ally from the Revanite crisis who later became the Alliance Commander, spending five years searching for them in Wild Space[34] and following them through whatever hardships fell upon them, to the point where she stopped associating herself with the Sith Empire and had no desire to visit her homeworld of Dromund Kaas again, a far cry from her previous devotion.[67] Her daily schedule was strongly regimented and consisted of meditation, sparring practice and coordination of Alliance spy networks. Lana followed a strict diet, which included a mixture of tea and bourbon before sleep and wrote poetry on her personal encrypted datapad.[5]
Powers and abilities
- "You need to go. Now. I'll handle the knights."
"There's too many of them, you'll be overwhelmed."
"Don't insult me." - ―Lana Beniko and the Outlander
Despite her calm and serene appearance, Lana was a fully-trained Sith Lord of great wisdom and strength.[6] She was proficient with a lightsaber and frequently employed both telekinesis and Force lightning against her opponents.[34] Lana had a strong affinity with the Force, which allowed her to sense the threat of Revan through her connection to Darth Arkous,[2] and to discover Odessen, which would serve as the permanent base of the Alliance.[4] She was a capable leader with a strong strategic mind, which she applied to both military operations and to managing a vast network of agents and spies who answered directly to her.[52]
Behind the scenes
Lana Beniko concept art by Chris Anderson
Lana Beniko is a character in Star Wars: The Old Republic voiced by English actress Lydia Leonard. First appearing as part of the Forged Alliances storyline in game update 2.7, released in April 2014,[2] she played a major role in every subsequent expansion and story update, becoming one of the most prominent NPCs in-game. She serves as mission control for the player during the four Forged Alliances flashpoints, the Temple of Sacrifice operation, three Uprisings introduced in the Knights of the Eternal Throne, and the Odessen Proving Grounds warzone.[69] Lana becomes a companion for the player in the Knights of the Fallen Empire expansion, which signifies the five-year time skip by changing her character model, outfit and hairstyle.[34]
Both male and female player characters of the Republic and Empire factions have the option to flirt with Lana on several different occasions during the Forged Alliances storyline,[11] potentially leading to a more developed romance and culminating in a passionate kiss at the end of the Shadow of Revan expansion.[3] The player can resume the romance or initiate it from clear slate during the Knights of the Fallen Empire storyline.[4]
Lana remains a critical character throughout Knights of the Eternal Throne, being the Outlander's most frequent companion, being particularly important on Nathema.[54] In the Light Side path, her prominence diminishes slightly during the last two Chapters as Senya Tirall and Arcann accompany the player in the fights against Vaylin and Valkorion. However, if the player follows the Dark Side path, both Senya and Arcann die prior to that and their roles are assumed by Lana and Theron, who remain by the player's side throughout the showdown with Vaylin and during the final push to the Eternal Throne, and will be the ones to broadcast the Outlander's ascension on the HoloNet.[56]
Gameplay alternatives
- During the Legacy of the Rakata flashpoint, Lana will ask Imperial players to collect data on the Infinite Army cyborgs for the Empire.[70] If the player refuses, she will lament that it did not matter, as she is now a fugitive and could not hand over the data anyway.[11]
- On Ziost the player can force Rane Kovach to reveal himself as a mole for Leontyne Saresh and either kill him themselves, let Lana Force-choke him, or order him to flee.[27] If the player maintains Kovach's identity on Ziost, he can later reveal it to Lana on Vaiken Spacedock after Ziost is destroyed, undermining her faith in her abilities.[29] The player can also let Lana take Master Surro to the Empire for experimenting on her brain, to Theron's disapproval.[28]
- In Fallen Empire Chapter III, Lana will insist on leaving the Sun Generator to explode, killing thousands of Zakuulians. If the player picks this Dark Side option, it will affect his conversations with Koth Vortena later on. The player can also let Lana kill Tanek, or order her to let him go, in which case Vaylin executes him for his failure.[34]
- In Fallen Empire Chapter IV, the player can choose whether to tell Lana that Valkorion continues to exist in their mind. If the player withholds this information, the truth comes out during Chapter VI, which affects Lana's approval with the Outlander.[32]
- In Fallen Empire Chapter V, the player can choose to use Valkorion's power and save Lana from a seemingly fatal blow by a Zakuulan Knight. In this case, Lana becomes greatly concerned by the display of such power. If the player refuses, she survives with only a minor wound.[33]
- In Fallen Empire Chapter VIII, either Lana or Koth will come to Outlander's aid during the second fight with Arcann, depending on who is romanced or has higher affection. She is alarmed if the player uses Valkorion's power to defeat Arcann, or saves the player after being stabbed if the offer is refused.[37]
- In Fallen Empire Chapter IX, the player can initiate a romance with either Lana, Theron, or Koth if they have enough [Flirt] options. Should the player later resume their romance with a returning original companion, they will have to break up with Lana.[4]
- In Fallen Empire Chapter X, if the player alienates Koth Vortena into abandoning the Alliance, Lana will attempt to persuade him to stay.[40]
- In Fallen Empire Chapter XV, Lana will become angry if the player lets Zasha Ranken die in favor of saving Malita Tal and Tai Cordan.[45]
- In Fallen Empire Chapter XVI, if the player previously alienated Koth Vortena, he will return and steal the Gravestone. Lana will put out a search for him.[46]
- In Eternal Throne Chapter I, the player can remain hostile to Senya Tirall. In this case, instead of providing her cover, Lana and the Mandalorian forces will attack Senya, only for the player to arrive and finish her off.[48]
- In Eternal Throne Chapter III, if the alienated Koth Vortena tries to make amends, Lana will reply that whatever was between them was over. She will whisper goodbye to Koth if the player decides to kill him.[50]
- In Eternal Throne Chapter VII, Lana will strongly suggest the player keep Dramath imprisoned in the holocron. If the player makes this Dark Side choice, the final fight against Vaylin in Chapter IX will be made much easier.[54]
- In Eternal Throne Chapter VIII, if Senya and Arcann were previously killed, Lana will accompany the player all the way through, up to the fight against Vaylin.[55]
- In Eternal Throne Chapter IX, if Senya and Arcann were previously killed, Lana and Theron will accompany the player to the Eternal Throne. They will then hold off the Skytroopers as the player fights Valkorion in their mind, sharing a tender moment when they believe they are making their last stand.[56]
- At the end of "The Nathema Conspiracy" flashpoint, players can order Lana to abandon Theron to die, in which case Lana will try to protest, but will reluctantly follow orders. If the player has romanced Lana previously, they can propose to marry her.[67]
Appearances
 The Final Trial on The Old Republic's official website (article) (backup link)
- Template:TOR (First appearance)
- Template:TOR
- Surface Details on The Old Republic's official website (article) (backup link)
- Template:TOR
- One Night at the Dealer's Den on The Old Republic's official website (article) (backup link) (Mentioned only)
- Template:TOR
- Template:TOR
Sources
- Welcome to Game Update 2.7: Invasion on The Old Republic's official website (backup link)
- The Story of SWTOR, 2014 on The Old Republic's official website (backup link)
- Lana Beniko's Journal: Darth Arkous on The Old Republic's official website (backup link)
- Legacy of the Rakata Flashpoint Now Live! on The Old Republic's official website (backup link (info/news/blog/20140909) not verified!)
- Shadow of Revan on The Old Republic's official website (backup link)
- New "Revan Returns" Trailer on The Old Republic's official website (backup link)
- Welcome to Shadow of Revan Early Access! on The Old Republic's official website (backup link)
- New Shadow of Revan Launch Trailer on The Old Republic's official website (backup link)
- "Launch Pad" — Star Wars Insider 154 (Picture only)
- Star Wars™: The Old Republic™ - Road Map 2017 on The Old Republic's official website (backup link)
- 'Sisters of Carnage' Update: Now Live on The Old Republic's official website (backup link)
- Star Wars™: The Old Republic™ - Fall Roadmap 2017 on The Old Republic's official website (backup link)
- First Look: 'Traitor Among The Chiss' Teaser on The Old Republic's official website (backup link)
- Celebrating the legacy of Star Wars™: Knights of the Old Republic™ on The Old Republic's official website (backup link) (Picture only)
- The Impact of KOTOR on SWTOR on The Old Republic's official website (backup link) (Picture only)