m (updated imagecat) |
mNo edit summary |
||
| (404 intermediate revisions by 72 users not shown) | |||
| Line 1: | Line 1: | ||
{{Top|legends=Lando Calrissian/Legends}} |
{{Top|legends=Lando Calrissian/Legends}} |
||
{{Rhere|Tamtel Skreej|the [[Tamtel Skreej/Legends|character]] from [[Star Wars Legends|''Star Wars'' Legends]]}} |
{{Rhere|Tamtel Skreej|the [[Tamtel Skreej/Legends|character]] from [[Star Wars Legends|''Star Wars'' Legends]]}} |
||
| + | {{Multiple issues|redlink|image|updatecontent=[[Star Wars Helmet Collection 19]], [[Star Wars Battlefront II]], [[Lando's Luck]], [[Solo: A Star Wars Story]], [[Han Solo & Chewbacca 9]], [[Rebel Bluff]], [[Fifth and Final]], [[From a Certain Point of View]], [[The Coin]], [[Age of Rebellion - Lando Calrissian 1]], [[Choose Your Destiny: A Smuggler Mission]], [[Tales from Wild Space: Family Affair, Part 1]], [[Tales from Wild Space: Family Affair, Part 2]], [[From a Certain Point of View: The Empire Strikes Back]], [[Star Wars Vol. 1: The Destiny Path]], [[Star Wars (2020) 8]], [[Star Wars: Operation Starlight]], [[Star Wars Vol. 3: War of the Bounty Hunters]], [[Star Wars: War of the Bounty Hunters (TPB)|Star Wars: War of the Bounty Hunters]], [[Darth Vader (2020) 16]], [[Star Wars (2020) 26]], [[Star Wars (2020) 27]], [[Revelations (2022) 1]], [[Star Wars (2020) 29]], [[Star Wars (2020) 30]], [[Star Wars (2020) 31]], [[Star Wars (2020) 32]], [[Star Wars (2020) 33]], [[Star Wars (2020) 34]], [[Star Wars (2020) 36]], [[Dark Droids 1]], [[Star Wars (2020) 37]], [[Star Wars (2020) 38]], [[Star Wars (2020) 39]], [[Star Wars (2020) 40]], [[Return of the Jedi – Lando 1]], [[Age of Rebellion - Princess Leia 1]], [[Tales from the Rancor Pit]], [[Galactic Tales: Valnir and Laizhu]], [[Shattered Empire 1]], [[The Princess and the Scoundrel]], [[Star Wars: Uprising]], [[Star Wars: The Rebel Files]], [[Last Shot]], [[Shadow of the Sith]], [[Flight of the Falcon, Part 3: Home Again]], [[Solo: A Star Wars Story The Official Guide]], [[Star Wars: Scum and Villainy: Case Files on the Galaxy's Most Notorious]], [[Star Wars: Smuggler's Guide]], [[A Race for Answers]], [[Hare-Brained Heist]], [[Halcyon Legacy 4]], [[Star Wars: Episode IX The Rise of Skywalker]], [[Star Wars: The Rise of Skywalker: Expanded Edition]], [[Star Wars: The Rise of Skywalker: A Junior Novel]], [[Star Wars: Dawn of Rebellion: The Visual Guide]]}} |
||
| − | {{Doom}} |
||
| − | {{Update|[[Star Wars Helmet Collection 19]], [[Star Wars Battlefront II]], [[Lando's Luck]], [[Solo: A Star Wars Story]], [[Rebel Bluff]], [[Fifth and Final]], [[From a Certain Point of View]], [[Age of Rebellion - Lando Calrissian 1]], [[Choose Your Destiny: A Smuggler Mission]], [[Tales from Wild Space: Family Affair, Part 1]], [[Tales from Wild Space: Family Affair, Part 2]], [[From a Certain Point of View: The Empire Strikes Back]], [[Star Wars Vol. 1: The Destiny Path]], [[Star Wars (2020) 8|Star Wars 8]], [[Star Wars: Operation Starlight]], [[Age of Rebellion - Princess Leia 1]], [[Shattered Empire 1]], [[Star Wars: Uprising]], [[Star Wars: The Rebel Files]], [[Last Shot]], [[Flight of the Falcon, Part 3: Home Again]], [[Solo: A Star Wars Story The Official Guide]], [[Star Wars: Scum and Villainy: Case Files on the Galaxy's Most Notorious]], [[Star Wars: Smuggler's Guide]], [[A Race for Answers]], [[Hare-Brained Heist]], [[Star Wars: Episode IX The Rise of Skywalker]], [[Star Wars: The Rise of Skywalker: Expanded Edition]], [[Star Wars: The Rise of Skywalker: A Junior Novel]]|hide=1}} |
||
| − | {{Redlink}} |
||
{{Character |
{{Character |
||
|type=Resistance |
|type=Resistance |
||
| Line 11: | Line 9: | ||
|birth=c. [[43 BBY]],<ref name="Birth year">''[[Star Wars: The Rise of Skywalker: The Visual Dictionary]]'' states that Landonis Balthazar Calrissian was [[Reproduction|born]] on [[Socorro]] around seventy-seven [[Standard year|years]] before the [[Hosnian Cataclysm|Starkiller Incident]], which ''[[Star Wars: Galactic Atlas]]'' dates to [[34 ABY]]. Therefore, Calrissian was born around [[43 BBY]].</ref> Socorro<ref name="TROSVD">''[[Star Wars: The Rise of Skywalker: The Visual Dictionary]]''</ref> |
|birth=c. [[43 BBY]],<ref name="Birth year">''[[Star Wars: The Rise of Skywalker: The Visual Dictionary]]'' states that Landonis Balthazar Calrissian was [[Reproduction|born]] on [[Socorro]] around seventy-seven [[Standard year|years]] before the [[Hosnian Cataclysm|Starkiller Incident]], which ''[[Star Wars: Galactic Atlas]]'' dates to [[34 ABY]]. Therefore, Calrissian was born around [[43 BBY]].</ref> Socorro<ref name="TROSVD">''[[Star Wars: The Rise of Skywalker: The Visual Dictionary]]''</ref> |
||
|death= |
|death= |
||
| − | |species=[[Human]]<ref name="Databank">{{Databank|lando-calrissian|Lando Calrissian |
+ | |species=[[Human]]<ref name="Databank">{{Databank|lando-calrissian|Lando Calrissian}}</ref> |
| − | |gender=[[ |
+ | |gender=[[Gender|Male]]<ref name="Databank" /> |
| − | | |
+ | |pronouns=He/him<ref name="Databank" /> |
| + | |height=1.77 [[meter]]s {{C|5[[Foot|ft]] 10in}}<ref name="TROSVD" /> |
||
|mass=79 [[kilogram]]s<ref name="Rebel Files">''[[Star Wars: The Rebel Files]]''</ref> |
|mass=79 [[kilogram]]s<ref name="Rebel Files">''[[Star Wars: The Rebel Files]]''</ref> |
||
| − | |hair=[[Color|Black]]<ref name="Episode V"> |
+ | |hair=[[Color|Brownish-Black]]<ref name="Episode V">{{Film|V}}</ref>, later graying<ref name="Star Wars Episode IX: The Rise of Skywalker">{{Film|IX}}</ref> |
| + | |feathers= |
||
|eyes=Brown<ref name="Episode V" /> |
|eyes=Brown<ref name="Episode V" /> |
||
|skin=Dark<ref name="Episode V" /> |
|skin=Dark<ref name="Episode V" /> |
||
|cyber= |
|cyber= |
||
| − | | |
+ | |families=[[Calrissian family]]<ref name="Episode V" /> |
| − | *[[ |
+ | |parents=*A [[Landonis Balthazar Calrissian's father|father]]<ref name="Solo">''[[Solo: A Star Wars Story]]''</ref> |
| + | *A [[Landonis Balthazar Calrissian's mother|mother]]<ref name="Solo" /> |
||
| + | |partners=*[[Kaasha Bateen]]<ref name="Last Shot">''[[Last Shot]]''</ref> |
||
| + | *[[Kadara Calrissian's mother]]<ref name="Shadow of the Sith">''[[Shadow of the Sith]]''</ref> |
||
| + | |siblings= |
||
| + | |children=[[Kadara Calrissian]]<ref name="Shadow of the Sith" /> |
||
| + | |affiliation=*[[Crimson Dawn]]<ref name="Solo" /> |
||
| + | *[[Landonis Balthazar Calrissian's crew]]<ref name="Lando 1">[[Lando 1|''Lando'' 1]]</ref> |
||
*[[Alliance to Restore the Republic]]<ref name="Databank" /> |
*[[Alliance to Restore the Republic]]<ref name="Databank" /> |
||
| − | **[[Gold Squadron (Rebel Alliance)|Gold Squadron]]<ref name="Episode VI"> |
+ | **[[Gold Squadron (Rebel Alliance)|Gold Squadron]]<ref name="Episode VI">{{Film|VI}}</ref> |
*[[New Republic]]<ref name="Aftermath">[[Aftermath (novel)|''Aftermath'']]</ref> |
*[[New Republic]]<ref name="Aftermath">[[Aftermath (novel)|''Aftermath'']]</ref> |
||
**[[New Republic Defense Force]]<ref name="Battlefront II">''[[Star Wars Battlefront II]]''</ref> |
**[[New Republic Defense Force]]<ref name="Battlefront II">''[[Star Wars Battlefront II]]''</ref> |
||
*[[Uprising]]<ref name="Uprising">''[[Star Wars: Uprising]]''</ref> |
*[[Uprising]]<ref name="Uprising">''[[Star Wars: Uprising]]''</ref> |
||
| − | *[[Calrissian Enterprises]]<ref name="Last Shot" |
+ | *[[Calrissian Enterprises]]<ref name="Last Shot" /> |
*[[Resistance]]<ref name="Amazing Sticker Adventures">''[[Star Wars: The Rise of Skywalker: Amazing Sticker Adventures]]''</ref> |
*[[Resistance]]<ref name="Amazing Sticker Adventures">''[[Star Wars: The Rise of Skywalker: Amazing Sticker Adventures]]''</ref> |
||
| − | *[[Citizens' |
+ | *[[Citizens' Fleet]]<ref name="Star Wars Episode IX: The Rise of Skywalker">{{Film|IX}}</ref> |
|masters= |
|masters= |
||
|apprentices=}} |
|apprentices=}} |
||
| + | {{Quote|I'm not interested in throwing my life away for nothing. I don't get into fights I know I can't win. But when it comes to something I care about, or some''one'' I care about…I'm as brave as they come. When it's like that, I don't ''care'' about the odds. ''Bet on it.|Lando Calrissian|<ref name="Star Wars (2020) 17">[[Star Wars (2020) 17|''Star Wars'' (2020) 17]]</ref>}} |
||
| − | {{Quote|I mean, he was brave, sure, but always in the service of saving his own hide or profit. But I had also detected that deep down, behind all that smooth talking and those well-ironed capes, there was a whole human being with a conscience and a desperate need to do something worthwhile with his life.|Kaasha Bateen, on Lando Calrissian|Last Shot}} |
||
| − | '''Landonis Balthazar |
+ | '''Landonis Balthazar Calrissian''', otherwise known as '''Lando Calrissian''', was a [[human]] [[smuggler]], [[gambler]], and entrepreneur who became [[Baron Administrator]] of [[Cloud City]] and, later, a [[general]] in the [[Alliance to Restore the Republic|Rebel Alliance]]. [[Reproduction|Born]] on [[Socorro]], he was the owner of the ''[[Millennium Falcon]]'' before losing it to [[Han Solo]] in a game of [[sabacc]] on [[Numidian Prime]]. Afterward, Calrissian put an end to his days as a smuggler and became an entrepreneur, setting up a small [[mining]] operation on the [[planet]] [[Lothal]] before eventually becoming the leader of Cloud City in the skies of the planet [[Bespin]]. |
| − | During the [[Galactic Civil War]], [[Anakin Skywalker|Darth Vader]] arrived on Cloud City |
+ | During the [[Galactic Civil War]], [[Anakin Skywalker|Darth Vader]] arrived on Cloud City to lay a trap for his [[Gender|son]], [[Luke Skywalker]]. As part of the trap, the [[Dark Lord of the Sith]] forced Calrissian into tricking a group of Rebels, including Solo and [[Prince]]ss [[Leia Skywalker Organa Solo|Leia Organa]], leading them to Vader himself. Though Vader promised to leave Cloud City without an Imperial presence, Calrissian felt the deal had been altered to the point where he could no longer tolerate it. Calrissian alerted his citizens to the [[Galactic Empire]]'s presence and impending occupation and ordered an evacuation. He helped the Rebels try to rescue Solo, who had been [[Carbon-freezing|frozen]] in [[carbonite]], from [[Boba Fett]], but the [[bounty hunter]] escaped. |
| − | Calrissian joined the Rebel Alliance and set out to find Solo. After locating him in the [[ |
+ | Calrissian joined the Rebel Alliance and set out to find Solo. After locating him in the [[Boba Fett's Palace|palace]] of [[Jabba Desilijic Tiure|Jabba]] the [[Hutt]] on [[Tatooine]], Calrissian aided in his [[Rescue of Han Solo|rescue]]. The Rebels returned to the fleet, and Calrissian became a general, volunteering to lead the assault on the [[DS-2 Death Star II Mobile Battle Station]] during the [[Battle of Endor]]. During the battle, he piloted the ''Millennium Falcon'' into the battle station's core, firing the shot which destroyed it. |
| − | In [[Standard year|years]] of peace after |
+ | In the [[Standard year|years]] of peace after the Empire's [[Galactic Concordance|dissolution]], Calrissian started a family and [[Parent|fathered]] a daughter named [[Kadara Calrissian]]. However, while she was only an infant, his daughter was kidnapped by the [[First Order]]. Six years later, he embarked on a [[Mission to Pasaana|quest]] to the [[desert]] planet of [[Pasaana]] with Luke Skywalker to find answers about the growing [[Dark side of the Force|darkness]] in [[the Force]], but failed to uncover anything. Seeking to bury the pain of those memories, Calrissian settled on Pasaana and led a solitary lifestyle where he was known as the "'''Hermit'''" to the [[Aki-Aki]] of the [[Lurch Canyon]]. He lived alone for some years while keeping contact with the [[Solo family]] and was later asked by Organa's [[Resistance]] for his aid in the [[First Order-Resistance War|war]] against the [[First Order]]. |
| − | In [[35 ABY]], Lando helped the Resistance and reunited with his old friend, Chewbacca. Calrissian played one more role in the fight for [[The galaxy|galactic]] freedom as he brought an assembled [[ |
+ | In [[35 ABY]], Lando helped the Resistance and reunited with his old friend, Chewbacca. Calrissian played one more role in the fight for [[The galaxy|galactic]] freedom as he brought an assembled [[Citizens' Fleet]] to reinforce the Resistance at the [[Battle of Exegol|battle]] at [[Exegol]], from which the Resistance emerged victorious. |
==Biography== |
==Biography== |
||
| − | === |
+ | ===Deals and adventures=== |
| + | ====Various schemes and journeys==== |
||
| − | [[File:Img-swsolo-char1.png|thumb|225x225px|left|Young Lando Calrissian]] |
||
| + | {{Quote|Holojournal Entr—''[sic]''…take the walkers…in the Halthor sector. Just my luck, the buyer was under Imperial surveillance.|Lando Calrissian in a holojournal entry|<ref name="Commander">''[[Star Wars: Commander]]''</ref>}} |
||
| − | Landonis<ref name="Solo" /> Balthazar<ref name="TROSVD" /> Calrissian, otherwise known as "Lando" Calrissian, was [[Reproduction|born]] on the [[planet]] [[Socorro]].<ref name="Galactic Explorer's Guide">''[[Star Wars: The Galactic Explorer's Guide]]''</ref> During [[Sexes|his]] youth, he became a [[smuggler]] and a [[gambler]], excelling in a card game known as [[sabacc]]. He traveled throughout [[the galaxy]] and [[pilot]]ed a [[freighter]] called the ''[[Millennium Falcon]]'',<ref name="Databank" /> which saved his life on numerous occasions.<ref name="Episode V" /> Sometime before [[10 BBY]], Lando won a [[Unidentified subtropical moon|subtropical moon]] in the [[Oseon Belt]] during a game of sabacc. Lando also developed a partnership with [[L3-37]], a custom self-made [[Pilot droid|piloting droid]].<ref name="Solo" /> During his time with L3, Lando nearly lost her to a [[Hutt]] after making a bad bet in a game of sabacc on [[Gonda]].<ref name="Lando's Luck">''[[Lando's Luck]]''</ref> At one point, Calrissian was involved in an incident with a [[Dawinian]] and their companion.<ref name="Double or Nothing 4">[[Lando - Double or Nothing 4|''Lando - Double or Nothing'' 4]]</ref> |
||
| + | [[File:LandoCalrissian2-SWBC18.png|thumb|225px|left|Young Lando Calrissian]] |
||
| + | A member of the tragic [[Calrissian family]],<ref name="Battlefront II" /> Landonis<ref name="Solo" /> Balthazar<ref name="TROSVD" /> Calrissian, otherwise known as "Lando" Calrissian, was [[Reproduction|born]] on the [[planet]] [[Socorro]].<ref name="Galactic Explorer's Guide">''[[Star Wars: The Galactic Explorer's Guide]]''</ref> During his youth, he became a [[smuggler]] and a [[gambler]], excelling in a card game known as [[sabacc]]. He traveled throughout [[the galaxy]] and [[pilot]]ed a [[freighter]] called the ''[[Millennium Falcon]]'',<ref name="Databank" /> which he won through a game of sabacc at<ref name="Falcon 1">{{FalconCite|1|Starship Fact File|The Fastest Hunk of Junk in the Galaxy}}</ref> the [[gas giant]]<ref name="Bespin DB">{{Databank|bespin|Bespin}}</ref> [[Bespin]].<ref name="Falcon 1" /> The ship saved his life on numerous occasions.<ref name="Episode V" /> Sometime before [[10 BBY]], Lando won a [[Unidentified subtropical moon|subtropical moon]] in the [[Oseon Belt]] during a game of sabacc. Lando also developed a partnership with [[L3-37]], a custom self-made [[Pilot droid|piloting droid]].<ref name="Solo" /> |
||
| + | During his time with L3, Lando nearly lost her to a [[Hutt]] after making a bad bet in a game of sabacc on [[Gonda]].<ref name="Lando's Luck">''[[Lando's Luck]]''</ref> At one point, Calrissian was involved in an incident with a [[Dawinian]] and their companion.<ref name="Double or Nothing 4">[[Lando - Double or Nothing 4|''Lando - Double or Nothing'' 4]]</ref> He also came to meet the [[Tonnika sisters]], even showing [[Brea Tonnika]] how to work the controls on the ''Falcon''. At another point, Brea and [[Senni Tonnika]] made a mess of the room they were staying in on<ref name="You Owe Me a Ride">{{StoryCite|story=You Owe Me a Ride|book=From a Certain Point of View}}</ref> the [[Ecumenopolis|city-world]] of<ref name="Coruscant">{{Databank|coruscant|Coruscant}}</ref> [[Coruscant]] in order to get back at Calrissian.<ref name="You Owe Me a Ride" /> At some point, Calrissian met a [[Unidentified droid mechanic (Kijimi)|droid mechanic]] who worked on<ref name="SW 2020 41">[[Star Wars (2020) 41|''Star Wars'' (2020) 41]]</ref> the [[Mid Rim Territories|Mid Rim]] planet<ref name="TROSVD" /> [[Kijimi]], with that [[Technician|mechanic]] coming to owe Calrissian a favor.<ref name="SW 2020 41" /> |
||
| − | ===Age of the Empire=== |
||
| + | |||
| − | {{Quote|Holojournal Entr—''[sic]''…take the walkers…in the Halthor sector. Just my luck, the buyer was under Imperial surveillance.|Lando Calrissian in a holojournal entry|Star Wars: Commander}} |
||
| − | [[Time|Sometime]] prior to the Battle of [[Yavin Prime|Yavin]], Lando and L3-37 were [[Ambush in the Halthor sector|ambushed]] in the [[Halthor sector]] when an Imperial [[Interdictor vessel|interdictor]] dropped out from [[hyperspace]]. As a result of the ambush, Calrissian lost a majority of his shipment of [[walker]]s that he acquired from an [[Er'Kit (species)|Er'Kit]] [[arms dealer]] in the [[Noonian sector]].<ref name="Commander" |
+ | [[Time|Sometime]] prior to the Battle of [[Yavin Prime|Yavin]], Lando and L3-37 were [[Ambush in the Halthor sector|ambushed]] in the [[Halthor sector]] when an Imperial [[Interdictor vessel|interdictor]] dropped out from [[hyperspace]]. As a result of the ambush, Calrissian lost a majority of his shipment of [[walker]]s that he acquired from an [[Er'Kit (species)|Er'Kit]] [[arms dealer]] in the [[Noonian sector]].<ref name="Commander" /> Lando also had dealings with [[Crimson Dawn]] on [[Felucia]]. He completed his debt to Crimson Dawn and its leader, [[Dryden Vos]].<ref name="Solo" /> At another point, Calrissian visited [[Pantora]] and successfully convinced Imperial [[Vice Grand Administrator]] [[Prita Sven]] to let him leave the planet with a freighter full of poached [[forlyn]] carcasses.<ref name="Last Shot" /> |
====Delivering an artifact==== |
====Delivering an artifact==== |
||
| − | {{Quote|Bad luck? No such thing,|Lando Calrissian, said laughing|Lando's Luck}} |
+ | {{Quote|Bad luck? No such thing,|Lando Calrissian, said laughing|<ref name="Lando's Luck" />}} |
| − | [[File: |
+ | [[File:Frozen_Kova.jpg|thumb|right|200x200px|Lando meets with Queen Forsythia Jin.]] |
| − | Calrissian and L3-37 at some point was arrested for smuggling and was sent to the planet [[Hynestia]]. Lando and L3 was asked by [[Queen]] [[Forsythia Jin]] of Hynestia to deliver an artifact to the Galactic Empire for making up for a [[gherlian fur]] failed delivery. [[Prince]]ss [[Rinetta Gan]] knew about the real purpose of the artifact from her teacher [[Zel Gris]]. It was supposed to function as an energy source and make up for the lack of sunlight on the planet [[Livno III]]. Without it, Livno III would fall to ruin and destruction. Rinetta tried to force Calrissian and L3 to comply with her new orders after sneaking onto the ''Millennium Falcon'' as a stowaway. Her plan failed as Calrissian traveled to [[Neral's moon]] to settle a debt with [[Ne'eda Frip]]. When the exchange went wrong and escaped but he was captured by Queen Forsythia again. Queen Forsythia put Calrissian and L3 in jail. Rinetta freed Calrissian and L3 again. She wanted them to help her return the artifact to Livno III. They all escaped Hynestia and had to defeat Ne'eda's [[starship]]s before making the jump to Livno III. After returning the artifact to Livno III, they put the princess Rinetta back to Hynestia. Queen Forsythia pardoned Calrissian and L3 afterwards.<ref name="Lando's Luck" /> |
+ | Calrissian and L3-37 at some point was arrested for smuggling and was sent to the planet [[Hynestia Prime|Hynestia]]. Lando and L3 was asked by [[Queen]] [[Forsythia Jin]] of Hynestia to deliver an artifact to the Galactic Empire for making up for a [[gherlian fur]] failed delivery. [[Prince]]ss [[Rinetta Gan]] knew about the real purpose of the artifact from her teacher [[Zel Gris]]. It was supposed to function as an energy source and make up for the lack of sunlight on the planet [[Livno III]]. Without it, Livno III would fall to ruin and destruction. Rinetta tried to force Calrissian and L3 to comply with her new orders after sneaking onto the ''Millennium Falcon'' as a stowaway. Her plan failed as Calrissian traveled to [[Neral's moon]] to settle a debt with [[Ne'eda Frip]]. When the exchange went wrong and escaped but he was captured by Queen Forsythia again. Queen Forsythia put Calrissian and L3 in jail. Rinetta freed Calrissian and L3 again. She wanted them to help her return the artifact to Livno III. They all escaped Hynestia and had to defeat Ne'eda's [[starship]]s before making the jump to Livno III. After returning the artifact to Livno III, they put the princess Rinetta back to Hynestia. Queen Forsythia pardoned Calrissian and L3 afterwards.<ref name="Lando's Luck" /> |
====Freeing slaves==== |
====Freeing slaves==== |
||
| − | {{Quote|So, are you |
+ | {{Quote|So, are you Calrissian?''"<br />"''Depends. Are you a fan, or a bounty hunter?|Kristiss and Lando Calrissian|<ref name="Double or Nothing 1">[[Lando - Double or Nothing 1|''Lando - Double or Nothing'' 1]]</ref>}} |
| − | [[File: |
+ | [[File:Kristiss_and_Lando.png|thumb|left|230x230px|Lando meeting with Kristiss]] |
| − | Calrissian later smuggled weapons to [[Petrusia]] after the Empire [[Seizure of Petrusia|seized]] control of it. Following that operation, Calrissian considered turning the ''Falcon'' into a [[casino]], despite L3's reservations about it. He also started to write the ''[[Calrissian Chronicles]]'' to show the [[galaxy]] his prodigiousness. Calrissian and L3 took the ''Falcon'' to [[Batuv]] where he tried to by a new [[cape]] from [[Borkus (Trandoshan)|Borkus]] until he met the [[bartender]] [[Kristiss]]. She told Calrissian of her [[Petrusian|people's]] plight and status as slaves at the [[Imperial outpost of Kullgroon|Imperial outpost]] on [[Kullgroon]]. Kristiss asked for his help in arming her people for 1,000 [[credit]]s up front. Despite his reservations, Calrissian decided to speak with her and have a drink with her.<ref name="Double or Nothing 1" |
+ | Calrissian later smuggled weapons to [[Petrusia]] after the Empire [[Seizure of Petrusia|seized]] control of it. Following that operation, Calrissian considered turning the ''Falcon'' into a [[casino]], despite L3's reservations about it. He also started to write the ''[[Calrissian Chronicles]]'' to show the [[galaxy]] his prodigiousness. Calrissian and L3 took the ''Falcon'' to [[Batuv]] where he tried to by a new [[cape]] from [[Borkus (Trandoshan)|Borkus]] until he met the [[bartender]] [[Kristiss]]. She told Calrissian of her [[Petrusian|people's]] plight and status as slaves at the [[Imperial outpost of Kullgroon|Imperial outpost]] on [[Kullgroon]]. Kristiss asked for his help in arming her people for 1,000 [[credit]]s up front. Despite his reservations, Calrissian decided to speak with her and have a drink with her.<ref name="Double or Nothing 1" /> |
Calrissian was confronted by [[Brushaun]], who believed that he cheated him out of 2,000 credits in a card game on [[Canto Bight]]. Calrissian was saved by Kristiss, who offered him the credits to pay off Brushaun and more if Calrissian helped her people. Calrissian spoke with L3 about this mission and knowing he would be a dead man, Calrissian accepted Kristiss' [[Job on Kullgroon|mission]]. Enroute to Kulgroon, the ''Falcon'' came under attack by several [[TIE/ln space superiority starfighter|TIE fighters]]. Calrissian and L3 were able to lead the TIEs to a moon, where he was able to pick them off before they arrived at Kullgroon.<ref name="Double or Nothing 1" /> |
Calrissian was confronted by [[Brushaun]], who believed that he cheated him out of 2,000 credits in a card game on [[Canto Bight]]. Calrissian was saved by Kristiss, who offered him the credits to pay off Brushaun and more if Calrissian helped her people. Calrissian spoke with L3 about this mission and knowing he would be a dead man, Calrissian accepted Kristiss' [[Job on Kullgroon|mission]]. Enroute to Kulgroon, the ''Falcon'' came under attack by several [[TIE/ln space superiority starfighter|TIE fighters]]. Calrissian and L3 were able to lead the TIEs to a moon, where he was able to pick them off before they arrived at Kullgroon.<ref name="Double or Nothing 1" /> |
||
| − | [[File:KullgroonWastelands. |
+ | [[File:KullgroonWastelands.jpg|thumb|202x202px|right|Lando arrives at Wastelands of Kullgroon aboard the ''Millennium Falcon'']] |
| − | Calrissian powered the ''Falcon'' down in order to appear as space junk in order sneak past the Empire. As the ''Falcon'' descended into Kullgroon's [[atmosphere]], he and L3 were able to pilot the ship in to the [[Wastelands |
+ | Calrissian powered the ''Falcon'' down in order to appear as space junk in order sneak past the Empire. As the ''Falcon'' descended into Kullgroon's [[atmosphere]], he and L3 were able to pilot the ship in to the [[Wastelands of Kullgroon|wastelands]]. Calrissian, Kristiss, and L3 made their way towards the camp. After Kristiss got herself captured by a pair of stormtroopers, Calrissian considered abandoning the mission but L3 convinced him to stay. He came under attack by some outlaws and starfighters. Calrissian was able to find a abandoned star fighter and attempted to evade them but he was shot down and taken prisoner by the outlaws.<ref name="Double or Nothing 2">[[Lando - Double or Nothing 2|''Lando - Double or Nothing'' 2]]</ref> |
| − | [[File: |
+ | [[File:Lando_fighting_in_arena.jpg|thumb|209x209px|left|Lando about to fight Murkel Kev, Cantor Zain, Kawal Trane, and Siswan in a arena battle.]] |
| − | The outlaws' leader, [[Batalla]], remembered Calrissian from [[Calladus Festival]], where he took the bulk of the [[Zakku Rain Cartel]]'s credits. Calrissian said it was actually Batalla's prize [[Sharropon]]. He tried to convince Batalla that he was on vacation and was visiting a friend. Batalla considered handing Calrissian over to one of his enemies for a king's ransom and had Calrissian taken to a jail cell. When a droid came with [[Foodstuff|food]], Calrissian was able to trick the droid and disable it. As he made his escape, Calrissian contacted L3 for a pick up. However, L3 was busy looking for Kristiss. He ran into Batalla's outlaws who threw into a arena where he fought against several members of the Zakku Rain Cartel, [[Murkel Kev]], [[Cantor Zain]], [[Kawal Tane]] and [[Siswan]], until L3 and the ''Falcon'' arrived. However, L3 wanted to pick up Kristiss despite Calrissian's protests. The ''Falcon'' came under attack by an indigenous creature, but Calrissian and L3 was able to steer past them. He contacted Kristiss to arrange the weapons drop off before L3 picked up several TIEs closing in on the ''Falcon''.<ref name="Double or Nothing 3">[[Lando - Double or Nothing 3|''Lando - Double or Nothing'' 3]]</ref> |
+ | The outlaws' leader, [[Batalla]], remembered Calrissian from [[Calladus Festival]], where he took the bulk of the [[Zakku Rain Cartel]]'s credits. Calrissian said it was actually Batalla's prize [[Sharropon]]. He tried to convince Batalla that he was on vacation and was visiting a friend. Batalla considered handing Calrissian over to one of his enemies for a king's ransom and had Calrissian taken to a jail cell. When a droid came with [[Foodstuff|food]], Calrissian was able to trick the droid and disable it. As he made his escape, Calrissian contacted L3 for a pick up. However, L3 was busy looking for Kristiss. He ran into Batalla's outlaws who threw into a arena where he fought against several members of the Zakku Rain Cartel, [[Murkel Kev]], [[Cantor Zain]], [[Kawal Tane]], and [[Siswan]], until L3 and the ''Falcon'' arrived. However, L3 wanted to pick up Kristiss despite Calrissian's protests. The ''Falcon'' came under attack by an indigenous creature, but Calrissian and L3 was able to steer past them. He contacted Kristiss to arrange the weapons drop off before L3 picked up several TIEs closing in on the ''Falcon''.<ref name="Double or Nothing 3">[[Lando - Double or Nothing 3|''Lando - Double or Nothing'' 3]]</ref> |
| − | [[File: |
+ | [[File:Lando_leads_Petrusians.jpg|thumb|220x220px|right|Lando leads Petrusian slaves against stormtroopers]] |
Calrissian flew the ''Falcon'' low into the wastelands' canyon, hoping to fool the TIEs into believing that the ''Falcon'' had crashed. Calrissian was able to cause a explosion that sealed off the canyon from the TIEs. He took the ''Falcon'' to a sewage expulsion port. As he made his way through the port, Calrissian was confronted by several creatures and shot at them. He was later confronted by the creatures mother, but was able to kill it. Calrissian was able to reach a control station and told L3 to hack into the mainframe to find Kristiss and disable Level 7 to 9's security monitors. Calrissian met up with Kristiss and her father. After rallying the other Petrusians to take arms against the Empire, despite their resistance to warfare, Calrissian and the slave made their escape to the sewage port and met up with the ''Falcon''. After the slaves armed themselves, Calrissian and Kristiss led them against the stormtroopers.<ref name="Double or Nothing 4" /> |
Calrissian flew the ''Falcon'' low into the wastelands' canyon, hoping to fool the TIEs into believing that the ''Falcon'' had crashed. Calrissian was able to cause a explosion that sealed off the canyon from the TIEs. He took the ''Falcon'' to a sewage expulsion port. As he made his way through the port, Calrissian was confronted by several creatures and shot at them. He was later confronted by the creatures mother, but was able to kill it. Calrissian was able to reach a control station and told L3 to hack into the mainframe to find Kristiss and disable Level 7 to 9's security monitors. Calrissian met up with Kristiss and her father. After rallying the other Petrusians to take arms against the Empire, despite their resistance to warfare, Calrissian and the slave made their escape to the sewage port and met up with the ''Falcon''. After the slaves armed themselves, Calrissian and Kristiss led them against the stormtroopers.<ref name="Double or Nothing 4" /> |
||
| − | [[File: |
+ | [[File:L3_and_Lando.jpg|thumb|206x206px|left|Lando fighting alongside L3 on Kullgroon]] |
Calrissian and the Petrusians fought the outpost's stormtroopers. When L3 told him that several TIEs were returning to the outpost, Calrissian believed it was time for him to retreat when the Petrusians were losing their battle. However, Kristis reactivated hundreds of derelict droids to help them win the battle. Calrissian and [[Rythus]] charged the stormtroopers and saved Kristiss from them. He and Kristiss used a cord to swing over the stormtroopers. He met up with L3 and saw the stormtroopers taking the ''Falcon''. After the battle, Calrissian and L3 met up with Kristiss and the slaves as they boarded an [[Lambda-class T-4a shuttle|Imperial shuttle]]. He accepted a ride from Kristiss and her father, who gave him his payment. Calrissian learned from L3 that the ''Falcon'' was taken and impounded on [[Vandor]]. A week later, Calrissian and L3 found the ''Falcon'' on Vandor. There, he decided to go into early retirement and play sabacc at [[the Lodge]].<ref name="Double or Nothing 5">[[Lando - Double or Nothing 5|''Lando - Double or Nothing'' 5]]</ref> |
Calrissian and the Petrusians fought the outpost's stormtroopers. When L3 told him that several TIEs were returning to the outpost, Calrissian believed it was time for him to retreat when the Petrusians were losing their battle. However, Kristis reactivated hundreds of derelict droids to help them win the battle. Calrissian and [[Rythus]] charged the stormtroopers and saved Kristiss from them. He and Kristiss used a cord to swing over the stormtroopers. He met up with L3 and saw the stormtroopers taking the ''Falcon''. After the battle, Calrissian and L3 met up with Kristiss and the slaves as they boarded an [[Lambda-class T-4a shuttle|Imperial shuttle]]. He accepted a ride from Kristiss and her father, who gave him his payment. Calrissian learned from L3 that the ''Falcon'' was taken and impounded on [[Vandor]]. A week later, Calrissian and L3 found the ''Falcon'' on Vandor. There, he decided to go into early retirement and play sabacc at [[the Lodge]].<ref name="Double or Nothing 5">[[Lando - Double or Nothing 5|''Lando - Double or Nothing'' 5]]</ref> |
||
====Coaxium heist==== |
====Coaxium heist==== |
||
| − | {{Quote| |
+ | {{Quote|Everything you heard about me is true.|Lando Calrissian, to Han Solo|<ref name="Solo" />}} |
| − | [[File:Lando sabacc game with Solo.jpg|thumb|215x215px|right|Lando about to play sabacc with Han Solo]] |
||
During Lando's retirement on Vandor,<ref name="Double or Nothing 5" /> [[Qi'ra]], who was an old acquaintance of Lando, and her comrades, [[Tobias Beckett]], [[Han Solo]], and [[Chewbacca]], needed a fast ship in order to steal unrefined [[coaxium]] from the [[Pyke Syndicate|Pykes]] on [[Kessel]] for Vos. Qi'ra suggested they search for Calrissian, and the group found him hustling several bar patrons at sabacc by hiding [[Sylop|a card]] up his sleeve. Solo joined in the game, and the stakes soon became Lando's ''Falcon'' against Solo's [[VCX-100 light freighter]]. Solo produced an impressive hand that caused the other bar patrons to erupt in applause, but Calrissian produced a superior hand by cheating. Calrissian inquired where Solo's ship was, but Qi'ra intervened, explaining the situation. Calrissian agreed to pilot the ''Falcon'' for the heist, in exchange for a 25% cut, negotiated down to 20% by Beckett.<ref name="Solo" /> |
During Lando's retirement on Vandor,<ref name="Double or Nothing 5" /> [[Qi'ra]], who was an old acquaintance of Lando, and her comrades, [[Tobias Beckett]], [[Han Solo]], and [[Chewbacca]], needed a fast ship in order to steal unrefined [[coaxium]] from the [[Pyke Syndicate|Pykes]] on [[Kessel]] for Vos. Qi'ra suggested they search for Calrissian, and the group found him hustling several bar patrons at sabacc by hiding [[Sylop|a card]] up his sleeve. Solo joined in the game, and the stakes soon became Lando's ''Falcon'' against Solo's [[VCX-100 light freighter]]. Solo produced an impressive hand that caused the other bar patrons to erupt in applause, but Calrissian produced a superior hand by cheating. Calrissian inquired where Solo's ship was, but Qi'ra intervened, explaining the situation. Calrissian agreed to pilot the ''Falcon'' for the heist, in exchange for a 25% cut, negotiated down to 20% by Beckett.<ref name="Solo" /> |
||
| − | [[File: |
+ | [[File:ElthreeHanLandoFalcon-Solo.jpg|thumb|220x220px|left|Lando and L3-37 about to jump to lightspeed.]] |
| − | + | After jumping to hyperspace, L3-37 plotted a course to Kessel that she implemented after admonishing Calrissian for flirting with Solo instead of flying. On Kessel, Calrissian remained aboard the ''Millennium Falcon'' during the [[Raid on Kessel|heist]] and updated his autobiography. When Solo, Qi'ra, Chewbacca, Beckett, and L3 returned with the coaxium, Calrissian helped lay down covering fire against the [[Pyke]]s until L3 was shot. Calrissian attempted to save L3, but was shot in the arm, and it took the efforts of Solo and Chewbacca to save him and L3. Aboard the ''Falcon'', L3 [[Death|died]] in a distraught Calrissian's arms. Due to his injury, Calrissian reluctantly allowed Solo to pilot the ''Falcon'' off Kessel.<ref name="Solo" /> |
|
| − | The crew encountered an [[Galactic Empire|Imperial]] [[blockade]] when departing Kessel, causing Solo to divert his course into the dangerous [[Akkadese Maelstrom|maelstrom]]. Calrissian retrieved L3's central [[processor]] and plugged it into the ''Falcon's'' [[Navigation computer|navicomputer]] in order to plot a course out of the maelstrom, in which navigation was otherwise impossible. The ''Falcon'' crew encountered a massive [[Summa-verminoth|space creature]], and [[ |
+ | The crew encountered an [[Galactic Empire|Imperial]] [[blockade]] when departing Kessel, causing Solo to divert his course into the dangerous [[Akkadese Maelstrom|maelstrom]]. Calrissian retrieved L3's central [[processor]] and plugged it into the ''Falcon's'' [[Navigation computer|navicomputer]] in order to plot a course out of the maelstrom, in which navigation was otherwise impossible. The ''Falcon'' crew encountered a massive [[Summa-verminoth|space creature]], and [[the Maw]], a powerful [[gravity well]]. Solo launched the ''Falcon's'' escape pod into the [[gravity]] well, causing the creature to follow it and become trapped. The ''Falcon'' became trapped in the gravity well, only escaping when Beckett used a drop of coaxium in order to give the ''Falcon'' the power to escape.<ref name="Solo" /> |
====Savareen and departure==== |
====Savareen and departure==== |
||
| − | {{Quote|She is a hell of a ship.''"<br />"''I hate you.''"<br />"''I know.''"<br />"''I'm going to be on ''my ship'', in ''my quarters'', waiting for you to bring me ''my share''. And then I don't ever wanna see you again.''"<br />"''Never?|Han Solo and Lando Calrissian on Savareen|Solo |
+ | {{Quote|She is a hell of a ship.''"<br />"''I hate you.''"<br />"''I know.''"<br />"''I'm going to be on ''my ship'', in ''my quarters'', waiting for you to bring me ''my share''. And then I don't ever wanna see you again.''"<br />"''Never?|Han Solo and Lando Calrissian on Savareen|<ref name="Solo" />}} |
| − | [[File: |
+ | [[File:SoloCalrissianSavareen-Solo.jpg|thumb|222x222px|right|Lando on Savareen.]] |
When the crew arrived at the refinery on [[Savareen]] in order to refine the coaxium, Calrissian was furious with Solo for the damage sustained by his beloved ship despite their miraculous escape. He abandoned the others in the ''Falcon'' when [[Enfys Nest]] and her [[Cloud-Riders]] arrived on Savareen to confront Beckett.<ref name="Solo" /> |
When the crew arrived at the refinery on [[Savareen]] in order to refine the coaxium, Calrissian was furious with Solo for the damage sustained by his beloved ship despite their miraculous escape. He abandoned the others in the ''Falcon'' when [[Enfys Nest]] and her [[Cloud-Riders]] arrived on Savareen to confront Beckett.<ref name="Solo" /> |
||
====Losing the ''Falcon''==== |
====Losing the ''Falcon''==== |
||
| − | {{Quote|You really have it bad for the ''Falcon'', don't you?''"<br />"''It's mutual, trust me. She belongs with me.|Lando Calrissian and Han Solo|Solo |
+ | {{Quote|You really have it bad for the ''Falcon'', don't you?''"<br />"''It's mutual, trust me. She belongs with me.|Lando Calrissian and Han Solo|<ref name="Solo" />}} |
| − | [[File: |
+ | [[File:Lando_on_Numidian_Prime.jpg|thumb|231x231px|left|Lando on Numidian Prime.]] |
| − | Solo and Chewbacca later tracked Calrissian to [[Numidian Prime]], where he was once again hustling others at sabacc. Solo swiped Calrissian's spare card when he greeted him, and won the ''Falcon'' in a rematch, leaving with it.<ref name="Solo" /> |
+ | Solo and Chewbacca later tracked Calrissian to [[Numidian Prime]], where he was once again hustling others at sabacc. Solo swiped Calrissian's spare card when he greeted him, and won the ''Falcon'' in a rematch, leaving with it.<ref name="Solo" /> At some point later, Solo and Calrissian's lives again intertwined in an event that the Tonnika sisters recalled as the "[[Lando ordeal]]." The ordeal was Solo's idea, but he blamed the sisters for the outcome.<ref name="You Owe Me a Ride" /> Calrissian's business partner,<ref name="Lando 1" /> [[Lobot]], also became familiar with Solo and the way he flew.<ref name="The Angle">{{StoryCite|story=The Angle|book=From a Certain Point of View}}</ref> |
====Meeting Kaasha Bateen==== |
====Meeting Kaasha Bateen==== |
||
| Line 99: | Line 107: | ||
====Working with Vizago==== |
====Working with Vizago==== |
||
| + | {{Quote|"Smuggler"? Such a small word. I'm more of a… galactic entrepreneur.|Lando Calrissian to Hera Syndulla|<ref name="Idiot's Array">{{Rebels|Idiot's Array (episode)}}</ref>}} |
||
| − | After losing the ''Falcon'', Calrissian put an end to his days as a smuggler. He fancied himself a respectable businessman,<ref name="Databank" /> and referred to himself as a "galactic entrepreneur." At some point Calrissian met a criminal known as [[Azmorigan]], who introduced him to [[Cikatro Vizago]], a [[Devaronian]] [[crime lord]] who operated on the [[Outer Rim Territories|Outer Rim]] planet of [[Lothal]].<ref name="Idiot's Array">{{Rebels|Idiot's Array (episode)|Idiot's Array}}</ref> At Azmorigan's reccomendation, Calrissian was hired by Vizago to assist him with recovering one of [[Maz Kanata]]'s treasure troves that was hidden on [[Seylott]]. On the planet, they were confronted by [[Black Sun]] thugs who had it locked down. Calrissian was able to escape with the ''[[Smuggler's Guide]]'' by claiming he was just hired help and that Vizago and Azmorigan were the brains of the operation. Afterword, he went to a spa to recover and read the book.<ref name="SG">''[[Star Wars: Smuggler's Guide]]''</ref> |
||
| + | At Azmorigan's recommendation, Calrissian was hired by Vizago to assist him with recovering one of [[Maz Kanata]]'s treasure troves that was hidden on [[Seylott]]. On the planet, they were confronted by [[Black Sun]] thugs who had it locked down. Calrissian was able to escape with the ''[[Smuggler's Guide]]'' by claiming he was just hired help and that Vizago and Azmorigan were the brains of the operation. Afterword, he went to the [[Spiran mineral spas]] to recover and read the book. The ''Smuggler's Guide'' was stolen from him by a [[Rybet]] [[thief]] nicknamed "[[Sticky Fingers]]" after he was beatean up by the [[Esoomian]] brawler [[Bumblethunk]], and eventually came into the possession of [[Latts Razzi]].<ref name="SG">''[[Star Wars: Smuggler's Guide]]''</ref> |
||
| + | |||
| + | After losing the ''Falcon'', Calrissian put an end to his days as a smuggler. He fancied himself a respectable businessman,<ref name="Databank" /> and referred to himself as a "galactic entrepreneur." At some point Calrissian met a criminal known as [[Azmorigan]], who introduced him to [[Cikatro Vizago]], a [[Devaronian]] [[crime lord]] who operated on the [[Outer Rim Territories|Outer Rim]] planet of [[Lothal]].<ref name="Idiot's Array" /> |
||
Later, Calrissian purchased a [[Lando Calrissian's farm|plot of land]] from Vizago on Lothal, on which the former smuggler intended to begin [[mining]] precious [[mineral]]s. In order to do so discreetly, without attracting the attention of the Empire due to Imperial mining regulations, Calrissian planned to acquire [[Lando Calrissian's puffer pig|a]] [[puffer pig]] from Azmorigan; puffer [[pig]]s could smell valuable minerals and could do the same job as twelve mining scanners. He required a ship that could evade the Imperial blockade set up around the planet; Calrissian attempted to smuggle mining equipment onto Lothal but was stopped by the Empire.<ref name="Idiot's Array" /> |
Later, Calrissian purchased a [[Lando Calrissian's farm|plot of land]] from Vizago on Lothal, on which the former smuggler intended to begin [[mining]] precious [[mineral]]s. In order to do so discreetly, without attracting the attention of the Empire due to Imperial mining regulations, Calrissian planned to acquire [[Lando Calrissian's puffer pig|a]] [[puffer pig]] from Azmorigan; puffer [[pig]]s could smell valuable minerals and could do the same job as twelve mining scanners. He required a ship that could evade the Imperial blockade set up around the planet; Calrissian attempted to smuggle mining equipment onto Lothal but was stopped by the Empire.<ref name="Idiot's Array" /> |
||
====Hiring the Spectres==== |
====Hiring the Spectres==== |
||
| − | {{Quote| Name's Calrissian. Lando Calrissian. Now please, introduce me to my new droid.|Lando Calrissian|Idiot's Array |
+ | {{Quote| Name's Calrissian. Lando Calrissian. Now please, introduce me to my new droid.|Lando Calrissian|<ref name="Idiot's Array" />}} |
Calrissian found such a ship after playing a game of sabacc in [[Jhothal]], a settlement on Lothal. He played the game in [[Old Jho's Pit Stop]], competing against [[Tsoklo]] and [[Garazeb Orrelios]], the latter of whom was a [[Lasat]] [[Spectres|crew member]] aboard the ''[[Ghost]]'', a ship operated by a band of rebels on Lothal. Orrelios believed he had the upper hand and bet his crew's [[astromech droid]], [[C1-10P]], but Calrissian beat his hand by using an [[Idiot's Array]]. The [[droid]], nicknamed Chopper, therefore belonged to Calrissian, but he agreed to give the droid back and pay the rebels much-needed credits if they assisted him on an operation—which, unknown to them, was the acquisition of the puffer pig. The crew was reluctant to trust Calrissian, but they needed the credits and wanted Chopper returned to them, so they agreed; Calrissian spent much of the time using a divide and conquer strategy, trying to play the rebels against each other so he could accomplish his goals. During the trip to rendezvous with Azmorigan, Chopper gave Calrissian a tour of the ship, where he admired the artwork of [[Sabine Wren]], a [[Mandalorian]] [[artist]] and member of the crew. Calrissian used this as part of his strategy, flattering the Mandalorian's work in order to make himself look good.<ref name="Idiot's Array" /> |
Calrissian found such a ship after playing a game of sabacc in [[Jhothal]], a settlement on Lothal. He played the game in [[Old Jho's Pit Stop]], competing against [[Tsoklo]] and [[Garazeb Orrelios]], the latter of whom was a [[Lasat]] [[Spectres|crew member]] aboard the ''[[Ghost]]'', a ship operated by a band of rebels on Lothal. Orrelios believed he had the upper hand and bet his crew's [[astromech droid]], [[C1-10P]], but Calrissian beat his hand by using an [[Idiot's Array]]. The [[droid]], nicknamed Chopper, therefore belonged to Calrissian, but he agreed to give the droid back and pay the rebels much-needed credits if they assisted him on an operation—which, unknown to them, was the acquisition of the puffer pig. The crew was reluctant to trust Calrissian, but they needed the credits and wanted Chopper returned to them, so they agreed; Calrissian spent much of the time using a divide and conquer strategy, trying to play the rebels against each other so he could accomplish his goals. During the trip to rendezvous with Azmorigan, Chopper gave Calrissian a tour of the ship, where he admired the artwork of [[Sabine Wren]], a [[Mandalorian]] [[artist]] and member of the crew. Calrissian used this as part of his strategy, flattering the Mandalorian's work in order to make himself look good.<ref name="Idiot's Array" /> |
||
| − | [[File: |
+ | [[File:Lando_on_the_Ghost.png|thumb|223x223px|right|Lando Calrissian aboard the ''Ghost'']] |
Once the ''Ghost'' arrived at the rendezvous, the ship docked with Azmorigan's vessel, ''[[Merchant One]]''. Calrissian and the crew's leaders, [[Hera Syndulla]] and [[Kanan Jarrus]], boarded ''Merchant One'', and Calrissian told them to follow his lead. Calrissian also hinted that the ship had [[escape pod]]s—a coded message to Syndulla, whom he intended to hand over to Azmorigan as payment for the puffer pig, and he knew that she would need a way to escape the vessel. Despite Jarrus' protests, Syndulla played along once Calrissian offered her to the crime [[lord]], and Azmorigan gave Calrissian the puffer pig, which was locked in a crate. Calrissian and Jarrus returned to the ''Ghost'', where Calrissian explained that he expected Syndulla to use an escape pod to leave ''Merchant One''—which she did, returning to the ''Ghost'' and attracting the ire of the crime lord. Once Syndulla was aboard, and had given Calrissian a piece of her mind over the betrayal via a knee to the groin, the ''Ghost'' jumped back into hyperspace, leaving Azmorigan behind them.<ref name="Idiot's Array" /> |
Once the ''Ghost'' arrived at the rendezvous, the ship docked with Azmorigan's vessel, ''[[Merchant One]]''. Calrissian and the crew's leaders, [[Hera Syndulla]] and [[Kanan Jarrus]], boarded ''Merchant One'', and Calrissian told them to follow his lead. Calrissian also hinted that the ship had [[escape pod]]s—a coded message to Syndulla, whom he intended to hand over to Azmorigan as payment for the puffer pig, and he knew that she would need a way to escape the vessel. Despite Jarrus' protests, Syndulla played along once Calrissian offered her to the crime [[lord]], and Azmorigan gave Calrissian the puffer pig, which was locked in a crate. Calrissian and Jarrus returned to the ''Ghost'', where Calrissian explained that he expected Syndulla to use an escape pod to leave ''Merchant One''—which she did, returning to the ''Ghost'' and attracting the ire of the crime lord. Once Syndulla was aboard, and had given Calrissian a piece of her mind over the betrayal via a knee to the groin, the ''Ghost'' jumped back into hyperspace, leaving Azmorigan behind them.<ref name="Idiot's Array" /> |
||
Calrissian showed the crew the puffer pig and warned them not to let it out of its cage, as it would expand into a larger creature if it was startled. Orrelios and fellow crew member [[Ezra Bridger]] ended up letting it out, and the pig ran throughout the ''Ghost'' before being so startled that its size increased and it became stuck in one of the ship's hallways. This proved potentially problematic once the ''Ghost'' [[Mission to Lando Calrissian's farm|returned]] to Lothal, where they needed to slip through the Imperial blockade; Syndulla, the ship's pilot, was stuck on the other side of the pig, so Jarrus would need to pilot the vessel himself. Calrissian asked Chopper, who only responded to Calrissian's commands, to fix the mechanism that would allow the ''Ghost'' to mask its signature and slip past the blockade. Chopper was able to do so and the ship nearly made it through the blockade, but the pig expanded again, knocking Orrelios into the controls that allowed the ship's signature to remain masked. The Empire detected the ''Ghost'' as a rebel vessel and sent a group of TIE fighters in pursuit, which the ''Ghost'' was able to destroy.<ref name="Idiot's Array" /> |
Calrissian showed the crew the puffer pig and warned them not to let it out of its cage, as it would expand into a larger creature if it was startled. Orrelios and fellow crew member [[Ezra Bridger]] ended up letting it out, and the pig ran throughout the ''Ghost'' before being so startled that its size increased and it became stuck in one of the ship's hallways. This proved potentially problematic once the ''Ghost'' [[Mission to Lando Calrissian's farm|returned]] to Lothal, where they needed to slip through the Imperial blockade; Syndulla, the ship's pilot, was stuck on the other side of the pig, so Jarrus would need to pilot the vessel himself. Calrissian asked Chopper, who only responded to Calrissian's commands, to fix the mechanism that would allow the ''Ghost'' to mask its signature and slip past the blockade. Chopper was able to do so and the ship nearly made it through the blockade, but the pig expanded again, knocking Orrelios into the controls that allowed the ship's signature to remain masked. The Empire detected the ''Ghost'' as a rebel vessel and sent a group of TIE fighters in pursuit, which the ''Ghost'' was able to destroy.<ref name="Idiot's Array" /> |
||
| − | [[File: |
+ | [[File:Lando_bids_farewell.png|thumb|202x202px|left|Calrissian bids farewell to the ''Ghost''.]] |
| − | The crew made their way to the [[farm]] that Calrissian purchased from Vizago, where Calrissian explained that his plan was to use the puffer pig for mining. They were confronted by Azmorigan, however, who had anticipated that Calrissian would return to the land. This led to a shootout between the rebels and Azmorigan's forces, one that ended when Azmorigan threatened to kill Orrelios if they did not hand Calrissian over to him. Syndulla refused, and Chopper—who stole a crate of [[fuel]] for the ''Ghost'' and returned to the ship—fired the cannons on the ''Ghost'' at Azmorigan, giving Orrelios a chance to gain an upper hand and hold Azmorigan at gunpoint. Syndulla demanded that the crime lord leave, a demand that he acquiesced to. With Azmorigan gone, Calrissian claimed that he did not have the credits that he owed the rebels, but he did return Chopper to them. Nonetheless, Syndulla held Calrissian in her debt, though what he did not reveal was that he knew Chopper had stolen the fuel, which was why he did not give them any credits. He did, however, believe that he would one [[Standard day|day]] meet the rebels again.<ref name="Idiot's Array" /> |
+ | The crew made their way to the [[Lando Calrissian's farm|farm]] that Calrissian purchased from Vizago, where Calrissian explained that his plan was to use the puffer pig for mining. They were confronted by Azmorigan, however, who had anticipated that Calrissian would return to the land. This led to a shootout between the rebels and Azmorigan's forces, one that ended when Azmorigan threatened to kill Orrelios if they did not hand Calrissian over to him. Syndulla refused, and Chopper—who stole a crate of [[fuel]] for the ''Ghost'' and returned to the ship—fired the cannons on the ''Ghost'' at Azmorigan, giving Orrelios a chance to gain an upper hand and hold Azmorigan at gunpoint. Syndulla demanded that the crime lord leave, a demand that he acquiesced to. With Azmorigan gone, Calrissian claimed that he did not have the credits that he owed the rebels, but he did return Chopper to them. Nonetheless, Syndulla held Calrissian in her debt, though what he did not reveal was that he knew Chopper had stolen the fuel, which was why he did not give them any credits. He did, however, believe that he would one [[Standard day|day]] meet the rebels again.<ref name="Idiot's Array" /> |
====Dealing with the Varluk Organization==== |
====Dealing with the Varluk Organization==== |
||
| − | {{Quote|I have some bad news for you sir. Your puffer pig has been stolen.|W1-LE to Lando Calrissian|Puffer |
+ | {{Quote|I have some bad news for you sir. Your puffer pig has been stolen.|W1-LE to Lando Calrissian|<ref name="Puffer Problems">{{SWRMCite|21|Puffer Problems}}</ref>}} |
[[File:LandosWillie-SWRM21.jpg|thumb|right|197x197px|Lando finds out his Puffer pig has been stolen by the Varluk Organization.]] |
[[File:LandosWillie-SWRM21.jpg|thumb|right|197x197px|Lando finds out his Puffer pig has been stolen by the Varluk Organization.]] |
||
| − | Calrissian and [[Rikarda]] were traveling to the planet [[Klonoid]], aboard the ''[[Stellar Sun]]''. During the jounrey, his droid [[W1-LE]], who he had left to watch over his puffer pig and the farm, said that the farm was attacked by raiders who stole Calrissian's pig. Calrissian found out it was the [[Varluk Organization]] and asked Rikarda to set [[Rescue of Lando Calrissian's puffer pig|course]] to their [[Varluk Organization headquarters|headquarters]] which was located on [[Zyzar]].<ref name="Puffer Problems" |
+ | Calrissian and [[Rikarda]] were traveling to the planet [[Klonoid]], aboard the ''[[Stellar Sun]]''. During the jounrey, his droid [[W1-LE]], who he had left to watch over his puffer pig and the farm, said that the farm was attacked by raiders who stole Calrissian's pig. Calrissian found out it was the [[Varluk Organization]] and asked Rikarda to set [[Rescue of Lando Calrissian's puffer pig|course]] to their [[Varluk Organization headquarters|headquarters]] which was located on [[Zyzar]].<ref name="Puffer Problems" /> |
After arriving, Calrissian tried to enter the headquarters through a window but was seen by to patrol men. Calrissian paralyzed and shot the patrol men and changed into one their uniforms. After entering the complex, he discovered all the rooms were empty but eventually found his pig in a cage. When trying to free her, he was captured by more patrol men and was sent to the companies leader, [[Ango Croom]].<ref name="Puffer Problems" /> |
After arriving, Calrissian tried to enter the headquarters through a window but was seen by to patrol men. Calrissian paralyzed and shot the patrol men and changed into one their uniforms. After entering the complex, he discovered all the rooms were empty but eventually found his pig in a cage. When trying to free her, he was captured by more patrol men and was sent to the companies leader, [[Ango Croom]].<ref name="Puffer Problems" /> |
||
| − | [[File: |
+ | [[File:Rescue_of_Landos_puffer_pig.png|thumb|219x219px|left|Lando rescuing his puffer pig]] |
Croom explained to Calrissian that he was tired of waiting for him to return his debt, and decided to do it for him, by stealing his pig. Later Calrissian began to pull his pig out of the hands of the patrol men and the pig increased size, throwing the patrol men to the ground. As he was escaping, Calrissian threw a [[hologram]] of locations of raw materials in a room so which the Varluk Organization could find it, which meant Calrissian could pay his debt to the organization. Later beyond the complex, Rikarda picked him up on the ''Stellar Sun'' and they escaped.<ref name="Puffer Problems" /> |
Croom explained to Calrissian that he was tired of waiting for him to return his debt, and decided to do it for him, by stealing his pig. Later Calrissian began to pull his pig out of the hands of the patrol men and the pig increased size, throwing the patrol men to the ground. As he was escaping, Calrissian threw a [[hologram]] of locations of raw materials in a room so which the Varluk Organization could find it, which meant Calrissian could pay his debt to the organization. Later beyond the complex, Rikarda picked him up on the ''Stellar Sun'' and they escaped.<ref name="Puffer Problems" /> |
||
| Line 129: | Line 140: | ||
====Trouble on Tyegin==== |
====Trouble on Tyegin==== |
||
| + | {{Quote|I really enjoyed your company but I'm afraid I'll have to get off at the next stop.|Lando Calrissian|<ref name="Off the Rails">{{SWRMCite|31|Off the Rails (comic)}}</ref>}} |
||
| − | [[File:Lando Calrissian & D'Lina.JPG|thumb|208x208px|right|Calrissian and D'Lina aboard the ''Exas Jewell''.]] |
||
| + | [[File:LandoDLina-OffTheRails.jpg|thumb|208x208px|right|Calrissian and D'Lina aboard the ''Exas Jewell''.]] |
||
| − | Calrissian later traveled to the planet [[Tyegin]] where he was part of a high-stake sabacc game taking place in the lead car of the ''[[Exas Jewell]]'', a [[luxury train]]. During the time, Calrissian was posing as the [[train]]'s designer, [[Shen Kanton]]. The other players of the game were [[D'Lina]], Prince [[Baj]], and [[Rakan]]. Calrissian eventually made a big win. Calrissian planned to leave the ''Exas Jewel'' before anyone figured out who he really was. However, the other players start to see through his scheme, because Kenton, as the designer of the train, was supposed to ride to the end of the line and host a grand reception. Calrissian attempted to smooth-talk his way out of the situation, but the conversation was interrupted by a sudden explosion at the front of the luxury train.<ref name="Off the Rails">{{SWRMCite||Off the Rails}}</ref> |
||
| + | Calrissian later traveled to the planet [[Tyegin]] where he was part of a high-stake sabacc game taking place in the lead car of the ''[[Exas Jewell]]'', a [[luxury train]]. During the time, Calrissian was posing as the [[train]]'s designer, [[Shen Kanton]]. The other players of the game were [[D'Lina]], Prince [[Baj]], and [[Rakan]]. Calrissian eventually made a big win. Calrissian planned to leave the ''Exas Jewel'' before anyone figured out who he really was. However, the other players start to see through his scheme, because Kenton, as the designer of the train, was supposed to ride to the end of the line and host a grand reception. Calrissian attempted to smooth-talk his way out of the situation, but the conversation was interrupted by a sudden explosion at the front of the luxury train.<ref name="Off the Rails" /> |
||
| − | [[File: |
+ | [[File:Lando_aboard_the_Exas_Jewell.jpg|thumb|left|195x195px|Calrissian hears the pirates explosion aboard the ''Exas Jewell''.]] |
| − | A [[pirate]] gang which consisted of [[Zira]], [[Grillo]], and [[Shelvy]] blasted their way through the |
+ | A [[pirate]] gang which consisted of [[Zira]], [[Grillo]], and [[Shelvy]] blasted their way through the door. Grillo then destroyed the train's controls and the three pirates escaped the train on jetpacks with stolen riches. Right before they went, Zira offered Calrissian to come with them but he refused. When the pirates left, the people turned to Calrissian for leadership, still believing he designed the train. They decided to try and unhook the engine. The rest of the train stopped while the engine still went on<ref name="Off the Rails" /> |
| − | Later, Calrissian ordered the people to grab whatever so they could carry it and take it all toward the train car's open front end in order to disrupt its magnetic field. Baj attempted to dump the train car's [[dealer droid]] out but was stopped by Calrissian told him otherwise. The considerable amount stuff up underneath the front of the train car ended up creating enough drag to slow it down. The big dining train car was still coming fast. It slammed into the back of the other cars. This sent the prince falling forward out of the train car. Calrissian then saving his life. When the ''Exas Jewel'' finally stopped, |
+ | Later, Calrissian ordered the people to grab whatever so they could carry it and take it all toward the train car's open front end in order to disrupt its magnetic field. Baj attempted to dump the train car's [[dealer droid]] out but was stopped by Calrissian told him otherwise. The considerable amount stuff up underneath the front of the train car ended up creating enough drag to slow it down. The big dining train car was still coming fast. It slammed into the back of the other cars. This sent the prince falling forward out of the train car. Calrissian then saving his life. When the ''Exas Jewel'' finally stopped, [[Tyegin's law enforcement]] landed close by and rescued them all.<ref name="Off the Rails" /> |
===Galactic Civil War=== |
===Galactic Civil War=== |
||
| + | ====Watching the Battle of Yavin==== |
||
| + | {{Quote|That's... that's my ship. That's the ''Millennium Falcon''.|Lando watches a recording of the battle over the Death Star|<ref name="The Angle" />}} |
||
| + | In the [[time]] following the [[Battle of Yavin]], which saw the [[Alliance to Restore the Republic]] destroy the [[DS-1 Death Star Mobile Battle Station]], Calrissian was playing a game of [[klikklak]] with [[Jaff Basan]] in the [[Luck Luck Freidal's casino|illegal casino]] owned by [[Luck Luck Freidal]]. Before the game, which Calrissian was certain he was winning, could end, the Empire raided the casino and shut it down. Traveling to a cantina to reunite with Lobot, Calrissian learned about the Battle of Yavin, watching a [[DarkNet]] recording leaked by the Rebels.<ref name="The Angle" /> |
||
| + | |||
| + | To his surprise, he saw the ''Millennium Falcon'' enter the fight. Asking to watch it again, he was certain the ship was being piloted by Solo. Surprised that Solo was fighting for what he had written off as a lost cause, Calrissian toasted to Solo before asking Lobot to shoot him if he ever tried to do something similar. Calrissian then sat, drinking drinks he could not currently afford and pondering what had made Solo join the Rebels.<ref name="The Angle" /> |
||
| + | |||
====Working with Sana Starros==== |
====Working with Sana Starros==== |
||
| − | {{Quote|Heh. Been a long time. I knew you'd come back sooner or later. Finally got sick of Han, didn't—''"<br />"''This isn't a social call. Can you help me or not?|Lando Calrissian and Sana Starros|Star Wars 34}} |
+ | {{Quote|Heh. Been a long time. I knew you'd come back sooner or later. Finally got sick of Han, didn't—''"<br />"''This isn't a social call. Can you help me or not?|Lando Calrissian and Sana Starros|<ref name="Star Wars 34">[[Star Wars (2015) 34|''Star Wars'' (2015) 34]]</ref>}} |
[[File:LandoandSana-SW34.png|thumb|right|250px|Lando meeting with Sana Starros]] |
[[File:LandoandSana-SW34.png|thumb|right|250px|Lando meeting with Sana Starros]] |
||
| − | [[Sana Starros]] and Calrissian traveled to [[Coruscant]] to help Starros crank a scam with thirteen crates of Imperial weapons. Calrissian arranged for them to meet with an Imperial officer, where Sana told them that [[Krawg]] [[Krawg pirates|pirates]] had the crates. For more information, she took 20,000 credits, in addition to 5,000 that she received from the pirates for selling them one box.<ref name="Star Wars 34" |
+ | [[Sana Starros]] and Calrissian traveled to [[Coruscant]] to help Starros crank a scam with thirteen crates of Imperial weapons. Calrissian arranged for them to meet with an Imperial officer, where Sana told them that [[Krawg]] [[Krawg pirates|pirates]] had the crates. For more information, she took 20,000 credits, in addition to 5,000 that she received from the pirates for selling them one box.<ref name="Star Wars 34" /> |
| − | After leaving Coruscant, they went to the planet [[Tatooine]], to the [[ |
+ | After leaving Coruscant, they went to the planet [[Tatooine]], to the [[Boba Fett's Palace|palace]] of [[Jabba Desilijic Tiure]]. There, Starros disowned from the common past with Calrissian and also reported for 20 thousand credits, who had the thirteenth box of weapons. She herself had stolen it from Jabba, but she stated that the Krawg had done it and successfully completion of their transaction.<ref name="Star Wars 34" /> |
When leaving Tatooine, the smugglers were attacked by a ship of Krawg who found out that she had deceived them. Eventually the Empire arrested the pirates and Calrissian and Starros managed to escape. They later traveled to [[Nar Shaddaa]] where they had dinner before Calrissian left.<ref name="Star Wars 34" /> |
When leaving Tatooine, the smugglers were attacked by a ship of Krawg who found out that she had deceived them. Eventually the Empire arrested the pirates and Calrissian and Starros managed to escape. They later traveled to [[Nar Shaddaa]] where they had dinner before Calrissian left.<ref name="Star Wars 34" /> |
||
====Deal of a lifetime==== |
====Deal of a lifetime==== |
||
| − | {{Quote|...I also know who they ''say'' you are. The Fiend of Castell. The Burning Moff. The Imperial Governor of this sector, ''brutal'' in your response to even the slightest challenge to the Empire's authority.|Lando Calrissian to Moff Ssaria|Lando 1}} |
+ | {{Quote|...I also know who they ''say'' you are. The Fiend of Castell. The Burning Moff. The Imperial Governor of this sector, ''brutal'' in your response to even the slightest challenge to the Empire's authority.|Lando Calrissian to Moff Ssaria|<ref name="Lando 1" />}} |
| − | [[File: |
+ | [[File:Orbital_shipyard_cc-24.jpg|left|217x217px|thumb|Lando lead an audacious heist to steal the Emperor's yacht ''Imperialis'']] |
| − | Prior to becoming the [[administrator]] of [[Cloud City]], Calrissian was a self-described opportunist trying to "make his way" through an uncaring [[universe]]. Calrissian was able to make a living by illegally acquiring and redistributing rare or valuable goods. However, due to Calrissian's penchant for gambling, he and his business partner |
+ | Prior to becoming the [[administrator]] of [[Cloud City]], Calrissian was a self-described opportunist trying to "make his way" through an uncaring [[universe]]. Calrissian was able to make a living by illegally acquiring and redistributing rare or valuable goods. However, due to Calrissian's penchant for gambling, he and his business partner Lobot were in deep with the wrong people. After convincing [[Moff]] [[Ssaria]], also known as the "fiend of [[Castell]]," into parting with a valuable and expensive [[Toren's object|trinket]], Calrissian rendezvoused with Lobot at a [[cantina]]. After having had a few drinks, Calrissian was informed that Papa [[Toren]], the individual who had loaned him money, was ready to see him. Calrissian sought to square away his debt by handing over the trinket to Toren, but the loan shark rejected to honor their prior arrangement. Instead of clearing the smuggler's debt, Toren offered to lower Calrissian's debt by ten percent.<ref name="Lando 1" /> |
Outraged by the offer, Calrissian claimed this was not the deal they had agreed upon. Toren argued that if Calrissian had any qualms about the deal, he should take it up with the Imperials, who had taken his property from him in the first place. Toren argued that had Calrissian used the time he had been given to pay off the debt, Calrissian would not be in his current predicament of owing a vast sum of credits, with little-to-no time to pay it off. The loan shark suggested that if the smuggler was sincere and adamant about clearing his debt, he would do so, provided Calrissian agreed to do a job for him. After leaving the cantina, Calrissian and Lobot got into a heated exchange. Angry at the fact that Calrissian had accepted the deal, as well as Toren's gall, Lobot argued that Calrissian should have stood up to Toren. Calrissian countered by explaining that only people with no imagination use [[blaster]]s. If they tried to harm Toren, a [[bounty]] would be placed on their heads, adding to their current troubles.<ref name="Lando 1" /> |
Outraged by the offer, Calrissian claimed this was not the deal they had agreed upon. Toren argued that if Calrissian had any qualms about the deal, he should take it up with the Imperials, who had taken his property from him in the first place. Toren argued that had Calrissian used the time he had been given to pay off the debt, Calrissian would not be in his current predicament of owing a vast sum of credits, with little-to-no time to pay it off. The loan shark suggested that if the smuggler was sincere and adamant about clearing his debt, he would do so, provided Calrissian agreed to do a job for him. After leaving the cantina, Calrissian and Lobot got into a heated exchange. Angry at the fact that Calrissian had accepted the deal, as well as Toren's gall, Lobot argued that Calrissian should have stood up to Toren. Calrissian countered by explaining that only people with no imagination use [[blaster]]s. If they tried to harm Toren, a [[bounty]] would be placed on their heads, adding to their current troubles.<ref name="Lando 1" /> |
||
| − | Instead of using violence to accept the deal, Calrissian insisted that the job would be quick. It would not only clear their debt but would also put them ahead. Although Lobot was concerned about their chosen dangerous lifestyle, Calrissian promised his friend that they would no longer accept high stakes work after completing the job. Having acquired the services of [[Aleksin]] and [[Pavol]], in case the plan required the use of force, Calrissian and Lobot went to speak to [[Sava]] [[Korin Pers]], a former [[antiques dealer]] and [[professor]]. Calrissian attempted to make good on a promise to Korin, to pay her back for the loss of the woman's eye. Korin argued that she could not think of a reason why she would ever work with Calrissian again, until she saw Toren's plan and what they were going to steal. According to the plan, Calrissian and company were to steal a pleasure craft being refitted at [[Sienar Fleet Systems]] [[Orbital Shipyard CC-24]].<ref name="Lando 1" /> |
+ | Instead of using violence to accept the deal, Calrissian insisted that the job would be quick. It would not only clear their debt but would also put them ahead. Although Lobot was concerned about their chosen dangerous lifestyle, Calrissian promised his friend that they would no longer accept high stakes work after completing the job. Having acquired the services of [[Aleksin]] and [[Pavol]], in case the plan required the use of force, Calrissian and Lobot went to speak to [[Sava]] [[Korin Pers]], a former [[antiques dealer]] and [[professor]]. Calrissian attempted to make good on a promise to Korin, to pay her back for the loss of the woman's eye. Korin argued that she could not think of a reason why she would ever work with Calrissian again, until she saw Toren's plan and what they were going to steal. According to the plan, Calrissian and [[Landonis Balthazar Calrissian's crew|company]] were to steal a pleasure craft being refitted at [[Sienar Fleet Systems]] [[Orbital Shipyard CC-24]].<ref name="Lando 1" /> |
Adhering to Toren's plan, Calrissian and his crew donned [[stealth suit]]s and [[Theft of the Imperialis|infiltrated]] the [[shipyard]]. They managed to overpower the [[stormtrooper]] sentries and escape in the stolen ship. After taking off, Calrissian and Lobot discussed the fact that the ship that they had stolen seemed to be fairly advanced, specially modified. Lobot asked whether his friend could activate the [[hyperdrive]]. Calrissian, however, assured Lobot that he could do so only after the ship escaped the planet's gravity well. Unknown to Calrissian and his crew, they had stolen the [[Galactic Emperor|Emperor]] [[Darth Sidious|Palpatine's]] personal luxury [[yacht]], ''[[Imperialis]]''.<ref name="Lando 1" /> |
Adhering to Toren's plan, Calrissian and his crew donned [[stealth suit]]s and [[Theft of the Imperialis|infiltrated]] the [[shipyard]]. They managed to overpower the [[stormtrooper]] sentries and escape in the stolen ship. After taking off, Calrissian and Lobot discussed the fact that the ship that they had stolen seemed to be fairly advanced, specially modified. Lobot asked whether his friend could activate the [[hyperdrive]]. Calrissian, however, assured Lobot that he could do so only after the ship escaped the planet's gravity well. Unknown to Calrissian and his crew, they had stolen the [[Galactic Emperor|Emperor]] [[Darth Sidious|Palpatine's]] personal luxury [[yacht]], ''[[Imperialis]]''.<ref name="Lando 1" /> |
||
====Imperial entanglements==== |
====Imperial entanglements==== |
||
| − | [[File: |
+ | [[File:Lando_and_Lobot_escape_Castell.png|right|241x241px|thumb|Lando and Lobot aboard the ''Imperialis'']] |
Before they could jump into hyperspace, Calrissian and Lobot found their path blocked by three [[Imperial-class Star Destroyer|Imperial Star Destroyers]]. Calrissian was surprised that the Empire would dispatch such resources and realized that the ship was worth a lot. After the Imperial [[commander]] [[Commodore]] [[Idel]] destroyed Shipyard CC-24 for failing to respect the Emperor's property, he deployed a pair of [[gravity mine]]s to disable the yacht. However, the ''Imperialis''{{'s}} advanced automated defenses incinerated the bombs. An amazed Calrissian then instructed Lobot to power up the hyperdrive.<ref name="Lando 2">[[Lando 2|''Lando'' 2]]</ref> |
Before they could jump into hyperspace, Calrissian and Lobot found their path blocked by three [[Imperial-class Star Destroyer|Imperial Star Destroyers]]. Calrissian was surprised that the Empire would dispatch such resources and realized that the ship was worth a lot. After the Imperial [[commander]] [[Commodore]] [[Idel]] destroyed Shipyard CC-24 for failing to respect the Emperor's property, he deployed a pair of [[gravity mine]]s to disable the yacht. However, the ''Imperialis''{{'s}} advanced automated defenses incinerated the bombs. An amazed Calrissian then instructed Lobot to power up the hyperdrive.<ref name="Lando 2">[[Lando 2|''Lando'' 2]]</ref> |
||
| Line 171: | Line 189: | ||
====Fall of the Sith==== |
====Fall of the Sith==== |
||
| − | [[File: |
+ | [[File:Chanath_Cha_face.png|left|175x175px|thumb|Chanath Cha, a familiar face from Lando and Lobot's past]] |
When Calrissian asked how much the treasures in the central chamber were worth, Korin recognized that these artifacts belonged to the ancient [[Sith Lord]] [[Darth Momin]], a [[Sith]] [[sculptor]] whose works were believed to be lost. While Calrissian and Korin discussed their plans to sell the merchandise, Aleksin gazed into the Sith helmet. He grabbed a [[double-bladed lightsaber]] and [[Dismemberment|sliced off]] his twin Pavol's lower right arm. Taken by surprise, Calrissian and Korin managed to exit the central chamber and seal the door. However, Pavol was left inside with the corrupted Aleksin.<ref name="Lando 4">[[Lando 4|''Lando'' 4]]</ref> |
When Calrissian asked how much the treasures in the central chamber were worth, Korin recognized that these artifacts belonged to the ancient [[Sith Lord]] [[Darth Momin]], a [[Sith]] [[sculptor]] whose works were believed to be lost. While Calrissian and Korin discussed their plans to sell the merchandise, Aleksin gazed into the Sith helmet. He grabbed a [[double-bladed lightsaber]] and [[Dismemberment|sliced off]] his twin Pavol's lower right arm. Taken by surprise, Calrissian and Korin managed to exit the central chamber and seal the door. However, Pavol was left inside with the corrupted Aleksin.<ref name="Lando 4">[[Lando 4|''Lando'' 4]]</ref> |
||
| Line 181: | Line 199: | ||
====Escaping the ''Imperialis''==== |
====Escaping the ''Imperialis''==== |
||
| − | [[File: |
+ | [[File:Lobot_Lando_and_Chanath.png|right|217x217px|thumb|Lando, Lobot, and Chanath aboard the ''Imperialis'']] |
Recalling the Emperor's orders to kill the intruders or to destroy the ship, Cha opted to follow the second option since she was unwilling to hurt her former friend. Calrissian tried to reason with her but she pulled out her blaster and warned him that plans get people killed. Calrissian then tried to enlist Cha's help in dealing with Aleksin. He also suggested letting Korin and him escape in a few escape pods with some choice items while she destroyed the ship. Cha rejected that offer on the grounds that Palpatine would notice any choice items turning up on the [[black market]]. Unwilling to risk trouble with the Empire, Cha insisted on proceeding with her plan. However, she agree to ferry Calrissian and Korin to anywhere they wanted with her ship.<ref name="Lando 5">[[Lando 5|''Lando'' 5]]</ref> |
Recalling the Emperor's orders to kill the intruders or to destroy the ship, Cha opted to follow the second option since she was unwilling to hurt her former friend. Calrissian tried to reason with her but she pulled out her blaster and warned him that plans get people killed. Calrissian then tried to enlist Cha's help in dealing with Aleksin. He also suggested letting Korin and him escape in a few escape pods with some choice items while she destroyed the ship. Cha rejected that offer on the grounds that Palpatine would notice any choice items turning up on the [[black market]]. Unwilling to risk trouble with the Empire, Cha insisted on proceeding with her plan. However, she agree to ferry Calrissian and Korin to anywhere they wanted with her ship.<ref name="Lando 5">[[Lando 5|''Lando'' 5]]</ref> |
||
| Line 188: | Line 206: | ||
Cha manged to shoot the door panel shut and initiate the [[Self-destruct mechanism|self-destruct countdown]]. She then instructed Calrissian to retrieve Lobot from the medical bay while she docked her ship. Calrissian managed to helped Lobot out of the bacta tank. Before they could head to the [[airlock]], they were cornered by a lightsaber-wielding Aleksin. Using his smooth talk, Calrissian managed to trick Aleksin into deactivating his lightsaber before shooting him dead. They then joined Cha at the airlock. Despite killing Pavol, the three encountered a new predicament. The ''Scimitar''{{'s}} droid steward [[O-66]] had abandoned Cha after learning that she had activated the ''Imperialis''{{'s}} self-destruct mechanism.<ref name="Lando 5" /> |
Cha manged to shoot the door panel shut and initiate the [[Self-destruct mechanism|self-destruct countdown]]. She then instructed Calrissian to retrieve Lobot from the medical bay while she docked her ship. Calrissian managed to helped Lobot out of the bacta tank. Before they could head to the [[airlock]], they were cornered by a lightsaber-wielding Aleksin. Using his smooth talk, Calrissian managed to trick Aleksin into deactivating his lightsaber before shooting him dead. They then joined Cha at the airlock. Despite killing Pavol, the three encountered a new predicament. The ''Scimitar''{{'s}} droid steward [[O-66]] had abandoned Cha after learning that she had activated the ''Imperialis''{{'s}} self-destruct mechanism.<ref name="Lando 5" /> |
||
| − | When all seemed lost, Lobot volunteered to connect his [[cyborg]] unit to an interface. Despite struggling in his fight against the implants, Lobot managed to override the control codes. Calrissian and Lobot left in one escape pod while Cha left in the other. After escaping the ''Imperialis'', Calrissian listened as Lobot advised Calrissian to use his charm and skills to find something bigger to believe in other than himself. He also counselled Calrissian to use his talents for good.<ref name="Lando 5" /> |
+ | When all seemed lost, Lobot volunteered to connect his [[cyborg]] unit to an interface. Despite struggling and losing in his fight against the implants, Lobot managed to override the control codes. Calrissian and Lobot left in one escape pod while Cha left in the other. After escaping the ''Imperialis'', Calrissian listened as Lobot advised Calrissian to use his charm and skills to find something bigger to believe in other than himself. He also counselled Calrissian to use his talents for good.<ref name="Lando 5" /> |
====Business success==== |
====Business success==== |
||
| − | {{Quote|A mining colony?''"<br />"''Yeah, a tibanna gas mine. Lando conned somebody out of it.|Leia Organa and Han Solo| |
+ | {{Quote|A mining colony?''"<br />"''Yeah, a tibanna gas mine. Lando conned somebody out of it.|Leia Organa and Han Solo|<ref name="Episode V" />}} |
| − | + | Around [[1 ABY]],<ref name="AdministratorDate">''[[The Empire Strikes Back: So You Want to Be a Jedi?]]'', the events of which are dated to [[3 ABY]] in ''[[Star Wars: Timelines]]'', states that Calrissian had been [[Baron Administrator]] for years, meaning he got this position in 1 [['ABY-BBY' dating system|ABY]] at the latest. Calrissian became Administrator after the events of [[Halcyon Legacy 4|''Halcyon Legacy'' 4]], which ''Star Wars: Timelines'' places around [[1 ABY]]. Therefore, he became Administrator around 1 ABY.</ref> Calrissian scored a major victory in a card game and won control of Cloud [[City]],<ref name="Ultimate Star Wars" /> a [[tibanna]] [[gas]] mining operation within the atmosphere of Bespin,<ref name="Databank" /> the same place he had won the ''Falcon'' years prior.<ref name="Falcon 1" /> The "legitimate pilot and businessman" [[Gev Hessan]] smuggled goods to Calrissian to help him build the city.<ref name="Aftermath" /> Calrissian became the [[Baron Administrator]] of Cloud City and turned to more reputable enterprises. As leader of the mining operation, he was able to keep the operation small enough to avoid being noticed by the Empire and the [[Mining Guild]], which he considered advantageous as his customers did not want to attract attention.<ref name="Episode V" /> |
|
====Return to legitimate business==== |
====Return to legitimate business==== |
||
| − | {{Quote|Nothing is glamorous when you have a blaster pointed at your face.|Lando Calrissian|Tales from Wild Space: Family Affair, Part 1}} |
+ | {{Quote|Nothing is glamorous when you have a blaster pointed at your face.|Lando Calrissian|<ref name="Family Affair 1">{{IDWAdventuresCite-2017|issue=10|story=Tales from Wild Space: Family Affair, Part 1}}</ref>}} |
| − | Calrissian met up with [[Tonee]] to have a toast about his new honest life. He was approached by an old friend, [[Clariah]] who asked him to help find and teach her son, [[Jiandy]], how to be a legitimate business man. As payment, Clariah offered to return one of Calrissian's beloved capes. However, Calrissian refused and wanted to run his business. However, Calrissian agreed to take Jiany under his wing. Calrissian took Jiandy to see [[Askroh]] but were caught by his men.<ref name="Family Affair 1" |
+ | Calrissian met up with [[Tonee]] to have a toast about his new honest life. He was approached by an old friend, [[Clariah]] who asked him to help find and teach her son, [[Jiandy]], how to be a legitimate business man. As payment, Clariah offered to return one of Calrissian's beloved capes. However, Calrissian refused and wanted to run his business. However, Calrissian agreed to take Jiany under his wing. Calrissian took Jiandy to see [[Askroh]] but were caught by his men.<ref name="Family Affair 1" /> |
| − | [[File: |
+ | [[File:Lando_and_Clariah_escaping_Askroh.jpg|thumb|236x236px|left|Lando and Clariah escaping Askroh.]] |
| − | The two of them made their escape on a speeder. When their speeder gave out, Calrissian spoke with Askroh about returning his brooch. Askroh decided to toss them over them, and realized that Jiandy had a secret compartment on his belt. He sold Jiandy out, but Calrissian was able to convince Askroh not to throw Jiandy over. As Jiandy ran, he told Calrissian that he never wanted to see him again. Calrissian returned to the bar and was thanked by Clariah for setting her son on a better path.<ref name="Family Affair 2">{{IDWAdventuresCite |
+ | The two of them made their escape on a speeder. When their speeder gave out, Calrissian spoke with Askroh about returning his brooch. Askroh decided to toss them over them, and realized that Jiandy had a secret compartment on his belt. He sold Jiandy out, but Calrissian was able to convince Askroh not to throw Jiandy over. As Jiandy ran, he told Calrissian that he never wanted to see him again. Calrissian returned to the bar and was thanked by Clariah for setting her son on a better path.<ref name="Family Affair 2">{{IDWAdventuresCite-2017|issue=10|story=Tales from Wild Space: Family Affair, Part 2}}</ref> |
====Deal with the Dark Lord==== |
====Deal with the Dark Lord==== |
||
| + | [[File:LandoCalrissian3-SWBC18.png|thumb|right|200px|Calrissian served as Baron Administrator over Cloud City.]] |
||
=====Placating the Empire===== |
=====Placating the Empire===== |
||
| − | In [[3 ABY]],<ref name="Galactic Atlas">''[[Star Wars: Galactic Atlas]]''</ref> [[Darth]] Vader and the [[Imperial Navy]] tracked Solo and the ''Millennium Falcon'' after they escaped from the [[Battle of Hoth]]. Vader intended to use Solo—as well as fellow |
+ | In [[3 ABY]],<ref name="Galactic Atlas">''[[Star Wars: Galactic Atlas]]''</ref> [[Darth]] Vader and the [[Imperial Navy]] tracked Solo and the ''Millennium Falcon'' after they escaped from the [[Battle of Hoth]]. Vader intended to use Solo—as well as fellow Rebel Alliance members Princess [[Leia Skywalker Organa Solo|Leia Organa]] and Chewbacca, who were also aboard the ''Millennium Falcon''—to lure Vader's son, Luke Skywalker, into a trap. Vader knew that if Skywalker thought his friends were in trouble, he would attempt to rescue them and fall into Vader's trap. In an effort to hide from the Empire, Solo suggested that they make their way to Cloud City and seek help from Calrissian. While en route to Bespin, the ''Falcon'' was tracked by bounty hunter [[Boba Fett]], who had been employed by Vader to find the ''Falcon''.<ref name="Episode V" /> Vader and Fett arrived on Cloud City before the ''Falcon'', and the Dark Lord of the Sith told Calrissian to help trap the Rebels or Cloud City would face the wrath of the Empire. Knowing full well that Lord Vader would certainly carry out that threat if he refused, Calrissian agreed to Vader's demands, while bargaining for as lenient a treatment for Solo and company as possible, and awaited the Rebels' arrival.<ref name="Databank" /> |
| − | Calrissian then summoned for Cloud City's [[Executive Chef]], [[Torro Sbazzle]] to her kitchen. Although it was the middle of the day and outside of her negotiated work hours, he pleaded with Sbazzle to cook for his new guests. Sbazzle, irritated, was ready to refuse until Calrissian and [[Gersolik]], Sbazzle's [[sous-chef]], explained that their "guests" were none other than the Empire and Lord Vader, and Calrissian elaborated that the meal was only for the sake of appearances. When Sbazzle asked how long she had |
+ | Calrissian then summoned for Cloud City's [[Executive Chef]], [[Torro Sbazzle]] to her kitchen. Although it was the middle of the day and outside of her negotiated work hours, he pleaded with Sbazzle to cook for his new guests. Sbazzle, irritated, was ready to refuse until Calrissian and [[Gersolik]], Sbazzle's [[sous-chef]], explained that their "guests" were none other than the Empire and Lord Vader, and Calrissian elaborated that the meal was only for the sake of appearances. When Sbazzle asked how long she had to cook the meal, Calrissian informed her she had only an hour, prompting her to eject the Baron Administrator from the kitchen before beginning her work.<ref name="But What Does He Eat?">{{StoryCite|story=But What Does He Eat?|book=From a Certain Point of View: The Empire Strikes Back}}</ref> |
| − | [[File:Lando13.jpg|thumb| |
+ | [[File:Lando13.jpg|thumb|left|250px|Calrissian arrives to greet Solo.]] |
The ''Millennium Falcon'' arrived at Cloud City and was granted permission from the city authorities to land. Once it landed, Calrissian personally greeted Solo and the others on the [[Platform 327|landing platform]] with Lobot and a full complement of the [[Bespin Wing Guard]] in tow. When Calrissian first approached, he feigned anger for actions Solo committed in their previous encounters. He quickly dropped the facade, however, and greeted his old friend with affection, telling Solo it was very good to see him again. Calrissian asked what brought Solo to Cloud City and the smuggler told him that they needed to repair the ''Falcon''. Calrissian briefly referred to it as his own ship, asking what Solo did to damage it, but Solo reminded him that he won it from Calrissian fair and square. Calrissian then noticed Organa and introduced himself, using his charms to personally welcome her to Cloud City.<ref name="Episode V" /> |
The ''Millennium Falcon'' arrived at Cloud City and was granted permission from the city authorities to land. Once it landed, Calrissian personally greeted Solo and the others on the [[Platform 327|landing platform]] with Lobot and a full complement of the [[Bespin Wing Guard]] in tow. When Calrissian first approached, he feigned anger for actions Solo committed in their previous encounters. He quickly dropped the facade, however, and greeted his old friend with affection, telling Solo it was very good to see him again. Calrissian asked what brought Solo to Cloud City and the smuggler told him that they needed to repair the ''Falcon''. Calrissian briefly referred to it as his own ship, asking what Solo did to damage it, but Solo reminded him that he won it from Calrissian fair and square. Calrissian then noticed Organa and introduced himself, using his charms to personally welcome her to Cloud City.<ref name="Episode V" /> |
||
| − | While the Rebels settled into an apartment on Cloud City, Calrissian ordered his workers to begin fixing the hyperdrive on the ''Millennium Falcon''.<ref name="Episode V" /> He went with the workers and inspected the ''Falcon'', making his way to the cockpit. Calrissian, missing L3-37, his former droid companion, saluted the copilot seat she once occupied. Now a part of the [[Millennium Collective]], L3-37 projected a holographic image of the planet Kessel, the place of her death, to make Lando realize she was still a part of the ship. Calrissian was then summoned by Vader.<ref name="Faith in an Old Friend">{{ |
+ | While the Rebels settled into an apartment on Cloud City, Calrissian ordered his workers to begin fixing the hyperdrive on the ''Millennium Falcon''.<ref name="Episode V" /> He went with the workers and inspected the ''Falcon'', making his way to the cockpit. Calrissian, missing L3-37, his former droid companion, saluted the copilot seat she once occupied. Now a part of the [[Millennium Collective]], L3-37 projected a holographic image of the planet Kessel, the place of her death, to make Lando realize she was still a part of the ship. Calrissian was then summoned by Vader.<ref name="Faith in an Old Friend">{{StoryCite|story=Faith in an Old Friend|book=From a Certain Point of View: The Empire Strikes Back}}</ref> At some point, the work was completed and Calrissian was informed that the vessel was fixed, but the Empire secretly disabled the vessel's hyperdrive without Calrissian's knowledge.<ref name="Episode V" /> |
| + | [[File:DiningWithADarth-TESB40.png|thumb|right|200px|Calrissian betrays his guests to the Empire.]] |
||
| − | Calrissian had a meeting with the [[Troglof]] [[Corovene Manakor]], which was interrupted by the Lepi smuggler Jaxxon, who's appointment had mistakenly been scheduled an hour by his droid, ML-08. Jaxxon, looking to become legitimate like Calrissian, asked the latter for an investment. Calrissian angrily declined before leaving to go to the princess<ref name="Fake It Till You Make It">{{Shortstory|story=Fake It Till You Make It|book=From a Certain Point of View: The Empire Strikes Back}}</ref> Leia's apartment, to gather her and her companions for a meeting with Darth Vader.<ref name="Episode V" /> |
||
| + | Calrissian had a meeting with the [[Troglof]] [[Corovene Manakor]], which was interrupted by the Lepi smuggler Jaxxon, whose appointment had mistakenly been scheduled an hour by his droid, ML-08. Jaxxon, looking to become legitimate like Calrissian, asked the latter for an investment. Calrissian angrily declined before leaving to go to the princess<ref name="Fake It Till You Make It">{{StoryCite|story=Fake It Till You Make It|book=From a Certain Point of View: The Empire Strikes Back}}</ref> [[Grand Bespin Hotel|Leia's apartment]], to gather her and her companions for a meeting with Darth Vader.<ref name="Episode V" /> |
||
=====An Imperial trap and altered deals===== |
=====An Imperial trap and altered deals===== |
||
| − | {{Quote|This deal's getting worse all the time.|Lando Calrissian| |
+ | {{Quote|This deal's getting worse all the time.|Lando Calrissian|<ref name="Episode V" />}} |
| − | Once the Empire was ready to capture Solo, Organa, and Chewbacca, Calrissian greeted them in the apartment, where he admired Organa for her beauty. He also found that their [[protocol droid]], [[C-3PO]], had been mysteriously damaged and blown into several pieces, which piqued the suspicions of the Rebels. Nonetheless, after he asked them to join him for refreshments, they followed Calrissian throughout the facility, where he told them about the mining operations and how the Empire and the Mining Guild had no presence on Cloud City. Upon arrival at<ref name="Episode V" /> the [[Rinetta dining room]],<ref name="Fake It Till You Make It">{{ |
+ | Once the Empire was ready to capture Solo, Organa, and Chewbacca, Calrissian greeted them in the apartment, where he admired Organa for her beauty. He also found that their [[protocol droid]], [[C-3PO]], had been mysteriously damaged and blown into several pieces, which piqued the suspicions of the Rebels. Nonetheless, after he asked them to join him for refreshments, they followed Calrissian throughout the facility, where he told them about the mining operations and how the Empire and the Mining Guild had no presence on Cloud City. Upon arrival at<ref name="Episode V" /> the [[Rinetta dining room]],<ref name="Fake It Till You Make It">{{StoryCite|story=Fake It Till You Make It|book=From a Certain Point of View: The Empire Strikes Back}}</ref> Calrissian told them that he had made a deal to keep the Empire off of Cloud City, and he opened the door to reveal Vader and Fett; Fett intended to take Solo to Jabba to claim a bounty on the smuggler's head. Vader quickly subdued Solo who attempted to shoot him, even as a squad of stormtroopers appeared behind the Rebels to prevent their escape. As a result, the Rebels were successfully captured by the Empire.<ref name="Episode V" /> |
[[File:BobaVaderLando.jpg|thumb|225x225px|left|Calrissian grows increasingly concerned about his deal with the Dark Lord.]] |
[[File:BobaVaderLando.jpg|thumb|225x225px|left|Calrissian grows increasingly concerned about his deal with the Dark Lord.]] |
||
The Rebels were taken into custody, and Solo was [[torture]]d by the Empire; as intended by Vader, the torture was seen by Skywalker in a [[Force vision|vision]], who rushed to Cloud City to save his friends. Calrissian waited outside of the torture chamber where he heard Solo's screams, disgusted with the evil he has been forced to collaborate with, and spoke with the Dark Lord once Vader emerged from the chamber. Vader told him that Organa and Chewbacca could never leave Cloud City, to which Calrissian protested, as neither that nor helping Fett were part of their arrangement. Vader threatened to leave an [[Imperial Garrison (Cloud City)|Imperial garrison]] on Cloud City if Calrissian did not cooperate, which made Calrissian realize that the deal was getting worse and that Vader would not uphold his promises. After Solo's torture ended, Calrissian spoke to his old friend, Organa, and Chewbacca, and told them that the princess and Chewbacca would have to remain on Cloud City. He also told them that Vader was not interested in them, but rather he was using them to bait someone named Skywalker to Cloud City, for which he received a slug to the face from an enraged Solo.<ref name="Episode V" /> |
The Rebels were taken into custody, and Solo was [[torture]]d by the Empire; as intended by Vader, the torture was seen by Skywalker in a [[Force vision|vision]], who rushed to Cloud City to save his friends. Calrissian waited outside of the torture chamber where he heard Solo's screams, disgusted with the evil he has been forced to collaborate with, and spoke with the Dark Lord once Vader emerged from the chamber. Vader told him that Organa and Chewbacca could never leave Cloud City, to which Calrissian protested, as neither that nor helping Fett were part of their arrangement. Vader threatened to leave an [[Imperial Garrison (Cloud City)|Imperial garrison]] on Cloud City if Calrissian did not cooperate, which made Calrissian realize that the deal was getting worse and that Vader would not uphold his promises. After Solo's torture ended, Calrissian spoke to his old friend, Organa, and Chewbacca, and told them that the princess and Chewbacca would have to remain on Cloud City. He also told them that Vader was not interested in them, but rather he was using them to bait someone named Skywalker to Cloud City, for which he received a slug to the face from an enraged Solo.<ref name="Episode V" /> |
||
| − | Later, Vader determined that he would use the Cloud City [[carbon-freezing]] [[Carbon- |
+ | Later, Vader determined that he would use the Cloud City [[carbon-freezing]] [[Carbon-freezing chamber|chamber]] to freeze Skywalker in [[carbonite]] so he could be delivered to the Emperor. To ensure that Skywalker would not be damaged, Vader decided to test the carbon-freezing on Solo. Calrissian protested, believing that the carbon-freezing would kill Solo. Nonetheless, Vader moved forward with the test. When Solo and the other Rebels arrived, Calrissian informed Solo of what was about to happen to him. Calrissian monitored the freezing and, when it was completed, checked on Solo's lifesigns, where he found that Solo was alive and in perfect carbonite hibernation. Vader then ordered Calrissian to bring Organa and Chewbacca to the Dark Lord's vessel, once again altering the deal he had made with the Baron Administrator. Knowing now that Sith Lord has no intention of keeping to his bargain, Calrissian secretly signaled to [[Lobot]] to put his contingency plan into action.<ref name="Episode V" /> |
=====Change of heart and escape===== |
=====Change of heart and escape===== |
||
| − | {{Quote|Attention. This is Lando Calrissian. The Empire has taken control of the city; I advise everyone to leave before more Imperial troops arrive.|Lando Calrissian alerts the residents of Cloud City| |
+ | {{Quote|Attention. This is Lando Calrissian. The Empire has taken control of the city; I advise everyone to leave before more Imperial troops arrive.|Lando Calrissian alerts the residents of Cloud City|<ref name="Episode V" />}} |
| − | [[File: |
+ | [[File:Brains_and_Brawn_SWL.png|thumb|right|225px|Calrissian is choked by Chewbacca]] |
[[Imperial Military|Imperial forces]] led Calrissian and the Rebels towards the Dark Lord's ship. While en route, they encountered Skywalker, who exchanged fire with the Imperials before the stormtroopers led Calrissian and the Rebels away. The Imperials were soon [[Escape from Cloud City|surrounded]] by Cloud City security forces, led by Lobot, and disarmed. Calrissian freed the Rebels from their [[Stuncuffs|restraints]] while trying explain that he intended to leave the city while helping the Rebels escape as well, at which point Chewbacca attacked him, grabbing his neck and choking him for his betrayal. Struggling to stop the enraged [[Wookiee]] from crushing his windpipe, Calrissian gasped out that there was still time to save Solo from the bounty hunter, who was taking him to the [[East Platform]]. The Rebels let Calrissian go, and he followed them towards the platform. They arrived in time to watch Fett's ship, ''[[Slave I]]'', take off. Though they attempted to fire at it with blasters, it had no impact and the bounty hunter escaped with Solo.<ref name="Episode V" /> |
[[Imperial Military|Imperial forces]] led Calrissian and the Rebels towards the Dark Lord's ship. While en route, they encountered Skywalker, who exchanged fire with the Imperials before the stormtroopers led Calrissian and the Rebels away. The Imperials were soon [[Escape from Cloud City|surrounded]] by Cloud City security forces, led by Lobot, and disarmed. Calrissian freed the Rebels from their [[Stuncuffs|restraints]] while trying explain that he intended to leave the city while helping the Rebels escape as well, at which point Chewbacca attacked him, grabbing his neck and choking him for his betrayal. Struggling to stop the enraged [[Wookiee]] from crushing his windpipe, Calrissian gasped out that there was still time to save Solo from the bounty hunter, who was taking him to the [[East Platform]]. The Rebels let Calrissian go, and he followed them towards the platform. They arrived in time to watch Fett's ship, ''[[Slave I]]'', take off. Though they attempted to fire at it with blasters, it had no impact and the bounty hunter escaped with Solo.<ref name="Episode V" /> |
||
| − | [[File: |
+ | [[File:Lando_covering_fire.png|thumb|237x237px|left|Calrissian provides covering fire for the Rebels' escape.]] |
Stormtroopers soon arrived on the platform, forcing Calrissian and the Rebels to fight through them and escape. They made their way to the ''Millennium Falcon'' and arrived at its landing platform, only to find a locked door. [[R2-D2]]—Skywalker's astromech droid, who had rendezvoused with the Rebels—attempted and failed to open the door. While the droid was working, Calrissian issued a city-wide broadcast warning his citizens of the Imperial presence and impending occupation of Cloud City. He advised everyone to leave Cloud City before more Imperial forces could arrive. Calrissian's announcement created a frenzy of activity, as numerous people fled throughout the city. Calrissian led the Rebels through the commotion towards another doorway, which R2-D2 was able to open while Calrissian and the Rebels fought off more stormtroopers. The group ran towards the ''Falcon'', where Calrissian provided cover fire as the others boarded the ship. Once aboard, the ''Falcon'' lifted off from the platform, pursued by TIE fighters.<ref name="Episode V" /> |
Stormtroopers soon arrived on the platform, forcing Calrissian and the Rebels to fight through them and escape. They made their way to the ''Millennium Falcon'' and arrived at its landing platform, only to find a locked door. [[R2-D2]]—Skywalker's astromech droid, who had rendezvoused with the Rebels—attempted and failed to open the door. While the droid was working, Calrissian issued a city-wide broadcast warning his citizens of the Imperial presence and impending occupation of Cloud City. He advised everyone to leave Cloud City before more Imperial forces could arrive. Calrissian's announcement created a frenzy of activity, as numerous people fled throughout the city. Calrissian led the Rebels through the commotion towards another doorway, which R2-D2 was able to open while Calrissian and the Rebels fought off more stormtroopers. The group ran towards the ''Falcon'', where Calrissian provided cover fire as the others boarded the ship. Once aboard, the ''Falcon'' lifted off from the platform, pursued by TIE fighters.<ref name="Episode V" /> |
||
| Line 235: | Line 255: | ||
Calrissian took the pilot's seat in the ''Falcon'' and prepared the ship for a jump into hyperspace. When he attempted to make the jump, however, the hyperdrive failed, much to Calrissian's frustration as he was unaware that the Empire had sabotaged the ship. The ''[[Executor]]'', Vader's [[Executor-class Star Dreadnought|Super Star Destroyer]], approached the vessel, where Vader would once again attempt to capture Skywalker. R2-D2, who learned of the sabotage while communicating with Cloud City's computer, made the necessary repairs to the hyperdrive and the ship was able to jump into hyperspace, successfully escaping from the Empire.<ref name="Episode V" /> |
Calrissian took the pilot's seat in the ''Falcon'' and prepared the ship for a jump into hyperspace. When he attempted to make the jump, however, the hyperdrive failed, much to Calrissian's frustration as he was unaware that the Empire had sabotaged the ship. The ''[[Executor]]'', Vader's [[Executor-class Star Dreadnought|Super Star Destroyer]], approached the vessel, where Vader would once again attempt to capture Skywalker. R2-D2, who learned of the sabotage while communicating with Cloud City's computer, made the necessary repairs to the hyperdrive and the ship was able to jump into hyperspace, successfully escaping from the Empire.<ref name="Episode V" /> |
||
| − | [[File:Galaxy1.png|thumb |
+ | [[File:Galaxy1.png|thumb|right|250px|Calrissian pilots the ''Falcon'' seeking to find Solo.]] |
| − | The ''Millennium Falcon'' united with the [[Alliance Fleet |
+ | The ''Millennium Falcon'' united with the [[Rebel Alliance Navy|Alliance Fleet's]] [[Fourth Division]] at [[Rendezvous Point Delta-Three]], but the rebel craft were [[Battle at Rendezvous Point Delta-Three|under attack]] from Imperial Commander [[Ellian Zahra]].<ref name="Star Wars 1">[[Star Wars (2020) 1|''Star Wars'' (2020) 1]]</ref> After the ''Falcon'' and other rebel ships escaped to [[Backup Rendezvous Point Gamma-Nine]], Calrissian did not stay long, as he and Chewbacca intended to set out in the ''Millennium Falcon'' to find Solo. Before leaving the [[fleet]], he contacted Organa and Skywalker, promising the princess that he and Chewbacca would find Solo. The group agreed to meet at a rendezvous point on Tatooine, the location of Jabba's Palace. They said their goodbyes and the ''Falcon'' departed from the fleet.<ref name="Episode V" /> |
| + | |||
| + | ====A promise to Han==== |
||
| + | Following the War of the Bounty Hunters, Calrissian and Lobot ventured to Jabba the Hutts palace on Tatooine. While there, the two would face a rancor, which they managed to escape from. Eventually, Calrissian came face to face with the carbon-frozen Solo, and opened up. Calrissian apologized to Solo for betraying him on Cloud City, stating that despite their differences, Solo deserved better than that. Lobot suggested they take Solo with them while they had the chance, though Lando stated that it would place Solo in harms way and would be too great a risk. Before departing, Calrissian made a promise to Han, that the second he had the chance, he would return to save his old friend.<ref name="SW 2020 39">[[Star Wars (2020) 39|''Star Wars'' (2020) 39]]</ref> |
||
====Rescued by Leia==== |
====Rescued by Leia==== |
||
| − | {{Quote|Leia! How'd you— What'd you— Where'd you—|Lando Calrissian|Age of Rebellion - Princess Leia 1}} |
+ | {{Quote|Leia! How'd you— What'd you— Where'd you—|Lando Calrissian|<ref name="Princess Leia 1">[[Age of Rebellion - Princess Leia 1|''Age of Rebellion - Princess Leia'' 1]]</ref>}} |
| − | Calrissian was on the planet [[Arkanis]]. During his time |
+ | Calrissian was on the planet [[Arkanis]]. During his time there, bounty hunters were trying to capture Calrissian so Leia Organa disguised herself as [[Boushh]] to rescue Calrissian. While Calrissian was on the run from the bounty hunters, he fell off a hill falling into Leia. Eventually Leia revealed herself to Calrissian and they both escaped to Leia's escape point. Later, bounty hunters then captured Chewbacca and brought him to [[Bossk'wassak'Cradossk|Bossk]]. Eventually Chewbacca was rescued.<ref name="Princess Leia 1" /> |
====Rescuing Han Solo==== |
====Rescuing Han Solo==== |
||
| − | {{Quote|Princess, we'll find Han. I promise.|Lando Calrissian, to Leia Organa| |
+ | {{Quote|Princess, we'll find Han. I promise.|Lando Calrissian, to Leia Organa|<ref name="Episode V" />}} |
| + | [[File:All-In-SWL78.png|thumb|left|250px|Calrissian disguised himself as one of Jabba's guards.]] |
||
Some time later, Calrissian and Chewbacca had located Solo's still-frozen body at Jabba's palace on Tatooine. Skywalker put together a plan in which Calrissian, Organa, Chewbacca, the droids, and Skywalker himself would rescue their friend and, if necessary, destroy Jabba the Hutt. Calrissian [[Rescue of Han Solo|infiltrated]] the palace and disguised himself as one of the Hutt's guards. He watched as each member of the Rebel team arrived; the droids arrived first, posing as gifts from Skywalker to Jabba, followed by Organa who posed as a bounty hunter collecting the bounty on Chewbacca, who she brought as her prisoner. Organa later released Solo from carbon-freeze, but they were discovered by Jabba and his court. Solo was placed into a [[prison]] cell with Chewbacca, while Organa became the Hutt's [[Slavery|slave]]. Calrissian remained in disguise throughout the arrivals.<ref name="Episode VI" /> |
Some time later, Calrissian and Chewbacca had located Solo's still-frozen body at Jabba's palace on Tatooine. Skywalker put together a plan in which Calrissian, Organa, Chewbacca, the droids, and Skywalker himself would rescue their friend and, if necessary, destroy Jabba the Hutt. Calrissian [[Rescue of Han Solo|infiltrated]] the palace and disguised himself as one of the Hutt's guards. He watched as each member of the Rebel team arrived; the droids arrived first, posing as gifts from Skywalker to Jabba, followed by Organa who posed as a bounty hunter collecting the bounty on Chewbacca, who she brought as her prisoner. Organa later released Solo from carbon-freeze, but they were discovered by Jabba and his court. Solo was placed into a [[prison]] cell with Chewbacca, while Organa became the Hutt's [[Slavery|slave]]. Calrissian remained in disguise throughout the arrivals.<ref name="Episode VI" /> |
||
Skywalker arrived last and, while declaring himself a [[Jedi Knight]], demanded that Solo and the others be released to him. Jabba refused, and Skywalker was forced to fight and kill [[Pateesa|Jabba's]] [[rancor]] beast. When the rancor failed to kill Skywalker, Jabba sentenced Skywalker, Solo, and Chewbacca to be killed; the sentence was that they would be fed to the [[sarlacc]] creature in the [[Great Pit of Carkoon]], where they would be slowly digested over the course of a [[millennium]]. Calrissian, still disguised as a guard, traveled with Jabba and his entourage to the Great Pit of Carkoon, and was stationed aboard the [[Bantha-II cargo skiff|skiff]] on which the prisoners were kept.<ref name="Episode VI" /> |
Skywalker arrived last and, while declaring himself a [[Jedi Knight]], demanded that Solo and the others be released to him. Jabba refused, and Skywalker was forced to fight and kill [[Pateesa|Jabba's]] [[rancor]] beast. When the rancor failed to kill Skywalker, Jabba sentenced Skywalker, Solo, and Chewbacca to be killed; the sentence was that they would be fed to the [[sarlacc]] creature in the [[Great Pit of Carkoon]], where they would be slowly digested over the course of a [[millennium]]. Calrissian, still disguised as a guard, traveled with Jabba and his entourage to the Great Pit of Carkoon, and was stationed aboard the [[Bantha-II cargo skiff|skiff]] on which the prisoners were kept.<ref name="Episode VI" /> |
||
| − | [[File: |
+ | [[File:LandoSarlaccROTJ.png|thumb|right|250px|Calrissian hanging over the sarlacc pit in fear.]] |
Before the Rebels could be executed, R2-D2 revealed he had been concealing [[Luke Skywalker's green lightsaber|Skywalker's lightsaber]]. The Jedi Knight attacked Jabba's guards and Calrissian revealed himself, helping to free the prisoners and fight off the other guards. While doing so, he was knocked from the side of the skiff and fell towards the sarlacc, clinging onto the edge of the pit. Solo, who was partially though temporarily blind as a result of the carbon freezing, was lowered towards Calrissian by Chewbacca. Solo handed him a staff and Calrissian reached for it, but one of the sarlacc's tentacles grabbed his leg. Solo aimed a blaster at the tentacle and, despite Calrissian's concerns over Solo's ability to see his target, fired upon the creature. He hit the tentacle and the sarlacc released Calrissian, allowing Solo to pull him to safety.<ref name="Episode VI" /> |
Before the Rebels could be executed, R2-D2 revealed he had been concealing [[Luke Skywalker's green lightsaber|Skywalker's lightsaber]]. The Jedi Knight attacked Jabba's guards and Calrissian revealed himself, helping to free the prisoners and fight off the other guards. While doing so, he was knocked from the side of the skiff and fell towards the sarlacc, clinging onto the edge of the pit. Solo, who was partially though temporarily blind as a result of the carbon freezing, was lowered towards Calrissian by Chewbacca. Solo handed him a staff and Calrissian reached for it, but one of the sarlacc's tentacles grabbed his leg. Solo aimed a blaster at the tentacle and, despite Calrissian's concerns over Solo's ability to see his target, fired upon the creature. He hit the tentacle and the sarlacc released Calrissian, allowing Solo to pull him to safety.<ref name="Episode VI" /> |
||
| Line 254: | Line 278: | ||
====Battle of Endor==== |
====Battle of Endor==== |
||
| − | {{Quote|General Calrissian has volunteered to lead the fighter attack.''"''<br />''"''Good luck. You're gonna need it.|Admiral Ackbar and Han Solo| |
+ | {{Quote|General Calrissian has volunteered to lead the fighter attack.''"''<br />''"''Good luck. You're gonna need it.|Admiral Ackbar and Han Solo|<ref name="Episode VI" />}} |
| − | [[File: |
+ | [[File:General_Lando.png|thumb|left|250px|Newly appointed general, Lando Calrissian jokes with Han Solo before a rebel briefing aboard Home One.]] |
Calrissian participated in the [[Battle of Taanab]],<ref name="Episode VI" /> helping defeat a pirate fleet.<ref name="Ultimate Star Wars" /> He then rendezvoused with the fleet to find that a battle was being prepared to strike a decisive blow against the Empire. The Empire was building a [[DS-2 Death Star II Mobile Battle Station|second Death Star]], which [[orbit]]ed the [[forest]] [[moon]] of [[Endor]], and the Emperor had personally arrived on the [[Space station|station]] to oversee the final stages of construction. Unknown to the Rebels was that the Emperor had allowed them to learn this information, as he was luring them into a trap in an attempt to destroy them. They believed that the station, which was fully operational, did not yet have use of its primary, [[Superweapon|planet-destroying weapon]]. As such, they put together a plan to destroy the Death Star and kill the Emperor. The plan would require a ground assault to destroy the [[Death Star's shield generator|generator]] that powered the shield protecting the Death Star, as well as a [[Navy|naval]] assault against the station itself. Calrissian volunteered to lead the [[starfighter]] attack and was commissioned as a [[general]] of the Rebel Alliance. He attended a Rebel briefing where the plan for the [[Battle of Endor]] was reviewed, and learned that Solo would lead the ground assault, with a [[Endor strike team|team]] that included Organa, Chewbacca, and Skywalker. Solo congratulated Calrissian on his promotion, to which he responded it must have been because of a maneuver he pulled at [[Taanab]]. Solo told Calrissian he could fly the ''Millennium Falcon'' during the battle. Knowing how much the ship meant to his friend, Calrissian promised that he would return her without so much as a scratch.<ref name="Episode VI" /> |
Calrissian participated in the [[Battle of Taanab]],<ref name="Episode VI" /> helping defeat a pirate fleet.<ref name="Ultimate Star Wars" /> He then rendezvoused with the fleet to find that a battle was being prepared to strike a decisive blow against the Empire. The Empire was building a [[DS-2 Death Star II Mobile Battle Station|second Death Star]], which [[orbit]]ed the [[forest]] [[moon]] of [[Endor]], and the Emperor had personally arrived on the [[Space station|station]] to oversee the final stages of construction. Unknown to the Rebels was that the Emperor had allowed them to learn this information, as he was luring them into a trap in an attempt to destroy them. They believed that the station, which was fully operational, did not yet have use of its primary, [[Superweapon|planet-destroying weapon]]. As such, they put together a plan to destroy the Death Star and kill the Emperor. The plan would require a ground assault to destroy the [[Death Star's shield generator|generator]] that powered the shield protecting the Death Star, as well as a [[Navy|naval]] assault against the station itself. Calrissian volunteered to lead the [[starfighter]] attack and was commissioned as a [[general]] of the Rebel Alliance. He attended a Rebel briefing where the plan for the [[Battle of Endor]] was reviewed, and learned that Solo would lead the ground assault, with a [[Endor strike team|team]] that included Organa, Chewbacca, and Skywalker. Solo congratulated Calrissian on his promotion, to which he responded it must have been because of a maneuver he pulled at [[Taanab]]. Solo told Calrissian he could fly the ''Millennium Falcon'' during the battle. Knowing how much the ship meant to his friend, Calrissian promised that he would return her without so much as a scratch.<ref name="Episode VI" /> |
||
| + | [[File:Lando7.jpg|thumb|right|250px|Calrissian and his co-pilot, Nien Nunb, during the Battle of Endor.]] |
||
Solo and his team departed prior to the fleet, in order to give themselves time to destroy the shield. The Rebel fleet, meanwhile, prepared to leave. Once it was ready, Calrissian and his co-pilot, a [[Sullustan]] named [[Nien Nunb]], flew the ''Falcon'' to the head of the fleet, where all fighter [[squadron]]s were accounted for. [[Admiral]] [[Gial Ackbar]], who led the Alliance fleet, gave Calrissian the order to depart for Endor. Once they arrived at Endor, Nunb told Calrissian that the ''Falcon''{{'s}} scanners had been jammed, leading Calrissian to realize that the Empire knew they were coming and that the attack was a trap. As the squadrons approached the Death Star, Calrissian ordered his [[Alliance Military|forces]] to break off the attack, as he knew that the shield was still operational.<ref name="Episode VI" /> |
Solo and his team departed prior to the fleet, in order to give themselves time to destroy the shield. The Rebel fleet, meanwhile, prepared to leave. Once it was ready, Calrissian and his co-pilot, a [[Sullustan]] named [[Nien Nunb]], flew the ''Falcon'' to the head of the fleet, where all fighter [[squadron]]s were accounted for. [[Admiral]] [[Gial Ackbar]], who led the Alliance fleet, gave Calrissian the order to depart for Endor. Once they arrived at Endor, Nunb told Calrissian that the ''Falcon''{{'s}} scanners had been jammed, leading Calrissian to realize that the Empire knew they were coming and that the attack was a trap. As the squadrons approached the Death Star, Calrissian ordered his [[Alliance Military|forces]] to break off the attack, as he knew that the shield was still operational.<ref name="Episode VI" /> |
||
| − | [[File:Lando7.jpg|thumb|249x249px|right|Calrissian and his co-pilot, Nien Nunb, during the Battle of Endor.]] |
||
A hidden Imperial fleet revealed itself, and Calrissian and his fighter squadrons were forced to contend with incoming TIE fighters. He led his fighters towards the Imperial fleet in order to draw enemy fire away from the Rebel [[cruiser]]s, and the ''Falcon'' shot a number of the TIE fighters down. He soon saw Imperial Star Destroyers positioned away from the main fighting and was unsure as to why they were hanging back. Calrissian soon found an answer once the Death Star, revealed as operational, fired its [[Superlaser|primary weapon]] and destroyed a [[Liberty|Rebel cruiser]] with a single shot. Ackbar ordered a retreat, but Calrissian convinced him to keep the fleet in place, as he had faith that Solo would complete his mission on the surface. When another [[Nautilian|Star Cruiser]] was atomized by the superweapon, Calrissian told Ackbar to move the rest of the cruisers and engage the Star Destroyers at point-blank range, reasoning that they stood a far better chance against them than the Death Star and that the destroyers would be caught in the blast if the superlaser dared to fire again.<ref name="Episode VI" /> |
A hidden Imperial fleet revealed itself, and Calrissian and his fighter squadrons were forced to contend with incoming TIE fighters. He led his fighters towards the Imperial fleet in order to draw enemy fire away from the Rebel [[cruiser]]s, and the ''Falcon'' shot a number of the TIE fighters down. He soon saw Imperial Star Destroyers positioned away from the main fighting and was unsure as to why they were hanging back. Calrissian soon found an answer once the Death Star, revealed as operational, fired its [[Superlaser|primary weapon]] and destroyed a [[Liberty|Rebel cruiser]] with a single shot. Ackbar ordered a retreat, but Calrissian convinced him to keep the fleet in place, as he had faith that Solo would complete his mission on the surface. When another [[Nautilian|Star Cruiser]] was atomized by the superweapon, Calrissian told Ackbar to move the rest of the cruisers and engage the Star Destroyers at point-blank range, reasoning that they stood a far better chance against them than the Death Star and that the destroyers would be caught in the blast if the superlaser dared to fire again.<ref name="Episode VI" /> |
||
On the surface, Solo and his team successfully completed their mission and destroyed the [[SLD-26 planetary shield generator|shield generator]]. With the Death Star vulnerable, Ackbar ordered Calrissian and his forces to begin their assault on the battle station. The ''Falcon'' and the fighter squadrons entered an opening on the space station and headed for the [[reactor]] core, all while pursued by TIE fighters. While piloting towards their target, the ''Falcon'' hit a bulkhead on the interior of the Death Star, knocking its [[sensor]] [[Rectenna|dish]] off; Calrissian, as a result, had broken his promise to return the ''Falcon'' to Solo "without a scratch." The Rebels reached the main reactor, where the ''Falcon'' fired the shot that started a chain reaction to destroy the station. Calrissian piloted the ship back through the same route that they entered, as a ball of fire followed close behind. Despite the minor damage, the ''Falcon'' escaped the Death Star just in time and flew back towards the Rebel fleet as the Death Star exploded behind it.<ref name="Episode VI" /> |
On the surface, Solo and his team successfully completed their mission and destroyed the [[SLD-26 planetary shield generator|shield generator]]. With the Death Star vulnerable, Ackbar ordered Calrissian and his forces to begin their assault on the battle station. The ''Falcon'' and the fighter squadrons entered an opening on the space station and headed for the [[reactor]] core, all while pursued by TIE fighters. While piloting towards their target, the ''Falcon'' hit a bulkhead on the interior of the Death Star, knocking its [[sensor]] [[Rectenna|dish]] off; Calrissian, as a result, had broken his promise to return the ''Falcon'' to Solo "without a scratch." The Rebels reached the main reactor, where the ''Falcon'' fired the shot that started a chain reaction to destroy the station. Calrissian piloted the ship back through the same route that they entered, as a ball of fire followed close behind. Despite the minor damage, the ''Falcon'' escaped the Death Star just in time and flew back towards the Rebel fleet as the Death Star exploded behind it.<ref name="Episode VI" /> |
||
| − | [[File: |
+ | [[File:Celebration_on_Endor.png|thumb|left|222px|Calrissian and his friends celebrate their victory on Endor.]] |
| − | Calrissian and his fellow Rebels made their way to the surface of Endor and regrouped in [[Bright Tree Village]], the home of the [[Ewok]]s who helped Solo and his team destroy the shield generator, where they all celebrated the destruction of the Death Star and the death of the Emperor; during the battle, Skywalker redeemed Vader, who in turn killed the Emperor before succumbing to his own injuries. Calrissian reunited with Solo, Chewbacca, and the rest of his friends for the festivities.<ref name="Episode VI" /> |
+ | Calrissian and his fellow Rebels made their way to the surface of Endor and regrouped in [[Bright Tree Village]], the home of the [[Ewok]]s who helped Solo and his team destroy the shield generator, where they all celebrated the destruction of the Death Star and the death of the Emperor; during the battle, Skywalker redeemed Vader, who in turn killed the Emperor before succumbing to his own injuries. Calrissian reunited with Solo, Chewbacca, and the rest of his friends for the festivities.<ref name="Episode VI" /> |
| − | ===Serving the New Republic=== |
||
====Operation: Cinder==== |
====Operation: Cinder==== |
||
| − | {{Quote| |
+ | {{Quote|You really trust us to fight beside you?''"<br />"''What can I say? I'm a big believer in second chances.|Iden Versio and Lando Calrissian|<ref name="Battlefront II" />}} |
| − | [[File: |
+ | [[File:Lando_meets_Iden_Versio.jpg|thumb|right|212x212px|Lando discusses matters with Iden Versio.]] |
Though they had won the Battle of Endor, the Rebels would still face many challenges as they sought to restore the [[Galactic Republic]]. Shortly after [[Inferno Squad]]'s surrender, Calrissian discussed matters with the squad leader [[Iden Versio]]. He offered to let them leave free on two X-Wing fighters as well as providing them the option of helping stop the Empire from implementing [[Operation: Cinder]]. Iden and [[Del Meeko]] took the second option, leading Lando to assign them to join his friend [[Shriv Suurgav]] in [[Danger Squadron]].<ref name="Battlefront II" /> |
Though they had won the Battle of Endor, the Rebels would still face many challenges as they sought to restore the [[Galactic Republic]]. Shortly after [[Inferno Squad]]'s surrender, Calrissian discussed matters with the squad leader [[Iden Versio]]. He offered to let them leave free on two X-Wing fighters as well as providing them the option of helping stop the Empire from implementing [[Operation: Cinder]]. Iden and [[Del Meeko]] took the second option, leading Lando to assign them to join his friend [[Shriv Suurgav]] in [[Danger Squadron]].<ref name="Battlefront II" /> |
||
| − | Calrissian commanded an Alliance Fleet including the [[MC80 Star Cruiser|cruiser]] ''[[Restoration]]'', the ''[[Mellcrawler II]]'' and a small fleet of starfighters, including Danger Squadron and defected members of Inferno Squad during the [[Battle of Theed]], aiding [[Monarch of Naboo|Queen]] [[Sosha Soruna]], Organa and [[Lieutenant]] [[Shara Bey]] as they disrupted the Imperial operation to render [[Naboo]] inhospitable.<ref name="Shattered Empire III">[[Shattered Empire 3|''Shattered Empire'' 3]]</ref><ref name="Battlefront II" /> |
+ | Calrissian commanded an Alliance Fleet including the [[MC80 Star Cruiser|cruiser]] ''[[Restoration]]'', the ''[[Mellcrawler II]]'' and a small fleet of starfighters, including Danger Squadron and defected members of Inferno Squad during the [[Battle of Theed]], aiding [[Monarch of Naboo|Queen]] [[Sosha Soruna]], Organa, and [[Lieutenant]] [[Shara Bey]] as they disrupted the Imperial operation to render [[Naboo]] inhospitable.<ref name="Shattered Empire III">[[Shattered Empire 3|''Shattered Empire'' 3]]</ref><ref name="Battlefront II" /> |
| − | The rebels then reengaged the Imperial forces and destroyed the last [[satellite]]s and engaged the ''Torment'', however, before going down, the ship deployed its [[Imperial Army|ground invasion force]] in an attempt to capture Theed and salvage the battle, after the ground battle ended, the [[New Republic]] began to form.<ref name="Battlefront II" /> |
+ | The rebels then reengaged the Imperial forces and destroyed the last [[satellite]]s and engaged the ''Torment'', however, before going down, the ship deployed its [[Imperial Army|ground invasion force]] in an attempt to capture Theed and salvage the battle, after the ground battle ended, the [[New Republic]] began to form. Calrissian later joined Suurgav on a [[Destruction of an abandoned weapons depot|mission]] to Sullust.<ref name="Battlefront II" /> |
====Liberation of Cloud City==== |
====Liberation of Cloud City==== |
||
| − | {{Quote|Lobot, we're home. Guess the Empire didn't keep up with housekeeping.|Lando Calrissian, remained good-humored in the midst of hardship and conflict|Aftermath: Empire's End}} |
+ | {{Quote|Lobot, we're home. Guess the Empire didn't keep up with housekeeping.|Lando Calrissian, remained good-humored in the midst of hardship and conflict|<ref name="Empire's End">''[[Aftermath: Empire's End]]''</ref>}} |
Following the events at Endor, [[Governor]] [[Ubrik Adelhard]] imposed the [[Iron Blockade]] on the [[Anoat sector]]. Adelhard also claimed that the Empire had won the Battle of Endor and that rumors of the Emperor's death were rebel [[propaganda]]. In response, a resistance movement known as the [[Uprising]] emerged in the sector. Calrissian kept in touch with his old friend Lobot, who relayed messages through the blockade and served as a liaison between Calrissian and members of the Uprising. Unable to intervene directly in the uprising on Cloud City, Calrissian instead transferred credits to the rebels through the auspices of Lobot. He was privy to a joint operation by Lobot and the pirate [[Kars Tal-Korla]] to breach [[Governor Adelhard's chamber|Adelhard's personal quarters]] and capture him.<ref name="Aftermath" /> Though Adelhard evaded capture, the Uprising managed to [[Liberation of Cloud City|liberate]] Bespin as the [[Galactic Civil War]] drew to a close.<ref name="Uprising" /> |
Following the events at Endor, [[Governor]] [[Ubrik Adelhard]] imposed the [[Iron Blockade]] on the [[Anoat sector]]. Adelhard also claimed that the Empire had won the Battle of Endor and that rumors of the Emperor's death were rebel [[propaganda]]. In response, a resistance movement known as the [[Uprising]] emerged in the sector. Calrissian kept in touch with his old friend Lobot, who relayed messages through the blockade and served as a liaison between Calrissian and members of the Uprising. Unable to intervene directly in the uprising on Cloud City, Calrissian instead transferred credits to the rebels through the auspices of Lobot. He was privy to a joint operation by Lobot and the pirate [[Kars Tal-Korla]] to breach [[Governor Adelhard's chamber|Adelhard's personal quarters]] and capture him.<ref name="Aftermath" /> Though Adelhard evaded capture, the Uprising managed to [[Liberation of Cloud City|liberate]] Bespin as the [[Galactic Civil War]] drew to a close.<ref name="Uprising" /> |
||
| − | Calrissian managed to starve [[Ubrik Adelhard's Imperial remnant|Adelhard's Imperial remnant]] into submission. Around the time of the [[Battle of Jakku]], he returned to Cloud City at the head of a ragtag force of Wing Guards and [[New Republic soldier]]s. With Lobot at his side, Calrissian led a mopping-up operation against an Imperial hold-out in the [[Casino Level]]{{'s}} [[Bolo Tanga room]]. As they made their way there, Lobot reminded Calrissian to get Organa and Solo a nuptial gift for their [[Ben Solo|expectant child]]. Calrissian joked about gifting the boy a little cape and mustache so that he could resemble Uncle Lando.<ref name="Empire's End" |
+ | Calrissian managed to starve [[Ubrik Adelhard's Imperial remnant|Adelhard's Imperial remnant]] into submission. Around the time of the [[Battle of Jakku]], he returned to Cloud City at the head of a ragtag force of Wing Guards and [[New Republic soldier]]s. With Lobot at his side, Calrissian led a mopping-up operation against an Imperial hold-out in the [[Casino Level]]{{'s}} [[Bolo Tanga room]]. As they made their way there, Lobot reminded Calrissian to get Organa and Solo a nuptial gift for their [[Ben Solo|expectant child]]. Calrissian joked about gifting the boy a little cape and mustache so that he could resemble Uncle Lando.<ref name="Empire's End" /> |
Upon arriving at the Bolo Tanga room, Calrissian met with the Wing Guard Captain [[Gladstone]], who informed him that the Imperials were holed up inside. While they had broken through to the beam outtake shaft, they were trapped by [[poison]]ous fumes. Calrissian then addressed the Imperials and offered to spare their lives if they surrendered. As a further incentive, he promised to give them a hot meal, a warm bed, and to send them away without fear of New Republic prosecution. After ending his address, Calrissian ordered his [[engineer]]s to unseal the door.<ref name="Empire's End" /> |
Upon arriving at the Bolo Tanga room, Calrissian met with the Wing Guard Captain [[Gladstone]], who informed him that the Imperials were holed up inside. While they had broken through to the beam outtake shaft, they were trapped by [[poison]]ous fumes. Calrissian then addressed the Imperials and offered to spare their lives if they surrendered. As a further incentive, he promised to give them a hot meal, a warm bed, and to send them away without fear of New Republic prosecution. After ending his address, Calrissian ordered his [[engineer]]s to unseal the door.<ref name="Empire's End" /> |
||
| − | A dozen Imperials accepted Calrissian's offer and they were taken into custody by the Wing Guard. However, Gladstone then informed the Baron Administrator that an [[Unidentified Imperial sergeant|Imperial sergeant]] was refusing to surrender. Calrissian tried to reason with the [[sergeant]] but the man tried to shoot him. Calrissian was forced to kill the sergeant with his [[Rossmoyne Vitiator pistol]].<ref name="Empire's End" /> |
+ | A dozen Imperials accepted Calrissian's offer and they were taken into custody by the Wing Guard. However, Gladstone then informed the Baron Administrator that an [[Unidentified Imperial sergeant|Imperial sergeant]] was refusing to surrender. Calrissian tried to reason with the [[sergeant]] but the man tried to shoot him. Calrissian was forced to kill the sergeant with his [[Rossmoyne Vitiator pistol]]. After subduing the Imperials, Calrissian chatted with Lobot about the matter of purchasing a nuptial gift. When Calrissian suggested a lamp and a blaster, Lobot opposed the ideas. Calrissian then proposed leaving his Vitiator in a save lock until Organa's son came of age. When Lobot vetoed that, Calrissian then proposed gifting the family a [[Vantillian catamaran]]. Lobot accepted that idea. When Calrissian toyed with the idea of starting his own family, Lobot vetoed that as well. Calrissian then invited Lobot out for a drink but Lobot responded that he did not drink. Calrissian then promised to find a win-win situation for both of them.<ref name="Empire's End" /> |
| + | ===New Republic Era=== |
||
| − | After subduing the Imperials, Calrissian chatted with Lobot about the matter of purchasing a nuptial gift. When Calrissian suggested a lamp and a blaster, Lobot opposed the ideas. Calrissian then proposed leaving his Vitiator in a save lock until Organa's son came of age. When Lobot vetoed that, Calrissian then proposed gifting the family a [[Vantillian catamaran]]. Lobot accepted that idea. When Calrissian toyed with the idea of starting his own family, Lobot vetoed that as well. Calrissian then invited Lobot out for a drink but Lobot responded that he did not drink. Calrissian then promised to find a win-win situation for both of them.<ref name="Empire's End" /> |
||
| + | ====Encountering Embo==== |
||
| + | {{Quote|Look at this place. I can see Han living like this, but Chewbacca?|Lando Calrissian|<ref name="Home Again">{{IDWAdventuresCite-2017|issue=16|story=Flight of the Falcon, Part 3: Home Again}}</ref>}} |
||
| + | [[File:Embo_and_Lando.jpg|thumb|222x222px|left|Lando encounters Embo.]] |
||
| + | Calrissian and Nunb at some point stopped at a [[Unidentified space station (Lando Calrissian)|space station]] to refuel the ''Falcon'', but were unable to take off. The ship was boarded by the bounty hunter [[Embo]], who was attempting to claim a bounty on Calrissian for the destruction of the second Death Star. Calrissian incapacitated Embo, and he and Nunb left him on the station when they departed.<ref name="Home Again" /> |
||
| + | ====Quest for the Phylanx Redux Transmitter==== |
||
| − | ===Encountering Embo=== |
||
| − | {{Quote|Look at this place. I can see Han living like this, but Chewbacca?|Lando Calrissian|Flight of the Falcon, Part 3: Home Again}} |
||
| − | [[File:Embo and Lando.JPG|thumb|222x222px|left|Lando encounters Embo.]] |
||
| − | Calrissian and Nunb at some point stopped at a [[Unidentified space station (Lando Calrissian)|space station]] to refuel the ''Falcon'', but were unable to take off. The ship was boarded by the bounty hunter [[Embo]], who was attempting to claim a bounty on Calrissian for the destruction of the second Death Star. Calrissian incapacitated Embo, and he and Nunb left him on the station when they departed.<ref name="Home Again">{{IDWAdventuresCite|issue=16|story=[[Flight of the Falcon, Part 3: Home Again]]}}</ref>{{Clear}} |
||
| − | |||
| − | ===Quest for the Phylanx Redux Transmitter=== |
||
By [[7 ABY]], Calrissian had taken over [[Calrissian Enterprises]], formerly VylarTech, which manufactured droids for service on Cloud City. [[Impresario]] Calrissian entertained a [[Twi'lek]] diplomatic brigade that included his old acquaintance Kaasha Bateen. That night, he was attacked by his [[protocol droid]] [[DRX-7]] and another droid, who had reprogrammed DRX-7. Calrissian was defended by Lobot, Bateen, and others, but he was still wounded in the shoulder. DRX-7 demanded Calrissian to return the [[Phylanx Redux Transmitter]] to his master, [[Fyzen Gor]]. When Calrissian admitted he had no idea what the Phylanx was, the droid told him the owner of the ''Millennium Falcon'' had stolen it around ten years ago. DRX-7 was eventually subdued, but the droid escaped, telling Calrissian that Gor would unleash a massacre upon Cloud City if he did not return the Phylanx within 72 hours.<ref name="Last Shot" /> |
By [[7 ABY]], Calrissian had taken over [[Calrissian Enterprises]], formerly VylarTech, which manufactured droids for service on Cloud City. [[Impresario]] Calrissian entertained a [[Twi'lek]] diplomatic brigade that included his old acquaintance Kaasha Bateen. That night, he was attacked by his [[protocol droid]] [[DRX-7]] and another droid, who had reprogrammed DRX-7. Calrissian was defended by Lobot, Bateen, and others, but he was still wounded in the shoulder. DRX-7 demanded Calrissian to return the [[Phylanx Redux Transmitter]] to his master, [[Fyzen Gor]]. When Calrissian admitted he had no idea what the Phylanx was, the droid told him the owner of the ''Millennium Falcon'' had stolen it around ten years ago. DRX-7 was eventually subdued, but the droid escaped, telling Calrissian that Gor would unleash a massacre upon Cloud City if he did not return the Phylanx within 72 hours.<ref name="Last Shot" /> |
||
| Line 302: | Line 324: | ||
The next day, Calrissian and the group traveled to the [[New Republic Defense Fleet]] [[New Republic Defense Fleet headquarters|headquarters]] to meet with [[Conder Kyl]], the chief of cyberware. Calrissian requested that Kyl recommend them a [[slicer]] to accompany them, and Kyl recommended the [[Ewok]] [[Peekpa]]. However, they had to promise Peekpa that Chewbacca would be amongst their crew to convince her to join. Solo contacted Chewbacca, who agreed to join them, and they arranged to pick him up from his home on [[Kashyyyk]].<ref name="Last Shot" /> |
The next day, Calrissian and the group traveled to the [[New Republic Defense Fleet]] [[New Republic Defense Fleet headquarters|headquarters]] to meet with [[Conder Kyl]], the chief of cyberware. Calrissian requested that Kyl recommend them a [[slicer]] to accompany them, and Kyl recommended the [[Ewok]] [[Peekpa]]. However, they had to promise Peekpa that Chewbacca would be amongst their crew to convince her to join. Solo contacted Chewbacca, who agreed to join them, and they arranged to pick him up from his home on [[Kashyyyk]].<ref name="Last Shot" /> |
||
| − | === |
+ | ====Searching for Kadara==== |
| + | Retiring from New Republic service, Calrissian settled down and started a family, but tragedy struck when his daughter<ref name="TROSVD" /> [[Kadara Calrissian]]<ref name="Shadow of the Sith" /> disappeared.<ref name="TROSVD" /> Unknown to him,<ref name="Shadow of the Sith" /> it was the nascent [[First Order]] that kidnapped her as part of [[Project Resurrection]], ostensibly to build up their [[First Order Army|army]] but also targeting the leaders of the former Rebel Alliance.<ref name="TROSVD" /> After receiving help from his friends during the initial period of his search, Calrissian eventually traveled alone across the galaxy in search of any sign for his daughter.<ref name="Shadow of the Sith" /> In [[21 ABY]],<ref name="Pasaana Date">''[[Star Wars: The Rise of Skywalker: The Visual Dictionary]]'' states that Landonis Balthazar Calrissian and [[Luke Skywalker]] [[Mission to Pasaana|traveled]] to [[Pasaana]] thirteen [[Standard year|years]] before the [[Hosnian Cataclysm|Starkiller Incident]], which ''[[Star Wars: Galactic Atlas]]'' dates to [[34 ABY]]. Therefore, the mission took place in [[21 ABY]].</ref> years into his search, Calrissian found himself in the [[Sennifer's Beam and Balance]] cantina, unsure if he had come to search for leads on his long-missing daughter or to gamble. However, he then overheard a former [[Jedi hunter]] named [[Ochi]] drunkenly brag about being hired by the [[Sith Eternal]]. Fearful about the possible return of the [[Sith]] but realizing it could be a lead on Kadara, having heard Ochi say something about kidnapping a young girl, Calrissian reached out for information on the girl's family by contacting Shriv Suurgav before deciding to meet up with his old friend Skywalker.<ref name="Shadow of the Sith" /> |
||
| − | After the [[Galactic Concordance]] many Imperials then retreated to the [[Unknown Regions]] where they reestablished themselves as the [[First Order]].<ref name="Visual Dictionary">''[[Star Wars: The Force Awakens: The Visual Dictionary]]''</ref> |
||
| + | With Skywalker having detected a growing darkness in the Force, the two joined forces<ref name="Shadow of the Sith" /> to [[Quest for Exegol|search]] for the Sith world of [[Exegol]]<ref name="TROSVD" /> by locating Ochi and stopping the re-emerging Sith [[viceroy]] [[Exim Panshard]], who had clung onto life within his [[Mask of Viceroy Exim Panshard|mask]]. While Panshard was indeed destroyed, Ochi managed to elude them, dying in the [[Forbidden Valley]] of the planet [[Pasaana]] on a false lead left by the girl's parents. The child, [[Rey Skywalker|Rey]], was left on the planet [[Jakku]] to avoid detection from the Sith, while Calrissian, Skywalker, and Skywalker's old contact [[Komat]] buried her parents, [[Dathan]] and [[Miramir]], on the cold world of [[Neftali]]. After Calrissian took a time to recover on Komat's planet [[Polaar]], he and Skywalker [[Mission to Pasaana|traveled to Pasaana]] but found no trace of Ochi. They did find his ship, the ''[[Bestoon Legacy]]'',<ref name="Shadow of the Sith" /> and Calrissian found himself taken by the humble nature of the native [[Aki-Aki]] people.<ref name="TROSVD" /> Having found himself changed after his time on Polaar and realizing Pasaana would make a good base to search the nearby quadrant for Kadara, Calrissian decided to remain behind<ref name="Shadow of the Sith" /> to live as a hermit in the Forbidden Valley.<ref name="TROSVD" /> |
||
| − | Retiring from New Republic service, Calrissian settled down and started a family, but tragedy struck when his [[Landonis Balthazar Calrissian's daughter|daughter]] disappeared—abducted by the nascent First Order as part of [[Project Resurrection]], ostensibly to build up their [[First Order army|army]] but also targeting the leaders of the former Rebel Alliance.<ref name="TROSVD" /> In [[21 ABY]],<ref name="Pasaana Date">''[[Star Wars: The Rise of Skywalker: The Visual Dictionary]]'' states that Landonis Balthazar Calrissian and [[Luke Skywalker]] [[Mission to Pasaana|traveled]] to [[Pasaana]] thirteen [[Standard year|years]] before the [[Hosnian Cataclysm|Starkiller Incident]], which ''[[Star Wars: Galactic Atlas]]'' dates to [[34 ABY]]. Therefore, the mission took place in [[21 ABY]].</ref> Calrissian joined his old friend Skywalker, who had detected a growing darkness in the Force, and wished to [[Mission to Pasaana|investigate]] a possible resurgence of the [[Sith]]. Through his underworld contacts, Calrissian heard about an assassin, [[Ochi]], who was searching for Sith relics on the desert planet of [[Pasaana]]. Skywalker and Calrissian did not find Ochi on Pasaana, but did find his ship, the ''[[Bestoon Legacy]]''. From their time on Pasaana, Calrissian was taken with the humble nature of the native [[Aki-Aki]] people, and remained on the planet living as a hermit,<ref name="TROSVD" /> although in [[28 ABY]],<ref name="Timeframe">{{Twitter|DelReyStarWars|status/652893780236988420|[[Del Rey]]|quote=So excited to have @claudiagray writing a #StarWars novel with us. SW: New Republic: Bloodline coming 2016. Set 6 years before TFA.|image=File:New Republic Bloodline Twitter Post.jpg}} The tweet in question states that the events of ''Bloodline'' take place six [[Standard year|years]] before the events of the film [[Star Wars: Episode VII The Force Awakens|''Star Wars'': Episode VII ''The Force Awakens'']]. ''[[Star Wars: Galactic Atlas]]'' establishes that the events of ''The Force Awakens'' take place in the year [[34 ABY]] and so using simple math it can be concluded that the events of ''Bloodline'' take place in [[28 ABY]].</ref> he sent a message of support to his old friend [[Senator]] Organa following a [[Politics|political]] scandal arising from revelations about Darth Vader being her true [[Parent|father]].<ref name="Bloodline">[[Bloodline (novel)|''Bloodline'']]</ref> |
||
| + | He also promised Skywalker he would keep an eye on the ''Bestoon Legacy''. As Skywalker took a final look at the starship's [[computer]] logs, Calrissian began to record a new entry in the Calrissian Chronicles series he had made during his younger years.<ref name="Shadow of the Sith" /> While still living on Pasaana<ref name="TROSVD" /> in [[28 ABY]],<ref name="Timeframe">{{Twitter|DelReyStarWars|status/652893780236988420|[[Del Rey]]|quote=So excited to have @claudiagray writing a #StarWars novel with us. SW: New Republic: Bloodline coming 2016. Set 6 years before TFA.|archivefile=File:New Republic Bloodline Twitter Post.jpg}} establishes that the events of [[Bloodline (novel)|''Bloodline'']] take place six [[Standard year|years]] before the events of {{Film|VII}}. ''[[Star Wars: Galactic Atlas]]'' dates the events of ''The Force Awakens'' to [[34 ABY]], so ''Bloodline'' must take place in [[28 ABY]].</ref> he sent a message of support to his old friend [[Senator]] Organa following a [[Politics|political]] scandal arising from revelations about Darth Vader being her true [[Parent|father]].<ref name="Bloodline">[[Bloodline (novel)|''Bloodline'']]</ref> |
||
| − | When [[Rey Skywalker|Rey]], [[Poe Dameron]], [[Finn]], [[Chewbacca]] and [[C-3PO]] [[Mission to Pasaana (Resistance)|arrived]] on Pasaana in [[35 ABY]],{{Fact}} also looking for Ochi, Calrissian saved them from arrest by a First Order stormtrooper, and took them to the bluff on [[Lurch Canyon]] where he and Skywalker had discovered Ochi's starship. Calrissian declined to aid the Resistance further, but eventually changed his mind—assembling and leading the [[citizens' fleet]] which engaged the [[Sith Eternal military|Sith Eternal forces]] at the [[Battle of Exegol]], where Calrissian flew the ''Millennium Falcon'' alongside Chewbacca. Following the battle, Calrissian saw something in former stormtrooper [[Jannah]], and offered to help her find her homeworld and family.<ref name="Star Wars Episode IX: The Rise of Skywalker" /> |
||
| + | |||
| + | ===First Order-Resistance War=== |
||
| + | ====Found on Pasaana==== |
||
| + | {{Quote|It's good to see you too old buddy.|Lando Calrissian reuniting with Chewbacca|<ref name="Star Wars Episode IX: The Rise of Skywalker" />}} |
||
| + | The very girl Calrissian had once hoped to save, Rey, eventually made her way into the [[Resistance]] during the [[First Order-Resistance War]].<ref name="Star Wars Episode IX: The Rise of Skywalker" /> In [[35 ABY]],<ref name="TROS date">''[[Star Wars: The Rise of Skywalker: The Visual Dictionary]]'' dates the events of [[Star Wars: Episode IX The Rise of Skywalker|''Star Wars'': Episode IX ''The Rise of Skywalker'']] to one [[Standard year|year]] after the events of [[Star Wars: Episode VII The Force Awakens|''Star Wars'': Episode VII ''The Force Awakens'']]. As ''[[Star Wars: Galactic Atlas]]'' dates the events of ''The Force Awakens'' to [[34 ABY]], the events of ''The Rise of Skywalker'', which include Rey's [[death]] and resuscitation on [[Exegol]], must occur in [[35 ABY]].</ref> Resistance members Rey, [[Poe Dameron]], [[Finn]], Chewbacca and C-3PO [[Mission to Pasaana (Resistance)|arrived]] on Pasaana, also looking for Ochi. Calrissian saved them from arrest by a [[Stormtrooper (First Order)|First Order stormtrooper]] and took them to the bluff on [[Lurch Canyon]] where he and Skywalker had discovered Ochi's starship. Calrissian declined to aid the Resistance further, but asked Rey to give his love to Organa.<ref name="Star Wars Episode IX: The Rise of Skywalker" /> |
||
| + | |||
| + | ====Passing the torch==== |
||
| + | {{Quote|We had eachother. That's how we won.|Lando Calrissian to Poe Dameron|<ref name="Star Wars Episode IX: The Rise of Skywalker" />}} |
||
| + | Following the death of Organa, Poe paid his respects to the late general and confided that he was not ready. He was soon joined by Calrissian who confided that neither were he, Skywalker, Solo or Organa during the age of the Rebellion. When Dameron asked Calrissian how they defeated an Empire with almost nothing, Calrissian replied that they had each other. Calrissian later attended a meeting where Dameron ordered him and Chewbacca to gather up people of the galaxy to help in their upcoming fight.<ref name="Star Wars Episode IX: The Rise of Skywalker" /> |
||
| + | |||
| + | ====Battle of Exegol==== |
||
| + | {{Quote|Lando you did it. You did it!|Finn to Lando Calrissian|<ref name="Star Wars Episode IX: The Rise of Skywalker" />}} |
||
| + | [[File:Lando_TROS_Promo.jpg|thumb|Lando during First Order-Resistance War]] |
||
| + | As the Resistance suffered heavy losses on Exegol, Calrissian assembled<ref name="Star Wars Episode IX: The Rise of Skywalker" /> the [[Citizens' Fleet]],<ref name="Databank" /> which was comprised of 14,000 starships.<ref name="Bucket List">{{SW|url=news/buckets-list-extra-the-escape-part-2-star-wars-resistance|text=Bucket's List Extra: 5 Fun Facts from "The Escape – Part 2" – ''Star Wars Resistance''}}</ref> As Dameron heard the distress of his comrades on the [[comlink]], he apologized that he thought that they had a chance, but there were too many of them. Just then, Dameron heard Calrissian's voice on the comlink, reassuring him that there were more of them. Shortly later, Calrissian and Chewbacca arrived in the ''Millennium Falcon'', accompanied by a massive Citizens' Fleet, including Rebellion hero [[Wedge Antilles]], who complimented Calrissian's flying while he gunned on the ''Falcon''. The reinforcements reinvigorated the Resistance forces and changed the tide of the battle. Dameron ordered the combined forces to take out the [[Xyston-class Star Destroyer|Sith Star Destroyers]]' world-destroying [[Axial superlaser|superlaser cannons]]. The fleet managed to take down several Sith Star Destroyers.<ref name="Star Wars Episode IX: The Rise of Skywalker" /> |
||
| + | |||
| + | During the battle, Galactic [[Emperor]] [[Darth]] Sidious shot [[Force lightning]] at the fleet, temporarily damaging them, before Rey saved them. Meanwhile, on the<ref name="Star Wars Episode IX: The Rise of Skywalker" /> [[Resurgent-class Star Destroyer|''Resurgent''-class Star Destroyer]]<ref name="TROSVD" /> ''[[Steadfast (Resurgent-class)|Steadfast]]'',<ref name="TROSVD" /> former stormtrooper [[Jannah]] connected the cables on a hijacked [[laser cannon]], which opened [[fire]] on the bridge of the command ship, killing [[Allegiant General]] [[Enric Pryde]]. The Resistance and allied armada took out the remaining Sith forces. Meanwhile, Finn and Jannah clung onto the stricken ''Steadfast'' as it descended into the atmosphere. Dameron wanted to rescue the two Resistance fighters, but Calrissian and Chewbacca used the ''Falcon'' to rescue Finn and Jannah, who jumped to safety before the ''Steadfast'' crashed onto the surface and disintegrated.<ref name="Star Wars Episode IX: The Rise of Skywalker" /> |
||
| + | |||
| + | Following the battle, Finn noticed that Rey was alive, which Calrissian smiled over. Calrissian's fleet inspired the galaxy to [[Uprising against the First Order|stand up against]] the First Order's oppression, which saved multiple planets including Bespin. In the following celebration, Calrissian sat alone and reminisced on his past. In that moment, Jannah asked Calrissian where he was from and he replied that he was from the [[Gold system]]. Calrissian in turn asked Jannah where she was from, and she told him that she did not know, and Calrissian responded by offering to help her find her family.<ref name="Star Wars Episode IX: The Rise of Skywalker" /> |
||
==Personality and traits== |
==Personality and traits== |
||
| + | {{Quote|I mean, he was brave, sure, but always in the service of saving his own hide or profit. But I had also detected that deep down, behind all that smooth talking and those well-ironed capes, there was a whole human being with a conscience and a desperate need to do something worthwhile with his life.|Kaasha Bateen, on Lando Calrissian|<ref name="Last Shot" />}} |
||
| − | {{Quote|Everything you heard about me is true.|Calrissian, to Han Solo|Solo: A Star Wars Story}} |
||
[[File:LandosCrest.png|right|thumb|177x177px|Calrissian's custom emblem.]] |
[[File:LandosCrest.png|right|thumb|177x177px|Calrissian's custom emblem.]] |
||
| − | Lando Calrissian was a human |
+ | Lando Calrissian was a [[Gender|male]] human who,<ref name="Episode V" /> in his youth, had [[Color|black]] [[hair]], brown eyes, and dark skin. As a young man<ref name="Databank" /> and continuing into his later years,<ref name="Shadow of the Sith" /> Calrissian enjoyed playing sabacc.<ref name="Databank" /> In particular, he believed a set of sabacc cards needed to be well worn to be perfect.<ref name="Shadow of the Sith" /> Solo described him as having been a scoundrel.<ref name="Episode V" /> Even though he only took jobs where he could see "the angle,"<ref name="The Angle" /> Calrissian was willing to undertaking dangerous risks. On one occasion, he, Lobot, and some companions stole the Emperor's luxury yacht ''Imperialis''.<ref name="Lando 1" /> Calrissian hoped to profit from selling the ship's treasures.<ref name="Lando 2" /> The heist undertook a dangerous turn when the Sith objects aboard corrupted his companions Aleksin, Pavol,<ref name="Lando 4" /> and Korin Pers.<ref name="Lando 5" /> Calrissian had little appreciation for the Sith and Jedi, regarding them as "con-jobs."<ref name="Lando 4" /> |
| + | [[File:StarWars2020-17-Rahzzah.png|thumb|left|250px|Lando Calrissian, once a galactic gambler who only joined fights if he saw "an angle," took on a respectable and even pro-rebel turn.]] |
||
| − | [[File:Landos Millennium Falcon Fathead.png|left|thumb|177x177px|The ''Millennium Falcon'' under Calrissian's ownership.]] |
||
He was also familiar with the bounty hunter Cha, which led her to spare his life.<ref name="Lando 4" /> Calrissian cared deeply for his friend Lobot and was unwilling to abandon him. The two were close friends. Lobot recognized Calrissian's charm and ability to motivate people and counseled him to find a greater cause than himself and to do good for others.<ref name="Lando 5" /> |
He was also familiar with the bounty hunter Cha, which led her to spare his life.<ref name="Lando 4" /> Calrissian cared deeply for his friend Lobot and was unwilling to abandon him. The two were close friends. Lobot recognized Calrissian's charm and ability to motivate people and counseled him to find a greater cause than himself and to do good for others.<ref name="Lando 5" /> |
||
| − | After |
+ | After Lobot lost his freewill,<ref name="Lando 5" /> Calrissian sought to turn into a respectable businessman, and he turned Cloud City into a mostly-legitimate enterprise.<ref name="Databank" /> He was protective of his people to the point that he was forced to betray Solo and the Rebels to save Cloud City from the wrath of the Empire, for whom Calrissian had no love. He turned against the Empire, however, in order to give his citizens a chance to escape and to save Solo. Although Solo had felt betrayed by Calrissian's actions,<ref name="Episode V" /> the two reconciled after Solo was rescued from Tatooine, and shared a warm embrace during the victory celebration on Endor.<ref name="Episode VI" /> When speaking or referring to Solo by his first name, Calrissian invariably pronounced the name the same way one would pronounce the word "hand," rather than rhyming with "on" as it was normally pronounced.<ref name="Solo" /> |
| − | [[File:X- |
+ | [[File:X-8_Night_Sniper_EaW.png|thumb|right|200px|Calrissian's X-8 Night Sniper, his primary weapon of choice.]] |
| − | Calrissian was known for his jocular and witty personality. Despite the wartime damage to Cloud City, Calrissian was undaunted and preferred to look on the bright side of things by hiring [[refugee]]s to staff his facilities. Calrissian was also a smooth-talking negotiator who managed to convince several Imperial holdouts to surrender in return for being well-treated and allowed to leave Cloud City. Calrissian was also a man of honor who kept his promises. The only person that could exert an influence on Calrissian was his friend and employee Lobot. Calrissian welcomed the news that his friends Solo and Organa were expecting a child and looked forward to being an uncle.<ref name="Empire's End" /> |
+ | Though he had once written the Rebel Alliance off as a lost cause,<ref name="The Angle" /> he came to join their fight against the Empire.<ref name="Episode VI" /> Calrissian was known for his jocular and witty personality. Despite the wartime damage to Cloud City, Calrissian was undaunted and preferred to look on the bright side of things by hiring [[refugee]]s to staff his facilities. Calrissian was also a smooth-talking negotiator who managed to convince several Imperial holdouts to surrender in return for being well-treated and allowed to leave Cloud City. Calrissian was also a man of honor who kept his promises. The only person that could exert an influence on Calrissian was his friend and employee Lobot. Calrissian welcomed the news that his friends Solo and Organa were expecting a child and looked forward to being an uncle.<ref name="Empire's End" /> |
==Skills and abilities== |
==Skills and abilities== |
||
| − | {{Quote|He's the best smuggler around. He's slipped through the Empire's fingers more times than anyone else. He's attractive, too. Sophisticated, with impeccable taste and…charisma. Not to mention his prodigious—|Qi'ra recommends Calrissian|Solo |
+ | {{Quote|He's the best smuggler around. He's slipped through the Empire's fingers more times than anyone else. He's attractive, too. Sophisticated, with impeccable taste and…charisma. Not to mention his prodigious—|Qi'ra recommends Calrissian|<ref name="Solo" />}} |
| − | [[File: |
+ | [[File:Lando_Calrissian_Charming_Gambler_TBG.png|thumb|left|215px|Calrissian was a good shot with his blaster.]] |
| − | Calrissian was a skilled pilot. During the Battle of Taanab, Calrissian performed a piloting maneuver that impressed even himself. He later attributed that maneuver as being one of the reasons why the Rebel Alliance commissioned him as a general and placed him in a command position for the Battle of Endor.<ref name="Episode VI" /> Calrissian was also skilled with a blaster, wielding [[Lando Calrissian's X-8 Night Sniper|an]] [[X-8 Night Sniper]] as his weapon of choice which he used against Azmorigan's thugs with enough proficiency to earn him a compliment from Wren, herself an accomplished markswoman.<ref name="Idiot's Array" /> |
+ | Calrissian was a skilled pilot. During the Battle of Taanab, Calrissian performed a piloting maneuver that impressed even himself. He later attributed that maneuver as being one of the reasons why the Rebel Alliance commissioned him as a general and placed him in a command position for the Battle of Endor.<ref name="Episode VI" /> Calrissian was also skilled with a blaster, wielding [[Lando Calrissian's X-8 Night Sniper|an]] [[X-8 Night Sniper]] as his weapon of choice which he used against Azmorigan's thugs with enough proficiency to earn him a compliment from Wren, herself an accomplished markswoman.<ref name="Idiot's Array" /> While living as a hermit on the planet Pasaana, Lando Calrissian utilized a custom-crafted [[prod pistol]] which he used to fire an arrow at FN-2802.<ref name="Star Wars Episode IX: The Rise of Skywalker" /> |
| + | |||
| + | Calrissian once undertook a dangerous maneuver which involved latching onto a Star Destroyer's tractor beam and causing it to collide with another Star Destroyer. Calrissian boasted of doing this maneuver a thousand times.<ref name="Lando 2" /> Calrissian was also a cunning combatant and once tricked the lightsaber-wielding Aleksin into deactivating his blade so that he could kill him.<ref name="Lando 5" /> Calrissian also owned a [[Rossmoyne Vitiator pistol|Rossmoyne Vitiator]] [[pistol]], which he won in a game of [[Six-Card Gizka Limit]] from a [[spice]]-drunk [[Aybarian]] [[Unidentified Aybarian diplomat|diplomat]]. Calrissian used this pistol to kill an Imperial sergeant who refused to surrender.<ref name="Empire's End" /> Calrissian had decades worth of experience playing sabacc, earning him a great degree of skill in the game and a complete understanding of its tricks.<ref name="Shadow of the Sith" /> Still, throughout his playing career he showed he was more than willing to cheat with cards up his sleeve<ref name="Solo" /> or by counting cards.<ref name="Shadow of the Sith" /> He knew how to make banter at the table<ref name="Solo" /> and was well-practiced in not letting his expression give his hand away.<ref name="Shadow of the Sith" /> |
||
| + | ==Equipment== |
||
| − | Calrissian once undertook a dangerous maneuver which involved latching onto a Star Destroyer's tractor beam and causing it to collide with another Star Destroyer. Calrissian boasted of doing this maneuver a thousand times.<ref name="Lando 2" /> Calrissian was also a cunning combatant and once tricked the lightsaber-wielding Aleksin into deactivating his blade so that he could kill him.<ref name="Lando 5" /> Calrissian also owned a [[Rossmoyne Vitiator pistol|Rossmoyne Vitiator]] [[pistol]], which he won in a game of [[Six-Card Gizka Limit]] from a [[spice]]-drunk [[Aybarian]] [[Unidentified Aybarian diplomat|diplomat]]. Calrissian used this pistol to kill an Imperial sergeant who refused to surrender.<ref name="Empire's End" /> |
||
| + | {{Quote|The cape makes the man.|Lando Calrissian, on capes|<ref name="Battlefront II" />}} |
||
| + | [[File:LandoGambler-DK.png|thumb|right|215px|Calrissian often wore capes.]] |
||
| + | Calrissian had a flamboyant sense of style. He often wore ornate [[clothing]] that included a cape.<ref name="Episode V" /> While having a fateful rematch of sabacc with smuggler Han Solo, Calrissian wore a colorful outfit that consisted of a red tie, white pants with a [[beckon call]] [[Radio transponder|transponder]] [[chit]], a white and blue bespoke cape made from a [[tailor]] on a subtropical moon in the Oseon Belt, and a bright yellow shirt with it's sleeve hiding a green sylop card.<ref name="Solo" /><ref name="Solo DK">''[[Solo: A Star Wars Story The Official Guide]]''</ref> On a mission to rescue Han Solo, he wore [[Tantel armor]] when he disguised himself as a [[Skiff Guard]] pretending to work for crime lord Jabba the Hutt in order to blend in with the crowd at Jabba's Palace. In the disguise he wore dark clothing which included a mask with [[bone]]s on it.<ref name="Episode VI" /> |
||
==Behind the scenes== |
==Behind the scenes== |
||
| − | {{Quote|The audience was so enamored with Lando, they could forgive Lando for anything. If you're able to play a character that can be sort of a bad guy but has redeeming qualities, those are the best characters to play. That was a great challenge to me, to make him palatable, and it worked.|Billy Dee Williams, commenting on his work as Lando Calrissian|Among the Clouds}} |
+ | {{Quote|The audience was so enamored with Lando, they could forgive Lando for anything. If you're able to play a character that can be sort of a bad guy but has redeeming qualities, those are the best characters to play. That was a great challenge to me, to make him palatable, and it worked.|Billy Dee Williams, commenting on his work as Lando Calrissian|<ref name="Among the Clouds">{{InsiderCite|38|Among the Clouds}}</ref>}} |
| − | Lando Calrissian was portrayed by [[Billy Dee Williams]] in [[Star Wars: Episode V The Empire Strikes Back|''Star Wars'': Episode V ''The Empire Strikes Back'']] and [[Star Wars: Episode VI Return of the Jedi|''Star Wars'': Episode VI ''Return of the Jedi'']].<ref name="Episode V" /><ref name="Episode VI" /> Williams reprised the role in "[[Idiot's Array (episode)|Idiot's Array]]," the |
+ | Lando Calrissian was portrayed by [[Billy Dee Williams]] in [[Star Wars: Episode V The Empire Strikes Back|''Star Wars'': Episode V ''The Empire Strikes Back'']] and [[Star Wars: Episode VI Return of the Jedi|''Star Wars'': Episode VI ''Return of the Jedi'']].<ref name="Episode V" /><ref name="Episode VI" /> Williams reprised the role in "[[Idiot's Array (episode)|Idiot's Array]]," the eleventh episode of the [[Star Wars Rebels Season One|first season]] of the animated television series ''[[Star Wars Rebels]]'',<ref name="Idiot's Array" /> and returned in the first episode of the [[Star Wars Rebels Season Two|second season]], "[[Star Wars Rebels: The Siege of Lothal|The Siege of Lothal]]."<ref name="The Siege of Lothal" /> Williams also reprised the role for the game ''[[Star Wars Battlefront II]]''.<ref name="Battlefront II" /> |
| − | [[Lawrence Kasdan]], who co-wrote ''The Empire Strikes Back'', ''Return of the Jedi'' and [[Star Wars: Episode VII The Force Awakens|''The Force Awakens'']], told ''Vanity Fair'' that Calrissian is not in ''The Force Awakens'', but added that he believes that there is a future for the character and that Calrissian is not "finished in any way, shape, or form."<ref name="Lando Future">{{ |
+ | [[Lawrence Kasdan]], who co-wrote ''The Empire Strikes Back'', ''Return of the Jedi'', and [[Star Wars: Episode VII The Force Awakens|''The Force Awakens'']], told ''Vanity Fair'' that Calrissian is not in ''The Force Awakens'', but added that he believes that there is a future for the character and that Calrissian is not "finished in any way, shape, or form."<ref name="Lando Future">{{WebCite|url=https://www.vanityfair.com/hollywood/2015/05/lawrence-kasdan-star-wars-force-awakens|title=Lawrence Kasdan Says There's a Future for Lando Calrissian in Star Wars|date=2015-05-18|work=Vanity Fair|archivedate=20181221015756}}</ref> [[Star Wars: Episode VIII The Last Jedi|''The Last Jedi'']] director [[Rian Johnson]] briefly considered to bring back Lando in the film as the codebreaker that [[Finn]] and [[Rose Tico]] needed to find at Canto Bight, but Calrissian was ultimately written out from the film's script and replaced by [[DJ]] in the role.<ref>{{WebCite|url=https://uk.movies.yahoo.com/star-wars-last-jedi-cast-demand-jj-abrams-brings-back-lando-episode-9-exclusive-170003275.html|title='Star Wars: The Last Jedi' cast demand JJ Abrams brings back Lando for 'Episode 9' (exclusive)|date=2017-12-14|work=Yahoo! Movies|archivedate=20180329144646}}</ref> |
| − | A young Lando Calrissian was portrayed by [[Donald Glover]] in the [[2018]] film ''[[Solo: A Star Wars Story]]''.<ref name="Donald Glover">{{SW|url=news/donald-glover-cast-as-young-lando-calrissian-in-upcoming-han-solo-star-wars-stand-alone-film|text=Donald Glover Cast as Young Lando Calrissian in Upcoming Han Solo ''Star Wars'' Stand-Alone Film |
+ | A young Lando Calrissian was portrayed by [[Donald Glover]] in the [[2018]] film ''[[Solo: A Star Wars Story]]''.<ref name="Donald Glover">{{SW|url=news/donald-glover-cast-as-young-lando-calrissian-in-upcoming-han-solo-star-wars-stand-alone-film|text=Donald Glover Cast as Young Lando Calrissian in Upcoming Han Solo ''Star Wars'' Stand-Alone Film}}</ref> Since the production's beginning, Calrissian was always included in the script as he was necessary to the story.<ref name="Lando From Beginning">{{SW|url=news/solo-lawrence-and-jonathan-kasdan-interview|text=A Portrait of the Scoundrel as a Young Man: Writers Lawrence and Jonathan Kasdan on ''Solo: A Star Wars Story''}}</ref> When asked about the character's depiction in the film, screenwriter [[Jon Kasdan]] confirmed that Lando is meant to be pansexual. "There's a fluidity to Donald and Billy Dee's [portrayal of Lando's] sexuality," he said. "I mean, I would have loved to have gotten a more explicitly LGBT character into this movie. I think it's time, certainly, for that, and I love the fluidity ― sort of the spectrum of sexuality that Donald appeals to and that droids are a part of." Kasdan's father and co-writer was more ambiguous about his thoughts on the character's sexuality, saying "Maybe [Lando's allegedly flirty attitude toward Han] means something, maybe it doesn't."<ref>{{WebCite|url=https://www.huffingtonpost.co.uk/entry/lando-calrissian-sexual-fluidity-solo-star-wars_us_5af77d59e4b00d7e4c1b37a9|title='Star Wars' Writer Confirms Lando's Sexual Fluidity In 'Solo'|date=2018-05-17|work=The Huffington Post|archivedate=20180625075307}}</ref> Kasdan also revealed on Twitter that they had recorded a line that stated Lando's full name was "Landonis Balthazar Calrissian III," but it did not make the final cut of the movie.<ref>{{Twitter|jonkasdan|status/1044823791405289473|[[Jon Kasdan]]|quote=It's actually Landonis Balthazar Calrissian III and we recorded Pheobe saying that but to put in his full name would've meant reediting like two weeks before we had to lock picture and I was told we couldn't. Another regret.|archivefile=File:JKasdan09252018.png}}</ref> |
| − | Billy Dee Williams reprised the role of Lando Calrissian for [[2019]]'s [[Star Wars: Episode IX The Rise of Skywalker|''Star Wars'': Episode IX ''The Rise of Skywalker'']], the final installment of the [[Star Wars saga|Skywalker saga]].<ref name="Episode IX cast">{{SW|url=news/star-wars-episode-ix-cast-announced|text=''Star Wars'': Episode IX Cast Announced |
+ | Billy Dee Williams reprised the role of Lando Calrissian for [[2019]]'s [[Star Wars: Episode IX The Rise of Skywalker|''Star Wars'': Episode IX ''The Rise of Skywalker'']], the final installment of the [[Star Wars saga|Skywalker saga]].<ref name="Episode IX cast">{{SW|url=news/star-wars-episode-ix-cast-announced|text=''Star Wars'': Episode IX Cast Announced}}</ref> [[Reggie Watts]] provided the voice of his disguised form in the film.<ref name="LandoVoice">{{InstagramCite|author=Reggie Watts|date=January 12, 2020|description=Reggie Watts' role in ''The Rise of Skywalker''|quote=I does voice of Lando in mask.|url=p/B7NwZZLhIDo|archivefile=File:ReggieWatts-LandoVoice-January-12-2020.png}}</ref> |
| − | On [[March 18]], [[2021]], [[StarWars.com]] announced that ''Star Wars'' comic books released by Marvel Comics in [[June]] will have Pride Month variant covers that feature gay and transgender artists paired with LGBTQ+ characters.<ref name="SW.com Marvel Celebrates">{{SW|url=news/marvel-star-wars-pride-month-covers|text=Marvel Celebrates Sana Starros and More in ''Star Wars'' Pride Month |
+ | On [[March 18]], [[2021]], [[StarWars.com]] announced that ''Star Wars'' comic books released by Marvel Comics in [[June]] will have Pride Month variant covers that feature gay and transgender artists paired with LGBTQ+ characters.<ref name="SW.com Marvel Celebrates">{{SW|url=news/marvel-star-wars-pride-month-covers|text=Marvel Celebrates Sana Starros and More in ''Star Wars'' Pride Month Comics Covers this June}}</ref> The artwork was revealed on [[May 7]], and includes Calrissian on the [[Star Wars (2020) 14|''Star Wars'' (2020) 14]] [[:File:PrideSW14SByrne.jpg|variant cover]] by [[Stephen Byrne]].<ref name="SW.com Pride Month Covers">{{SW|url=news/marvel-star-wars-pride-month-covers-exclusive|text=Check Out All of Marvel's ''Star Wars'' Pride Month Covers – Exclusive}}</ref> |
===Continuity=== |
===Continuity=== |
||
| − | ''[[Star Wars Rebels: Visual Guide: Epic Battles]]'' states that Calrissian was twenty-six at the time of "[[Idiot's Array (episode)|Idiot's Array]]," placing his birth in around 30 BBY.<ref name="Visual Guide Battles">''[[Star Wars Rebels: Visual Guide: Epic Battles]]''</ref> This conflicts with ''[[Star Wars: The Rise of Skywalker: The Visual Dictionary]]'', which states that Calrissian was approximately 78 years old at the time of ''Star Wars'': Episode IX ''The Rise of Skywalker'', placing his birth in around 43 BBY.<ref name="TROSVD" /> |
+ | ''[[Star Wars Rebels: Visual Guide: Epic Battles]]'' states that Calrissian was twenty-six at the time of "[[Idiot's Array (episode)|Idiot's Array]]," placing his birth in around 30 BBY.<ref name="Visual Guide Battles">''[[Star Wars Rebels: Visual Guide: Epic Battles]]''</ref> This conflicts with ''[[Star Wars: The Rise of Skywalker: The Visual Dictionary]]'', which states that Calrissian was approximately 78 years old at the time of ''Star Wars'': Episode IX ''The Rise of Skywalker'', placing his birth in around 43 BBY.<ref name="TROSVD" /> In the [[2018]] film ''[[Solo: A Star Wars Story]]'', where the main events take place in 10 BBY,<ref name="SoloTimeline">''[[Solo: A Star Wars Story The Official Guide]]'' establishes that the events of ''[[Solo: A Star Wars Story]]'' begin nine [[Standard year|years]] after the [[Proclamation of the New Order|founding]] of the [[Galactic Empire]]. ''[[Star Wars: Galactic Atlas]]'' dates the Empire's founding to [[19 BBY]], meaning the main events of ''Solo'' can be placed in [[10 BBY]].</ref> where Han Solo is 22 years old,<ref name="Birth year Han Solo">''[[Skywalker: A Family at War]]'' states that [[Han Solo]] was [[Reproduction|born]] 13 [[Standard year|years]] before [[Leia Skywalker Organa Solo|Leia Organa]], who was born in [[19 BBY]] according to ''[[Star Wars: Galactic Atlas]]''. Therefore, Han Solo was born in [[32 BBY]].</ref> Calrissian refers to Solo as "this kid" ("I like this kid. You're adorable.") and "the boy" ("What are you doing with hairy and the boy?"),<ref name="Solo" /> indicating that he is several years older than Han Solo and that the information in ''The Visual Dictionary'' is the correct version. |
| + | |||
| + | Calrissian's original name in early drafts was Lando Kadar. Three options for the character were discussed—a trader, a James Bond style of individual, or a clone from the Clone Wars.<ref name="annotated">''[[Star Wars: The Annotated Screenplays]]''</ref> Eventually, he evolved into the role seen in ''Empire Strikes Back''.<ref name="Episode V" /> |
||
==Appearances== |
==Appearances== |
||
{{Scroll_box| |
{{Scroll_box| |
||
| − | *''[[5-Minute Star Wars Villain Stories]]'' |
||
| − | *''[[Star Wars: Galactic Defense]]'' |
||
| − | *''[[Star Wars: Galaxy of Heroes]]'' |
||
*''[[Star Wars: Force Arena]]'' |
*''[[Star Wars: Force Arena]]'' |
||
| + | *''[[Star Wars: Galactic Defense]]'' |
||
| + | *{{SeriesListing|short}} ''[[5-Minute Star Wars Villain Stories]]'' |
||
*''[[Star Wars Battlefront II]]'' |
*''[[Star Wars Battlefront II]]'' |
||
*''[[Lando's Luck]]'' |
*''[[Lando's Luck]]'' |
||
| + | *[[Lando's Luck (audiobook)|''Lando's Luck'' audiobook]] |
||
*''[[Solo: A Star Wars Story]]'' {{1stID|Landonis}} |
*''[[Solo: A Star Wars Story]]'' {{1stID|Landonis}} |
||
*''[[Solo: A Star Wars Story: Expanded Edition]]'' |
*''[[Solo: A Star Wars Story: Expanded Edition]]'' |
||
| Line 359: | Line 406: | ||
*''[[Solo: A Star Wars Story: Meet the Crew]]'' |
*''[[Solo: A Star Wars Story: Meet the Crew]]'' |
||
*[[Solo: A Star Wars Story Adaptation 1|''Solo: A Star Wars Story Adaptation'' 1]] {{Co}} |
*[[Solo: A Star Wars Story Adaptation 1|''Solo: A Star Wars Story Adaptation'' 1]] {{Co}} |
||
| − | *[[Solo: A Star Wars Story Adaptation 3|''Solo: A Star Wars Story Adaptation'' 3]] |
||
| − | *[[Solo: A Star Wars Story Adaptation 4|''Solo: A Star Wars Story Adaptation'' 4]] |
||
| − | *[[Solo: A Star Wars Story Adaptation 5|''Solo: A Star Wars Story Adaptation'' 5]] |
||
| − | *[[Solo: A Star Wars Story Adaptation 6|''Solo: A Star Wars Story Adaptation'' 6]] {{C|Ship only}} |
||
| − | *[[Solo: A Star Wars Story Adaptation 7|''Solo: A Star Wars Story Adaptation'' 7]] |
||
*[[Lando - Double or Nothing 1|''Lando - Double or Nothing'' 1]] |
*[[Lando - Double or Nothing 1|''Lando - Double or Nothing'' 1]] |
||
*[[Lando - Double or Nothing 2|''Lando - Double or Nothing'' 2]] |
*[[Lando - Double or Nothing 2|''Lando - Double or Nothing'' 2]] |
||
| Line 369: | Line 411: | ||
*[[Lando - Double or Nothing 4|''Lando - Double or Nothing'' 4]] |
*[[Lando - Double or Nothing 4|''Lando - Double or Nothing'' 4]] |
||
*[[Lando - Double or Nothing 5|''Lando - Double or Nothing'' 5]] |
*[[Lando - Double or Nothing 5|''Lando - Double or Nothing'' 5]] |
||
| + | *[[Solo: A Star Wars Story Adaptation 3|''Solo: A Star Wars Story Adaptation'' 3]] |
||
| + | *[[Solo: A Star Wars Story Adaptation 4|''Solo: A Star Wars Story Adaptation'' 4]] |
||
| + | *[[Solo: A Star Wars Story Adaptation 5|''Solo: A Star Wars Story Adaptation'' 5]] |
||
| + | *[[Solo: A Star Wars Story Adaptation 6|''Solo: A Star Wars Story Adaptation'' 6]] {{C|Ship only}} |
||
| + | *[[Solo: A Star Wars Story Adaptation 7|''Solo: A Star Wars Story Adaptation'' 7]] |
||
*{{Galaxy of Adventures|Han Solo - From Smuggler to General}} |
*{{Galaxy of Adventures|Han Solo - From Smuggler to General}} |
||
| + | *''[[Choose Your Destiny: A Han & Chewie Adventure]]'' {{Mo}} |
||
| + | *[[Han Solo & Chewbacca 9|''Han Solo & Chewbacca'' 9]] {{Mo}} |
||
*''[[Lost Stars]]'' {{Voice}} |
*''[[Lost Stars]]'' {{Voice}} |
||
| + | *[[Lost Stars (audiobook)|''Lost Stars'' audiobook]] {{Voice}} |
||
*[[Lost Stars (webcomic)|''Lost Stars'' webcomic]] |
*[[Lost Stars (webcomic)|''Lost Stars'' webcomic]] |
||
| − | *{{Rebels|Idiot's Array (episode) |
+ | *{{Rebels|Idiot's Array (episode)}} |
*''[[Always Bet on Chopper]]'' |
*''[[Always Bet on Chopper]]'' |
||
*{{InsiderCite|158|Rebel Bluff}} |
*{{InsiderCite|158|Rebel Bluff}} |
||
| Line 379: | Line 429: | ||
*{{Rebels|Brothers of the Broken Horn}} {{Mo}} |
*{{Rebels|Brothers of the Broken Horn}} {{Mo}} |
||
*''[[Forces of Destiny: The Leia Chronicles]]'' |
*''[[Forces of Destiny: The Leia Chronicles]]'' |
||
| − | *{{SWRMCite||Off the Rails}} |
+ | *{{SWRMCite|31|Off the Rails (comic)}} |
*{{Rebels|Imperial Supercommandos}} {{Mo}} |
*{{Rebels|Imperial Supercommandos}} {{Mo}} |
||
*{{Rebels|The Wynkahthu Job}} {{Mo}} |
*{{Rebels|The Wynkahthu Job}} {{Mo}} |
||
| + | *{{SWRMCite|37|Fifth and Final}} |
||
*{{Rebels|Trials of the Darksaber}} {{C|Art only}} |
*{{Rebels|Trials of the Darksaber}} {{C|Art only}} |
||
*{{Rebels|The Occupation}} {{Mo}} |
*{{Rebels|The Occupation}} {{Mo}} |
||
| − | *{{SWRMCite||Fifth and Final}} |
||
| − | *''[[Choose Your Destiny: A Han & Chewie Adventure]]'' {{Mo}} |
||
| − | *{{Galaxy of Adventures|Chewie vs. Holochess - Let the Wookiee Win}} |
||
*''[[A New Hope: The Princess, the Scoundrel, and the Farm Boy]]'' {{Imo}} |
*''[[A New Hope: The Princess, the Scoundrel, and the Farm Boy]]'' {{Imo}} |
||
| + | *[[A New Hope: The Princess, the Scoundrel, and the Farm Boy (audiobook)|''A New Hope: The Princess, the Scoundrel, and the Farm Boy'' audiobook]] {{Imo}} |
||
*''[[The Adventures of Luke Skywalker, Jedi Knight]]'' |
*''[[The Adventures of Luke Skywalker, Jedi Knight]]'' |
||
| + | *''[[A Leader Named Leia]]'' |
||
*''[[Star Wars: The Original Trilogy – A Graphic Novel]]'' |
*''[[Star Wars: The Original Trilogy – A Graphic Novel]]'' |
||
| − | *''[[A Leader Named Leia]]'' |
||
*''[[Star Wars Battlefront]]'' {{C|DLC}} |
*''[[Star Wars Battlefront]]'' {{C|DLC}} |
||
| − | *{{ |
+ | *{{StoryCite|story=You Owe Me a Ride|book=From a Certain Point of View}} {{Mo}} |
| − | *{{ |
+ | *{{StoryCite|story=You Owe Me a Ride|book=From a Certain Point of View (audiobook)|bformatted=''From a Certain Point of View'' audiobook}} {{Mo}} |
| + | *{{Galaxy of Adventures|Chewie vs. Holochess - Let the Wookiee Win}} |
||
| − | *[[Star Wars (2015) 5|''Star Wars'' 5]] {{Mo}} |
||
| + | *{{StoryCite|story=The Angle|book=From a Certain Point of View}} |
||
| − | *[[Star Wars 33|''Star Wars'' 33]] |
||
| + | *{{StoryCite|story=The Angle|book=From a Certain Point of View (audiobook)|bformatted=''From a Certain Point of View'' audiobook}} |
||
| − | *[[Star Wars 34|''Star Wars'' 34]] |
||
| − | *[[Star Wars 56|''Star Wars'' 56]] {{Mo}} |
||
| − | *''[[Star Wars: Commander]]'' {{Hologram}} |
||
*[[Lando 1|''Lando'' 1]] |
*[[Lando 1|''Lando'' 1]] |
||
*[[Lando 2|''Lando'' 2]] |
*[[Lando 2|''Lando'' 2]] |
||
| − | *{{ |
+ | *{{StoryCite|story=Lando's Big Score|book=Galactic Adventures Storybook Collection}} |
*[[Lando 3|''Lando'' 3]] |
*[[Lando 3|''Lando'' 3]] |
||
*[[Lando 4|''Lando'' 4]] |
*[[Lando 4|''Lando'' 4]] |
||
*[[Lando 5|''Lando'' 5]] |
*[[Lando 5|''Lando'' 5]] |
||
| + | *''[[Star Wars: Commander]]'' {{Hologram}} |
||
| + | *[[Star Wars (2015) 5|''Star Wars'' (2015) 5]] {{Mo}} |
||
| + | *[[Star Wars (2015) 33|''Star Wars'' (2015) 33]] |
||
| + | *[[Star Wars (2015) 34|''Star Wars'' (2015) 34]] |
||
| + | *[[Star Wars (2015) 56|''Star Wars'' (2015) 56]] {{Mo}} |
||
*[[Age of Rebellion - Lando Calrissian 1|''Age of Rebellion - Lando Calrissian'' 1]] |
*[[Age of Rebellion - Lando Calrissian 1|''Age of Rebellion - Lando Calrissian'' 1]] |
||
| + | *{{IDWAdventuresCite-2020|annual=2021|story=The Coin}} |
||
*''[[Choose Your Destiny: A Smuggler Mission]]'' |
*''[[Choose Your Destiny: A Smuggler Mission]]'' |
||
| + | *{{Film|V}} {{1st}} |
||
| − | *{{IDWAdventuresCite|year=2017|issue=10|story=[[Tales from Wild Space: Family Affair, Part 1]]}} |
||
| − | *{{IDWAdventuresCite|issue=11|story=[[Tales from Wild Space: Family Affair, Part 2]]}} |
||
| − | *[[Star Wars: Episode V The Empire Strikes Back|''Star Wars'': Episode V ''The Empire Strikes Back'']] {{1st}} |
||
| − | *{{Galaxy of Adventures|Rendezvous at Bespin}} |
||
| − | *{{Galaxy of Adventures|Clash on Cloud City}} |
||
*''[[The Empire Strikes Back: So You Want to Be a Jedi?]]'' |
*''[[The Empire Strikes Back: So You Want to Be a Jedi?]]'' |
||
*[[The Empire Strikes Back: So You Want to Be a Jedi? (audiobook)|''The Empire Strikes Back: So You Want to Be a Jedi?'' audiobook]] |
*[[The Empire Strikes Back: So You Want to Be a Jedi? (audiobook)|''The Empire Strikes Back: So You Want to Be a Jedi?'' audiobook]] |
||
*[[Star Wars: The Empire Strikes Back (paperback novel)|''Star Wars: The Empire Strikes Back'' junior novelization]] |
*[[Star Wars: The Empire Strikes Back (paperback novel)|''Star Wars: The Empire Strikes Back'' junior novelization]] |
||
*''[[Episode V: The Empire Strikes Back Read-Along Storybook and CD]]'' |
*''[[Episode V: The Empire Strikes Back Read-Along Storybook and CD]]'' |
||
| + | *{{StoryCite|story=Faith in an Old Friend|book=From a Certain Point of View: The Empire Strikes Back}} {{C|Appears on screen}} |
||
| + | *{{StoryCite|story=Faith in an Old Friend|book=From a Certain Point of View: The Empire Strikes Back (audiobook)|bformatted=''From a Certain Point of View: The Empire Strikes Back'' audiobook}} {{C|Appears on screen}} |
||
| + | *{{Galaxy of Adventures|Rendezvous at Bespin}} |
||
*''[[Captured on Cloud City]]'' |
*''[[Captured on Cloud City]]'' |
||
| − | *{{ |
+ | *{{StoryCite|story=Fake It Till You Make It|book=From a Certain Point of View: The Empire Strikes Back}} |
| − | *{{ |
+ | *{{StoryCite|story=Fake It Till You Make It|book=From a Certain Point of View: The Empire Strikes Back (audiobook)|bformatted=''From a Certain Point of View: The Empire Strikes Back'' audiobook}} |
| − | *{{ |
+ | *{{StoryCite|story=Into the Clouds|book=From a Certain Point of View: The Empire Strikes Back}} {{Voice}} |
| − | *{{ |
+ | *{{StoryCite|story=Into the Clouds|book=From a Certain Point of View: The Empire Strikes Back (audiobook)|bformatted=''From a Certain Point of View: The Empire Strikes Back'' audiobook}} {{Voice}} |
| − | *{{ |
+ | *{{StoryCite|story=Due on Batuu|book=From a Certain Point of View: The Empire Strikes Back}} |
| − | *{{ |
+ | *{{StoryCite|story=Due on Batuu|book=From a Certain Point of View: The Empire Strikes Back (audiobook)|bformatted=''From a Certain Point of View: The Empire Strikes Back'' audiobook}} |
| − | *{{ |
+ | *{{StoryCite|story=The Witness|book=From a Certain Point of View: The Empire Strikes Back}} |
| − | *{{ |
+ | *{{StoryCite|story=The Witness|book=From a Certain Point of View: The Empire Strikes Back (audiobook)|bformatted=''From a Certain Point of View: The Empire Strikes Back'' audiobook}} |
| + | *{{Galaxy of Adventures|Clash on Cloud City}} |
||
| − | *{{Shortstory|story=Right-Hand Man|book=From a Certain Point of View: The Empire Strikes Back}} {{Voice}} |
||
| + | *{{StoryCite|story=The Man Who Built Cloud City|book=From a Certain Point of View: The Empire Strikes Back}} {{Voice}} |
||
| − | *[[Star Wars (2020) 1|''Star Wars'' 1]] |
||
| + | *{{StoryCite|story=The Man Who Built Cloud City|book=From a Certain Point of View: The Empire Strikes Back (audiobook)|bformatted=''From a Certain Point of View: The Empire Strikes Back'' audiobook}} {{Voice}} |
||
| − | *[[Star Wars (2020) 2|''Star Wars'' 2]] |
||
| + | *{{StoryCite|story=Bespin Escape|book=From a Certain Point of View: The Empire Strikes Back}} {{Mo}} |
||
| − | *[[Star Wars (2020) 3|''Star Wars'' 3]] |
||
| + | *{{StoryCite|story=Bespin Escape|book=From a Certain Point of View: The Empire Strikes Back (audiobook)|bformatted=''From a Certain Point of View: The Empire Strikes Back'' audiobook}} {{Mo}} |
||
| − | *[[Star Wars (2020) 4|''Star Wars'' 4]] |
||
| + | *{{StoryCite|story=The Backup Backup Plan|book=From a Certain Point of View: The Empire Strikes Back}} {{Mo}} |
||
| − | *[[Star Wars (2020) 6|''Star Wars'' 6]] |
||
| + | *{{StoryCite|story=The Backup Backup Plan|book=From a Certain Point of View: The Empire Strikes Back (audiobook)|bformatted=''From a Certain Point of View: The Empire Strikes Back'' audiobook}} {{Mo}} |
||
| − | *[[Star Wars (2020) 8|''Star Wars'' 8]] |
||
| − | *[[Star Wars (2020) |
+ | *[[Star Wars (2020) 1|''Star Wars'' (2020) 1]] |
| − | *[[Star Wars (2020) |
+ | *[[Star Wars (2020) 2|''Star Wars'' (2020) 2]] |
| + | *{{StoryCite|story=Right-Hand Man|book=From a Certain Point of View: The Empire Strikes Back}} {{Voice}} |
||
| − | *[[Star Wars (2020) 11|''Star Wars'' 11]] |
||
| + | *{{StoryCite|story=Right-Hand Man|book=From a Certain Point of View: The Empire Strikes Back (audiobook)|bformatted=''From a Certain Point of View: The Empire Strikes Back'' audiobook}} {{Voice}} |
||
| − | *[[Star Wars (2020) 12|''Star Wars'' 12]] {{Mo}} |
||
| − | *[[Star Wars (2020) |
+ | *[[Star Wars (2020) 3|''Star Wars'' (2020) 3]] |
| − | *[[Star Wars (2020) |
+ | *[[Star Wars (2020) 4|''Star Wars'' (2020) 4]] |
| + | *[[Star Wars (2020) 6|''Star Wars'' (2020) 6]] |
||
| + | *[[Star Wars (2020) 8|''Star Wars'' (2020) 8]] |
||
| + | *[[Star Wars (2020) 9|''Star Wars'' (2020) 9]] |
||
| + | *[[Star Wars (2020) 10|''Star Wars'' (2020) 10]] |
||
| + | *[[Star Wars (2020) 11|''Star Wars'' (2020) 11]] |
||
| + | *[[Star Wars (2020) 12|''Star Wars'' (2020) 12]] {{Mo}} |
||
| + | *[[Star Wars (2020) 13|''Star Wars'' (2020) 13]] {{Mo}} |
||
| + | *[[War of the Bounty Hunters 1|''War of the Bounty Hunters'' 1]] |
||
| + | *[[Star Wars (2020) 14|''Star Wars'' (2020) 14]] |
||
| + | *[[Star Wars (2020) 15|''Star Wars'' (2020) 15]] |
||
| + | *[[War of the Bounty Hunters 2|''War of the Bounty Hunters'' 2]] |
||
| + | *[[War of the Bounty Hunters 3|''War of the Bounty Hunters'' 3]] |
||
| + | *[[Star Wars (2020) 16|''Star Wars'' (2020) 16]] |
||
| + | *[[Darth Vader (2020) 16|''Darth Vader'' (2020) 16]] |
||
| + | *[[War of the Bounty Hunters 4|''War of the Bounty Hunters'' 4]] |
||
| + | *[[Star Wars (2020) 17|''Star Wars'' (2020) 17]] |
||
| + | *[[War of the Bounty Hunters 5|''War of the Bounty Hunters'' 5]] |
||
| + | *[[Star Wars (2020) 18|''Star Wars'' (2020) 18]] |
||
| + | *[[Star Wars (2020) 22|''Star Wars'' (2020) 22]] {{Mo}} |
||
| + | *[[Star Wars (2020) 26|''Star Wars'' (2020) 26]] |
||
| + | *[[Star Wars (2020) 27|''Star Wars'' (2020) 27]] |
||
| + | *[[Revelations (2022) 1|''Revelations'' (2022) 1]] {{Vision|Darth Vader}} |
||
| + | *[[Sana Starros 4|''Sana Starros'' 4]] {{C|Variant cover only}} |
||
| + | *[[Bounty Hunters 32|''Bounty Hunters'' 32]] {{C|Variant cover only}} |
||
| + | *[[Star Wars (2020) 29|''Star Wars'' (2020) 29]] |
||
| + | *[[Star Wars (2020) 30|''Star Wars'' (2020) 30]] |
||
| + | *[[Star Wars (2020) 31|''Star Wars'' (2020) 31]] |
||
| + | *[[Star Wars (2020) 32|''Star Wars'' (2020) 32]] |
||
| + | *[[Star Wars (2020) 33|''Star Wars'' (2020) 33]] |
||
| + | *[[Star Wars (2020) 34|''Star Wars'' (2020) 34]] {{Mo}} |
||
| + | *[[Star Wars (2020) 36|''Star Wars'' (2020) 36]] |
||
| + | *[[Dark Droids 1|''Dark Droids'' 1]] |
||
| + | *[[Star Wars (2020) 37|''Star Wars'' (2020) 37]] |
||
| + | *[[Dark Droids: D-Squad 4|''Dark Droids: D-Squad'' 4]] |
||
| + | *[[Star Wars (2020) 38|''Star Wars'' (2020) 38]] |
||
| + | *[[Star Wars (2020) 39|''Star Wars'' (2020) 39]] |
||
| + | *[[Darth Vader (2020) 39|''Darth Vader'' (2020) 39]] {{C|Variant cover only}} |
||
| + | *[[Star Wars (2020) 40|''Star Wars'' (2020) 40]] |
||
| + | *[[Dark Droids 5|''Dark Droids'' 5]] |
||
| + | *[[Star Wars (2020) 41|''Star Wars'' (2020) 41]] |
||
| + | *[[Doctor Aphra (2020) 40|''Doctor Aphra'' (2020) 40]] |
||
| + | *[[Star Wars (2020) 43|''Star Wars'' (2020) 43]] {{Mo}} |
||
| + | *[[Star Wars (2020) 44|''Star Wars'' (2020) 44]] |
||
| + | *{{StoryCite|story=A Trick of the Mind|book=Revelations (2023) 1|bformatted=''Revelations'' (2023) 1}} {{Voice}} |
||
| + | *[[Star Wars (2020) 45|''Star Wars'' (2020) 45]] |
||
| + | *[[Star Wars (2020) 46|''Star Wars'' (2020) 46]] |
||
| + | *[[Star Wars (2020) 47|''Star Wars'' (2020) 47]] |
||
| + | *[[Star Wars/Darth Vader 1|''Star Wars/Darth Vader'' 1]] |
||
*''[[Moving Target: A Princess Leia Adventure]]'' {{Mo}} |
*''[[Moving Target: A Princess Leia Adventure]]'' {{Mo}} |
||
| + | *[[Moving Target: A Princess Leia Adventure (audiobook)|''Moving Target: A Princess Leia Adventure'' audiobook]] {{Mo}} |
||
| + | *[[Return of the Jedi – Lando 1|''Return of the Jedi – Lando'' 1]] |
||
| + | *[[Hyperspace Stories 12|''Hyperspace Stories'' 12]] |
||
*[[Age of Rebellion - Princess Leia 1|''Age of Rebellion - Princess Leia'' 1]] |
*[[Age of Rebellion - Princess Leia 1|''Age of Rebellion - Princess Leia'' 1]] |
||
| + | *''[[Tales from the Rancor Pit]]'' |
||
| − | *[[Star Wars: Episode VI Return of the Jedi|''Star Wars'': Episode VI ''Return of the Jedi'']] |
||
| + | *[[Return of the Jedi – The Rebellion 1|''Return of the Jedi – The Rebellion'' 1]] {{C|Variant cover only}} |
||
| − | *{{Galaxy of Adventures|Leia and Han - The Han Rescue}} {{Flash}} |
||
| + | *{{InsiderCite|222|Galactic Tales: Valnir and Laizhu}} |
||
| − | *''[[Return of the Jedi: Beware the Power of the Dark Side!]]'' |
||
| + | *{{Film|VI}} |
||
*[[Star Wars: Return of the Jedi (paperback novel)|''Star Wars: Return of the Jedi'' junior novelization]] |
*[[Star Wars: Return of the Jedi (paperback novel)|''Star Wars: Return of the Jedi'' junior novelization]] |
||
| + | *''[[Return of the Jedi: Beware the Power of the Dark Side!]]'' |
||
| + | *[[Return of the Jedi: Beware the Power of the Dark Side! (audiobook)|''Return of the Jedi: Beware the Power of the Dark Side!'' audiobook]] |
||
*''[[Episode VI: Return of the Jedi Read-Along Storybook and CD]]'' |
*''[[Episode VI: Return of the Jedi Read-Along Storybook and CD]]'' |
||
| − | * |
+ | *[[Rescue from Jabba's Palace (World of Reading)|''Rescue from Jabba's Palace'']] |
| + | *{{Galaxy of Adventures|Leia and Han - The Han Rescue}} {{Flash}} |
||
| − | *{{InsiderCite|issue1=149|issue2=150|Blade Squadron (short story)|Blade Squadron}} {{Mo}} |
||
| + | *{{StoryCite|story=My Mouth Never Closes|book=From a Certain Point of View: Return of the Jedi}} |
||
| + | *{{StoryCite|story=My Mouth Never Closes|book=From a Certain Point of View: Return of the Jedi (audiobook)|bformatted=''From a Certain Point of View: Return of the Jedi'' audiobook}} |
||
| + | *{{StoryCite|story=The Chronicler|book=From a Certain Point of View: Return of the Jedi}} |
||
| + | *{{StoryCite|story=The Chronicler|book=From a Certain Point of View: Return of the Jedi (audiobook)|bformatted=''From a Certain Point of View: Return of the Jedi'' audiobook}} |
||
| + | *{{StoryCite|story=The Burden of Leadership|book=From a Certain Point of View: Return of the Jedi}} |
||
| + | *{{StoryCite|story=The Burden of Leadership|book=From a Certain Point of View: Return of the Jedi (audiobook)|bformatted=''From a Certain Point of View: Return of the Jedi'' audiobook}} |
||
| + | *{{InsiderCite|issue1=149|issue2=150|Blade Squadron (short story)}} {{Mo}} |
||
| + | *{{StoryCite|story=The Buy-In|book=From a Certain Point of View: Return of the Jedi}} |
||
| + | *{{StoryCite|story=The Buy-In|book=From a Certain Point of View: Return of the Jedi (audiobook)|bformatted=''From a Certain Point of View: Return of the Jedi'' audiobook}} |
||
| + | *{{StoryCite|story=When Fire Marked the Sky|book=From a Certain Point of View: Return of the Jedi}} |
||
| + | *{{StoryCite|story=When Fire Marked the Sky|book=From a Certain Point of View: Return of the Jedi (audiobook)|bformatted=''From a Certain Point of View: Return of the Jedi'' audiobook}} |
||
| + | *{{StoryCite|story=The Extra Five Percent|book=From a Certain Point of View: Return of the Jedi}} |
||
| + | *{{StoryCite|story=The Extra Five Percent|book=From a Certain Point of View: Return of the Jedi (audiobook)|bformatted=''From a Certain Point of View: Return of the Jedi'' audiobook}} |
||
| + | *{{StoryCite|story=Ackbar (comic)|book=From a Certain Point of View: Return of the Jedi}} |
||
| + | *{{StoryCite|story=Ackbar (comic)|book=From a Certain Point of View: Return of the Jedi (audiobook)|bformatted=''From a Certain Point of View: Return of the Jedi'' audiobook}} |
||
| + | *{{StoryCite|story=The Impossible Flight of Ash Angels|book=From a Certain Point of View: Return of the Jedi}} {{Voice}} |
||
| + | *{{StoryCite|story=The Impossible Flight of Ash Angels|book=From a Certain Point of View: Return of the Jedi (audiobook)|bformatted=''From a Certain Point of View: Return of the Jedi'' audiobook}} {{Voice}} |
||
*[[Shattered Empire 1|''Shattered Empire'' 1]] |
*[[Shattered Empire 1|''Shattered Empire'' 1]] |
||
| + | *{{StoryCite|story=Brotherhood (short story)|book=From a Certain Point of View: Return of the Jedi}} |
||
| − | *{{IDWAdventuresCite|issue=23|story=[[A Race for Answers]]}} |
||
| + | *{{StoryCite|story=Brotherhood|book=From a Certain Point of View: Return of the Jedi (audiobook)|bformatted=''From a Certain Point of View: Return of the Jedi'' audiobook}} |
||
| + | *''[[The Princess and the Scoundrel]]'' |
||
| + | *[[The Princess and the Scoundrel (audiobook)|''The Princess and the Scoundrel'' audiobook]] |
||
| + | *[[Return of the Jedi – Max Rebo 1|''Return of the Jedi – Max Rebo'' 1]] {{Flash}} |
||
| + | *''[[Star Wars: Uprising]]'' |
||
| + | *{{IDWAdventuresCite-2017|issue=23|story=A Race for Answers}} |
||
*[[Shattered Empire 3|''Shattered Empire'' 3]] |
*[[Shattered Empire 3|''Shattered Empire'' 3]] |
||
| − | *{{IDWAdventuresCite| |
+ | *{{IDWAdventuresCite-2017|annual=2019|story=Hare-Brained Heist}} |
*[[Alphabet Squadron (novel)|''Alphabet Squadron'']] {{Mo}} |
*[[Alphabet Squadron (novel)|''Alphabet Squadron'']] {{Mo}} |
||
| + | *[[Alphabet Squadron (audiobook)|''Alphabet Squadron'' audiobook]] {{Mo}} |
||
*[[Aftermath (novel)|''Aftermath'']] {{Mo}} |
*[[Aftermath (novel)|''Aftermath'']] {{Mo}} |
||
| + | *[[Aftermath (audiobook)|''Aftermath'' audiobook]] {{Mo}} |
||
| − | *''[[Star Wars: Uprising]]'' |
||
| + | *[[Star Wars Adventures: Ghosts of Vader's Castle 2|''Star Wars Adventures: Ghosts of Vader's Castle'' 2]] {{Mo}} {{C|In dream}} |
||
*''[[Star Wars: Squadrons]]'' {{Mo}} |
*''[[Star Wars: Squadrons]]'' {{Mo}} |
||
*''[[Aftermath: Life Debt]]'' {{Mo}} |
*''[[Aftermath: Life Debt]]'' {{Mo}} |
||
| + | *[[Aftermath: Life Debt (audiobook)|''Aftermath: Life Debt'' audiobook]] {{Mo}} |
||
*''[[Aftermath: Empire's End]]'' |
*''[[Aftermath: Empire's End]]'' |
||
| + | *[[Aftermath: Empire's End (audiobook)|''Aftermath: Empire's End'' audiobook]] |
||
| + | *{{StoryCite|story=The Tree of Life|book=Life Day Treasury}} {{Imo}} |
||
*''[[Last Shot]]'' |
*''[[Last Shot]]'' |
||
*[[Last Shot (audiobook)|''Last Shot'' audiobook]] |
*[[Last Shot (audiobook)|''Last Shot'' audiobook]] |
||
| − | *''[[ |
+ | *''[[Shadow of the Sith]]'' |
| + | *[[Shadow of the Sith (audiobook)|''Shadow of the Sith'' audiobook]] |
||
*[[Bloodline (novel)|''Bloodline'']] {{Mo}} |
*[[Bloodline (novel)|''Bloodline'']] {{Mo}} |
||
| + | *[[Bloodline (audiobook)|''Bloodline'' audiobook]] {{Mo}} |
||
*[[The Rise of Kylo Ren 4|''The Rise of Kylo Ren'' 4]] {{Vision|Kylo Ren}} |
*[[The Rise of Kylo Ren 4|''The Rise of Kylo Ren'' 4]] {{Vision|Kylo Ren}} |
||
| + | *''[[The Legends of Luke Skywalker]]'' |
||
| + | *[[The Legends of Luke Skywalker (audiobook)|''The Legends of Luke Skywalker'' audiobook]] |
||
*''[[Join the Resistance]]'' {{Mo}} |
*''[[Join the Resistance]]'' {{Mo}} |
||
*''[[Star Wars: The Force Awakens: A Junior Novel]]'' {{Mo}} |
*''[[Star Wars: The Force Awakens: A Junior Novel]]'' {{Mo}} |
||
| + | *[[Star Wars: The Force Awakens: A Junior Novel (audiobook)|''Star Wars: The Force Awakens: A Junior Novel'' audiobook]] {{Mo}} |
||
| − | *{{IDWAdventuresCite|Ashcan}} {{Flash}} |
||
| + | *''[[Star Wars Adventures Ashcan]]'' {{Flash}} |
||
| − | *{{IDWAdventuresCite|issue=16|story=[[Flight of the Falcon, Part 3: Home Again]]}} {{Flash}} |
||
| + | *{{IDWAdventuresCite-2017|issue=16|story=Flight of the Falcon, Part 3: Home Again}} {{Flash}} |
||
| − | *[[Star Wars: Episode IX The Rise of Skywalker|''Star Wars'': Episode IX ''The Rise of Skywalker'']] |
||
| + | *[[Halcyon Legacy 4|''Halcyon Legacy'' 4]] {{Flash}} |
||
| + | *{{IDWAdventuresCite-2017|issue=10|story=Tales from Wild Space: Family Affair, Part 1}} {{Flash}} |
||
| + | *{{IDWAdventuresCite-2017|issue=11|story=Tales from Wild Space: Family Affair, Part 2}} {{Flash}} |
||
| + | *{{Film|IX}} |
||
*''[[Star Wars: The Rise of Skywalker: Expanded Edition]]'' |
*''[[Star Wars: The Rise of Skywalker: Expanded Edition]]'' |
||
| − | * |
+ | *[[Star Wars: The Rise of Skywalker: Expanded Edition (audiobook)|''Star Wars: The Rise of Skywalker: Expanded Edition'' audiobook]] |
| + | *''[[Star Wars: The Rise of Skywalker: A Junior Novel]]'' |
||
| + | *[[Star Wars: The Rise of Skywalker: A Junior Novel (audiobook)|''Star Wars: The Rise of Skywalker: A Junior Novel'' audiobook]] |
||
| + | *''[[Star Wars: Galaxy of Heroes]]'' |
||
| + | }} |
||
===Non-canon appearances=== |
===Non-canon appearances=== |
||
| + | {{Scroll_box| |
||
*''[[Disney Infinity 3.0]]'' |
*''[[Disney Infinity 3.0]]'' |
||
| + | *{{CelebrateTheSeason|Cruising with Luke}} |
||
*''[[Star Wars Epic Yarns: The Empire Strikes Back]]'' |
*''[[Star Wars Epic Yarns: The Empire Strikes Back]]'' |
||
*{{All-Stars|Dealing with Lando/Han and Chewie Strike Back}} |
*{{All-Stars|Dealing with Lando/Han and Chewie Strike Back}} |
||
*{{The Freemaker Adventures|The Lost Treasure of Cloud City}} |
*{{The Freemaker Adventures|The Lost Treasure of Cloud City}} |
||
*{{The Freemaker Adventures|Return of the Kyber Saber}} {{Mo}} |
*{{The Freemaker Adventures|Return of the Kyber Saber}} {{Mo}} |
||
| − | *{{The Freemaker Adventures|Beware, the Gamorrean Flu!}} |
||
*{{The Freemaker Adventures|A New Home}} |
*{{The Freemaker Adventures|A New Home}} |
||
| + | *{{The Freemaker Adventures|Beware, the Gamorrean Flu!}} |
||
*''[[Star Wars Epic Yarns: Return of the Jedi]]'' |
*''[[Star Wars Epic Yarns: Return of the Jedi]]'' |
||
*{{The Freemaker Adventures|Return of the Return of the Jedi}} |
*{{The Freemaker Adventures|Return of the Return of the Jedi}} |
||
| + | *{{CelebrateTheSeason|May the Fourth}} |
||
*{{Droid Tales|Exit from Endor}} {{C|Appears as hooded figure}} |
*{{Droid Tales|Exit from Endor}} {{C|Appears as hooded figure}} |
||
*{{Droid Tales|Crisis on Coruscant}} |
*{{Droid Tales|Crisis on Coruscant}} |
||
| − | *{{Droid Tales|Mission to Mos Eisley (episode) |
+ | *{{Droid Tales|Mission to Mos Eisley (episode)}} |
| − | *{{Droid Tales|Flight of the Falcon (episode) |
+ | *{{Droid Tales|Flight of the Falcon (episode)}} |
*{{Droid Tales|Gambit on Geonosis}} |
*{{Droid Tales|Gambit on Geonosis}} |
||
| + | *{{CelebrateTheSeason|Droid Holiday Hustle}} |
||
*{{The Resistance Rises|Hunting for Han}} |
*{{The Resistance Rises|Hunting for Han}} |
||
*''[[LEGO Star Wars: The Force Awakens]]'' |
*''[[LEGO Star Wars: The Force Awakens]]'' |
||
*''[[The LEGO Star Wars Holiday Special]]'' |
*''[[The LEGO Star Wars Holiday Special]]'' |
||
| − | *''[[LEGO Star Wars |
+ | *''[[LEGO Star Wars Summer Vacation]]'' {{Hologram}} |
*''[[A Vader Family Sithmas]]'' |
*''[[A Vader Family Sithmas]]'' |
||
| + | *''[[LEGO Star Wars: The Skywalker Saga]]'' |
||
| + | }} |
||
==Sources== |
==Sources== |
||
{{Scroll_box|content= |
{{Scroll_box|content= |
||
| − | {{Mediacat|soundcat=Audio files of Lando Calrissian|imagecat=Images of Landonis Balthazar |
+ | {{Mediacat|soundcat=Audio files of Lando Calrissian|imagecat=Images of Landonis Balthazar Calrissian}} |
| − | *{{SW|url=video/ |
+ | *<!-- 2011-09-13 -->{{SW|url=video/ol-smoothie|text=Ol' Smoothie}} |
| − | *{{SW|url=video/ |
+ | *<!-- 2011-09-13 -->{{SW|url=video/carbon-freeze|text=Carbon-Freeze}} |
| − | *{{SW|url=video/ |
+ | *<!-- 2011-09-13 -->{{SW|url=video/luke-confronts-jabba|text=Luke Confronts Jabba}} |
| − | *{{SW|url=video/ |
+ | *<!-- 2011-09-13 -->{{SW|url=video/battle-over-the-sarlacc|text=Battle Over the Sarlacc}} |
| − | *{{SW|url=video/ |
+ | *<!-- 2011-09-13 -->{{SW|url=video/into-the-trap|text=Into the Trap}} |
| − | *{{SW|url=video/refreshments|text=Refreshments |
+ | *<!-- 2011-09-13 -->{{SW|url=video/refreshments|text=Refreshments}} |
| + | *<!-- 2012-07-05 -->{{SWYouTube|JNwNXF9Y6kY|Star Wars Episode V: The Empire Strikes Back - Trailer|sw_url=video/episode-v-trailer}} |
||
| − | *{{SW|url=video/he-s-no-good-to-me-dead|text=He's No Good to Me Dead|archivedate=20150524024341}} |
||
| + | *<!-- 2014-06-14 -->{{SW|url=video/star-wars-saga-children-s-books-meet-the-authors|text=Star Wars Saga Children's Books: Meet the Authors|nolive=1}} |
||
| − | *{{SW|url=video/carbon-freeze|text=Carbon-Freeze|archivedate=20190111191808}} |
||
| − | *{{SW|url=video/ |
+ | *<!-- 2014-07-01 -->{{SW|url=video/episode-v-teaser-trailer|text=Episode V Teaser Trailer}} |
| + | *<!-- 2014-07-01 -->{{SWE|characters|ackbar|Ackbar}} |
||
| − | *{{SW|url=video/cloud-city-escape|text=Cloud City Escape|archivedate=20200521184330}} |
||
| + | *<!-- 2014-07-01 -->{{SWE|characters|landocalrissian|Lando Calrissian}} |
||
| − | *{{SW|url=video/classic-tv-spot-jedi|text=Classic TV Spot: Jedi|archivedate=20190302143159}} |
||
| + | *<!-- 2014-07-XX -->{{SW|url=video/cloud-city-apartment|text=Cloud City Apartment}} |
||
| − | *{{SW|url=video/star-wars-episode-vi-return-of-the-jedi-trailer|text=''Star Wars'': Episode VI ''Return of the Jedi'' – Trailer|archivedate=20180223123529}} |
||
| − | *{{SW|url=video/ |
+ | *<!-- 2014-07-XX -->{{SW|url=video/cloud-city-escape|text=Cloud City Escape}} |
| − | *{{SW|url=video/ |
+ | *<!-- 2014-07-XX -->{{SW|url=video/he-s-no-good-to-me-dead|text=He's No Good to Me Dead}} |
| − | *{{SW|url=video/ |
+ | *<!-- 2014-07-XX -->{{SW|url=video/he-s-only-a-wookiee|text=He's Only a Wookiee}} |
| − | *{{SW|url=video/ |
+ | *<!-- 2014-07-XX -->{{SW|url=video/he-seems-very-friendly|text=He Seems Very Friendly}} |
| − | *{{SW|url=video/ |
+ | *<!-- 2014-07-XX -->{{SW|url=video/i-know-that-laugh|text=I Know That Laugh}} |
| − | *{{SW|url=video/not-a-scratch|text=Not a Scratch |
+ | *<!-- 2014-07-XX -->{{SW|url=video/not-a-scratch|text=Not a Scratch}} |
| − | *{{SW|url=video/ |
+ | *<!-- 2014-07-XX -->{{SW|url=video/point-it-at-the-deck|text=Point It At the Deck!}} |
| + | *<!-- 2014-07-XX -->{{SW|url=video/there-will-be-no-bargain|text=There Will Be No Bargain}} |
||
| − | *{{SWE|characters|ackbar|Ackbar|archivedate=20140115060536}} |
||
| + | *<!-- 2014-09-09 -->{{InsiderCite|152|Classic Moment|Classic Moment: Lando's Second Surprise}} |
||
| − | *{{SWE|characters|landocalrissian|Lando Calrissian|archivedate=20140107111649}} |
||
| + | *<!-- 2014-09-09 -->{{InsiderCite|152|Blaster (Star Wars Insider)}} |
||
| − | *''[[Star Wars Costumes: The Original Trilogy]]'' |
||
| + | *<!-- 2014-10-28 -->''[[Star Wars Costumes: The Original Trilogy]]'' |
||
| − | *{{InsiderCite|152|Classic Moment|Classic Moment: Lando's Second Surprise}} |
||
| + | *<!-- 2015-01-12 -->{{SWYouTube|FiVxmWQsu-8|Scoundrel School: Lando Calrissian Returns | Star Wars Rebels|sw_url=video/scoundrel-school-lando-calrissian-returns}} |
||
| − | *{{InsiderCite|152|Blaster (Star Wars Insider)|Blaster}} |
||
| + | *<!-- 2015-01-19 -->{{SWYouTube|xQgRIRWgA5s|Rebels Recon #1.10: Inside "Idiot's Array" | Star Wars Rebels|sw_url=video/rebels-recon-10-inside-idiot-s-array}} |
||
| − | *{{SW|url=video/star-wars-saga-children-s-books-meet-the-authors|text=Star Wars Saga Children's Books: Meet the Authors (video)|archivedate=20180930025928}} |
||
| − | *{{SW|url= |
+ | *<!-- 2015-01-19 -->{{SW|url=series/star-wars-rebels/idiots-array-episode-guide|text="Idiot's Array" Episode Guide | Star Wars Rebels}} |
| + | *<!-- 2015-03-10 -->{{InsiderCite|156|Star Wars Rebels Recounted|''Star Wars Rebels'' Recounted}} |
||
| − | *{{SW|url=series/star-wars-rebels/idiots-array-episode-guide|text=Idiot's Array Episode Guide|archivedate=20200319191540}} |
||
| + | <!-- 2015-03-11 -->{{CardGameSet|set={{SWCT|set=Base Series 1|nolink=1}}|cards= |
||
| − | *{{SW|url=video/rebels-recon-10-inside-idiot-s-array|text=Rebels Recon #10: Inside "Idiot's Array"|archivedate=20180329113617}} |
||
| + | *<!-- 2015-03-11 -->{{SWCT|C-3PO - Asteroid Repair - Base Series 1|C-3PO - Asteroid Repair - ''Base Series 1''}} |
||
| − | *{{InsiderCite|156|Star Wars Rebels Recounted|''Star Wars Rebels'' Recounted}} |
||
| − | *{{SWCT| |
+ | *<!-- 2015-03-11 -->{{SWCT|Chewbacca - Rebel Alliance - Base Series 1|Chewbacca - Rebel Alliance - ''Base Series 1''}} |
| − | *{{SWCT| |
+ | *<!-- 2015-03-11 -->{{SWCT|Darth Vader - Search For Skywalker - Base Series 1|Darth Vader - Search For Skywalker - ''Base Series 1''}} |
| − | *{{SWCT| |
+ | *<!-- 2015-03-11 -->{{SWCT|Lando Calrissian - Bespin Administrator - Base Series 1|Lando Calrissian - Bespin Administrator - ''Base Series 1''}} |
| − | *{{SWCT|Lando Calrissian - |
+ | *<!-- 2015-03-11 -->{{SWCT|Lando Calrissian - Rebel Alliance - Base Series 1|Lando Calrissian - Rebel Alliance - ''Base Series 1''}} |
| − | *{{SWCT| |
+ | *<!-- 2015-03-11 -->{{SWCT|Lobot - Lando's Aide - Base Series 1|Lobot - Lando's Aide - ''Base Series 1''}} |
| − | *{{SWCT| |
+ | *<!-- 2015-03-11 -->{{SWCT|Luke Skywalker - Jedi Knight - Base Series 1|Luke Skywalker - Jedi Knight - ''Base Series 1''}} |
| − | *{{SWCT| |
+ | *<!-- 2015-03-11 -->{{SWCT|Nien Nunb - Millennium Falcon Co-Pilot - Base Series 1|Nien Nunb - Millennium Falcon Co-Pilot - ''Base Series 1''}} |
| − | *{{SWCT| |
+ | *<!-- 2015-03-11 -->{{SWCT|Wedge Antilles - Rogue Leader - Base Series 1|Wedge Antilles - Rogue Leader - ''Base Series 1''}} |
| + | }} |
||
| − | *{{SWCT|Wedge Antilles - Rogue Leader - Base Series 1|Wedge Antilles - Rogue Leader - ''Base Series 1''}} |
||
| − | *{{SW|url=news/lando-1-coming-in-july-from-marvel-exclusive|text=''Lando'' #1 Coming in July from Marvel – Exclusive! |
+ | *<!-- 2015-04-16 -->{{SW|url=news/lando-1-coming-in-july-from-marvel-exclusive|text=''Lando'' #1 Coming in July from Marvel – Exclusive!}} |
| − | *''[[Ultimate Star Wars]]'' |
+ | *<!-- 2015-04-28 -->''[[Ultimate Star Wars]]'' |
| − | *''[[Star Wars |
+ | *<!-- 2015-09-04 -->''[[Star Wars: Absolutely Everything You Need to Know]]'' |
| − | *''[[Star Wars: |
+ | *<!-- 2015-09-04 -->''[[Star Wars: Ships of the Galaxy]]'' |
| − | *''[[ |
+ | *<!-- 2015-10-06 -->''[[Star Wars Rebels: Visual Guide: Epic Battles]]'' |
| − | *''[[ |
+ | *<!-- 2015-12-14 -->''[[The Art of Star Wars: Uprising]]'' |
| − | *''[[Star Wars: The Force Awakens: The Visual Dictionary]]'' |
+ | *<!-- 2015-12-18 -->''[[Star Wars: The Force Awakens: The Visual Dictionary]]'' |
| + | *<!-- 2016-01-13 -->{{HelmetCollectionCite|1|Highlights of the Saga|Duel in Cloud City}} |
||
| − | *''[[Star Wars Character Encyclopedia: Updated and Expanded]]'' |
||
| + | *<!-- 2016-01-27 -->{{HelmetCollectionCite|2|Highlights of the Saga|The Capture of Han Solo}} |
||
| − | *''[[Star Wars: ABC-3PO]]'' |
||
| + | *{{HelmetCollectionCite|3|Databank A-Z|Wedge Antilles–Azmorigan}} |
||
| − | *[[Star Wars: Complete Locations (2016)|''Star Wars: Complete Locations'']] |
||
| + | *<!-- 2016-03-16 -->{{BuildFalconCite|63|Starship Fact File|Heavy Corvette ''Imperialis''}} |
||
| − | *''[[Star Wars: X-Wing Deluxe Book and Model Set]]'' |
||
| + | *<!-- 2016-04-05 -->''[[Star Wars Character Encyclopedia: Updated and Expanded]]'' |
||
| − | *{{SW|url=news/donald-glover-cast-as-young-lando-calrissian-in-upcoming-han-solo-star-wars-stand-alone-film|text=Donald Glover Cast as Young Lando Calrissian in Upcoming Han Solo ''Star Wars'' Stand-Alone Film|archivedate=20200305102157}} |
||
| + | *<!-- 2016-05-04 -->{{HelmetCollectionCite|9|Databank A-Z|C-21–Chandrila}} |
||
| − | *''[[Poe Dameron: Flight Log]]'' {{Po}} |
||
| + | *<!-- 2016-05-18 -->{{HelmetCollectionCite|10|Databank A-Z|Chewbacca–Cloud City}} |
||
| − | *''[[Star Wars: Galactic Atlas]]'' |
||
| − | *''[[ |
+ | *<!-- 2016-06-14 -->''[[Star Wars: ABC-3PO]]'' |
| + | *<!-- 2016-06-15 -->{{HelmetCollectionCite|12|Databank A-Z|Cosians–Dagobah}} |
||
| − | *''[[Entertainment Weekly's Ultimate Guide to Rogue One]]'' |
||
| − | *{{HelmetCollectionCite| |
+ | *<!-- 2016-09-21 -->{{HelmetCollectionCite|19|Helmets|Lando Calrissian}} |
| − | *{{HelmetCollectionCite| |
+ | *<!-- 2016-09-21 -->{{HelmetCollectionCite|19|Highlights of the Saga|The Death of Jabba the Hutt}} |
| + | *<!-- 2016-09-27 -->[[Star Wars: Complete Locations (2016)|''Star Wars: Complete Locations'']] |
||
| − | *{{HelmetCollectionCite|9|Databank A-Z|C-21–Chandrila}} |
||
| − | *{{HelmetCollectionCite| |
+ | *<!-- 2016-10-05 -->{{HelmetCollectionCite|20|Databank A-Z|Saw Gerrera–Commander Gree}} |
| + | *<!-- 2016-10-18 -->''[[Star Wars: X-Wing Deluxe Book and Model Set]]'' |
||
| − | *{{HelmetCollectionCite|12|Databank A-Z|Cosians–Dagobah}} |
||
| + | *<!-- 2016-10-21 -->{{SW|url=news/donald-glover-cast-as-young-lando-calrissian-in-upcoming-han-solo-star-wars-stand-alone-film|text=Donald Glover Cast as Young Lando Calrissian in Upcoming Han Solo ''Star Wars'' Stand-Alone Film}} |
||
| − | *{{HelmetCollectionCite|19|multiple=[[Helmets|Helmets: Lando Calrissian]]; [[Highlights of the Saga|Highlights of the Saga: The Death of Jabba the Hutt]]}} |
||
| + | *<!-- 2016-11-01 -->''[[Poe Dameron: Flight Log]]'' {{Po}} |
||
| − | *{{HelmetCollectionCite|20|Databank A-Z|Saw Gerrera–Commander Gree}} |
||
| + | *<!-- 2016-11-03 -->''[[Star Wars: Galactic Atlas]]'' |
||
| − | *{{HelmetCollectionCite|23|Highlights of the Saga|Assault on Endor}} |
||
| + | *<!-- 2016-11-04 -->{{SW|url=news/much-to-learn-you-still-have-7-things-you-might-not-know-about-sullustans|text=Much to Learn You Still Have: 7 Things You Might Not Know About Sullustans}} |
||
| − | *{{HelmetCollectionCite|26|Databank A-Z|Imperial Future Council–Inquisitorius}} |
||
| + | *<!-- 2016-11-16 -->{{HelmetCollectionCite|23|Highlights of the Saga|Assault on Endor}} |
||
| − | *{{BuildR2Cite|5|Droid Directory|2-1B-series Medical Droids, Part 1}} {{Po}} |
||
| − | *''[[ |
+ | *<!-- 2016-11-29 -->''[[Princess Leia: Royal Rebel]]'' |
| + | *<!-- 2016-12-09 -->''[[Entertainment Weekly's Ultimate Guide to Rogue One]]'' |
||
| − | *''[[Star Wars: The Visual Encyclopedia]]'' |
||
| + | *<!-- 2016-12-28 -->{{HelmetCollectionCite|26|Databank A-Z|Imperial Future Council–Inquisitorius}} |
||
| − | *''[[Star Wars: On the Front Lines]]'' |
||
| + | *<!-- 2017-02-28 -->''[[Darth Vader: Sith Lord]]'' |
||
| − | *''[[Star Wars Super Graphic: A Visual Guide to a Galaxy Far, Far Away]]'' |
||
| + | *<!-- 2017-02-XX -->{{BuildR2Cite|5|Droid Directory|2-1B-series Medical Droids, Part 1}} {{Po}} |
||
| − | *''[[Star Wars: Absolutely Everything You Need to Know, Updated and Expanded]]'' |
||
| + | *<!-- 2017-04-04 -->''[[Star Wars: The Visual Encyclopedia]]'' |
||
| − | *{{Destiny|Empire at War|link=https://swdestinydb.com/card/03055|cardname=X-8 Night Sniper}} |
||
| + | *<!-- 2017-05-17 -->{{HelmetCollectionCite|36|Databank A-Z|Cut Lawquane–Lothal}} |
||
| − | *''[[Star Wars: Geektionary: The Galaxy from A - Z]]'' |
||
| + | *<!-- 2017-05-17 -->{{HelmetCollectionCite|36|Helmets|Boushh}} |
||
| − | *''[[Star Wars: The Rebel Files]]'' |
||
| − | *{{HelmetCollectionCite|36| |
+ | *<!-- 2017-05-17 -->{{HelmetCollectionCite|36|Highlights of the Saga|Attack on Jabba's Palace}} |
| + | *<!-- 2017-07-18 -->''[[Star Wars: On the Front Lines]]'' |
||
| − | *{{HelmetCollectionCite|43|Databank A-Z|Leia Organa}} |
||
| + | *<!-- 2017-07-25 -->''[[Star Wars Super Graphic: A Visual Guide to a Galaxy Far, Far Away]]'' |
||
| − | *{{HelmetCollectionCite|46|Weapons & Uniforms|Heroes of the Resistance}} |
||
| − | *{{HelmetCollectionCite| |
+ | *<!-- 2017-08-23 -->{{HelmetCollectionCite|43|Databank A-Z|Leia Organa}} |
| + | *<!-- 2017-10-01 -->''[[Star Wars: Absolutely Everything You Need to Know, Updated and Expanded]]'' |
||
| − | *{{HelmetCollectionCite|51|Databank A-Z|''Soulless One''–Super Battle Droids}} |
||
| + | *<!-- 2017-10-04 -->{{HelmetCollectionCite|46|Weapons & Uniforms|Heroes of the Resistance}} |
||
| − | *''[[Star Wars Encyclopedia of Starfighters and Other Vehicles]]'' |
||
| + | *<!-- 2017-10-18 -->{{HelmetCollectionCite|47|Databank A-Z|Max Rebo–Sabacc}} {{Imo}} |
||
| − | *{{LEGOCite|solo|TRUMF|Mini Millennium Falcon}} {{Po}} |
||
| + | *<!-- 2017-11-15 -->''[[Star Wars: Geektionary: The Galaxy from A - Z]]'' |
||
| − | *{{HasbroCite|set=Star Wars: The Black Series|pack=Lando Calrissian|altlink=https://www.rebelscum.com/Lando-Calrissian-65-The-Black-Series-6-inch-hasbro.asp|archiveurl=https://web.archive.org/web/20180415094110/https://www.rebelscum.com/Lando-Calrissian-65-The-Black-Series-6-inch-hasbro.asp}} |
||
| − | *''[[ |
+ | *<!-- 2017-11-21 -->''[[Star Wars: The Rebel Files]]'' |
| + | *<!-- 2017-11-29 -->{{HelmetCollectionCite|50|Databank A-Z|Luke Skywalker–Han Solo}} |
||
| − | *''[[Solo: A Star Wars Story The Official Guide]]'' |
||
| + | *<!-- 2017-12-13 -->{{HelmetCollectionCite|51|Databank A-Z|''Soulless One''–Super Battle Droids}} |
||
| − | *''[[Solo: A Star Wars Story: Tales from Vandor]]'' |
||
| + | *<!-- 2018-01-10 -->{{HelmetCollectionCite|53|Helmets|Nien Nunb}} |
||
| − | *{{SWCT|Lando Calrissian - Solo: A Star Wars Story - The Lodge|Lando Calrissian - ''Solo: A Star Wars Story'' - ''The Lodge''}} |
||
| + | *<!-- 2018-03-07 -->{{HelmetCollectionCite|57|Helmets|Wedge Antilles}} |
||
| − | *{{FFGXW2|Lando's Millennium Falcon Expansion Pack|link=https://xwing-miniatures-second-edition.fandom.com/wiki/Lando_Calrissian_(Crew/Scum)|cardname=Lando Calrissian (Crew/Scum)}} |
||
| + | *<!-- 2018-04-03 -->''[[Star Wars Encyclopedia of Starfighters and Other Vehicles]]'' |
||
| − | *{{FFGXW2|Lando's Millennium Falcon Expansion Pack|link=https://xwing-miniatures-second-edition.fandom.com/wiki/Lando_Calrissian_(Custom_YT-1300)|cardname=Lando Calrissian (Custom YT-1300)}} |
||
| + | *<!-- 2018-04-10 -->{{LEGOCite|solo|TRUMF|Mini Millennium Falcon}} {{Po}} |
||
| − | *{{FFGXW2|Lando's Millennium Falcon Expansion Pack|link=https://xwing-miniatures-second-edition.fandom.com/wiki/Lando_Calrissian_(Escape_Craft)|cardname=Lando Calrissian (Escape Craft)}} |
||
| + | *<!-- 2018-05-02 -->{{HelmetCollectionCite|61|Helmets|4-LOM}} |
||
| − | *{{FFGXW2|Lando's Millennium Falcon Expansion Pack|link=https://xwing-miniatures-second-edition.fandom.com/wiki/Lando%27s_Millennium_Falcon|cardname=Lando's ''Millennium Falcon''}} |
||
| + | *<!-- 2018-05-02 -->{{HelmetCollectionCite|61|Highlights of the Saga|Escaping Cloud City}} |
||
| − | *{{FFGXW2|Rebel Alliance Conversion Kit|link=https://xwing-miniatures-second-edition.fandom.com/wiki/Lando_Calrissian_(Crew/Rebel)|cardname=Lando Calrissian (Crew/Rebel)}} {{C|Reissued in [[Millennium Falcon Expansion Pack (Second Edition)|''Millennium Falcon Expansion Pack'']]}} |
||
| + | *<!-- 2018-05-02 -->{{HelmetCollectionCite|61|Weapons & Uniforms|Bespin's Cloud City}} |
||
| − | *{{FFGXW2|Rebel Alliance Conversion Kit|link=https://xwing-miniatures-second-edition.fandom.com/wiki/Lando_Calrissian_(Modified_YT-1300)|cardname=Lando Calrissian (Modified YT-1300)}} {{C|Reissued in [[Millennium Falcon Expansion Pack (Second Edition)|''Millennium Falcon Expansion Pack'']]}} |
||
| + | *<!-- 2018-05-25 -->''[[Solo: A Star Wars Story The Official Guide]]'' |
||
| − | *''[[Star Wars: The Complete Visual Dictionary, New Edition]]'' |
||
| − | *''[[Star Wars: |
+ | *<!-- 2018-05-25 -->''[[Solo: A Star Wars Story: Han on the Run]]'' |
| + | *<!-- 2018-07-25 -->{{HelmetCollectionCite|67|Helmets|B-wing Pilot}} |
||
| − | *''[[Star Wars: Scum and Villainy: Case Files on the Galaxy's Most Notorious]]'' |
||
| − | *''[[Star Wars |
+ | *<!-- 2018-09-11 -->''[[Solo: A Star Wars Story: Tales from Vandor]]'' |
| + | *<!-- 2018-09-11 -->{{SWCT|Lando Calrissian - Solo: A Star Wars Story - The Lodge|Lando Calrissian - ''Solo: A Star Wars Story'' - ''The Lodge''}} |
||
| − | *''[[YT-1300 Millennium Falcon Owners' Workshop Manual]]'' |
||
| + | <!-- 2018-09-13 -->{{CardGameSet|set={{FFGXW2|set=Lando's Millennium Falcon Expansion Pack|sformat=''Lando's'' Millennium Falcon ''Expansion Pack''}}|cards= |
||
| − | *''[[Star Wars: Smuggler's Guide]]'' |
||
| + | *<!-- 2018-09-13 -->{{FFGXW2|set=Lando's Millennium Falcon Expansion Pack|link=https://xwing-miniatures-second-edition.fandom.com/wiki/Lando_Calrissian_(Crew/Scum)|cardname=Lando Calrissian (Crew/Scum)}} |
||
| − | *''[[Star Wars Character Encyclopedia, New Edition]]'' |
||
| + | *<!-- 2018-09-13 -->{{FFGXW2|set=Lando's Millennium Falcon Expansion Pack|link=https://xwing-miniatures-second-edition.fandom.com/wiki/Lando_Calrissian_(Custom_YT-1300)|cardname=Lando Calrissian (Custom YT-1300)}} |
||
| − | *''[[Star Wars Search and Find Volume I]]'' |
||
| + | *<!-- 2018-09-13 -->{{FFGXW2|set=Lando's Millennium Falcon Expansion Pack|link=https://xwing-miniatures-second-edition.fandom.com/wiki/Lando_Calrissian_(Escape_Craft)|cardname=Lando Calrissian (Escape Craft)}} |
||
| − | *[[Star Wars: Outer Rim|''Star Wars'': Outer Rim]] |
||
| + | *<!-- 2018-09-13 -->{{FFGXW2|set=Lando's Millennium Falcon Expansion Pack|link=https://xwing-miniatures-second-edition.fandom.com/wiki/Lando%27s_Millennium_Falcon|cardname=Lando's ''Millennium Falcon''}} |
||
| − | *{{LEGOCite|tros|75257|Millennium Falcon}} |
||
| + | }} |
||
| − | *''[[Star Wars: The Rise of Skywalker: Amazing Sticker Adventures]]'' |
||
| + | <!-- 2018-09-13 -->{{CardGameSet|set={{FFGXW2|set=Rebel Alliance Conversion Kit}}|cards= |
||
| − | *{{HelmetCollectionCite|53|Helmets|Nien Nunb}} |
||
| + | *<!-- 2018-09-13 -->{{FFGXW2|set=Rebel Alliance Conversion Kit|link=https://xwing-miniatures-second-edition.fandom.com/wiki/Lando_Calrissian_(Crew/Rebel)|cardname=Lando Calrissian (Crew/Rebel)}} {{C|Reissued in [[Millennium Falcon Expansion Pack (Second Edition)|''Millennium Falcon Expansion Pack'']]}} |
||
| − | *{{SWKidsYoutube|UQg6aX7lqTA|Every Droid in Star Wars | Star Wars By the Numbers|archiveurl=https://archive.is/GtIML}} |
||
| + | *<!-- 2018-09-13 -->{{FFGXW2|set=Rebel Alliance Conversion Kit|link=https://xwing-miniatures-second-edition.fandom.com/wiki/Lando_Calrissian_(Modified_YT-1300)|cardname=Lando Calrissian (Modified YT-1300)}} {{C|Reissued in [[Millennium Falcon Expansion Pack (Second Edition)|''Millennium Falcon Expansion Pack'']]}} |
||
| − | *''[[Gadgets and Gear]]'' |
||
| + | }} |
||
| − | *''[[Ultimate Star Wars, New Edition]]'' |
||
| − | *''[[Star Wars: |
+ | *<!-- 2018-09-18 -->''[[Star Wars: The Complete Visual Dictionary, New Edition]]'' |
| + | *<!-- 2018-10-04 -->''[[Star Wars: Alien Archive]]'' |
||
| − | *{{SWKidsYoutube|CZp8Civk2co|Every Language in Star Wars Movies | Star Wars By the Numbers|archiveurl=https://archive.is/1vR7M}} {{Po}} |
||
| − | *''[[Star Wars: |
+ | *<!-- 2018-10-23 -->''[[Star Wars: Scum and Villainy: Case Files on the Galaxy's Most Notorious]]'' |
| − | *''[[Star Wars: |
+ | *<!-- 2018-10-30 -->''[[Star Wars: Women of the Galaxy]]'' |
| + | *<!-- 2018-11-05 -->''[[YT-1300 Millennium Falcon Owners' Workshop Manual]]'' |
||
| − | *''[[Star Wars: The Rise of Skywalker: The Visual Dictionary]]'' {{1stID|Balthazar}} |
||
| − | *''[[Star Wars: |
+ | *<!-- 2018-11-13 -->''[[Star Wars: Smuggler's Guide]]'' |
| + | *<!-- 2018-11-14 -->{{HelmetCollectionCite|75|Weapons & Uniforms|Green Squadron}} |
||
| − | *''[[The Art of Star Wars: The Rise of Skywalker]]'' |
||
| + | *<!-- 2018-12-10 -->{{Destiny|Empire at War|link=https://swdestinydb.com/card/03055|cardname=X-8 Night Sniper}} |
||
| − | *{{BuildXWingCite|60|Starfighter Aces|Lando Calrissian – Galactic Adventurer}} |
||
| + | *<!-- 2018-XX-XX -->{{HasbroCite|set=Star Wars: The Black Series|pack=Lando Calrissian|altlink=https://www.rebelscum.com/Lando-Calrissian-65-The-Black-Series-6-inch-hasbro.asp}} |
||
| − | *{{BuildXWingCite|68|Starfighter Aces|Sana Starros – Rebel Sympathizer}} |
||
| + | *<!-- 2019-01-23 -->{{HelmetCollectionCite|80|Helmets|Death Trooper}} |
||
| − | *''[[Starships and Speeders]]'' |
||
| + | *<!-- 2019-03-02 -->{{SW|url=video/classic-tv-spot-jedi|text=Classic TV Spot: Jedi}} |
||
| − | *{{DisneyGallery|Legacy (Disney Gallery: The Mandalorian episode)|Legacy}} |
||
| + | *<!-- Unknown -->{{SW|url=video/star-wars-episode-vi-return-of-the-jedi-trailer|text=Teaser Trailer | Star Wars: Return Of The Jedi}} |
||
| − | *{{DisneyGallery|Connections}} |
||
| + | *<!-- 2019-04-04 -->''[[Star Wars Character Encyclopedia, New Edition]]'' |
||
| − | *{{SWCT|Chewbacca - 2020 Base Series 2|Chewbacca - ''2020 Base Series 2''}} |
||
| + | *<!-- 2019-04-09 -->''[[Star Wars Search and Find Volume I]]'' |
||
| − | *{{SWCT|Lando Calrissian (TESB) - 2020 Base Series 2|Lando Calrissian (TESB) - ''2020 Base Series 2''}} |
||
| + | *<!-- 2019-06-13 -->[[Star Wars: Outer Rim|''Star Wars'': Outer Rim]] |
||
| − | *{{SWCT|Lando Calrissian (Solo) - 2020 Base Series 2|Lando Calrissian (Solo) - ''2020 Base Series 2''}} |
||
| + | *<!-- 2019-07-25 -->{{SWKidsYouTube|UQg6aX7lqTA|Every Droid in Star Wars | Star Wars By the Numbers|nolive=1}} |
||
| − | *{{AltayaCite|The Millennium Falcon (Star Wars Encyclopedia)|The ''Millennium Falcon''}} |
||
| + | *<!-- 2019-09-05 -->''[[Star Wars: How Not to Get Eaten by Ewoks and Other Galactic Survival Skills]]'' |
||
| − | *''[[The Star Wars Book]]'' |
||
| + | *<!-- 2019-09-13 -->''[[Gadgets and Gear]]'' |
||
| − | *{{SW|url=series/the-mandalorian/chapter-5-guide|text="Chapter 5: The Gunslinger" Episode Guide|archivedate=20201030104644}} |
||
| + | *<!-- 2019-10-04 -->''[[Star Wars: The Rise of Skywalker: Amazing Sticker Adventures]]'' |
||
| − | *{{Armada|Upgrade Card Collection|''Upgrade Card Collection''|cardname=Lando Calrissian|link=https://starwars-armada.fandom.com/wiki/Lando_Calrissian}} |
||
| + | *<!-- 2019-10-04 -->''[[Ultimate Star Wars, New Edition]]'' |
||
| − | *{{AltayaCite|Battle of Hoth and the Second Death Star}} |
||
| + | *<!-- 2019-10-XX -->{{BuildXWingCite|60|Starfighter Aces|Lando Calrissian – Galactic Adventurer}} |
||
| − | *''[[Disney Gallery: The Mandalorian: Making of Season Two]]'' |
||
| + | *<!-- 2019-10-XX -->{{LEGOCite|tros|75257|Millennium Falcon}} |
||
| − | *{{BuildXWingCite|96|Starfighter Aces|Lando Calrissian – Hero of the Rebels}} |
||
| + | *<!-- 2019-11-14 -->''[[Star Wars: The Galactic Explorer's Guide]]'' |
||
| − | *''[[A Galaxy for Everyone]]'' |
||
| + | *<!-- 2019-11-14 -->{{SWKidsYouTube|CZp8Civk2co|Every Language in Star Wars Movies | Star Wars By the Numbers|archiveurl=https://archive.is/1vR7M|nolive=1}} {{Po}} |
||
| − | *{{Legion|Lando Calrissian Commander Expansion|link=https://starwarslegion.fandom.com/wiki/Ace_Up_His_Sleeve|cardname=Ace up His Sleeve}} |
||
| + | *<!-- 2019-12-19 -->[[Star Wars: The Rise of Skywalker – The Official Collector's Edition|''Star Wars: The Rise of Skywalker'' – The Official Collector's Edition]] |
||
| − | *{{Legion|Lando Calrissian Commander Expansion|link=https://starwarslegion.fandom.com/wiki/All_In|cardname=All In}} |
||
| + | *<!-- 2019-12-20 -->''[[Star Wars: The Rise of Skywalker: The Galactic Guide]]'' |
||
| − | *{{Legion|Lando Calrissian Commander Expansion|link=https://starwarslegion.fandom.com/wiki/Idiot's Array|cardname=Idiot's Array}} |
||
| + | *<!-- 2019-12-20 -->''[[Star Wars: The Rise of Skywalker: The Visual Dictionary]]'' {{1stID|Balthazar}} |
||
| − | *{{Legion|Lando Calrissian Commander Expansion|link=https://starwarslegion.fandom.com/wiki/I%27ve_Altered_the_Deal|cardname=I've Altered the Deal}} |
||
| + | *<!-- 2019-12-XX -->{{BuildXWingCite|68|Starfighter Aces|Sana Starros – Rebel Sympathizer}} |
||
| − | *{{Legion|Lando Calrissian Commander Expansion|link=https://starwarslegion.fandom.com/wiki/Lando_Calrissian|cardname=Lando Carlissian}} |
||
| + | *<!-- 2020-02-28 -->''[[Starships and Speeders]]'' |
||
| − | *{{SWKidsYoutube|c89zqlUwEeo|The Mandalorian | Star Wars Full Circle|archivedate=20210420071607}} |
||
| + | *<!-- 2020-03-31 -->''[[The Art of Star Wars: The Rise of Skywalker]]'' |
||
| − | *{{SWKidsYoutube|5sBtcRMkzdk|Lando | Star Wars A to Z|archiveurl=https://archive.vn/XqUnd}} |
||
| + | *<!-- 2020-05-08 -->{{DisneyGallery|Legacy (Disney Gallery: The Mandalorian episode)}} |
||
| − | *{{AltayaCite|BB-8 and Other Astromech Droids}} |
||
| + | *<!-- 2020-06-19 -->{{DisneyGallery|Connections (Disney Gallery: The Mandalorian)}} |
||
| − | *''[[Star Wars: The Skywalker Saga: The Official Collector's Edition]]'' |
||
| + | <!-- 2020-07-21 -->{{CardGameSet|set={{SWCT|set=2020 Base Series 2|nolink=1}}|cards= |
||
| − | *{{HasbroCite|set=Star Wars: The Black Series|pack=General Lando Calrissian|altlink=https://www.target.com/p/star-wars-the-black-series-general-lando-calrissian/-/A-82325393|archiveurl=https://archive.vn/g5je0}} |
||
| + | *<!-- 2020-07-21 -->{{SWCT|Chewbacca - 2020 Base Series 2|Chewbacca - ''2020 Base Series 2''}} |
||
| − | *{{Databank|a-wing-fighter|A-wing Fighter|archivedate=20210125000926}} |
||
| + | *<!-- 2020-07-21 -->{{SWCT|Lando Calrissian (Solo) - 2020 Base Series 2|Lando Calrissian (Solo) - ''2020 Base Series 2''}} |
||
| − | *{{Databank|admiral-ackbar|Admiral Ackbar|archivedate=20210323153914}} |
||
| + | *<!-- 2020-07-21 -->{{SWCT|Lando Calrissian (TESB) - 2020 Base Series 2|Lando Calrissian (TESB) - ''2020 Base Series 2''}} |
||
| − | *{{Databank|azmorigan|Azmorigan|archivedate=20170528233037}} |
||
| + | }} |
||
| − | *{{Databank|b-wing-fighter|B-wing Fighter|archivedate=20200408011653}} {{Po}} |
||
| + | *<!-- 2020-07-XX -->{{BuildXWingCite|96|Starfighter Aces|Lando Calrissian – Hero of the Rebels}} |
||
| − | *{{Databank|bespin|Bespin|archivedate=20170606133655}} |
||
| + | *<!-- 2020-08-19 -->{{EncyclopediaCite|Millennium Falcon (Star Wars Encyclopedia)|''Millennium Falcon''}} |
||
| − | *{{Databank|boba-fett|Boba Fett|archivedate=20170605030244}} |
||
| + | *<!-- 2020-09-30 -->{{EncyclopediaCite|R2-D2 (Star Wars Encyclopedia)}} |
||
| − | *{{Databank|chewbacca|Chewbacca|archivedate=20200607024006}} |
||
| + | *<!-- 2020-10-01 -->''[[The Star Wars Book]]'' |
||
| − | *{{Databank|cloud-city|Cloud City|archivedate=20170528224811}} |
||
| + | *<!-- 2020-10-30 -->{{SW|url=series/the-mandalorian/chapter-5-guide|text="The Gunslinger" Episode Guide | The Mandalorian}} |
||
| − | *{{Databank|death-star-ii|Death Star II|archivedate=20170706025345}} |
||
| + | *<!-- 2020-12-04 -->{{Armada|Upgrade Card Collection|''Upgrade Card Collection''|cardname=Lando Calrissian|link=https://starwars-armada.fandom.com/wiki/Lando_Calrissian}} |
||
| − | *{{Databank|han-solo|Han Solo|archivedate=20200514053950}} |
||
| + | *<!-- 2020-12-11 -->{{EncyclopediaCite|The Battle of Hoth and the Second Death Star}} |
||
| − | *{{Databank|imperial-star-destroyer|Imperial Star Destroyer|archivedate=20190329084012}} |
||
| + | *<!-- 2020-12-25 -->{{DisneyGallery|Disney Gallery: The Mandalorian: Making of Season Two|Making of Season Two}} |
||
| − | *{{Databank|ion-restraining-bolt|Ion restraining bolt|archivedate=20180726134650}} |
||
| + | *<!-- 2021-01-05 -->''[[A Galaxy for Everyone]]'' |
||
| − | *{{Databank|l3-37|L3-37|archivedate=20180416224905}} {{Po}} |
||
| + | *<!-- 2021-01-08 -->{{EncyclopediaCite|The Final Order and the Battle of Exegol}} |
||
| − | *{{Databank|lando-calrissian|Lando Calrissian|archivedate=20200607023608}} |
||
| + | *<!-- 2021-01-22 -->{{EncyclopediaCite|C-3PO (Star Wars Encyclopedia)}} |
||
| − | *{{Databank|lando-s-prod-pistol|Lando's prod pistol|archivedate=20200514080522}} |
||
| + | <!-- 2021-03-XX -->{{CardGameSet|set={{Legion|Lando Calrissian Commander Expansion}}|cards= |
||
| − | *{{Databank|leia-organa|Princess Leia Organa|archivedate=20200517015010}} |
||
| + | *<!-- 2021-03-XX -->{{Legion|Lando Calrissian Commander Expansion|link=https://starwarslegion.fandom.com/wiki/Ace_Up_His_Sleeve|cardname=Ace up His Sleeve}} |
||
| − | *{{Databank|lobot|Lobot|archivedate=20200324113905}} |
||
| + | *<!-- 2021-03-XX -->{{Legion|Lando Calrissian Commander Expansion|link=https://starwarslegion.fandom.com/wiki/All_In|cardname=All In}} |
||
| − | *{{Databank|lobot-tech-headgear|Lobot-Tech Headgear|archivedate=20200220171405}} |
||
| + | *<!-- 2021-03-XX -->{{Legion|Lando Calrissian Commander Expansion|link=https://starwarslegion.fandom.com/wiki/I%27ve_Altered_the_Deal|cardname=I've Altered the Deal}} |
||
| − | *{{Databank|millennium-falcon|''Millennium Falcon''|archivedate=20190329083500}} |
||
| + | *<!-- 2021-03-XX -->{{Legion|Lando Calrissian Commander Expansion|link=https://starwarslegion.fandom.com/wiki/Idiot's Array|cardname=Idiot's Array}} |
||
| − | *{{Databank|nien-nunb|Nien Nunb|archivedate=20190214033949}} |
||
| + | *<!-- 2021-03-XX -->{{Legion|Lando Calrissian Commander Expansion|link=https://starwarslegion.fandom.com/wiki/Lando_Calrissian|cardname=Lando Carlissian}} |
||
| − | *{{Databank|numidian-prime|Numidian Prime|archivedate=20190909204641}} |
||
| + | }} |
||
| − | *{{Databank|ochi-of-bestoon|Ochi of Bestoon|archivedate=20200313031426}} |
||
| + | *<!-- 2021-04-19 -->{{SWKidsYouTube|c89zqlUwEeo|The Mandalorian | Star Wars Full Circle|nolive=1}} |
||
| − | *{{Databank|rebel-alliance|Rebel Alliance|archivedate=20190401134341}} |
||
| + | *<!-- 2021-04-23 -->{{SWKidsYouTube|5sBtcRMkzdk|Lando | Star Wars A to Z|nolive=1}} |
||
| − | *{{Databank|resistance-pilots|Resistance Pilots|archivedate=20200527023956}} |
||
| + | *<!-- 2021-04-27 -->{{EncyclopediaCite|BB-8 and Other Astromech Droids}} |
||
| − | *{{Databank|sabacc|Sabacc|archivedate=20190910042040}} |
||
| + | *<!-- 2021-05-04 -->[[Star Wars: The Skywalker Saga – The Official Collector's Edition|''Star Wars: The Skywalker Saga'' – The Official Collector's Edition]] |
||
| − | *{{Databank|se-14-blaster-pistol|SE-14 blaster pistol|archivedate=20190909201526}} |
||
| + | *<!-- 2021-05-18 -->[[Star Wars: The Mandalorian: Guide to Season One|''Star Wars: The Mandalorian'': Guide to Season One]] |
||
| − | *{{Databank|shield-generators|Shield Generators|archivedate=20191223162219}} |
||
| + | *<!-- 2021-06-21 -->[[Star Wars Day-at-a-Time Calendar 2022|''Star Wars'' Day-at-a-Time Calendar 2022]] |
||
| − | *{{Databank|shriv|Shriv|archivedate=20190909202543}} |
||
| + | *<!-- 2021-08-25 -->{{DisneyGallery|Disney Gallery: The Mandalorian: Making of the Season 2 Finale|Making of the Season 2 Finale}} |
||
| − | *{{Databank|stormtroopers|stormtroopers|archivedate=20200311120537}} |
||
| + | *<!-- 2021-08-XX -->{{HasbroCite|set=Star Wars: The Black Series|pack=General Lando Calrissian|altlink=https://www.target.com/p/star-wars-the-black-series-general-lando-calrissian/-/A-82325393|archiveurl=https://archive.vn/g5je0}} |
||
| − | *{{Databank|sullustan|Sullustan|archivedate=20180226032809}} |
||
| + | *<!-- 2021-09-28 -->{{EncyclopediaCite|Tobias Beckett and Other Characters of the Underworld}} |
||
| − | *{{Databank|tie-fighter|TIE fighter|archivedate=20200220131540}} |
||
| + | *<!-- 2021-10-28 -->''[[Star Wars: Battles that Changed the Galaxy]]'' |
||
| − | *{{Databank|wedge-antilles|Wedge Antilles|archivedate=20200629111650}} |
||
| + | *<!-- 2021-11-12 -->''[[Under The Helmet: The Legacy Of Boba Fett]]'' |
||
| − | *{{Databank|weequay|Weequay|archivedate=20200215203710}} {{Po}} |
||
| + | *<!-- 2021-12-14 -->{{InsiderCite|207|Launchpad}} {{ID|Calrissin}} |
||
| − | *{{Databank|wicket-w-warrick|Wicket W. Warrick|archivedate=20140703043251}} {{Po}} |
||
| + | *<!-- 2021-12-22 -->{{SW|url=news/star-wars-best-of-2021|text=''Star Wars'': Best of 2021}} |
||
| − | *{{Databank|willie-w1-le|Willie (W1-LE)|archivedate=20150624133845}} |
||
| + | *<!-- 2022-02-18 -->{{SWKidsYouTube|Y5aD4fuiuuQ|Faithful Friends | Star Wars: List It!|nolive=1}} |
||
| − | *{{Databank|wookiee|Wookiee|archivedate=20190420003117}} |
||
| + | *<!-- 2022-03-04 -->{{EncyclopediaCite|Pilots of the Rebel Alliance}} |
||
| − | *{{Databank|x-wing-Starfighter|X-wing Starfighter|archivedate=20200626130409}}}} |
||
| + | *<!-- 2022-04-29 -->{{SW|url=news/star-wars-day-deals|text=''Star Wars'' Day 2022 Deals!|oldversion=1|archivedate=20220408204823}} {{Po}} |
||
| + | *<!-- 2022-04-28 -->{{SW|url=news/star-wars-day-video-game-deals|text=''Star Wars'' Day 2022 Games and Experiences Deals!|oldversion=1|archivedate=20220421045236}} {{Po}} |
||
| + | *<!-- 2022-05-04 -->{{DisneyGallery|Disney Gallery: The Book of Boba Fett|The Book of Boba Fett}} |
||
| + | *<!-- 2022-06-07 -->{{InsiderCite|211|Launchpad}} |
||
| + | *<!-- 2022-06-29 -->{{SW|url=news/marvel-star-wars-halcyon-legacy-4-exclusive-preview|text=Maz, Lando, and Hondo Hatch a Scheme in Marvel's ''Star Wars: Halcyon Legacy'' #4 – Exclusive Preview}} |
||
| + | *<!-- 2022-07-20 -->{{SW|url=news/charles-soule-star-wars-interview|text=As His 100th ''Star Wars'' Comic Hits Shelves, Charles Soule Looks Back}} |
||
| + | *<!-- 2022-08-18 -->{{ThisWeek|pLhnHDRIxQ8|Rogue One Is Back, The Rebel Spirit Of ILM, And More!|sw_url=video/rogue-one-is-back-the-rebel-spirit-of-ilm-and-more}} |
||
| + | *<!-- 2022-09-06 -->''[[Star Wars: Exploring Tatooine]]'' |
||
| + | *<!-- 2022-12-21 -->{{SW|url=news/star-wars-best-of-2022|text=''Star Wars'': Best of 2022}} |
||
| + | *<!-- 2023-01-11 -->{{SW|url=news/marvel-star-wars-black-history-month-covers|text=Marvel Comics and Mateus Manhanini Reveal Stunning ''Star Wars'' Black History Month Covers – Exclusive}} |
||
| + | *<!-- 2023-01-30 -->{{SW|url=news/swce-2023-celebrity-guests|text=Star Wars Celebration Europe 2023 Announces First Celebrity Guests}} |
||
| + | *<!-- 2023-02-09 -->{{SW|url=news/marvel-lando-rotj-cover|text=We're On Our Way to ''Star Wars: Return of the Jedi – Lando'' #1 – Reveal}} |
||
| + | *<!-- 2023-02-09 -->{{ThisWeek|c2q9KdsiFUQ|Young Jedi Adventures Release Date, Billy Dee Williams Joins Star Wars Celebration Europe, and More!|sw_url=video/young-jedi-adventures-release-date-billy-dee-williams-heads-to-star-wars-celebration-europe-and-more}} |
||
| + | *<!-- 2023-03-14 -->{{InsiderCite|217|Launchpad}} |
||
| + | *<!-- 2023-04-03 -->{{SW|url=news/star-wars-celebration-europe-2023-exclusives|text=Check Out ''Star Wars'' Celebration Europe 2023 Exclusives from Hasbro, the LEGO Group, and More}} {{Po}} |
||
| + | *<!-- 2023-04-04 -->''[[Star Wars 100 Objects]]'' |
||
| + | *<!-- 2023-04-09 -->{{SW|url=news/swce-2023-dark-horse|text=SWCE 2023: Dark Horse Reveals a ''Star Wars: The High Republic Adventures'' Phase III Teaser, New Jaxxon Art, and More}} {{Po}} |
||
| + | *<!-- 2023-04-10 -->{{SW|url=news/swce-2023-jazwares|text=SWCE 2023: Check Out Jazwares' ''Star Wars'' Micro Galaxy Squadron Series V}} |
||
| + | *<!-- 2023-04-10 -->{{SW|url=news/swce-2023-marvel|text=SWCE 2023: Marvel Reveals ''Star Wars: Dark Droids'' Horror Event and More}} {{Po}} |
||
| + | *<!-- 2023-04-18 -->''[[Star Wars: Timelines]]'' |
||
| + | *<!-- 2023-05-02 -->{{InsiderCite|218|Launchpad}} |
||
| + | *<!-- 2023-05-04 -->{{ThisWeek|BgxVjGP8Hi0|Star Wars Day is Here, Visions Volume 2, and More!|sw_url=video/star-wars-day-is-here-visions-volume-2-and-more}} |
||
| + | *<!-- 2023-05-24 -->{{SW|url=news/from-a-certain-point-of-view-star-wars-return-of-the-jedi-best-moment|text=''Jedi'' at 40 | From a Certain Point of View: What's the Best Moment in ''Star Wars: Return of the Jedi''?}} |
||
| + | *<!-- 2023-05-25 -->{{ThisWeek|uLxo96DUOjc|Celebrating 40 Years of Return of the Jedi|sw_url=video/celebrating-40-years-of-return-of-the-jedi}} |
||
| + | *<!-- 2023-06-13 -->{{InsiderCite|219|A Certain Point of View (Star Wars Insider)|A Certain Point of View}} {{Po}} |
||
| + | *<!-- 2023-06-22 -->{{SW|url=news/marvel-star-wars-september-2023-preview|text=Uncover the ''Dark Droids'' Crossover Event in Marvel's September 2023 ''Star Wars'' Comics – Exclusive Preview}} |
||
| + | *<!-- 2023-07-21 -->{{SW|url=news/sdcc-2023-lucasfilm-publishing-panel|text=SDCC 2023: 10 Reveals from the Lucasfilm Publishing Panel}} {{Po}} |
||
| + | *<!-- 2023-07-26 -->{{SW|url=news/marvel-dark-droids-1-exclusive-preview|text=An Ancient Evil Awakens in Marvel's ''Star Wars: Dark Droids'' #1 – Exclusive Preview}} {{Po}} |
||
| + | *{{FalconCite|1|Starship Fact File|The Fastest Hunk of Junk in the Galaxy}} |
||
| + | *{{InsiderCite|220|Launchpad}} |
||
| + | *{{SW|url=news/marvel-star-wars-revelations-1-2023-cover-reveal|text=Marvel's New ''Star Wars: Revelations'' to Offer a Glimpse at What's to Come – First Look}} |
||
| + | *{{SW|url=news/marvel-star-wars-december-2023-preview|text=''Dark Droids'' Meets a Terrifying End in Marvel's December 2023 ''Star Wars'' Comics – Exclusive Preview}} |
||
| + | *{{SW|url=news/inside-ahsoka-easter-eggs-sabine-wren|text=Inside ''Ahsoka'': 12 Easter Eggs from Sabine Wren's Lothal Lookout}} |
||
| + | *{{InsiderCite|222|Launchpad}} |
||
| + | *{{InsiderCite|222|After Endor}} |
||
| + | *{{SW|url=news/scariest-star-wars-scenes|text=13 of the Scariest ''Star Wars'' Scenes}} |
||
| + | *''[[Star Wars: Dawn of Rebellion: The Visual Guide]]'' |
||
| + | *{{InsiderCite|223|Launchpad}} |
||
| + | *{{SW|url=news/marvel-star-wars-revelations-1-2023-preview|text=Darth Vader Returns to Mustafar in Marvel's ''Star Wars: Revelations'' (2023) #1 – Exclusive Preview}} {{Po}} |
||
| + | *{{InsiderCite|224|Launchpad}} |
||
| + | *<!-- 2024-03-12 -->{{InsiderCite|224|A Certain Point of View (Star Wars Insider)}} |
||
| + | *{{ThisWeek|I193vqhWArk|Dispatch: Star Wars on Free Comic Book Day|archivedate=20240402181350}} |
||
| + | *{{Databank|a-wing-fighter|A-wing Fighter}} |
||
| + | *{{Databank|admiral-ackbar|Admiral Ackbar}} |
||
| + | *{{Databank|azmorigan|Azmorigan}} |
||
| + | *{{Databank|b-wing-fighter|B-wing Fighter}} {{Po}} |
||
| + | *{{Databank|bespin|Bespin}} |
||
| + | *{{Databank|boba-fett|Boba Fett}} |
||
| + | *{{Databank|chewbacca|Chewbacca}} |
||
| + | *{{Databank|cloud-city|Cloud City}} |
||
| + | *{{Databank|death-star-ii|Death Star II}} |
||
| + | *{{Databank|han-solo|Han Solo}} |
||
| + | *{{Databank|imperial-star-destroyer|Imperial Star Destroyer}} |
||
| + | *{{Databank|ion-restraining-bolt|Ion restraining bolt}} |
||
| + | *{{Databank|l3-37|L3-37}} {{Po}} |
||
| + | *{{Databank|lando-calrissian|Lando Calrissian}} |
||
| + | *{{Databank|lando-s-prod-pistol|Lando's prod pistol}} |
||
| + | *{{Databank|lobot|Lobot}} |
||
| + | *{{Databank|lobot-tech-headgear|Lobot-Tech Headgear}} |
||
| + | *{{Databank|millennium-falcon|''Millennium Falcon''}} |
||
| + | *{{Databank|nien-nunb|Nien Nunb}} |
||
| + | *{{Databank|numidian-prime|Numidian Prime}} |
||
| + | *{{Databank|ochi-of-bestoon|Ochi of Bestoon}} |
||
| + | *{{Databank|leia-organa|Princess Leia Organa}} |
||
| + | *{{Databank|rebel-alliance|Rebel Alliance}} |
||
| + | *{{Databank|resistance-pilots|Resistance Pilots}} |
||
| + | *{{Databank|sabacc|Sabacc}} |
||
| + | *{{Databank|se-14-blaster-pistol|SE-14 blaster pistol}} |
||
| + | *{{Databank|shield-generators|Shield Generators}} |
||
| + | *{{Databank|shriv|Shriv}} |
||
| + | *{{Databank|stormtroopers|Stormtroopers}} |
||
| + | *{{Databank|sullustan|Sullustan}} |
||
| + | *{{Databank|tie-fighter|TIE fighter}} |
||
| + | *{{Databank|wedge-antilles|Wedge Antilles}} |
||
| + | *{{Databank|weequay|Weequay}} {{Po}} |
||
| + | *{{Databank|wicket-w-warrick|Wicket W. Warrick}} {{Po}} |
||
| + | *{{Databank|willie-w1-le|Willie (W1-LE)}} |
||
| + | *{{Databank|wookiee|Wookiee}} |
||
| + | *{{Databank|x-wing-starfighter|X-wing Starfighter}}}} |
||
| + | |||
| + | ===Non-canon sources=== |
||
| + | *<!-- 2022-06-21 -->{{SWYouTube|RZnXjJqJp8g|LEGO Star Wars Summer Vacation | Official Trailer|sw_url=video/official-trailer-lego-star-wars-summer-vacation}} |
||
| + | *<!-- 2022-07-25 -->{{SWYouTube|xYFSaqQ-oMM|LEGO Star Wars Summer Vacation: A Vacation Adventure Clip|sw_url=video/official-clip-a-vacation-adventure-lego-star-wars-summer-vacation}} |
||
| + | *<!-- 2022-08-10 -->{{SWYouTube|YV6gGSxqNF4|LEGO Star Wars Summer Vacation | Booth to Beach|sw_url=video/featurette-booth-to-bricks-lego-star-wars-summer-vacation}} |
||
==Notes and references== |
==Notes and references== |
||
| Line 683: | Line 919: | ||
|es=Landonis Balthazar Calrissian |
|es=Landonis Balthazar Calrissian |
||
|fr=Landonis Balthazar Calrissian |
|fr=Landonis Balthazar Calrissian |
||
| + | |he=לאנדו קלרסיאן |
||
|ja=ランドーニス・バルサザール・カルリジアン |
|ja=ランドーニス・バルサザール・カルリジアン |
||
|ka=ლენდონის ბალთაზარ კალრისიანი |
|ka=ლენდონის ბალთაზარ კალრისიანი |
||
| Line 688: | Line 925: | ||
|pl=Lando Calrissian |
|pl=Lando Calrissian |
||
|pt=Lando Calrissian |
|pt=Lando Calrissian |
||
| − | |ru=Лэндонис Бальтазар Калриссиан |
||
|tr=Landonis Balthazar Calrissian |
|tr=Landonis Balthazar Calrissian |
||
|uk=Лендоніс-Балтазар Калріссіан |
|uk=Лендоніс-Балтазар Калріссіан |
||
| Line 701: | Line 937: | ||
[[Category:Calrissian family]] |
[[Category:Calrissian family]] |
||
[[Category:Con artists]] |
[[Category:Con artists]] |
||
| + | [[Category:Crimson Dawn personnel]] |
||
| + | [[Category:Entrepreneurs]] |
||
[[Category:Gamblers]] |
[[Category:Gamblers]] |
||
[[Category:Gold Squadron personnel]] |
[[Category:Gold Squadron personnel]] |
||
[[Category:Humans]] |
[[Category:Humans]] |
||
| + | [[Category:Individuals with he/him pronouns]] |
||
[[Category:LGBTQ+ individuals]] |
[[Category:LGBTQ+ individuals]] |
||
[[Category:Males]] |
[[Category:Males]] |
||
Latest revision as of 03:51, 9 April 2024
| | |
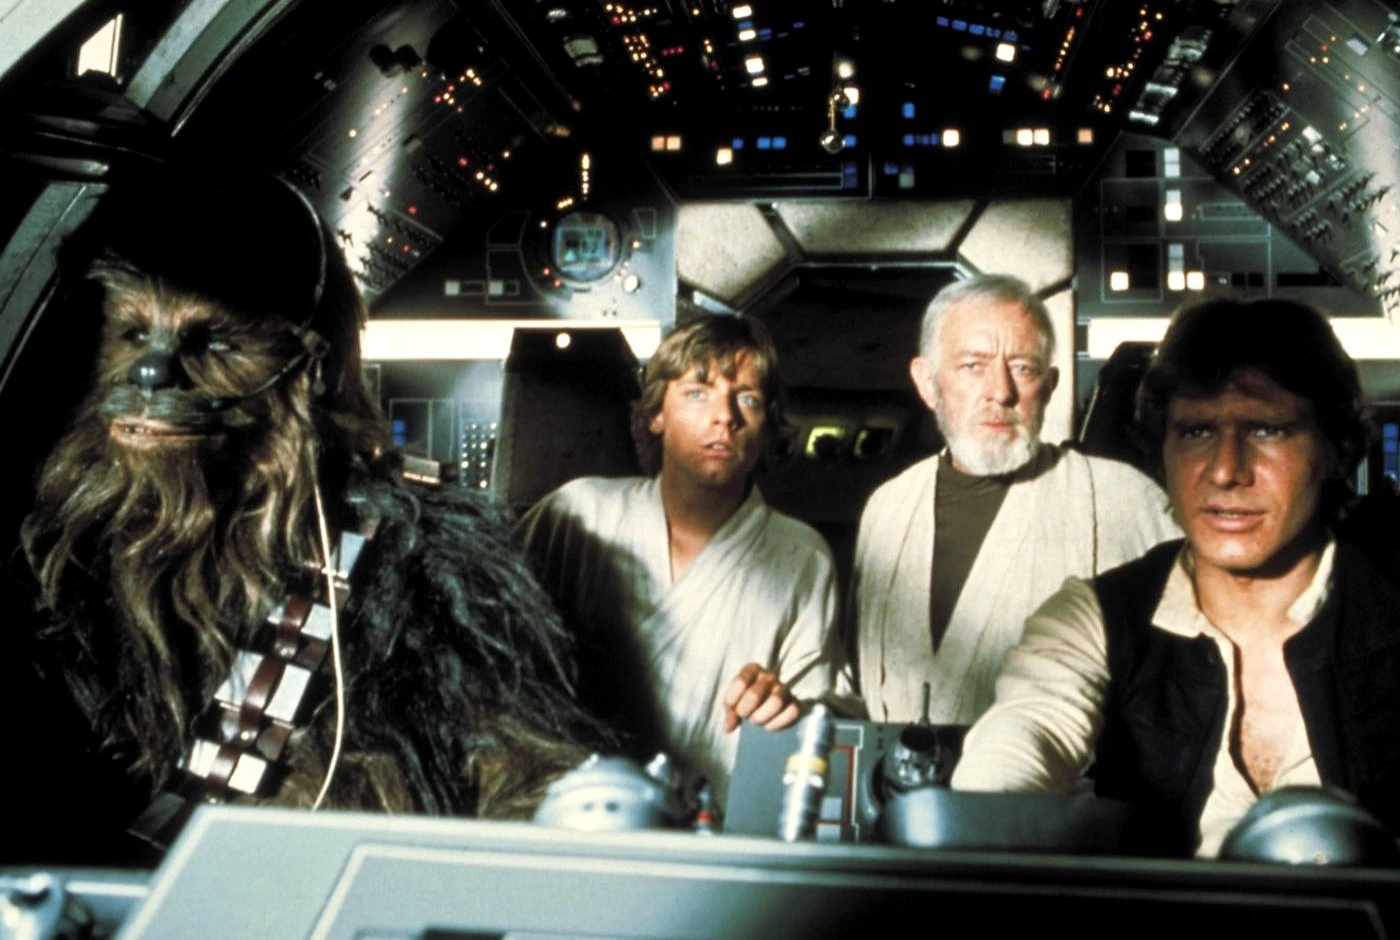
- "I'm not interested in throwing my life away for nothing. I don't get into fights I know I can't win. But when it comes to something I care about, or someone I care about…I'm as brave as they come. When it's like that, I don't care about the odds. Bet on it."
- ―Lando Calrissian
Landonis Balthazar Calrissian, otherwise known as Lando Calrissian, was a human smuggler, gambler, and entrepreneur who became Baron Administrator of Cloud City and, later, a general in the Rebel Alliance. Born on Socorro, he was the owner of the Millennium Falcon before losing it to Han Solo in a game of sabacc on Numidian Prime. Afterward, Calrissian put an end to his days as a smuggler and became an entrepreneur, setting up a small mining operation on the planet Lothal before eventually becoming the leader of Cloud City in the skies of the planet Bespin.
During the Galactic Civil War, Darth Vader arrived on Cloud City to lay a trap for his son, Luke Skywalker. As part of the trap, the Dark Lord of the Sith forced Calrissian into tricking a group of Rebels, including Solo and Princess Leia Organa, leading them to Vader himself. Though Vader promised to leave Cloud City without an Imperial presence, Calrissian felt the deal had been altered to the point where he could no longer tolerate it. Calrissian alerted his citizens to the Galactic Empire's presence and impending occupation and ordered an evacuation. He helped the Rebels try to rescue Solo, who had been frozen in carbonite, from Boba Fett, but the bounty hunter escaped.
Calrissian joined the Rebel Alliance and set out to find Solo. After locating him in the palace of Jabba the Hutt on Tatooine, Calrissian aided in his rescue. The Rebels returned to the fleet, and Calrissian became a general, volunteering to lead the assault on the DS-2 Death Star II Mobile Battle Station during the Battle of Endor. During the battle, he piloted the Millennium Falcon into the battle station's core, firing the shot which destroyed it.
In the years of peace after the Empire's dissolution, Calrissian started a family and fathered a daughter named Kadara Calrissian. However, while she was only an infant, his daughter was kidnapped by the First Order. Six years later, he embarked on a quest to the desert planet of Pasaana with Luke Skywalker to find answers about the growing darkness in the Force, but failed to uncover anything. Seeking to bury the pain of those memories, Calrissian settled on Pasaana and led a solitary lifestyle where he was known as the "Hermit" to the Aki-Aki of the Lurch Canyon. He lived alone for some years while keeping contact with the Solo family and was later asked by Organa's Resistance for his aid in the war against the First Order.
In 35 ABY, Lando helped the Resistance and reunited with his old friend, Chewbacca. Calrissian played one more role in the fight for galactic freedom as he brought an assembled Citizens' Fleet to reinforce the Resistance at the battle at Exegol, from which the Resistance emerged victorious.
Biography[]
Deals and adventures[]
Various schemes and journeys[]
- "Holojournal Entr—[sic]…take the walkers…in the Halthor sector. Just my luck, the buyer was under Imperial surveillance."
- ―Lando Calrissian in a holojournal entry
Young Lando Calrissian
A member of the tragic Calrissian family,[14] Landonis[8] Balthazar[3] Calrissian, otherwise known as "Lando" Calrissian, was born on the planet Socorro.[19] During his youth, he became a smuggler and a gambler, excelling in a card game known as sabacc. He traveled throughout the galaxy and piloted a freighter called the Millennium Falcon,[4] which he won through a game of sabacc at[20] the gas giant[21] Bespin.[20] The ship saved his life on numerous occasions.[6] Sometime before 10 BBY, Lando won a subtropical moon in the Oseon Belt during a game of sabacc. Lando also developed a partnership with L3-37, a custom self-made piloting droid.[8]
During his time with L3, Lando nearly lost her to a Hutt after making a bad bet in a game of sabacc on Gonda.[22] At one point, Calrissian was involved in an incident with a Dawinian and their companion.[23] He also came to meet the Tonnika sisters, even showing Brea Tonnika how to work the controls on the Falcon. At another point, Brea and Senni Tonnika made a mess of the room they were staying in on[24] the city-world of[25] Coruscant in order to get back at Calrissian.[24] At some point, Calrissian met a droid mechanic who worked on[26] the Mid Rim planet[3] Kijimi, with that mechanic coming to owe Calrissian a favor.[26]
Sometime prior to the Battle of Yavin, Lando and L3-37 were ambushed in the Halthor sector when an Imperial interdictor dropped out from hyperspace. As a result of the ambush, Calrissian lost a majority of his shipment of walkers that he acquired from an Er'Kit arms dealer in the Noonian sector.[18] Lando also had dealings with Crimson Dawn on Felucia. He completed his debt to Crimson Dawn and its leader, Dryden Vos.[8] At another point, Calrissian visited Pantora and successfully convinced Imperial Vice Grand Administrator Prita Sven to let him leave the planet with a freighter full of poached forlyn carcasses.[9]
Delivering an artifact[]
- "Bad luck? No such thing,"
- ―Lando Calrissian, said laughing

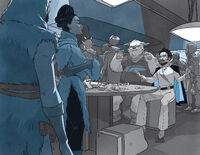
Lando meets with Queen Forsythia Jin.
Calrissian and L3-37 at some point was arrested for smuggling and was sent to the planet Hynestia. Lando and L3 was asked by Queen Forsythia Jin of Hynestia to deliver an artifact to the Galactic Empire for making up for a gherlian fur failed delivery. Princess Rinetta Gan knew about the real purpose of the artifact from her teacher Zel Gris. It was supposed to function as an energy source and make up for the lack of sunlight on the planet Livno III. Without it, Livno III would fall to ruin and destruction. Rinetta tried to force Calrissian and L3 to comply with her new orders after sneaking onto the Millennium Falcon as a stowaway. Her plan failed as Calrissian traveled to Neral's moon to settle a debt with Ne'eda Frip. When the exchange went wrong and escaped but he was captured by Queen Forsythia again. Queen Forsythia put Calrissian and L3 in jail. Rinetta freed Calrissian and L3 again. She wanted them to help her return the artifact to Livno III. They all escaped Hynestia and had to defeat Ne'eda's starships before making the jump to Livno III. After returning the artifact to Livno III, they put the princess Rinetta back to Hynestia. Queen Forsythia pardoned Calrissian and L3 afterwards.[22]
Freeing slaves[]
- "So, are you Calrissian?"
"Depends. Are you a fan, or a bounty hunter?" - ―Kristiss and Lando Calrissian

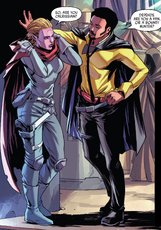
Lando meeting with Kristiss
Calrissian later smuggled weapons to Petrusia after the Empire seized control of it. Following that operation, Calrissian considered turning the Falcon into a casino, despite L3's reservations about it. He also started to write the Calrissian Chronicles to show the galaxy his prodigiousness. Calrissian and L3 took the Falcon to Batuv where he tried to by a new cape from Borkus until he met the bartender Kristiss. She told Calrissian of her people's plight and status as slaves at the Imperial outpost on Kullgroon. Kristiss asked for his help in arming her people for 1,000 credits up front. Despite his reservations, Calrissian decided to speak with her and have a drink with her.[27]
Calrissian was confronted by Brushaun, who believed that he cheated him out of 2,000 credits in a card game on Canto Bight. Calrissian was saved by Kristiss, who offered him the credits to pay off Brushaun and more if Calrissian helped her people. Calrissian spoke with L3 about this mission and knowing he would be a dead man, Calrissian accepted Kristiss' mission. Enroute to Kulgroon, the Falcon came under attack by several TIE fighters. Calrissian and L3 were able to lead the TIEs to a moon, where he was able to pick them off before they arrived at Kullgroon.[27]
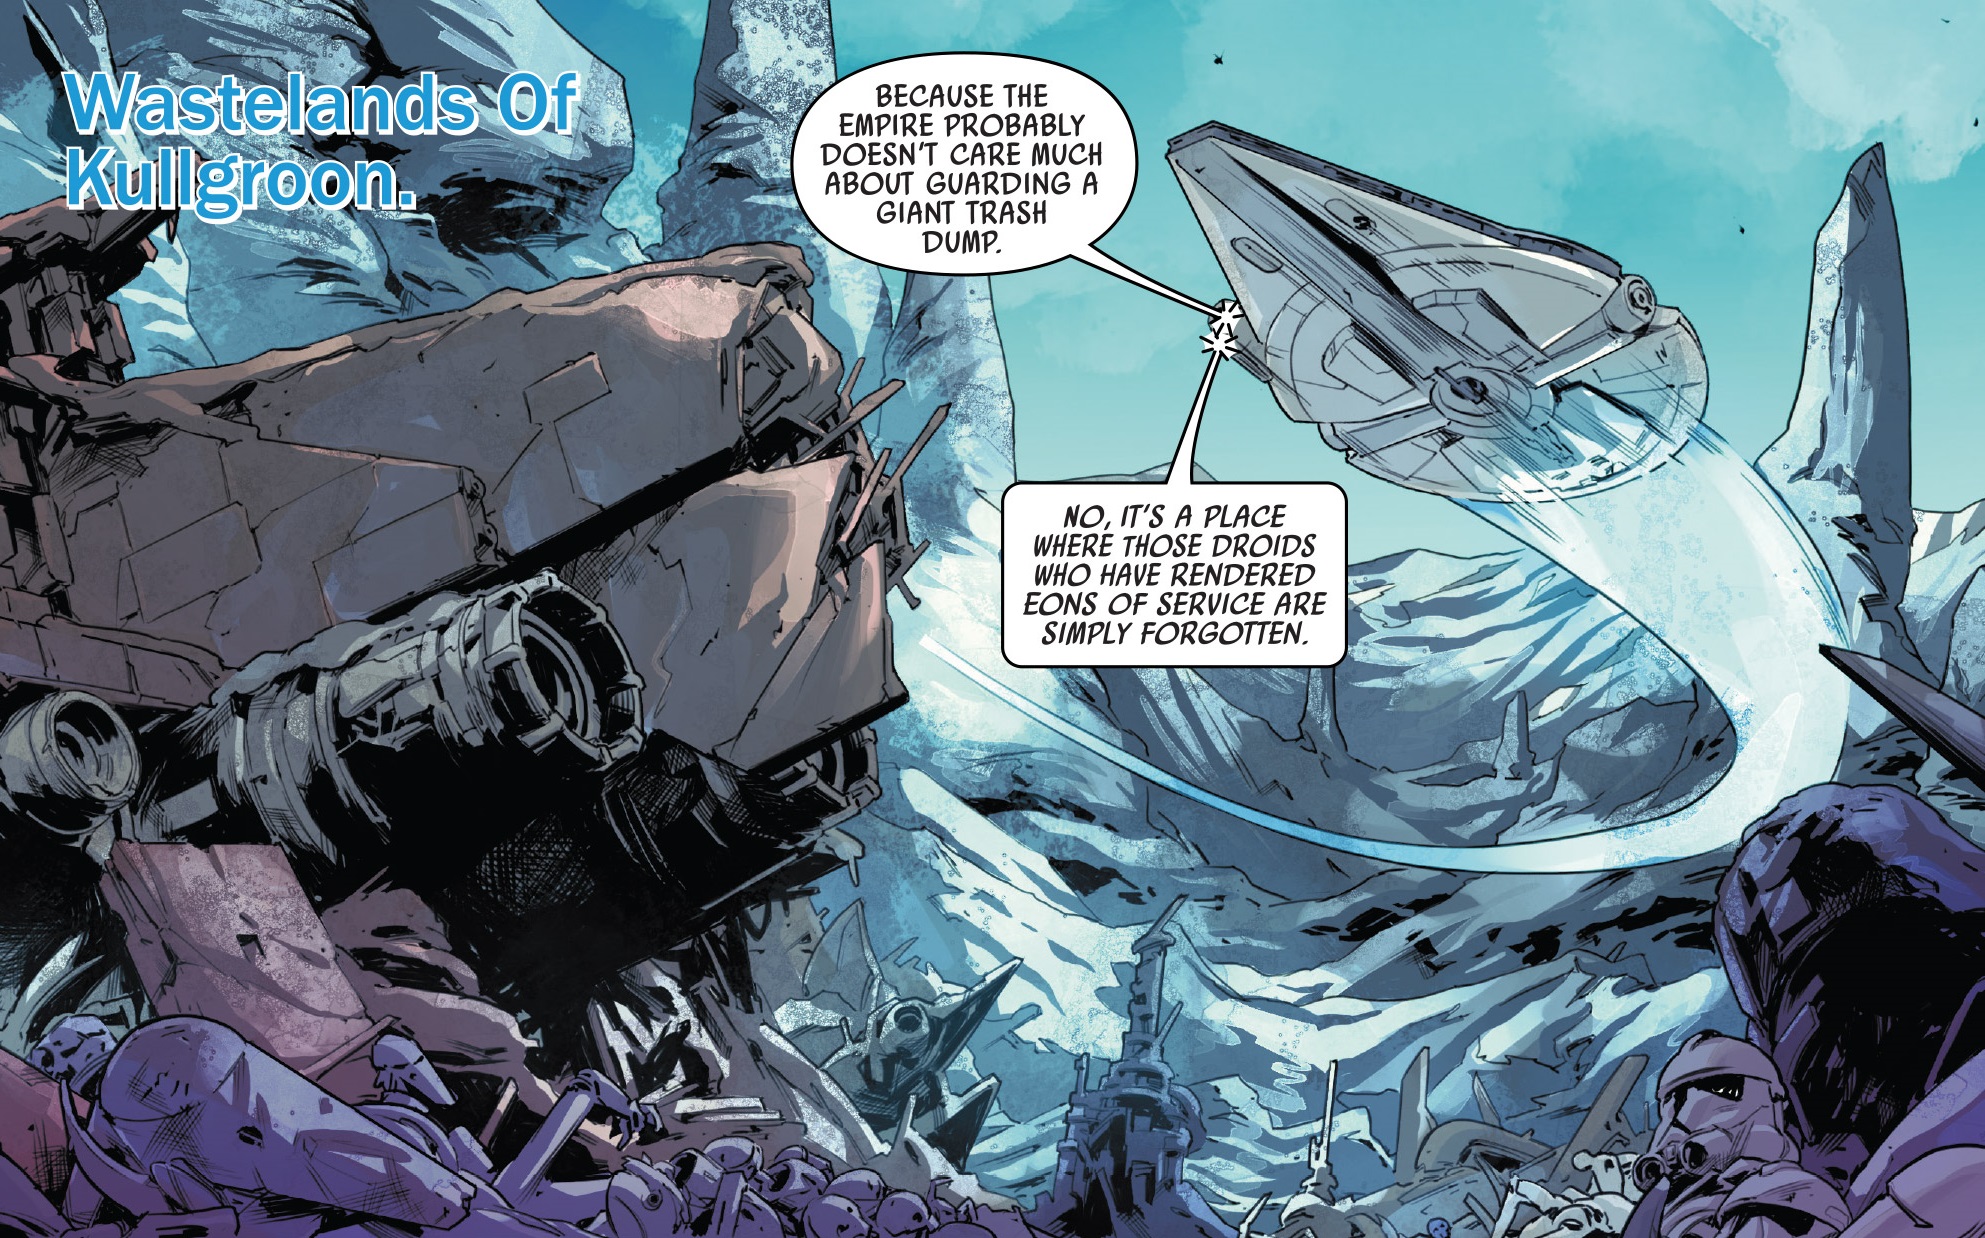
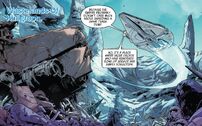
Lando arrives at Wastelands of Kullgroon aboard the Millennium Falcon
Calrissian powered the Falcon down in order to appear as space junk in order sneak past the Empire. As the Falcon descended into Kullgroon's atmosphere, he and L3 were able to pilot the ship in to the wastelands. Calrissian, Kristiss, and L3 made their way towards the camp. After Kristiss got herself captured by a pair of stormtroopers, Calrissian considered abandoning the mission but L3 convinced him to stay. He came under attack by some outlaws and starfighters. Calrissian was able to find a abandoned star fighter and attempted to evade them but he was shot down and taken prisoner by the outlaws.[28]

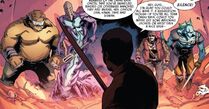
Lando about to fight Murkel Kev, Cantor Zain, Kawal Trane, and Siswan in a arena battle.
The outlaws' leader, Batalla, remembered Calrissian from Calladus Festival, where he took the bulk of the Zakku Rain Cartel's credits. Calrissian said it was actually Batalla's prize Sharropon. He tried to convince Batalla that he was on vacation and was visiting a friend. Batalla considered handing Calrissian over to one of his enemies for a king's ransom and had Calrissian taken to a jail cell. When a droid came with food, Calrissian was able to trick the droid and disable it. As he made his escape, Calrissian contacted L3 for a pick up. However, L3 was busy looking for Kristiss. He ran into Batalla's outlaws who threw into a arena where he fought against several members of the Zakku Rain Cartel, Murkel Kev, Cantor Zain, Kawal Tane, and Siswan, until L3 and the Falcon arrived. However, L3 wanted to pick up Kristiss despite Calrissian's protests. The Falcon came under attack by an indigenous creature, but Calrissian and L3 was able to steer past them. He contacted Kristiss to arrange the weapons drop off before L3 picked up several TIEs closing in on the Falcon.[29]

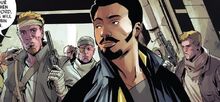
Lando leads Petrusian slaves against stormtroopers
Calrissian flew the Falcon low into the wastelands' canyon, hoping to fool the TIEs into believing that the Falcon had crashed. Calrissian was able to cause a explosion that sealed off the canyon from the TIEs. He took the Falcon to a sewage expulsion port. As he made his way through the port, Calrissian was confronted by several creatures and shot at them. He was later confronted by the creatures mother, but was able to kill it. Calrissian was able to reach a control station and told L3 to hack into the mainframe to find Kristiss and disable Level 7 to 9's security monitors. Calrissian met up with Kristiss and her father. After rallying the other Petrusians to take arms against the Empire, despite their resistance to warfare, Calrissian and the slave made their escape to the sewage port and met up with the Falcon. After the slaves armed themselves, Calrissian and Kristiss led them against the stormtroopers.[23]
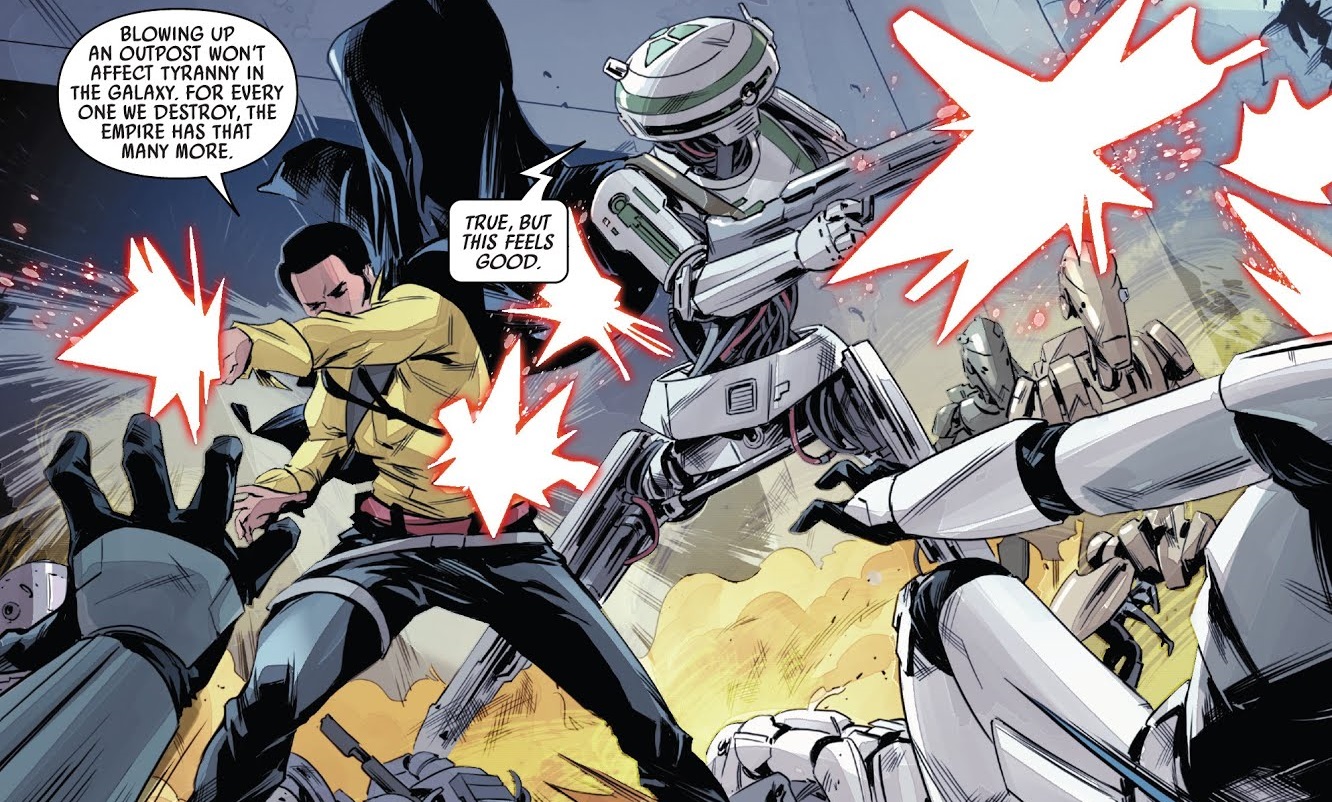

Lando fighting alongside L3 on Kullgroon
Calrissian and the Petrusians fought the outpost's stormtroopers. When L3 told him that several TIEs were returning to the outpost, Calrissian believed it was time for him to retreat when the Petrusians were losing their battle. However, Kristis reactivated hundreds of derelict droids to help them win the battle. Calrissian and Rythus charged the stormtroopers and saved Kristiss from them. He and Kristiss used a cord to swing over the stormtroopers. He met up with L3 and saw the stormtroopers taking the Falcon. After the battle, Calrissian and L3 met up with Kristiss and the slaves as they boarded an Imperial shuttle. He accepted a ride from Kristiss and her father, who gave him his payment. Calrissian learned from L3 that the Falcon was taken and impounded on Vandor. A week later, Calrissian and L3 found the Falcon on Vandor. There, he decided to go into early retirement and play sabacc at the Lodge.[30]
Coaxium heist[]
- "Everything you heard about me is true."
- ―Lando Calrissian, to Han Solo
During Lando's retirement on Vandor,[30] Qi'ra, who was an old acquaintance of Lando, and her comrades, Tobias Beckett, Han Solo, and Chewbacca, needed a fast ship in order to steal unrefined coaxium from the Pykes on Kessel for Vos. Qi'ra suggested they search for Calrissian, and the group found him hustling several bar patrons at sabacc by hiding a card up his sleeve. Solo joined in the game, and the stakes soon became Lando's Falcon against Solo's VCX-100 light freighter. Solo produced an impressive hand that caused the other bar patrons to erupt in applause, but Calrissian produced a superior hand by cheating. Calrissian inquired where Solo's ship was, but Qi'ra intervened, explaining the situation. Calrissian agreed to pilot the Falcon for the heist, in exchange for a 25% cut, negotiated down to 20% by Beckett.[8]
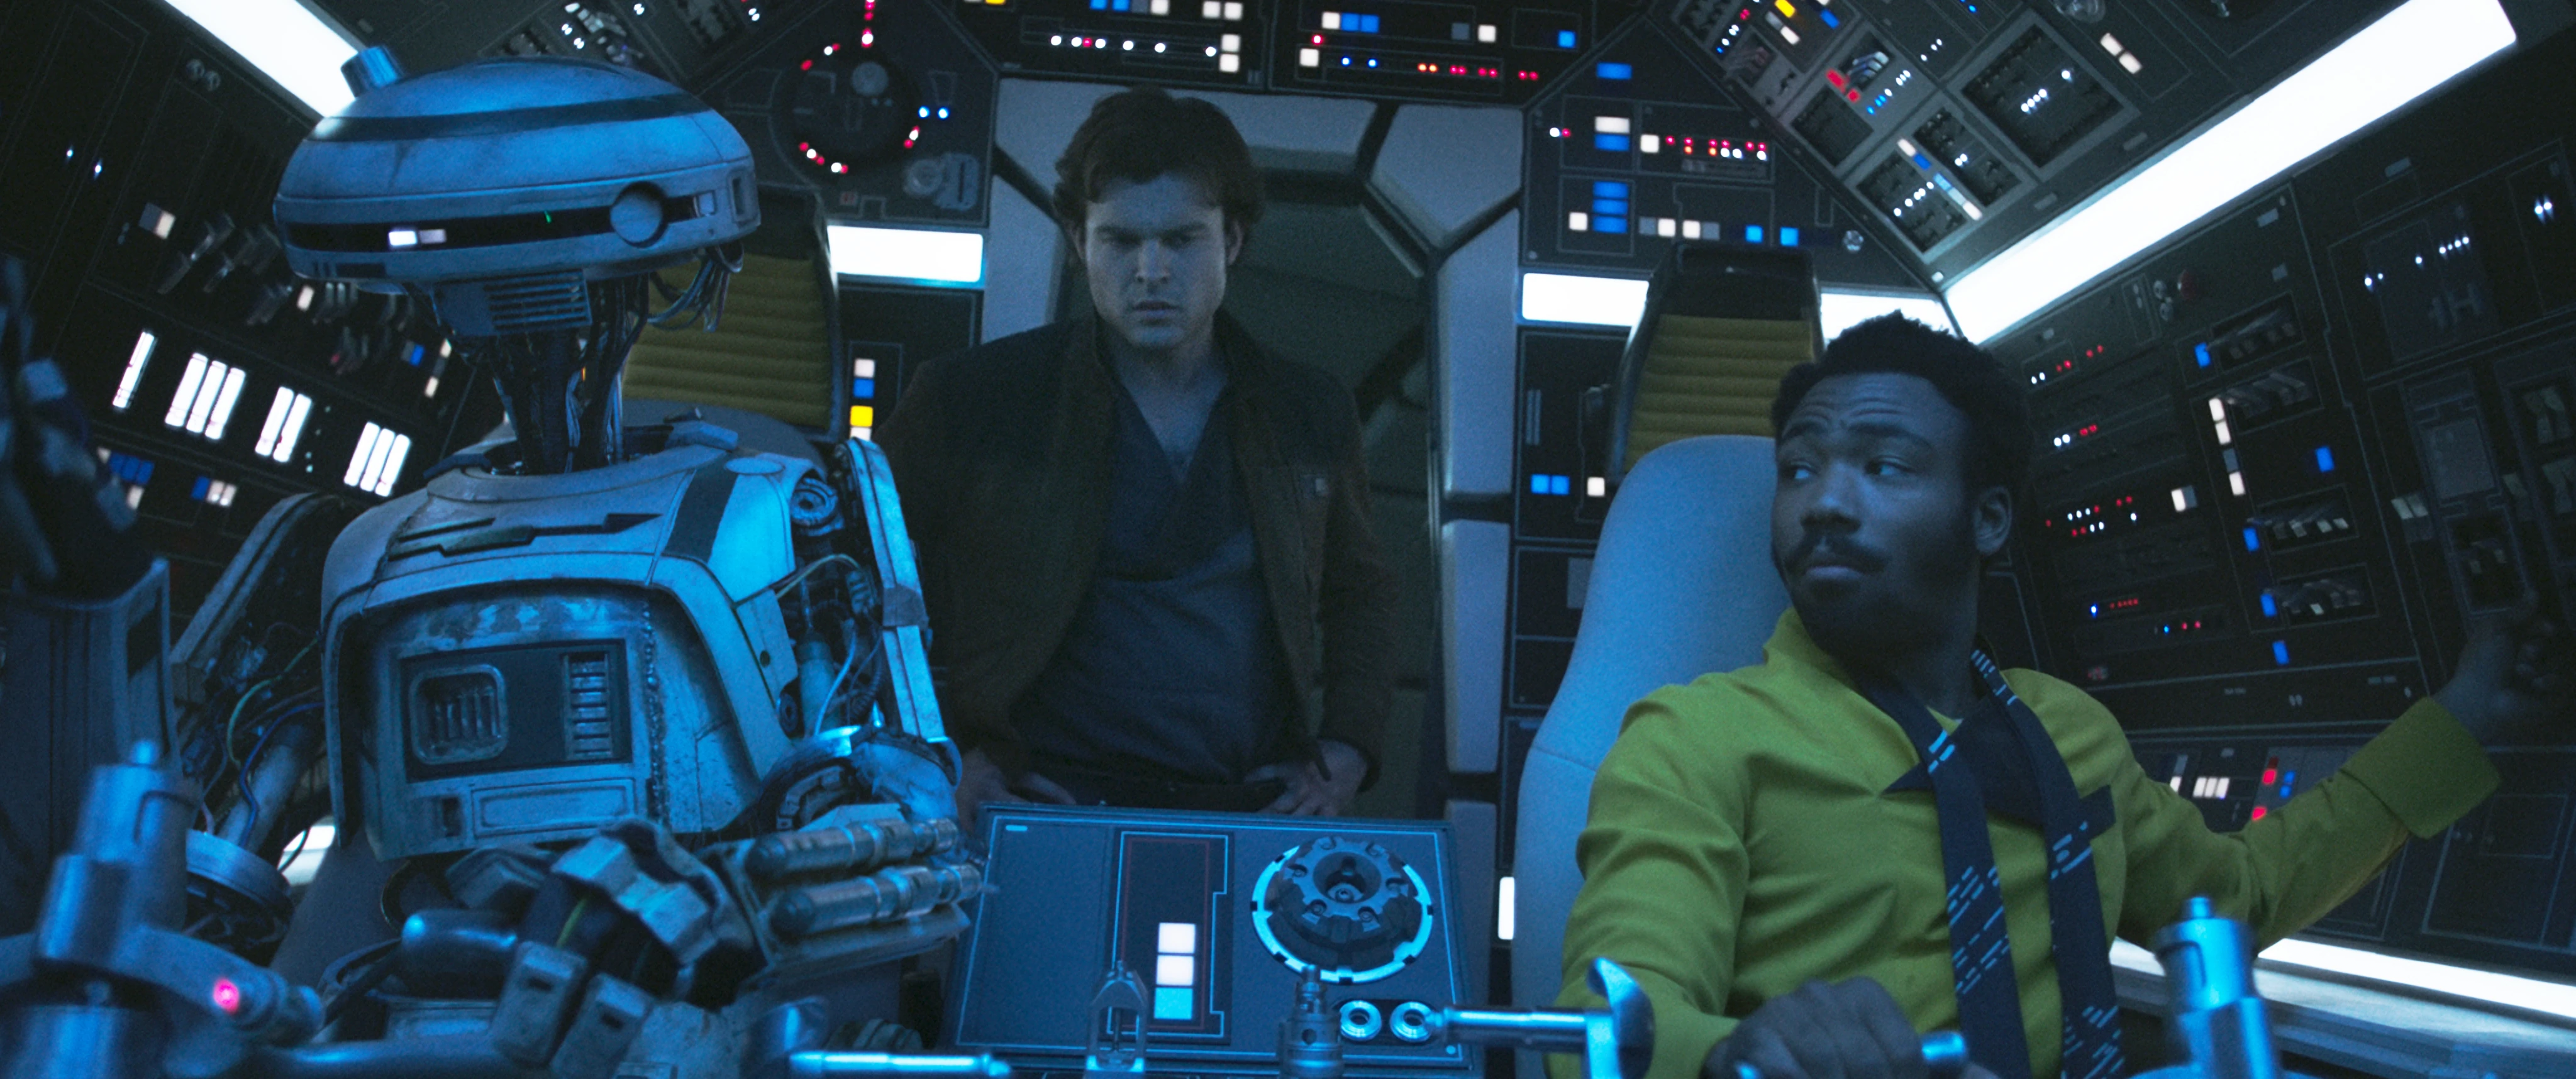

Lando and L3-37 about to jump to lightspeed.
After jumping to hyperspace, L3-37 plotted a course to Kessel that she implemented after admonishing Calrissian for flirting with Solo instead of flying. On Kessel, Calrissian remained aboard the Millennium Falcon during the heist and updated his autobiography. When Solo, Qi'ra, Chewbacca, Beckett, and L3 returned with the coaxium, Calrissian helped lay down covering fire against the Pykes until L3 was shot. Calrissian attempted to save L3, but was shot in the arm, and it took the efforts of Solo and Chewbacca to save him and L3. Aboard the Falcon, L3 died in a distraught Calrissian's arms. Due to his injury, Calrissian reluctantly allowed Solo to pilot the Falcon off Kessel.[8]
The crew encountered an Imperial blockade when departing Kessel, causing Solo to divert his course into the dangerous maelstrom. Calrissian retrieved L3's central processor and plugged it into the Falcon's navicomputer in order to plot a course out of the maelstrom, in which navigation was otherwise impossible. The Falcon crew encountered a massive space creature, and the Maw, a powerful gravity well. Solo launched the Falcon's escape pod into the gravity well, causing the creature to follow it and become trapped. The Falcon became trapped in the gravity well, only escaping when Beckett used a drop of coaxium in order to give the Falcon the power to escape.[8]
Savareen and departure[]
- "She is a hell of a ship."
"I hate you."
"I know."
"I'm going to be on my ship, in my quarters, waiting for you to bring me my share. And then I don't ever wanna see you again."
"Never?" - ―Han Solo and Lando Calrissian on Savareen
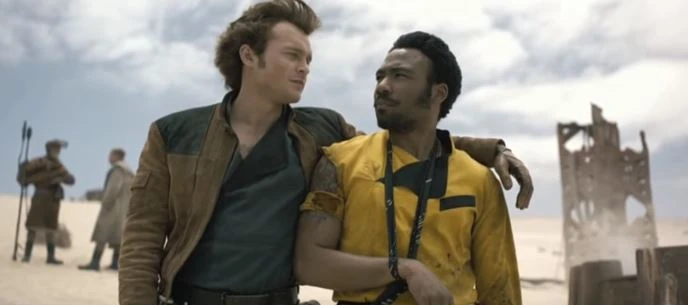
Lando on Savareen.
When the crew arrived at the refinery on Savareen in order to refine the coaxium, Calrissian was furious with Solo for the damage sustained by his beloved ship despite their miraculous escape. He abandoned the others in the Falcon when Enfys Nest and her Cloud-Riders arrived on Savareen to confront Beckett.[8]
Losing the Falcon[]
- "You really have it bad for the Falcon, don't you?"
"It's mutual, trust me. She belongs with me." - ―Lando Calrissian and Han Solo
Lando on Numidian Prime.
Solo and Chewbacca later tracked Calrissian to Numidian Prime, where he was once again hustling others at sabacc. Solo swiped Calrissian's spare card when he greeted him, and won the Falcon in a rematch, leaving with it.[8] At some point later, Solo and Calrissian's lives again intertwined in an event that the Tonnika sisters recalled as the "Lando ordeal." The ordeal was Solo's idea, but he blamed the sisters for the outcome.[24] Calrissian's business partner,[11] Lobot, also became familiar with Solo and the way he flew.[31]
Meeting Kaasha Bateen[]
At one point, Calrissian met Kaasha Bateen, who was serving within the Free Ryloth Movement during the Pasa Novo campaign, where the two developed romantic feelings for each other.[9]
Working with Vizago[]
- ""Smuggler"? Such a small word. I'm more of a… galactic entrepreneur."
- ―Lando Calrissian to Hera Syndulla
At Azmorigan's recommendation, Calrissian was hired by Vizago to assist him with recovering one of Maz Kanata's treasure troves that was hidden on Seylott. On the planet, they were confronted by Black Sun thugs who had it locked down. Calrissian was able to escape with the Smuggler's Guide by claiming he was just hired help and that Vizago and Azmorigan were the brains of the operation. Afterword, he went to the Spiran mineral spas to recover and read the book. The Smuggler's Guide was stolen from him by a Rybet thief nicknamed "Sticky Fingers" after he was beatean up by the Esoomian brawler Bumblethunk, and eventually came into the possession of Latts Razzi.[33]
After losing the Falcon, Calrissian put an end to his days as a smuggler. He fancied himself a respectable businessman,[4] and referred to himself as a "galactic entrepreneur." At some point Calrissian met a criminal known as Azmorigan, who introduced him to Cikatro Vizago, a Devaronian crime lord who operated on the Outer Rim planet of Lothal.[32]
Later, Calrissian purchased a plot of land from Vizago on Lothal, on which the former smuggler intended to begin mining precious minerals. In order to do so discreetly, without attracting the attention of the Empire due to Imperial mining regulations, Calrissian planned to acquire a puffer pig from Azmorigan; puffer pigs could smell valuable minerals and could do the same job as twelve mining scanners. He required a ship that could evade the Imperial blockade set up around the planet; Calrissian attempted to smuggle mining equipment onto Lothal but was stopped by the Empire.[32]
Hiring the Spectres[]
- " Name's Calrissian. Lando Calrissian. Now please, introduce me to my new droid."
- ―Lando Calrissian
Calrissian found such a ship after playing a game of sabacc in Jhothal, a settlement on Lothal. He played the game in Old Jho's Pit Stop, competing against Tsoklo and Garazeb Orrelios, the latter of whom was a Lasat crew member aboard the Ghost, a ship operated by a band of rebels on Lothal. Orrelios believed he had the upper hand and bet his crew's astromech droid, C1-10P, but Calrissian beat his hand by using an Idiot's Array. The droid, nicknamed Chopper, therefore belonged to Calrissian, but he agreed to give the droid back and pay the rebels much-needed credits if they assisted him on an operation—which, unknown to them, was the acquisition of the puffer pig. The crew was reluctant to trust Calrissian, but they needed the credits and wanted Chopper returned to them, so they agreed; Calrissian spent much of the time using a divide and conquer strategy, trying to play the rebels against each other so he could accomplish his goals. During the trip to rendezvous with Azmorigan, Chopper gave Calrissian a tour of the ship, where he admired the artwork of Sabine Wren, a Mandalorian artist and member of the crew. Calrissian used this as part of his strategy, flattering the Mandalorian's work in order to make himself look good.[32]
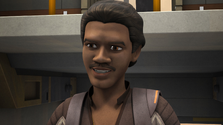
Lando Calrissian aboard the Ghost
Once the Ghost arrived at the rendezvous, the ship docked with Azmorigan's vessel, Merchant One. Calrissian and the crew's leaders, Hera Syndulla and Kanan Jarrus, boarded Merchant One, and Calrissian told them to follow his lead. Calrissian also hinted that the ship had escape pods—a coded message to Syndulla, whom he intended to hand over to Azmorigan as payment for the puffer pig, and he knew that she would need a way to escape the vessel. Despite Jarrus' protests, Syndulla played along once Calrissian offered her to the crime lord, and Azmorigan gave Calrissian the puffer pig, which was locked in a crate. Calrissian and Jarrus returned to the Ghost, where Calrissian explained that he expected Syndulla to use an escape pod to leave Merchant One—which she did, returning to the Ghost and attracting the ire of the crime lord. Once Syndulla was aboard, and had given Calrissian a piece of her mind over the betrayal via a knee to the groin, the Ghost jumped back into hyperspace, leaving Azmorigan behind them.[32]
Calrissian showed the crew the puffer pig and warned them not to let it out of its cage, as it would expand into a larger creature if it was startled. Orrelios and fellow crew member Ezra Bridger ended up letting it out, and the pig ran throughout the Ghost before being so startled that its size increased and it became stuck in one of the ship's hallways. This proved potentially problematic once the Ghost returned to Lothal, where they needed to slip through the Imperial blockade; Syndulla, the ship's pilot, was stuck on the other side of the pig, so Jarrus would need to pilot the vessel himself. Calrissian asked Chopper, who only responded to Calrissian's commands, to fix the mechanism that would allow the Ghost to mask its signature and slip past the blockade. Chopper was able to do so and the ship nearly made it through the blockade, but the pig expanded again, knocking Orrelios into the controls that allowed the ship's signature to remain masked. The Empire detected the Ghost as a rebel vessel and sent a group of TIE fighters in pursuit, which the Ghost was able to destroy.[32]
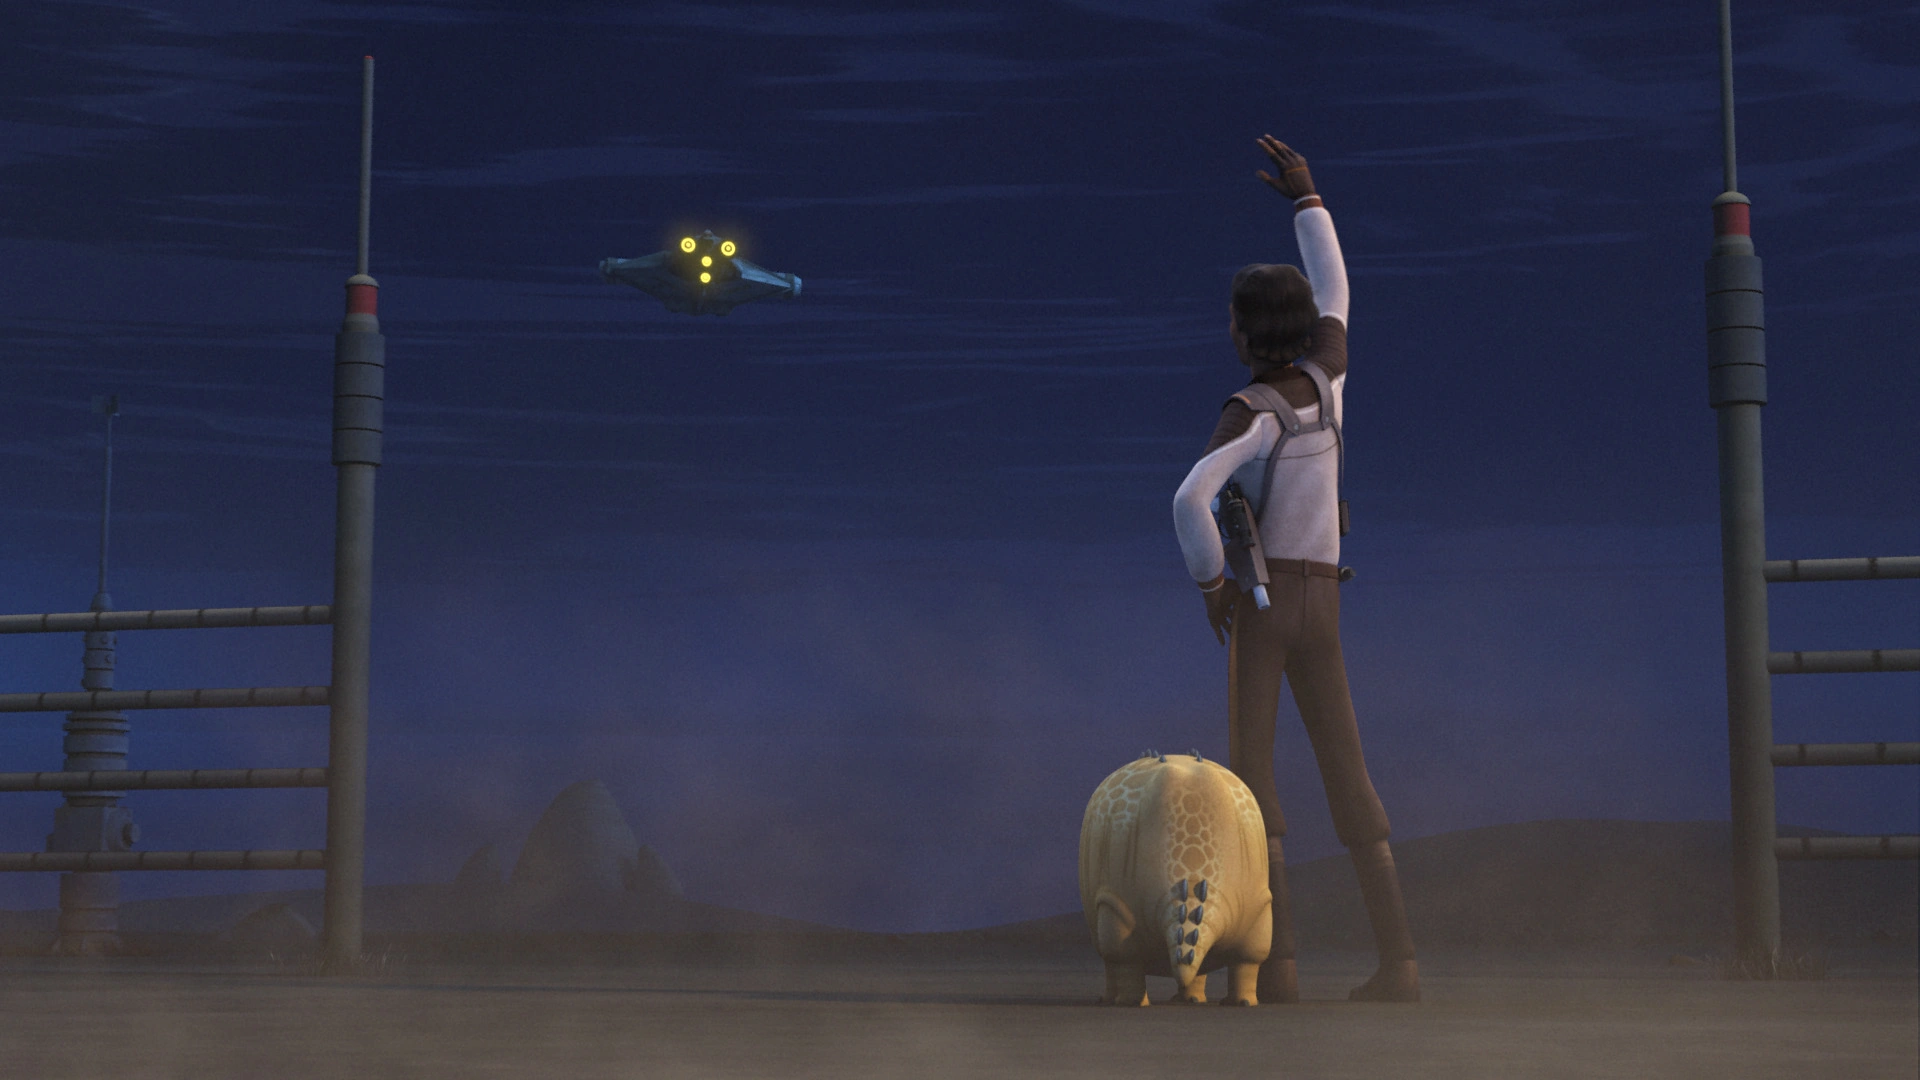
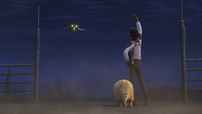
Calrissian bids farewell to the Ghost.
The crew made their way to the farm that Calrissian purchased from Vizago, where Calrissian explained that his plan was to use the puffer pig for mining. They were confronted by Azmorigan, however, who had anticipated that Calrissian would return to the land. This led to a shootout between the rebels and Azmorigan's forces, one that ended when Azmorigan threatened to kill Orrelios if they did not hand Calrissian over to him. Syndulla refused, and Chopper—who stole a crate of fuel for the Ghost and returned to the ship—fired the cannons on the Ghost at Azmorigan, giving Orrelios a chance to gain an upper hand and hold Azmorigan at gunpoint. Syndulla demanded that the crime lord leave, a demand that he acquiesced to. With Azmorigan gone, Calrissian claimed that he did not have the credits that he owed the rebels, but he did return Chopper to them. Nonetheless, Syndulla held Calrissian in her debt, though what he did not reveal was that he knew Chopper had stolen the fuel, which was why he did not give them any credits. He did, however, believe that he would one day meet the rebels again.[32]
Dealing with the Varluk Organization[]
- "I have some bad news for you sir. Your puffer pig has been stolen."
- ―W1-LE to Lando Calrissian

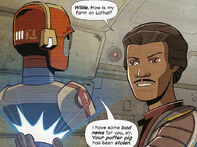
Lando finds out his Puffer pig has been stolen by the Varluk Organization.
Calrissian and Rikarda were traveling to the planet Klonoid, aboard the Stellar Sun. During the jounrey, his droid W1-LE, who he had left to watch over his puffer pig and the farm, said that the farm was attacked by raiders who stole Calrissian's pig. Calrissian found out it was the Varluk Organization and asked Rikarda to set course to their headquarters which was located on Zyzar.[34]
After arriving, Calrissian tried to enter the headquarters through a window but was seen by to patrol men. Calrissian paralyzed and shot the patrol men and changed into one their uniforms. After entering the complex, he discovered all the rooms were empty but eventually found his pig in a cage. When trying to free her, he was captured by more patrol men and was sent to the companies leader, Ango Croom.[34]
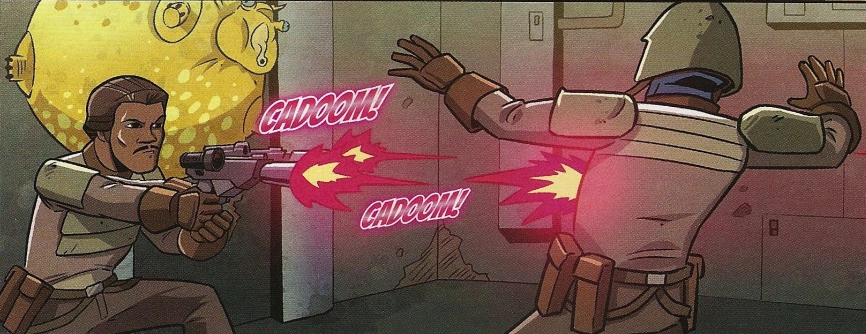

Lando rescuing his puffer pig
Croom explained to Calrissian that he was tired of waiting for him to return his debt, and decided to do it for him, by stealing his pig. Later Calrissian began to pull his pig out of the hands of the patrol men and the pig increased size, throwing the patrol men to the ground. As he was escaping, Calrissian threw a hologram of locations of raw materials in a room so which the Varluk Organization could find it, which meant Calrissian could pay his debt to the organization. Later beyond the complex, Rikarda picked him up on the Stellar Sun and they escaped.[34]
Returning a favor[]
Calrissian later came into contact with the rebels again some time later. After the rebels destroyed the Sovereign, the personal Star Destroyer of Grand Moff Wilhuff Tarkin, the Imperials tightened security on Lothal. The rebels returned to Lothal after having been away from the planet, where they were pursued by numerous Imperial agents: including Darth Vader, the Dark Lord of the Sith. Vader ordered that no ship could leave Lothal, leading the rebels to contact Calrissian to ask for his assistance in smuggling them off-planet. He spoke to them via hologram, as he was not on Lothal, but nonetheless agreed to help them in exchange for three military-grade shield generators. With the deal having been made, Calrissian ordered his personal droid, W1-LE, to assist the rebels with the masking transponders that would trick the Empire into pursuing false signals from their stolen Imperial shuttle. The rebels successfully escaped Lothal.[35]
Trouble on Tyegin[]
- "I really enjoyed your company but I'm afraid I'll have to get off at the next stop."
- ―Lando Calrissian
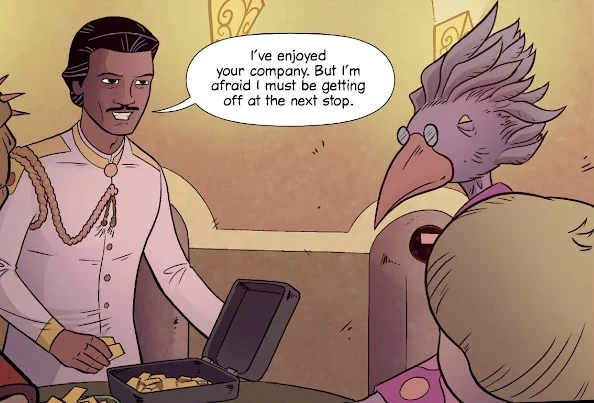
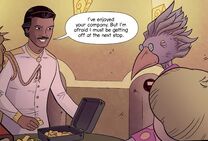
Calrissian and D'Lina aboard the Exas Jewell.
Calrissian later traveled to the planet Tyegin where he was part of a high-stake sabacc game taking place in the lead car of the Exas Jewell, a luxury train. During the time, Calrissian was posing as the train's designer, Shen Kanton. The other players of the game were D'Lina, Prince Baj, and Rakan. Calrissian eventually made a big win. Calrissian planned to leave the Exas Jewel before anyone figured out who he really was. However, the other players start to see through his scheme, because Kenton, as the designer of the train, was supposed to ride to the end of the line and host a grand reception. Calrissian attempted to smooth-talk his way out of the situation, but the conversation was interrupted by a sudden explosion at the front of the luxury train.[36]
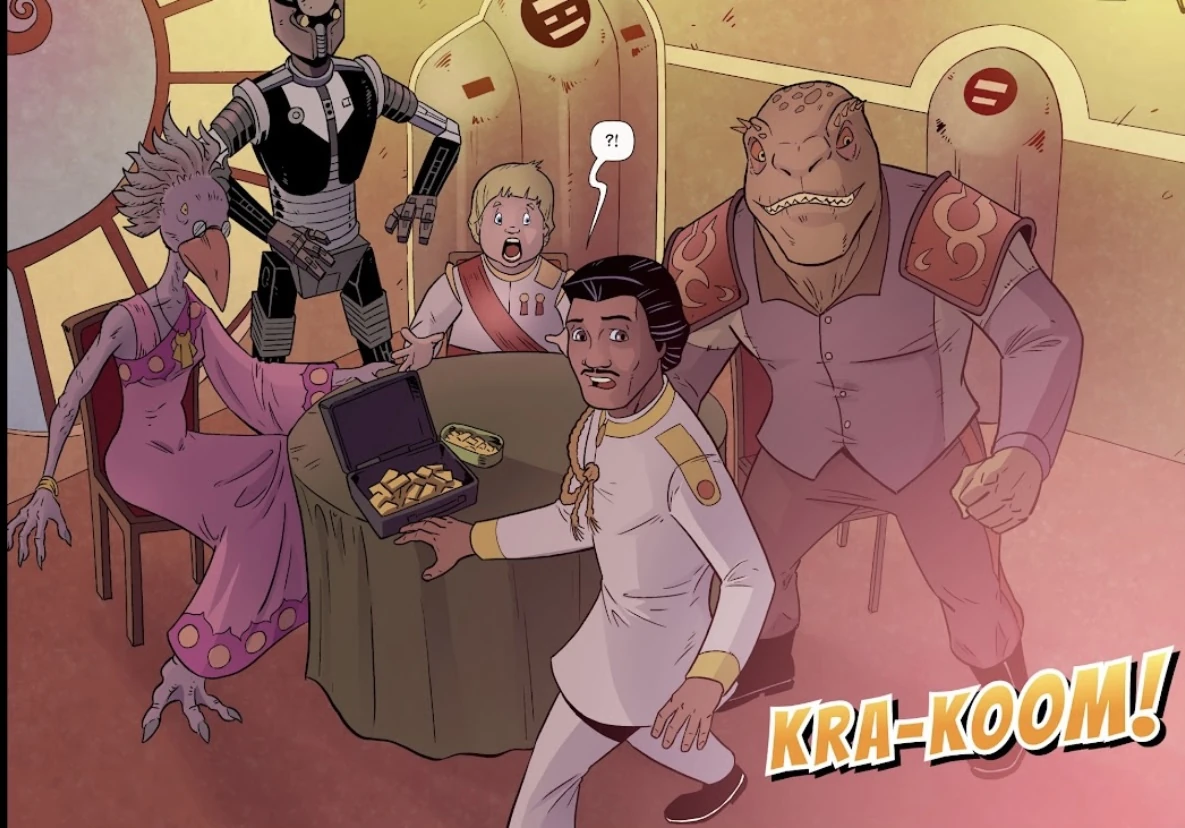

Calrissian hears the pirates explosion aboard the Exas Jewell.
A pirate gang which consisted of Zira, Grillo, and Shelvy blasted their way through the door. Grillo then destroyed the train's controls and the three pirates escaped the train on jetpacks with stolen riches. Right before they went, Zira offered Calrissian to come with them but he refused. When the pirates left, the people turned to Calrissian for leadership, still believing he designed the train. They decided to try and unhook the engine. The rest of the train stopped while the engine still went on[36]
Later, Calrissian ordered the people to grab whatever so they could carry it and take it all toward the train car's open front end in order to disrupt its magnetic field. Baj attempted to dump the train car's dealer droid out but was stopped by Calrissian told him otherwise. The considerable amount stuff up underneath the front of the train car ended up creating enough drag to slow it down. The big dining train car was still coming fast. It slammed into the back of the other cars. This sent the prince falling forward out of the train car. Calrissian then saving his life. When the Exas Jewel finally stopped, Tyegin's law enforcement landed close by and rescued them all.[36]
Galactic Civil War[]
Watching the Battle of Yavin[]
- "That's... that's my ship. That's the Millennium Falcon."
- ―Lando watches a recording of the battle over the Death Star
In the time following the Battle of Yavin, which saw the Alliance to Restore the Republic destroy the DS-1 Death Star Mobile Battle Station, Calrissian was playing a game of klikklak with Jaff Basan in the illegal casino owned by Luck Luck Freidal. Before the game, which Calrissian was certain he was winning, could end, the Empire raided the casino and shut it down. Traveling to a cantina to reunite with Lobot, Calrissian learned about the Battle of Yavin, watching a DarkNet recording leaked by the Rebels.[31]
To his surprise, he saw the Millennium Falcon enter the fight. Asking to watch it again, he was certain the ship was being piloted by Solo. Surprised that Solo was fighting for what he had written off as a lost cause, Calrissian toasted to Solo before asking Lobot to shoot him if he ever tried to do something similar. Calrissian then sat, drinking drinks he could not currently afford and pondering what had made Solo join the Rebels.[31]
Working with Sana Starros[]
- "Heh. Been a long time. I knew you'd come back sooner or later. Finally got sick of Han, didn't—"
"This isn't a social call. Can you help me or not?" - ―Lando Calrissian and Sana Starros
Lando meeting with Sana Starros
Sana Starros and Calrissian traveled to Coruscant to help Starros crank a scam with thirteen crates of Imperial weapons. Calrissian arranged for them to meet with an Imperial officer, where Sana told them that Krawg pirates had the crates. For more information, she took 20,000 credits, in addition to 5,000 that she received from the pirates for selling them one box.[37]
After leaving Coruscant, they went to the planet Tatooine, to the palace of Jabba Desilijic Tiure. There, Starros disowned from the common past with Calrissian and also reported for 20 thousand credits, who had the thirteenth box of weapons. She herself had stolen it from Jabba, but she stated that the Krawg had done it and successfully completion of their transaction.[37]
When leaving Tatooine, the smugglers were attacked by a ship of Krawg who found out that she had deceived them. Eventually the Empire arrested the pirates and Calrissian and Starros managed to escape. They later traveled to Nar Shaddaa where they had dinner before Calrissian left.[37]
Deal of a lifetime[]
- "...I also know who they say you are. The Fiend of Castell. The Burning Moff. The Imperial Governor of this sector, brutal in your response to even the slightest challenge to the Empire's authority."
- ―Lando Calrissian to Moff Ssaria

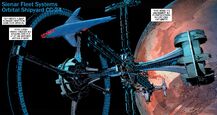
Lando lead an audacious heist to steal the Emperor's yacht Imperialis
Prior to becoming the administrator of Cloud City, Calrissian was a self-described opportunist trying to "make his way" through an uncaring universe. Calrissian was able to make a living by illegally acquiring and redistributing rare or valuable goods. However, due to Calrissian's penchant for gambling, he and his business partner Lobot were in deep with the wrong people. After convincing Moff Ssaria, also known as the "fiend of Castell," into parting with a valuable and expensive trinket, Calrissian rendezvoused with Lobot at a cantina. After having had a few drinks, Calrissian was informed that Papa Toren, the individual who had loaned him money, was ready to see him. Calrissian sought to square away his debt by handing over the trinket to Toren, but the loan shark rejected to honor their prior arrangement. Instead of clearing the smuggler's debt, Toren offered to lower Calrissian's debt by ten percent.[11]
Outraged by the offer, Calrissian claimed this was not the deal they had agreed upon. Toren argued that if Calrissian had any qualms about the deal, he should take it up with the Imperials, who had taken his property from him in the first place. Toren argued that had Calrissian used the time he had been given to pay off the debt, Calrissian would not be in his current predicament of owing a vast sum of credits, with little-to-no time to pay it off. The loan shark suggested that if the smuggler was sincere and adamant about clearing his debt, he would do so, provided Calrissian agreed to do a job for him. After leaving the cantina, Calrissian and Lobot got into a heated exchange. Angry at the fact that Calrissian had accepted the deal, as well as Toren's gall, Lobot argued that Calrissian should have stood up to Toren. Calrissian countered by explaining that only people with no imagination use blasters. If they tried to harm Toren, a bounty would be placed on their heads, adding to their current troubles.[11]
Instead of using violence to accept the deal, Calrissian insisted that the job would be quick. It would not only clear their debt but would also put them ahead. Although Lobot was concerned about their chosen dangerous lifestyle, Calrissian promised his friend that they would no longer accept high stakes work after completing the job. Having acquired the services of Aleksin and Pavol, in case the plan required the use of force, Calrissian and Lobot went to speak to Sava Korin Pers, a former antiques dealer and professor. Calrissian attempted to make good on a promise to Korin, to pay her back for the loss of the woman's eye. Korin argued that she could not think of a reason why she would ever work with Calrissian again, until she saw Toren's plan and what they were going to steal. According to the plan, Calrissian and company were to steal a pleasure craft being refitted at Sienar Fleet Systems Orbital Shipyard CC-24.[11]
Adhering to Toren's plan, Calrissian and his crew donned stealth suits and infiltrated the shipyard. They managed to overpower the stormtrooper sentries and escape in the stolen ship. After taking off, Calrissian and Lobot discussed the fact that the ship that they had stolen seemed to be fairly advanced, specially modified. Lobot asked whether his friend could activate the hyperdrive. Calrissian, however, assured Lobot that he could do so only after the ship escaped the planet's gravity well. Unknown to Calrissian and his crew, they had stolen the Emperor Palpatine's personal luxury yacht, Imperialis.[11]
Imperial entanglements[]
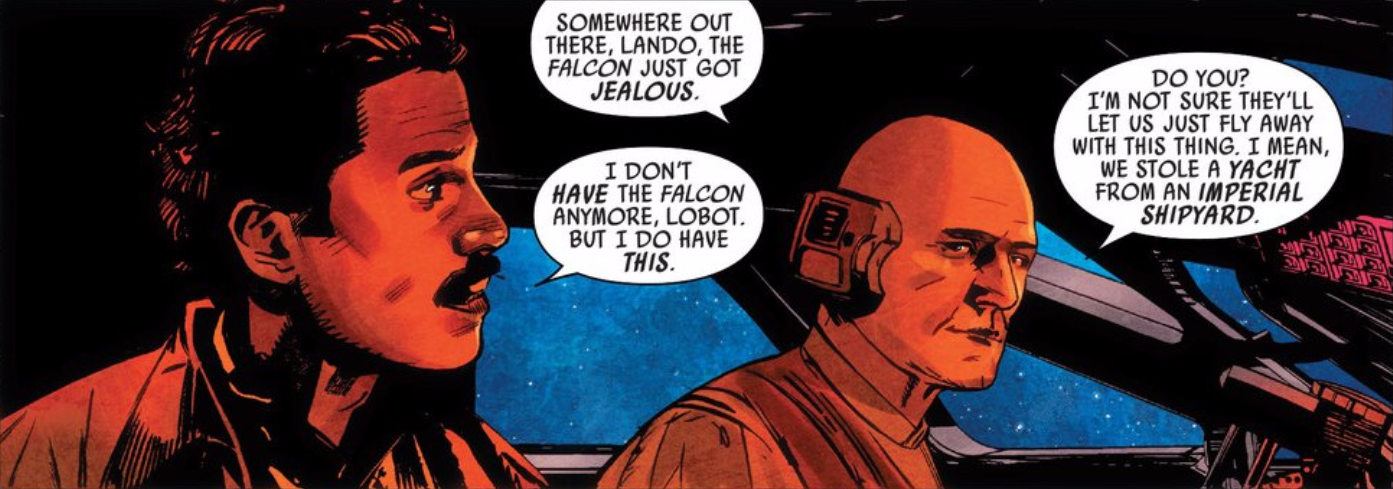

Lando and Lobot aboard the Imperialis
Before they could jump into hyperspace, Calrissian and Lobot found their path blocked by three Imperial Star Destroyers. Calrissian was surprised that the Empire would dispatch such resources and realized that the ship was worth a lot. After the Imperial commander Commodore Idel destroyed Shipyard CC-24 for failing to respect the Emperor's property, he deployed a pair of gravity mines to disable the yacht. However, the Imperialis's advanced automated defenses incinerated the bombs. An amazed Calrissian then instructed Lobot to power up the hyperdrive.[38]
Korin then confronted Calrissian and asked what he had gotten them into. Based on the fact that the Imperials had deployed gravity mines, Calrissian deduced that the Empire wanted to capture them because there was something irreplaceable and priceless aboard the ship. When two of the Star Destroyers trapped the Imperialis in their tractor beams, Calrissian devised a trick escape maneuver. He got Lobot to feed the coordinates of the tractor beams into his piloting computer. Lobot and Aleksin were skeptical about Calrissian's plan to fly into the beams but Korin convinced the others to trust him. Flying the Imperialis, Calrissian locked Captain Conro's Star Destroyer's tractor beam onto Captain Shan's ship. This collision damaged the two Star Destroyers, allowing Calrissian and his crew to flee into deep space.[38]
After escaping the Star Destroyers, Lobot thanked Calrissian for his dangerous maneuver. Calrissian then proposed to Korin that they divide the Imperialis's treasures among themselves and give the ship to Toren. When Calrissian asked Korin what they stole, she replied that the ship was full of treasure. After touring the ship's hallways, they reached the Imperialis's central chamber. Lobot managed to access the chamber with his cybernetic headset but was impaled in the gut by a pair of Imperial Royal Guards.[38]
As Lobot succumbed to his injuries, his implants began to take over his mind. With Korin's help, Calrissian brought the wounded Lobot to the ship's medical bay while Aleksin and Pavol fought the Royal Guards with knives.[39] Meanwhile, the Emperor dispatched the bounty hunter Chanath Cha to recover his ship.[38] He supplied her with the modified Star Courier Scimitar, which was capable of tracking the hyperspace signature of starships. While Lobot recuperated inside a bacta tank, Korin told Calrissian that they had encountered Imperial Royal Guards. Based on the ship's opulent treasures and the Royal Guard's presence, Korin deduced that the stolen ship belonged to the Emperor himself.[39]
Calrissian was unwilling to listen to Korin's admonition and told him they were going to help the twins. Calrissian and Korin found an armory and helped themselves to some blasters. When they returned to the central chamber, they discovered that Aleksin and Pavol had killed the Royal Guards. While Calrissian complimented the twins, Korin discovered that the guards had mysteriously been corrupted by something in the valuable chamber. Calrissian and his companions discovered that the central chamber stored several Sith artifacts including the ancient mask of Lord Momin. Not realizing the danger, Calrissian quipped that the treasures they found could make up for Korin's lost eye.[39]
Fall of the Sith[]
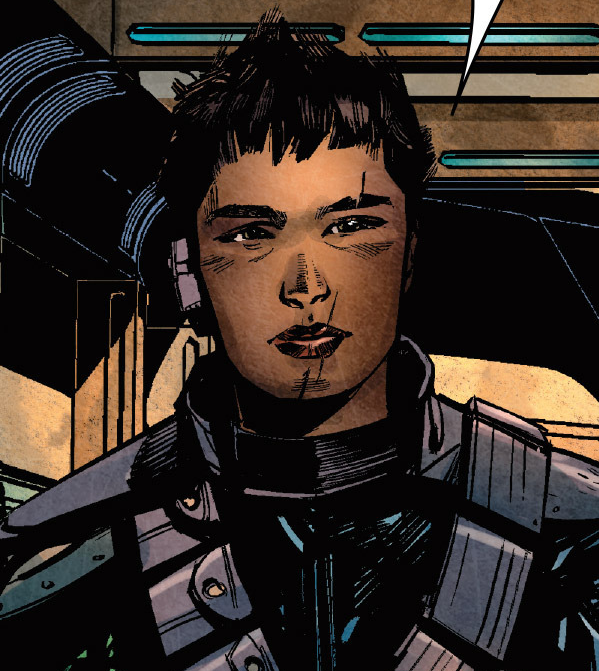

Chanath Cha, a familiar face from Lando and Lobot's past
When Calrissian asked how much the treasures in the central chamber were worth, Korin recognized that these artifacts belonged to the ancient Sith Lord Darth Momin, a Sith sculptor whose works were believed to be lost. While Calrissian and Korin discussed their plans to sell the merchandise, Aleksin gazed into the Sith helmet. He grabbed a double-bladed lightsaber and sliced off his twin Pavol's lower right arm. Taken by surprise, Calrissian and Korin managed to exit the central chamber and seal the door. However, Pavol was left inside with the corrupted Aleksin.[40]
Ignorant of the Sith and their history, Calrissian believed that Aleksin had double-crossed them. However, Korin speculated that Aleksin had been corrupted by the Sith artifacts, based on her research into Sith lore at the University of Bar'leth. She deduced that the Royal Guards had been corrupted by their proximity to the Sith objects in the central chamber. Calrissian complimented Korin for being a "fascinating" lady but dismissed the Jedi and Sith as superstition. All that he was concerned about was that one of his team members had gone nuts and chopped off the arm of his companion. Calrissian also wanted to get back into the chamber and help Pavol.[40]
Korin replied that she was leaving the ship in an escape pod and marveled that Calrissian cared for others for a change. Unknown to Calrissian and his companions, Cha had infiltrated the ship. She was a former romantic interest of Lobot. When Calrissian objected to leaving Pavol behind, Korin warned him not to underestimate the powers of the Sith. Calrissian refused to leave his friend Lobot behind. Before the argument could escalate, the two heard over the intercom that the Imperialis's escape pods had been disabled.[40]
Despite Calrissian's objections, Korin headed to the bridge to reactivate the escape pods. However, she was held at gunpoint by Cha, who had disabled the escape pods. Calrissian went to confront the intruder only to discover that it was Cha. After embracing, Cha chastised Calrissian for stealing the Emperor's yacht. She recounted that the Emperor had sent her to kill whoever took his ship. If she was unable to do that, he had instructed her to destroy the ship. Cha warned Calrissian that the only cargo that the Imperialis carried was death.[40]
Escaping the Imperialis[]
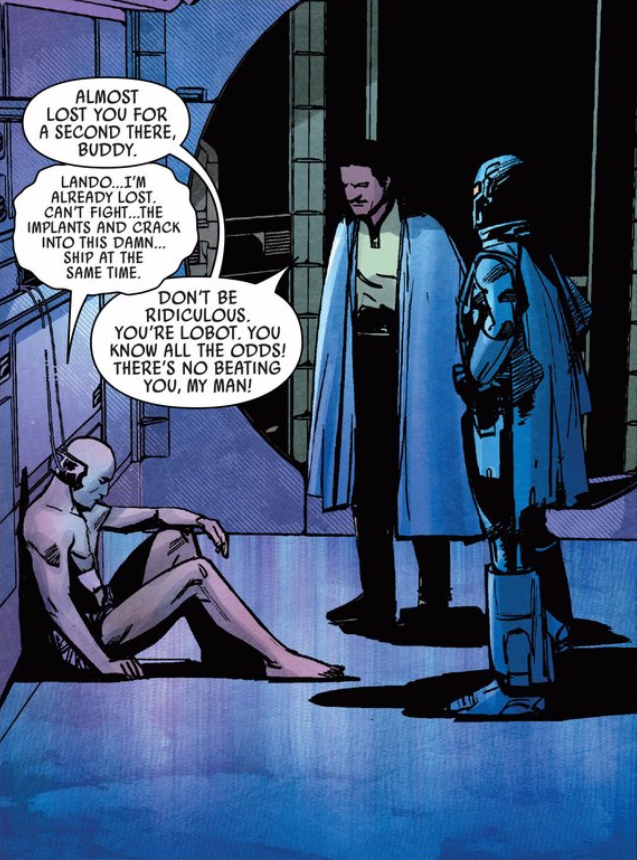
Lando, Lobot, and Chanath aboard the Imperialis
Recalling the Emperor's orders to kill the intruders or to destroy the ship, Cha opted to follow the second option since she was unwilling to hurt her former friend. Calrissian tried to reason with her but she pulled out her blaster and warned him that plans get people killed. Calrissian then tried to enlist Cha's help in dealing with Aleksin. He also suggested letting Korin and him escape in a few escape pods with some choice items while she destroyed the ship. Cha rejected that offer on the grounds that Palpatine would notice any choice items turning up on the black market. Unwilling to risk trouble with the Empire, Cha insisted on proceeding with her plan. However, she agree to ferry Calrissian and Korin to anywhere they wanted with her ship.[41]
Calrissian then mentioned that he could not risk bringing his friend Lobot out of the bacta tank to avoid the danger of the implants taking over his mind. He reminded Cha that she once had a relationship with Lobot. Cha reluctantly agreed to help. However, they were then cornered by the corrupted Aleksin and Pavol, who were under the influence of Sith objects. Aleksin demanded that they leave "his" ship or he would kill them. Calrissian objected on the grounds that the heist had been his idea. Aleksin then appealed to Korin and offered to share their treasures with her. Korin stared into the Sith helmet and was corrupted. She volunteered to join forces with Aleksin and Pavol. However, Aleksin killed her with his double-bladed lightsaber.[41]
Cha manged to shoot the door panel shut and initiate the self-destruct countdown. She then instructed Calrissian to retrieve Lobot from the medical bay while she docked her ship. Calrissian managed to helped Lobot out of the bacta tank. Before they could head to the airlock, they were cornered by a lightsaber-wielding Aleksin. Using his smooth talk, Calrissian managed to trick Aleksin into deactivating his lightsaber before shooting him dead. They then joined Cha at the airlock. Despite killing Pavol, the three encountered a new predicament. The Scimitar's droid steward O-66 had abandoned Cha after learning that she had activated the Imperialis's self-destruct mechanism.[41]
When all seemed lost, Lobot volunteered to connect his cyborg unit to an interface. Despite struggling and losing in his fight against the implants, Lobot managed to override the control codes. Calrissian and Lobot left in one escape pod while Cha left in the other. After escaping the Imperialis, Calrissian listened as Lobot advised Calrissian to use his charm and skills to find something bigger to believe in other than himself. He also counselled Calrissian to use his talents for good.[41]
Business success[]
- "A mining colony?"
"Yeah, a tibanna gas mine. Lando conned somebody out of it." - ―Leia Organa and Han Solo
Around 1 ABY,[42] Calrissian scored a major victory in a card game and won control of Cloud City,[1] a tibanna gas mining operation within the atmosphere of Bespin,[4] the same place he had won the Falcon years prior.[20] The "legitimate pilot and businessman" Gev Hessan smuggled goods to Calrissian to help him build the city.[13] Calrissian became the Baron Administrator of Cloud City and turned to more reputable enterprises. As leader of the mining operation, he was able to keep the operation small enough to avoid being noticed by the Empire and the Mining Guild, which he considered advantageous as his customers did not want to attract attention.[6]
Return to legitimate business[]
- "Nothing is glamorous when you have a blaster pointed at your face."
- ―Lando Calrissian
Calrissian met up with Tonee to have a toast about his new honest life. He was approached by an old friend, Clariah who asked him to help find and teach her son, Jiandy, how to be a legitimate business man. As payment, Clariah offered to return one of Calrissian's beloved capes. However, Calrissian refused and wanted to run his business. However, Calrissian agreed to take Jiany under his wing. Calrissian took Jiandy to see Askroh but were caught by his men.[43]
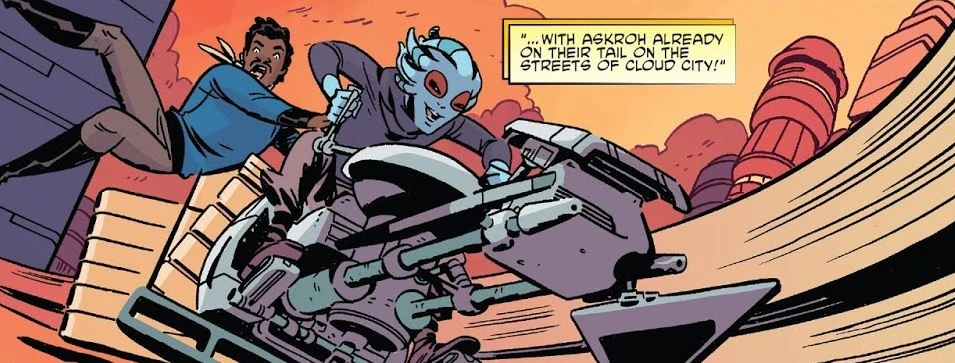

Lando and Clariah escaping Askroh.
The two of them made their escape on a speeder. When their speeder gave out, Calrissian spoke with Askroh about returning his brooch. Askroh decided to toss them over them, and realized that Jiandy had a secret compartment on his belt. He sold Jiandy out, but Calrissian was able to convince Askroh not to throw Jiandy over. As Jiandy ran, he told Calrissian that he never wanted to see him again. Calrissian returned to the bar and was thanked by Clariah for setting her son on a better path.[44]
Deal with the Dark Lord[]
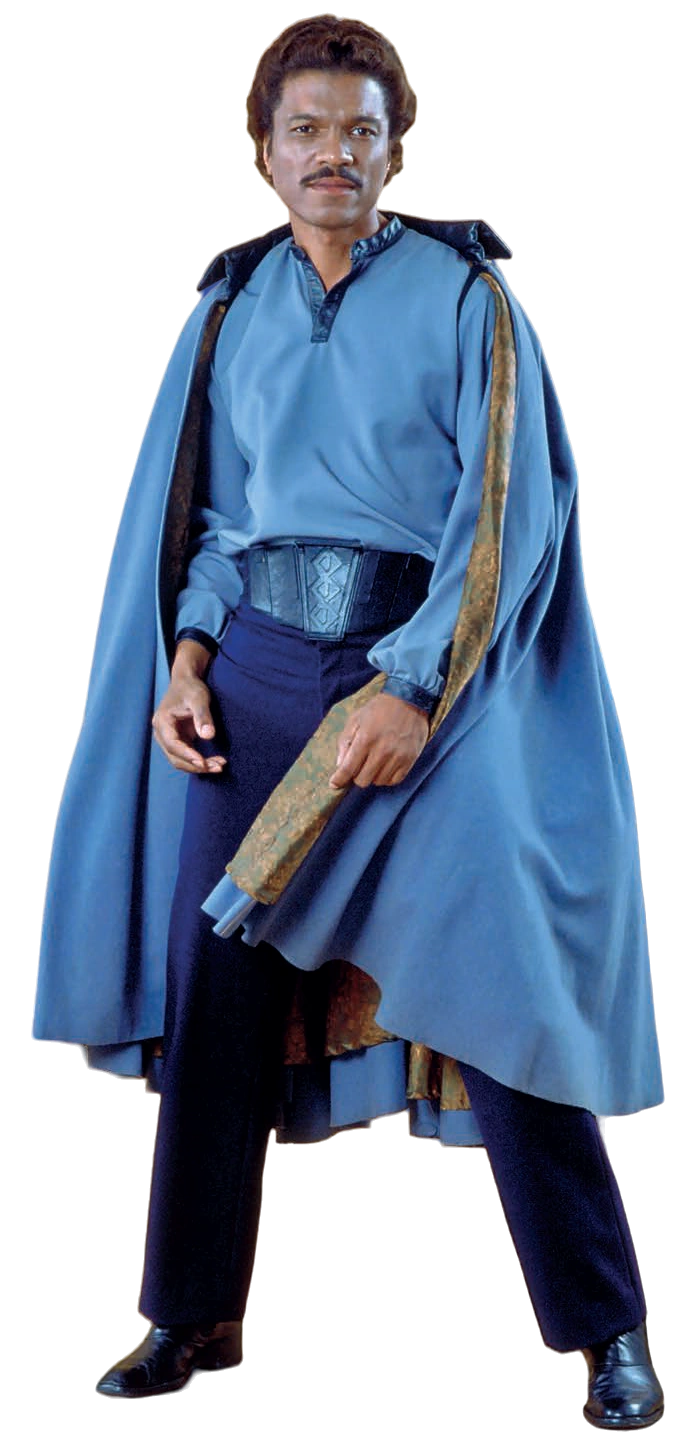
Calrissian served as Baron Administrator over Cloud City.
Placating the Empire[]
In 3 ABY,[45] Darth Vader and the Imperial Navy tracked Solo and the Millennium Falcon after they escaped from the Battle of Hoth. Vader intended to use Solo—as well as fellow Rebel Alliance members Princess Leia Organa and Chewbacca, who were also aboard the Millennium Falcon—to lure Vader's son, Luke Skywalker, into a trap. Vader knew that if Skywalker thought his friends were in trouble, he would attempt to rescue them and fall into Vader's trap. In an effort to hide from the Empire, Solo suggested that they make their way to Cloud City and seek help from Calrissian. While en route to Bespin, the Falcon was tracked by bounty hunter Boba Fett, who had been employed by Vader to find the Falcon.[6] Vader and Fett arrived on Cloud City before the Falcon, and the Dark Lord of the Sith told Calrissian to help trap the Rebels or Cloud City would face the wrath of the Empire. Knowing full well that Lord Vader would certainly carry out that threat if he refused, Calrissian agreed to Vader's demands, while bargaining for as lenient a treatment for Solo and company as possible, and awaited the Rebels' arrival.[4]
Calrissian then summoned for Cloud City's Executive Chef, Torro Sbazzle to her kitchen. Although it was the middle of the day and outside of her negotiated work hours, he pleaded with Sbazzle to cook for his new guests. Sbazzle, irritated, was ready to refuse until Calrissian and Gersolik, Sbazzle's sous-chef, explained that their "guests" were none other than the Empire and Lord Vader, and Calrissian elaborated that the meal was only for the sake of appearances. When Sbazzle asked how long she had to cook the meal, Calrissian informed her she had only an hour, prompting her to eject the Baron Administrator from the kitchen before beginning her work.[46]
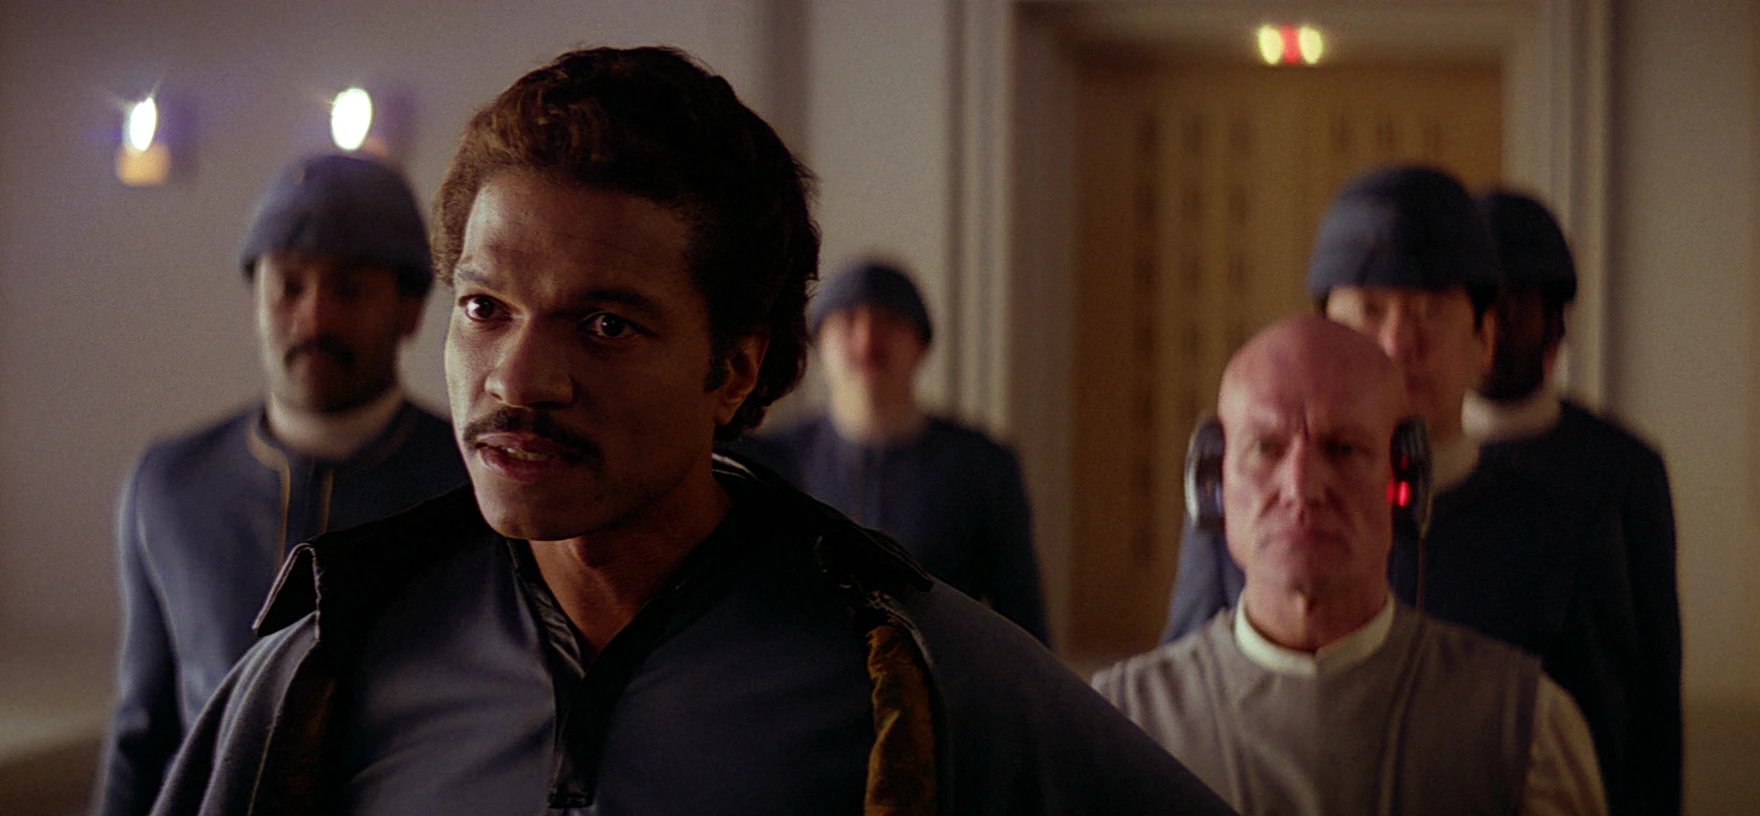

Calrissian arrives to greet Solo.
The Millennium Falcon arrived at Cloud City and was granted permission from the city authorities to land. Once it landed, Calrissian personally greeted Solo and the others on the landing platform with Lobot and a full complement of the Bespin Wing Guard in tow. When Calrissian first approached, he feigned anger for actions Solo committed in their previous encounters. He quickly dropped the facade, however, and greeted his old friend with affection, telling Solo it was very good to see him again. Calrissian asked what brought Solo to Cloud City and the smuggler told him that they needed to repair the Falcon. Calrissian briefly referred to it as his own ship, asking what Solo did to damage it, but Solo reminded him that he won it from Calrissian fair and square. Calrissian then noticed Organa and introduced himself, using his charms to personally welcome her to Cloud City.[6]
While the Rebels settled into an apartment on Cloud City, Calrissian ordered his workers to begin fixing the hyperdrive on the Millennium Falcon.[6] He went with the workers and inspected the Falcon, making his way to the cockpit. Calrissian, missing L3-37, his former droid companion, saluted the copilot seat she once occupied. Now a part of the Millennium Collective, L3-37 projected a holographic image of the planet Kessel, the place of her death, to make Lando realize she was still a part of the ship. Calrissian was then summoned by Vader.[47] At some point, the work was completed and Calrissian was informed that the vessel was fixed, but the Empire secretly disabled the vessel's hyperdrive without Calrissian's knowledge.[6]

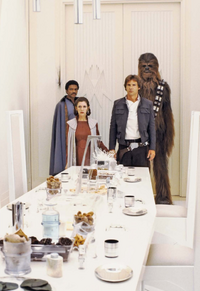
Calrissian betrays his guests to the Empire.
Calrissian had a meeting with the Troglof Corovene Manakor, which was interrupted by the Lepi smuggler Jaxxon, whose appointment had mistakenly been scheduled an hour by his droid, ML-08. Jaxxon, looking to become legitimate like Calrissian, asked the latter for an investment. Calrissian angrily declined before leaving to go to the princess[48] Leia's apartment, to gather her and her companions for a meeting with Darth Vader.[6]
An Imperial trap and altered deals[]
- "This deal's getting worse all the time."
- ―Lando Calrissian
Once the Empire was ready to capture Solo, Organa, and Chewbacca, Calrissian greeted them in the apartment, where he admired Organa for her beauty. He also found that their protocol droid, C-3PO, had been mysteriously damaged and blown into several pieces, which piqued the suspicions of the Rebels. Nonetheless, after he asked them to join him for refreshments, they followed Calrissian throughout the facility, where he told them about the mining operations and how the Empire and the Mining Guild had no presence on Cloud City. Upon arrival at[6] the Rinetta dining room,[48] Calrissian told them that he had made a deal to keep the Empire off of Cloud City, and he opened the door to reveal Vader and Fett; Fett intended to take Solo to Jabba to claim a bounty on the smuggler's head. Vader quickly subdued Solo who attempted to shoot him, even as a squad of stormtroopers appeared behind the Rebels to prevent their escape. As a result, the Rebels were successfully captured by the Empire.[6]
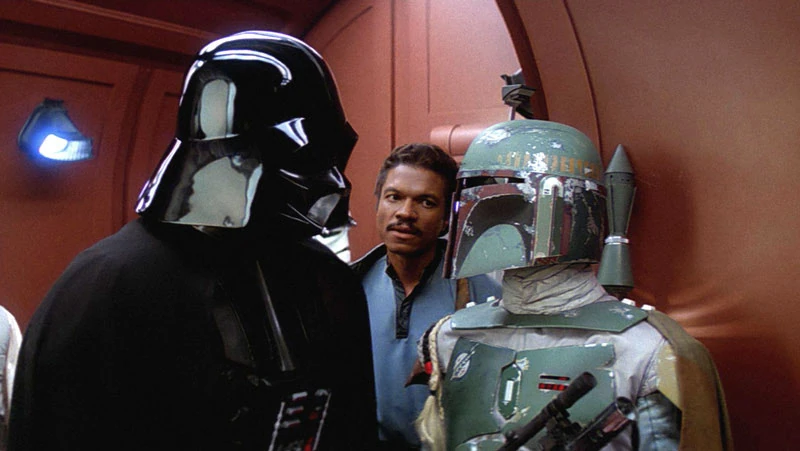
Calrissian grows increasingly concerned about his deal with the Dark Lord.
The Rebels were taken into custody, and Solo was tortured by the Empire; as intended by Vader, the torture was seen by Skywalker in a vision, who rushed to Cloud City to save his friends. Calrissian waited outside of the torture chamber where he heard Solo's screams, disgusted with the evil he has been forced to collaborate with, and spoke with the Dark Lord once Vader emerged from the chamber. Vader told him that Organa and Chewbacca could never leave Cloud City, to which Calrissian protested, as neither that nor helping Fett were part of their arrangement. Vader threatened to leave an Imperial garrison on Cloud City if Calrissian did not cooperate, which made Calrissian realize that the deal was getting worse and that Vader would not uphold his promises. After Solo's torture ended, Calrissian spoke to his old friend, Organa, and Chewbacca, and told them that the princess and Chewbacca would have to remain on Cloud City. He also told them that Vader was not interested in them, but rather he was using them to bait someone named Skywalker to Cloud City, for which he received a slug to the face from an enraged Solo.[6]
Later, Vader determined that he would use the Cloud City carbon-freezing chamber to freeze Skywalker in carbonite so he could be delivered to the Emperor. To ensure that Skywalker would not be damaged, Vader decided to test the carbon-freezing on Solo. Calrissian protested, believing that the carbon-freezing would kill Solo. Nonetheless, Vader moved forward with the test. When Solo and the other Rebels arrived, Calrissian informed Solo of what was about to happen to him. Calrissian monitored the freezing and, when it was completed, checked on Solo's lifesigns, where he found that Solo was alive and in perfect carbonite hibernation. Vader then ordered Calrissian to bring Organa and Chewbacca to the Dark Lord's vessel, once again altering the deal he had made with the Baron Administrator. Knowing now that Sith Lord has no intention of keeping to his bargain, Calrissian secretly signaled to Lobot to put his contingency plan into action.[6]
Change of heart and escape[]
- "Attention. This is Lando Calrissian. The Empire has taken control of the city; I advise everyone to leave before more Imperial troops arrive."
- ―Lando Calrissian alerts the residents of Cloud City
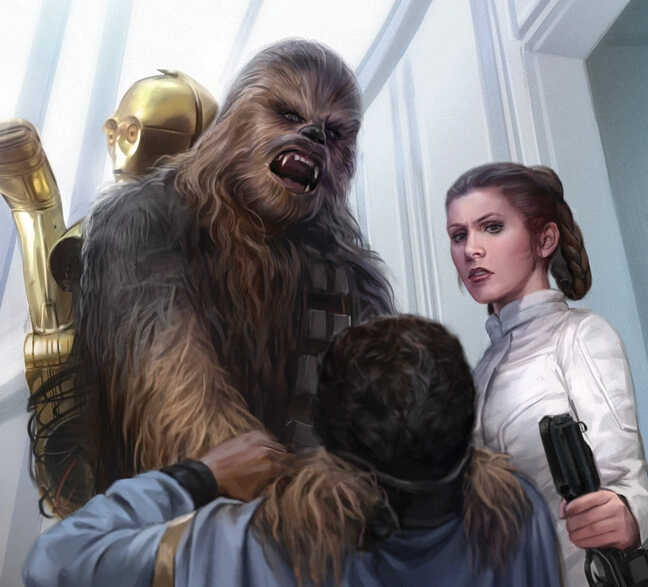
Calrissian is choked by Chewbacca
Imperial forces led Calrissian and the Rebels towards the Dark Lord's ship. While en route, they encountered Skywalker, who exchanged fire with the Imperials before the stormtroopers led Calrissian and the Rebels away. The Imperials were soon surrounded by Cloud City security forces, led by Lobot, and disarmed. Calrissian freed the Rebels from their restraints while trying explain that he intended to leave the city while helping the Rebels escape as well, at which point Chewbacca attacked him, grabbing his neck and choking him for his betrayal. Struggling to stop the enraged Wookiee from crushing his windpipe, Calrissian gasped out that there was still time to save Solo from the bounty hunter, who was taking him to the East Platform. The Rebels let Calrissian go, and he followed them towards the platform. They arrived in time to watch Fett's ship, Slave I, take off. Though they attempted to fire at it with blasters, it had no impact and the bounty hunter escaped with Solo.[6]


Calrissian provides covering fire for the Rebels' escape.
Stormtroopers soon arrived on the platform, forcing Calrissian and the Rebels to fight through them and escape. They made their way to the Millennium Falcon and arrived at its landing platform, only to find a locked door. R2-D2—Skywalker's astromech droid, who had rendezvoused with the Rebels—attempted and failed to open the door. While the droid was working, Calrissian issued a city-wide broadcast warning his citizens of the Imperial presence and impending occupation of Cloud City. He advised everyone to leave Cloud City before more Imperial forces could arrive. Calrissian's announcement created a frenzy of activity, as numerous people fled throughout the city. Calrissian led the Rebels through the commotion towards another doorway, which R2-D2 was able to open while Calrissian and the Rebels fought off more stormtroopers. The group ran towards the Falcon, where Calrissian provided cover fire as the others boarded the ship. Once aboard, the Falcon lifted off from the platform, pursued by TIE fighters.[6]
As the Falcon was escaping, Skywalker—who had been injured in and escaped from a lightsaber duel with Vader—communicated to Organa through the Force, calling to her for help as he struggled to hang onto an antenna at the base of Cloud City. Organa asked Chewbacca, who piloted the Falcon, to turn the ship around so they could save their friend. Calrissian protested because of the TIE fighters, but the Rebels went back anyway to rescue their friend. They found Skywalker hanging from the city and positioned the ship underneath him. Once in position, Calrissian opened a hatch and took a lift to the top of the ship, where Skywalker fell into and Calrissian caught him. With Skywalker on board, the Falcon took off again from Cloud City, and Calrissian left Skywalker in Organa's care.[6]
Calrissian took the pilot's seat in the Falcon and prepared the ship for a jump into hyperspace. When he attempted to make the jump, however, the hyperdrive failed, much to Calrissian's frustration as he was unaware that the Empire had sabotaged the ship. The Executor, Vader's Super Star Destroyer, approached the vessel, where Vader would once again attempt to capture Skywalker. R2-D2, who learned of the sabotage while communicating with Cloud City's computer, made the necessary repairs to the hyperdrive and the ship was able to jump into hyperspace, successfully escaping from the Empire.[6]

Calrissian pilots the Falcon seeking to find Solo.
The Millennium Falcon united with the Alliance Fleet's Fourth Division at Rendezvous Point Delta-Three, but the rebel craft were under attack from Imperial Commander Ellian Zahra.[49] After the Falcon and other rebel ships escaped to Backup Rendezvous Point Gamma-Nine, Calrissian did not stay long, as he and Chewbacca intended to set out in the Millennium Falcon to find Solo. Before leaving the fleet, he contacted Organa and Skywalker, promising the princess that he and Chewbacca would find Solo. The group agreed to meet at a rendezvous point on Tatooine, the location of Jabba's Palace. They said their goodbyes and the Falcon departed from the fleet.[6]
A promise to Han[]
Following the War of the Bounty Hunters, Calrissian and Lobot ventured to Jabba the Hutts palace on Tatooine. While there, the two would face a rancor, which they managed to escape from. Eventually, Calrissian came face to face with the carbon-frozen Solo, and opened up. Calrissian apologized to Solo for betraying him on Cloud City, stating that despite their differences, Solo deserved better than that. Lobot suggested they take Solo with them while they had the chance, though Lando stated that it would place Solo in harms way and would be too great a risk. Before departing, Calrissian made a promise to Han, that the second he had the chance, he would return to save his old friend.[50]
Rescued by Leia[]
- "Leia! How'd you— What'd you— Where'd you—"
- ―Lando Calrissian
Calrissian was on the planet Arkanis. During his time there, bounty hunters were trying to capture Calrissian so Leia Organa disguised herself as Boushh to rescue Calrissian. While Calrissian was on the run from the bounty hunters, he fell off a hill falling into Leia. Eventually Leia revealed herself to Calrissian and they both escaped to Leia's escape point. Later, bounty hunters then captured Chewbacca and brought him to Bossk. Eventually Chewbacca was rescued.[51]
Rescuing Han Solo[]
- "Princess, we'll find Han. I promise."
- ―Lando Calrissian, to Leia Organa

Calrissian disguised himself as one of Jabba's guards.
Some time later, Calrissian and Chewbacca had located Solo's still-frozen body at Jabba's palace on Tatooine. Skywalker put together a plan in which Calrissian, Organa, Chewbacca, the droids, and Skywalker himself would rescue their friend and, if necessary, destroy Jabba the Hutt. Calrissian infiltrated the palace and disguised himself as one of the Hutt's guards. He watched as each member of the Rebel team arrived; the droids arrived first, posing as gifts from Skywalker to Jabba, followed by Organa who posed as a bounty hunter collecting the bounty on Chewbacca, who she brought as her prisoner. Organa later released Solo from carbon-freeze, but they were discovered by Jabba and his court. Solo was placed into a prison cell with Chewbacca, while Organa became the Hutt's slave. Calrissian remained in disguise throughout the arrivals.[12]
Skywalker arrived last and, while declaring himself a Jedi Knight, demanded that Solo and the others be released to him. Jabba refused, and Skywalker was forced to fight and kill Jabba's rancor beast. When the rancor failed to kill Skywalker, Jabba sentenced Skywalker, Solo, and Chewbacca to be killed; the sentence was that they would be fed to the sarlacc creature in the Great Pit of Carkoon, where they would be slowly digested over the course of a millennium. Calrissian, still disguised as a guard, traveled with Jabba and his entourage to the Great Pit of Carkoon, and was stationed aboard the skiff on which the prisoners were kept.[12]
Calrissian hanging over the sarlacc pit in fear.
Before the Rebels could be executed, R2-D2 revealed he had been concealing Skywalker's lightsaber. The Jedi Knight attacked Jabba's guards and Calrissian revealed himself, helping to free the prisoners and fight off the other guards. While doing so, he was knocked from the side of the skiff and fell towards the sarlacc, clinging onto the edge of the pit. Solo, who was partially though temporarily blind as a result of the carbon freezing, was lowered towards Calrissian by Chewbacca. Solo handed him a staff and Calrissian reached for it, but one of the sarlacc's tentacles grabbed his leg. Solo aimed a blaster at the tentacle and, despite Calrissian's concerns over Solo's ability to see his target, fired upon the creature. He hit the tentacle and the sarlacc released Calrissian, allowing Solo to pull him to safety.[12]
Once they were aboard, Skywalker and Organa—who had killed Jabba aboard the Hutt's vessel—jumped from Jabba's ship to the skiff. Calrissian piloted the skiff away from Jabba's vessel as it exploded, and the group rescued the droids, who had fallen overboard earlier. With the rescue completed, the group returned to the Millennium Falcon and left Tatooine.[12]
Battle of Endor[]
- "General Calrissian has volunteered to lead the fighter attack."
"Good luck. You're gonna need it." - ―Admiral Ackbar and Han Solo
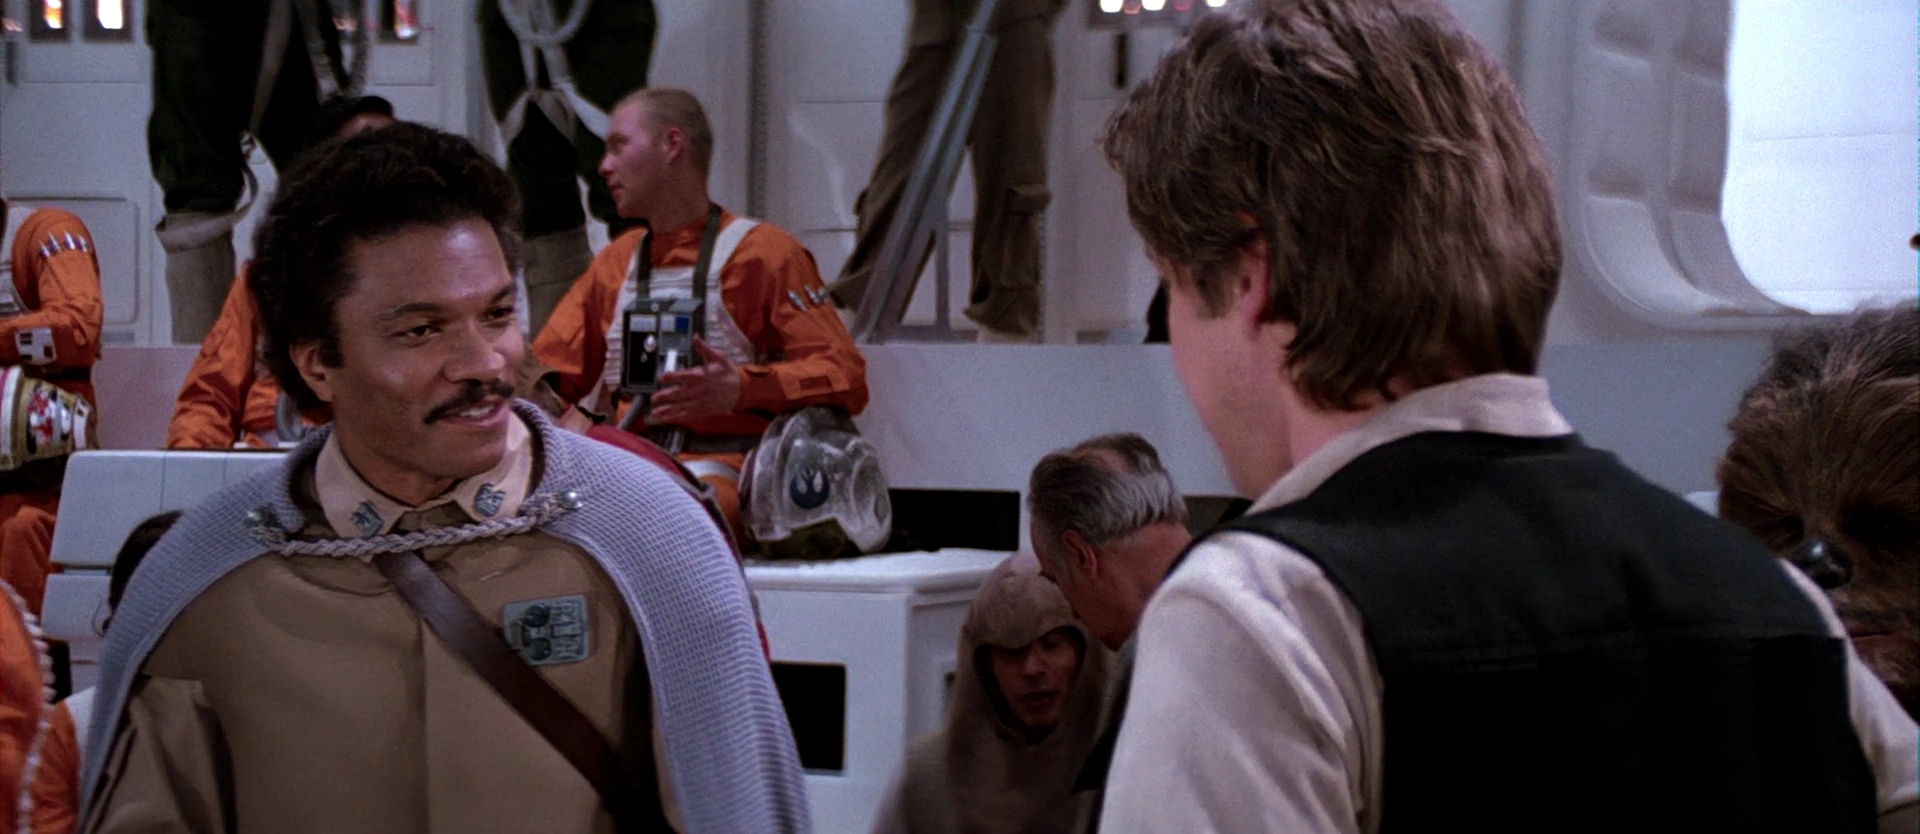

Newly appointed general, Lando Calrissian jokes with Han Solo before a rebel briefing aboard Home One.
Calrissian participated in the Battle of Taanab,[12] helping defeat a pirate fleet.[1] He then rendezvoused with the fleet to find that a battle was being prepared to strike a decisive blow against the Empire. The Empire was building a second Death Star, which orbited the forest moon of Endor, and the Emperor had personally arrived on the station to oversee the final stages of construction. Unknown to the Rebels was that the Emperor had allowed them to learn this information, as he was luring them into a trap in an attempt to destroy them. They believed that the station, which was fully operational, did not yet have use of its primary, planet-destroying weapon. As such, they put together a plan to destroy the Death Star and kill the Emperor. The plan would require a ground assault to destroy the generator that powered the shield protecting the Death Star, as well as a naval assault against the station itself. Calrissian volunteered to lead the starfighter attack and was commissioned as a general of the Rebel Alliance. He attended a Rebel briefing where the plan for the Battle of Endor was reviewed, and learned that Solo would lead the ground assault, with a team that included Organa, Chewbacca, and Skywalker. Solo congratulated Calrissian on his promotion, to which he responded it must have been because of a maneuver he pulled at Taanab. Solo told Calrissian he could fly the Millennium Falcon during the battle. Knowing how much the ship meant to his friend, Calrissian promised that he would return her without so much as a scratch.[12]
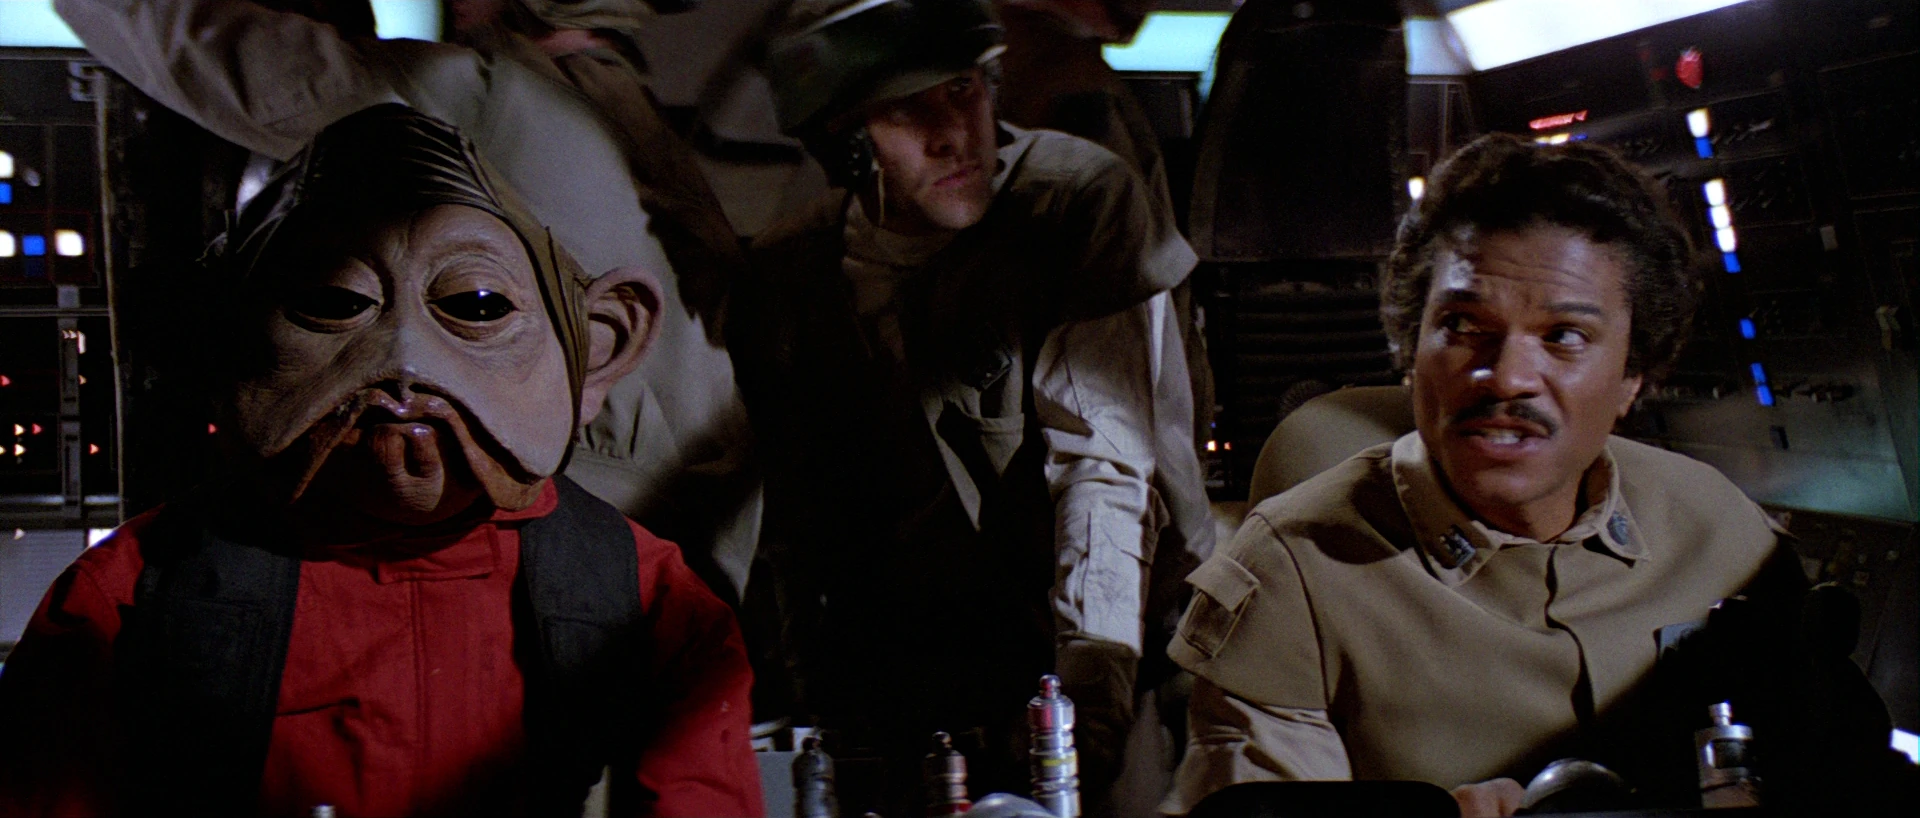

Calrissian and his co-pilot, Nien Nunb, during the Battle of Endor.
Solo and his team departed prior to the fleet, in order to give themselves time to destroy the shield. The Rebel fleet, meanwhile, prepared to leave. Once it was ready, Calrissian and his co-pilot, a Sullustan named Nien Nunb, flew the Falcon to the head of the fleet, where all fighter squadrons were accounted for. Admiral Gial Ackbar, who led the Alliance fleet, gave Calrissian the order to depart for Endor. Once they arrived at Endor, Nunb told Calrissian that the Falcon's scanners had been jammed, leading Calrissian to realize that the Empire knew they were coming and that the attack was a trap. As the squadrons approached the Death Star, Calrissian ordered his forces to break off the attack, as he knew that the shield was still operational.[12]
A hidden Imperial fleet revealed itself, and Calrissian and his fighter squadrons were forced to contend with incoming TIE fighters. He led his fighters towards the Imperial fleet in order to draw enemy fire away from the Rebel cruisers, and the Falcon shot a number of the TIE fighters down. He soon saw Imperial Star Destroyers positioned away from the main fighting and was unsure as to why they were hanging back. Calrissian soon found an answer once the Death Star, revealed as operational, fired its primary weapon and destroyed a Rebel cruiser with a single shot. Ackbar ordered a retreat, but Calrissian convinced him to keep the fleet in place, as he had faith that Solo would complete his mission on the surface. When another Star Cruiser was atomized by the superweapon, Calrissian told Ackbar to move the rest of the cruisers and engage the Star Destroyers at point-blank range, reasoning that they stood a far better chance against them than the Death Star and that the destroyers would be caught in the blast if the superlaser dared to fire again.[12]
On the surface, Solo and his team successfully completed their mission and destroyed the shield generator. With the Death Star vulnerable, Ackbar ordered Calrissian and his forces to begin their assault on the battle station. The Falcon and the fighter squadrons entered an opening on the space station and headed for the reactor core, all while pursued by TIE fighters. While piloting towards their target, the Falcon hit a bulkhead on the interior of the Death Star, knocking its sensor dish off; Calrissian, as a result, had broken his promise to return the Falcon to Solo "without a scratch." The Rebels reached the main reactor, where the Falcon fired the shot that started a chain reaction to destroy the station. Calrissian piloted the ship back through the same route that they entered, as a ball of fire followed close behind. Despite the minor damage, the Falcon escaped the Death Star just in time and flew back towards the Rebel fleet as the Death Star exploded behind it.[12]

Calrissian and his friends celebrate their victory on Endor.
Calrissian and his fellow Rebels made their way to the surface of Endor and regrouped in Bright Tree Village, the home of the Ewoks who helped Solo and his team destroy the shield generator, where they all celebrated the destruction of the Death Star and the death of the Emperor; during the battle, Skywalker redeemed Vader, who in turn killed the Emperor before succumbing to his own injuries. Calrissian reunited with Solo, Chewbacca, and the rest of his friends for the festivities.[12]
Operation: Cinder[]
- "You really trust us to fight beside you?"
"What can I say? I'm a big believer in second chances." - ―Iden Versio and Lando Calrissian
Lando discusses matters with Iden Versio.
Though they had won the Battle of Endor, the Rebels would still face many challenges as they sought to restore the Galactic Republic. Shortly after Inferno Squad's surrender, Calrissian discussed matters with the squad leader Iden Versio. He offered to let them leave free on two X-Wing fighters as well as providing them the option of helping stop the Empire from implementing Operation: Cinder. Iden and Del Meeko took the second option, leading Lando to assign them to join his friend Shriv Suurgav in Danger Squadron.[14]
Calrissian commanded an Alliance Fleet including the cruiser Restoration, the Mellcrawler II and a small fleet of starfighters, including Danger Squadron and defected members of Inferno Squad during the Battle of Theed, aiding Queen Sosha Soruna, Organa, and Lieutenant Shara Bey as they disrupted the Imperial operation to render Naboo inhospitable.[52][14]
The rebels then reengaged the Imperial forces and destroyed the last satellites and engaged the Torment, however, before going down, the ship deployed its ground invasion force in an attempt to capture Theed and salvage the battle, after the ground battle ended, the New Republic began to form. Calrissian later joined Suurgav on a mission to Sullust.[14]
Liberation of Cloud City[]
- "Lobot, we're home. Guess the Empire didn't keep up with housekeeping."
- ―Lando Calrissian, remained good-humored in the midst of hardship and conflict
Following the events at Endor, Governor Ubrik Adelhard imposed the Iron Blockade on the Anoat sector. Adelhard also claimed that the Empire had won the Battle of Endor and that rumors of the Emperor's death were rebel propaganda. In response, a resistance movement known as the Uprising emerged in the sector. Calrissian kept in touch with his old friend Lobot, who relayed messages through the blockade and served as a liaison between Calrissian and members of the Uprising. Unable to intervene directly in the uprising on Cloud City, Calrissian instead transferred credits to the rebels through the auspices of Lobot. He was privy to a joint operation by Lobot and the pirate Kars Tal-Korla to breach Adelhard's personal quarters and capture him.[13] Though Adelhard evaded capture, the Uprising managed to liberate Bespin as the Galactic Civil War drew to a close.[15]
Calrissian managed to starve Adelhard's Imperial remnant into submission. Around the time of the Battle of Jakku, he returned to Cloud City at the head of a ragtag force of Wing Guards and New Republic soldiers. With Lobot at his side, Calrissian led a mopping-up operation against an Imperial hold-out in the Casino Level's Bolo Tanga room. As they made their way there, Lobot reminded Calrissian to get Organa and Solo a nuptial gift for their expectant child. Calrissian joked about gifting the boy a little cape and mustache so that he could resemble Uncle Lando.[53]
Upon arriving at the Bolo Tanga room, Calrissian met with the Wing Guard Captain Gladstone, who informed him that the Imperials were holed up inside. While they had broken through to the beam outtake shaft, they were trapped by poisonous fumes. Calrissian then addressed the Imperials and offered to spare their lives if they surrendered. As a further incentive, he promised to give them a hot meal, a warm bed, and to send them away without fear of New Republic prosecution. After ending his address, Calrissian ordered his engineers to unseal the door.[53]
A dozen Imperials accepted Calrissian's offer and they were taken into custody by the Wing Guard. However, Gladstone then informed the Baron Administrator that an Imperial sergeant was refusing to surrender. Calrissian tried to reason with the sergeant but the man tried to shoot him. Calrissian was forced to kill the sergeant with his Rossmoyne Vitiator pistol. After subduing the Imperials, Calrissian chatted with Lobot about the matter of purchasing a nuptial gift. When Calrissian suggested a lamp and a blaster, Lobot opposed the ideas. Calrissian then proposed leaving his Vitiator in a save lock until Organa's son came of age. When Lobot vetoed that, Calrissian then proposed gifting the family a Vantillian catamaran. Lobot accepted that idea. When Calrissian toyed with the idea of starting his own family, Lobot vetoed that as well. Calrissian then invited Lobot out for a drink but Lobot responded that he did not drink. Calrissian then promised to find a win-win situation for both of them.[53]
New Republic Era[]
Encountering Embo[]
- "Look at this place. I can see Han living like this, but Chewbacca?"
- ―Lando Calrissian

Lando encounters Embo.
Calrissian and Nunb at some point stopped at a space station to refuel the Falcon, but were unable to take off. The ship was boarded by the bounty hunter Embo, who was attempting to claim a bounty on Calrissian for the destruction of the second Death Star. Calrissian incapacitated Embo, and he and Nunb left him on the station when they departed.[54]
Quest for the Phylanx Redux Transmitter[]
By 7 ABY, Calrissian had taken over Calrissian Enterprises, formerly VylarTech, which manufactured droids for service on Cloud City. Impresario Calrissian entertained a Twi'lek diplomatic brigade that included his old acquaintance Kaasha Bateen. That night, he was attacked by his protocol droid DRX-7 and another droid, who had reprogrammed DRX-7. Calrissian was defended by Lobot, Bateen, and others, but he was still wounded in the shoulder. DRX-7 demanded Calrissian to return the Phylanx Redux Transmitter to his master, Fyzen Gor. When Calrissian admitted he had no idea what the Phylanx was, the droid told him the owner of the Millennium Falcon had stolen it around ten years ago. DRX-7 was eventually subdued, but the droid escaped, telling Calrissian that Gor would unleash a massacre upon Cloud City if he did not return the Phylanx within 72 hours.[9]
Calrissian then traveled to Chandrila in the Lady Luck to meet with Han, assuming it was a deed done during his time as owner of the Millennium Falcon that was causing the problem. He arrived at Han and Leia's apartment to discuss the matter, starting with punching Solo in the face when he opened the door. After calming down with some Corellian whiskey, Han admitted he knew of the Phylanx from a run he performed with Sana Starros a long time ago. Calrissian convinced Han that he needed to help him find the Phylanx to save Cloud City since it was mostly his fault and the city was in grave danger. That night, Calrissian ate in his their apartment and then smoked a Chandrilan monjav alongside Solo. Later, Calrissian and Bateen would walk down the Grand Promenade of the Rebellion in Hanna City, where Calrissian gave credits to a rebel veteran missing a leg due to an injury at the Battle of Hoth.[9]
The next day, Calrissian and the group traveled to the New Republic Defense Fleet headquarters to meet with Conder Kyl, the chief of cyberware. Calrissian requested that Kyl recommend them a slicer to accompany them, and Kyl recommended the Ewok Peekpa. However, they had to promise Peekpa that Chewbacca would be amongst their crew to convince her to join. Solo contacted Chewbacca, who agreed to join them, and they arranged to pick him up from his home on Kashyyyk.[9]
Searching for Kadara[]
Retiring from New Republic service, Calrissian settled down and started a family, but tragedy struck when his daughter[3] Kadara Calrissian[10] disappeared.[3] Unknown to him,[10] it was the nascent First Order that kidnapped her as part of Project Resurrection, ostensibly to build up their army but also targeting the leaders of the former Rebel Alliance.[3] After receiving help from his friends during the initial period of his search, Calrissian eventually traveled alone across the galaxy in search of any sign for his daughter.[10] In 21 ABY,[55] years into his search, Calrissian found himself in the Sennifer's Beam and Balance cantina, unsure if he had come to search for leads on his long-missing daughter or to gamble. However, he then overheard a former Jedi hunter named Ochi drunkenly brag about being hired by the Sith Eternal. Fearful about the possible return of the Sith but realizing it could be a lead on Kadara, having heard Ochi say something about kidnapping a young girl, Calrissian reached out for information on the girl's family by contacting Shriv Suurgav before deciding to meet up with his old friend Skywalker.[10]
With Skywalker having detected a growing darkness in the Force, the two joined forces[10] to search for the Sith world of Exegol[3] by locating Ochi and stopping the re-emerging Sith viceroy Exim Panshard, who had clung onto life within his mask. While Panshard was indeed destroyed, Ochi managed to elude them, dying in the Forbidden Valley of the planet Pasaana on a false lead left by the girl's parents. The child, Rey, was left on the planet Jakku to avoid detection from the Sith, while Calrissian, Skywalker, and Skywalker's old contact Komat buried her parents, Dathan and Miramir, on the cold world of Neftali. After Calrissian took a time to recover on Komat's planet Polaar, he and Skywalker traveled to Pasaana but found no trace of Ochi. They did find his ship, the Bestoon Legacy,[10] and Calrissian found himself taken by the humble nature of the native Aki-Aki people.[3] Having found himself changed after his time on Polaar and realizing Pasaana would make a good base to search the nearby quadrant for Kadara, Calrissian decided to remain behind[10] to live as a hermit in the Forbidden Valley.[3]
He also promised Skywalker he would keep an eye on the Bestoon Legacy. As Skywalker took a final look at the starship's computer logs, Calrissian began to record a new entry in the Calrissian Chronicles series he had made during his younger years.[10] While still living on Pasaana[3] in 28 ABY,[56] he sent a message of support to his old friend Senator Organa following a political scandal arising from revelations about Darth Vader being her true father.[57]
First Order-Resistance War[]
Found on Pasaana[]
- "It's good to see you too old buddy."
- ―Lando Calrissian reuniting with Chewbacca
The very girl Calrissian had once hoped to save, Rey, eventually made her way into the Resistance during the First Order-Resistance War.[7] In 35 ABY,[58] Resistance members Rey, Poe Dameron, Finn, Chewbacca and C-3PO arrived on Pasaana, also looking for Ochi. Calrissian saved them from arrest by a First Order stormtrooper and took them to the bluff on Lurch Canyon where he and Skywalker had discovered Ochi's starship. Calrissian declined to aid the Resistance further, but asked Rey to give his love to Organa.[7]
Passing the torch[]
- "We had eachother. That's how we won."
- ―Lando Calrissian to Poe Dameron
Following the death of Organa, Poe paid his respects to the late general and confided that he was not ready. He was soon joined by Calrissian who confided that neither were he, Skywalker, Solo or Organa during the age of the Rebellion. When Dameron asked Calrissian how they defeated an Empire with almost nothing, Calrissian replied that they had each other. Calrissian later attended a meeting where Dameron ordered him and Chewbacca to gather up people of the galaxy to help in their upcoming fight.[7]
Battle of Exegol[]
- "Lando you did it. You did it!"
- ―Finn to Lando Calrissian


Lando during First Order-Resistance War
As the Resistance suffered heavy losses on Exegol, Calrissian assembled[7] the Citizens' Fleet,[4] which was comprised of 14,000 starships.[59] As Dameron heard the distress of his comrades on the comlink, he apologized that he thought that they had a chance, but there were too many of them. Just then, Dameron heard Calrissian's voice on the comlink, reassuring him that there were more of them. Shortly later, Calrissian and Chewbacca arrived in the Millennium Falcon, accompanied by a massive Citizens' Fleet, including Rebellion hero Wedge Antilles, who complimented Calrissian's flying while he gunned on the Falcon. The reinforcements reinvigorated the Resistance forces and changed the tide of the battle. Dameron ordered the combined forces to take out the Sith Star Destroyers' world-destroying superlaser cannons. The fleet managed to take down several Sith Star Destroyers.[7]
During the battle, Galactic Emperor Darth Sidious shot Force lightning at the fleet, temporarily damaging them, before Rey saved them. Meanwhile, on the[7] Resurgent-class Star Destroyer[3] Steadfast,[3] former stormtrooper Jannah connected the cables on a hijacked laser cannon, which opened fire on the bridge of the command ship, killing Allegiant General Enric Pryde. The Resistance and allied armada took out the remaining Sith forces. Meanwhile, Finn and Jannah clung onto the stricken Steadfast as it descended into the atmosphere. Dameron wanted to rescue the two Resistance fighters, but Calrissian and Chewbacca used the Falcon to rescue Finn and Jannah, who jumped to safety before the Steadfast crashed onto the surface and disintegrated.[7]
Following the battle, Finn noticed that Rey was alive, which Calrissian smiled over. Calrissian's fleet inspired the galaxy to stand up against the First Order's oppression, which saved multiple planets including Bespin. In the following celebration, Calrissian sat alone and reminisced on his past. In that moment, Jannah asked Calrissian where he was from and he replied that he was from the Gold system. Calrissian in turn asked Jannah where she was from, and she told him that she did not know, and Calrissian responded by offering to help her find her family.[7]
Personality and traits[]
- "I mean, he was brave, sure, but always in the service of saving his own hide or profit. But I had also detected that deep down, behind all that smooth talking and those well-ironed capes, there was a whole human being with a conscience and a desperate need to do something worthwhile with his life."
- ―Kaasha Bateen, on Lando Calrissian
Calrissian's custom emblem.
Lando Calrissian was a male human who,[6] in his youth, had black hair, brown eyes, and dark skin. As a young man[4] and continuing into his later years,[10] Calrissian enjoyed playing sabacc.[4] In particular, he believed a set of sabacc cards needed to be well worn to be perfect.[10] Solo described him as having been a scoundrel.[6] Even though he only took jobs where he could see "the angle,"[31] Calrissian was willing to undertaking dangerous risks. On one occasion, he, Lobot, and some companions stole the Emperor's luxury yacht Imperialis.[11] Calrissian hoped to profit from selling the ship's treasures.[38] The heist undertook a dangerous turn when the Sith objects aboard corrupted his companions Aleksin, Pavol,[40] and Korin Pers.[41] Calrissian had little appreciation for the Sith and Jedi, regarding them as "con-jobs."[40]
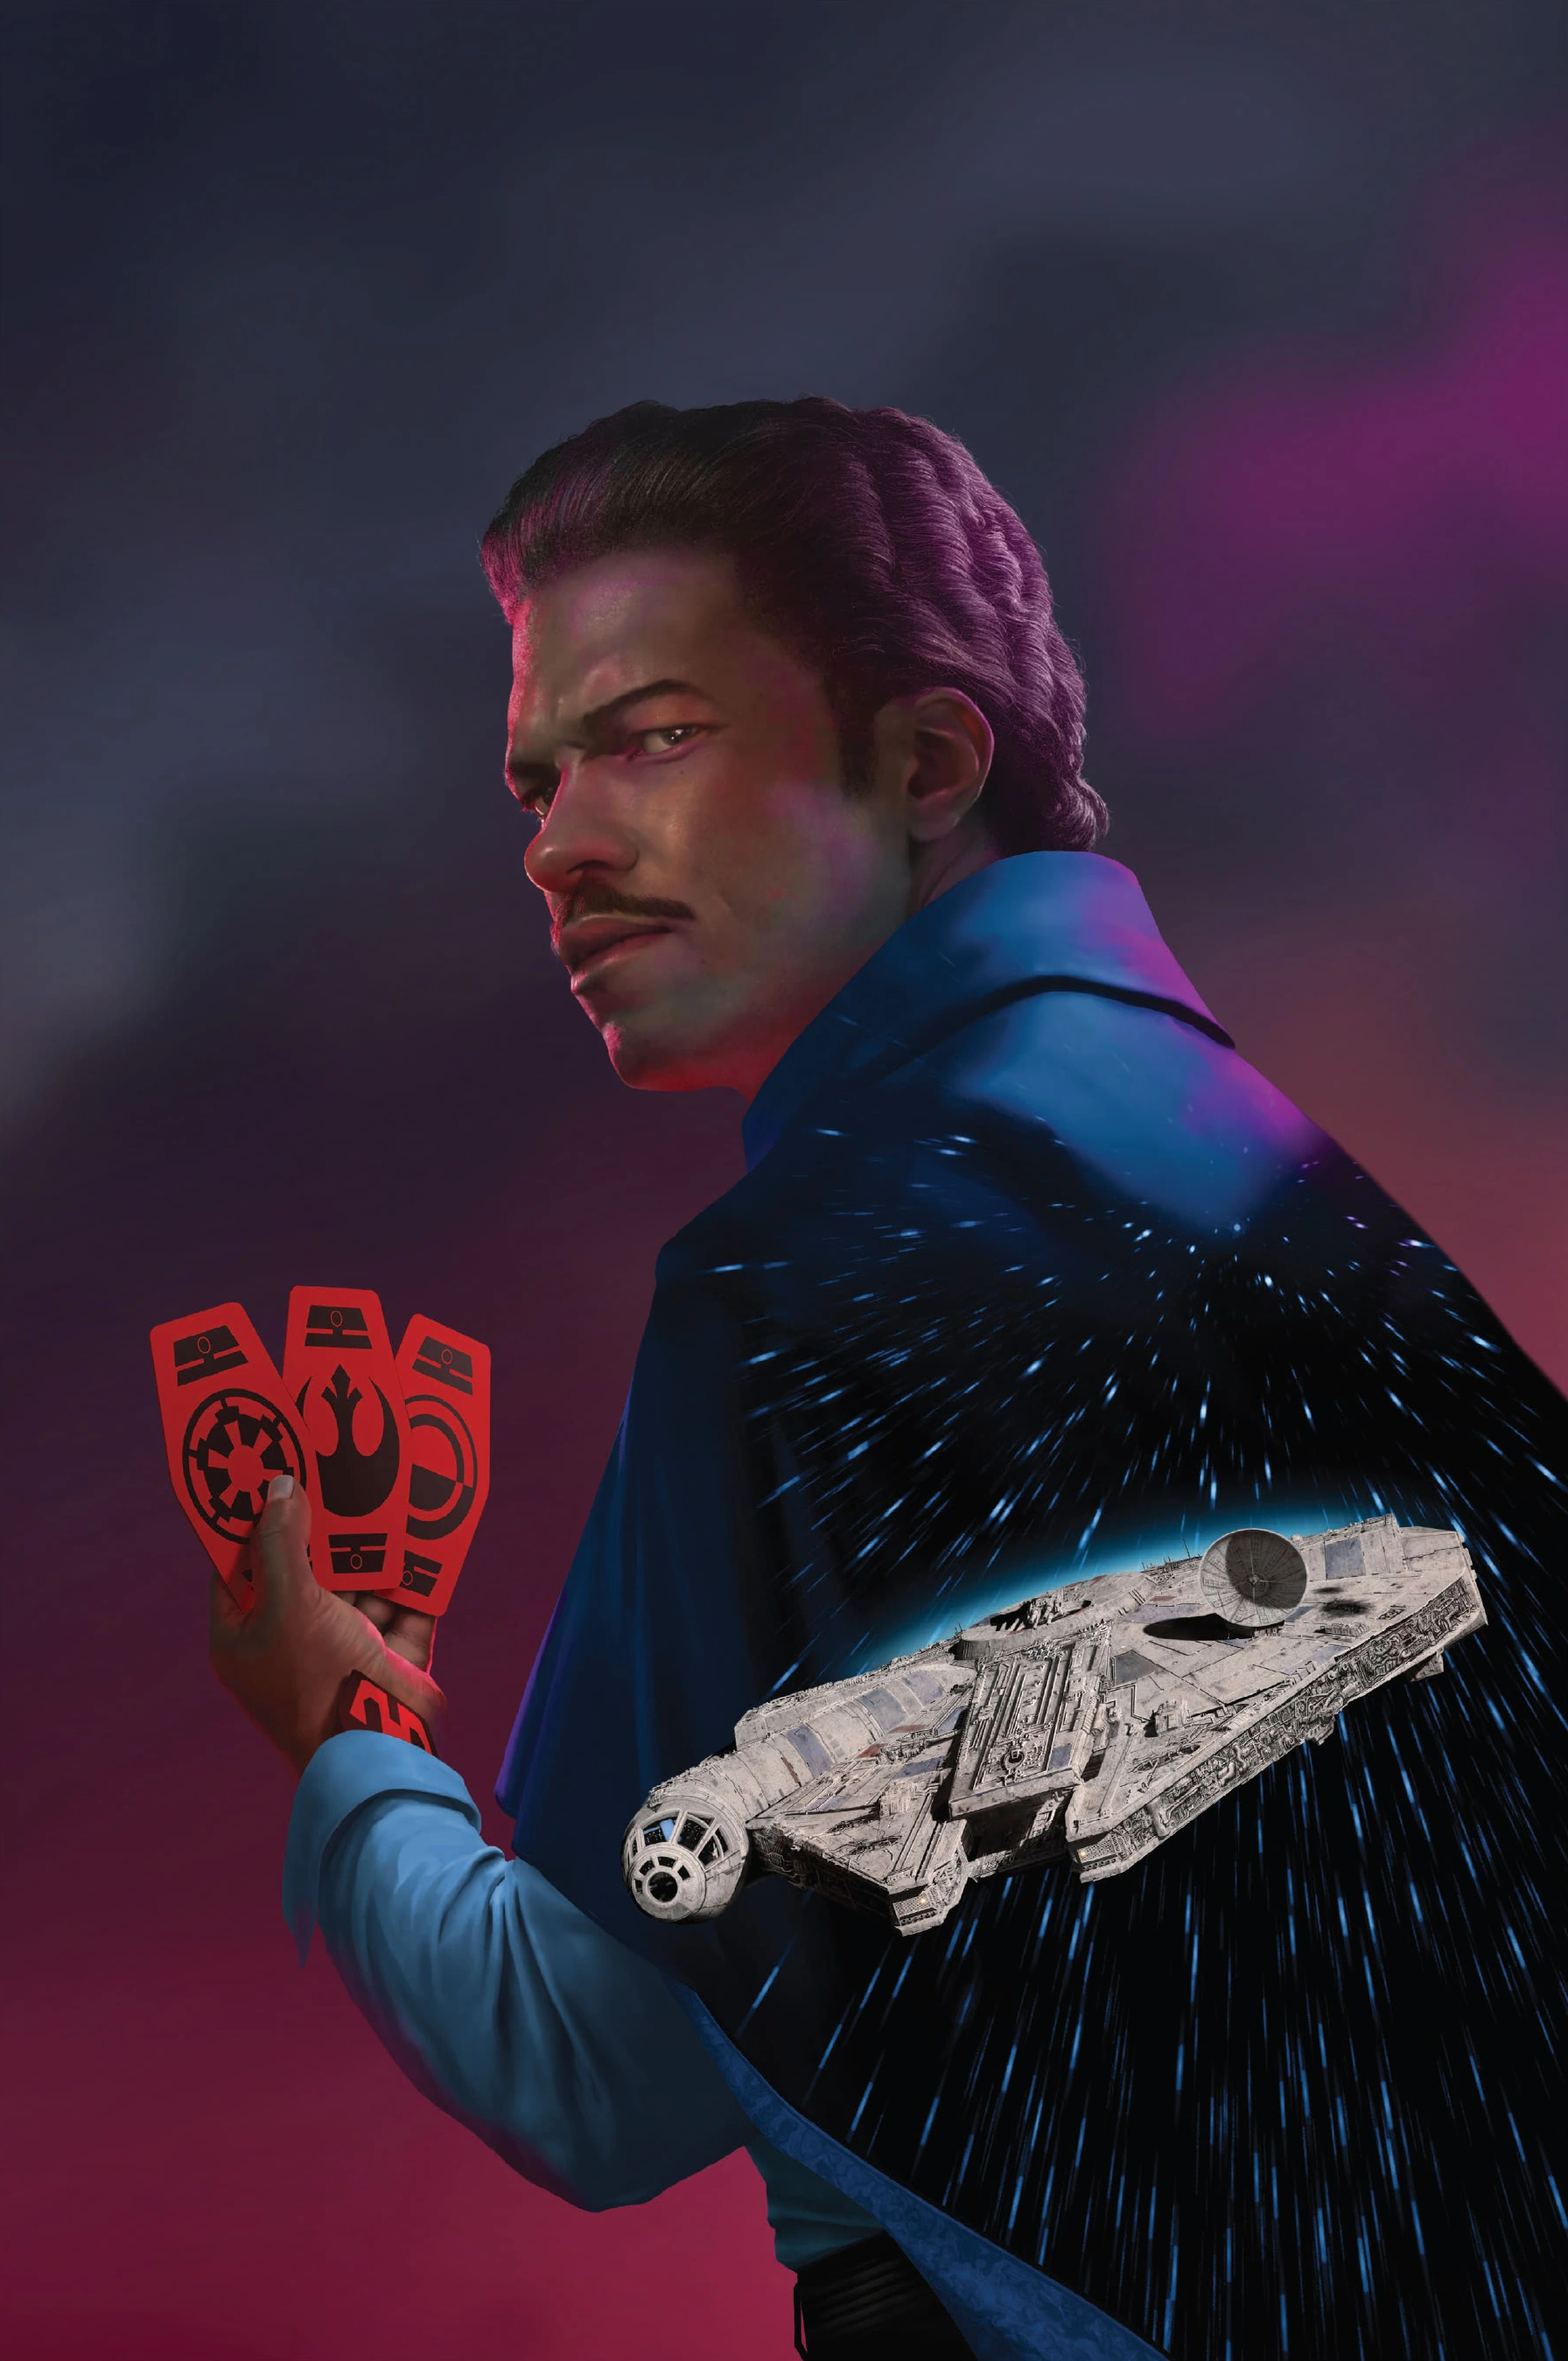
Lando Calrissian, once a galactic gambler who only joined fights if he saw "an angle," took on a respectable and even pro-rebel turn.
He was also familiar with the bounty hunter Cha, which led her to spare his life.[40] Calrissian cared deeply for his friend Lobot and was unwilling to abandon him. The two were close friends. Lobot recognized Calrissian's charm and ability to motivate people and counseled him to find a greater cause than himself and to do good for others.[41]
After Lobot lost his freewill,[41] Calrissian sought to turn into a respectable businessman, and he turned Cloud City into a mostly-legitimate enterprise.[4] He was protective of his people to the point that he was forced to betray Solo and the Rebels to save Cloud City from the wrath of the Empire, for whom Calrissian had no love. He turned against the Empire, however, in order to give his citizens a chance to escape and to save Solo. Although Solo had felt betrayed by Calrissian's actions,[6] the two reconciled after Solo was rescued from Tatooine, and shared a warm embrace during the victory celebration on Endor.[12] When speaking or referring to Solo by his first name, Calrissian invariably pronounced the name the same way one would pronounce the word "hand," rather than rhyming with "on" as it was normally pronounced.[8]


Calrissian's X-8 Night Sniper, his primary weapon of choice.
Though he had once written the Rebel Alliance off as a lost cause,[31] he came to join their fight against the Empire.[12] Calrissian was known for his jocular and witty personality. Despite the wartime damage to Cloud City, Calrissian was undaunted and preferred to look on the bright side of things by hiring refugees to staff his facilities. Calrissian was also a smooth-talking negotiator who managed to convince several Imperial holdouts to surrender in return for being well-treated and allowed to leave Cloud City. Calrissian was also a man of honor who kept his promises. The only person that could exert an influence on Calrissian was his friend and employee Lobot. Calrissian welcomed the news that his friends Solo and Organa were expecting a child and looked forward to being an uncle.[53]
Skills and abilities[]
- "He's the best smuggler around. He's slipped through the Empire's fingers more times than anyone else. He's attractive, too. Sophisticated, with impeccable taste and…charisma. Not to mention his prodigious—"
- ―Qi'ra recommends Calrissian
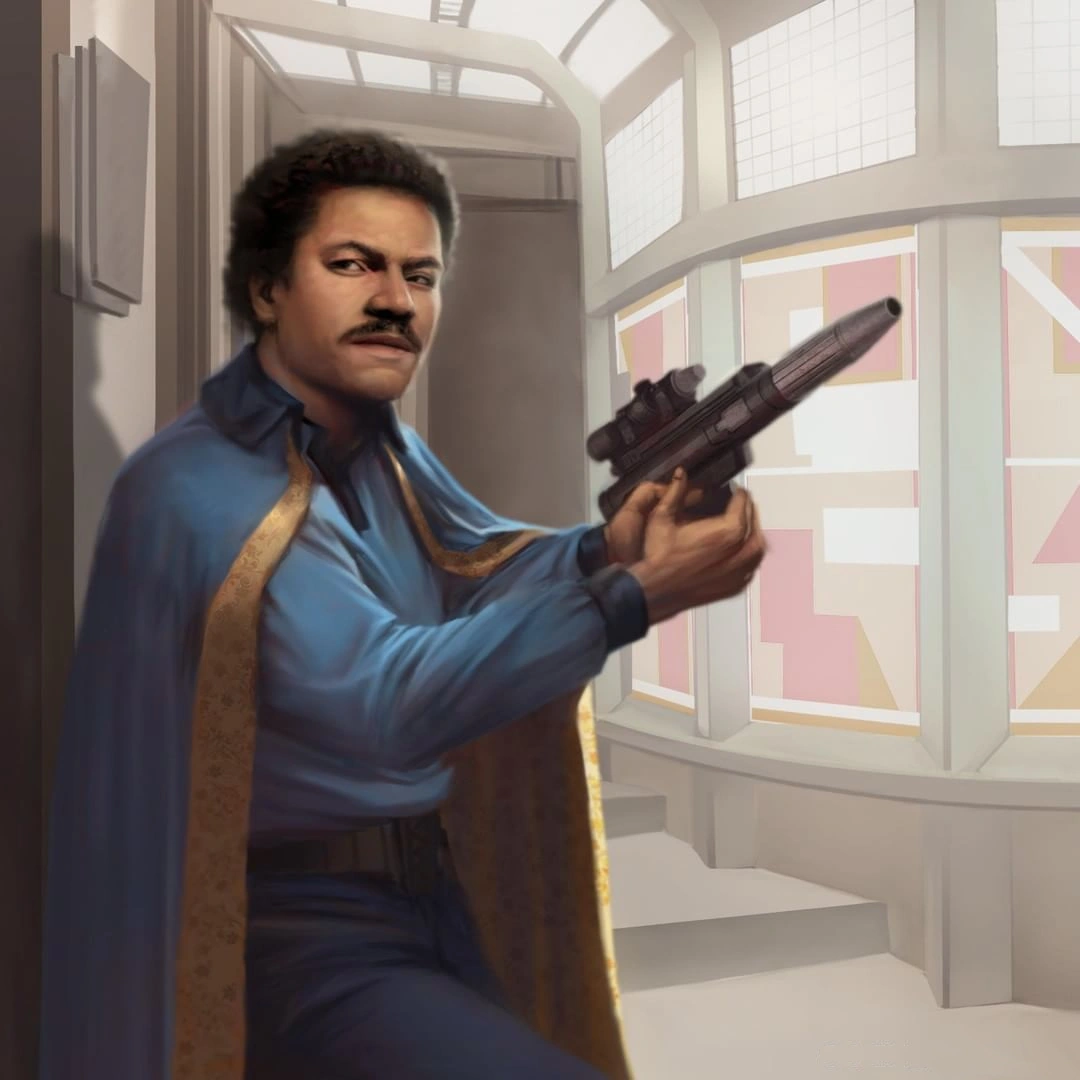

Calrissian was a good shot with his blaster.
Calrissian was a skilled pilot. During the Battle of Taanab, Calrissian performed a piloting maneuver that impressed even himself. He later attributed that maneuver as being one of the reasons why the Rebel Alliance commissioned him as a general and placed him in a command position for the Battle of Endor.[12] Calrissian was also skilled with a blaster, wielding an X-8 Night Sniper as his weapon of choice which he used against Azmorigan's thugs with enough proficiency to earn him a compliment from Wren, herself an accomplished markswoman.[32] While living as a hermit on the planet Pasaana, Lando Calrissian utilized a custom-crafted prod pistol which he used to fire an arrow at FN-2802.[7]
Calrissian once undertook a dangerous maneuver which involved latching onto a Star Destroyer's tractor beam and causing it to collide with another Star Destroyer. Calrissian boasted of doing this maneuver a thousand times.[38] Calrissian was also a cunning combatant and once tricked the lightsaber-wielding Aleksin into deactivating his blade so that he could kill him.[41] Calrissian also owned a Rossmoyne Vitiator pistol, which he won in a game of Six-Card Gizka Limit from a spice-drunk Aybarian diplomat. Calrissian used this pistol to kill an Imperial sergeant who refused to surrender.[53] Calrissian had decades worth of experience playing sabacc, earning him a great degree of skill in the game and a complete understanding of its tricks.[10] Still, throughout his playing career he showed he was more than willing to cheat with cards up his sleeve[8] or by counting cards.[10] He knew how to make banter at the table[8] and was well-practiced in not letting his expression give his hand away.[10]
Equipment[]
- "The cape makes the man."
- ―Lando Calrissian, on capes


Calrissian often wore capes.
Calrissian had a flamboyant sense of style. He often wore ornate clothing that included a cape.[6] While having a fateful rematch of sabacc with smuggler Han Solo, Calrissian wore a colorful outfit that consisted of a red tie, white pants with a beckon call transponder chit, a white and blue bespoke cape made from a tailor on a subtropical moon in the Oseon Belt, and a bright yellow shirt with it's sleeve hiding a green sylop card.[8][60] On a mission to rescue Han Solo, he wore Tantel armor when he disguised himself as a Skiff Guard pretending to work for crime lord Jabba the Hutt in order to blend in with the crowd at Jabba's Palace. In the disguise he wore dark clothing which included a mask with bones on it.[12]
Behind the scenes[]
- "The audience was so enamored with Lando, they could forgive Lando for anything. If you're able to play a character that can be sort of a bad guy but has redeeming qualities, those are the best characters to play. That was a great challenge to me, to make him palatable, and it worked."
- ―Billy Dee Williams, commenting on his work as Lando Calrissian
Lando Calrissian was portrayed by Billy Dee Williams in Star Wars: Episode V The Empire Strikes Back and Star Wars: Episode VI Return of the Jedi.[6][12] Williams reprised the role in "Idiot's Array," the eleventh episode of the first season of the animated television series Star Wars Rebels,[32] and returned in the first episode of the second season, "The Siege of Lothal."[35] Williams also reprised the role for the game Star Wars Battlefront II.[14]
Lawrence Kasdan, who co-wrote The Empire Strikes Back, Return of the Jedi, and The Force Awakens, told Vanity Fair that Calrissian is not in The Force Awakens, but added that he believes that there is a future for the character and that Calrissian is not "finished in any way, shape, or form."[62] The Last Jedi director Rian Johnson briefly considered to bring back Lando in the film as the codebreaker that Finn and Rose Tico needed to find at Canto Bight, but Calrissian was ultimately written out from the film's script and replaced by DJ in the role.[63]
A young Lando Calrissian was portrayed by Donald Glover in the 2018 film Solo: A Star Wars Story.[64] Since the production's beginning, Calrissian was always included in the script as he was necessary to the story.[65] When asked about the character's depiction in the film, screenwriter Jon Kasdan confirmed that Lando is meant to be pansexual. "There's a fluidity to Donald and Billy Dee's [portrayal of Lando's] sexuality," he said. "I mean, I would have loved to have gotten a more explicitly LGBT character into this movie. I think it's time, certainly, for that, and I love the fluidity ― sort of the spectrum of sexuality that Donald appeals to and that droids are a part of." Kasdan's father and co-writer was more ambiguous about his thoughts on the character's sexuality, saying "Maybe [Lando's allegedly flirty attitude toward Han] means something, maybe it doesn't."[66] Kasdan also revealed on Twitter that they had recorded a line that stated Lando's full name was "Landonis Balthazar Calrissian III," but it did not make the final cut of the movie.[67]
Billy Dee Williams reprised the role of Lando Calrissian for 2019's Star Wars: Episode IX The Rise of Skywalker, the final installment of the Skywalker saga.[68] Reggie Watts provided the voice of his disguised form in the film.[69]
On March 18, 2021, StarWars.com announced that Star Wars comic books released by Marvel Comics in June will have Pride Month variant covers that feature gay and transgender artists paired with LGBTQ+ characters.[70] The artwork was revealed on May 7, and includes Calrissian on the Star Wars (2020) 14 variant cover by Stephen Byrne.[71]
Continuity[]
Star Wars Rebels: Visual Guide: Epic Battles states that Calrissian was twenty-six at the time of "Idiot's Array," placing his birth in around 30 BBY.[72] This conflicts with Star Wars: The Rise of Skywalker: The Visual Dictionary, which states that Calrissian was approximately 78 years old at the time of Star Wars: Episode IX The Rise of Skywalker, placing his birth in around 43 BBY.[3] In the 2018 film Solo: A Star Wars Story, where the main events take place in 10 BBY,[73] where Han Solo is 22 years old,[74] Calrissian refers to Solo as "this kid" ("I like this kid. You're adorable.") and "the boy" ("What are you doing with hairy and the boy?"),[8] indicating that he is several years older than Han Solo and that the information in The Visual Dictionary is the correct version.
Calrissian's original name in early drafts was Lando Kadar. Three options for the character were discussed—a trader, a James Bond style of individual, or a clone from the Clone Wars.[75] Eventually, he evolved into the role seen in Empire Strikes Back.[6]
Appearances[]
Non-canon appearances[]
Sources[]
Non-canon sources[]
 LEGO Star Wars Summer Vacation | Official Trailer on the official Star Wars YouTube channel (backup link) (Posted on StarWars.com)
- LEGO Star Wars Summer Vacation: A Vacation Adventure Clip on the official Star Wars YouTube channel (backup link) (Posted on StarWars.com)
- LEGO Star Wars Summer Vacation | Booth to Beach on the official Star Wars YouTube channel (backup link) (Posted on StarWars.com)