
Warning: This infobox has missing parameters: parents, pronouns, children, siblings, partners, families, feathers and unrecognized parameters: imageBG, era
- "'Accessory?!' 'Small-time hood?!' I'm not an accessory! I am a mastermind!"
- ―Marn Hierogryph
Marn "Gryph" Hierogryph, also known as Baron Hieromarn, Remulus Horne, Professor Gryphomarn, Junior Saber-Twirler, and Bulgryph Mandrake, was a confidence trickster, black marketeer, entrepreneur, and restaurant host who rose to prominence during the Mandalorian Wars. The Snivvian was born to Garl and Glomkettle Hierogryph, and dabbled in various acts of larceny and felony at an early age. He eventually found himself on the ecumenopolis of Taris, where he was able to set up various black market enterprises. Soon, he fell afoul of the Jedi Order. The Human Padawan Zayne Carrick was assigned to hunt down Hierogryph, although the Snivvian was largely successful at evading him. Eventually, the young Padawan apprehended him, but in a twist of fate, Carrick himself was then hunted by the Jedi Covenant of Taris, who were convinced that the Human was destined to become a Sith Lord, based on a vision they had recently experienced. The Jedi Masters had murdered their own Padawans, but Carrick's tardiness had saved him.
Hierogryph and Carrick fled, picking up Arkanian companions Jarael and Gorman "Camper" Vandrayk along the way, as well as the droid T1-LB. The Covenant Masters, led by Carrick's own master, Lucien Draay, were in constant pursuit of them, however, and had spread word that it was he that had killed the Padawans, with the Snivvian as his accomplice. Trying to lay low as a result, Hierogryph and his companions found themselves caught up in the Mandalorian Wars themselves, in the midst of various confrontations at Vanquo, Flashpoint, and Serroco. Along the way, they picked up new members of their retinue, such as the Mandalorian Rohlan Dyre, and the Trandoshan Slyssk. On Serroco, however, Hierogryph and Slyssk were separated from Carrick, and only narrowly escaped the Mandalorian nuclear strike against that planet. In escaping, however, they inadvertently saved half a battalion of Republic soldiers. The Ministry of Defense, failing to recognize Hierogryph as a criminal and a fugitive, decided to build a propaganda story around the Snivvian and his Trandoshan, giving rise to the character of "Captain Benegryph Goodvalor," who in turn inspired holovids, restaurant chains, and assorted merchandise.
Afterwards, Hierogryph fought with the Taris Resistance against the new Mandalorian occupation. There, he was reunited with Carrick, and subsequently, the two of them set out to clear the young Jedi's name. Braving an onslaught of Covenant Jedi, Hierogryph and Carrick were able to accomplish their goal during the Vindication campaign on Coruscant. In the wake of that operation, Carrick eschewed the option of becoming a Jedi Knight in favor of becoming Hierogryph's partner. Hierogryph and his crew subsequently took on slavers, as well as the Crucible, freeing slaves and participating in various competitions. Eventually, with the onset of the trial of Demagol, Hierogryph and Carrick returned to Coruscant, where the young Human revealed that he had been "borrowing" funds for a private project of his, called the Rogue Moon Project—an organization dedicated to aiding ordinary people as the Mandalorian Wars raged. Similarly, Hierogryph had his own project—Goodvalor's Little Bivoli, a thriving restaurant which attracted the loftiest of clientele. Now in possession of the Goodvalor's franchise, the Snivvian settled down as host of the restaurant, while Carrick went his separate way.
Biography
Early life
Born to Garl and Glomkettle Hierogryph,[7] Marn had a brother, who worked as an actor.[8] Marn found himself in a career of larceny and felony at an early age. At school, he blackmailed his headmaster into giving him a perfect record of attendance. While this garnered attention, it was not until he auctioned off the school grounds to foreign buyers that he was expelled. As a result, Garl and Glomkettle had Marn home-schooled, but this proved fruitless as the young Snivvian framed his tutor for racketeering. Fed up, Marn's parents had him sent offworld. Marn soon found himself in the company of illustrious and well known criminals, such as Davik Kang and Loopy "The Lip" Leverby. But he seldom gained the respect of his peers, as he would constantly betray and swindle any partners he had. One of his more infamous scams involved adopting the guise of "Remulus Horne," a folk balladeer. As Horne, he instigated a "holo-thon," urging viewers to donate 384,000 credits to his fictional charity. In due course, the authorities pulled his feed from the air.[7]
Operations on Taris
- Marn Hierogryph: "He's not a Jedi! He's just an intern!
" - Zayne Carrick: "That's "Padawan!""
- Marn Hierogryph: "That's "chump!""
- ―Marn Hierogryph and Zayne Carrick[src]
While living on the ecumenopolis world of Taris, Hierogryph's black-market operations garnered the notice of the Tarisian constabulary.[9] He took the young Twi'lek Griff Vao under his wing, but his new protégé was almost arrested five times during con-operations. Hierogryph believed that this was due to the fact that Vao was far too obvious during his scams, and would tell the target that they had been "conned" immediately after doing so.[3] During the Mandalorian Wars, he started a fleek eel scam, under the alias "Baron Hieromarn." Using the Market Street Outdoor Exchange as a platform, he insisted that fleek eel would soon be considered a delicacy, and that any investments in the venture would prove profitable. Claiming to be selling the product, he referred buyers onto "a family friend" at Junavex Hotel, and insisted upon hard currency, as there was a "delay" in transferring his accounts from Cadomai Prime.[9]
During this time, Hierogryph was enlisted by Zovius Mendu to help him flee the planet. Mendu, on the run from Jedi Master Feln, hoped to escape to Corellia. Hierogryph contacted Gorman Vandrayk, better known as "Camper," who was able to refit an old escape pod into a shipping container, allowing Mendu to escape amongst a crate of dried dreeka fish. While the operation was a success, Hierogryph neglected to pay Vandrayk for his assistance.[10]
Sector Constable Noana Sowrs soon tired of Hierogryph's scams, and enlisted the services of the Jedi Order. In turn, the Jedi of Taris dispatched Padawan Zayne Carrick. Fortunately for Hierogryph, Carrick was not particularly adept at his role, and would make many unsuccessful arrest attempts. On his seventh attempt, he was able to lure Hierogryph to the Upper City. Hierogryph believed he was entering a deal in which he would receive military-grade blaster packs. His rationale for such a potentially anti-Republic deal was that he was "doing [his] part for the planetary defense." The merchant selling the packs was in fact Carrick, and the Jedi swiftly grabbed the Snivvian black-marketeer. While Carrick was searching for restraining binders, however, Hierogryph activated the Jedi's vehicle, sending Carrick hurtling through the Upper City. The Snivvian then made his escape.[2]
Hierogryph escapes the clutches of Carrick.
Some time later, Hierogryph gained intelligence of a ryll and lum shipment bound for Coruscant. Making a deal with the Highport Stevedore Guild, he dispatched a group of bulk-loader droids to switch the shipment with a thousand kegs of sewage. Meanwhile, he had the ryll and lum stored in an Upper City warehouse. He was able to interest a pair of buyers with better prices than the Hidden Beks or the Black Vulkars, and was confident enough in the ineptitude of the constabulary to make the transaction in broad daylight. Little did Hierogryph know that Carrick had already infiltrated the Snivvian's warehouse, and had dismantled his droids. When Carrick revealed himself, Hierogryph's customers fled, despite his claims that Carrick was just a "Jedi Intern." Buying himself some time, Hierogryph remotely dropped several barrels of lum on Carrick, while pursuing the customers. The customers were well and truly gone, however, and Carrick was almost able to apprehend Hierogryph. Despite this, Hierogryph was immune to the Jedi's mind tricks, and was able to once again elude Carrick.[11]
By nightfall, Hierogryph was trying to sell the demolished LB-series bulk-loading droids, and the tarnished merchandise to an Upper City contact. The deal struck, he noticed a purse of credits on the ground. Reaching to grab them, he was apprehended, for the ninth and final time, by Zayne Carrick. At first protesting by crying of robbery and murder, Hierogryph staged a diversion by throwing the purse amongst the crowd. Just as he thought he had made his escape, Carrick used the Force to stop him in his tracks. Carrick was in fact late for what he thought to be his own knighting ceremony, so he left the captive Snivvian cuffed to a speeder outside the Jedi Tower.[11] Shortly thereafter, the young Jedi came hurtling back out, with five Masters of the Jedi Covenant in hot pursuit. They believed that Carrick, or his fellow students, would bring about the destruction of the Republic, and so set about killing them. Carrick, having turned up late, discovered their scheme, and fled, with Hierogryph in tow.[12]
Fugitive
Carrick and the captive Hierogryph prepare to flee the Jedi Tower and the clutches of the Jedi Covenant.
- "Snivvians—my people—we play at things. Adventuring, politics, even crime. And I love the game. I'm good at it. But this—this is too much heat for me."
- ―Marn Hierogryph
The two fugitives eventually found their way to the Lower City via a garbage chute. Safe, for a while, Carrick explained the situation to Hierogryph, who began to suspect that it was Carrick who had murdered the Padawans, not the Covenant. The young Jedi was able to convince Hierogryph, however, before the Snivvian destroyed a surveillance droid of the Taris Civil Authority. The two then spotted a "wanted" sign for Carrick in the SoroSuub Landing, accompanied by another one for Hierogryph. The signs claimed that Carrick had indeed killed the Padawans, and that Hierogryph had helped. The Snivvian was enraged at the fact that he was being portrayed as an accessory to Carrick's crime, rather than the mastermind, and had a smaller bounty. Entering a Kedorzhan public house, Hierogryph treated the depressed Carrick to a drink. They then both ducked to avoid being spotted by sentients who are not blind, Zayne breaks a glass with the Force in anger for how his Masters massacred his friends in cold blood. Gryph suggested that perhaps his master is Sith (he mistakenly suggests Bith before being corrected) but Zayne denied the thought, recalling that his masters have always voiced their hate for the Sith. It then occurred him that this hate is suppose to be forbidden by the Jedi Order. Zayne insists to Gryph that if they are going to have to survive, then they need to retrace their steps to the events before the massacre.[12]
Realizing that they needed to escape the planet, Hierogryph devised a plan. He intended to contact Vandrayk at Junk Junction and obtain a method of escape, but he told Carrick that they would be journeying to the dangerous Undercity.[12] He had hoped that by telling Carrick they were going to the Undercity, he could sway the telepathic Jedi into thinking that was their destination. While Hierogryph was skeptical the gambit had worked, the Masters had in fact entered the Undercity, buying the two fugitives more time. Hierogryph obtained passage through the Lower City by bartering with a Wookiee cart driver, who would take them to Junk Junction. Upon getting off the cart, they were confronted by a pair of Black Vulkars. Seeing that the Wookiee had let them off at the wrong stop, Hierogryph was able to convince the Vulkars that the Wookiee had sewn spice capsules into his cart harness, creating a disturbance and allowing the pair of fugitives to escape unnoticed.[10]
The pair were able to make it to Junk Junction with a minimum of fuss, but upon reaching Vandrayk's home, dubbed "The Last Resort," they were set upon by Jarael. Jarael and Vandrayk were Arkanian offshoots, with the former caring for the frail latter. Jarael had seen the "wanted" signs, and demanded that the pair leave immediately. Carrick's supposed "actions" had prompted several companies to leave Taris, effectively ruining honest Lower City employees. This angered Jarael, but Hierogryph was able to persist until Vandrayk had emerged. Vandrayk too was in a foul mood, due to the fact that Hierogryph had still neglected to pay him for the Mendu operation. Just as Carrick prepared to leave, Constable Sowrs and four masters of the Covenant arrived, demanding that the young Jedi surrender himself. Fleeing into the refuge of Vandrayk's home, the old junk dealer revealed that the "Last Resort" was in fact a spaceworthy junk hauler. Escaping their pursuers, the foursome were able to make it to orbit.[10]
At first, the Last Resort stalled, and was nearly destroyed by Civil Authority police cruisers. Vandrayk was able to make quick repairs, however, and the craft sped towards Taris's inner debris field. Hierogryph was horrified, believing that the ship would surely crash in the treacherous field, but Jarael was able to pull up just in time. Suddenly, the Snivvian's skepticism became confidence; a turn that riled Jarael. She threatened to throw Hierogryph and his Jedi accomplice out through the airlock, before Hierogryph reasoned that the Civil Authority would question them anyway. The group decided to spend the "night" in the field, with Hierogryph sleeping in a space suit. Meanwhile, Carrick decided to move the Last Resort out of the field, while he contacted Jedi Master Vandar Tokare for guidance. Tokare, however, did not believe Carrick. Jarael, frustrated, had to move the Last Resort once again, in case Carrick's transmission had alerted the Civil Authority. Carrick had decided that he needed to retrace the events leading up to the Padawan Massacre, and so the group set out for the "Rogue moon," where the Padawans had completed a training exercise in days prior.[13]
While Carrick and Jarael investigated the moon looking for clues as to what the Covenant's motives were, Vandrayk and Hierogryph took the Last Resort to the far side of the moon for shelter. During their absence, Carrick's master, Lucien Draay, and the Civil Authority caught up with the fugitive Jedi. Just as they closed in, Vandrayk fired on and destroyed their ship, while Hierogryph retrieved Carrick, Jarael, and the remains of T1-LB, a droid formerly in the employ of the Jedi Order. Safe aboard the Last Resort, Vandrayk was able to access the droid's holographic memory, revealing to Carrick that the Jedi Covenant had predicted the death of the Republic at the hands of one of the present Padawans. While debating this, the Last Resort was captured by the Oroko, a pirate ship.[14]
Hierogryph barters for his freedom with Valius Ying.
Upon capture, Hierogryph put his bartering skills to good use on the Oroko's captain, Valius Ying. He offered Ying access to all of his Taris warehouses in exchange for his freedom, and that of the Arkanians. Carrick, however, was the non-negotiable element of Ying's deal, and Hierogryph was forced to abandon him. He explained that Carrick was a "losing hand," and more than he had bargained for. The young Jedi understood, and despite initial trepidations, resigned himself to his fate.[14]
Hierogryph, however, felt guilty over the trade, since no one had ever sacrificed themselves for his gain. With the Arkanians in agreement, he bribed the Oroko's first mate into releasing the Last Resort in Taris's orbit. From there, the Snivvian and the Arkanians hatched a scheme to rescue Carrick. Jarael burst into the Jedi Tower, where the young Jedi was being condemned by the Covenant, wearing a red space suit that the masters had prophesied about. Wielding Carrick's lightsaber, she fended off the Masters, and used the low-gravity booster jets on the space suit to escape the tower. Meanwhile, Vandrayk and Hierogryph brought the Last Resort in next to the tower, allowing for a swift getaway.[15]
Cheerfully reunited with Carrick, Hierogryph offered the young Jedi a place in his "organization," which, in fact, consisted of only Hierogryph. The Snivvian believed that his brains, and Carrick's destructive power would either lead them to own the galaxy or destroy it—in which case, Hierogryph planned to sell the remains for salvage. Carrick agreed, though he intended to hunt down the members of the Taris Covenant, until one of them confessed to their actions.[15] Before they left Taris, Hierogryph wrote a speech for Carrick to deliver for the Covenant, saying that he had seen a vision in which the one member who confessed to their crimes had lived.[16]
Mandalorian Wars
- "Blast it! I hate it when my cons come true."
- ―Marn, when he, Zayne and Camper are attacked by Mandalorians
While he could no longer fleece the citizens of Taris, Hierogryph hoped to gain as much from the war as possible. Journeying to Vanquo with his new friends, he set up a scam to steal Republic supplies from a small frontier camp. The group had gone without food for days by the time the operation was ready to begin. Jarael, disguised as Q'Anilia, sent a holographic image into the Republic camp with the help of Vandrayk, warning them of an impending Mandalorian attack, while T1-LB and Hierogryph created the pyrotechnics to support the claim. The Republic force fled, allowing the group to reap the benefits of a fully stocked warehouse. Working quickly before the occupants returned, Hierogryph salvaged some munitions, hoping to sell them on other worlds.[17]
While they were doing this, however, the Mandalorians really did attack, making Hierogryph's scam "come true". They descended on the planet, and while Hierogryph, Vandrayk and Carrick were able to find shelter, Jarael, still disguised as a Jedi, was apprehended. Realizing that they could not rescue her immediately, Carrick led the others deep into the Vanquo woods, with Mandalorians in hot pursuit. He requested that Hierogryph aid in fending off the attackers, but the Snivvian refused. They reached the Last Resort, only to find it being hijacked by a Mandalorian, Rohlan Dyre.[17] Despite this, they were able to board it before it took off.[18]
As the Last Resort flew away from Vanquo, Vandrayk attacked the Mandalorian hijacker. The group detained Dyre in one of Vandrayk's smuggling compartments, while the elderly Arkanian, who had planted a homing device in one of Jarael's bracelets, piloted the ship towards Mandalorian territory, a fact that alarmed Hierogryph and Carrick. Releasing Dyre to question him, they learned that Jarael was being taken to Flashpoint Stellar Research Station, a Mandalorian-held installation. There, she was to be interrogated by Demagol, a leading Mandalorian biologist. Dyre explained to them that he was a renegade Mandalorian, and that raiding Flashpoint would be suicidal, but Carrick had a plan.[18]
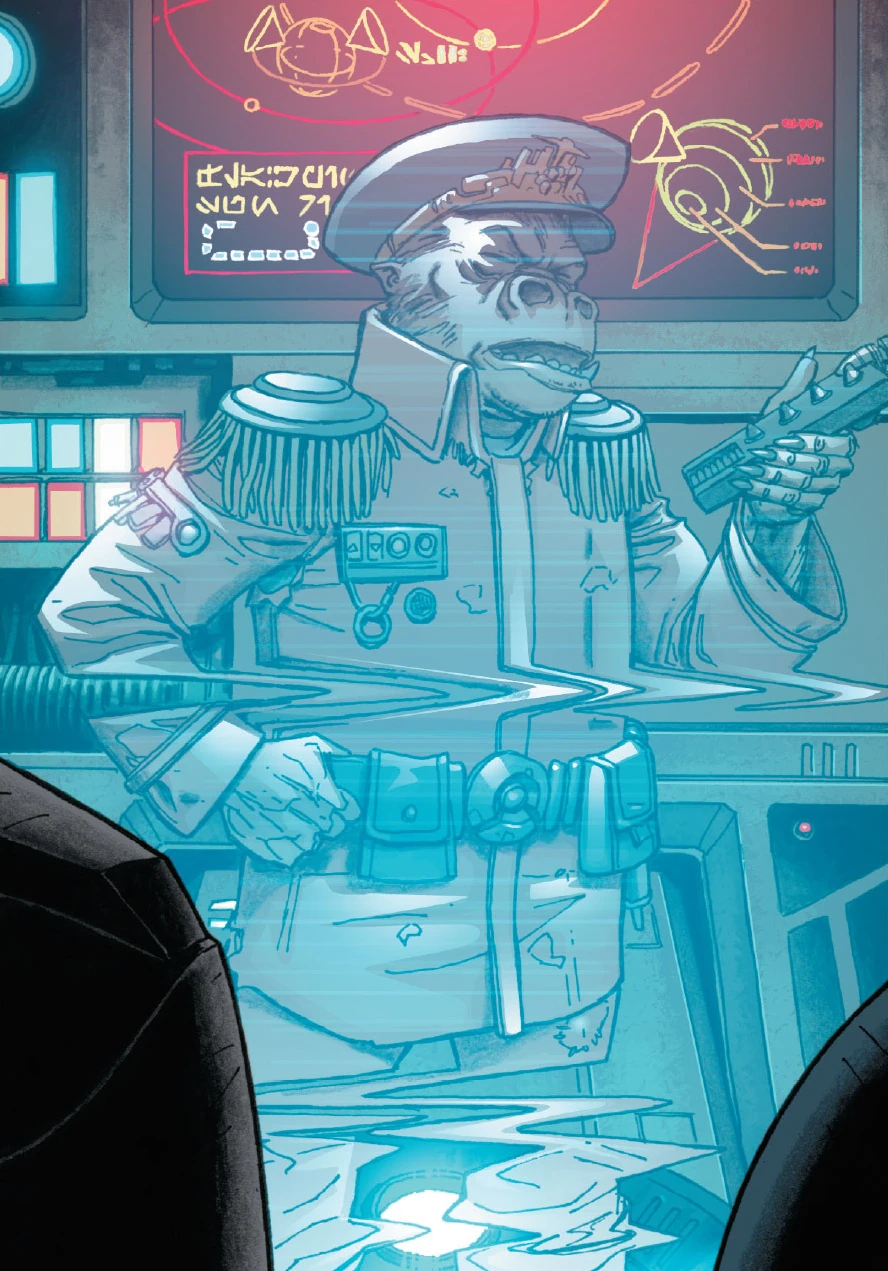

"Admiral" Hierogryph of the Republic Cruiser "Glomkettle."
Dyre hailed Flashpoint, claiming that he had "captured" Carrick. After landing, he took Carrick to Demagol, while Hierogryph and Vandrayk hid in one of the Last Resort's hidden compartments. When Demagol made to torture Carrick, Dyre incapacitated the biologist, and disguised Carrick in the vacant Mandalorian armor. Hierogryph had T1-LB drop a bag of mines stolen from Vanquo into the Flashpoint compound, and Carrick used the Force to attach them to the Mandalorian emplacements. Then, Hierogryph, disguised as "Admiral Hierogryph of the Republic Cruiser Glomkettle," sent a transmission to the Mandalorians, claiming that his ship was nearby, and would attack Flashpoint if the they did not retreat immediately. To further his claim, he detonated the mines, destroying Mandalorian and captured Republic craft alike. The Mandalorians retreated, allowing Carrick and Dyre to retrieve Jarael successfully.[19]
Retrieving funds
- Marn Hierogryph: "Here, this amount seems fair."
- Zayne Carrick: "Gryph!"
- Marn Hierogryph: "My hand slipped! My hand slipped!"
- ―Marn Hierogryph paying Zayne Carrick for his services.[src]
Following Flashpoint, the Arkanians decided that they wanted to depart from Hierogryph and Carrick's company. Resolving to pay the Arkanians to help them on their way, Hierogryph and company went to Telerath, the banking world. Since Hierogryph's accounts were frozen following the Padawan Massacre, and he was a wanted Snivvian, he sent Vandrayk and Jarael to retrieve the funds, with Vandrayk using the Snivvian's old alias of "Baron Hyro Margryph." Their story was that "Margryph" had been confused with Hierogryph, that it was nothing more than a simple confusion of names, and that "Margryph" had full rights to access his money. Hierogryph coordinated the operation from the Last Resort and was incensed when "Margryph" began insulting his character in front of the banker, Arvan Carrick. Carrick was in fact Zayne's father, but the group was not aware of the fact at the time.[20]
Further problems arose when Carrick senior asked for "Margryph's" 30-digit account access code, which had been left on the Last Resort. Hierogryph panicked, and made to call the whole operation off, but Vandrayk began reeling off seemingly random numbers. Fretting, Hierogryph urged Jarael to stop Vandrayk, before realizing that the numbers were in fact the code. As Arvan led the Arkanians to the banquet pavilions, they were ambushed by the Moomo Brothers, a pair of incompetent Ithorian bounty hunters. They captured Arvan, while Zayne and Hierogryph raced to the scene, hoping to avert potential disaster. Upon meeting the Arkanians, Zayne raced off after the bounty hunters, and learned the identity of the banker, though he was unable to save his father.[20]
Hierogryph confers with Dob Moomo.
Wary that the entire situation might be a trap, Hierogryph met with Dob Moomo at a Telerath public house. He played to the Ithorian's vanity, and claimed that he was a far superior hunter to his brother, Del. Hierogryph claimed that Carrick wanted to surrender himself to the Brothers, in exchange for Arvan's freedom. Dob, inebriated due to Hierogryph's willingness to foot the drinks bill, accepted the deal. Meanwhile, Carrick infiltrated the Moomo Williwaw, and rescued his father. Hierogryph arrived, claiming that Vandrayk was in fact the Jedi, and demanded that the Moomo Brothers hand over custody of Arvan. The two brothers started arguing, as Del had agreed to no such deal, and when Carrick subtly let some machinery fly at Del's head, the argument broke into a fully fledged fight. The Carricks hurriedly left the scene.[21]
Back at the Last Resort, Arvan resolved the issues with Hierogryph's account, and had the money delivered to the ship in hard currency. Zayne, at that moment, demanded that Hierogryph pay him for his efforts. The Snivvian grudgingly complied, and lamented that he hadn't hooked up with Arvan, or even Lucien Draay, who was a member of an exceptionally wealthy family. Zayne ensured that his father was transferred out of Telerath, and the crew of the Last Resort departed for Ralltiir.[21]
Little Bivoli
- "Maybe we shouldn't have served seconds…"
- ―Marn Hierogryph, as Mandalorian warheads descended on Serroco
With his new self-styled status as a "crime lord," Hierogryph intended to fleece what he dubbed "Stupid People."[22] Collecting piles of what he called "junk" from the Last Resort, Hierogryph and Carrick soldered together pieces of miscellaneous machinery, in the hope of selling them as statuary works of mechanical art. Heading to the Obohn Gallery of the Industrial Aesthetic, Hierogryph negotiated with the curators, Dremullar Obohn di Garthos, and a Rodian by the name of "Father." Claiming that the machinery was the work of Ineas Tikartine, Hierogryph initially failed to convince his marks, but Carrick was able to use a Jedi mind trick on them.[23]
Before Hierogryph could collect the money, however, Vandrayk barged into the gallery, demanding that the Snivvian return his machinery. Di Garthos did not tolerate the rowdy arguing in his gallery, and so set his Wookiee guards after the trio. Luckily for Hierogryph, though, he incorrectly assumed that Vandrayk was Tikartine, and that the creator of the artworks was aware that his work was stolen, which made the pieces more valuable. He paid Hierogryph double the Snivvian's original price. Carrick was displeased with the fact that he had aided in conning an innocent Muun, but Hierogryph was now able to further his plans.[23]
While Carrick bade the Arkanians goodbye, Hierogryph enlisted the services of a Trandoshan thief called Slyssk. Meeting Carrick in one of the cities, Hierogryph explained that he intended to make the most out of the war, and that he planned to travel to the frontier, to exploit the locals and the combatants. Slyssk delivered the ship: a provisioning ship called the Little Bivoli. The Trandoshan, however, reneged on the initial deal, demanding more credits from Hierogryph. Tiring of the banter, Hierogryph asked Carrick to bring down a damaged structure on Slyssk, while the Snivvian saved the Trandoshan. Slyssk was now bound to a life-debt, called ghrakhowsk. After the initial explanations were made, the trio prepared to depart, but were set upon by the Bivoli's original crew.[22]

Marn Hierogryph greets Lt. Carth Onasi to the Little Bivoli.
Blasting away from Ralltiir, the Little Bivoli was raised by the Republic Navy, and upon forming up with the flagship, the Courageous, the trio learned that the Bivoli was in fact a provisioning ship.[22] Touching down on Serroco, near the Mandalorian front, Hierogryph reveled in running the business of the Bivoli, and by curious happenstance, Slyssk was an adept chef. Posing as the "Host" of the Bivoli, Hierogryph relegated Carrick to cleanup duties; a fact that riled the young Jedi fugitive. Nevertheless, the Bivoli was thriving on profits, and while Carrick argued that he wanted to clear his name, and not sully it, Hierogryph explained that he had always clamored for "wanted" status. He kept the scam going, despite Carrick's objections.[24] During this time, Hierogryph had seven bounties on his head, with the total number of credits coming to 24,000. But "sightings" of him were highly common, due to the fact that most Snivvians presented themselves in a similar manner.[25]
The first night, Hierogryph fell asleep amongst his credits, while Carrick experienced a vision of the future, which told him that the Mandalorians would destroy Serroco upon arrival, which was due the following day. Grudgingly, Hierogryph prepared to close up the Bivoli, while Carrick traveled to meet with Admiral Saul Karath to warn him of the approaching disaster.[24] Slyssk, for whatever reason, countermanded Hierogryph's orders, and when the Snivvian tasted the Trandoshan's breakfast fare, he agreed to keep the shop open for a little longer. Klaxons began to blare, signifying the Mandalorian arrival, and the Republic troops quickly purchased whatever the Bivoli staff could wrap for what could potentially be a grueling campaign ahead. Meanwhile Slyssk informed Hierogryph that they would not have enough fuel to reach orbit, let alone hyperspace. Hierogryph lamented that they shouldn't have served the troops seconds as the first Mandalorian warheads struck the planet surface. The Bivoli attempted to lift off, but was struck, and forced back to the planet.[26]
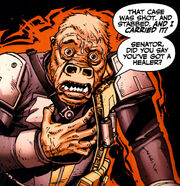
Slyssk was thrown into a wild panic, as he picked up Hierogryph and began running through the Republic camp. He carried the Snivvian up into a troop ship, barging past the men inside, and then secured himself in the cockpit, launching the ship into orbit, mere seconds before the Mandalorians made their nuclear strike against the planet. As it turned out, the troop ship's flight crew had been asleep, and so Slyssk and Hierogryph had inadvertently saved half a battalion of Republic troops. Traveling to Chandrila, Hierogryph and Slyssk were met by members from the Ministry of Defense, who failed to recognize the pair as fugitives. They were instead more interested in building a propaganda story around the Snivvian and the Trandoshan—that of "Captain Benegryph Goodvalor, Hero of Serroco, and his trusty Trandoshan sidekick." The character subsequently had holovids and toys based on him, as well as propaganda broadcasts, which were performed by Hierogryph's brother. Also inspired by the character was the Goodvalor's restaurant chain, which had a franchise on Coruscant,[8] named Goodvalor's Little Bivoli.[6] The story of what had actually occurred on Serroco, however, was to remain a state secret, largely preventing Hierogryph from recounting it to others.[8]
Mission for Thalien
- "Welcome back, Henchman!"
- ―Marn Hierogryph
When Jervo Thalien, head of Lhosan Industries, learned of the Snivvian's survival, he saw the opportunity to use Hierogryph to settle scores with his old partner, Tarisian Senator Haydel Goravvus.[27] Goravvus had disappeared following the Padawan Massacre, though rumors persisted that he was lead the resistance movement against Cassus Fett's Mandalorian occupation. Meanwhile on Coruscant, the Supreme Chancellor set up an inquiry to find out how Taris had entered the Republic so effortlessly. In reality, it was Thalien who had "bought" Goravvus's Senate seat as a reward for establishing Lhosan on Taris.[3]

Hierogryph back on Taris.
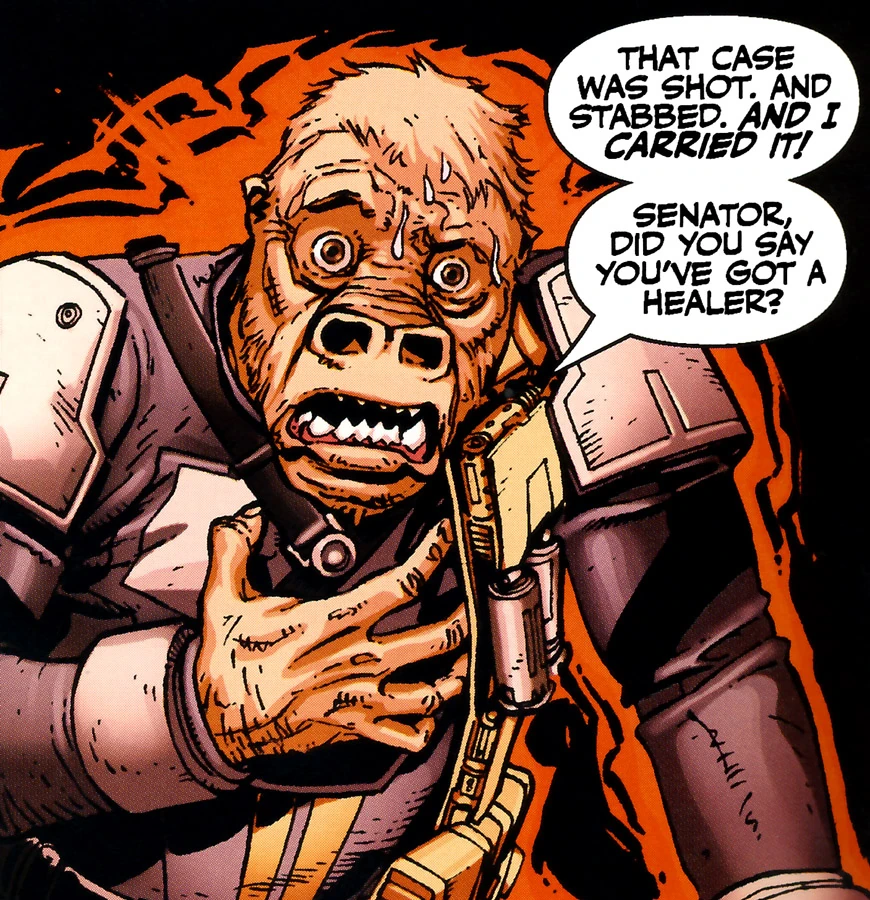
Hoping to both save his friend and keep him hidden from the Chancellor's committee, Thalien had Moomo Brothers grab Hierogryph off the streets of Chandrila and return him to Taris to track down Goravvus.[27] In return, Thalien would get the Padawan Massacre charges dropped, and most of the bounties lifted. Thinking that he could get the charges on Carrick dropped as well, Hierogryph increased his price, and Thalien obliged. He set up a high-tech communication system with Thalien, allowing him to contact the Skrilling on Coruscant without having to worry about Fett's planet-wide jamming system. He then joined the Hidden Beks, hoping to gain access to Taris's primary resistance group. In reality, Gadon Thek, leader of the Beks, was having trouble gaining an audience with the resistance group, as Constable Sowrs's children had been kidnapped during the invasion, and she blamed the Beks. Thalien, using the codename "Mastermind," paid Thek a significant amount in Republic Credits, but this was not enough to solve the problem. Realizing that Carrick would provide the political leverage needed to contact the main resistance,[3] Hierogryph sent Slyssk and Dob Moomo to find Carrick and bring him back to Taris.[4][7] By this time, the bounty on Hierogryph's head had reached a six-figure number.[28]
Sure enough, days later, Carrick cut his way through to the Hidden Beks' base, where Hierogryph was present. Mastermind and henchman were reunited, and preparations were made for the journey to the resistance base. Hierogryph and Thek explained the situation to Carrick, and though the young man was not overly pleased, he was overjoyed at the prospect of having the criminal charges dropped. During the preparations, young Mission Vao, sister of Griff, discovered that her elder brother had been hiding Sowrs's children, who had been captured by Brejik. Thek was livid, but Carrick was no longer needed as leverage for admittance to the resistance. The group set out on their swoops, with Gryph and Carrick joining them. They cut their way through the Mandalorian front lines until the reached the resistance base. Upon arrival, however, Carrick was set upon and stunned by Shel Jelavan, sister of one of the Padawan Massacre victims. Hierogryph's case containing the communication system, however, caught the main brunt of the attack.[3]
Gryph in shock over Thalien's bomb.
Jelavan had been goaded on by none other than Master Tey, who was soon distracted by an outraged Del Moomo. In the ensuing confusion, Hierogryph pounced on Jelavan, knocking her away from the incapacitated Carrick. Goravvus revealed himself and reeled Tey in, while Hierogryph revived Carrick. Thek was able to convince both Goravvus and Sowrs that Carrick meant no ill intent, and reunited the children with the constable. When Tey had been adequately sedated, Hierogryph took Goravvus aside, and explained his mission to the Senator. Hierogryph watched on the Senator contacted Thalien with the high-tech communication system, but was shocked when Del Moomo grasped the Goravvus. The holographic image of Thalien explained that Goravvus had become too much of a liability, and ordered Moomo to finish off the Senator. The situation grew more complex again as Master Tey intervened, grappling with the Ithorian. Thalien quickly initiated his back up plan by activating a bomb that had been stored within the communication device, but apparently Jelavan's shot had disabled it. Goravvus ended the communication, and resumed his planning of the resistance. Though Hierogryph was now without a friend on Coruscant, he decided to help the resistance wholesale.[29]
Returning to Carrick, Hierogryph was met with an accusation from Jelavan, who included the Snivvian in her accusations. Hierogryph protested, claiming that he certainly didn't kill her brother Shad. Tey entered the discussion, painting Carrick as a madman, and Hierogryph was hard-pressed to suppress the young fugitive. Goravvus intervened before the confrontation came to blows, diffusing the situation. The disparate elements of the resistance then began setting about planning to rid Taris of Fett's Mandalorians. Fett had set himself up in the former Jedi Tower, so Carrick volunteered to scout the location, lest the building contain any prisoners of war. Tey and Jelavan also volunteered to aid Carrick, and Thek assigned Hierogryph the task of monitoring the reconnaissance expedition.[29]
Attacking the Jedi Tower
- "Minion, this is Mastermind. Civilians clear from the tower base, and Murderer is on the way. Repeat, Murderer is on the way!"
- ―Marn Hierogryph
Hierogryph triggers the explosion that kills Raana Tey.
Hierogryph ran the comlink for the operation, serving as the link between Carrick's group and Thek, who was in charge of the explosives at the Tower's base. However, as Carrick would soon discover, Fett had already left the Tower and began attacking the resistance's base. As the other resistance fighters began fleeing the base of the Tower to go fight, Hierogryph scrambled to find a way to reach the top of the Tower, refusing to abandon Zayne and the others. Thek attempted to convince him to abandon his potentially suicidal rescue attempt; Hierogryph responded by telling Thek that Zayne was a good person, worth going after. Thek agreed to help Hierogryph, flying the Snivvian up to the Tower on his speeder through heavy Mandalorian interdiction efforts.[30]
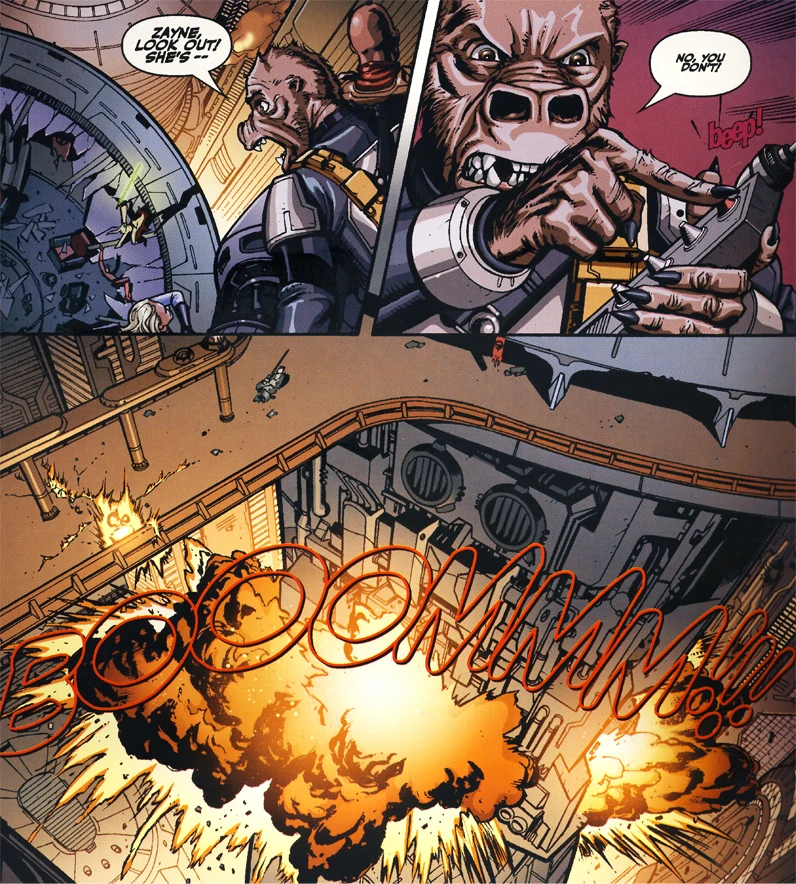
The pair reached the top of the Tower shortly after the conclusion of the fight between Carrick, Jelavan, and Tey. Seeing that Carrick was wounded, Hierogryph's noble streak continued as he offered to stay behind so Carrick could escape. However, Thek instead lowered a tow cable to Carrick and Jelavan and began to haul them away. Tey, badly wounded but still alive, attempted to pursue but became trapped in the damaged tower. When Carrick offered to rescue her, she ignited her lightsaber to cut herself free. Hierogryph, high above on the speeder and unable to hear the conversation between the two, mistook the raised weapon as a final attempt to kill Carrick. He triggered the detonation of the explosives at the Tower's base to stop her, toppling the Tower and killing Tey.[30]
Going Mando
- "You gotta love an elite killing force that you can fool by putting on a hat."
- ―Marn Hierogryph, referring to the Mandalorians at Jebble.
Despite the triumph over Tey, the Mandalorians turned the tables, routing the Resistance at their base and forcing the freedom fighters into the Taris Undercity. Hierogryph and Carrick initially found shelter in an outcast village, but the occupants kicked the pair out when Hierogryph accidentally let a horde of rakghouls into the settlement. The Snivvian suggested joining the Mandalorians as an alternative to death in the Undercity, but the Jedi wouldn't hear of it. Hierogryph and Carrick were left with no alternative but to run for their lives, and though the pair did their best to evade the vicious rakghouls that populated the Undercity, but they were eventually cornered. Luckily for Hierogryph and Carrick, the Jedi Knight Celeste Morne was in the vicinity, and she saved the hapless pair. As she strode off, Hierogryph elected to follow her, as Carrick suspected that she might have a way of getting off Taris.[31]
Mandalorian Marn Hierogryph.
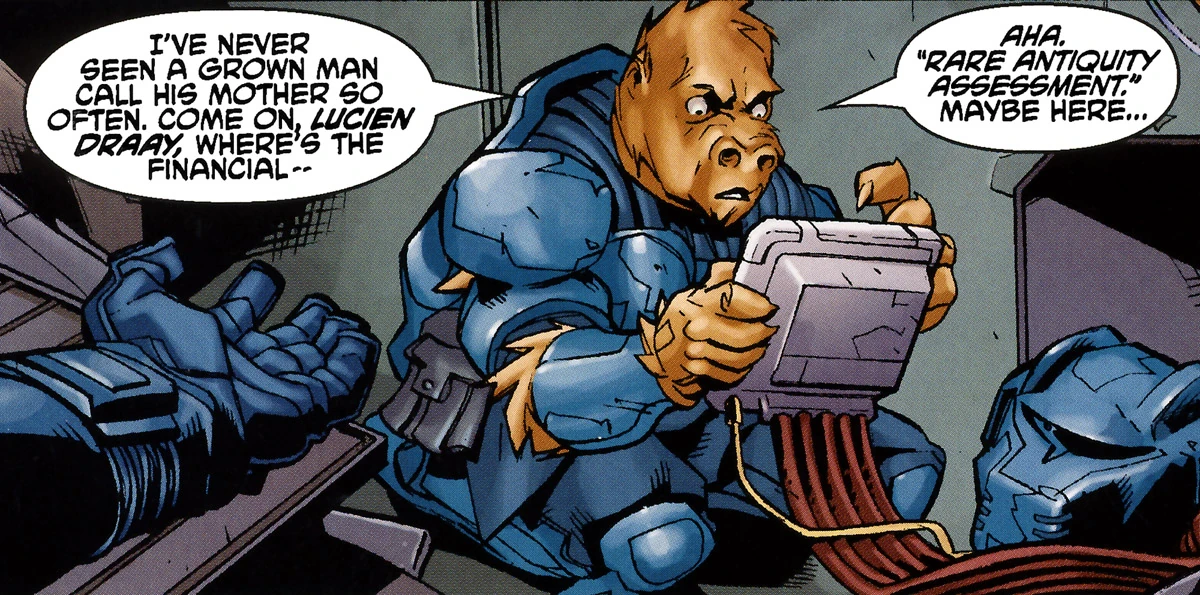
As the band traversed through the Undercity, they detected a Mandalorian mining operation. They arrived just in time to see the Mandalorian Pulsipher holding the Muur Talisman aloft. Though Morne expressed concern, Carrick had no idea what the object was. Morne wasted no time in obtaining a jetpack and pursuing the Mandalorians, who had completed their mission. Carrick followed suit, dragging the reluctant Hierogryph along with him.[31] The group tracked the Mandalorian miners to the Mar'eyce, which they stowed away on. En route to the Mandalorian-held planet Jebble, Hierogryph eavesdropped on Pulsipher, who mused out loud about files pertaining to the Muur Talisman being mixed in with Lucien Draay's financial records. Hierogryph's excitement at the prospect of access to Draay's finances nearly blew the group's cover, though Carrick was able to sedate him. Meanwhile, Morne attempted to use a Mind Trick on Pulsipher, hoping to convince him to hand over the Talisman. The attempt failed, but it triggered the Talisman somehow, causing it to latch onto Pulsipher. The group watched on as the Mandalorian inadvertently killed one of his men with the talisman. Though Hierogryph was confused by the events, Morne leapt into action, pursuing the Mandalorians as they landed on Jebble.[32]
Hierogryph and Carrick attempted to follow, but were apprehended by a Mandalorian soldier. The Mandalorian did not realize that the pair were stowaways, however, and assumed that they were part of the horde of criminals that they had collected and detained on Jebble. The pair were subsequently put into a group of felons, and told that they would become Mandalorian warriors, trained for the planned invasion of Alderaan. During the address, Hierogryph sneaked off, and obtained a set of Mandalorian armor. Hoping to obtain the financial records he had heard mention of before, he rendezvoused with Carrick and Morne, and had them masquerade as his prisoners in an attempt to gain access to the Mandalorian citadel. The gambit succeeded, but as the group made their way through the structure, Hierogryph accidentally fired his rifle at the ice ceiling, causing a cave-in.[32]
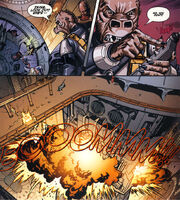
Though he survived, he was now cut off from his allies. To make matters more complicated, the Mandalorians were rapidly turning into rakghouls, though the source of the new plague was unknown. Hierogryph made his way to the now-abandoned data center of the Mandalorian citadel, searching for the aforementioned financial records of Lucien Draay. Instead, the Snivvian found data on the Muur Talisman. In viewing Draay's retelling of Master Xamar's report on the subject, Hierogryph learned that the device was an ancient Sith artifact, that would attach itself to a subject and hold them in the thrall of the long-dead Karness Muur. Draay also suggested a connection between the talisman's power and the rakghoul plague. In addition to the talisman data, Hierogryph discovered that Morne was in fact an agent working for Draay to recover the artifact.[33]
Marn Hierogryph stumbles across Lucien's data regarding the Muur Talisman.
Leaving the data center, Hierogryph reached Pulsipher's chambers, which were littered with Sith artifacts. Pulsipher and his "Mando-Raks" were all on the floor, heavily injured, and in the center of the room, he found Carrick laid out on a slab, with Morne kneeling over him, attempting to wrest control of the Muur Talisman away from the Jedi fugitive. Not bothering to question the circumstances, Hierogryph hurriedly urged the Jedi to drop the talisman immediately. The warning was not heeded, and the device latched onto Morne, throwing her into a stupor. Hierogryph, panicking, insisted on departing the site as quickly as possible, but he and Carrick were soon cut off by more Mando-Raks. Meanwhile, Morne was back on her feet, with the rakghouls now under her control.[33]
While Morne oversaw a large battle between the Mando-Raks and the Mandalorians of Jebble, Hierogryph stayed in the fortress and inspected the gathered Sith artifacts. He was swiftly brought out to Morne and Carrick's location outside the fortress by a rakghoul, before telling his Jedi ally about the true allegiance of the Covenant agent. In turn, Morne told Carrick that Krynda Draay, Lucien Draay's mother, was the head of the organization. As the young Jedi began to pontificate to Morne about the wrongdoings of the Covenant, she rounded on both him and Hierogryph, and assaulted them with a Force push. Before she could kill Carrick, however, he convinced her that she was acting under the Muur Talisman's influence, and was not herself.[34]

Gryph confronts Celeste regarding her alliance to Lucien Draay and the Jedi Covenant.
Wanting to help his new friend, Carrick offered aid by suggesting that Morne place herself in Dreypa's Oubliette, a sealed Sith torture device that would preserve life in the agony of "living death." Since the device had originally been conceived to trap Karness Muur himself, Morne agreed, giving instructions to take the oubliette, with her inside, to the Sanctum of the Exalted on Odryn, where Covenant researchers would possibly be able to free her from the thrall of the talisman. Enclosing Morne within the oubliette, Hierogryph and Carrick ventured outside, where the Mando-Raks were clambering up a cliff side to their location. The pair, in a panic, rushed to higher ground, before the Snivvian sighted a ship descending to Jebble in the distance. It was the Moomo Williwaw, carrying the majority of Carrick and Hierogryph's allies. Provided cover by the Jedi Alek Squinquargesimus, Jarael, and Rohlan Dyre, the pair safely boarded the craft, which then rocketed away from the planet.[34]
As they departed, Carrick insisted that they turn around and retrieve Morne, but was interrupted by the arrival of Cassus Fett's task force. To the shock of the ship's crew and passengers, Fett wasted no time, and commenced a nuclear attack on Jebble, that brought back memories of Serroco. While Carrick moped, Hierogryph explained to Squinquargesimus that the rakghoul plague had been carried by a Sith artifact, much to the Jedi's surprise and interest. Carrick was suddenly roused from his depressed stupor, and resolved to bring down the Covenant and fulfill Morne's wishes. Hierogryph, Squinquargesimus, Jelavan, Jarael, the Moomo brothers, Dyre, and Slyssk all stood ready before the man, ready and willing to aid him in his task.[34]
Shortly after the encounter with the Muur Talisman, Gryph made a holographic recording detailing his memoirs of the encounter with Celeste, mainly how the rakghoul plague and the Talisman worked. He twisted some of the details in order to enhance his contributions to the events he encountered. Zayne Carrick saw the opportunity to use it as a part of his plan to help clean up his name from an accusation in the Padawan Massacre of Taris and send the hologram to Vandar Tokare, the only member of the Jedi Council he could trust, to enlighten him on the events that really happened on Jebble. The hologram would outlive Gryph for many thousands of years to come.[35][36][37]
To Odryn
- "If showing someone Ludo Kressh's pedicure will change the game, I'm for it."
- ―Marn Hierogryph
Gryph investigates an artifact inside the Temple.
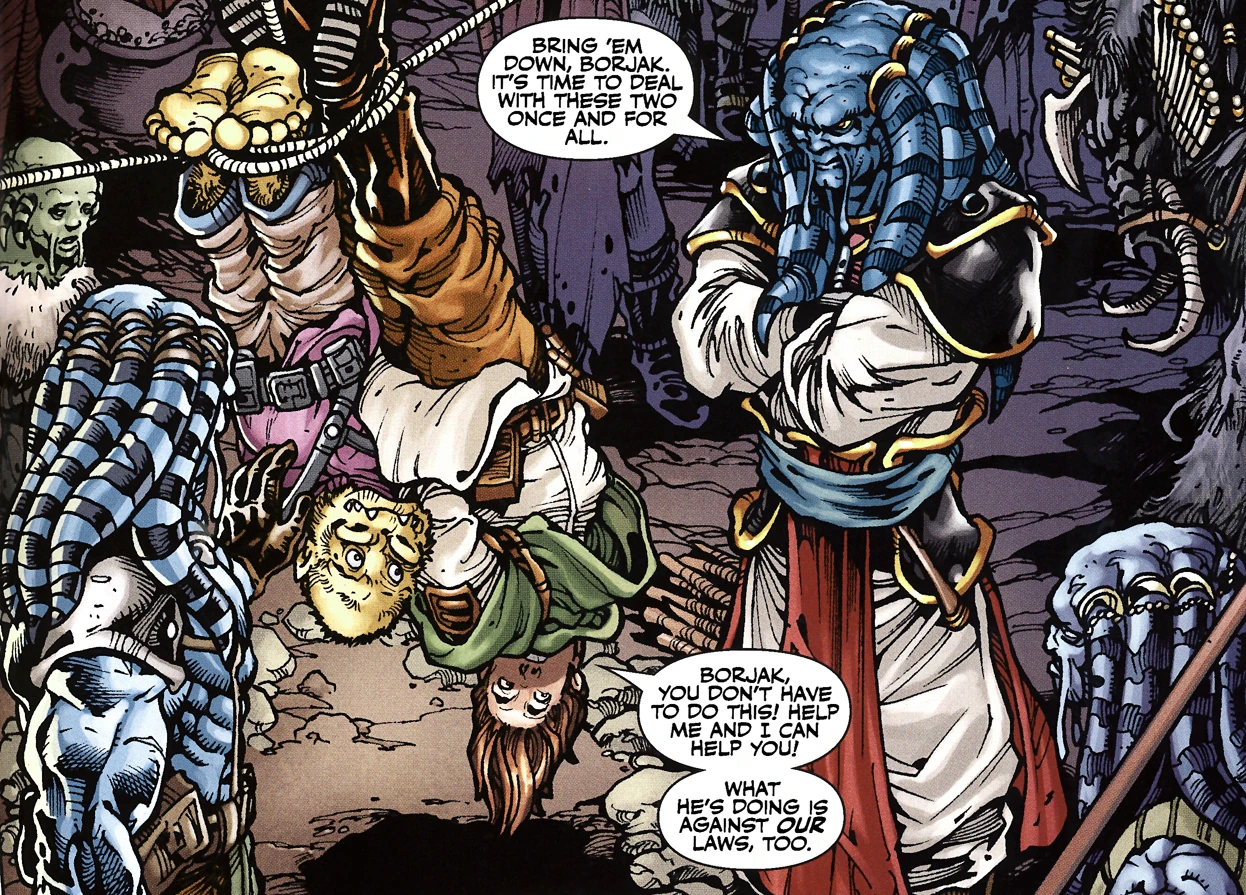
Arriving on Odryn, the Feeorin homeworld, in the Moomo Williwaw, Hierogryph outlined his plan to get into the Sanctum of the Exalted. Jarael would disguise herself as Morne, who had permission to enter the Sanctum on the express orders of Feln, and the Moomo Brothers would enter on the provision that they carry the "item" she had been sent to retrieve. The item was in fact the Moomos' laundry hamper, which contained both Hierogryph and Carrick. Although Jarael was forced to briefly fight Borjak, she was eventually granted entry.[38]
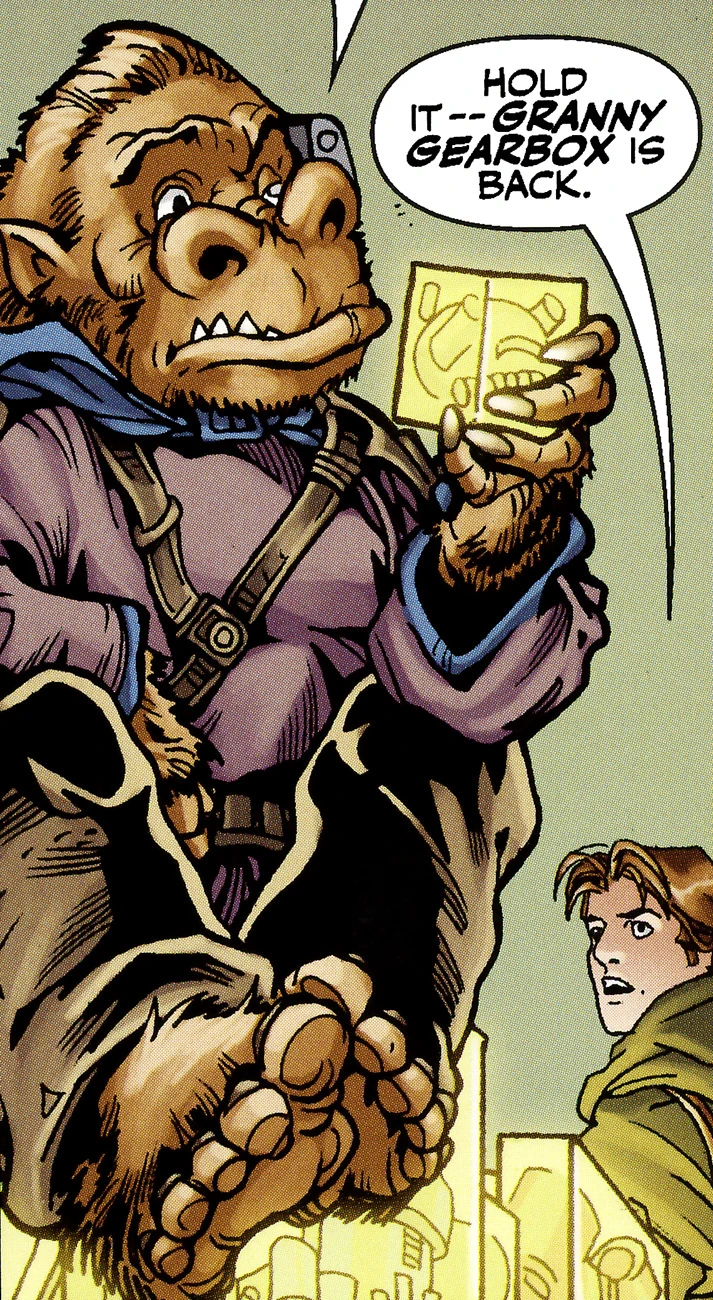
Using the key Morne had given them, Carrick, Hierogryph and company made their way into a room containing hundreds of Sith artifacts, just as the Jedi had hoped to find. The artifacts were covered in a special resin designed to protect the caretakers from the dark taint of the objects. One such object, identified by Gryph from its attached identichip, was Ludo Kressh's pedicure set. More artifacts continued to arrive rapidly, carried in by a droid dubbed "Granny Gearbox" by the Snivvian and the Human. Carrick intended to take photographs of all the weapons, which he would be able to present before the Jedi Council as evidence against the Covenant. Jarael and the Moomos departed Odryn to leave Carrick and Hierogryph to amass as much evidence as they could. After one and a half days of cataloging, the pair decided to follow "Granny Gearbox" throughout the Sanctum.[38]
They discovered a lab, where a technician was studying the Helm of Dathka Graush, a Sith artifact that was causing continual foul weather on Odryn. Satisfied that footage of the lab would be enough to damn the Covenant in the Council's eyes, Carrick and Hierogryph attempted to sneak out of the Sanctum. Moving away from the temple and into the wilderness for their rendezvous with the Moomo Williwaw, the pair were attacked by Feeorin guards. While Carrick fought with Borjak, the Snivvian was apprehended by the other guards, and held at ax-point. Taken to the Feeorin Blockhouse, Hierogryph and Carrick were bound and watched over by Borjak. While the burly Feeorin explained that Jedi Master Feln was in fact the "Exalted" and head of his race, the man himself arrived, determined to put an end to Carrick in particular.[38]
The pair of intruders were strung up and suspended upside down while Feln journeyed to the Sanctum. The Jedi Master returned shortly afterward, with the intent of killing both Carrick and Hierogryph in combat. Feln, however, threw Carrick's lightsaber far away from their current location, before moving to destroy the fugitive Jedi with his own weapon. Borjak protested, claiming that since Carrick had entered the Sanctum, the Rime Feeorin stated that that he could only be challenged in unarmed combat. The "Exalted" stowed away his lightsaber in a pouch, before Carrick barreled into him. As the two Jedi fought, Hierogryph switched Feln's lightsaber with a stick. After a short bout, Carrick bounded away from the fight, with Feln following close behind.[39]
Gryph and Zayne under the "merciful" care of Feln and the Feeorins.
By the time Hierogryph and the rest of the Feeorin had reached the village, Feln had Carrick at his mercy. The Covenant's sensors had indicated that the Moomo Williwaw had entered the edge of system; as Borjak reported this, Feln was incensed, and believed that the occupants planned to raid the Sanctum for Sith artifacts. To avert the potential disaster, he detonated charges installed by the Covenant in the Sanctum, destroying the ancient structure. Simultaneously, the surrounding village was destroyed, since the Sith artifacts had amplified the power of the blast. Enraged, Feln intended to slay Carrick with his lightsaber, regardless of the Rime Feeorin rules, but was shocked to discover that he was merely wielding the stick Hierogryph had replaced the weapon with.[39]
In the aftermath of the blast Borjak and the rest of the Feeorin rose up against their "Exalted," and killed Feln. While this was happening, Hierogryph presented his friend with the late Jedi Master's lightsaber. In turn, Carrick presented Borjak with the weapon, as the Feeorin had been able to find his own lightsaber. Borjak and his people had tired of the Jedi, however, and they disposed of Feln's weapon. Hierogryph loudly lamented that since Feln destroyed their recordings of the Sanctum's inventory, their whole expedition had been for nothing. By that time, the Moomo Williwaw had landed, and as the occupants began to file out, Jarael revealed that the Moomo Brothers had in fact stolen several of the Sith artifacts from the sanctum earlier.[39]
Arrival on Coruscant
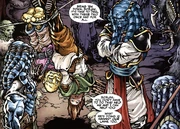
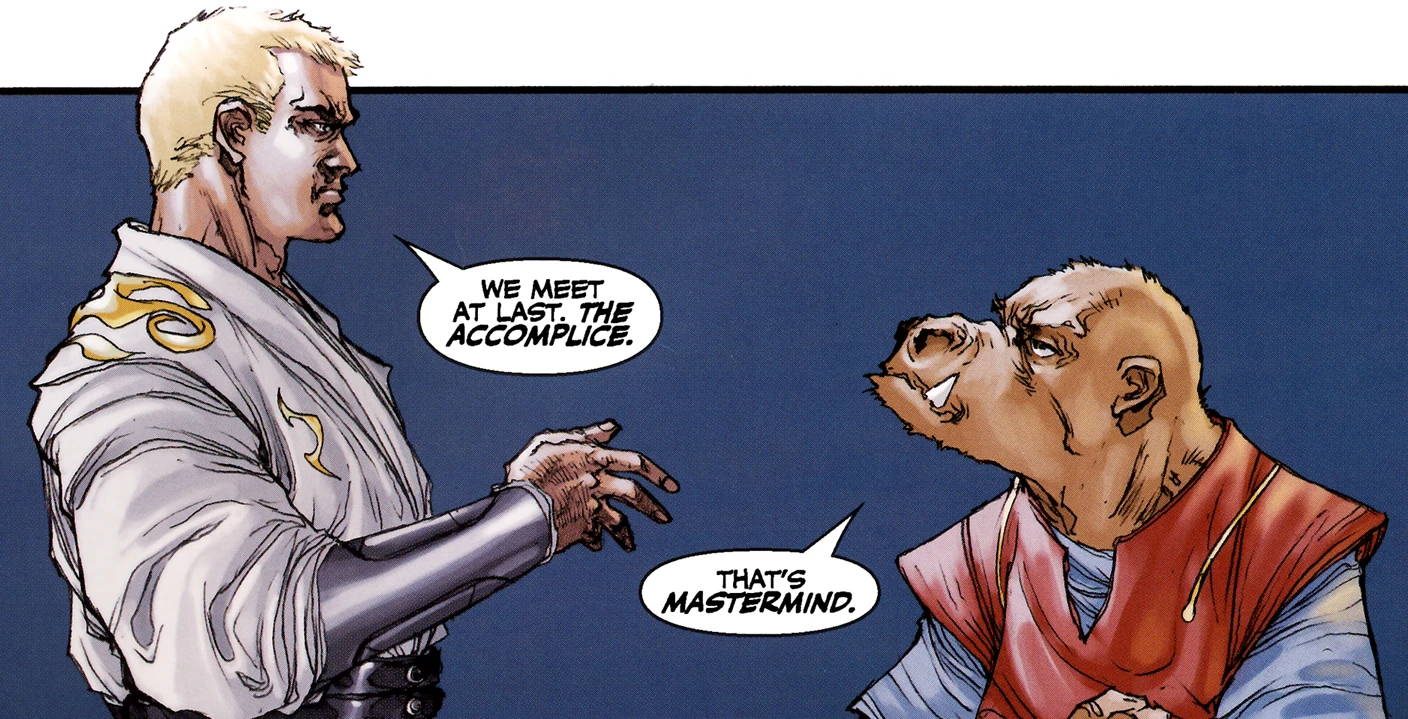
- "We meet at last. The accomplice."
"That's mastermind." - ―Lucien Draay and Marn Hierogryph
Upon the arrival in Coruscant system the crew of Moomo Williwaw realized that they could not get on the surface through the blockade of Republic Warships set up by Admiral Karath around the planet. Determined not to be stopped, Zayne instead had the Williwaw crash in the hangar deck of the Swiftsure, emptying the hangar of crew and jamming the doors shut. By the time Admiral Karath and his soldiers were able to enter the hangar, Zayne, Gryph, and Slyssk had stolen the Deadweight from the hangar and made their escape to the planet, where Gryph sent Slyssk off to a hotel before the Trandoshan could have a panic attack, and despite Zayne's offer to get out while he could, remained to help Zayne deliver the evidence to Tokare and Lamar. However, before they got far they were ambushed by Jedi Master Xamar of the Jedi Covenant's First WatchCircle and captured. The Seer then brought the pair before Master Tokare and Lamar, claiming that he had brought them to face justice and that the form it would take would depend on the Councilors.[36]
Xamar decided to help the Council, as he had become disenchanted with the actions of Lucien Draay and the Covenant. He prepared to help the Council attack the Draay Estate by opening the building's doors, but with the caveat that Krynda Draay, Lucien's mother, be escorted to safety first. In exchange, he would accept punishment for the crimes of the Covenant. Hierogryph and Carrick accompanied Xamar on his journey to the estate, posing as captives of the seer. The pair were tasked with creating a diversion while Xamar opened the doors. Carrick in particular bore a replica of the Muur Talisman which held his lightsaber, and wore yellow contact lenses to indicate to the Covenant that he had fallen to the dark side and become a Sith Lord. Upon entering the compound, Hierogryph was amazed by the sheer amount of Jedi present. Xamar explained that there were more Jedi loyal to Krynda Draay than most people imagined, due to her leadership during the fallout following the Great Sith War.[40]

Marn Hierogryph and Lucien Draay meet for the first time.
The trio were brought before Lucien Draay, Q'Anilia, and an array of Covenant Jedi. After a brief exchange, Draay himself confronted Hierogryph. Persisting with the ruse, the Snivvian demanded that the Jedi remove the "Talisman" from Carrick, claiming that the young man's possession by the artifact was bad for business. Igniting his lightsaber, Draay suggested that slaying Carrick would solve the problem, but Xamar insisted that the fugitive be brought before Krynda. The Khil Jedi Master found support from a newcomer: Haazen, one of Krynda Draay's associates. Haazen reported that Krynda would be unavailable to survey Carrick's predicament, since she was otherwise occupied, but offered to do the examination himself, instead.[40]
Reversal of fortune
- "Nice play, Gryph."
- ―Marn Hierogryph
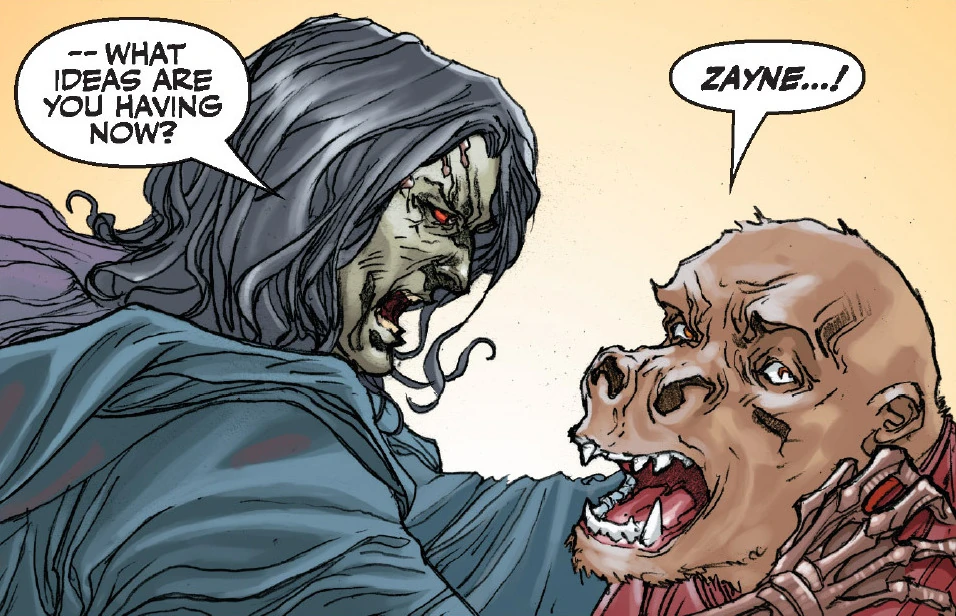
Without ready access to Krynda, the trio were forced to alter their plan on the spot. Carrick sprang into action, freeing himself from his false shackles before threatening to destroy the Jedi with the Sith artifacts recovered from Odryn. Xamar mentioned that he had seen one of the devices on the Deadweight, prompting Haazen to send the Khil to retrieve them. While Xamar was away, however, Haazen was able to see through Carrick's deception, and informed the others present that the fugitive had merely feigned his fall to the dark side. Draay, outraged, surmised that Hierogryph was behind the ploy. Haazen then turned his attention to the Snivvian, stating that he had learned how Hierogryph had managed to escape death on Serroco. The elder Jedi then began accosting the unarmed conman, prompting Carrick to explain just what had happened to the real Muur Talisman, as well as Celeste Morne. As he finished, alarm klaxons sounded throughout the estate. Haazen suddenly left Hierogryph be, and began uttering orders into a comlink. In particular, he issued codename "Vindication", ordering members of the Covenant to rise up against the Order proper, and rally to the defense of the Draay Estate. Meanwhile, Lucien Draay realized that he had been an unwitting pawn in Haazen's bid to create an insurrection against the Jedi Council.[40]

Haazen turns to Marn Hierogryph for answers.
Carrick, after releasing Hierogryph from his shackles, informed Haazen that his plot was over before it had begun, as Jedi were, at that moment, attacking the compound. Haazen retorted by having Saul Karath's orbiting fleet fire on the skybridge, killing many of the Jedi attacking the compound, including Xamar. The blasts of the turbolaser strikes were large enough to shatter the windows of the hall Hierogryph and Carrick were in, throwing the pair to the ground.[40] Briefly, Draay explained Haazen's tumultuous past to Carrick,[41] before moving against Haazen himself. The turncoat then utilized one of his Sith relics, the Gauntlet of Kressh the Younger, to knock Draay back, but the Jedi Master persisted, and moved to strike Haazen down with his saber. The Gauntlet's power came into effect, sending Draay across the room, far over Hierogryph's head.[16]
At that moment, a squad of Jedi Knights entered the room, and engaged Haazen in combat, allowing Hierogryph and Carrick to help the fallen Draay, who, instead of being grateful, accused the younger Human of lacking the ability to act when needed. When Haazen returned his attention to the trio, he recounted Krynda Draay's Prophecy of the Five—a prophecy that in his eyes, concerned himself, Draay, Q'Anilia, Carrick, and Hierogryph, as the one from the darkness who stands in the light, due to the Snivvian's checkered past. Haazen then claimed that he was both Jedi and Sith, and decided that Draay would be the one to train more Sith within the Covenant. As he returned Carrick's lightsaber to the young fugitive, Q'Anilia recovered, and dashed away to find Krynda Draay. Carrick, desperately hoping the elder Draay would be able to aid them against Haazen, sent Hierogryph off in pursuit.[16]
Q'Anilia leans on Marn Hierogryph.
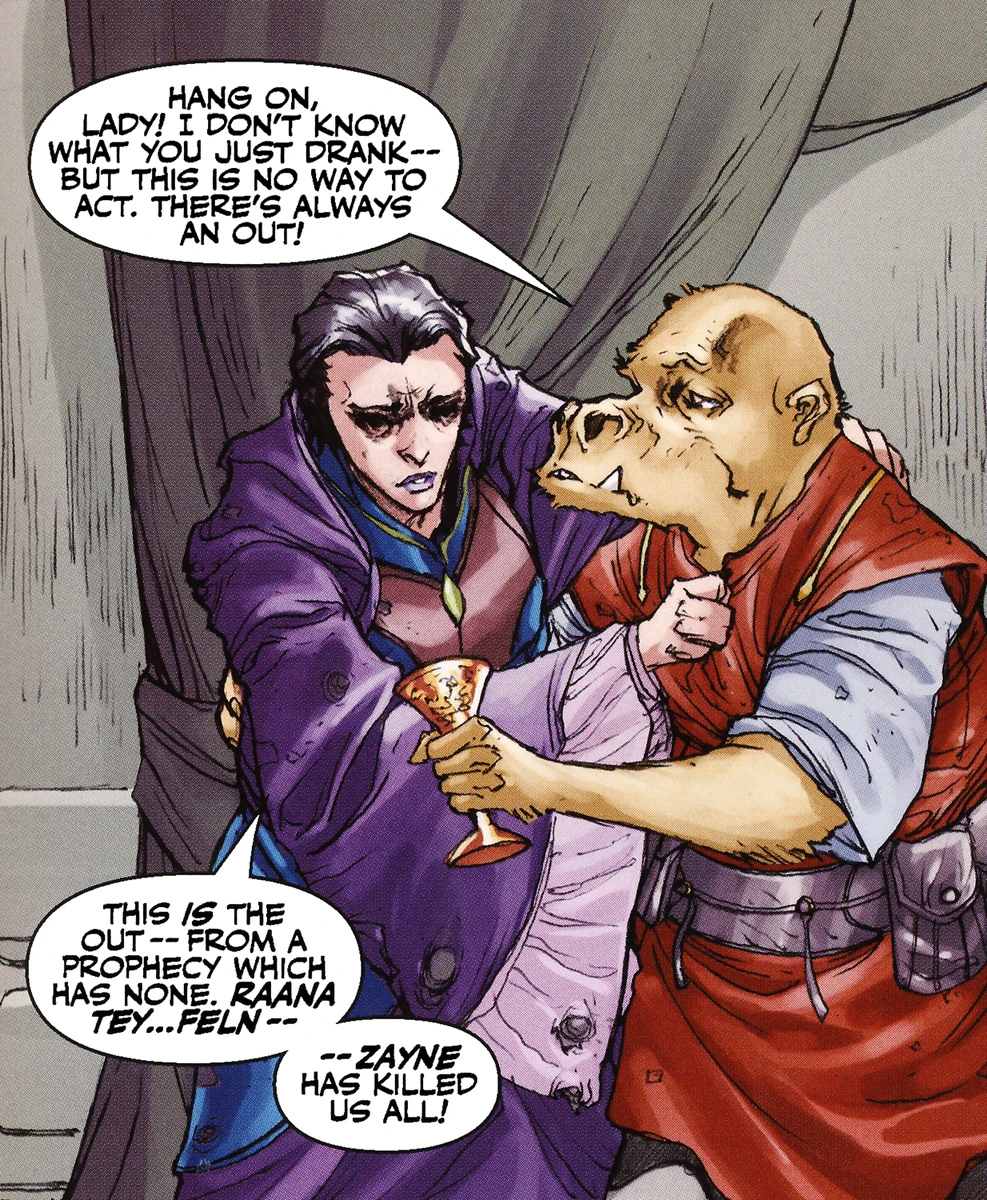
Venturing up a flight of stairs, the Snivvian was met with the sight of several corpses of Jedi. Entering Krynda Draay's room, he found Q'Anilia mourning over what appeared to be the corpse of the elder woman. As a chalice fell away from the Miralukan's person, Hierogryph deduced that Q'Anilia had been drinking poison, in order to join her dead master. As she staggered, Q'Anilia lamented Carrick's killing over her colleagues, but Hierogryph explained that in reality, he had been more instrumental in the deaths of Tey and Feln. The Miralukan protested, claiming that it had been Carrick in the red spacesuit of their prophecy, but the Snivvian mentioned that he had also worn it at some stage. Q'Anilia, mortified, cited Carrick's prophecy that he had sent to the Covenant when he escaped from Taris, but Hierogryph had an answer for that as well, revealing that he had written the fugitive's speech. The Miralukan expired then, leaving the Snivvian to worry about himself.[16]
Turning his attention to the elder Draay, he noticed that the woman's "coffin" was actually an oubliette. Hierogryph surmised that the Human was likely alive, but in stasis. Helping her out of the oubliette, but breaking the device in the process, the Snivvian took Krynda Draay downstairs, where Carrick and her son were engaged in a duel. When the younger Draay noticed Hierogryph supporting his mother, he angrily pushed her away from him, and tended to the woman himself. Carrick and Hierogryph could do nothing as the elder Draay died in her son's arms, after lambasting him for killing his own students. When Snivvian explained to Draay that the oubliette had broken when he opened it, the Human realized that Hierogryph had killed his mother. The Snivvian tried to explain that it was an accident, but Carrick knew that Draay would not be satisfied with a simple explanation. He urged Hierogryph to flee, before re-engaging Draay in a lightsaber duel.[16]
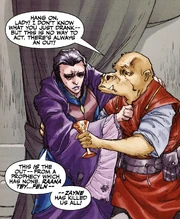
Jarael and Gryph in the aftermath of Vindication.
Draay continually tried to get to Hierogryph, an as a result, the duel moved away from Haazen's location. Carrick continued to urge the Snivvian to flee, but Hierogryph did not. The two duelists exchanged barbs, and during a lull in the fight, Carrick launched a verbal attack on his former master's character and actions. Draay then turned his attentions back to Hierogryph, punting the Snivvian into Haazen's general vicinity with the Force. He launched himself after the grounded Hierogryph, and was followed closely by Carrick. The two resumed their duel in front of Haazen, but a stray stroke from Draay's lightsaber damaged the base of a large statue of his father, Barrison Draay. The statue then toppled and fell on top of Draay, and Carrick appeared to plunge his lightsaber into his fallen master's body, to Hierogryph's dismay.[5]
Haazen was suitably impressed, and allowed Carrick to approach him. Feigning subservience, the young fugitive moved within range of Haazen, and then severed the older man's prosthetic arm, removing the Gauntlet of Kressh the Younger. Angered, Haazen blasted Carrick towards Hierogryph with lightning. The surprised Snivvian was embraced by the wounded Human, who quickly instructed Hierogryph to hang onto him. In an instant, the two of them were propelled out of the compound by a still alive Draay, who had worked with Carrick to feign his death, allowing the younger Human to strike at Haazen. The two of them landed in a sludge vat before Draay had Karath's fleet fire on his and Haazen's location, killing the latter and severely wounding the former. As Carrick and Hierogryph made their way out of the sludge vat, the Snivvian expressed indignation at having been himself conned by the pair of Jedi.[5]
The scamming of Metellos 3
- "Speaking of, I've been legit for an hour too long."
- ―Marn Hierogryph
In the aftermath of the fiasco at the Draay estate, Carrick was called before the Jedi Council—presumably, in Hierogryph's eyes, to receive a knighthood. He and Hierogryph were cleared of the Padawan Massacre of Taris, and the bounties on their heads were paid off by the Jedi. Along with Jarael, the Snivvian attended Admiral Karath's address to the public, in which the Mandalorians were blamed for the chaos. Hierogryph planned to take to space with Slyssk, as a confidence trickster once more, and asked Jarael to give Carrick his Padawan braid, which the Snivvian had kept since their flight from the covenant on Taris. As he left the address, however, he was met by Carrick, who had finished his meeting.[5]
Carrick was sporting new Jedi fatigues, leading Hierogryph to believe that he had been made a Jedi Knight. To the Snivvian's surprise, he had received the offer, but refused, and instead hoped to be Hierogryph's partner in crime. The Snivvian accepted, and decided that their first target would be the ruins of the Draay estate, since Hierogryph believed that valuable financial records could be found within. As he knew one of the people in charge of the cleanup, he surmised that surveying the wreckage would not be difficult at all, prompting outrage from Carrick.[5] Hierogryph opted to journey to the Core World of Metellos 3, where planets were auctioned off to the highest bidder.[42] There, Hierogryph hoped to scam market, which was run by the criminal Raff Syndicate.[43] Carrick, however, wanted to see his family again, and told the Snivvian he would rendezvous with them on Metellos 3. For accomplices, Hierogryph had Jarael and Rohlan Dyre to aid him.[42] The Snivvian then sent Slyssk to Coruscant to buy a new form of transport, but to Hierogryph's disappointment, the Trandoshan returned with a dilapidated gem miner, the Hot Prospect. As punishment for Slyssk's incompetence, Hierogryph had the Trandoshan set about cleaning and restoring the ship.[43]

Marn Hierogryph alias "Professor Gryphomarn" .
Reaching Metellos 3, Hierogryph disguised himself as "Professor Gryphomarn," and sought out a Chev, Cipiter, who was in the service of Nunk Plaarvin, the Chevin in charge of operations on Metellos 3. Meeting Cipiter, "Gryphomarn" innocently inquired about the goings on, until the Hot Prospect entered the area. Hierogryph feigned disgust at its unattractive appearance, but he knew what it carried: Jarael, disguised as "Captain Brackel," and Dyre. The pair entered the auction room with great fanfare, weapons drawn, and they confronted Cipiter.[42]
The pair then claimed that they had just returned from Italbos, a world recently auctioned on Metellos 3. "Brackel" claimed that the disguised Dyre hailed from the world, which was, contrary to the belief of those present, occupied and settled. Hierogryph, feigning outrage, loudly declared that he would represent the pair in their inevitable legal battle with the businessmen of Metellos 3, much to Cipiter's chagrin. The Snivvian suggested that a new auction take place, in order to purchase the world from the existing Italbosi, and Jarael claimed that the original resource projections for Italbos had been far below what was actually there. As the buyers grew excited at the prospect, Cipiter closed the auction until midday the next day. Moving to their quarters, Hierogryph, Dyre, and Jarael watched from a vantage point as Cipiter was privately reprimanded by Plaarvin. The group then planned to collect the money from Italbos' auction the next day, take it to the Hot Prospect, and flee Metellos 3.[42]
Once they reached their spacious quarters, they entered to find that the lights were not lit. Dyre eventually realized that they had company: Plaarvin's security force, armed with energy bolas. As he and Jarael battled them off, Hierogryph fled, only to be confronted by a set of Sentinel droids. Dyre and Jarael were subdued, but just before Hierogryph was pushed out of a window and into Metellos 3's lack of atmosphere, Carrick arrived, and dispatched the attackers.[42] Despite his arrival, Dyre and Jarael were captured, and brought before Plaarvin. Hierogryph and Carrick followed them covertly, and learned that they were being taken to the "Negotiating Room." Plaarvin, his guards, and their captives boarded a dustskimmer, preventing Hierogryph and Carrick from following any further, and so the Snivvian decided that they would have to use the Hot Prospect.[43]
After Hierogryph gave Carrick a brief tour of his new ship, he was confronted by the Human about the morality of scamming honest traders, but Hierogryph reminded him that Plaarvin was working for the Raff Syndicate. Slyssk overheard this, and became concerned—he had once worked for the Raffs, and knew that the only thing that people within the Syndicate were afraid of were other people within the Syndicate. This gave the Snivvian and the Human an idea, and they decided to disguise Slyssk as a member of the Syndicate. They then made their way to the Negotiating Room, which was actually a large solar observatory. Barging their way into one of the lower levels, Carrick dispatched Plaarvin's sentinel droids, before Hierogryph lambasted the Chevin for fouling up a Syndicate operation.[43]
Slyssk, in his disguise as a Raff courier, then entered, and began threatening Plaarvin. Hierogryph then informed Cipiter, who was present, that he had been tasked by the Syndicate to see how easy it would be to scam Plaarvin's operation. Slyssk then accused Plaarvin of either being incompetent or skimming profits. The Chevin then began to blame his Chev servants, but Hierogryph cut him off, claiming that the Syndicate wanted to meet with him on Jebble. Plaarvin, not aware of the recent nuclear attack against Jebble, obliged, and prepared to depart Metellos 3, leaving Cipiter to mind the operation. The Chev remembered Jebble's recent bombardment, but Hierogryph quickly pointed out that he was now free to run the trading on Metellos 3 by himself. Dyre and Jarael, who had been hung up in the solar observatory's tower to be killed, were able to escape thanks to Jarael's recently discovered affinity to the Force. Carrick proceeded to tell the traders the truth about Italbos, but the buyers didn't care, as they were more convinced by Hierogryph's earlier story. They bought the planet, resulting in a considerable profit for the Snivvian and his makeshift team.[43]
Jervo's World
- "Gryph might talk the station guards into selling him their pants!"
- ―Jervo Thalien
Hierogryph spying on Bardron and Jervo Thalien.
Hierogryph later left the group to do "advance work" on their next job.[44] This involved scamming Jervo Thalien, as a form of payback for conning Hierogryph back on Taris. He infiltrated Jervo's World, a large network of swoop-dueling arenas above Pantolomin owned by Lhosan Industries, under the alias of inspector "Bulgryph Mandrake." With his companions returned to him, the conman planned to use a small delay in the feed from the secondary dueling arenas to place bets on the winners before the result of the race was revealed to the audience. Much to his dismay however, Carrick had entered the dueling games himself to win a replica swoop bike of his hero, Goethar Kleej. Jarael, who was supposed to place bets based on Hierogryph's information, did not due to her consequently foul mood, brought on by Carrick's actions. To make the matters even worse, Dyre was caught sneaking out of the Hot Prospect. To prevent him from getting incarcerated, Hierogryph claimed that Dyre was a duelist named "Spikes," and as a result the Mandalorian was forced to participate in the games.[45] When Thalien arrived to watch the finals of the Tandem Open and learned about Snivvian's presence on his station, he was incensed, remembering the disaster of the Taris operation. He demanded that the Krish who ran the arena to take down Hierogryph and all his companions. Bardron, the representative of the organization named Franchise that had complete control over the duels, responded by promising to arrange a series of tragic accidents in the arena. Little did both of them know that Hierogryph overheard the whole conversation while hiding in a nearby maintenance shaft and recorded it to use against them.[27]
Shortly before the start of the finals of the swoop-dueling event called the Tandem Open, the security on Jervo's World received an order to stop every Snivvian and Arkanian offshoot they saw, in order to capture Hierogryph and Jarael. This, however, proved to be unsuccessful, as the Snivvian already had himself and Jarael disguised in preparation for the next part of his confidence trick. Jarael, disguised as a blue-skinned species, flirted with the composer for the games and managed to switch his data cube containing a score for the finals with a cube that contained the full version of Goethar's speech as well as the conversation of Bardron and Thalien, which exposed the Franchise's slave dealings. While Bardron's attempts to kill Carrick, Dyre, Goethar Kleej and his son, Aubin, went wrong, the composer was forced to play the speech and Jervo's confession, thus exposing Jervo's crimes for the audience, much to the joy of Marn Hierogryph. Soon afterward, Carrick and his companions, including Hierogryph, traveled to Pantolomin spaceport, where the Snivvian once again expressed certainty that Thalien would have a hard time explaining the recent incident. What Hierogryph did not know was that Thalien was killed by an acquaintance of Jarael, Chantique, when he tried to pull his support.[46]
Malak's recruitment
A short time afterward, Alek, now going under the name of Malak, called Hierogryph and learned from him about Hot Prospect's next stop; Wor Tandell. On the planet, the Jedi Knight approached Jarael, trying to recruit her into joining him in the crusade movement against the Mandalorians. Hierogryph unwittingly mentioned Jarael's recently discovered Force talents which overjoyed Malak although Jarael was still unwilling to go with him. While Malak continued to try and convince Jarael, Dyre returned and was enraged at the fact that Malak was attempting to take her away. The Mandalorian struck Malak and a brawl between the two ensued. Malak was only stopped when two of his own comrades, Telettoh and Ferroh, arrived and were forced to restrain him, along with Carrick, who accompanied them. In an attempt to get Malak to leave, Carrick kissed Jarael, claiming that they were in love and were going far away from the war. The ruse was successful and Malak, rejected again by Jarael, left along with Ferroh and Telettoh. Dyre thanked Carrick for the trick, as it allowed Jarael to stay with the company, and Hierogryph commented that he never understood why people were fighting when no money was involved.[47]
Mining scam
To Hierogryph's surprise, Carrick advocated stealing a number of crystals from a mining station run by the Sungrazer cooperative. What Hierogryph did not know was that Carrick was using this as an excuse so that he and Jarael could pose as Crucible agents to free the slaves carrying out the dangerous task of dustdiving for the crystals. Jarael knew that if Hierogryph was aware of what was going on, he would abandon them for attempting to con slavers.[48]
Not long into the scam, Carrick and Jarael were discovered and the overseers on the mining ship, Sungrazer, attempted to capture them. The duo donned spacesuits and escaped from the ship into space following the miners. They then proceeded to transfer the slaves onto the Hot Prospect; Upon realizing Carrick's original intent, Hierogryph was distraught. Suddenly, a massive ship called the Gladiator emerged from hyperspace and launched Skyreaper drones at the escapees.[48][49] Carrick and Jarael got back aboard with Dyre's help after rescuing as many slaves as they could. Unfortunately, they were at a major disadvantage; the Hot Prospect's gun turret only pointed one way and the ship couldn't maneuver to point. However, they fired drills and hooks at the ship to cause the targeted, pressurized areas on board to decompress before launching xenoboric acid at it. Despite the fact that the Gladiator was blind, it had the Skyreapers attack the Hot Prospect. In a plan to escape, Carrick had everyone jam the centrifuge on board the Hot Prospect; much to Hierogryph's dismay for it was processing the crystals they had harvested. At the same time as doing this, Carrick had Slyssk, piloting the ship, shut down the inertial compensators to cause the ship to spin so Jarael could fire at their attackers. The ploy was successful and the Calipsan 560 escaped to hyperspace.[49]
After dropping the slaves off, Hierogryph chastised the two for attempting to con people who could fight back. He was amazed that Jarael was a ex-slaver to which Jarael apologized for keeping a secret. Dyre suggested that they try and take on the Crucible themselves although Hierogryph found it unwise to confront an organization that could "make people vanish".[49]
It was Hierogryph's idea to have Carrick go to Volgax, where the Crucible trained its agents, disguised as a Republic naval officer.[50]
Trial of Demagol
- "Gah! I wish you did something—so I could fire you!"
- ―Marn Hierogryph, upon T1-LB's belated revelation concerning "Rohlan Dyre."
When Dyre heard that captured Mandalorian scientist Demagol was to stand trial, he suggested that Carrick travel to Coruscant, so that he could testify. Not long afterwards, he and Jarael left the Hot Prospect with Dyre. Arriving on Coruscant, Hierogryph acquired the rights to the Goodvalor's restaurant chain, and then met with one of his accountants—learning, to his chagrin, that the money Carrick's father had been managing was gone. Hierogryph, now in a foul mood, joined Carrick in watching the scientist brought to the Old Senate Hall, where the trial was to take place. While there, Carrick briefly talked with Malak, who was also brought in to testify. Once he was done, Hierogryph, Carrick, Slyssk, and T1-LB all walked to Goodvalor's Little Bivoli. En route, Hierogryph confronted Carrick about the missing money, and the Human claimed that he was "borrowing" it for a "special project." The Snivvian lambasted his partner for his clandestine movements, but was met with a query about just how he survived the bombardment of Serroco—a story Hierogryph had neglected to relay to Carrick up to that point.[8]
At that moment, the crew arrived at Goodvalor's, in front of which stood two giant statues of Hierogryph and Slyssk. When the Human inquired as to the meaning of the opulent display, the Snivvian invited him to sit down for a drink, as he recalled the events on Serroco. By the time he had finished, Hierogryph began discussing the prospect of settling down and working at the restaurant with Slyssk, now that Carrick had his "special project." An offhand comment from the Snivvian, however, prompted T1-LB to mention that the Rohlan Dyre they had encountered initially on Vanquo was not the same one that had been travelling with them since their escapade on Flashpoint, due to a large discrepancy in their weight. Carrick slowly came to the realization that the man they thought to be Rohlan Dyre was in fact Demagol—in turn, the Demagol on trial at the Senate Hall was in fact the true Rohlan Dyre. Hierogryph remained skeptical, although Carrick was now distraught, and was already planning to save Dyre, as he realized that Jarael, in the clutches of Demagol, was now in considerable danger.[8]
The pair traveled to the Old Senate Hall, where they secured a getaway speeder, and disguised themselves as guards. Hierogryph stayed in the speeder while Carrick entered the hall and extracted Dyre, who was under physical attack from both Malak and the trial's audience. Once in the speeder, Dyre removed Demagol's helmet, revealing his identity, although Carrick had already divined it.[8] They eventually reached a garage, which Carrick had purchased with his borrowed money. While inside, Dyre, at Carrick's request, explained what he knew of Demagol, namely that he was a Zeltron named Antos Wyrick who had attempted to genetically engineer a breed of Force-sensitive mutants and raise them to become Mandalorian Knights, to serve as a counter to the Jedi that had proved to be a formidable enemy to the Mandalorians in the past. He also revealed that Wyrick had switched places with him back on Flashpoint, heavily inducing him with drugs, resulting in Dyre's long sleep.[51]
Rescue mission
- "He's got the look. Spirits help us, he's got the look!"
- ―Marn Hierogryph
By the time Dyre had finished his rundown on Wyrick's history, Hierogryph was crestfallen that he had been so thoroughly deceived by the Mandalorian. By that time, Shel Jelevan, summoned by Carrick, arrived, with Slyssk in tow. After disguising Dyre as "Spikes" once again, who was now a sports icon, Carrick revealed what was underneath his new garage: Rogue Moon Project Command, an extensive base funded by what Carrick and Hierogryph had taken in from The Exchange, as well as the bounty on Toki Tollivar's head that the Human had collected earlier—without the Snivvian's knowledge. The Rogue Moon Project was in fact an initiative that Carrick and Jelevan had set up after Carrick's refusal to become a Jedi Knight in the wake of Vindication; their intent was to aid ordinary people displaced and affected by the war. It was also made up of the families of those lost in the Padawan Massacre of Taris. The Rogue Moon Project, according to Carrick, had located the Chancellor Fillorean and the Crucible earlier, as well as helped out with the liberation of the slaves.[51]
As Carrick turned his attention to locating Jarael, Slyssk mentioned that he had found a microtag while mopping on the Hot Prospect. Hierogryph inspected the microtag, and discovered that it had been attached to the lightsaber of a dead Sith Lord, Exar Kun. The Snivvian realized that it must have been one of the artifacts taken from the Odryn warehouse by the Moomo Brothers; Carrick was highly alarmed, mentioning that Kun had lived to corrupt others, and that anything he touched might have been tainted by his spirit. The Human turned his attention back to locating Osadia, which is where he believed Wyrick would take Jarael, as it was the Arkanian offshoot's place of birth. Dyre contested that there was no way to locate the planet, however. After some musing, Carrick struck upon an idea—Captain Dace Golliard, a member of the Crucible that Carrick had encountered before, and the slaver who originally captured Jarael, would know where to find the planet. He immediately had Jelevan pinpoint the specific fleet movements of the Republic Navy, and requested that she prepare to set up a direct call on the diplomatic channel straight through to Admiral Karath. Meanwhile, he asked Dyre to contact Cassus Fett.[51][52]
Bringing the Hot Prospect into an asteroid field near the Ithor system, Carrick was brought into contact with Fett, who he lured into helping him with both the incentive of being able to stop Demagol, who Fett had no love for, and for the Mandalorian to repay the debt he owed Carrick since the young Human had saved so many Mandalorian lives at Jebble. Meanwhile, an anonymous tip was passed on to Karath, bringing his fleet into the area. As Carrick predicted, Golliard was lured by the prospect of a confrontation between the Republic and the Mandalorians, and brought his ship, the Gladiator into the area, laying in wait. Fett's fleet exited hyperspace and engaged Karath's briefly, before departing the area. Carrick then contacted Karath, and alerted him towards Golliard's presence. The Republic forces opened fire on the Gladiator, forcing the slaver to abandon ship. Hierogryph ordered Slyssk to dock the Hot Prospect with the stricken Gladiator.[52]
Although Golliard had abandoned ship, he was retrieved, and arrested aboard the Gladiator, after Karath and his men had boarded. While there, Carrick questioned Golliard as to the location of Osadia—he grudgingly told them to check the ship's databanks. Doing so, Hierogryph noted that it was quite far away, and that the Hot Propsect would likely not reach the planet in time. Carrick was able to convince Karath to provide them with transportation, and so they were transferred to the Testament, which was under the command of Captain Telletoh. While Telletoh toured the ship with "Spikes," Hierogryph, left alone with Carrick, aired a suspicion he had long held about his young accomplice. The Snivvian had noticed that whenever Carrick used the Force to affect the outcome of a given situation, both something positive and negative came about—in the confidence trickster's terms, a "bad break" for every "good break." The young Human claimed that he had what the Jedi had termed a learning disability, which ultimately effected his timing. Hierogryph, however, assured Carrick that it was not a disability, and that he just needed to learn just when to implement his unique skills, since everything balanced out for him.[52]
Aftermath and legacy
- "Mastermind!"
- ―Marn Hierogryph

The appearance of Zayne Carrick and Gryph from a hologram in 19 BBY.
Upon reaching Osadia, Carrick and Dyre journeyed planetside, to confront Wyrick. Also present was Chantique, who battled Jarael. During the ensuing confrontation, it was discovered that Jarael possessed in fact little Force-sensitivity—but Wyrick had much more. Both Wyrick and Chantique, who was revealed to be his daughter, were killed, and Carrick was able to save Jarael. Back on Coruscant, Dyre was able to reunite Jarael with her mother and father, before departing quietly. Hierogryph, meanwhile, had taken to personally hosting Goodvalor's Little Bivoli as the Hero of Serroco, with Slyssk working in the kitchen. The restaurant quickly became a hotbed of activity, and the Snivvian had every table bugged, allowing him to listen in on all the major business deals taking place on Coruscant. Hierogryph was disappointed to learn that Carrick would be departing on Rogue Moon Project business, but he was able to trick the young Human into a romantic meeting with Jarael. As Carrick and Jarael began to finally strike up a relationship, the Snivvian watched on, satisfied at his handiwork.[39]
During the Galactic War, a utility belt that had belonged to Hierogryph was stored in the vaults of the Sith Empire's treasure ship the King's Ransom, from where it was stolen by a smuggler working for the Republic as a privateer.[53] At some point, thousands of years later, the hologram Gryph had recorded in the wake of the events on Jebble entered a cache of artifacts on the planet Muunilinst and fell into the possession of Fane Peturri who used information within the recording to research Dreypa's Oubliette and the Muur Talisman. Upon coming into possession of the oubliette, Peturri showed Hierogryph's hologram to Sith Lord Darth Vader in 19 BBY. Vader then opened the Oubliette, releasing Morne and her rakghoul plague once more.[35][36] Morne was eventually killed in 137 ABY, taking the spirit of Karness Muur with her.[54]
Personality and traits
- "You Humans. You keep trying to choose who to be. But why stop at one choice? You can be everybody. And if you don't know how to be someone, you can fake it."
- ―Marn Hierogryph to Zayne Carrick.
Marn Hierogryph was an exceptionally talented liar; a talent he worked to its full advantage.[2][11][21] As a confidence trickster, he enjoyed lucrative business from gullible customers, and often, by the time the constabulary saw through his ruses, it was too late.[9] He would often use his lying skills to avoid paying contacts,[10] and even to shaft colleagues into buying soiled merchandise.[11] In addition to Snivvian, he knew various languages, including Basic, Bocce, and Huttese and at least one unspecified form of Wookiee dialect.[28] As a fugitive, Hierogryph put his skills to use deceiving the Republic, in pursuit of supplies he could pilfer.[17] His skills eventually rubbed off on Zayne Carrick, who would put them to good use following the events on Serroco.[4]
As much as he was an accomplished liar, Hierogryph was also highly skeptical that he himself could ever be scammed, as he demonstrated when T1-LB revealed that the man they thought to be Rohlan Dyre was in fact Demagol. In particular, he scoffed at the idea that "Dyre" had lied to them at every turn of their escapades together.[8] When he learned that this was in fact the truth, he was horrified.[51] Although Hierogryph eventually decided to settle down and run Goodvalor's Little Bivoli, he still did so with a considerable amount of underhanded criminal enterprise, such as bribing food inspectors and keeping the tables bugged for sound.[6]
Marn Hierogryph, "host" of the Little Bivoli.
Always clamoring for a credit, Hierogryph supposedly saw business opportunities everywhere.[2][11][22] At first satisfied with just conning the citizens of Taris, the Padawan Massacre made him a wanted criminal, gaining him a level of notoriety in the galactic criminal community. Upon leaving Taris, he did not immediately capitalize on the fact, preferring to con with the simple intent of staying alive.[17] Upon reaching Ralltiir, however, he planned to make the most of the Mandalorian Wars, by exploiting not only the combatants, but the citizens of frontier worlds.[22] Eventually, his enterprising nature would lead him into great danger on Serroco.[26]
Hierogryph had a habit for assigning nicknames; he himself was most commonly referred to as "Gryph." He called Zayne Carrick, successively, "Wayne," "Intern,"[11] "Tall Blur,"[12] and "Henchman,"[15] with each name signifying a different step in their friendship. The last was used frequently following the departure from Taris, when Hierogryph considered Carrick a partner. He was often exasperated by the Jedi fugitive's actions, but nonetheless respected his opinion, and would usually grudgingly comply with Carrick's requests.[14][18][21] When forced to sell Carrick out to the bounty hunter Valius Ying, Hierogryph's latent conscience got the better of him, causing him to for once sacrifice profit in the name of friendship.[15]
Although Gryph claimed he would tolerate all kinds of strenuous and harrowing circumstances, such as being chased by rakghouls and what he termed "crooked Jedi," he found the prospect of being robbed by one of his partners to be beyond the pale. He also resented secrets being kept amongst his crew. After having worked with Carrick for a considerable amount of time, he genuinely cared about his young accomplice's opinion of him.[8] When Hierogryph learned of the Rogue Moon Project, he was surprised that Carrick had been able to put together such a large operation, and expressed chagrin at having his status as "Mastermind" threatened.[51] Towards the end of their collaboration together, Hierogryph knew Carrick so well that he could read his facial expressions, and know immediately whenever the young Human had struck upon a particularly risky and dangerous plan. The Snivvian referred to that particular expression of Carrick's as "the look."[51] He used his incisive skills to question just how the young Human's luck always seemed to "balance out;" while Carrick seemed ashamed of what the Jedi Masters called a learning disability that affected his timing, Hierogryph encouraged his accomplice, assuring him that his unique relationship with the Force was an asset.[52] Although Hierogryph eventually accepted that his and Carrick's collaboration was at an end, he was satisfied with the fact that he was able to organize a relationship between him and Jarael.[6]
Behind the scenes
Marn Hierogryph was created by John Jackson Miller, and first appeared in Star Wars: Knights of the Old Republic 1: Commencement, Part 1. In the ensuing series, Hierogryph, or "Gryph" serves as a companion and comedic foil to the protagonist, Zayne Carrick. Miller initially intended Hierogryph to be an Ortolan, however, artist Brian Ching stated that Ortolans have no clear visual facial expressions. Remembering his interest in the Snivvian action figure from the 1970s Kenner Star Wars toy range, Miller made Hierogryph a Snivvian.[55] Miller has stated that Hierogryph has "a little bit of Peter Lorre in him",[56] as well as actor Steve Buscemi.[57]
Appearances
- Star Wars Miniatures: Knights of the Old Republic advertisement (Non-canonical appearance)
- Star Wars: Knights of the Old Republic 0: Crossroads
- The Taris Holofeed: Prime Edition
- Star Wars: Knights of the Old Republic: Commencement (First appearance)
- Star Wars: Knights of the Old Republic: Flashpoint
- Star Wars: Knights of the Old Republic: Reunion
 Labor Pains on Hyperspace (article) (content removed from StarWars.com; new link on Suvudu; backup link)
- Star Wars: Knights of the Old Republic: Days of Fear
- The Adjudicator Special Report: The Outer Rim
- Star Wars: Knights of the Old Republic 16: Nights of Anger, Part 1 (Mentioned only)
- Star Wars: Knights of the Old Republic 20: Daze of Hate, Part 2 (Mentioned only)
- The Adjudicator Special Report: Tools of the Trade
- Star Wars: Knights of the Old Republic 21: Daze of Hate, Part 3 (Mentioned only)
- Star Wars: Knights of the Old Republic: Knights of Suffering
- The Adjudicator Special Report: The Colonies
- Star Wars: Knights of the Old Republic: Vector
- Star Wars: Knights of the Old Republic: Exalted
- Star Wars: Knights of the Old Republic 31: Turnabout
- Star Wars: Knights of the Old Republic 32: Vindication, Part 1
- Star Wars: Knights of the Old Republic 34: Vindication, Part 3
- Star Wars: Knights of the Old Republic 35: Vindication, Part 4
- Star Wars: Knights of the Old Republic: Prophet Motive
- Star Wars: Knights of the Old Republic 38: Faithful Execution (Mentioned only)
- Star Wars: Knights of the Old Republic: Dueling Ambitions
- Star Wars: Knights of the Old Republic 42: Masks
- Star Wars: Knights of the Old Republic: The Reaping
- Star Wars: Knights of the Old Republic 45: Destroyer, Part 1 (Mentioned only)
- Star Wars: Knights of the Old Republic 46: Destroyer, Part 2
- Star Wars: Knights of the Old Republic: Demon
- Star Wars: Knights of the Old Republic: War 2 (Indirect mention only)
- Star Wars: Knights of the Old Republic: War 3
- Star Wars: Knights of the Old Republic: War 4 (Mentioned only)
- Star Wars: The Old Republic (Mentioned only)
- Star Wars: Dark Times 11: Vector, Part 5 (Appears in hologram)
Sources
- Star Wars: The Ultimate Visual Guide (Special Edition)
- Star Wars: Knights of the Old Republic Handbook
- The Complete Star Wars Encyclopedia
- Knights of the Old Republic Campaign Guide
- The Secret Journal of Doctor Demagol on Hyperspace (article) (content removed from StarWars.com; new link on Suvudu; backup link)
- "Secrets of the Force" — Star Wars Insider 123
- Star Wars: The Ultimate Visual Guide: Updated and Expanded
- Star Wars Epic Collection – Sneak Peek! on StarWars.com (backup link)