| | |

Warning: This infobox has missing parameters: designer, type and unrecognized parameters: modules, class
- "You've never heard of the Millennium Falcon?"
"Should I have?"
"It's the ship that made the Kessel Run in less than twelve parsecs. I've outrun Imperial starships. Not the local bulk cruisers, mind you, I'm talking about the big Corellian ships now. She's fast enough for you, old man." - ―Han Solo and Obi-Wan Kenobi
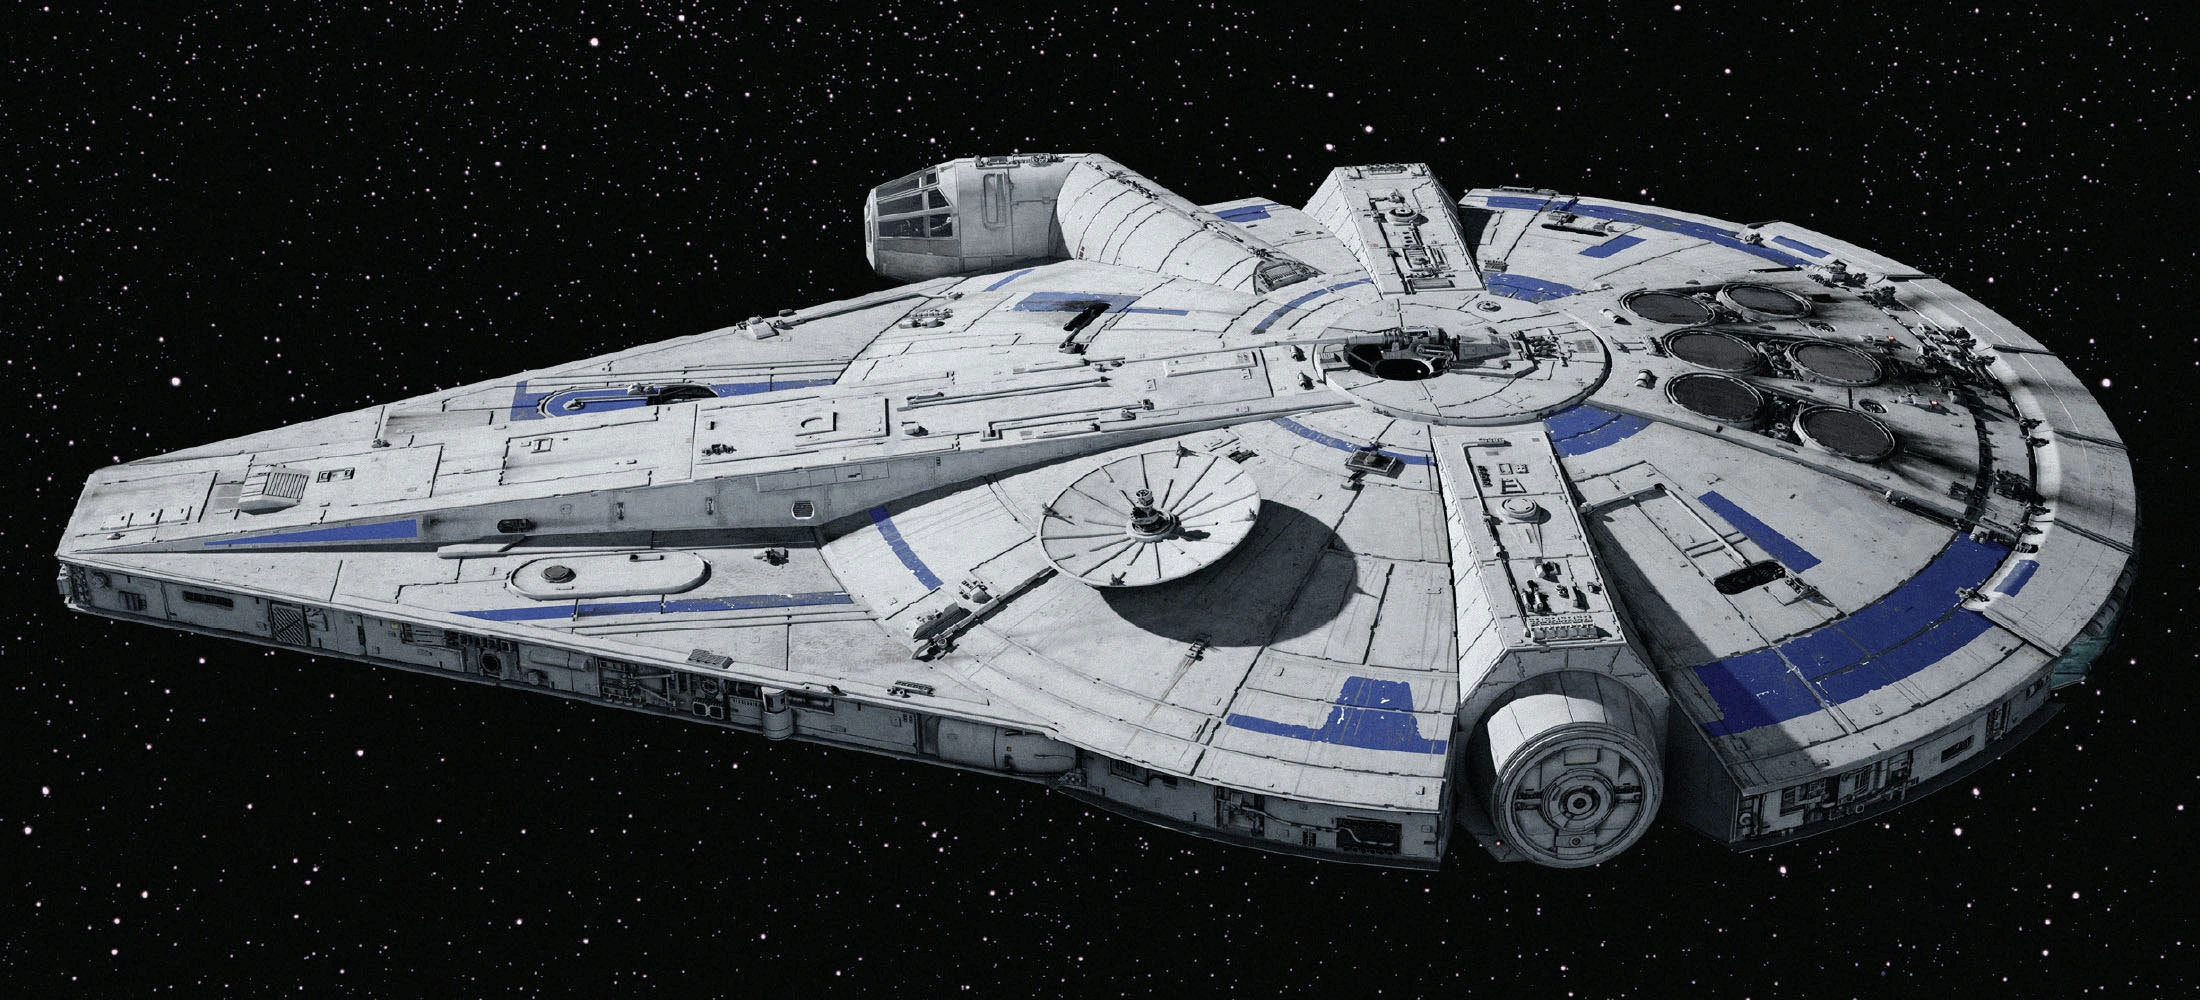
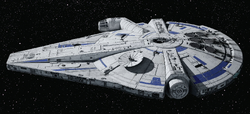
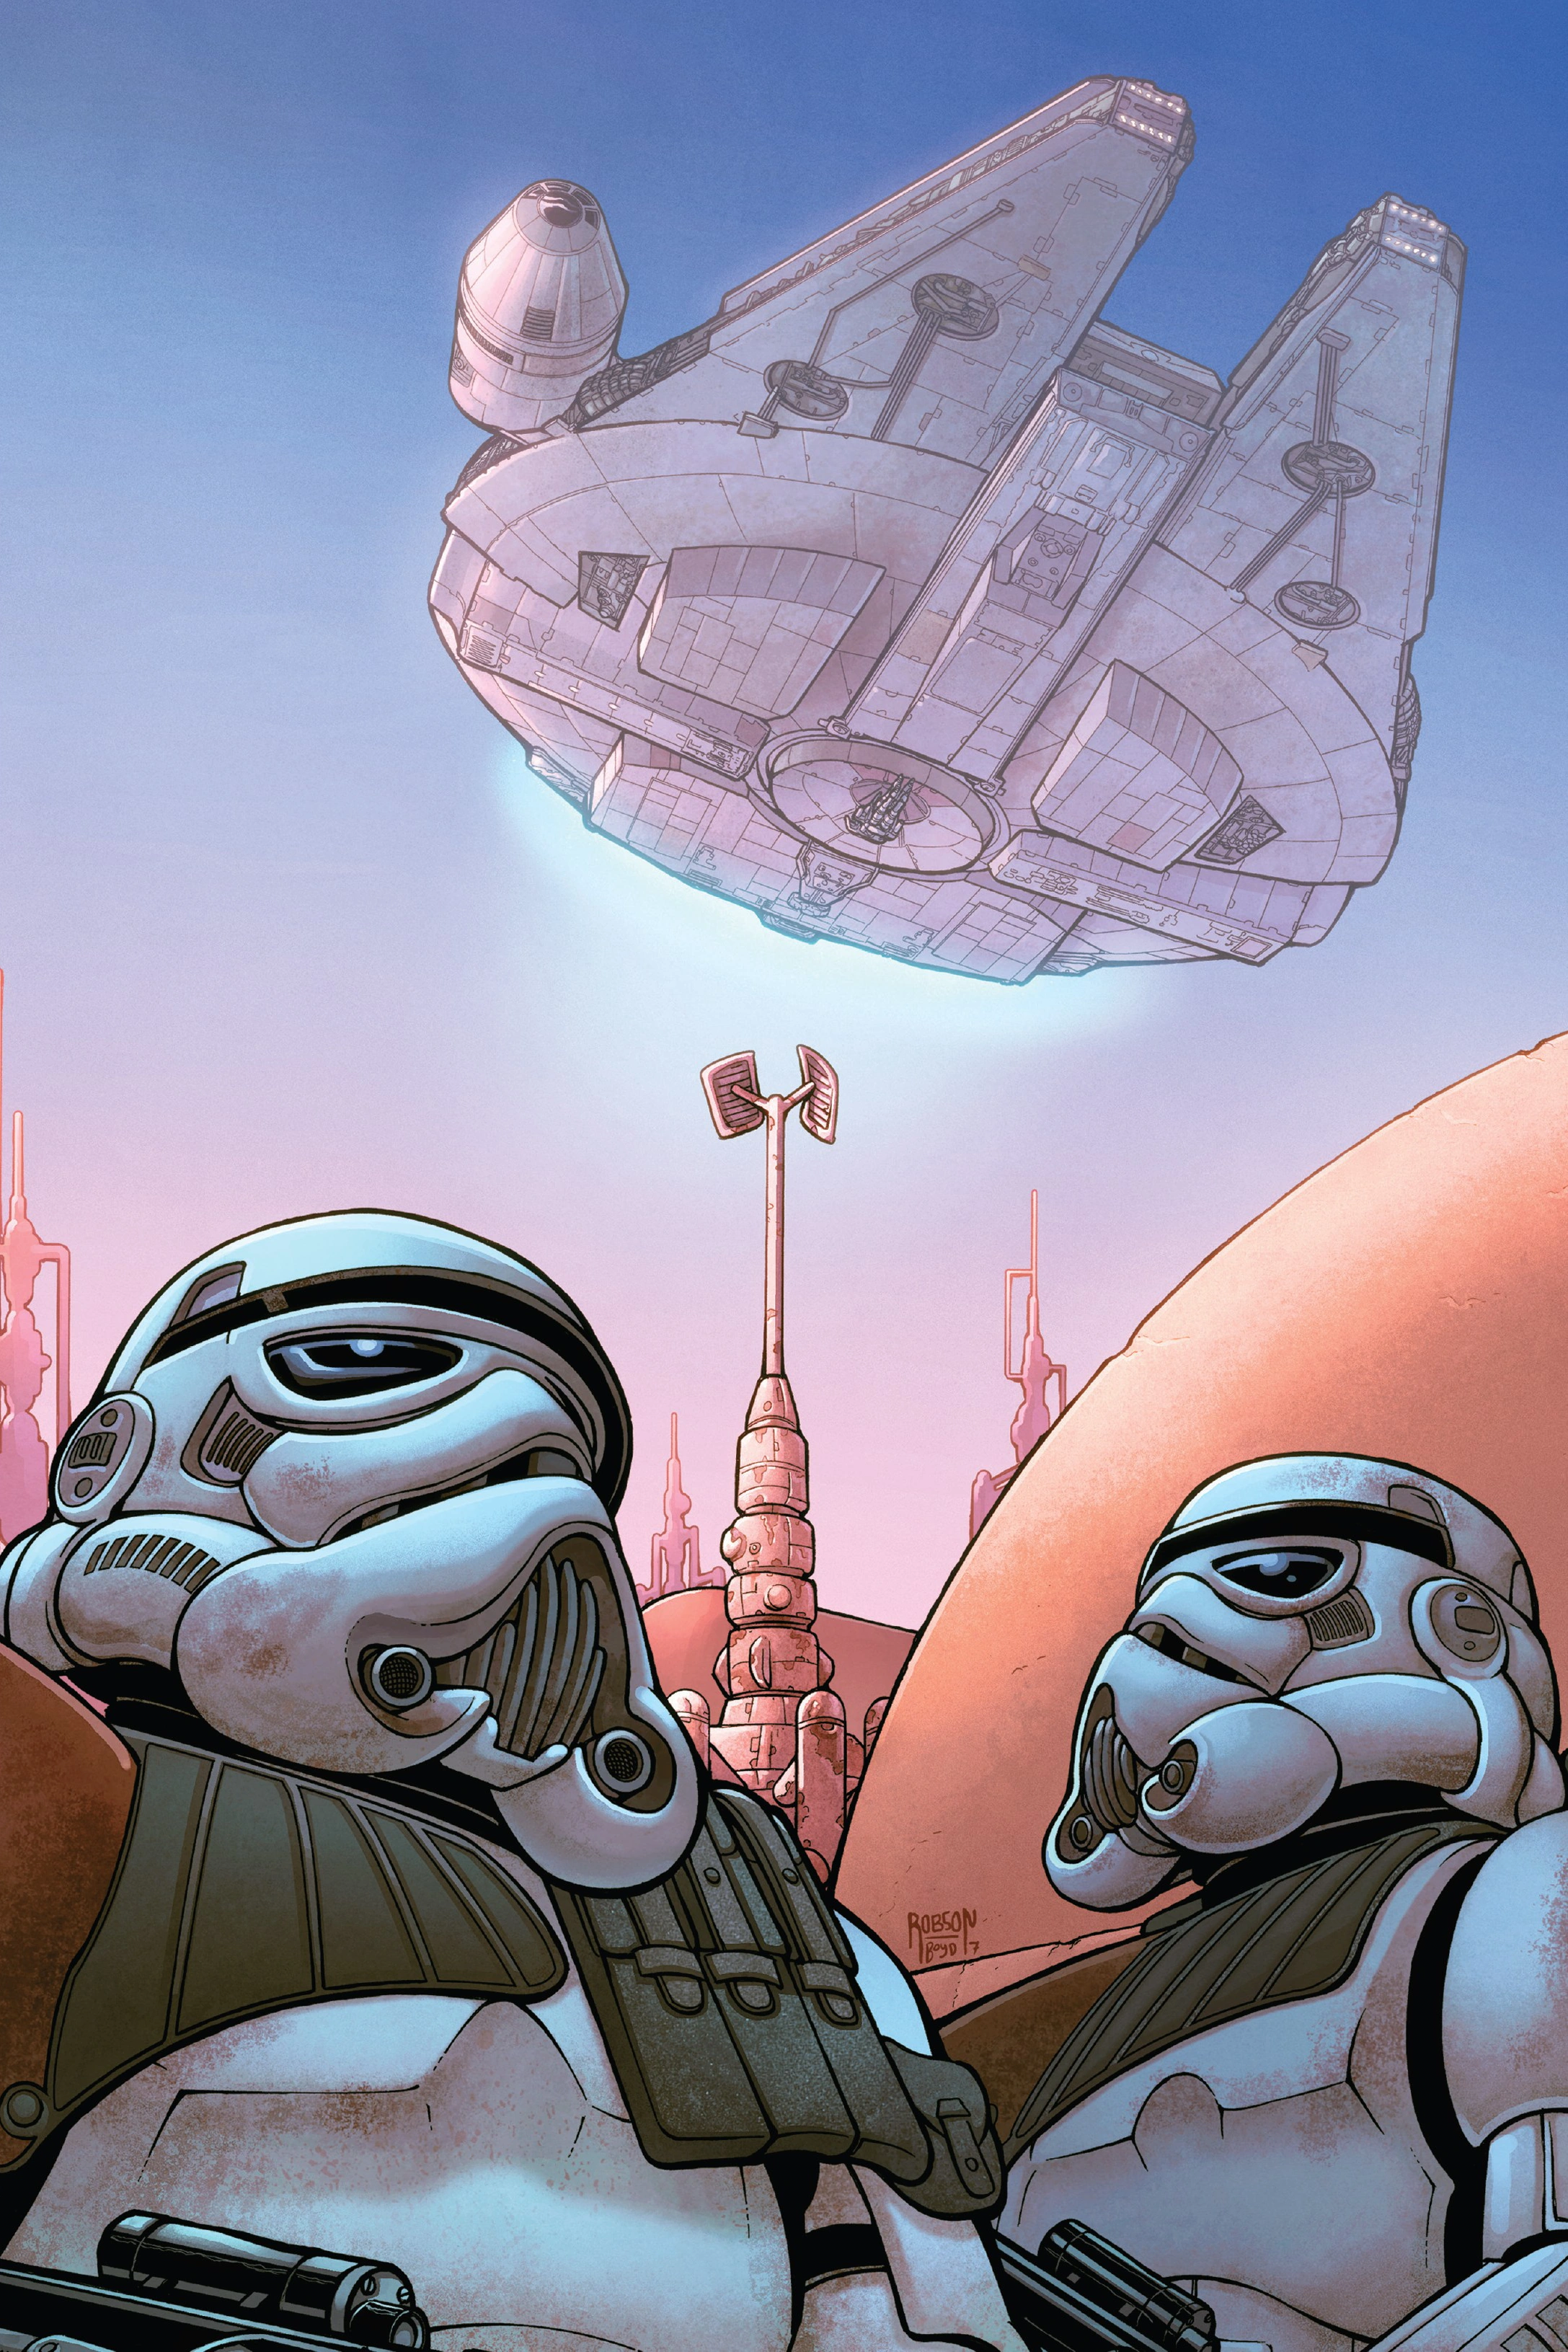
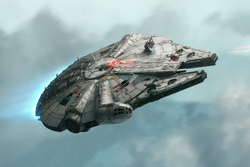
The Millennium Falcon, original designation YT-1300 492727ZED, was a Corellian YT-1300f light freighter most famously used by the smugglers Han Solo and Chewbacca during the Galactic Civil War. In the time following the Battle of Endor, Imperial turncoat Ralsius Paldora noted that 2.2 out of every 300 stormtroopers were aware of the Falcon's existence.[34]
Its aged appearance belied numerous advanced modifications to boost the ship's speed, weapons, and shield, including a hyperdrive engine among the fastest in the entire galaxy, enabling it to outrun Imperial Star Destroyers. It included sensor-proof smuggling compartments, which were used during the rescue of Princess Leia Organa in 0 BBY to evade Imperial stormtroopers.[1] Afterwards, the Millennium Falcon saw further action when Solo chose to join the Rebels during the Battle of Yavin, where it was able to sneak up and fire on Darth Vader's TIE Advanced, allowing Luke Skywalker to fire the proton torpedo that destroyed the Death Star.
After Han was captured on Bespin, Lando took command of the Falcon once more to search for him. In 4 ABY, Lando flew the ship at the Battle of Endor, where it entered the Death Star II and destroyed it from within. Over the next decades, the ship fell out of Solo's hands and was stolen by a succession of criminals and thieves. It ended up back in Solo's hands in 34 ABY, after it was found on Jakku, a remote world in the Western Reaches.
Description
- "For once, sir, the Millennium Falcon actually appears to be in good working order."
- ―C-3PO, during the Attack on Cymoon 1
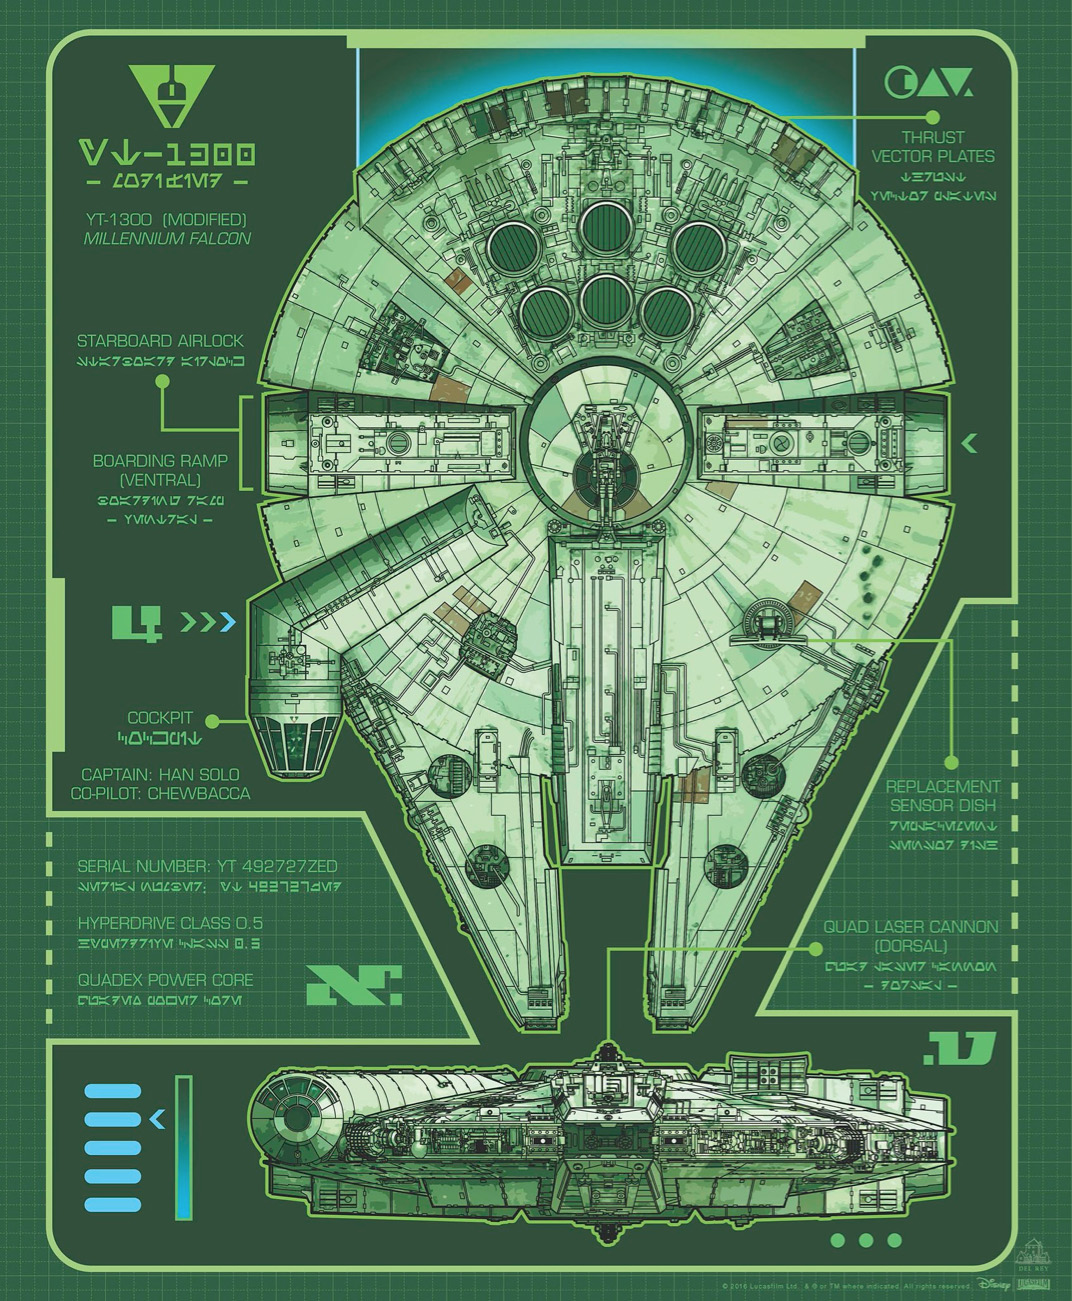

Schematics of the Millennium Falcon
The Millennium Falcon was a YT-1300 light freighter of the YT-1300f variety.[1] Its basic shape was defined by two convex saucers welded together, a pair of front-facing mandibles and an outrigger-style, side-mounted cockpit with transparisteel viewports. Apart from the shape of its chassis, the Falcon retained very little of its off-the-dock instrumentation. Because its successive owners either upgraded or downgraded every system according to their personal specifications, the freighter ended up becoming a unique ship.[9] These customizations, however, came at the price of reliability, and the Falcon was known to suffer frequent breakdowns in the heat of battle. After the circular military-grade sensor dish was lost during the Battle of Endor, the dish was replaced with the base rectangular model which was originally supplied with the ship. Additionally, the Falcon had a dejarik table featuring creatures found throughout the galaxy for the amusement of passengers and crew.[4]
Engines
- "She'll make point five past lightspeed."
- ―Han Solo explains the Falcon's lightspeed capabilities
The Millennium Falcon's Girodyne SRB42 sublight engines were heavily modified through the addition of a SLAM overdrive that rerouted energy for acceleration bursts. As a result, the ship could fly at a maximum speed of 1,200 kilometer per hour in atmosphere and 3,000 G in space.[6] The stock hyperdrive of the YT-1300 series was replaced with a Isu-Sim SSP05.[1] Although the regular SSP05 was a Class 1 hyperdrive, the one that equipped the Falcon had been jury-rigged "Vandangante style" into a Class 0.5 drive[9]—twice as fast as most warships of the Galactic Empire.[8] According to Ralsius Paldora, the Millennium Falcon's hyperdrive failed 1.22 times more than the one on the YT-2400 light freighter.[34] In addition to its renowned hyperdrive, which supposedly made the Falcon the "fastest ship in the galaxy," the ship was equipped with a backup hyperdrive. It was much slower than the primary engine and often took several weeks or months to reach the nearest star system.[1]
Armament, hull, and shields

The Falcon's forward mandibles housed the forward deflector shields, concussion missile launchers, and beam lamps.
The weaponry of the Millennium Falcon was normally suited for a much larger warship.[1] It included two CEC AG-2G quad laser cannons (one ventral and one dorsal) with enhanced laser actuators and gas feeds, which gave them maximum range and damage. Between the forward mandibles, there were two Arakyd ST2 concussion missile tubes, each of which carried a four-missile magazine.[9] Additionally, a BlasTech Ax-108 "Ground Buzzer" blaster cannon mounted near the ventral boarding ramp allowed its crew to defend the ship while on the ground.[1] Duralloy plates salvaged from an Imperial cruiser afforded the Falcon capital ship-class hull armor.[9]
The ship had three deflector shield generators: the bow was protected from both lasers and concussion missiles by Torplex and Nordoxicon units, while a Kuat Drive Yards generator shielded the stern.[9]
The Falcon's combination of sublight speed and maneuverability was comparable to most of the starfighters fielded by the Rebellion and Empire, while its shielding, hyperdrive, and heavy weapons were on par with those typically found on capital ships. These traits made it an ideal choice for General Lando Calrissian's attack run within the bowels of the Death Star during the Battle of Endor. The Falcon's only real combat weakness was its sheer size in comparison to starfighters. Although the ship had squeezed through many narrow spots in its history, it still lost the oversized sensor dish while trying to get through a particularly tight section of the Death Star's superstructure.
Other systems and equipments
The Falcon's main source of power was a Quadex power core.[1] Its main computer was made of three droid brains. One was cannibalized from a V-5 transport droid, another from a slicer droid.[8] The third was that of L3-37, which began as an R3-series astromech droid brain, but was overlaid with data architecture from an espionage droid, protocol droid processors, and custom state-of-the-art coding.[6]
A pair of Gelieg 20m-cp Strobe/C-Beam Lamps, which flooded illumination outside the ship, were mounted on the tips of the front mandibles.[9] In case of emergency landing or crash on water, the Falcon was also equipped with floatation pontoons.[12]
History
Early years
The YT-1300f light freighter designated unit YT 492727ZED was built in by the Corellian Engineering Corporation more than 90 years before the cold war.[9] As was intended, the ship began its career as an intermodal tug pushing container in orbital freight yards.[1] It once worked in the galaxy's busiest spacelanes.[6] Just after the Battle of Coruscant it was docking in the Senate Office Building.[35] At some point, the ship acquired the name Millennium Falcon, and came into the hands of a human gambler called Lando Calrissian, who began to modify the freighter, inside and out,[9] converting it into his own speedy sports vessel as Calrissian saw how powerful its freight-pushing engines were. As such, Calrissian modified the two cargo mandibles at the front into an auxiliary ship launch, thus turning the plain freighter into a unique starship.[6] However, Calrissian was injured during a raid on Kessel, leaving the smuggler Han Solo and Wookiee Chewbacca in command of the ship. During the escape from Kessel, Calrissian uploaded L3 to the Falcon as the ship's navigational system, assisting the crew in making the Kessel Run in under 13 parsecs. Calrissian later took the heavily damaged ship after landing on Savareen but ended up betting his ship in a "Corellian Spike" game of sabacc on Numidian Prime,[10] losing to the smuggler Han Solo.[36] Under the captaincy of Solo, the Falcon was further customized.[9]
Galactic Civil War
A fateful trip
- "You came in that thing? You're braver than I thought."
- ―Leia Organa upon seeing the Millennium Falcon for the first time

The Millennium Falcon blasts its way out of Mos Eisley
The Millennium Falcon's destiny as a tool for a small-time smuggling operation was changed when it was chartered by Obi-Wan Kenobi and Luke Skywalker in Chalmun's Cantina for passage to Alderaan. When challenged by Kenobi about his ship's speed, Solo bragged that the Falcon was capable of attaining 0.5 past lightspeed, and that it "made the Kessel Run in less than twelve parsecs."[15]
The journey to Alderaan proved to be much more than a simple passenger flight. The Falcon was forced to blast its way out of Mos Eisley when a garrison of stormtroopers attacked the ship in an attempt to recover its cargo. It also narrowly avoided capture by a couple of Star Destroyers before making the jump to lightspeed.[15]
The Falcon emerged from hyperspace into the remains of Alderaan. After chasing a single TIE fighter stranded in what appeared to be empty space, the Falcon was captured by one of the first Death Star's tractor beams and secured aboard the massive space station. Thanks to quick thinking by those aboard the Falcon, the ship was made to appear as if the crew had escaped soon after taking off from Tatooine. It was searched by stormtroopers and it was reported that there were no passengers on board and the escape pods had been jettisoned. Their search had missed the crew, who were hidden in a series of secret smuggling holds. They then killed a scanning crew before they could be detected by the scanner.[15]
In a matter of hours, the Millennium Falcon had once again escaped the Imperial Navy, this time with the rescued Princess Leia Organa on board. After a fleeing battle with Imperial fighters and a trip through hyperspace, the ship arrived at the secret Alliance base on Yavin 4. During the ship's stay on the battle station, the Empire had planted a homing device on board the Falcon, which it used to pursue Organa to this location. As the Rebels scrambled to organize a preemptive attack on the massive Death Star, Solo loaded his reward on board the Falcon and departed the moon. However, thanks to Chewbacca, its smuggler captain had a change of heart. Solo and his ship returned just in time to cover Skywalker in his last-ditch effort to destroy the station and secure the safety of the Rebel Alliance. The ship's surprise attack destroyed Darth Vader's two wingmen and sent Vader himself spinning off into space, allowing Skywalker to successfully complete his attack and destroy the Death Star.[15]
Escape from Hoth
- "Punch it!"
- ―Han Solo to Chewbacca

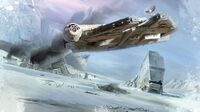
Millennium Falcon blasts out of Echo Base
Three years after the Battle of Yavin, the Falcon was undergoing repairs in the main hangar of the Rebel installation Echo Base as the Empire began its assault on Hoth. As the Alliance scrambled to escape the base, Solo and Chewbacca hurried to make the ship spaceworthy. Organa was cut off from her transport by a tunnel cave-in and was forced to make her escape from Hoth on board the Falcon accompanied by Solo, Chewbacca, and C-3PO. Solo used the ship's uncanny maneuverability and his piloting skills to elude an Imperial Star Destroyer chasing them, and two more emerging from hyperspace. Solo's maneuvers in the Falcon caused the two Star Destroyers approaching and the one pursuing to nearly collide with each other. The Falcon then attempted to make the jump into lightspeed, but was stopped short by an equipment malfunction.[3]
Forced to take drastic measures to avoid capture, Solo made the decision to pilot the Falcon into a nearby asteroid field in an attempt to lose the Imperial pursuers. However, his repairs were cut short as he had unknowingly landed inside a space slug. Escaping just in time as the beast's huge mouth was closing, the Falcon was discovered by the Star Destroyer Avenger. They attempted to jump to lightspeed but once again, the hyperdrive was not fully repaired. Solo then had Chewbacca change course and fly directly at Avenger's bridge in an apparent suicidal attack run. The ship disappeared from sight and became undetectable to Avenger. It had not gone far: Solo had attached the Falcon to a blind spot on the conning tower of the Star Destroyer. Adhering to standard Imperial procedure, the Star Destroyers of Death Squadron ejected all scrap and garbage before entering hyperspace. Solo then signaled Chewbacca to release the ship's landing claws, allowing the Falcon to "float away with the rest of the garbage." Boba Fett, however, saw through this ruse, and waited behind in the Slave I, following the Falcon as it left the system.[3]

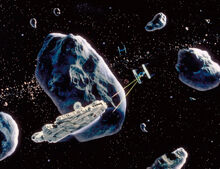
The Falcon is pursued into the Hoth asteroid field.
After its close encounter with the Empire, the Falcon journeyed to Bespin's Cloud City, where Solo's old acquaintance Calrissian held the position of Baron Administrator. The Empire had arrived first, however, due to Fett tailing the Falcon to Bespin. The crew of the Falcon were captured, tortured, and detained. Solo was encased in carbonite and given to the bounty hunter. The remaining members of the crew, joined by Calrissian, escaped to the Falcon. After rescuing Skywalker, who was dangling from a weather vane on the underside of Cloud City, the ship left the planet and attempted to jump to lightspeed. The crew were unaware that the recently repaired hyperdrive had been disabled by Vader's men, and only a last-minute patch by R2-D2 prevented the Falcon from falling into Imperial hands. Thanks to R2's efforts, the hyperdrive was activated and the Falcon managed to make the jump at the last second and escape.[3]
Rescuing Han
During the following months, the Falcon served as home base to Organa, Skywalker, and Calrissian as they tracked Fett in an attempt to save Solo. After they successfully rescued Han, the Falcon rendezvoused with the Rebel Fleet and prepared to assault the newest Death Star.[27]
Battle of Endor
- "Look, I want you to take her. I mean it, take her! You need all the help you can get; she's the fastest ship in the fleet!"
- ―Han Solo, to Lando Calrissian
The Falcon leads the starfighter attack during the Battle of Endor.
During the Battle of Endor, Calrissian and Sullustan copilot Nien Nunb flew the Falcon as Gold Leader. After the planetary shield protecting the second Death Star was destroyed, the Falcon and several Alliance fighters entered the battle station through a conduit port and headed towards the reactor core. Space was limited in the conduit tunnels leading to the core, and the relatively large Falcon lost its sensor dish when the ship clipped a conduit in the tunnel. Calrissian was able to pilot the craft into the energy core housing the main reactor, fired upon the reactor, and headed for the exhaust port. The Falcon barely outran the massive explosion that destroyed the powerful battle station. Soon afterwards, the Imperial fleet retreated, and the galaxy celebrated the death of Emperor Palpatine.[27]
New Republic
On the day after the Battle of Endor, Solo and the rebel pilot Shara Bey flew the Millennium Falcon during an attack on an Imperial outpost on the far side of Endor.[37] Several months later, Solo and Chewbacca traveled through space on the Millennium Falcon. After receiving intelligence from Imra that the Empire had reduced their presence on the Wookiee homeworld of Kashyyyk due to the advances of the New Republic, Solo and Chewie traveled to Warrin Station to rally smugglers and Wookiee exiles for a campaign to liberate Kashyyyk.[30]
However, this information turned out to be a trap set by the Empire. Chewie was captured, but Solo managed to escape on the Falcon. A year later, Solo corresponded with his wife Organa via hologram on the edge of Wild Space. During the conversation, the Falcon came under attack, and communication was lost with Organa. In response, Organa dispatched the New Republic starfighter pilot Norra Wexley to rescue her husband. Norra was joined by her son Temmin Wexley, the B1 battle droid Mister Bones, the former Imperial Sinjir Rath Velus, the Zabrak bounty hunter Jas Emari, and the New Republic Special Forces soldier Jom Barell.[28]

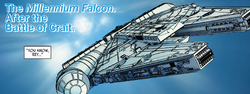
The Millennium Falcon after the Battle of Endor
Norra and her team found Solo and the Falcon on the planet Irudiru. After interrogating the Siniteen prison builder Golas Aram, Solo and his allies traveled on the Falcon and Emari's ship Halo to the Kashyyyk system. They bluffed their way through the Imperial blockade by posing as a repair crew working at Ashmead's Lock, an automated prison on the far side of Kashyyyk. There, they managed to free Chewbacca and a hundred other prisoners including Norra's husband Brentin Lore Wexley. Norra, Temmin, and the prisoners except Chewbacca then used the Falcon to travel back to the New Republic capital of Chandrila.[28]
After learning that the Wookiee uprising was underway and that the Empire was orbitally bombarding Kashyyyk, Organa convinced the Alderaanian pilot Evaan Verlaine to fly her on the Millennium Falcon into the Kashyyyk system to aid her husband and Chewie. Later, she contacted the New Republic Captain Wedge Antilles and convinced him to send his Phantom Squadron there.[28]
During the brief space skirmish, Organa and Verlaine flew circles around the Imperial Star Destroyers. After the Imperials capitulated, Organa landed the Falcon in the hangar of the Star Destroyer Dominion, which her husband had captured. Organa used the ship's laser cannons to blast several stormtroopers who were still putting up a fight. After reuniting with her husband, Organa and Solo took the Falcon to Kashyyyk. There, they parted company with Chewbacca before returning to Chandrila.[28]
Prior to the Battle of Jakku, Temmin tried to convince Solo to lend him the Millennium Falcon so that he could travel to Jakku to rescue his mother Norra, who was hunting for the Imperial fugitive Grand Admiral Rae Sloane. After some haggling, Solo and Organa relented. Temmin and Velus attempted to depart on the Falcon but were prevented from leaving Chandrila by Senate Guards. While Temmin and Velus initially believed that Solo had double-crossed them, they later learnt that Senator Tolwar Wartol, a political opponent of Chancellor Mon Mothma, was the true culprit and had been spying on Solo and Organa's conversations. The Millennium Falcon later saw action during an operation on Nakadia to rescue the slicer Conder Kyl and Nim Tar's child.[38]
Reappearance
- "The garbage will do!"
- ―Rey, being forced to board the Falcon during the escape from Jakku

The Falcon fends off TIE Fighter fire during the Escape from Jakku
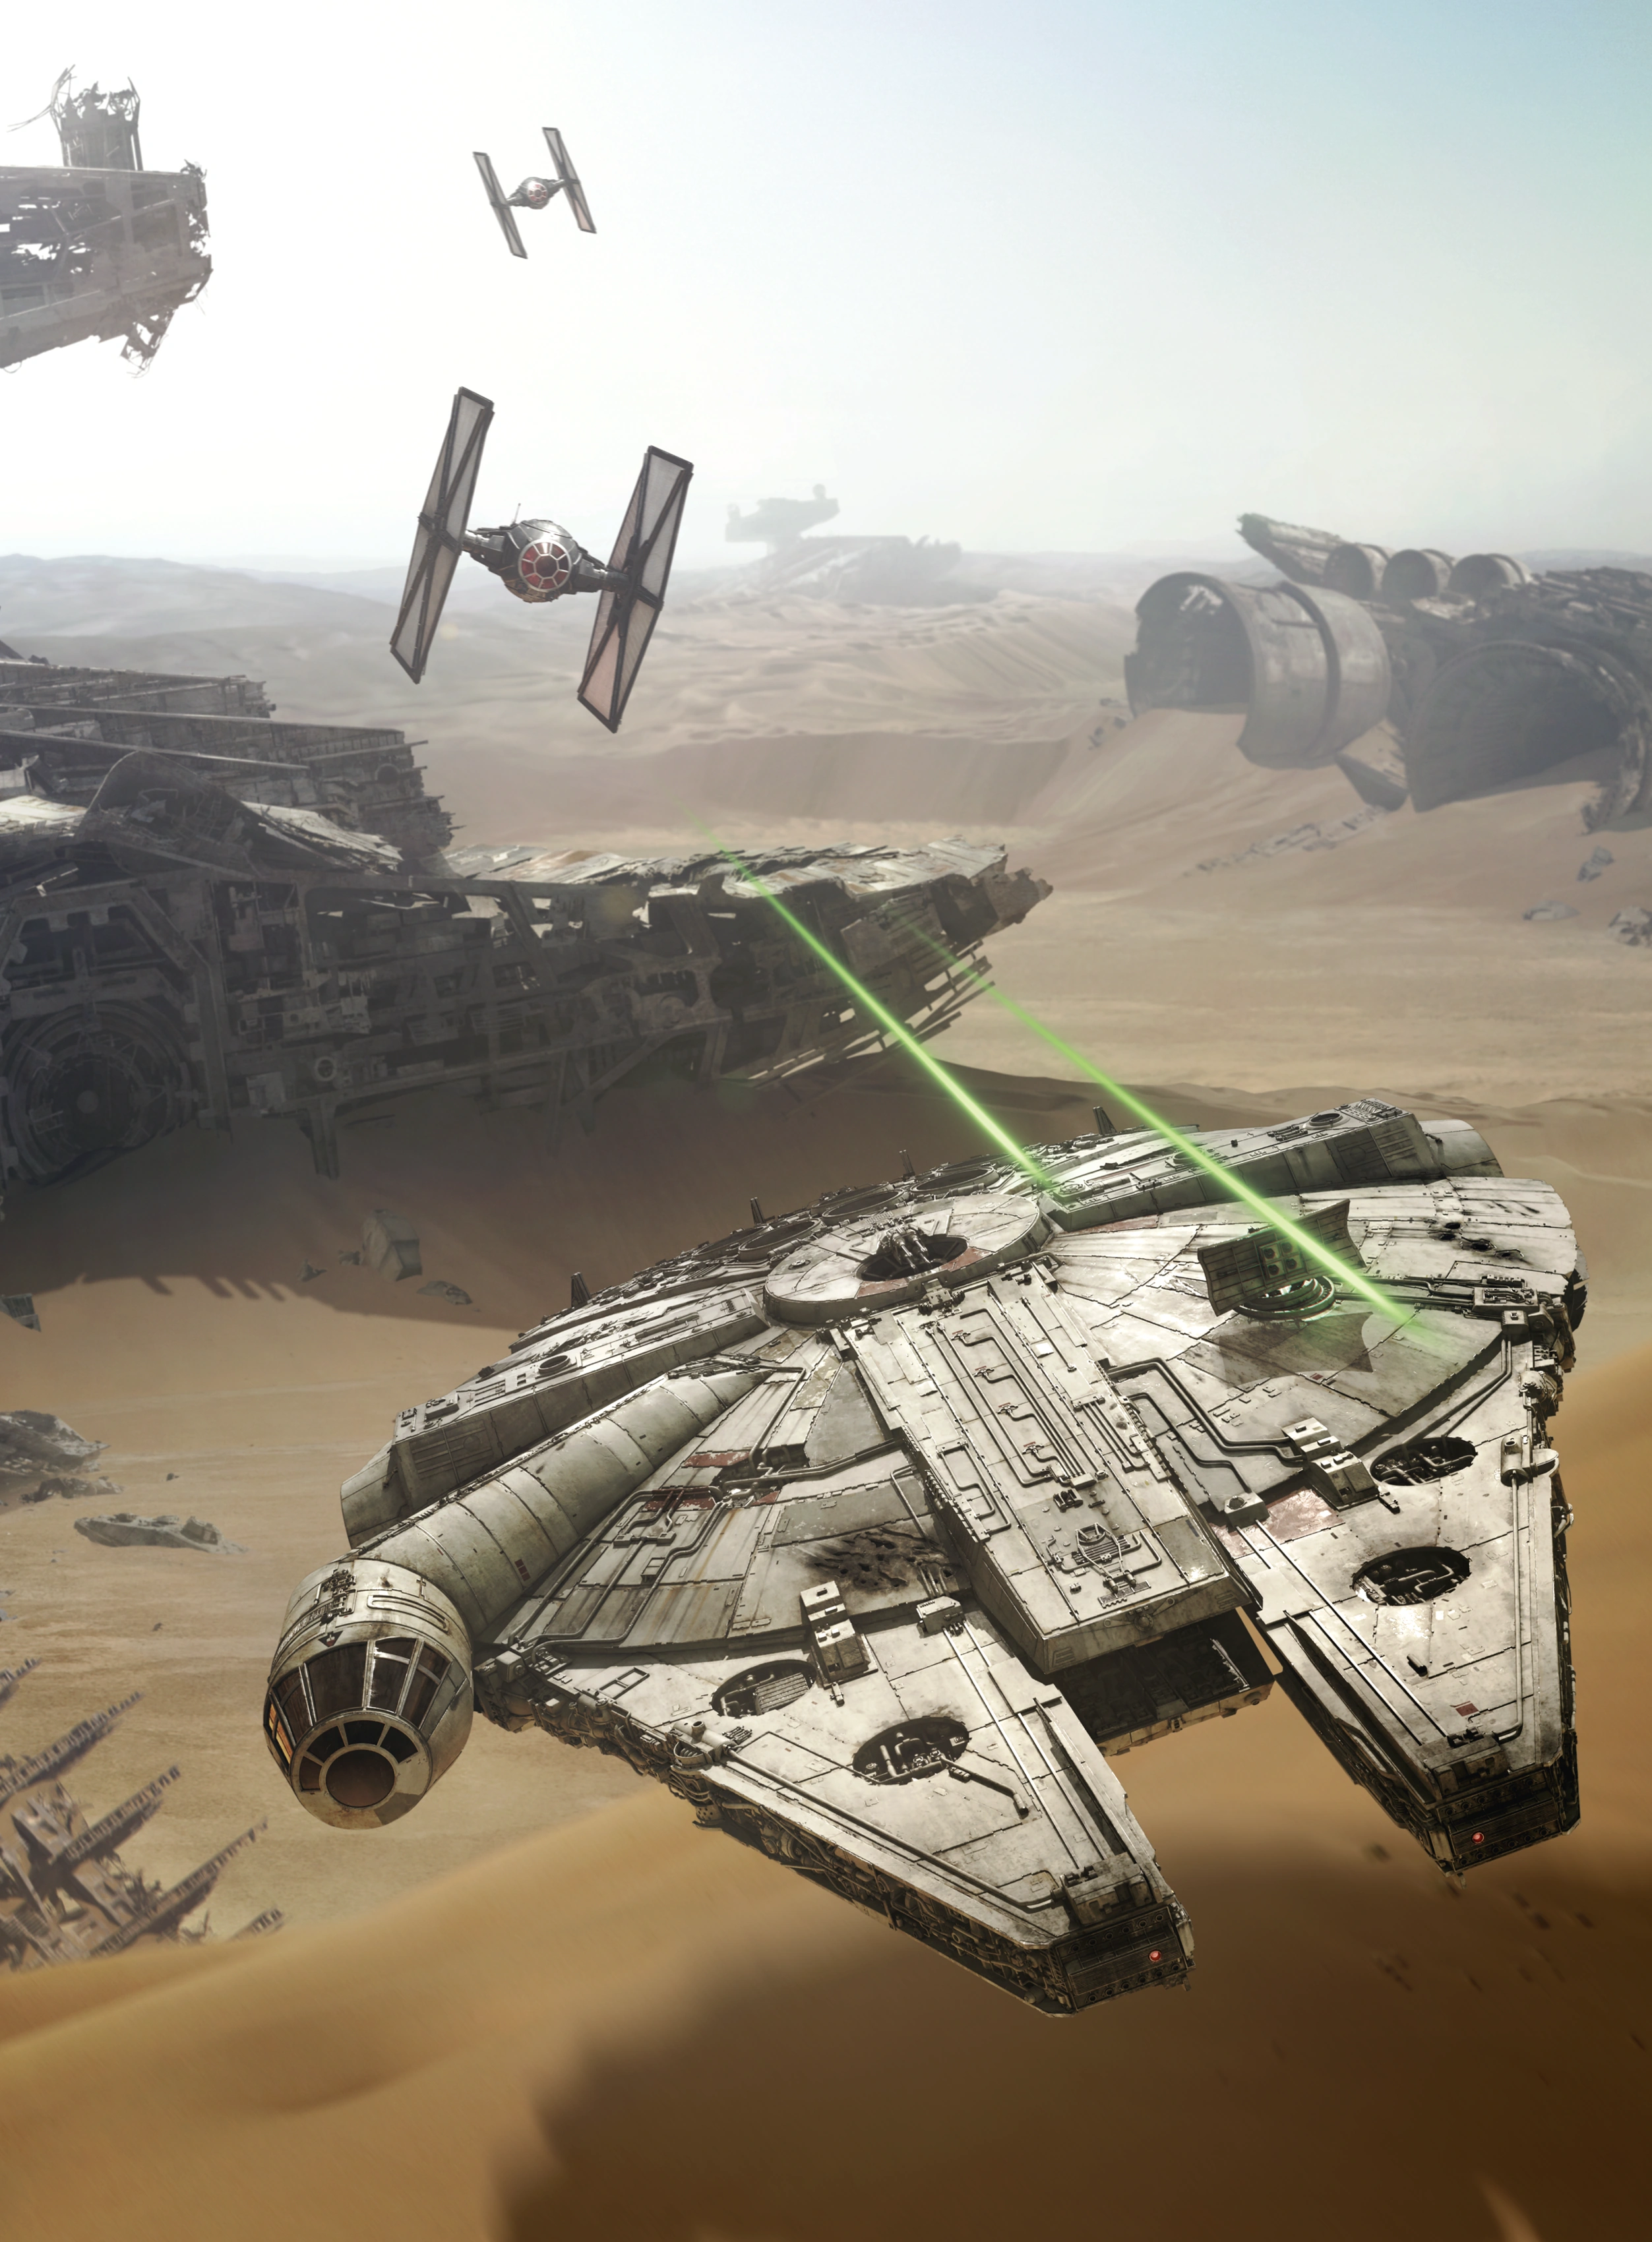
At some point in the years following the Battle of Jakku,[39] Solo traveled to Maz Kanata's castle on Takodana to speak with Kanata. Whilst the pair were conversing, a Nikto named Gannis Ducain offered to co-pilot for Solo after overhearing that Chewbacca was with his family and that Solo was short-handed for a job. After accepting Ducain's offer, he and Solo went to Christophsis, where Ducain stole the Falcon.[40] It was later stolen by Toursant Irving and Vanver Irving—also known as the Irving Boys—before finally ending up in the possession of junk boss Unkar Plutt. In his possession, it would sit unused for years in Niima Outpost on the junkyard planet Jakku. Plutt paid for minimum maintenance for the ship with the intention of preparing it fully for flight only in the event that he would actually find a buyer.[39] In 34 ABY, Rey, Finn, and BB-8 stole the vessel to escape an attack from the First Order on the outpost.[4]
Returned ownership
- "You tell him Han Solo just stole back the Millennium Falcon for good."
- ―Han Solo


Han Solo and Chewbacca once again take ownership of the Falcon.
While in spaceflight, the Falcon was picked up by Solo and Chewbacca's sensors, and they promptly locked down the Falcon's systems so they could recapture it using a freighter they were then using for their smuggling operations. Upon boarding their old vessel, Solo and Chewie went about inspecting their ship and found Rey and Finn hiding, who they assumed were the thieves that had stolen the Falcon. When Rey and Finn explained that they were going to take BB-8 to the Resistance as he had a map that would reveal Skywalker's location, Solo and Chewie agreed to help them. Solo was impressed with how much Rey knew about the ship itself, and how it worked.[4]
On the way to Kanata's castle, when the Falcon began to malfunction, the mechanically savvy Rey, who was sitting in the cockpit to the right of Solo, made a modification to the ship by simply bypassing a faulty compressor. Later, the Falcon's crew arrived at Takodana and met Maz Kanata.[4]
The Resistance
- "Blow that piece of junk out of the sky!!"
- ―Kylo Ren

The Millennium Falcon departing Takodana
Following the attack on Kanata's castle, Starkiller Base prepared to fire on D'Qar. After learning of this, the Resistance devised a plan to sneak onto the surface and lower the planetary shields so their fighters could attack the superweapon's weak spot. Using the Falcon, Solo, Chewbacca, and Finn infiltrated the base, lowered the shields, and reunited with Rey, who had been captured on Takodana by the First Order.[4]
While the Millennium Falcon lay dormant, it was briefly spotted by members of the Resistance's J-Squadron who were flying a stolen TIE silencer into the planet. At least two of its members speculated on whether it could be the Millennium Falcon that they'd heard so many stories about, but at the time they could not confirm whether it was.[41]
After the confrontation with Kylo Ren following the death of Solo, Chewbacca rescued Finn and Rey aboard the Falcon, managing to escape the planet as it exploded. After learning of Skywalker's location, Rey, Artoo, and Chewbacca flew in the Falcon to Ahch-To, the remote planet where he had gone into self-exile.[4] Chewbacca and Artoo remained with the Falcon while Rey attempted to persuade Skywalker to join the Resistance, though Luke slipped aboard the old freighter to reminisce, and was reminded of what was at stake when Artoo replayed the hologram Leia Organa recorded to recruit Obi-Wan Kenobi on her secret mission to Tatooine some thirty-four years earlier.[29]

The Falcon escaped Crait carrying some of the last Resistance forces.
Rey later departed the island, believing herself capable of restoring Ben Solo to the light side of the Force, and used one of the freighter's escape pods to reach the Supremacy while Chewbacca piloted the Falcon to Crait. After Snoke's death, Rey returned to the Falcon using Snoke's escape vessel, and the YT-1300 participated in the Battle of Crait. Piloted by Chewie with the dorsal turret manned by Rey, the Falcon led TIE fighters away from the Resistance V-4X-D ski speeders attempting to destroy the First Order's superlaser siege cannon. The freighter lost its radar dish during a chase through Crait's subterranean caverns. The Falcon was later used to evacuate surviving Resistance personnel from the Crait outpost while Luke Skywalker bought his allies time by confronting Kylo Ren.[29]
Behind the scenes


Unused concept art of the Millennium Falcon with cargo pods for Star Wars: The Force Awakens: Incredible Cross-Sections
It was speculated that the Millennium Falcon would make an appearance in Star Wars: Episode III Revenge of the Sith to further tie the prequel trilogy to the original trilogy, and the ship did indeed make a cameo in the movie. At the beginning of one shot closing in on a docking bay on Coruscant, a YT-1300 freighter is seen flying in to dock. George Lucas confirmed that it was the Millennium Falcon and not just another ship of the same class.[42]
For the Star Wars Anthology film Solo: A Star Wars Story, the interior Falcon sets were the same ones used in Star Wars: Episode VII The Force Awakens and Star Wars: Episode VIII The Last Jedi, although they were redressed. These sets were augmented with the addition of extra sets depicting Lando Calrissian's quarters and cape closet.[43]

The Falcon's serial number
For Star Wars: The Force Awakens: Incredible Cross-Sections, the author Jason Fry intended for the book to include information about the freighter series being able to act as a cargo pusher, but was unable to get the image in time.[44]
The infographic Fictional Travel Times estimated that the Millennium Falcon, with its class 0.5 hyperdrive, can travel at 6.13 quadrillion miles per hour, and that it may be capable of travelling from one galaxy to another within 100 days.[45]
In Episode IV the Millennium Falcon had only three landing gear legs but five landing gear legs in Episode V. Solo fixes this by revealing the Millennium Falcon had five landing gear legs but two were lost during the Kessel Run.[10]