mNo edit summary |
Cade Calrayn (talk | contribs) No edit summary Tag: sourceedit |
||
| Line 128: | Line 128: | ||
{{Quote|I will inflict unimaginable suffering on your people. Billions will die because of you. […] My son's death will be avenged on the entire Republic—and you will bow down before I let you die.|Darth Angral|Star Wars: The Old Republic}} |
{{Quote|I will inflict unimaginable suffering on your people. Billions will die because of you. […] My son's death will be avenged on the entire Republic—and you will bow down before I let you die.|Darth Angral|Star Wars: The Old Republic}} |
||
{{Main|Desolator crisis}} |
{{Main|Desolator crisis}} |
||
| − | [[File:Angralhead. |
+ | [[File:Angralhead.png|thumb|right|140px|Angral's hatred would consume entire worlds as he sought revenge.]] |
While the crisis on Coruscant ended with the deactivation of the Planet Prison, the mission would have far-reaching consequences. True to his world, Angral embarked on a [[Desolator crisis|crusade]] against the Knight, including both the Republic and the Jedi Order in his mad quest for revenge.<ref name="New Intelligence" /> Sending his apprentices and agents to various worlds, he took advantage of his son's information and seized control of the Republic's superweapon projects, combining them into a ship-mounted world-killer weapon<ref name="Uphrades">{{TORcite|type=class|Jedi Knight|Uphrades|the ''Daybreaker''}}</ref> known as the [[Desolator (superweapon)|Desolator]].<ref name="New Intelligence" /> |
While the crisis on Coruscant ended with the deactivation of the Planet Prison, the mission would have far-reaching consequences. True to his world, Angral embarked on a [[Desolator crisis|crusade]] against the Knight, including both the Republic and the Jedi Order in his mad quest for revenge.<ref name="New Intelligence" /> Sending his apprentices and agents to various worlds, he took advantage of his son's information and seized control of the Republic's superweapon projects, combining them into a ship-mounted world-killer weapon<ref name="Uphrades">{{TORcite|type=class|Jedi Knight|Uphrades|the ''Daybreaker''}}</ref> known as the [[Desolator (superweapon)|Desolator]].<ref name="New Intelligence" /> |
||
Revision as of 12:54, 23 July 2015
Warning: This infobox has missing parameters: date, prev and unrecognized parameters: previous, imageBG, width
- "Tarnis will use the Planet Prison against Coruscant. He could trap us here forever. Paralyze the Republic be holding us hostage. You're our only hope of stopping that."
- ―General Var Suthra
During the Cold War between the Galactic Republic and the Sith Empire, a young Jedi Knight—the former apprentice of Jedi Master Orgus Din—was sent on a mission to the Republic capital of Coruscant to investigate a dark presence there. Accompanied by the astromech droid T7-O1, who had helped the young Jedi put a stop to the recent Flesh Raider uprising on the Jedi Order's homeworld of Tython, the Knight worked with the Republic Strategic Information Service and the Coruscant Security Force to stop the Sith Lord Tarnis from activating the Planet Prison superweapon.
After a gang of thieves stole the design files for the Planet Prison from a military warehouse on Coruscant, the Strategic Information Service tracked the thieves back to the criminal organization known as the Migrant Merchants' Guild. The newly-arrived Jedi Knight and T7-O1 were immediately sent to recover the files, but Doctor Eli Tarnis—the Planet Prison's designer and secretly a Sith Lord who had been undercover as a Republic scientist—orchestrated his own kidnapping by his allies in the Black Sun criminal syndicate so that he could proceed with his plans.
Chasing the kidnappers to the Coruscant Spaceport, the Padawan Kira Carsen and the CSF were aided by the Knight in retaking the hangar where the criminals were holed up, and discovered that the kidnappers were actually a decoy. Tarnis had retreated to the territory of the paramilitary Justicars' Brigade, but the Jedi unknowingly followed another false lead into Black Sun Territory in a vain attempt to rescue the scientist. After staging a successful assault on the syndicate's headquarters with the help of an elite CSF team, the Knight failed to find Tarnis—but instead discovered Tarnis' true identity and his plans for the Planet Prison.
As the Republic scrambled to secure their other jeopardized weapon projects from the Empire, Carsen and the Knight tracked Tarnis to the Justicar's Sector, only to find that he had murdered the Planet Prison design team and stolen the superweapon after tricking them into bringing it to him. With the help of a dying scientist, the two Jedi traced the Planet Prison's signal to the ruins of the Jedi Temple, and they confronted the Sith Lord in the depths of the damaged edifice. Tarnis, who revealed his identity as the son of the Sith Lord Darth Angral, battled the pair in a fierce duel before holograms of his father and Angral's apprentices as the Planet Prison inched ever closer to activation. To Angral's fury, the duel ended with the death of Tarnis at the hands of the Knight, and the Sith Lord would embark on a crusade of vengeance against the entire Republic in response.
Prelude
- "All I've ever wanted was to protect the Republic. I was stationed here when the Empire attacked Coruscant. Saw the Jedi Temple destroyed. All those Padawans and Masters cut down… I started these weapon projects in their honor."
- ―Var Suthra
The events on the planet Coruscant had their beginnings in the last days of the Great Galactic War between the Galactic Republic and the resurgent Sith Empire. The Empire deceived the Republic with sham peace negotiations on the Core World of Alderaan while they attacked the Republic's capital in what would become known as the Sacking of Coruscant. After a strike team led by Sith Lords Darth Malgus and Adraas destroyed the Jedi Temple and took down the planet's defense grid, massacring a great number of Jedi in the process, the Sith Lord Darth Angral held the capital hostage with an invasion fleet.[10] The Empire then forced the Republic into signing the Treaty of Coruscant,[11] requiring the Republic to withdraw its forces from across the galaxy and beginning an uneasy peace known as the Cold War. The Jedi Order migrated to their recently rediscovered homeworld of Tython, where they rebuilt their numbers amidst scattered attacks by the native Flesh Raiders.[12]
These attacks would take on a sinister purpose in the year 3643 BBY,[3] when it was discovered that the Nautolan Dark Jedi Bengel Morr was manipulating the natives against the Order in an attempt to destroy the Jedi. The former apprentice of Jedi Master Orgus Din, Morr had been inside the Temple on Coruscant during Malgus' attack and was presumed dead when his body was not recovered. However, he had actually escaped the attack and subsequently went insane, turning to the dark side of the Force and blaming the Jedi for submitting to the Sith.[13] Morr's Flesh Raider forces began to attack the Jedi in an attempt to destroy them,[12] but Din and his newest apprentice uncovered the Dark Jedi's plans and put a stop to them.[9] For rescuing Din from his former student and defeating Morr[9] with the help of a Jedi astromech droid designated T7-O1,[14] Din's Padawan was elevated to the rank of Jedi Knight by Grand Master Satele Shan and sent to Coruscant with T7-O1 and Din.[9]


Doctor "Eli Tarnis"
The agents of the Empire were also busy during the decade following the Treaty, however. Angral's son Tarnis, who was trained in the ways of the dark side by Angral's own apprentice Lord Praven,[15] entered into an undercover mission on the Republic capital itself. Under the alias "Eli Tarnis," he masqueraded[8] as a Republic scientist and inserted himself into the development team for the Planet Prison superweapon,[2] where he gathered information on the Republic's weapon projects.[8] The Planet Prison was one of many weapons projects started by Mon Calamari General Var Suthra in honor of the Jedi killed during the destruction of the Jedi Temple,[5] and by 3643 BBY[3] the weapon was in prototype stage.[2]
The mission
Deception
- "Thirty-two hours ago, thieves raided a military storehouse. They stole weapons, supplies and data files for the Planet Prison project."
- ―Agent Galen
Around that time, the Jedi High Council had become concerned about a seemingly dark presence that they could sense on the capital even all the way from Tython in the Deep Core. The Council had dispatched Jedi Master Bela Kiwiiks and her Padawan Kira Carsen to Coruscant during the war with the Flesh Raiders in order to investigate, and Tarnis sensed that his mission was in jeopardy. Therefore, he approached Salarr, the leader of the Black Sun criminal syndicate, and revealed his true identity as a Sith Lord. In exchange for Imperial weapons and technology[7] acquired through Tarnis' contacts[8] in the Imperial-friendly Justicars' Brigade paramalitary group,[16] Black Sun would help the Sith in the elaborate deception he was about to perpetrate.[7]


Vistis Garn, one of the many pawns in Tarnis' game
At Tarnis' request,[7] Black Sun sent a team of thieves led by the Rodian Vistis Garn—who often worked for Black Sun's rival, the Migrant Merchants' Guild—to raid a military warehouse in order to steal the design files[2] for all of the Republic's superweapon projects.[6] The raid was successful, and Garn's team made off with the files and a shipment of advanced weapons and munitions, but the Rodian was caught on a security camera as the group was departing for the Guild-controlled Old Galactic Market.[2] Tarnis planned to take the stolen files with him back to the Empire, but also intended to strike a blow against the Republic before leaving.[5] Agent Galen of the Republic Strategic Information Service, the Republic's primary intelligence agency, was ordered to head the search for the stolen plans, and his office worked collaborated with the Coruscant Security Force in their efforts.[2]
Thirty-two hours later, General Suthra met with Din, Kiwiiks, Carsen, and Tarnis in Conference Room 2-Aurek in the Senate Building to discuss the status of the security breach, and they were soon joined by Din's former apprentice and T7-O1. Tarnis was irritated that the Jedi disapproved of the Planet Prison weapon—as it ionized a planet's atmosphere, thus blockading a world and preventing any ships from leaving or arriving, it was a humane method of warfare that he believed the Jedi should favor. During the discussion, Galen's subordinates had identified Garn as one of the thieves and tracked him to the Old Galactic Market, causing the agent to interrupt the meeting with the news. Leaving Galen to work with the Knight and Carsen on the search, Suthra departed with Kiwiiks and Din in order to meet with Supreme Chancellor Dorian Janarus aboard the official's personal flagship, the Founder, above Coruscant.[2]
Recovery attempts
- "While you were gone, kidnappers grabbed Doctor Tarnis."
"This is the most secure building on Coruscant. It's full of guards."
"Guards never stood a chance. Whoever the kidnappers are, they knew right where to hit us." - ―Galen briefs the Knight on the situation
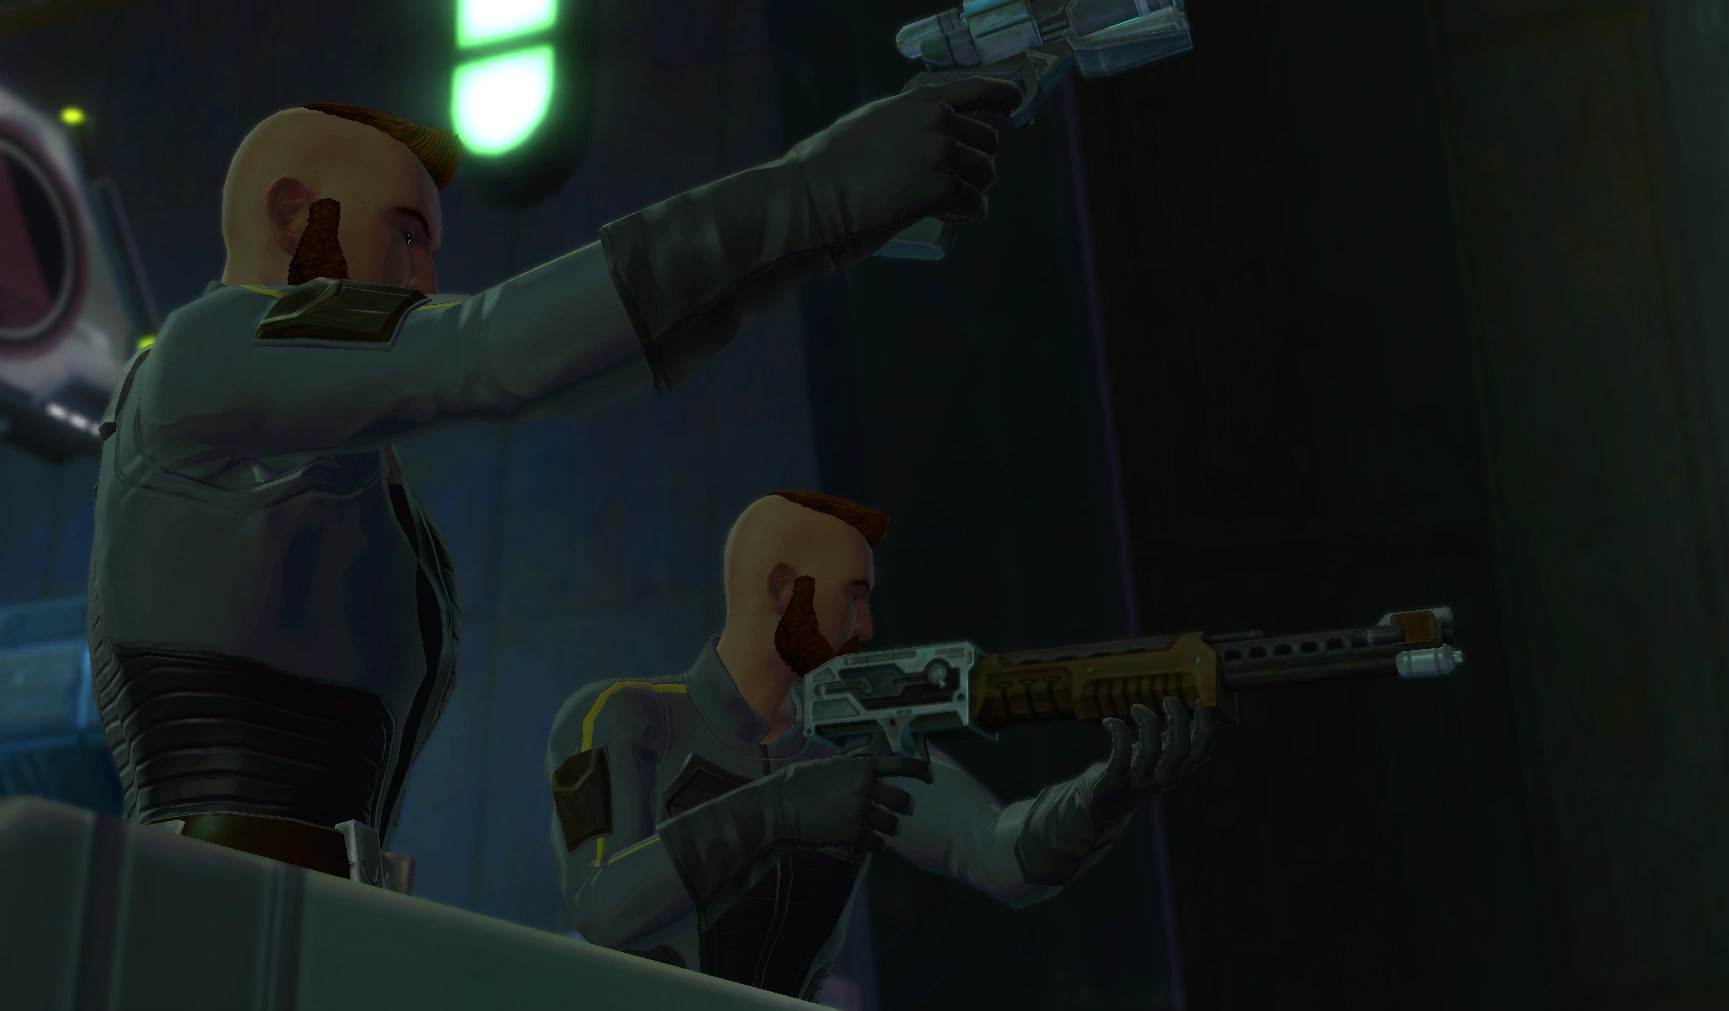
Tarnis remained behind as the two Masters departed with Suthra, and Galen gave his report to the Knight and Carsen. By that time, the SIS had tracked Garn back to the Old Galactic Market with the aid of the Coruscant Security Force, and the Knight immediately departed for the Guild's territory with T7-O1 while Carsen and Galen worked to distract the gangsters with the CSF's security network. Arriving in the Market, the Jedi and T7-O1 fought their way into the heart of the region and raided the warehouse where Garn was holed up. The Knight made short work of the Rodian's crew and stormed the secure vault into which Garn had retreated, defeating the autoturrets that the thief had set up. Interrogating Garn, the Jedi learned that Black Sun had hired him, and that a copy of the now-decrypted plans had already been sent to the gang.[2]

The CSF lay siege to the Black Sun criminals in the spaceport.
Following the Knight's departure, Tarnis put the second part of his plan in motion by signalling a Black Sun "kidnapping" team[7] led by the Human Zeer.[6] With inside information supplied by the Sith Lord,[7] the criminals infiltrated the Senate Building and made off with the scientist before they were detected by Senate Security.[6] As part of their arrangement,[7] Zeer and his men fled to the nearby Coruscant Spaceport to serve as a distraction so that Tarnis could escape to Black Sun Territory[6]—but the Sith Lord instead chose to head to the Justicars' Sector in order to continue his plans.[7] When the SIS and Senate Security realized what had transpired, Galen dispatched a CSF team under Carsen's leadership to the spaceport to retrieve the doctor[6] and ordered the Knight to return immediately when the second Jedi contacted the agent to report the outcome of the raid.[2]
Allowing Garn to leave in peace in exchange for the information, the Knight recovered the other stolen weapons and left them to be taken into custody by the CSF forces in the area[2] before returning to the Senate Building. There, the Jedi and T7-O1 were briefed on the situation and sent to the spaceport to reinforce Carsen and the CSF, who were in a stalemate with the Black Sun gang. The two Jedi were able to break the criminals' lines through the Knight's combat prowess and Carsen's use of a borrowed SIS stealth field generator, confronting Zeer and quickly defeating him. Carsen convinced Zeer to tell them where the doctor had been taken by pretending to read his mind and terrifying the criminal, and the two Jedi left the Black Sun members to the CSF as they returned to the Senate Building.[6]
The special tactical unit arrives to support the Knight.
There, they found that Galen's analysts had read through the recovered data files and discovered that they contained information on all of the Republic's superweapon projects. Suthra, having returned from the meeting with the Chancellor, was worried about the safety of the facilities, so Kiwiiks and Din agreed to each secure one of the three off-world projects. Agent Galen departed as well to secure the third facility, but before leaving he told the Knight to make contact with Sergeant Nidaljo of the CSF's special tactical unit in Black Sun Territory. Galen contacted Nidaljo as he was heading to his ship, and the special tactical unit attempted to set up a perimeter around Black Sun's headquarters for the upcoming mission to rescue Tarnis from the structure. However, the gang had attacked with advanced weapons and armor, killing half a dozen of Nidalgo's men and forcing the unit to retreat into an abandoned building. It was there that the Jedi and T7-O1 found Nidaljo and his men trapped behind a hastily erected barricade, pinned down by heavily armed Black Sun members, and the Knight quickly dispatched the criminals.[7]
The police officer was ready to give up hope, but the Knight reminded him of his duty and how the fallen members of his squad had given their lives to aid the man trapped inside the enemy headquarters. Inspired by the Jedi, the entire unit rallied to the Knight's call to arms and prepared to launch their attack. Nidaljo's men targeted the rear entrance of the compound, while the Knight and T7-O1 stormed the front entrance and reached the central room first—where the pair were astonished to discover that Tarnis was not present in the building, but was in fact speaking with Salarr, Black Sun's leader, via a holotransmission.[7]
A traitor revealed
- "You won't get away with betraying the Republic, Doctor Tarnis."
"The name is Lord Tarnis. I've shed that old skin." - ―Tarnis and the Jedi Knight


Tarnis betrayed Slarr as soon as he was no longer useful.
Listening to Salarr's angry exchange with Tarnis, the Knight learned that the entire affair had been staged—Tarnis had hired the criminals to steal the files and kidnap him. When the Jedi accused the scientist of treason, Tarnis revealed that he was in fact a Sith Lord, and ended the transmission after informing Salarr that his services were no longer required. Furious, Salarr turned to confront the Jedi, but Nidaljo's unit burst into the room at that moment and shot the Black Sun member who was sneaking up on the Knight. Together, the CSF and the Jedi fought and defeated Salarr's men, striking down the syndicate's leader and dealing a crippling blow to Black Sun's operations. While Nidaljo's men retreated to a safer location and the Knight returned to the Senate Building,[7] Tarnis began to put the third stage of his plans in motion. Upon arriving in the Justicars' Sector, he contacted his research team and informed them that the Jedi were planning on shutting down the Planet Prison project. Imploring them to do the right thing for the Republic, he convinced the scientists to bring the prototype to him in the Justicars' Tower. But when the team arrived, Tarnis turned on them and massacred his subordinates before taking the prototype deep into the ruins of the Jedi Temple.[8]
Back in the Senate Building, General Suthra was both furious and horrified that a Sith had infiltrated his people so easily, and when Carsen traced Tarnis' holotransmission to the Justicars' Sector, he immediately dispatched the two Jedi to recover both the prototype and the research team—whom he also suspected were traitors. But once the two Jedi fought their way to the source of the transmission, they found the bodies of the research team and realized the truth. One scientist, a man named Jonkan, was still alive, and with his last breaths he managed to tell the Jedi that the Planet Prison required time to charge and how it generated immense amounts of heat while doing so. Using that information, Carsen located the Planet Prison in the Jedi Temple,[8] and the two Jedi raced through the industrial sector known as the Works to reach the Temple.[5]

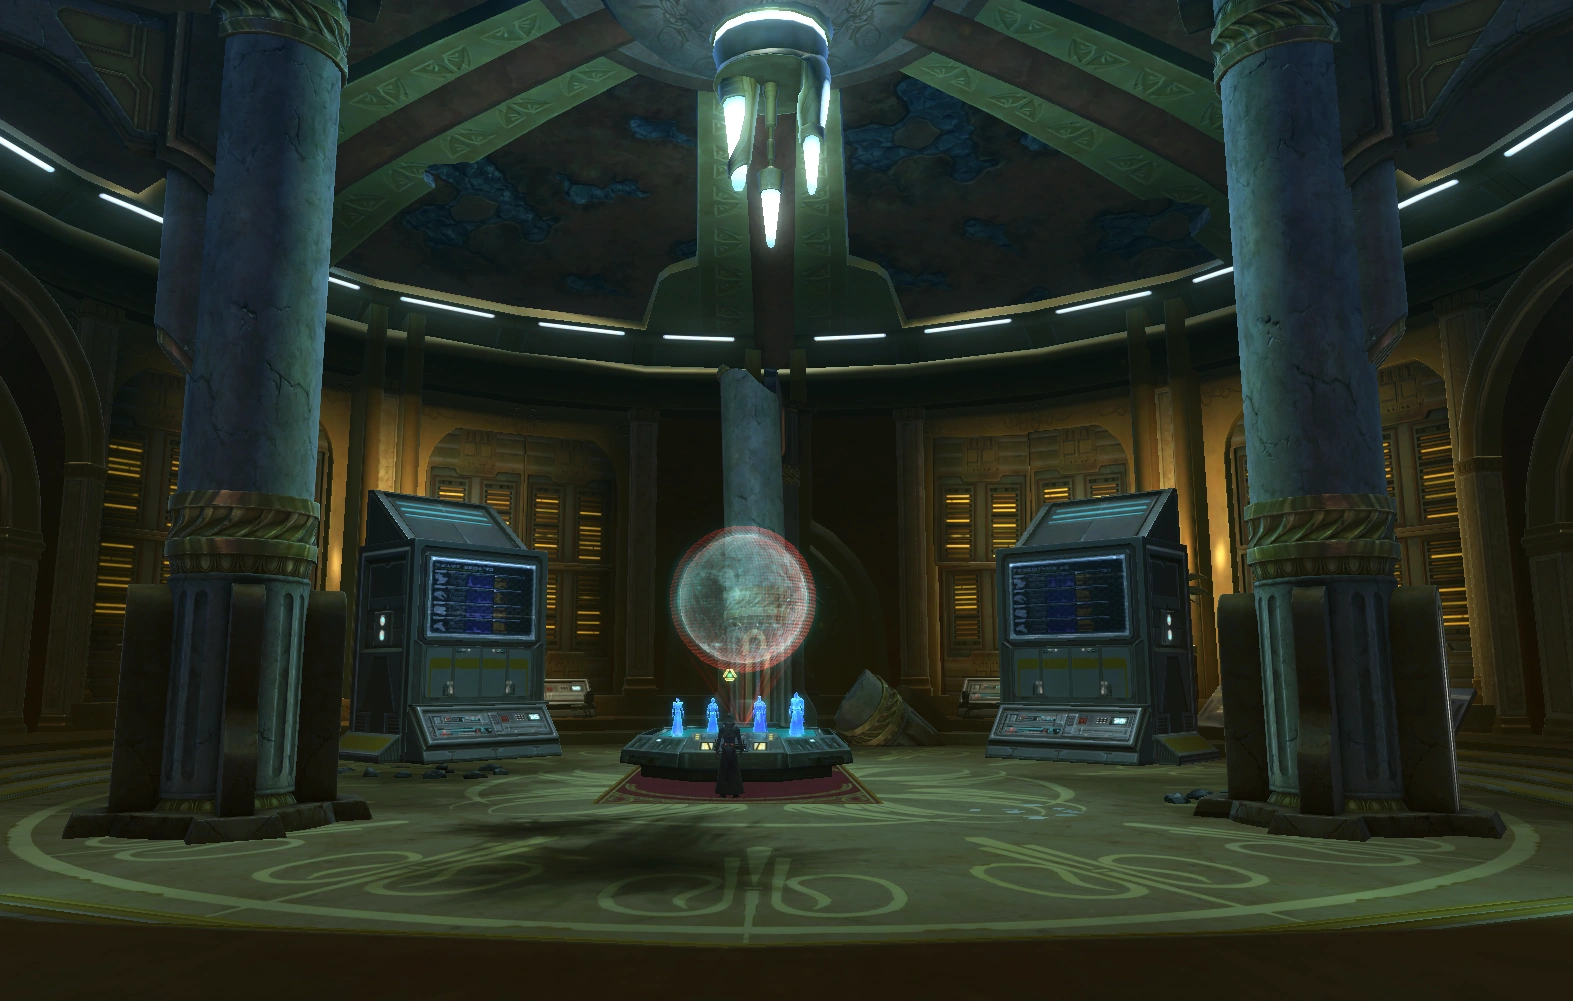
The Planet Prison, set up in the Jedi Temple
Fighting through Imperial strike teams[5] searching for lost information amidst the ruins,[17] the Knight and Carsen finally located Tarnis in the chambers of the Jedi Council. Having set up the machinery of the Planet Prison in the chamber, Tarnis was using the Temple's own power grid to charge the superweapon while he conversed with four holograms. Listening to the conversation, the Knight and Carsen were shocked to discover that the people were Darth Angral and his apprentices, Lords Sadic, Nefarid, and Praven; but they were more astonished to hear Tarnis call Angral "father."[5]
Approaching the Sith Lord, the Knight asked Tarnis to surrender peacefully, but the older man was egged on by both his father and Angral's apprentices so that he charged the two Jedi, unleashing a blast of violet lightning. The three engaged in a fierce duel before the holoterminal, and Angral watched in horror and fury as his son was slowly beaten back and finally struck down by the Knight's lightsaber. Consumed by anger and grief, the elder Sith Lord declared undying hatred upon his son's killer, and promised the Knight that he would exact his revenge even if it meant destroying the entire Republic. After Angral ended the communication, the Knight and Carsen inspected the Planet Prison. They found that it was not yet fully charged, and the two Jedi were able to disable it and return to the Senate Building safely.[5]
Aftermath
- "I will inflict unimaginable suffering on your people. Billions will die because of you. […] My son's death will be avenged on the entire Republic—and you will bow down before I let you die."
- ―Darth Angral


Angral's hatred would consume entire worlds as he sought revenge.
While the crisis on Coruscant ended with the deactivation of the Planet Prison, the mission would have far-reaching consequences. True to his world, Angral embarked on a crusade against the Knight, including both the Republic and the Jedi Order in his mad quest for revenge.[1] Sending his apprentices and agents to various worlds, he took advantage of his son's information and seized control of the Republic's superweapon projects, combining them into a ship-mounted world-killer weapon[18] known as the Desolator.[1]
Traveling with T7-O1 and Carsen, who was made the Knight's official Padawan by Grand Master Shan,[1] the Jedi battled Angral's apprentices and Imperial Intelligence in order to destroy the stolen superweapons before they could be used against the rest of the galaxy.[18] The trio finally faced Angral aboard his flagship, the Oppressor, above Tython after the Sith Lord used the Desolator against the Republic agriworld of Uphrades. Together, the Knight and Carsen were able to strike down the Sith and end the crisis.[19]
Behind the scenes
- "We already control your secret weapons facilities. All that power is ours, now."
- ―Lord Nefarid introduces the plot line of Act I for the Jedi Knight class
The mission to Coruscant appears in Star Wars: The Old Republic, a massively multiplayer role-playing game released by BioWare and LucasArts.[20] The mission represents the in-universe events of the Jedi Knight class' Prologue on Coruscant, which is divided into six in-game missions: "The Jedi Envoy," "Stolen Secrets," "Kidnapped!," "The Rescue," "Tracking Down the Traitor," and "Race to the Ruins." As it is the Prologue of the class storyline, the mission sets up the storyline of Act I, and introduces many characters who appear later throughout the game.


The duel is the first time that Jedi Knight players face an actual Sith in their class storyline.
Kira Carsen is gained as a companion at the end of the planet storyline, and General Suthra sends the player to various planets throughout Act I.[1] Bela Kiwiiks will later be encountered on Tatooine,[21] Orgus Din on Alderaan,[22] and Agent Galen on Nar Shaddaa,[23] where they have all been captured or otherwise impaired by the Sith. Angral's apprentices are also introduced in the confrontation with Tarnis, and they serve as the main enemies on Tatooine, Alderaan, and Nar Shaddaa.[21][22][23] The player is first sent to Ord Mantell to recover information on Angral's plans,[1] and on Taris the Knight attempts to rescue the scientist Doctor Nasan Godera from Watcher One of Imperial Intelligence.[24]
As a Republic player, the Knight is assumed to make only light-side decisions throughout the course of the game,[25] although most details of the storyline are consistent across all alignment options. Regardless of player choice, Tarnis[5] and Salarr will both die,[8] though both Vistis Garn and Nidaljo can be handled differently. Vistis Garn can be killed for dark side points,[2] and Nidaljo can be forced to aid the player through a mind trick, although this also results in dark side points.[8] The mission is also summarized in the 2012 reference book Star Wars: The Old Republic Encyclopedia, during an overview of the Jedi Knight class' storyline.[26]
Appearances
- Star Wars: The Old Republic (First appearance)
- Star Wars: The Old Republic: Rise of the Hutt Cartel (Mentioned only)
Sources
Notes and references
- ↑ 1.0 1.1 1.2 1.3 1.4 1.5 1.6
 Star Wars: The Old Republic — Jedi Knight Mission: "New Intelligence" on Ord Mantell
- ↑ 2.00 2.01 2.02 2.03 2.04 2.05 2.06 2.07 2.08 2.09 2.10 2.11 2.12 2.13 2.14 2.15 2.16 2.17 2.18 2.19 2.20 2.21 2.22 2.23 2.24 2.25 2.26 2.27 2.28 Star Wars: The Old Republic — Jedi Knight Mission: "Stolen Secrets" on Coruscant
- ↑ 3.0 3.1 3.2 3.3
 STAR WARS: The Old Republic - Question ! :) - Page 3 on The Old Republic's official website (backup link) places Star Wars: The Old Republic about ten to twelve years after the signing of the Treaty of Coruscant, which is dated to 3653 BBY by Star Wars: The Old Republic Encyclopedia. The Old Republic—The Lost Suns 2 takes place ten years after the treaty, one week after the mission to Nar Shaddaa, and around the time of the SpecForce Incident. Since the mission and the incident are respectively part of Act I of the Jedi Knight and Republic Trooper's storylines, and the Trooper's Act I occurs concurrent to Act I of the Smuggler storyline, the general events of Act I for all classes can be assumed to occur in 3643 BBY.
The Prologue for each class immediately precedes Act I, and The Old Republic Encyclopedia places the Battle of Ilum at the end of Act III in 3640 BBY. Assuming that in-universe chronology of the Star Wars: The Old Republic events roughly aligns with the release of story content in real-life as with Forums: Dear Story Team, What Year Are We Currently In? on The Old Republic's official website (backup link), the Act III Epilogue must take place near the end of 3640 BBY since it was the chronologically latest story of the The Old Republic base game, which was released toward the end of 2011. Therefore, assuming that The Old Republic takes place over the course of three years per the former of the two aforementioned swtor.com posts, Act I takes place near the end of 3643 BBY.
STAR WARS: The Old Republic - Question ! :) - Page 3 on The Old Republic's official website (backup link) places Star Wars: The Old Republic about ten to twelve years after the signing of the Treaty of Coruscant, which is dated to 3653 BBY by Star Wars: The Old Republic Encyclopedia. The Old Republic—The Lost Suns 2 takes place ten years after the treaty, one week after the mission to Nar Shaddaa, and around the time of the SpecForce Incident. Since the mission and the incident are respectively part of Act I of the Jedi Knight and Republic Trooper's storylines, and the Trooper's Act I occurs concurrent to Act I of the Smuggler storyline, the general events of Act I for all classes can be assumed to occur in 3643 BBY.
The Prologue for each class immediately precedes Act I, and The Old Republic Encyclopedia places the Battle of Ilum at the end of Act III in 3640 BBY. Assuming that in-universe chronology of the Star Wars: The Old Republic events roughly aligns with the release of story content in real-life as with Forums: Dear Story Team, What Year Are We Currently In? on The Old Republic's official website (backup link), the Act III Epilogue must take place near the end of 3640 BBY since it was the chronologically latest story of the The Old Republic base game, which was released toward the end of 2011. Therefore, assuming that The Old Republic takes place over the course of three years per the former of the two aforementioned swtor.com posts, Act I takes place near the end of 3643 BBY.
- ↑ Star Wars: The Old Republic — Jedi Knight Mission: "The Jedi Envoy" on Coruscant
- ↑ 5.00 5.01 5.02 5.03 5.04 5.05 5.06 5.07 5.08 5.09 5.10 5.11 5.12 5.13 Star Wars: The Old Republic — Jedi Knight Mission: "Race to the Ruins" on Coruscant
- ↑ 6.00 6.01 6.02 6.03 6.04 6.05 6.06 6.07 6.08 6.09 6.10 6.11 6.12 6.13 6.14 Star Wars: The Old Republic — Jedi Knight Mission: "Kidnapped" on Coruscant
- ↑ 7.00 7.01 7.02 7.03 7.04 7.05 7.06 7.07 7.08 7.09 7.10 7.11 7.12 7.13 7.14 7.15 7.16 7.17 7.18 Star Wars: The Old Republic — Jedi Knight Mission: "The Rescue" on Coruscant
- ↑ 8.00 8.01 8.02 8.03 8.04 8.05 8.06 8.07 8.08 8.09 8.10 8.11 Star Wars: The Old Republic — Jedi Knight Mission: "Tracking Down the Traitor" on Coruscant
- ↑ 9.0 9.1 9.2 9.3 Star Wars: The Old Republic — Jedi Knight Mission: "Weapon of the Jedi" on Tython
- ↑ The Old Republic: Deceived
- ↑ Timeline 1: Treaty of Coruscant
- ↑ 12.0 12.1 Star Wars: The Old Republic — Jedi Knight Mission: "Attack of the Flesh Raiders" on Tython
- ↑ Star Wars: The Old Republic — Jedi Knight Mission: "The Face of the Enemy" on Tython
- ↑ Star Wars: The Old Republic — Jedi Knight Mission: "High-Tech Savages" on Tython
- ↑ Star Wars: The Old Republic — Jedi Knight Mission: "Tatooine" on Desert Duel
- ↑ Star Wars: The Old Republic — Mission: "A Diverting Assignment" on Coruscant
- ↑ Star Wars: The Old Republic — Mission: [Heroic] "Enemies of the Republic" on Coruscant
- ↑ 18.0 18.1 Star Wars: The Old Republic — Jedi Knight Mission: "Uphrades" on the Daybreaker
- ↑ Star Wars: The Old Republic — Jedi Knight Mission: "Fate of the Jedi" on the Oppressor
- ↑ Global Launch for The Old Republic on The Old Republic's official website (article) (backup link)
- ↑ 21.0 21.1 Star Wars: The Old Republic — Jedi Knight Mission: "The Shock Drum" on Tatooine
- ↑ 22.0 22.1 Star Wars: The Old Republic — Jedi Knight Mission: "The Death Mark" on Alderaan
- ↑ 23.0 23.1 Star Wars: The Old Republic — Jedi Knight Mission: "The Power Guard Project" on Nar Shaddaa
- ↑ Star Wars: The Old Republic — Jedi Knight Mission: "The Architect of Annihilation" on Taris
- ↑ Community consensus is to assume that the Republic classes in Star Wars: The Old Republic choose the options that provide the most light side alignment points.
- ↑ Star Wars: The Old Republic Encyclopedia