m (Adding backup links) |
Starlordbeta (talk | contribs) No edit summary |
||
| Line 17: | Line 17: | ||
|side1=Lothal rebels<ref name="Droids in Distress" /> |
|side1=Lothal rebels<ref name="Droids in Distress" /> |
||
|side2=Galactic Empire<ref name="Droids in Distress" /> |
|side2=Galactic Empire<ref name="Droids in Distress" /> |
||
| − | |side3= |
+ | |side3=[[Alliance to Restore the Republic|Rebel Alliance]] {{C|secretly}}<ref name="Fire Across the Galaxy">{{Rebels|Fire Across the Galaxy}}</ref> |
|side4= |
|side4= |
||
|commanders1=[[Kanan Jarrus]]<ref name="Droids in Distress" /> |
|commanders1=[[Kanan Jarrus]]<ref name="Droids in Distress" /> |
||
Revision as of 15:31, 10 May 2020
Warning: This infobox is missing the following parameters: unit1, unit2, unit4, unit3
- "The simplest gesture of kindness can fill a galaxy with hope."
- ―Bail Organa, to Kanan Jarrus
The mission to steal Imperial weapons was an operation undertaken in 5 BBY by the rebel crew of the Ghost to steal and, ultimately, destroy illegal T-7 ion disruptor rifles from the Galactic Empire. It was a formative operation in the early days of the Alliance to Restore the Republic.
The mission began as a means of securing credits needed to replenish their ship's supplies and continue their operations against the Empire; the crime lord Cikatro Vizago, who operated on the Outer Rim planet Lothal, was willing to pay for the weapons. The mission took the rebels to the planet Garel, which they traveled to aboard a star commuter shuttle. Aboard that shuttle was Minister Maketh Tua, who was attempting to procure the weapons from their manufacturer, Amda Wabo, with the help of two droids—R2-D2 and C-3PO, who were secretly working for Senator Bail Organa of Alderaan to destroy the weapons. The rebels were able to learn the location of the weapons in the Garel City Spaceport, and stole them before the Empire could obtain them. After a brief firefight on Garel, the rebels escaped back to Lothal.
Once on Lothal, the rebels attempted to sell the weapons to Vizago, but were quickly discovered by Agent Kallus of the Imperial Security Bureau. This led to a brief battle against Imperial forces, in which the rebels destroyed the disruptors so they could not fall into Imperial hands. The rebels escaped Agent Kallus' forces and returned the droids to Senator Organa, who was able to learn about the rebels from R2-D2. In the aftermath of the mission, the rebels became part of the fledging Rebel Alliance that Organa helped lead, though only the pilot of the Ghost, Hera Syndulla, knew of their involvement at first. They later learned of their involvement, as well as Organa's, after other rebel cells came to their assistance during mission to rescue the crew's field leader, Kanan Jarrus, from the Empire.
Prelude
- "Told you we'd get away."
"With the shipment. You said we'd get away with the shipment." - ―Kanan Jarrus and Sabine Wren, after the Ghost escaped Imperial forces
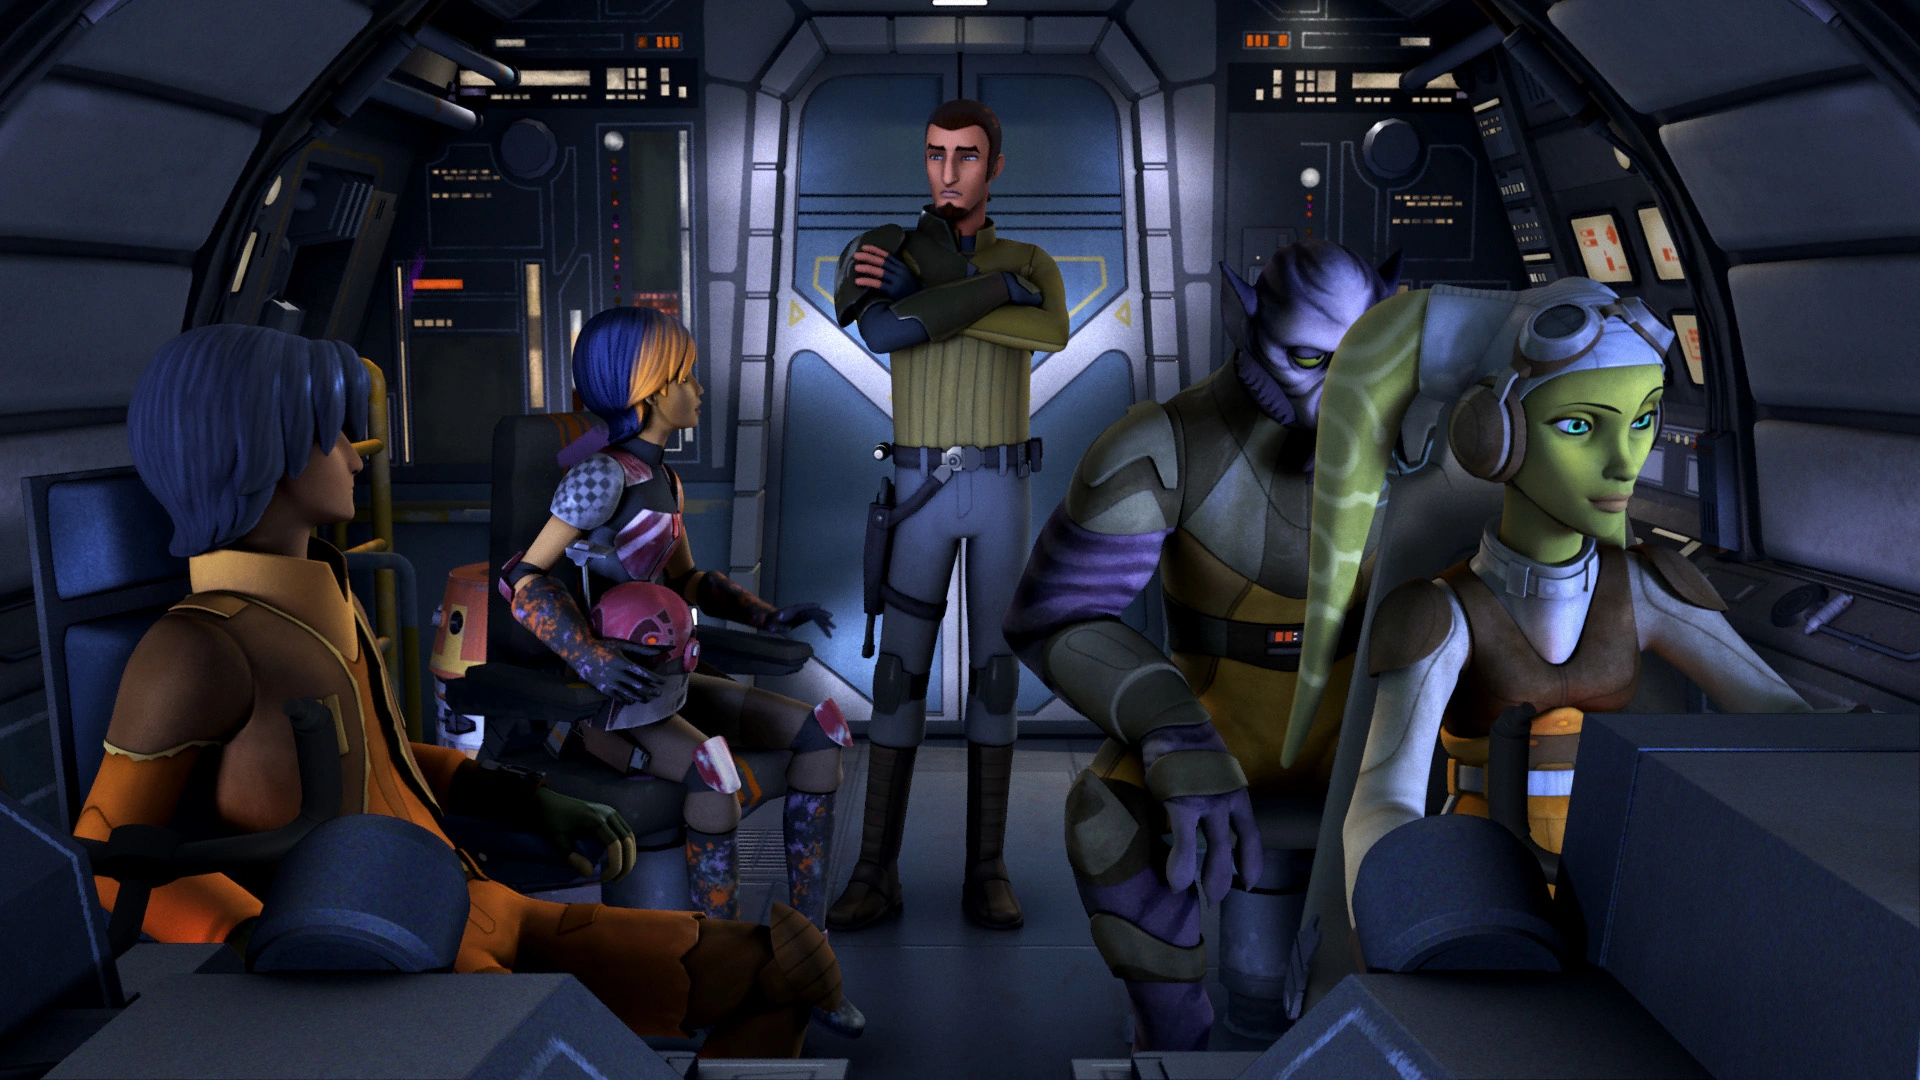
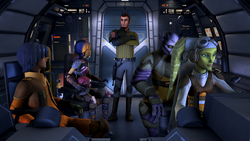
The rebels discuss taking a job from Cikatro Vizago.
In 5 BBY,[source?] the rebel crew of the freighter Ghost carried out a number of operations against the Galactic Empire on the Outer Rim planet Lothal. Shortly after their successful mission to rescue Wookiee slaves from the spice mines of Kessel, the crew ran low on supplies, including food, explosives, and fuel. They attempted to steal a shipment of supplies from the Empire, but ended up in battle with an Imperial-class Star Destroyer and a squadron of TIE/ln space superiority starfighters. The Ghost was able to escape from the Imperial forces, but without the supplies the crew was hoping to obtain. They knew that if they did not obtain supplies or money, they would not be able to continue fighting against the Galactic Empire or even maintain the operations of the Ghost. Kanan Jarrus, the field leader of the rebel crew, suggested that they take a job from Lothal crime lord Cikatro Vizago. The idea was met with resistance by the Lasat crew member Garazeb Orrelios, who objected to taking a job as arms dealers for the Devaronian criminal, but Padawan Ezra Bridger agreed with Jarrus, his Jedi teacher. The rebel leader said he already knew the mission, which was to intercept an Imperial arms deal on the planet Garel. After some further discussion, the crew headed to Capital City on Lothal to begin their mission.[2]
Meanwhile, the Empire prepared for their arms deal, where Minister Maketh Tua of Lothal would meet with weapons manufacturer Amda Wabo to obtain Wabo's T-7 ion disruptor rifles on Garel; the disruptors, which could be used to gruesome effect on sentient beings, had previously been banned by the Imperial Senate after their use in the near-extinction of the Lasat species. In order for Tua to understand Wabo, an Aqualish, she would be assisted by two droids, the astromech droid R2-D2 and and the protocol droid C-3PO.[2] The droids were loaned to Lothal's governor, Arihnda Pryce, by Senator Bail Organa of Alderaan,[6] who secretly wanted the illegal weapons destroyed. However, only R2-D2 was aware of their true motives; the chatty C-3PO was kept in the dark.[2]
The mission
Stealing the disruptors
- "They're T-7 disruptors. These were banned by the Senate. You can short-circuit an entire ship with these."
"That's not why they were banned." - ―Sabine Wren and Garazeb Orrelios
Upon arrival at the Capital City starport, the rebels boarded a Star Commuter 2000 transport shuttle bound for Garel,[2] which was only a few minutes away from Lothal via hyperspace.[7] In order to avoid suspicion, as well as enact a plan to locate the weapons, the rebels boarded the shuttle pretending to not know one another; Bridger and the rebels' astromech droid, C1-10P—also known as Chopper—sat together, while Orrelios and Wren sat across from them. Tua and Wabo soon arrived and were seated in front, just ahead of Orrelios and Wren. R2-D2 and C-3PO arrived shortly thereafter, followed by Jarrus, who arrived at the shuttle at the last minute while pretending to be running late. Once all were aboard, the shuttle departed from Lothal and made the jump towards Garel.[2]
While en route to Garel, Chopper made a scene by pretending to start a fight with Bridger, so as to draw attention towards them. Jarrus, still acting as a stranger, demanded that the pilot droid, RX-24, enforce the Imperial regulations regarding droids in the passenger area. With Chopper sent to the back of the shuttle, Bridger demanded that C-3PO and R2-D2 also be sent to the back. Despite Tua's objections, as she needed them for her mission, RX-24 sent the two Imperial droids to the back of the shuttle. With Tua unable to understand Wabo, Wren offered her services as a translator, posing as a loyal student from the Imperial Academy. In Aqualish, Wren asked Wabo where the shipment of T-7 disruptors was being held on Garel. Wabo told her they were in Bay 7, but Wren misled Tua and told the Minister that they were in Bay 17, a lie that would give the rebels time to steal the weapons before the Empire could get to them.[2]


Bridger jumps across rooftops to reach Bay 7.
The ship arrived in the Garel City Spaceport moments later, and the rebels and Imperials disembarked. While the Empire headed for the wrong cargo bay, the rebels began the next phase of their plan. Bridger was tasked with crawling through a ventilation system and reaching Bay 7, where he would unlock the door for the rest of the crew. Bridger, who had been a thief while living alone on Lothal, resented having to resort to stealing and infiltration again, as he had joined the crew of the Ghost so Jarrus could train him as a Jedi—training that had yet to begin. He made his way to a rooftop and across a number of others before arriving at the cargo bay, where he found the cache of weapons and opened the door for the others. Once Jarrus, Wren, and Orrelios arrived, Syndulla—who made her way to Garel aboard the Ghost—landed the ship.[2]
As the Ghost landed, the rebels inspected the weapons and realized that they were T-7 disruptors. Orrelios was horrified at the discovery, as he had seen them used against his people. Despite Orrelios' reluctance, Jarrus ordered that the weapons be loaded onto the Ghost. Meanwhile, the Imperials arrived in Bay 17 and found that there were no weapons. Wabo stated that they were in Bay 7, which C-3PO translated for the Minister. Tua ordered her stormtroopers to head for the correct cargo bay, where the rebels were still loading the weapons. Chopper, who was spying on the Imperials, was discovered, prompting Tua to realize that she had been tricked by Wren and the rebels.[2]

Orrelios fights a group of stormtroopers.
The Imperials arrived in Bay 7 just as the cargo crates were being loaded. The stormtroopers demanded that the rebels surrender, but, while Orrelios distracted the Imperials, the weapons continued to be loaded onto the Ghost. As the stormtroopers attempted to inspect the crates, which Orrelios claimed were his, the Lasat attacked the soldiers, leading to a firefight between the Imperials and the rebels. During the firefight, R2-D2 realized that the thieves were rebels and led C-3PO aboard the Ghost, which took off and departed Garel once the remaining weapons were loaded. Jarrus ordered restraining bolts to be placed on the droids, not realizing what their true mission was.[2]
The realization that the mission was to steal the disruptors led to some debate amongst the crew, a debate that R2-D2 recorded. Orrelios did not want to sell the disruptors to Vizago, instead wanting to destroy them so they could never be used again. Wren was thankful that, at the very least, they were out of Imperial hands, as she had learned through her translating that the Empire intended to mass produce them on Lothal. Jarrus was satisfied that the Empire could not have the weapons, but was insistent that they still sell the weapons to Vizago for the credits the crew needed. Wren also suggested selling C-3PO and R2-D2 to Vizago for extra credits.[2]
While the rebels were en route to Lothal, Minister Tua contacted Agent Kallus of the Imperial Security Bureau,[2] who had taken an interest in the rebels during their rescue mission on Kessel.[3] Tua informed the ISB Agent of the weapons theft and described the crew, including how one crew member was a Lasat, prompting Kallus to realize it was the rebels he had been tracking.[2]
Battle on Lothal
- "Sabine, destroy the guns."
"Ha. Now you're speaking my language." - ―Kanan Jarrus and Sabine Wren


C-3PO speaks to Agent Kallus.
After Jarrus confirmed the crew's rendezvous with Vizago, the Ghost landed in the crime lord's encampment on Lothal. Before the crew disembarked, R2-D2 revealed that his real mission was to ensure that the disruptors did not fall into Imperial hands and that his master—whom the droid did not identify as Senator Organa—would provide a generous reward if the droids were returned to him. Jarrus said he would consider it, but nonetheless pushed ahead with his plan to sell the weapons to Vizago. While the rebels unloaded the weapons, C-3PO sent a distress call to Governor Pryce, saying that he and R2-D2 had been abducted by criminals. The signal was intercepted aboard Kallus' ship, the Lawbringer, and Kallus himself replied to the worried protocol droid. C-3PO, who believed Kallus would rescue him, sent the ISB Agent the location of the Ghost.[2]
As Imperial forces prepared to attack the rebels, Vizago inspected the weapons that the crew had stolen for him. Before Vizago could pay the rebels, however, Kallus' forces arrived, including multiple stormtroopers and two AT-DP walkers. Vizago fled the scene with some of the disruptors, unwilling to pay for only half a shipment, and left the rebels behind to deal with the Imperial forces. Unwilling to risk the disruptors falling into Imperial hands, Jarrus ordered Wren to destroy them. R2-D2, who disembarked from the ship with C-3PO, offered his assistance in destroying the weapons, thus fulfilling Senator Organa's orders. R2-D2 suggested overloading the disruptors so they would explode, a plan that Wren agreed with. Jarrus took one of the weapons for himself in order to eliminate the AT-DPs, while the rest of the crew helped Wren.[2]


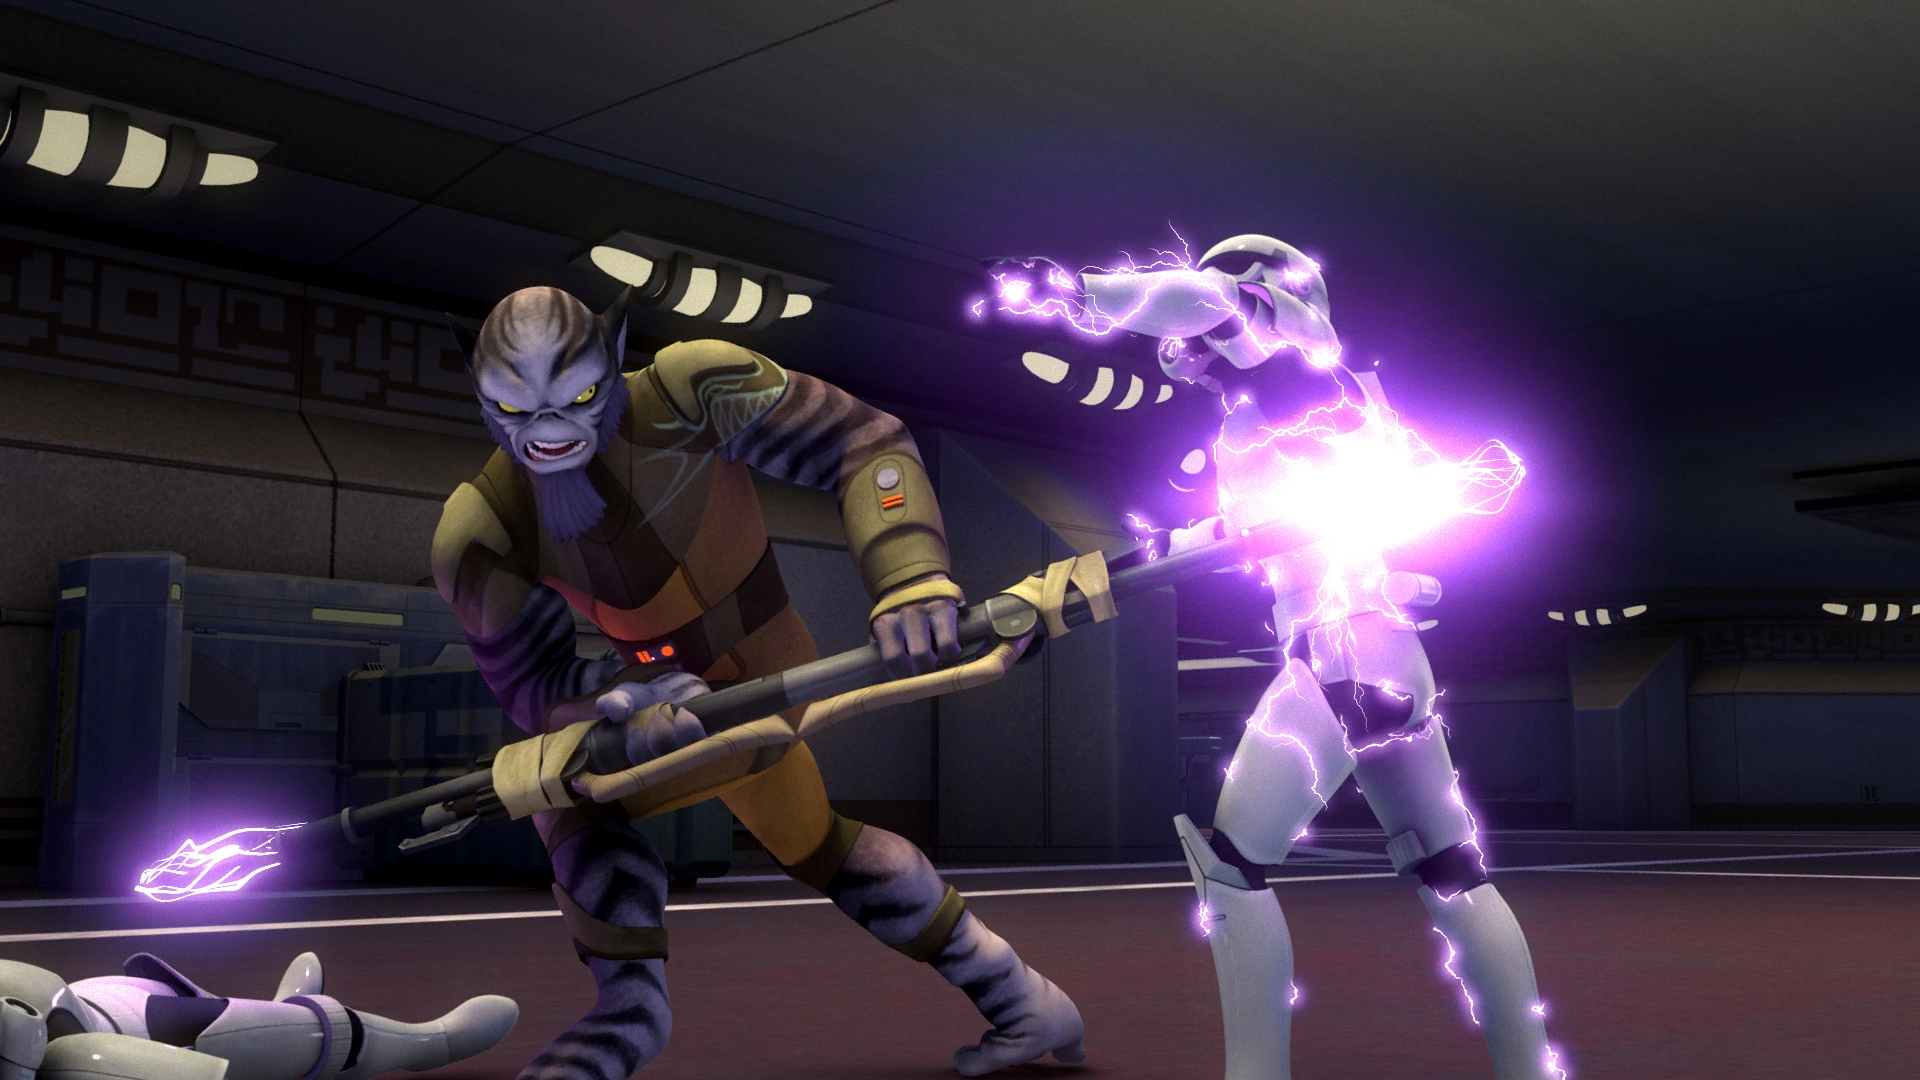
Jarrus uses a disruptor to fire on an AT-DP.
The walkers began firing on the rebels' location, and Jarrus took one of them out. Orrelios and Bridger ran to his aid once a walker fired at him, and they watched as Kallus and his stormtroopers approached. Once Kallus saw Orrelios, he demanded that the Lasat face him in combat. The two fought using AB-75 bo-rifles, the weapon of the Lasan High Honor Guard—Kallus revealed he had stolen the weapon from a Lasat he had killed, and that Kallus himself had personally ordered the use of the disruptors on Lasan. Enraged, Orrelios continued fighting against the ISB Agent. While the two fought, the rebels overloaded the disruptors and pushed them towards the remaining walker and the stormtroopers, triggering explosions that took out both the weapons, the soldiers, and the AT-DP.[2]
The resulting explosions triggered a small ground tremor, causing Orrelios to lose his balance. Kallus found the upper hand and nearly killed his opponent, before Bridger spontaneously used the Force to throw Kallus through the air, away from Orrelios. The rebels were able to use that as an opportunity to grab Orrelios and return to the Ghost, which took off and departed Lothal, leaving Kallus behind.[2]
Aftermath
- "We'll focus on the Imperials later. For now, show me what you have on your... rebels."
- ―Bail Organa, to R2-D2


Organa asks R2-D2 to tell him about the rebels.
After escaping from Kallus, the crew regrouped on the Ghost, where Orrelios thanked Bridger for saving him and Jarrus told Bridger that his formal Jedi training would start the next day. Shortly thereafter, the Ghost docked with Senator Organa's corvette, the Tantive IV, where Jarrus returned the droids to the grateful senator—though the rebels did not know who Organa was. In exchange for returning the droids, Organa provided them with a monetary reward. Jarrus disembarked, and R2-D2 gave Organa the recordings he had made on the rebel cell.[2] Unknown to Jarrus, Organa was also part of fledging Rebel Alliance that communicated with and gave missions to rebel cells across the galaxy. As a result of the mission, Syndulla came into contact with Ahsoka Tano, one of the leaders of the movement.[1] Tano, who identified herself only as "Fulcrum," would often send the rebels missions to strike against the Empire.[8]
Bridger's actions in saving Orrelios' life remained a source of contention between the two for a short time after the mission. Bridger frequently reminded Orrelios, with whom he shared quarters aboard the Ghost, of how he saved the Lasat's life from Agent Kallus, leading to fighting between the two bunkmates. The fighting intensified enough that Syndulla sent both of them on a supply run together, in order to get them off of the ship. During the supply run, the two inadvertently found themselves in a skirmish with Imperial forces and stole a TIE fighter, which they then used to attack a group of Imperial Troop Transports and rescue imprisoned civilians. The situation allowed Bridger and Orrelios, who had to work together to return to the Ghost, to settle their differences.[4]
The crew encountered Organa again some time later, during a mission to rescue Jarrus from Imperial captivity; Jarrus had been captured by Grand Moff Wilhuff Tarkin, who wanted to learn about the wider rebel movement. Chopper sent a message to "Fulcrum" and asked for reinforcements to assist them in their battle against the Empire in orbit of the planet Mustafar. A rebel fleet arrived in orbit of Mustafar and helped the crew escape from the Empire, marking the first time rebel cells began openly working together. Once the rebels were in hyperspace, Organa contacted the crew via hologram, where Syndulla revealed his true identity. The crew also met Tano and learned that she was Fulcrum.[1]
During the liberation of Lothal, Vizago openly regretted meeting Bridger that day because it had put him on the Empire's radar permanently.[9]
Behind the scenes
The rebels' mission to steal the T-7 ion disruptor rifles was the central plot of "Droids in Distress," the first regular series episode of the animated television series Star Wars Rebels.[2] The event was first referenced in Star Wars Rebels: The Visual Guide, a reference book that introduced the characters and settings of the show, and was described as an arms deal in which C-3PO and R2-D2 encountered the rebels and went on "an unexpected adventure." The Visual Guide also introduced the fact that the droids were on loan to Governor Pryce by Senator Organa, thereby setting up the backstory of the episode.[6]
Highlighting how the Imperial regime would sometimes avoid the authority of the Imperial Senate, StarWars.com drew a comparison between the illicit Imperial arms deal in "Droids in Distress" and the capture of Princess Leia Organa in Star Wars: Episode IV A New Hope. In the episode, the Empire arranges for the arms deal in secret so as to avoid the attention of the Imperial Senate, whereas A New Hope implies that the Imperial Senate would not approve of the fact that Darth Vader and the Empire boarded the Tantive IV and took Princess Leia captive.[7]
Appearances
 Star Wars Rebels — "Droids in Distress" (First appearance)
- Spark of Rebellion: A Star Wars Rebels Cinestory Comic
- Droids in Distress chapter book
- Star Wars Rebels — "Fighter Flight" (Mentioned only)
- "Sabotaged Supplies" — Star Wars Rebels Magazine 7 (Indirect mention only)
- Star Wars Rebels — "Fire Across the Galaxy" (Indirect mention only)
- Star Wars Rebels: The Ultimate Guide
- Star Wars Rebels — "A Fool's Hope" (Indirect mention only)
Non-canon appearances
- LEGO Star Wars: Droid Tales — "Mission to Mos Eisley" (In flashback(s))
Sources
Notes and references
- ↑ 1.0 1.1 1.2
 Star Wars Rebels — "Fire Across the Galaxy"
- ↑ 2.00 2.01 2.02 2.03 2.04 2.05 2.06 2.07 2.08 2.09 2.10 2.11 2.12 2.13 2.14 2.15 2.16 2.17 2.18 2.19 2.20 2.21 2.22 2.23 2.24 2.25 2.26 2.27 2.28 2.29 2.30 2.31 2.32 2.33 2.34 2.35 2.36 2.37 2.38 2.39 2.40 2.41 2.42 2.43 2.44 2.45 2.46 2.47 2.48 2.49 2.50 Star Wars Rebels — "Droids in Distress"
- ↑ 3.0 3.1 Star Wars Rebels: Spark of Rebellion
- ↑ 4.0 4.1 Star Wars Rebels — "Fighter Flight"
- ↑ Star Wars: Galactic Atlas places the events of Star Wars Rebels: Spark of Rebellion and "Fighter Flight" in 5 BBY. As "Droids in Distress" (in which the Mission to steal Imperial weapons) takes place between Spark of Rebellion and "Fighter Flight," the Mission to steal Imperial weapons must also take place in 5 BBY.
- ↑ 6.0 6.1 Star Wars Rebels: The Visual Guide
- ↑ 7.0 7.1 "Droids in Distress" Trivia Gallery on StarWars.com (backup link (tv-shows/droids-in-distress-trivia-gallery) not verified!)
- ↑ Star Wars Rebels — "Out of Darkness"
- ↑ Star Wars Rebels — "A Fool's Hope"