| | |


Warning: This infobox is missing the following parameters: parents, pronouns, children, siblings, partners, families, feathers
- "There are things in the universe that are simply and purely evil. A warrior does not seek to understand them, or to compromise with them. He seeks only to obliterate them."
- ―Thrawn
Mitth'raw'nuruodo, better known by his core name Thrawn, was a Chiss male officer of the Chiss Ascendancy and Grand Admiral of the Imperial Navy during the reign of the Galactic Empire. An alien Imperial officer with striking blue skin, red eyes, and an angular face, Thrawn was well known as a brilliant and ruthless strategist. He believed that in order to achieve victory in war, one must know their enemy. As such, he dedicated himself to understanding the philosophy, art, and culture of his opponents, which included the Twi'leks of Ryloth and the warriors of Mandalore. When Governor Arihnda Pryce requested a strong commander capable of defeating the rebels on Lothal, Grand Admiral Thrawn accepted the challenge, intending to dismantle the rebellion one piece at a time.
Before joining the Imperial Military, Thrawn served with the Defense Fleet of the Chiss Ascendancy. A native of the planet Csilla, located in the Unknown Regions of the galaxy, Thrawn left his homeworld and traveled to known space where he encountered the Jedi Knight Anakin Skywalker during the Clone Wars. Following the Galactic Republic's reorganization into the Galactic Empire, Thrawn offered his allegiance to Emperor Palpatine, having deemed an alliance with the new regime beneficial to his people. With the help of Cadet Eli Vanto, Thrawn assimilated into galactic society, becoming fluent in Galactic Basic and ultimately graduating from the Royal Imperial Academy on Coruscant. His career in the Navy was notably successful; after a series of promotions, he received the rank of Grand Admiral from the Emperor himself.
At the height of his career, Grand Admiral Thrawn served as commanding officer of the Seventh Fleet, the flagship of which was the Imperial I-class Star Destroyer Chimaera. Deployed to the Lothal sector a few years prior to the start of the Galactic Civil War, Thrawn sought to defeat the rebels led by Captain Hera Syndulla. Following the Battle of Atollon, Thrawn's fleet worked with the First Legion led by the Sith Lord Darth Vader, whom Thrawn once knew as the Jedi Skywalker, during a mission that resulted in the rescue of Force-sensitive Chiss girls. Resuming his task to eliminate Syndulla's cell, Thrawn and his forces were confronted by the rebels who intended to liberate Lothal once and for all. During the battle, the purrgil came to the aid of Jedi Padawan Ezra Bridger and inflicted much damage to the Seventh Fleet. Thrawn himself was on the bridge of his command ship when the creatures surrounded the Chimaera and pulled it into hyperspace, taking both Thrawn and Bridger into the great unknown. In the years following Thrawn's disappearance, the Emperor and Vader were killed at the Battle of Endor, the Empire was decisively beaten at the Battle of Jakku, and the Alliance to Restore the Republic was reorganized into the New Republic. Thrawn's knowledge of the Unknown Regions proved useful to the Imperials that retreated from the known galaxy, however, as they were able to survive in unexplored space and eventually form the First Order.
Biography
Origins and service in the Chiss Ascendancy
Mitth'raw'nuruodo,[4] better known as Thrawn, was a Chiss male[2] who hailed from Csilla[1] in the Unknown Regions, a dangerous and uncharted region of the galaxy.[7] During this time he rose through the ranks to become a well respected member of the Chiss Ascendancy.[4]
At some point during his career within the Chiss Ascendancy, Thrawn was assigned to explore the Outer Rim of the galaxy. The Ascendancy had discovered a mysterious threat in the Unknown Regions, and wished to know if the Galactic Republic would be a suitable ally against the threat.[4]
Meeting Anakin Skywalker
- "Unidentified ship, this is General Anakin Skywalker of the Galactic Republic. You are intruding on Republic equipment and interfering with a Republic mission. I order you to pull back and identify yourself."
- ―Anakin Skywalker, to Mitth'raw'nuruodo
An unlikely ally

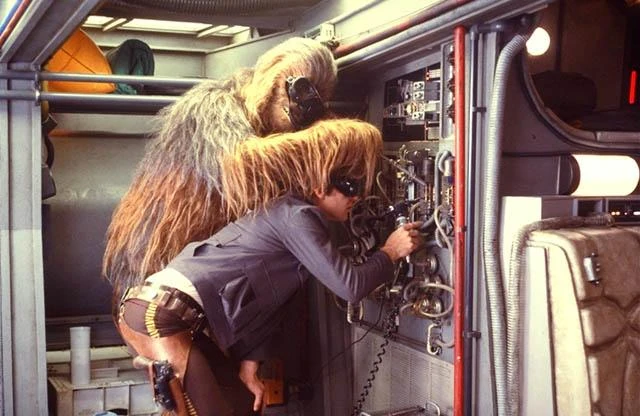
Thrawn encountered Anakin Skywalker during the Clone Wars.
Exiting hyperspace above Batuu, Jedi General Anakin Skywalker and R2-D2's Eta-2 Actis-class light interceptor encountered an unidentified freighter. Following a conversation, the intruder introduced himself as Commander Mitth'raw'nuruodo, an officer of the Chiss Defense Fleet. Thrawn sought Skywalker's assistance in learning of the Clone Wars. The Jedi agreed to help in return for Thrawn's assistance in locating Padmé Amidala and Duja.[5]
Skywalker found Padmé's ship in small forest clearing thirty kilometers from Black Spire Outpost. Skywalker fought a group of smugglers upset at the presence of Amidala's ship in their landing spot. Commander Thrawn broke up the fight. Together, he, Skywalker, and R2-D2 investigated Amidala's ship. They found no sign of forced entry but found logs indicating that Duja's ship, a Nomad Four, had left a week before Amidala's arrival. The two made arrangements to travel to Black Spire to continue their search.[5]
Skywalker and Thrawn visited a cantina in Black Spire Outpost, where they asked the bartender about Padmé and Duja's whereabouts. The two were attacked by four assailants, but subdued and killed their attackers. Thrawn deduced that the assailants had come to assassinate Skywalker and that a fifth companion was still at large. To track down the fifth companion, Skywalker came up with a plan to make it appear that one of the human assassins survived.[5]
Thrawn and R2-D2 returned to his Jedi starfighter with the body. While flying with the human assassin's body, an explosion in the Actis's portside repulsorlift caused it to descend rapidly. Skywalker managed to regain control of the ship and landed it among the trees. He was attacked by a droid assassin, but Skywalker used the Force to deflect the blaster bolt back at the droid, disabling it. Skywalker soon encountered Thrawn, who has captured the fifth assailant. The two searched the assassin's Separatist freighter.[5]
Padmé's mission
Earlier, Padmé sent a message to Skywalker as she landed on Batuu. After landing in Black Spire, she contacted Duja but heard nothing from her. After disembarking, Padmé asked a human man if he knew the whereabouts of someone named Kuseph Jovi, claiming that she had come to deliver his ship. The man directed her to a cantina in the middle of Black Spire.[5]
Padmé traveled to the cantina on her BARC speeder. In the town square, she found Duja's body in an open coffin. Inspecting the body, Padmé deduced that Duja was murdered based on her battered face and stab wounds. At the cantina, Padmé asked the bartender about how Duja died. The bartender claimed that Duja was killed in a speeder-bike accident. Padmé then composed a song for the fallen Duja.[5]
Padmé used a concealed beckon call within Duja's brooch to summon her ship to a remote forest clearing. While checking the ship's communications systems, she found out that Duja discovered a Separatist factory on Mokivj. Padmé decided to collect her belongings from her ship, sent a message to Anakin, and then departed aboard Duja's ship, which was equipped with enhanced shields and heavy weaponry.[5]
Jedi and Chiss
Returning to the present, Skywalker and Thrawn disabled the droids guarding the freighter. They discovered that the freighter was transporting alcoholic beverages and gold ingots. Thrawn deduced that the ship was transporting its goods to a Separatist manufacturing facility. They also found that crates were etched with an unfamiliar symbol. R2-D2 inspected the navigation computer and found that the Separatist ship was traveling to Cermau.[5]
Thrawn learned from the listening devices he has installed in the cantina that five individuals had entered the cantina and carried the unconscious bartender away. Thrawn explained that Chiss listening devices translated speech into powerful sonic signals which were processed by another device into a pattern of invisible flickering lights.[5]
Returning to Black Spire in their landspeeder, Anakin and Thrawn were attacked by several thugs. The wounded Thrawn rammed their landspeeder into their attackers. Following a fight, Anakin and Thrawn subdued the assailants. They questioned two prisoners, including a cargo inspector named Oenti. One of the prisoners revealed that the bartender Janott had connections to the pro-Separatist Duke Solha.[5]
Questioning their prisoners, Thrawn and Anakin determined that Padmé's handmaid Duja had discovered that the smugglers were using Batuu to smuggle supplies to a Separatist droid factory. Duja had entered a Separatist ship and contacted the Republic. However, Oenti's comrades had realized she was a spy. The smugglers had panicked and attempted to ship their gains off world. However, before their ship had arrived, the landing space had been occupied by Ambassador Padmé's ship.[5]
Oenti confirmed that Padmé landed at Black Spire and wrote a poem for the deceased Duja. Janott and Oenti denied killing Duja, and Anakin confirmed they were being truthful. When Thrawn announced that they were going to the Separatist base on Mokivj, Oenti and his companions attacked Thrawn and Anakin. Anakin slew the assailants with the exception of Janott with his lightsaber. Janott confirmed that Padmé survived and left in a different ship. Leaving the bar, Skywalker briefed Thrawn about the political dynamics of the Clone Wars.[5]
Later
Thrawn fought alongside Skywalker, finding himself impressed with Skywalker's courage and cunning. Skywalker was also impressed with Thrawn, speaking highly of him to Chancellor Sheev Palpatine when he returned to Coruscant.[4]
Thrawn was unimpressed, however, with the state of the Republic. He believed it to be unfit for an alliance with the Chiss Ascendancy, citing that the Republic's democratic style of government created a bogged-down system where everyone had a voice but nothing was accomplished.[4]
Era of the Empire
Encounter with the Neimoidians
Nevertheless, Thrawn continued his exploration of the Outer Rim until, some time after the rise of the Galactic Empire, he discovered a colony of refugee Neimoidians. The colonists warned him of the tyranny of the Empire, pleading with Thrawn to bring the full force of the Chiss Ascendancy against the Empire on Coruscant. Furthermore, they promised to help with the attack if it meant the revival of the Galactic Republic. Thrawn refused their offer, but returned to the Chiss intrigued.[4]
Faking his exile
After his encounter with the Neimoidians, Thrawn returned to the Chiss Ascendancy seeking counsel. Growing increasingly worried about the threat in the Unknown Regions, the Ascendancy ruled that the time had come to judge whether or not the Empire would be a suitable ally. Thrawn was given his mission; he would infiltrate the Empire in order to either make them an ally or to weaken them as easy prey for the threat to attack instead of the Ascendancy. In order to carry out this mission, Thrawn proceeded to fake his exile.[4]
With the help of the Ascendancy and Aristocra, Thrawn chose a planet in Wild Space and set up a hut designed to look as though Thrawn had been living in it for years. After several attempts and a few standard months, Thrawn finally managed to gain the attention of the Empire.[4]
Encounter with the crew of the Strikefast
Thrawn was away from his encampment when the Venator-Class Star Destroyer Strikefast led by Captain Voss Parck arrived at the planet searching for smugglers. As Parck, Colonel Mosh Barris, and Cadet Eli Vanto examined his encampment and the Sy Bisti markings on the crates around it in accordance with Imperial Unknown Alien protocols, Thrawn managed to crash a V-Wing starfighter surveying the planet with carefully placed monofilament line. Thrawn managed to remove the pilot's body from his flight suit, steal the pilot's blaster, power packs, comlink, and concussion grenades, stuff the flight suit with grass, leaves, and fermented pyussh berries, and escape the crash site before Major Wyan arrived at the scene to investigate.[4]
Once Wyan had brought the stuffed flight suit into the Imperial encampment for Parck, Barris, and Vanto to see, Thrawn set his plan to board the Strikefast into motion. Hiding on the edge of the encampment, Thrawn removed the sturm dowels from his stolen blaster power packs and strapped them to the backs of small nocturnal creatures as improvised explosives. Drawn by the smell of the fermented berries, the creatures ran into the Imperial encampment, exploding and causing chaos within the base.[4]
In response, Parck ordered another group of V-Wings to perform a grid search. Thrawn, realizing he would need to replace his stolen comm before they jammed it, managed to crash another V-Wing and swapped his stolen comm with the pilot's. Thrawn also stole the pilot's blaster, power packs, and concussion grenades, but did not remove the pilot's corpse from his flight suit. When Barris discovered that Thrawn had stolen the first pilot's comm he ordered that particular comm shut down. Barris did not, however, discover that Thrawn had swapped the first stolen comm with the second pilot's, so Thrawn was still able to eavesdrop on Imperial communications.[4]
Thrawn captured by Imperials
Thrawn attacked the navy troopers with explosives throughout the night, hoping to goad the Imperials into sending stormtroopers into the forest to investigate. Once the stormtroopers were sent out in search of Thrawn, he used another explosive to dispatch one in order to study the armor, jamming the Imperials' comms in order to distract from the sound of the explosion.[4]
After the screeching of the comms subsided, Barris decided that he had had enough of Thrawn's attacks, deciding to take Thrawn's hut aboard the Strikefast to study it there. Knowing the time had come for him to return to his camp, Thrawn silently killed another stormtrooper. Filling the stormtrooper's armor with explosives, Thrawn snuck the armor into the encampment and propped it up by the transport with sticks. While the Imperials were distracted by the exploding armor, Thrawn hid in a power generator casing from his camp. The casing was then loaded into a transport and taken, with the rest of Thrawn's hut and crates, to the Strikefast.[4]
Once Thrawn was aboard the Strikefast, he spent two standard hours waiting in the casing before leaving his hiding place. Moving swiftly, but not so swiftly that he wouldn't be seen, Thrawn crossed the hangar and boarded a Zeta-class cargo shuttle. When Parck sent troopers to intercept him, Thrawn allowed himself to be captured without resistance.[4]
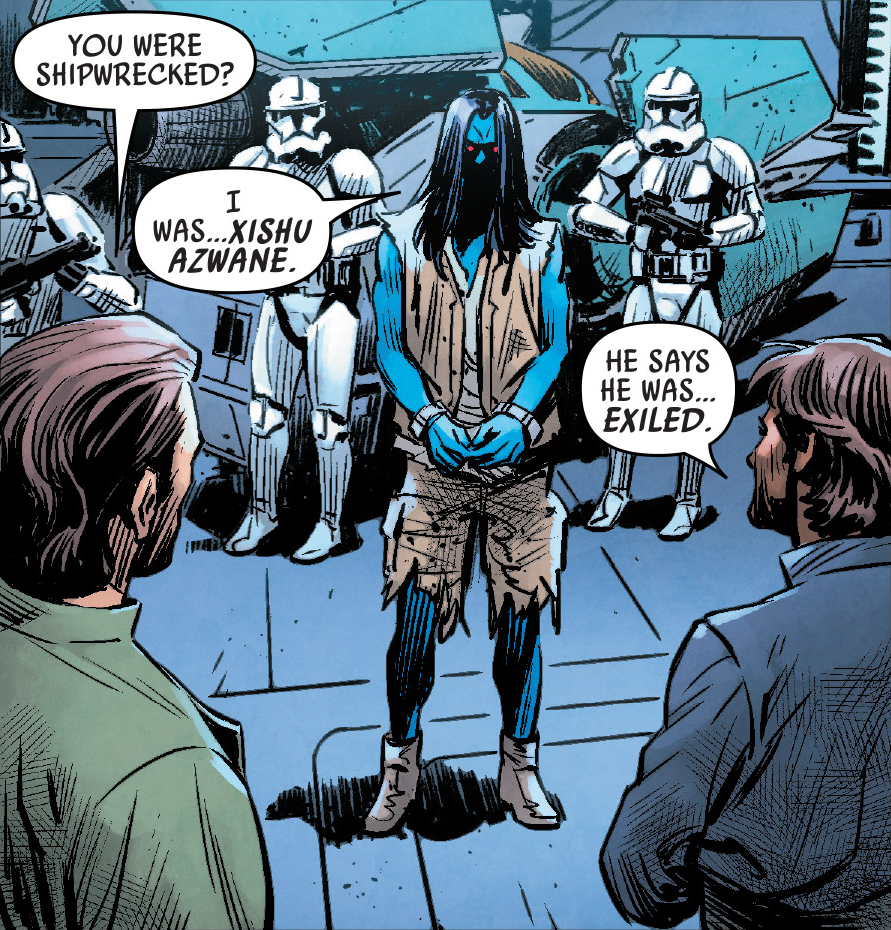
Once he had willingly surrendered, Thrawn was brought before Parck, Barris, and Vanto. Using Vanto as a translator, Parck asked whether Thrawn spoke basic or Sy Bisti, to which Thrawn replied that he knew a fair bit of Basic but was far more comfortable with Sy Bisti. Vanto served as Thrawn's translator for the remainder of the conversation as he told the Imperials of his exile and how he had crashed the V-Wings, attacked the camp unseen, and infiltrated the Strikefast. This conversation impressed Parck, to the point that he decided to present Thrawn to Emperor Palpatine himself.[4]
Thrawn was sent to his temporary living quarters on board the Strikefast, and a separate meeting was held between Parck and Vanto. In this meeting it was determined that, due to his knowledge of the Chiss and Sy Bisti, Vanto would serve as Thrawn's translator and basic teacher for the duration of the trip.[4]
Meeting at the Imperial Palace

Thrawn meets the Emperor for the first time.
For the rest of his passage to Coruscant aboard the Strikefast, Thrawn spent his time in the company of Vanto. In addition to helping Thrawn with his basic, Vanto told him the legend of the Chiss that he had heard growing up on Lysatra. Thrawn was amused by the legends, finding them interesting and informative but at times false or over-exaggerated. The two also discussed the Empire, particularly the Empire's social hierarchy and prejudices against aliens and those not from the Core.[4]
Once the Strikefast reached Coruscant, Thrawn, Vanto, Barris, Parck, and several navy troopers and stormtroopers boarded a Lambda-class T-4a shuttle for the flight to the Imperial Palace. Despite knowing the importance of the man he was about to meet, Thrawn did not feel daunted by the prospect of meeting the Emperor. Instead, Vanto noticed, he looked maddeningly confident.[4]
Upon debarking from the shuttle, Thrawn and the Imperials were guided by two of Palpatine's personal royal guardsmen to the throne room. Once they had arrived before the Emperor, Parck presented Thrawn as a gift to him. Thrawn, however, offered himself as not a gift but a resource. He informed Palpatine that the Ascendancy had discovered a mysterious threat in the Unknown Regions, offering his information on the threat in exchange for the Empire's help. In hope of convincing Palpatine that he was to be trusted, Thrawn offered the name of Skywalker as someone who could vouch for him, believing Skywalker to be a servant to the Emperor. The Emperor informed Thrawn that Skywalker had died at the end of the Clone Wars, but also that Skywalker had spoken highly of him before he had died. Accepting Thrawn's offer for information on the Unknown Regions, the Emperor offered something else in return: a role in the Imperial Navy. Thrawn accepted on the condition that he was allowed to keep Vanto as his translator.[4]
Wishing to discuss the threat in the Unknown Regions further, Palpatine guided Thrawn to the privacy of his throne room's interior garden. Thrawn was impressed by the artistry of the garden, believing it to be indicative of power, subtlety, and depth of thought. Once within the garden, Thrawn and Palpatine discussed Palpatine's personal interest in the mysteries of the Unknown Regions. Palpatine decided that Thrawn did not need a translator, but agreed to give him Vanto anyway.[4]
Exiting the garden and returning to the main throne room, Thrawn was assigned three months of training at the Royal Imperial Academy with Vanto by his side.[4]
Rising through the ranks
Education at the Royal Imperial Academy
Upon arriving at the Royal Imperial Academy, Thrawn and Vanto found their way to the office of Commandant Deenlark. Thrawn was met with hostility in Deenlark's office, Deenlark openly expressing contempt for the alien Thrawn and the fact that he had arrived in Deenlark's office by command of the Emperor. As the meeting with Deenlark drew to a close, Thrawn was informed that instead of graduating the academy as an ensign like Vanto, he would be graduating with the rank of lieutenant. Thrawn was given his lieutenant's rank insignia plaque, Deenlark secretly hoping that it would make Thrawn the target of bullying. On the way out of the office, Vanto informed Thrawn of Deenlark's intent, and Thrawn took the opportunity to learn more about the social hierarchy within the academy. Ultimately, Thrawn decided not to wear his rank plaque until it proved convenient to him, masquerading as a normal cadet.[4]
Thrawn spars with fellow cadets during a training exercise
From the start of their term at Royal Imperial, Thrawn and Vanto were plagued by incidences of bullying and harassment. Thrawn refused to respond, however, hypothesizing that the lack of response would embolden the bullies to cross the line and commit a punishable act of bullying.[4]
Thrawn's hypothesis proved true one month into the three-month term, when cadets Spenc Orbar and Rosita Turuy invited him and Vanto to play a game of cards called Highland Challenge in the metallurgy lab. Thrawn was aware that the offer was a trap intended to get the Chiss and Vanto caught gambling for credits in a lab they weren't authorized to be in, but chose to accept the offer anyway. Vanto protested Thrawn's decision, but Thrawn felt confident that he could twist the trap in his favor.[4]
Arriving in the lab at the appointed time, Thrawn and Eli were quick to turn down Orbar and Turuy's offer to play for credits. Turuy was upset with their decision, but decided not to push the matter. The four proceeded to play a tense game of Highland Challenge, Orbar and Thrawn discussing the topic of traps in the context of hands of cards. As the round drew to an end and Orbar activated his trap by discreetly calling in an instructor, Thrawn slipped on his lieutenant's rank plaque. The instructor, powerless to punish a lieutenant for being in the lab, was forced to reluctantly let Thrawn and Vanto go, much to Orbar and Turuy's chagrin. Confident that he had dismantled the trap and embarrassed the two cadets enough, Thrawn set down his hand of cards and declared that the game was over.[4]

Thrawn fighting three attacking cadets while Vanto looks on the scene in horror
Thrawn and Vanto walked back to their barracks, Vanto expressing his admiration for Thrawn and how he had managed to subvert the trap with such precise timing. A moment later, however, Thrawn pushed Vanto into the bushes as he was assailed by cadet Gimm and two other unidentified cadets who had been called to the scene by Orbar and Turuy. Thrawn fought off the assailants, allowing them to land a few hits in order to assess their combat skills before, with the help of a distraction from Vanto, injuring one of the assailants and causing all three to scatter.[4]
After the assailants had fled the scene, Thrawn and Vanto returned to Deenlark's office to report the incident. Thrawn deduced that the attack had been masterminded by Orbar and Turuy, and informed Deenlark that the assailants were likely friends of the two cadets. When Deenlark protested that it would be impossible for him to punish the guilty cadets because of their influential parents, Thrawn suggested that rather than being punished, Gimm and the assailants should be transferred to the Skystrike Academy for fighter pilot training. He explained that during the fight he had observed that all three had tremendous aptitude as fighter pilots and that it would be a waste of their potential if they weren't transferred to Skystrike. Furthermore, Thrawn argued that the punishment would be paranoia. Gimm and the assailants would live in fear that they would one day be punished, and Orbar and Turuy would be frightened by the fact that their friends had disappeared so suddenly. Deenlark agreed to carry out Thrawn's suggestion, and the matter was closed.[4]
Two standard months later, Thrawn graduated the Royal Imperial Academy as a lieutenant. On the day of his graduation, Thrawn received a second rank insignia plaque, Deenlark having forgotten that he gave Thrawn his plaque the day he arrived at the school. Thrawn held onto his spare plaque for later use if he ever needed it. After the graduation ceremony, Thrawn briefly met Eli's father and mother who both expressed subtle discomfort around him. As they left, the Vantos mentioned wishing they could use their beckon call, a technology that intrigued Thrawn greatly. After the Vantos were gone, Thrawn and Vanto reported to Deenlark's office for the first assignments of their careers.[4]
Thrawn was assigned to be Second weapons officer of the Gozanti-class cruiser Blood Crow, and Vanto was assigned the role of his aide. They boarded the transport and began their careers in the Imperial Navy.[4]
Service aboard the Blood Crow
For the first eighteen months of his service aboard the Blood Crow, Thrawn served under Captain Rik Virgilio hunting smugglers, aiding distressed vessels, and defusing political situations in the Mid and Outer Rims. Thrawn enjoyed his service under Virgilio, facing little to no discrimination and enjoying a quick promotion to First weapons officer. Additionally, Virgilio granted Thrawn use of the Blood Crow's previously unused Number Two storage bay for the storage of the collection of Clone Wars–era technology that Thrawn was amassing. Thrawn was using the technology as a means to study the era and war, and by the end of the eighteen months, he had collected two doonium-shelled Mark One Buzz Droids, a droideka, half a STAP, and most of a hyperdrive ring. This was not to last, however, as Virgilio was replaced suddenly and without explanation by Captain Filia Rossi.[4]
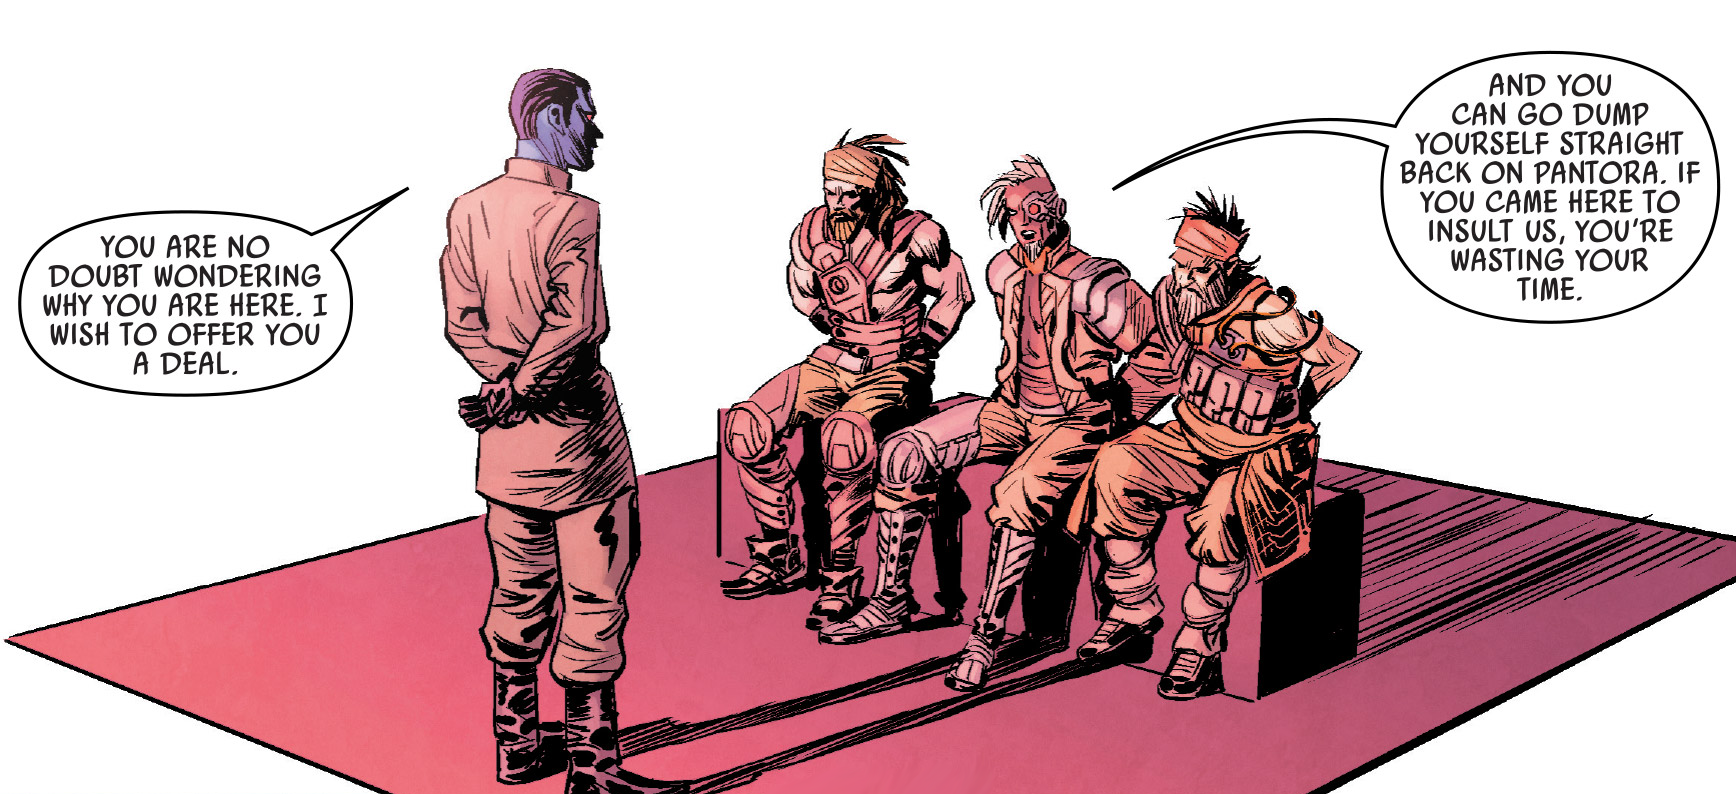
Thrawn found himself at odds with Rossi not long after she first set foot aboard the Blood Crow. Discovering Thrawn's stash of Clone Wars technologies while surveying the ship with First Officer Senior Lieutenant Nels Deyland, Rossi demanded a meeting between the three of them in the storage bay. Rossi, eager to assert her dominance as captain, demanded that Thrawn's collection be dumped or otherwise destroyed. Thrawn, still having plans for his collection, argued that he should be allowed to keep his collection due to the value of the pieces that he had accrued with his own credits. With the help of Deyland, Thrawn managed to argue Rossi down to a compromise. She told Thrawn that he was allowed to keep his collection until the Blood Crow reached Ansion. In that time he would be allowed to continue to attempt to get the buzz droids working again in order to bring them up to their maximum market value. At that point, the collection would be turned over to her and she would be allowed to sell it. Thrawn agreed to the compromise. Unbeknownst to Rossi, Thrawn had already managed to get the buzz droids back to full working order.[4]
Thrawn found his service under Rossi notably more difficult than his service under Virgilio. Unlike Virgilio, Rossi was prejudiced against aliens and took offense to the fact that Thrawn was allowed an aide. As a result, Thrawn was assigned to every dirty, nasty, or undesirable job on the Blood Crow while working under Rossi.[4]
The Dromedar incident
Thrawn approaches the Dromedar on his shuttle
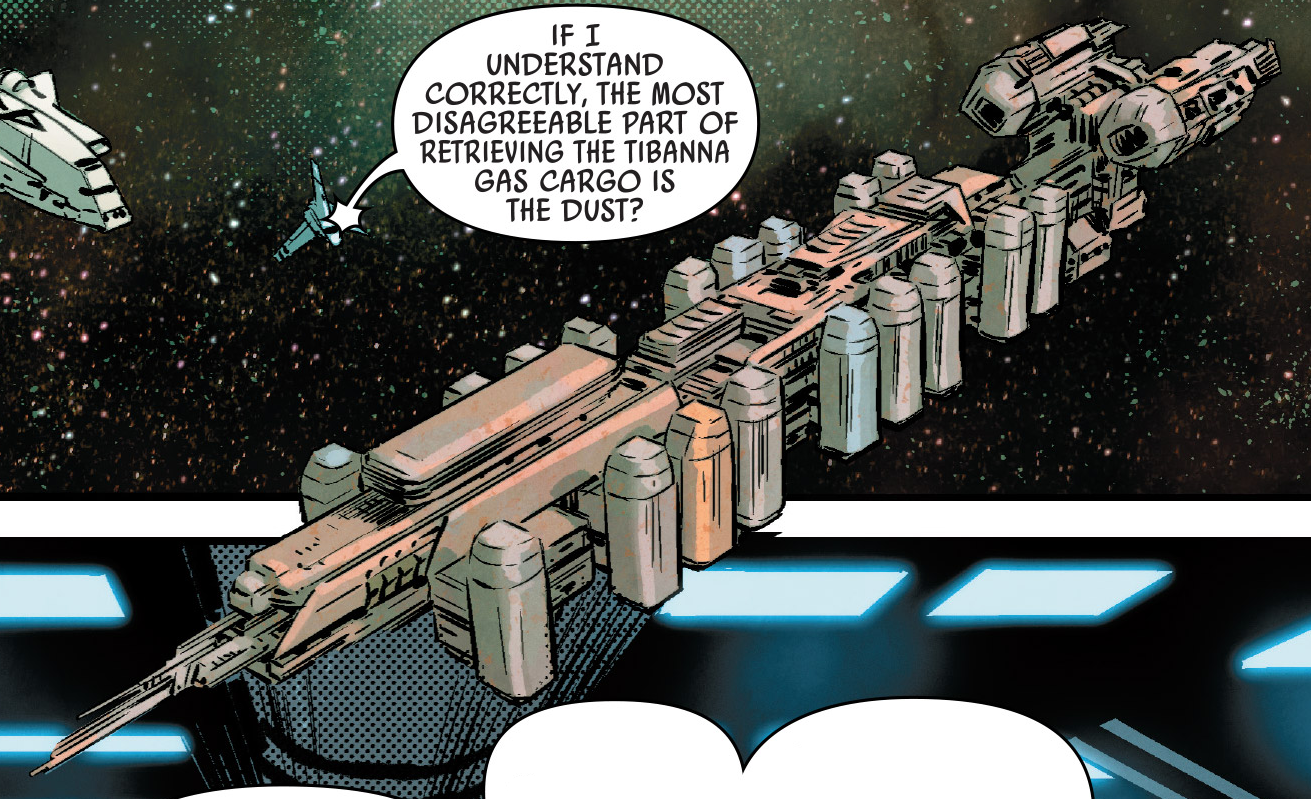
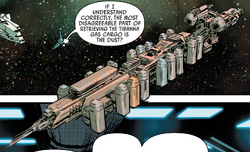
As a consequence of Rossi's tendency to assign him to the undesirable jobs, Thrawn was not surprised when he and Vanto were assigned to investigate the distress call coming from the cargo freighter Dromedar. The freighter was carrying a valuable shipment of static-locked tibanna gas, a locking mechanism infamous for generating incredible amounts of dirt and dust. Once the Blood Crow reached the adrift Dromedar, Thrawn boarded a shuttle to the vessel alongside a boarding party which consisted of Vanto, Ensign Merri Barlin, Electronics Tech Layneo, and Engineering Tech Jakeeb.[4]
Once they had boarded the Dromedar, Thrawn assigned Vanto, Layneo, and Jakeeb to investigate the engine section while he made his way to the bridge with Barlin. Several minutes later, Vanto signaled Thrawn that he had found someone in the central passageway. Thrawn instructed Vanto to return to the bridge with the prisoner.[4]
At this moment Thrawn met the man he would later come to know as Nightswan, currently operating under the alias "Nevil Cygni." Thrawn asked Nightswan why he had threatened Vanto, Layneo, and Jakeeb, to which he replied that he had mistaken them for pirates. He explained to Thrawn that the Dromedar had been attacked by pirates hoping to make off with the tibanna gas and that they had taken the crew of the freighter hostage while they returned to their base to get a slicer to help them restart the Dromedar's hyperdrive. Assessing the situation, Thrawn commanded Vanto to contact Rossi and request a full operational team to either restart the hyperdrive or transfer the tibanna gas canisters to the Blood Crow. Vanto protested that Rossi wouldn't like Thrawn's request, but Thrawn did not change his mind. Once Vanto had gone to relay the message, Thrawn began a thorough examination of the ship.[4]
As Vanto had predicted, Thrawn was not granted his requested full operational team by Rossi. Instead, Thrawn was granted the supplies he needed and up to three crew members aside from Vanto and himself. Additionally, they would be left to deal with the Dromedar situation on their own as the Blood Crow had been called to Moltok to deal with a Makurth boss' attack on a Ho'Din settlement. Thrawn was fine with this arrangement, remaining on the Dromedar with Vanto, Barlin, Layneo, and Jakeeb as the Blood Crow voyaged to Moltok.[4]
On the Dromedar's bridge, Thrawn oversaw Barlin and Layneo's attempts to find an asymmetric backdoor code that would get the ship up and running again. As they worked, Thrawn moved with Vanto and Nightswan to the cargo bay. There, Thrawn unpacked one of his crates of supplies from the Blood Crow, revealing one of his two Mark I Buzz Droids. Taking the buzz droid to where the tibanna canisters static-locked to the hull, Thrawn explained his plan to free the tibanna. The static-lock sealed the canisters, but only from the cargo bay side. Thrawn intended to use his buzz droid to cut through the hull and free the tibanna canisters. Nightswan was impressed with the plan, shocked he hadn't come up with it himself and that people didn't use it more often. Thrawn admitted that his plan wasn't completely unheard of, but that it would require the sacrifice of one of the tibanna canisters, a sacrifice that many weren't willing to make. This plan proved unnecessary, however, when Barlin and Layneo got the hyperdrive back in working order.[4]
When he turned back around to face Nightswan, however, Thrawn found himself staring down the barrel of Nightswan's second blaster. Calmly, Nightswan requested that Thrawn order Barlin, Layneo, Jakeeb, and Vanto to surrender so that no one would have to be harmed. Before Thrawn could give the order, however, he found himself, Vanto, and Jakeeb surrounded by Angel and his pirate crew. Nightswan gave Thrawn one more chance to surrender, and Thrawn obeyed, surrendering and commanding Barlin and Layneo to surrender via comlink.[4]
Thrawn, Vanto, Barlin, Layneo, and Jakeeb were then taken, with the buzz droid, to Angel's ship Marauder to be with the prisoners from the Dromedar. Nightswan, only interested in the tibanna and Dromedar, demanded that Thrawn and the prisoners be dropped off unharmed at a predetermined rendezvous. Angel reluctantly agreed, locking up Thrawn and the Imperials with the Dromedar crew.[4]
Once they were locked inside the cell, Thrawn proceeded to wait silently until Nightswan and Angel had re-boarded the Dromedar and jumped to lightspeed. Once the Dromedar had gone, Thrawn set his plan into action. He asked Layneo if she could isolate the bridge and fly the Marauder from the control panel in the room, to which she replied that she could as long as she could reach the panel. Pleased with Layneo's answer, Thrawn removed his insignia plaque, revealing that he had turned the spare plaque from graduation into a beckon call for the buzz droids. Using the beckon call, Thrawn guided the buzz droid to attack the prison cell's locking mechanism. Drawn by the commotion, three pirates entered the lockup, and Thrawn redirected the buzz droid to attack them. While they were distracted with the buzz droid, Jakeeb kicked apart the damaged cell door, and the Imperials and prisoners rushed the pirates. The three pirates were subdued, and Thrawn directed his second buzz droid to cut the ship in half so that they wouldn't have to deal with the pirates in the forward portion of the vessel. Once Layneo had used the control panel to gain control of what remained of the ship, Thrawn took command of the Marauder.[4]
Back aboard the Blood Crow, Thrawn and Vanto were brought before Rossi to justify their actions aboard the Dromedar and Angel's ship. In this meeting, Thrawn revealed that he had realized Nightswan was deceiving him, had anticipated his betrayal, and had allowed himself to be captured in hopes of finding the crew of the Dromedar. Rossi was unhappy with Thrawn's report, berating him for choosing the crew instead of the much more financially valuable tibanna gas. Thrawn was baffled by Rossi's assessment, believing that his decision to save the crew and capture some of the pirates was the correct one. Rossi, however, stuck by her original statement, believing the value of tibanna to outweigh the value of lives. As a punishment for Thrawn's failure in the eyes of High Command, Rossi sentenced Thrawn to suspension at Admiral Plor Wiskovis' base on Ansion while she waited for a more official ruling from Coruscant. Seeing this as his opportunity to get the Dromedar back, Thrawn subtly manipulated Rossi into sentencing Vanto to suspension along with him.[4]
Thrawn interrogates the prisoners
Once on Ansion, Thrawn managed to convince Wiskovis to allow him to interrogate the three pirates they had captured with Vanto as witness to the interrogation. Correctly deducing that the pirates, who called themselves Culoss, were remnants from the crew of Queen Q'anah, Thrawn threatened the three prisoners with a visit from Grand Moff Wilhuff Tarkin, the man who had been responsible for the death of Q'anah and most of her crew. The pirates, frightened by the prospect of being turned over to Tarkin, allowed Thrawn to tell them his deal. In exchange for the location of Nightswan, Angel, and the Dromedar, Thrawn offered the pirates safe transport out of the sector before Tarkin and the Imperial Security Bureau (ISB) arrived for additional interrogations. Hoping to trick Thrawn, the pirates had a short meeting in Sy Bisti where they planned to give Thrawn false information in order to secure their freedom. Speaking in Basic once more, the pirates told Thrawn that the Dromedar had been taken to Cartherston on the planet Keitum.[4]
Out of the interrogation room, Thrawn, Vanto, and Wiskovis used the pirates' use of the slang words "trapo," "ub-dub," and "squalsh" to determine that the Dromedar had been taken to a trading post on the planet Uba in the Barsa sector. Hoping to save Wiskovis from any of the career fallout that Thrawn feared might accompany his actions, Thrawn volunteered to take full responsibility for the operation to Uba to rescue the Dromedar. Interpreting this action as Thrawn attempting to hoard the glory, Wiskovis became angry and argued with Thrawn for several minutes before ultimately deciding to save the argument for later. Returning to the more pressing matter at hand, Thrawn and Wiskovis dispatched forces to Uba and Keitum to arrest the pirates and retake the tibanna gas. Hypothesizing that the stolen tibanna may be taken from Uba to the nearby tibanna producing planet Kril'Dor, Thrawn also ordered a force be sent there as part of the reclamation effort.[4]
Aftermath of the Dromedar incident
Thanks to Thrawn's actions on Ansion, the Dromedar and its tibanna canisters were found and recovered although Nightswan managed to evade capture. Once the tibanna canisters were checked, however, it was discovered that Nightswan had managed to covertly steal the contents of twelve of the twenty canisters using a variation of the technique that Thrawn had suggested aboard the Dromedar. This partial defeat vexed Thrawn greatly, kicking off his obsession and rivalry with Nightswan.[4]

Driller MarDapp points out Thrawn
Despite the fact that the operation had been an arguable success, Thrawn found himself facing the threat of a court-martial from High Command due to his actions throughout the Dromedar incident. As such, Thrawn spent the following Ascension Week and Empire Day on Coruscant, touring parties and mingling with the influential elite alongside Vanto and ISB Colonel Wullf Yularen. Yularen believed that Thrawn's actions on Ansion had been justified and beneficial, and sought to aid Thrawn with the court marshal by introducing him to senators and ministers that he felt could be an asset against the investigation. It was at one such Ascension Week party, the party in the Alisandre Hotel's grand ballroom, where Thrawn met Arihnda Pryce for the first time, then an aide to Lothal Senator Domus Renking. The two spoke briefly, Pryce correctly guessing Thrawn's purpose at the party, before Yularen, Thrawn, and Vanto moved on to speak to another senator.[4]
Thrawn and Yularen's party-going strategy ultimately paid off, Thrawn being cleared of all charges by the court-martial committee. Despite the fact that the committee's decision had closed the Dromedar incident officially, Thrawn continued to be bothered by the incident's outcome and Nightswan's cunning. Additionally, he found Nightswan's knowledge of the Mark I Buzz Droid's value intriguing, asking Vanto if he could investigate doonium demand. Thrawn had begun to suspect that the Empire was working on a secret military project of some sort, and wished to discover the truth.[4]
After the court-martial committee made their decision, Thrawn received new orders from High Command. He was promoted from lieutenant to captain and assigned the role of First Officer aboard the Arquitens-class light cruiser Thunder Wasp with Vanto still playing the role of his aide. Thrawn was disappointed that Vanto was not promoted, having recommended Vanto for both a rank promotion and a combat position, but the two accepted their new assignments nonetheless.[4]
Hunting down pirates and insurgents
After being assigned to the Thunder Wasp, Thrawn spent the next year hunting smugglers and pirates in the Mid Rim under the guidance of Commander Alfren Cheno. During this time, Thrawn also made five visits to Coruscant, traveling to the Imperial Palace to help Emperor Palpatine map the Unknown Regions. Thrawn also paid a visit to Yularen during each of his five visits to Coruscant, working with him on an investigation of Nightswan and his activities in the galaxy.[4]
Sometime towards the end of his first year of service aboard the Thunder Wasp, Thrawn noticed a sudden uptick in the value of vulture droids while shopping for his collection. Hoping to investigate, Thrawn purchased another vulture droid part, sneaking a glimpse at the Rodian salesman's order requests when the Rodian wasn't looking. It was on the order requests that Thrawn discovered that Nightswan had purchased a large number of vulture droid parts and paid with iridium.[4]
Not long after, Thrawn and Vanto investigated and arrested a group of smugglers who had been smuggling iridium in the shells of Paklarn grist mollusks. Looking into the matter further, Thrawn deduced that the smuggling operation had been masterminded by Nightswan and that Nightswan had used the smuggled iridium to pay for large shipments of vulture droids. Pressing the captured smugglers for details, Thrawn discovered that Nightswan had mentioned Umbara when he had been instructing the smugglers. Vanto dismissed Umbara as a false lead, believing that Umbara wouldn't dare to try insurgency again after choosing to join the Separatists and being defeated during the Clone Wars. Thrawn, however, felt confident in his intuition and believed that an investigation of insurgent activity on Umbara was necessary.[4]
Thrawn's intuition proved correct; insurgent activity was discovered on Umbara and the Thunder Wasp was dispatched to help put a stop to it with Admiral Carlou Gendling's task force.[4]
Battle over Umbara
Thrawn spent the entirety of the passage to Umbara locked away in his cabin. He used the solitude to immerse himself in Umbaran art, surrounding himself with holograms of Umbaran art through the ages. He noted the subtle differences between Republic and Imperial era art, using the similarities and differences to extrapolate details of modern Umbaran culture and military doctrine.[4]
Thrawn was interrupted mid-thought when Vanto entered his cabin to inform him that they had arrived at Umbara and that Cheno had requested his presence at the bridge. By the time Thrawn arrived at the bridge, the Thunder Wasp was in position and ready for battle, joined by Gendling's ISD Foremost and two Raider-class corvettes. As they stood on the bridge, Cheno joked with Thrawn that he hoped the Umbarans would attack so that he and the Thunder Wasp could finally get some recognition. Thrawn, however, felt it was unlikely that the Umbarans would attack.[4]
Thrawn watched from the bridge alongside Vanto and Cheno as Gendling delivered his ultimatum to the Umbaran insurgents, demanding that they hand over their leaders within the hour or face reprisal. Even as Vanto declared the matter finished after Gendling's ultimatum the battle erupted as four hundred vulture droids appeared from behind Umbara's outer moon.[4]
As the battle began and Cheno commanded a counterattack against the vulture droids, Vanto was quick to point out to Thrawn that he had been wrong. Thrawn, however, stood by his original statement, deducing that the attack was not by the Umbarans and that they were merely watching it in hopes of deciding whether or not to join in.[4]
As the battle continued and the Thunder Wasp took more and more damage, Thrawn realized that Cheno was unable to command the battle and promptly seized control of the Thunder Wasp. Moving Senior Lieutenant Hammerly to a turbolaser station, Thrawn sat down with Vanto at Hammerly's sensor station to study the attack patterns of the vulture droids. After several moments of watching the vulture droid attack patterns, Thrawn was able to deduce that the vulture droids were not acting on their swarming programming but rather were being controlled directly by a transmitting base. Thrawn informed Vanto that he also knew this as he saw that the design of the vulture droid, and artistry featured on them, showed that the starfighters were designed for swarm tactics, which they didn't use. Utilizing the transmission shadows where vulture droids relied on their swarming programming rather than the transmissions, Thrawn was able to pinpoint the location of the transmitting base on the surface of Umbara. His analytical work done, Thrawn called out to Cheno, telling him to contact Gendling to inform him of the location of the base. Gendling, however, felt that Thrawn's assessment was merely guesswork and disregarded the advice.[4]
Frustrated with Gendling's ineptitude, Thrawn ordered the Communications Officer to signal the remaining ships to attack the vulture droids when they were flying through the transmission shadows. The other ships acknowledged Thrawn's strategy and shifted tactics, quickly turning the tide of the battle.[4]
By the end of the battle, one of the corvettes had been destroyed and the remaining corvette, Thunder Wasp, and Foremost were all badly damaged, but the vulture droids had been destroyed and Umbara unconditionally surrendered.[4]
Despite the fact that Thrawn's strategy had won what had begun to appear to be a losing battle, Gendling was furious with both Thrawn and Cheno for their roles in the battle. His pride bruised, Gendling promised Cheno that the battle would be the end of his career. When Gendling turned on Thrawn, however, Cheno stepped in to save his career. Once they were alone Cheno admitted that he believed Thrawn to be the future of the Imperial Navy, saying that it had been a privilege to be Thrawn's commander for even just a short time.[4]
After departing from the meeting with Gendling and Cheno, Thrawn met with Vanto to discuss the possibility of Nightswan's involvement in the battle. By analyzing the value of Umbaran ore as well as the success rates of smugglers on Umbara versus smugglers on an Imperial-controlled planet, Thrawn was able to deduce that Nightswan had orchestrated the events on Umbara in order to ensure that the Empire took over Umbara's mines in order to further his smuggling operations. Going even further, Thrawn concluded that Nightswan had purposefully allowed the iridium smugglers to be caught in order to draw the Imperials to Umbara. Impressed, Thrawn admitted that he would be forced to wait until Nightswan chose to resurface again.[4]
As a result of the actions taken during the battle, Cheno was forced to retire by Gendling and High Command. This decision angered Thrawn greatly as he considered it nothing more or less than a foolish waste of resources. Surprised by Thrawn's reaction, Vanto informed him that Cheno was neither the first navy career Thrawn had destroyed nor was it the last career he would destroy. Thrawn was vexed by this, but resigned himself to the reality of his situation and the Empire's military politics.[4]
Investigating Nightswan
Meeting with Yularen
Not long after learning Cheno's fate, Thrawn and Vanto paid a visit to Yularen's Coruscant office to discuss the ongoing investigation of Nightswan's activities. Yularen reported that the ISB had managed to connect Nightswan to metal smuggling, antiques purchases, and political protests, but had not been able to determine the man's identity. Intrigued by the mention of political protesting, Thrawn asked Yularen to give him a list of the insurgent activities Nightswan was associated with. Pursuing his inquiry further, Thrawn asked Yularen about insurgent activity on Coruscant. Yularen brushed off his theory, believing that political unrest in the lower levels would never be able to impact anything. Thrawn refused to relent, however, countering Yularen's disbelief by citing the protest in the Circle Bay mayor's office on Nubia. Yularen pointed out that the protest had only succeeded because the insurgents had managed to infiltrate the servant staff in the capital, and Thrawn deduced that insurgency on Coruscant could be equally effective if insurgents infiltrated the government via bodyguard training dojos. Yularen conceded that Thrawn had a point, and the three set off for an investigation of Coruscant's dojos.[4]
Visit to the Yinchom Dojo
Eventually, the investigation led Thrawn, Yularen, and Vanto to the Yinchom Dojo, a senate guard training dojo owned by a Togorian named H'sishi. While waiting to speak with H'sishi, Thrawn once again found himself talking to Pryce, now working for Higher Skies Advocacy Group and at the dojo for self-defense lessons and networking with senate guards.[4]
After a brief conversation with Pryce, Thrawn spoke with H'sishi, obtaining records of the dojo's government contracts and trained guards. Seeking to learn more about the difficult to read Togorian in front of him, Thrawn challenged H'sishi to an advanced stick fighting duel under the guise of searching for an instructor for an urban combat unit. Just prior to the duel, Thrawn asked Pryce for the name of her advocacy group, paying attention to the reactions of those around him when Pryce revealed the name of her organization. As the two dueled, Thrawn observed not only H'sishi but also Pryce and her friend Juahir Madras, observing Madras' nervousness and H'sishi's single minded focus on combat. After the duel, Thrawn complimented H'sishi's Togorian-inspired style of stick fighting, expressing his interest in one day learning it from her.[4]
Outside the dojo, Thrawn shared his findings with Vanto and Yularen, reporting that he believed there was more to Higher Skies than met the eye and that while H'sishi was undoubtedly innocent, Madras was likely complicit. Thrawn wished to pursue the investigation further, but new orders from High Command prevented this wish from becoming a reality.[4]
Thrawn had been commanded to spend the next four weeks while the Thunder Wasp was repaired at the Imperial Palace, charting the Unknown Regions with Emperor Palpatine. Once the repairs were finished, Thrawn was once again assigned to patrol the Mid Rim and Outer Rim, but he had been promoted to a commander and the captain of the Thunder Wasp following Cheno's firing.[4]
Covert meeting with Pryce

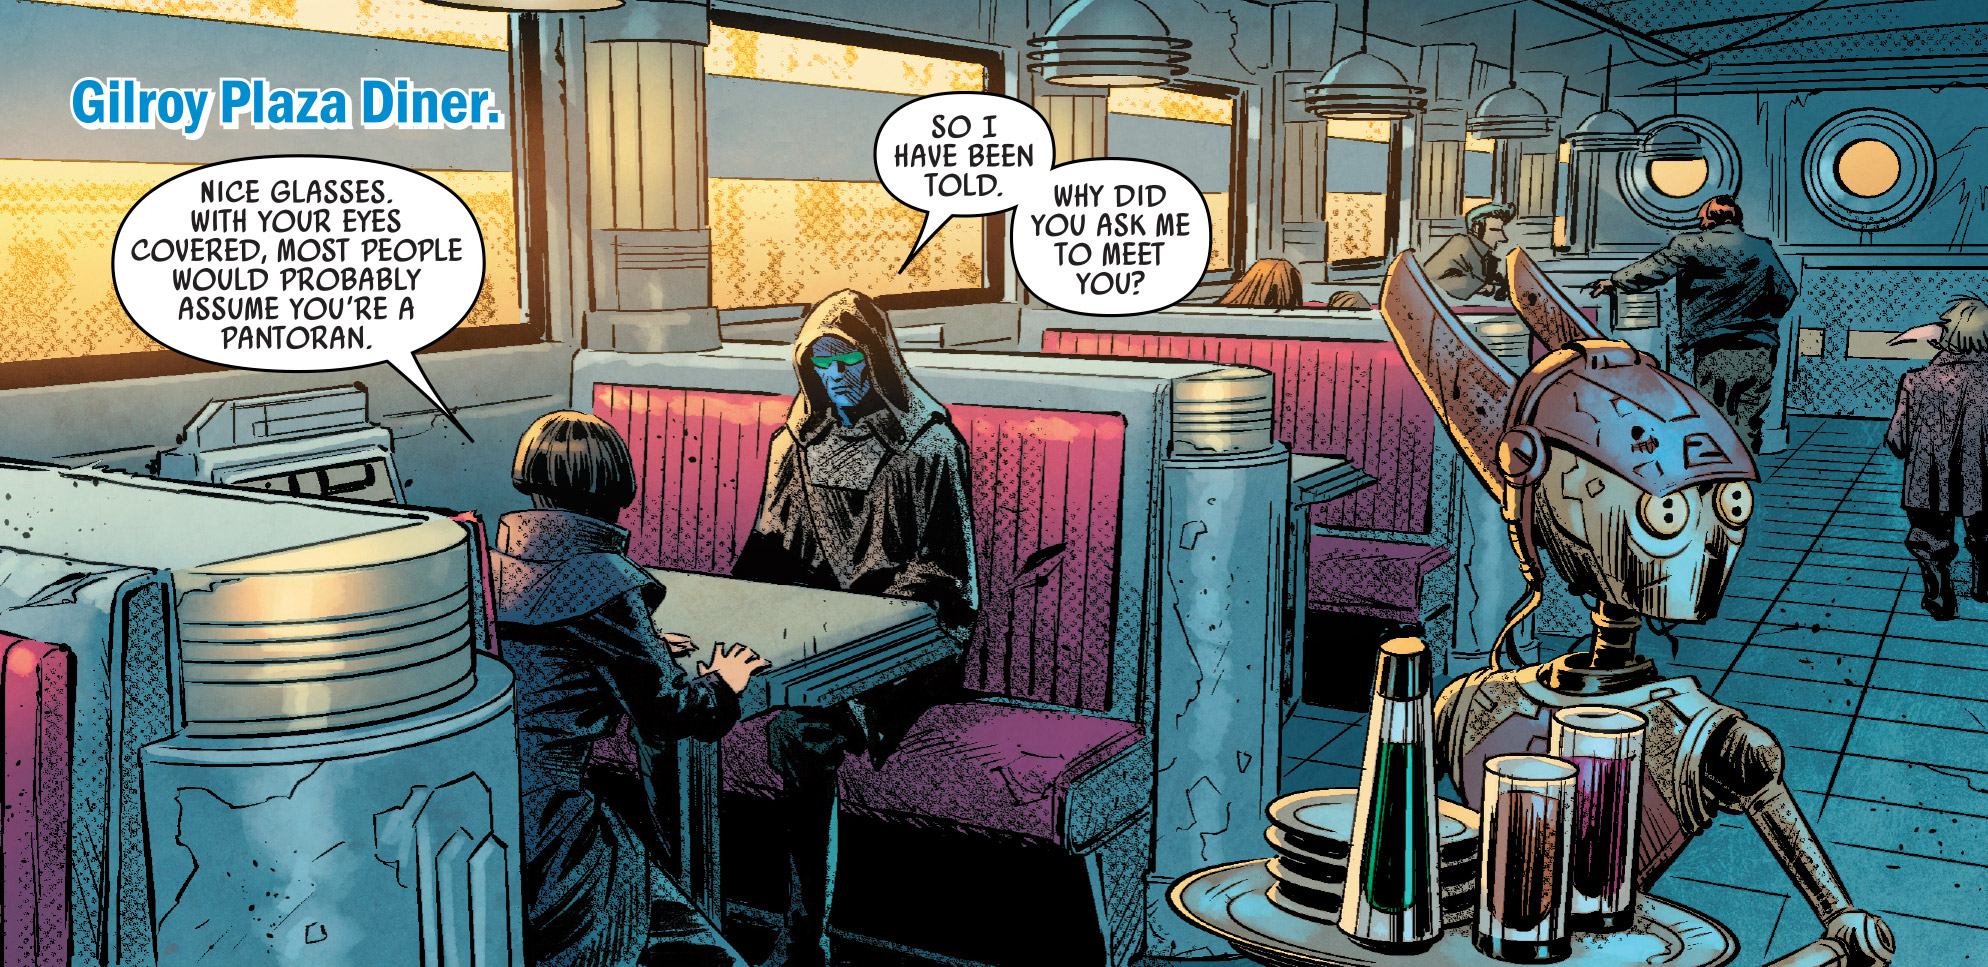
Thrawn and Pryce at the Gilroy Plaza Diner
Sometime during his four week stay at the Imperial Palace, Thrawn was called upon by Pryce to help her escape the trap that had been laid for her by Imperial Moff Ghadi. Wearing glasses and a hood to conceal his identity and masquerade as a Pantoran, Thrawn met Pryce in the Gilroy Plaza Diner to discuss Ghadi's trap and how to dismantle it. Pryce handed Thrawn a datacard filled with evidence of Ghadi's corruption, requesting that he hand it along to Yularen and ensure that only Yularen knew that it came from her. Thrawn agreed to do as she asked, but refused to hand it over until the best possible moment, deducing that the longer it stayed in the ISB, the more likely it was that Ghadi would get his hands on it by way of an inside man. Pryce argued that she was unwilling to wait, attempting to bribe Thrawn to give it to Yularen as quickly as possible. The two discussed the politics of military promotions and ship repairs, Pryce offering to use her contacts to both speed up the repairs of the Thunder Wasp and to get Vanto his long-awaited promotion. Thrawn was receptive to Pyrce's offers, placing a high value on Vanto's promotion and his ship's repairs. As his end of the bargain, Thrawn offered Pryce some military advice; he advised her to use Ghadi's hatred of Tarkin to her advantage to either ally herself with Tarkin or use Tarkin to force Ghadi to ally himself with her.[4]
Before he left the diner, Thrawn asked Pryce if she would be willing to turn on the Higher Skies group if it was discovered that they were involved in insurgent activity. Pryce replied that she would absolutely turn her back on them, and the meeting ended.[4]
Afe Clan land dispute
Some time after Thrawn returned to patrol duty as the captain of the Thunder Wasp, he was assigned, per his request, to investigate, mediate, and solve a land dispute on the planet Cyphar between the native Cyphari and human colonists. Thrawn had noticed an uptick in shellfish exports from Cyphar reminiscent of the Nightswan-led smuggling operation that had led him to Umbara, and had deduced that the exports were an invitation from Nightswan. Thrawn spent the passage to Cyphar discussing his Nightswan theories with Vanto, particularly his belief that Nightswan was connected to the sharp increases in doonium theft, land disputes, and general unrest that spread the Empire's military thin.[4]
Thrawn and Vanto on the bridge of the Thunder Wasp as it approaches Cyphar
Once on Cyphar, Thrawn and Vanto attended a meeting to discuss the circumstances of the dispute with the mayor of the human Hollenside Enclave colony Pord Benchel, Lenora Scath, Brigte Polcery, Clay Tanoo, and a small committee of other concerned citizens. The meeting was brief and hostile, Polcery and Scath in particular finding it ridiculous that Thrawn wished to hear both sides before making his determination. The dispute between the humans and the Cyphari Afe clan was hardly Thrawn's top priority during the meeting, however. Thrawn had deduced that the entire land dispute was an elaborate cover-up and spent the meeting studying Benchel, Scath, Polcery, and Tanoo for signs of guilt or innocence in the smuggling scheme that the dispute was designed to hide.[4]
On the shuttle ride to meet Chief Joko of the Afe Clan, Thrawn discussed his findings with Vanto. The two had come to the same conclusion: Scath, Polcery, and Tanoo were all involved in the smuggling activity, but Benchel was oblivious to everything besides what had been reported to him about the land dispute.[4]
Next, Thrawn and Vanto visited the mobile Afe clan meetinghouse to speak with Joko. Joko pleaded his case to Thrawn, telling him that the dispute had started when humans from the Hollenside Enclave had invaded Afe land and that all issues since then had either been self-defense or acts of retaliation. Whilst in the meetinghouse, Thrawn subtly studied the artwork on the walls, ascertaining information on Afe culture and strategy.[4]
Joko then showed Thrawn the grain field where the incursions had occurred, along with a holo-map of likely airspeeder travel paths and the sites of both the human attacks on the Afe lands and the Cyphari attacks on Hollenside. Thrawn studied both the damaged grain and the attack locations, quickly discerning patterns and developing a plan to combat the invaders. Thrawn cautioned Joko against attacking Hollenside again, promising Joko that the situation would be resolved that night if he followed Thrawn's orders. Thrawn resolved to spend the night at the meetinghouse with Vanto, offering Joko stormtroopers for protection and ordering him to evacuate the surrounding area. Joko was hesitant, but followed Thrawn's commands after Thrawn promised once more that he would resolve the situation in a single night. Thrawn was confident in his promise that he could fix it that night; he had deduced that the colonists would see that evening as their final chance to advance the smuggling operation until the investigation was closed.[4]

Thrawn watches as Vanto stuns Tanoo's team
That night, Thrawn and Vanto observed from a distance as three landspeeders full of humans led by Tanoo arrived on Afe Clan land and began digging for ore. Thrawn immediately focused his attention on Tanoo, asking Vanto to find him Tanoo's full record. Vanto revealed that Tanoo had studied organic chemistry, and that his brother had been arrested for possession of spice derived from scarn. Thrawn found what he was looking for in the information about scarn, calling in stormtroopers and a TIE escort led by Lieutenant Gimm to their location. Hoping to stop the perpetrators from escaping before they could be arrested, Thrawn drew his blaster and opened fire, destroying the repulsorlifts of two of the landspeeders. After a short firefight, Thrawn and Vanto managed to stun all of the perpetrators and arrest Tanoo, interrogating him at gunpoint in the speeder he had attempted to escape in. Tanoo admitted that Polcery had designed the scarn smuggling plot and that he had been forced to participate as the chemist. Thrawn was unsatisfied with his answer, however, pointing out to Tanoo that he could have easily changed the formula slightly to make a far less potent and illegal version of scarn that Polcery would never notice. Tanoo, trapped by Thrawn's logic, admitted that Thrawn was too clever for his lie but quickly added that he had done nothing that Thrawn had enough evidence to arrest him for. Thrawn then inquired about Nightswan, and Tanoo admitted that Scath had brought him in to help the smuggling plan along.[4]
Having nothing to charge Tanoo with but unwilling to accept defeat, Thrawn studied Tanoo's scarn sensor and quickly formulated a plan to end the scarn smuggling without arresting Tanoo. Meeting with Gimm, Thrawn delivered him the sensor and commanded him to fly close to the ground, using it to follow the underground scarn vein. As Gimm flew along the vein, Thrawn ordered Lieutenant Commander Osgoode to use the Thunder Wasp's turbolasers to obliterate the scarn vein behind him. Once the night was over, Thrawn's plan had succeeded and the scarn had been scorched out of existence.[4]
Thrawn's plan, though successful, was met with backlash from both High Command on Coruscant and Joko on Cyphar. In a final confrontation with Joko before he departed, Thrawn was promised that Joko would appeal his actions in hopes of securing yet another court-martial for Thrawn. Thrawn expressed no regret for his actions, however, believing that he had done the best he possibly could have in the situation. He felt complete apathy towards High Command's disdain for him, believing that they wanted him to be a yes man but that there were some situations that could simply only be solved by his particular brand of strategy.[4]
Promotion to Commodore
After Thrawn was once again cleared of all charges of misconduct, he and the Thunder Wasp returned to hunting for smugglers and illicit activity connected to Nightswan. Using Vanto's knowledge of shipping and supplies, Thrawn was able to uncover and stamp out several doonium smuggling operations, at least two of which were connected to Nightswan. Frustrated that Nightswan was still slipping through the Empire's fingers, Thrawn contacted his fellow officers with warnings about Nightswan, but his warnings were generally not taken seriously. Additionally, Thrawn continued to be perplexed by the Empire's excessively high demand for doonium, having still found no answers despite his and Vanto's continued investigation.[4]
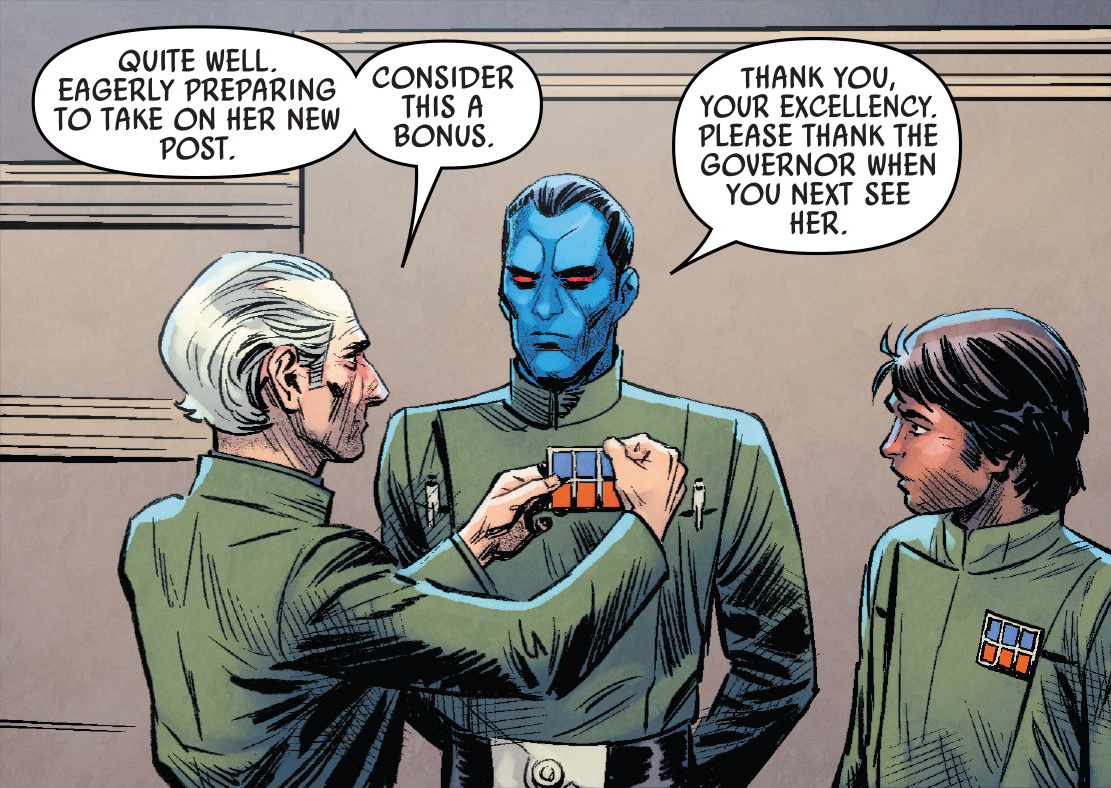

Thrawn is promoted to Commodore.
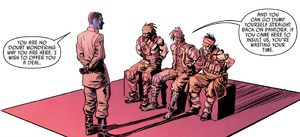
Eventually, Thrawn and Vanto were surprised by a summons from High Command on Coruscant. Once on Coruscant, Thrawn and Vanto found themselves in the center of an award ceremony attended by various admirals and Grand Moff Tarkin. For his outstanding record of successes and his string of unusually fast promotions, Thrawn was promoted from commander to commodore and was given command of the ISD Chimaera. Additionally, Vanto was promoted from ensign to lieutenant commander, a decision that greatly pleased Thrawn. After the ceremony concluded, Thrawn briefly spoke with Tarkin, discussing Pryce's recent promotion to Governor of Lothal and subtly thanking Pryce for her role in Vanto's promotion. After Tarkin had departed, Thrawn briefly exchanged a heartfelt congratulations with Vanto before the two set off for their career aboard the Chimaera.[4]
Quelling insurgency
Mission to aid the Sempre
Sometime into Thrawn's tenure as commander of the Chimaera, the Chimaera received a distress call from the troop carrier Sempre. Meeting on the bridge of the ship to discuss the mission with Vanto, senior comm officer Lomar, Stormtrooper commander Ayer, and his First Officer Karyn Faro, Thrawn discussed his belief that Nightswan was behind the theft of the frigate Castilus and V-19 starfighters that had attacked the Sempre but not behind the attack itself. Thrawn also called into question the motivation behind the attack, as Ayer revealed that the Sempre wasn't actually transporting stormtroopers when it was attacked. Ayer refused to divulge more, firmly asserting that the mission of the Sempre was classified and that only he and his troopers would be allowed aboard to combat the threat. Thrawn took this news in stride, calmly commanding Faro to check the Chimaera's weapons and Vanto to ensure that they were going at the quickest possible speed.[4]
Thrawn investigates attack on the Sempre
Almost two hours later, Thrawn arrived at the site of the attack to discover that the crew of the Sempre had been completely massacred and that the Castilus and V-19s were long gone. Ayer's orders no longer relevant in the face of their failure to reach the Sempre in time, Thrawn and Vanto boarded the Sempre to observe the carnage for themselves. Moving carefully through the ship, Thrawn observed that only a few of the dead had blaster burns while the rest appeared to have been brutally beaten to death. Studying the bloodstains on the walls, Thrawn noted several that appeared to have been written glyphs or attempts at words. Moving deeper into the ship, Thrawn found himself once more blocked by one of Ayer's men who was in charge of guarding the troop quarters. Curious what the Empire was hiding, Thrawn commanded the stormtrooper to stand aside, asserting that seeing the contents of the troop quarters was necessary for him to deliver justice for the murdered soldiers. When the stormtrooper continued to insist that the room's contents were classified, Thrawn raised his voice, shouting in what appeared to be anger for the stormtrooper to step aside. Vanto was surprised by Thrawn's uncharacteristic anger, but once inside the troop quarters, Thrawn explained that it had been a pragmatic choice to appear angry in order to cut the conversation short. Inside the room, Thrawn discovered what the Empire had been trying to hide: the Sempre had been used to transport slaves.[4]
Back on the bridge of the Chimaera, Thrawn met once more with Vanto, Faro, and Lomar to discuss the matter further. After Faro revealed that the attacking V-19s had destroyed the Sempre's shield generators, hyperdrive, and sublight engines, Thrawn deduced that the intention of the attack had been to free the slaves, not to take command of the Sempre. Focusing instead on the slaves, Thrawn asked what species the ship had been transporting, to which Lomar replied that he had used the ship's audio and the size of the restraints to determine that the slaves had been Wookiees. Utilizing Kashyyyk as a starting point and the Sempre's location as an ending point, Thrawn and Vanto managed to pinpoint the location of the Empire's secret slave-processing center as Lansend Twenty-Six, an old Separatist staging area from the Clone Wars. Identifying the blood marking on the wall as a Wookiee clan symbol signifying defiance, Thrawn deduced that there was a saboteur on Lansend Twenty-Six and that rescued Wookiees and freedom fighters would attack there next in an effort to free more of the Empire's slaves. Determined to succeed Lansend Twenty-Six where they had failed the Sempre, Thrawn commanded radio silence as the Chimaera approached the processing center.[4]
When the Chimaera arrived at Lansend Twenty-Six, the station had already fallen under attack by the Castilus and its squadrons of V-19s. Thrawn quickly deployed a TIE squadron to deal with the threat, ordering them to disable the Castilus without destroying it. He also ordered a signal be sent to the nearby Baklek Base, asking for assistance. Contacting Colonel Zenoc of Lansend Twenty-Six next, Thrawn learned that the saboteur had already been captured and requested a holo-map of the station. Using the map to track the positions of the escaped slaves and attackers, Thrawn fired on the station, destroying sections of it to trap the escapees unharmed in section B-5. The threat within the station neutralized, Thrawn turned the Chimaera's attention back to what remained of the attacking frigate and V-19s.[4]
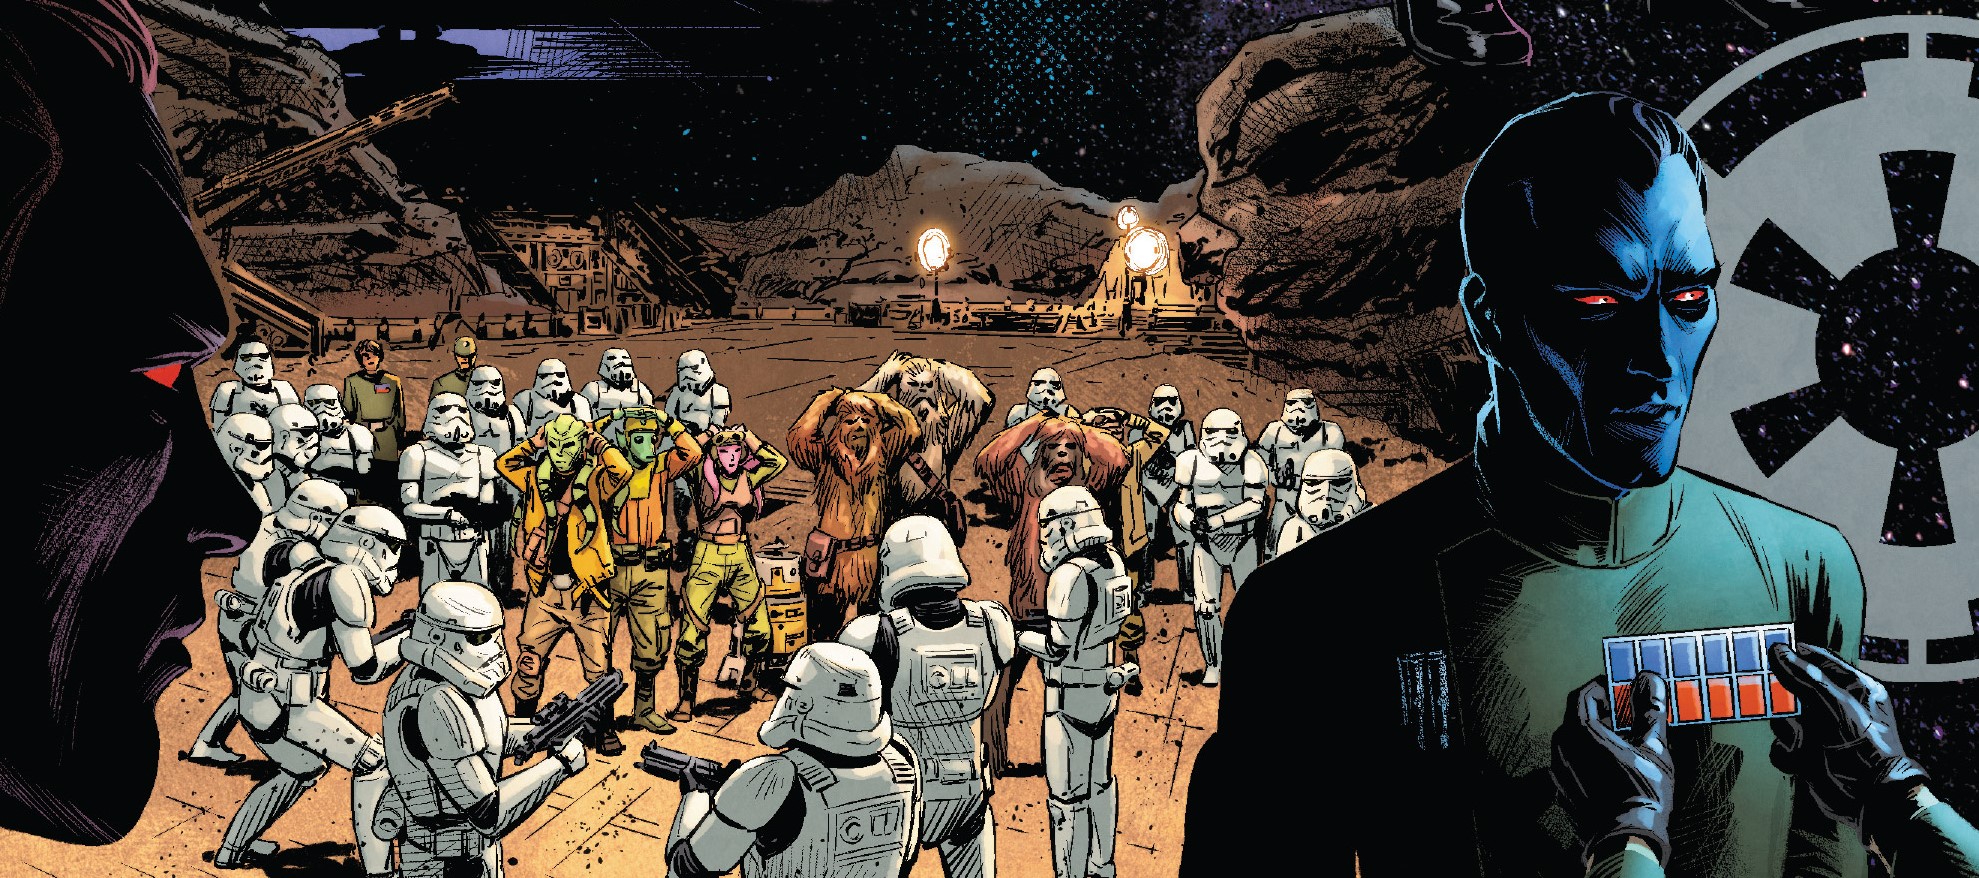
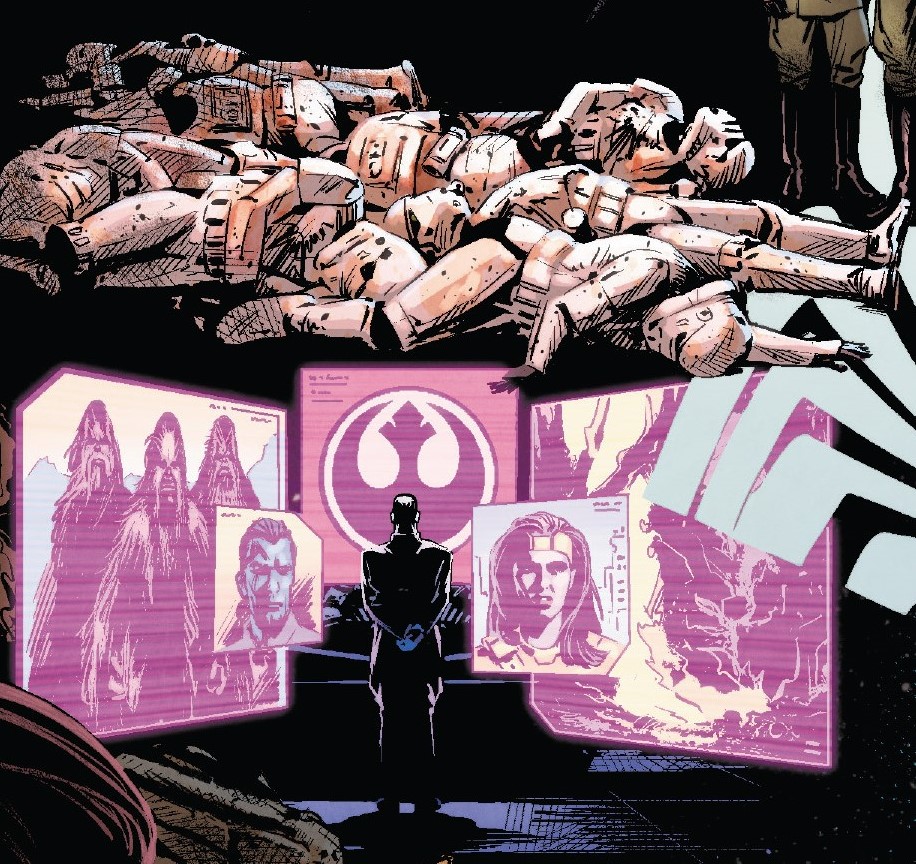
Insurgents and Wookiee slaves are rounded up after the attack on Lansend twenty-six
As the battle drew to a close, Vanto approached Thrawn, asking him what would happen to the Wookiee slaves. Thrawn replied that the Wookiee slaves would be left with Zenoc on Lansend, prompting Vanto to express his discomfort with the idea of the Empire using slaves at all. Thrawn replied that it was entirely possible that they were actually indentured servants, prisoners, or had sold themselves into slavery voluntarily to pay off debts, but admitted that it was unlikely that the Wookiees were anything more or less than innocent captured slaves. In the end, he concluded that it didn't matter. In Thrawn's eyes, the Wookiees were now Imperial property and had to be treated as such.[4]
Botajef Insurgency
Sometime later, Thrawn and the Chimaera were called upon by Fleet Admiral Jok Donassius to put down an insurgency on Botajef. The planet, led by Governor Quesl, had declared independence from the Empire, and the Empire, fearing this might lead to another Confederacy of Independent Systems situation, commanded Thrawn to put down the revolt by any means necessary. Setting course for Botajef immediately, Thrawn turned to Vanto, Faro, and Senior Lieutenant Pyrondi to discuss the matter further. Pyrondi offered her disbelief that Quesl would rebel alone with the knowledge that the full military might of the Chimaera alone could stop their rebellion dead in its tracks, to which Faro replied that she feared that Botajef may just be one of many worlds prepping to declare independence. Thrawn listened to their theories without offering any of his own, and listened intently as Pyrondi described to him the follower nature of the Jefi people. Carefully noting the Jefies' tendency to follow anyone who presented themselves as a capable leader, Thrawn suggested that the best overall strategy may be to overthrow Quesl in favor of a new, non-insurgent leader. The conversation ending, Thrawn retired to his quarters and left Faro in charge of the bridge.[4]
Thrawn spent the rest of the fourteen-hour passage to Botajef in his quarters, studying Jefi artwork. Thrawn felt that the low-contrast sculpts showed a self-awareness of their shortcomings, whereas their tressiles depicted their belief in the stability of their political system.[4]
Two hours prior to the Chimaera's arrival at Botajef, Vanto arrived in Thrawn's quarters to discuss his growing concerns about the mission. Vanto feared that the mission was a set up by government officials and High Command designed to make Thrawn look bad by either painting him as a war crazed alien who wiped out a planet of innocent followers or as a coward unable to deal with Botajef's substantial planetary defense force and forced to retreat. Thrawn, however, felt confident as always that he would be able to avoid falling into such a trap. Shifting the conversation when Vanto threatened that a mess up could mean being demoted to an ore carrier like Rossi's old assignment, Thrawn once again brought up their investigation into the Empire's secret military project. Sharing his most recent research with Vanto, Thrawn revealed that he had deduced that it was a single large military project with a hyperdrive on a scale the Empire had never before seen. Thrawn admitted that he believed the product to be a foolish waste of resources, believing that it would be wiser for the Empire to pour their resources into a more flexible and mobile navy of capital ships and fighters. Hoping to check out the project for himself, Thrawn revealed to Vanto that he had used the vectors from the Wookiee slave ships and Rossi's doonium transports from Socorro to discover the likely location of the secret project's construction site. Thrawn told Vanto that once the opportunity presented itself, they would investigate it further. Shifting the conversation back to the present issue, Thrawn pulled up a holo of Quesl delivering his declaration of independence from the Empire. Pointing out Quesl's mannerisms, Thrawn noted that he seemed to be daring the Empire to fight back against him and theorized that the capital would be heavily fortified and that the planetary defense force would be deployed to keep the Chimaera at a distance. Closing the holo, Thrawn and Vanto returned to the bridge to discuss strategy further.[4]
Upon arriving at Botajef, Thrawn discovered that his theory about the planet's defenses had proved correct. The planet was defended from space by two CR90 corvettes as well as five squadrons of V-19s dispatched from the north-polar base and two squadrons from the south-polar base, and the governor's palace was fortified by five ground-based turbolasers. Confident in his ability to handle the situation, Thrawn ordered Starfighter Commander Yve to launch the Chimaera's TIEs to perform flybys past the corvettes and to form a screen between the Chimaera and the V-19s. A moment later, Thrawn received a call from Quesl telling him that he was invading Jefi space and was required to either vacate or be fired upon. Responding calmly as a means of buying himself time, Thrawn informed Quesl that his act of secession was in direct violation of a fictitious Clone Wars-era treaty signed by Botajef at the end of the war. As he spoke, Thrawn watched the TIE flybys, noting the slight twitch in the starboard corvette and the lack of reaction from the portside corvette. Having ascertained all the information he needed, Thrawn proceeded with his plan, ordering Yve's special unit of TIEs to destroy Quesl's turbolaser placements. As Thrawn distracted Quesl with his attack on the turbolasers, he navigated the Chimaera closer, capturing the starboard corvette in the Star Destroyer's tractor beam. As he did, Quesl gasped and stumbled, confirming Thrawn's theory: Quesl and the valuable Jefi art were on the starboard CR90 corvette. This information in hand, Thrawn correctly deduced that the insurrection had been staged to allow Quesl to steal and sell off the Jefies' valuable art collection. Quesl had intended for Thrawn to destroy the palace to cover the theft while Quesl slipped away during the ensuing battle. Thrawn also revealed to Quesl that the flyby had revealed that the starboard corvette had a human crew while the portside corvette had a Jefi crew; he had surmised that Quesl was on the human corvette as it was unlikely that a Jefi crew would aid in the theft of their own art. Thrawn drew the corvette in, promising Quesl he would face trial for his actions before cutting the transmission. Ordering that the prisoners be apprehended and the art be returned to the Jefi, Thrawn commanded Vanto to inform High Command that the situation had been resolved.[4]
After this and other successes, Thrawn was promoted to Admiral and Vanto to Commander.[8]
Battle of Batonn
Prelude to the battle
Thrawn attended a high-security meeting run by Donassius
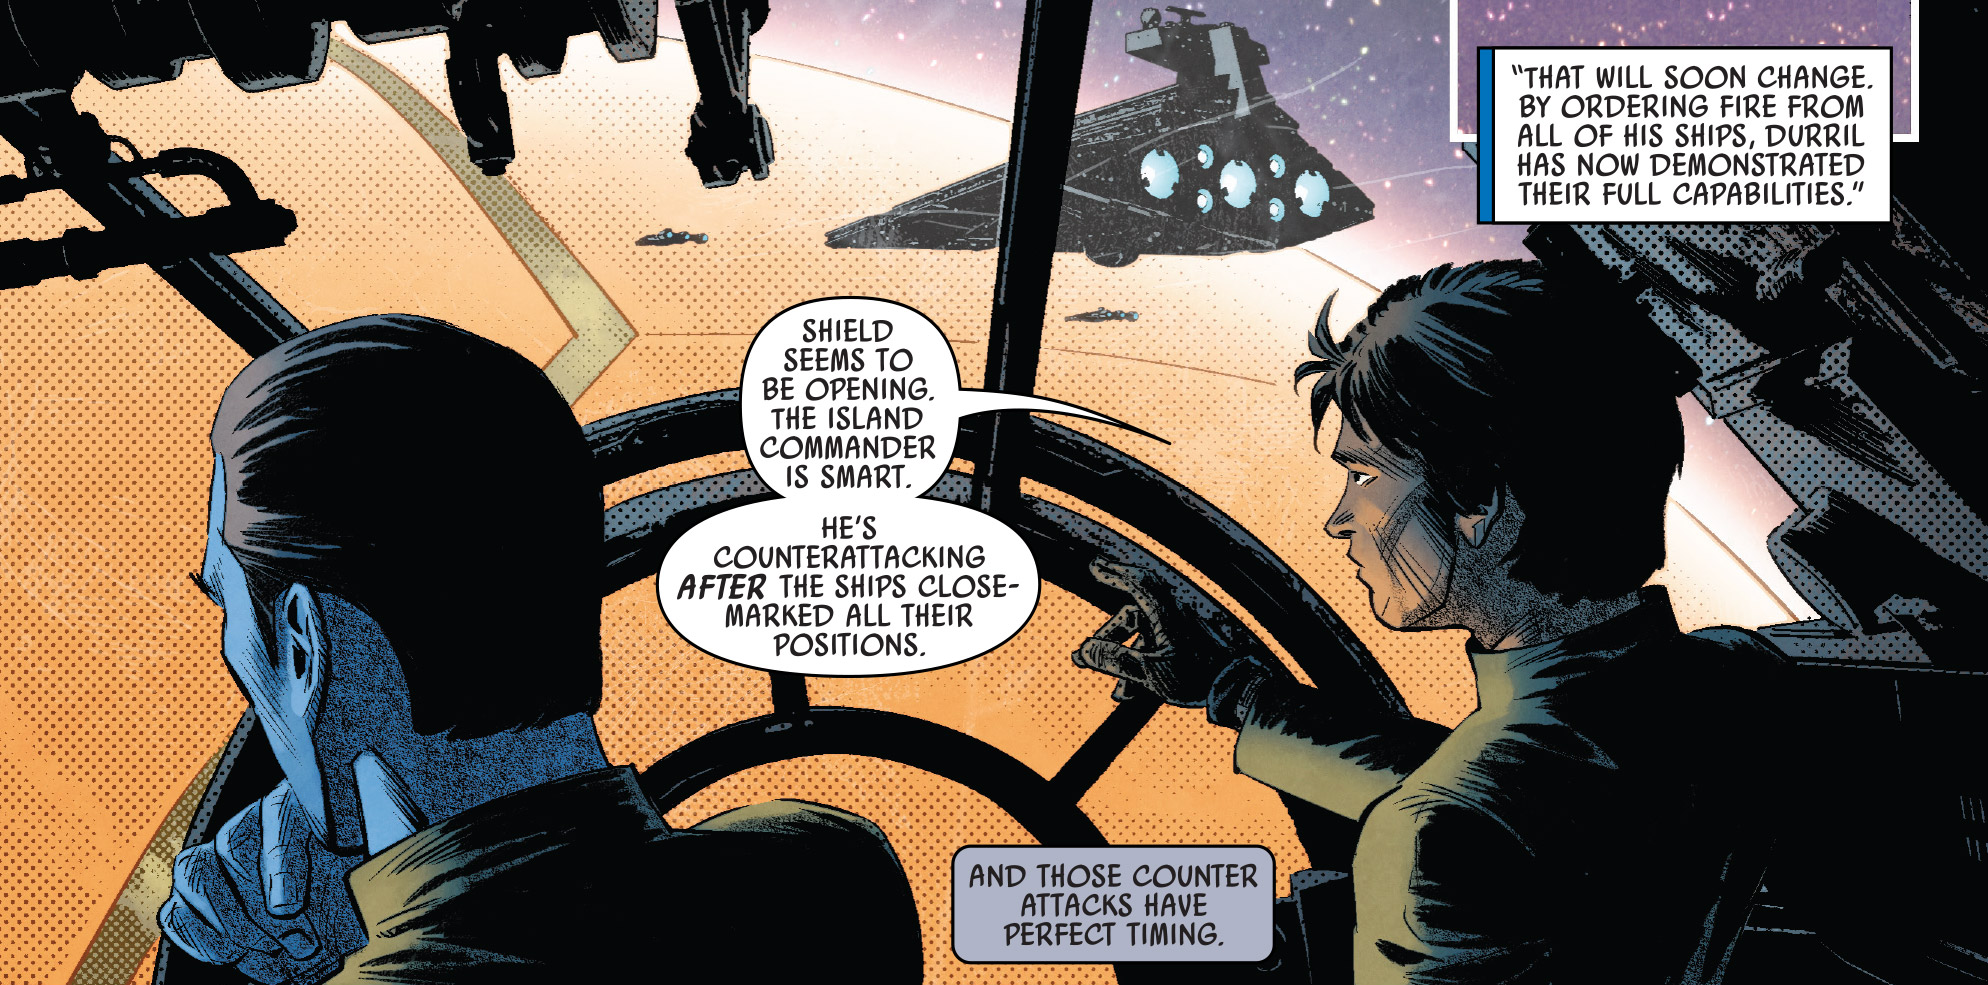
As insurgent activity began ramping up across the galaxy, Thrawn and Vanto were invited to represent the Ninety-Sixth Task Force at a high-security meeting by Donassius. Inside the meeting room, Thrawn was greeted by Yularen, Donassius, Admiral Durril of the One Oh Third Task Force, and Admiral Kinshara of the One Twenty-Fifth. Also in attendance were governors Restos, Wistran, Estorn, and Pryce, representing the at risk planets of Batonn, Denash, Sammun, and Lothal respectively. Taking his seat at the table, Thrawn listened as Yularen described the situation: a series of coordinated insurgencies had sprung up on the represented planets, indicating the potential for Rebel cell activity. Yularen moved forward to inform the admirals and governors that the Lothal insurgency was being handled by Admiral Konstantine, and that the rebel activity on Batonn's Scrim Island. Yularen explained that Scrim Island's Imperial Garrison had been overrun by insurgents who had taken hostages and seized control of the island's energy shield and ion cannons. Thrawn was assigned to Batonn and Scrim Island, but found the information provided by Yularen regarding which cannons were operational to be inadequate to plan his assault. Asking for more time to study the situation and formulate a plan, Thrawn was sharply informed by Donassius that they had no time to simply study the situation without taking action. Refusing to take action that would risk innocent lives, Thrawn refused the assignment and was instead assigned the insurgency on Sammun while the duty of retaking Scrim Island was handed over to Durril and the 103rd.[4]
After the meeting, Thrawn and Vanto discussed the repercussions of Thrawn's decision to so openly disrespect the assignments of High Command. Thrawn asserted with confidence that while he may have soured High Command's perception of him for the time being, that would quickly change. He was confident that the attack on Scrim Island would go poorly for Durril and that he would, as always, be able to clean up the mess. Coldly disinterested in the impact this would have on Durril's career, Thrawn abruptly ended the conversation and spent the rest of the walk to the landing platform silently studying Sammuni art.[4]
Arriving at the landing platform, Thrawn contacted Faro aboard the Chimaera. Thrawn directed her to take the Chimaera and the Ninety-Sixth Task Force to Sammun, verbally giving her a strategy to use to swiftly crush the Sammuni insurgency. Additionally, Thrawn requested that she dispatch the Arquitens-class light cruiser Shyrack and Captain Brento to him for use in his plan. Faro agreed to Thrawn's directives, agreeing to contact him once the insurgency had been dealt with. Vanto expressed concern with Thrawn's choice to stray once again from his assigned mission, but Thrawn was calm in the face of potential backlash from High Command. He confidently asserted once more that all would end up as planned, informing Vanto that while Faro handled the Sammun job they would be observing Durril's attack on Scrim Island.[4]
Boarding the nondescript light freighter Slipknot, Thrawn set course for Batonn.[4]
Studying Scrim Island

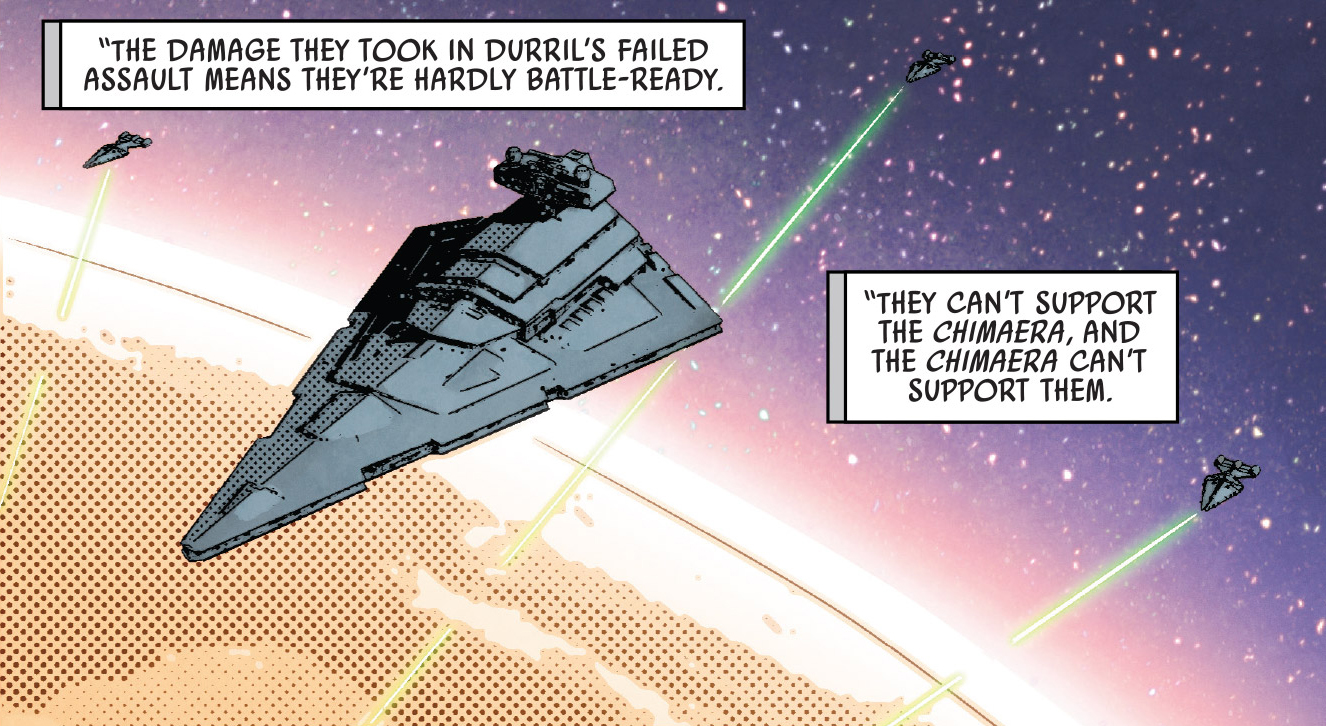
Thrawn and Vanto study Admiral Durril's assault on Scrim Island.
Arriving in space above Batonn, Thrawn positioned the Slipknot in a location where it could view both the Judicator and Scrim Island. From the Slipknot, Thrawn watched as the insurgents carried out their strategy and left Durril flailing. The insurgents, Thrawn observed, weathered Durril's attacks by hiding behind an island covering shield. In the time between attacks, the shield contracted, allowing the Scrim Island insurgents to use ion fire to incapacitate Durril's ships. Thrawn also observed eight small space freighters flying close to the sea between Scrim Island and Batonn's main continent to avoid detection. As he watched, seven of the freighters continued towards the continent while the eighth slipped off to space. Temporarily shifting his attention back to Scrim Island, Thrawn noted that the insurgents were in possession of a turbolaser that Yularen's intel had failed to mention.[4]
His interest piqued by the freighter attempting to flee, Thrawn directed Vanto to hail it with a tight comm signal before it could jump to lightspeed. Instructing Vanto to use the pseudonym "Horatio Figg," Thrawn explained that he wanted Vanto to convince the insurgents on board that they were weapons smugglers in order to gain access to the insurgents' base. Once Vanto received the coordinates, Thrawn commanded him to make the jump, leaving Durril and the 103rd to their fate. Vanto expressed unease with Thrawn's choice, but Thrawn assured him that he had already sent out a distress call on Durril's behalf and that he had seen more than enough of the Scrim Island insurgents' strategy to formulate a strategy of his own.[4]
Leaving Brento and the Shyrack to track the movements of the seven freighters remaining on Batonn, Thrawn jumped to the coordinates that the eighth freighter had given Vanto.[4]
Infiltrating the smugglers' starship
At the coordinates, Thrawn discovered a large Clone Wars-era Nomad starship that the smugglers had set up as their mobile base of operations. Prepping Vanto for the infiltration, Thrawn removed his uniform tunic and shot it to make it appear as though Vanto had killed an Imperial officer and stolen his uniform. Additionally, he had affixed his old rigged lieutenant's plaque to the uniform, telling Vanto to press the tile closest to the center of his chest when the time comes. Promising to spend the time while Vanto is gathering information engineering their escape, Thrawn sent Vanto out to the smugglers and proceeded with his portion of the plan.[4]
Once Vanto had been brought to the insurgents' leader, Thrawn created a bomb out of gimmicked blaster packs like he'd done so many years ago to gain access to the Strikefast. Falsifying a radiation leak warning and hiding in the Slipknot's escape pods, Thrawn set off his bomb when a boarding party boarded the Slipknot to investigate the leak. Escaping the damaged ship in the confusion, Thrawn triggered the Nomad's abandon ship alarm. Reuniting with Vanto in the frenzied chaos of the Nomad's repair bay, Thrawn led Vanto into one of the insurgents' freighters.[4]

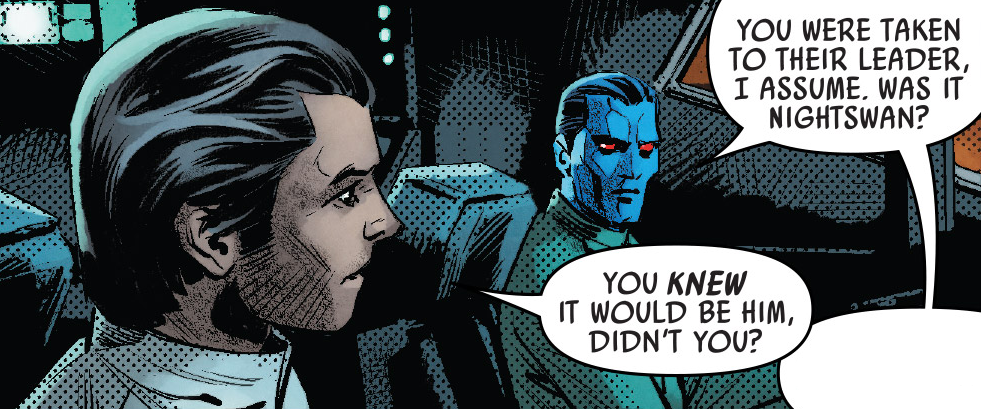
Thrawn and Vanto discuss their successful infiltration of the smugglers' ship.
Settling into the pilots seat, Thrawn explained to Vanto that he hoped that by stealing one of the insurgents' freighters they would be able to gain any data that had been left on the ship's computer. Inquiring about Vanto's time on the ship, Thrawn learned that he had surmised correctly that Vanto had spoken to Nightswan, and that Nightswan was the man behind the Scrim Island Operation.[4]
Having accomplished all that he could on the Nomad, Thrawn used the insurgent freighter to return to Batonn.[4]
Reassessing the battle
Arriving back at Scrim Island, Thrawn discovered that Durril had survived and with the help of Brento and the Shyrack, had made it out of harm's way.[4]
The battle paused, Thrawn met via holographic projection with Donassius, Kinshara, and Durril. During this meeting, Kinshara reported his success on Denash while Thrawn reported the Ninety-Sixth's success at Sammun. Displeased with Durril's loss at Scrim Island, Donassius ordered Durril to take the Judicator and 103rd to the Marleyvane shipyards for repairs. Turning to Thrawn, Donassius asked how much longer Thrawn would need to study the insurgents before he could make an attack. Confident in his ability to handle the situation, Thrawn replied that he had already gathered the information he needed. With that, Donassius officially returned the Batonn Operation to Thrawn and the Ninety-Sixth.[4]
His new mission in hand, Thrawn prepared the Chimaera for battle.[4]
Retaking Scrim Island
The Chimaera and the cruisers fire on scrim island's defenses
Moving into position around Scrim Island, Thrawn briefed Faro, Vanto, and the commanders of the Shyrack, Flensor, and Tumnor on the strategy he had come up with to deal with the insurgents. Ordering the three light cruisers into position, Thrawn watched as they bombarded Scrim Island's shields before being disabled by the island's previously unseen fourth ion cannon. Thrawn, however, was not surprised by the fourth ion cannon and had built his strategy around it. Speaking to Captain Yelfis of the Tumnor, Thrawn learned that the cathtron tube of the fourth ion cannon was in the process of dying.[4]
Moving forward with his strategy, Thrawn began the Chimaera's descent towards Scrim Island, using the partially disabled light cruisers as cover against the ion cannons. Once the Chimaera reached optimal firing position, Thrawn opened fire, shooting into the ocean off Scrim Island's shore. Thrawn's gambit worked, sending a tsunami crashing into the western shoreline of Scrim Island. Firing at a second target in the sea, the Chimaera created a second tsunami that managed to hit the turbolaser emplacement. Alternating fire between targets one and two, Thrawn slammed Scrim Island with tsunami after tsunami until the water shorted out the island's turbolasers. Contacting the island, Thrawn ordered them to either lower their shields or risk the death of those operating the shoreline defenses. When the shields did not lower, Thrawn sent two more tsunamis at Scrim Island.[4]
Faced with destruction, the insurgents of Scrim Island lowered their shield and surrendered to Thrawn. Accepting their surrender with the terms that any further resistance would be met with lethal force, Thrawn directed Vanto to send word of their victory at Scrim Island to Coruscant. Humble in the face of Faro's praise, however, Thrawn admitted that there was more to be done before the battle for Batonn was over. Asking Faro to inform him when the island had been secured, Thrawn retired to his cabin.[4]
Between the battles
Sometime later that day, Thrawn hosted Pryce and Yularen aboard the Chimaera. Settling into the Star Destroyer's conference room with Vanto and Faro, the group discussed the situation on Batonn's main continent. Thrawn revealed that he had discovered the location of the insurgents' stronghold to be the Creekpath Mining and Refining complex outside Paeragosto City. Thrawn then informed Yularen and Pryce of his plan to invade the complex via ground troops as the complex was both shielded and home to 30,000 innocent civilians. Worried about her parents, Pryce suggested that she should go into the complex first to scope out the area and potentially take out the shield generator. Yularen explained further that Pryce would enter the complex with ISB Agent Gudry and tell her family that she was looking for a friend who got lost in the mines to gain access to the insurgent base. Thrawn was hesitant to accept Pryce's plan but ultimately conceded, knowing that he was likely unable to stop an Imperial governor backed by the ISB even as an admiral. Yularen went on to explain that they would send Pryce and Gudry in disguise to the planet Dennogra and have them take a planet hopper from there to Batonn. Though he was forced to accept the plan, Thrawn was vocal about his disapproval of it, thinking it to be both unsafe and dubiously effective. His feelings aside, Thrawn wished Pryce luck on her mission.[4]
As repairs were conducted on the Tumnor, Flensor, and Shyrack, Thrawn positioned them in a wide equilateral triangle around a hundred kilometers away from the Chimaera, a strategic positioning that worried both Vanto and Yularen.[4]
Parley with Nightswan
As twilight fell on Paeragosto City, Thrawn sat in his office aboard the Chimaera surrounded by holograms of Batonnese art. Even as he studied the art as always, Thrawn felt the pressure of each passing moment, knowing that his time with Nightswan was rapidly approaching its end. Keying a comm frequency that he had discovered aboard the stolen freighter, Thrawn contacted the insurgents as requested to speak with Nightswan. Once Nightswan was on the comm, Thrawn requested a face to face meeting in the field two kilometers to the north of the Creekpath facility. Nightswan met Thrawn's request with caution, prompting Thrawn to promise that his guards would stay out of firing distance. Additionally, Thrawn informed Nightswan that he was valueless to Thrawn dead or captured. His interest piqued, Nightswan asked Thrawn why he thought he wouldn't try to kill Thrawn, to which Thrawn replied that he knew that Nightswan valued life too much to try to kill him. He asserted that his life was the only thing keeping the Imperials from destroying the Creekpath facility and killing the civilians inside because he was the only Imperial commander that would go out of his way to prevent casualties. Pained, Nightswan admitted that he had never wanted civilians to endanger themselves by living within his base. Thrawn revealed that he felt the same drive to prevent the deaths of innocents. After a pause, Nightswan agreed to Thrawn's invitation to parley in one hour.[4]
When Thrawn arrived at the field an hour later, he found that Nightswan was waiting for him. Nightswan mused that Thrawn could kill him at any moment, leading Thrawn to reiterate that he had no use for Nightswan dead. The two began discussing the Dromedar incident, Nightswan revealing that he was the reason that Thrawn had a Buzz Droid that day and Thrawn countering by revealing that he had two Buzz Droids so even if Nightswan hadn't helped he still would have escaped. Shifting the conversation, Thrawn revealed that he knew that Nightswan was a part of the Mining Guild, having deduced it from Nightswan's knowledge of precious metals and the fact that he had been to the Thrugii asteroid belt. In response, Nightswan revealed that his activism had begun when the Imperial demand for metals had led to him joining a splinter group of the Mining Guild dedicated to helping out the small businesses hurt by the rapidly forming Imperial metal monopoly. He went on to tell Thrawn that the corruption had eventually spread to the splinter group so he had set off on his own and become the mercenary Thrawn had met on the Dromedar. Nightswan closed his speech by telling Thrawn that once he heard rumors of the Imperials' secret military project, he'd joined the insurgents. His interest piqued by the mention of the Imperials' secret weapon, Thrawn demanded to know everything Nightswan knew about the project. Nightswan, however, refused to divulge unless Thrawn joined him. Changing the subject, Thrawn learned that Nightswan had purposefully sabotaged the Cyphar scarn operation due to being strictly against spice and that Nightswan had never approved of Higher Skies' attempted assassinations.[4]
After another brief discussion about the military project, Thrawn complimented Nightswan's talents as a leader and tactician. In response, Nightswan revealed that he had tried to unit the rebel cells into a Rebel Alliance but distrust and infighting had prevented his plan from coming to fruition. Hoping for equal honesty from Thrawn, Nightswan asked him why he was perpetuating the Empire's evils. In a moment of honesty Thrawn revealed the truth of his situation to Nightswan, telling him about his meeting with the Neimoidians, the Chiss Ascendancy's plans for the Empire, and that he had completely faked his exile in order to infiltrate the Empire. Thrawn revealed that the Ascendancy had given him a single task: either use the Empire as an ally against the threats in the Unknown Regions or collapse them from the inside as easy prey. Discussing political ideals with Nightswan, Thrawn revealed that he believed that the Empire's tyranny was necessary to keep the galaxy in a state of order rather than chaos. The rebellion, he believed, would bring about a dangerous chaos that could allow the threat in the Unknown Regions to overtake everything. Taking a more optimistic tone, Thrawn reminded Nightswan that Emperor Palpatine would one day die and that when that day came there was hope that the Empire would choose a more tolerant and just leader.[4]
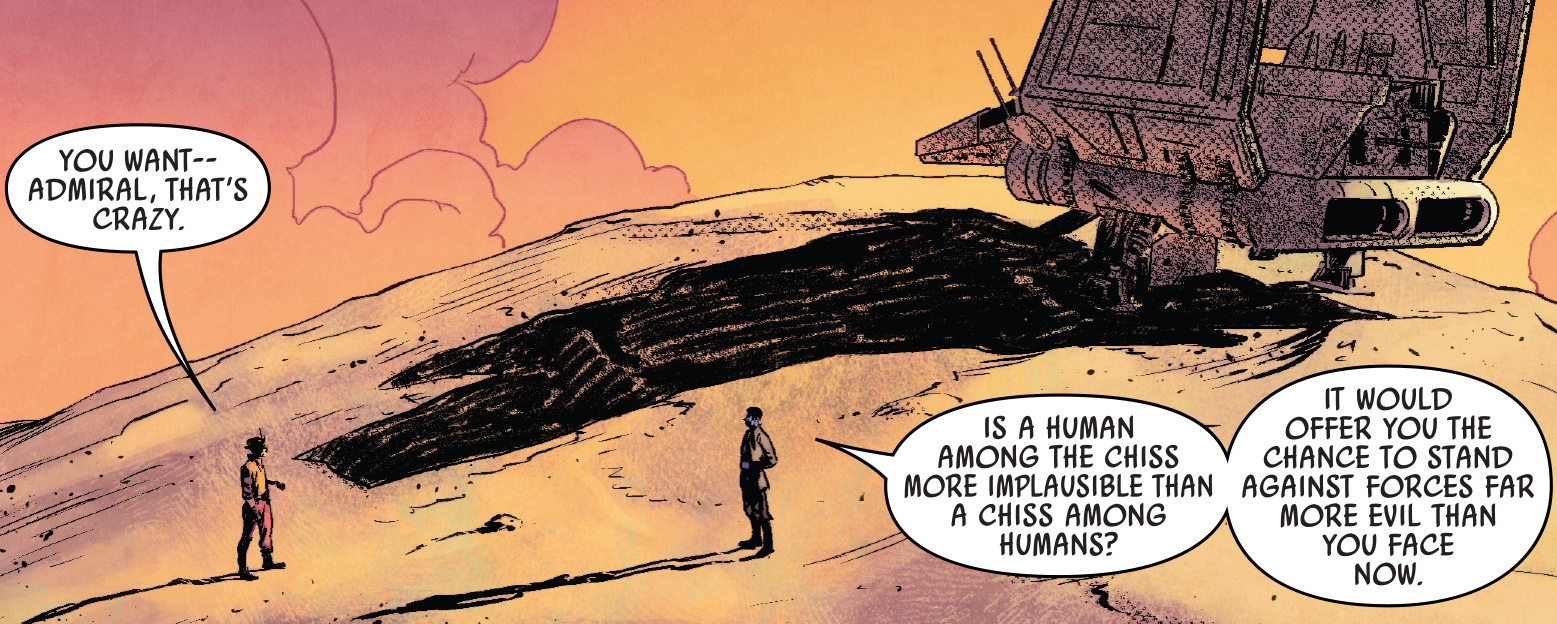
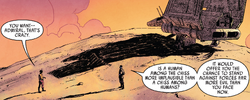
Thrawn's parlay with Nightswan
Returning once more to Nightswan's tactical prowess, Thrawn made Nightswan an offer he hadn't expected; he asked Nightswan to use his skills to aid the Chiss Ascendancy in their battle against the evils far worse than the Empire. Furthermore, he promised Nightswan that if the people of Batonn put down their weapons, no harm would come to them. Believing Thrawn's promise to be impossible to keep, Nightswan declined his offer. He believed that he and Thrawn had the same vision for the future, but vastly different paths to get there.[4]
In a final effort to get Nightswan on his side, Thrawn offered to take Nightswan to his deduced construction site for the Imperial project so that they might investigate it together. Nightswan was intrigued to the point of nearly agreeing, but once again found his obligation to the people of Creekpath forcing him to decline; he knew that surrendering would mean that the people would continue to suffer despite Thrawn's promises.[4]
As he departed, Nightswan admitted that he knew his stand at the Creekpath mine would fail. Thrawn promised to order the soldiers to capture him alive, but Nightswan assured him that the soldiers would execute him anyway. Thrawn made one final attempt to save Nightswan's life by arresting him then and there, but Nightswan once more declined stating that he would hold to his ideals and protect his followers even if it led to his death.[4]
As Thrawn watched him go, Yularen approached him from behind, threatening to shoot him as a traitor to the Empire.[4]
Having overheard none of the conversation that had occurred between Thrawn and Nightswan, Yularen demanded to know why the two had met alone in the field to talk. Thrawn was honest, openly admitting his intentions to recruit Nightswan to the Chiss Ascendancy. Accepting Thrawn's answer, Yularen returned to the matter of Thrawn's unconventional light cruiser positioning, and Thrawn explained that he had positioned the cruisers as he had in hopes of deterring any attempts by the insurgents to steal them. With this, Yularen was satisfied and the two briefly discussed Pryce's mission.[4]
No longer seeing a reason to remain on Batonn, Thrawn returned to the Chimaera to prepare for the remainder of the conflict.[4]
The Battle of Batonn
Once aboard the Chimaera, Thrawn stood at the bridge's forward viewport gazing down at the planet below, lost in thought. As time wore on and Pryce and Gudry failed to check in, Thrawn commanded Yularen to dispatch a special-duty squad to search Pryce's parents' house for Pryce, Gudry, or clues to find them.[4]
The ground battle accounted for and suspecting that the space portion of the battle would begin at any moment, Thrawn ordered Faro to prepare the Chimaera for combat. Even as he did so, ten mid-sized ships emerged from hyperspace and moved at attack speed towards the Shyrack, followed shortly after by two more groups of eleven ships also targeting the cruisers. As the ships closed in on the cruisers, Thrawn calmly commanded the ground troops to send harassment fire in the direction of Creekpath.[4]
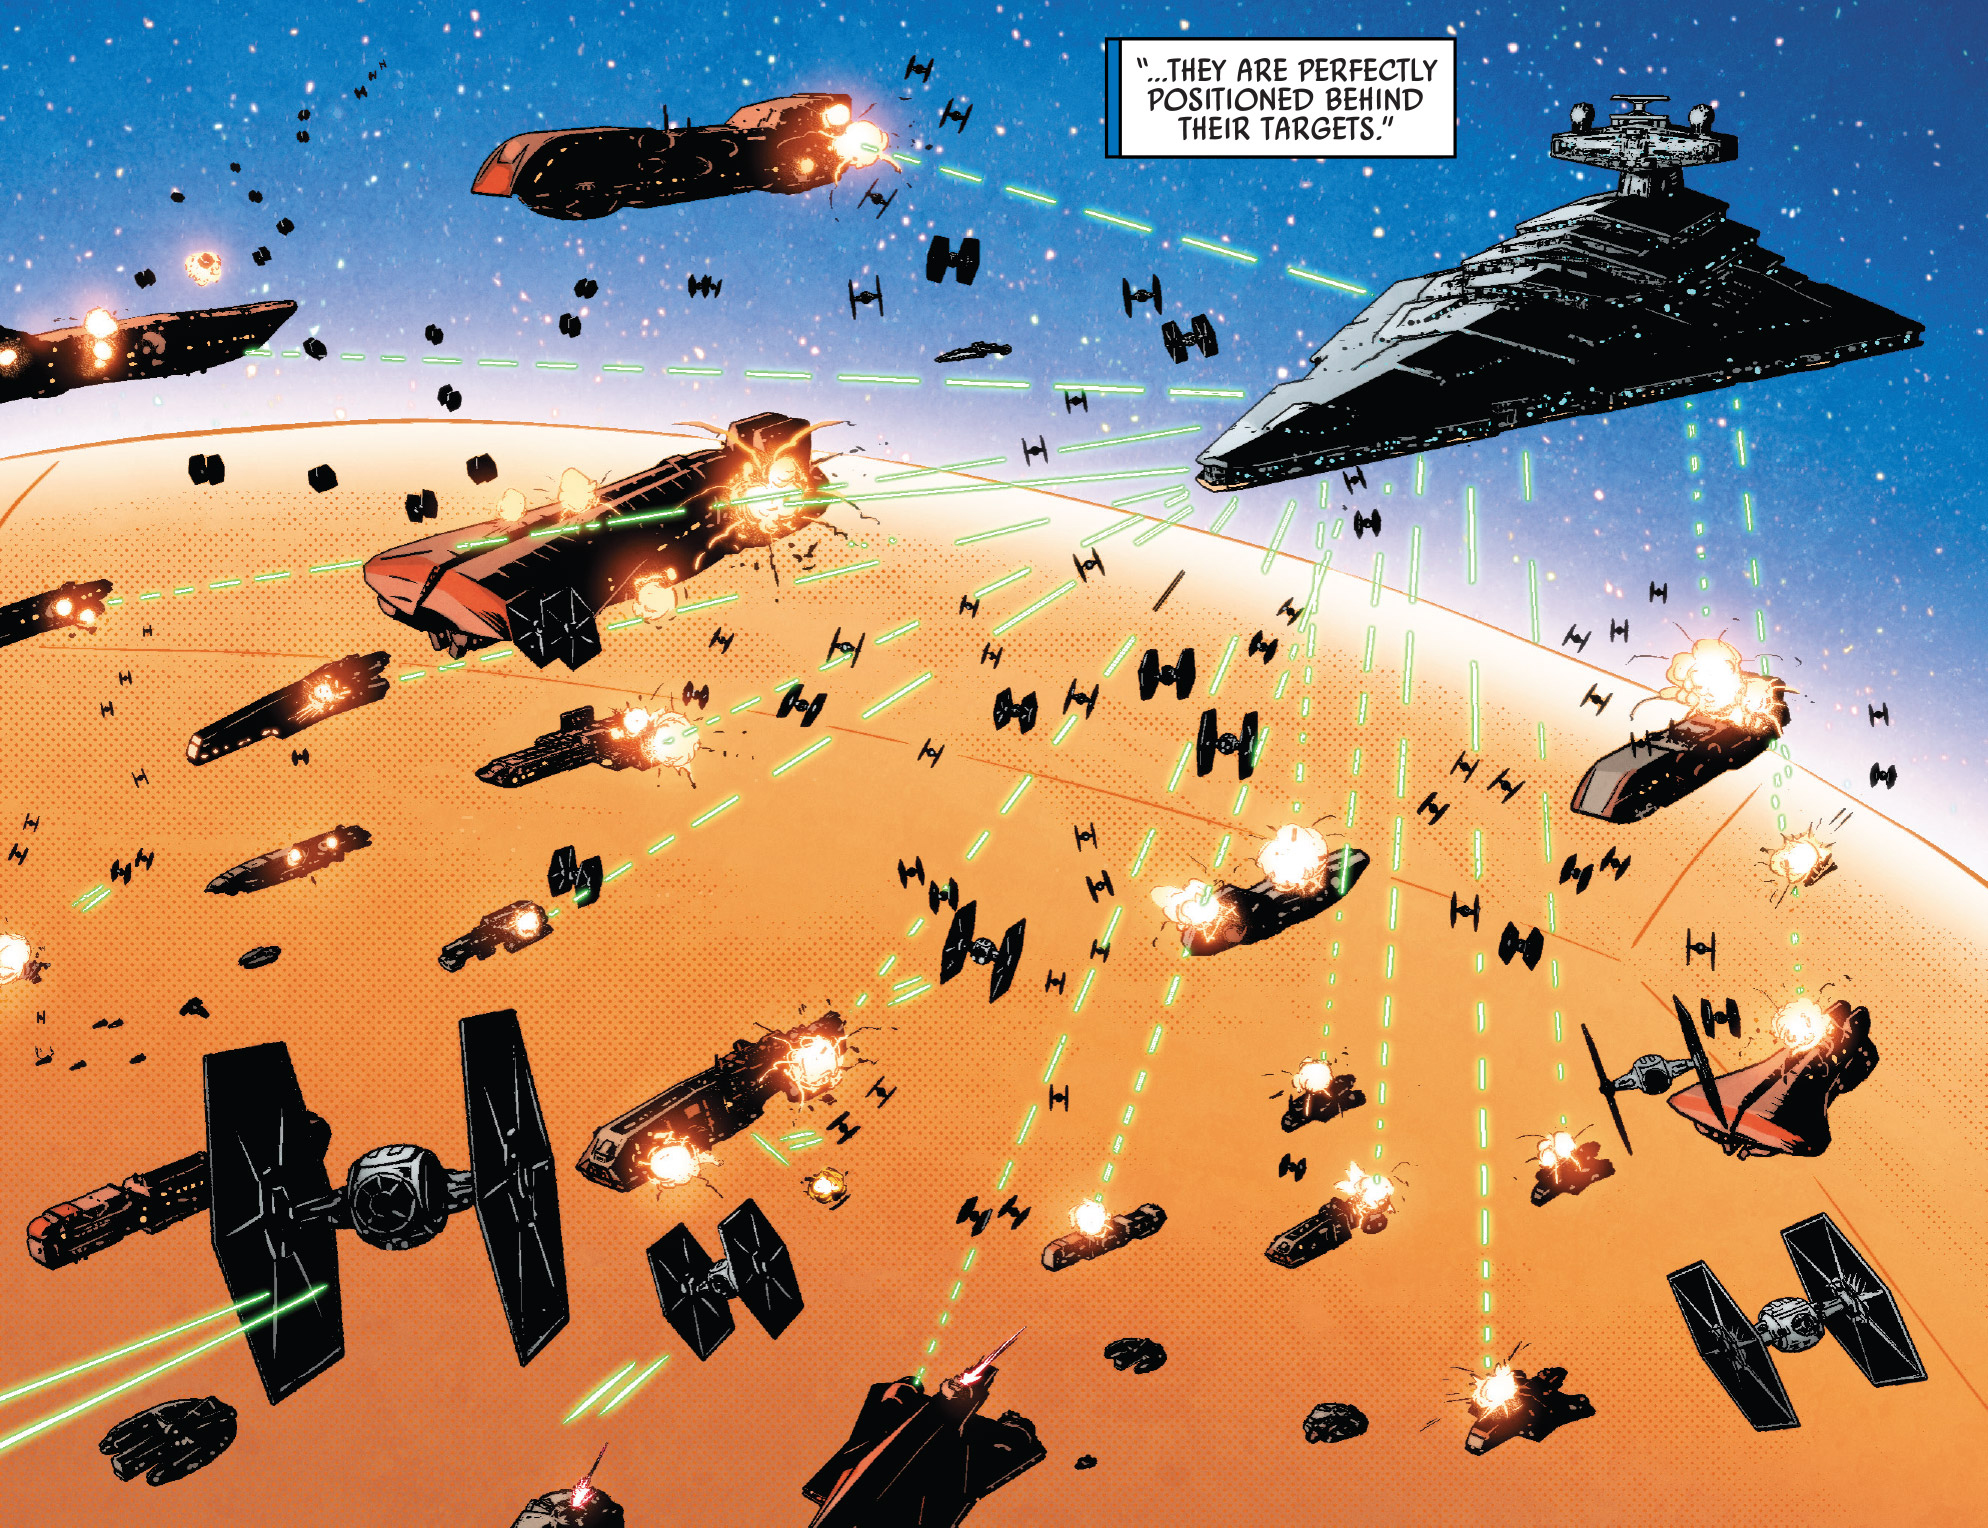

The Chimaera fires on the insurgent ships
As the ships reached the cruisers, however, they passed them by without firing, heading in the direction of the Chimaera. Thrawn remained placid in the face of the imminent attack, ordering the cruisers to free themselves from the repair barges so that the repair barges could release their stowed squadrons of TIE fighters. Using a combination of the TIE fighters attacking from behind and the Chimaera's turbolasers, Thrawn easily neutralized the threat of the mid-sized insurgent ships.[4]
Thrawn watched from the Chimaera's bridge as the explosion set off by Pryce in an attempt to cover up Gudry's death destroyed the Creekpath facility and consumed the civilian houses in the vicinity. Thrawn was disgusted and unnerved by the loss of civilian life, but strode to hide it, attempting to keep up a calm facade as he commanded the ground troops to enter Creekpath to act as a search and rescue team.[4]
When Faro reminded Thrawn that a few mid-sized insurgent ships remained, he decided to let those that chose to flee go unharmed. Those that stayed to fight, he destroyed.[4]
Aftermath of Batonn
Dealing with Pryce
In the wake of the massacre at Creekpath, Thrawn held a meeting with Yularen, Pryce, and Vanto to discuss the events that had transpired. Thrawn and Yularen interrogated Pryce, asking her to explain the events leading up to the explosion. Pressing further, Thrawn asked Yularen to confirm Nightswan's death in the explosion. Yularen confirmed, and Thrawn silently reflected that the galaxy was worse off because of his death. Shifting the conversation, Pryce informed Thrawn that Emperor Palpatine was pleased with what had occurred at Batonn and, as if on cue, Faro signaled on the intercom that Palpatine requested his presence on Coruscant. The meeting over, Thrawn requested a word with Pryce once Vanto and Yularen had left the room.[4]
Quick to protect herself from the repercussions of her actions on Batonn, Pryce proposed a deal to Thrawn. In return for him dropping his Batonn suspicions and helping her with Phoenix Cell on Lothal, she would guarantee him Fleet Admiral Sartan's job as the commander of the Seventh Fleet. Additionally, she promised to help him navigate politics, something that she considered to be his major weakness. Tempted by her offer, Thrawn agreed to consider it and allowed Pryce to depart the board room.[4]
Promotion to Grand Admiral

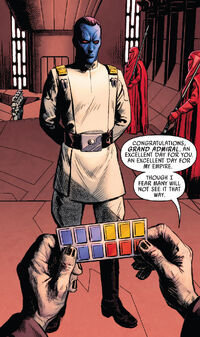
Thrawn receiving his promotion from the Emperor
Arriving on Coruscant, Thrawn made his way once more to the Emperor's throne room. In the throne room, Palpatine presented Thrawn with a new uniform, a white one with gold shoulder bars and a silver collar insignia along with a rank insignia plaque indicating his promotion to Grand Admiral. Before he would take the promotion from the Emperor, however, Thrawn demanded to know about the Death Star. Thrawn explained that his concerns with the Death Star were twofold; he feared that Palpatine might use it against the Chiss and he believed that Palpatine was diverting too many resources that would be better served elsewhere into a single military project. Palpatine assured Thrawn that he had no plans to use the Death Star on the Chiss, mentioning that he had noticed that Thrawn had left the locations of Chiss worlds and bases off his maps of the Unknown Regions. Additionally, he expressed complete confidence in the Death Star's ability to suppress all opposition, making it worth the cost. This said, Palpatine offered the Grand Admiral's rank plaque again and this time, Thrawn accepted.[4]
As Thrawn accepted his rank insignia plaque, Darth Vader entered the throne room. Thrawn greeted him and exchanged formalities, oblivious to the fact that this was the same man that he had once fought beside.[4]
Moving forward
- "It is said that one should keep one's allies within view, and one's enemies within reach. A valid statement. One must be able to read an ally's strengths, so as to determine how to best use them. One must similarly be able to read his enemy's weaknesses, so as to determine how to best defeat him. But what of friends? There is no accepted answer, perhaps true friendship is so exceedingly rare. But I had formulated my own. A friend need not be kept within sight or within reach. A friend must be allowed the freedom to find and follow his own path. If one is fortunate, those paths will for a time join. But if paths separate, it is comforting to know that a friend still graces the universe with his skills, and his viewpoint, and his present. For if one is remembered by a friend, one is never truly gone."
- ―Thrawn, on Eli Vanto
As he prepared to begin the campaign against the rebels of Phoenix Squadron, Thrawn decided it was finally time for he and Vanto to part ways. Pleased with the progress Vanto had made in the areas of tactics, leadership, and strategy, Thrawn believed that Vanto would be a perfect candidate for the Chiss Ascendancy's army. Gifting Vanto his journal, Thrawn directed Vanto to a set of coordinates in the Unknown Regions. These coordinates would bring Vanto to Admiral Ar'alani and the Chiss Defense Fleet, carrying with him greetings from Thrawn.[4]
Freshly promoted and having given Vanto the job he believed that Vanto deserved, Thrawn set off to combat Phoenix Squadron and the rebel cells of Lothal.[4]
Fighting the rebellion
First encounter
- "I will start my operations here, and pull the rebels apart piece by piece. They will be the architects of their own destruction."
- ―Grand Admiral Thrawn


Governor Pryce petitioned Thrawn to deal with the threat posed by the Spectres rebel cell.
As soon as he arrived on Lothal, Thrawn began overseeing operations against the rebels. He attended a briefing with Pryce, Agent Kallus of the ISB, Konstantine and Grand Moff Tarkin, where they discussed that the rebels had attacked Mining Guild ships at the Sereeda Waypoint. Thrawn deduced that the rebels were planning an operation on Reklam Station in the Yarma system. The Grand Admiral declared that he would pull the rebels apart piece by piece, ensuring that they would be the architects of their own destruction. The Imperial garrison there was alerted to the potential rebel threat.[3]
During the rebels' operations, they stole a number of Republic Y-wing starfighters that were left over from the Clone Wars. A group of rebel ships arrived to assist, and Thrawn allowed them to escape. While some officers, such as Konstantine, believed that these ships were the rebel fleet, both Thrawn and Pryce knew that there was a larger resistance movement growing in the galaxy and that these rebels could be the key to the Empire destroying them all.[3]
Occupation of Ryloth
- "War. It's all you've ever known, isn't it? You were so young when you survived the Clone War. No wonder you are equipped in spirit to fight us like you do. War is in your blood. I study the art of war. Work to perfect it. But you...You were forged by it."
- ―Thrawn to Hera
Later, Thrawn fought against the Free Ryloth movement led by Cham Syndulla. The Twi'lek, who had found previous success fighting against the Imperial occupation of Ryloth under Captain Slavin, underestimated Thrawn's abilities and battle strategies. When combating the Twi'leks, Thrawn used far more precise tactics compared to other Imperial officers Syndulla had encountered. Thrawn established a base of operations on Ryloth in the Tann Province, where he spent time studying their culture to better understand them.[9]
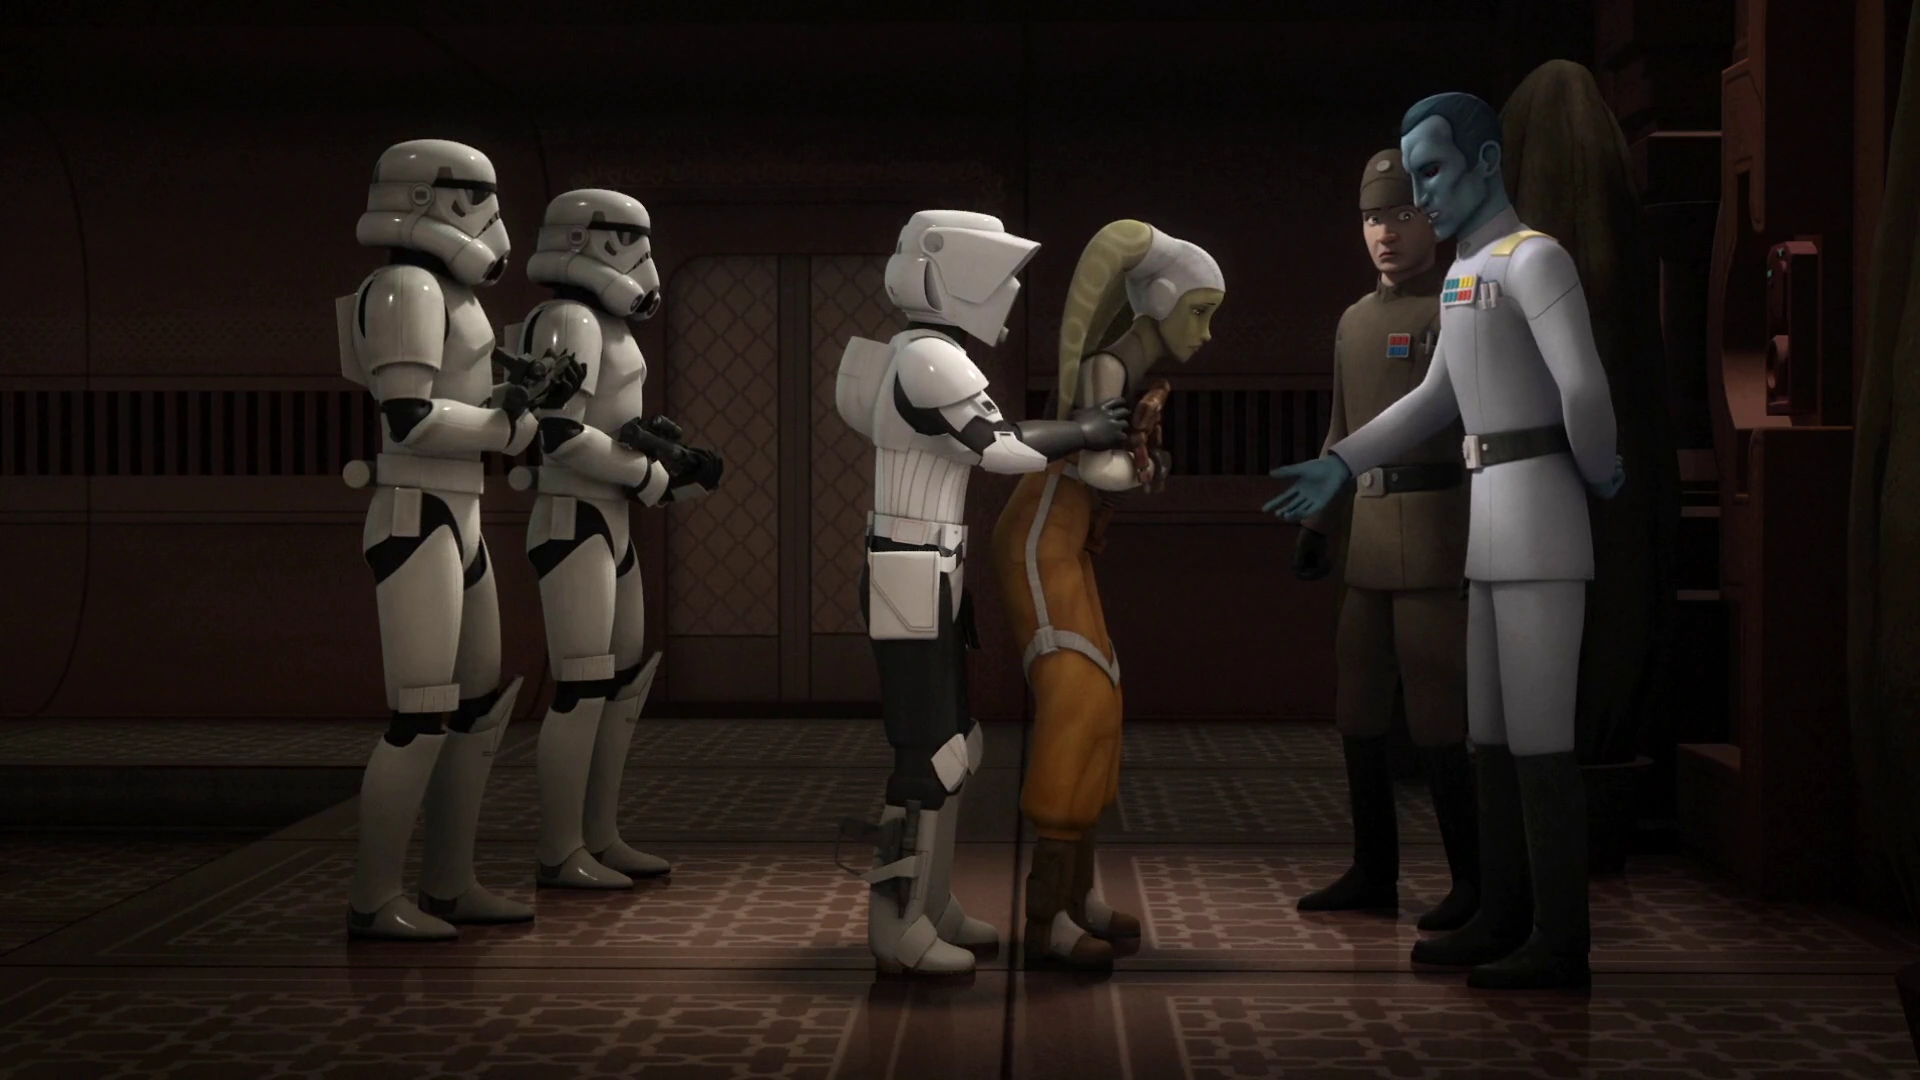
Thrawn's first interaction with Hera Syndulla
Thrawn then spoke with Slavin in his headquarters inside the Syndulla residence about his security arrangements. Thrawn knew that Syndulla would come for her family's Kalikori. Thrawn and Slavin then ran into a servant who tried to steal the Kalikori. Thrawn, Slavin and several troopers then took her into questioning. There, Thrawn was able to deduce from the sentimental value of the Kalikori to a single Twi'lek family and the Syndulla family portrait that she was in fact Hera Syndulla, Cham's daughter and noted rebel. Thrawn was also able to see that the Scout trooper on guard was actually Ezra Bridger and stunned him. Slavin asked Thrawn how he knew that the trooper was actually a rebel, who stated that if trouble brewed, they would quickly come to their aid. After locking them up, Thrawn asked Captain Slavin to have the Kalikori transferred to his ship, which Slavin derisively called a "piece of Twi'lek trash." Enraged at the philistine remark, Thrawn seized the captain by the front of his tunic in an uncharacteristic display of emotion, but released him after a moment and apologized for forgetting that not everyone appreciated art like he did.[9]
Thrawn then went aboard an Arquitens-class command cruiser and watched as Slavin oversaw a prisoner exchange between Syndulla and his daughter. However, Syndulla and the Rebels were able to escape from Slavin's forces by detonating the Syndulla residence, with a mildly impressed Thrawn watching from a distance. Thrawn then allowed the rebels to have their victory.[9]
Testing Konstantine
- "No, Admiral, I want you to handle it yourself. A single light cruiser should be sufficient for a man of your talents."
"You would send me? In one ship?"
"Unless you're not… up to it."
"I will leave immediately." - ―Thrawn dispatches Admiral Konstantine to Mykapo
Thrawn, Admiral Konstantine and another officer discuss the events on Mykapo
Grand Admiral Thrawn was aboard the Chimaera above Lothal with the Seventh Fleet when Konstantine and another Imperial officer arrived to report on the imposition of martial law on Mykapo and the ongoing Imperial blockade of Synistahg. After learning that a local rebel cell called the Iron Squadron had attacked an Imperial patrol with the help of the Ghost, Thrawn deduced that the rebels were evacuating Mykapo's treasonous inhabitants. Curious about the Iron Squadron, Thrawn dispatched Konstantine to deal with the rebels there.[10]
When Konstantine announced that he would depart with a full squadron, Thrawn insisted that the Admiral only deploy a single light cruiser. He reasoned that one ship would be sufficient for a man of his talents. The Admiral was unhappy but complied after Thrawn insinuated that he was not up to the challenge. Konstantine managed to trap the Iron Squadron's leader Mart Mattin and cripple his ship Sato's Hammer and attempted to use him to lure his rebel rescuers into a trap. However, the Spectres circumvented Konstantine's plan and managed to rescue Mart with the help of his uncle Commander Jun Sato. In desperation, Konstantine sent a call for reinforcements to Thrawn.[10]
Thrawn arrived in his Star Destroyer shortly after the rebels damaged Konstantine's light cruiser. The rebels nearly collided with his ship but managed to flee under the ventral hangar. Speaking to Thrawn over the com, Sato vowed to meet him again. Thrawn replied in a similar fashion and allowed the rebels to escape. Thrawn then turned his attention to Konstantine and asked whether he had contacted him for assistance. Konstantine tried to deny it by claiming he had called to report that he had driven the rebels from the system. However, Thrawn realized that Konstantine was lying after seeing his blazing cruiser and noted that the planet's treasonous inhabitants had already escaped.[10]
Extraditing subversives
- "When we find our spy, and we will find them, we shall turn them from an obstacle to an asset."
- ―Thrawn on locating a possible Imperial spy
After a surge of defective vehicles at the Lothal Imperial Armory Complex, Imperial High Command dispatched Grand Admiral Thrawn to investigate the presence of subversives at the factory. In fact, a small rebel cell led by the former Governor Ryder Azadi had been infiltrating the factory and sabotaging vehicles. Thrawn also initiated a new starfighter initiative to develop a starfighter equipped with deflector shields. Thrawn believed that this starfighter would contribute to the Empire's counterinsurgency efforts against the rebellion.[6]

Thrawn addressing the Lothal factory workers
Intelligence of the starfighter project was leaked to the rebellion. While not the full details of the project, this information led the Phoenix Squadron to send Bridger, Kanan Jarrus and the astromech droid Chopper to spy on the factory and link up with Ryder's cell. The Rebel mission coincided with Thrawn's crackdown on the factory. After berating the workers for their poor craftsmanship, Thrawn forced the worker Morad Sumar to demonstrate how fast a 614-AvA speeder bike could reach maximum speed. Sumar had earlier inspected the vehicle. Unknown to Thrawn, he was part of Ryder's rebel cell and a saboteur.[6]
The speeder bike began to overheat and Sumar begged Thrawn to end the simulation. However, Thrawn was not satisfied and set the speeder bike's engines to full speed. The faulty bike exploded and killed Sumar. Thrawn's actions horrified Bridger, Jarrus, the workers, Kallus and even Yogar Lyste. Thrawn took this as an opportunity to warn the workers that they would be personally testing every vehicle they built, expecting a substantial drop in the malfunction rate as a result. Thrawn then ordered Pryce, Kallus, and Lieutenant Lyste to question each of the workers. As a precaution, the Empire also jammed the factory's communication signals.[6]
However, Bridger and his team managed to slip away and reach Section A2, which stored the blueprints for Thrawn's weapons. Meanwhile, Thrawn reassured Pryce that he had secured the chamber by ordering the sentries to shoot anyone trying to enter the facility without his personal code on sight. When Kallus expressed skepticism that Thrawn's new fighter initiative would make a difference, Thrawn responded that victory and defeat depended on the smallest details. He then ordered another worker to demonstrate his AT-DP walker. When the walker collapsed, Thrawn gestured for his stormtroopers to arrest the man.[6]
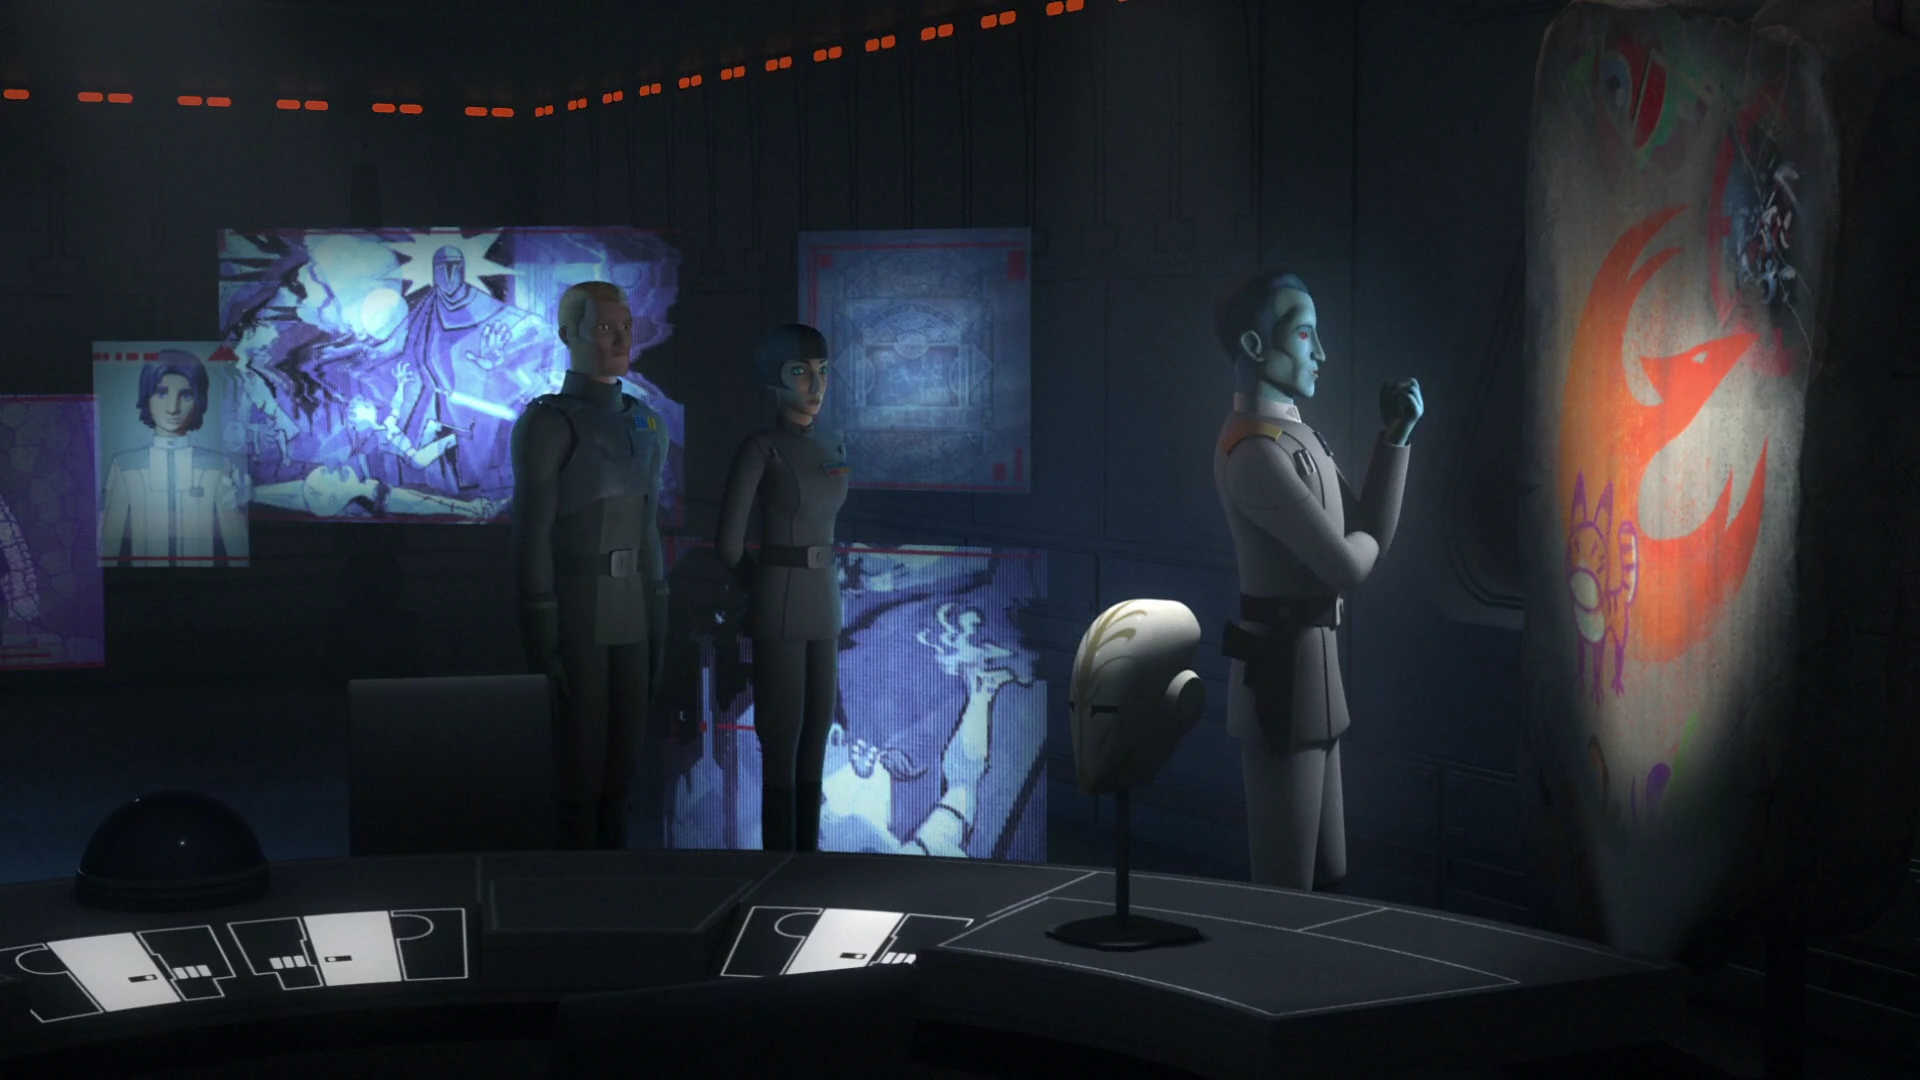

Thrawn studying his enemies' art
Thrawn later summoned Lyste and Kallus to his office at the Imperial headquarters. The office was decorated by holographic displays of the Spectres, Sabine Wren's graffiti, Mandalorian art and a Jedi Temple Guard's helmet. Thrawn then showed his subordinates one of Wren's starbird graffiti paintings. While Lyste merely dismissed the painting as a retaining wall, the more perceptive Kallus recognized the starbird as a creature of light that had been re-appropriated as a symbol of the Phoenix Squadron. Thrawn speculated that the crew of the Ghost, whom he had encountered on Ryloth, had a special connection to Lothal.[6]
When Thrawn inquired about their crackdown, Lyste informed the Admiral that two of the workers had disappeared following his speech and that they had left behind their uniforms. Kallus advised issuing an alert but Thrawn countered that the rebel infiltrators had already found new disguises and were after his secret starfighter project. Thrawn ordered Kallus and Lyste to secure Section A2 but the Rebels managed to escape the factory with the help of their secret informant, who allowed the rebels to escape on an AT-DP walker at the east gate's hangar bay. The Rebels' escape coincided with a diversionary attack launched by Ryder at the east gate.[6]
Reasoning that the Rebel infiltrators would take advantage of the attack to make their escape, Thrawn ordered the AT-AT pilots aboard the AT-AT walkers "271" and "414" to attack the Rebel's stolen AT-DP walker. Despite the efforts of Thrawn, the Rebel infiltrators managed to escape with the stolen plans. Later, Thrawn heard a report on the skirmish from Lyste. Satisfied, he dismissed him and then turned to talk with Pryce and Kallus. Thrawn voiced his suspicions that the Empire had a mole within their ranks who was supplying the rebellion with information. When Pryce suggested questioning all Imperial personnel, Thrawn suggested to set up a trap for the traitor.[6]
Strike on Lothal
- "Is Admiral Thrawn there?"
"We have reports of an increase in capital ships, but no confirmation." - ―Sabine Wren and Hera Syndulla about Thrawn's presence on Lothal
Using the information stolen by Chopper, Bridger, and Jarrus, Syndulla was able to plan a strike on the Lothal Imperial Factory. She planned to deploy a fraction of Phoenix Squadron and assigned Bridger to carry out reconnaissance work on Imperial military positions. When Wren asked if Thrawn was there, Syndulla replied that there had been an increase in Imperial ships above Lothal but that they did not know for sure. Syndulla was forced to relieve Bridger of his duties after he experienced a Force vision of the former Sith Lord Maul and attacked a Rebel Crewman. While Bridger, Jarrus, and Wren stayed behind to deal with Maul, Syndulla proceeded with the mission.[11]
Continuing the search
- Kallus: "You seem, in surprisingly, good spirits, considering this loss."
- Thrawn: "Loss you say? The rebels may have protected the location of their base for now, but, in doing so, they have narrowed my search. Before today, they could have been hiding in any of the thousand systems. But now, now I know they are, almost certainly, on one of the ninety-four planets surveyed by my infiltrators. The rebels have won this battle, but the war will be ours."
- ―Kallus and Thrawn discussing the outcome of the EXD infiltrator droid sabotage.[src]
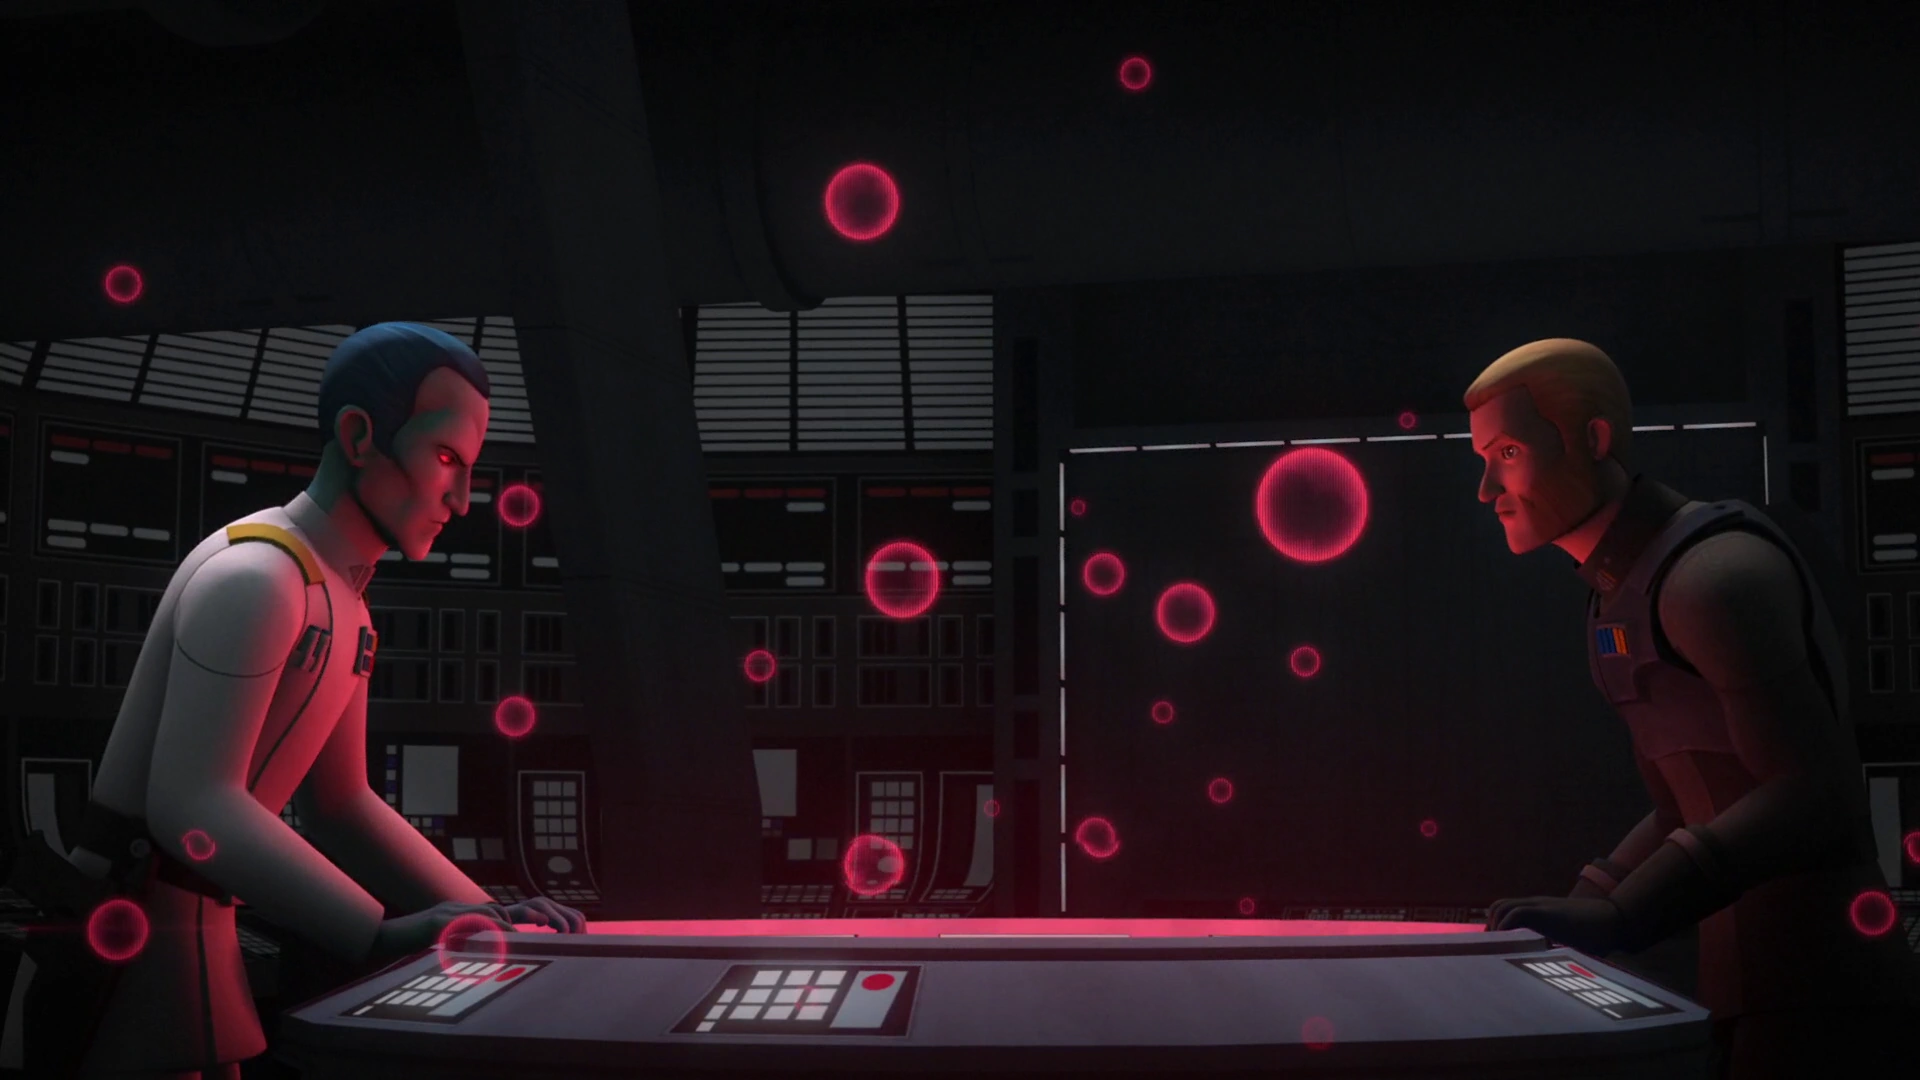
Thrawn and Kallus discussing the loss of the EXD droids
Later, Thrawn embarked on a campaign to scour the Outer Rim for the Phoenix Squadron's base. Under his command, E-XD infiltrator droids were dispatched to Outer Rim worlds to search for the bases. One of these droids, EXD-9, stumbled upon Chopper Base and was adopted by Garazeb Orrelios and AP-5, who mistook him for a protocol droid. Kallus, using the pseudonym Fulcrum, managed to warn Orrelios who disabled and reprogrammed the droid with the help of AP-5 and Chopper. The rebels then sent EXD-9 back to the Empire as an improvised bomb which destroyed an Imperial Star Destroyer.[12]
Following the destruction of the Star Destroyer, Thrawn met with Kallus aboard the Chimaera. When Thrawn asked how the explosion happened, Kallus responded that he believed that the rebels reprogrammed the infiltrator droid to explode upon returning back to the ship. Despite the setback, Thrawn remained in good spirits because the incident greatly narrowed down the planets that could be housing the rebel base from a thousand to ninety-four systems.[12]
Discovering Fulcrum
- "I believe Agent Fulcrum will prove far more useful to the Empire than Kallus ever was."
- ―Thrawn revealing his discovery of the identity of Fulcrum
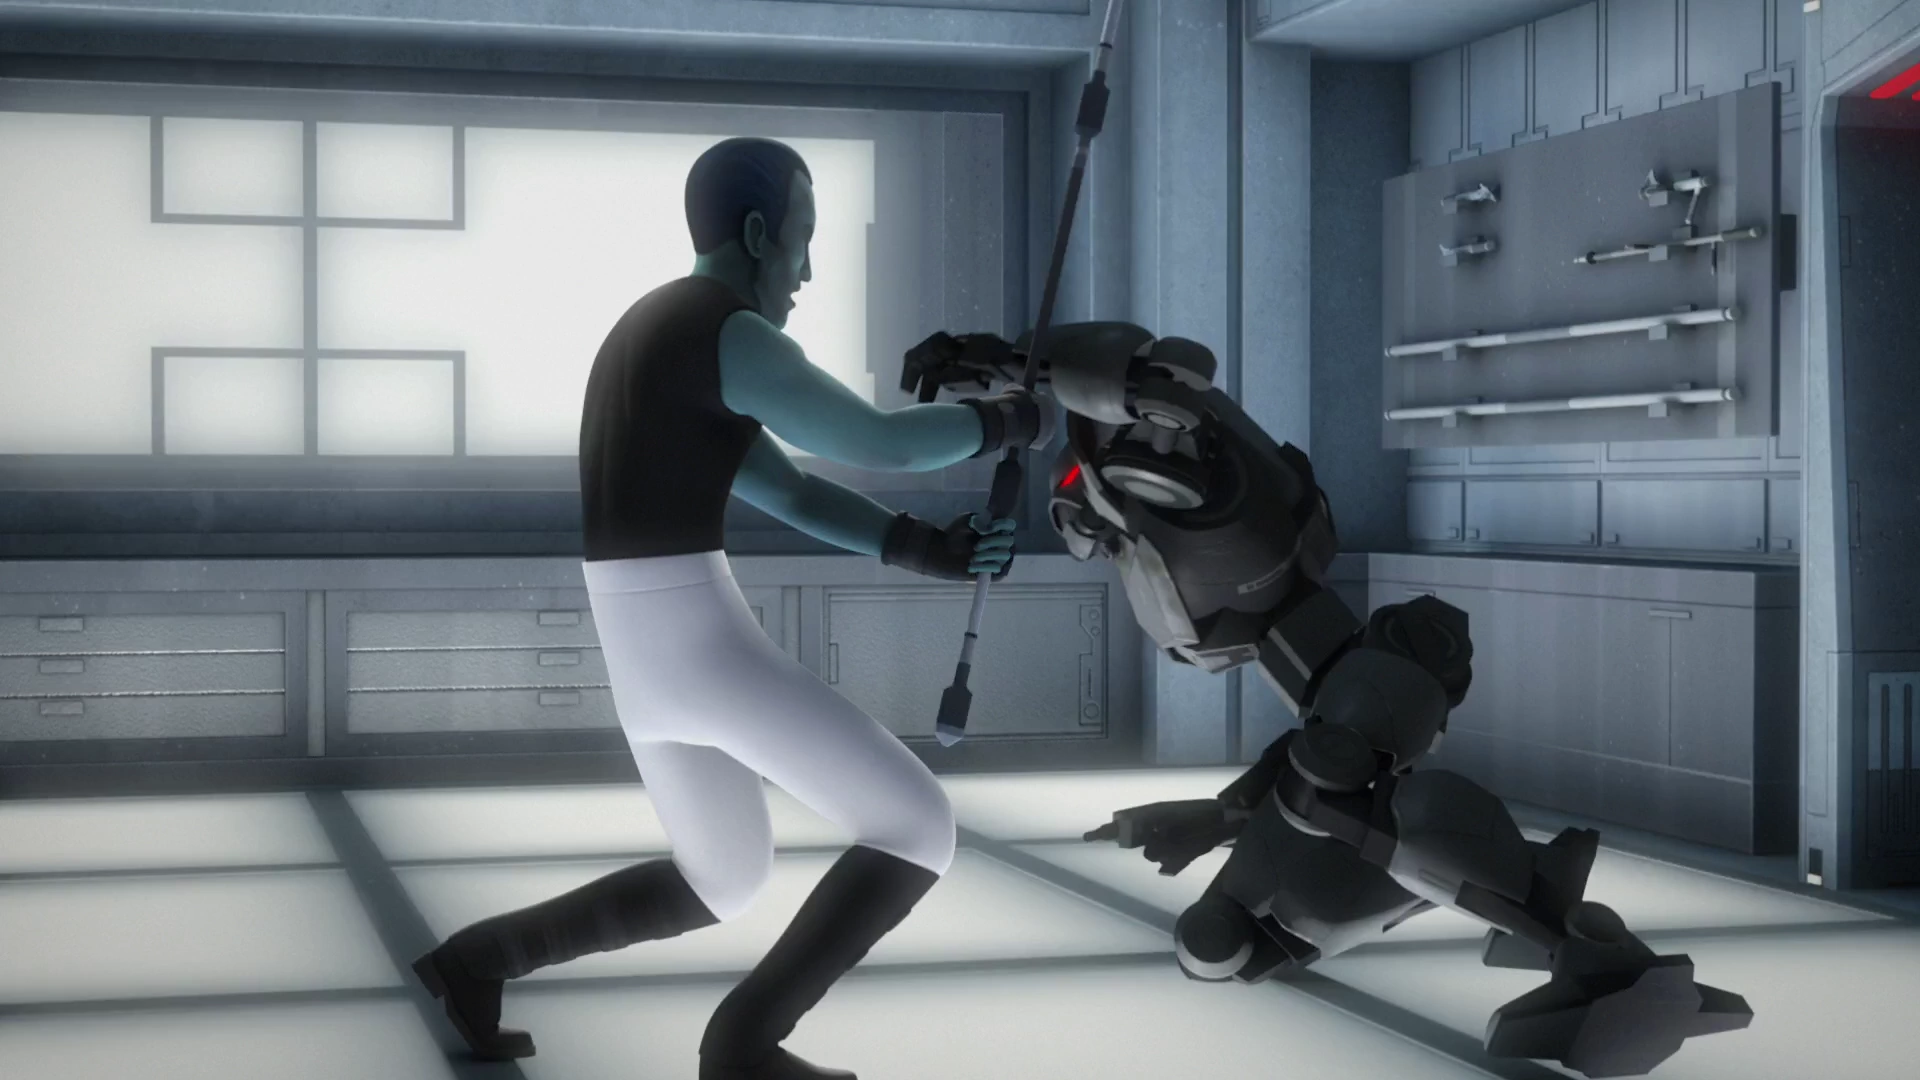
Thrawn sparring with specially programmed sentry droids
Thrawn intercepted a transmission beamed out under the code phrase "by the light of Lothal's moons" and discovered that the rebel mole went by the codename "Fulcrum," and that it was the reason for recent rebel successes. Thrawn and Pryce listened in on Fulcrum's next transmission to learn his true identity. Because only Imperial officers who were Sector Command staff or higher had access to the intel Fulcrum sent in the transmission, Thrawn realized that Fulcrum was not only a Rebel spy and an undercover saboteur but also a traitor to the Empire as well. To ferret out the traitor, Thrawn enlisted the help of the Head of the Imperial Security Bureau Colonel Wulff Yularen to screen the Lothal Sector's Command staff. Agent Kallus and Lieutenant Lyste were summoned to the Chimaera, where they encountered Sector Command staff en route to Thrawn's office. Kallus and Lyste encountered Thrawn as he was practicing hand-to-hand combat with a pair of Imperial sentry droids, and then continued to the office and met with Yularen and Admiral Konstantine. Thrawn then met with the group and, along with Yularen, briefed Lyste and Kallus about the danger posed by Fulcrum. During the meeting, Thrawn also revealed that he had narrowed the search for the rebel base by analyzing Rebel attack patterns on Imperial installations and ships, and most importantly their proximity to the planet Lothal. When Lyste expressed his enthusiasm in hunting Fulcrum, Thrawn warned him that nobody was above suspicion.[13]
After dismissing his guests, Thrawn met with Pryce, who had come to inquire about progress in determining the Rebel base's location and the identity of Fulcrum. Thrawn told her he had set a trap by asserting that the Rebel spy in question was present for the meeting and that they now needed to wait for the spy to pass on the information they learned. Yularen then informed Thrawn that a coded message had been beamed off the Chimaera following the transfer of the shuttle thief that Lyste had apprehended above Lothal. Thrawn decided to visit the prisoner for himself.[13]
When Thrawn along with Pryce and Yularen arrived at the detention block, they discovered that the prisoner had escaped. After Yularen discovered that Lyste was the last person to access the detention block, Thrawn came to suspect that Lyste was the rebel agent Fulcrum.[13]
Thrawn returned to his office and was informed by the stormtrooper sentry outside that Lyste was waiting inside his office. Already suspicious, he beckoned for two stormtrooper guards and cautiously entered his office. By this time, "Lyste" and Chopper had deleted the Atollon system from his charts and were hiding behind one of his exhibits to avoid detection. Meanwhile, Fulcrum reprogrammed two of Thrawn's sentry droids into assassin droids and set them to Thrawn's office. The droids entered the room and knocked out the guards. Thrawn attempted to disable the droids with the command "Override Code Rukh," but failed. Following a fierce struggle, Thrawn destroyed the droids by shooting them in their chests. Thrawn also caught sight of "Lyste" fleeing his office. Believing that Lyste had tried to assassinate him, Thrawn contacted Yularen and instructed him to proceed to the Chimaera's hangar bay.[13]
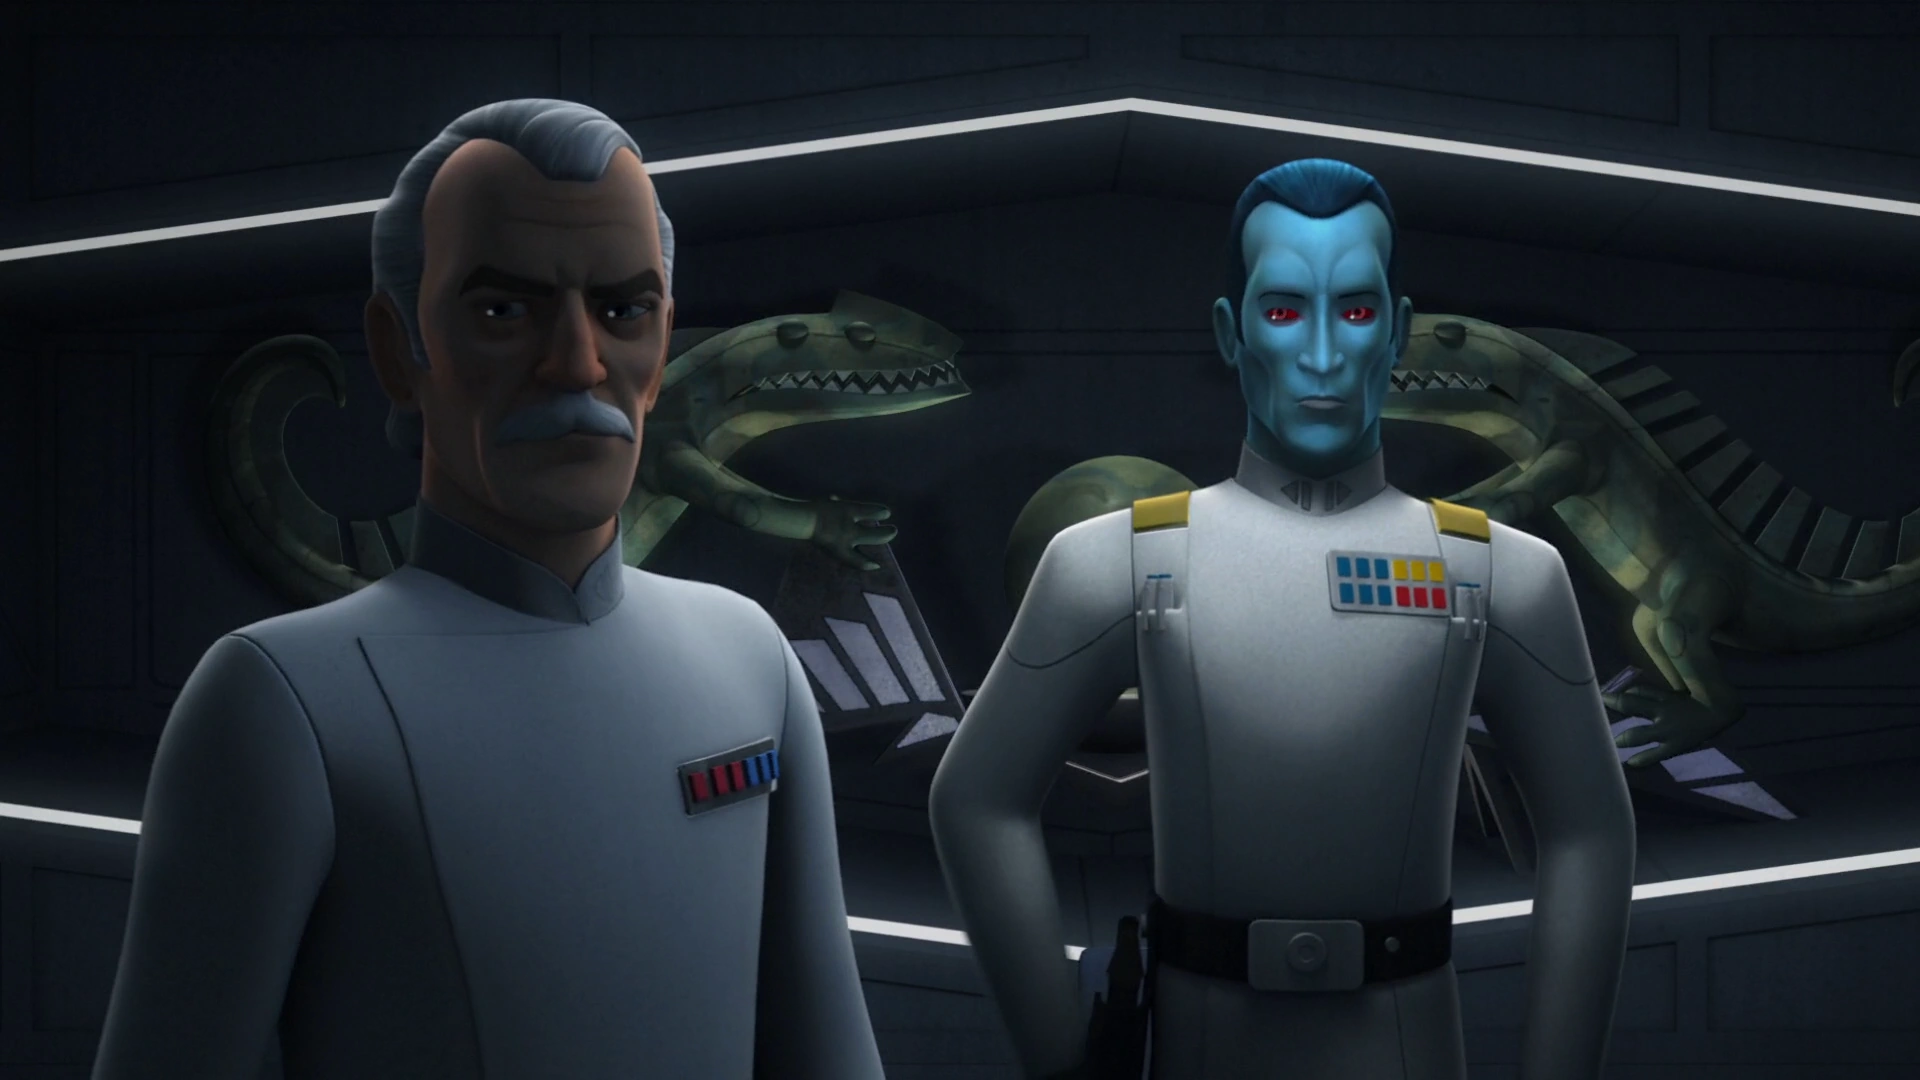
Yularen with Thrawn discuss the real Fulcrom
The rebels managed to escape, but Lyste was arrested as Fulcrum. Following Lyste's arrest, Thrawn and Yularen interrogated him and quickly ascertained that he was not Fulcrum. Despite being aware that Lyste was innocent, Thrawn told Kallus and Pryce that Fulcrum was apprehended, before dismissing the two. In private, Yularen expressed his dissatisfaction with how easy the conclusion was made and how Lyste was too inexperienced and naive to be capable of what he's been accused of. Thrawn agreed with Yularen's assessment. They then analyzed the helmet the shuttle thief had left behind, which was inscribed with an artistic depiction of a Loth-cat. Thrawn recognized the art style as belonging to Wren and identified Bridger as the owner of the helmet. When Yularen asked why Kallus did not report Bridger's capture, Thrawn concluded that Kallus was the real Fulcrum and had framed Lyste for the crime. Thrawn's plan was to manipulate Kallus into revealing the location of the rebel base in the Lothal sector.[13]
Hunt for Mon Mothma
- "She could be our key to locating the true rebel fleet."
- ―Grand Admiral Thrawn on the possible capture of Mon Mothma
After Senator Mon Mothma resigned from the Imperial Senate and gave a fiery speech denouncing the Ghorman Massacre placing the blame upon Palpatine, Thrawn received intelligence that Mothma and the Spectres rebel cell were planning to travel through the Archeon Nebula to avoid Imperial detection. Based on his knowledge of Phoenix Leader Syndulla, Thrawn anticipated that Syndulla would be risky enough to travel through the Archeon pass. In response, he deployed his prototype TIE Defender piloted by Imperial ace, Commander Vult Skerris, and escorted by two TIE interceptors to flush the rebels out of the nebula. Thrawn also tasked Pryce and Konstantine with positioning two Star Destroyers outside of the Archeon Nebula to capture them when Skerris drove them out. Despite Thrawn's planning, Syndulla and the Spectres managed to escape with Mothma and her entourage following a brief skirmish in the Archeon Nebula. Following her escape, Mothma and other rebel leaders formally established the Alliance to Restore the Republic above the planet Dantooine.[14]
Spy droids
- "I believe this C1 astromech is the droid infiltrator Grand Admiral Thrawn referenced in his memo about the rebels of Phoenix Squadron."
- ―LT-319 on capturing Chopper
As part of his counterinsurgency efforts, Thrawn also utilized the services of a team of Imperial Information Office intelligence officers based aboard an IGV-55 surveillance vessel. This team was led by Imperial Controller LT-319 and were tasked with gathering intelligence and monitoring rebel activities. These individuals were fitted with AJ^6 cyborg construct implants and gave up part of their autonomy in the Empire's service.[15] As part of their intelligence operations, these spies were tasked with keeping an eye out for rebel droids such as Chopper, who had taken part in numerous undercover missions.[16]
During the Spectres rebel cell's mission to Killun Station, LT-319's team detected Chopper's presence at the ISB base. Using a network terminal, the team reprogrammed Chopper into a double agent droid and tried to use him to discover the location of Chopper Base. As part of the operation, Chopper hijacked the rebel ship Ghost and used a data spike to transfer data from the ship's navigation computer to the surveillance vessel. Before the download could be completed, the rebels retook control of their ship and removed the Imperial programming from Chopper. Syndulla then destroyed the surveillance vessel by sending back their data feed, causing a data surge that blew the vessel apart.[16]
Locating Atollon
Blockading Chopper Base
- "I do not require glory, only results for my Emperor."
- ―Thrawn's response to Kallus after he derided Thrawn for holding his capital ships
Thrawn arrives at the Imperial Complex flanked by his death trooper guards
Later, Thrawn acquired the services of a six-man squad of death troopers that became his personal guard.[17] He flew his Lambda-class shuttle to the Imperial Complex in Lothal's Capital City for a private meeting with Pryce and Konstantine. Inside the briefing room, Thrawn closed the blinds and warned them that they still had a traitor in their midst. He also initiated a hologram conversation with Tarkin and warned that the Phoenix Squadron and General Jan Dodonna's Massassi Group were planning to attack the TIE Defender factories on Lothal. While Thrawn had not determined the location of the Rebel base yet, he vowed to capture the Rebel leadership at Tarkin's request.[18]
Agent Kallus was listening to Thrawn's conversation and traveled to Bridger's former home, which had a transmitter which he had used to send his Fulcrum transmissions to the rebels. Aware that the traitor had listened in on the briefing, Thrawn followed him. When Kallus tried to inform the rebels, Thrawn startled him and revealed a communications jammer in his hand. Following a brief scuffle, Thrawn managed to defeat the rogue agent, though Kallus destroyed his jammer and was able to warn the rebels. Kallus was taken captive by two death troopers and brought to Thrawn's command center. Thrawn coolly stated to Kallus that by looking at both the trajectory of General Dodonna's fleet and the agent's transmission, they pointed at a spot that was not shown on Imperial charts. Thrawn was aware that it was not on the charts, as it had been deleted by Bridger, but by looking at the ancient art of the people in the sector, instantly knew that the rebel base was in the Atollon system.[18]
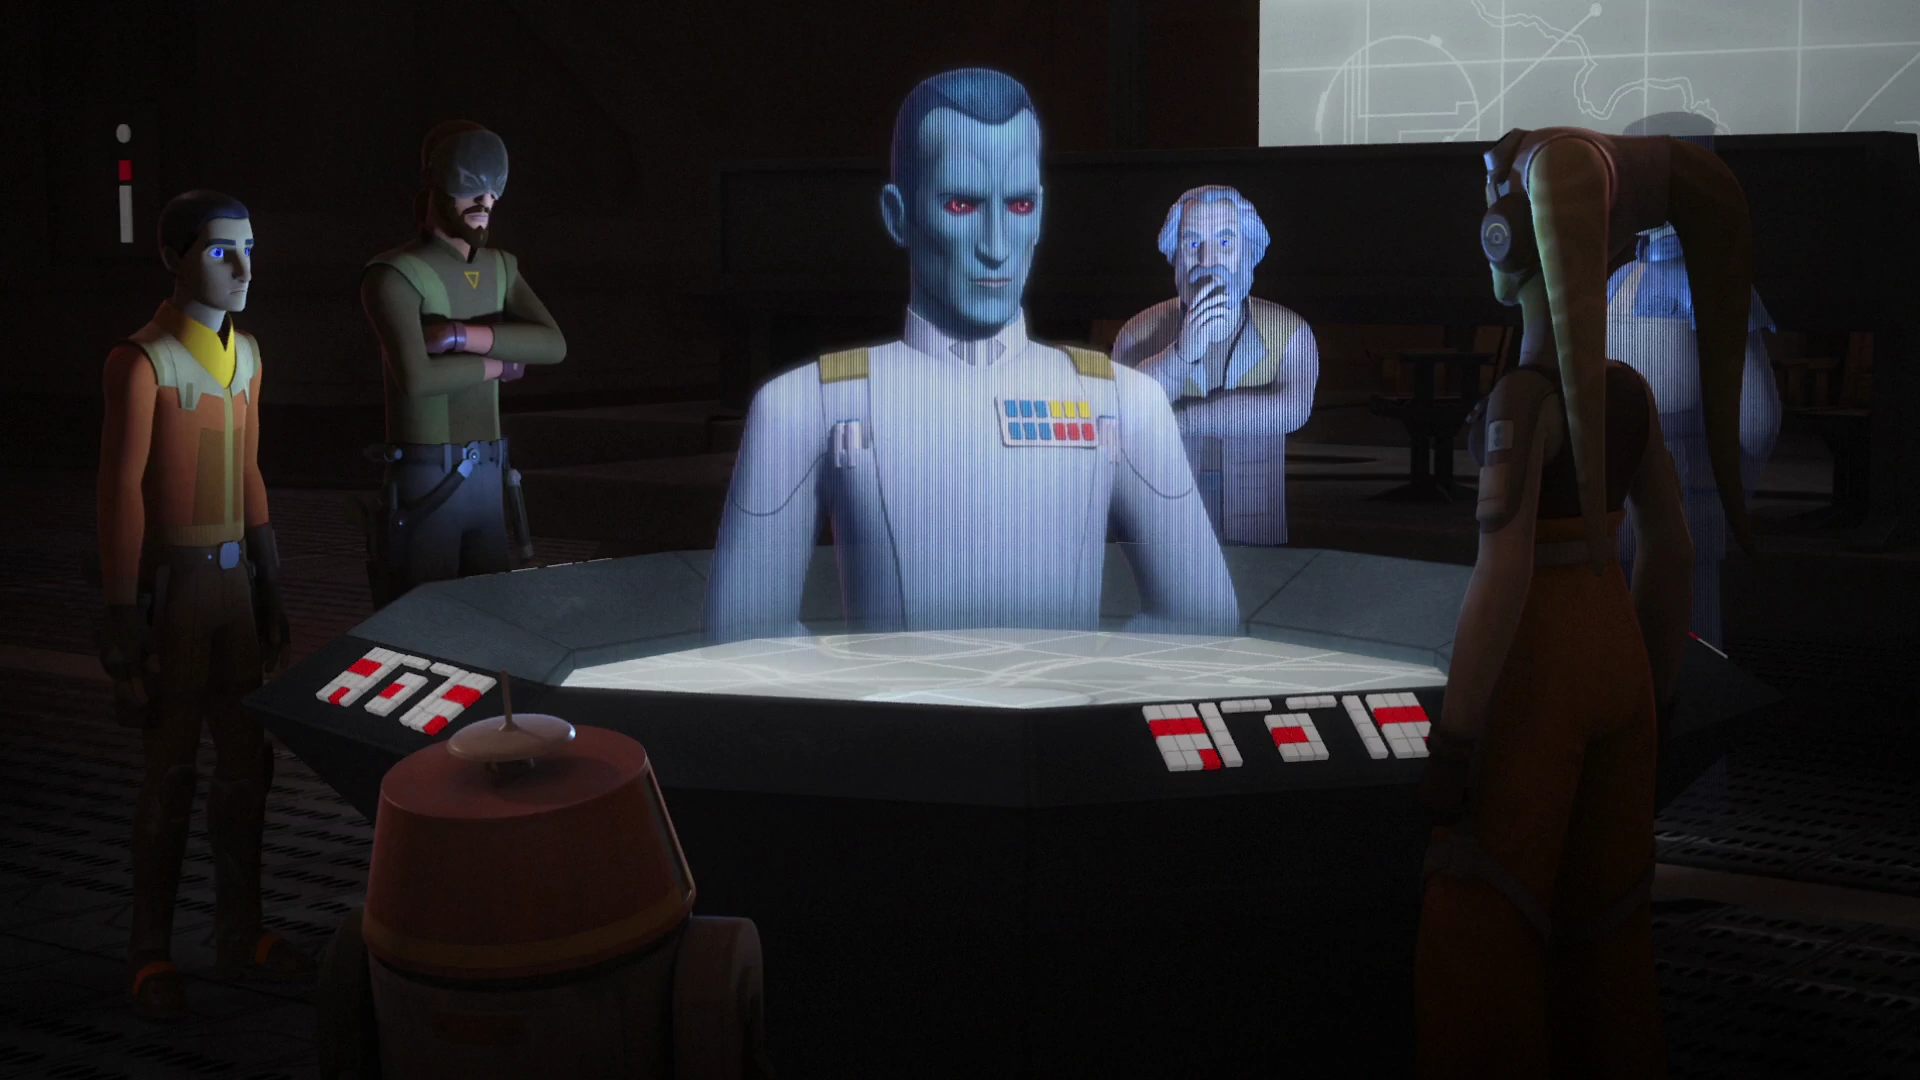

Thrawn addresses the Rebels on Atollon
Thrawn ordered Konstantine to blockade the Atollon system with the Seventh Fleet, cutting off any escape with two Interdictor vessels. He then traveled to Atollon aboard the Chimaera with Pryce and the captive Kallus in tow. Thrawn then issued a hologram transmission to Syndulla, Sato, and Dodonna, stating that negotiations were off the table and vowed to crush them. The rebel fleet tried to break the blockade but Thrawn's Star Destroyers and TIE fighters inflicted heavy casualties. The rebels only managed to find a gap in Thrawn's blockade after Konstantine disobeyed orders and went to intercept Sato's Quasar Fire-class cruiser-carrier Phoenix Nest in an attempt to gain personal glory. Sato rammed his ship into Konstantine's Interdictor-class Star Destroyer, destroying both vessels and allowing the rebels Bridger and Chopper to flee on a Gauntlet fighter into hyperspace. Thrawn witnessed the debacle and hoped that Konstantine's folly would not undermine his battle plan.[18]
The ground assault
- "You cannot see. But I can."
"What? What do you see?"
"I see your defeat. Like many arms surrounding you in a cold embrace." - ―The Bendu and Thrawn
Despite this setback, Thrawn's forces had inflicted heavy casualties on the two rebel groups. After forcing the rebels back on the ground, Thrawn ordered his fleet to bombard Chopper Base from orbit. However, the rebels had managed to activate Wren's prototype deflector shield generator. To give the rebels the impression that their shield could withstand orbital bombardment, Thrawn ceased the attack. He then delegated command of the Seventh Fleet to Pryce while he led the ground assault on Chopper Base. Thrawn deployed both AT-DP and AT-AT walkers for the ground assault.[18]
In order to learn the rebels' strength, Thrawn sent his AT-DP walkers into the canyon leading to Chopper Base first. The walkers were destroyed by Rex and the Lasat Orrelios' detonators and a rocket launcher. Thrawn then deployed several AT-AT walkers that were protected by shield generators. These walkers destroyed the remaining detonators, forcing the rebels to retreat. Thrawn and his death troopers then entered the base, while ordering his stormtroopers to advance.[18]
One of Thrawn's AT-AT walkers managed to destroy a rebel GR-75 medium transport fleeing offworld. Thrawn and his troops then surrounded Syndulla, Dodonna and several rebels. When Syndulla refused to surrender, Thrawn threatened to kill them one by one beginning with Jarrus. However, Thrawn was interrupted by the mysterious Force entity known as Bendu, who had arrived after being provoked by Jarrus. Bendu used lightning to destroy the base and strike down one of Thrawn's troopers and a walker. This gave the rebels the window needed to flee into space with their comrades.[18]
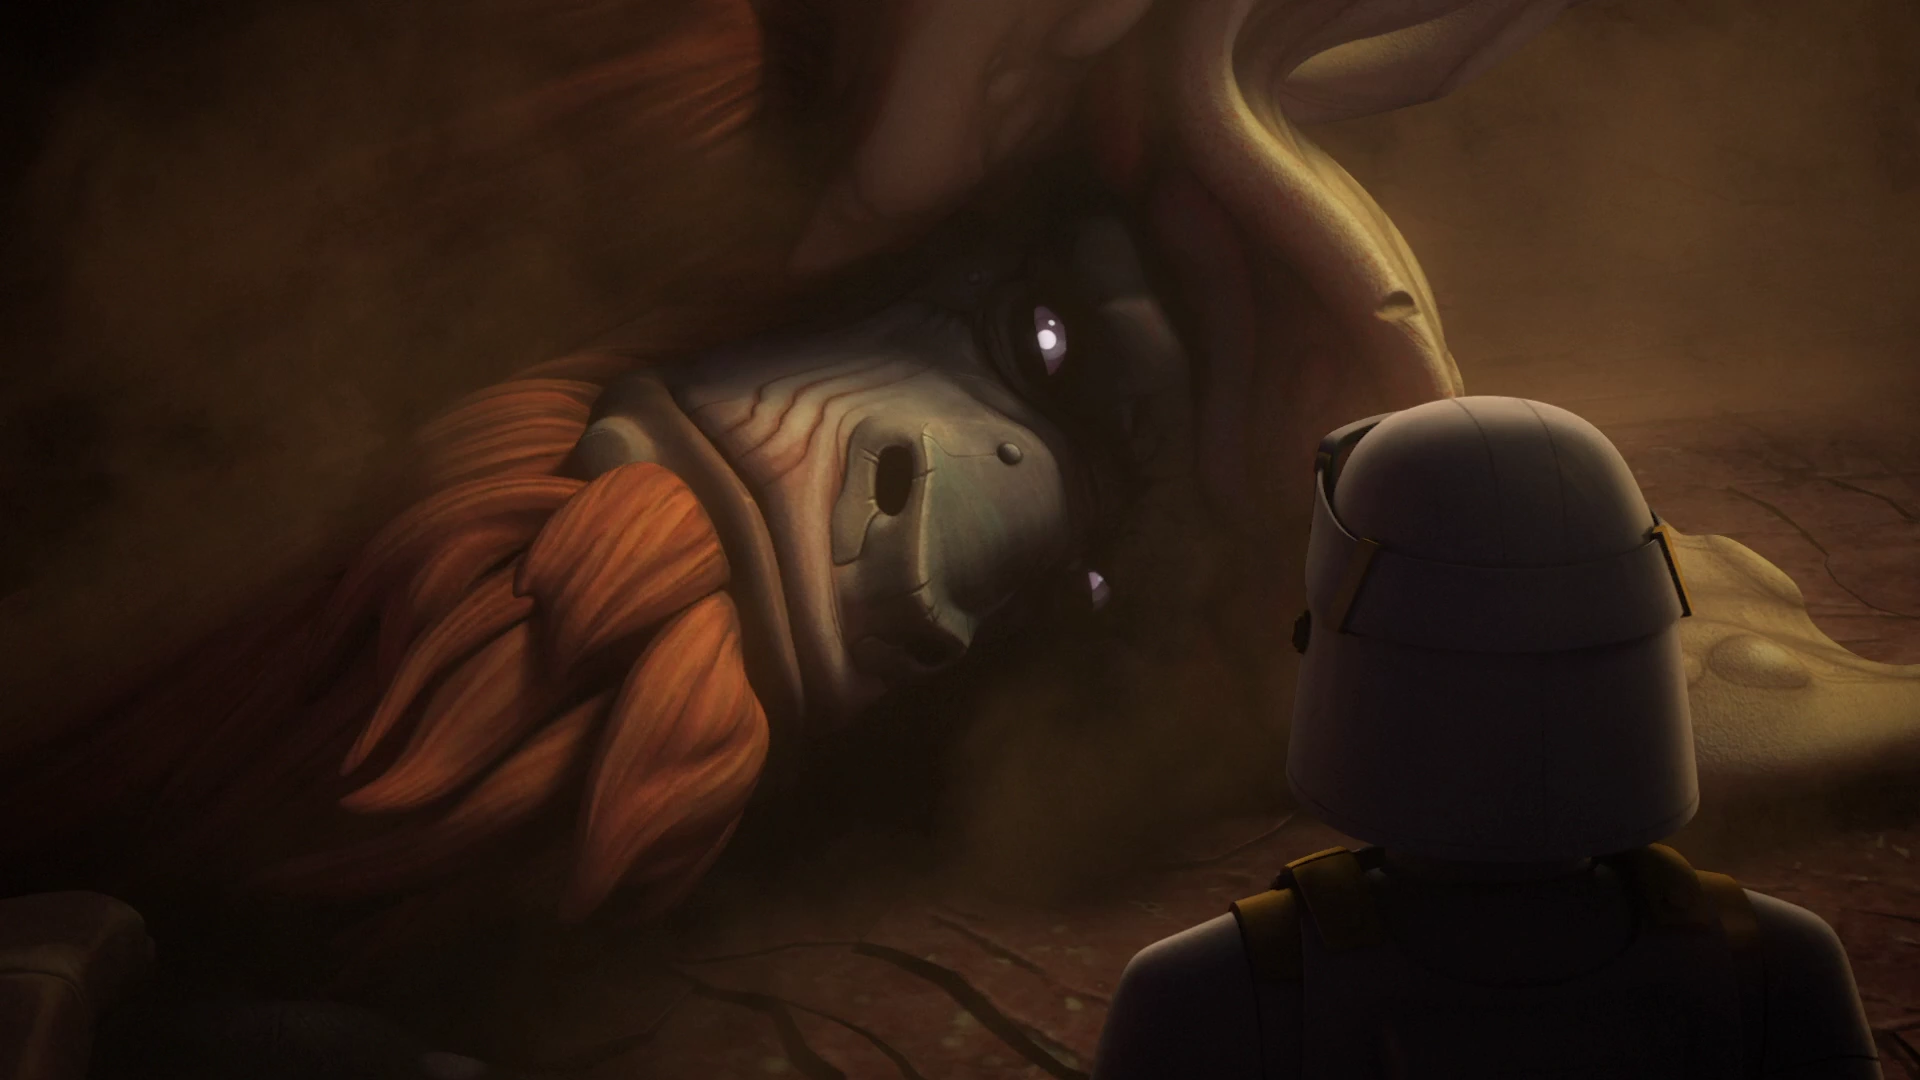
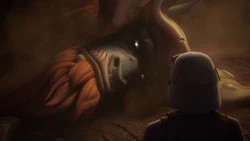
Thrawn stands before the wounded Bendu
Undaunted by this new enemy, Thrawn ordered his soldiers to fire at the Bendu, effectively ending its rampage. Back in space, Bridger, Wren and their Mandalorian allies were able to destroy the second Interdictor, allowing the remains of the rebel fleet to escape into hyperspace. While he was unable to capture the rebel leadership and crush the rebellion completely due to Konstantine's folly, Thrawn viewed the battle as an Imperial victory.[18]
Following the battle, Thrawn confronted the fallen Bendu. When Thrawn asked Bendu what manner of creature it was, the Bendu replied that it was beyond Thrawn's power to kill. The Bendu also predicted Thrawn's defeat, describing it as "many arms surrounding you in a cold embrace." Undaunted, Thrawn attempted to kill the Bendu, but by the time he fired, it was already gone. Thrawn could still hear the Bendu's laughter ringing in the air. Meanwhile, the surviving rebels fled to Yavin 4.[18]
In the aftermath of the battle, the Rebel Alliance had come to believe, because of Thrawn's victory, that they weren't ready for open warfare against the Empire, and their mission to liberate Lothal would have to be postponed.[19][20]
Working with Darth Vader
- "The invasion is coming, Lord Vader. But I have now bought the Empire time to prepare."
- ―Thrawn, to Darth Vader on the threat of the Grysk to the Empire.
Following his failure on Atollon, Thrawn spoke with the Emperor and Vader on Coruscant. The Emperor was displeased with how the rebels escaped. Thrawn was tasked with traveling with Vader to the planet Batuu to deal with a disturbance in the Force felt by Palpatine. During their trip, Thrawn took multiple occasions to taunt Vader about him being the very same Anakin Skywalker he fought alongside on Batuu many years ago. After arriving above the planets surface aboard the Chimaera, Thrawn and Vader took a shuttle down to the surface. They entered a bar and encountered a species called the Darshi. Following the skirmish, Imperial forces became involved in a conflict with the warlike Grysk species.[5]
Procuring weapons
Civil war on Mandalore
- "Effective, yes, but you miss the true artistry of this weapon, Governor Saxon. It turns an armor legendary for its strength into a crippling weakness, and it strikes at the very heart of your people's tradition."
- ―Grand Admiral Thrawn to Governor Tiber Saxon
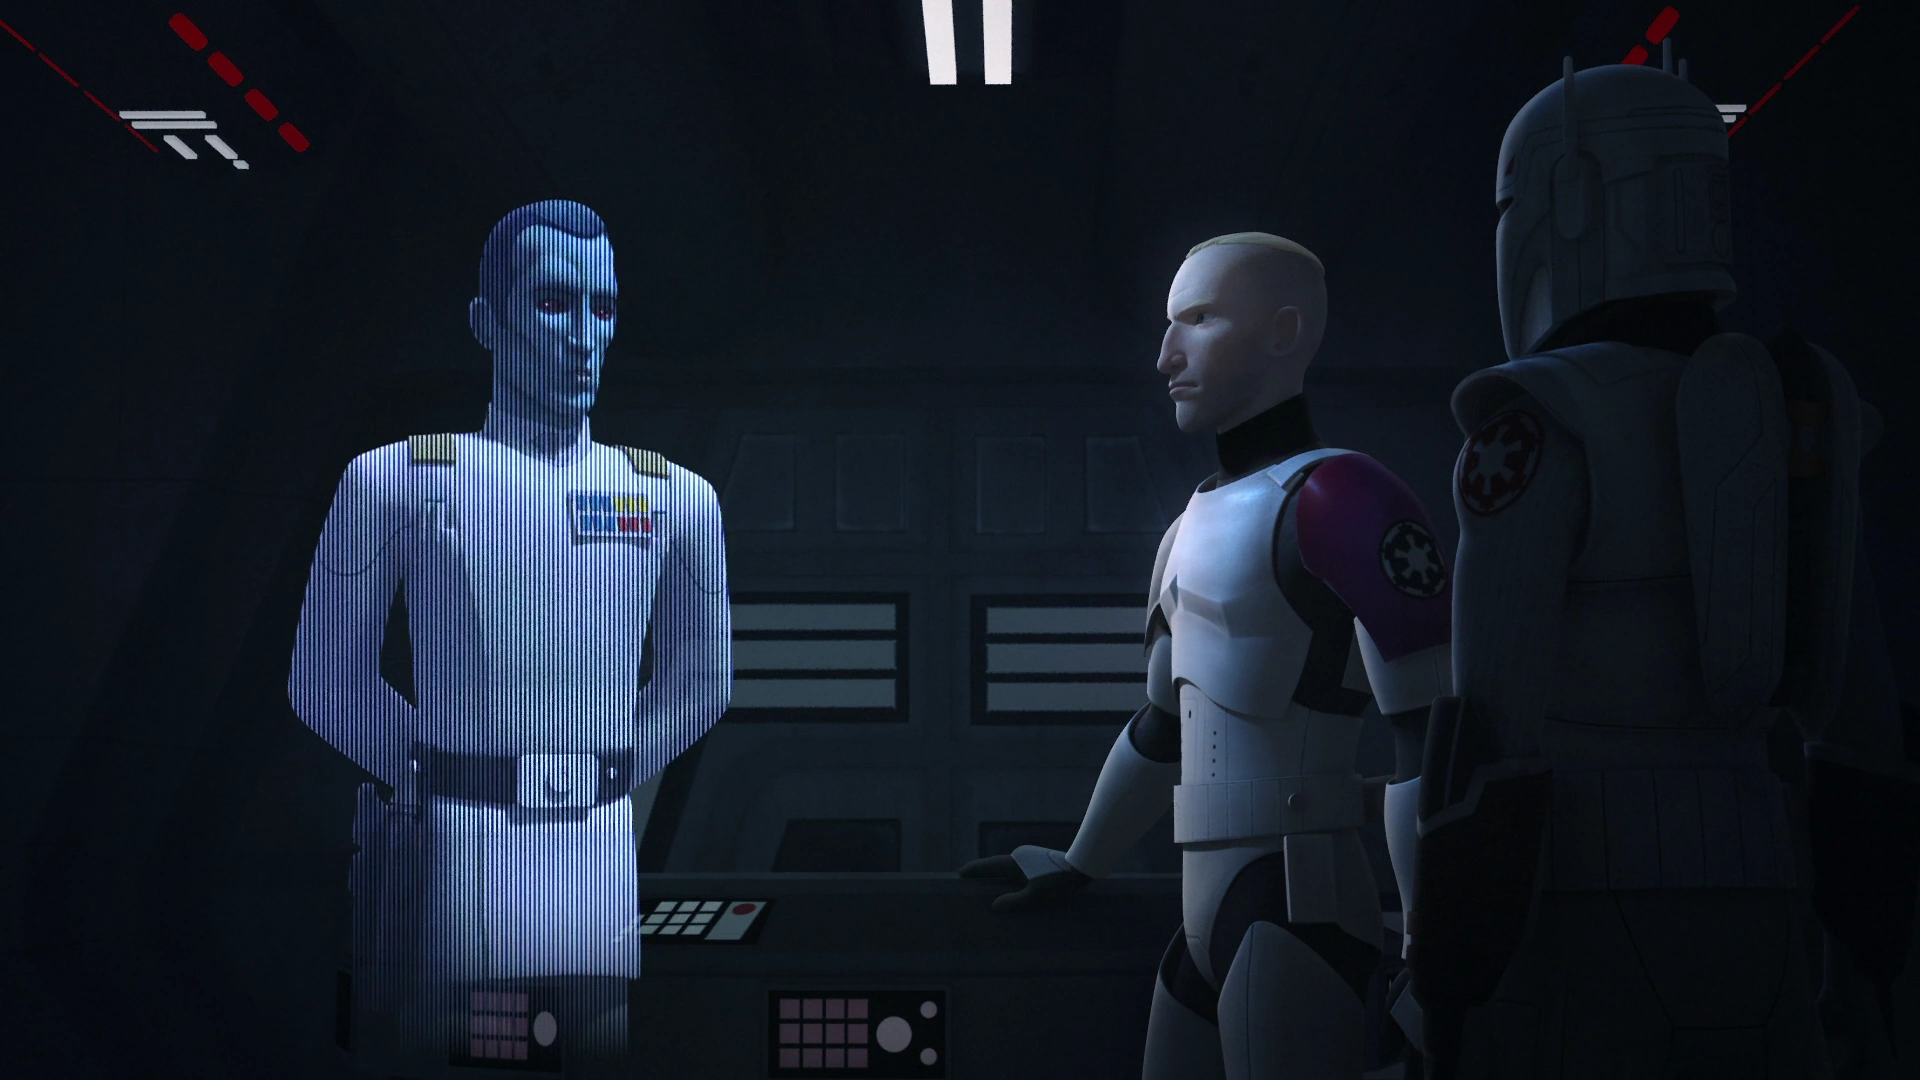

Thrawn orders Saxon to extend "The Dutchess'" range.
Shortly before Thrawn's victory against the rebels on Atollon, an uprising led by Clan Wren of Krownest against the Imperial-backed government of Mandalore had begun as a result of Sabine Wren's return to her homeworld. This event saw the death of Governor Gar Saxon and all-out conflict engaged on Mandalore. Acting on the Emperor's behalf, Thrawn contacted Saxon's brother and successor as Governor, Tiber Saxon, instructing him to end the uprising as swiftly as possible. Saxon assured Thrawn that he would succeed in ending the conflict and promised that he would unveil a new weapon prototype that would prove invaluable to the Empire.[21][22]
A short time after the weapon had been tested for the first time during a battle with Clan Wren, Saxon showed Thrawn, present via hologram, the efficiency of the Arc Pulse Generator, also known as "The Duchess." Thrawn was shown the successful test of the Duchess against Clan Wren's warriors, and asked how his brother would feel if he saw him using such a weapon. Despite being impressed by the Duchess's abilities to target the Beskar metal in Mandalorian armor, Thrawn expected the range to be greater. Though Saxon tried to defend that he had managed to rebuild the weapon from what fragment remained, the Grand Admiral bluntly stated that Saxon couldn't use the Duchess to its fullest potential because he did not truly understand it. Thrawn then suggested to Saxon that he should capture the Duchess's creator, Sabine Wren.[22]
Upgrading the TIE Defender
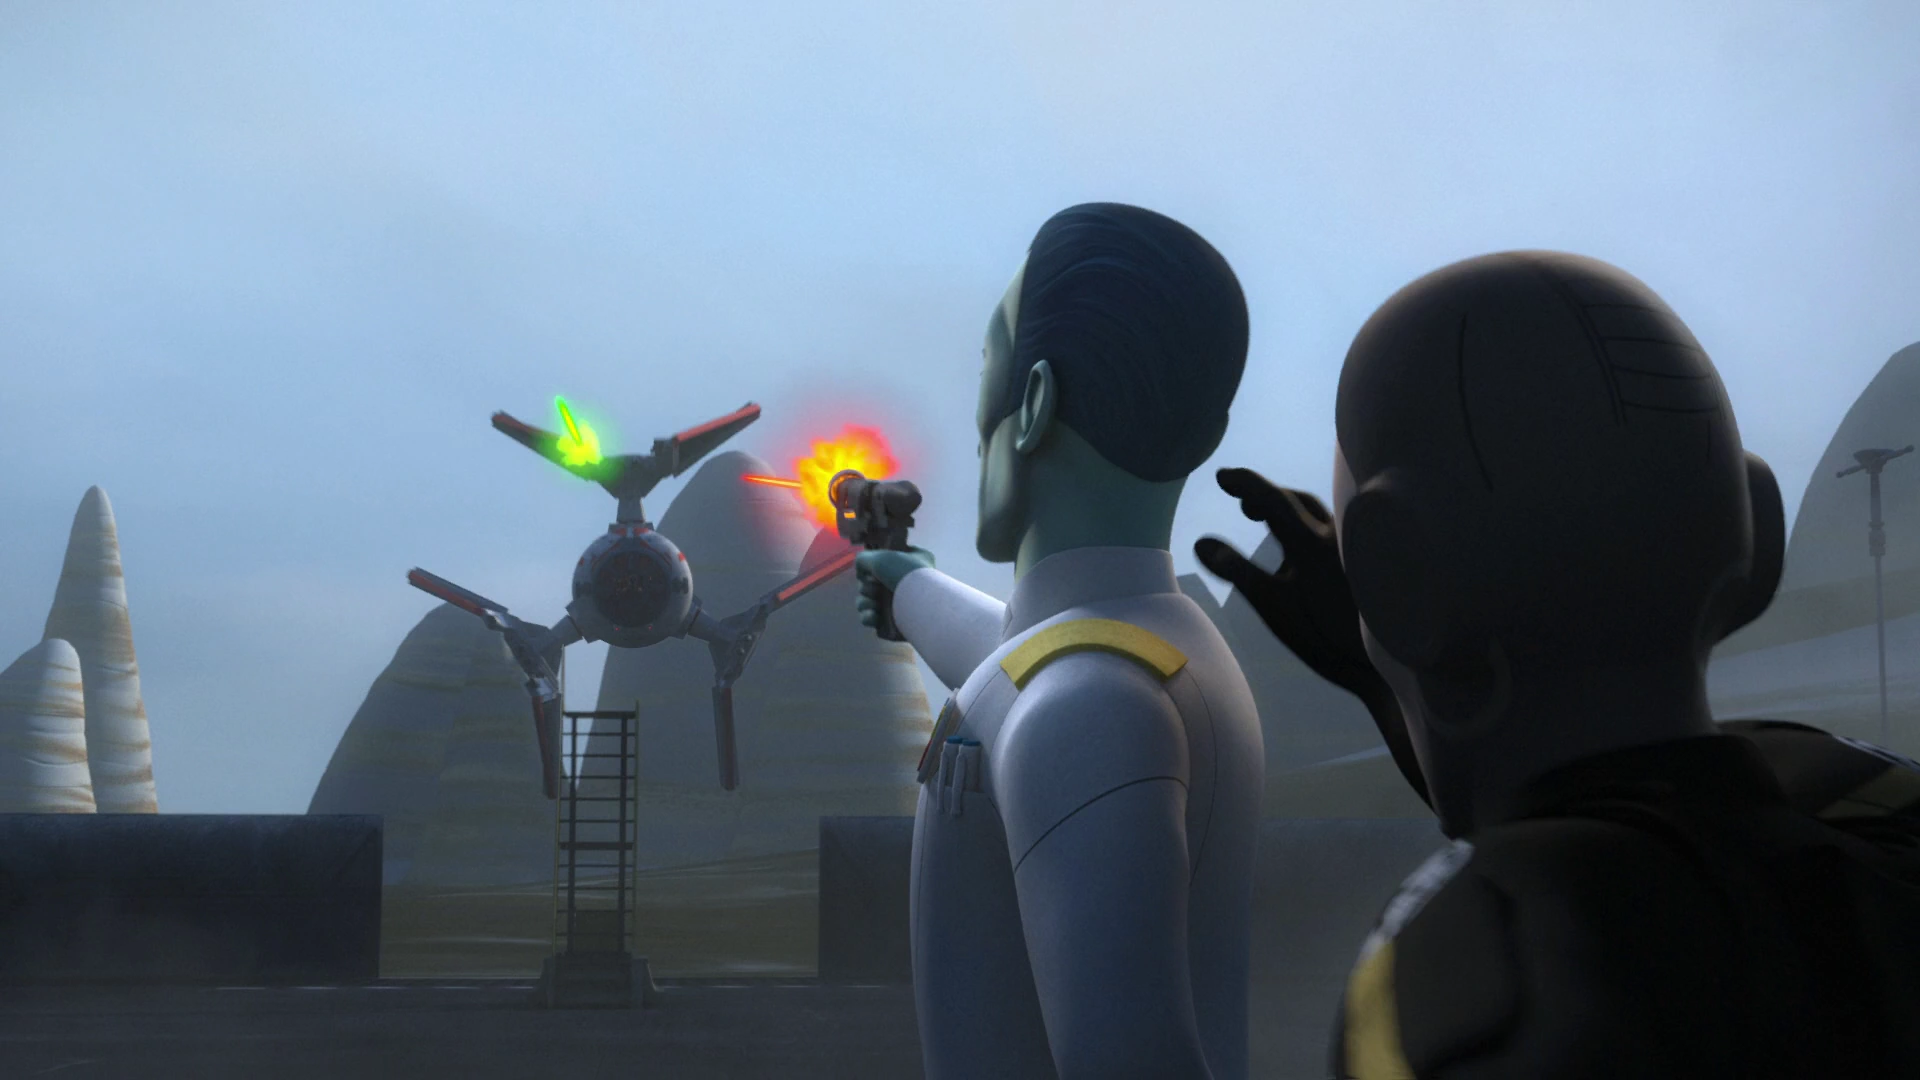

Thrawn stands his ground against the rogue Defender
Some time later Thrawn visited a remote Imperial base on the plains of Lothal to see how his new prototype was faring. Upon arriving, he was greeted by the TIE pilot Vult Skerris, who promised to show him the fighter's capabilities. During the visit, a TIE pilot caught Ezra off guard, causing him to be spotted by Thrawn and Pryce. Thrawn was surprised to see the rebels here, and ordered his Death troopers to secure the prototype, before watching the young Jedi's antics with vague curiosity and responding to Bridger's casual greeting with a dry remark, sounding unsurprised.[23]
Ezra was merely distracting the Imperials for his friend Sabine, as she was inside the Defender Elite attempting to steal its flight data recorder. Seeing Ezra pinned down, she lifted off in the fighter and helped him inside before destroying most of the depot's parked fighters and even strafing the area where Thrawn was standing. Unfazed by the powerful bolts scorching the ground inches from him, Thrawn calmly stood his ground and fired up at the rogue fighter with his blaster even as his fellows scurried for cover until it went screaming over his head. The fighter then proceeded to blow up the shuttle Thrawn had arrived in and strafed the command tower before screeching off into the grasslands. Still calm, Thrawn dryly inquired if the debacle had been part of the aforementioned demonstration. Pryce offered to activate the Defender Elite's kill switch, but Thrawn instead saw a perfect opportunity to test the ship's combat abilities and ordered Skerris to deploy three TIE Interceptors in pursuit.[23]
After two of the Interceptors were destroyed in short order, Skerris surmised that Syndulla was piloting the Defender Elite. Thrawn stated that it was unlikely, as she would have destroyed all three Interceptors much earlier. When the Defender Elite's transponder was disabled, he notes that it has been done in record time and correctly guessed that Sabine was also on the Defender Elite with Ezra. He was greatly impressed with the results of the test, as a novice pilot like Ezra was able to best three trained pilots. Thrawn then allowed Pryce to activate the kill switch. He promises her ground reinforcements in their attempt to find Ezra and Sabine, but they failed to find them, as the Loth-wolf had already taken them to safety.[23]
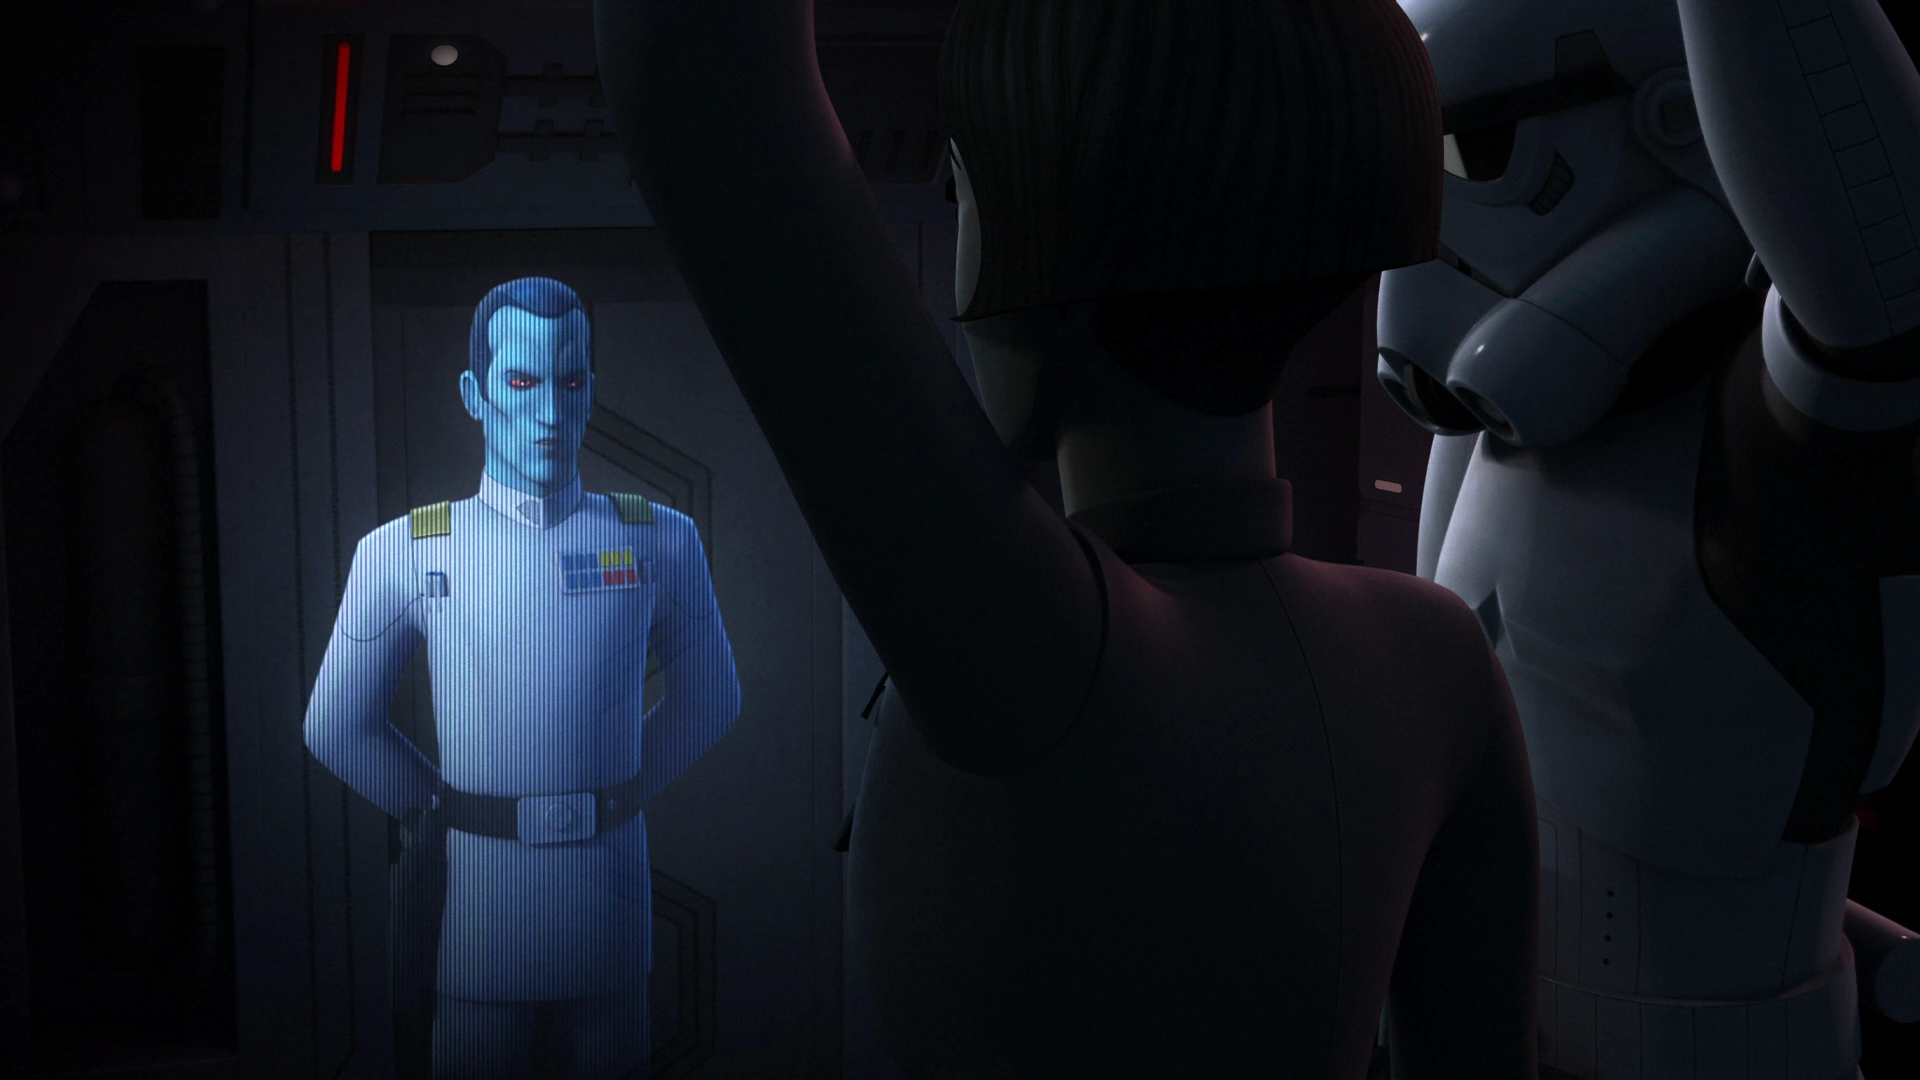

Pryce updates Thrawn on the missing Defender components
Having secured the crash site, Pryce contacted Thrawn and informed him that both the flight data recorder and hyperdrive were missing from the wreckage. This led Thrawn to deduce that they would try to get the data to Rebel Command, and so he dispatched his own personal agent, Rukh, to stop them. When Pryce protested that such help was unnecessary, Thrawn pointed out that the rebels' presence on Lothal and the theft of the Elite as testaments to the contrary. Despite Rukh's efforts, the rebels nonetheless escaped. Attaching the stolen hyperdrive to an aging U-wing, Captain Hera Syndulla eluded Thrawn's massive blockade by jumping to lightspeed through the hangar of an Imperial construction module, leaving Thrawn visibly annoyed.[24]
After Syndulla returned to Yavin 4 with the data recorder, the rebel leaders were reluctant to commit to an attack because of Thrawn's tactical brilliance. Syndulla was, however, able to convince the reluctant leaders to show the galaxy that the Rebellion would not back down.[25]
Attack on Lothal
Thrawn was later holding command on his flagship when he was informed of several rebel starfighters entering the system and realized that the long-awaited attack on Lothal was now commencing. Reasoning that the rebels would most likely target the TIE Defender factory and Lothal City fuel depot in Capital City, Thrawn contacted Governor Pryce and ordered her to shore up ground defenses. When the rebels on Lothal managed to destroy the anti-air batteries on the ground, Thrawn ordered Commander Skerris to join the fray and prevent any rebels from reaching the surface. Skerris, piloting a new TIE Defender Elite, destroyed two rebels in quick succession but was unable to resist pursuing Syndulla (newly promoted to General) after she revealed herself. Unable to match the Elite's speed, Syndulla instead headed straight for Thrawn's flagship, the Chimaera.[26]

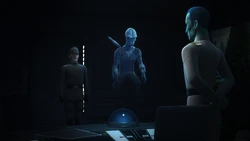
Thrawn orders Rukh to capture any surviving Rebel pilots
Realizing she was attempting to lure Skerris into a trap, Thrawn ordered him to cease his pursuit but was refused, as Skerris believed that he almost had her. Thrawn was disappointed by this and told his gunners to open fire, the blasts struck both Skerris' Defender Elite and Syndulla's X-wing, disabling their shields. Hera then damaged the Chimaera's targeting array, briefly hid in the smoke produced by the subsequent explosion, and fired on Skerris' now vulnerable fighter, damaging its wing assembly and sending it spinning into an Arquitens-class command cruiser. The crippled light cruiser in turn then crashed into a Star Destroyer and sheared through its bridge tower, allowing the strike force to make a break for the planet surface. Before they were able to reach their targets, Thrawn had ordered the second wave of TIE fighters to intercept them, and they managed to destroy the entire strike force. Upon being informed that by Woldar that several X-wings crashed in and around the Capital City, Thrawn contacted Rukh on the ground and ordered him to locate and capture any survivors, particularly Syndulla. After a lengthy chase through the streets of Capital City, Rukh caught up with Syndulla and successfully captured her after a short fight.[26]
Threat to the Defender project
- Tarkin: "Your TIE Defender program is at risk. Orson Krennic has been quite persuasive about diverting the funding to his own project: Stardust."
- Thrawn: "The Emperor has assured me that he supports my project."
- Tarkin: "In my view, Director Krennic's project has been nothing but expenses and excuses for years on end. If construction of the Defender is to continue, you must make your case directly to the Emperor himself. I have already arranged the meeting."
- Thrawn: "I'll leave immediately, Moff Tarkin."
- ―Tarkin and Thrawn discuss the continued support for the TIE Defender program[src]
While Governor Pryce was torturing Hera Syndulla, Grand Admiral Thrawn entered Pryce's office and asked if Hera had yet revealed the location of the rebel fleet. Pryce responded that she had not begun interrogating Hera. Thrawn questioned Hera but the rebel leader remained defiant. Thrawn then showed Hera her Kalikori and talked about the shapes on the Twi'lek artifact. When Thrawn questioned Hera about her lost brother, Hera responded that he was unworthy of holding it. Believing that the Kalikori would end with her, Thrawn promised that the Kalikori would be in good hands before leaving the room.[27]

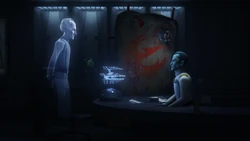
Tarkin informs Thrawn that the TIE Defender project is in jeopardy.
Due to Hera's failed attack against the Lothal factory and the theft of the Defender Elite, Grand Moff Tarkin informed Thrawn that Orson Krennic, the Director of Advanced Weapons Research, had persuaded the Imperial authorities to divert further funding to his "Project Stardust"—the first Death Star battlestation, which had been under development and construction for nearly two decades. Thrawn protested that the Emperor had already assured him that he supported the TIE Defender program, to which Tarkin replied that he had arranged an audience with the Emperor for Thrawn to plead his case. Thrawn immediately departed Lothal aboard the Chimaera to return to Coruscant.[27]
Thrawn later learned that Governor Pryce had destroyed the fuel depot outside of Lothal's capital in an attempt to prevent the rescue of Hera Syndulla. Though the resulting explosion had killed the rebels' leader Kanan Jarrus, it had also crippled the Imperials by destroying all of their fuel on the planet, bringing the Defender program screeching to an indefinite halt. Thrawn chastised the governor for having the audacity of holding a parade to hide the magnitude of the disaster. Cutting off her protests, the Grand Admiral coldly informed Pryce that he would deal with her upon his return to Lothal, but in the meantime, he felt that without Kanan's leadership, the rebels—particularly Ezra—would be aimless, and attack recklessly. To that end, he dispatched Rukh to eliminate them once they showed themselves.[28]
Pryce became afraid of what Thrawn would do to her when he returned, and resolved to capture the Rebels before he arrived.[29]
Fooling scout troopers
Sometime later, the Spectres attempted to infiltrate the Lothal Jedi Temple. Which was now under the Empire's control. To that end, Chopper displayed a hologram recording of Thrawn during the Battle of Atollon to distract two scout troopers long enough for Orrelios to knock them out and give their armor to Bridger and Wren.[30]
After Wren was exposed and captured by Veris Hydan, Hydan informed the Mandalorian that Thrawn admired her work and had amassed a collection of her artwork.[31]
Liberation of Lothal
- "Whatever happens next happens to both of us."
"That's the idea." - ―Thrawn and Ezra Bridger
Thrawn returned from Coruscant to find that Ezra and his forces had captured Governor Pryce and taken control of Imperial headquarters in the capital, falsely enacting Protocol 13 to lure the planet's garrison into the dome in order to remove them from the planet. The Chimaera positioned itself directly above the dome, so that the dome crashing into it would destroy Lothal City. When Ezra stated that the rebels would kill all the Imperial personnel on board and that they could withstand his assault, Thrawn stated the opposite: Ezra had moved all of his personnel to safety, and ordered Rukh to disable the shield generator before beginning his bombardment.[32]
Seeking to prevent his people from being slaughtered, Ezra surrendered himself to Thrawn aboard the Chimaera. Thrawn warned Ezra to not attempt any "heroics," or he would resume his bombardment. Upon arriving, Thrawn took him to his office and showed him the displays of art he had collected from Lothal, explaining the intent to preserve them before the destruction of the planet, a course of action he now deemed inevitable, but one he admitted was never his intention. Thrawn then brought Ezra into a cargo hold which contained the remains of the Jedi Temple, and a hologram of Emperor Palpatine. Leaving Ezra in the presence of his Emperor, Thrawn returned to the bridge and ordered a full-scale bombardment.[32]
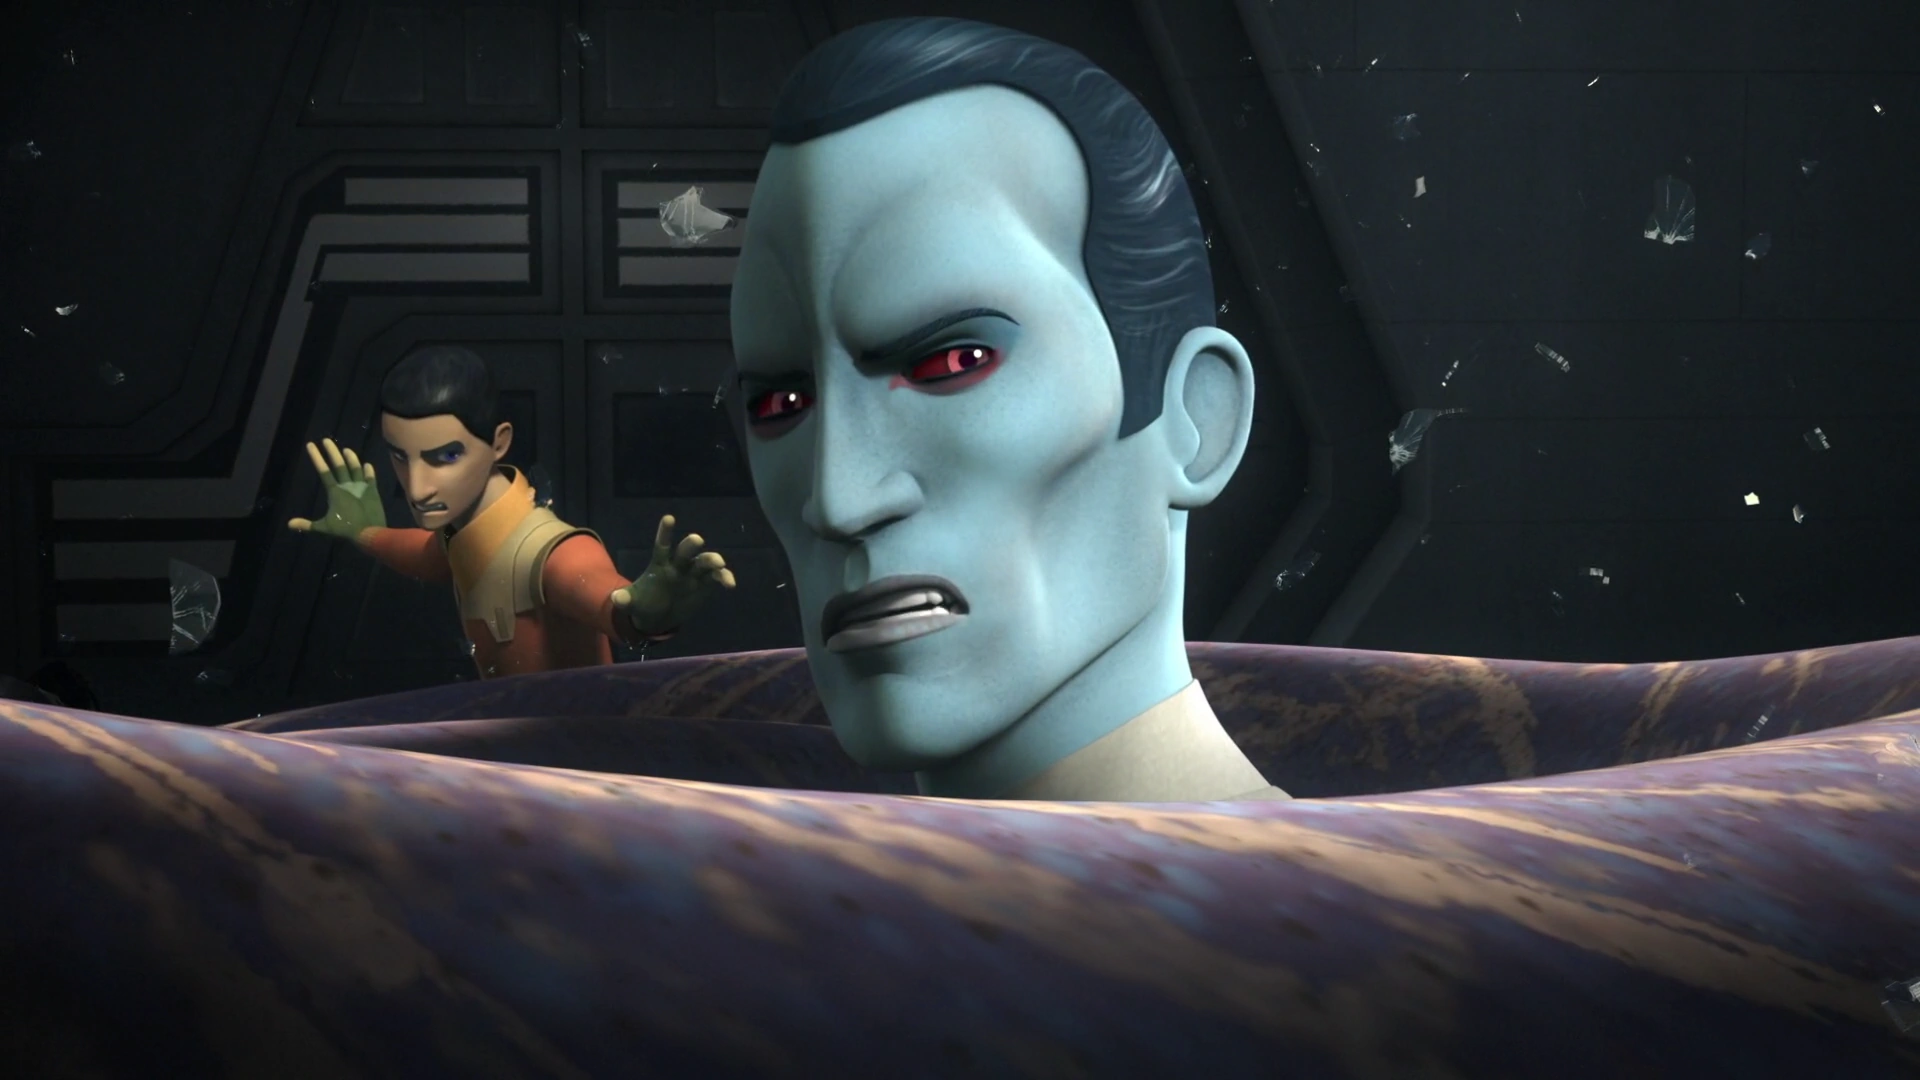
Thrawn watches in fear as the purrgils pull the Chimaera into hyperspace.
Ezra managed to escape from the cargo hold and stormed the Chimaera's bridge, just as the rebel forces on the ground were able to raise Lothal's planetary shield. Thrawn attempted to contact Rukh after his barrage was repulsed, but Zeb answered instead, as Rukh was being electrocuted to death. Ezra entered the bridge and told the Grand Admiral that he had lost. Thrawn stated that it was only a momentary setback, but multiple unknown contacts emerged from hyperspace and destroyed Thrawn's blockade fleet in orbit: a flock of purrgils, which had been summoned by the Ghost at Ezra's instruction.[32]
One Imperial officer reported that the ships attacked by the purrgil were "just gone," and Captain Gilad Pellaeon reported that he had never seen something like it before losing communication. The purrgils wrapped their tentacles around the Chimaera, smashing their tentacles through the viewports and holding Thrawn and his crew in their grip. Though he wounded Ezra with his blaster, Thrawn was Force-pushed into the purrgils' tentacles by the young Jedi, the "many arms" of the creatures holding him in their "cold embrace," just as the Bendu had foretold. The creatures carried the Chimaera—and Thrawn and Ezra—into hyperspace,[32] though both survived.[33]
Legacy
Several years after his battles with the nascent rebellion, the Alliance to Restore the Republic that formed from the early rebel cells had managed to cripple the Empire, kill Emperor Palpatine, and give rise to the New Republic. The shattered remnants of the Empire were defeated during the Battle of Jakku in 5 ABY, and the Imperial Navy retreated into the Unknown Regions. To do so, they used an Imperial Observatory on Jakku to help chart the way through the harsh region of space. Much of what Thrawn knew of the Unknown Regions had been used in the Observatory's computations. As a result of Thrawn's knowledge, as well as information retrieved by the few survey teams and droids the fallen Emperor had once sent into the unknown, the Imperial Navy reorganized into the First Order in the depths of the galaxy. This was part of Palpatine's Contingency, a plan to ensure that the Galactic Empire would not outlive him—but that was co-opted by surviving Imperials to ensure that the Empire continued after his death.[7]
Although Thrawn's TIE Defender project never saw widespread use during the Galactic Civil War, many of its design features were eventually incorporated into the First Order's TIE/sf space superiority fighter and TIE/vn space superiority fighter.[34]
Personality and traits
- "You are aware, I presume, that I have some skill in anticipating enemies' tactics from a study of their artwork."
"I am."
"That skill can also work in the opposite direction. If I am familiar with a warrior's tactics, I can in some measure identify that warrior's artwork." - ―Grand Admiral Thrawn and Darth Vader
Thrawn was able to understand the art of his enemies and use what he learned to counter their military ideals.
Grand Admiral Thrawn was a member of the Chiss species who possessed a calm and collected demeanor. He was a brilliant military strategist, known for his anticipation of enemy attacks and his own tactical precision. He was known to speak at least three languages: Cheunh, his native tongue; Sy Bisti, the language the Chiss used to communicate with traders; and Galactic Basic fluently after joining the Empire.[4]
Thrawn worked to perfect the art of war. He had respect for his enemies, believing that in order to defeat a worthy opponent, one must understand them in every aspect, including their history and philosophy. In particular, Thrawn had a strong appreciation for art, and he believed that studying it could allow him to delve into the psyche of the people of the cultures that the artists belonged to.[9] Other Chiss never understood Thrawn's ability to build detailed tactical knowledge from what was viewed to be insignificant or obscure details, but Thrawn believed anything in a species' art was important. To Thrawn, all threads tied together, every brushstroke spoke to him, and the light curves told the artist's story. While he knew that every artist was an individual, Thrawn knew that they were the product of a culture, so Thrawn could use art to begin to deduce the "fundamental pattern" of a species. He also could find the relationships between a species' art, culture, and military doctrine, which allowed him to anticipate and counter them on the battlefront.[4]
Thrawn's calm demeanor and suave sophisticated mannerisms masked his ruthlessness. Thrawn rarely wavered in his generally cool temperament, though at one point, he furiously grabbed Slavin by his uniform for regarding his collectible Kalikori as Twi'lek trash. He quickly regained his composure, however, and apologized to him for his emotional outburst.[9] This display may not have been an emotional outburst, however, but rather a calculated tactic on Thrawn's part. In a similar incident years earlier, Thrawn had apparently shouted in anger at a stormtrooper refusing to listen, but as he explained to his aide Eli Vanto, he had in fact not been angry but had only broken his usual pattern of behavior, which he believed was an effective tool in dealing with people who would not listen to reason or change their normal pattern of behavior.[4]
Thrawn was also polite and respectful, even towards his enemies, whom he generally tended to admire. Even when interrogating Hera Syndulla, he showed mannerly behavior despite their antagonistic relationship.[9] Thrawn did not have a high opinion of Konstantine and once sent him on a mission to deal with the Iron Squadron in the Mykapo system. Thrawn set a test for Konstantine by ordering the Admiral to depart with only a light cruiser in order to test his mettle. Konstantine underestimated the ingenuity and resourcefulness of the rebels there. Thrawn was astute enough to discern that Konstantine was lying when the latter tried to save face by claiming to have driven the rebels from the system. In fact, Thrawn was aware that the rebels had already evacuated their sympathizers from the system.[10]
As a tactician, Thrawn sponsored a new initiative to develop starfighters that were equipped with deflector shields. He believed that this feature would give the Empire an edge over their rebel opponents, as he stated that even the smallest features can mean the difference between victory and defeat. Thrawn disliked incompetence and shoddy craftsmanship, personally engineering the death of rebel agent Morad Sumar (Thrawn was unaware that Morad was a rebel agent) by forcing him to ride a faulty speeder bike. After Morad's death, Thrawn informed the workers present at the scene that they would be personally testing each machine they built.[6]


Grand Admiral Thrawn
Thrawn's appreciation for art and his determination to defeat the rebellion led him to amass a vast collection of images and objects related to the crew of the rebel ship Ghost, who had outsmarted his predecessors. In addition, Thrawn's scrutiny of Lyste and Kallus' reports following the rebel infiltration of the Lothal Imperial factory led him to realize that the Empire had a spy within their ranks. Thrawn believed that interrogating all Imperial personnel would alert the traitor. Instead, he advocated engineering a trap for the traitor that would turn them into an asset of the Empire.[6]
Thrawn was willing to take high risks, as shown when he dispatched E-XD infiltrator droids to hunt for the Phoenix Squadron's Chopper Base. Despite the loss of a Star Destroyer, Thrawn succeeded in narrowing the the search for the rebel base from possibly thousands to 94 worlds.[12] Agent Kallus later tried to elude Thrawn's hunt for Fulcrum by planting clues that incriminated Lieutenant Lyste. However, Thrawn discovered Kallus' deception and decided to manipulate the traitorous ISB agent into helping him find the rebel base.[13]
While other Imperial commanders overlooked the threat posed by rebel droids such as Chopper, Thrawn kept a catalog on these droids, which he circulated to his intelligence operatives. This information enabled LT-319 to embark on an ambitious plot to hijack the Ghost and find the location of Chopper Base.[16]
In an effort to find the location of Chopper Base, Thrawn set a trap for Kallus by revealing that his spies were aware that the rebels were planning to attack Lothal. Cross-referencing his knowledge of ancient art with the trajectories of Dodonna's Massassi Group and Kallus' Fulcrum transmissions, Thrawn deduced that Chopper Base was in the Atollon system. As a career officer, Thrawn was not interested in personal glory but was only concerned with yielding results for his Emperor. His interest in the bigger game irked Konstantine, who was only interested in personal glory. Thrawn was angered by Konstantine's incompetence, as his folly ruined Thrawn's chance of crushing the rebellion once and for all.[18]
Thrawn was also an excellent ground commander. To test the mettle of the rebels, he orbitally bombarded Chopper Base. When it was still standing due to a shield generator, Thrawn decided to test their strength by sacrificing several AT-DPs. Thrawn was skilled at coordinating both his ground and starfighter forces and also preferred to lead his men from the front. As a scientifically minded man, Thrawn was unperturbed by mystical threats like Bendu, as seen when he used the combined firepower of his troops and walkers to bring down the mystical Force-being. Thrawn was not intimidated by Bendu and tried to destroy the Force-wielding being by shooting him with his blaster, only to be surprised and unnerved by his sudden disappearance and mocking laughter.[18]


Grand Admiral Thrawn
As a seasoned military commander, Thrawn advised Governor Tiber Saxon to capture Sabine Wren in order to utilize the Arc Pulse Generator's full potential. While impressed by the weapon's ability to incinerate Mandalorian warriors by reacting with the beskar alloy in their armor, he believed that Saxon did not know how to utilize the weapon's full potential.[22]
Due to his combat experience, Thrawn was not the least startled when Ezra and Sabine flew their stolen TIE/D Defender Elite inches above him. Maintaining a steely resolve, Thrawn instead fired back. Thrawn was not upset by the loss of the TIE/D Defender Elite prototype and instead used the rebels' theft as an opportunity to test the fighter's flight capabilities and weapons systems against TIE/IN Interceptors.[23] Thrawn's growing frustration with Governor Pryce's ability to capture the Spectres and Ryder Azadi's cell and stop the theft of the TIE/D Defender Elite led him to dispatch the Noghri assassin Rukh to hunt down and eliminate the insurgents.[24]
When General Syndulla attacked Lothal with a strike force of X-wings, Thrawn unleashed the power of his Seventh Fleet on them. Despite using his ships to form a blockade, Thrawn's plan was undermined when Commander Skerris defied his orders to cease pursuing Hera's X-wing. Due to Skerris' insubordination, Hera was able to destroy his TIE Defender Elite, causing it to crash into an Imperial light cruiser, which collided with a Star Destroyer. This created a gap which allowed Hera and a few rebel pilots to land in Capital City. Thrawn was not worried that a few ships escaped his blockade, because many of the ships were destroyed, and Thrawn personally had a second wave which consisted of TIE fighters and turbolaser cannons.[26]
Thrawn's respect for his foe General Syndulla led him to visit her while she was being interrogated by Governor Pryce. While Thrawn regarded looking after her Kalikori as a sign of respect, Hera was insulted that her enemy would hold a valuable family heirloom. Thrawn believed that his TIE Defender project was a better investment than Orson Krennic's Death Star project and traveled to Coruscant to lobby the Emperor.[27]
Thrawn's efforts came to naught when Governor Pryce destroyed the Lothal City fuel depot in an effort to destroy the Spectres, in the process damaging the TIE Defender factory. While Pryce managed to kill Kanan Jarrus, Thrawn thought that the loss of the TIE Defender factory outweighed the Jedi Knight's death. Frustrated with Pryce's incompetence, Thrawn resolved to deal with her when he returned to Lothal.[28]
As a tactician, Thrawn detected a flaw in Ezra's plan to trap the Imperial garrison in the "Dome," a mobile Imperial Planetary Occupation Facility. With his army in a safe position, Thrawn used the Chimaera to bombard Capital City. Knowing Ezra's Jedi training made him put others first, Thrawn was willing to kill civilians and destroy buildings in order to force Ezra to meet him aboard the Chimaera to discuss his surrender.[32]
Thrawn regarded the Jedi as rosy-eyed idealists who were willing to sacrifice strategically sound choices for perceived "just and moral" reasons. Thrawn regarded the Force as a weapon and believed that the Jedi did not know how to use it. Intending to destroy Lothal, Thrawn collected Sabine's art, since he regarded her as a talented artist and believed that he was safeguarding her legacy.[32]
Thrawn displayed fear, anger, and frustration when Ezra's purrgil allies attacked his fleet and latched onto the Chimaera. Despite his brilliant tactics, Thrawn for the first time was outmaneuvered by a lesser opponent because he had no way of predicting that Ezra would unleash the purrgil. However, before the arrival of the purrgil, Thrawn had stated the rebels had only created "a momentary setback," implying that the defeat may have been turned around to an Imperial victory, but the unexpected arrival of the purrgil halted any possible Imperial retaliation. Though he was surrounded by purrgil tentacles, Thrawn accepted his fate and maintained a steely resolve, telling Ezra that the same fate awaited him.[32]
Skills and abilities
- "I am a warrior, Your Majesty. A warrior may retreat. He does not flee. He may lie in ambush. He does not hide. He may experience victory or defeat. He does not cease to serve."
- ―Thrawn pledging his allegiance to Emperor Palpatine
Thrawn was a seasoned military commander and accomplished tactician who was known to be thorough and respected by his subordinates.[3] Thrawn wielded a RK-3 blaster pistol on some occasions, for instance when he stunned the rebel fighter Ezra Bridger, who had disguised himself as a scout trooper,[9] and tried to execute Bendu with it before Bendu disappeared.[18] Thrawn also had considerable skill with hand-to-hand combat, often practicing with a pair of sentry droids. Thrawn used his combat skills to survive at least one assassination attempt by Kallus, who had reprogrammed his sentry droids.[13] During a mission with Vader, they both were attacked by Darshi, and Thrawn used a combat baton to "disable" them for integration. During the Clone Wars, Thrawn utilized a lightning gun to take out B2 super battle droids that had their armor covered in cortosis.[5]

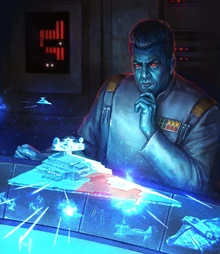
Thrawn was a master strategist.
Thrawn was physically fit and agile. He was adept at unarmed combat and was familiar with the limitations of Imperial Academy martial art. Thrawn managed to defeat Kallus in unarmed combat. As a Grand Admiral, Thrawn was familiar with the various rebel tactics including the Danaan formation. To prevent the rebels from escaping, he reinforced the center of the Seventh Fleet with Konstantine's interdictor cruiser. While this tactic prevented the rebels from escaping, it came undone when Konstantine ignored Thrawn's orders and decided to engage Sato's flagship.[18]
As a military commander, Thrawn devised a cunning strategy to intercept and trap General Syndulla's X-wings. While Thrawn's fleet succeeded in wiping out much of the rebel assault force, his plan was undermined when Commander Skerris defied his orders to cease pursuing Syndulla and created an accident, which allowed Hera and some rebels to escape to the planet's surface. However, Thrawn had prepared a contingency force of TIE fighters which shot down these fighters, leading to Hera's capture.[26]
While Thrawn was an effective communicator, his plan to encourage the Emperor to support his TIE/D Defender project was fatally undermined when Governor Pryce destroyed Lothal's fuel supply in order to kill the Jedi Kanan Jarrus.[28]
Though the rebels managed to capture the Dome and lure the Imperial garrison aboard, Thrawn devised a counter-strategy which involved Rukh and his Imperial forces sabotaging the Dome's shield generators. This enabled Thrawn to bombard Lothal's Capital City in a successful effort to force Ezra to meet him to discuss his unconditional surrender. As a commander, Thrawn maintained an iron resolve when confronting the rebels and preferred to set the conditions of the battlefield.[32]
Despite his skills as a commander, Thrawn's strategy during the Liberation of Lothal was challenged by the rebel resolve to restart the Dome's shield generators and Ezra's ingenious contingency plan of summoning a pod of space-faring purrgil to attack and carry his fleet away into uncharted space, which was a plan Thrawn had no way of predicting.[32]
Behind the scenes
- "Most of the Imperial leaders we see in the movies rule through a combination of fear and manipulation. I wanted to create something different: a commander who could lead through loyalty. The result was Thrawn, a tactical genius whose troops follow him willingly, and who will fight for him whether or not he's watching over their shoulders"
- ―Timothy Zahn
Thrawn's Legends (and original) counterpart
Grand Admiral Thrawn was created by author Timothy Zahn as an antagonist in the 1991 novel Heir to the Empire, the first installment of The Thrawn Trilogy.[35] IGN has asserted that the character "essentially kicked off the wave of Expanded Universe novels,"[36] while Empire Online credited Thrawn with doing "much to revitalize and legitmise [sic] Star Wars fiction… at a time when the franchise was in danger of dying."[37] He remained popular for years, and in 2016, Zahn described it as "highly gratifying" that Thrawn "captured the imaginations of so many people over the past quarter century."[38]
In response to a fan letter, Zahn stated that the character of Thrawn is a composite of various historical and fictional personalities, including Erwin Rommel, Robert E. Lee, Hannibal Barca, Alexander the Great, and Sherlock Holmes, to name a few.[39] When deciding Thrawn's rank, as Zahn wanted him to be a military leader rather than a darksider or political title-holder, Zahn settled for giving Thrawn the Grand Admiral rank, which he had encountered while reading William L. Shirer's The Rise and Fall of the Third Reich in the context of its use in the German Navy, feeling that making Thrawn a normal admiral would have been too mundane.[40]
Thrawn was brought into Star Wars canon in the third season of the animated television series Star Wars Rebels, voiced by Lars Mikkelsen. Zahn has since wrote a canon novel series focused on Thrawn.[41][38] Executive producer Dave Filoni first expressed interest in using Thrawn in 2010, while producing Star Wars: The Clone Wars.[42]
Regarding Thrawn's fate, as well Ezra's, following the series finale of Rebels, it was initially assumed by fans that they perished upon getting contact with the vacuum of space. However, during the final Rebels Recon, Filoni revealed that both Thrawn and Bridger survived the finale.[33] In asking the question of where Thrawn and Ezra were dragged by the purrgil, Zahn answered that he has already some ideas to what exactly happened with Thrawn, but that he is waiting Filoni to decide what he wants to do with the characters post-Rebels, though he thinks that there are at least two things to which he has answers but must wait: the first is where Thrawn and Ezra are in the next in-universe four years and why the purrgil didn't kill Thrawn.[43]