| | |
Warning: This infobox has missing parameters: cost, type, plating, pronouns, mass and unrecognized parameters: imageBG, era
- "An extremely well put-together little droid."
- ―Panaka
R2-D2, sometimes spelled Artoo-Detoo and often referred to as Artoo, was an R2-series astromech droid manufactured by Industrial Automaton prior to 32 BBY. Resourceful and spunky, the droid developed an adventurous personality during his many decades of operation. Inside of his cylindrical frame were many arms, sensors, and other tools that could be extended to fulfill various needs, such as slicing computers, extinguishing fires, projecting holograms, repairing starships, and flying. Along with his counterpart, the protocol droid C-3PO, R2-D2 constantly found himself directly involved in pivotal moments of galactic history. His bravery, coupled with his many gadgets, played large roles in saving the galaxy time and time again. Like other astromech droids, R2-D2 could walk on two legs or use a third leg to roll across the ground.
In 32 BBY, R2-D2 was serving the Royal Engineers of Naboo aboard Queen Padmé Amidala's royal starship when the Trade Federation blockaded the planet. His maintenance work on the ship's hull allowed the queen and her crew to bypass the blockade and flee the sieged world, and R2-D2 afterwards directly served the queen, playing a decisive role in liberating Naboo and remaining with Amidala for another ten years, even as she transitioned to the role of senator eight years later. When attempts on her life were made in 22 BBY and the Jedi Padawan Anakin Skywalker was assigned to protect her, R2-D2 and C-3PO accompanied the two to Geonosis and participated in a battle that kicked off the Clone Wars, a galaxy-wide conflict between the Galactic Republic and the Separatist Confederacy of Independent Systems. Amidala gave R2-D2 to Skywalker when he became a Jedi Knight, and the astromech droid faithfully served him throughout the war, often flying in the droid socket of Skywalker's starfighter or fighting next to him on the front lines.
The war was in fact orchestrated by the Republic's Supreme Chancellor Palpatine, who was secretly the Sith Lord Darth Sidious, and who brought the conflict to an end three years in, taking Skywalker as his Sith apprentice, wiping out the Jedi, and reorganizing the Republic into a Galactic Empire. In the aftermath of the war, R2-D2 and C-3PO were assigned to the corvette Tantive IV of Alderaan, where they served Alderaan's viceroy Bail Organa for nineteen years. They were, however, separated from Organa during that time period, and got caught up in a wide variety of misadventures, ruining the gangster Tig Fromm, helping restore the Tammuz-an monarchy, and aiding the merchant Mungo Baobab in reviving his family's fortune, among other exploits. After rejoining the crew of the Tantive IV, they became embroiled in the Galactic Civil War, and in 0 BBY, Leia Organa of the Rebel Alliance entrusted R2-D2 to bring a copy of the Death Star plans to the Jedi Master Obi-Wan Kenobi on Tatooine. After meeting Skywalker's son Luke and the smuggler Han Solo, the droids helped rescued princess Leia from the Empire's Death Star and became directly attached to the three Humans, helping them and their rebellion defeat the Empire and restore freedom to the galaxy. R2-D2 would also assist Luke in his training as the galaxy's last Jedi Knight.
When the Rebellion became a New Republic, R2-D2 continued to serve Luke and the now-married Han & Leia Solo, helping them defeat remnants of the Empire; R2-D2 notably sliced into Palpatine's Galaxy Gun and used it to destroy the Emperor's fortress world of Byss, teamed up with C-3PO and a young mechanic named Cole Fardreamer to foil a plan to bomb the galactic capital of Coruscant, and recovered a copy of the Caamas Document, which allowed peace to be forged between the New Republic and the final remnants of the Empire. When an extra-galactic race of religious zealots known as the Yuuzhan Vong invaded the galaxy in 25 ABY, R2-D2 participated in the four-year conflict that eventually saw the invaders defeated. Six years later, Luke and Leia discovered the identities of their parents via holorecordings found inside of R2-D2's memory, and R2-D2 remained at their side during the subsequent Second Galactic Civil War. The astromech droid was passed down to many subsequent generations of Skywalkers, and in 137 ABY, aided Cade Skywalker in fighting against a revived Sith Empire.
Description
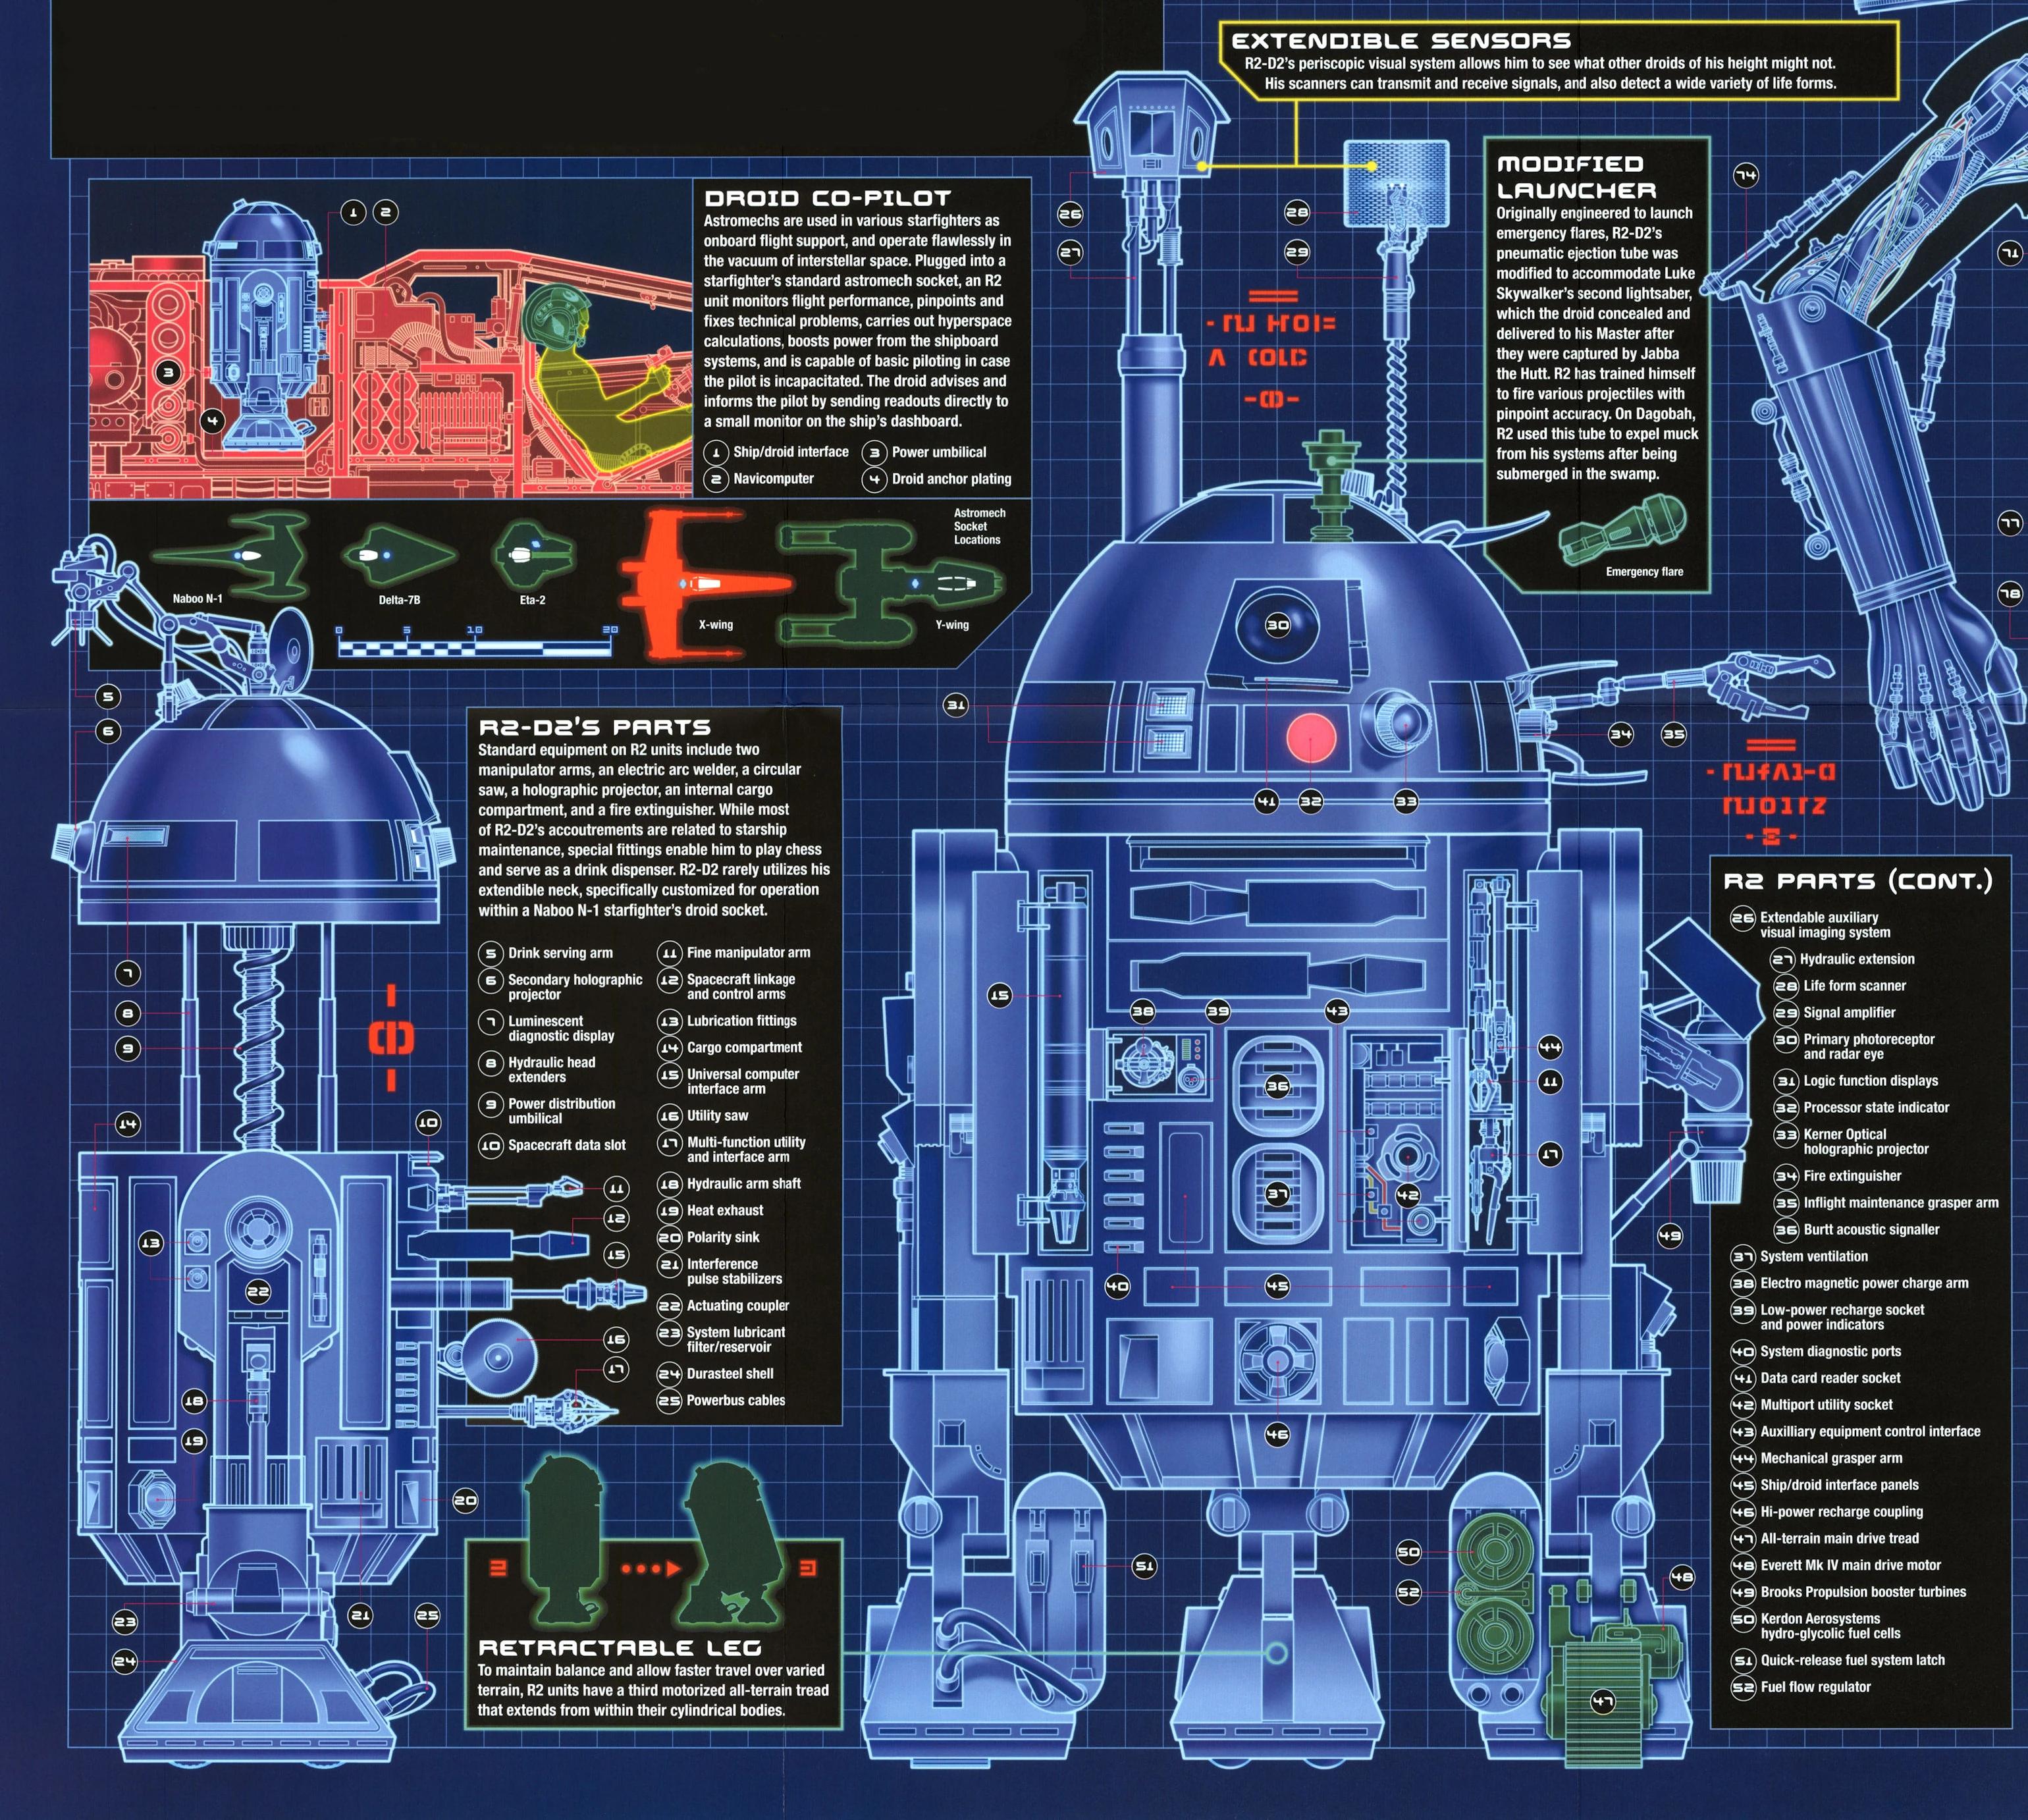
R2-D2 blueprints
- "Don't you call me a mindless philosopher, you overweight glob of grease!"
- ―C-3PO to R2-D2
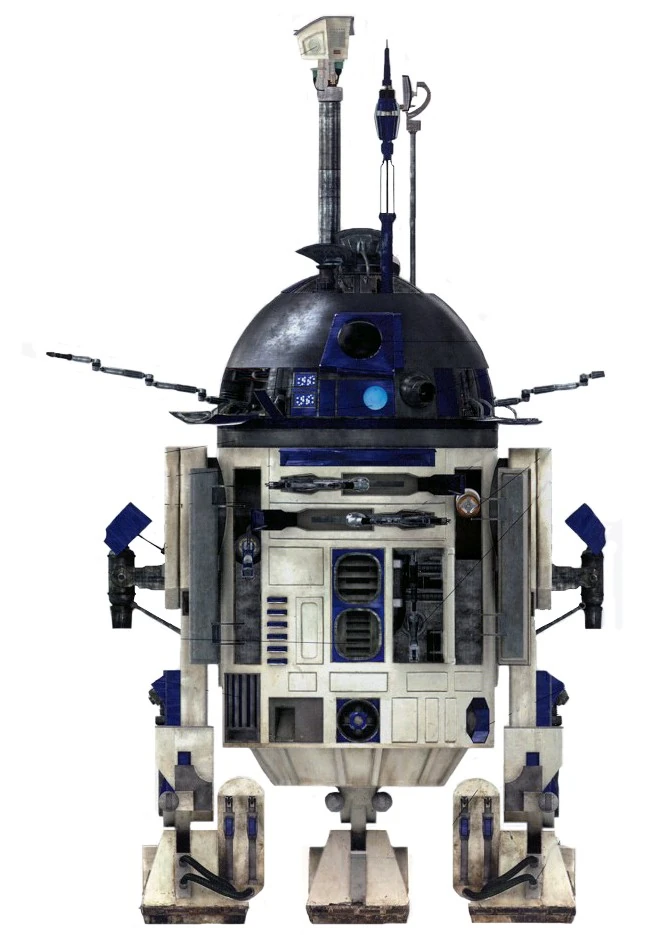
R2-D2 was a diminutive droid, standing 0.96 meters tall. He rolled on three legs, one could retract into his body, and had a silver and blue domed head. His white, blue, and silver body housed many arms, sensors, and other apparatuses, many of which were not readily seen by the typical humanoid eye. This often made the droid seem like a box of tricks, unexpectedly pulling out some previously unseen but very much needed device at a critical moment.
While R2-D2 contained many specialized gadgets, he was also quite good at taking the initiative and often employed unorthodox means to help his friends.
Known features
- Brooks Propulsion rocket booster
- Cable gun
- Oil injector
- Claw arm
- Fusion cutter
- Holoprojector / Recorder
- Internal comlink
- Periscope
- Electric pike
- Propeller
- Hidden lightsaber compartment with ejector
- Fire extinguisher / Smoke Screen
- Small Saw
- Air Cannon
- Crashmat
- Lariat
R2-D2: expanded view
- Submarine Mode
- Collapsible Umbrella
- Flea Remover
- Distracter
- Headdress Detangler
- Droid Deactivator
- Computer Interface Arm
- Charge Arm (electric shock)
- Life-form Scanner
- Breakdance Mode[2]
- Polarity sink
- Water pump/hose[3]
- Inflatable mattress
- Media copy / storage disc drive
- Jukebox
- Small red "tongue" ribbon[2]
- "Confetti-creation device" [4]
Biography
In the service of the Naboo
The Invasion of Naboo
- "Clean this droid up as best you can. It deserves our gratitude."
- ―Sabé
R2-D2 repairs the shield generator of Queen Amidala's Royal Starship.
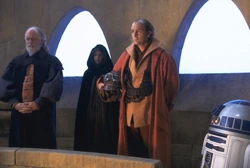
In 32 BBY, R2-D2 was in the possession of the Royal Engineers of Naboo, and was assigned aboard Queen Amidala's Royal Starship as a maintenance droid.[5][6] The Royal Engineers were famous for making after-market additions to their R2 units, which rendered the droids some of the most sought after units in the galaxy.[7] During that year, the Trade Federation created a blockade of battleships around Naboo in response to legislation passed by the Senate of the Galactic Republic which called for the taxation of trade routes to outlying star systems, and began landing their army of battle droids on the planet. Accompanied by the Jedi Knights Qui-Gon Jinn and Obi-Wan Kenobi, the Queen and a group of her royal personnel boarded the royal starship in the capital city of Theed and attempted to flee the planet by breaking the blockade. When the turbolasers of one of the Federation's battleships damaged the royal starship's shield generator, R2-D2 and several other astromech droids made their way through a turbolift to the ship's hull to effect repairs; R2-D2 bumped into the Gungan Jar Jar Binks on his way out of the ship. As R2-D2's droid companions were systematically blown off of the hull by laser blasts, the deflector shields gave out completely until R2-D2 was able to bypass the main power drive and bring the shields back online. With the shields again intact, the pilot Ric Olié was able to break the blockade and flee the planet.[6]
As the ship traveled through hyperspace to the planet Tatooine, a dirtied R2-D2 was brought before the queen by Captain Panaka, the head of the Royal Naboo Security Forces. Sabé, a decoy posing as the queen, thanked him for saving the lives of everyone aboard, and ordered Padmé Amidala, actually the queen posing as a handmaiden, to clean the droid up. Amidala cleaned R2-D2's exterior while Jar Jar Binks watched; the trio later accompanied Qui-Gon Jinn to the city of Mos Espa on Tatooine in search of a new hyperdrive generator. R2-D2 accompanied Jinn and the others to the junk shop of the Toydarian merchant Watto, and later to the home of Anakin Skywalker, a young slave working for Watto who offered his home to the party as a reprieve from a coming sandstorm. In Skywalker's home, R2-D2 was introduced to C-3PO, a protocol droid that the boy was building. As C-3PO was yet to be covered with an outer plating, R2-D2 candidly remarked that his parts were showing, even calling him "naked". The astromech droid then stood in the home's kitchen as the guests dined with Skywalker and his mother, Shmi Skywalker, and later helped Skywalker make final adjustments to his podracer in time to race it in the Boonta Eve Classic race. Despite C-3PO's shock at R2-D2's initial candor, the two droids fast developed a friendship of sorts, working on the podracer together, discussing space travel, and noting the clumsy actions of Binks.[6]
On the day of the race, R2-D2 helped pull Skywalker's racer onto the course, and later stood on the sidelines with C-3PO and two of Skywalker's playmates, Kitster Banai and W. Wald, who cheered their friend on. Skywalker won the race, which secured the hyperdrive generator and freed the boy from his enslavement. R2-D2 was waiting inside the royal starship and next to its boarding ramp as Skywalker entered the ship, and was present shortly thereafter when Jinn entered, having just dueled a Sith Lord on the planet's sand dunes. The ship and its crew traveled to the galactic capital of Coruscant and remained there for several days, before returning to Naboo in an effort to rid the planet of its Trade Federation presence. Onworld, R2-D2 accompanied the queen's party to the Gungan sacred place as she requested help from Boss Rugor Nass of the Gungans in the impending battle. After Nass accepted, R2-D2 attended an informal council of war, and projected a hologram of Theed as plans were made to lay siege to the city.[6]

R2-D2 attends the funeral of Qui-Gon Jinn.
Amidala, along with her handmaidens, bodyguards, Jinn and Kenobi, Skywalker, and R2-D2 stormed the Theed Royal Palace through its hangar; after the area was cleared of battle droids, R2-D2 was pulled into the droid socket of a Naboo Royal Starfighter that Skywalker had taken refuge in the cockpit of. After locating the firing controls, Skywalker destroyed several droidekas with the ship's guns, but found the ship in an automatic pilot mode. R2-D2 was able to override the auto-pilot, but only after the ship had made its way to a space battle that was raging above the planet's atmosphere. The astromech droid instructed his pilot to return to the hangar, but Skywalker refused, and joined Bravo Squadron of the Naboo Royal Space Fighter Corps as they assaulted the Trade Federation's Droid control ship. Shortly into the battle, Skywalker's fighter was hit and made a crash landing inside one of the control ship's hangars. Firing proton torpedoes at the ship's main reactor, Skywalker was able to destroy it, which played a large part in the day's victory over the Trade Federation.[6]
Following the victory, R2-D2 attended the Funeral of Qui-Gon Jinn, who had been slain during the battle by the same Sith Lord he had fought on Tatooine. R2-D2 was later present at a ceremony which celebrated the battle's victory, and stood by as Amidala presented Boss Nass with the Naboo people's Globe of Peace.[6]
Serving a Senator
- "Don't worry. We have Artoo with us."
- ―Anakin Skywalker to Padmé Amidala
R2-D2 would remain in Amidala's service for another ten years, even transitioning with her from the Royal House of Naboo to the Galactic Senate in 25 BBY.[8] Three years after her appointment to the senate, Amidala traveled from Naboo to Coruscant to vote against the senate's proposed Military Creation Act, but chose a handmaiden to pose as her and to make the journey in an official ship, while Amidala flew in a Naboo Royal starfighter with R2-D2 in the droid socket. After their arrival at a landing platform on Coruscant, a bomb detonated and killed most of the crew of the yacht; R2-D2 followed as Amidala's head of security Captain Typho rushed her to safety. Anakin Skywalker, now a Jedi Padawan, and his Master Obi-Wan Kenobi were assigned by the Jedi Council to protect the senator from further assassination attempts, and R2-D2 was programmed to warn the two Jedi if anyone intruded into her apartment while she slept. Despite his programming, R2-D2 failed to detect the insertion of two poisonous kouhuns into Amidala's bedroom, which had been administered through a hole in the window created by an ASN courier droid. Although the creatures were sensed and killed by Skywalker, Supreme Chancellor Palpatine of the Republic felt that Coruscant was an unsafe place for Amidala, and agreed to delay the vote on the Military Creation Act so that she might lay low on Naboo under the watchful eye of Skywalker.[9]
R2-D2 accompanies Amidala and Skywalker to Naboo.
R2-D2 accompanied the two onto a freighter whose voyage saw them posing as refugees, and brought them food in spite of the protests of a serving droid. After the ship's arrival at Theed, R2-D2 accompanied Skywalker and Amidala to the Royal Palace and quietly waited outside of the Royal Court as the two met with Queen Jamillia. Several days later, he journeyed with the two to Tatooine in Amidala's yacht as a restless Skywalker searched for his mother, and accompanied them to Watto's junk shop in Mos Espa. When Watto directed them to a moisture farm, the yacht was flown to the Great Chott Salt Flat, and R2-D2 was instructed by Amidala to remain with the ship while she and Skywalker went to the farm. While aboard the ship, R2-D2 received a holocomm message from Kenobi, who was on Geonosis and whose long-range transmitter had been damaged; Kenobi asked Skywalker to relay the message to the Jedi Council on Coruscant. Leaving the ship, R2-D2 found Skywalker, Amidala, C-3PO, and the Lars family attending a funeral for Shmi Skywalker, and informed them of the message. When C-3PO translated his binary beeps and whistles, Skywalker and Amidala returned to the ship and relayed the message to Coruscant. Seeing that Kenobi had been captured by droidekas while recording the message, the two decided to fly to Geonosis and rescue him. They were joined by R2-D2 and C-3PO,[9] the latter having been given to Skywalker by his step-brother Owen Lars.[8]
Entering the Clone Wars
The Battle of Geonosis
- "Where are you going now? You don't know what's out there! Have you no sense at all? Idiot!"
- ―C-3PO to R2-D2
R2-D2 soars through a battle droid factory on Geonosis.
Landing the yacht inside an exhaust vent on Geonosis, Skywalker and Amidala set out, leaving the droids behind. R2-D2 insisted on following them, but C-3PO disagreed and claimed to be in charge. R2-D2 ignored his friend and set out, and was ultimately followed by a reluctant C-3PO. Within the planet's catacombs, Geonosian warriors swarmed by the droids in flight from Skywalker's lightsaber; the droids soon discovered an entrance to a battle droid factory, within which Skywalker and Amidala were battling Geonosian warriors. Hoping to reach them, R2-D2 knocked C-3PO off of the platform on which they stood, before activating his booster jets and soaring through the factory. Finding Amidala trapped in a large bucket, R2-D2 landed on a bridge and sliced into a computer terminal with his scomp link, successfully saving the senator from being doused by molten ore. He also loosed the bucket from the mechanical arm which held it, spilling Amidala onto the factory floor. Surrounded by enemies, Amidala and Skywalker were captured and sentenced to die with Kenobi in a Geonosian execution arena. The timely arrival of 200 Jedi saved them, but the Jedi soon found themselves in a fierce battle with hundreds of armed droids fighting in the name of the Separatist Confederacy of Independent Systems. R2-D2 entered the melee and discovered C3PO's head attached to a battle droid's body. Using his cable gun to detach the head, R2-D2 dragged it across the arena and grafted it to the correct torso. As the battle droids overwhelmed the Jedi, the Jedi Master Yoda arrived with a large force of the newly-commissioned Grand Army of the Republic, and the fighting spilled out of the arena, soon leaving R2-D2, C-3PO, and the young clone Boba Fett as its sole occupants.[9]
The Republic Army won the battle, launching a galactic war between the Republic and the Confederacy. Shortly after the battle, R2-D2 and C-3PO accompanied Amidala and Skywalker back to Naboo, where they were the lone witnesses to a wedding between the two in the planet's Lake Country.[9]
From Amidala to Skywalker
- "I'm going to look for Master Yoda."
"Alone?"
"No. You two will accompany me." - ―Senator Amidala to her droids on Ilum


R2-D2 during the early stages of the Clone Wars
R2-D2 remained with Amidala on Coruscant during the initial battles of the war,[10] as did C-3PO, who had been given to the senator by Skywalker as a wedding gift.[11] The three witnessed Skywalker depart the planet in a starfighter on his way to lay siege to Muunilinst.[10] Some time later, the droids were traveling with Amidala in her Royal yacht while the ship was host to Yoda. After Yoda convinced Amidala and Captain Typho to make a detour, the ship headed to Ilum on a rescue mission of the Jedi Luminara Unduli and Barriss Offee.[12] The Jedi Master set out into the planet's blizzard alone, but a worried Amidala, after being assured by R2-D2 that his sensors were functioning properly in the snowy weather, soon set out to find him with the droids in tow. During the search, R2-D2's sensors detected several incoming objects, which turned out to be three cloaked Separatist Chameleon droids. Amidala destroyed all three, and the trio was greeted by their three wayward Jedi, Yoda concerned that the location of Ilum's Crystal Caves had been discovered by the Separatists. Slicing into one of the destroyed droids, R2-D2 discovered and revealed a hologram of Count Dooku, Head of State of the Confederacy, giving instructions to destroy the caves.[13]
After Skywalker was elevated to the rank of Jedi Knight, he gave his former Padawan braid to Amidala as a gift. R2-D2 was present when she received the hairpiece; in return, Amidala gave the astromech droid to her husband. Traveling to a hangar, R2-D2 showed Skywalker a hologram of Amidala indicating the droid's new ownership, much to Skywalker's delight. R2-D2 was then locked into the Jedi Knight's starfighter, and the two departed the planet.[14] R2-D2 flew with Skywalker in space combat throughout much of the war, including a battle where Skywalker saved Jedi Master Saesee Tiin from droid tri-fighters.[15] Skywalker programmed a large amount of tactical data and locations of Republic bases into the droid's memory, and broke protocol by never giving R2-D2 a memory wipe.[16] The droid was with Skywalker when he returned to Coruscant to visit Amidala.[15]
The new Padawan, the missing Huttlet
- "If there's a way out of here, Artooie will find it."
- ―Ahsoka Tano
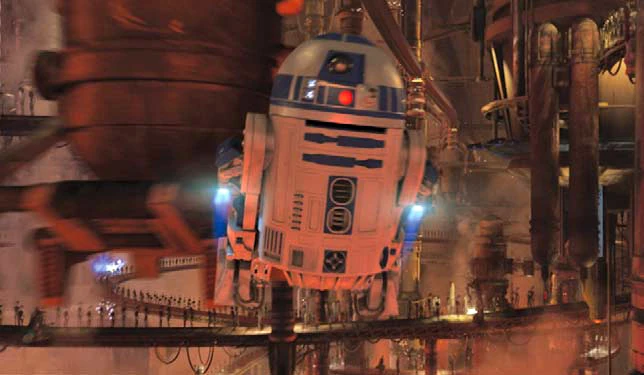
When the native population of the planet Christophsis appealed to the Jedi for aid in repelling an invading Separatist force, Kenobi, now a High Jedi General, and Skywalker, a Jedi General, arrived in the planet's Crystal City with a contingent of Clone troopers and R2-D2. Following a disastrous ambush by battle droids, R2-D2 watched as Clone Commander CC-2224, nicknamed "Cody", and Clone Captain CC-7567, nicknamed "Rex", analyzed the recovered head of TJ-55, a T-series tactical droid, in the communications center of the Republic base. When the two troopers discovered a spy in their midst, they rushed out of the center, but later returned and employed R2-D2 in locating any transmissions the spy had made. Plugging into a computer terminal, R2-D2 discovered a number of external communications that had taken place every few days in an irregular pattern. He traced them to the barracks of the Clone trooper sergeant Slick, which ultimately resulted in Cody and Rex fettering out the traitor.[17]
R2-D2 and R2-KT aboard Skywalker's transport, bound for Teth
A large force of battle droids marched on the city,[17], but was repelled by the Jedi and the Republic army. As a second wave arrived, R2-D2 was in the thick of the battle, but retreated to the safety of the Republic's AV-7 Antivehicle Cannon as the cannons fired at the droids' Armored Assault Tanks. After the droids retreated from the overwhelming cannon fire, a shuttle arrived on-planet from Coruscant and landed in the City's plaza. R2-D2 followed Kenobi and Skywalker to the plaza, and squealed in delight as the shuttle's lone occupant disembarked: Ahsoka Tano, Skywalker's new Padawan learner. As the Separatist army set up a deflector shield, R2-D2 joined Skywalker, Kenobi, Tano, and Rex at a council of war, where a plan was hatched to disable the shield. During the ensuing firefight, R2-D2 again remained with the Republic's cannons, which were able to decisively end the battle following the sabotage of the Separatists' shield generator. In the wake of the victory, Yoda arrived in Crystal City and ordered Skywalker and Tano to Teth to rescue the kidnapped son of the notorious crime lord Jabba the Hutt; R2-D2 traveled with them to the Outer Rim world and was present in the hangar of Skywalker's Acclamator-class transport while Skywalker was briefed on the situation planetside, and while Tano bragged of her exploits on Christophsis to a group of clone troopers.[18]
Skywalker and Tano led their troops to a successful siege of a B'omarr Order Monastery that Separatist forces, and rescued Rotta the Huttlet from within. Outside of the castle, R2-D2 sat in Skywalker's starfighter and projected a holographic transmission from Kenobi, which was cut short by the arrival of several Confederate C-9979 landing craft and vulture droids. R2-D2 jettisoned himself from the starfighter mere second before it received a barrage of blasterfire and exploded. As B1 and B2 battle droids swarmed the exterior of the castle, R2-D2 followed Tano inside, and was joined by Skywalker and several clone troopers before the castle's door slammed shut. Tano quickly devised an escape plan, and brought R2-D2 and Skywalker to a computer terminal where the astromech droid sliced in and located a backdoor landing platform.[18] En route to the platform, the trio was met by the Dark Acolyte Asajj Ventress and several B2 droids, but before a skirmish could ensue, R2-D2 activated a trap door in the floor, sending everyone present plunging down a long chute and into a small arena. As Skywalker dueled Ventress, Tano neutralized the droid threat; a second group of B2 droids arrived in an overhead gallery but were assailed by R2-D2 and knocked into the arena below. The distraction offered by a jungle rancor present in the arena allowed an outgunned Ventress to escape, and the trio continued on their way to the landing platform.[19][20]
Fleeing from Asajj Ventress, R2-D2 follows Skywalker and Tano to a secret landing platform on Teth.
Arriving at the platform, they were again greeted Ventress, this time with several droidekas in tow, but R2-D2 was able to close the door to the platform before their foes arrived. After Skywalker leapt off of the platform and onto the back of a large, winged insectoid, he tamed the beast and used it to tackled Ventress, who had cut through the door with her lightsabers and was dueling Tano. As Tano joined her Master on the beast's back, R2-D2 activated his booster rockets and followed them to Ventress's secret landing platform, located on a nearby mesa. The Huttlet was strapped to R2-D2 as the two Jedi attempted to start the engines of the Twilight, a freighter they discovered, but it was R2-D2 who was able to successfully get the ship running. Unable to rendezvous with the Star Destroyer Spirit of the Republic, the trio was forced to take the freighter to Tatooine and deliver the Huttlet directly to his father. R2-D2 programmed the coordinates into the ship's navicomputer, and it jumped to hyperspace.[18]
Above Tatooine, the freighter was attacked by vulture droids, the last of which was destroyed when R2-D2 plugged into a computer terminal and fired the freighter's cannons at it. Damaged in the firefight, the freighter crashed into the planet's Dune Sea, which forced the trio to journey to Jabba's Palace on foot. When Skywalker sensed the presence of the dark side of the Force, he suspected a nearby Dark Jedi and set off to draw it towards him and away from the Huttlet. He left Rotta with R2-D2 and Tano, who made it to Jabba's Palace without incident until three IG-100 MagnaGuards rose from the sand and attacked them. R2-D2 electrocuted one with his droid shock arm before being knocked away, and it fell to Tano to destroy all three with her lightsaber. The two then entered the palace and returned the Huttlet, which, coupled with a holo-transmission from Senator Amidala on Coruscant identifying Jabba's uncle Ziro as the responsible party for the kidnapping, placated an angry Jabba and saved the lives of the two Jedi.[18]
In the hands of Grievous
- "You can't replace Artoo."
- ―Anakin Skywalker upon receiving a new Astromech droid
When the Jedi Council received intelligence that General Grievous, Supreme Commander of the Separatist Droid Armies, intended to invade the planet of Bothawui, they dispatched three Venator-class Star Destroyers under Skywalker's command to blockade the Both system. When six Confederate frigates arrived in the system, Skywalker led the starfighters of Gold Squadron out to meet them, with R2-D2 flying in the general's droid socket. When the frigates were outflanked by several Republic AT-TE Walkers hiding on an asteroid, Grievous fled his flagship in his personal starfighter, and was pursued closely by Skywalker and R2-D2. A piece of shrapnel from an exploding frigate became lodged in Skywalker's fighter, and he lost both control of the ship and consciousness; the Jedi was soon recovered by Rex, but R2-D2 was salvaged from the starfighter's remains by the Trandoshan scavenger Gha Nachkt and brought aboard Nachkt's freighter, the Vulture's Claw.[16]

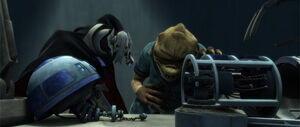
Grievous and Gha Nachkt take R2-D2 apart.
Nachkt suspected that the droid's memory contained valuable Republic information, and accordingly fitted R2-D2 with a restraining bolt and contacted Grievous, offering the droid in exchange for credits. En route to a rendezvous with the General, Nachkt slept in the freighter's bridge, which allowed R2-D2 to loose his restraining bolt and escape from the closet in which he was being held captive. As he rolled down the ship's corridors, he was pursued by an IG-86 sentinel droid, but managed to slice into a computer terminal, shutting a blast door between the sentinel and himself, and opening a trap door beneath the sentinel that jettisoned it into space. However, the mayhem woke Nachkt, who found R2-D2 and refitted the droid with his restraining bolt.[16] Again a captive, R2-D2 was inspected by Passel Argente, the Magistrate of the Separatist-allied Corporate Alliance, who boarded the Vulture's Claw with the hope of purchasing a spy droid. Although he showed an interest in R2-D2, Nachkt informed him that the astromech already had a customer.[21]
As the Vulture's Claw arrived at Skytop Station, a Confederate listening post in the Hoth's Brand system, R2-D2 again worked at escaping his confinement. Cutting through a wall in the closet with his buzzsaw, he accessed a control panel and sent an audio transmission through the freighter's broadcast antennae, which was ultimately picked up by Skywalker. Nachkt discovered the droid's actions and electrocuted him with an ion prod; the Trandoshan then landed the freighter at the listening post and brought R2-D2 before Grievous. The General instructed Nachkt to take the droid apart and extract any information on the Republic from his memory, and Nachkt complied, discovering that R2-D2's memory contained every single Republic formation and strategy. Grievous killed Nachkt for demanding more credits, and then instructed several of his Magnaguards to reconstruct R2-D2 and bring him to a secure location after learning that Republic troops had boarded the station. As the astromech was carried through the station's corridors, Skywalker, who had traced R2-D2's broadcast to the system, located him and destroyed every Magnaguard with his lightsaber. As the skirmish occurred, a partially-reconstructed R2-D2 managed to mostly reattach his arms and dome, and then electrocuted a Magnaguard as its destroyed arm attempted to grab a hold of Skywalker's leg.[22]

The duel of the droids
Skywalker was happy to see his friend again, but was promptly commed by R3-S6, his replacement astromech droid who was in fact a Confederate spy. After R2-D2 and Skywalker raced back to the Twilight, which Skywalker had docked in one of the station's hangar bays, R3-S6 revealed his true allegiance by shutting all the doors to the hangar and activating several derelict vulture droids, who, along with a group of B2 battle droids, attacked Skywalker, R2-D2, and a group of clone troopers. Skywalker ordered R2-D2 to an outer platform to see if there was a way to open the hangar door. After rolling across a bridge, R2-D2 began to interact with a computer terminal, but was accosted by R3-S6, who had followed him to the platform. The two astromechs began shooting electricity at each other, but R2-D2's lightning proved the more powerful and incapacitated his foe. He successfully opened the hangar door, but was again attacked by R3-S6, and responded by shooting oil at his opponent. Having been rigged with explosives that had been recently been detonated, the station began to weaken, causing the bridge to buckle and begin to collapse. R3-S6 began to tumble off, but held on by firing his cable gun at R2-D2. As the two droids slowly began to slip towards the edge of the collapsing bridge, R2-D2 fired his booster rockets, setting fire to the space between them, and used his buzzsaw to cut the cable, sending R3-S6 rocketing off of the bridge and towards his destruction. R2-D2 then flew into Skywalker's waiting starfighter with the aid of his rockets, and the ship sped away from the exploding station.[22]
Chasing the Malevolence
- "Artoo! Program the navicomputer. Be ready to get us out of here."
"You forgot. We turned him off!" - ―Skywalker and Tano, preparing to flee from the Malevolence
News began to spread through the Republic of a Separatist weapon that had destroyed over a dozen Republic warships and left no survivors; when Jedi Master Plo Koon's fleet was presumed destroyed in the Abregado system, Skywalker, Tano, and R2-D2 took the Twilight from the Bith system to investigate, despite instructions from Master of the Order Mace Windu stating that they were to remain with their fleet and protect vital convoy missions. Arriving in the Abregado system, R2-D2 tuned the Twilight's scanners to detect lifeforms, and received a holonet transmission from Kenobi, who instructed Skywalker to rendezvous with his fleet. As the three prepared to leave the system, R2-D2 discovered a lifeform reading on the ship's emergency channel and traced the signal to a specific area of the shattered remains of Koon's fleet. When Tano sensed Koon's presence, the three were able to employ a tow cable in bringing an escape pod aboard their ship which was housing Koon and three clone troopers. The joy of the recovery was cut short when the Separatist's secret weapon arrived in-system: A heavy cruiser of prodigious proportions called the Malevolence, which sported massive ion cannons that it used to disable its prey. R2-D2 was shut off with the rest of the Twilight's systems in a bid to avoid detection from the battleship's sensors, but when the gambit failed, the astromech droid was reactivated and plotted a hyperjump away from the system. Having successfully escaped from the ion cannons' blast, the Twilight rendezvoused with the Star Destroyer Resolute.[23]
Hoping to acquire a group of Y-wing bombers to use against the heavy cruiser, Skywalker brought R2-D2, Tano, and the clone pilots of Shadow Squadron in the Twilight to the Bormus Testing Facility, a space station orbiting the planet of Bormus that possessed such a group. Aboard the station, R2-D2 plugged into a computer terminal and uploaded falsified documents that a protesting worker needed into the station's computer system, which claimed that Skywalker had permission to take the untested fighters.[24] With new fighters to their name, Shadow Squadron returned to the Resolute, where they were briefed by Skywalker and Admiral Wullf Yularen; R2-D2 assisted in the briefing by projecting a hologram of the Malevolence while Skywalker outlined the squadron's attack strategy: bomb the cruiser's bridge superstructure. R2-D2 then joined Skywalker and Tano in one of the bombers; Skywalker would be commanding Shadow Squadron while Tano acted as his gunner. Having received intelligence that their target was heading towards the Republic's Kaliida Shoals Medical Center, Shadow Squadron took a shortcut through the Balmorra Run in order to cut the Malevolence off.[25]
Shadow Squadron is briefed by R2-D2, Skywalker, and Admiral Yularen aboard the Resolute.
The shortcut necessitated passage through the Kaliida Nebula, which saw the squadron and Master Koon, acting as its fighter escort, dodge through nesting giant Neebray mantas. Passing through mostly unscathed, the squadron beat the Malevolence to the medical center, but was reduced to half of its strength when five bombers were lost to vulture droids and the cruiser's massive ion cannons. Unable to destroy the bridge, the squadron directed its efforts at one of the ion cannons at Tano's suggestion, firing proton torpedoes at the weapon. The damage inflicted caused the Malevolence to nearly tear itself apart when it attempted to fire, incapacitating both weapons and its hyperdrive.[25] The Resolute prepared to destroy the derelict cruiser, but held off when Senator Amidala's yacht, having arrived in-system due to false intelligence, was brought aboard by the damaged ship's tractor beam. Bringing R2-D2 with them, Skywalker and Kenobi took the Twilight aboard to rescue her.[26]
Arriving inside the Malevolence, R2-D2 was ordered to remain at the airlock entrance, where he was soon commed by Skywalker and told to shut down a rail jet hovertrain. After complying by means of a sliced computer terminal, the astromech droid was told to locate C-3PO, who had arrived with Amidala but had gotten lost. R2-D2 found his friend, and the two rendezvoused with Skywalker and Amidala before meeting Kenobi at the Twilight. The task of powering up its engines and releasing its docking clamp fell to R2-D2, who then performed a scan of the Malevolence and discovered that it was powering up its hyperdrive. Owing to an act of sabotage performed by Skywalker and Amidala, the hyperdrive caused the cruiser to explode as the Twilight sped to safety.[26]
Despite the victory, Grievous, who had been in command of the cruiser, escaped,[26] and Skywalker began dedicating his efforts to tracking the General down. R2-D2 stayed by his owner's side aboard the Resolute as Skywalker forsook sleep in his task.[27] However, the Jedi Knight's focus would soon shift to Count Dooku; R2-D2 aided Skywalker in making his starfighter appear damaged in a ruse that ended with Skywalker allowing himself to be captured by a Confederate Munificent-class star frigate commanded by Dooku near Vanqor.[28]
A white truce, a blue shadow
- "Might we go inside, Master Anakin? Artoo would like to get out of the cold."
- ―C-3PO on Orto Plutonia
R2-D2 and C-3PO were again reunited during a trip to Orto Plutonia, the latter having been lent to Skywalker by his wife for the mission to the icy world. When contact was lost with a planetside military outpost, Skywalker and Kenobi brought the droids and a contingent of Clone cold assault troopers to investigate, and were accompanied by Senator Riyo Chuchi of Pantora, as well as Chi Cho, Chairman of the Pantoran Assembly, due to the planet's location in Pantoran space. When the Jedi discovered that the clone troopers stationed on Pantora had been wiped out by a group of local Talz, Cho declared war on the natives, but the conflict was quickly halted when Chuchi received permission from the Pantoran Speaker of the Assembly to negotiate peace. R2-D2 and C-3PO accompanied Chuchi, the Jedi, and what clone troopers were not fighting to the scene of the battle, where Chuchi made peace with Thi-Sen, the Talz's tribal leader.[29]
The two droids met again when R2-D2, Kenobi, Skywalker, and Tano landed on Naboo in a Low Altitude Assault Transport, having been sent by the Jedi Council in response to intelligence suggesting that a Separatist bio-lab had been set up on the planet. After being greeted by C-3PO, Typho, and the Gungan Peppi Bow in a hangar of Theed's Royal Palace, Skywalker sent Tano and Bow to locate the laboratory, while he, Kenobi, and R2-D2 were shown a hologram of the scientist Doctor Nuvo Vindi that had been discovered inside the head of a B1 battle droid. The Jedi managed to locate Vindi's laboratory in the planet's swamps and arrest the mad doctor,[30] but Skywalker, Kenobi, and R2-D2 were forced to take the Twilight to Iego when Tano, Amidala, Jar-Jar Binks, Rex, and several other clone troopers became trapped in the laboratory with an airborne stream of the deadly Blue Shadow Virus that Vindi had been synthesizing.[31]
Master and droid tinker with Tano's starfighter above Ryloth.
The two Jedi were able to obtain a root of Iego's Reeksa plant, which was a necessary ingredient in the creation of an antidote for the virus, but were unable to leave the planet due to the presence of Drol, a LaserWeb Defense Station that the Separatists had installed in the planet's orbit. After one unsuccessful attempt to pass through it, the Twilight landed in the spaceport city of Cliffhold, and R2-D2 received and amplified a holonet transmission from Amidala and Tano, both of whom were suffering from the effects of the virus. A plan was hatched to break through Drol, and as the Twilight left the city, several vulture droids that the Separatists had left on the planet were slave-rigged to the control of R2-D2. Via a computer terminal, R2-D2 sent the droid ships on kamikaze runs into Drol's laser generators, destroying the defense system and allowing the Twilight passage out of the system. R2-D2 set a course for Naboo, where the antidote was synthesized and the affected parties cured.[31]
The Resolute, along with the Star Destroyers Defender and Redeemer were soon after called to the planet of Ryloth after its inhabitants were enslaved by Wat Tambor, Emir of the Separatist-allied Techno Union. An initial skirmish above the planet saw the destruction of the Redeemer, and when its companion ships fled, R2-D2 assisted Skywalker in working on his Padawan's starfighter while Skywalker and Tano concocted a plan to break the blockade. The damaged Defender was evacuated, save for R2-D2 and Skywalker, who piloted it straight into the lead Separatist control ship. Prior to the crash, the two fled the Defender in an escape pod, which was recovered by the Resolute. With the blockade broken, Kenobi's troops could now mount a ground assault of the planet.[32]
New threats
A cunning bounty hunter
- "Artoo says we're close…stay sharp."
- ―Skywalker during the Battle of Devaron
In the employ of Darth Sidious, the secret leader of the Confederacy, a Duros bounty hunter named Cad Bane stole a holocron from the archives of the Jedi Temple,[33] but was subsequently pursued to Devaron by the Resolute. The Resolute targeted the hyperdrive of a Munificent-class frigate that Nute Gunray, the Viceroy of the Separatist-allied Trade Federation, had leant to Bane, and the bounty hunter found himself trapped in the system; R2-D2, Skywalker, Tano, Rex, and a group of clone troopers took several AT-TE walkers to the hull of the frigate in an attempt to board and recover the holocron. R2-D2 opened a hatch, allowing the party to board, and joined them as they stormed the bridge. Plugging into a computer terminal, R2-D2 discovered a hologram of Bane indicating that he had taken the Kyber crystal from the captured Jedi Master Bolla Ropal, and located the detention area where Ropal was being held. The party found Ropal dead, but were able to locate Bane with the help of R2-D2's glowrod. They followed him into a hangar that was filled with battle droids, and a fierce firefight ensued that saw Bane disable the ship's artificial gravity. Using his booster rockets, R2-D2 turned the gravity back on, and, with the droids defeated, the boarding party fled the ship in a Sheathipede-class transport shuttle.[34] Upon their return to the Resolute, it was discovered that Bane had donned the armor of a clone trooper and had fled with them; Bane quickly escaped the Resolute with a list of all-known Force-sensitive children in the galaxy that he had obtained by combining the holocron and the Kyber crystal.[35]

R2-D2 and Tano in zero gravity
Skywalker and Tano captured Bane on Naboo and brought him to the Resolute, where, with the aid of R2-D2, they investigated the bounty hunter's fighter and discovered that he had recently been to Mustafar. Hoping to find a higher power that they suspected Bane to be working for, the three took the Twilight to the volcanic planet. After landing, R2-D2 opened the door to a mining station and allowed Skywalker and Tano access, and followed them inside, later opening another door that allowed the two Jedi to flee the station with two recovered infants.[35]
Deadly new weapons
- "Oh, hello! You're not in trouble again, are you?"
- ―C-3PO to R2-D2
Soon after the mission to Mustafar, R2-D2 and Skywalker accompanied C-3PO, Amidala, Typho, and Senator Rush Clovis of the Intergalactic Banking Clan on Amidala's star skiff from Coruscant to Cato Neimoidia, where Amidala would parley with Senator Lott Dod of the Trade Federation while simultaneously spying on Clovis; both Dodd and Clovis were suspected of being in league with the Confederacy. R2-D2 and Skywalker initially remained with the skiff outside of Dod's palace, but Skywalker, disguised as a pilot, infiltrated the fortress and returned with a datacard that Amidala had stolen. R2-D2 took the datacard and prepared the skiff for takeoff, which Typho piloted away from the planet after Skywalker, Amidala, and C-3PO returned. The datacard contained tactical coordinates for a new droid foundry being constructed on Geonosis,[36] and R2-D2 accompanied Skywalker and several other Jedi to the planet as Republic forces laid siege to the factory. R2-D2 projected a hologram of the target as Skywalker and Jedi Master Luminara Unduli planned an attack.[37]
R2-D2 later joined a clone escort that included Skywalker, Kenobi, Cody, and Rex; the group was aboard the starship Coronet in an effort to ensure the Duchess Satine Kryze of Mandalore and several other Senators belonging to Kryze's Council of Neutral Systems safe passage from Satine's homeworld to Coruscant. As it was suspected that Kryze's enemies, the Death Watch, were allied with the Confederacy, R2-D2 and the clones troopers aboard patrolled the ships' cargo hold in search of any suspicious droid activity. When R2-D2 discovered a solitary clone trooper helmet, his agitated beeping and whistling, coupled with the disappearance of two troopers, prompted Rex to contact Skywalker, whose arrival resulted in R2-D2's discovery of an empty cargo box and an assassin probe droid. The probe was destroyed by Skywalker and the clones, but its mangled remains began spewing legions of tiny probe killers, some of which R2-D2 electrocuted with his droid shock arm. The astromech went on to electrocute one more probe killer, just as it was about to strike at Rex's throat. Skywalker and the clone troopers destroyed the remaining probes, as well as several B2 battle droids that arrived on the ship via three Droch-class boarding ships and the traitorous Senator Tal Merrick, and the ship arrived safely at Coruscant.[38]
Skywalker rides R2-D2 away from the Zillo Beast.
When Separatist forces attacked the native Dug on the planet Malastare, the long campaign worried the Supreme Chancellor, who was interested in the planet's fuel resources. Palpatine approved the use of the Republic's newest weapon, the electro-proton bomb, and R2-D2 accompanied Skywalker and Mace Windu to Malastare to oversee the weapon's detonation. The bomb was dropped on advancing Separatist forces, releasing an electromagnetic pulse that short-circuited the systems of the battle droids, but creating a sink hole in the ground. R2-D2 joined Skywalker, Windu, Rex, Dug leader Nakha Urus, creator of the bomb Doctor Sionver Boll, and a hologram of the Supreme Chancellor at a round-table discussion regarding the retrieval of clones that had fallen into the sinkhole and the signing of a treaty that would secure the planet's fuel reserves for the Republic. Skywalker left to negotiate with the Dug Council, but soon commed R2-D2 and told him to ready his starfighter. The two piloted the ship into the sink hole, where Windu and several clones were battling a Zillo Beast, a massive creature that had been awakened by the bomb's detonation.[39]
A swipe from the beast caused the fighter to crash, and as it approached the downed craft, Skywalker yanked R2-D2 out of the droid socket and rode the droid to safety via R2-D2's booster rockets. He told the droid to get to safety, but R2-D2, again using his rockets, remained in the vicinity of the beast as Skywalker attacked it. When the Jedi Knight leapt off of the Zillo Beast's head, R2-D2 positioned himself beneath his master's trajectory, allowing Skywalker to land on the droid and safely ride him out of the sinkhole. The Dugs began dropping bombs into the sinkhole, but found the weapons unable to penetrate the beast's armored scales. R2-D2 joined the two Jedi, Rex, and Boll as they contacted the Supreme Chancellor and requested permission to spare the innocent creature's life. Skywalker proposed using stun cannons on gaps in the beast's armor to put it to sleep and transport it off of the planet, and when Boll convinced Palpatine to acquiesce, the plan was successfully executed. R2-D2 was present in Urus's palace as the Council signed a treaty welcoming them into the Republic. The Zillo Beast was then transported to Coruscant,[39] and R2-D2, Skywalker, and Windu accompanied it there, meeting the Supreme Chancellor on a landing pad as he placed the beast in Dr. Boll's care.[40]
Opinions on what to do with the beast differed greatly within the small circle of those who knew of its existence. When Senator Amidala caught wind of Palpatine's plan to kill it, she contacted Kenobi, who invited Skywalker to meet him in the Senate building. R2-D2 accompanied his master and greeted C-3PO, who was attending Amidala and Kenobi. The Senator convinced her husband to appeal to his friend Palpatine, and the droids joined their masters in appearing before Palpatine in the Chancellor's Suite. As Skywalker and Amidala discussed their options with Palpatine and Vice Chair Mas Amedda, the Zillo Beast meanwhile escaped from its captivity and began charging through Coruscant's cityscape. R2-D2 displayed a hologram to Skywalker from one of the clone troopers attempting to halt it, but when the beast reached the Chancellor's office, everyone present evacuated through an emergency escape route. Amedda had previously excused himself from the discussion, but Palpatine, Skywalker, Amidala, R2-D2, and C-3PO boarded an executive ship piloted by a Senate Commando. As the commando took the ship into the air, it was grabbed by one of the Zillo Beast's massive hands.[40]
Skywalker used his lightsaber to cleave the ship clean in half, sending the bow and all six passengers sliding down the exterior of the Senate Rotunda. R2-D2 skidded down the side of the building, and used his tow cable to catch himself in place. C-3PO landed atop him, but the astromech droid soon disengaged himself from the cable and used his booster rockets to make his way over to Palpatine. The Senate Commando sacrificed himself to the rampaging Zillo beast as the Chancellor rode a flying R2-D2 to safety. Clone troopers in LAAT gunships used gas bombs to kill the creature and end the threat it posed to Coruscant's citizens, and the poison they emitted was held back with the Force by Skywalker, as well as Yoda and Aayla Secura, who had been attempting to engage the beast. R2-D2, Palpatine, and the three Jedi remained safe from the poison gas, as did Amidala and C-3PO, who had also safely landed. The following morning, the entire party was present as the Zillo Beast's corpse was taken away from the scene.[40]
The fighting thickens
- "Your astromech is programmed to feel?"
"Artoo is kind of a…special case. He's got a lot of personality, that's all." - ―Mace Windu and Skywalker on Vanqor
R2-D2 battles a Gundark on Vanqor.
When Skywalker and Windu were sent to the Star Destroyer Endurance to greet a detachment of Clone cadets from the Clone Youth Brigade, R2-D2 stayed at his master's side, and was present when the group of youngsters were shown the ship's bridge. Several of the cadets were given the opportunity to fire the Destroyer's guns at skeet targets launched by a trooper, and R2-D2 bore witness to Boba Fett, now a bounty hunter, hit all of his targets with one shot. Fett was infiltrating the group of his brethren in an attempt to avenge his father's death and kill Windu. When Fett sabotaged the ship, R2-D2 was on the bridge when Skywalker unsuccessfully attempted to persuade Admiral Kilian to evacuate the failing Destroyer, and then evacuated with Skywalker in the Jedi Knight's interceptor. As the Endurance crashed onto the planet Vanqor, R2-D2 and Skywalker took their interceptor to rescue the young clone cadets from an escape pod that Fett had left them in after escaping on his ship, the Slave I.[41]
As the occupants of the many jettisoned escape pods were rescued, Skywalker and Windu took their fighters planetside to search for Kilian and his command crew. Setting down behind the crashed Star Destroyer, they proceeded on foot along with R2-D2 and Windu's astromech R8-B7. R2-D2 spotted several gundarks following them, but the group soldiered on, and R2-D2 discovered the corpse of a clone trooper that had been shot following the crash. The two Jedi proceeded to the ship's bridge and ordered the droids to remain on the ground and scan for any additional survivors. Instead, the droids found two gundarks, who ripped R8-B7 apart. R2-D2's attempts to help his companion saw him swatted away. Before the gundarks could seize him, however, they were scared off by falling debris from an explosion on the bridge. R2-D2 boarded the downed vessel and found the two Jedi trapped under a pile of debris; when he attempted to move it, Skywalker warned him that the effort would cause the entire bridge to collapse. The droid was thus instructed to return to the starfighters and call the Jedi Temple for help. On his way out of the ship, he spotted Fett and fellow bounty hunters Aurra Sing and Castas approaching on speeder bikes. As the bounty hunters climbed a turbolift shaft into the ship, hoping to find Windu's corpse, R2-D2 repeatedly dropped debris on them. After he dropped a downed clone trooper's grenade, the bounty hunters fled the ship, deciding to destroy it instead.[42]
R2-D2 proceeded to Skywalker's fighter, but was met by a gundark who lifted him from the ground. The astromech droid shot one end of his tow cable to the creature's forehead and the other to the fighter, and after escaping from the gundark's grasp, set the fighter to autopilot, sending it and the attached gundark rocketing into the side of the Star Destroyer. R2-D2 then climbed inside of the droid socket of Windu's starfighter and lifted off of the ground, but was pursued by the Slave I, whose occupants believed that Windu was flying the interceptor. R2-D2 evaded their laserfire and took the ship out of the planet's atmosphere, but a shot from Fett destroyed his communications dish. As he neared the two parked hyperdrive docking rings, Fett destroyed one, but R2-D2 managed to lock into the other and take the fighter into hyperspace. Arriving at the Jedi Temple on Coruscant, he raced through the temple's hallways and into a briefing room, where Plo Koon and Tano were in the midst of a briefing. In a frenzy, R2-D2 attempted to shove Koon's astromech out of the room's computer terminal, but the scuffle was broken up by Tano. When she identified R2-D2 to Koon, the Jedi Master allowed him to play a recording he had taken of Skywalker issuing his instructions, and Koon and Tano immediately prepared to leave. They brought R2-D2 and a contingent of clone troopers to Vanqor, where they found the Endurance suffering from compounded damage and in its final throes. From an LAAT gunship, Koon and Tano used the Force to hold the Star Destroyer together while several clones rescued Skywalker and Windu. The gunship was taken a safe distance away from the exploding vessel, and as Skywalker and Windu were taken away on gurneys, the Master of the Order thanked R2-D2 for his assistance.[42]
War's end
Cleaning up messes
- "That's it, pal. Now we're moving!"
- ―Skywalker to R2-D2 immediately prior to the Battle of Belderone

R2-D2 and Skywalker are attacked by Separatist vulture droids above Maramere.
Thirty-one months into the war, Skywalker and Kenobi had both been serving on the front lines for nearly an entire uninterrupted year, and were consequently granted a ten-day reprieve. Skywalker and R2-D2 traveled to Naboo to visit Amidala in the lake country for some peaceful time away from the fighting.[43] Shortly into the vacation, Kenobi arrived, and recruited a reluctant Skywalker to help him hunt Asajj Ventress, whom he alone believed to be still alive following a duel with Skywalker on Coruscant. Kenobi left immediately, and Skywalker and R2-D2 took Skywalker's Eta-2 Actis-class light interceptor to rendezvous with him above Maramere in the Karthakk system. Kenobi flew an interceptor of his own, and as they waited in an empty system, a large Separatist capital ship emerged from hyperspace. Skywalker blasted battle droids that waited on its hull, and the two Jedi entered the ship to search for Ventress.[44]
The arrival of the ship had in fact been orchestrated by the Separatist commander Durge, who planned on using Kenobi's obsession with finding Ventress to kill the Jedi Master. R2-D2 waited in Skywalker's starfighter as the two Jedi explored the ship. While Skywalker battled Durge, Kenobi commed R2-D2 and had the astromech droid locate the ship's secondary hangars. Skywalker lured Durge into an escape pod and fired it into Maramere's sun, and Kenobi found a travel log inside one of Durge's droids indicating Ventress's presence at Boz Pity. They returned to their starfighters and escaped from the ship, which Durge had programmed to self-destruct. R2-D2 and the two Jedi prepared to take on a group of vulture droids that were waiting in space for them, but the timely arrival of senator Bail Organa of Alderaan in the Star Destroyer Intervention prevented the need.[45] R2-D2 did not accompany Skywalker during the subsequent siege of Boz Pity, but the siege saw the end of Ventress's role in the war, as the Dark Jedi fled both the planet and her role in Separatist command.[46]
As the Confederacy was pushed further and further from its former bases in the Core worlds, Skywalker and Kenobi participated in the Outer Rim Sieges, attacking key Separatist strongholds on the far side of the Galactic Slice. Thirty-six months into the war, Nute Gunray, still the viceroy of the Trade Federation, stopped at his purse world of Cato Neimoidia to loot his citadel before fleeing with the rest of the Separatist Council to the Outer Rim, and R2-D2 accompanied Skywalker and Kenobi in an attempt to capture him. Although Gunray escaped, a mechno-chair of his was discovered. In the citadel's launching bay, R2-D2 conversed with TC-16, Gunray's protocol droid, and then plugged his scomp link into the chair to run a diagnostic. The chair began walking away, and brought a frantic R2-D2 into a compact data room, where it plugged into a control console and programmed itself to self-destruct. Skywalker was able to disrupt the sequence, and in the process uncovered a hologram of Gunray addressing Darth Sidious. Kenobi had heard the name from Count Dooku on Geonosis, who had told him that Sidious was in control of the Republic Senate. As such, Master Yoda assigned Skywalker and Kenobi to hunt Sidious down.[47]
After following a lead to Xi Char, the two Jedi were en route to Escarte when new orders from the Jedi Council redirected them to Belderone to capture Grievous. R2-D2 flew in Skywalker's interceptor as he, Kenobi, Clone Fight Squad Seven, and sixty Republic capital ships engaged Grievous's Separatist fleet. Skywalker fought his way through enemy starfighters and attacked Grievous's flagship, the Invisible Hand, but the General and his fleet fled shortly into the battle. R2-D2 sustained damage and remained on Belderone while Skywalker and Kenobi continued their pursuit of the wayward Sith Lord; after being repaired by technicians, he rejoined his Jedi companions on a MedStar orbiting the planet before traveling to Tythe. Republic Intelligence claimed that Dooku was currently on the desert planet.[47]

Via R2-D2, Mace Windu orders Skywalker and Kenobi back to Coruscant to rescue the Chancellor.
R2-D2 flew in Skywalker's interceptor as a Republic battle group engaged a Separatist fleet over Tythe. With the space battle acting as a diversion, Skywalker and Kenobi took Red Squadron down the planet's gravity well to infiltrate the Separatist base. Separatist ground defenses destroyed every clone fighter in the squadron, but the two Jedi managed to land at and enter the base after spotting Dooku's signature starship. The Dooku they found was merely a hologram, however, and after the overwhelmed Separatist fleet departed the planet,[47] the Republic battle group followed the Count's trail to Nelvaan. Skywalker lost his cybernetic arm battling forces of the Techno Union there, and afterwards, R2-D2 helped him fit himself with a new one aboard the Star Destroyer Integrity. The astromech droid then received and played an urgent message from Mace Windu on Coruscant: A Confederate fleet had struck at the galactic capital and kidnapped Chancellor Palpatine, and Skywalker and Kenobi were needed to return to Coruscant and rescue him.[48]
Rescuing the Chancellor
- "Yeah! You got him!"
"Great, Artoo!" - ―Skywalker and Kenobi during the Battle of Coruscant
Darth Sidious had planted false intelligence regarding Dooku's location in order to draw Skywalker, Kenobi, and much of the Republic's military strength away from its capital.[47] Nevertheless, Skywalker and Kenobi brought the Fifth Fleet of the Republic Navy's Open Circle Fleet back to the ecumenopolis, themselves flying Eta-2's; R2-D2 was stationed in Skywalker's fighter while R4-P17 flew in Kenobi's. As the battle raged in the skies of Coruscant, the two Jedi took Clone Flight Squad Seven towards the Invisible Hand, but were met with resistance from several vulture droids and tri-fighters. R2-D2 helped Skywalker evade two missiles that had been fired at him, and electrocuted a buzz droid that made its way from Kenobi's fighter onto Skywalker's. When the two fighters landed in a hangar of the Invisible Hand, R2-D2 plugged into a computer terminal and located the Chancellor's homing beacon on the ship's observation deck. He was then instructed to remain with the fighters while the Jedi infiltrated the destroyer in search of the Chancellor. R2-D2 followed the orders, and hid himself when two B2 battle droids entered the hangar; he placed his comlink inside of his dome in order to mute the sound of a hailing from Kenobi. The sentries were alerted to his presence, however, as he plugged into the terminal to activate a turbolift that Kenobi was in, and lifted him off of the ground. R2-D2 responded by squirting them with oil and setting it ablaze with his booster jets, destroying the two battle droids.[1]
R2-D2 sets two B2 battle droid on fire during the Battle of Coruscant.
Skywalker and Kenobi succeeded in killing Count Dooku and rescuing the Chancellor; the former commed R2-D2 and told him to activate another turbolift. However, due to damage inflicted by the Star Destroyer Guarlara, the artificial gravity, tensor fields, and inertial compensators of the Invisible Hand all began to fail, causing the astromech droid to plummet across the hangar into a pile of battle droid parts. When the ship's Neimoidian pilot brought its gravity back online, R2-D2 left the hangar and discovered the Jedi and the Chancellor caught in a ray shield in one of the ship's corridors. Before he could free them, a group of B2 battle droids and droidekas arrived and took the four captive, bringing them before General Grievous on the ship's bridge. Following some banter between the General and the Jedi, R2-D2 opened all of his panels and began shrieking; the distraction allowed the Jedi to recall their lightsabers from Grievous's cloak and to begin destroying the battle droids and Magnaguards present on the bridge. When the droids were subdued, Grievous fled, bringing all of the ship's escape pods with him.[1] As the Invisible Hand continued to be battered by the Republic's Home Fleet Strike Group Five,[7] it broke in half and began plummeting towards the planet's surface. R2-D2 helped Skywalker and Kenobi perform a crash-landing, extending the ship's drag fins in the process. With the Chancellor safe, the remnants of the Separatist armada fled to the Outer Rim, and R2-D2 accompanied Skywalker, Kenobi, and the Chancellor to the Senate Building where they were greeted by Mace Windu and the Senate's Loyalist Committee. R2-D2 was greeted by C-3PO, who was attending Senator Amidala, and entertained his golden friend with tales of the rescue.[1]
A hero's fall
- "Captain Antilles."
"Yes, your highness?"
"I'm placing these droids in your care. Treat them well, clean them up, have the protocol droid's mind wiped." - ―Bail Organa to Raymus Antilles
R2-D2 and Chancellor Palpatine, mere days before the latter's seduction of Skywalker to the dark side of the Force
Over the next several days, R2-D2 bore witness to several conversations between Skywalker and Amidala, and holographically recorded them into his memory.[49] The days were harrowing ones for Skywalker, and they ultimately saw him fall to the dark side of the Force under the sway of Chancellor Palpatine, who was secretly also Darth Sidious. As Jedi across the galaxy were killed, Skywalker, now known as Darth Vader, brought the 501st Legion of clone troopers to the Jedi Temple and slaughtered all of the Jedi present; he afterwards took R2-D2 in his starfighter to Amidala's apartment, where R2-D2 had a brief conversation with C-3PO. Vader then traveled to the planet Mustafar on Sidious's orders, where, after instructing R2-D2 to remain with his starfighter, he killed every member of the Separatist Council, ending the war. When Amidala and C-3PO arrived on the planet, Vader saw that Kenobi had stowed away aboard their skiff, and began choking his wife with the Force;[1] R2-D2 holographically recorded the incident.[49] As Vader and Kenobi left the platform and engaged in a lightsaber duel, R2-D2 and C-3PO brought Amidala back aboard the skiff and attempted to stabilize her condition.[1]
Kenobi soon returned, having defeated Vader, and took the skiff to the planetoid Polis Massa to rendezvous with Yoda and Bail Organa. Amidala was brought to a medical center, where R2-D2, C-3PO, Kenobi, Organa and Yoda bore witness to the birth of two twins she had been carrying: Luke and Leia. Weakened and without the will to continue living, Amidala passed away on the operating table. As the five survivors brought her body to Naboo on Organa's corvette, the Tantive IV, Kenobi and Yoda discussed the situation with Organa: The Jedi Order had nearly been completely wiped out, and the Republic had been reorganized into a Galactic Empire with Palpatine as its Emperor. Yoda and Kenobi went into hiding, the latter watching over Luke, who was entrusted to the Lars family on Tatooine. Leia was adopted by Organa and his wife; the twins would be kept safe from the Sith in the dark times ahead. Organa entrusted R2-D2 and C-3PO to Raymus Antilles, the Captain of the Tantive IV, who was instructed to treat them well and to wipe C-3PO's memory.[1] Organa's hope was that the droids would one day belong to his daughter.[7]
Early Imperial era
Separated from the Tantive IV
- "What?! Go on adventures? Explore the galaxy? You must be short-circuiting again! We are droids, after all… Nothing exciting ever happens to us!"
- ―C-3PO to R2-D2
As units of the droid pool aboard the Tantive IV, R2-D2 and C-3PO were paired together, with the latter acting as the interpreter counterpart of the former.[50] Several years into the droid duo's service aboard the corvette, they were in an escape pod while the ship's Chief Petty Officer, Corla Metonae, was supervising test launches of the pods. When a pirate group from the Karthakk system attacked the Tantive IV, it was forced to flee and to abandon the jettisoned pods.[51]
C-3PO and R2-D2 look on as Prince Plooz of Alzar strangles King Zornog of Sooma.
Dislocated, R2-D2 and C-3PO ended up in the care of the Intergalactic Droid Agency, who sent them to the planet Dodz to serve their new master, the crystal merchant Lott Kemp. Upon arrival, they discovered that Kemp's home had been destroyed and that he had gone missing; a young orphan named Jost Ellon found them and became their de facto master. Ellon spent his life hiding from Dodz's Governor Kugg and his war droid Destroyer, but when R2-D2 and C-3PO discovered Ranger X-1, an old labor droid laying dormant in Ellon's home, they activated the ranger and brought it to the Dodz Citizen's Monthly Council to fight against Kugg. Threatened by Destroyer, the council had already agreed to pay the exorbitant taxes that Kugg was demanding; too late to stop him, C-3PO, R2-D2, and Ellon brought the Ranger to Kugg's mansion and saw it defeat Destroyer with help from R2-D2, who suffered micro-synapse damage during the battle. Kugg was sent to face intergalactic trial, and R2-D2 and C-3PO left the planet to repair the damaged astromech.[52]
Returning to the headquarters of the Intergalactic Droid Agency, C-3PO was able to persuade the scientist Lonn Idd to repair his counterpart. When the Annoo-dat gangster Tig Fromm came to the space station to steal a powerful laser from Idd, R2-D2 and C-3PO helped Idd's children, Vik and Nikki free the scientist; C-3PO was able to destroy all of Fromm's hover guard droids while dressed as a guardian droid, allowing Vik to trap Fromm in a net and turn him over to the authorities.[53] The two droids were soon after sold to Ambassador Zell of Majoor to act as tutors and companions of Zell's son Llez, who had dreams of dismantling C-3PO and using R2-D2 for entertainment purposes. During a diplomatic mission to Armath that saw Zell command a fleet of Majooran consular ships, Llez fled from his father and took up with the pirate Reddjak, but returned to his father when Reddjak was personally defeated by Zell.[54]
A wrinkle in time
- "Too late, Artoo…He's disrupted the anti-matter pods!"
"Kwaz-Oortik!" - ―The droids regarding Prince Plooz, just before traveling to the future
The droids passed from Zell to King Gokus of Alzar, who sent them as diplomats to the Royal Palace of the planet Sooma to retrieve his son Plooz. The infant had ended up in the care of Sooma's King Zornog when Sludd, First General to Alzar's forces, had concocted a scheme to overthrow his King. When R2-D2 and C-3PO stopped a hyperactive Plooz from choking Zornog, the King gave them his fastest starship to use to ferry the Prince back to his father. En route, battleships under the command of General Sludd appeared. C-3PO hailed the vessels and informed them that Plooz was onboard, but Sludd prepared to attack anyway; R2-D2 was ordered by the protocol droid to prepare the ship's hyperdrive. Hoping to help, Plooz inadvertently disrupted the ship's anti-matter pods, but with electron torpedoes incoming, R2-D2 was ordered by his counterpart to jump to hyperspace regardless.[55]
The anti-matter pods of the droids' vessel are disrupted, opening a time warp in nearby outer space.
A bright pink opening surrounded the ship, and R2-D2 realized that they had created a time warp by causing an anti-matter overload upon jumping to hyperspace.[55] The vessel had temporally jumped over fifteen years into the future,[56] and spatially jumped to the Endor system. Plooz dashed for an escape pod while C-3PO was issuing instructions to R2-D2; as the infant's pod made its way towards the forest moon of Endor, R2-D2 and C-3PO landed the ship to give chase.[55] On the moon, they met with Kneesaa a Jari Kintaka, an Ewok Princess and the daughter of Chief Chirpa of the Ewok's Bright Tree Village, who spoke an obscure dialect of the Inner Zuma Region that C-3PO was able to understand. Kneesaa brought them to a peace summit occurring between Chirpa's Council of Elders and King Gorneesh of the Duloks, another sentient species native to the moon. Gorneesh was holding a terrified Plooz over a chasm, and C-3PO demanded that he be let go. Just then, rays from Endor's primary star Ibleam reflected off of C-3PO's plating, giving him the glowing appearance of what the Duloks perceived to be an Ewok demon. The Duloks fled, and Ploz was rescued from the chasm by R2-D2 and the Ewok Wicket W. Warrick.[56]
After the Ewoks escorted the droids and Plooz back to their Sooman craft, the trio piloted the ship through the time warp seconds before it closed and returned to their own time. Sludd's fleet remained where they had left it and began firing on them, but C-3PO took control of the situation and was able to direct R2-D2 to land the damaged craft outside of Gokus's palace. As Plooz entered the palace to find his father, Sludd landed his own ship and held the two droids at gunpoint. When Gokus arrived, demanding an explanation from his general, R2-D2 played a recording of Sludd's earlier threat to kill Plooz and seize control of both Alzar and Sooma. Livid, Gokus had his general and his co-conspirators thrown in prison.[56] R2-D2 and C-3PO would not remain in Gokus's service for long, soon finding themselves for sale at the droid store of Van P. Quist on R-duba.[57]
R2-D2 was soon purchased by the human Kirk Windjammer, but was reunited with his counterpart when Baron Starlock of R-duba purchased C-3PO and betrayed his Prince, Jagoda of R-duba, by helping the people of Dorande attempt to conquer the planet. His efforts were thwarted by R2-D2, C-3PO, and Windjammer.[57]
Re-encountering Tig Fromm
- "Oh what a perilous chain of events! We're lost in a game of chance to a new master who turns out to be a smuggler, then we're tossed overboard with the stolen goods whilst he gets himself arrested."
- ―C-3PO, regarding himself and R2-D2
R2-D2 and C-3PO's rapid transitions between masters continued, as the two were lost in a game of chance to the smuggler[58] Zevel Hortine,[59] who jettisoned them from his ship along with a large amount of contraband while being arrested above the planet Ingo. Landing in the planet's Vaj Desert, the droids began trekking across the sands before being spotted by two speeder jockeys, Thall Joben and Jord Dusat. Having been in search of an R2-unit, the two declared themselves the new masters of the droid duo and welcomed them into Joben's speeder. While traveling to the jockeys' auto-shop, they crossed into the desert's restricted zone and were pursued by seeker probe droids, but successfully evaded them. At the shop, R2-D2 and C-3PO helped fix up Joben and Dusat's speeders and were shown the White Witch, a heavily-modified C/L-82 landspeeder speeder that the jockeys intended to enter into an upcoming race, with R2-D2 flying in its droid socket. When Joben left the shop for the night, he brought the droids with him, but noticed pursuit by an unknown party and hid his speeder accordingly. With the pursuers dodged, the trio returned to the shop, only to find that Dusat had been kidnapped. Following the arrival of Kea Moll, a young resistance fighter seeking a mechanic, R2-D2's sensors detected movement outside of the shop. Investigating, Joben discovered that his speeder had been sabotaged, and soon found himself surrounded by hostile droids. R2-D2, C-3PO, and Moll took the White Witch outside and saved Joben, and then tracked the droids to a base belonging to Tig Fromm, the Anoo-Dat gangster that R2-D2 and C-3PO had previously encountered while in the service of Lonn Idd.[58]

R2-D2 and C-3PO with their new masters and Kea Moll
R2-D2 infiltrated the base and intentionally alerted the guards to his presence. A Fromm Tower Droid opened the doors to the base in an effort to find the intruder and was swiftly decapitated by the White Witch, which zoomed into the open doors and made its way through a cave system after locating Dusat on a map of the complex. After coming to a locked door, Joben cut his way through with a lightsaber that a customer had previously left him, before taking R2-D2 in the White Witch through the base's tube system and rescuing Dusat. After recovering C-3PO and Moll, Joben piloted the speeder to the base's exit, only to find several droid cruisers waiting outside and firing at them. C-3PO activated several dormant tower droids, which began battling the cruisers; the White Witch was able to escape in the midst of the confusion, destroying several seeker probes that attempted to follow it. The speeder was then taken to Moll's ship, the Sand Sloth, where Moll, the droids, and their masters prepared to take the Witch to the Boonta Speeder Race. Aboard the ship, R2-D2 and C-3PO held a discussion regarding speeder racing[58] before the ship jumped to the Annoo system. Following the jump, the droids made their way to the ship's hull to enact repairs. When C-3PO and the hyperdrive began to float away, R2-D2 was able to recover the protocol droid by wheeling him back towards the ship via a rope. The crew of the Sand Sloth needed a new hyperdrive, however, and traveled to Annoo to find one.[60]
Following a scuffle with another droid at Annoo customs, R2-D2 and C-3PO spotted two members of the Fromm Gang and began to cause a scene, offering a distraction that allowed their human companions to escape. Joben, Dusat, and Moll took the droids to the home of Kea's mother Demma, where R2-D2 and C-3PO cleaned several Sand sloth stalls while their masters slept. Adjacent to the stalls, C-3PO unintentionally activated a secret door leading to a rebel base of the Annoo Resistance. When the droids went to wake Joben up and inform him of their discovery, they found an assassin droid spraying the jockey with gas. A brief skirmish ensued that concluded with Moll arriving and shooting the assassin; her mother promptly arrived home and informed her guests that Sise Fromm, the leader of the Fromm gang, was trying to kill Joben and Dusat for having discovered his secret base on Ingo. In that base, the Fromm gang was developing a secret and deadly weapons satellite called the Trigon One.[60]
The next morning, Dusat and Moll took the White Witch to a ship belonging to the Fromm gang, hoping to ride it back to Ingo and sabotage the Trigon One. When Joben, still in recovery from the gas, later woke up, he took the droids and followed his friends, finding them held captive by a pair of Annoo-Dat thugs at one of the gang's freighters. R2-D2 aided in knocking the gangsters unconscious in the ensuing confrontation, and Joben and Moll hid themselves in two cargo containers, giving C-3PO a thermal detonator to hold still until they reached Ingo. The droids and Dusat posed as laborers when more gang members passed by; Dusat then left the scene, intending to remain on Annoo and protect Demma. R2-D2and C-3PO were soon after witnesses to a conversation between Sise and Tig Fromm regarding their plans for the Trigon One. Under their guise as laborers, they boarded the freighter, and were accosted by two other droids during the journey to Ingo. However, a chance passage through a meteor shower saved them.[60]
To take the Trigon
- "It was all Artoo's idea."
"I'm a little tired of Artoo's ideas. Especially the one to use my servo-mechanism to guide this spacecraft." - ―Thall Joben and C-3PO aboard the Sand Sloth, discussing the destruction of the Trigon One

R2-D2 and C-3PO escape from Aaron.
At the Fromm gang's base on Ingo, C-3PO saved the life of the gang's head of security, Vlix Oncard, by pushing him out of the way of falling debris. The grateful security chief agreed to take the container that Joben and Moll had hid inside of to the hangar that held the Trigon One. The droids began making their own way to the hangar, dropping Oncard's name in order to avoid trouble with rowdy gangsters that they passed. Two of the gangsters, however, unintentionally activated the thermal detonator. With only ten minutes until its detonation, the droids hurried to the hangar and rendezvoused with their companions. When several guard droids arrived, R2-D2 covered them with foam and knocked another one onto the ground; the astromech droid also closed a door before more members of the gang could arrive. R2-D2, C-3PO, Joben, and Moll boarded the Trigon One, and the thermal detonator destroyed the scaffolding holding the satellite in place. The team took the Trigon One into atmosphere, where R2-D2, having activated its weapons systems, destroyed several attacking droid fighters.[60]
R2-D2 and C-3PO were soon after kidnapped by the Fromm Gang and brought to their mining facility on the planet Aaron. Imprisoned at the bottom of the complex's eight levels, the droids managed to escape from their cell and ascend all eight levels, evading various Fromm Tower Droids, ceiling-mounted gun emplacements and other hazards along the way, and activating turbolifts by entering correct sequences of colored keys. After exiting the facility, the droids found Joben and Dusat waiting to rescue them.[61]
Back in Joben's care,[61], R2-D2 devised a plan for destroying the Trigon One, and after taking it back to Ingo, he and Joben hid and sabotaged it, ensuring that any subsequent activation of its drives would send it on a collision course with the Fromm gang's stronghold on Annoo. Upon returning to Joben's auto-shop, they found the building surrounded by members of the Fromm gang. They recovered C-3PO and Moll in their speeder, but a subsequent chase through a nearby city concluded with the Fromm gang trapping them in a warehouse. The four were taken prisoner and brought to the Fromm gang's Annoo strongold, where Joben informed Sise Fromm that he had taken the Trigon One to Ingo. They were then locked in a cell with Dusat, who had been previously captured along with Demma. R2-D2 hatched an escape plan, and C-3PO, preying on their guard's avarice, loudly claimed that his counterpart's dome was filled with jewels. Investigating, the guard was covered with foam by R2-D2, who then used his shock arm to zap Joben's binders. Joben freed his four companions and took Moll to rescue Demma, while Dusat and the droids made their to a hangar and commandeered a ship. After discovering that the Trigon One was inbound, R2-D2 informed Dusat and C-3PO of the sabotage, and consequently took a cargo sled with C-3PO to aid Joben and Moll, knocking over several patrol droids in the process. The droids activated an evacuation alarm and brought Joben, Moll, and Demma back to the ship, which Dusat had hotwired. Aided by C-3PO's servomotors, he guided the ship away from the exploding base.[62]
With the Trigon One destroyed and the Fromm gang finished, Joben and Dusat could finally focus on the upcoming speeder race. En route to Boonta, R2-D2 and C-3PO were on the Sand Sloth's hull enacting repairs to the White Witch's power couplings when another starship appeared and began firing at them. R2-D2 quickly activated the hyperdrive via external controls, and the droids rode through hyperspace on the hull. After arriving at Boonta, an engine damaged in the firefight caused the Sand Sloth to crash into a scrap yard. An old security droid named Proto One appeared and, after befriending R2-D2, offered to fix the ship. Moll agreed, and along with Joben and the droids, brought Dusat to a local hospital, as Dusat had injured an arm during the firefight. The White Witch had also been damaged in the crash, and when R2-D2 suggested that Proto One fix it, a jealous C-3PO enlisted the help of a droid named BL-17 instead. BL-17 offered the used of a garage that he claimed was owned by his master, and Moll accepted the offer, unaware that BL-17 was actually working for the bounty hunter Boba Fett. Fett had been hired by Sise Fromm, who wanted revenge on the group that had ruined his gang.[63]
R2-D2 and C-3PO look on as BL-17 is crushed by rubble.
While R2-D2 and Moll were fixing the Witch, C-3PO, unaware of BL-17's duplicity, became fast friends with the droid. When BL-17 remotely triggered a gas leak in the garage's welding tanks, Moll began losing consciousness, and R2-D2 found himself unable to open the doors. Thinking quickly, he programmed a heavy lifter to knock the door down, and brought Moll to safety outside just as Joben was arriving. Joben took Moll to the hospital and charged R2-D2 with guarding the Witch, but when C-3PO and BL-17 returned, the protocol droid blamed his old friend for any trouble that might have happened and agreed to BL-17's suggestion to move the speeder to the safety of a nearby processing plant. R2-D2 followed them to the plant, where he found that BL-17 had attacked Proto One. Distracting the duplicitous droid with his arrival, R2-D2 allowed C-3PO to body-check BL-17 into a pile of rubble which then buried him. Joben and Moll arrived, but when Fett appeared and began shooting at the group, Joben and R2-D2 fled in the Witch to participate in the imminent Boonta Race.[63]
During the race, Fett pursued the Witch in his own speeder, attempting to both harpoon and blast his quarry. R2-D2's shock arm and fire extinguisher were able to counteract the bounty hunter's efforts, however. When a thermal detonator that Tig Fromm had placed aboard the Witch shook free and landed on Fett's speeder, Joben was able to win the race. While celebrating, he and Dusat were approached by Zebulon Dak, the owner of a powerful speeder corporation, who offered them both jobs. The jockeys eagerly accepted, but their mirth was interrupted by the arrival of Sise Fromm, Tig Fromm, and Vlix Oncard, who were fuming at having once again been foiled. Proto One arrived as well, however, and arrested them, but Fett was unimpressed by their meddling in his work after having hired him, and captured them in order to deliver them to Jabba the Hutt. R2-D2 and C-3PO joined their masters and Moll aboard the Sand Sloth, where they overheard a conversation between the humans: Dak would not allow R2-D2 and C-3PO to accompany the jockeys unless they were reprogrammed. Having grown attached to the droids' personalities, Joben and Dusat decided not to take the jobs. Accordingly, the droids fled the ship in an escape pod, hoping that their masters would be free to pursue their dreams.[63]
The lost Prince
- "Yorpo says we certainly know how to pick a master. "
" And I know how to pick my droids." - ―C-3PO and Jann Tosh
R2-D2 and C-3PO found their way back to the Intergalactic droid agency, whose agents found them a new owner in the form of Doodnik, a cantankerous[64] Besalisk[65] who owned and operated a café on the planet[64] Tyne's Horky.[66] Arriving at the establishment in one of the world's mining colonies, the droids anticipated respectively being put to work as maintenance and translator droids, but were instead relegated to waiting tables. After tripping over one another and disrupting the meal of the crime lord Kleb Zellock, they were disowned by Doodnik and told never to return to the café. Desiring a master, R2-D2 and C-3PO found their way to a public auction within the colony, where an asking price of 500 keschels was given for the two of them and an android. C-3PO picked a young Human male out in the crowd and asked if he would buy them, but the sale was made for sixty keschels to Yorpo Mog, the bodyguard of Zellock whom R2-D2 had earlier sent face-first into his boss's soup. When Mog began manhandling the android, the young man that C-3PO had appealed to intervened and traded his mining droid for Mop's three acquisitions. Named Jann Tosh, the young man took his new comrades to his wheel bike, but was pursued by Mog after the bodyguard remembered that Zellock had charged him with acquiring the android. C-3PO piloted the vehicle away from Mog, but the bodyguard managed to board it before being quickly shaken off. Tosh and his companions then to return to Tosh's mine.[64]
Tosh's uncle Gundy was less-than-impressed that Tosh had returned home without a mining droid, and his vexation only increased when R2-D2's sensors discovered that the android was in fact an addle-brained member of the Tammuz-an species. Gundy kicked R2-D2 but injured his foot in the process, and put all three of his new acquisitions to work. R2-D2 and C-3PO were often helped by the Tammuz-an stranger, who displayed great strength and impressed Gundy by using it to rescue the miner from a collapsing mineshaft. Tosh dubbed the stranger Kez-Iban, a Bocce word meaning "He That Returns from Death", and took him and the droids along as he brought an injured Gundy to a local hospital. When R2-D2 witnessed Mog take Kez-Iban away from the medical facility, Tosh took the droids back to Doodnik's, where they confronted Zellock, leading to a brawl erupting throughout the café. After a young female Human paralyzed one of Zellock's thugs with a miniature stunner, Tosh and the droids rushed out of the eatery, only to find Mog and several more thugs waiting for them. They were brought to Zellock's Nergon-14-filled mine and sentenced to perform labor, but escaped their chains when R2-D2 used a detached foreleg of C-3PO to deactivate the power restraints of the mine's power conductor. When the Tammuz-an Sollag arrived and presented Kez-Iban with a scepter, Kez-Iban's vitality was restored, and he revealed himself as Mon Julpa, Prince of Tammuz-an. He thanked Tosh for his kindness, but the joyful moment was cut short when R2-D2's sensors detected rising levels of combustible gas. Fearful of the Nergon-14's impending activation, Tosh, Julpa, Sollag, and the droids rushed out of the mine.[64]
Unimpressed with and astromech droid being hired on at his mine, Gundy gives R2-D2 a swift kick.
Several mining droids attempted to repulse them, but were neutralized by R2-D2, C-3PO, and the power of Julpa's scepter. Commandeering a bulldozer, the desperate team drove it through a large door before ascending to Zellock's control platform in a turbolift. The Nergon-14 was activated by the gas leak just as they confronted Zellock and Mog, who fled from the base, pursued by Tosh and his allies. When the latter group slit up in order to find their way out of the mine's twisting tunnels, it was R2-D2 and C-3PO who came upon Zellock and Mog arriving at their getaway ship. C-3PO's foreleg, having gained some independence after being reattached by R2-D2, sprang forward and knocked a miniature stunner from Zellock's hand into Mog's, and Mog, having just been betrayed by his boss, fired the weapon at Zellock. Tosh, Julpa, and Sollag arrived, and the group brought Zellock's prone form onto the ship and escaped from the base just prior to its destruction. Returning to his mine, Tosh discovered that his uncle had found a large deposit of keschels where the mineshaft had earlier collapsed; Gundy polished and shone R2-D2 and C-3PO up, but informed them that he intended to keep them working hard at the mine.[64]
Hoping to help Julpa regain his rightful place as King of Tammuz-An, Tosh enlisted the help of a stranger named Old Iron Pants to take he, his droids, Julpa, and Sollag to the planet. Before he left his mine, Gundy recorded a farewell hologram inside of R2-D2 and instructed him to ensure that only Tosh received it. On the bridge of Iron Pants's ship, she revealed to Tosh that she was actually Jessica Meade, the stranger who had saved him inside Doodnik's Café. R2-D2 and C-3PO then rushed onto the bridge, where the astromech droid played the hologram to both Tosh and Meade in spite of Gundy's request. Afterwards, Julpa and Sollag entered the bridge, and the ship was attacked by the Dianoga, a hostile starship belonging to the pirate Kybo Ren. R2-D2 was able to successfully detach the bridge, a starship in its own right, from the rest of the vessel, before the bounty hunter IG-88, having been hired by Tammuz-an's Vizier Zatec-Cha to take Julpa alive, arrived in-system in his own ship and crippled the Dianoga. Free of pirate trouble, Meade brought her ship to ground-level on the planet and was hailed by ships belonging to the forces of Zatec-Cha. C-3PO asserted that it was the ineptitude of the ships' guards that had allowed them to be attacked by pirates; the guards, fearful of retribution from Zatec-Cha, left Meade's ship alone.[67]
Injured from the firefight, Meade was taken to a hospital by Sollag, while the others booked a room at a local inn. At the inn, Julpa revealed that he needed to infiltrate Zatec-Cha's fortress and reach the royal tower in order to hold his scepter up to the rising sun at dawn and be crowned King. Tosh noticed a spy outside of their room and gave chase, while the droids left the inn to check on Meade at the hospital. Discovering that Meade and Sollag had been escorted out of the hospital by the Vizier's guards, they attempted to return to the inn but got lost on the way, eventually discovering Tosh surrounded by the spy, Vinga, and several of his companions in an alleyway. The distraction of their arrival prompted Tosh to start a fight with his foes, which R2-D2 and C-3Po helped him win by each grabbing a guard's wig and pulling at it, spinning the guard around until he collapsed. With under three hours until dawn, they rushed to the Vizier's palace to save their missing comrades, whom Julpa had joined the ranks of after being captured by IG-88. After entering the palace via a secret door that Julpa had revealed to them, Tosh and C-3PO fell through a trap door and were followed down by R2-D2. Landing without injury, they were chased by a giant droid that fired lasers from its photoreceptors, but their foe fell from a partially extended bridge into a pit of lava. The next room that the trio found their way into saw its ceiling begin to press in on them, but the crisis was averted when R2-D2 pressed a floor panel that caused the walls to follow suit; the stress created by the walls acting against the ceiling caused both elements to cease their pressure, allowing the trio to escape.[67]
Unfazed by the hazards, the trio pressed on, soon entering a pit where Julpa was being chased by a Durkii. The beast, however, lost its aggression and fell asleep when R2-D2 was able to remove several kleexs from its body. R2-D2 quickly grew affectionate toward the sleeping giant, but pressed on. He, C-3PO, and Tosh were joined by Julpa and Sollag, and rushed after Zatec-Cha to rescue Meade and recover the scepter. They dodged several barrels before Tosh mounted a Floater-935 repulsorlift vehicle to chase Zatec-Cha and his henchmen, who rode Ubrikkian Airhooks. In a chase around the royal tower, the scepter changed hands repeatedly before R2-D2, riding on an Imperial Sniper Vehicle awkwardly piloted by C-3PO, grabbed it with his claw-arm. It fell again into the hands of Zatec-Cha, who readied himself to approach the Keeper of the Tower and present it at dawn. Landing his vehicle, C-3PO stood atop R2-D2's dome and donned a cloak over both of them, posing as Vinga, Zatec-Cha's assistant. When Meade wrestled the scepter from the Vizier's hands, C-3PO recovered it and tossed it to Julpa, who presented it to the keeper of the tower and was declared King of Tamuz-an. Now loyal to Julpa, the guards took Zatec-Cha and Vinga away. R2-D2 and C-3PO received medals, were polished and shined, and, along with Tosh, were appointed advisors to Julpa's court.[67]
The revenge of Kybo Ren
- "Tell me again how you captured Kybo Ren all by yourself, Threepio!"
"Well, I, um…I wouldn't say…all by myself. I did have luck on my side. The best luck of all: Good friends." - ―C-3PO informs Prince Coby of R2-D2's role in capturing Kybo Ren
Desperate to power his R-22 Spearhead fighters, Julpa tasked Tosh, Meade, and the droids with obtaining fuel and bringing it to Tammuz-an. Tosh flew in a Spearhead while Meade brought the droids aboard her ship. On the return flight to Tammuz-an, a ship was sent ahead containing the fuel, but R2-D2 and C-3PO were kept in the dark and told that it was a decoy meant to attract pirates. The pirate Kybo Ren fell for the ploy, and brought the Dianoga and several stolen Imperial TIE fighters against Meade and Tosh. Tosh was able to cripple the TIEs, but Ren and several of his crew boarded and seized control of Meade's ship. C-3PO was stunned with an ion bolt while contacting Tosh, and after Tosh surrendered, Ren brought his quarry to his base, an island grotto on Tarnoonga. R2-D2 reactivated his friend during the trip.[68]


R2-D2 propels Jann Tosh through the oceans of Tarnoonga.
Enamored with her fiery spirit,[69] Ren personally brought Meade as a guest of honor to his court, while Tosh and the droids were separately escorted by guards. When C-3PO was too slow to step onto a turbolift and fell off a ledge, R2-D2 released an inflatable mattress from inside his dome to catch the falling protocol droid. Brought before Ren, Tosh and the droids learned that the pirate was planning to invade Tammuz-an, and had pursued the fuel in order to leave the planet defenseless. The following morning, he brought the trio on his skiff to the ocean surrounding his base, fitted Tosh with stun cuffs, and threw him into the ocean to be eaten by a Miridon sea monster. R2-D2 plunged into the water after his master, bringing an unwitting C-3PO with him, and activated a propeller to allow him to begin swimming through the ocean's depths. After fitting Tosh with a breath mask and breaking his stun cuffs with a shock of electricity, R2-D2 began evading the Miridon, Tosh hanging onto the droid and C-3PO hanging onto Tosh. The monster found itself stuck inside of a sunken ship, and R2-D2 propelled his allies back to Ren's base, which the trio entered via an underwater pipe.[68]
Back inside the base, they pulled two fishing guards into the water, and the droids donned their uniforms in order to infiltrate the base and rescue Meade. When C-3PO mistakenly woke a sleeping guard, a scuffle ensued that saw Tosh and the droids commandeer a boat and pilot it through the base's waters. Several guards gave chase in a boat of their own, but were intercepted by the Miridon, the beast having entered the base through the same pipe as Tosh and the droids. With the guards distracted, Ren stood alone against the trio, and was caught in a net by Meade, who had escaped from her cell. She joined Tosh and the droids in racing to their ships and escaping the planet, with the droids inside of Tosh's Spearhead. Several TIE fighters gave chase, leading the starfighter into the tractor beam of Ren's Gladiator-class Star Destroyer Demolisher that the pirate had stolen from an Imperial repair dock. When the spearhead was brought into a hangar of the Star Destroyer, Tosh was imprisoned and the droids were put to work loading arms as the warship jumped to Tammuz-an.[68]
As R2-D2 and C-3PO worked at loading proton torpedoes, the astromech droid inverted one before trapping their droid overseer on a magnetic hoist. The two then made their way to the detention level and freed Tosh, who raced to the bridge while the droids further sabotaged the ship's weapons systems. Having arrived at Tammuz-an, the Demolisher fired its turbolasers at Meade's ship, and Ren was shocked to discover that it was a decoy. The fully-fueled Tammuz-an space navy arrived from the planet's atmosphere and engaged the Demolisher, which became crippled after attempting to fire the inverted torpedo. Tosh and the droids fled the ship in his Spearhead and returned to Tammuz-an, where the droids were treated to an oil bath,[68] and Ren and his crew were placed in the dungeons.[66]
Soon after capturing Ren, Julpa invited the warrior chief Toda to his court, proposing a peace treaty and hoping to end a longstanding rivalry between the royal court and the warrior chief. R2-D2 and C-3PO prepared dessert for the occasion, and after accidentally tossing the prepared food out a window, made a second cake and rushed into the courtroom, crashing into a wall and ending up covered in the cake. Their hijinks cut tension that had been mounting between Toda and and Sollag, but Toda remained suspicious of Julpa's motives and decided to wait until the following morning to give Julpa his answer. Later that evening, the doids and Tosh were working on Tosh's spearhead when C-3PO unintentionally sealed the hatch, trapping Tosh and R2-D2 inside. The two could only watch helplessly as Kybo Ren, having escaped from his cell, fired a miniature stunner at both Julpa and Toda's daughter Gerin. Tosh managed to free himself before being stunned himself, and Ren took Gerin and fled the planet in another spearhead. Toda was furious, but Julpa placated the warrior chief by sending Tosh and Meade to rescue Gerin and surrendering himself to Toda until she was safely returned.[66]
C-3PO hatched a plan to discover where Ren had brought Gerin. He entered the prison cell of Ren's first mate Jyn Obah and began shouting, with R2-D2 in tow, many of the astromech droid's weapons and tools extended menacingly. C-3PO begged a confused and frightened Obah to reveal the location, and gleaned the word "Bogden" from Obah's babbled response. The two droids then brought the news to Tosh and Meade, who took R2-D2 and C-3PO in spearheads to Bogden. In the planet's orbit, R2-D2 detected life-form readings in a shipwrecked starcruiser on the surface, and the rescue team proceeded to Ren's makeshift base. After they split up, R2-D2 and Meade came across Ren in a transmission room. They rushed at their foe but were repulsed by an energy web, and were promptly hung upside-down by several ensnaring vines. When Ren left the room, R2-D2 was able to free them with his buzzsaw, and the two used the surveillance system inside the room to contact Tosh and warn him that Ren was wandering the base. R2-D2 made his way to Tosh's location, leading several snarling Sungwas to begin chasing Ren. Along with Meade, he found Tosh, C-3PO, and Gerin, and the group followed their pirate foe to one of the base's landing platforms. Obah and several of Ren's other henchmen had arrived in Ren's ship with a captive Julpa, as Ren had contacted Toda and arranged a prisoner swap. When Ren refused to make the trade, Toda and several of his warriors burst forth from a secret compartment in Ren's ship and attacked Ren's gang. R2-D2 rushed into battle and began covering Ren's cronies with red goop, and C-3PO tripped Ren, allowing Julpa and Toda to subdue the pirate.[66]
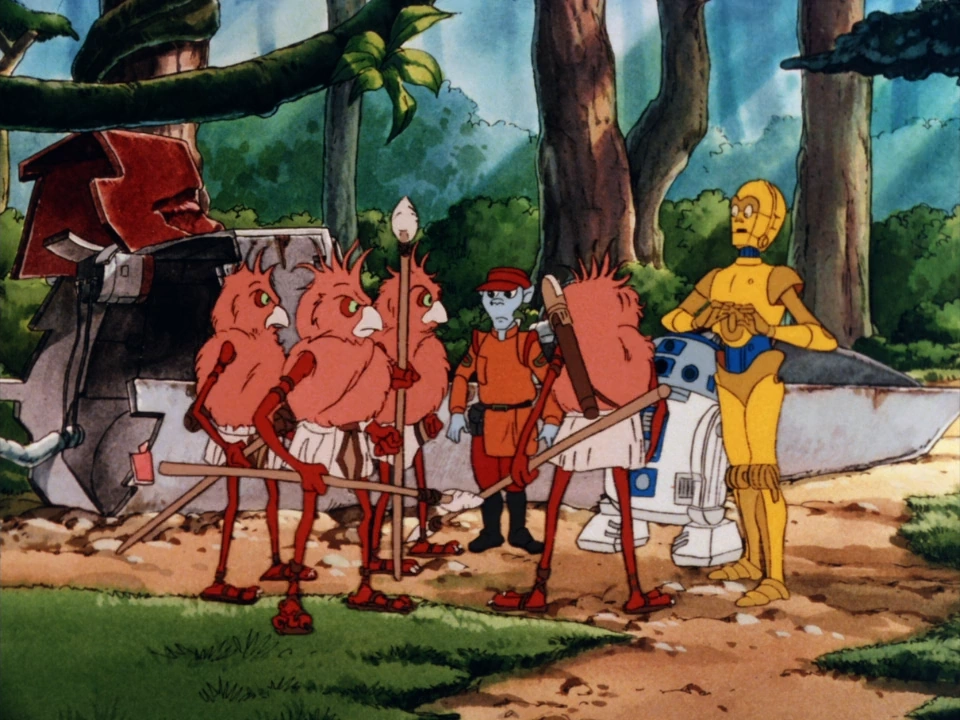

C-3PO and R2-D2 encounter a group of Fuzzums.
Back on Tammuz-an, Meade prepared to return to Tyne's Horky, and Toda's young son Coby insisted that R2-D2 and C-3PO entertain him with tales of the rescue.[66] Coby was soon after accepted into the Imperial[70] space academy, and the droids and Tosh were assigned to escort him there. A passenger ship took them from Tammuz-an to Chuzalla, where they would be taking a connecting flight from the planet's spaceport Zallakesh. As Tosh searched for the connection, the droids watched over Coby, holding onto the inheritance he had received from his great-uncle and forbidding him to spend it foolishly. When members of Starhunter's Intergalactic Menagerie spotted Ingey, Coby's pet tessellated Arboreal binjinphant, they stole the creature and fled aboard their ship. Coby pounded on its door, but he and C-3PO ended up crashing to the ground when the ship lifted off.[71]
R2-D2 used Coby's money to purchase a Blackhawk Destroyer from a local merchant, and took Coby and C-3PO in the vessel to pursue the starhunters. C-3PO intervened and attached the destroyer to the side of the starhunters' vessel via magnetic landing gear; the trio thus traveled with the starhunters through hyperspace to the planet Dandelo. Within Dandelo's atmosphere, they detached the destroyer, but discovered that it was out of fuel and promptly crashed into the forested ground. Although the ship was destroyed, R2-D2 was able to send out a distress signal immediately before Dandelo's native Fuzzums subdued the trio. C-3PO understood their language, and was able to divert their spears by explaining Coby's missing pet. Moved by the boy's plight, the Fuzzums took the trio to the starhunters' base, where they witnessed Ingey being placed in a cell. After R2-D2 and C-3PO restrained Coby from rushing out of their hiding place in the woods, a plan was concocted to rescue both Ingey and several Fuzzums that the starhunters also held captive.[71]
A diversion was created by C-3PO, who imitated the call of a native spotted jugadoo and caused the starhunters rush from their base into the forest in an attempt to catch the rare animal. R2-D2 and Coby rushed the base, climbing onto a catwalk and finding Ingey in a cell with a man named Greej. When R2-D2 sliced into the door controls and opened the cell, a patrol droid approached, but Greej rushed in front of Coby to protect the boy. R2-D2 fired a flare into the sky to signal the Fuzzums to enter the base, but was knocked over by the patrol droid and lost power. When he was later repaired, he discovered that Tosh had received his distress signal and had traveled to Dandelo, helping to subdue the starhunters. Coby and Greej made plans to return all of the starhunters' captive creatures to their natural habitats, and Tosh revealed that he had been accepted into the[71] Imperial[70] academy. After heartfelt goodbyes were exchanged, Tosh, Greej, and Coby departed the planet.[71]
Later owners
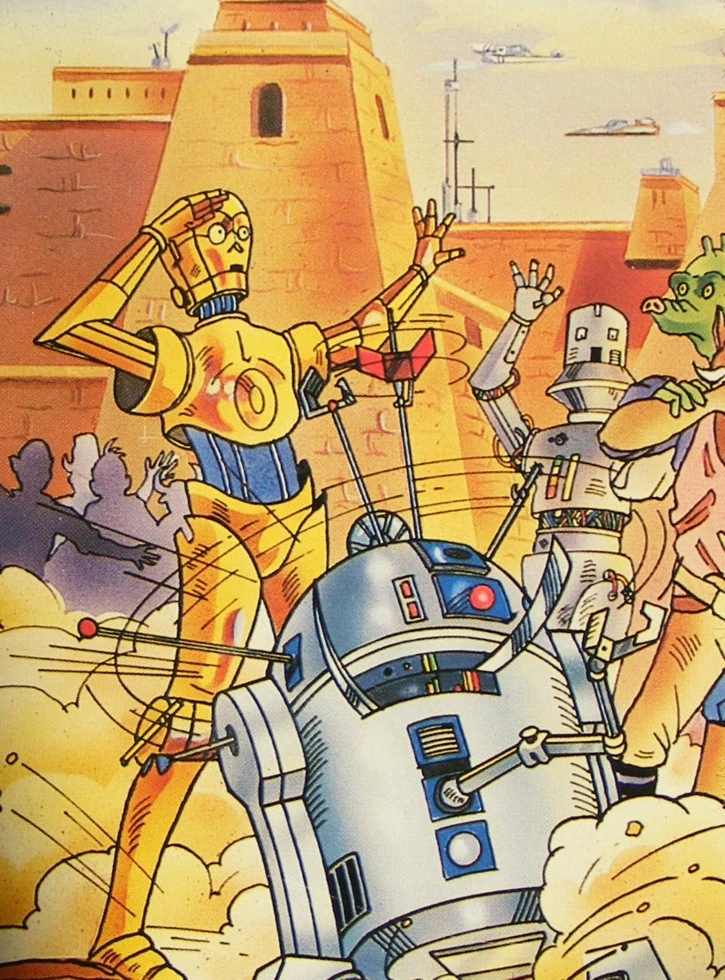
R2-D2 and C-3PO during the early days of the Galactic Empire.
R2-D2 and his counterpart, C-3PO.
Afterwards, the two helped Jann Tosh and Mon Julpa restore the Tammuz-an monarchy. Later, Tosh, on his way to enroll in the Imperial Academy, left the droids on Manda. It was there that they got jobs at a hotel. From there they went to Biitu and were involved with the Great Heep. Mungo Baobab saved them from the Heep and took the droids back to Manda. Later, on Roon, Baobab found some Roonstones which C-3PO told him were etched with the ancient poem Dha Werda Verda. But when the droids went with Mungo to the Baobab Archives, they were separated from him and sold to a used technological goods trafficker.
When another owner, Governor Wena, put the droids up for auction, they ended up going to Hosk Station. Between there and Kalarba, the droids had a number of adventures with Nak Pitareeze and his family, Olag Greck, and Jace Forno. R2-D2 and C-3PO later went with a police droid named Unit Zed to Nar Shaddaa, where Jace Forno blasted off C-3PO's right leg below the knee. However, the replacement leg that he got actually contained secret programming that overrode his regular personality. The new C-3PO led a droid rebellion against Boonda the Hutt. However, his original programming was later restored when R2-D2 replaced his leg. After that, the two droids were owned by an Ithorian botanist named Zorneth and then a diplomat, Councelor Harthan.
Some other masters of the droids during this time included Stigrit Krax, Larka Nimondro, Lott Kemp, Jost Ellon, Vik Idd and Nikki Idd, King Gokus, Van P. Quist, and Prince Jagoda. After all their many adventures, the droids finally returned to the Tantive IV.
In 2 BBY, R2-D2 accompanied Leia to Kashyyyk, where officially, she was serving as a Senatorial observer to the skyhook's construction, but unofficially, it was to keep Bail from speaking out against the Empire. The two had been collecting data on the mechanism and resolved to find a way to destroy it. When Galen Marek came to Kashyyyk, Leia refused to leave until the skyhook was destroyed, which Marek had to agree to. Leia and R2-D2 then left the planet.
Galactic Civil War
- "Artoo, why did you have to be so brave?"
- ―C-3PO, after R2-D2 was shot while trying to open the bunker doors during the Battle of Endor
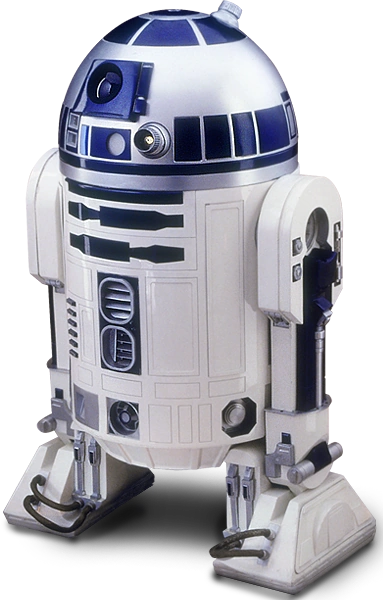

R2-D2 during the Galactic Civil War
The growth of the nascent Rebellion gave R2-D2 a great deal of scope for his slicing skills, serving under Antilles on the Tantive IV and Sundered Heart. Much of the technical data used by the Rebellion was stolen by R2-D2 from Imperial networks, including the earliest information the Rebels received about the existence of the Death Star.
In 0 BBY, both R2-D2 and C-3PO were back aboard the Tantive IV, which was on a secret mission to obtain the plans for a new battle station, the Death Star, when it came under attack by the Devastator, Darth Vader's Star Destroyer. Leia Organa, then the owner of the Tantive IV (having been given it by her adopted father), stored the Death Star I plans in R2-D2 and recorded a distress message on him. R2-D2 then jettisoned in an escape pod, along with a confused C-3PO, on a new mission to find Obi-Wan Kenobi.[72]
- "You watch your language!"
- ―C-3PO
Once the escape pod had landed on Tatooine, R2-D2 and C-3PO were captured by Jawas and then purchased by Owen Lars and fitted with a restraining bolt. While cleaning the droids for his uncle, Luke Skywalker discovered part of princess Leia's secret message to Obi-Wan Kenobi. R2-D2 conveyed to the intrigued Luke that if he wished to see the entire message, the restraining bolt the droid had been fitted with earlier would have to be removed. Luke, eager to see the rest of the message, removed the restraining bolt. R2-D2 promptly reneged on his promise and refused to show his new master the entire message. He did, however, succeed in having the restraining bolt removed, a fact that Luke did not seem particularly worried about, perhaps underestimating the little droid's determination and commitment to his mission. Luke later told his uncle of the experience, who ordered him to have the new droids' memories wiped. Before this could be done, however, R2-D2 escaped into the desert to seek out Obi-Wan. He was followed by Luke and C-3PO, who managed to catch up with him, but were then attacked by Tusken Raiders. R2-D2 hid in a small cave as Obi-Wan Kenobi came to C-3PO and Luke's rescue. Once in Obi-Wan's small hut, R2-D2 was finally able to play Leia's message to the correct recipient. Obi-Wan decided to follow her orders and take R2-D2 to Alderaan. After coping with the deaths of Luke's aunt and uncle, the group found transport in Mos Eisley; a young smuggler named Han Solo agreed to transport them to Alderaan in his ship, the Millennium Falcon. When they arrived where Alderaan should have been, it was no longer there, having been blown away by the Death Star.[72]
A filthy R2-D2 on Dagobah
The Millennium Falcon was then captured by the Death Star I, which was still in the system. Evading stormtrooper inspections of the ship, this allowed the group the chance to rescue the Alderaanian Princess Leia Organa. As the Wookiee Chewbacca and the three Humans went searching for the Princess' cell and the tractor beam controls, R2-D2 and C-3PO took position in a communications room. Once discovered, the pair pretended to be Imperial droids, and managed to communicate with the group in time for R2-D2 to rescue them from a trash compactor. After escaping from the Death Star I, at the cost of Obi-Wan's life, R2-D2 was finally delivered to the Rebel Alliance on Yavin 4, bringing the Death Star I plans with him and allowing the Alliance to defend themselves against the battle station. R2-D2 then acted as Luke's astromech during the attack on the station. He was severely damaged during the battle, ironically enough by his former friend and owner Darth Vader, but Rebel mechanics were able to restore him.[72]
R2-D2 remained in the service of the Heroes of Yavin. When the Rebel Alliance established Echo Base on the icy planet of Hoth, he used his sensors to attempt to locate Luke when he failed to return from a scouting mission. Soon after Luke healed from his wampa attack, Echo Base suffered a mass coordinated attack by several of the ice creatures. R2-D2 himself narrowly escaped a wampa attack. During the fracas, R2-D2 and C-3PO were instrumental in helping the base's defenders discover a way to capture the creatures. They informed Major Bren Derlin, head of security at the base, that the high-shrilled beeping of astromech droids drove the wampas into berserker rages. Most of the wampas attacking from outside the base were driven off, but many still remained hiding within the base. Recordings of astromech droids were used to force out the remaining wampas from their dark crevasses so they could be stunned and captured.[73] When the Empire attacked Hoth, R2-D2 was readied in Luke's X-wing fighter while Luke flew a snowspeeder in the Battle of Hoth. He thus did not board the Millennium Falcon with his usual companion, C-3PO, when it left the planet.[74]

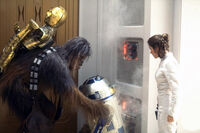
R2-D2 mistakenly accesses a power socket on Cloud City
When Luke returned to Echo Base following the destruction of its shield generators, he took R2-D2 to Dagobah. After Luke's crash-landing in the planet's swamps, R2-D2 became the potential meal of a Dragonsnake when he fell from the X-wing's hull. However, the beast found him inedible, and spat him into the jungle. R2-D2 was present during all of Luke's Jedi training from the Jedi Master Yoda on Dagobah, and was often levitated by Luke along with stones and other inanimate objects. The droid stayed with Luke as he flew to Cloud City. After being separated from his master in the city, he was spotted by C-3PO, who was in a disassembled state and tied to Chewbacca's back. When Chewbacca, Leia, Lando and the droids escaped to the Falcon, R2-D2 helped to repair a heavily damaged C-3PO. He also played a part in the escape from Cloud City, slicing computer systems, providing smoke screen, and fixing the Millennium Falcon's hyperdrive at the last minute, having learned it from the city's computer, facilitating escape from the Empire.[74]
C-3PO later complained about his leg, and said that he had an unnatural urge to kick himself all the time. But R2-D2 stated that 'there was nothing unnatural about that'.[75]
As part of his plan to rescue a carbonite-frozen Han Solo from the clutches of the gangster Jabba the Hutt, Luke sent R2-D2 and C-3PO to Jabba's Palace on Tatooine. After receiving an audience with Jabba, R2-D2 displayed a holographic image of Luke Skywalker, who greeted the notorious gangster, and offered the droids as gifts to the avaricious Hutt. The news came as a surprise to C-3PO, but R2-D2 had been aware of the impending offer for some time.[76]
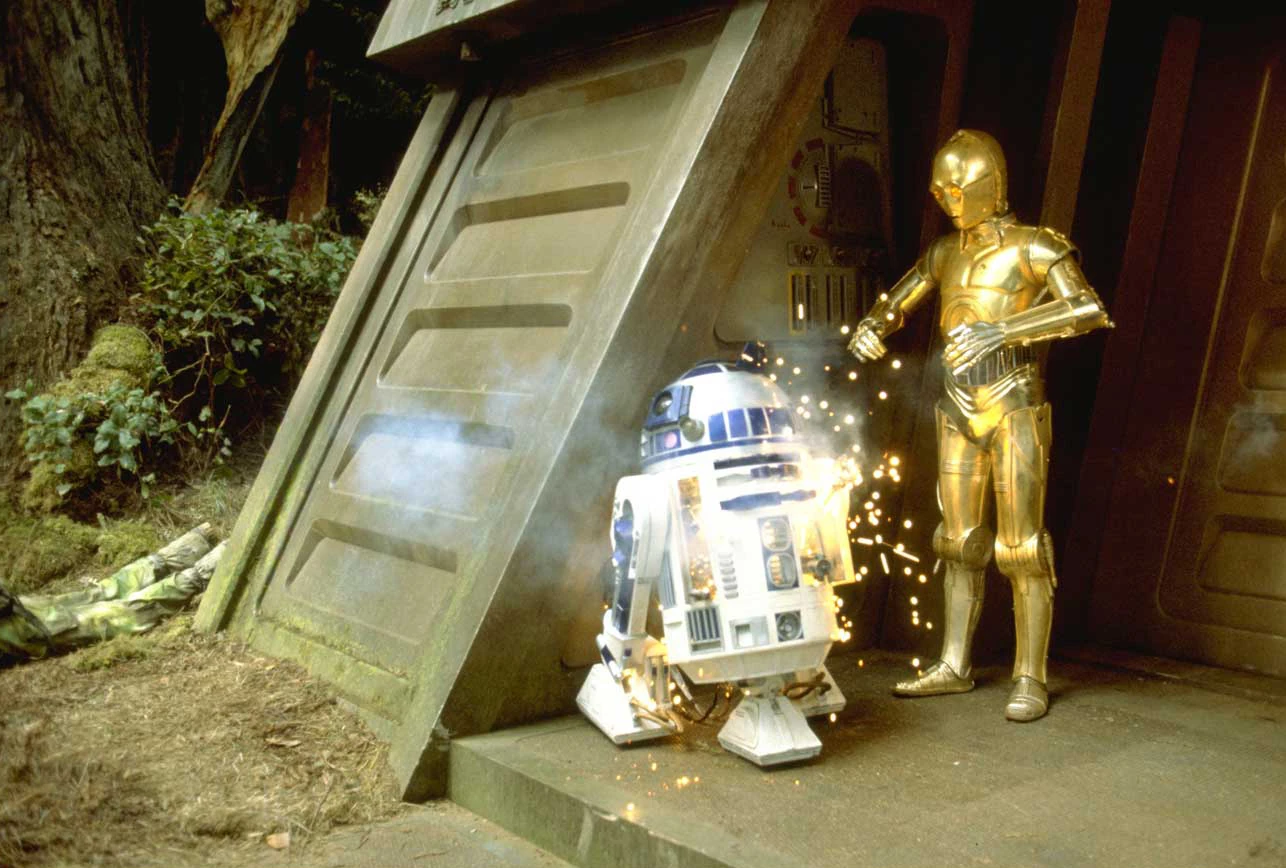

Artoo gets blasted by enemy fire during the battle of Endor
- "You're a feisty little one, but you'll soon learn some respect. I have need for you on the master's sail barge. And I think you'll fill in nicely."
- ―EV-9D9 to R2-D2
The droid EV-9D9 put R2-D2 to work serving drinks on Jabba's sail barge. He did not see C-3PO again until Jabba brought his court to the Great Pit of Carkoon to witness the execution of his prisoners, Luke Skywalker, Han Solo, and Chewbacca. C-3PO was unaware that R2-D2 had smuggled Luke's newly constructed lightsaber into the palace, which he launched into the air, allowing Luke to catch it with the aid of the Force. This allowed Luke, Han, and Chewbacca to avoid being fed to the Sarlacc, and stirred up confusion in the sail barge, which in turn allowed Leia to kill the Hutt.[76]
R2-D2 later joined the Rebel strike team on Endor, where he helped to bring down the deflector shield so the fleet could destroy the new Death Star. While on Endor, he befriended the Ewok Wicket W. Warrick. During the Battle of Endor, he was hit by the laser blast of an Imperial stormtrooper while attempting to override a door-locking mechanism, and was severely damaged. He was soon repaired, however, and joined in the celebrations that took place that evening in Bright Tree Village.[76]
Post-Endor
After the victory at the Battle of Endor, R2-D2 continued to serve the New Republic as Luke Skywalker's droid. He was often separated from Luke, however, whether having adventures with Han, Leia, or others. He continued to serve in Luke's X-wing well into the New Republic era. In 9 ABY, R2-D2 flew with Luke during several battles of the Thrawn campaign, and accompanied Luke, Han, Lando, Chewbacca, C-3PO, and Mara Jade to Wayland in their quest to destroy the Empire's store of Spaarti cloning cylinders.[77]
During the reborn Emperor Palpatine's campaign one year later, R2-D2 aided the New Republic on numerous occasions, including the defeat of a World Devastator attack on Mon Calamari[78] and the destruction of the Emperor's remaining two superweapons: the Galaxy Gun and the Eclipse II.[79]
Life at the Jedi Academy
R2-D2.
In 11 ABY, R2-D2 and C-3PO aided Luke in searching for potential Jedi trainees for his New Order. Sifting through a mass of data, the two found several candidates. Later, R2-D2 and C-3PO accompanied Lando Calrissian to the planet Umgul to search for the hopeful. The trio did not recruit the so-called "Jedi hopeful," due to the revelation that the man was not using Jedi powers to win major blob races but instead cheating his way to victory. R2-D2 and company managed to convince him to reunite with his wife, rather than suffer the death penalty.[80]
A year after Luke's academy was established, R2-D2 journeyed to the planet Belsavis with Han and Leia. He was influenced by the dark side adept Irek Ismaren, who had learned the ability of droid-control through the Force. Under Ismaren's influence, R2-D2 planted explosives in a cupboard of the room where the Solos were staying. This action nearly destroyed the three; however, a well-aimed blaster bolt from Han Solo deactivated the droid. Chewbacca had to repair the damaged droid, which left his systems in a different configuration; this restricted Ismaren from controlling R2-D2 again.[81]
In 13 ABY, R2-D2 and C-3PO were stranded on the planet Nim Drovis. Following many attempts to find passage off the planet, the duo was intercepted by Admiral Daala, who reunited them with Han Solo.[82]
Black Fleet Crisis
Three years later, R2-D2 and C-3PO accompanied Lando Calrissian on a New Republic Intelligence mission to investigate the Teljkon Vagabond, a mysterious vessel that always seemed to disappear into hyperspace when any other ship came too close. Without the permission of the mission's commanding officer, Colonel Pakkpekatt, Lando, his former aide Lobot, and the droids infiltrated the Vagabond, and were able to get onboard. While still on the ship, the mission was scrapped, due to the increasing tensions between the New Republic and the Duskhan League. Pakkpekatt convinced New Republic Admiral Hiram Drayson to allow him and a small crew to follow the Vagabond in Lando's personal Yacht, the Lady Luck. During the entire Black Fleet Crisis, Lando, Lobot, and the droids were aboard the Vagabond, discovering the ship's mysteries. After the ship returned to the planet Brath Qella, Pakkpekatt, with the aid of Luke Skywalker, rescued the four from the ship.

Side view of R2-D2.
In 17 ABY, during the Kueller crisis, R2-D2 and C-3PO, along with a young mechanic named Cole Fardreamer, independently investigated the source of the recent bombing of the Senate Hall. While they were investigating, R2-D2 and C-3PO were briefly held by mechanics while attempting to check on Luke's X-wing. Trails of clues led them to the planet Telti and its droid-construction facilities, where the Dark Jedi Kueller had been producing droids equipped with remote bombs. When they got there, R2-D2 was sent off to investe the place while Cole distracted the Dark Jedi. While doing that he was chased by the plant guards and while being chased discovered thousands of droids being held and helped release them and overwhelm the plants guards. The three then managed to shut down the facility, which was instrumental in foiling Kueller's plot.[83]
Two years later, during the Caamas Document/Hand of Thrawn crisis, R2-D2 accompanied Luke to the planet of Nirauan. While Luke and Mara confronted the Empire of the Hand, R2-D2 managed to download a copy of the elusive Caamas Document from the Hand's computers. With a copy of the document finally in their hands, the New Republic were able to assuage anti-Bothan sentiments throughout the galaxy, and avert a war that the Empire, under Moff Disra's leadership, had been secretly and subtly fueling.[84]
R2-D2 would continue to serve his Master Luke Skywalker at the Jedi Praxeum on Yavin 4. He would accompany Jedi trainees Anakin Solo and Tahiri Veila during their discovery of the Golden Globe in the Palace of the Woolamander. R2-D2 also accompanied them on their trip to Dagobah and would later play a role in the trip to Exis Station and the defeat of Orloc.
Yuuzhan Vong War
During the Battle of Borleias, when Han and Leia were arrested on Aphran for setting up resistance cells, he and C-3PO staged a daring rescue attempt. R2-D2 sliced into the prison's computer and changed the images of the Solos' weapons into the image of several foodstuffs. C-3PO then was able to arm the Solos by giving them a last meal. R2-D2 saw plenty of battles during the war, serving on the starfighters of both Luke Skywalker and Jaina Solo.
Dark Nest Crisis


R2-D2 reveals the holo of Padmé Amidala and Anakin Skywalker to Luke Skywalker and Leia Organa Solo.
In 35 ABY, when Luke was fixing R2-D2, the Jedi encountered a recording of his father and mother discussing a dream of Anakin's in which his mother had died in childbirth, and another recording of Padmé talking to Obi-Wan Kenobi about Anakin. The recordings, however, were apparently encoded, probably by Alderaanian technicians. R2-D2 himself refused to show Luke or Leia the recordings and insisted he was trying to protect them. The only way to remove the recordings safely was to either find the original designers of the unit, a prototype, or erase R2-D2's memory, an idea only C-3PO seemed to take seriously. Because the recordings hadn't been removed, R2-D2 began to malfunction. By 36 ABY, a year after the first recording was shown, R2-D2 seemed to be functioning again, though he remained unwilling to show the recordings. It wasn't until the Swarm War, when Luke needed to see it to help him in his fight against Lomi Plo, that R2-D2 finally revealed Padmé's death to Luke, as well as his and Leia's birth, and an image from a Hologram inside the Jedi Temple showing Vader and the 501st carrying out Operation:Knightfall at the exact moment Artoo hacked into the Jedi Temple Security system and watched Order 66 happen at the Jedi Temple on Coruscant.
Second Galactic Civil War
R2-D2 would continue to travel with Luke while he tried to rebuild the Jedi Order, and still belonged to him as of 40 ABY.
After the Millennium Falcon nearly broke apart upon returning to Coruscant from Corellia in 40 ABY, Han Solo asked R2-D2 to perform repairs on the ship while he and Leia traveled back to Corellia on a different shuttle, and under assumed identities. R2-D2 spent a number of days performing repairs to the Millennium Falcon.
R2-D2 also flew with Luke Skywalker in the Battle of Kashyyyk, where he and R2-D2 faked having their starfighter destroyed to make it seem as though Luke was dead so he could confront Jacen Solo.
Post-Second Galactic Civil War
Two years after the defeat of Caedus, Natasi Daala, the former Imperial Admiral who had recently been elected Chief of State of the Galactic Alliance, issued an arrest warrant for Skywalker, claiming that dereliction of duty on his part had caused Jacen Solo to fall to the dark side. Skywalker struck a deal with Daala that nevertheless resulted in his exile from the Jedi Order; Luke and Ben Skywalker set out on an Odyssey to learn more about Jacen's fall to the dark side. As a result, R2-D2 was assigned to the Solos, and joined his longtime friend C-3PO in serving them aboard the Falcon. The ship had a fifth crewmember, however, as Solo and Organa Solo had adopted Allana Solo, the daughter of Jacen and Tenel Ka, following the end of the war. All five crewmembers took a trip to Kessel, where the Solos aided Lando Calrissian in discovering what was causing groundquakes that were threatening to tear the planet apart. While Solo and Organa Solo explored Kessel's spice mines, R2-D2 and C-3PO supervised Allana. The curious infant nearly escaped their watchful photoreceptors when wandering the planet's surface, but was safely kept out of harm's way. Shortly thereafter, the Solos and Calrissian were able to save Kessel from potential destruction.[85]
At this time, many young adult members of the Jedi Order began succumbing to a mysterious illness that affected their perception of reality. The Jedi Council resisted Daala's attempts to encase the afflicted Jedi in carbonite, and, as tensions rose, the five crewmembers of the Falcon smuggled four of the infected Knights from Coruscant to the Jedi Academy on Shedu Maad: Seff Hellin, Natua Wan, Yaqeel Saav'etu, and Bazel Warv. Also aboard the ship were three Barabel Jedi Knights acting as gunners: Wilyem, Dordi, and Zal.[86]
After dropping the Barabel and the afflicted Jedi off on Shedu Maad, the Solos received a hypercomm message from Ben Skywalker informing them of a group of Sith that he and his father had encountered while aboard a space station in the Maw. The Skywalker had pursued the sole survivor of the Sith to Dathomir, and Ben asked if the Solos could come to the planet to lend some support. The Falcon was brought to Dathomir and landed at its primary spaceport, and Solo and Organa Solo departed to locate Luke and Ben, leaving Allana in the care of R2-D2 and C-3PO. R2-D2 spotted a nearby SoroSuub yacht in the spaceport and informed his friend, but C-3PO forbade him from investigating. R2-D2 left anyway after C-3PO had tucked Allana into bed, telling the protocol droid not to contact Solo and Organa Solo unless he was absent for a certain amount of time. The astromech droid discovered the presence of the Jedi Knight Zekk and his partner Taryn Zel in a nearby Batag Skiff, who had been assigned by Solo and Organa Solo to secretly watch over Allana and the Falcon. He was told not to reveal their presence to C-3PO or Allana. R2-D2 then made his way into Monarg's Mechanic Works, where he found the yacht but was in turn found by the large mechanic Monarg, who fitted him with a restraining bolt and shut him down.[87]
The following evening, R2-D2 awoke when C-3PO issued him a wake-up command. He discovered the presence of C-3PO and Allana in the shop; the latter had come to rescue him and had removed his restraining bolt, and the former had woken him up in the hope that R2-D2 could rescue them all from the Monarg, who was in the process of throwing C-3PO around the shop. After contacting Zekk and learning that he and Zel were in the shop and had been secretly aiding Allana in her scuffle with Monarg, R2-D2 wheeled past the astonished girl and electrocuted Monarg's buttocks. A surprised Monarg ran away, allowing the droids, Allana, and her pet Nexu Anji to escape his shop. R2-D2 closed and locked the door before they made their way to the Falcon. Monarg gathered two friends and pursued them, prompting Allana to attempt to contact her parents. When no answer immediately came, Allana and R2-D2 began powering up the Falcon and flying it away from the spaceport. Allana was able to land the Falcon in nearby marshes, and R2-D2 suggested covering it with camouflage netting. Allana once again commed her mother, and when Organa Solo answered, Allana and C-3PO relayed the events to her and her astonished husband.[87]
After returning to their ship, the Solos took it back to Coruscant after learning of a Mandalorian raid on the Jedi Temple that had been sanctioned by Daala. After landing at the capital, the five crewmembers of the Falcon were greeted by Daala, her aide Wynn Dorvan, and several members of Coruscant Security. The next day, the five of them joined Jaina Solo and Jagged Fel, now her fiance, for a dinner at the Pangalactus restaurant; R2-D2 and C-3PO situated themselves against a wall while their masters dined. The meal was soon interrupted, however, when a terrorist named Kester Tolann and two YVH-series battle droids blew a hole through the wall from the next room and attacked the party. The attackers were quickly neutralized, with a blaster bolt to R2-D2 being the only harm done. Fel's diplomatic speeder then dropped everyone save for himself and Jaina off at the Solos' safehouse.[87]
Several days later, C-3PO was busying himself with a task assigned to him by Luke of translating the language used by the Lost Tribe of Sith, whom Luke and Ben had formed a shaky alliance with to counter the mysterious being Abeloth who lived on a planet in the Maw, and often spoke with R2-D2 as he completed the assignment. While he reported his success to Luke via a holocomm message, Allana eavesdropped and, misunderstanding the situation, believed that her great-uncle had defected to the Sith. R2-D2 entered the room with the Solos after C-3PO fetched them and gave C-3PO a questioning tweedle, but was waved to silence by his counterpart.[88]
Legacy
- "This is Artoo-Detoo. As it happens, he has served your family a long, long time. He has been updated to current specs. You do need a mechanic, don't you?"
- ―K'Kruhk to Cade Skywalker

R2-D2 is given to Cade Skywalker on Ossus.
In the decades following the Second Galactic Civil War, R2-D2 was passed down from generation to generation within the Skywalker family.[89] In the year 130 ABY, following three years of war between the Galactic Alliance and Emperor Roan Fel's Galactic Empire, the Jedi Order was devastated and scattered when agents of the Sith Lord Darth Krayt's Sith Order attacked the Jedi Academy on Ossus.[90] Kol Skywalker, a leading member of the Jedi Council,[91] was killed.[90] In the wake of the massacre, R2-D2 was recovered by the Whipid Jedi Master K'Kruhk, who had the droid updated to current specifications.[89] Seven years later, K'Kruhk gave R2-D2 to Cade Skywalker, Kol's son.[92] Although Cade had forsaken his Jedi heritage and had been working as a bounty hunter for seven years,[93] he had recently returned to Ossus to complete his Jedi training under K'Kruhk, Wolf Sazen and Shado Vao. R2-D2 was given to Cade to serve as a mechanic as he prepared to leave the planet in mid-training in order to rescue the Jedi Hosk Trey'lis from the clutches of Darth Krayt on Coruscant.[92] Seated on Coruscant, Darth Krayt and his Empire had been ruling the galaxy for seven years.[94]
Aboard Cade's ship, the Mynock, R2-D2 was surprised when he was instructed to input hyperspace coordinates for Coruscant into the navicomputer, but obeyed Cade nonetheless. The bounty hunter explained that he didn't care about the Jedi Order, but, having turned Trey'lis over to the Sith himself, desired to right his wrong.[92] On Coruscant, the Mynock was pursued by the Imperial fighter group Skull Squadron. After evading the squadron of Predator-class fighters, Cade landed the Mynock in the depths of Coruscant's undercity and left to inflitrate the Temple of the Sith, placing R2-D2 in charge of his ship. The droid's instructions were to allow no one access save for Jariah Syn and Deliah Blue, respectively the ship's co-pilot and mechanic. Cade downloaded a holo-message for them into R2-D2 before disappearing into the planet's depths.[95] The two of them found the Mynock by way of the Hutt Queen Jool, whom Cade had left its access codes with at Rik's Cantina. Syn and Blue brought R2-D2 into the cantina, where he played Cade's holo-message for them, Jool, Jool's bodyguard Jak. Although the hologram instructed them to take the Mynock and leave Coruscant,[96] Syn and Blue teamed up with the smugglers Chak and Kee, and Cade's mother, Moff Nyna Calixte, and rescued Cade from the Temple of the Sith.[97]


Fruit is served by the poolside at Rawk's Nest.
As Cade and Syn set a course for Iego to visit Cade's uncle "Bantha" Rawk, R2-D2 helped Blue tinker with the ship's innards. Cade joined them and began discussing with Blue their rocky romantic relationship, which quickly escalated into a physical affair. R2-D2 was shooed away by Cade. The Mynock soon after landed on Iego,[98] and its crew relaxed at the home of Rawk and his family. After four days, R2-D2 served fruit from a hat as everyone relaxed at Rawk's swimming pool. The peace and quiet was shattered when the Imperial Knight Azlyn Rae arrived, closely followed by agents of Krayt's Empire. After she drove them off with a mind trick, Rawk informed Cade of a Hidden Temple where a group of Jedi were living in hiding.[99] He then brought Rae and the crew of the Mynock to the Temple on the planet of Taivas. Skywalker formulated a plan to assassinate Darth Krayt,[100] and although he received no support from the Jedi Council, he was joined on his mission by Shado Vao, Rae, and two other Imperial Knights, Antares Draco and Ganner Krieg. Before Cade could approve of the Imperial Knights' inclusion, R2-D2 opened the cargo bay doors of the Mynock and allowed Draco and Krieg to load their TIE Predators into the ship's hold.[101]
Cade formulated a plan to lure Krayt to the planet Had Abbadon. En route, the Mynock was drawn out of hyperspace by the interdiction field of the Star Destroyer Iron Sun, which Old Republic Jedi Celeste Morne had commandeered ten years before and kept dormant in the Deep Core. Syn, in the cockpit, began taking his frustration out on R2-D2 until he spotted the massive warship before them. Everyone save for the droid boarded the seemingly-empty Iron Sun, where they were able to recruit Morne for their mission.[102] After arriving on Had Abbadon, they baited Krayt into coming, and the ensuing battle resulted in his apparent death. While striking one of the finishing blows on him, however, Rae was grievously wounded by Force lightning.[103] She was taken by the crew of the Mynock to Kiffex, where Rawk and his wife Droo had relocated to. While they attempted to heal her, R2-D2 busied himself at Droo's home by making pancakes, but Cade, angry at Rae's situation, berated him for not helping Blue repair the damaged Mynock.[104] After fitting Rae with life-preserving armor, Rawk and Droo bade Cade leave their home.[105]
Chronological list of known owners
The following is a chronological list of R2-D2's known owners. When a being's name appears twice, it means that R2-D2 fell out of their possession, then later returned.
- Royal House of Naboo
- Padmé Amidala
- Anakin Skywalker
- Captain Raymus Antilles
- Vik & Nikki Idd
- Ambassador Zell of Majoor
- Zevel Hortine
- Doodnik
- Thall Joben
- Jann Tosh
- Mungo Baobab
- Governor Wena of Kalarba
- Unknown junk dealer
- Pitareeze family
- Captain Huba (theft)
- Nak Pitareeze and family
- Zorneth
- Harthan
- Royal House of Alderaan
- Captain Raymus Antilles
- Shen-and-Gretta Pikeual-Angeles (briefly; almost immediately returned to Captain Antilles)
- Royal House of Alderaan
- Captain Raymus Antilles
- Jawas
- Owen and Beru Lars
- Luke Skywalker
- Jabba Desilijic Tiure
- Luke Skywalker
- Kol Skywalker
- K'Kruhk
- Cade Skywalker
Behind the scenes
Origins
- "The external bombardment does appear to be concentrated in this area. The structure has exceeded the normal stress quotient by point four, although there appears to be no immediate danger."
- ―ARTWO DETWO's first line in the rough draft of The Star Wars
Ralph McQuarrie concept art of R2-D2
Although R2-D2 and C-3PO did not appear in 1973's original fourteen-page story synopsis of "The Star Wars",[106] their characters were featured in the 132-page rough draft of "The Star Wars", completed in May 1974, as ARTWO DETWO and See Threepio. ARTWO is described as a short, old and battered claw-armed tripod whose face is a mass of computer lights surrounding a radar eye, and the two droids are written as construction robots in an Imperial Space Fortress. As the Fortress is attacked by Aquilaean starships, Threepio is the robot who decides to abandon ship, while ARTWO is hesitant to desert their duty. The two then land in the dune sea of Utapau, where they meet Starkiller.[107] By 1975, when George Lucas had written Adventures of the Starkiller, Episode I: The Star Wars, the story began with the two droids aboard a Rebel Spacefighter and oriented itself around their evacuation, landing on Utapau, and being captured by Jawas.[108] With relatively few changes, this storyline went on to appear in the original Star Wars film.[72]
When creating the characters of R2-D2 and C-3PO, Lucas looked to Akira Kurosawa's 1958 film The Hidden Fortress, which he credits as one of his inspirations for Star Wars. The Hidden Fortress is told from the point of view of the peasants[109] Tahei and Matashichi,[110] who are the film's comic relief duo that travel Japan in the company of a General and a Princess, and, despite coming from the lowest possible social class, are privy to an adventure taking place on a grand level of international diplomacy. Lucas thus wrote R2-D2 and C-3PO into Star Wars as similar comic characters and narrators to The Hidden Fortress's peasants.[109]
Lucas felt that the two droids had to be very different from one another in both personality and appearance.[109] After creating their characters, he took his character concept of R2-D2 to artist Ralph McQuarrie, who began working on sketches. Then name R2-D2 was derived from the shorthand for "Reel 2, Dialogue 2,", the heading present on a cue sheet during the making of THX 1138.[111] Lucas wrote the name down and later included it in his rough drafts of Star Wars.[112]
John Stears, the mechanical effects supervisor of the original Star Wars film, was responsible for building the first working version of R2-D2. Told by animatronics experts that it would be virtually impossible to create mechanical beings with the functionality required of the character, he abandoned the experts and turned to his own crew, who had R2-D2 and other droids ready within a few months.[111] During the creation of R2-D2, the walls of the special effects shop were lined with many posters of the robots Huey, Dewey, and Louie from the 1972 film Silent Running, who influenced the design of the character.[113]
Portrayal
- "Lucas looked at me and immediately said: "You'll do.""
- ―Kenny Baker on being cast as R2-D2
When the role of R2-D2 was being cast, the approximately eighty-pound costume negated the idea of children being able to make it move. Three-foot-five-inches tall stage comedian Kenny Baker[114] was in London, England, performing a musical comedy act with his friend Jack Purvis, and heard that some American people were looking for a small person to fit inside a robot suit. After going to the London office of Twentieth Century Fox, Baker was immediately cast after meeting George Lucas.[115] He was measured and left the studio, only finding out more about the part later on. He initially turned down the role[116] three times,[117] hesitant to appear in a film where his face would not be shown and hoping to continue the success of his comedy act, which had recently started to appear on television. He acquiesced upon being told by Lucas that R2-D2 was a great character and essentially the narrator of the film.[116]
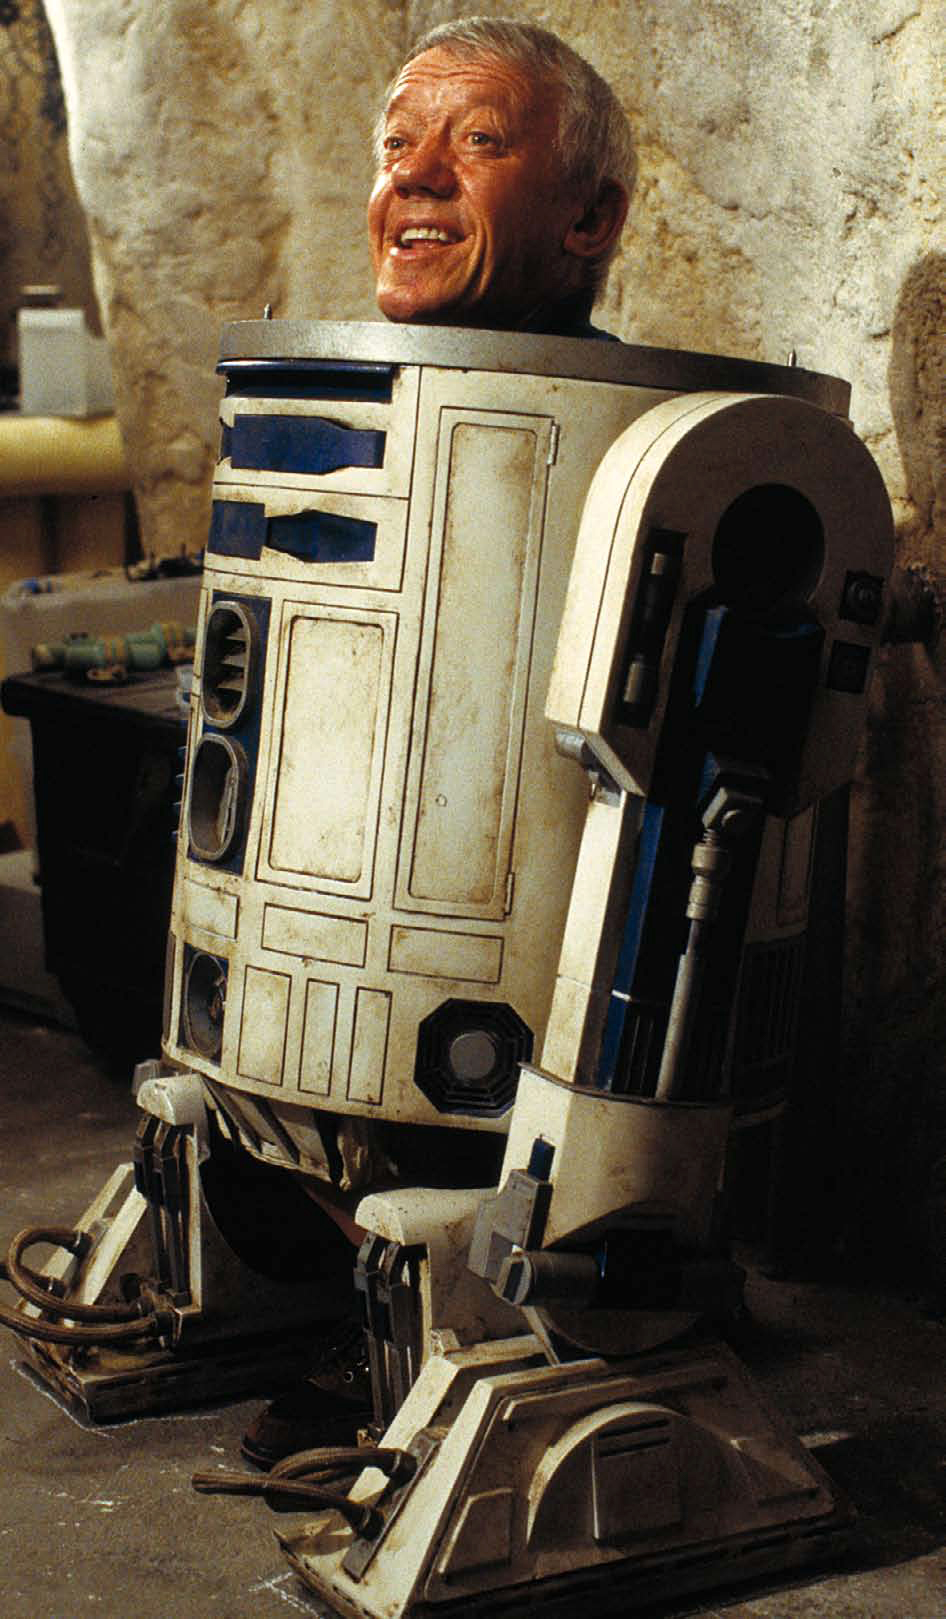

Kenny Baker, the man behind R2-D2
Baker performed the role of R2-D2 inside a standing unit of the droid, wearing a specially-made suit and manipulating the droid's lights and appendages,[89] turning his head, rocking his body back and forth,[111] and moving his eye with a rod.[116] In addition to Baker's unit, every Star Wars film has made use of a number of remote control units, as Baker's was largely immobile.[89] R2-D2's third leg and various tools that deployed from his body panels, as well as his ability to roll along as a tripod, proved too much for a single body.[118] The original Star Wars film, released in 1977, had just one radio-controlled unit to complement Baker's performance, being used in scenes that required use of R2-D2's third leg,[119] but improvements in miniaturized technology saw remote control R2-D2 units end up with most of the character's screen time by 1983's Return of the Jedi. During the filming of the original trilogy, the remote control units continually malfunctioned.[89]
When Star Wars Episode I: The Phantom Menace was being filmed in 1999, around eighteen R2 units were used,[118] including the costume originally worn by Baker over twenty years prior,[120] modified to be more comfortable. Other R2 units from the original trilogy were disassembled and rengineered for specific purposes, such as traveling through sand and crossing deep sliding door thresholds.[118] The R2 mini-department was led by Jolyon Bambridge, an experienced radio control operator in film, whose expertise steered R2-D2 smoothly along with actors as they walked. To ensure that the units didn't bang into any actors or extras, the R2-D2 operators found vantage points up to seventy feet overhead in stage rafters. While in the rafters, they often steered the R2 units in chases after the children of crewmembers, and sometimes had the droids shadow George Lucas as a faux-fan club.[121] 2002's Episode II: Attack of the Clones had fifteen units on set, two of which were costumes worn by Baker and eight of which were radio-controlled and prone to failure, particularly during filming in Tunisia. The remaining five were stunt models moved by puppet strings or towed by wires.[122] A computer-generated R2-D2 was also used in many scenes of the prequel trilogy, including a scene in Episode II where the character walks up a staircase. Baker has stated that he would never have been able to do that in his costume.[117]
Despite the multitude of units, Baker's performance has been credited as imbuing a sense of personality into the character,[89] adding a living touch and making the character a little more human.[118] Many of Baker's manipulations of the costume were based on emotions that R2-D2 felt such as fright and excitement, and George Lucas loved the performance, feeling that Baker made R2-D2 into more than just a robot.[116] During filming of the prequel trilogy, Lucas preferred when Baker was wearing the suit.[117]
Baker performed as R2-D2 in all six primary films of the Star Wars saga,[123] although C-3PO actor Anthony Daniels claims to be the the only person to appear in every film.[124] Daniels has stated that Baker did not film any scenes for the final installment, Episode III: Revenge of the Sith,[125] and Baker has admitted that most footage of his R2-D2 unit appearing in the film was reused from Episode II, though he did film bits and pieces.[117] Baker received credit for playing R2-D2 in the film.[126] He has also worn the costume in several Star Wars documentaries,[123] on The Muppet Show and Jeopardy!, in Disney's Star Tours,[126] and in an anti-smoking public service announcement.[127] Notably, Baker was not involved in The Star Wars Holiday Special,[120] although R2-D2 did appear.[128] In both the Holiday Special and the animated series Star Wars: Droids, R2-D2 was credited as playing himself.[58][128]
Voice
- "I always thought that all the extensive design worked well and created a distinct vocal identity, but you know I still get people asking me if I just used telephone touch tones."
- ―Ben Burtt
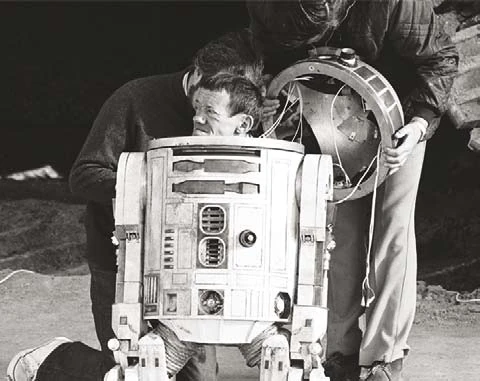
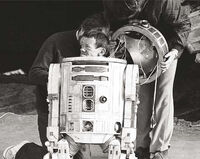
Baker on the set of Star Wars
R2-D2's voice was created by Star Wars sound designer Ben Burtt. Burtt was unhappy with electronic sounds that he initially created on a small electronic synthesizer, feeling that they didn't sound alive enough.[114] He was searching for a balance between a voice that sounded truly electronic while simultaneously possessing character and personality.[111] R2-D2's personality was developing like a toddler's,[114] and Burtt decided that, like a baby, the droid should communicate with recognizable but inarticulate emotional sounds. He added modified human-generated squeaks and sounds into the electronic mix,[111] and the final product ended up being roughly fifty percent synthesizer and fifty percent Burtt doing baby-talk.[114] Burtt has long considered R2-D2's voice to be the most difficult challenge of all of his sound design work on the original trilogy.[111]
In Star Wars media
One of few characters to appear in all six primary Star Wars films, R2-D2 is notable for functioning as a Deus Ex Machina of sorts and saving the rest of the heroes from certain death in each film.[129][130][131] Along with C-3PO, his role in the original film was as its narrator.[109][116]
Outside of Episodes I through VI, R2-D2 has appeared in myriad works within the Expanded Universe. Along with his counterpart C-3PO, he starred in an animated series that ran from 1985 to 1986 on ABC, in which he was credited as playing "himself".[126] The two also starred in comic books based around the series published by Marvel and Dark Horse Comics.[132][133] R2-D2 and C-3PO played prominent roles in many of the novels published by Bantam Spectra throughout the 1990's taking place in the years following Return of the Jedi, sometimes accompanying Luke, Han, & Leia,[134][135] and sometimes being caught up in adventures of their own.[82][83] When Del Rey took over Star Wars novel publishing in 1999, the droid duo faded into the background somewhat as a new generation of heroes began to develop,[136] although 2005's Dark Nest trilogy saw Luke and Leia discover the identity of their mother via old recordings discovered inside R2-D2.[137] In-universe, R2-D2 is faithfully serving Luke Skywalker's descendant Cade 137 years after the events of the original Star Wars.[92] Scenes written from R2-D2's perspective are rare and have happened only a handful of times.[138][139][140][87][141]
Although relatively absent from the original Clone Wars multimedia project, R2-D2 has thus far played a recurring role in the CGI-animated series The Clone Wars.[18][16][22][25] In the episode Duel of the Droids, he is taken apart by the Confederate General Grievous, and staff working on the episode animated a pea shooter and a boxing glove inside of the droid as a joke at Director Rob Coleman's expense.[142]
Actor and author comments
- "Once I'd done it though, and the film was released, it snowballed - when you're part of one of the most famous films of all time, you decide to stick with it."
- ―Kenny Baker

George Lucas (right) has named R2-D2 (center) as his favorite Star Wars character.
Kenny Baker credits R2-D2, as well as C-3PO, as telling the story of Star Wars, linking scenes together and acting as the continuity.[143] Filming scenes, however, proved quite uncomfortable for both he and Anthony Daniels.[115] Baker cites controlling the droid's movements as having been a struggle, but one that worked out alright in the end.[144]
George Lucas has named R2-D2 as his favorite Star Wars character.[145] Following completion of Revenge of the Sith, he stated that R2-D2 was the character he would miss the most, owing to the droid's tendency to come through and save everyone. Lucas also claimed to want a friend like that of his own.[146]
While seeking writers for Dark Horse Comics' Droids series, editors Ryder Windham and Dan Thorsland were dismayed that many of their potential hirees regarded R2-D2 and C-3PO as little more than comic relief. The two eventually settled on Thorsland himself to write the series, who felt that the droid duo were intelligent machines that often found themselves in an unfortunate plight, being treated worse than slaves.[147]
Impact on popular culture
- "Ask your grandmother who R2-D2 is, and she'll know who you're talking about."
- ―Matt Atchity of Rottentomatoes.com
As a principal character[126] in a wildly popular film saga,[114] R2-D2 has become a cultural icon.[111] He was ranked the best robot from film or television of all time by Amazon.co.uk and the Internet Movie Database in 2004,[148] and the best movie robot of all time by Rotten Tomatoes in 2009.[149] In 2003, he was inducted into the Robot Hall of Fame.[150] Baker's work as the droid has garnered widespread support as well; when rumors began circulating that the character would be appearing in Episode I, a campaign on the internet asking for Baker to reprise the role reached the attention of George Lucas.[117]
A wide variety of R2-D2 merchandise has been produced over the years, including scores of action figures,[151][152][153][154][155] a telephone,[156] a USB Humidifier,[157] a DVD player, and a wireless webcam.[158] In 2007, around 400 mailboxes across the United States were made over to look like R2-D2 in celebration of Star Wars's thirtieth anniversary.[159] The Phalanx CIWS anti-ship missile defense system used by the United States Coast Guard is nicknamed R2-D2, owing to its resemblance to the droid.[160]
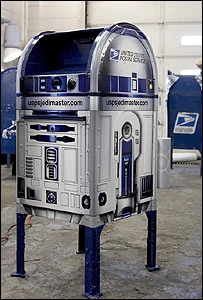

In 2007, around 400 R2-D2 mailboxes appeared across the United States
R2-D2 has popped up in several other films, including appearances as debris in 2009's Star Trek[161][162] and Transformers: Revenge of the Fallen,[163] and as a Hieroglyphic in 1981's Raiders of the Lost Ark.[164] He and C-3PO were presenters at the fiftieth Academy Awards. The droid has also been parodied in a wide variety of media, including appearances on the American cartoons The Simpsons,[165] Futurama,[166] Robot Chicken,[167] and Family Guy.[168] In Family Guy's Star Wars-themed episodes Blue Harvest and Something, Something, Something, Dark Side, the character Cleveland Brown plays the role of R2-D2.[169][170] In a 1980 episode of the children's television show Sesame Street, R2-D2 and C-3PO visited Sesame Street, and the astromech droid fell in love with a fire hydrant.[171][172]
Rhett Alain, a physicist at Southeastern Louisiana University, examined R2-D2's flight in Attack of the Clones and deduced that the droid would need to weigh 100 grams in order for it to be possible. Including thrust, gravitational fields, and air resistance in his calculations, he concluded that the droid would need to weigh 0.1 kilograms in order to take flight.[173]
Non-canon appearances
In the alternate comic series Star Wars Infinities: A New Hope, Luke's proton torpedoes fail to destroy the Death Star and the Rebel Alliance is wiped out. Leia is taken as Darth Vader's Sith apprentice, and Luke travels to Dagobah to train with Yoda for five years, before taking Yoda, Han, Chewbacca, and R2-D2 to the renamed "Justice Star" to confront the Emperor. After Luke redeems Leia, Yoda uses R2-D2 to control the orbit of the Justice Star to crash it into Coruscant. R2-D2 is destroyed along with the Empire, but his memory is reinserted into a new, identical body on Naboo.[174] Its sequel, Star Wars Infinities: The Empire Strikes Back, sees Luke die in a Hoth snowstorm and R2-D2 accompany the others to Cloud City.[175]
R2-D2 and C-3PO similarly star in another alternate take on the original Star Wars trilogy: Vader vs. Artoo & Threepio, published in Tokyopop's Star Wars Manga: Silver. Merging the endings of the trilogy's latter two installments, the comic tells their story with the droids in place of Luke and Leia.[176]
R2-D2 was depicted in Egyptian hieroglyphs in Raiders of the Lost Ark.
R2-D2 appears in every entry in the LEGO Star Wars series.[177][178] An online Browser game was developed called LEGO Star Wars: The Quest for R2-D2 that sees the player, as either Anakin Skywalker or Asajj Ventress, hunt for the droid, who is lost in space and possessing intelligence vital to the war effort during the Clone Wars.[179] A two-part short film was created to supplement the game, depicting R2-D2 relaxing on a hammock at an oasis on Tatooine before being found by Jawas. The Jawas bring him to General Grievous, who takes the droid to a Trade Federation Droid Control Ship to confront Count Dooku and Ventress. The timely arrival of Anakin, Ahsoka, Obi-Wan, Yoda, Cody, and Rex saves the day, and the victorious heroes travel to a "Skywalker world" theme park.[180]
The cast and crew of Attack of the Clones created a twenty-minute mockumentary entitled R2-D2: Beneath the Dome. The short film is a tongue-in-cheek look at the life of R2-D2, born Reginald Dillingham, as he found fame, spiraled into depression, and had his career reinvigorated when invited to star in The Phantom Menace.[181] A deleted scene from The Phantom Menace involves R2-D2 using his booster rockets. The rockets went on to debut in Attack of the Clones.[116]
In the book The Making of Star Wars Revenge of the Sith, George Lucas remarks that R2-D2 recounts the story of Star Wars to a Shaman of the Whills one hundred years after the Battle of Endor.[182] Leland Chee, the Keeper of the Holocron continuity database, has stated that in terms of canon, such a comment has to be taken with a grain of salt.[183]
Appearances

Non-canon appearances
Sources
.JPG)
.JPG)
.JPG)
Notes and references
External links
 R2-D2 on Wikipedia
- R2-D2 at the Internet Movie Database
- R2-D2's Greatest Gadgets on StarWars.com (backup link (kids/explore/eu/f20041116/index.html) not verified!)
- The Many Faces of R2-D2 on StarWars.com (backup link (episode-i/bts/profile/f19990414/index.html) not verified!)
- Drawing R2-D2 on StarWars.com (backup link (kids/activity/draw/f20070321/index.html) not verified!)
- Lucas states that R2 is his favorite character.