Warning: This infobox is missing the following parameters: unit2, unit1
- "I can't believe we have to break this guy out of prison."
- ―Sabine Wren
In 2 BBY, Jedi Padawan Ezra Bridger, along with Sabine Wren, Garazeb Orrelios, and the droid C1-10P launched a rescue mission to free the Pirate Hondo Ohnaka and his partner Terba from the Imperial prison on Naraka for some valuable information. Following a skirmish with stormtroopers and an All Terrain Defense Pod, the rebels managed to extract Hondo safely but Terba was killed during the escape attempt.
Prelude
Ezra, Zeb, Hondo, and Sabine
Following the skirmish in Nixus Hub 218 and the rediscovery of Lira San, the Weequay pirate Hondo Ohnaka was imprisoned by the Galactic Empire at the Imperial prison on Naraka.[4] Hondo's cellmate was the Ugnaught Terba, who had worked as a laborer at the Imperial junkyard Reklam Station, which lay inside the gas planet of Yarma. Seeking to escape the prison, Terba told Hondo that Republic Y-wing starfighters were being dismantled at Reklam Station. Hondo managed to secretly contact his one-time partner Ezra Bridger, who was a member of the Phoenix Cell. He offered to give Ezra valuable information in return for his rescue. Ezra considered and accepted his offer since Hondo's information had been useful in the past.[2]
The prison heist
The Spectres traveled to Naraka. While Captain Hera Syndulla stayed aboard the Ghost to provide an escape vessel, Ezra along with Garazeb Orrelios and Sabine Wren climbed under one of the bridges that led to the mountainside prison. They encountered two stormtroopers. Zeb pulled one of them by his leg and threw him into a ravine. Ezra then confronted the second stormtrooper and pushed him down into the ravine. Sabine then emerged from under the bridge and the three rebels narrowly avoided an Imperial sensor light.[2]
After escaping the sensor light, Ezra contacted the astromech droid Chopper and instructed the droid to jump over the cliff. Chopper was unable to activate his rocket boosters because doing so would alert the Imperials. Chopper threw himself down the cliff and was caught by Zeb. Chopper then opened the door to the Imperial prison and the rebels made their way to cell 6611 where Hondo and Terba were being held. The rebels were initially reluctant to rescue Terba until Hondo assured them that the information he was carrying was of great value to Phoenix Cell.[2]
Sabine then spotted a stormtrooper sneaking up on Ezra and the young Jedi shot him with his blaster. The rebels, Hondo and Terba were then attacked by the stormtroopers' companions and fled down the corridor. Ezra then contacted Hera and told her to bring the Ghost for a "44 scoop". After a brief firefight, the rebels fled down a turbolift. Upon exiting the lift, the rebels ambushed another stormtrooper patrol. During the skirmish, Ezra ignited his new green lightsaber and cut down several stormtroopers.[2]
The rebels then fled towards the main entrance. At that point, Terba demanded a second share from Hondo but the Weequay refused. Snubbed, Terba broke off the deal and ran ahead of the rebels towards the entrance. However, an Imperial AT-DP walker was positioned on the nearby platform and blasted the Ugnaught to his death. The rebels and Hondo were then trapped on both sides with the walker and stormtroopers at front and more stormtrooper reinforcements behind.[2]
Sabine hurled a thermal detonator through the door which killed the pursuing stormtroopers whilst Chopper locked the door. Meanwhile, Ezra used the Force to take control of the AT-DP pilot's mind and used him to shoot the other stormtroopers. The pilot under the influence of Bridger then drove his walker over the edge of the platform into the ravine. Despite eliminating these obstacles, another group of stormtroopers caught up with them. Before another gun battle could break out, Hera arrived with the Ghost and dived under the main platform. At Ezra's command, the rebels and Hondo jumped onto the freighter which evacuated them from the prison.[2]
Aftermath

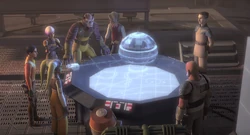
Hondo showing the Phoenix and Spectres Reklem Station
By rescuing Hondo Ohnaka, the Spectres and their Phoenix allies learned about the presence of Republic Y-wings at the Imperial junkyard Reklam Station inside the gassy planet Yarma. The rebels subsequently mounted a reconnaissance mission to scout the floating junkyard. In return for his services, the Phoenix rebels reluctantly agreed to supply Hondo with a hyperspace-capable smuggling vessel and a crew. In the end, the rebels did not have to foot the bill for Hondo's reward because the pirate acquired an Imperial vessel and an Ugnaught crew at Reklam Station.[2]
Due to his actions during the rescue mission, Ezra was promoted to Lieutenant Commander and given charge of the Reklam mission. By raiding Reklam Station, the Spectres liberated several Ugnaught laborers and acquired five Y-wings for General Jan Dodonna's unit. The rebels' activities also attracted the attention of Grand Admiral Thrawn, the commander of the Seventh Fleet and a rising star in the Imperial Military.[2]
Behind the scenes
The first appeared in Star Wars Rebels: Steps Into Shadow, the premiere of the third season of Star Wars Rebels, which premiered on September 24, 2016 on Disney XD.
Appearances
- Star Wars Rebels: Steps Into Shadow (First appearance)
Sources
 The Star Wars Show Episode 10 on StarWars.com (backup link)
- Star Wars Rebels Season Three Trailer on StarWars.com (backup link)
- Star Wars Rebels: "Mind Trick" on StarWars.com (backup link)
- Steps Into Shadow Episode Guide on StarWars.com (backup link (tv-shows/star-wars-rebels/steps-into-shadow-episode-guide) not verified!) (First identified as rescue of Hondo Ohnaka)
- Star Wars Rebels: "Ezra and the Sith Holocron" on StarWars.com (backup link) (Indirect mention only)
Notes and references
- ↑
 Star Wars Rebels — "Twilight of the Apprentice"
- ↑ 2.00 2.01 2.02 2.03 2.04 2.05 2.06 2.07 2.08 2.09 2.10 2.11 2.12 2.13 2.14 2.15 2.16 2.17 2.18 2.19 2.20 2.21 2.22 2.23 2.24 2.25 2.26 2.27 2.28 2.29 2.30 2.31 2.32 2.33 Star Wars Rebels: Steps Into Shadow
- ↑ The events of this article take place in or after Star Wars Rebels: Steps Into Shadow, which is the first known episode to take place in the second year before the Battle of Yavin. As such, we can deduce that this event takes place in the second year before the Battle of Yavin. For more information, see Wookieepedia's Timeline of Star Wars Rebels Events.
- ↑ Star Wars Rebels — "Legends of the Lasat"