During the Galactic Civil War with the Galactic Empire, two rebels—the Jedi Kanan Jarrus and Captain Rex—carried out a rescue mission on the experimental Imperial Interdictor. Their objective was to rescue Commander Jun Sato, Padawan Ezra Bridger, and other rebels from the Phoenix Cell, who had been captured when the Interdictor used gravity well projectors to pull their ship out of hyperspace. Jarrus and Rex were successful in their operation, and, with the help of Bridger and the astromech droid Chopper, the rebels destroyed the experimental vessel to prevent it from disrupting the movements of the rebel fleet.
Prelude[]
In 4 BBY,[2] the Galactic Empire developed a new prototype Interdictor vessel called the Imperial Interdictor. Since the vessel was still in its experimental stage, the Empire tested the vessel in a remote system called the Del Zennis system. During the testing period, the vessel was commanded by Admiral Brom Titus. Around that time, a rebel patrol ship disappeared in the Del Zennis system. In response, Commander Jun Sato and several rebels including the Jedi apprentice Ezra Bridger traveled on the CR90 corvette Liberator to investigate the disappearance.[1]
While traveling through the Del Zennis system, the Liberator was pulled out of hyperspace by the Imperial Interdictor's gravity well projectors. The Imperials then proceeded to freeze the ship's controls and to jam its communications. Despite the jamming, Commander Sato still managed to issue a distress call to the Phoenix Cell that his ship had been pulled of hyperspace by an unknown Imperial weapon. Shortly later, the Liberator was boarded and its crew were captured by stormtroopers. Admiral Titus recognized Commander Sato and Ezra as wanted rebels. After receiving word about Ezra's Force-sensitivity from Agent Kallus, Sato ordered three of his men to send Ezra into a secure cell.[1]
Sato's distress call was received by the rebel ship Ghost, the base of operations for the Spectres. Sabine Wren, a former Imperial cadet, rightfully suspected that the Empire was developing a new Interdictor cruiser. While Ezra's master Kanan Jarrus recommended sending the entire crew to rescue Ezra and the Phoenix rebels, the Ghost's captain Hera Syndulla had another plan. She proposed that Kanan and the former Clone Captain Rex disguise themselves as stormtroopers and infiltrate the Imperial Interdictor in a stolen Imperial shuttle. The astromech droid Chopper would also come along disguised as an Imperial droid.[1]
The rescue mission[]
Infiltrating the Imperial Interdictor[]
Despite Kanan's distrust of clone troopers due to the Great Jedi Purge, he reluctantly agreed to work with Rex for the good of the rebel cause. Upon reaching the Del Zennis system, Rex managed to obtain permission to dock with the Imperial Interdictor by claiming that their shuttle was experiencing an emergency. After landing in the ship's hangar bay, Kanan used a Jedi mind trick to trick the stormtrooper sentries into letting them through. Meanwhile, Ezra managed to break free of his stormtrooper captors by using the Force to activate his lightsaber-blaster; startling the guard. Ezra then locked his three captors in a secure cell.[1]

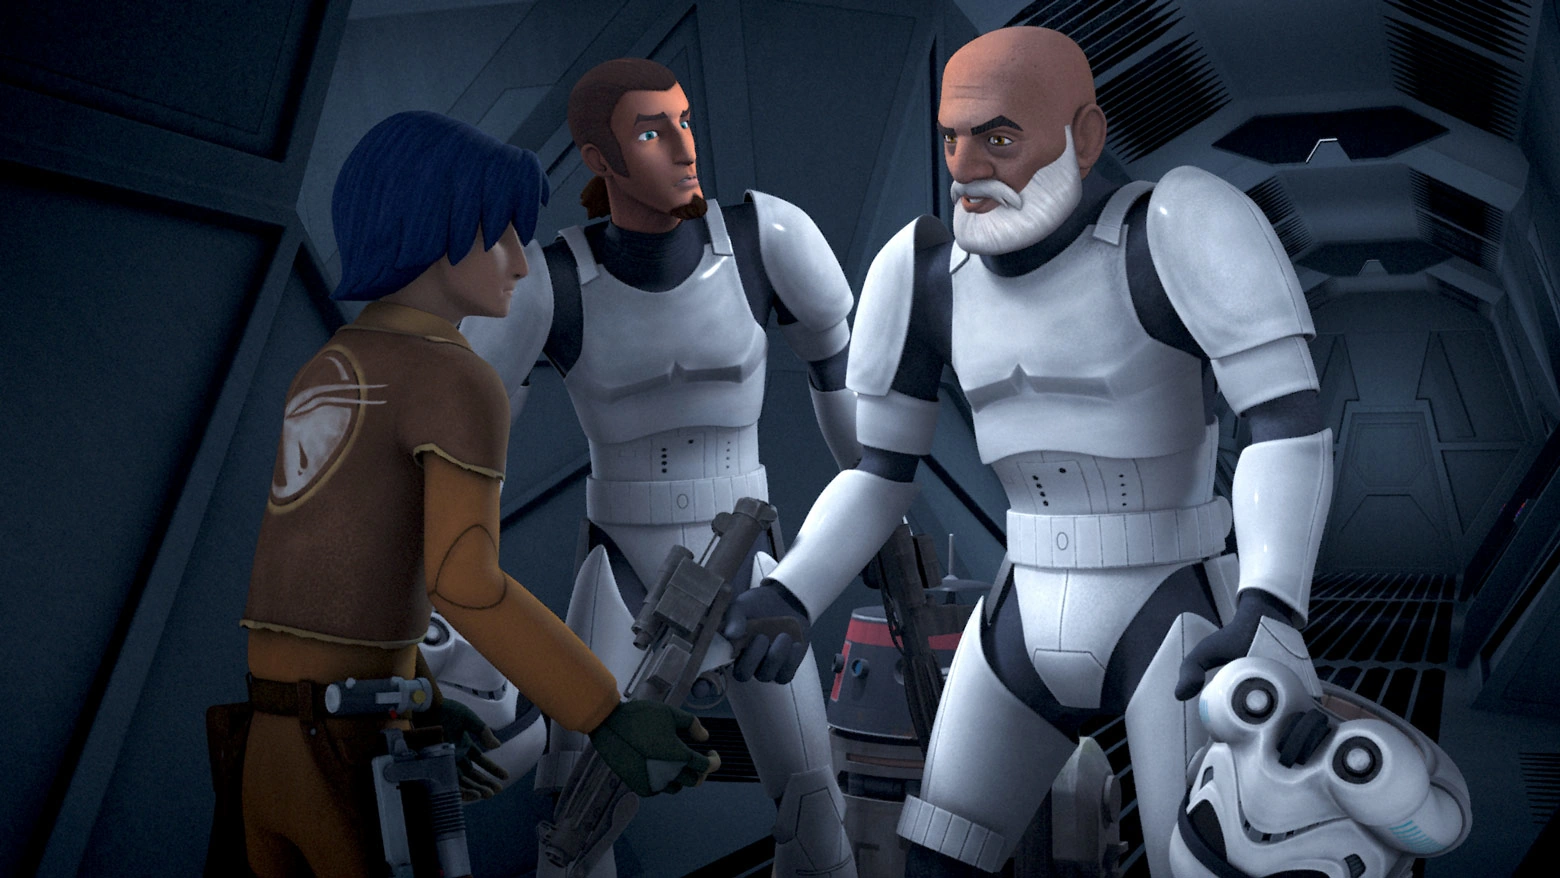
Kanan, Rex, and Chopper locate Ezra
Shortly later, Kanan and Rex arrived. Not recognizing his fellow rebels due to their Imperial armor, Ezra stunned them with his lightsaber-blaster. Upon seeing Chopper, Ezra realized his mistake. When Kanan and Rex stirred, he claimed that they had been caught up in a firefight. However, Chopper soon produced a holographic recording of Ezra shooting them. Having rescued Ezra, the rebels then split into two. While Kanan and Rex proceeded to rescue Commander Sato and the other prisoners, Chopper and Ezra decided to sabotage the ship's gravity well projectors.[1]
Meanwhile, Admiral Titus received word that Ezra had escaped and ordered his men to secure all levels and the hangar bays. He also gave orders for Ezra to be killed on sight in order not to prove Agent Kallus right about underestimating the rebel youth. In the ship's reactor core, Ezra managed to distract the Imperial technicians while Chopper switched off the gravity field. After sabotaging the gravity well projectors, Chopper reactivated the gravity field; sending the Imperials crashing below. Ezra narrowly escaped the skirmish and joined Chopper in fleeing the stormtrooper reinforcements.[1]
The escape[]
Elsewhere aboard the Imperial Interdictor, Kanan and Rex managed to free Commander Sato and his crew. While making their way back to the Liberator, they were pursued by several stormtroopers. As the other rebels fled through a blast door, Rex stayed behind to hold off the Imperials. Despite putting up a fierce fight, he was stunned by a stormtrooper and taken prisoner. Meanwhile, Ezra and Chopper managed to reunite with Kanan, Sato, and the rebel crew. While Ezra helped Commander Sato and his crew fight their way back to the CR90 corvette, Kanan went back to rescue Rex.[1]
Meanwhile, Admiral Titus summoned Rex to his chambers. Upon learning of the Clone Captain's honorable record, he offered Rex amnesty in return for convincing the other rebels to surrender. When Rex refused to serve the Galactic Empire, Titus ordered an interrogator droid to tortured the Clone veteran to death. Before Titus could complete the execution, Kanan entered the chambers disguised as a stormtrooper and attacked Titus' men. Having rescued the wounded Rex, the two Clone Wars veterans escaped the Interdictor aboard an escape pod.[1]


The Interdictor explodes as the rebels escape
After breaking free of the Imperial Interdictor, Commander Sato's CR90 corvette attempted to jump into space. However, Admiral Titus ordered his crew to activate the Interdictor's gravity-well projectors. The gravity well-protectors then suddenly malfunctioned and began attracting every nearby object including the Interdictor's two escort Arquitens-class command cruisers. The CR90 corvette managed to break free of the gravity well but the Imperial Interdictor and its escort ships were destroyed in a cataclysmic explosion.[1]
Aftermath[]
The destruction of the Imperial Interdictor was another victory in the rebellion's struggle against the Galactic Empire. The rebels not only succeeded in rescuing their captured comrades but also managed to deprive the Empire of another weapon. While Commander Sato praised Kanan, Rex, and Ezra for rescuing them, he neglected to mention Chopper's role. When Chopper hooted, Ezra assured him that it was a team effort.[1]
Unknown to the rebels, Admiral Titus survived the destruction of the Imperial Interdictor and its escort ships by fleeing into an escape pod. However, many Imperial personnel were killed in the explosion. Shortly later, Agent Kallus arrived with a fleet of Imperial Star Destroyers. When a humiliated Admiral Titus contacted Kallus via hologram, Kallus mockingly asked the Admiral whether he had any problems with the boy. For the Empire, the destruction of the Imperial Interdictor was one in a chain of losses against the rebellion.[1]
Behind the scenes[]
The rescue on the Imperial Interdictor first appeared on the Star Wars Rebels episode "Stealth Strike," which debuted on Disney XD on November 25, 2015. This episode marked the introduction of a new secondary antagonist Brom Titus, who was played by Derek Partridge. It also saw the reappearance of the Interdictor vessel, a warship that had first appeared in the 1989 Legends role-playing guide Imperial Sourcebook.
Appearances[]
 Star Wars Rebels — "Stealth Strike" (First appearance)
- "The Gangsters of Galzez" — Star Wars Rebels Magazine 20 (Indirect mention only)
- Star Wars Rebels: Steps Into Shadow (Indirect mention only)
Sources[]
- "Stealth Strike" Episode Guide | Star Wars Rebels on StarWars.com (backup link)
- Star Wars: The Rebel Files
- Star Wars Helmet Collection 55 (Databank A-Z: Saesee Tiin–Toydaria) (Indirect mention only)
- Star Wars Encyclopedia of Starfighters and Other Vehicles
- "BB-8 and Other Astromech Droids" — Star Wars Encyclopedia
Notes and references[]
- ↑ 1.00 1.01 1.02 1.03 1.04 1.05 1.06 1.07 1.08 1.09 1.10 1.11 1.12 1.13 1.14 1.15 1.16 1.17 1.18 1.19 1.20 1.21 1.22 1.23 1.24 1.25 1.26 1.27 1.28 1.29 1.30 1.31 1.32 1.33 1.34 1.35 1.36 1.37 1.38 1.39 1.40 1.41 1.42 1.43 1.44 1.45
 Star Wars Rebels — "Stealth Strike"
- ↑ 2.0 2.1 "Stealth Strike" takes place in 4 BBY per Star Wars: Timelines.