| | |

Warning: This infobox is missing the following parameters: unit2, unit1
- "Pursued by the Empire's sinister agents, Princess Leia races aboard her starship, custodian of the stolen plans that can save her people and restore freedom to the galaxy...."
- ―Journal of the Whills
The secret mission to Tatooine was an operation undertaken in 0 BBY by the Alliance to Restore the Republic during the Galactic Civil War. The mission followed the Rebellion's theft of the plans to the Death Star, the Galactic Empire's planet-destroying deep space mobile battle station from the planet Scarif. Rebel spies Jyn Erso and Cassian Andor transmitted the plans to Admiral Raddus aboard his flagship. As the battle concluded, the plans were nearly reclaimed by Darth Vader, but were successfully transferred to Princess Leia Organa of Alderaan aboard the Tantive IV.
After escaping into hyperspace, Organa's corvette was pursued by the Star Destroyer Devastator to the planet Tatooine. A fierce battle erupted in orbit between the Tantive IV and the Devastator. The corvette was no match for the immense Devastator and was captured and boarded by Imperial troops, led by Darth Vader, the Dark Lord of the Sith. Organa herself was stunned and captured but not before she uploaded the plans to the astromech droid R2-D2 who, along with his protocol droid companion C-3PO, escaped to Tatooine aboard an escape pod. Artoo's mission was to find Jedi Master Obi-Wan Kenobi, for whom the droid had a holographic message from the princess.
Once on the surface, the two droids came into the possession of a group of Jawa scavengers before being sold to moisture farmer Owen Lars and his nephew, Luke Skywalker. The Empire, meanwhile, learned that the droids were likely in possession of the stolen plans and searched the planet for them. Artoo fled from the Lars moisture farm in search of Kenobi. The message, which Artoo delivered to Kenobi with Skywalker's assistance, was the princess' plea for help, asking that the Jedi Master safely deliver the plans to Bail Organa, one of the founders of the Rebel Alliance, on Alderaan.
When the Empire learned that the droids had been sold to the Lars family, they killed Owen and his wife, Beru Lars. His family having been killed, Skywalker agreed to leave with Kenobi and take the droids to Alderaan. They hired a pilot, Han Solo, in Mos Eisley, and Solo agreed to take them to Alderaan aboard his ship, the Millennium Falcon. The arrangement was discovered by Imperial troops, who attacked the ship before it departed. The Millennium Falcon blasted its way out of the Mos Eisley spaceport and evaded two Star Destroyers in orbit. They arrived at the former location of Alderaan after it was destroyed by the Death Star, and they rescued Organa from Imperial captivity. Though Kenobi was killed by Darth Vader during a duel, the group brought the stolen plans to the Rebel base on Yavin 4, where Rebel analysts studied them and found a weakness in the battle station's systems. The Rebel forces launched an attack on the Death Star, leading to the Battle of Yavin and the destruction of the dreaded Imperial superweapon.
Prelude
- "My father's revenge. He put a flaw in the Death Star. He put a fuse in the middle of your machine and I've just told the entire galaxy how to light it."
- ―Jyn Erso, to Director Orson Krennic
During the Clone Wars, renowned energy scientist Galen Erso was recruited by Orson Krennic to research the energy potential of kyber crystals for the Galactic Republic—which, at the end of the war, transformed into the Galactic Empire. Erso, who initially believed the project was for benevolent purposes, defected from the Empire in 17 BBY after learning that his research was being used for weapons development.[8] He was captured by Krennic in 13 BBY and forced back into Imperial service to build the superlaser that would power the Death Star, a superweapon capable of destroying entire planets. Erso used this as an opportunity to add a vulnerability into the Death Star's reactor, which, if triggered by pressurized explosions, would destroy the battle station. He set off a series of events that led to his daughter, Jyn Erso, and the Alliance to Restore the Republic learning of the flaw. It also resulted in Galen's death once the Empire learned of his treason. Erso and Captain Cassian Andor of Rebel Alliance Intelligence Service soon led a team called Rogue One to steal the Death Star plans and discover this vulnerability during the Battle of Scarif.[1]

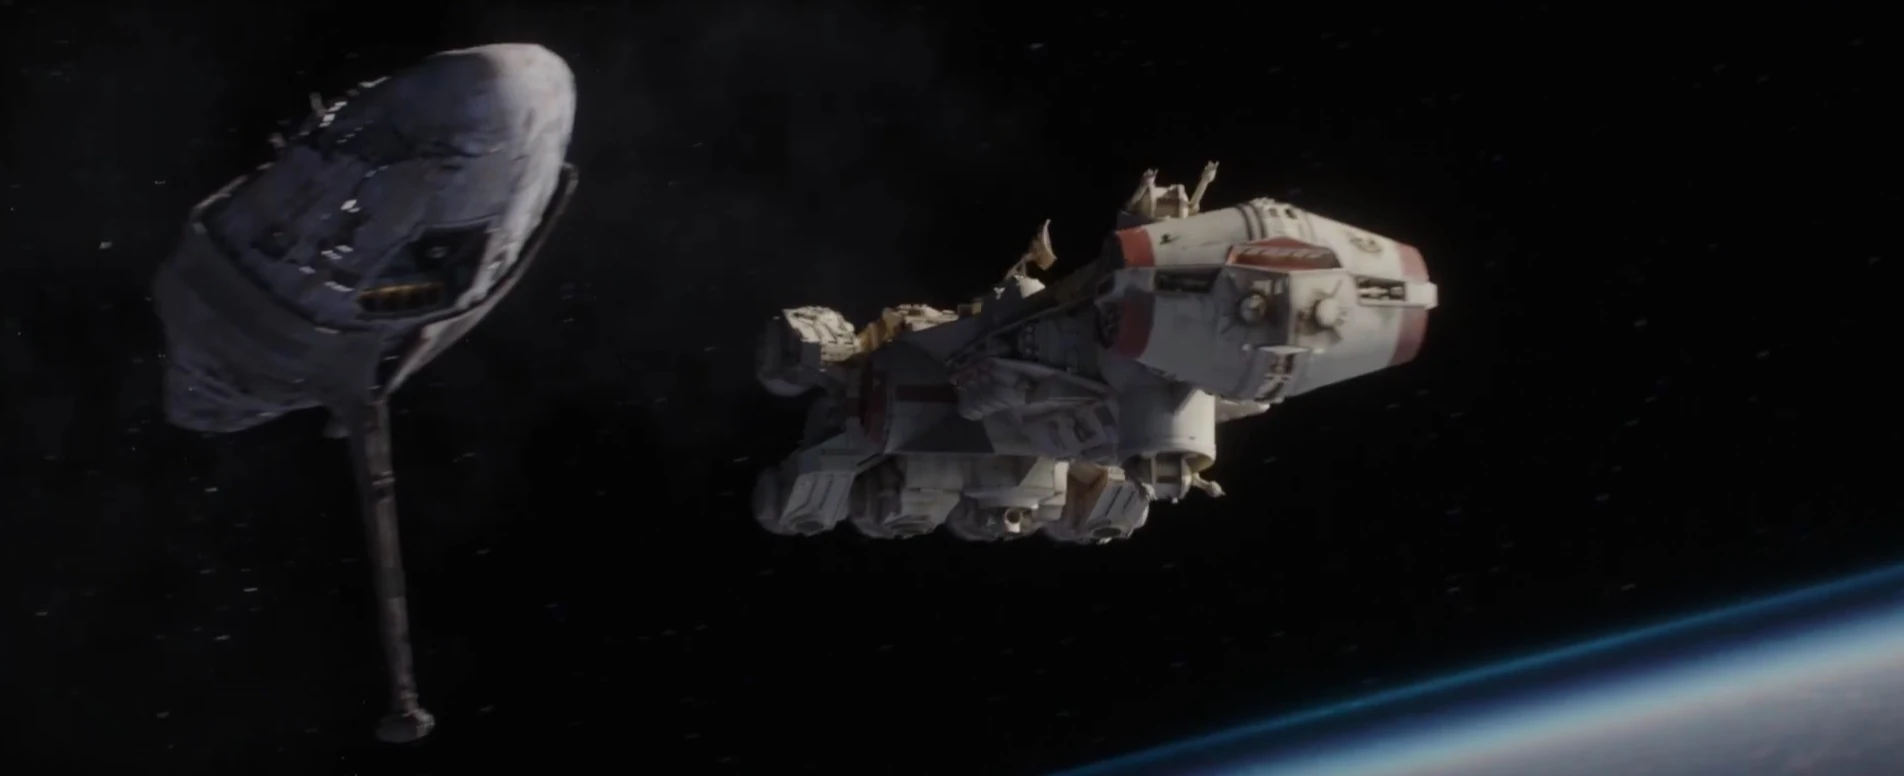
The Tantive IV escaping from Scarif with the plans
Erso, Andor, and the Rogue One unit were all killed during the battle, but not before Erso was able to transmit the plans to the Alliance Fleet that was engaged with Imperial forces above Scarif. The plans were intercepted by the MC75 Star Cruiser flagship Profundity, within which was docked the CR90 corvette Tantive IV. The Sith Lord Darth Vader boarded Profundity and slaughtered a host of Rebel soldiers as he attempted to recover the plans, but the Rebel forces passed the information on a data tape to the crew of the Tantive IV. The plans were given to Princess Leia Organa of Alderaan, a member of the Imperial Senate and a leader in the Alliance to Restore the Republic who was aboard the vessel.[1] Organa was tasked by her father, Bail Organa, to bring the plans to Tatooine and deliver them to the exiled Jedi Master Obi-Wan Kenobi, who served Bail Organa during the Clone Wars. Vader pursued the Tantive IV aboard his Star Destroyer, the Devastator, and followed the ship to Tatooine.[3]
The battle
Firefight on Tantive IV
- "Don't act so surprised, your highness. You weren't on any mercy mission this time. Several transmissions were beamed to this ship by Rebel spies. I want to know what happened to the plans they sent you."
"I don't know what you're talking about. I am a member of the Imperial Senate on a diplomatic mission to Alderaan."
"You are a part of the Rebel Alliance and a traitor. Take her away!" - ―Princess and Senator Leia Organa and Lord Vader
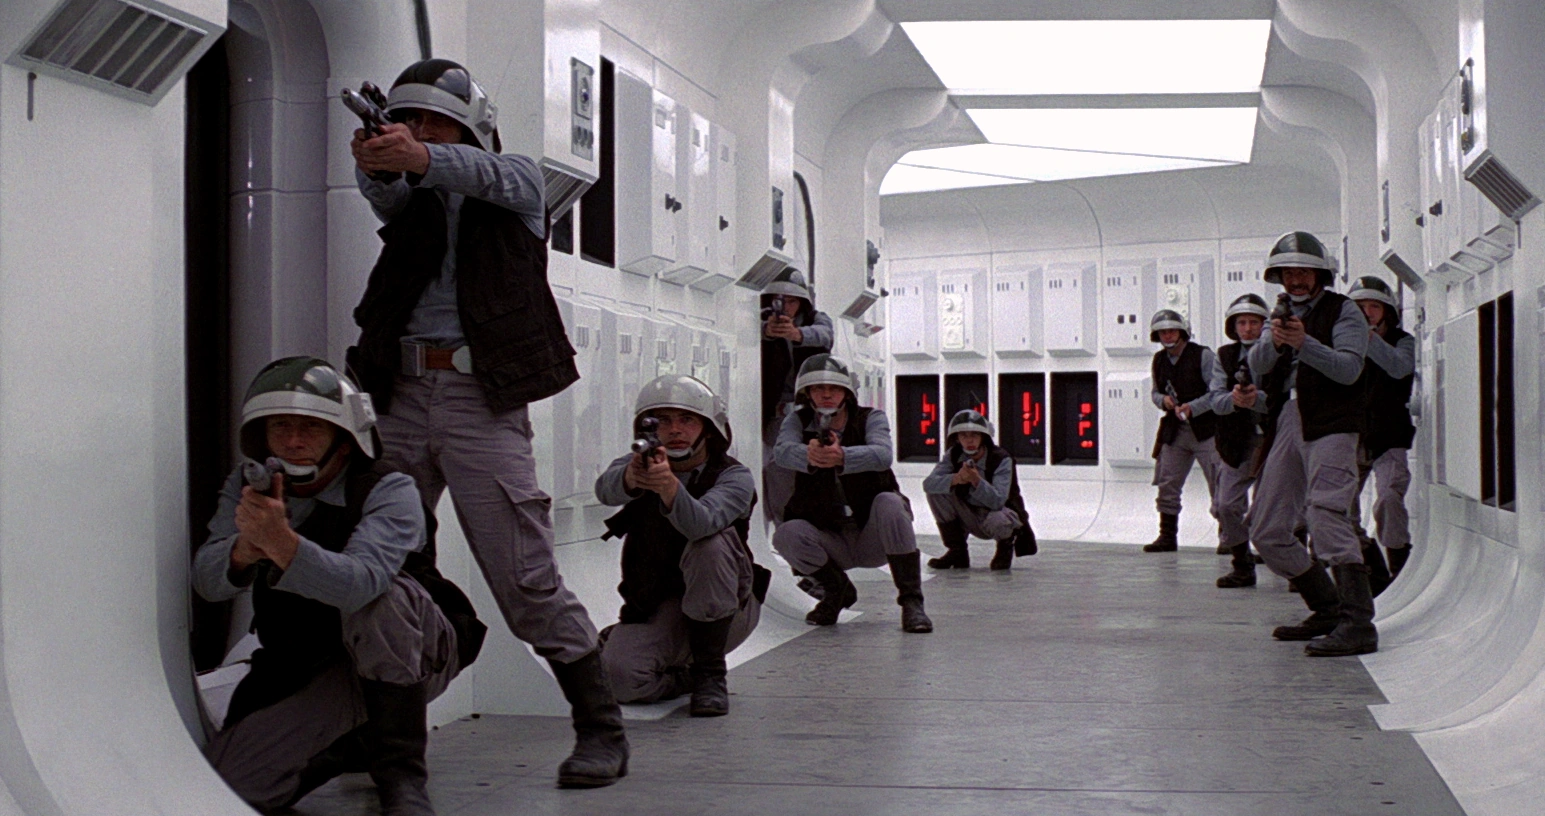
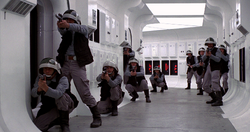
Rebel troopers prepare for Imperial forces to board the Tantive IV.
Less than an hour later,[9] the Tantive IV arrived in orbit of Tatooine, with the Devastator in close pursuit. The Star Destroyer dwarfed the corvette and overpowered it, knocking out its main reactor, before drawing the small ship into its lower hangar. During the pursuit, Lieutenant Ciena Ree was the officer responsible for activating the tractor beam that drew the Tantive IV into the Devastator's hangar. As the Tantive IV was being pulled into the Devastator, the corvette continued to broadcast protests that it was on a "diplomatic mission." This was ignored by Ree and the other Imperial officers. Darth Vader then issued the order to board the Tantive IV.[10]
Meanwhile, Rebel troopers prepared for their ship to be boarded, taking positions in the hallway near the entrance from which the Imperials would enter. As the stormtrooper boarding party readied to blast their way into the ship, they cut down the door and it exploded outward, and the Imperial forces swarmed into the halls of the Tantive IV.

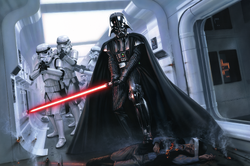
Imperial forces aboard the Tantive IV
The Rebels were quickly overwhelmed, and the ship quickly fell under Imperial control. Captain Raymus Antilles was captured along with several surviving rebels and astromech droids.[3] While the ship was being boarded, four of the rebel crew attempted to escape in a pod but the Imperials shot it down.[10]
The stormtroopers checked the vessel's main computer and found that there was no trace of the Death Star plans. The plans were in the princess' hands, and she uploaded them into the memory banks of the astromech droid R2-D2,[3] who belonged to her father and Antilles.[11] In addition to the plans, she recorded a holographic message for Kenobi introducing herself and telling him that her father had requested that he come to the assistance of the Rebellion. She begged him to help and to bring the Death Star plans to her father on Alderaan, saying that Kenobi was the Rebellion's only hope. She ended her recording and sent R2 on his mission. The droid, along with protocol droid C-3PO, made his way to an escape pod, intent on delivering the plan and message to the Jedi Master.[3]
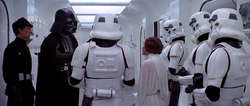
Meanwhile, Darth Vader, who had boarded the ship soon after the attack began, interrogated the captured Antilles by choking him with his bare hands. The Dark Lord demanded to know where to find the Death Star plans, but Antilles claimed that the ship had not intercepted any transmissions and that it was simply a consular vessel on a diplomatic mission. Antilles, haven proven he would not talk, had his neck crushed by the Dark Lord, killing the captain. Vader ordered his stormtroopers to begin tearing the Tantive IV apart until the plans could be found, and that all passengers were to be captured and brought before him. The stormtroopers continued their search as ordered, and one group located the princess. They stunned Organa and captured her.[3]

Darth Vader interrogates the princess
As the princess was taken prisoner, Artoo and Threepio boarded an escape pod and ejected it from the ship, bound for Tatooine. Imperial gunners aboard the Devastator noticed that the escape pod had been jettisoned but were ordered to hold their fire, as an Imperial officer believed that the escape pod had likely short-circuited. As the droids escaped, Organa was brought before Vader and denied any involvement in the Rebel Alliance, claiming instead that she was on a diplomatic mission to Alderaan and that the Imperial Senate would not be pleased with what Vader had done to the vessel. The Dark Lord ordered the princess to be taken away, and was then informed that the Death Star plans were not aboard the vessel. He also learned of the escape pod and ordered his men to retrieve them, as well as to send a false distress signal and then tell the Senate that the crew had been killed by some other means.[3]
Reunion aboard the Devastator
- "I wanted to say, I'm sorry about your princess. You must feel so ... betrayed."
"Princess Leia can only have been misled by her courtiers. I feel sure that a thorough investigation will clear her of any real wrongdoing." - ―Lieutenants Ciena Ree and Nash Windrider responding to news of Princess Leia's arrest
Following the boarding of the Tantive IV, Ciena Ree delivered the auxiliary bridge's hard data files to the Imperial Security Bureau internal affairs officer Captain Ronnadam. On the way, she encountered a fellow Imperial officer Nash Windrider, who was a native of Alderaan. Both were privy to the details of an Imperial search mission being sent to Tatooine to find the stolen Death Star plans but expressed relief that they had not been dispatched to the hot, desert world. When Ree apologized for the discovery of Princess Leia's treason, Nash opined that she had been misled by her courtiers and expressed his hopes that a thorough investigation would clear her of any real wrongdoing.[10]
Ciena took the lift to the heart of the Devastator where she was greeted by Captain Ronnadam. At that point, Grand Moff Wilhuff Tarkin appeared via hologram and chastised Ronnadam for his lax protocols and bad manners. At that point, Lieutenant Ree recognized Tarkin as the man who had befriended her and fellow cadet Thane Kyrell when they were eight year olds living on Jelucan. The Moff recognized Ree from that encounter and expressed his delight that his "diplomacy" had led Ree and her friend to join the Imperial Navy. Pleased with Ree and Kyrell's achievements at the Royal Imperial Academy, Tarkin remarked that she should recruit more people from Jelucan in the future. Ree and Kyrell's favorable perceptions of the Empire would later be challenged by the destruction of Alderaan. Nash was devastated by the destruction of his homeworld but renewed his devotion to the Empire.[10]
Search for the droids
- "General Kenobi. Years ago you served my father in the Clone Wars. Now he begs you to help him in his struggle against the Empire. I regret that I am unable to convey my father's request to you in person, but my ship has fallen under attack, and I'm afraid my mission to bring you to Alderaan has failed. I have placed information vital to the survival of the Rebellion into the memory systems of this R2 unit. My father will know how to retrieve it. You must see this droid safely delivered to him on Alderaan. This is our most desperate hour. Help me, Obi-Wan Kenobi. You're my only hope."
- ―Princess and Senator Leia Organa, in her message to Jedi Master Obi-Wan Kenobi

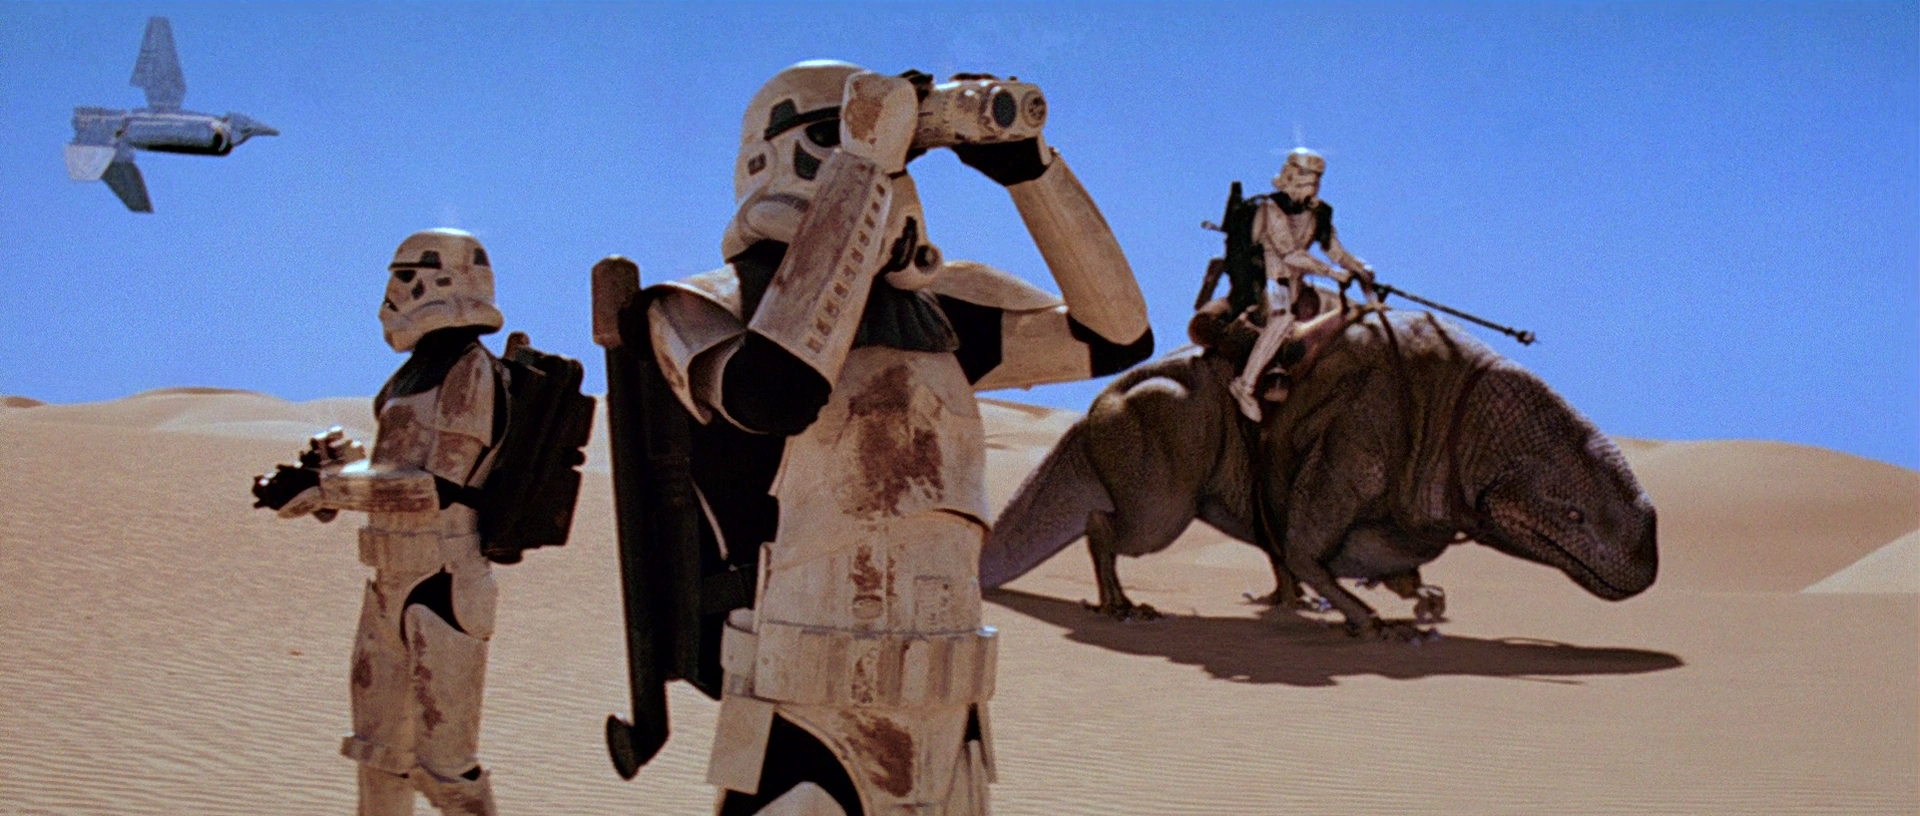
Sandtroopers search for the Death Star plans before discovering they were taken by droids
The droids' escape pod landed in the desert wastes of Tatooine, far from any form of civilization. R2-D2 and C-3PO left the pod, with 3PO not knowing what planet they were on or what R2's true mission was. Unclear as to which direction to head in, the droids argued about where to go before splitting up over their disagreement; R2 set off on his own, intent on finding Kenobi, while 3PO left in the opposite direction. 3PO wandered in the desert before spotting a sandcrawler, the type of vehicle used by Jawa scavengers. He was picked up by the Jawas and fitted with a restraining bolt, as the Jawas planned on selling him as well as the many other droids in their vehicle. Later, R2 faced similar circumstances. While making his way through a canyon, he was discovered by the same Jawas, who stunned him and brought him aboard the crawler, where the two droids reunited. Meanwhile, the Empire continued their search for the missing plans and found the escape pod, where they discovered parts that had fallen off of the droids. This put the Empire on the trail of R2 and 3PO.[3]
The morning after the droids were captured by the Jawas, the sandcrawler arrived at the Lars moisture farm, where moisture farmer Owen Lars lived with his wife Beru and their nephew Luke Skywalker[3]—who was secretly the son of Darth Vader and the twin brother of Princess Organa.[12] Owen and Skywalker inspected what the Jawas had for sale and ultimately purchased Artoo and Threepio, with Owen intending to use them as farm workers. While Skywalker was cleaning them, he discovered a partial version of the princess' message for Kenobi. Although Skywalker had never heard the name Obi-Wan Kenobi, he did know of a Ben Kenobi who lived beyond the Dune Sea, and was unaware that they were the same person. Skywalker told his aunt and uncle what he had discovered, and Owen let slip that Kenobi knew Skywalker's father, then-known as Anakin Skywalker. Owen claimed, however, that the two died around the same time, though Kenobi was still very much alive.[3]
While Skywalker was speaking with his family about the message,R2 escaped from the farm to find the Jedi Master. The next morning, Skywalker and 3PO quietly left the farm to locate R2. While they were gone, the Empire traced the droids to the Jawas and finally to the Lars farm. The stormtroopers killed Owen and Beru and left their charred corpses amongst the burning ruins of the farm. Skywalker and 3PO, meanwhile, found R2 in the Jundland Wastes but were attacked by Tusken Raiders. Skywalker was knocked unconscious and, soon thereafter, Kenobi arrived and scared the Raiders off by imitating the cry of a krayt dragon, a type of beast that lived in the desert. As the Raiders and their bantha beasts left, Skywalker came to and told Kenobi about the droid and its mission, and the Jedi Master admitted that he was, indeed, Obi-Wan Kenobi.[3]

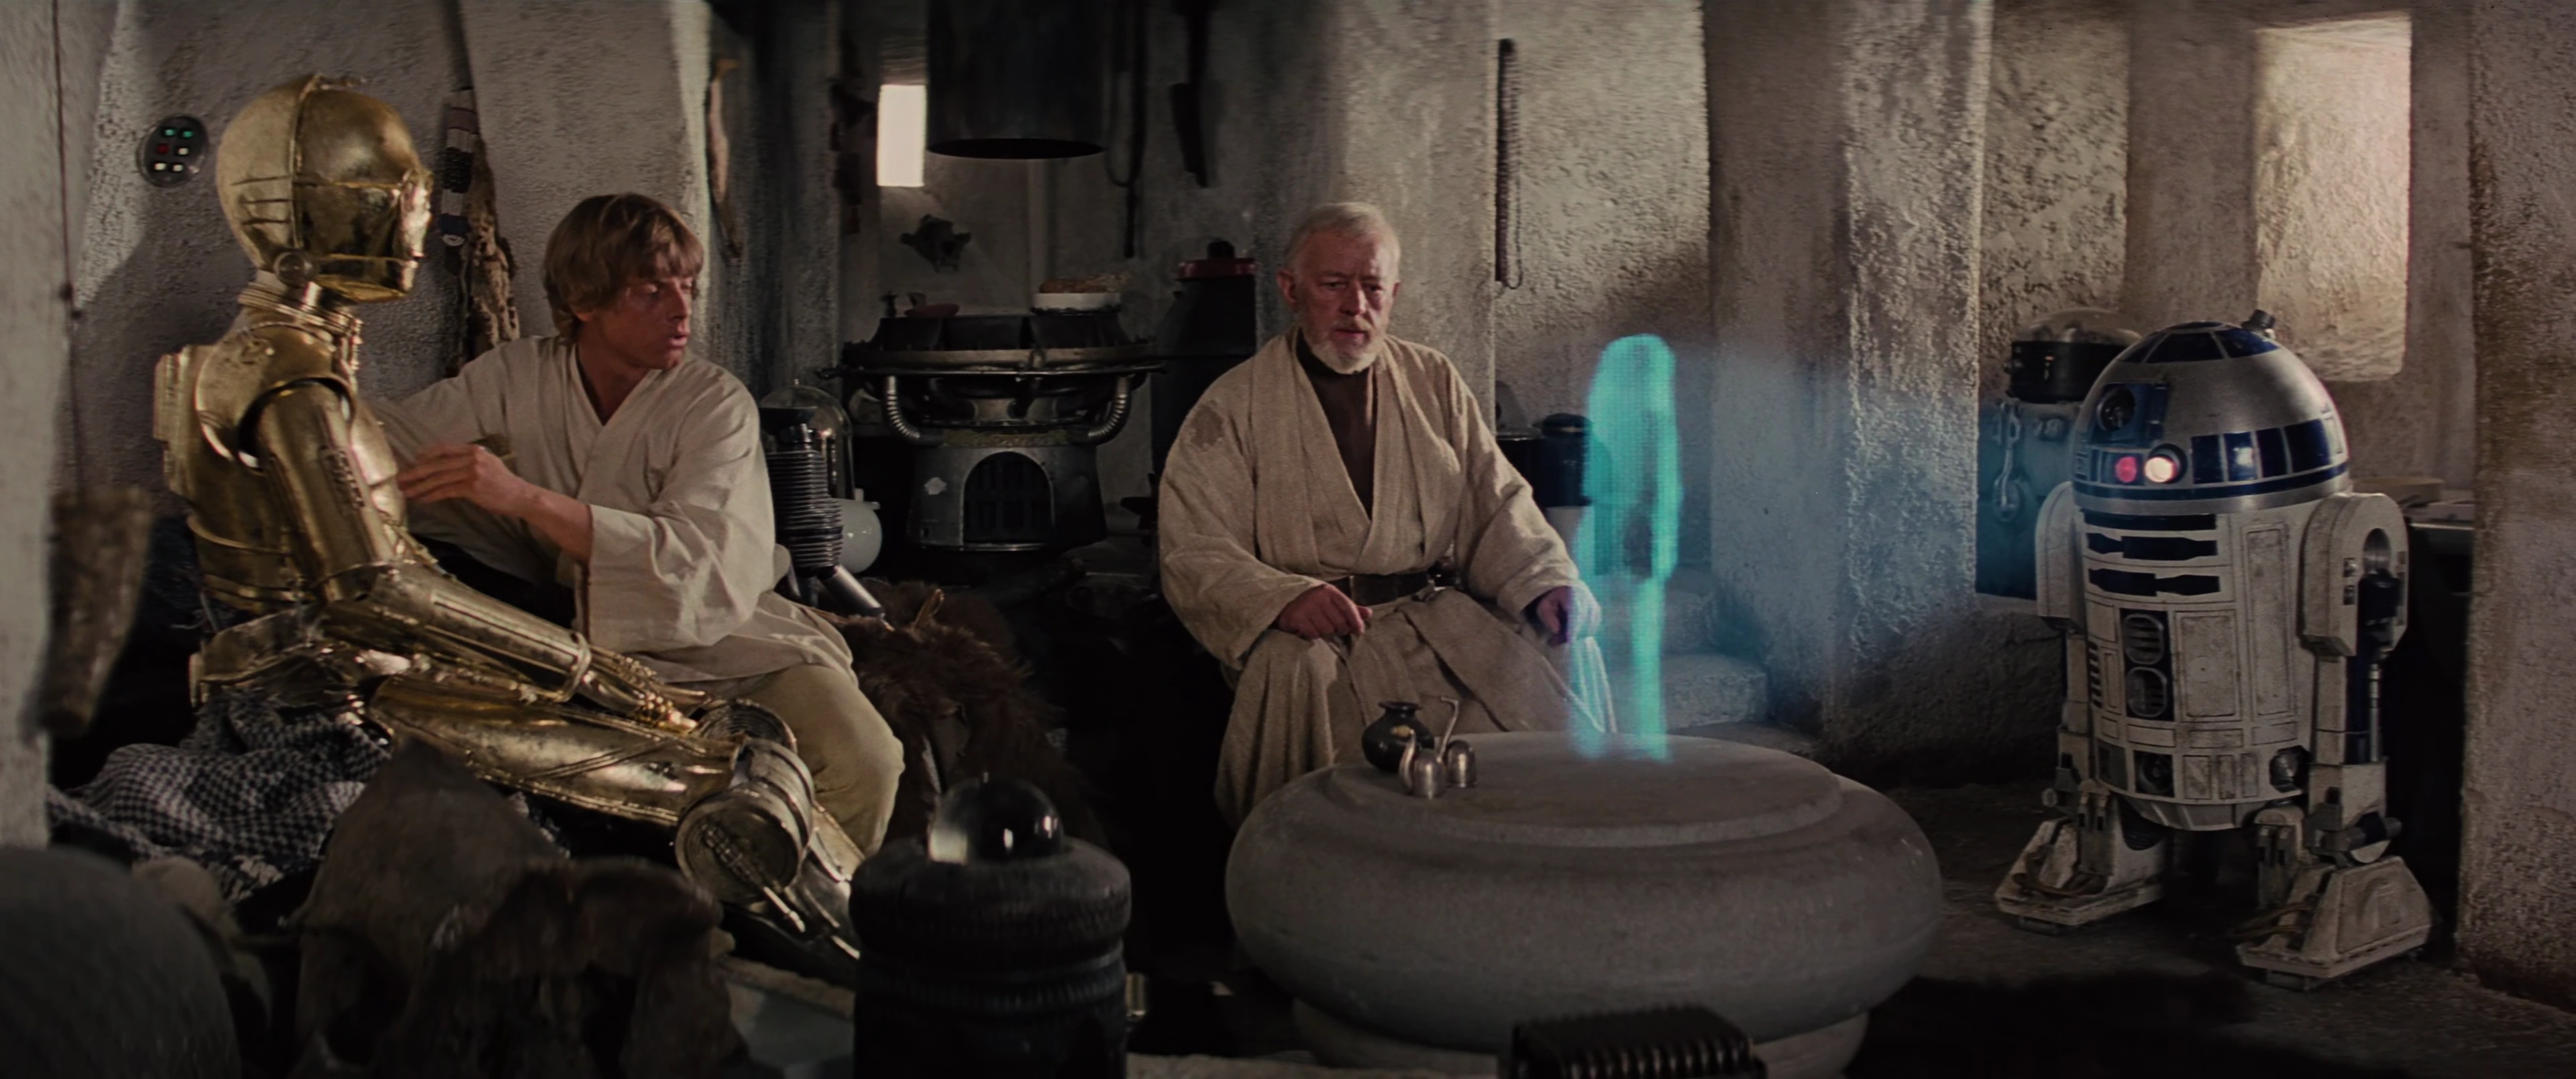
R2-D2 plays the princess' message.
Kenobi brought Skywalker and the droids to his home, where he explained that he was once a Jedi Knight and that he had fought in the Clone Wars alongside Anakin. He gave the boy Anakin's lightsaber and claimed that Anakin had been murdered by Darth Vader. The two then watched the full message that Artoo had brought for the Jedi Master. Kenobi resolved to bring the plans to Alderaan and asked Skywalker to go with him, but the boy refused. It was not until he discovered that his family had been murdered by Imperial Stormtroopers[13] that Skywalker agreed to go to Alderaan—and to be trained as a Jedi, as his father once was.[3]
Escape from Mos Eisley
- "What's the cargo?"
"Only passengers. Myself, the boy, two droids—and no questions asked."
"What is it? Some kind of local trouble?"
"Let's just say we'd like to avoid any Imperial entanglements." - ―Captain Han Solo and Jedi Master Obi-Wan Kenobi


Skywalker and Kenobi are stopped and questioned about the droids
Knowing that they would need to charter passage to Alderaan for themselves and the droids, Skywalker and Kenobi made their way to the spaceport settlement of Mos Eisley. Imperial forces had already arrived in the city to inspect the area for the droids. Skywalker's landspeeder, which carried the group, was stopped and the group was questioned about the droids they were carrying. In order to avoid further questioning, Kenobi used a mind trick to convince the soldiers that R2 and 3PO were not the droids they were looking for. This allowed the group to temporarily evade Imperial suspicions and make their way further into Mos Eisley.[3]
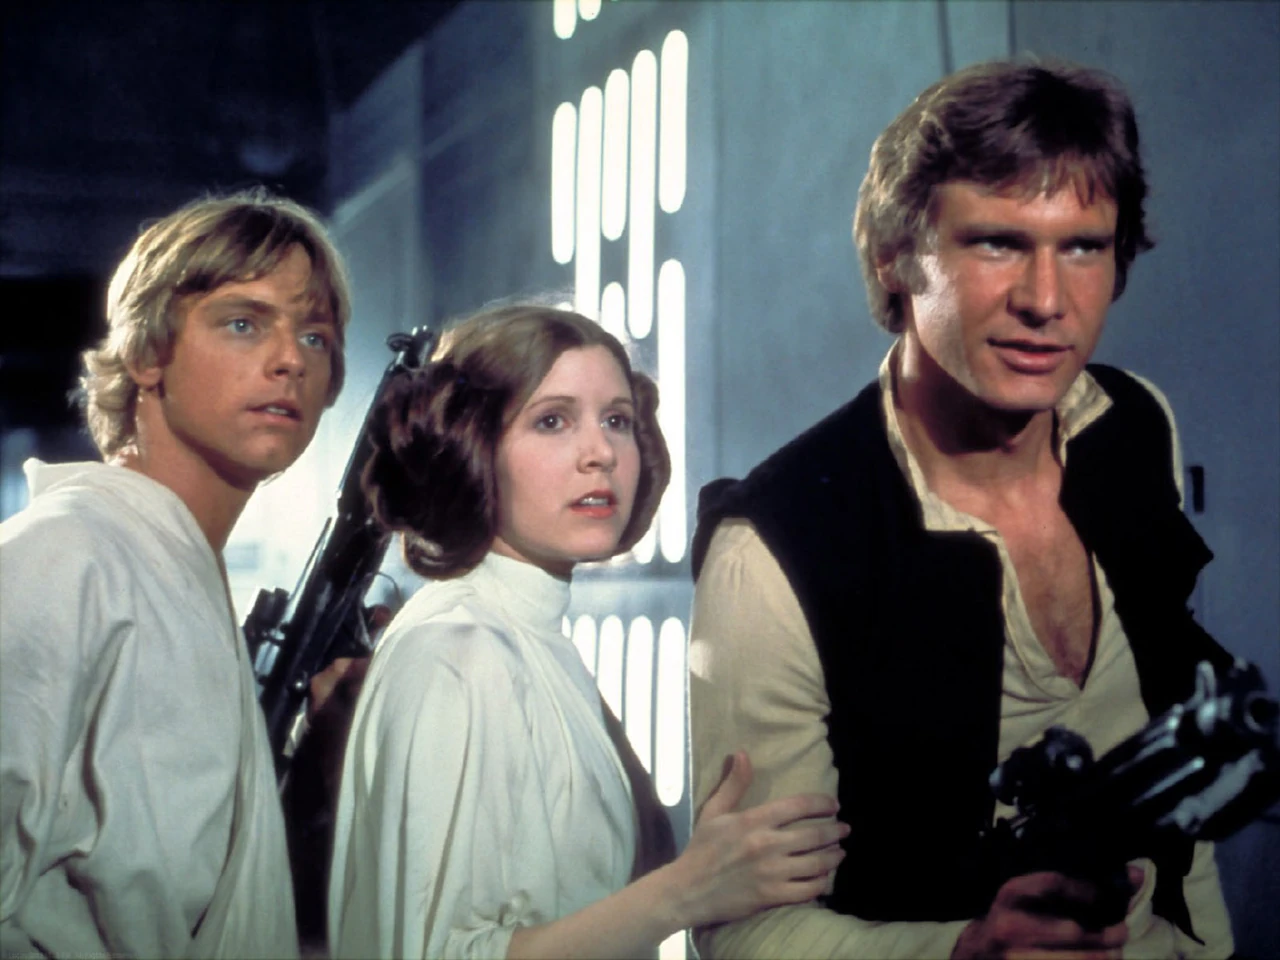
To find a charter, Kenobi and Skywalker made their way into Chalmun's Spaceport Cantina, while the droids were forced to wait outside; the establishment had a rule about not serving droids, and the two humans didn't want to cause any trouble or draw any further suspicion.[3] However this attempt to blend appeared to back fire as it only made them seem more suspicious, as was noted by a member of the band Figrin D'an and the Modal Nodes, who were playing at the Cantina at the time.[14] Due to being forced to wait outside R2 and 3PO were left in the open. In order to avoid questioning and potential capture from the stormtroopers, the droids hid inside a building and narrowly escaped attention from stormtroopers who were inspecting the area. Kenobi, meanwhile, met Chewbacca, the first mate and co-pilot aboard the Millennium Falcon. The Wookiee introduced the Jedi Master and Skywalker to the freighter's captain, Han Solo, and Kenobi questioned Solo as to whether the Falcon would be a suitable vessel to make it to Alderaan without Imperial detection. After Solo boasted about his vessel's accomplishments and speed, Kenobi negotiated for Solo to bring them to Alderaan for a large sum of money—money that Solo, a smuggler, needed in order to pay off debts he owed to Outer Rim crime lord Jabba the Hutt.[3]
With their passage to Alderaan secured, Skywalker sold his speeder in order to make enough money for the initial payment.[3] On the way to the Falcon, which was docked in Docking Bay 94, he and Kenobi confronted a stormtrooper who asked for their identification. Kenobi quickly ignited his lightsaber and sliced through his E-11 blaster rifle. Kenobi then used the Force to drop a piece of metal onto the trooper's head, knocking him unconscious. Kenobi noticed that the Imperials had expanded their search for the droids, so they hastened their pace towards the docking bay.[15] They soon reunited with the droids and discussed their plan to meet Solo at the Falcon. Their conversation was overheard by Garindan, an informant working for the Empire, who told a group of stormtroopers where Skywalker and Kenobi were headed. Hoping to capture the group before their escape, the troopers made their way towards the bay.[3]

The Millennium Falcon leaves Tatooine.
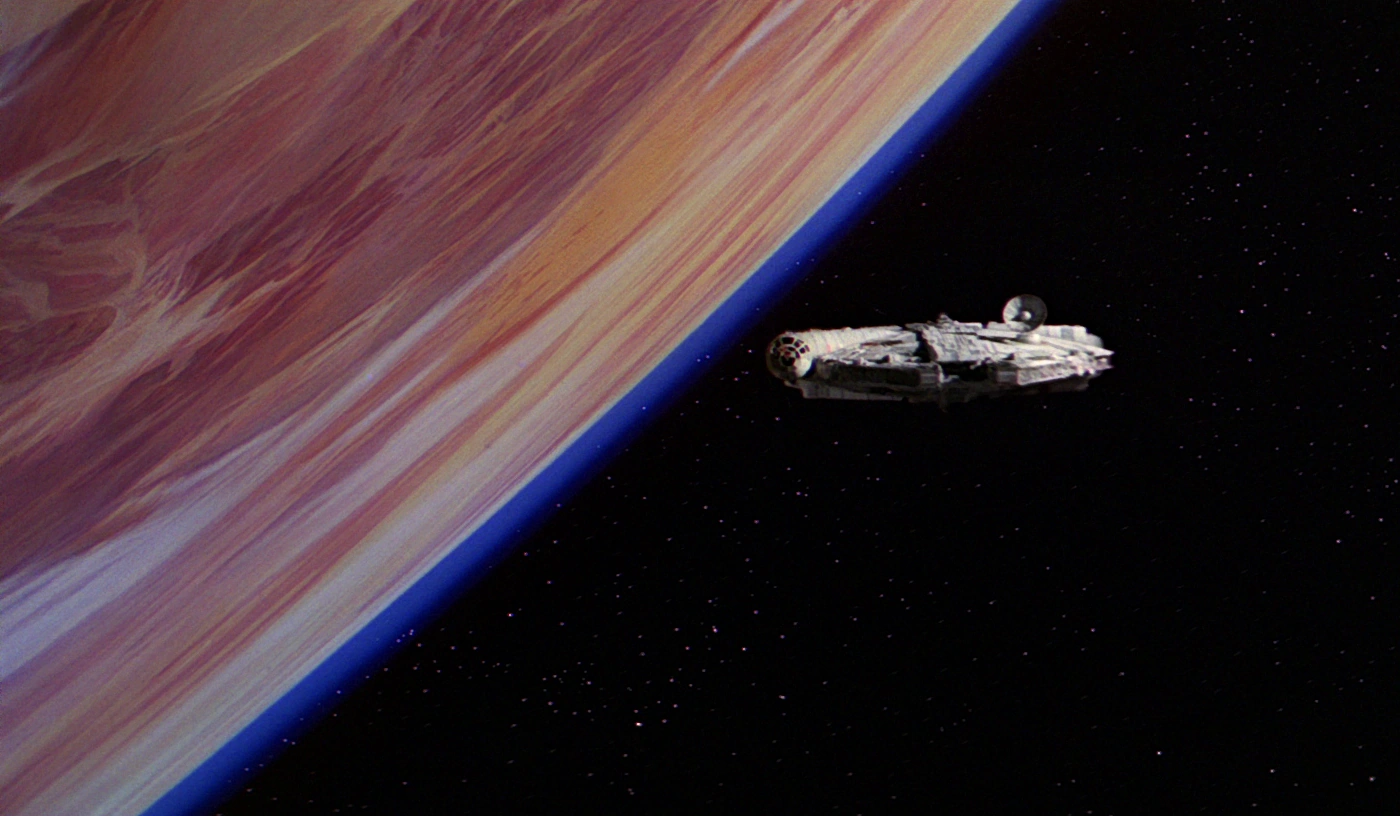
The group met Solo in Docking Bay 94 and began boarding the Millennium Falcon. As they prepared to leave, the stormtroopers swarmed into the bay and fired on the group and the ship. Solo fired back before boarding, and he ordered Chewbacca to take off immediately. The Falcon left the bay and quickly sped out of Mos Eisley and off of the planet. Once in orbit, the Falcon was pursued by three Imperial Star Destroyers. Solo and Chewbacca piloted the ship with evasive actions, while Solo plotted the course to Alderaan in the navigation computer. The ship took enemy fire as the course was calculated, but soon enough the ship made the jump into hyperspace, escaping Tatooine with a course set for Alderaan.[3]
Aftermath
- "We've captured a freighter entering the remains of the Alderaan system. Its markings match those of a ship that blasted its way out of Mos Eisley."
"They must be trying to return the stolen plans to the princess. She may yet be of some use to us." - ―An Imperial officer and Lord Vader, to Grand Moff Wilhuff Tarkin
As the Millennium Falcon made its way to Alderaan, Organa was interrogated aboard the Death Star, where she was taken after her capture. The Empire wanted to learn the location of the Rebel base—the Great Temple on Yavin 4—but Organa refused to provide the information. In an attempt to coerce the information from her, Grand Moff Tarkin, who had become Governor of the Outer Rim and commander of the Death Star, threatened to destroy Alderaan if she did not comply. Organa provided a false location, claiming that the base was on the planet Dantooine. Though Tarkin believed her, he carried out the operation in order to demonstrate the station's firepower to the galaxy. With a single shot from the station's superlaser, Alderaan was destroyed. Tarkin later learned from Imperial scouts that the Rebel base was not located on Dantooine.[3]

Skywalker, Organa, and Solo, during their escape from the Death Star
The Millennium Falcon arrived to find the remains of Alderaan. The ship was pulled into the Death Star by a tractor beam, one that needed to be deactivated in order for the group to escape. The group infiltrated the Death Star and set out on separate missions: Kenobi located and deactivated the tractor beam, while Skywalker, Solo, and Chewbacca made their way to Death Star's detention level to rescue Organa once they learned she was aboard. Together with the princess, the group fought against Imperial forces and escaped the detention level. Kenobi, meanwhile, came face to face with Darth Vader in a final confrontation between the one-time Master and Padawan. The others returned to the Millennium Falcon where they saw Kenobi fighting Vader. To allow the group to escape, Kenobi sacrificed himself; Vader killed the Jedi Master, and Kenobi became one with the Force.[3]
Having escaped the Death Star, the Millennium Falcon—upon which the Empire, on Vader's suggestion, had placed a homing beacon to track the vessel—destroyed pursing TIE/ln space superiority starfighters and made its way to the Great Temple. Organa delivered the stolen Death Star plans to the Alliance, and General Jan Dodonna presented a plan for how the Rebels could destroy the Death Star with a single proton torpedo shot into a two meter-wide exhaust port. This led to the Battle of Yavin, with Rebel fighter squadrons fighting their way through Imperial defenses in an attempt to reach the exhaust port. Skywalker, piloting a T-65B X-wing starfighter, was the only starfighter to reach the exhaust port. He was pursued by Darth Vader, but Vader and his flanking TIE fighters were fought off by the Millennium Falcon. Skywalker fired the shot that destroyed the Death Star, and he, Solo, and Chewbacca were hailed as heroes.[3] Exploiting the fatal flaw in the Death Star's designs proved to be the late Galen Erso's revenge against the Empire, and it honored the sacrifice made by Jyn Erso, Cassian Andor, and the rest of Rogue One.[1]
After many years had passed, a Whill tasked with recording key events of the galaxy believed that this mission was an appropriate starting point to deliver the story of the vast history the galaxy had gone through.[16]
Behind the scenes
The secret mission to Tatooine first appeared in the 1977 film Star Wars: Episode IV A New Hope.[3]
Appearances
Non-canon appearances
 LEGO Star Wars: Droid Tales — "Mission to Mos Eisley" (In flashback(s))
Sources
Notes and references
- ↑ 1.0 1.1 1.2 1.3 Rogue One: A Star Wars Story
- ↑ "The Secrets of Long Snoot" — From a Certain Point of View
- ↑ 3.00 3.01 3.02 3.03 3.04 3.05 3.06 3.07 3.08 3.09 3.10 3.11 3.12 3.13 3.14 3.15 3.16 3.17 3.18 3.19 3.20 3.21 3.22 3.23 3.24 3.25 3.26 3.27 3.28 3.29 3.30 3.31 3.32 3.33 3.34 3.35 3.36 3.37 3.38 3.39 3.40 3.41 3.42 3.43 3.44 3.45 3.46 3.47 3.48 3.49 3.50 3.51 3.52 3.53 3.54 3.55 3.56 3.57 3.58 3.59 3.60 3.61 3.62 3.63 3.64 3.65 3.66 3.67 3.68 3.69 3.70 3.71 3.72 Star Wars: Episode IV A New Hope
- ↑ Star Wars: Galactic Atlas
- ↑ 5.0 5.1 5.2 5.3 5.4 5.5 5.6 5.7 5.8 "The Bucket" — From a Certain Point of View
- ↑ 6.0 6.1 6.2 6.3 6.4 6.5 "Born in the Storm" — From a Certain Point of View
- ↑ 7.0 7.1 Star Wars: Ships of the Galaxy
- ↑ Catalyst: A Rogue One Novel
- ↑ "Raymus" — From a Certain Point of View
- ↑ 10.0 10.1 10.2 10.3 Lost Stars
- ↑ Star Wars: Episode III Revenge of the Sith
- ↑ Star Wars: Episode VI Return of the Jedi
- ↑ Star Wars: Absolutely Everything You Need to Know
- ↑ "Not for Nothing" — From a Certain Point of View
- ↑ Star Wars (LINE Webtoon)
- ↑ "Whills" — From a Certain Point of View