- "Accresker Jail will continue on its course. Let it fall."
- ―Darth Vader
After the Galactic Empire decommissioned the wreckage-prison Accresker Jail, a skirmish ensued as the prison was fired on a collision course with the planet Tiferep Major. Doctor Chelli Aphra, who had been a prisoner at Accresker, was a main cause of the events. Both Darth Vader and the Rebel Alliance became involved with the skirmish, along with the assassin droids 0-0-0 and BT-1. The skirmish ended with Accresker Jail being allowed to collide with Tiferep Major, and with Aphra and Triple-Zero being captured by Doctor Cornelius Evazan.
Prelude[]
- "Where are you sending me, oh needlessly cold Imperial tyrant?"
"Straight to hell, criminal. You're going to Accresker Jail." - ―Chelli Aphra and Magna Tolvan
After Doctor Chelli Lona Aphra was captured by Magna Tolvan during an attack on the Son-tuul Pride's base on Son-tuul[9] around 1 ABY,[10] she was imprisoned aboard the Galactic Empire's wreckage-prison Accresker Jail.[9] While she was a prisoner in Accresker, Aphra served in the Accresker Penal Legion, an expendable fighting force that were deployed into battles. During one such battle, Aphra organized an escape attempt with her droideka Dek-Nil and fellow convict "Lopset Yas,"[11] who was actually a disguised Doctor Cornelius Evazan.[1] The attempt was foiled by the interference of a Force spirit that caused Dek-Nil's restraining bolt to activate, and Aphra was forced to return to the prison.[11]
After the battle, Aphra was given a transmitter by Yas,[11] and used it to contact Magna Tolvan, forcing the Captain-Inspector to rescue her by implicating her with the knowledge of a conspiracy involving Darth Vader. When Aphra was deployed in an attack against a pirate station, she met up with Tolvan, but was distracted by the Force spirit, which led her to the wreckage of a Penumbra-1 shattersprite[2] that contained the corpse of an ancient Jedi. The ship had been overrun by gundravian hookspores that had infested the jail, but Aphra was forced to retreat when the battle ended.[5]
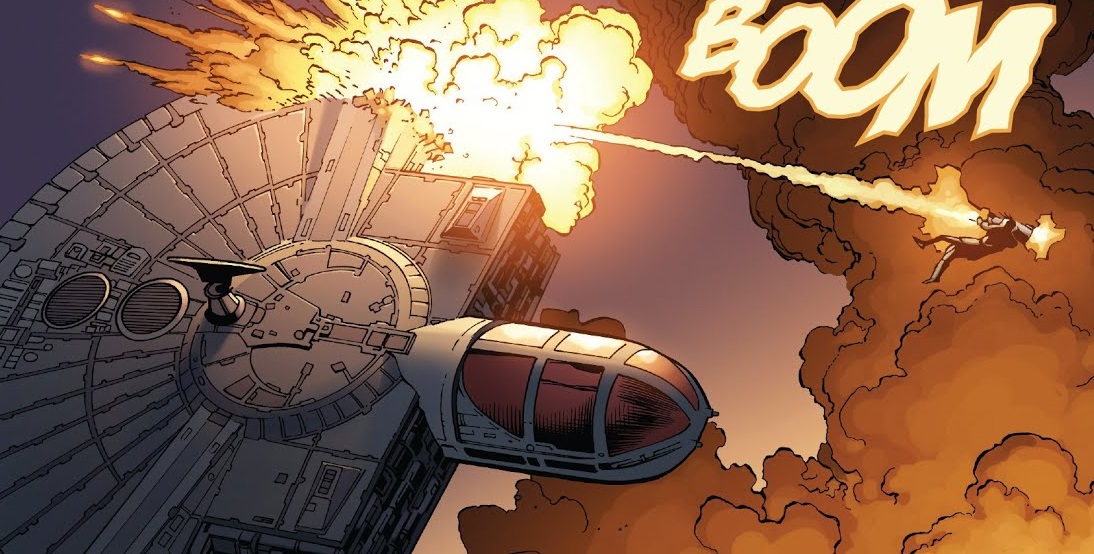
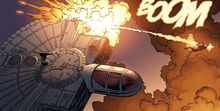
Magna Tolvan shoots down the Volt Cobra.
As she did so, Sana Starros,[5] who had been hired by Hera Syndulla to capture Aphra,[2] attacked Tolvan's TIE fighter in the Volt Cobra, and the two briefly fought before they realized they were both there for the same person. Aphra and Yas returned to Tolvan, where Aphra also encountered Starros. A hubdroid ordered the four of them to return to the prison, taking Aphra to be interrogated by a bor. To protect the knowledge of Vader's conspiracy, Aphra was forced to reveal the existence of the hookspores, leading the prison command to abandon Accresker Jail and fire it on a collision course with the Rebel Alliance-affiliated planet[5] of Tiferep Major.[7]
The skirmish[]
Accresker decommissioned[]
- "This facility has been infected by a biotoxin. To avoid contamination, it is hereby decommissioned."
- ―Accresker command

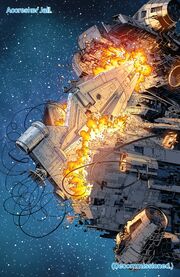
The prison-tug crashes into Accresker Jail.
As Aphra was thrown back into the prison, the Accresker command announced the jail's decommission to the convicts.[5] Desperate to escape, Aphra contacted Tam Posla, requesting that he bring her an untraceable shuttle in return for his nemesis, Doctor Cornelius Evazan. Posla, who was unaware that the Evazan he saw Aphra hold captive was the shape-shifter Lopset Yas, agreed to the deal. The assassin droids 0-0-0 and BT-1, who were listening in on Posla's ship, heard Aphra state her location and left in a hijacked ship to find her. As Aphra spoke with Posla, the jail's prison-tug evacuated its staff in escape pods, abandoning the Arquitens-class command cruiser and leaving it to fall toward the prison.[7]
As the cruiser crashed into Accresker Jail, the convicts began to riot and attack each other. One of the convicts recognized Aphra as the one that had been interrogated, and accused her of causing the decommission. Aphra, Starros, Tolvan and Yas ran from the convicts, but their path was blocked by one prisoner carrying a large weapon. Before the prisoner could attack Aphra, however, they were hit by a piece of wreckage carried by the Force spirit, which was rampaging through the prison and killing many convicts as it went. Starros had an idea to use the large gun to break a hole in the side of the cruiser's wreckage, which they then entered through. Searching the cruiser's controls, Aphra located a single escape pod that had been left behind, but there was no way to get through the sealed bulkheads.[7]
Coming up with an idea, Aphra took Dek-Nil's head,[7] which Yas had taken with them as they ran from the Jedi shipwreck,[5] and used it to slice into the gravity generator. As she did so, Tolvan tried to contact Imperial Sector Control to rescue her, but the Sector Control assumed she was a rebel who had accessed Tolvan's codes. When that failed, Tolvan used the Imperial Informant System to send an anonymous message to Darth Vader, informing him that she knew of his conspiracy and summoning him to Accresker Jail. By then, Aphra had managed to set the gravity to half of what it had been, opening the bulkheads and killing many convicts. Leaving the tug cruiser, Aphra rediscovered the Jedi ship, which she had moved when she altered the gravity. The hookspore-infected Force spirit reappeared, and briefly possessed Aphra and her associates, but rejected all four of them as potential hosts. As Aphra tried, and failed, to break through the hookspores, Tam Posla approached the prison in his ship.[7]
Enter Vader[]
- "…Tell me you didn't."
"My rank—my command codes—they weren't enough! I needed someone who could cancel the planetfall! Someone with a reason to come, who—who wouldn't be scared off by the hookspores!" - ―Chelli Aphra and Magna Tolvan
Ten minutes before Accresker Jail hit Tiferep Major, Aphra had found the escape pod, letting Starros and Tolvan enter it. Before either she or Lopset could board the escape pod, Aphra set it to launch. Tolvan, who had realized what she was doing, jumped out of the pod at the last minute, leaving Starros in the pod alone as it exited the gravity field that surrounded the prison. Aphra led Tolvan and Yas to the main launch hangar as Tam Posla's ship arrived. Aphra made Yas shape-shift into Evazan, and then froze him in Evazan's form using the coolant grille he was standing on. The hookspores, which sensed Posla's presence, began to make their way towards him. Posla exited his ship and inspected the frozen body of Yas, falling for Aphra's trick. As he was about to take his captive away, the hookspores rushed towards him, attempting to merge with him. Aphra froze the hookspores using the coolant grille, and Posla left Accresker Jail with "Evazan," leaving a shuttle for Aphra.[8]

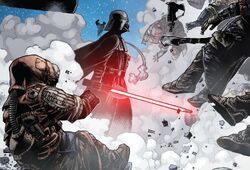
Darth Vader boards Accresker Jail.
Aphra and Tolvan returned to the Jedi ship, where Aphra retrieved the lightsaber from the corpse of the Jedi. She and Tolvan boarded Posla's escape shuttle, and began to fly away, but their ship was shot down and crashed back onto Accresker Jail. As they escaped the shuttle's wreckage, Aphra noticed the astromech droid BT-1, realizing who had destroyed their shuttle. As BT-1 began to fire at them, Aphra and Tolvan ran, looking back to see Triple-Zero walking towards them. Several convicts encircled the protocol droid, waiting to destroy him and take his ship, but Triple-Zero unleashed his weaponry, slaughtering them. Tolvan tried to run, but Aphra had given up—the prison was mere seconds away from crashing into Tiferep Major. As Aphra waited for the inevitable impact, Accresker Jail was suddenly decelerated to a stop by[8] the Executor's[1] tractor beam, launching several convicts into space and breaking the hookspores free of the ice. Darth Vader, who had received Tolvan's anonymous message, boarded the jail in a Lambda-class T-4a shuttle. Aphra, realizing the information she knew endangered both her and everyone she met, found the bor, asking Tolvan to erase her brain.[8]
Endgame[]
- "They've restarted the drop. I'm sorry, ma'am—we're outta time. Aphra's gone."
- ―Sana Starros, to Hera Syndulla
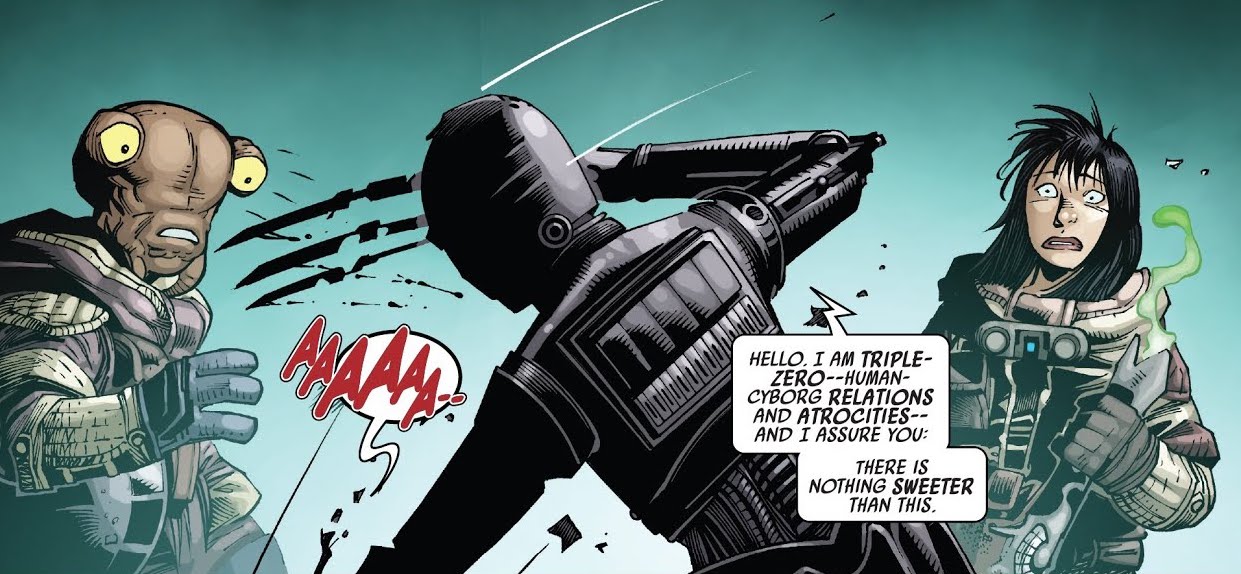
Posla is killed by Triple-Zero.
While Vader slaughtered his way through the convicts that stood before him, Tolvan begged Aphra not to do what she planned to. Coming face to face with BT-1, Vader recognized the droid, who stopped and looked back at him. As Vader destroyed Beetee with his lightsaber, Tolvan decided to have her mind wiped instead of Aphra's. Reluctantly, Aphra agreed, using Bor Ifriem to alter Tolvan's memories of her. Vader discovered Tolvan, lifting her up with the Force to interrogate her. Aphra watched the interrogation through a cam droid, but was interrupted by Lopset Yas, who had used the piece of Dek-Nil to home in on her proximity bomb. When Aphra asked why Yas had returned, Tam Posla stepped out, aiming a blaster at her face. After discovering Aphra had attempted to trick him, he had returned to Accresker to arrest her.[1]
Aphra, enraged by Posla calling her heartless, activated the Jedi's lightsaber, holding it toward him. However, the ancient lightsaber deactivated, broken due to its age. As Posla prepared to arrest the now defenseless Aphra, Triple-Zero appeared from behind him and knocked him down. As the assassin droid mauled Posla to death, Yas escaped and Aphra watched in shock. With Posla dead, Triple-Zero turned to Aphra, seeing the transmission of Tolvan's interrogation and realizing what she had done. Tolvan, being held at lightsaber-point by Vader, claimed she had murdered Aphra in revenge. Triple-Zero dragged Aphra away, taking her prisoner, as Vader took Tolvan back to his shuttle. Sensing the thawing hookspores, Vader left to investigate.[1]

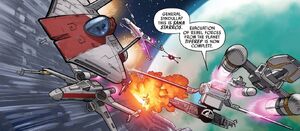
The rebel squadron leaves Tiferep Major.
Unknown to everyone in the jail, Starros had gone to the Rebel Alliance for help, and a squadron of starfighters had been sent to Tiferep Major. Using the delay of Accresker Jail's collision to their advantage, they had evacuated the rebel forces from the planet, and Starros had retrieved the Volt Cobra. The starfighters flew over Vader's shuttle, destroying it as they went. Vader, noticing them, threw his lightsaber into the X-wing of Tan Leader, and the rebels began to panic. Before Vader could attack further, the hookspores reached him, swirling around him. Vader destroyed the hookspores with the Force, and decided that he no longer needed to find Aphra. Communicating with the Executor, Vader ordered them to pick him up in another shuttle and release Accresker Jail from the tractor beam.[1]
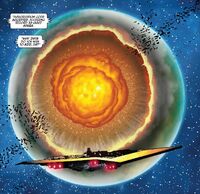
Starros managed to find Tolvan, who survived the explosion, but was forced to give up on saving Aphra when she learnt the collision had been restarted. Triple-Zero had dragged Aphra to his hijacked ship, discovering that it had been destroyed by Vader. As Triple-Zero called out for Beetee, Lopset Yas stepped around the corner, telling the droid that he had seen astromech parts lying on the ground. When Triple-Zero threateningly questioned Yas what he meant, Yas shot him, deactivating him. As Aphra thanked Yas for saving her, he stunned her, taking both her and Triple-Zero prisoner aboard Posla's ship. As Accresker Jail continued to fall, both the rebel squadron and Yas escaped, leaving the empty prison to crash into Tiferep Major. The jail was vaporized in the collision, leaving nothing but a vast crater behind on the planet's surface.[1]
Aftermath[]
- "He's set to auto-boot in one minute. And you'll notice he's not restrained. I'm just dying to know what you'll say when he wakes up…?"
- ―Cornelius Evazan, to Chelli Aphra

The devastation of Tiferep Major
Vader, safely aboard the Executor, assumed Aphra had perished in the crash, altering her official record to show she was deceased. Yas took Posla's ship into an empty area of space, where he began to modify the deactivated body of Triple-Zero. Eight hours later, Aphra woke up, noticing she was chained to the wall. She asked Yas what he had done, and he revealed that his name was not actually Lopset Yas—he was the infamous Doctor Cornelius Evazan, wearing a pluripleq stolen from Thannt as a disguise.[1]
As Evazan's friend Ponda Baba arrived in a separate ship, he revealed that he had implanted his own proximity bomb into Triple-Zero, forcing the two of them to stay together to keep the bomb from exploding. Evazan set Triple-Zero to reboot, leaving Aphra on the ship with the assassin droid.[1] Once Triple-Zero was activated and learned of the situation they were in, the two decided to take the ship to Milvayne so they could find Posla's personal cyberneticist Rajam Nuss and get him to remove the implants. However, they fell into trouble with the Milvayne Authority after Triple-Zero killed a border officer and stole a speeder. Amongst the wreckage of Accresker Jail that floated above Tiferep Major, the Force energy from the hookspores surrounded the body of Tam Posla and brought him back to life.[4] Posla retrieved the remains of BT-1, using the reconstructed droid to track Triple-Zero to Milvayne.[12]
Behind the scenes[]
The skirmish first appeared in Doctor Aphra (2016) 22, a 2018 canon comic written by Simon Spurrier and Kev Walker.[5]
Appearances[]
- Doctor Aphra (2016) 22 (First appearance)
- Doctor Aphra (2016) 23
- Doctor Aphra (2016) 24
- Doctor Aphra (2016) 25
- Doctor Aphra (2016) 26 (Indirect mention only)
- Doctor Aphra (2016) 38 (Indirect mention only)
- Doctor Aphra (2016) 39 (Indirect mention only)
- Doctor Aphra (2020) 22 (Indirect mention only)
Sources[]
- Ultimate Star Wars, New Edition (Indirect mention only)
- Star Wars: Timelines
Notes and references[]
- ↑ 1.00 1.01 1.02 1.03 1.04 1.05 1.06 1.07 1.08 1.09 1.10 1.11 1.12 1.13 1.14 1.15 1.16 1.17 1.18 1.19 1.20 1.21 1.22 1.23 1.24 1.25 1.26 Doctor Aphra (2016) 25
- ↑ 2.0 2.1 2.2 Doctor Aphra (2016) 21
- ↑ Doctor Aphra (2016) 36
- ↑ 4.0 4.1 Doctor Aphra (2016) 26
- ↑ 5.00 5.01 5.02 5.03 5.04 5.05 5.06 5.07 5.08 5.09 5.10 5.11 5.12 Doctor Aphra (2016) 22
- ↑ Star Wars: Timelines dates the events of issues 9 to 31 of the Star Wars: Doctor Aphra comic-book series to around 1 ABY. Therefore Doctor Aphra 22, including the skirmish aboard Accresker Jail, must take place around 1 ABY.
- ↑ 7.0 7.1 7.2 7.3 7.4 7.5 7.6 Doctor Aphra (2016) 23
- ↑ 8.00 8.01 8.02 8.03 8.04 8.05 8.06 8.07 8.08 8.09 8.10 8.11 8.12 8.13 Doctor Aphra (2016) 24
- ↑ 9.0 9.1 9.2 Doctor Aphra (2016) 19
- ↑ Star Wars: Timelines dates the events of issues 9 to 31 of the Star Wars: Doctor Aphra comic-book series to around 1 ABY. Therefore Doctor Aphra 19 must take place around 1 ABY.
- ↑ 11.0 11.1 11.2 Doctor Aphra (2016) 20
- ↑ Doctor Aphra (2016) 27