Template:Infobox CVG
Star Wars: Republic Commando is a first person shooter Star Wars computer and video game, released in the US on March 22, 2005. It was developed and published by LucasArts for the Windows and Xbox platforms. The game uses the "Unreal Engine" developed by Epic Games.
Synopsis
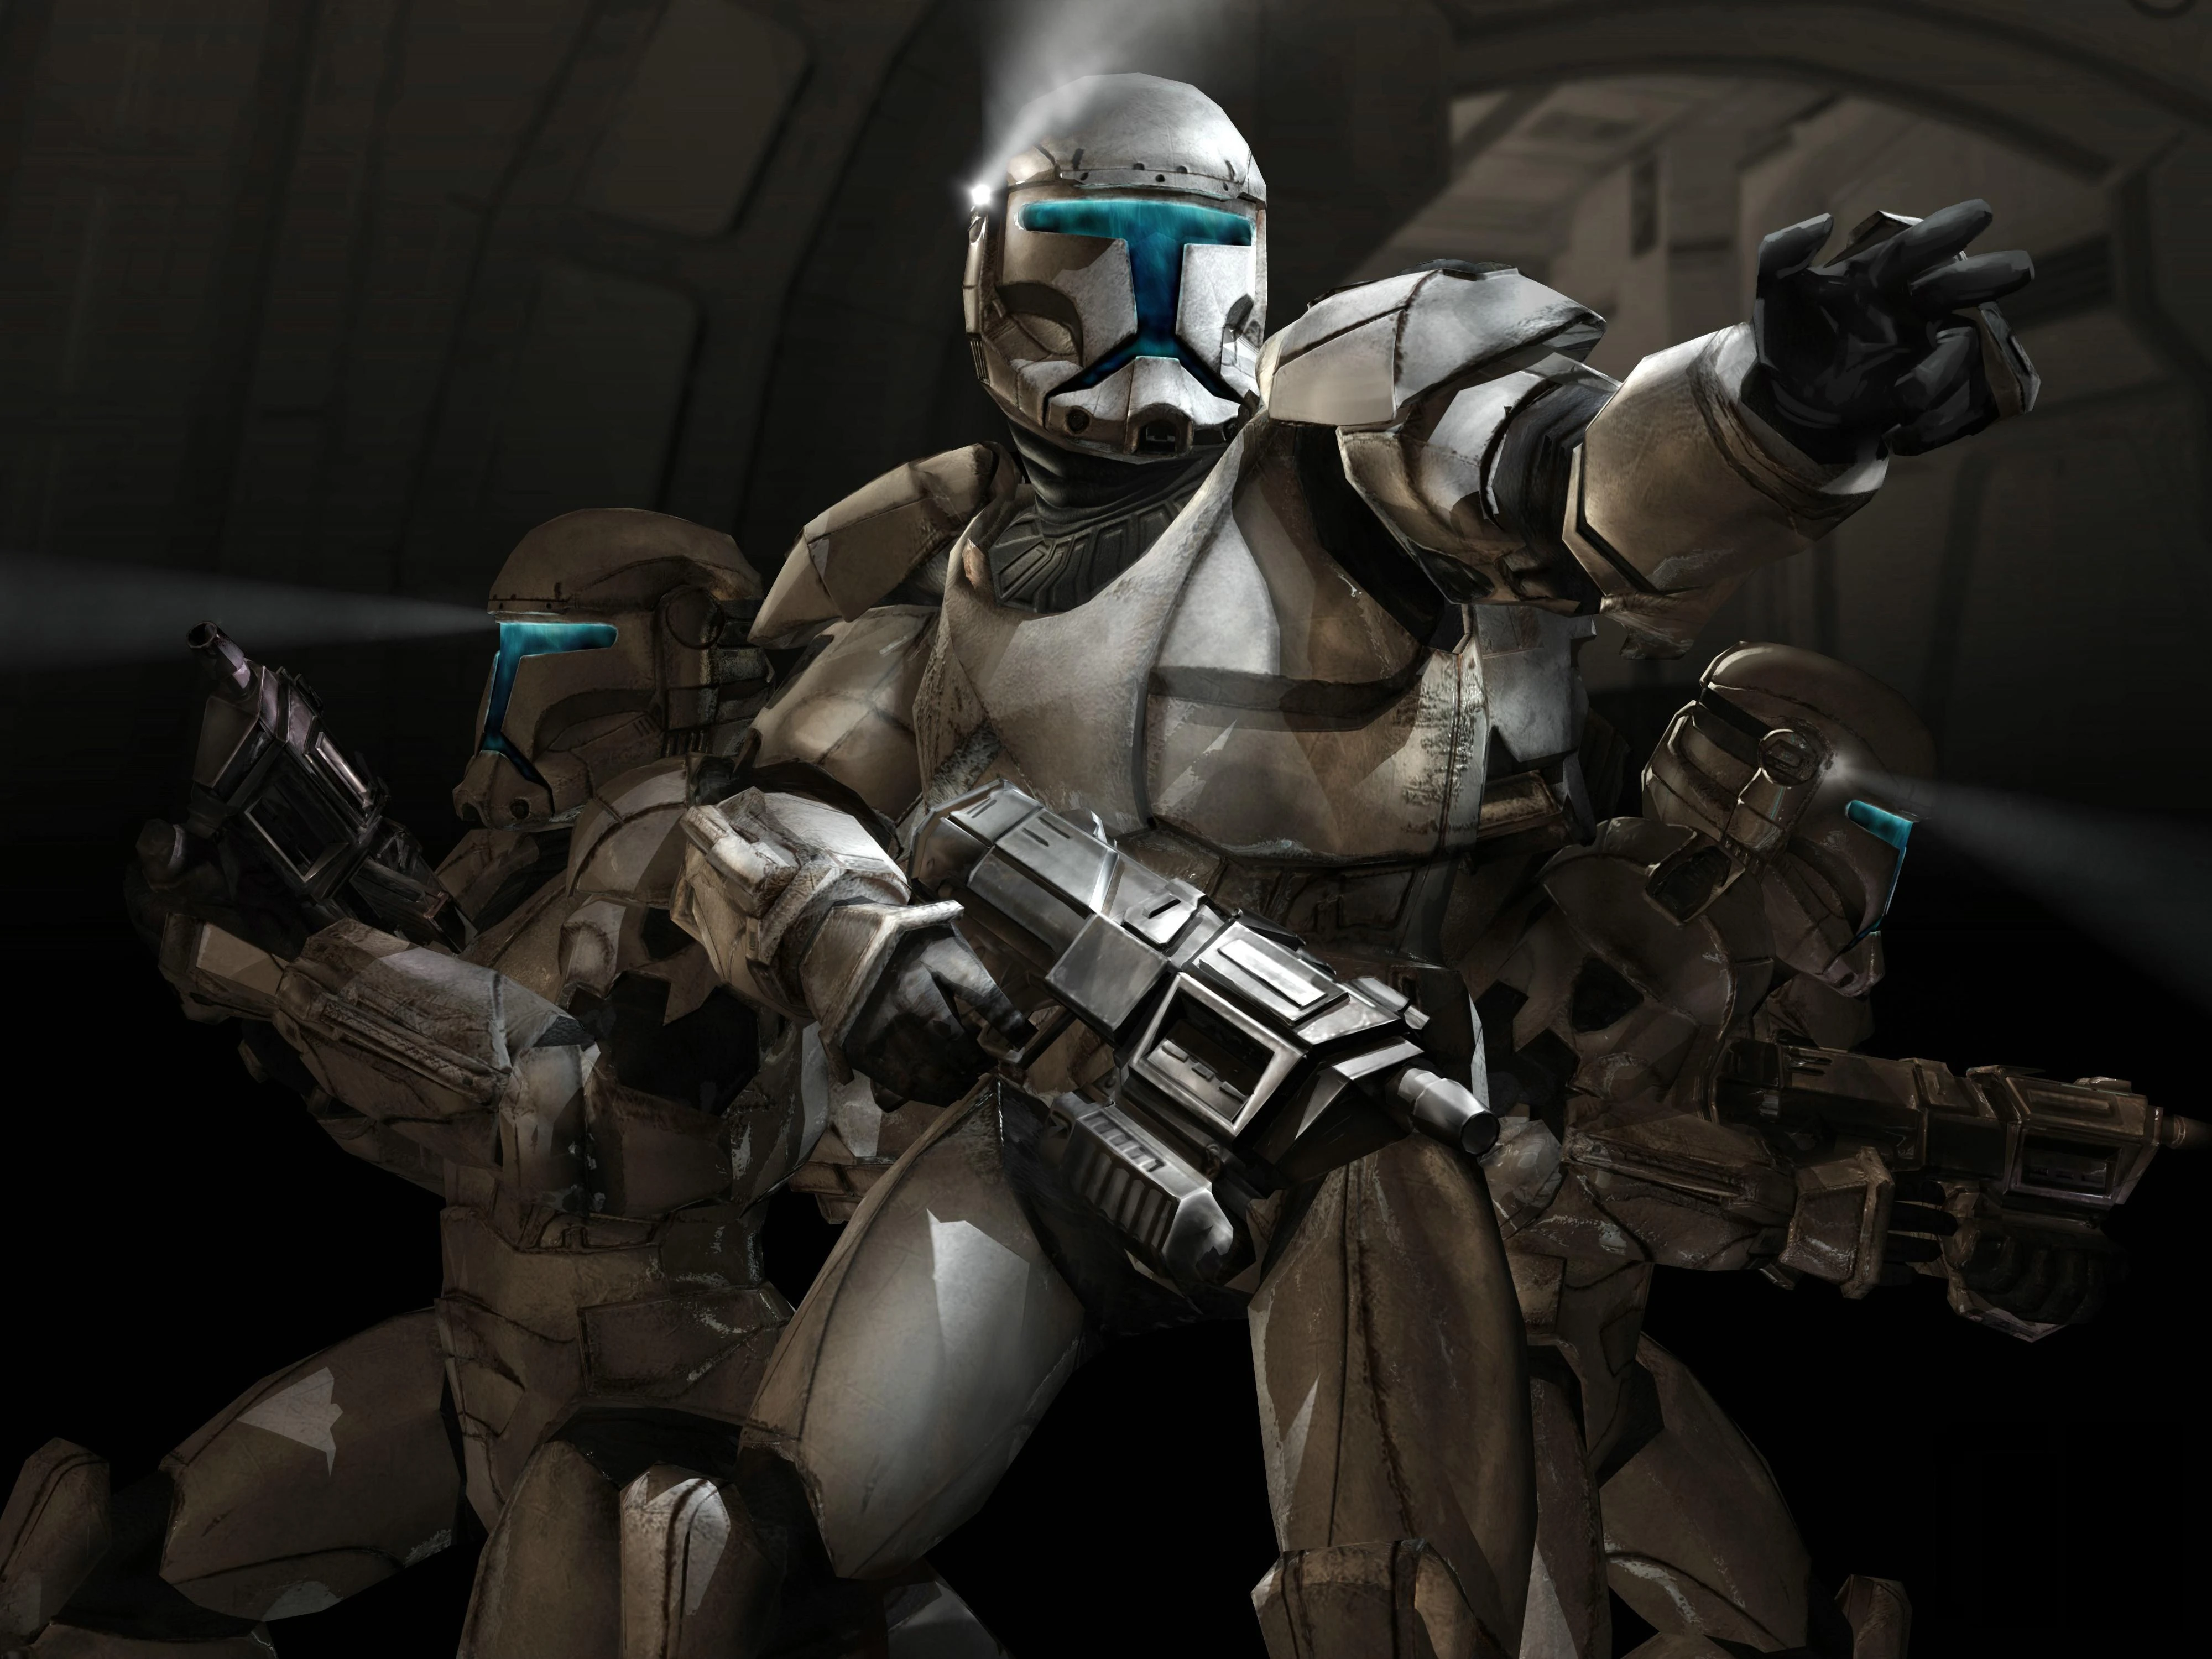
Star Wars: Republic Commando follows the tale of 'Delta Squad', an elite group of clone commandos, through three missions during the Clone Wars. Trained in squads of four by Mandalorian mercenaries such as Walon Vau and Kal Skirata, the commandos were more capable than their rank-and-file clone brethren, having undergone live-fire training as opposed to mere computerized simulations. All clone commandos were proficient with a large variety of weapons, computer systems, and demolitions equipment.
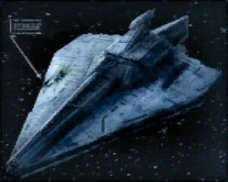
The game covers Delta Squad’s activities in three locations, the planet Geonosis, a derelict Acclamator I-class assault ship designated the Prosecutor, and the planet Kashyyyk. In each location, the player leads the squad through a series of objectives while battling against enemy forces ranging from droids to Trandoshans. The player is assisted throughout the game by a clone adviser designated CC-01/425, who regularly updates mission objectives as each level progresses.
The game was designed partly to bridge the gap between Star Wars Episode II: Attack of the Clones and Star Wars Episode III: Revenge of the Sith. The developers stated that whereas the novels and movies are seen from the point of view of the Jedi, Republic Commando is told from the point of view of the troops.
Plot summary

The game is set during the events of the Clone Wars, a galaxy wide conflict that started at the climax of the movie Star Wars Episode II: Attack of the Clones. In the game, the player takes command of Delta Squad, a unit of four elite clone troopers that are given high-risk high reward missions. Delta Squad is deployed to various locations in the Star Wars universe, including Kashyyyk, Geonosis, and an Acclamator I-class assault ship, the Prosecutor. Enemies include Battle Droids, Geonosian Warriors, Geonosian Hatchlings, Super Battle Droids, Geonosian Elites, Dwarf Spider Droids, Droidekas, Trandoshan Slavers, Scavenger Droids, Trandoshan Mercenaries, Trandoshan Elites, and Magna Guards.
Sev on Kamino
Intro
In the intro, a Kaminoan, Taun We, introduces the Delta Squad to the player, as well as the war situation, the played character, RC-01/138, (nicknamed Boss) is born into. After a cut-scene of Boss' growth and training and meeting his squad, Delta Squad is then sent to the planet of Geonosis into the war-torn Petranaki arena. The members of Delta Squad are inserted to the battle separately, to meet later as the game progresses. On a LAAT/i gunship en route to his insertion point, the player meets the squad's direct command and advisor CC-01/425 through a holocomm unit. The Advisor gives the player information about his/her first mission. As the gunship reaches the drop off point, player gets full control over his/her character.
Geonosis missions
Sun Fac
The main objective on Geonosis is to find and eliminate Sun Fac, the Geonosian chief lieutenant, while the first task planet-side is to find and link up with other members of squad. Just few meters after exiting gunship, the player's character, Boss, along with two clone troopers, are hit by an anti-infantry round. The nearby standing clones are killed, while Boss' health scan shows 50 percent vitality. The advisor thus recommends healing procedures by using nearby bacta dispenser. After doing so, Boss is ordered to secure the area around a recently crashed gunship, where three clone troopers are outnumbered by B1 battle droids. After taking back the area, player meets a squad of clones, where clone troopers 17 and 35 with their squad are holding a barricade against battle droids. Shortly after Boss' arrival, the droids blow through the barricade, killing at least one of the clones by the explosion, however, the clones manage to push the droid lines back to an armored gun emplacement, which is holding the Republic lines off. Boss is then assigned to take the gun position out with thermal detonators, allowing the Republic troops to advance as well as clearing his own path. After pushing through debris from the destroyed gun position, Boss meets with the squad's demolition expert, RC-01/262, nicknamed "Scorch". Because another bunker is blocking the squad's way, Scorch is immediately assigned by Boss to destroy it, clearing the path. After this point, Boss and Scorch cross the enemy lines to complete the mission.
As they navigate the Geonosian corridors, Delta Squad encounters very little resistance, and where they meet with RC-01/140 ("Fixer"), the team's slicer, and later with RC-01/207 ("Sev"), the squad's sniper. After finding Fixer, and on the way to Sev, they must walk through Geonosian hangars and dimly-lit hallways. Right at the place where they meet Sev, Sun Fac's planning room is located, however it's behind a large glass wall. After Boss shoots through the glass and Delta ambushes the planning room, Sun Fac escapes through the door, heading to his Nantex-class territorial defense starfighter and sends in a B2 super battle droid, along with B1 escorts. While the squad is taking out the droids, Sun Fac makes his way to his aircraft and warms up its engines. When Deltas get to the hangar, they find him behind a shield, starting up his fighter and taking off. While Boss assigns Sev to a sniper position, Fac oddly decides against escaping, and turns his fighter weapons on them. However, Sev is successful in damaging the fighter's critical systems, causing it to crash back into the hangar.
With this objective accomplished, the Advisor informs Delta squad, that another commando squad had been subdued while attempting to disable the droid foundries deep in the Geonosian hives. Delta squad is reassigned to this task, but before they can proceed to the factory itself, they have to take out a signal jammer, which is jamming the Advisor's scanners trying find it's weaknesses. As they proceed to the jamming device through the Geonosian birthing chambers, the player acquires a sniper attachment to his DC-17m blaster rifle. After locating the device, disabling its shield and destroying the jammmer itself, the communications with command are restored, and the Advisor is able to give the squad exact path to the foundries.
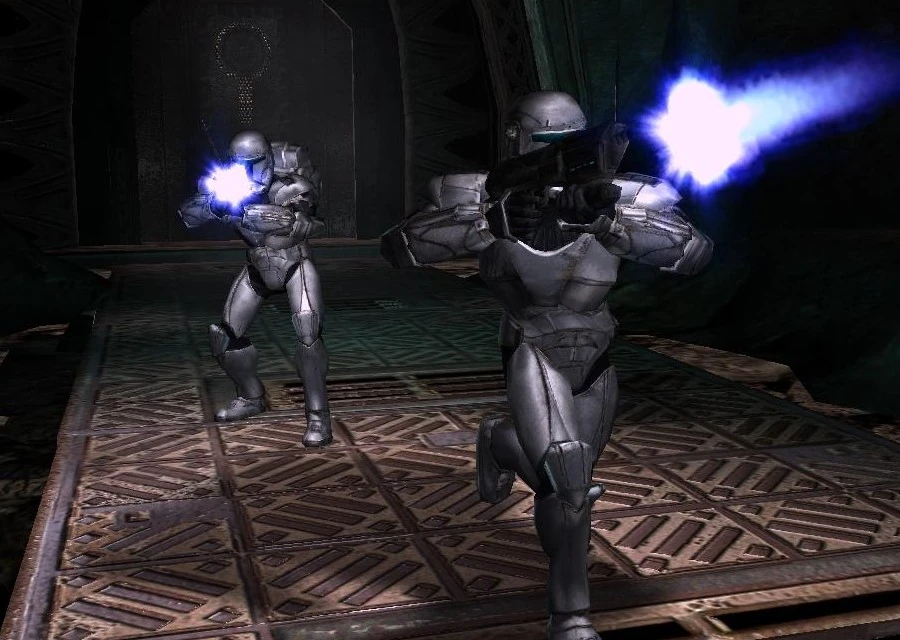
Republic Commandos
Although Advisor is able to scan the area of the factory, he isn't able to find any weakness Delta squad could hit and destroy it. Therefore Delta is assigned to find and slice the foundry's computer terminal and upload the complete factory schematics. Navigating through ventilation shafts, they find the console, giving the data to Advisor. The squad is informed of two power conduits that have to be destroyed if the factory is to be shut down. Continuing through the shafts and encountering more and more droid resistance, the squad finds the first power conduit, . After destroying it, they proceed to the next one, eliminating it as well, after which escaping in a gunship.
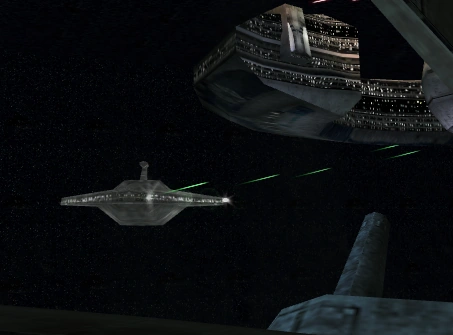
Their next objective is to disable a nearby Confederacy Lucrehulk-class core ship, but more importantly, to retrieve the launch codes for entire separatist fleet, that are needed to prevent the droid armies from retreating the Battle of Geonosis. The gunship pilot has to drop Delta in greater distance from the Coreship as planned, due to a large anti air turret placed near the core ship. They have to get there on foot through the canyon, encountering some Geonosian resistance, several crashed gunships (whose beam turrets help to fend off the enemy units), and as approaching the anti air turret, more and more battle droids. As the squad fights its way into the turret emplacement building, the Advisor leads it to the loading mechanism and commands its demolition. Although they put a charge on the loading mechanism and detonate it, it doesn't stop functioning and Deltas search move to the upper level to try it again on another level, now successfully. After disabling the turret, they proceed to the Core Ship, now with gunship support.
Through several more canyons, Delta squad finds its way to the Core Ship entrance, but it's shielded. Since the door itself is deep in the landscape, the squad can't call in gunship support to punch through it's shielding. Therefore they go through another canyon passage to reach the next entrance. After reaching it, Deltas encounter an A-DSD Advanced dwarf spider droid. As they fight it, the Advisor informs the squad about its only weakness, the red optical cluster in the middle of the droid's frame. After defeating it, they finally get to the entrance, discovering it's shielded as well, but in position suitable for air support. Shortly after Advisor calling it in, Delta 42's gunship appears above player's head and fires several rockets at the shield, warning the Delta squad to stand back in cover. The shield is now down and the squad is able to enter the hallway to the ship itself. The hallway leads Deltas to an extendible bridge, connecting the ship's hull with planet's surface. Since the bridge isn't extended, they have to slice a nearby console to extend it, while eliminating several droids guarding the entrance. When the bridge is extended, squad is ready to infiltrate the ship by entering its ventilation system. They are now assigned to two objectives. First to disable the ship for good and the second, to retrieve the important launch codes. The advisor reminds the player several times, how important these codes are. Since each squad member is tasked disabling different critical systems (Boss is assigned to disable the super battle droid storage racks, Scorch to detonating coolant intake valve, Sev to disabling the repulsorlift controls and Fixer to destroying the primary power conduit), the squad splits off and enter the ventilation shafts separately, to reach their objectives directly.
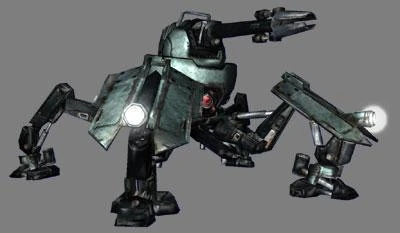
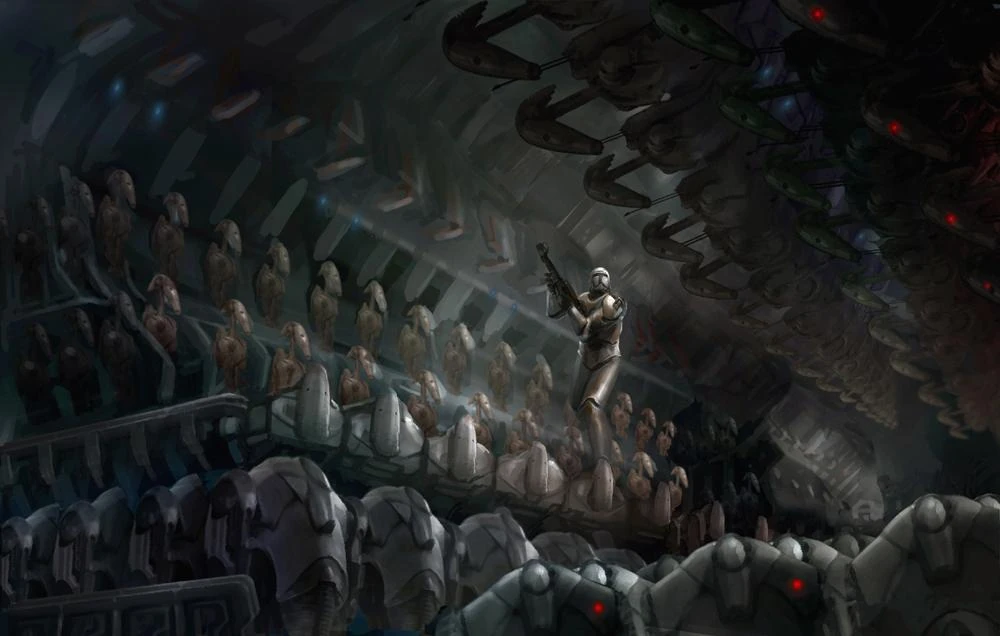
Spider droid
After player enters the ventilation shaft's elevator, he's taken to the Super battle droid storage racks. As he navigates through the racks full of droids on standby, other Delta squad members report reaching their objectives and successfully disabling the ship's systems. The squad's presence is no longer secret, as Boss runs into a Geonosian elite warrior that sounds an alarm, before Boss is able to kill him. As he finds his way to the next elevator, player encounters several Super Battle Droids activated. The second elevator takes Boss to the level, where the storage racks controls are located. En route to this point, Advisor uploads disabling protocols to him, tasking him with locating the control mainframe and inserting these protocols. As he completes this, causing explosions and short circuits in the racks, destroying the mechanism's functionality. Now he's ready to meet up with Sev and the rest of the squad at level 1157. Encountering destroyer droids and droid dispensers for the first time, Delta squad makes its way through the ship's hallways to its command bridge. The ship's many systems are already malfunctioning, as a chain reaction started by disabling four critical systems on the ship occurs. Encountering heavier and heavier resistance with every meter they get closer to their objective, they enter the bridge, they retrieve the launch codes from the mainframe console, under heavy fire of wall turrets and droids. After successful download of codes, Deltas escape the core ship with help of Delta 42 and his gunship, who leads them to a hallway leading to the ship's hull surface, blasted the hull door open and evacuated Delta Squad shortly before Core Ship's total destruction.
Prosecutor missions
A year after the Battle of Geonosis, an Acclamator I-class assault ship goes missing. After two weeks of being unable to contact or find it the Prosecutor, Delta Squad first home appears in Chaykin cluster near the Corbantis system, but doesn't respond to any attempt of being made contact with. On 367th day of Clone Wars, Delta Squad is dispatched to investigate and dropped into four ship's data cores to retrieve critical information. Boss' primary objective is to retrieve the flight recorder data from the aft data core, then rendezvous with the squad, but also as the squad leader, he's to assist other squad members if necessary. Sev is tasked with retrieving the sensor logs from the starboard data core, Fixer is to retrieve certain data from the port core. The data Scorch is charged to download and the name of the data core it's stored in is however unknown to player, as well as what data Fixer is to retrieve, because of static jamming the transmission between Advisor and Boss.
The Prosecutor
After briefing in a CR25 troop carrier, Boss jumps to the void space with his squad and lands in the proton torpedo tube, losing the contact with Advisor. Then after manually opening the torpedo bay hatch, he enters the ship encountering mynocks. As he walks the torpedo bay's corridors, Delta 62 reports strange static of his visor, then being attacked by a droid. After that, he doesn't respond to any of squad members. As players continues, he meets one confused clone trooper, hiding in the torpedo bay, which is killed by a scavenger droid. Continuing through ship's maintenance hatches, Boss experiences an attack by one of the scavenger droids himself. He realizes what happened to Scorch and warns the other squad members to stay out of static and be aware of these droids. When he reaches a hallway leading to his objective, he finds it blocked by debris. Sev informs him the only way around is through the droid maintenance hatch, passing nearby the starboard data core. While Boss overrides the entrance, he's attacked by three more scavenger droids. As he exits the maintenance hatch by Sev's position in the core, he watches his squad-mate being attacked and knocked unconscious by a Trandoshan slaver, while he's getting ambushed by the Trandoshans as well. Then he enters another maintenance hatch and moves through the hallways to do Sev's work first, encountering Trandoshans equipped with Accelerated Charged Particle Array Guns, but mistakes them for projectile weapons. He enters the core, but is unable to locate Sev. He slices a console while being under enemy fire. After downloading the data he enters a hallway connecting two data cores and heads to the aft data core, his previous task.
On his way to his objective, the player finds a group of clone troopers successfully fighting the Trandoshans with help of the defense autoturrets. As he reaches the entrance to the data core, he's attacked by a sliced pair of turrets, however another two turrets are inactive and he uses them to cover his back and enters the aft data core. After a successful slice, he heads to the rendezvous point through the ship's landing gear section. As he navigates a variety of corridors and hallways, Boss encounters a heavily armed Trandoshan, a Trandoshan Elite, carrying a LS-150 Heavy Accelerated Charged Particle Repeater Gun. Reaching the rendezvous point, player finds a junction door he needs to pass locked. However, Delta 40 appears on the other side of this door and unlocks the door. While Fixer is slicing, a Trandoshan slaver breaches a wall behind Boss and brings in a droid dispenser. When Fixer unlocks the door and Boss is good to go, he advises to player to leave the dispenser alone and escape, however it's players choice whether to blow the dispenser up or not.

Delta Squad
Now in two, Deltas 38 and 40 go to find their incapacitated squad-mates and complete their objectives. As they navigate the hallways, they find Sev being held by a group of Trandoshan slavers and brutally interrogated. Then they enter the room, killing all enemies and revive Sev with the field bacta dispenser. After Delta 07 acknowledges squad about Scorch probably being held in the detention area, they head there to rescue him. When they get there, they get ambushed and after killing all the enemies in their area, they locate Delta 62 in one of the detention cells. After reviving him, the enemy battle droids blow up a barricade on the other side of the detention block, clearing the way which delta squad uses to advance to the ship's bridge. Navigating the hallways, deltas encounter more reprogrammed turrets. As they reach the bridge, they find it well defended by super battle droids and Trandoshans. After eliminating the droid presence, they locate and destroy a jamming device, blocking their communications with command and re-establishing the link with Advisor. Deltas sending him the data, Advisor is surprised by the amount of data retrieved by commandos, as they contain many Trandoshan and Separatist sensitive information, like tactics and so, so many that it could take months of analyzing to process them all. After receiving the data, Advisor finds out the Trandoshans stole the ship to sell it to the Confederacy of Independent Systems and get some of their battle droids in return. Since the jamming device is offline, Advisor is able to provide a full scan of the ship that indicates a Trandoshan dropship located in hangar A. Delta Squad is now tasked to destroy that ship to wipe out Trandoshan presence in the ship. On a booby trapped elevator on their way to the hangars, Delta Squad gets stuck in the detention area and ambushed by Trandoshans. Their only hope surviving in the detention block full of Trandoshan slavers and mercenaries is now the automated lockdown system, but it has been damaged by Trandoshans. To make it functioning, Deltas navigate the detention block and fix four damaged circuits, encountering a Trandoshan Rocket Turret. While they fight the Trandoshans, Fixer picks up multiple clone trooper signatures coming from below their position. Advisor tells them not to be distracted and investigates it himself. Shortly after the lockdown kicked in, a poison gas started to flow in the hallways, dealing with all remaining Trandoshans in this level instantly. Then Delta Squad moves through a maintenance hatch to a room full of dead clone trooper bodies that have apparently been carried here by scavenger droids. As they leave the room, they get past Trandoshan mines and reprogrammed autoturrets (whether by destroying them or by reprogramming them back on the player's side). Then they proceed to the hangar and the Trandoshan dropship.
As members of Delta Squad arrive to the hangar A, they encounter the Trandoshan dropship barricaded by debris and guarded heavily by remaining Trandoshans, mines and two rocket turrets. As the dropship is heavily shielded, Advisor informs Deltas that they have to control both turrets to destroy the dropship. While they fight, Advisor picks up a Confederacy Lucrehulk-class battleship on long range sensors and contacts the Coruscant command for backup. After a tough fight, they take over the turrets and blow up the dropship, destroying the Trandoshan base on the ship and wiping out their presence. In the time while they recover from the fight with Trandoshans, the Lucrehulk-class battleship jumps out of hyperspace and starts to send battle droid dispensers to the other three hangars to take over the ship. Advisor realizes they can't wait for help from Coruscant and starts sending an emergency signal to any Republic ship near the Corbantis system. After few moments of no response, when the hope seems to be lost, Captain Talbot of the RAS Arrestor responds and sets his ship's course to Delta Squad's position to help. Delta Squad therefore proceeds to the hangar B to fend off the dispensers. As they enter the hangar, they acquire defensive positions and await incoming attack. When the first two dispensers land on the hangar's floor and start to deploy battle droids, Advisor finds a way to seal the hangar and stop the incoming dispensers by blowing up the hangar's force field regulator. As the squad members do so, they continue to the next hangar via the maintenance tunnels, where two dispensers are already deployed and more on their way. After defending this hangar and destroying its force field,the Deltas proceed to the last hangar, hangar D, where the droids are fully deployed and start to spread out throughout the ship. As they arrive to the hangar, Advisor acknowledges the squad of useful ordnance that he can get to them via the lift in back of the hangar and commands them to set up defensive positions and since he can't remotely manipulate the lift, one of Deltas has to override the nearby console. As they do so, an AT-TE walker comes up on the lift. Boss then mounts the walker's main turret and takes out the force field regulator and all the droids with their dispensers in the hangar as well. As the commander of the Lucrehulk-class battleship realizes there's no hope taking over the ship by sending battle droids and the force fields are up, he decides to take aim and fire.
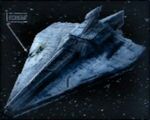
The Arrestor
When Delta Squad realizes the ship won't stand long defenseless against the larger Separatist battleship, Advisor leads them to the turbolaser control room to return the fire. Fighting countless hordes of battle droids and their own reprogrammed defense turrets, Delta Squad arrives to the designated control room and is tasked slicing three terminals to program all turbolaser batteries to attack the largest enemy target in range. While the Deltas are slicing and fending off many droids, Captain Talbot with his ship, RAS Arrestor arrives at the location and opens fire on the separatist ship. Shortly after that, Deltas manage to turn on their own weapon systems and together, with the firepower of two Acclamators they defeat the Separatist battleship. As the droid remote controls are destroyed with the ship, all enemy droids within the Prosecutor are deactivated and the ship is finally secure
Kashyyyk missions
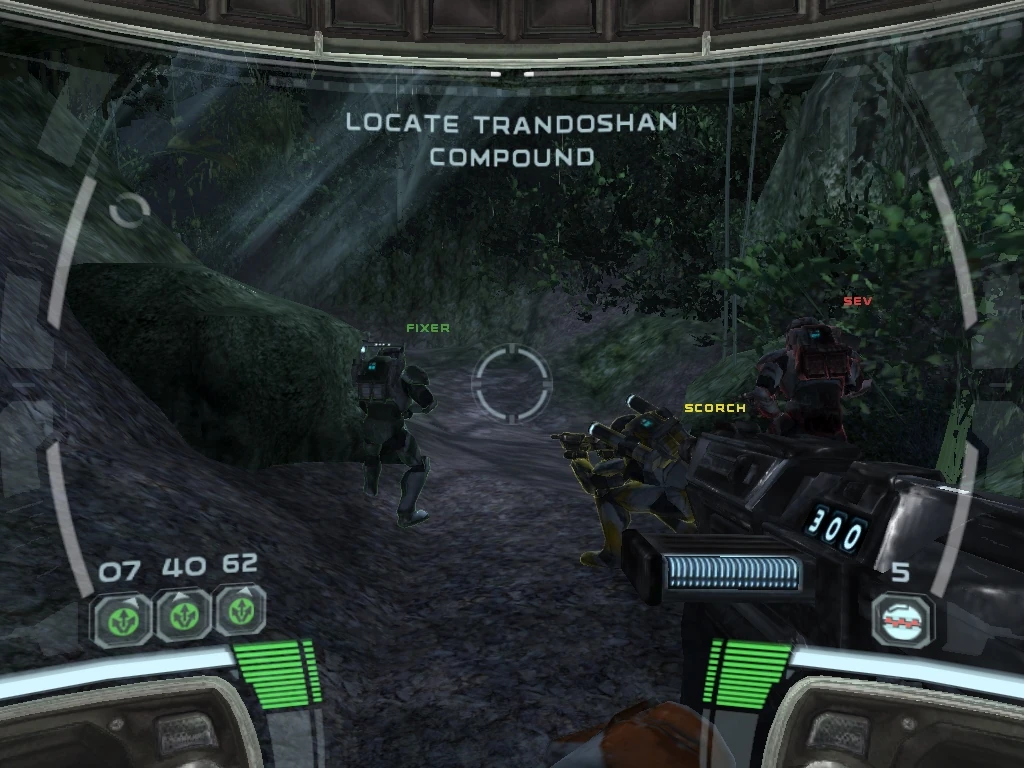
As the war drags onward, Delta Squad participates in increasingly dangerous missions. A cry for help is heard by the Republic from the Wookiee homeworld of Kashyyyk, where Trandoshan slavers have established their camps and are enslaving the Wookiees with the help of Separatist weaponry. Delta Squad is sent to rescue the Wookiee chieftain Tarfful, which has been captured by the Trandoshan presence on this planet weeks before the beginning of Delta Squad's mission. Delta is secretly inserted in the deep jungle of Kashyyyk near one of the Trandoshan slaver camps and proceeds through the main entrance. After entering with some difficulties with a trap set by the slavers, the squad infiltrates the camp and releases few imprisoned Wookiees. Moving through the camp, they spot a starfighter that looks familiar to the Advisor. He then tasks them finding the ship and letting the command get a closer look to identify it. As they proceed to the designated landing pad, they spot the ship and it's owner, General Grievous himself. As the General realizes he's seen, he warms up his fighter to escape. Deltas are now tasked to quickly get to him and stop him. On the way to the landing pad, they finally meet Tarfful, the captured Wookiee chieftain. When they spot him behind a force field, he is being held by two IG-100 MagnaGuards and dragged to Grievous's ship, but shortly after they get out of Deltas' sight, the Wookiee defeats the droids, returns and awaits Delta Squad, which is placing a charge to breach the force field and prevent General Grievous from escaping. In the time Deltas get to Tarfful and breach the door leading to the landing pad, Grievous's fighter is already taking off and two of his bodyguard droids attack Deltas. They're ordered to protect Tarfful at all costs as he has information vital to the Republic, however the Wookiee refuses to stand back and fights the tough droids himself, making it even harder to defeat them for the player.
Delta Squad on Kashyyyk
After that, Delta Squad sabotages a vital Trandoshan supply depot and proceeds to the key battle of Kachirho, the beginning of the battle of Kashyyyk. There, they move through the Wookiee tree city, securing important objectives and battling against hordes of advanced battle droids. They destroy the Bridge at Kachirho, cutting the droid army off from its reinforcements, and proceed to secure the Citadel. Soldiering through the most elite CIS forces and weaponry, Delta Squad once again splits up to man four Heavy AA turrets in order to assist in the destruction of a Recusant-class light destroyer. Once the ship is destroyed, Advisor orders the Deltas to regroup at 38's position. However, Sev does not make the rendezvous and the squad manages to grab a last transmission from him, in which it's clear that he is under heavy attack and is possibly injured or killed. Delta Squad prepares to rescue Sev, but the commander orders them to pull back. As they head out on the gunship, devastated by the loss of their comrade, they are debriefed by Jedi Master Yoda. A huge Republic fleet is seen deploying outside the gunship, as Delta Squad prepares for another assignment in the battle.
Soundtrack
The soundtrack for Republic Commando
Republic Commando is notable for being the first official Star Wars game to feature licensed music. The song "Clones," performed by the band Ash, is played during the credits roll at the end of the game. Ash are known for their Star Wars fandom; their debut album was entitled "1977", and contained numerous Star Wars references.
The main bulk of the soundtrack is a break from convention of previous Star Wars games that use abridged versions of John Williams' original score, instead using a combination of Williams' music and new music composed by Jesse Harlin. This new music takes on a high-paced, gritty, and vocal theme compared to the traditional Star Wars score, helping to immerse the player even further in the game.
The Mandalorian battle song Vode An (Brothers All) is also heard throughout several parts of the game, including the main menu and several battle sequences. Other Mandalorian battle songs such as "Gratua Cuun" are played throughout segments of the game, corresponding to the current actions undertaken by Delta Squad.
Credits
Cast
- RC-1138 (Delta Three-Eight or "Boss"), voiced by Temuera Morrison
- RC-1140 (Delta Four-Oh or "Fixer"), voiced by Andrew Chaikin
- RC-1207 (Delta Oh-Seven or "Sev"), voiced by Jonathan Cook
- RC-1262 (Delta Six-Two or "Scorch"), voiced by Raphael Sbarge
- Taun We, RAS Ship Computer, voiced by Rena Owen
- Trandoshans, Trando Multi-player announcer, Clone trooper sergeant, Republic voices, Radio chatter voiced by David W. Collins
- Automated ship voice, Clone troopers, Clone trooper lieutenant, Gunship pilot voiced by Roger Jackson
- Yoda, Captain Talbot, Trandoshan slaver #2 voiced by Tom Kane
- B1 battle droid, B2 super battle droid voiced by Clint Young
Crew
- Director—Tim Longo
- Writers—Ryan Kaufman, Michael Stemmle, John A. Hancock, Justin Lambros
Appearances
| Characters | Organisms | Droid models | Events | Locations |
| Organizations and titles | Sentient species | Vehicles and vessels | Weapons and technology | Miscellanea |
Characters
 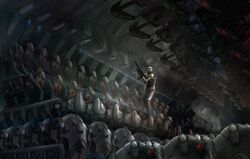 Concept art for Republic Commando.
|
Organisms
Droid models
Events
|
Locations
|
Organizations and titles
|
Sentient species
|
Vehicles and vessels
Weapons and technology
Miscellanea
Reception
The game received overall good reviews with only a couple of minor complaints, most of them regarding the short campaign and limited multiplayer options.
- IGN: 8.2/10. (readers' score: 8.6/10)[1]
- GameSpot]]: 8.7/10. [2]
- GameSpy: 4/5 stars (press average score: 8.2/10)[3]
Behind the scenes
Template:Trivia The main character's number in the game is 1138. This is paying tribute to one of George Lucas's pre-Star Wars projects, THX 1138.
There are several references to the original trilogy quotes. When you approach B1 battle droids, Scorch says "Ah! These must be the droids we're looking for!" and "Look sir, droids." Also, when slicing, Scorch can somtimes be heard humming The Imperial March and when you approach the Core Ship, Sev says, "Look at the size of that thing," both references to A New Hope. When Boss is pointing his weapon at a lightsaber, he says, "An elegant weapon for a more civilized time, eh? Well, guess what? Times have changed!" is another reference to A New Hope and sometimes when a squadmate says something which is not related to the topic, someone says "Cut the chatter" as in the Battle of Yavin.


Concept art for Republic Commando
Whenever the enemy kills a squadmate, another member mutters something insulting them. This also occurs if you kill a squadmate via explosives or rifle fire, for example Sev would say "If you do that again I will kill you myself"
If playing online and on the Ghostship level you can find a lightsaber under the stairs of the Republic base by where the flag is in CTF/Assault.
Another lightsaber can also be found on the ship in campaign mode when the player has not yet regrouped with his squad. The second time the player has to burst away a barricade, he can turn right and crouch through a little tunnel. If he then turns right again, he will encounter a dead clone trooper and the lightsaber. This also triggers a comment by 38 on Obi-Wan description of a lightsaber in Episode IV as a "noble weapon of a more civilized age."
Several holograms in the game display Aurebesh text which reads "I hate computers so much."
Despite the fact that it means "Curse", in game the word "Fierfek" acts as a cheat code that refills all your ammo and grenades.
The game features high levels of violence, an uncommon occurrence in a Star Wars game. For example: when the player punches an enemy to death or kills them any other way when they're at very close range, it (the enemy) essentially spills blood (or oil in the case of droids) over the clone commando's helmet visor, which subsequently cleans itself automatically. The Geonosians (having the most violent death graphical sequences of organic enemies) can explode if enough damage is dealt. Also, if a Geonosian is shot at somewhere on the head with the DC-17m Sniper Attachment, the Geonosian's head will blow off. Another example of heavy violence is that the player can venture through a Geonosian birthing chamber and kill Geonosian infants. Also, if a player shoots his Wookiee allies, they bleed red blood. Furthermore, in the Acclamator-class assault ship raid, there are at least two instances of clone troopers lying torn apart on the ground with blood spills near them. Due to this, it was given the equivalent of an M rating in Germany due to the fact that Germany has less tolerance for blood in games. As said by game designers in the "Making Of" section of the bonus material. For years players almost always played as Jedi, what they wanted to do was give the player a different view of Star Wars universe, through the eyes of "A hardened Clone Commando".
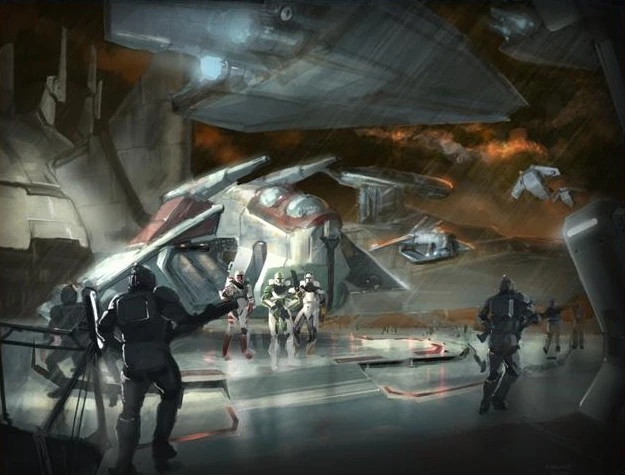

Concept art for Delta Squad
On the second part of the level "Attack of the Clones," during the ride down the booby trapped elevator, a piano remix of The Imperial March can sometimes be heard.
The Chaykin Cluster could be named after Andrew Chaikin, the man who voices "Fixer." Another possibility is that of Howard Chaykin, artist of the adaptation of Episode IV published by Marvel Comics.
Various voices/sounds used for the B2 super battle droids were later stocked and reused for the ones in the Star Wars Episode III: Revenge of the Sith (video game) as well as for the IG-100 MagnaGuards that are encountered in the game.
A map editor was released with one of the patches to Republic Commando. It uses the Unreal engine, UnrealEd. - The Clone Adviser notes once that "wookies don't take kindly to friendly fire." Interestingly, if you shoot at your wookie allies or squadmates too much, they will say "38's gone mad!" or something similar, and attack you as if you were a hostile, eventually killing you.
Canceled sequel
During development a sequel was already being planned but was canceled in 2004 with only as far as concept art and sketches made.
Notes and references
External links
 LucasArts Announces Star Wars: Republic Commando on StarWars.com (content now obsolete; backup link)
- What is a Republic Commando? on StarWars.com (content now obsolete; backup link)
- The Art of Star Wars Republic Commando on StarWars.com (content now obsolete; backup link)
- The Squad is Your Weapon: Star Wars Republic Commando Tactics on StarWars.com (content now obsolete; backup link)
- The Making of Star Wars Republic Commando: Temuera Morrison on StarWars.com (content now obsolete; backup link)
- Troop Movements: Animating Republic Commandos on StarWars.com (content now obsolete; backup link)
- Star Wars Republic Commando: Out Now! on StarWars.com (content now obsolete; backup link)
- Republic Commando on Wikipedia
- Star Wars: Republic Commando on MobyGames
- Template:Imdb title
- Modding Community
- Clonecommandos.net, a fansite and Republic Commando Forum
- Republic Commando('s head) cameos in Force Unleashed demo, an article depicting Delta 1138's helmet in The Force Unleashed demo.