
Warning: This infobox has missing parameters: parents, pronouns, children, siblings, type, partners, families, feathers and unrecognized parameters: hidep, hidec, era, imageBG, hideb
- "There's a title reserved for the most prestigious among us, whose wisdom and skill safeguard the galaxy. It hasn't been bestowed in thousands of years."
"But you have proven worthy. Now the Council names you Barsen'thor, Warden of the Order." - ―Masters Jaric Kaedan and Syo Bakarn
The third Jedi to hold the title of Barsen'thor - also known as the Scorekeeper's Herald by the Trandoshan hunter Qyzen Fess - was a Jedi Master of great importance who lived during the Cold War and was instrumental in the Jedi Order's and the Republic's effort against the Sith Empire.
Biography
Training on Tython
Early training
- "There is no emotion, there is peace. There is no ignorance, there is knowledge. There is no passion, there is serenity. There is no chaos, there is harmony. There is no death, there is the Force."
- ―Master Syo Bakarn recites the Jedi Code to the individual
A Force-sensitive individual was born at some point during the period of galactic history marked by the resurgence of the Sith Empire, the resulting Great Galactic War between the Empire and the Galactic Republic, and the Cold War that followed the conflict.[1] A child prodigy, whose Force powers manifested at a very early age,[7] the individual was discovered by the Jedi Order and trained as a Jedi under several masters during the Cold War. The young Jedi Initiate was considered extremely wise for their age and displayed a remarkable connection to the Force, something unheard of in decades.[1] In 3,643 BBY.[8] the young Jedi was eventually sent to the ancestral Jedi world of Tython to learn from an official mentor and further develop their unique connection with the Force, following the path of a Jedi Consular. The individual was assigned as a Padawan to a respected Jedi Master and scholar called Yuon Par, who specialized in archeology. Arriving via a shuttle down to the planet's surface, the individual landed at a remote meditation temple known as the Masters' Retreat. There, the young Padawan was greeted by the famed Jedi High Council Member, Master Syo Bakarn, while Master Par was delayed on her archaeological inquiries. When Par finally arrived, she informed her new apprentice of an urgent matter. A team of Jedi researchers had recently uncovered several teaching holograms—priceless holorecordings made by the founders of the Jedi Order—in the region known as the Tythonian Gnarls. However, the native Flesh Raiders, known for their tendency to destroy such invaluable findings, had started rampaging through the region. As a first official training task, Par's Padawan was assigned to go to the Gnarls and retrieve the hologram's projectors so that they could be preserved.[1]


Yuon Par, the Consular's Master
The Jedi Consular successfully defeated the attacking Flesh Raiders and retrieved three of the four recorders, containing the recordings made by Masters Cala Brin, Garon Jard, and Ters Sendon. However, the individual found out that the fourth holoprojector had been stolen. They reported the discovery to Master Par, who was surprised by that fact. The Flesh Raiders were not known for stealing artifacts; they usually merely destroyed them. Par promised to look into the matter and instructed the student to meet her at the Jedi Temple. Arriving at the Temple, the Padawan found Par in a conversation with a Trandoshan, whom the Jedi Master introduced as Qyzen Fess, an old friend of hers who was on Tython on a hunting expedition. Par also told the apprentice the information she had managed to discover about the missing holorecording. The recording belonged to Master Rajivari, the fourth of the founding members of the Order, who fell to the dark side of the Force and betrayed his fellow Masters. Par suspected that the thief was likely from the Kalikori Village, an illegal settlement of Twi'lek Pilgrims, driven from their homeworld of Ryloth by religious prosecution. As the Pilgrims lived in a state of poverty, the thief was most likely intending to sell the ancient device.[1]
Afraid that the holoprojector could hold the most powerful and darkest secrets of Rajivari, Par tasked the Padawan to travel to the Kalikori Village and speak with the captain of the village guard, Bashenn, in hopes of hopefully discovering the thief's identity. However, the Consular was instructed to be delicate in their task, as the Jedi Order was oficially forbidden from helping the Pilgrims, due to them being on Tython in violation of Republic law. Once in the Kalikori Village, the individual spoke to Bashenn as instructed and discovered that Nalen Raloch, the village's dueling champion and the person responsible for defending his people against Flesh Raider attacks had taken the holoprojector and ventured deep into Flesh Raider territory. The Padawan followed Raloch's path and found the holoprojector in Raloch's camp established inside a Flesh Raider cave. Raloch soon arrived himself, explaining to the Consular that the reason he had stolen the holoprojector was to find a way to defeat the Flesh Raiders once and for all and protect his people from them. Raloch was, in fact, sensitive to the Force and had gained some knowledge on how to manipulate it from Rajivari's hologram. Demonstrating what he had learned, Raloch used the Force to collapse the Flesh Raiders' cave in an attempt to destroy the Raiders, before escaping the scene. The Consular took Rajivari's holoprojector and managed to escape from the cave as well. Bringing the projector to Par, the individual activated it. The holographic image of Rajivari spoke enigmatically of "true wisdom," which he had hidden at a location which the "true blade at the sanctuary of the Order" pointed at.[9]
The Fount of Rajivari
- "Master, you seem shaken?"
"I—I'm fine. This is just…hard to believe. After Rajivari fell, sources claimed he created a great archive of his knowledge and teachings. The Fount of Rajivari. Generations of Jedi searched for it, finding nothing. The Fount's considered a hoax by all reputable scholars, but…we just heard proof." - ―The Consular and Yuon Par, after seeing Rajivari's holorecording
Master Par realized that the "true wisdom" Rajivari spoke of was the Fount of Rajivari, a rumored collection of the fallen Master's teachings. The Fount was considered a hoax by the Jedi after numerous unsuccessful attempts to locate it, but the holorecording provided proof of its existence. Master Par also deduced that "the sanctuary of the Order" referred to Kaleth, an ancient fortress of the Je'daii Order, the precursor to the Jedi Order. The fortress's name was a Je'daii word meaning "sanctum." To that end, Par sent the Consular to travel to the ruins of Kaleth and retrieve the mysterious "first blade" in order to locate the Fount before Raloch, who she believed would also be looking for it.[9] Among the ruins of Kaleth, the Consular found a grave containing the remains of the Weapon Master, an ancient Je'daii Master and the creator of the First Blade, the weapon that served as the foundation of all modern lightsabers. The hilt of the First Blade had been hidden among the remains of the Weapon Master and had been guarded all those millenia by ancient Tythonian War Droids. In order to be allowed access to the hilt, one of those droids instructed the Consular to undertake the challenges the Weapon Master had devised for his students to prove their combat prowess. The Padawan defeated a number of training droids around Kaleth and was granted access to the hilt, which appeared heavily modified and contained data encrypted in it by Rajivari. As they reported that discovery to Master Par, the latter started to believe that the Force itself had intervened in the training of her Padawan and was now guiding the training process, an opinion which—as the Padawan later discovered—was not shared by the Jedi Council.[10]

Nalen Raloch, the Force-sensitive Twi'lek, whom the Consular tried to stop from finding the Fount of Rajivari
The individual delivered the hilt of the First Blade to Par, who informed her apprentice that after further analysis of Rajivari's hologram, she found out that the hilt needed to be taken into a cave in the nearby mountains, which served as the meeting place for the very first Jedi Council. Once brought inside the cave, the hilt would then supposedly point to the location of the Fount. Qyzen Fess, who was once again present at the scene, stated that he would assist the Padawan in their search and departed from the Jedi Temple with a head start.[10] Entering the cave, the individual fought their way through some Flesh Raiders and reached its end, locating a number of ceremonial carvings and a pile of bones. The Consular also met Fess there, who agreed to share "Jagannath points" with the individual for the "hunt." Fess explained to the Padawan that Jagganath points were a concept of the Trandoshan religion. A Trandoshan was granted Jagganath points for each kill by the goddess known as the Scorekeeper. Removing the pile of bones, the Consular discovered an ancient pedestal, which contained an alcove the same shape as the First Blade.[11]
However, a trio of Twi'leks Pilgrims from the Kalikori Village, led by a female called Allia, entered the cave. The Pilgrims, who were working for Raloch, demanded that the Consular handed the hilt to them, but the individual was able to convince them that Raloch had been corrupted by his thirst for power, and the Twi'leks left peacefully. Inserting the hilt inside the pedestal, the Consular was presented with another recording of Rajivari, discovering that the Jedi Master and the three fellow founders of the Jedi Order had become members of the very first Jedi Council. However, Rajivari had disagreements with the rest of the Jedi Council regarding which direction the fledgling Order should be taken. Therefore, he assembled an army of followers and planned to assassinate his fellow Councilors. The image of Rajivari also provided the Consular with a map showing the way to the Fount, but the Padawan was unable to decipher the map's directions. Therefore, the individual and Fess returned to Master Par, who showed her apprentice a hologram she had received from Raloch. The Twi'lek had been set back in his search for the Fount after his fellow Pilgrims failed to bring him the hilt, but he had other ways to find Rajivari's archive, and he threatened to kill the Consular should the latter try to stop him.[11]
The Consular, Par, and Fess analyzed a set of three coordinates shown in Rajivari's map. They were able to decipher two of them, but the third one, which looked like a rock formation was unfamiliar to both Par and the Padawan. However, Fess stated that he had seen similar markings during his hunting trips and told the two that he would search the waterfall caves in an attempt to find anything. The map's code, however, also contained a warning that the path to the Fount of Rajivari was filled with numerous traps that only those who had knowledge of Rajivari's philosophies and followed his steps could pass. Kaleth was known to have served as the fortress of Rajivari and his followers, and several computer terminals had been found in the ruins. Believing that the terminals could be accessed using the hilt of the First Blade,[11] the Consular traveled to Kaleth in hopes of finding some records of Rajivari's teachings in those terminals. The terminals contained recordings made by Rajivari's apprentices. The Consular discovered that Rajivari's attempt to kill the Jedi Council had failed, and the Jedi had besieged Kaleth in retaliation. Rajivari's followers held the line to the end, but were ultimately all killed, while their Master abandoned them and escaped. The individual learned several of the Rajivari's principles, which dictated that mercy was a foolish act and held strength in great esteem. Returning to Par, the Padawan discovered that Fess had not returned from his mission yet.[12]
The Jedi traveled to the waterfall cave in search of the Trandoshan, encountering a band of hostile Twi'leks inside. Defeating them, the Consular found and freed Fess from a cage, who had deciphered the last coordinate. The Trandoshan explained that Raloch had tracked him, captured him, and questioned on the location of the Fount. Fess was also greatly distraught, as being captured alive was considered the greatest of humiliations in his religion and he had lost all of his Jagganath points. Fess said that after he refused to tell anything to Raloch, he was visited by Master Par, who asked for the final coordinate and behaved very strangely. However, the Consular realized that since the real Par had been at the Jedi Temple all that time, the image Fess had seen must have a been a Force trick employed by Raloch. With the knowledge of the final coordinate, the Consular was able to triangulate the location of the Fount, which turned out to be an ancient acropolis inside the ruins of the city of Vur Tepe, also known as "the Forge;" named so after the Forge, an ancient machine located nearby, where lightsabers used to be made by the Jedi of the old times. Fess decided to accompany the Consular in their search, hoping to reclaim some honor he had lost. After defeating a large number of Flesh Raiders inside the acropolis, the Padawan faced the traps the map had mentioned. A series of visions manifested before the aspiring Jedi, presenting challenges associated with Rajivari's philosophies, but using the knowledge he had acquired from Kaleth, the individual was able to pass them all and finally reached the Fount of Rajivari. To the Padawan's surprise, they discovered that the spirit of Rajivari himself inhabited the Fount. Rajivari's stubbornness allowed him to cheat death and remain as a ghost inside his laboratory, where he had been waiting for a new apprentice, who would bring his vision of the Jedi Order to life. Rajivari informed the Padawan that Raloch had already visited the Fount and left after learning from Rajivari.[13]
The Consular crafts the lightsaber inside the Forge.
Raloch was greatly changed by the power he discovered within the Fount, however, and was seeking to destroy the Jedi Order completely, starting with the Forge. Rajivari realized the mistake he had made by teaching Raloch, explaining that the destruction of the Order was never his goal—he merely intended to rebuild it. The spirit of the Jedi Master asked the Consular to stop Raloch. In order to do so, Rajivari advised the individual to find a lightsaber crystal inside the caves leading to the Forge and use it to power the hilt of the First Blade in order to create a fully-functional lightsaber. Rajivari then became one with the Force, while the Consular and Fess departed toward the Forge.[13] Passing through the caves leading to the ancient machine, the two found a crystal formation. However, when the Padawan tried to extract one of the crystals, they were attacked by a Dark Beast that guarded the caves. Having defeated the beast and gathered a green lightsaber crystal, the Padawan and their companion reached the Forge ahead of Raloch. While Fess stood guard, the Consular deeply concentrated and used the machine to create a working lightsaber.[14]
Upon creating the lightsaber, the Consular barely had time to test it when Raloch appeared, escorted by Allia and another Twi'lek named Keth. Raloch's companions hesitated, however, to follow their leader's plan of destroying the Forge, although Raloch tried to convince them that what he was doing was right. Ultimately, Allia and Keth decided to stay out of the fight as Raloch attacked the Consular. The individual defeated the fallen Twi'lek but spared his life, instead instructing him to go to the Jedi Temple, where his fate would be decided. After Allia and Keth took the wounded Raloth away, Fess approached the Consular. The Trandoshan was impressed by the individual's bravery and proclaimed that he would follow them everywhere they would go, as Fess now considered them to be the "Herald of the Scorekeeper." The Padawan returned to the Jedi Temple to report on the mission's progress to the Jedi Council and Master Par. There, Grand Master of the Order, Satele Shan, informed them that Raloch had been undergoing kolto treatment after their battle. Believing the Consular ready to become a fully-fledged Jedi Knight, Master Shan asked the latter to decide Raloch's fate as a final test. The individual instructed Raloch to be trained as a Jedi so that he could learn to control his burgeoning Force abilities. Following that decision, Par proclaimed her apprentice a Jedi Knight. However, in the midst of the ceremony, she suddenly fell ill. When Par was taken for treatment, Fess revealed that the woman had been suffering from her illness for a long time, but she chose to keep it in secret. It was decided to send Master Par to the galactic capital of Coruscant, in hopes that Jedi researchers who were working on excavating the old Jedi Temple that had been ravaged during the Sacking of Coruscant, might find something to cure her. In the meantime, the Jedi on Tython would study the discoveries the Consular had made pertaining to the Fount of Rajivari. The newly appointed Knight was then instructed to travel to Coruscant as well to oversee Par's treatment.[14]
The Threat of the Dark Plague
The Noetikons
- "The ritual is a difficult one to learn, Jedi, and will take many hours of deep meditation and study."
"I am ready, master." - ― Master Wole Vahn cautioning the Consular on the learning of the Shielding Technique

The Consular consults the Noetikon of Science.
Embarking on their journey, the Consular and Fess first took a shuttle that brought them to Carrick Station, the main staging area of the Republic fleet. There, the Knight was greeted by Kel Dor Jedi Master Ostar-Gal, the Keeper of the Jedi Archives and a close friend of Par's. Ostar-Gal advised the individual to seek out Master Dynaroth for the next phase of the Knight's continuing training. Master Dynaroth, in turn, helped the Consular choose the path to follow, either that of a Jedi Sage or a Jedi Shadow.[15] After arriving on Coruscant, following the instructions the Consular was provided on Tython, they traveled to the Senate Building and met with Attros Finn, a Mirialan Jedi researcher who was tending to Par. The Jedi Knight found Par in an unstable condition, seemingly talking nonsense about someone named Parkanas as well as a mysterious "Dark Man." Finn believed that the key to discovering the cure to Par's illness laid within the Jedi Archives, but accessing the information was a problem, since the Temple currently laid in ruins. However, the Temple's artificers had created a set of three special holocrons, called the Noetikons, to sort through all the information, with the personalities of the Order's greatest Masters imprinted in those holocrons. The Noetikons had been stolen from the Temple, but Finn had a lead on one of them. Republic security had witnessed Gand scavengers from the Migrant Merchants' Guild, a shady refugee consortium, carrying a Noetikon. One of the Gand had been detained, but he refused to talk. The Consular and Fess then departed to talk to Republic officer Alec Efran, who had the Gand in custody, while Finn began working on finding a lead to the second artifact.[16]
The Jedi confronted the Gand scavenger, persuading him to talk about the location of the Noetikon. The Gand revealed that a man named Lars Baddeg had given it to the leader of the Gand scavengers, Aulus G'luun, and instructed to keep the relic out of Jedi hands. To this end G'luun developed a system of special signals which he issued from a signal station in the Old Galactic Market on occasion, passing the Noetikon from one Gand to another for safekeeping. The Consular managed to crack the Gands' code and summoned G'luun himself to the meeting place, convincing him to hand over the Noetikon, which turned out to be the Noetikon of Science. Its gatekeepers, Masters Tharis Orne, Arca Jeth and Vandar Tokare, scoured their vast library of scientific knowledge, but were unable to find any clues to Par's sickness. Ruling out any medical sickness as a possible answer, they instead suggested to the Knight to seek out the Noetikon of Light and ask its gatekeepers if they knew of any mystical illness that could fit the description. The Consular returned back to Finn, who had in the meantime found a lead on the second Noetikon. His assistant, Pharen, had a sister who worked at the Silent Sun Cantina in the Black Sun territory. Black Sun, a local criminal gang, had turned the cantina's back rooms into some sort of secret warehouse. Pharen's sister had seen the Noetikon among one of the shipments going inside the cantina.[17]
The Jedi Knight traveled through the dangerous Black Sun territory and reached the Silent Sun Cantina, wherein he met a Human Doctor called Maer. The Doctor explained to them that Black Sun was smuggling contraband offworld inside people's bodies. The entire operation was paid by the Justicars' Brigade, a local Coruscant vigilante organization. Lars Baddeg was one of the Justicars, and he paid the Black Sun to smuggle the Jedi artifacts, and the Noetikon in particular. However, the smugglers started hurting badly from the contraband implanted inside of them and some of them were even dying. Also, they could not get the necessary paperwork to travel from Coruscant, so they were still inside the cantina, with Doctor Maer desperately trying to save their lives. The Doctor had discovered a magnetic ID tag printed on one of the artifacts that he had extracted, so he realized that the Black Sun had a special scanner with which they were able to identify the smugglers carrying the relics. The Consular found one of the scanners and used it to identify the man carrying the Noetikon inside of him. After healing him by administering a medpac and extracting the Noetikon from his body, the Jedi Knight activated the Noetikon of Light, consulting Masters Noab Hulis, Wole Vahn, and Nomi Da'Boda, but they had no information on the cure as well. As a final desperate measure, the gatekeepers directed the Consular to the final Noetikon, the Noetikon of Secrets, warning the seeker of knowledge about some of the dark secrets that Noetikon possessed.[18]
The Jedi Knight was then contacted by Finn, who informed them that Par's condition deteriorated and she even attacked Pharen. Finn had her restrained, but he asked the Consular to return to the Senate Building and hopefully calm her down. The Knight found the ill Jedi Master agitated, willing to hurt someone. Clearly not having control of herself, Par activated her lightsaber and attacked her former student. The latter was able to defeat the Jedi Master and knock her unconscious.[19] Realizing that Par's condition worsened with every minute, the Consular and Fess traveled to the Justicar Territory in search of the final Noetikon. There, they located Lars Baddeg, who revealed that he was working for someone else, after that person promised to give him rule over the entire Justicar Territory if he managed to smuggle the Noetikons to them. Seemingly giving up on his cause when confronted, Baddeg told the Consular to simply take the final Noetikon. However, when the individual activated it, the Jedi and the Jedi's Trandoshan companion appeared in a room filled with white light. An entity calling itself the Master of Questions explained to the Consular that something went wrong when the holocron was activated and the Jedi's consciousness was transported to that place of nothingness. The Master of Questions agreed to let the Jedi go, provided the latter answered three questions correctly. However, should the individual answer wrong, they would be trapped inside forever.[20]
The Jedi answered the questions correctly and was able to escape from Baddeg's trap, witnessing him talking to a a Sith, certain that he had dealt with his unwanted visitors. From their conversation, the Jedi learned that the Sith was merely a servant of another Master. However, once the Sith saw the Consular and Fess unscathed, he instructed Baddeg to kill them. The Justicar tried to follow the command, but the Consular defeated him and retrieved the real Noetikon of Secrets. Its gatekeepers were named Jesper Altex, Bastila Shan and Chamma; all of them had once turned to the dark side but then returned to the light. Their knowledge of dark side secrets helped to finally find out about Par's illness. It was encountered by the Jedi Order before only once. A Sith Lord named Terrak Morrhage had created a plague that afflicted the minds of Jedi. Morrhage used the plague to control the minds of his victims and turn them to the dark side by the hundreds, using the afflicted Jedi to fight the Order. Morrhage was only stopped when a Jedi Healer developed a shielding technique, which could be used to break Morrhage's control on his victims. The healer used the technique to sever the affected Jedi from Morrhage, one by one. However, each time he used the technique, it cost him some of his own strength, to the point that it eventually cost him his life when he was done. The Consular realized that the only way to save Master Par was to learn the technique. In order to do so, according to the Noetikon of Secrets, the Jedi had to go to the Jedi Archives inside the ravaged Jedi Temple and use the combined knowledge of all three Noetikons.[20]
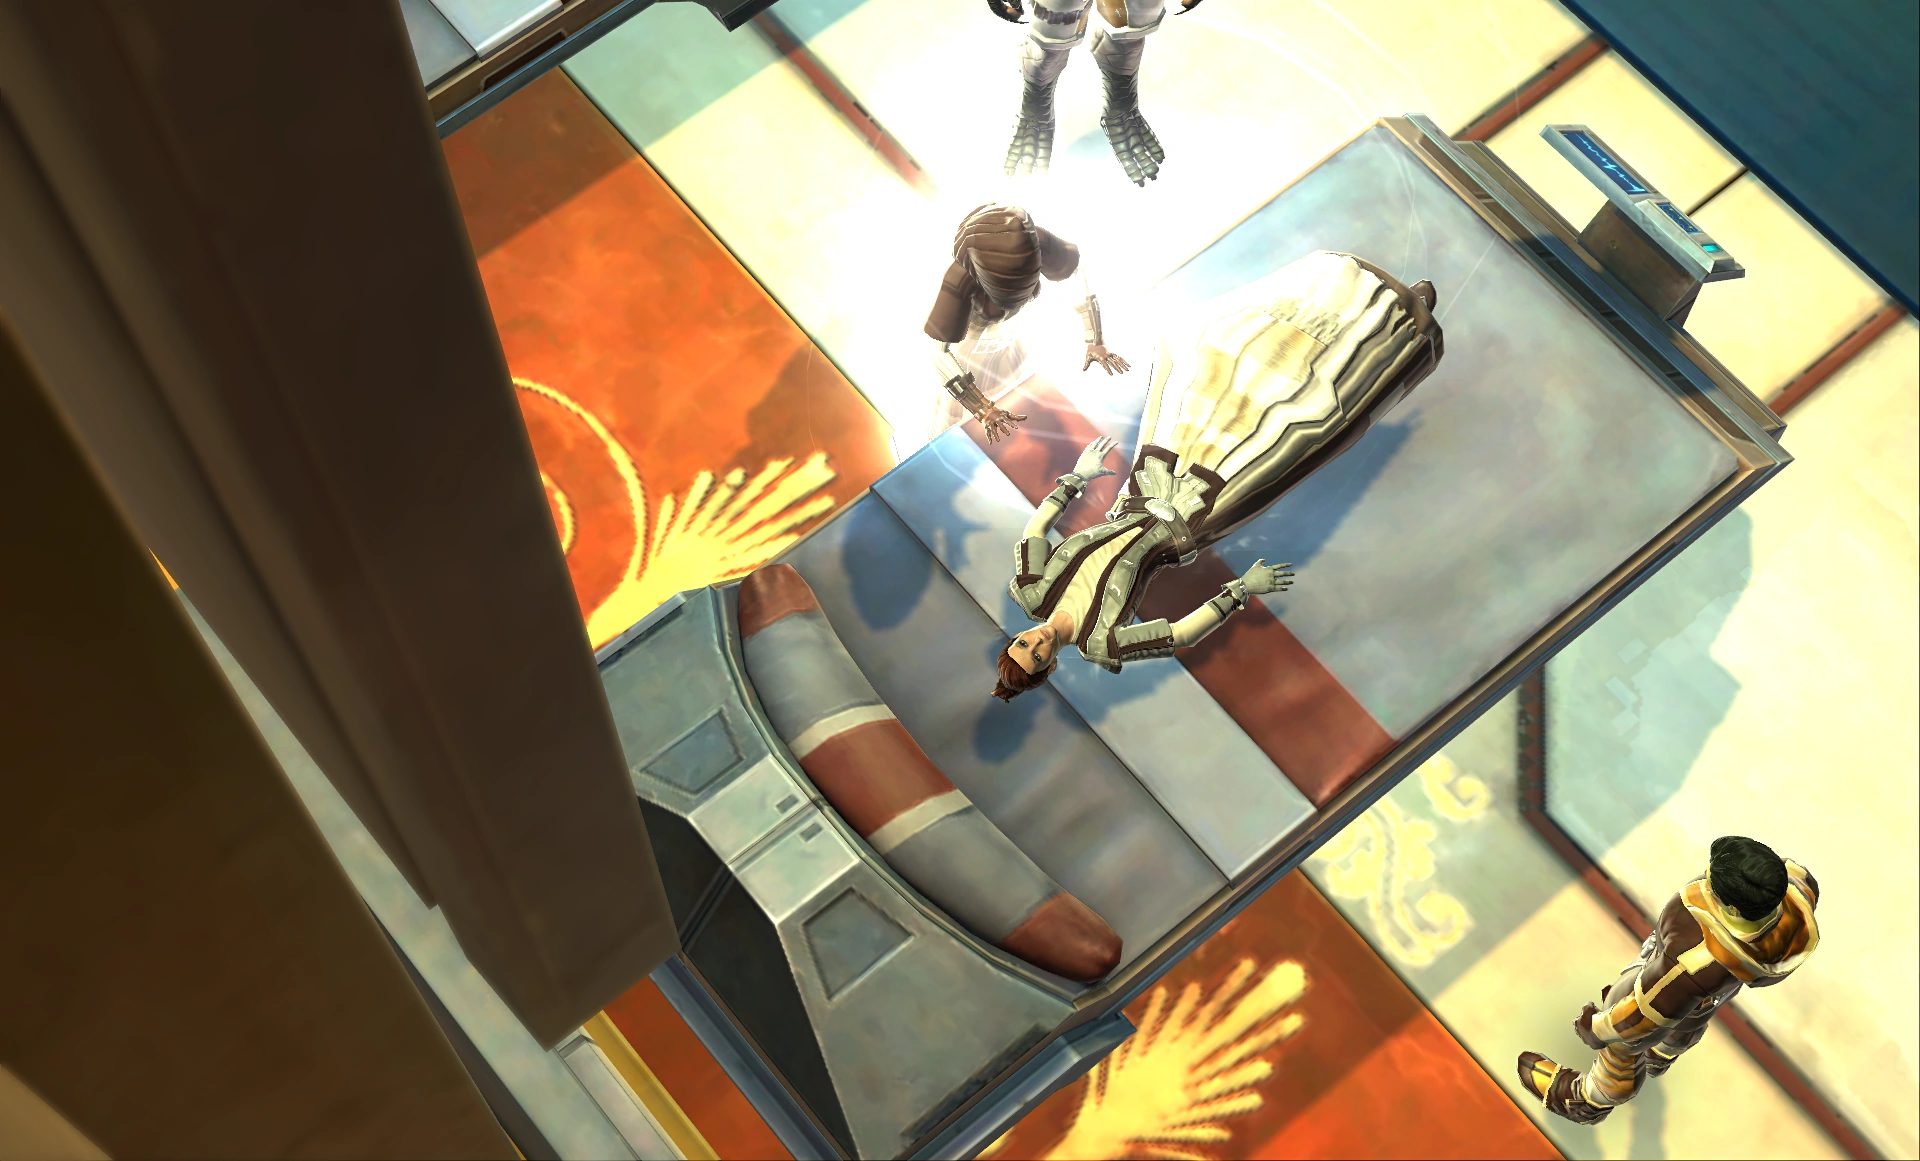

The Jedi Consular performing the shielding technique on Yuon Par
The Consular and Fess went through The Works, the industrial sector of Coruscant and reached the Jedi Temple.[21] Fighting their way through Imperial forces that had been searching the Temple for a valuable Republic navigation computer,[22] the duo reached the Jedi Archives. Upon activating the three Noetikons using a special terminal, all nine holographic Jedi Masters appeared before the Consular, and, after deep meditation on their part, taught the Jedi the shielding technique. Right afterward, however, the Sith that Baddeg had spoken to earlier entered the Jedi Archives, intent on stopping the Consular, before the latter could use the newly acquired skill to cure the afflicted Jedi Master. Upon entering, the Sith used Force lightning to destroy the terminal, effectively preventing future Jedi from ever learning the ritual and allowing his master, the Sith behind the plague, to destroy the Order once the Consular was killed and the secret of the shielding technique was lost forever. The Jedi Knight was then attacked by the Sith, but managed to defeat him. They were then contacted by Master Syo Bakarn, who had been overseeing the Knight's progress and instructed the latter to hurry back to Master Par, who was fading away with every minute. Returning to the Senate Building, the Jedi used the technique to shield the sick Par from the plaguemaster's influence. Although she was now conscious and felt considerably better, she was still not fully cured until the plaguemaster was defeated.[21]
The Jedi Council, gathered on Coruscant, summoned the Knight and informed the individual that Master Par's was not an isolated case, as other Masters began falling out of contact, supposedly falling victim to the plague. In order to stop the disease from spreading, the Sith controlling it had to be defeated, but the Jedi Order had no clue to his identity and no other plan but to shield the afflicted Masters and try to gather any clues from them. As such, the Jedi Knight was asked by the Council to travel around the galaxy and use their newly acquiered technique on the Masters. In order to do so, they were provided with a personal ship, a Defender-class light corvette. After saying goodbye to Par, the Consular and Fess departed Coruscant on the newly acquired starship, while also meeting the onboard droid, C2-N2, a non-combat C2-N2 unit that served as a medic and ship's steward.[21] The Consular was also contacted by Flight Commander Judin of the Republic Navy, who recruited the Jedi into the elite fighter squadron known as the Coruscant Aegis. The Coruscant Aegis was a brand new initiative created by Fleet Admiral Numinn that was intended to quickly deal with Imperial offensives. The Consular was given the call sign "Guardian" and would fly a number of missions for the Coruscant Aegis over the course of the following years.[2]
Curing the afflicted masters
Taris
- "Too late, Jedi. You wandered too long, too long. But now the reactor will bathe Taris in fire. No black rock. No shadow. The Republic will not spread it! I can cleanse it here, cauterize the flow!"
- ―Master Cin Tykan, while afflicted by the plague
The Jedi's first assignment was to travel to the ravaged world of Taris to locate Master Cin Tykan. Once a great ecumenopolis, Taris had been ravaged by Sith Lord Darth Malak during the Jedi Civil War more than three hundred years ago, reducing the planet to a desolated swampland populated by rakghoul mutants. A renowned scout, survival expert, and pathfinder, Tykan had been assisting the Republic efforts in the restoration of the planet, but he had recently gone silent and stopped sending reports to the Jedi Council, leading them to believe that Tykan could have been affected by the plague. After landing on Taris, the Jedi Knight was instructed by Master Bakarn to go to the Republic base and meet Tykan's Padawan Aris Vauranelle and Captain Nelex of the Republic Expeditionary Forces, whom Tykan was working with. Both of them were surprised to hear of Tykan's possible illness, explaining that the Jedi Master had recently left with a research expedition on a mission to take pollution readings and displayed no signs of the plague. The expedition was not due to return in days, but Nelex contacted it just in case. The expedition's Republic guardsman, Sergeant Valoy, answered to the hails, claiming that the expedition was gone and requesting backup. Assuming that something went wrong but unable to assemble a rescue team in time, Nelex gave the Consular the expedition's coordinates.[23]
Arriving at the marked location, however, the Jedi found only a lone utility droid, before being attacked by a group of assassins from the Death's Claw organization. After defeating them, they spoke to T8-C3, the expedition's survey droid that was in the area, which informed the Consular that the expedition had gone offtrack and had been attacked by the Death's Claw. Most of the expedition was killed with the exception of Tykan himself and a small survey team, who had left before the attack, carrying with them the expedition's findings, consisting of several medical holocrons and valuable relics. T8-C3 provided the Jedi with the survey team's coordinates, and left the scene, going back to the Republic base. Arriving at the survey team's location, the Consular found the place in ruin, with two expedition members trapped under a large piece of debris. The Jedi used the Force to lift the object and freed the men, only to discover two more members, Laria and Tal, clinging to their lives among the debris engulfed in fire. The Consular used the Force to levitate Tal back to safety and then proceeded to perform the same trick with Laria. By choosing to save the woman, however, they had to sacrifice the holocrons that had also been caught on fire, much to the dismay of the final surviving member of the expedition, Doctor Eraine.[23]
Master Cin Tykan, afflicted by Lord Vivicar's plague, tried to undermine the Republic's reclamation efforts on Taris.
Eraine, Laria, and Tal explained to the Consular that after they had found the holocrons during their expedition, Tykan had decided to take them to the base as fast as possible, leaving the rest of the expedition behind at the ambush site. However, he instead lured the survey team into a trap, ignited the pollution and left them to die, stating that he was punishing them for letting Taris be ravaged three hundred years ago and that soon they would be joined by everyone at the Junction, an old purification facility retrofitted by the Republic to process poisonous gases. The Consular was then contacted by Nelex, who wanted Tykan brought to justice, while Padawan Vauranelle begged the Jedi not to hurt her Master.[23] Traveling to the Junction, the Consular met the factory's security chief and the clearly plague-affected Tykan. Like Yuon Par, the Master also spoke of a man named Parkanas as well as the planet Malachor. He then proceeded to sabotage the main gas line as well as open the factory's vents, letting swarms of rakghouls inside. That forced the Consular to choose to either repair the Junction—which was crucial in cleansing the planet—or saving the factory's workers from the rakghoul attack. The Jedi chose the latter and successfully evacuated a maintenance crew that was trapped behind a blast door.[24]
After the rest of the staff were evacuated from the areas filled with gas, the security chief thanked the Jedi and gave the individual some old Taris infrastructure charts that Tykan had been studying before he fell victim to the plague. The data was encrypted, so the chief instructed the Jedi to bring it to Captain Nelex back at the base, who could decipher it.[24] Nelex himself contacted the Consular at the very same moment, stating that the Republic base was under attack before the transmission was cut off. Trekking back to the base, the Jedi found it swarming with rakghouls, which, as Nelex explained, had been released when Tykan uncovered the rakghoul tunnels beneath the base. The plague-affected Master had also taken his Padawan away. The Knight saved the base by sealing the tunnels, and Nelex was then able to decrypt the data provided by the Junction security chief. From those files, they discovered that Tykan had copied all files pertaining to one of Taris's still functional super-reactors. Sabotaging the reactor could potentially send it into meltdown and trigger a chemical detonation that could destroy the entire Republic reclamation area.[25]
The Consular went to the reactor's coordinates and confronted Tykan and Vauranelle there. In his delirium, Tykan spoke of a Lord Vivicar, finally revealing the plaguemaster's name. Vauranelle, in her affection and loyalty for her Master, had come to believe his mad ramblings about the necessity of sabotaging the Republic's reclamation efforts in order to stop their attempts to "destroy" the natural beauty of Taris, but the Consular convinced her to change her mind. The Jedi Knight was then attacked by the angered Tykan, but they defeated the Jedi Master and used the shielding technique on him, freeing him from Vivicar's influence. Tykan was horrified by the atrocities he had committed and left to Tython to report to the Jedi Council and then willingly turn himself in to the Republic authorities. The individual also contacted Bakarn, informing him of the "Lord Vivicar" Tykan had mentioned, and the Jedi Master promised to start looking into that name. The Consular then left Taris, on the journey to save one more Jedi Master.[26]
Nar Shaddaa
- "My, my. You've got Tharan Cedrax to care about something, Jedi. That's a gift I want on my side. Now. Serve me and—agghh!What the—?What is that thing?"
- ―Duras Fain, trying to take control of the Consular and Tharan Cedrax, before being stopped by Cedrax's exo-tech device


Nar Shaddaa, the world controlled by the Hutts
Their next stop was Nar Shaddaa, a lawless moon ruled by the Hutt Cartel, which had recently found itself clashing with an emerging criminal organization called the Guiding Hand. The Guiding Hand's members were fanatically loyal to their leader, who the Jedi Council suspected to be Master Duras Fain, another one of the affected Masters, who possessed great skill of influencing others with the Force. Fain was known to hate illegal spice trade, so the Guiding Hand's repeated attacks on the Hutts' spice shipments, using tactics that the Jedi Master was known for, provided almost definite proof of Fain's involvement with the gang. The Hutt Cartel was an immensely powerful organization, which had so far been providing its assistance to the Republic. Therefore, the Jedi Council placed utmost priority on stopping Fain, afraid that the Cartel might discover that a Jedi was involved in the attacks on their property and stop their support. Bakarn instructed the Consular to visit his contact on Nar Shaddaa, an exo-technologist named Tharan Cedrax. When the Consular arrived at Cedrax's offices, however, they found that the man was not there. Instead, they were greeted by Holiday, Cedrax's female holographic assistant. Holiday informed the two that Cedrax had ventured into the Nikto sector to deliver a weapon prototype he had been contracted to develop to the Nikto gangsters.[27]
Journeying to the meeting place's coordinates provided by Holiday, the Jedi Knight found Cedrax arguing with several Nikto gang members. Having discovered that the Nikto were planning to use the weapon against the Hutt Cartel, Cedrax tried to call the deal off, afraid of the Hutts' vengeance should they discover who invented the weapon. The Nikto turned out to be members of the Guiding Hand, but when the Consular tried to find out about their leader and asked about joining the gang, the Nikto attacked the Jedi. After defeating them, the Knight spoke to Cedrax, telling him about the Council's suspicions of Fain's involvement with the Guiding Hand. Cedrax thought that attempting to infiltrate the Guiding Hand was indeed the best course of action and informed the Consular of the Red Light Lancers, an organization of tech specialists, who were rumored to be a part of the Guiding Hand. The Lancers had been trying to contract Cedrax to do a special job, so he decided to pretend to be interested in it in order to set up a meeting for the Consular. He also provided the Jedi with the weapon prototype in order to prove the individual's expertise to the Lancers, as well as an earpiece so that they communicate privately. Cedrax also started working on finding a way to prevent Fain's mind control.[27]
The Lancers were delighted when Cedrax agreed to meet them, so the Consular soon went to the Lancers' safehouse in the Red Light Sector, to meet with their leader, Klage, telling him that Cedrax could not come and sent them instead. The Zabrak gang leader was reluctant to hire them for the job, since his orders were to get Cedrax specifically. However, after the Jedi gave him the weapon prototype and answered Klage's tech-related questions, using advice given by Cedrax through the earpiece, they were deemed expert enough and were accepted into the Red Light Lancers. Klage informed the Consular that the job the latter was hired for was to destroy spice factories shared by the Hutts and the Empire in the Lower Industrial Sector. They were instructed to go to the defense network control room there and disrupt the protocols on the primary control node, triggering the factories' automated defenses and killing everybody inside. Returning to Cedrax's offices, the Jedi Knight was informed by the scientist that there was a way to do the Lancers' job, using a Sith overseer's ID Cedrax had obtained. Unwilling to kill innocent factory workers, however, the Consular demanded Cedrax to come up with an alternative. The exo-technologist decided to use a resonator key, a device that, when attached to the primary control node, would fake the network failure. Klage, who would be monitoring the network remotely, would then assume that automated defenses were activated as planned.[5]
Using the Sith overseer's ID, the Consular was able to fool the security at the Lower Industrial Sector and reached the primary control node. Attaching the resonator key was enough to fake the destruction of the factories to Klage, and the Jedi was contacted by the Lancers' leader. The individual was informed by Klage that the Guiding Hand's Master was willing to meet with them inside the tech gang's quarters in the Red Light Sector.[28] Arriving at the provided destination, the Consular discovered that the Guiding Hand was indeed led by Fain, who appeared via a hologram and ordered several Nikto Morgukai cultists present at the scene to kill the Jedi. After the Morgukai were defeated, the Jedi Knight was contacted by Cedrax, who directed the individual to examine the holotransmitter Fain was using. Using slicing subroutines programmed into her by Cedrax, Holiday was able to trace Fain's signal to Shadow Town, an Imperial prison facility located on Nar Shaddaa.[29] When the Consular returned to Cedrax's office to develop a plan to infiltrate Shadow Town, they found a Hutt Cartel enforcer confronting Cedrax. Rumors of a Jedi's involvement with the Guiding Hand had reached the Hutt Cartel, and as Cedrax was spotted working with the Consular, the Cartel suspected that the latter could be the Jedi they were looking for. The Jedi Knight assured the Cartel representative of having no ties to the Guiding Hand, and claimed being merely a friend of Cedrax.[30]
The Consular worked with Tharan Cedrax to stop Duras Fain on Nar Shaddaa
After the thug left, promising to keep watching the two's actions, the Consular and Cedrax discussed their next move. The scientist presented the Jedi with an exo-tech device that he had developed in conjunction with Bakarn. The device was designed to block Fain's mind control powers by paralyzing the part of the forebrain that became active when a Jedi tried to exert his influence upon their target. The Jedi Knight and Cedrax then departed for Shadow Town, fighting through the Imperial soldiers and using Cedrax's expertise to disable the security cameras throughout the sector and cut the power to Fain's hideout. When they finally confronted Fain after fighting through his guards, the Jedi Master told the Consular about a mission to Malachor Three that he and the other affected Jedi had participated in in their youth, and during which one of their fellow Jedi, a man named Parkanas Tark had been lost. Fain tried to exercise his mind control powers, but that failed thanks to Cedrax's device. The plague-affected Fain then attacked the two, but the Jedi Knight defeated Fain and his guards. Before the Consular could shield Fain, however, a Hutt Cartel enforcer, Vorlo Stragen, arrived, demanding to have Fain handed to the Hutts. The Jedi Knight was able to negotiate with the Cartel to let the Jedi have Fain in exchange for a large sum of credits in compensation. The Consular then used the shielding technique, freeing Fain from Vivicar's influence. After Fain promised to return to Tython, the Consular and Cedrax parted ways.[30]
However, as the Jedi was returning to their ship to report to Master Bakarn, they found Cedrax and his holographic assistant waiting in the hangar. Finding all of his current contracts boring and spurred by the encounter with Fain, Cedrax wanted to travel the galaxy and seek adventure, so he decided to join the Consular's crew. Having welcomed Cedrax aboard, the Consular contacted Bakarn, who congratulated them on the expert handling of the Hutt Cartel and the Guiding Hand. However, a new urgent matter had arisen. The Jedi Council had received a distress signal from the Republic starship Carida, related to the plague. The ship was carrying a Jedi Knight named Laranna Fain, Duras Fain's daughter, aboard. Reports by the Republic forces aboard the Carida stated that the young Fain had gone insane and killed several people.[30] Docking with the Carida, the Consular met with the few remaining Republic soldiers let by Lieutenant Bela Whinn. She explained that the ship had been caught in an Imperial ambush. Laranna fought off the attackers, but was wounded in the process. When the Republic soldiers put up call for medical assistance, a mysterious man arrived to the Carida, claiming to be a Jedi Master. He healed Laranna and left, but the girl changed after their encounter. She became violent, killing several people, and reprogramming the droids aboard the Carida to attack everyone in sight. Whinn and the remaining soldiers managed to lock her down in the ship's aft section, but Laranna started slicing into the ship's computer system, planning to shut down life support.[31]
The Consular fought through Laranna's droids and confronted the young woman, who revealed that the man who had healed her was indeed Lord Vivicar, just as the Consular suspected. The individual had to fight Fain, but defeating her was not enough. The girl Force-pushed the Jedi Knight away and locked herself inside an airlock, threatening to open the outer door and commit suicide. However, the Consular was able to convince Laranna to leave the airlock and used the shielding technique on her. Laranna, no longer influenced by the plague, but still not trusting herself, locked herself down in the brig until the Carida would reach the nearest port. Meanwhile, a message came to the Carida from Lord Vivicar himself. The Sith tried to contact Laranna, but seeing the Consular, he realized that his plan had failed. From the conversation with Vivicar, the Jedi learned that the Sith was once a member of the Jedi Order himself, before embracing the teachings of Morrhage, and that—as the Jedi Council already suspected—his control of the plague was limited. Vivicar could only control those he had had personal contact with. Leaving Whinn to take control of the ship and bring Fain to Coruscant, the Jedi reported to Master Bakarn, who had more unfortunate news. Two more Jedi Masters had gone silent, both mentioning that the "darkness was coming," something the other plague-affected Masters kept repeating as well.[31]
Tatooine
- "We were all weak. We all came under the thrall of the dark side. We did things we regretted. But Parkanas was our strength. As we tried to escape, I fell behind, and he ran back to save me. He became trapped—we had to leave him. It was my weakness that killed him."
- ―Eriz Vossan remembers the ill-fated mission to Malachor Three
The Jedi's next assignment took them to the desert planet of Tatooine, where Master Eriz Vossan, one of the Order's best cultural explorers, had dropped out of contact with the Council. The Consular was told by Bakarn to contact Rowan Delk, the man who had served as Master Vossan's guide through the desert and who was now recovering from the Sand Rot, an illness caused by prolonged desert exposure, in the Dreviad Outpost. Master Vossan's research on the various cultures of the galaxy was considered vital to the Order, so the Consular embarked on the search for the Jedi Master immediately. Conversing with Delk inside the Dreviad Outpost's medical center, the Consular was assured by the man that Vossan displayed no signs of the plague and was last seen talking to the local Jawa species in one of their camps in the desert, impressed by their ability to survive in the harsh environment of the planet. Upon arriving at the Jawa camp, the Jedi was attacked by war droids. After destroying them, the Consular talked to one of the Jawas, Tteek Tlek. The diminutive creature said that Master Vossan had instructed the Jawas to dismantle their camp's sandcrawler and build the war droids to fight the Sand People—a nomadic Tatooine species—and take control of the desert. However, Vossan then left the Jawas, leaving only a message that they could not decipher and that was intended for Delk. Now, however, the Jawas had neither the sandcrawlers, nor the droids, after the machines were destroyed by the Consular. As the sandcrawler was crucial to the Jawas' survival, since they used the vehicle to trade, the Jawas tried to fix it by taking parts from other machines, but those spare parts had been stolen by the Geonosian raiders who had spread around Tatooine. The Consular agreed to help Tlek fix the machines, retrieved spare parts from the Geonosians and was given the message in gratitude.[32]
The Jedi Knight traveled to Tatooine on his continuing quest to shield Vivicar's victims.
The Consular returned to Delk's clinic, and the man was able to crack the holorecording's code. Master Vossan stated that he had been looking to find out the answer as to how the species of Tatooine were able to survive such hostile environment, in hopes of finding a way to live through the "great darkness." He also spoke of a cave where he loved to meditate. During one of such meditations, he saw that he was wrong to seek the answers from the Jawas and instead went to try to find luck with the "original species" of Tatooine, although he did not mention which species that was. Delk provided the Consular with the location of the cave Vossan spoke about and signal flares to light the way.[32] Inside the cave in the Jundland Wastes, the Consular lit several torches surrounding a Sand People carving. In the light of the torches, the carving revealed that the Sand People were the original people of Tatooine. Contacting Delk via a holocommunicator, the Consular explained the situation to the man, and the latter said that if Vossan indeed went to the Sand People, "the ultimate warriors," as he called them in his message, then it was worth looking into a group of Sand People who had become overly aggressive and attacked a farming settlement in the nearby settlement known as Malcolm's Dunes.[33]
There, the Consular met Delk and the leader of the settlement, Hale Malcolm. The settlers were initially very aggressive toward the Knight, since Vossan, the last Jedi they had helped by providing him the coordinates of the Sand People's camp had turned on them and started sending the warrior people to attack them. However, the Consular convinced the farmers to provide help and Malcolm drew a map of the route to the Sand People camp.[34] The Jedi Knight and Delk went to the camp to confront the ill Master, fighting through the Sand People, augmented and empowered by Vossan's influence. When they finally found the Jedi Master himself, Vossan tried to convince the Consular that they should follow the Sand People's teachings—to abandon the weak, and value strength only. The individual fought the Jedi Master and emerged victorious, finding more details about the mission to Malachor Three, which was turning out to be clearly connected to Vivicar. The Jedi Masters who had been there had uncovered some terrible evil and were affected by it. As they tried to escape, Vossan fell behind, and Parkanas Tark saved him, but became trapped in the process and was left behind by the other Jedi. The Consular shielded the Jedi Master, but his research on the Sand People still remained. Vossan effectively possessed knowledge on how to create an unstoppable army, and consulted the Consular on what should they do with it. Believing that the knowledge was too dangerous and was against everything the Republic stood for, the individual advised Vossan to destroy his records.[35]
Alderaan
- "Master Sidonie just checked in. She seems well, but very frustrated with herself. She reports that you were able to prevent war from breaking out on Alderaan, however. You've once again done very good work in a tense situation, Jedi"
- ―Master Syo Bakarn commends the Jedi on the latter's work on Alderaan
The Jedi proceeded to fly to Alderaan, a former member world of the Republic now embroiled in a civil war after both Queen Silara Panteer and crown prince Gaul Panteer died, and a noble named Bouris Ulgo usurped the throne. Master Sidonie Garen had been working on Alderaan to organize a peace treaty between the noble houses of Alderaan, in an attempt to stop the war. However, she raised the Jedi Council's suspicions by dropping out of contact for some time, so the Consular was assigned to contact her. The individual started the mission on Alderaan by talking to Hallam Organa, the head of House Organa's diplomatic corps, who had been working closely with Garen. Hallam Organa contacted Garen, who was already at the peace summit, which was held at a secret meeting place, but she declined to let the Consular come speak to her, stating that only representatives of the Houses were allowed to come to the meeting. The Organa delegate was already at the summit, but Hallem Organa and his brother Lew advised the Jedi to become representative of one of the lesser Houses, like House Teral, which was desperate to find a delegate after theirs was murdered. In addition to that, the Teral had been torn between the attacks by House Ulgo and the native Killiks.[36]
The Consular arrived on Alderaan in the midst of the civil war between its noble houses.
The Consular traveled to the Teral residence, and, after helping to fend off an Ulgo attack, was granted audience with the leader of the House, Lord Teral. The individual asked to be made the House's delegate, but there were complications to that. In its current state, House Teral was extremely weak and unable to fend off Ulgo attacks. They planned to form an alliance with the Organa through a marriage between Lord Teral's daughter, Fasha Teral, and Lew Organa, but Teral needed to prove to Organa that they had the ability to defend themselves against their enemies first. To this end, Lord Teral asked the Jedi to go to the commander of Ulgo's forces that besieged House Teral, Astar Vox, a mercenary who was known for being relatively honorable for his profession. The Teral hoped to sway Vox to their side and break the siege. When the Consular attempted to negotiate with Vox at his camp, however, the mercenary maintained that the Jedi had to prove themselves in battle first. The individual successfully fought off all the enemies Vox sent to fight them and convinced the mercenary general to work for House Teral. However, the Consular was then informed that the prospect of the marriage alliance was at stake, as Lew Organa had been kidnapped by House Rist, Ulgo's allies and a well-known organization of assassins.[37]
The Consular rescued Lew Organa from a Rist bunker, and the young man decided to check the Rist's holoterminal in order to find out who had hired the assassins to kidnap him. Lew had heard his kidnappers mentioning Master Garen, but he was not sure what she had to do with the kidnapping. The Jedi and Lew indeed found Master Garen's holofrequency inside the terminal and were able to contact her, indicating that she was responsible for the kidnapping, although she denied her involvement.[6] Upon returning to the House Teral residence, the Consular was named an official representative of the House and was provided with a set of coordinates and a data spike that belonged to the murdered delegate. Lord Teral also asked them to ask the representatives at the summit to strip House Ulgo of their power, in retaliation for what they had done to the Teral.[6] Traveling to the set of coordinates, the new Teral delegate found a shuttle and a computer terminal there. After using the data spike at the terminal, the Consular was taken to the summit's location on the shuttle. Even despite being House Teral's official delegate, the Consular was detained and attacked by the summit's guards, on the orders of Garen.[38]
After defeating them, the individual finally reached the summit, where the plague-affected Jedi Master had already proceeded with her plan. Her mind clouded, she believed that the only future for Alderaan was war, so she brought incriminating evidence on each of the Houses to the summit, reminding them of old grudges, and spurring escalation of the conflict. When the Consular managed to calm the delegates down, the enraged Garen attacked the Jedi Knight, unleashing her Force powers. The Consular bested her in combat and once again used the shielding technique, saving Garen, who, in her plague-affected state of mind, felt responsible for the loss of Tark on Malachor, since she was the one who had developed their plan of escape from the planet. The Jedi Knight then advised the delegates to declare truce and reconvene at a later time to discuss peace. Unwilling to break the fragile peace, the Consular did not ask to strip the Ulgo of their noble status, much to Lord Teral's disappointment. Although he was hopeful with the promise of peace. The Consular reported to Master Bakarn as usual, and was asked to come to Tython. Now that the last of the plague-infected Masters had been shielded, the Council decided that it was time to direct all of their effort into finding Vivicar himself.[38]
Battle with the plaguemaster
- "I will crush you, Jedi, and your shattered body will fuel my rebirth!"
- ―Vivicar gloats to the Jedi Consular
Lord Vivicar, the plaguemaster
Reporting back to the Jedi Council on Tython, the Jedi Knight informed the Masters of Vivicar's true identity. A common link between all the affected Masters was that they had all participated in the mission to Malachor Three. In a clear act of revenge, Vivicar made them all relieve the horrors they experienced there and the loss of Parkanas Tark in their plague-induced madness, so the Consular believed that Vivicar was Tark. Yuon Par then stepped out to finally reveal what she had been hiding all those years. Malachor Three was not just a dark world, it was the resting place of Terrak Morrhage, the original creator of the plague, lending more proof to the Consular's guess as to Vivicar's identity. Par also developed a plan to locate Vivicar. Using her former Padawan's shielding ability, she hoped to invert the link between herself and the Sith Lord, in order to sense his location. The Consular and Par performed the ritual inside a meditation chamber, but in the process, Vivicar took full control of Par's actions and attacked the Jedi Knight. Forced to duel their former Master, the Jedi defeated her. Weakened from the Sith influence, Par was still able to relay Vivicar's location—a ship drifting in deep space, as well as the codes to get aboard. The Consular then shielded the woman once again, breaking the link.[39]
Tracking Vivicar to his ship, the Jedi fought through a number of brainwashed Republic soldiers and reached the Sith Lord on the ship's bridge. Vivicar explained to the Consular that his plague not only allowed him to control the Jedi Masters, it had also siphoned their power from them. Through certain rituals, Vivicar could harness that power, potentially becoming the most powerful Force-user in the galaxy. In fact, Vivicar was merely a vessel for the spirit of Morrhage, who had been controlling the Lord's actions since the mission to Malachor. The Consular fought Vivicar in a lightsaber duel and won, but Vivicar revealed that hundreds of Jedi Masters were still falling victim to the plague. Should the Consular kill him, the plague would be stopped, but those Jedi, even those who had been shielded, would die as they were still bound to Vivicar. The Consular chose another option, using the shielding technique on Vivicar himself, and freeing him from the spirit of Morrhage. The spirit of Morrhage was severely weakened without a body and disappeared, vowing revenge when he regained his strength. Still, the Sith Lord's connection to the Jedi Masters was broken and the threat of the dark plague was dealt with for the time being. Without the influence of Morrhage, Vivicar regained his identity as Tark and promised to go into exile on Tython. The Consular returned to Tython as well, where the individual was recognized for all their effort in saving the Jedi Order and stopping Vivicar and was granted the title of Barsen'thor, Warden of the Order, a rare and distinguished title that only two Jedi had held in the millennia before. On Jedi Council's advice, the Jedi Knight also recorded the information on their journey to stop Vivicar in a holocron in the Jedi Archives.[40] With Vivicar no longer a threat, the Barsen'thor and the individual's companions took the following several months to rest and reflect on their past experiences.[8][41]
Aiding the Rift Alliance
- "The Republic is badly weakened. The Rift Alliance controls critical resources, armies, trade centers. If they leave, the Republic will die. "
"I refuse to believe there's no solution to this." - ―The Supreme Chancellor and the Barsen'thor discuss the latter's mission, and how important it is that the latter succeeds
Boarding the Fortitude and joining the Balmorran Resistance
The Consular's rest was cut short when Master Bakarn contacted them, requesting their presence on Tython, where an emergency meeting was supposed to take place, with Republic's Supreme Chancellor Dorian Janarus present over the hololink. The Chancellor informed the Barsen'thor that the Republic was on the brink of collapse. Strained by the ongoing Cold War, many worlds threatened secession. A small league of dissidents had emerged, calling themselves the Rift Alliance. Members of the Rift Alliance represented planets whose infrastructure was crucial to the Republic's survival. Therefore, the Barsen'thor was assigned as the Chancellor's personal liaison to the Rift Alliance and instructed to do anything possible to convince its members to stay with the Republic. However, as such an important assignment could not be assigned to someone less of a Jedi Master, the Barsen'thor was elevated to that rank in Chancellor's presence. The newly elevated Jedi Master was then assigned a first mission. Several representatives of the Rift Alliance had been convinced by the Chancellor to be guests aboard a Republic flagship, the Valor-class cruiser Fortitude. Upon arriving on the Fortitude, the Barsen'thor was contacted by Nadia Grell, the daughter of Tobas Grell, one of the Senators of the Alliance. Nadia told the Barsen'thor that the ship had been captured by the Sith, who took the Senators hostage. The Consular fought to the ship's bridge, discovering along the way that the Sith had sabotaged the ship to crash into the planet Deralia. They confronted and killed the Sith boarding party's leader, Arrax, who revealed that he was working for a Sith named Lord Kyrus.[42]
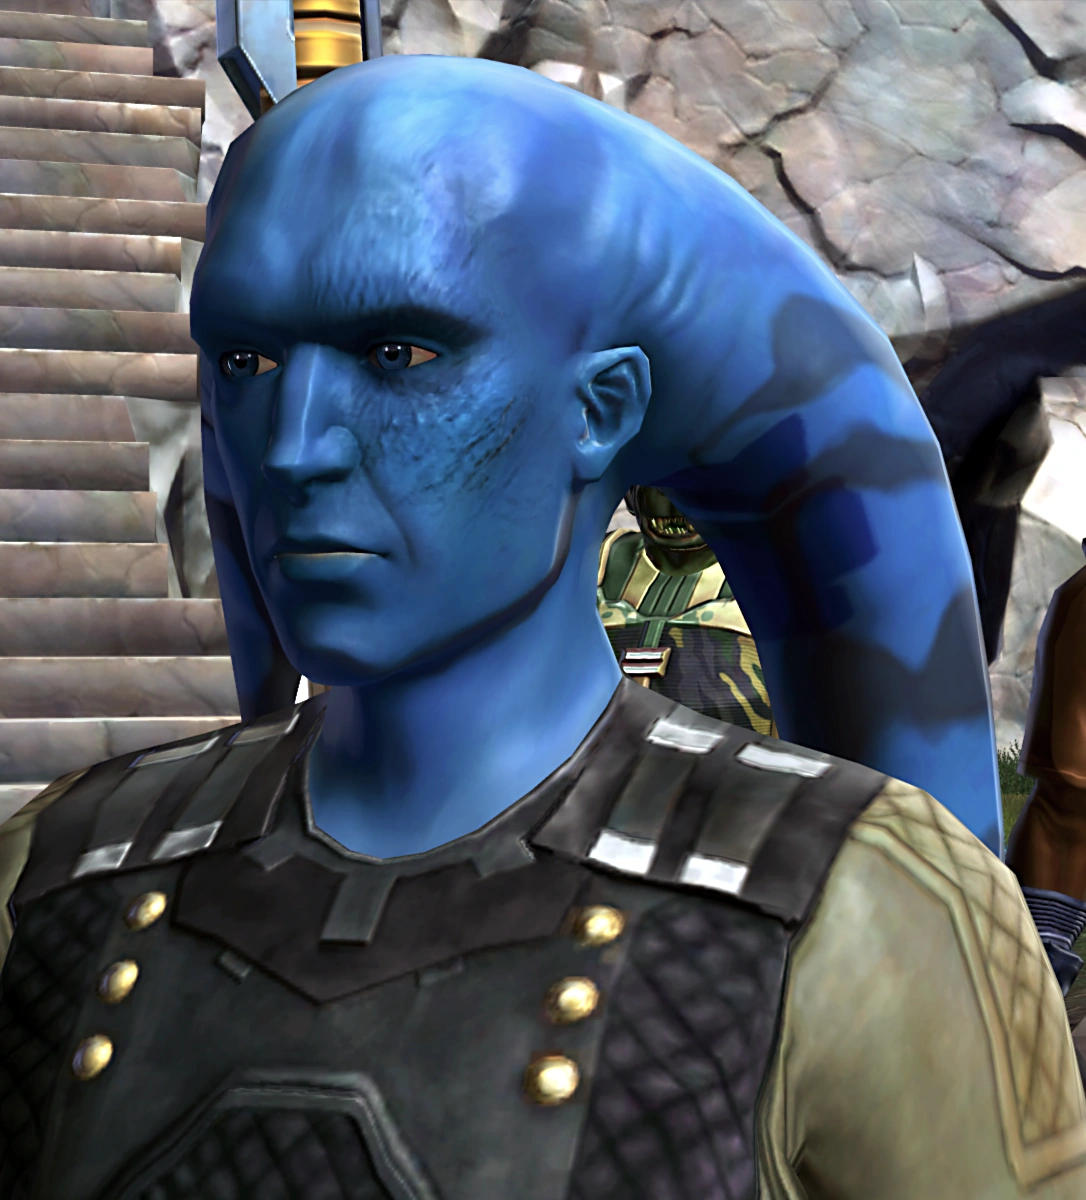
Although the Senators were saved, the Fortitude was still plunging toward Deralia, and there was seemingly no way to stop it. Tobias Grell suggested changing the course to Deralia's uninhabited moon, which would buy them some extra time to escape. However, Nadia was against the proposal, afraid that crushing the ship into the moon would affect Deralia's tides, which would have potentially catastrophic consequences for Deralia's population. Instead, she suggested using the Fortitudes manual controls to steer the ship into Deralia's orbit. The Barsen'thor went with Nadia's option, and they fought through the remaining Sith troops led by Arrax's minion Tassandra to the ship's control section. The plan worked, and the Fortitude successfully entered Deralia's orbit. The Senators then transferred to the Consular's ship, which now essentially became their base of operations. In order to prove that the Republic cared about the members of the Rift Alliance, the Senators asked the Barsen'thor to help trade secretary Tai Cordan's world of Balmorra be freed from Imperial control. Cordan assured the Consular that once the Empire was off his planet, Balmorra would join the Republic and bring its vast battle droid factories to assist its war effort.[42] Cordan, Balmorra's former trade secretary, who now had seniority after the other officials had been killed or expelled from the planet, and the current president's whereabouts were unknown, planned to become the planet's president after its liberation. To proceed with his liberation plan, Cordan planned to contact a revolutionary named Zenith, the leader of Balmorran Resistance. Arriving on Balmorra and using a number of secret protocols, the Barsen'thor contacted Zenith via a holocomm.[3]


Tai Cordan became a valuable ally for the Barsen'thor after retaking his home planet.
The Twi'lek revolutionary was reluctant to help a Republic representative and asked the Barsen'thor to prove if they were truly determined to free the planet by locating the Imperial head of manufacture, Trabier, inside the Okara Droid Factory. Zenith was unable to apprehend the chief himself because the man was protected by a powerful bodyguard. The bodyguard turned out to be Lerek Serrus, a young Sith apprentice to Darth Lachris, the Sith ruler of the planet. Confronting the two inside the factory, the Barsen'thor convinced Serrus to stand down and abandon the dark side. Serrus left Trabier's side, allowing Zenith, who had secretly infiltrated the facility, to wound the chief with a shot from a sniper rifle. The revolutionary wanted the man dead, but the Barsen'thor insisted on keeping the Imperial alive, convincing Zenith that he was worth more that way. Now convinced that the Jedi was indeed trying to help his planet, Zenith smuggled Cordan and his entourage into a safe house in the Republic settlement of Bugtown. The safe house became the base of operations for the Balmorran Resistance. The first step of Cordan's and Zenith's plan to liberate their planet was to gain support of Balmorra's powerful corporations.[3]
The Barsen'thor was sent to meet with Director Fenn of the Troida Corporation, who spoke for the rest of the corporations. The Jedi met Fenn inside an old records vault in the Gorinth Canyon. After destroying the Imperial droids that were watching him, the Barsent'hor was able to speak to the man. Fenn agreed to have the corporations join Cordan's cause, but he demanded that the Jedi Order stopped interfering in Balmorra's weapon production. Although Zenith contacted the Barsen'thor, informing them that the resistance knew where to find Fenn's wife and daughter and offering to use the two as leverage in the negotiations, the Consular found a neutral solution, promising Fenn that the Jedi control would be scaled back but not completely removed, securing the deal. Fenn then provided the Jedi with the locations of secret stockpiles of blueprints, secret credits accounts, and weapons. The Troida leader gave the Jedi passwords that would allow them to access terminals scattered throughout the Sith-occupied city of Sobrik containing encrypted data on the stockpiles. As instructed by Fenn, after obtaining that data, the Consular took it to a cyborg named Benx in the Sunken Sarlacc Cantina in Sobrik. Benx was afraid to help the Jedi decrypt and transmit the data, since he had been forced to use his computerized brain to constantly work for Darth Lacris and stopping for even one moment from transmitting data streams for her could mean a lot of pain for him as punishment. However, the Barsen'thor showed the cyborg certain Jedi techniques, teaching the man how to process several streams at once, allowing Benx to successfully decrypt Fenn's data and transmit it to Cordan, without alerting Darth Lachris. Upon returning to the resistance bunker, the Jedi was contacted by Master Bakarn, who complimented them on the successful negotiations with the corporations, although he was doubtful if limited Jedi control would be enough. With the corporations' support, Cordan was now ready to proceed with the next part of his plan—saving the current president, Galthe in order to have him handle the control of the planet to Cordan. Galthe was rumored to be ill and had not been seen for a long time, with Darth Lachris claiming to act on his behalf.[43]
However, Zenith appearead with worrying news. Darth Lachris made a public holographic announcement, claiming that in response to the Balmorran Resistance's attacks, Galthe had issued Executive Order 228. According to it, numerous civilians allegedly associated with the Resistance had been rounded, imprisoned inside an Imperial Holding Facility at the Gorinth Canyon, and scheduled to be executed soon. Despite realizing that to be an obvious trap meant to catch them, the Jedi decided that rescuing the civilians was paramount.[43] While Zenith's men engaged the Imperials, drawing them away from the holding facility, the Barsen'thor, using coordinates provided by the revoluationary leader, disabled a number of generators powering force fields that protected the entrance to the facility. With the force fields down, the Barsen'thor was able to infiltrated the facility, fight through the Imperial guards, and rescue the Balmorran prisoners. They were then contacted by Zenith, who informed them that his men were taking heavy casualties, but they had set demolition charges around the holding facility, and the countdown had already started. Zenith promised to escort the liberated civilians to a safe location before the transmission broke off. The Jedi barely escaped from the faciltiy before it was destroyed and contacted Cordan from a secure terminal. Zenith soon arrived at the place, as well, along with one of the liberated prisoners, Voro Hesh. The man informed his saviors that he knew where President Galthe was being held, as he had seen the Imperials smuggle him in and out of the Balmorran Arms Factory. Cordan asked the Barsen'thor to act quickly and rescue the President, before Lachris could move him out of the factory. Zenith, who knew the factory's defense shutdown codes, chose to accompany the Jedi on the task, hoping to kill Lachris. Meanwhile, Cordan began searching for a refuge for the rescued civilians.[44]
Using Zenith's knowledge of the factory's codes, the Jedi Knight hurried through the facility, as they realized that the Imperials were already preparing to smuggle th president out. The two soon found Galthe, frozen in a slab of carbonite, and were confronted by Darth Lachris who stated that even thawed, Galthe would be unable to help them. After Lachris was defeated, Zenith moved the President to the safe house and began the thawing process. It turned out that Lachris had been right, however, as Imperial torture had shattered Galthe's mind. Upon being free from the carbonite, Galthe turned out to be just a shell of a man, unable to think or act clearly, and speaking gibberish. The Barsen'thor tried their shielding technique in an attempt to restore Galthe's sanity. However, the technique did not work, as the President's states had been caused not by a Sith influence, but by a physical trauma. Since Galthe was in no condition to hand over power to Cordan, Zenith suggested using medical technology donated by the corporations. A spinal implant could hack into the man's brain and muscle functions, allowing him to speak and sign his name at the formal ceremony. However, such technology would not last long and might even kill him afterward. Still, Zenith believed that option to be acceptable not wanting the people to witness Galthe's state of mind and lose their hope. The Jedi refused the offer, believing that the people of Balmorra deserved to know the truth. Amidst a wave of revolts by the Balmorrans spurred by the news of Lachris' death, Cordan and a citizens' commitee organized by Voro Hesh, met inside the bunker. Although they witnessed Galthe's broken state, the citizens of Balmorra recognized Cordan's ascendency to the Presidentship. The latter, as his first official order, send a formal request to the Republic to accept Balmorra as its member world.[45]
Discovering Nadia's power
Later, during a Rift Alliance meeting aboard the Jedi ship, Zenith asked for a seat in the new government so he could express his own ideas on the future of the planet. However, Cordan refused the Twi'lek's request, believeing that he had learned too much violence from the Empire during his fight to liberate the world, and that Balmorra needed a fresh start. The newly appointed President offered an alternative instead. Since his duties now demanded him to stay on Balmorra, Cordan's place aboard the Barsen'thor's ship was now left open. He offered Zenith to take that place, and to become a liaison between Balmorra and the Rift Alliance, a position which the revolutionary accepted. As Cordan left the ship, Tobas and Nadia Grell asked to speak with the Barsen'thor in private. The Jedi was informed of two pressing issues—first, Nadia had found an Imperial tracking device aboard the ship, indicating the presence of a potential spy aboard. Secondly, Tobas told the Jedi aboard Attis Station, a Rift Alliance research facility established on the contested planet Quesh. Using Quesh's vast resources of natural chemicals, the researchers at Attis Station had developed both powerful weapons and healing technology. However, the station had recently dropped out of contact, and Imperial troops had been sighted nearby. The other members of the Rift Alliance were still thinking on their course of action and did not want to inform the Jedi Knight about the station, but the Grells disagreed. Also, since Attis Station had been built using the resources of Sarkhai, the Grells' home planet, Nadia requested to accompany the Barsen'thor during the mission to Attis Station.[45]
Arriving on Quesh and travelling to Attis Station, the Jedi found the station's doors jammed. Fortunately, Nadia was able to use a manual override to open them and went inside ahead, since she had to close the doors before Quesh's atmposphere contaminated the station. Once inside, the Barsen'thor found the station overrun with Sith troops. After defeating a number of them, the Jedi met up with Nadia, who used the station's systems to locate a group of surving researchers trapped behind a security force field. A number of Sith were already heading their way. As the Barsen'thor and Grell set off to rescue them, however, they were confronted by a squad of Imperial soldiers sent to kill them. Determined to rescue the scientists, Nadia unexpectedly demonstrated that she was in fact Force-sensetive, knocking the Imperials back. Instructing the Barsen'thor to get to the scientists using her override command, she went deeper into the facility, drawing the Imperial troops away. While fighting their way through the facility, the Jedi came upon a holographich transmission from Lord Kyrus, a Sith who was determined to undermine the Barsent'thor's efforts and who had been monitoring the Rift Alliance ever since the attack on the Fortitude. Kyrus goaded the Jedi, mocking the fact the they were serving the bureaucrats of Rift Alliance, and promised to keep an eye on them. Soon, the Barsen'thor was able to rescue the scientists, who asked the Jedi's opinion on which project they should keep pursuing. After the Sith attack, Attis Station's remaining equipment could support only one research project—either the weapons, or the medicince. After helping the scientists choose the project, the Jedi Master was contacted by Nadia, who had evaded the Imperial pursuit and was on her way back to the ship. Once the Jedi returned to their ship as well, they were greeted by the members of the Rift Alliance, who apologized for keeping Attis Station classified. In a private conversation, Tobas Grell explained more about Nadia's powers. She was indeed Force-sensitive, and a very powerful at that, but she was untrained and was unable to control her powers when becoming emotional. Tobas asked the Jedi to provide Nadia with some basic Jedi teachings to help her better understand and control her powers. Speaking about Lord Kyrus and how he was able to spy on them, Grell realized that the Imperial tracking device they had found earlier was the reason for that, and there was indeed a traitor aboard the ship. The Jedi Master and the Barsen'thor decided to act normally in the meantime, hoping that the traitor would soon reveal themselves.[7]
Fighting the White Maw

Lieutenant Felix Iresso joined the Jedi Master's crew after the events of Hoth.
The Senator then informed the Jedi Master of another urgent matter. A group of Rift Alliance soldiers on the ice planet of Hoth required assistance. Hoth was overrun with pirates, who harassed the Alliance's shipping lanes, so a Rift Alliance Coalition Force had been put together to battle the pirate threat.[7] The coalition force tried to repel the attacks of the pirate group, the White Maw, but suffered one defeat after another, and the Republic had no forces to spare to assist the Rift Alliance. The coalition force was on the brink of mutiny, with only the man in charge of the troops on Hoth, Lieutenant Felix Iresso, still bothering to send daily reports. The Barsen'thor was officially granted command of the Coaltion Force by the Rift Alliance and asked to meet with Lieutenant Iresso inside the Republic Aurek Base on Hoth in order to discover how the White Maw was able to defeat his troops. Arriving at the Coalition Forces camp, the Barsen'thor found Iresso and his troops in a dispute. The Lieutenant's men's morale was broken after their repeated attempts to kill the leader of one of the White Maw factions, Captain Valon, failed. The Captain seemed to survive anything the Coaltion Forces could throw at him, even a collapsed ice cavern, and he seemed invincivble. In addition to that Valon had recently stolen a thermal bore device that could crack Hoth's ice shelf and potentially destroy the Republic base. Since Iresso's men refused to fight Valon, the Liutenant asked the Jedi to retrieve the thermal boost device, hoping that a victory like that would boost his men's confidence. Following the thermal bore's transponder signature to an old Imperial science lab, the Jedi Master broke inside and confronted Valon himself there. Although the pirate leader put up a fierce fight, the Consular was able to seemingly kill him quite easily and retrieve the thermal bore device. However, when they returned to Iresso with the device, they received a holographic message from Valon, who was somehow alive. The pirate revealed that the White Maw had taken control of the heat exchanger powering all the Republic bases on Hoth and that he intended to destroy it and let the Republic forces freeze to death. Iresso could not allow his men to learn that Valon survived the encounter with the Jedi, else they would defect for certain. Therefore he decided to distract them by taking them to fight Valon's scouting parties. Meanwhile, the Barsen'thor was asked to secure the heat exchanger,[4] located at the Tromper Crags Geothermal Plant.[46]
The Jedi went to the geothermal plant and disarmed the explosives placed by the White Maw. However, they were then ambushed by a squad of Imperial commando, who intended to capture the Jedi alive and freeze them in carbonite. After all but one of the commandos were defeated, the surviving engineer informed the Barsen'thor that the Valon was not invulnerable at all. Him surviving certain death was thanks to a set of special regenerative armor that could bring back its wearer to life from near-death condition. The Empire had found that armor inside the wreckage of one of the numerous starships that had crashed on Hoth, but Valon had stolen it from them. The Empire was trying to capture Valon and reclaim the armor. After discovering that the Barsen'thor had angered Valon, they had sent the commando squad to capture the Jedi and lure out the pirate. The Jedi Master healed the wounded engineer and let him go. They then proceeded to go to Outpost Onith to meet up with Iresso. It turned out that the White Maw's scouts had tracked Iresso's men to the outpost. Seeing the pirates so well coordinated, the coalition forces realized that Valon was still alive and confronted the Lieutenant for lying to them. Iresso managed to quell the mutiny, subduing Private Kree, who pointed a gun at him. Iresso wanted to punish the man, but the Barsen'thor told Iresso to forgive the man. They then informed the soldiers about Valon's secret armor. In order to learn a way to counter the armor, Iresso suggessted infiltrating the lab where the Imperials had studied the suit before Valon stole it from them.[46] While Iresso's troops distracted the facility's guards, drawing them out into the snow wilderness, the Jedi Master broke into the facility and found the lead scientist, Doctor Jurnak. Although the doctor refused to cooperate at first, claiming that he had received information about the Jedi coming for him and destroyed his notes on the armor, the Barsen'thor managed to convince the Doctor to talk. The latter revealed that the healing properties of Valon's armor could be overstressed by repeatedly inflicting mortal injuries to him. At that moment, one of Iresso's men delivered news that Valon's men were attacking a scavenger camp in the glacial fissure. Jurnak then demanded to be escorted to safety in accordance with Galactic Republic Charter, which dictated that prisoners had to be cared for. Although Iresso was reluctant to spare any of his men to escort the Doctor, the Barsen'thor convinced him to do so. The Jedi Master then departed to the scavenger camp to investigate pirate activity.[47]
After defeating the pirates inside the scavenger camp, the Jedi was confronted by Private Kree, who had betrayed the coalition force and joined the White Maw.[48] The Barsen'thor tried to talk the man down and convince him to redeem himself, but the latter refused and attacked the Jedi, forcing them to kill him. Iresso soon arrived at the scavenger camp, informing the Jedi Master that the coalition force had tracked Valon to a Republic dreadnaught buried in ice in the starship graveyard nearby. Also, the scavengers they attacked used special equipment to salvage out of the ice. Therefore, Iresso deduced that Valon was planning to use the equipment to dig out the dreadnaught and unite all the White Maw factions aboard that flagship. The dreadnaught was of an old design, with numerous security doors to pass through. In addition, Iresso's scouts had spotted a large number of pirates guarding it. The coalition soldiers then developed a plan to attack the ship's engines, drawing out Valon's men, and buying the Jedi Master time to get through the security doors.[47] Infiltrating the ship, the Barsen'thor had to fight an Imperial boarding party, the leader of which revealed that Valon did not steal the armor, but was given it so he could carry out strikes against the Republic. Valon had gotten out of control, however, and the Imperials wanted to reclaim the armor. After defeating the Imperials and passing through the security doors, the Jedi confronted Valon and the captain of another White Maw group, who was planning to join Valon. The Barsen'thor killed the second captain and repeatedly defeated Valon several times, breaking the armor. Meanwhile, Iresso and his men sabotaged the dreadnaught's engines, preventing it from ever taking off. Defeated, Valon tried to negotiate the Barsen'thor to let him go, promising to use his resources to attack the Empire's trade routes on behalf of the Rift Alliance. Not trusting the captain, the Jedi instead had him taken into custody. With their work on Hoth done, the Jedi was prepared to leave. He was thanked by the coalition soldiers, while Lieutenant Iresso asked the Rift Alliance to put a word with his Republic superiors to have him reassigned aboard the Barsen'thor's starship.[49]
The traitor revealed
By this point it seemed that finally the Rift Alliance had been swayed. However, as the Sarkhai sent warriors to join the Republic, it was learned that Augin Blaesus, a member of the Rift Alliance, was actually one of the Children of the Sith Emperor, a group of powerful Sith infiltrators that had a special connection to the Emperor. He had kidnapped the Sarkhai king and queen and threatened to kill them. While the Barsen'thor managed to defeat Blaesus, the Jedi Master was greatly worried by the inability to sense Blaesus' hidden darkness the whole time he was on the ship, only to learn the Children were being hidden by the influence of their leader, the First Son of the Emperor.
Facing the Children of the Sith Emperor
- "Tell me why, Jedi. I stand unique among all other men in the galaxy. Why must I be destroyed? "
" There is more to you than the First Son of the Emperor. That part, I must save. "
"Gone. He is... is-uhh! "
" Now, Master Syo, while he's weak. Take control and unmask the other Children."
" I won't allow you to... I am the one who will not allow this, First Son. I know who I am. I am Syo Bakarn. I am a Jedi Master, and you have lost." - ―The Barsen'thor successfully redeeming the First Son as Master Syo Bakarn
Eventually, war broke out between the Empire and the Republic. While the Rift Alliance held out, Barsen'thor was given the task of finding an army for the Republic. Using clues of the Infinite Empire's secret army on Belsavis, they found a group of the ancient Esh-Ka, led by Hallow Voice. The Herald also won support on Voss, where a Voss mystic, Gaden-Ko, and his entourage, joined the Barsen'thor's forces.
As the war progressed, the Empire attacked Corellia. The first job for Barsen'thor and the Rift Alliance was to attack an Imperial fleet led by the Dreadnaught the Javelin. However, after boarding the vessel, it was revealed to be a trap set by the First Son. The ship was covered in detonite charges and was intended to destroy the Rift Alliance. Barsen'thor's companions and their new army was able to take out enough of the detonite charges that only the Javelin would be destroyed. However, one of Barsen'thor's friends was forced to escape in a pod, crashing on the surface of Corellia after gathering some Imperial intelligence reports.
With the Rift Alliance safe, Barsen'thor landed on the surface, leading their new army of Balmorran battle droids, Esh-ka warriors, and Voss commandos. At first, the Republic was confident due to its Guardian Holds, impenetrable fortresses across Coronet City. Unfortunately, it was revealed that Children of the Emperor, still protected by the First Son, had taken over the Guardian Holds. Thus, they would need to be defeated in order to retake them.
After retaking Guardian Hold Six, Barsen'thor's lost companion was recovered with help from Selonian scouts, and along with them, the stolen Imperial data. It also contained information about First Son. With help from Holiday, the data was unlocked. However, when this data was decrypted, Barsen'thor would, much to their dismay, find out that the First Son was none other than Jedi Council member Syo Bakarn, who was in command of the Guardian Holds on Corellia. Barsen'thor had to retake several Guardian Holds, and defeat the Children of the Emperor, and the Imperial Guards leading them. The Rift Alliance was able to retake the Guardian Holds, but they found no trace of the First Son; however, his location was revealed to be in the caves of Corellia. The Barsen'thor then set out to face him.
Duel with the First Son
- "Tell me why Jedi. I stand unique among all other men in the galaxy. Why must I be destroyed?"
- ―A defeated First Son's last attempt to prevent destruction
The Barsen'thor and Master Bakarn dueled in the caves, with their duel ending with the First Son's defeat and Master Syo's redemption. With First Son locked away back in Master Syo's mind, the cloak that was protecting the Children of the Emperor from being sensed by the Jedi was gone, revealing their presence. Returning to Coruscant, former Taris governor Saresh, now the newly selected Supreme Chancellor of the Republic, welcomed Barsen'thor back and stated they would help rebuild the Rift Alliance in thanks for their service and Barsen'thor selected one of the three remaining representatives to become their Senator. Hallow Voice and the Esh-ka were welcomed into the Republic as well. Gaden-Ko stated the Voss commandos would be honored and hoped that some Jedi would come to Voss to learn about the Mystics' understanding of the Force. And finally, the Barsen'thor then received Bakarn's now-empty seat on the Jedi High Council after being offered the role by Master Satele.
Despite this, the Children of the Sith Emperor were still at large- they were still active, and because the Hero of Tython had defeated the Emperor's Voice, causing the Emperor to fall into a deep slumber, the remaining Children of the Sith Emperor heard the Emperor's voice in their heads far more deeply than they ever had before- and now they were more dangerous than they had ever been before.
Continued travels
Darth Malgus, traitor to the Emperor and usurper of the Sith Empire.
The Barsen'thor was eventually a key figure of the Galactic War, even more so than during the Cold War, as in the latter, the Barsen'thor had only been active during the later parts. The Barsen'thor would be active for all of the Galactic War, though.
When the Sith Lord Darth Malgus betrayed the Sith Empire and broke away with an army of loyal mercenaries, droids and a few Sith allies during the Emperor's absence after his excruciatingly painful defeat at the hands of the Hero of Tython, the Barsen'thor teamed up with the Hero of Tython, the Voidhound and Havoc Squad Commander once again, and after they defeated Malgus's forces, the reprogrammed droid HK-47 and Malgus's ally Darth Serevin on Ilum and Malgus's flagship, they fought - and killed- Darth Malgus. Since then, the four greatest heroes of the Republic rejoined the war against the Sith which included facing the Infernal One on Belsavis and Karagga the Hutt. Later problems would arise on baradium-rich Denova, where the Imperial invaders defected and joined the Warstalkers, Trandoshan mercenaries hired by the Republic, who took over the planet for themselves. The Barsen'thor was among those sent to resolve the situations.
Personality and traits

- "Would you risk your life to save Voss, outsider?"
"I accept the dangers." - ―A Voss Mystic and the Barsen'thor
Even as a child the future Jedi Master had a remarkable connection to the Force as well as the wisdom to use it correctly. Barsen'thor greatly believed in the Jedi Code and tried at every opportunity to help those in need as well as earning redemption. One example would be how the then Padawan greatly aided the Twi'lek village despite the fact that they settled there illegally and the Jedi Temple was forbidden to assist them openly, the future Barsen'thor also saved Nalen Rolach, a Force-sensitive villager, who in his desire for power to defend the village fell to the dark side. Instead of killing him the then Padawan asked the Jedi Council to allow Nalen Jedi training, even after Nalen's many attempts to kill the then Padawan.
The Barsen'thor was a calm, collected, wise and intelligent being. The Barsen'thor would take risks to help others, and would do whatever was necessary to help others and redeem those fallen if possible. The Barsen'thor was described as having unparalleled wisdom and insight during the Cold War and Galactic War eras.
The Consular often meditates after combat to gather their thoughts as well as recover. This helps him control his emotions as stay on the Light Side of the Force. Barsen'thor understood the threat that their power would be if they fell to the Dark Side, and so never deviated from his path of selflessness never doing things for personal profit or happiness but for the good of the whole.
The Barsen'thor was also very humble. The Barsen'thor thought themselves as a servant to the Republic, Jedi Order, and the Force. Even after becoming invaluable to the Order after learning the Shielding technique necessary to save the Jedi Order from a Sith Force Plague. While powerful the Jedi Master did not enjoy violence and if possible avoided it with diplomacy, only when it was absolutely necessary did the Jedi engage in combat.
Powers and abilities
- "A Jedi who was stronger in the Force at four than I was at fifteen?"
- ―Master Yuon Par regards her Padawan's strength and innate power
Trained as a Jedi Consular, the Barsen'thor was a master of wielding the Force and had at least minor proficiency with a lightsaber. One of the most gifted Jedi of the era, the Barsen'thor possessed a vast repertoire of skills and abilities that could be used and applied in virtually any situation. The Barasen'thor knew the Shielding Technique, applying it to remove Sith corruption or harmful effects of a target. This Shielding Technique was used primarily to deal with a dark plague created by Terrak Morrhage, and the Barsen'thor could indeed remove the harmful effects of the plague from its victims. The Barsen'thor also could use it without the need of sacrificing all their life force, unlike the former user of this technique who had to sacrifice his or her life in order to successfully defeat Morrhage and his plague. The Barsen'thor also had enough telekinetic ability to rip through a blast door the size of a two-story building without aid. The Barsen'thor also possessed enough telekinetic strength to utilize a Force push with enough intensity to stun the First Son.
The Barsen'thor had at least a minor proficiency in wielding a lightsaber, and could apply kinetic combat and Force use while dueling. The Barsen'thor was skilled enough to defeat Nalen Raloch while only a Padawan, Lord Vivicar, as a Jedi Knight, and numerous Children of the Sith Emperor such as Augin Blaesus, Sophia Farash and the First Son as a Jedi Master and as the Barsen'thor.
Behind the scenes
The Barsen'thor is the playable Jedi Consular from the MMO Star Wars: The Old Republic. During the customization, one can choose between several races, and between male and female. The title Barsen'thor is awarded to the player—after his or her defeat of Lord Vivicar, and the eradication of the plague—by the Council. By receiving the title, the Consular became the third Barsen'thor in the history of the Jedi Order. The male consular is voiced by Nolan North and the female by Athena Karkanis.
Appearances
- Star Wars: The Old Republic (First appearance)
Notes and references
|
Template:TOR companions - Jedi Consular