m (Cleanup and formatting fixes) |
m (Adding backup links) |
||
| (5 intermediate revisions by 3 users not shown) | |||
| Line 24: | Line 24: | ||
===Rebel pilot=== |
===Rebel pilot=== |
||
{{Quote|There's one on my tail. I can't shake him. I can't shake him!''"<br />"''Stay on course, Harris! We'll lose them in the asteroid field.|Thurlow Harris and Merrick Simms|audio=HarrisSimms1-RA.ogg|Star Wars: Rebel Assault}} |
{{Quote|There's one on my tail. I can't shake him. I can't shake him!''"<br />"''Stay on course, Harris! We'll lose them in the asteroid field.|Thurlow Harris and Merrick Simms|audio=HarrisSimms1-RA.ogg|Star Wars: Rebel Assault}} |
||
| − | Born around [[20 BBY/Legends|20 BBY]]<ref name="DOB" /> on the [[Planet/Legends|planet]] [[Centares/Legends|Centares]]<ref name="VQ1" /> in the [[Maldrood sector]] of the [[Mid Rim/Legends|Mid Rim]],<ref name="TEAOC">{{SW|url=wp-content/uploads/sites/6/2015/06/Starwars.com_Atlas_appendix_June_15.pdf|text=Star Wars: The Essential Atlas Online Companion|int=Star Wars: The Essential Atlas Online Companion| |
+ | Born around [[20 BBY/Legends|20 BBY]]<ref name="DOB" /> on the [[Planet/Legends|planet]] [[Centares/Legends|Centares]]<ref name="VQ1" /> in the [[Maldrood sector]] of the [[Mid Rim/Legends|Mid Rim]],<ref name="TEAOC">{{SW|url=wp-content/uploads/sites/6/2015/06/Starwars.com_Atlas_appendix_June_15.pdf|text=Star Wars: The Essential Atlas Online Companion|int=Star Wars: The Essential Atlas Online Companion|archivedate=20200614060142}}</ref> Thurlow Harris grew up in a [[The galaxy/Legends|galaxy]] controlled by the [[Galactic Empire/Legends|Galactic Empire]]. His [[Thurlow Harris's father|father]] became a [[Captain/Legends|captain]] in the [[Alliance to Restore the Republic/Legends|Alliance to Restore the Republic]], so Harris had seen many battles by the [[Time/Legends|time]] he was twenty [[Standard year/Legends|years]] old. Harris followed his father into the fledgling Rebellion early in the [[Galactic Civil War/Legends|Galactic Civil War]] and undertook training as a [[Starfighter/Legends|starfighter]] [[Pilot/Legends|pilot]]<ref name="RA manual">''[[Star Wars: Rebel Assault]]'' manual</ref> at the Alliance's [[Kolaador Base|pilot training center]] on [[Kolaador]],<ref name="RA" /> alongside another recruit known as [[Rookie One]].<ref name="CSWE">{{CSWECite|II|22|Harris, Thurlow}}</ref> |
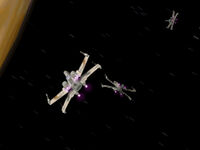
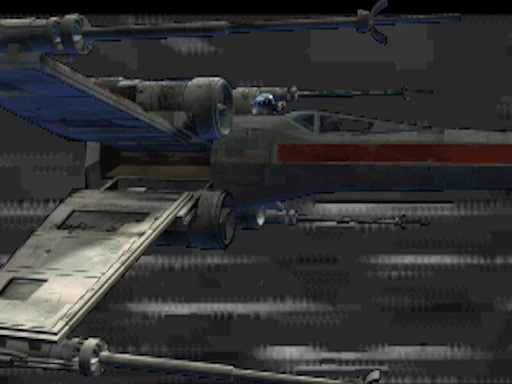
[[File:X-wingsTatooine-RA.jpg|thumb|left|200px|Harris, Murleen, and Rookie One approach Tatooine.]] |
[[File:X-wingsTatooine-RA.jpg|thumb|left|200px|Harris, Murleen, and Rookie One approach Tatooine.]] |
||
In [[0 BBY/Legends|0 BBY]],<ref name="NEC">''[[The New Essential Chronology]]''</ref> Rebel agents acquired the [[Death Star plans/Legends|plans]] to the Empire's [[DS-1 Orbital Battle Station/Legends|Death Star]] [[battlestation]], a [[Superweapon/Legends|superweapon]] capable of destroying a planet. Pursued by the [[Dark Lord of the Sith/Legends|Dark Lord of the Sith]] [[Anakin Skywalker/Legends|Darth Vader]], [[Prince/Legends|Princess]] [[Leia Organa Solo|Leia Organa]] of [[Alderaan/Legends|Alderaan]] entrusted the stolen plans to the [[Droid/Legends|droids]] [[R2-D2/Legends|R2-D2]] and [[C-3PO/Legends|C-3PO]], who escaped her [[Tantive IV/Legends|ship]] as it was boarded by Imperial forces, landing on the [[Outer Rim Territories/Legends|Outer Rim]] world of [[Tatooine/Legends|Tatooine]]. Realizing that the plans were no longer aboard the vessel, Vader ordered his forces to begin searching Tatooine.<ref name="ANH">[[Star Wars: Episode IV A New Hope|''Star Wars'': Episode IV ''A New Hope'']]</ref> When the Imperial search uncovered the Alliance's [[Anchorhead Base]], the Rebels called for assistance from Kolaador. In response to the distress call, Harris, Rookie One, and [[Commander/Legends|Commander]] [[Ru Murleen]] were dispatched to Tatooine in [[T-65 X-wing starfighter/Legends|T-65 X-wing starfighters]].<ref name="RA" /> |
In [[0 BBY/Legends|0 BBY]],<ref name="NEC">''[[The New Essential Chronology]]''</ref> Rebel agents acquired the [[Death Star plans/Legends|plans]] to the Empire's [[DS-1 Orbital Battle Station/Legends|Death Star]] [[battlestation]], a [[Superweapon/Legends|superweapon]] capable of destroying a planet. Pursued by the [[Dark Lord of the Sith/Legends|Dark Lord of the Sith]] [[Anakin Skywalker/Legends|Darth Vader]], [[Prince/Legends|Princess]] [[Leia Organa Solo|Leia Organa]] of [[Alderaan/Legends|Alderaan]] entrusted the stolen plans to the [[Droid/Legends|droids]] [[R2-D2/Legends|R2-D2]] and [[C-3PO/Legends|C-3PO]], who escaped her [[Tantive IV/Legends|ship]] as it was boarded by Imperial forces, landing on the [[Outer Rim Territories/Legends|Outer Rim]] world of [[Tatooine/Legends|Tatooine]]. Realizing that the plans were no longer aboard the vessel, Vader ordered his forces to begin searching Tatooine.<ref name="ANH">[[Star Wars: Episode IV A New Hope|''Star Wars'': Episode IV ''A New Hope'']]</ref> When the Imperial search uncovered the Alliance's [[Anchorhead Base]], the Rebels called for assistance from Kolaador. In response to the distress call, Harris, Rookie One, and [[Commander/Legends|Commander]] [[Ru Murleen]] were dispatched to Tatooine in [[T-65 X-wing starfighter/Legends|T-65 X-wing starfighters]].<ref name="RA" /> |
||
| − | The three Rebels arrived in the [[Tatoo system/Legends|Tatoo system]] to find an [[Imperial-class Star Destroyer/Legends|''Imperial''-class Star Destroyer]] in [[Orbit/Legends|orbit]] around Tatooine, coordinating the [[Battle of Tatooine (Galactic Civil War)|attack]] below. As the [[Star Destroyer/Legends|Star Destroyer]] [[Space warfare|launched]] [[TIE/LN starfighter]]s against the incoming Rebels, Murleen led Harris and Rookie One in strafing runs to weaken its defenses. When the [[Deflector shield/Legends|deflector shields]] protecting the [[Bridge (starship)/Legends|bridge]] fell under the Rebel assault, Rookie One fired [[Proton torpedo/Legends|proton torpedoes]] at the unprotected command tower, crippling the vessel and allowing the Rebel [[Flight|flight group]] to proceed to the surface.<ref name="RA" /> |
+ | The three Rebels arrived in the [[Tatoo system/Legends|Tatoo system]] to find an [[Imperial-class Star Destroyer/Legends|''Imperial''-class Star Destroyer]] in [[Orbit/Legends|orbit]] around Tatooine, coordinating the [[Battle of Tatooine (Galactic Civil War)|attack]] below. As the [[Star Destroyer/Legends|Star Destroyer]] [[Space warfare|launched]] [[TIE/LN starfighter]]s against the incoming Rebels, Murleen led Harris and Rookie One in strafing runs to weaken its defenses. When the [[Deflector shield/Legends|deflector shields]] protecting the [[Bridge (starship)/Legends|bridge]] fell under the Rebel assault, Rookie One fired [[Proton torpedo/Legends|proton torpedoes]] at the unprotected command tower, crippling the vessel and allowing the Rebel [[Flight/Legends|flight group]] to proceed to the surface.<ref name="RA" /> |
As the Rebels approached [[Anchorhead/Legends|Anchorhead]] Base, it came under attack from three TIE fighters. Arriving too late to prevent the base's destruction, the Rebels pursued the TIE fighters into [[Beggar's Canyon/Legends|Beggar's Canyon]] to stop them from reporting the arrival of the [[X-wing starfighter/Legends|X-wings]]. After all three enemies were eliminated, the Rebels were joined by the X-wing of Captain [[Merrick Simms]], and Murleen instructed Harris and Rookie One to accompany Simms while she attacked the Imperial supply lines. With enemy [[Imperial Army/Legends|ground forces]] [[Ground warfare|moving]] into [[Mos Eisley/Legends|Mos Eisley]], Simms led Harris and Rookie One to the [[Spaceport/Legends|spaceport]] [[City/Legends|town]], where they engaged [[All Terrain Scout Transport/Legends|All Terrain Scout Transports]] and Imperial [[Lambda-class T-4a shuttle/Legends|landing craft]] until the arrival of a TIE fighter group forced them to withdraw. With Harris struggling to outrun a [[TIE/IN interceptor/Legends|TIE/IN interceptor]] as the Rebels fled into [[Realspace/Legends|space]], Simms led the two rookies into a nearby [[Asteroid belt|asteroid field]], where they lost their pursuers before making a [[Hyperspace/Legends|hyperspace]] jump to rendezvous with the [[Alliance Fleet/Legends|Alliance Fleet]].<ref name="RA" /> |
As the Rebels approached [[Anchorhead/Legends|Anchorhead]] Base, it came under attack from three TIE fighters. Arriving too late to prevent the base's destruction, the Rebels pursued the TIE fighters into [[Beggar's Canyon/Legends|Beggar's Canyon]] to stop them from reporting the arrival of the [[X-wing starfighter/Legends|X-wings]]. After all three enemies were eliminated, the Rebels were joined by the X-wing of Captain [[Merrick Simms]], and Murleen instructed Harris and Rookie One to accompany Simms while she attacked the Imperial supply lines. With enemy [[Imperial Army/Legends|ground forces]] [[Ground warfare|moving]] into [[Mos Eisley/Legends|Mos Eisley]], Simms led Harris and Rookie One to the [[Spaceport/Legends|spaceport]] [[City/Legends|town]], where they engaged [[All Terrain Scout Transport/Legends|All Terrain Scout Transports]] and Imperial [[Lambda-class T-4a shuttle/Legends|landing craft]] until the arrival of a TIE fighter group forced them to withdraw. With Harris struggling to outrun a [[TIE/IN interceptor/Legends|TIE/IN interceptor]] as the Rebels fled into [[Realspace/Legends|space]], Simms led the two rookies into a nearby [[Asteroid belt|asteroid field]], where they lost their pursuers before making a [[Hyperspace/Legends|hyperspace]] jump to rendezvous with the [[Alliance Fleet/Legends|Alliance Fleet]].<ref name="RA" /> |
||
| Line 41: | Line 41: | ||
===Capture=== |
===Capture=== |
||
| − | {{Quote|I was born here and when I saw the Death Star gone, I wanted everyone to know that we'd won! That |
+ | {{Quote|I was born here and when I saw the Death Star gone, I wanted everyone to know that we'd won! That Vader was dead and… that the war was over! Except that it wasn't. And he isn't.''"<br />"''There's only one way war ends for a soldier.''"<br />"''I know. Now I know.''"<br />"''I'm sorry.''"<br />"''I'm not.|Thurlow Harris and Mala Mala|Vader's Quest 1}} |
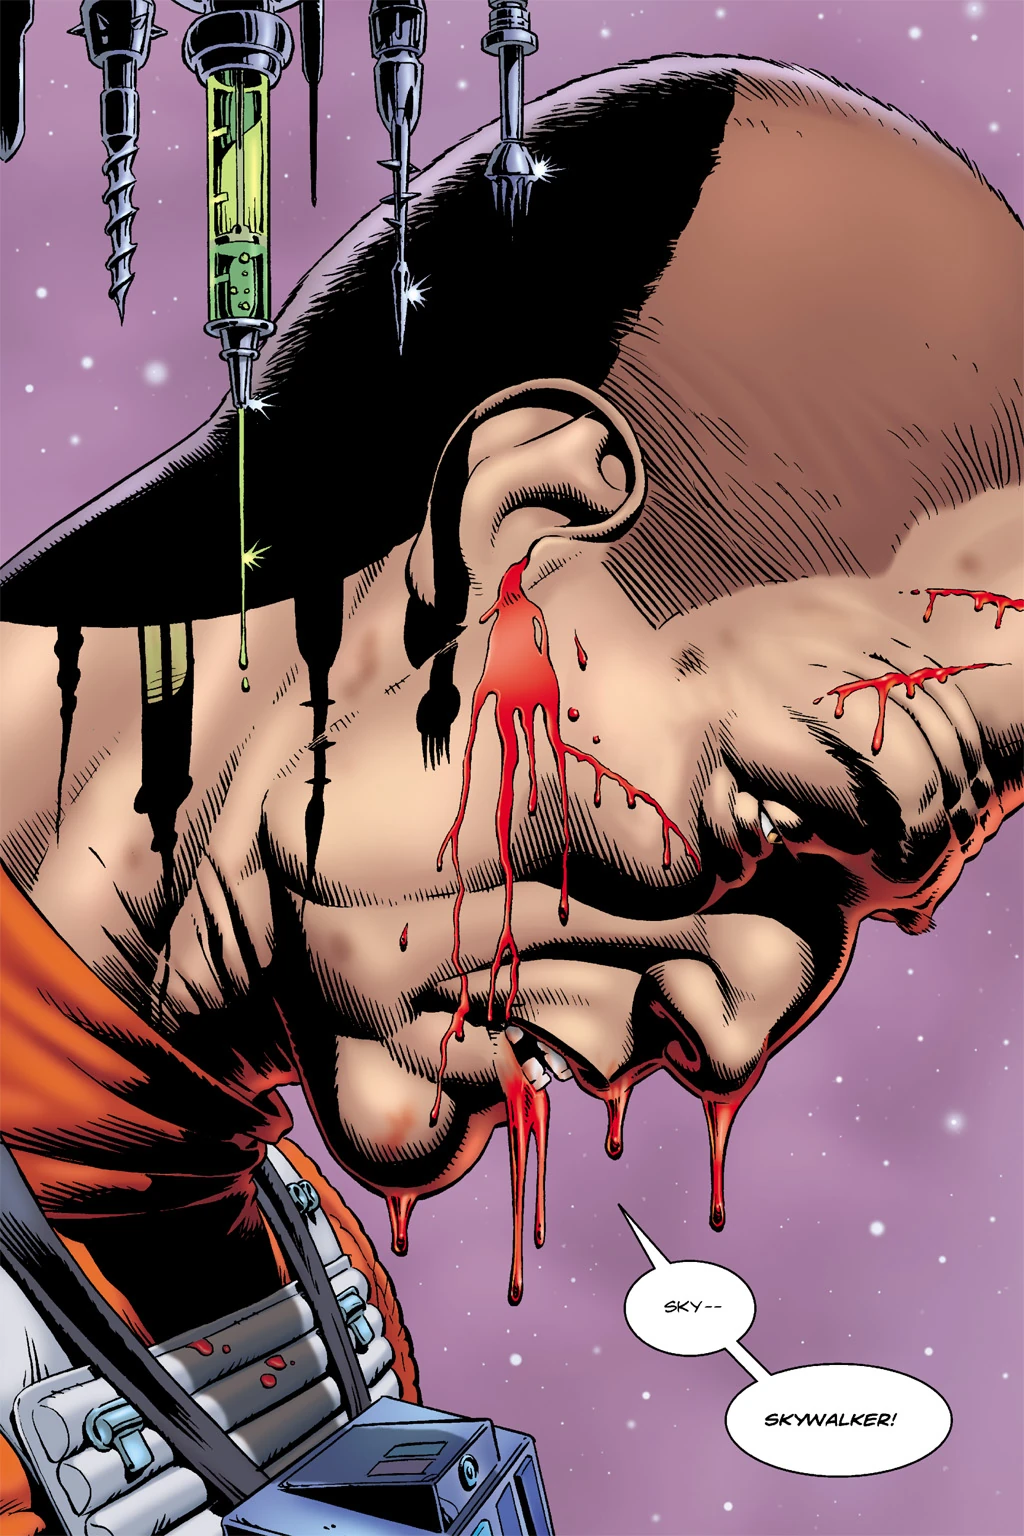
[[File:Rebeltorture.jpg|thumb|left|130px|Thurlow Harris being tortured.]] |
[[File:Rebeltorture.jpg|thumb|left|130px|Thurlow Harris being tortured.]] |
||
Following the Battle of Yavin, [[Lord/Legends|Lord]] Vader became obsessed with taking revenge against the Rebel pilot responsible for the Death Star's destruction<ref name="VQ2">''[[Vader's Quest 2]]''</ref> and hired [[Bounty hunter/Legends|bounty hunters]] to track the pilot down.<ref name="TNSMS" /> Believing Vader to have been killed during the battle, Harris thought that the Rebels would soon win the Galactic Civil War and returned to his [[Homeworld/Legends|homeworld]] of Centares in [[0 ABY/Legends|0 ABY]] to spread news of the Alliance's victory.<ref name="VQ1" /> There he was captured by a group of bounty hunters<ref name="TNSMS" /> including the [[Sephi/Legends|Sephi]] [[Mala Mala]], her droid [[Fordee]] and the [[Human/Legends|Human]] siblings [[Brazzo]] and [[Selle]].<ref name="VQ1" /> Vader arrived on Centares soon after to oversee Harris's interrogation<ref name="TNSMS" /> and, with the aid of [[Ban Papeega]] and a [[Unidentified torture droid|torture droid]], [[Torture/Legends|tortured]] Harris in the former [[Museum of the Old Republic]] until he revealed Skywalker's name before losing consciousness. Flying into a rage, Vader,<ref name="VQ1" /> who had been born Anakin Skywalker and was Luke Skywalker's father,<ref name="ESB">[[Star Wars: Episode V The Empire Strikes Back|''Star Wars'': Episode V ''The Empire Strikes Back'']]</ref> ordered the bounty hunters killed to prevent Skywalker's name from reaching [[Galactic Emperor/Legends|Emperor]] [[Palpatine/Legends|Palpatine]].<ref name="TNSMS" /> Vader dispatched a [[Stormtrooper/Legends|stormtrooper]] to execute Harris, but Mala Mala intercepted and killed the [[Trooper/Legends|trooper]]. Going to Harris, the bounty hunter inquired what he had revealed that had caused Vader to turn on her partners. After he admitted betraying Skywalker and the Alliance, Mala Mala killed him with a [[Blaster/Legends|blaster]] shot.<ref name="VQ1" /> |
Following the Battle of Yavin, [[Lord/Legends|Lord]] Vader became obsessed with taking revenge against the Rebel pilot responsible for the Death Star's destruction<ref name="VQ2">''[[Vader's Quest 2]]''</ref> and hired [[Bounty hunter/Legends|bounty hunters]] to track the pilot down.<ref name="TNSMS" /> Believing Vader to have been killed during the battle, Harris thought that the Rebels would soon win the Galactic Civil War and returned to his [[Homeworld/Legends|homeworld]] of Centares in [[0 ABY/Legends|0 ABY]] to spread news of the Alliance's victory.<ref name="VQ1" /> There he was captured by a group of bounty hunters<ref name="TNSMS" /> including the [[Sephi/Legends|Sephi]] [[Mala Mala]], her droid [[Fordee]] and the [[Human/Legends|Human]] siblings [[Brazzo]] and [[Selle]].<ref name="VQ1" /> Vader arrived on Centares soon after to oversee Harris's interrogation<ref name="TNSMS" /> and, with the aid of [[Ban Papeega]] and a [[Unidentified torture droid|torture droid]], [[Torture/Legends|tortured]] Harris in the former [[Museum of the Old Republic]] until he revealed Skywalker's name before losing consciousness. Flying into a rage, Vader,<ref name="VQ1" /> who had been born Anakin Skywalker and was Luke Skywalker's father,<ref name="ESB">[[Star Wars: Episode V The Empire Strikes Back|''Star Wars'': Episode V ''The Empire Strikes Back'']]</ref> ordered the bounty hunters killed to prevent Skywalker's name from reaching [[Galactic Emperor/Legends|Emperor]] [[Palpatine/Legends|Palpatine]].<ref name="TNSMS" /> Vader dispatched a [[Stormtrooper/Legends|stormtrooper]] to execute Harris, but Mala Mala intercepted and killed the [[Trooper/Legends|trooper]]. Going to Harris, the bounty hunter inquired what he had revealed that had caused Vader to turn on her partners. After he admitted betraying Skywalker and the Alliance, Mala Mala killed him with a [[Blaster/Legends|blaster]] shot.<ref name="VQ1" /> |
||
| Line 56: | Line 56: | ||
''Rebel Assault'' depicts Harris, as part of Blue Squadron, taking part in a trench run at the Battle of Yavin which contradicts the battle as depicted in [[Star Wars: Episode IV A New Hope|''Star Wars'': Episode IV ''A New Hope'']]. The trench run in the game is almost identical to that of the movie—only the persons involved are different. The game depicts Blue Squadron attempting a trench run with Simms entering first while Rookie One joins Murleen and Harris in providing cover. As they negotiate the long trench, the group is pursued by three TIE fighters, including a [[TIE Advanced x1/Legends|TIE Advanced x1]] such as [[Darth Vader's TIE Advanced x1|the one]] used by Darth Vader in the movie. The TIEs open fire, killing Harris and forcing Murleen to pull out, echoing the fates of [[Biggs Darklighter/Legends|Biggs Darklighter]] and [[Wedge Antilles/Legends|Wedge Antilles]] in the movie. Simms finally reaches firing range but his torpedoes impact on the surface, leaving Rookie One next to make an attempt, mirroring [[Garven Dreis/Legends|Garven Dreis's]] failed attempt. In the game, it is Rookie One's shot that is depicted as destroying the battlestation, as opposed to Skywalker's.<ref name="RA" /><ref name="ANH" /> |
''Rebel Assault'' depicts Harris, as part of Blue Squadron, taking part in a trench run at the Battle of Yavin which contradicts the battle as depicted in [[Star Wars: Episode IV A New Hope|''Star Wars'': Episode IV ''A New Hope'']]. The trench run in the game is almost identical to that of the movie—only the persons involved are different. The game depicts Blue Squadron attempting a trench run with Simms entering first while Rookie One joins Murleen and Harris in providing cover. As they negotiate the long trench, the group is pursued by three TIE fighters, including a [[TIE Advanced x1/Legends|TIE Advanced x1]] such as [[Darth Vader's TIE Advanced x1|the one]] used by Darth Vader in the movie. The TIEs open fire, killing Harris and forcing Murleen to pull out, echoing the fates of [[Biggs Darklighter/Legends|Biggs Darklighter]] and [[Wedge Antilles/Legends|Wedge Antilles]] in the movie. Simms finally reaches firing range but his torpedoes impact on the surface, leaving Rookie One next to make an attempt, mirroring [[Garven Dreis/Legends|Garven Dreis's]] failed attempt. In the game, it is Rookie One's shot that is depicted as destroying the battlestation, as opposed to Skywalker's.<ref name="RA" /><ref name="ANH" /> |
||
| − | In [[December]] [[2006]], [[Leland Chee]], keeper of [[Lucasfilm Ltd.|Lucasfilm's]] [[Holocron continuity database]], commented on the [[StarWars.com]] [[StarWars.com Message Boards|Message Boards]] that Rookie One's trench run was non-[[Canon|continuity]], leaving it unclear whether the scene depicting Harris's death was canon.<ref name="Chee">{{Cite_web|url=http://forums.starwars.com/thread.jspa?threadID=152583&start=1062|title=Holocron continuity database questions|accessdate=2012-04-28|author=[[Leland Chee]]|date=[[July 7]], [[2006]] 18:15|work=[[StarWars.com Message Boards]]|archiveurl= |
+ | In [[December]] [[2006]], [[Leland Chee]], keeper of [[Lucasfilm Ltd.|Lucasfilm's]] [[Holocron continuity database]], commented on the [[StarWars.com]] [[StarWars.com Message Boards|Message Boards]] that Rookie One's trench run was non-[[Canon|continuity]], leaving it unclear whether the scene depicting Harris's death was canon.<ref name="Chee">{{Cite_web|url=http://forums.starwars.com/thread.jspa?threadID=152583&start=1062|title=Holocron continuity database questions|accessdate=2012-04-28|author=[[Leland Chee]]|date=[[July 7]], [[2006]] 18:15|work=[[StarWars.com Message Boards]]|archiveurl=https://web.archive.org/web/20100607040721/http://forums.starwars.com/thread.jspa?threadID=152583&start=1062|archivedate=2010-06-07}}</ref> Harris received an entry in ''[[The Complete Star Wars Encyclopedia]]'' ([[2008]]) which mentions his participation in the Battle of Yavin but did not clarify whether he survived the battle,<ref name="CSWE" /> and ''[[The Essential Guide to Warfare]]'' ([[2012]]) later confirmed that Blue Squadron were assigned to attack the Death Star's superlaser while Red and Gold Squadrons attacked the trench.<ref name="TEGW" /> In [[September]] [[2013]], the [[Star Wars Blog]] article ''[[The Not-So Magnificent Seven]]'' by [[Greg Mitchell]] confirmed that Harris survived the battle. The article [[Retcon|established]] that a previously unidentified Rebel pilot whose interrogation and death soon after the Battle of Yavin were depicted in the [[1999]] [[Star Wars comic books|comic book]] ''[[Vader's Quest 1]]'' by [[Darko Macan]] is Harris.<ref name="VQ1" /><ref name="TNSMS" /> |
==Appearances== |
==Appearances== |
||
Revision as of 22:28, 28 June 2020
Warning: This infobox is missing the following parameters: parents, pronouns, children, siblings, partners, families, feathers
- "Harris, standing by."
- ―Thurlow Harris
Thurlow Harris was a Human male starfighter pilot who served in the Alliance to Restore the Republic during the early Galactic Civil War. The son of a Rebel captain, Harris spent much of his life in his father's shadow and witnessed many battles during his youth. Harris completed his Alliance training at the pilot training center on Kolaador, and was one of three pilots sent from Kolaador to Tatooine when Anchorhead Base was attacked by the Galactic Empire. Harris helped to incapacitate an Imperial-class Star Destroyer in orbit of Tatooine, but his group arrived too late to prevent the destruction of Anchorhead Base. Harris was later stationed at the Alliance's main base in the Great Temple on Yavin 4 when it came under assault by the Empire's Death Star battlestation. As part of Blue Squadron, Harris fought in the subsequent Battle of Yavin, in which Rebel forces destroyed the Death Star. He was captured soon after, however, when he returned to his homeworld of Centares to spread news of the Alliance's victory. After being tortured by the Dark Lord of the Sith Darth Vader, Harris revealed that Luke Skywalker was the pilot responsible for the Death Star's destruction. He was subsequently killed by the bounty hunter Mala Mala.
Biography
Rebel pilot
- "There's one on my tail. I can't shake him. I can't shake him!"
"Stay on course, Harris! We'll lose them in the asteroid field." - ―Thurlow Harris and Merrick Simms
Born around 20 BBY[2] on the planet Centares[1] in the Maldrood sector of the Mid Rim,[4] Thurlow Harris grew up in a galaxy controlled by the Galactic Empire. His father became a captain in the Alliance to Restore the Republic, so Harris had seen many battles by the time he was twenty years old. Harris followed his father into the fledgling Rebellion early in the Galactic Civil War and undertook training as a starfighter pilot[5] at the Alliance's pilot training center on Kolaador,[3] alongside another recruit known as Rookie One.[6]

Harris, Murleen, and Rookie One approach Tatooine.
In 0 BBY,[7] Rebel agents acquired the plans to the Empire's Death Star battlestation, a superweapon capable of destroying a planet. Pursued by the Dark Lord of the Sith Darth Vader, Princess Leia Organa of Alderaan entrusted the stolen plans to the droids R2-D2 and C-3PO, who escaped her ship as it was boarded by Imperial forces, landing on the Outer Rim world of Tatooine. Realizing that the plans were no longer aboard the vessel, Vader ordered his forces to begin searching Tatooine.[8] When the Imperial search uncovered the Alliance's Anchorhead Base, the Rebels called for assistance from Kolaador. In response to the distress call, Harris, Rookie One, and Commander Ru Murleen were dispatched to Tatooine in T-65 X-wing starfighters.[3]
The three Rebels arrived in the Tatoo system to find an Imperial-class Star Destroyer in orbit around Tatooine, coordinating the attack below. As the Star Destroyer launched TIE/LN starfighters against the incoming Rebels, Murleen led Harris and Rookie One in strafing runs to weaken its defenses. When the deflector shields protecting the bridge fell under the Rebel assault, Rookie One fired proton torpedoes at the unprotected command tower, crippling the vessel and allowing the Rebel flight group to proceed to the surface.[3]
As the Rebels approached Anchorhead Base, it came under attack from three TIE fighters. Arriving too late to prevent the base's destruction, the Rebels pursued the TIE fighters into Beggar's Canyon to stop them from reporting the arrival of the X-wings. After all three enemies were eliminated, the Rebels were joined by the X-wing of Captain Merrick Simms, and Murleen instructed Harris and Rookie One to accompany Simms while she attacked the Imperial supply lines. With enemy ground forces moving into Mos Eisley, Simms led Harris and Rookie One to the spaceport town, where they engaged All Terrain Scout Transports and Imperial landing craft until the arrival of a TIE fighter group forced them to withdraw. With Harris struggling to outrun a TIE/IN interceptor as the Rebels fled into space, Simms led the two rookies into a nearby asteroid field, where they lost their pursuers before making a hyperspace jump to rendezvous with the Alliance Fleet.[3]
Battle of Yavin
- "I got him, I got him!"
"Cut the chatter, Blue Four." - ―Thurlow Harris and Merrick Simms

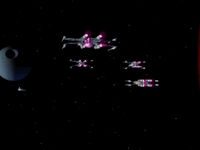
Blue Squadron approaches the Death Star.
Harris was later assigned to the Alliance's main base on the moon Yavin 4, but soon found himself in battle once more.[3] The stolen Death Star plans were eventually delivered to the Rebel base, but the Empire dispatched the Death Star itself to destroy the moon. Analysis of the plans revealed a weakness in the battlestation which General Jan Dodonna formulated a plan to exploit; a direct proton torpedo hit on a small thermal exhaust port would trigger a chain reaction in the Death Star's main reactor and destroy the battlestation.[8] Harris was assigned to Blue Squadron, a group of four X-wings led by Simms and including Murleen and Rookie One; Harris received the call sign Blue Four.[3] Blue Squadron was charged with attacking the Death Star's superlaser directly in an attempt to both damage it and divert attention away from Red and Gold Squadrons while those groups attacked the exhaust port.[9]
As Blue Squadron approached the Death Star, a Star Destroyer in its support fleet launched TIE fighters to intercept them. The group battled their way through the incoming TIEs, with Harris getting at least one kill. During the fight, three of the Imperial fighters were able to get on Simms' tail. Harris tried to go to his wingmate's aid, but he was unable to get a lock, leaving Rookie One to destroy the TIEs and save the flight leader. After making it past the perimeter, Blue Squadron commenced strafing runs on the Death Star's turbolaser batteries and cleared the way for the Alliance forces to enter the narrow trench leading to the exhaust port.[3] Though the initial attempts failed, Red Squadron pilot Luke Skywalker finally made a direct hit on the exhaust port and destroyed the Death Star. The Rebels took heavy losses[8] but Harris narrowly survived the battle.[10]
Capture
- "I was born here and when I saw the Death Star gone, I wanted everyone to know that we'd won! That Vader was dead and… that the war was over! Except that it wasn't. And he isn't."
"There's only one way war ends for a soldier."
"I know. Now I know."
"I'm sorry."
"I'm not." - ―Thurlow Harris and Mala Mala
Thurlow Harris being tortured.
Following the Battle of Yavin, Lord Vader became obsessed with taking revenge against the Rebel pilot responsible for the Death Star's destruction[11] and hired bounty hunters to track the pilot down.[10] Believing Vader to have been killed during the battle, Harris thought that the Rebels would soon win the Galactic Civil War and returned to his homeworld of Centares in 0 ABY to spread news of the Alliance's victory.[1] There he was captured by a group of bounty hunters[10] including the Sephi Mala Mala, her droid Fordee and the Human siblings Brazzo and Selle.[1] Vader arrived on Centares soon after to oversee Harris's interrogation[10] and, with the aid of Ban Papeega and a torture droid, tortured Harris in the former Museum of the Old Republic until he revealed Skywalker's name before losing consciousness. Flying into a rage, Vader,[1] who had been born Anakin Skywalker and was Luke Skywalker's father,[12] ordered the bounty hunters killed to prevent Skywalker's name from reaching Emperor Palpatine.[10] Vader dispatched a stormtrooper to execute Harris, but Mala Mala intercepted and killed the trooper. Going to Harris, the bounty hunter inquired what he had revealed that had caused Vader to turn on her partners. After he admitted betraying Skywalker and the Alliance, Mala Mala killed him with a blaster shot.[1]
Personality and traits
- "Hey, traitor!"
"Wha—what? A traitor. Right. It's what I am. A traitor."
"As if you were the only one! What was it you told Vader? Must've been something bad!"
"A name. Never thought I'd become one. Always believed myself to be stronger. But it's not easy, you know, when… when they…"
"What name? Why is it so important?"
"Skywalker. He destroyed the Death Star. That's all I know. I… how do you go on living as a traitor?" - ―Mala Mala and Thurlow Harris
Thurlow Harris was a Human male with brown hair, brown eyes and light skin.[1] With his father serving in the Rebel Alliance, Harris was exposed to the Galactic Civil War at an early age and saw many battles during his youth. Harris chose to follow his father's example by joining the Alliance, but he struggled to escape his father's shadow. Although he became a skilled pilot, Harris lacked the confidence and mental control of more experienced pilots.[5] Following the Alliance's victory at the Battle of Yavin, Harris was overjoyed and confident that the Rebels would soon win the war. Harris always believed he would be strong and not reveal anything if he was ever captured by the Empire, but his resolve failed when Darth Vader personally had him tortured following his capture on Centares. After revealing Skywalker's name, Harris was ashamed and could not forgive himself for betraying the Alliance. He ultimately welcomed his death when Mala Mala came to kill him.[1]
Behind the scenes
- "I'm hit! I'm hit! I can't hold it… I can't hold it!"
- ―The death of Thurlow Harris

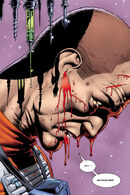
Harris attempts a trench run at the Battle of Yavin.
Thurlow Harris was created by Vincent Lee for the 1993 LucasArts video game Star Wars: Rebel Assault, and his backstory was expanded in the game's manual.[5][3] Harris is a non-player character in the game, who serves in the same squadron as the player's character, Rookie One.[3] Harris's appearance in the game was modeled on footage of LucasArts artist Jon Knoles.[13]
Rebel Assault depicts Harris, as part of Blue Squadron, taking part in a trench run at the Battle of Yavin which contradicts the battle as depicted in Star Wars: Episode IV A New Hope. The trench run in the game is almost identical to that of the movie—only the persons involved are different. The game depicts Blue Squadron attempting a trench run with Simms entering first while Rookie One joins Murleen and Harris in providing cover. As they negotiate the long trench, the group is pursued by three TIE fighters, including a TIE Advanced x1 such as the one used by Darth Vader in the movie. The TIEs open fire, killing Harris and forcing Murleen to pull out, echoing the fates of Biggs Darklighter and Wedge Antilles in the movie. Simms finally reaches firing range but his torpedoes impact on the surface, leaving Rookie One next to make an attempt, mirroring Garven Dreis's failed attempt. In the game, it is Rookie One's shot that is depicted as destroying the battlestation, as opposed to Skywalker's.[3][8]
In December 2006, Leland Chee, keeper of Lucasfilm's Holocron continuity database, commented on the StarWars.com Message Boards that Rookie One's trench run was non-continuity, leaving it unclear whether the scene depicting Harris's death was canon.[14] Harris received an entry in The Complete Star Wars Encyclopedia (2008) which mentions his participation in the Battle of Yavin but did not clarify whether he survived the battle,[6] and The Essential Guide to Warfare (2012) later confirmed that Blue Squadron were assigned to attack the Death Star's superlaser while Red and Gold Squadrons attacked the trench.[9] In September 2013, the Star Wars Blog article The Not-So Magnificent Seven by Greg Mitchell confirmed that Harris survived the battle. The article established that a previously unidentified Rebel pilot whose interrogation and death soon after the Battle of Yavin were depicted in the 1999 comic book Vader's Quest 1 by Darko Macan is Harris.[1][10]
Appearances
- Star Wars: Rebel Assault (First appearance)
- Vader's Quest 1 (Retcon)
Sources
- Rebel Assault: The Official Insider's Guide
 "Ask the Master" — Star Wars Insider 81 (Indirect mention only)
- The Complete Star Wars Encyclopedia
- The Official Star Wars Fact File (2013) Part 1 (YAV3-4, The Battle of Yavin)
- The Not-So Magnificent Seven on StarWars.com (article) (backup link)
Notes and references
- ↑ 1.00 1.01 1.02 1.03 1.04 1.05 1.06 1.07 1.08 1.09 1.10 1.11 Vader's Quest 1
- ↑ 2.0 2.1 The Star Wars: Rebel Assault manual states that Harris is twenty years old at the time of the game. Rebel Assault takes place at the same time as the events of Star Wars: Episode IV A New Hope, which The New Essential Chronology places in 0 BBY.
- ↑ 3.00 3.01 3.02 3.03 3.04 3.05 3.06 3.07 3.08 3.09 3.10 3.11 3.12 3.13 Star Wars: Rebel Assault
- ↑
 Star Wars: The Essential Atlas Online Companion on StarWars.com (article) (backup link)
- ↑ 5.0 5.1 5.2 Star Wars: Rebel Assault manual
- ↑ 6.0 6.1 The Complete Star Wars Encyclopedia, Vol. II, p. 22 ("Harris, Thurlow")
- ↑ The New Essential Chronology
- ↑ 8.0 8.1 8.2 8.3 Star Wars: Episode IV A New Hope
- ↑ 9.0 9.1 The Essential Guide to Warfare
- ↑ 10.0 10.1 10.2 10.3 10.4 10.5 The Not-So Magnificent Seven on StarWars.com (article) (backup link)
- ↑ Vader's Quest 2
- ↑ Star Wars: Episode V The Empire Strikes Back
- ↑ Rebel Assault: The Official Insider's Guide
- ↑ Holocron continuity database questions by Leland Chee on StarWars.com Message Boards (bad argument #2 to 'formatDate' (not a valid timestamp)) (archived from the original on June 7, 2010)