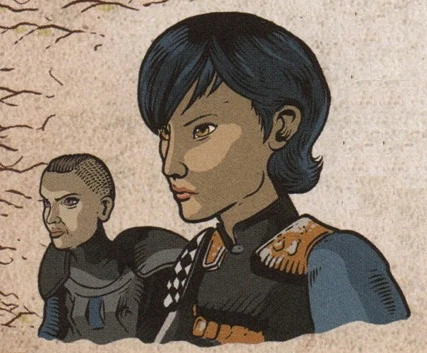
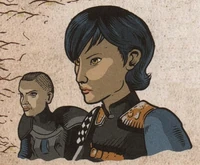
I'm surprised to see you so swayed by Sabine Wren. You seem to be as impressed with her as I am."
"I had my doubts, Rau, but she came back to face her past and her bold initiative has impressed me. She has become a courageous leader. She reminds me of the best of who we were, and could inspire us to become more than we have been of late.
——Fenn Rau and Bo-Katan Kryze[来源]
萨宾·雷恩(英文:Sabine Wren)是一名曼达洛籍人类女性。她是一位革命领袖,在银河内战前加入以洛塔星为据点的幽灵小队,参与了反抗银河帝国统治的活动,在大小战斗中功勋卓著,在重返雷恩氏族时,雷恩经受考验并最终成为暗剑的持有者,领导雷恩氏族解放曼达洛,反抗银河帝国的暴政。雷恩同时也是一位热衷于涂鸦的艺术家,她的作品甚至成为了共和国光复同盟标志同盟星鸟的灵感来源,其艺术造诣对后世艺术发展产生了重要影响。
在走上起义道路之前,雷恩是曼达洛帝国军事学院的一名军校生,在校期间,她出于和平的目的曾涉足武器开发,但帝国却将她的作品用于对抗曼达洛人。羞愧难当的雷恩在破坏武器材料后负气出走,她也因此被帝国和自己的母亲——雷恩氏族族长厄莎·雷恩视为叛徒。雷恩后来与凯楚·奥尼奥做过一阵子赏金猎人,直到她加入由赫拉·辛杜拉和凯南·贾勒斯领导的幽灵小队,同他们一同对抗帝国暴政。在这一过程中,雷恩的作品成为了希望的象征。随着战事不断扩大,幽灵小队成为了更大规模起义运动的一部分,雷恩在这一过程中也不断地激励着自己的战友,鼓励他们继续作战。
在2 BBY时,雷恩与同伴前往达索米尔星追捕前西斯尊主、曼达洛现任统治者摩尔,在那里她意外发现了曼达洛圣物——暗剑。起初,雷恩并不希望与暗剑有太多瓜葛,但贾勒斯和芬·劳——谐晨星的曼达洛保护者说服她成为暗剑持有者,让曼达洛人再度统一起来,成为义军的一员。雷恩后来带着暗剑返回了自己的氏族,击杀卑鄙的帝国总督加尔·萨克森,并赢得雷恩氏族的支持。在接下来的曼达洛内战中,雷恩帮助氏族抵抗帝国统治,不久后她返回义军同盟,参与到即将全面爆发的银河内战当中。
个人经历[ | ]
早年生活[ | ]
“你真正的家人怎么了?”
“帝国,你呢?”
"What happened to your real family?"
"The Empire. What happened to yours?"
——埃兹拉·布里杰与萨宾·雷恩的对话
A human female, Sabine Wren was born on the planet Krownest[1] in the waning years of the Galactic Republic, into Clan Wren of House Vizsla.[5] Her mother Ursa[12] was a member of Death Watch[5] during a time when Mandalore had fallen into chaos after the collapse of the New Mandalorian government, near the end of the Clone Wars.[13] Trained from an early age in Mandalorian warrior culture,[14] Wren forged her distinctive armor with her family,[5] but also inherited her Nite Owls[15] helmet from someone whose identity she was reluctant to reveal.[14] Her father, artist Alrich Wren, took Sabine to see the statue of Tarre Vizsla.[16]
克隆人战争结束后,银河帝国控制了曼达洛领土,并建立起一座帝国军校。当时的雷恩还对帝国抱有信心[17],便加入了军校,成为一名学员。[17]在校期间,她对提列克抵抗组织领袖查姆·辛杜拉和曼达洛保护者芬·劳使用过的战术进行了研究。[5] during the Clone Wars. This would eventually put her at odds with the Imperial establishment there, and led to a nightmarish experience.[6]
Sabine Wren and Ketsu Onyo became bounty hunters after leaving the Imperial Academy.
As a young and idealistic Imperial cadet, Sabine built an Arc Pulse Generator that she nicknamed the "Duchess", which reacted with the beskar alloy inside the Mandalorian armor, incinerating the armor and disintegrating their wearers. The weapon was regarded by many Mandalorians as an abomination because it turned their armor against them; Mandalorian armor held a sacrosanct place in Mandalorian culture since it was passed down from generation to generation.[18] As Wren witnessed the Empire subjugating Mandalore, she was wracked with guilt at her own role in helping the Empire build the weapon used to oppress her people.[11]
When she spoke out against the Empire, Sabine's mother, her father, and her brother Tristan Wren sided with the Empire and cast her out. Estranged from her family,[11] Sabine Wren escaped the Imperial Academy with the help of her friend, Ketsu Onyo, and deserted the Empire.[19] Sabine's decision to renounce the Empire had serious ramifications for her family. Her father became a hostage of Viceroy Gar Saxon, the Emperor's Hand and the Imperial puppet ruler of Mandalore. Her mother Ursa was forced to prove her clan's loyalty to the Empire while her brother Tristan was forced to serve in Saxon's Imperial Super Commandos so that the family could remain in Saxon's favor.[11] Before fleeing Mandalore, Sabine also destroyed her weapon. However, the Empire was able to use her research to build another arc pulse generator.[18]
在逃离曼达洛的时候,雷恩从伍基人那里得到了很大的帮助,因此她一直都觉得自己欠了后者的人情。[20] Wren and Onyo then became bounty hunting partners; the two were like sisters, though Wren was the softer of the two. Together, they dreamed of joining the criminal organization Black Sun, all the while doing things just for money and caring only about themselves in an attempt to survive.[19] Ultimately, they parted on bad terms[15] due to Onyo getting "greedy" and leaving Wren for dead.[19]
At some point, while on the run from an Imperial attempt to capture her after she had left the Academy, a man named Janard saved her life by knocking over a stack of freight containers to block the Imperials' path while she escaped.[17] Eventually, the brutal Imperial crackdown on her homeworld and the consequent loss of her family pushed Wren into open rebellion.[14]
洛塔义军[ | ]
加入幽灵号[ | ]
What do you think you're doing?"
"What does it look like? Art.
——TK-626 and Sabine Wren[来源]


Sabine Wren paints the starbird on a TIE fighter.
16岁时,[2] 雷恩加入了由提列克船长赫拉·辛杜拉、流亡绝地学徒凯南·贾勒斯、拉桑战士加拉泽布·奥雷利奥斯及宇航技工机器人C1-10P的义军小队。这支小队搭乘经过改装的VCX-100轻型运输船——幽灵号[2],三五不时地袭击帝国军、破坏帝国设施,并将缴获物资提供给需要帮助的人[9],这一切对莎宾而言都犹如重生。[19]
在一次任务中,代号“幽灵5号”(英文:Spectre 5)的雷恩需要声东击西,为幽灵号创造逃跑机会,她潜入洛塔首都城的TIE战斗机停机平台,and spray-painted graffiti of a violet starbird onto a TIE fighter wing. She was then noticed and hunted down by stormtrooper TK-626, his captain, and four others. Wren eventually detonated a paint bomb, creating a colorful explosion that left the stormtroopers stunned and splattered in blue paint, but alive, and strode off into the city amid grateful locals, an event that earned her the nickname "The Artist" among local stormtroopers.[8][21] Wren, or an individual closely matching her description, was on Lothal's most-wanted list for wreaking havoc on an Imperial airfield.[22]
解救伍基人[ | ]
Who are you people? I mean, you're not thieves exactly."
"We're not exactly anything. We're a crew. A team. In some ways, a family.
——Ezra Bridger and Sabine Wren(播放 ▶ · 查看文件)[来源]
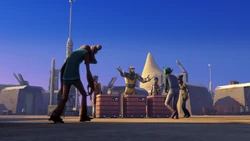
在一次抢夺帝国物资的行动中[20],雷恩、贾勒斯和奥雷利奥斯埋伏在了首都城主广场周围,where a group of stormtroopers led by Supply Master Cumberlayne Aresko were transferring several crates containing food and blasters to the Imperial Portal. At a hand signal given by Jarrus, 雷恩朝帝国士兵的614-AvA飞行摩托扔了几枚手榴弹,把他们炸得东倒西歪,而贾勒斯和奥雷里奥斯则利用混乱伏击了帝国士兵,但是就在这个时候,当地的一个小扒手埃兹拉·布里杰乘机偷走了其中一台陆行艇。不过,雷恩最终还是把陆行艇上的箱子偷了回来并返回幽灵号[23]

Wren, Orrelios, and Bridger provide food for the people of Tarkintown.
Accompanied by Bridger (who expressed a new-found fondness towards Wren, but she did not return his affection), the Ghost crew fended off a few TIE fighters and went to Tarkintown, 向那里的居民分发食物。they also sold the stolen blasters to the Cikatro Vizago to obtain information about the location of an Imperial Gozanti-class cruiser ferrying several enslaved Wookiee prisoners. Subsequently, they commenced the mission and infiltrated the Gozanti, unaware that 帝国安全局特工卡勒斯 Agent Kallus had set a trap for them. He and several stormtroopers were hiding in the transport compartment, ready to apprehend the rebel boarders. After learning of this deception, Wren and Chopper disabled the ship's artificial gravity systems for two minutes, which temporarily slowed down Kallus and his stormtroopers and allowed for their escape, except Bridger, who was captured by Kallus and taken aboard his Imperial I-class Star Destroyer,[23] Lawbringer.[22] As the Ghost fled into hyperspace, Sabine detonated the explosives she had left behind, destroying the Gozanti cruiser.[23]
发现布里杰被丢下后,幽灵号掉转船头实施营救。然而当他们回到歼星舰时,布里杰已经从拘禁室里逃脱,并得知帝国准备把伍基人押送到科舍尔星的太空矿场,Using the information, the Ghost traveled to Spice mine K76 and Wren assisted Jarrus and Orrelios in attacking the Wookiees' stormtrooper guards while Bridger freed the prisoners, a skirmish during which Jarrus revealed himself as a Jedi Purge survivor. Ultimately, they managed to liberate the Wookiees and escape in a shipping container that was ferried by the Ghost; later, they parted when the Wookiees boarded an Auzituck anti-slaver gunship. Yet, the rebels were joined by Bridger, who would train under Jarrus as a Jedi.[23]
Garel theft[ | ]
These were banned by the Senate. You can short-circuit an entire ship with these."
"That's not why they were banned.
——Sabine Wren and Garazeb Orrelios, on the T-7 ion disruptors[来源]

Sabine with a T-7 ion disruptor rifle.
由于幽灵号缺乏燃料,义军们决定前往加雷尔星的太空港偷取一批军火,并拿去和维萨格交换。For the mission, all but Syndulla boarded Star Commuter 2000 shuttle ST-45 and arranged for Imperial Minister Maketh Tua to rely on Wren's translating skills in her negotiations with Aqualish arms dealer Amda Wabo, by preventing Tua's borrowed droids, R2-D2 and C-3PO, from helping her. Wren offered her services as a translator and asked Wabo tell her the weapons' location in Bay 7, but deliberately mistranslated this as "Bay 17" in order to mislead Tua. After disembarking, Wren and the crew headed to Bay 7 where they discovered that the shipment was an T-7 ion disruptor rifles.[24]
Before the rebels could finish loading the contraband weapons onto the Ghost, piloted by Syndulla, they were confronted by Tua and several stormtroopers. They were accompanied by C-3PO and R2-D2, who during the confrontation stowed away in the Ghost; unbeknownst to the rebels, the two droids were on a secret mission to prevent the Imperials from taking the weapons. Returning to Lothal, the rebels attempted to sell the rifles to Vizago, but before they could complete the transaction, the two parties were interrupted by the arrival of Kallus, two AT-DP walkers and several stormtroopers. While Vizago fled, Jarrus refused to let the weapons fall into Imperial hands and ordered Wren to destroy them; she, at R2-D2's suggestion, overloaded the disruptors and fired them at the stormtroopers instead. Yet, forced to escape, they left on the Ghost, after which they returned the stowaway droids to their owner, Bail Organa. He never identified himself but rewarded the rebels for returning them.[24]

The mural made by Wren in Orrelios and Bridger's room.
Sometime later, while Bridger was running down Chopper in the halls of the ship, he stopped by Wren's room to offer her some "inspiration" for her artwork although she did not express any interest. 不久后,她受到切宝对布里杰和奥雷利奥斯的恶作剧启发,在他们二人的舱室内画了一幅涂鸦,令二人好生尴尬。[25]
Stygeon Prime[ | ]
Welcome to the Spire on Stygeon Prime, the only Imperial detainment facility in the Stygeon system— and it's impregnable."
"That's never stopped us before."
"Trust me, we have never faced anything like this. It's a real work of art.
——Sabine Wren and Kanan Jarrus[来源]
Following a HoloNet transmission from Senator-in-exile Gall Trayvis that announced that Jedi Master Luminara Unduli was still alive but imprisoned at the Spire, 贾勒斯决定尝试解救昂杜利,并指示他的队友们做好准备。
Jarrus decided to mount a rescue mission for Unduli and told the crew to prepare for the operation. Wren, for her part, studied the schematics of the Spire, and while en route to the Stygeon system, explained that the prison was impregnable and that they had never faced anything as secure as the Spire's defenses. Despite the odds, the rebels continued on their way to Stygeon Prime and left Chopper to look after the Ghost in orbit, whereas the rest descended on the Phantom. Upon arriving, Wren and her comrades landed on the prison's landing platform and overpowered four stormtroopers who were guarding the facility's entrance, while Syndulla awaited aboard the Phantom.[26]

The rebels fight their way into the Spire.
进入监狱后,雷恩入侵了计算机系统,并得知昂杜利被关押在尖塔的底层,而这与她手头上的建筑图纸不相吻合。Jarrus then devised a backup plan in which Wren and Orrelios were to guard the turbolift while he and Bridger ventured to Unduli's cell. Meanwhile, Wren discovered that the Empire was jamming their signal and quickly deduced that they had stumbled into a trap and decided to find another escape route, disabling the lifts along the way to slow down Imperial reinforcements. While fleeing through the complex, Wren and Orrelios encountered Jarrus and Bridger, who were fleeing the Grand Inquisitor.[26]
After dodging several closing blast doors, the four entered an empty hangar bay, where Bridger and Jarrus used the Force to open the hangar's outer doors. However, they encountered numerous stormtroopers and parked TIE fighters waiting for them on the other side. During the ensuing skirmish, Syndulla arrived in the Phantom accompanied by a large swarm of tibidees. With the Inquisitor and his troops preoccupied, Wren and her comrades managed to escape into hyperspace.[26]
Later on, during a mission to destroy a massive kyber crystal, Wren along with Orrelios and Chopper kept a watch over Bridger while he infiltrated Lothal's Academy for Young Imperials to steal a decoder containing the shipment's location. While Chopper infiltrated the Academy disguised as an Imperial astromech droid, Wren and Orrelios waited outside the Academy to evacuate Bridger once he had accomplished his mission. When he managed to secure the decoder with the assistance of fellow cadet Zare Leonis, Bridger passed the device to Chopper who then gave it to Wren; she, in turn, transmitted the crystal's coordinates to Jarrus and Syndulla, who then intercepted and destroyed the Imperial convoy transporting the crystal.[27] Wren then made arrangements to pass it to Leonis' friend Merei Spanjaf, who needed it to hack into the Imperial data network to find Leonis's sister, Dhara.[28] Afterwards, as requested by Bridger, Wren and Orrelios staged a diversionary attack on the Academy the following day so that he could escape with Jai Kell. 和计划中的一样,雷恩和奥雷利奥斯向学员发起了进攻,为布里杰和克尔提供掩护。随后他们一同返回了幽灵号。[27]
Fort Anaxes[ | ]
We are making a difference, Sabine. And I promise: we won't always be fighting this battle alone. Do you think you can trust me?"
"I think I can try.
——Hera Syndulla and Sabine Wren[来源]

Hera Syndulla and Sabine Wren settling their differences on Fort Anaxes
在执行辛杜拉的神秘联络人“支点”提供的任务时,搭乘幽灵号的雷恩、布里杰与辛杜拉遭到数架TIE战斗机袭击。由于不相信“支点”情报的可靠性,雷恩质问了辛杜拉,结果令两人产生嫌隙。Not content with being kept in the dark, Wren interrupted Jarrus and Syndulla's conversation in the Ghost’s cockpit; Jarrus, however, told her that he trusted "Fulcrum" because Syndulla trusted in her contact, prompting Wren to accompany Syndulla on a supply run to Fort Anaxes at the Anaxes asteroid belt, where they were supposed to meet "Fulcrum".[6]
As the two departed on the VCX-series auxiliary starfighter and landed on PM-1203, they found the crates ready for them to transport and no sign of "Fulcrum", and Wren apologized to Syndulla for her attitude, explaining that she simply wanted to be trusted by Syndulla and Jarrus and that she was not walking into another nightmare as the one she had experienced at the Imperial Academy. Syndulla assured Wren that they did trust her and, following rebel protocol, simply asked her to have faith. Before Wren could answer, the two were attacked by fyrnocks. After deducing the creatures could not tolerate light, they loaded all the supplies onto the Phantom and tried to take off, only to find that Bridger, Orrelios, and Chopper had not finished the shuttle's fuel tank repairs, leaving them stranded.[6]
After Syndulla contacted the rest of the crew for help, Wren devised a plan to use rhydonium explosives to keep at bay the creatures should the sunlight disappear. However, they quickly ran out of explosives and, when they were cornered and forced to get atop the Phantom, the Ghost came to their rescue. Once safely aboard the freighter, Syndulla assured Wren that she trusted her and promised she would eventually understand the cause they were fighting for, and Wren to try and trust her.[6]
其他任务[ | ]
Following a raid on an Imperial supply yard, the crew was in need of parts to repair the Ghost and so, went to Osisis Station in the Regani sector. Hoping to obtain the parts from long-time-"associate" Galus Vez's black market operation, the team met with the Besalisk, but as the Empire had been doubling their inspections since their last visit, he refused to the transaction and challenged Syndulla to a race in Fool's Run. Although she won, Vez tried to retaliate by handing them over to the Empire. However, on Jarrus' orders, Wren and Orrelios took out one of Vez's cargo ships and placed explosives on another two. Threatened into cooperation, Vez gave the parts to the rebels and the Ghost departed after Wren managed to leave a starbird graffiti stencil in the station's outer hull.[29]
While Orrelios and Jarrus were away to destroy on a mission an Imperial transmission centre with the Phantom, Wren, Syndulla, Chopper and Bridger remained on the Ghost. However, an Imperial showed up and attacked them, prompting the rebels to defend themselves and Syndulla to enter an ion storm to lose them. Manning the nose turret, Wren destroyed two TIE fighters before the storm took the Ghost’s systems down. In the ensuing repairs, Wren fixed the targeting systems and when Bridger was done with his part, she was able to destroy a Gozanti cruiser, and the Ghost was able to escape the storm and rendezvous with Orrelios and Jarrus.[30]

Wren dueling Zygerrian slaver MaDall on Oon.
During a mission to swipe the Lothal Academy's new recruits, Wren heard about a slave trading operation on Oon and, after leaving a graffiti calling card so that the rest of the crew knew where she was, let herself be captured for a self-imposed mission. Wren put little resistance but her spirit earned her the recommendation of the captor to his employer, MaDall; taking the suggestion, the Zygerrian made of Wren her personal slave and outfitted her with a shock collar. That night, while MaDall was asleep, Wren sneaked away to reconnoiter the location, but a slaver captured and returned her to MaDall. While her master was again asleep, Wren made a painting of the Zygerrian woman, deactivated her collar and saw that her attempts had inspired a rebellion among the slaves. Wren then engaged in a electro-whip duel with MaDall and defeated her, after which she waited for the Ghost to arrive. Agreeing to relocate the freed slaves, Jarrus and Syndulla let MaDall free, and Wren suggested her that she could fight against the Empire.[31]
Kaller[ | ]
Contacted by "Fulcrum", the Ghost crew was to pick up supplies on Kaller, where crates were ready and waiting for them, for the Tarkintown refugees.[32] Wren and the team arrived at the coordinates where the crates had been waiting for them but found them empty. Furthermore, the provincial governor, Gamut Key, and his constabularies arrived at the scene, for they had received a tip that smugglers were using the area as a drop point and demanded that they let him search the ship. With nothing to hide, Syndulla allowed them; before long, Key and his men left them to their devices. Instead of leaving empty-handed, the team decided to track the shipment themselves. Once they reached Plateau City, Jarrus decided to split the team up to cover more ground, and Wren went to search with Orrelios.[33]
最终,Wren and the others learned from Chopper that Jarrus had been stabbed in the back and had passed out from blood loss,[33] and quickly moved him to a medcenter where he was put into a bacta tank. As they waited for him to regain consciousness,[34] Imperial forces surrounded the medical facility and demanded that the rebels surrender,[35][36] and later, erupted into the building. Protecting Jarrus, they fought the stormtroopers even as they threatened to overwhelm them.[37]
帝国日[ | ]
“生日快乐,埃兹拉·布里杰”
——萨宾·雷恩[来源]
在帝国日的那天,雷恩和她的朋友们拜访了 Old Jho's Pit Stop, where they learned that the Empire had launched a manhunt for a Rodian, and where Jarrus decided to sabotage the Empire Day celebrations in Capital City. Though Bridger refused, Wren and the rest of the team went to the Imperial parade. During the operation, Wren and Orrelios distracted the crowd and Imperial personnel by throwing fireworks into the sky, while Jarrus planted a detonator on the newly-unveiled TIE Advanced v1 prototype on display. 爆炸发生后,义军们成功逃离了现场,但辛杜拉却只接应到了奥雷里奥斯一人。在布里杰的指引下,雷恩和贾勒斯逃进了前者的旧宅,but as Syndulla could not extract them with the Ghost, Wren and Jarrus followed Bridger to his old residence, while Orrelios rendezvoused with Syndulla. At Bridger's family home, however, they found the fugitive Rodian, Tseebo, who had once been a friend of Bridger's missing parents.[38]
Wren and Bridger protect the fugitive Tseebo.
Wren then noticed that Tseebo was wearing an AJ^6 cybernetic implant and learned that it carried invaluable information on Imperial Military secrets. She also took a holodisk that Bridger has left, before Jarrus decided to smuggle the Rodian off Lothal. Together, Wren and Jarrus stole an Imperial Troop Transport. Wren drove the transport through the city's main gate in spite of the Imperial lockdown (and Kallus' intervention) and until they were extracted by Syndulla in the Ghost. However, the freighter was soon attacked by the Grand Inquisitor's TIE squadron, an attack during which Wren and Bridger learned that Tseebo knew the fate of his parents,[38] and that the Inquisitor had placed an XX-23 S-thread tracker on the Phantom. Jarrus then decided to use the Phantom and lure the Inquisitor to Fort Anaxes, in Bridger's company.[39]
Before they left for the asteroid, Wren tried to convince him to talk to Tseebo about his parents, but as he declined out of resentment towards Tseebo, Wren opted to repair the holodisk while he was away. As the waited for their return, Wren and Orrelios stayed aboard the Ghost while Syndulla and Tseebo boarded Fulcrum's corvette that would take him into hiding. After Bridger and Jarrus returned from Anaxes, Wren gave the boy the holodisk (which contained a picture of his parents, Ephraim and Mira, and him) she had salvaged from his home as a birthday present.[39]
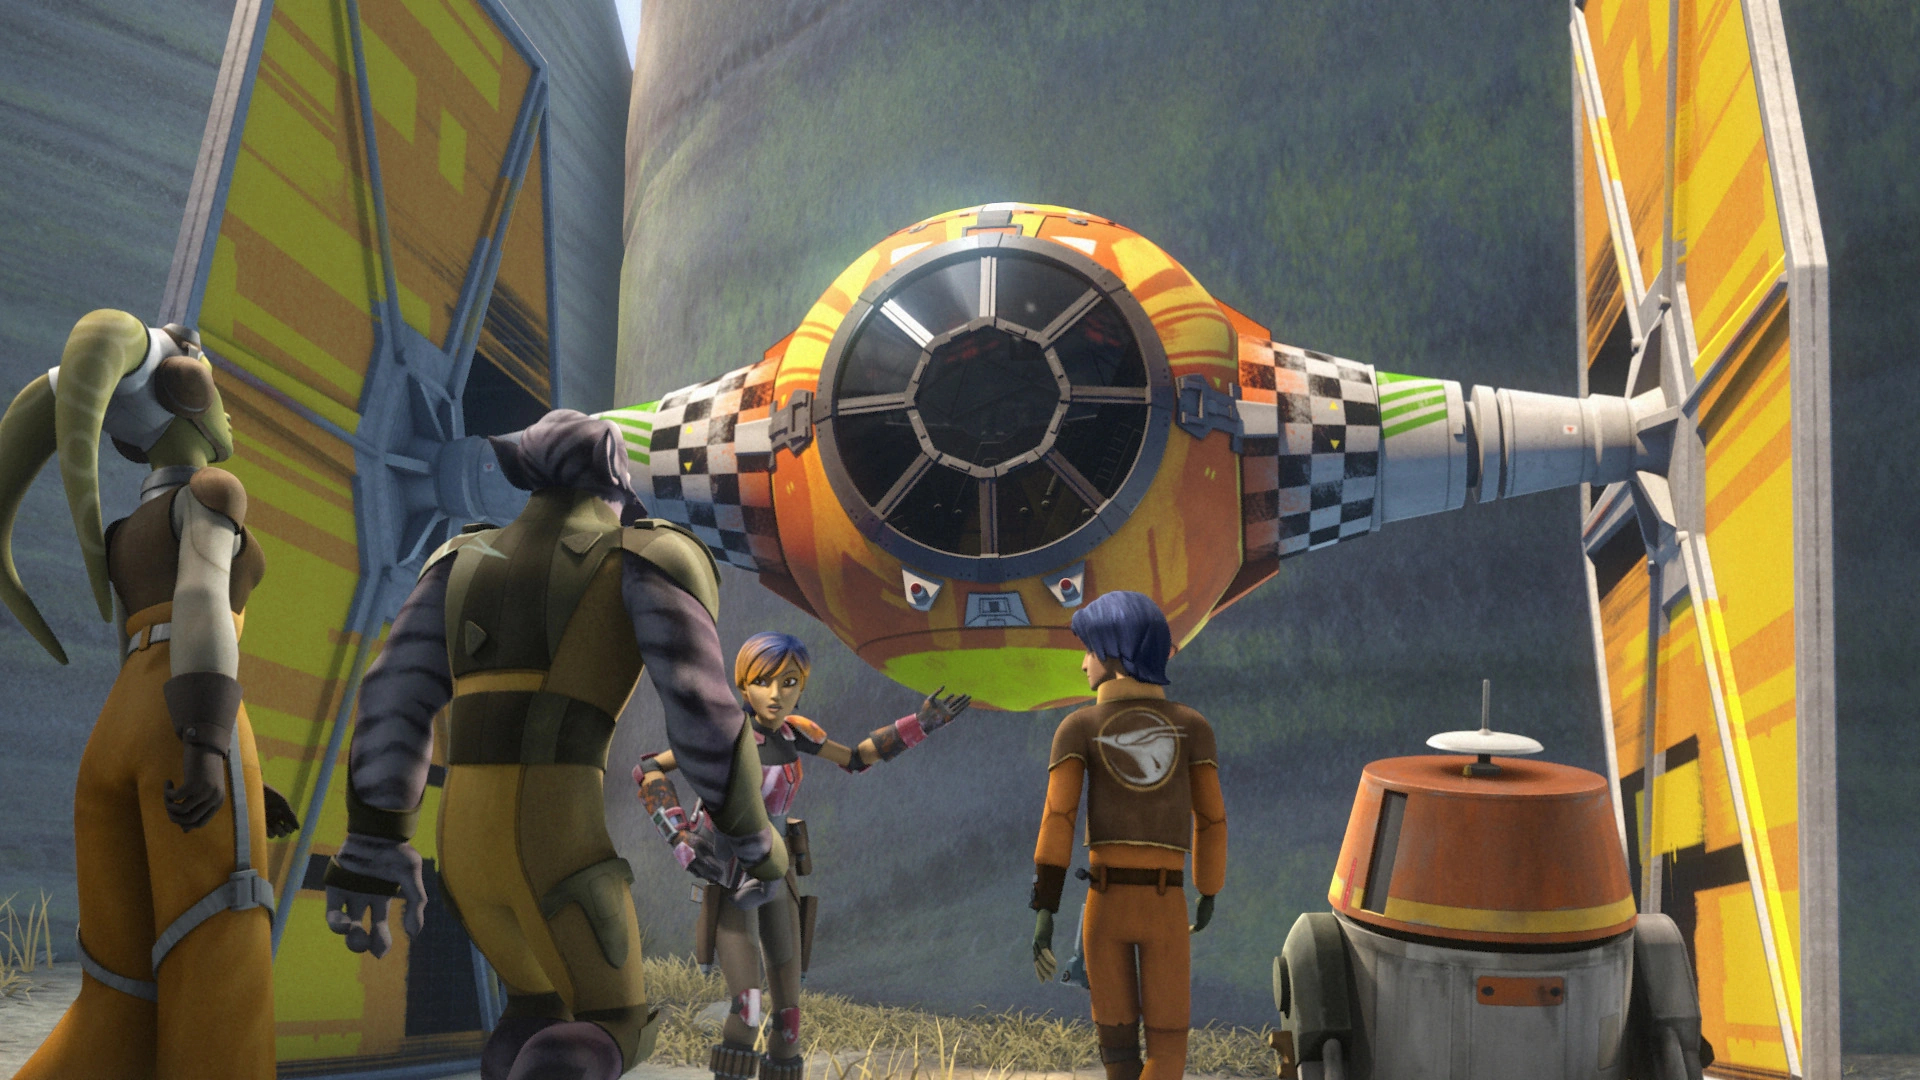
Sometime later, Bridger showed Wren the TIE fighter that he and Orrelios had stolen. While she gave it a paint job,[21] their activity delayed Bridger in his Jedi lesson with Jarrus. After their venture to a Jedi Temple, Bridger began to build his own lightsaber; for its construction, Wren supplied him modulation circuits and an energy gate, and was present when he ignited the lightsaber for the first time.[40]
卡瑞辛的赌博[ | ]
I understand this is your work. Reminds me of Janyor's protest paintings on Bith."
"Janyor of Bith is a major influence."
"Well, your work is even more stunning in its simplicity.
——Lando Calrissian and Sabine Wren[来源]
Calrissian admires Wren's artwork.
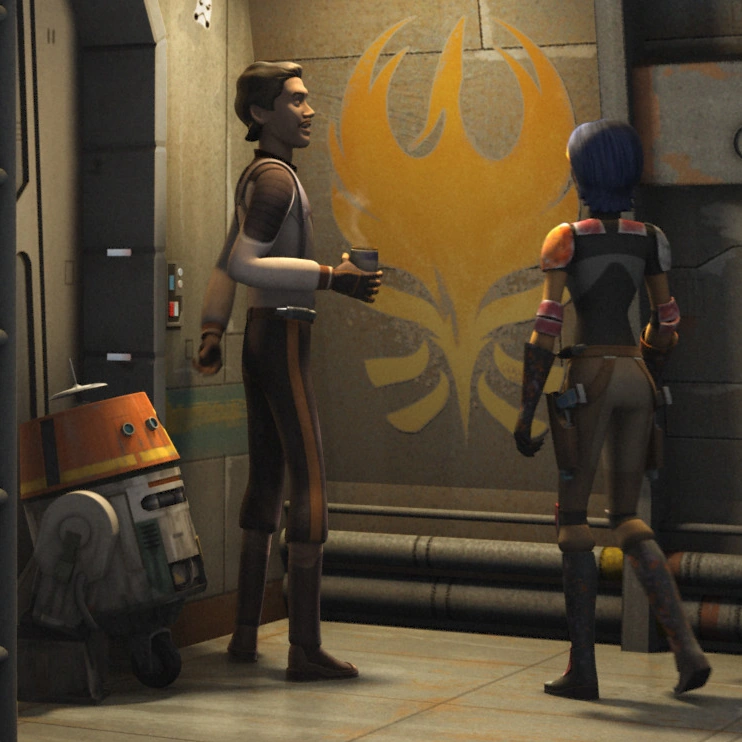
奥雷利奥斯在打萨巴克牌时不小心把切宝输给蓝多·卡瑞辛,贾勒斯被迫和卡瑞辛达成协议,帮他运送一批货物通过洛塔星的帝国封锁线。尽管辛杜拉对此极为不满,但却也无可奈何。As they departed Lothal and were in hyperspace, Calrissian spotted some of Wren's art painted inside the ship and mentioned his familiarity with the artist Janyor of Bith, who happened to be one of Wren's favorite artists. Wren, pleased that her art was both appreciated and understood for a change, offered to show him more of her art.[41]
After the Ghost docked with Merchant One and Syndulla traded herself as a slave to crime lord Azmorigan (according to Calrissian's plan, they obtained Calrissian's cargo. The smuggler and Wren welcomed Syndulla when she returned to the Ghost in one of the Merchant’s escape pods, and then went to see what Calrissian's cargo was—a puffer pig—, only to find that Orrelios had scared the creature. The pig had inflated to more than three times its normal size, blocking their way to the cockpit, and forced Jarrus to pilot through the blockade and land near Calrissian's estate. However, the Ghost crew and Calrissian were surprised to find a resentful Azmorigan and his men waiting for them. In the ensuing skirmish, the rebels managed to scare Azmorigan off. The rebels, in turn, left Calrissian when it seemed he would not pay them; yet, it was because he knew that Chopper had taken a fuel canister from him.[41]
在前往塔金镇休整的时候,雷恩和义军向居民们分发了一批食物。unbeknownst to them, the food had been poisoned by Kallus, prompting those who had eaten to become ill, among them Mindiz, for whom Orrelios had a soft spot. Although they were planning to obtain the medicine from Capital City, Orrelios left on his own and prompted Wren and the others to go help him at a medical facility. After obtaining a antidote for the Tarkintown settlers, they found Orrelios at Kallus' mercy, they intervened and engaged in a firefight with the Imperials. After retreating aboard the Ghost, they distributed the medicine and saved the settlers, including Mindiz.[42]
Deception[ | ]
Is anybody on our side?
——Sabine Wren[来源]
Wren along with Orrelios and Chopper took part in one of Bridger's Jedi training sessions, so that he learned to redirect blaster fire at a specific target; instead, he had a vision of them fighting alongside Senator-in-exile Gall Trayvis. Following the training session, the Ghost crew received a transmission from Trayvis telling them to meet at the Lothal Lothal City Capitol Building. After Bridger confirmed an Imperial operation with his friend Zare Leonis, Wren and her comrades decided to sneak into the building through the sewers in order to warn Trayvis. Per Jarrus' orders, Wren and Orrelios went to the rooftop to provide cover fire to Syndulla, Jarrus and Bridger's meeting with Trayvis.[43]

Wren and her comrades stalking the Lothal City Capitol Building.
然而在会面时,他们却遭到了卡勒斯手下的埋伏,prompting Wren and Orrelios to activate smoke bombs to cover their escape, with Wren throwing a thermal detonator once they did. To evade their Imperial pursuers and protect Trayvis, they fled down the sewers and split into two groups: Wren traveled with Orrelios and Jarrus to provide a distraction to their pursuers, while Bridger and Syndulla accompanied the fugitive senator, who revealed his loyalty to the Empire and attempted to kill Bridger and Syndulla. Once he was overpowered by her, the rebels met up and managed to exit the sewers after Jarrus used the Force to temporarily stop a large circular fan. After reuniting with Chopper at the manhole, they fled back to the Ghost.[43]
Sometime afterward, a Clawdite seeking to collect the bounty that the Empire had put on their heads infiltrated the Ghost. After Chopper was attacked, the intruder knocked Wren out and impersonated her, but when the crew discovered the real Wren, the Clawdite started a firefight and changed her appearance to that of Bridger's until Orrelios attacked it. Ultimately, it was Bridger who stunned the impersonator, whom the crew dropped on a moon and left.[44]
之后,雷恩和切宝潜入了洛塔星帝国军校, to destroy a weapons cache. Hacking the academy's security system to get the access code, the two got past the main door, but Chopper forgot to zap one of three guards, letting the third to set off the alarm. During the pursuit, Wren and Chopper made the "escape through the lift hatch" trick and made their way into the main weapons area. As she proceeded to plant the charges, she was surprised by Dunum, who held her at gunpoint until he was stunned by a probe droid, betrayed by fellow Imperials, Aresko and Myles Grint. Wren then finished with the charges and, after Chopper made a hole in the wall, she sent the pick-up signal to Orrelios, who extracted them on a X-34 landspeeder. She then detonated the charges, damaging the Imperial Complex.[45]
塔金到来[ | ]
Maybe this mission doesn't make military sense. But Kanan is family. And we've all lost enough family to the Empire. So rescuing him makes sense to me.
——Hera Syndulla, on Jarrus' rescue[来源]
Not too long after, Wren participated in a raid near Jalath with Bridger and Jarrus. Successful in their endeavor, they returned to the Ghost to find that Senator Trayvis had publicly declared his loyalties to the Empire and had condemned them as terrorists in the HoloNet. To counter his claims, Jarrus decided to transmit their own message to the people of Lothal and tell the truth about the Empire. 之后,布里杰和贾勒斯前往帝国指挥中心刺探情报,a dwarf probe droid caught glimpse of them alerting 高级星区总督威尔赫夫·塔金 of their presence. Unaware of the trap, the rebels continued with their mission, and Wren prepared a data spike for Chopper to upload it into the tower's computer core. During the operation itself, she distracted the stormtroopers thereby ramming her Undicur-class jumpspeeder into a gun turret while Orrelios hijacked the other one to destroy the last remaining turret, enabling Jarrus and Bridger to bring Chopper as Wren eliminated the remaining troopers inside the tower.[46]
Once he installed the spike, Wren worked to have the transmitter operational, just as Imperial reinforcements arrived. Once she got a signal, Jarrus ordered them all to take the tower's lift to meet Syndulla on the Phantom at the top. On Jarrus' orders, they were forced to leave without him and return to the Ghost, from where Bridger was the one to give their message to Lothal and the surrounding systems before the tower was destroyed by Tarkin.[46] Distressed by Jarrus' capture, the next day, they vowed to rescue him and hijacked an AT-DP walker on patrol in an attempt to hack into the Imperial data network to find his location, only to find that the network was down.[47]

Wren's "masterpiece": a repainted TIE fighter.
Once they retreated to the Ghost, Syndulla received word from "Fulcrum" that they were to stop their search for Jarrus for the greater good of the rebellion, and in turn, forbade her crew from continuing the effort. However, Wren, Chopper and Orrelios Bridger disobeyed her collaborated so that Bridger could make a deal with Cikatro Vizago: the Devaronian told him that the Imperials were using courier droids due to the communication tower's destruction. Though Syndulla discovered their ruse, she was convinced with Bridger's plan to use Chopper to infiltrate an Imperial communications ship and obtain Jarrus' location. For the mission, Wren disguised Chopper as an Imperial courier with a paint job and, along with Orrelios, abducted 264 so that Chopper could take his place. Their mission a success, they learned that Jarrus was to be transported to the Mustafar system aboard the Sovereign.[47]
Subsequently, Wren and her comrades stole Transport Ship 63378 so that they could get close to the Imperial fleet over Mustafar. For the operation, Wren also outfitted Bridger and Orrelios' stolen TIE fighter with EMP grenades to disable the Sovereign with a pulse detonation. Leaving Chopper to guard their stolen cruiser, Wren and the rest boarded the Star Destroyer and made their way to Jarrus' cell, until they were forced to separate with Bridger going alone to free Jarrus from his cell. Meanwhile, Wren had the idea to use their TIE fighter to escape, just as the Sovereign’s destruction started due to its power core being destroyed in the aftermath of Jarrus' duel with the now-dead Grand Inquisitor. Soon joined by Jarrus and Bridger in the Inquisitor's TIE Advanced, the team escaped the derelict vessel, only to be pursued by a swarm of TIE fighters. They were only saved when Chopper arrived with the Phoenix Squadron. Docking their TIEs with Chopper's ship, they made the jump into hyperspace and returned to the Ghost, where Wren and her comrades learned from Syndulla that they were part of a larger rebellion and Fulcrum's identity as Ahsoka Tano.[21]
The larger rebellion[ | ]
Area Null[ | ]


Wren and her comrades storming Area Null.
Later on, Wren along with Orrelios and Bridger participated in a mission to rescue Zare Leonis. Earlier, the crew of the Ghost had picked up Zare's girlfriend Merei Spanjaf, her parents Gandr and Jessa, Leonis' parents Leo and Tepha, and their nanny droid Auntie Nags at the edge of the Garel system as part of an arrangement with the Ithorian tavern keeper Old Jho to deliver them into hiding. After Merei discovered that Leonis had been exposed as a traitor and was facing trial, she successfully convinced Sabine and her two rebel companions to help rescue Leonis.[48]
Without seeking Syndulla's permission, Wren and her companions traveled with Spanjaf and Jessa to the planet Arkanis. They landed on the roof of Area Null, a secret Imperial facility that was connected to the Arkanis Imperial Academy. Making their way downstairs, Sabine and her companions encountered Zare and another prisoner named Beck Ollet, who had already managed to free themselves and were planning to rescue Zare's sister Dhara, who was also held in Area Null. Wren and Orrelios took Jessa down to the main computer node to lock Imperial reinforcements out of the facility and the elevators. Wren instructed Spanjaf to slice into Area Null's network and find Dhara. The rescue mission was a success. Wren and her companions' reunited both Zare and Dhara with their parents escaping back to Garel before TIE fighters arrived.[48]
Quila[ | ]
Sometime later, after stealing food from an Imperial vessel and Thrad Senator Nadea Tural's rescue by Syndulla, her presence aboard the Ghost attracted Imperial attention before long. Following an effective attack by TIE fighters that took out the Ghost’s shields and hyperdrive, they were promptly boarded by Commander Earll's forces, who intended to retrieve Senator Tural. During the skirmish, Wren and Orrelios were stunned, leaving Jarrus and Bridger to clear the ship from troopers after Tural's intervention, and Syndulla to make the escape to Camson, where they parted ways with Tural.[49]


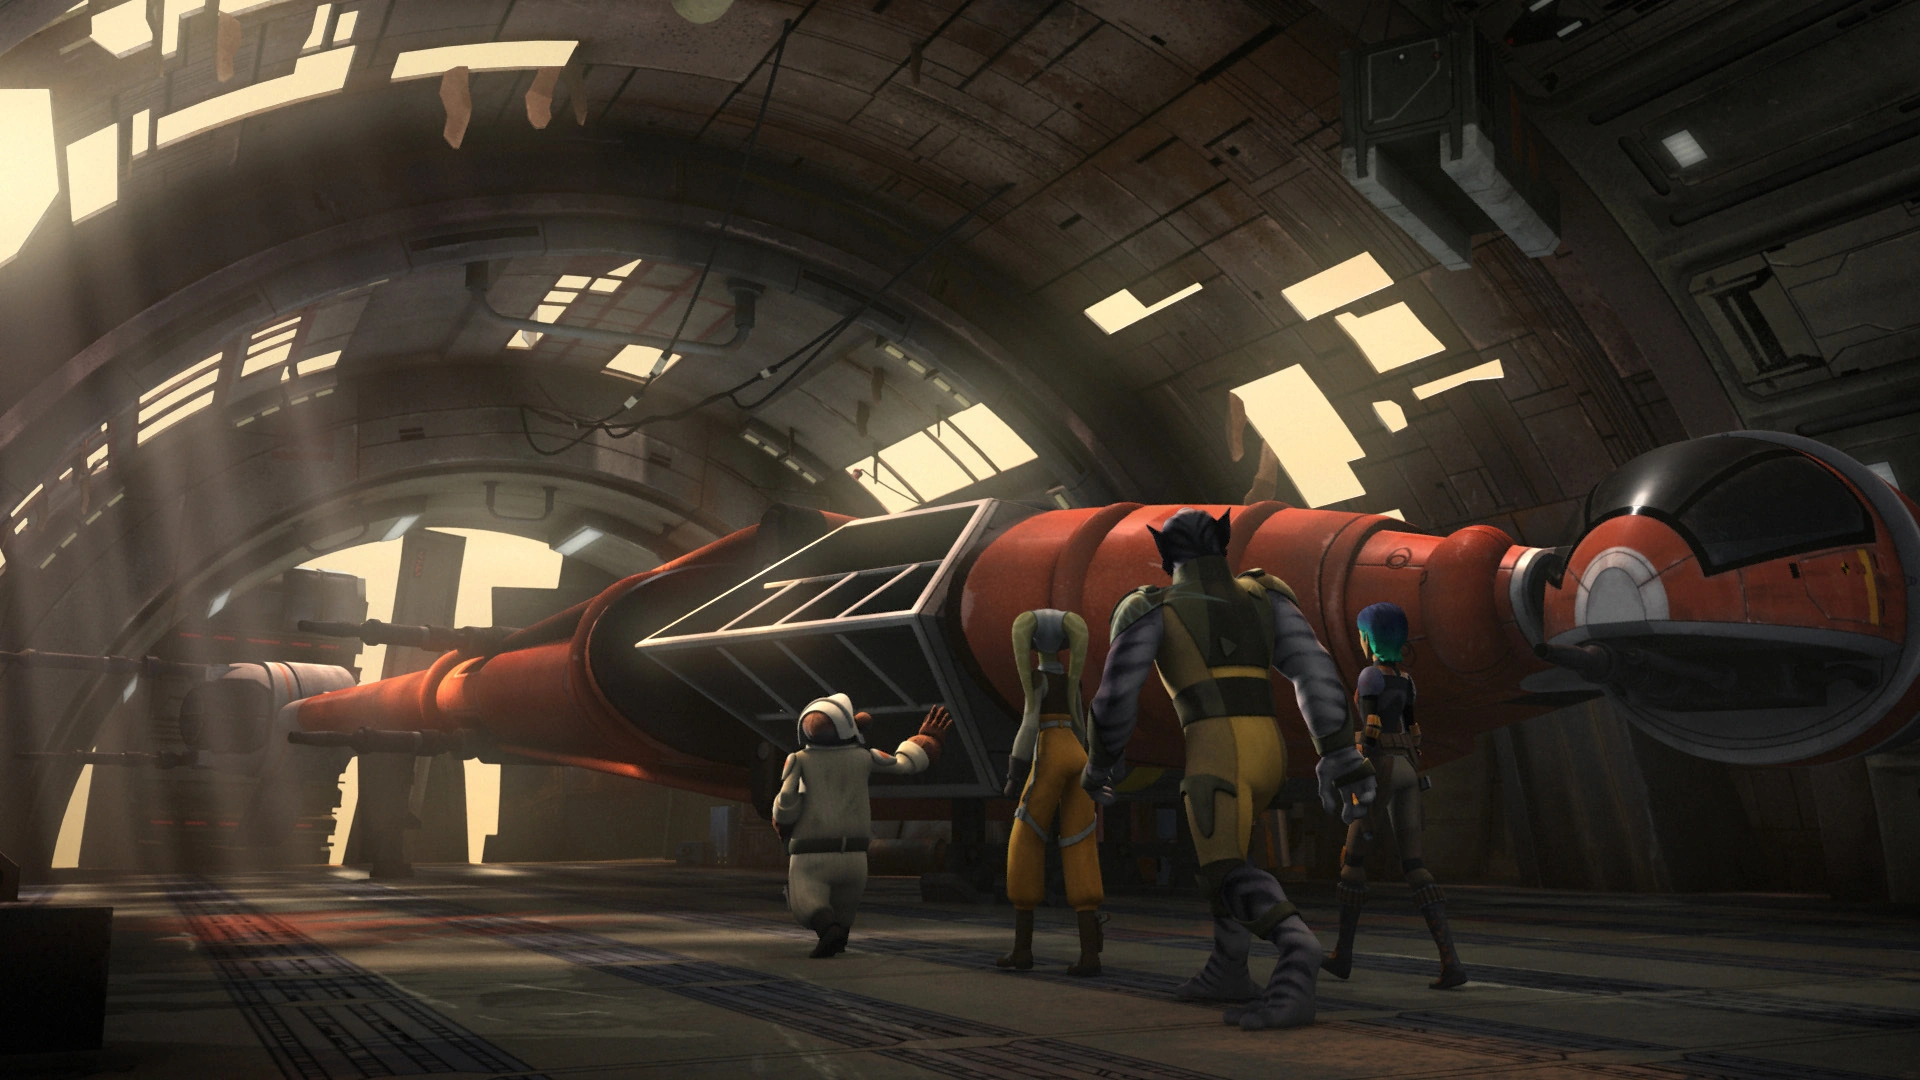
Wren and Ahsoka Tano looking for Janard.
When Wren was informed that her old friend Janard, who had given her intel on Imperial activity every now and then, had been captured by the Empire, she set out to rescue him as she felt she owed him and was willing to do anything to save him. Accompanied by Syndulla and Tano, they managed to locate Janard's transport on the aquatic planet of Quila. Hit by an asteroid, the cruiser had crash-landed and sent a distress signal that they followed. While Syndulla remained on the Ghost, Wren and Tano changed into sub-aquatic gear and dived in to enter the sinking Imperial vessel. Once inside, they tried to reach the detention cells through the wreckage, when eel attacked Wren and disconnected her oxygen tubes. Tano saved her and shared some of hers before going to the empty cells. Refusing to give up, Wren continued their search in the non-inundated areas and eventually found Janard. After their reunion, the three went to the bridge, only to find Imperial opposition. In the skirmish, Janard was shot by a stormtrooper and died in Wren's arms, as he told her to carry on fighting the Empire. As they got out of the sinking vessel, Syndulla picked them up and went to reunite with the fleet.[17]
Siege of Lothal[ | ]
We can't just run. The people have to know the truth."
"I don't think the Empire is giving us much choice.
——Ezra Bridger and Sabine Wren[来源]

Wren and her comrades hear Maketh Tua's desperate pleas.
Upon joining Commander Jun Sato's Phoenix Squadron and after a while of not returning to Lothal, Wren and her comrades took part in a mission to steal shield generators from an Imperial convoy. During the skirmish, Wren manned the Phantom and used its armament to liberate the supplies from one of the Imperial vessels so that Syndulla could secure them, after which Wren docked the Phantom in the Ghost. Once away from danger, the Ghost crew took on another mission: to extract the defecting Minister Maketh Tua in exchange for Imperial secrets. Wren and her comrades departed for Lothal aboard a Star Commuter 2000 to avoid detection and, leaving Orrelios and Chopper to guard the transport, the rebels went to rendezvous with Tua before she boarded the Sentinel-class landing craft that would take her to 塔金。[9]
然而,卡勒斯再度设下了陷阱,by rigging the Minister's shuttle to explode once she entered, and laid the blame of Tua's death on the rebels. With the failure of their mission (and their shuttle being disabled by an AT-DP walker), the Ghost crew was forced to retreat into hiding in Bridger's former residence. When it, too, was attacked, they deduced the Imperial Complex's forces were stretched thin due to the manhunt and infiltrated its Armory. After Wren noticed unguarded 49-v99 Deflectors, they were in the process of loading them to a vacant shuttle when they were accosted by Darth Vader. Through a team effort, they managed to knock down two walkers over him, but as he survived unscathed, Wren tried to earn Jarrus and Bridger time to board their stolen shuttle, and took two shots at the Dark Lord of the Sith with her pistols, but he deflected them back to her.[9]
幸运的是,雷恩的装甲挡住了爆能枪的射击。they escaped aboard the shuttle (which unbeknownst to them, had a tracking device implanted) and contacted Calrissian for assistance. He agreed in exchange for half their shield generators and had W1-LE assist in their escape arrangements. At his estate, Wren programmed several masking transponders to replicate their stolen shuttle's signal; with them, they passed through the blockade safely (a journey during which the crew decided to support the wider rebellion) and rendezvoused with the Phoenix fleet. However, Vader alone attacked with his TIE Advanced, causing extensive damage to Phoenix Squadron and the Phoenix Home. With the fleet defeated and Lothal under siege,[9] the Phoenix fleet and the Ghost chose to use Garel temporarily as its new base of operations, using multiple spaceports to hide their ships.[50]
Seelos[ | ]
It's just a bunch of old-geezers!"
"Well-armed old geezers.
——Garazeb Orrelios and Sabine Wren, upon meeting the clones[来源]
Following the incident, Wren dyed her hair once again and gave her armor a new paint job. For its part, the Rebel network faced a shortage of bases and facilities, and so, Ahsoka Tano sent the Ghost crew to meet with an old friend of hers, who might know where to find such bases, on Seelos. Upon arriving in the Seelos system, Syndulla and Chopper stayed behind on the Ghost to repair the ship, while the others approached Tano's friend with the Phantom in the desert below. Using the head of an old tactical droid, they located him in an antiquated AT-TE walker and discovered that Tano's friend, Captain Rex, and his companions Wolffe and Gregor, were veteran clone troopers. Though Rex refused to Bridger's urging to join the fight against the Empire, he agreed to put together a list of coordinates of bases and facilities for the rebellion. Meanwhile, with the Phantom parked on the AT-TE, Gregor convinced them to help them in a joopa hunt, and through a team effort during which Wren kept the regulator's line working, they captured "Big Bongo".[51]
Staying for dinner, Rex left Wren record the list of potential bases and other potentially useful intel in data-tapes from their main computer; instead, she discovered that Wolffe (trying to protect his brothers from the Empire) had secretly alerted the Empire to their presence. An Imperial probe droid also damaged the Phantom before it was destroyed by Rex, but the Empire already knew their location.[51] Wren promptly worked to repair their ship's damaged engines but only had it ready when All Terrain Armored Transports closed in on them, where they could shut the Phantom down, forcing them to stay a bit longer and to enter the oncoming sandstorm inside the AT-TE. Using the Force, Jarrus led them through the storm, while Bridger shot an AT-AT at its weak point; then, they escaped the storm and were to abandon the clones. However, Jarrus gave in and they saved the clones from the two remaining AT-ATs before Syndulla arrived with the Ghost. Ultimately, Rex decided to join the rebellion and they together went to the Phoenix fleet, where Rex reunited with Tano.[52]
新的帝国裁判官[ | ]
“裁判官?”
“没错,两个。我们走运,泽布救了我们,要是没他,呃,事情就很难看了。”
"Inquisitors?"
"Yes. Two. We got lucky. Zeb saved us. Without him, uh, things could've been bad."
——凯南·贾勒斯和萨宾·雷恩的对话[来源]
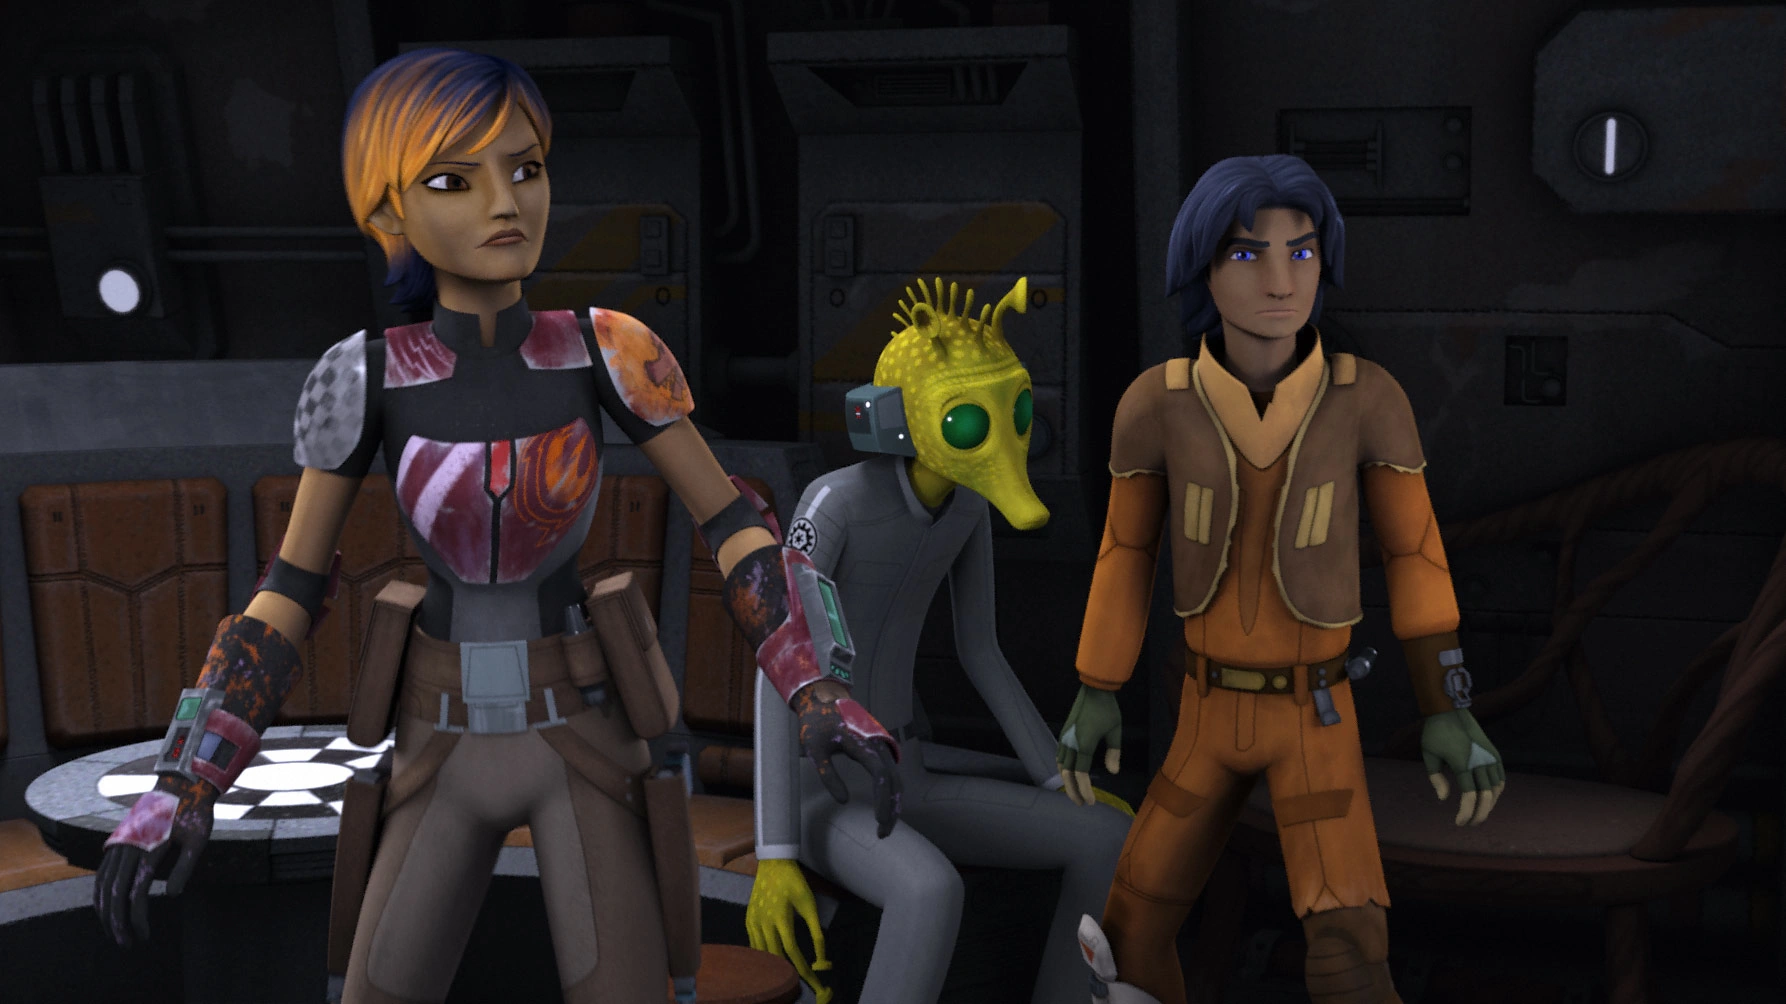
在布里杰的一次课程中,雷恩和切宝 connived to play a prank on him by locking Chopper's feet to the Ghost’s metallic floor. The prank, however, sparked another of Jarrus and Rex’s all-too-common-by-then discussions. At the same time, Syndulla assigned Wren, Orrelios, and Chopper on a mission to salvage medical supplies from an abandoned Republic medical station. They were joined by Bridger, who was trying to avoid Jarrus and Rex, and together the four traveled to the station in the Phantom. Once inside, they made it to the command center, where Wren ordered to restart a control panel, but the droid instead jump-started the whole station— unwittingly making their presence be detected by the nearby Relentless. Once Chopper corrected his mistake, Wren accessed the station's database but found it corrupted. Leaving Chopper to repair it, Wren, Orrelios, and Bridger searched for the medical supplies.[53]

五哥威胁要伤害雷恩
在切宝遭到攻击的时候, Wren and Bridger used the ventilation shafts to help him, yet also leaving Orrelios behind. Instead of the astromech, they lured into a trap by the Seventh Sister and one of her ID9 seeker droids. Though they tried to run away from her, the Fifth Brother intervened, and ultimately, Wren was separated from Bridger when he closed a blast door with his lightsaber and was subsequently captured by the Seventh Sister. Wren then went to meet Orrelios, only for the Fifth Brother to go to their encounter and to turn Wren's explosives against them. In the explosion, the two were separated and the Brother took the unconscious Wren to where the Sister was interrogating Bridger; there, both Wren and Bridger refused to give away the fleet or Jarrus' location.[53]
Pretending to be "Commander Meiloorun", Orrelios then contacted them on the comlink, and Wren refused his help only for the Brother to threaten to behead her with his lightsaber, prompting Bridger to accept his help. Told to meet at Bay 5 by the Lasat, the four made their way to the indicated hangar where Orrelios (who had found the supplies and was in Chopper's company) had secured the Phantom to the roof and detached it to fire upon the inquisitors. With the two distracted, Wren and Orrelios entered the Phantom. They were about to leave but the Inquisitors kept the ship from leaving by use of the Force, and so, Wren began to shoot them forcing the Brother to release the grip to protect himself. Unable to hold them alone, the Sister was forced to let go and the rebels escaped. Once they returned to the Ghost, they informed Jarrus of their encounter but also delivered their report to Commander Sato.[53]
Later on, while they hid in Garel, Wren and the rest of the crew (with the exception of Bridger and Chopper) participated in a mission to find fuel cells to deliver to the people of ice world of Rinn, who were experiencing an energy crisis.[54]
Shantipole[ | ]
Never get between a Mandalorian and a weapons package.
——Sabine Wren, to Quarrie[来源]

Wren and her comrades with Quarrie following the blockade run on Ibaar.
Upon the first, but failed attempt of Phoenix Squadron and the Ghost to break the blockade of Ibaar and deliver relief supplies to the starving people in the planet below—plus the loss of Phoenix leader and a transport ship—, Rex suggested that they made contact with Quarrie. However, the Mon Calamari engineer, rumored to have developed a prototype starfighter, would only discuss the ship in person, on Shantipole. For the mission, Wren and Orrelios accompanied Syndulla on the Phantom, while Jarrus, Bridger, and Chopper used the Ghost to pick up the supplies for the second attempt to break the blockade. Upon surviving the Phantom’s crash-landing on Shantipole, the three met Quarrie; he showed them Prototype B6, also called the "Blade Wing". While Wren and Orrelios were initially skeptical of the Blade Wing's effectiveness, they were mollified when Syndulla completed her test flight.[55]
Jarrus then contacted them to inform them that the blockade run had started, and Syndulla resolved to depart for Ibaar immediately. Wren, however, notified that the Blade Wing's energy drain from the multi-cannon firing system had killed the hyperdrive; however, they found a way around the problem when Quarrie revealed that he had his assistant, BG-81, modify the Phantom to include a hyperdrive system. Using the Phantom to tow the Blade Wing to the blockade run, Wren accompanied Syndulla as her gunner. As they flew ahead of Phoenix Squadron and, once in sight of a target, Wren fired the Prototype B6's multi-cannon, instantly destroying one of the Imperial Arquitens-class light cruisers, and clearing the path for the Ghost to deliver its relief supplies to the Ibaarians. After their rendezvous with the crew, Sato, and Quarrie, Wren was present when Syndulla was promoted to Phoenix Leader and saluted her.[55]
Garel reunion[ | ]
Still a bounty hunter, I see."
"Tell me you don't miss it.
——Sabine Wren and Ketsu Onyo[来源]
Wren spots the calling card of her old friend, Ketsu Onyo.
辛杜拉派遣雷恩独自外出执行任务:在加雷尔城的太空港与携有重要情报的信使碰面,并护送他前往Havoc Outpost. With Bridger and Chopper as a backup, they were told that the courier would respond to code phrase "It's a long way to Alderaan." Along the way, Wren noticed a familiar symbol scribbled on a nearby wall, Ketsu Onyo's calling card, and quickly deduced that Onyo was in the area. For the next few hours, Wren and Bridger greeted disembarking passengers with the phrase to no avail, until a GNK-series power droid called EG-86 responded to it. Before they could proceed, Onyo revealed herself and attempted to collect EG-86 for Black Sun but Wren refused to let Onyo have her way. Interrupted by stormtroopers, the rebels evacuated EG-86 onto a nearby GX1 short hauler while Ketsu was busy attacking the troopers.[19]
在起飞时,after shutting down the hauler's pilot droid, they were separated from Bridger while Onyo pursued them on her ship, the Shadow Caster. Onyo then damaged their hauler's hyperdrive and blasted open their side door and Chopper was sucked into space before Wren sealed the hatch. Wren was then contacted by Onyo, who demanded that Wren surrender the power droid or she would blast the shuttle to pieces. Seeing as Chopper was disabling her ship's weapons array from outside, Wren distracted Onyo by talking; she derided her own desire to join Black Sun, which she now knew were slavers and assassins who only cared about profits and body counts. Nevertheless, Onyo fired to find it disabled, and Wren tried to catch Chopper and fly away until she realized Onyo had captured Chopper with the Caster’s tractor beam projector.[19]
Unable to leave him behind, Wren offered to make a trade and agreed to dock their ships. However, Wren told EG-86 to remain in the hauler while she spoke to Onyo. Realizing that Wren would not give up EG-86, Onyo offered to share her cut for it, but Wren asserted that she no longer did things just for money. In a leap of faith, Wren forgave Onyo for betraying her and claimed she still trusted in her, trying to give her "sister" a second chance in life. Before Onyo could answer, an Imperial vessel announced that they were to board her stolen shuttle; forced to put aside their differences and to work together, they observed that it seemed they were friends once again.[19]
Syndulla congratulates Wren and Onyo for their efforts in helping the rebellion.
Unable to escape, Wren had Chopper overload the hauler's hyperdrive and then go to the Caster to prepare to disengage the docking tube on her signal. Using Onyo's armory of explosives, Wren rigged the shuttle to explode and told the shuttle's pilot droid to exercise emergency protocol and powered up the ship's thrusters. However, the Imperial vessel was aware of this and shot at the shuttle, damaging the tube and knocking Wren unconscious. As the pilot droid attempted to leave, Onyo saved Wren and helped her aboard the Caster. Once inside, Chopper disconnected the two ships and was about to leave when the Imperial cruiser used their tractor beams to impede their escape. It also dragged the shuttle and so, its explosion damaged the cruiser and enabled the Shadow Caster to slip away. Together, Wren and Onyo delivered EG-86 to R2-D2 to Havoc Outpost and returned to Garel, where they were greeted by Syndulla and Bridger; before parting ways, Wren thanked Onyo for saving her life and told her that she was welcome to join the Rebellion.[19]
Upon the Liberator’s capture in the Del Zennis system by Brom Titus's Imperial Interdictor, Wren recalled that during her Academy days she had learned that the Empire was developing a new cruiser with gravity well projectors that were capable of pulling ships out of hyperspace. As Jarrus and Rex were to carry out the rescue mission for Sato, Bridger and the rest of the crew, Wren was inspired to paint a new stencil of the two working together in the Sentinel-class shuttle they would use to infiltrate the Interdictor.[56]

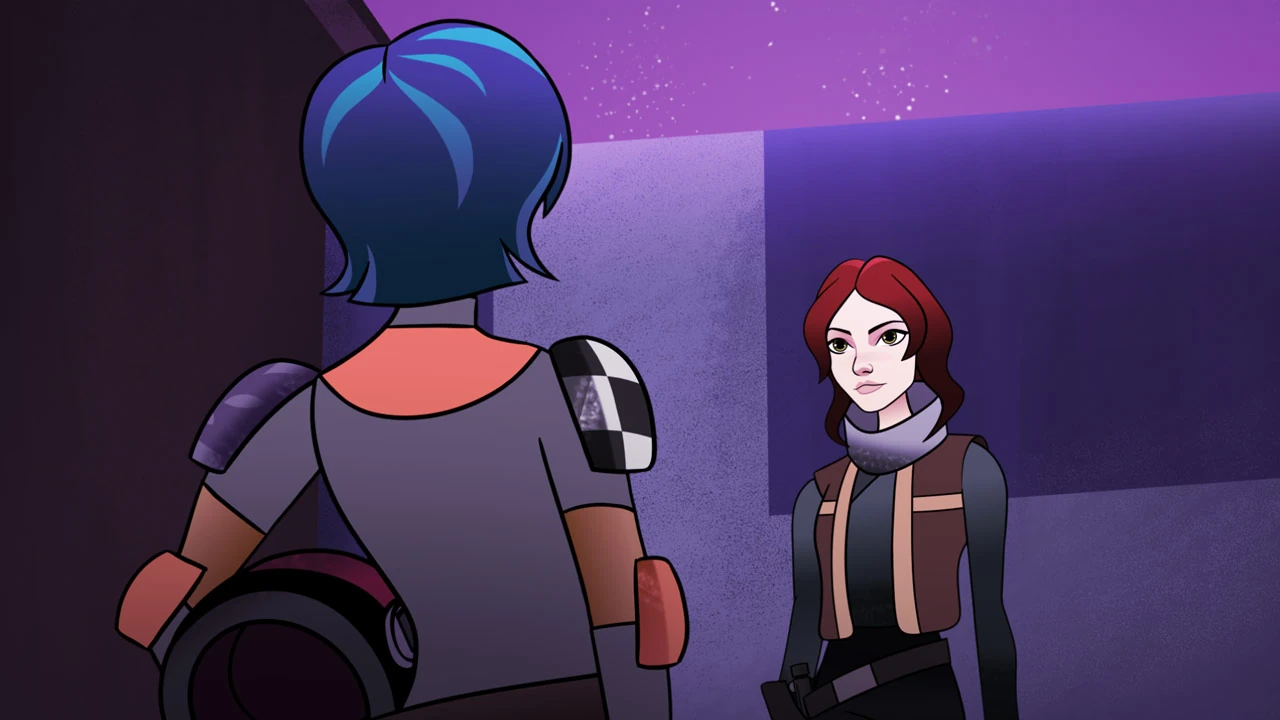
萨宾遇见琴·厄索
Sabine took charge of a package that contained a holo-map. En route to the drop-off point, Sabine ran into several stormtroopers. She made her escape by jumping across several rooftops. However, she dropped the package and it was picked up by Jyn Erso. Sabine followed Erso in order to retrieve the package before the storm troopers capture her and the map. As Erso reached a dead end, Sabine shot at some chains, and caused the cargo to crash on the stormtroopers. Sabine confronted Erso and asked for the map. At first, Erso refused, but ultimately gave Sabine the map. After Erso, Sabine made contact with the Phoenix cell and left the scene.[57]
Escaping Garel[ | ]
Wren was monitoring Imperial transmissions when she received intelligence that the Imperial fleet blockading Lothal had left its orbit for unknown purposes; Bridger, who had just experienced a vision of his parents, interpreted it as a sign that they had to return to his homeworld immediately. Willing to accompany him, they ordered Orrelios and Chopper to return to the Ghost from their supply run, when Wren realized that the Empire had pulled its patrols back in its preparations for a major strike: a battle against the rebel presence on Garel. Upon Orrelios and Chopper's return, the Ghost took to the skies of Garel, where before they could escape, the Liberator was trapped by the Relentless’s tractor beam. While Jarrus, Bridger, and Chopper departed on the Phantom for Lothal, Wren, Syndulla and Orrelios remained to help the fleet's command ship. On Wren's idea, they tried to use the torpedoes to disable the tractor beam, but the intervention of a TIE fighter damaged the weapons systems. Instead, Syndulla freed the Liberator by ramming the side of the Ghost on the tractor beam to disable it.[50]
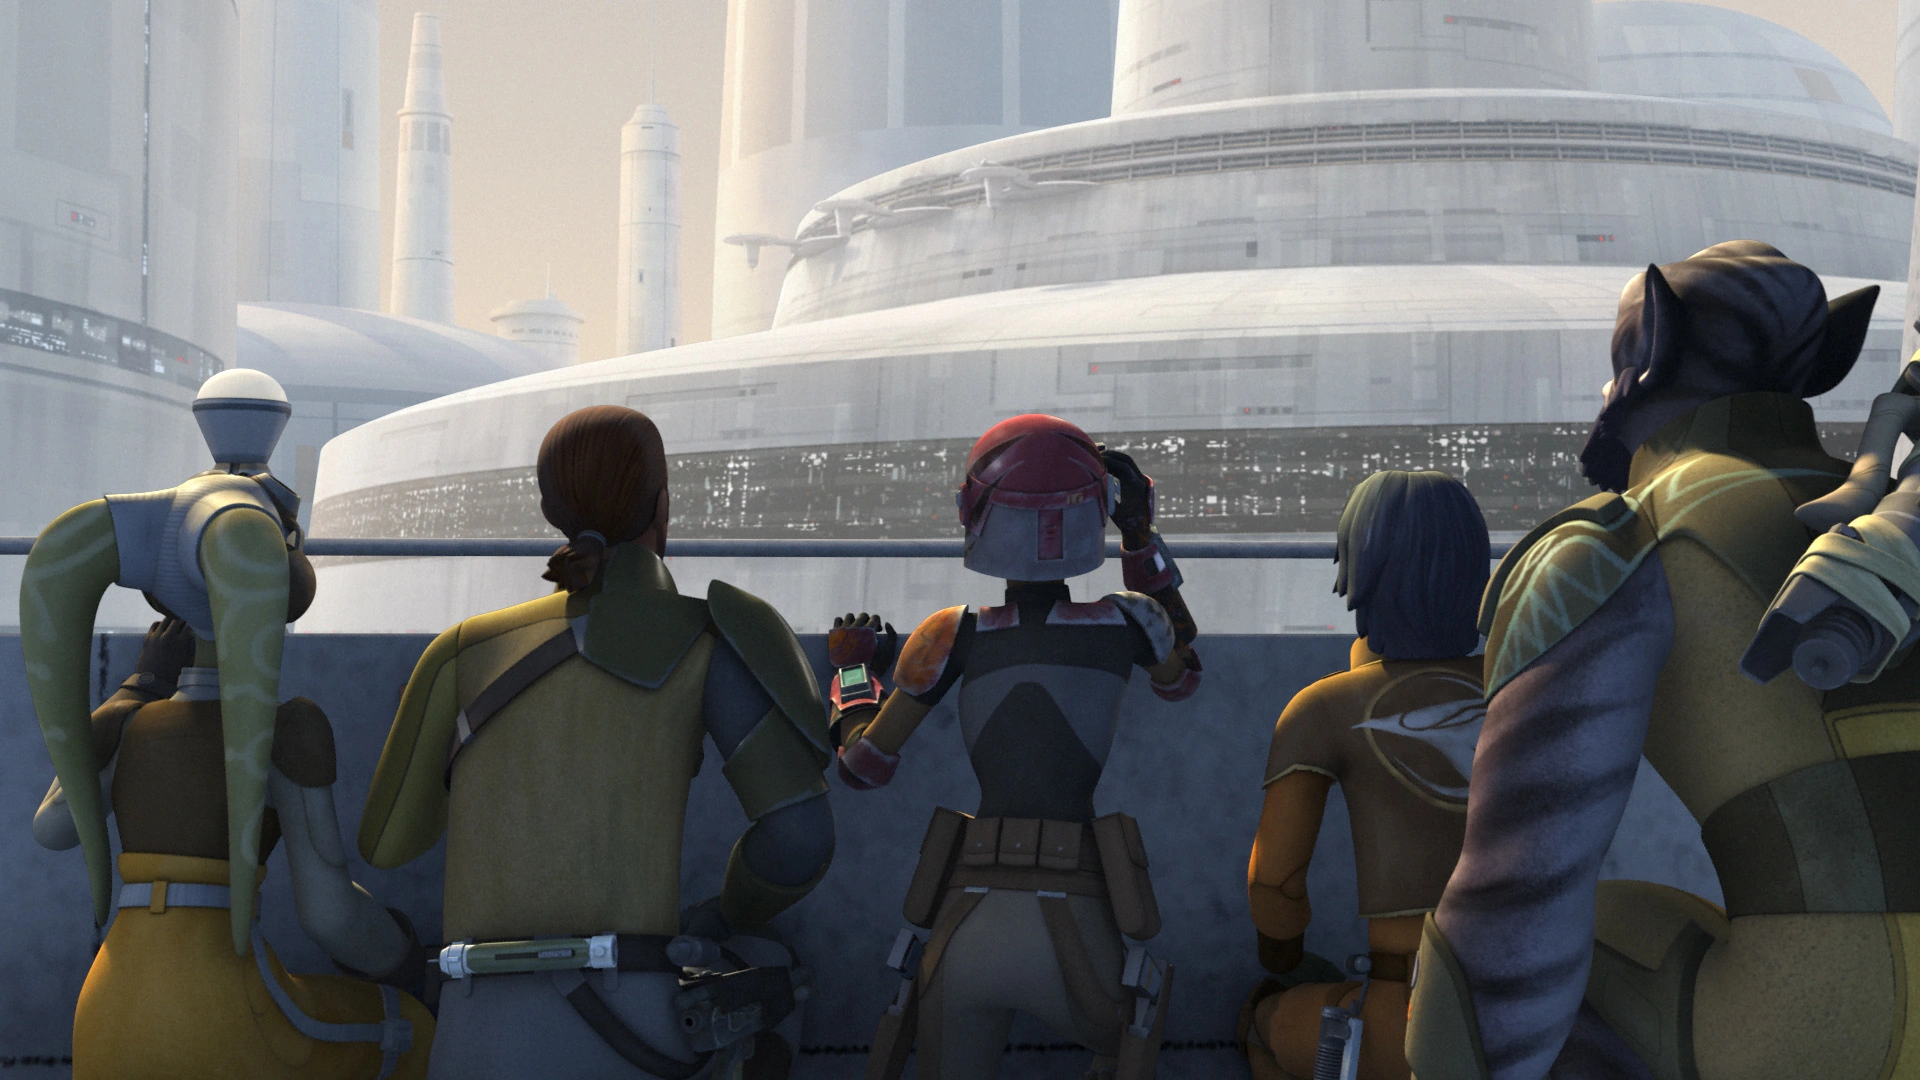
重返洛塔[ | ]
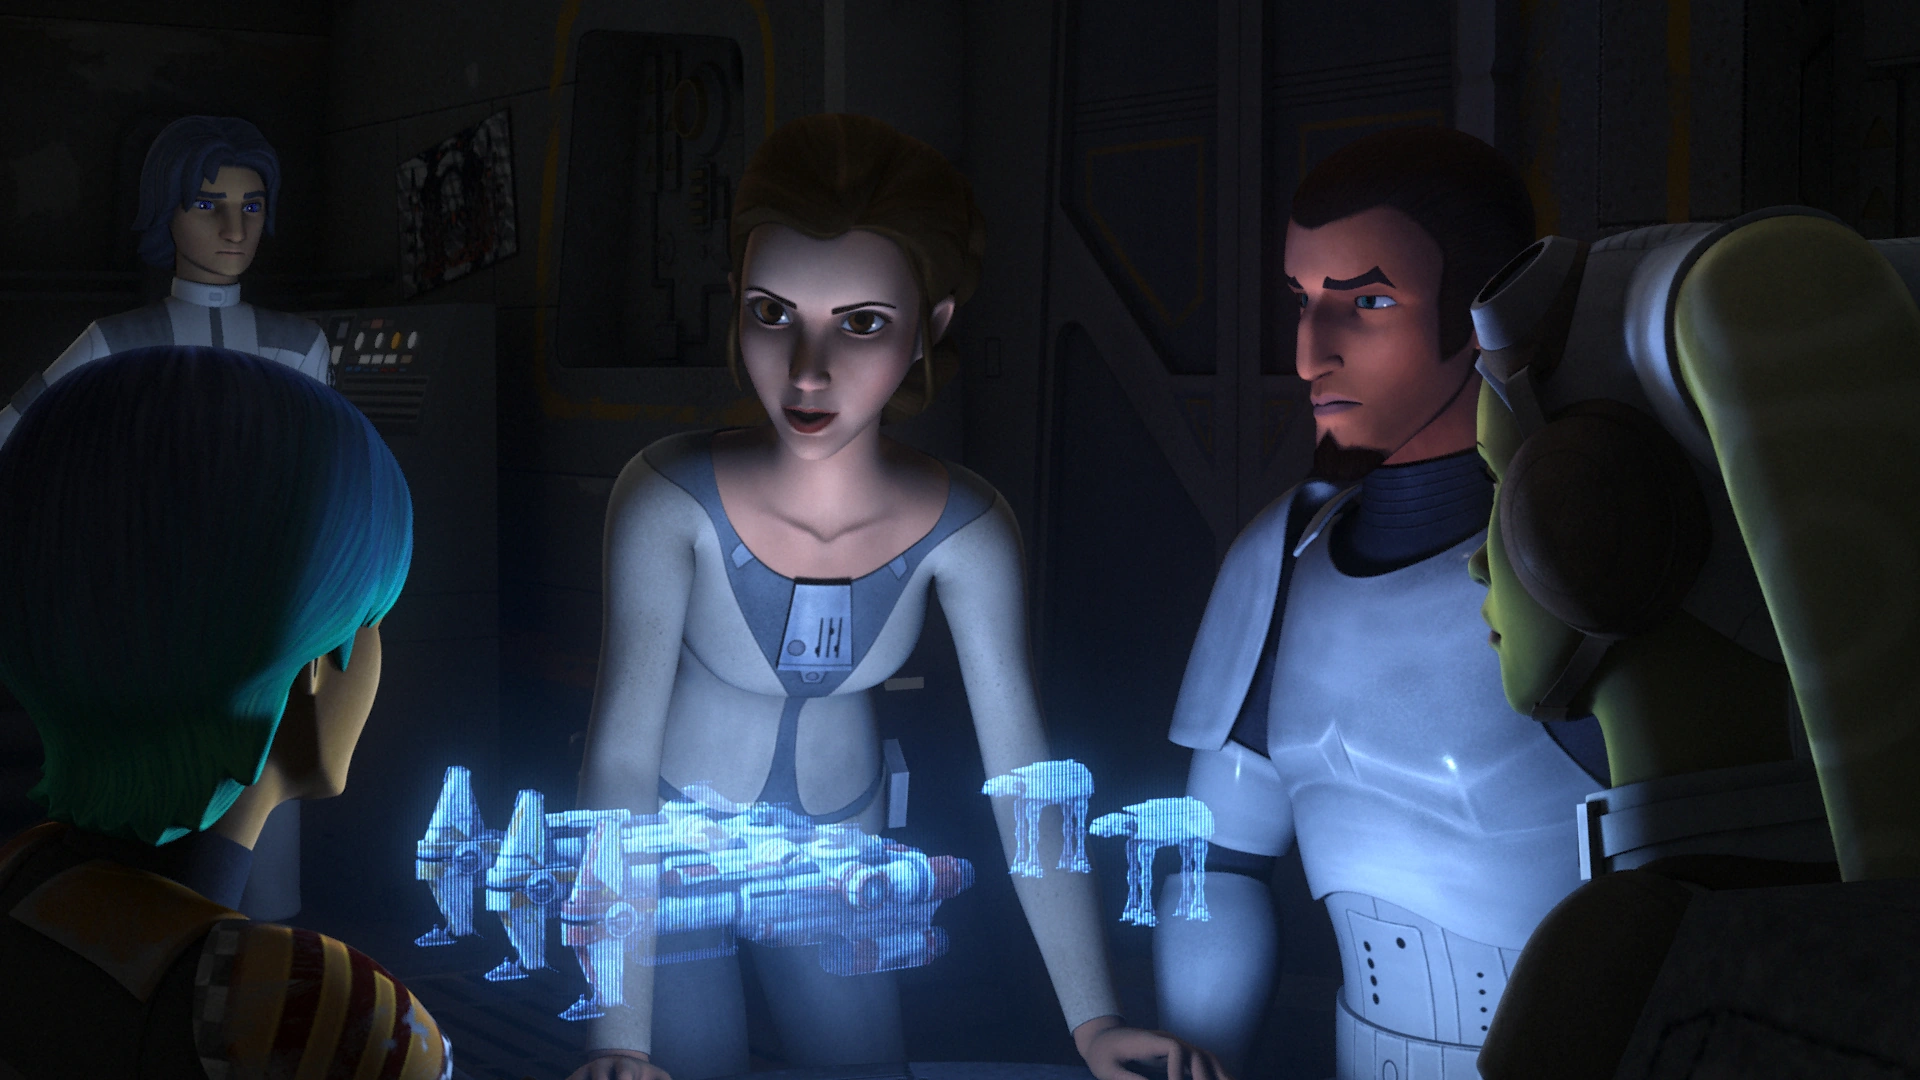
Those defenses are formidable. Why? Because the Empire doesn't underestimate you. They know how good you are.
——Leia Organa, to the Spectres[来源]
The Ghost crew working alongside Princess Leia Organa.
Sometime later they received word that Senator Organa was sending reinforcements to Lothal with his agent and daughter, Princess Leia Organa. They set out to meet them and rescued her, Jarrus, Bridger, Chopper as well as Lothal ex-governor Ryder Azadi from an Imperial altercation. Once away from the skirmish, Wren and Orrelios were told of the fate of Bridger's parents and gave their condolences to the boy. However, they immediately set out to steal Organa's ships, three Sphyrna-class corvettes: while Organa, Jarrus, and Bridger (the latter disguised as stormtrooper and cadet) distracted Lieutenant Yogar Lyste, Wren, Azadi and Chopper unlocked the gravity locks that kept Organa's ships in Imperial custody.[58]
During the operation, they deactivated the first device and Wren boarded the freed corvette, only to depart to Lothal and reunite with the rest of the fleet. The two other ones, piloted by Jarrus and Azadi, and the Ghost soon arrived with all the rebels but Organa, who stayed behind to perpetuate the ruse that she was a loyal Imperial citizen.[58]
A Princess on Garel[ | ]
Sometime later, Wren undertook a solo mission to obtain data-tapes from Leia that contained the locations of numerous Imperial bases. In order to meet Organa without exposing her secret involvement in the Rebellion, Wren posed as a bounty hunter and "abducted" Organa, separating her from her stormtrooper security detail for the handoff. As Organa was about to hand over the tape cassette, the pair were tracked down by an IG-88 assassin droid, which also desired to acquire the data-tape. Wren and Organa fled the scene and ran back to the stormtroopers, where Wren hid out of sight and Organa ordered her bodyguards to engage the droid. While the stormtroopers were distracted, Organa handed the tape over to Wren and expressed her desire to work with her in the future.[59]
谐晨星[ | ]
I invoke the code to seek justice through single combat!
——Sabine Wren[来源]
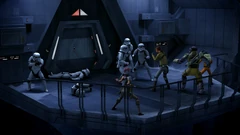
In a discussion for a new hyperspace route to the Lothal sector with Phoenix command, Wren recommended that they used the Concord Dawn system, a Mandalorian colony not yet under Imperial subjugation. Unaware of their allegiance, they decided to try diplomatic venues and Wren accompanied Syndulla and Phoenix Squadron in a RZ-1 A-wing interceptor. Upon arriving in Concord Dawn space, Syndulla requested safe passage for the rebellion, but the Imperial-aligned leader of the Protectors of Concord Dawn, Fenn Rau, refused. He and his men then attacked the rebel squadron. Forced to retreat, on Syndulla's orders, Wren made the jump back to the fleet, only to be followed by Syndulla, who was gravely injured by the attack. Though Syndulla's vital signs stabilized, Wren promised her that they were going to answer for the attack.[5]
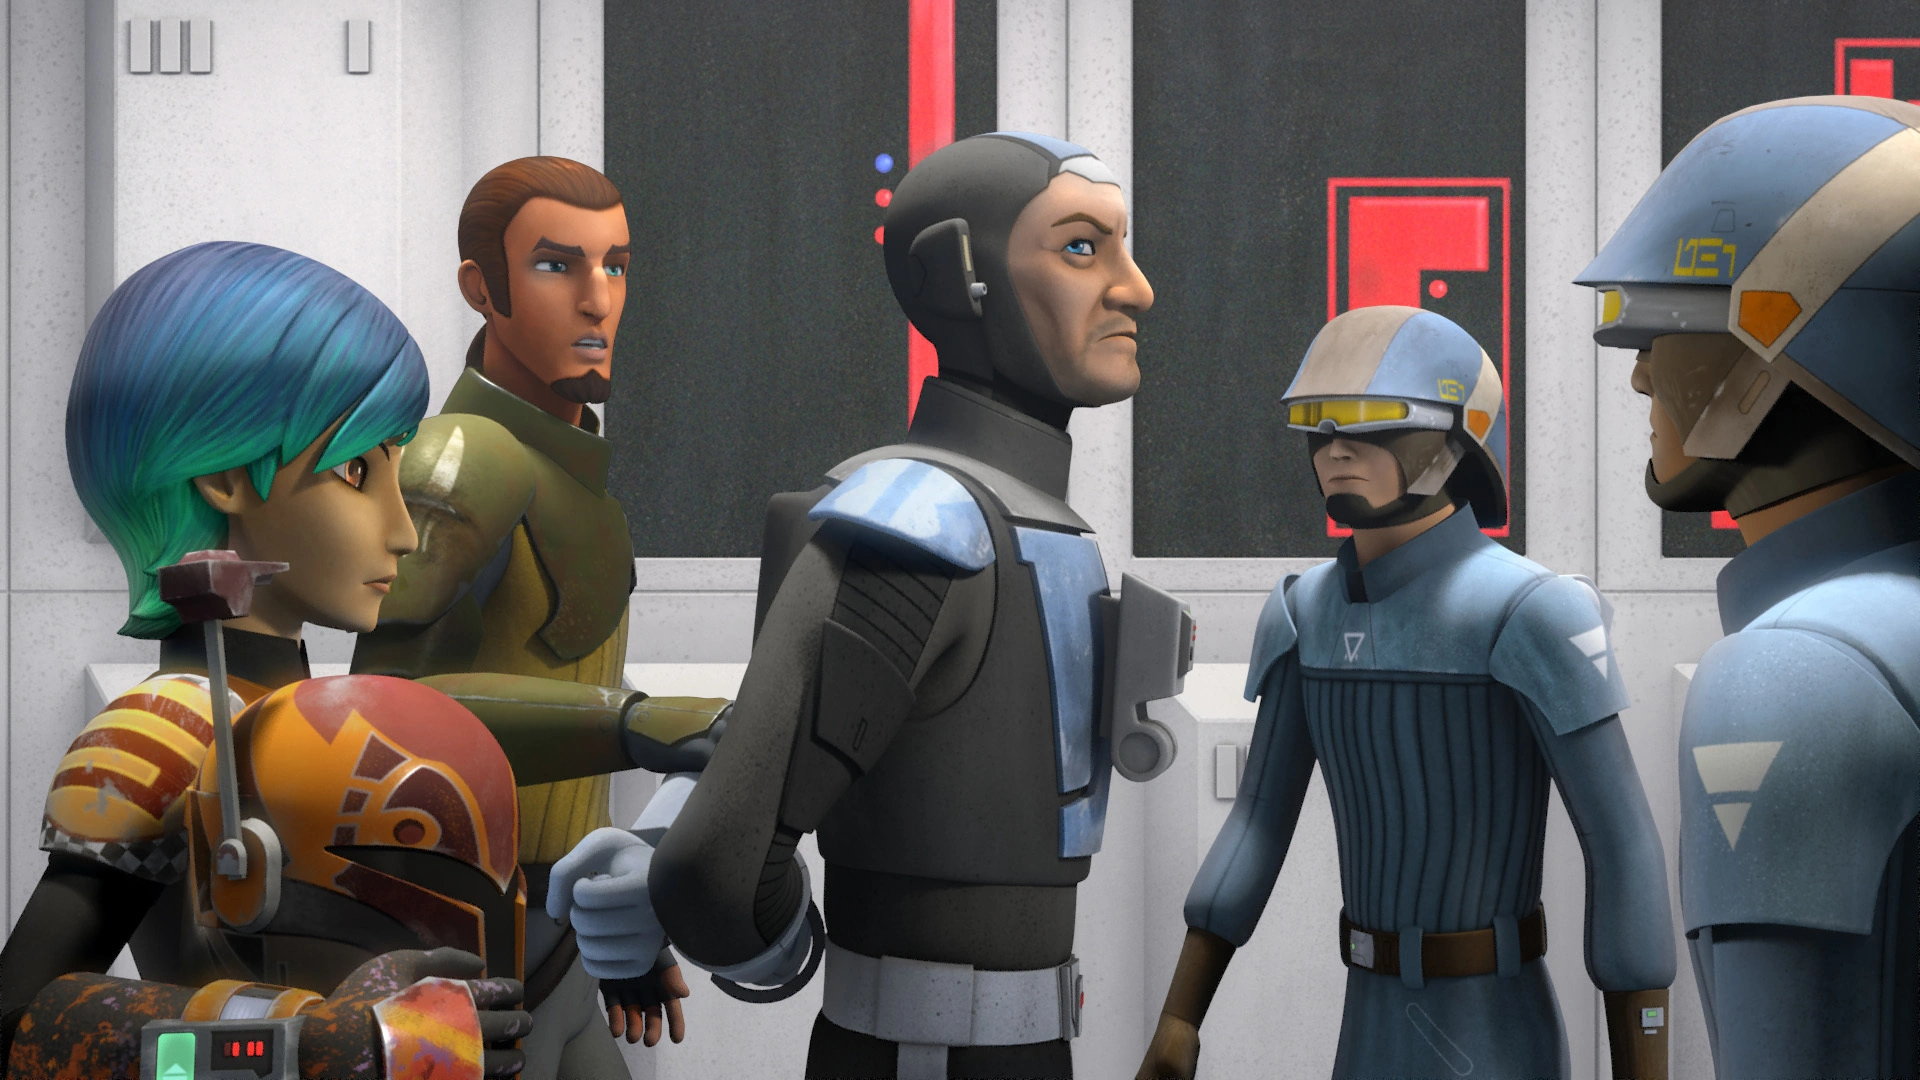

Fenn Rau, captured by Wren and Jarrus.
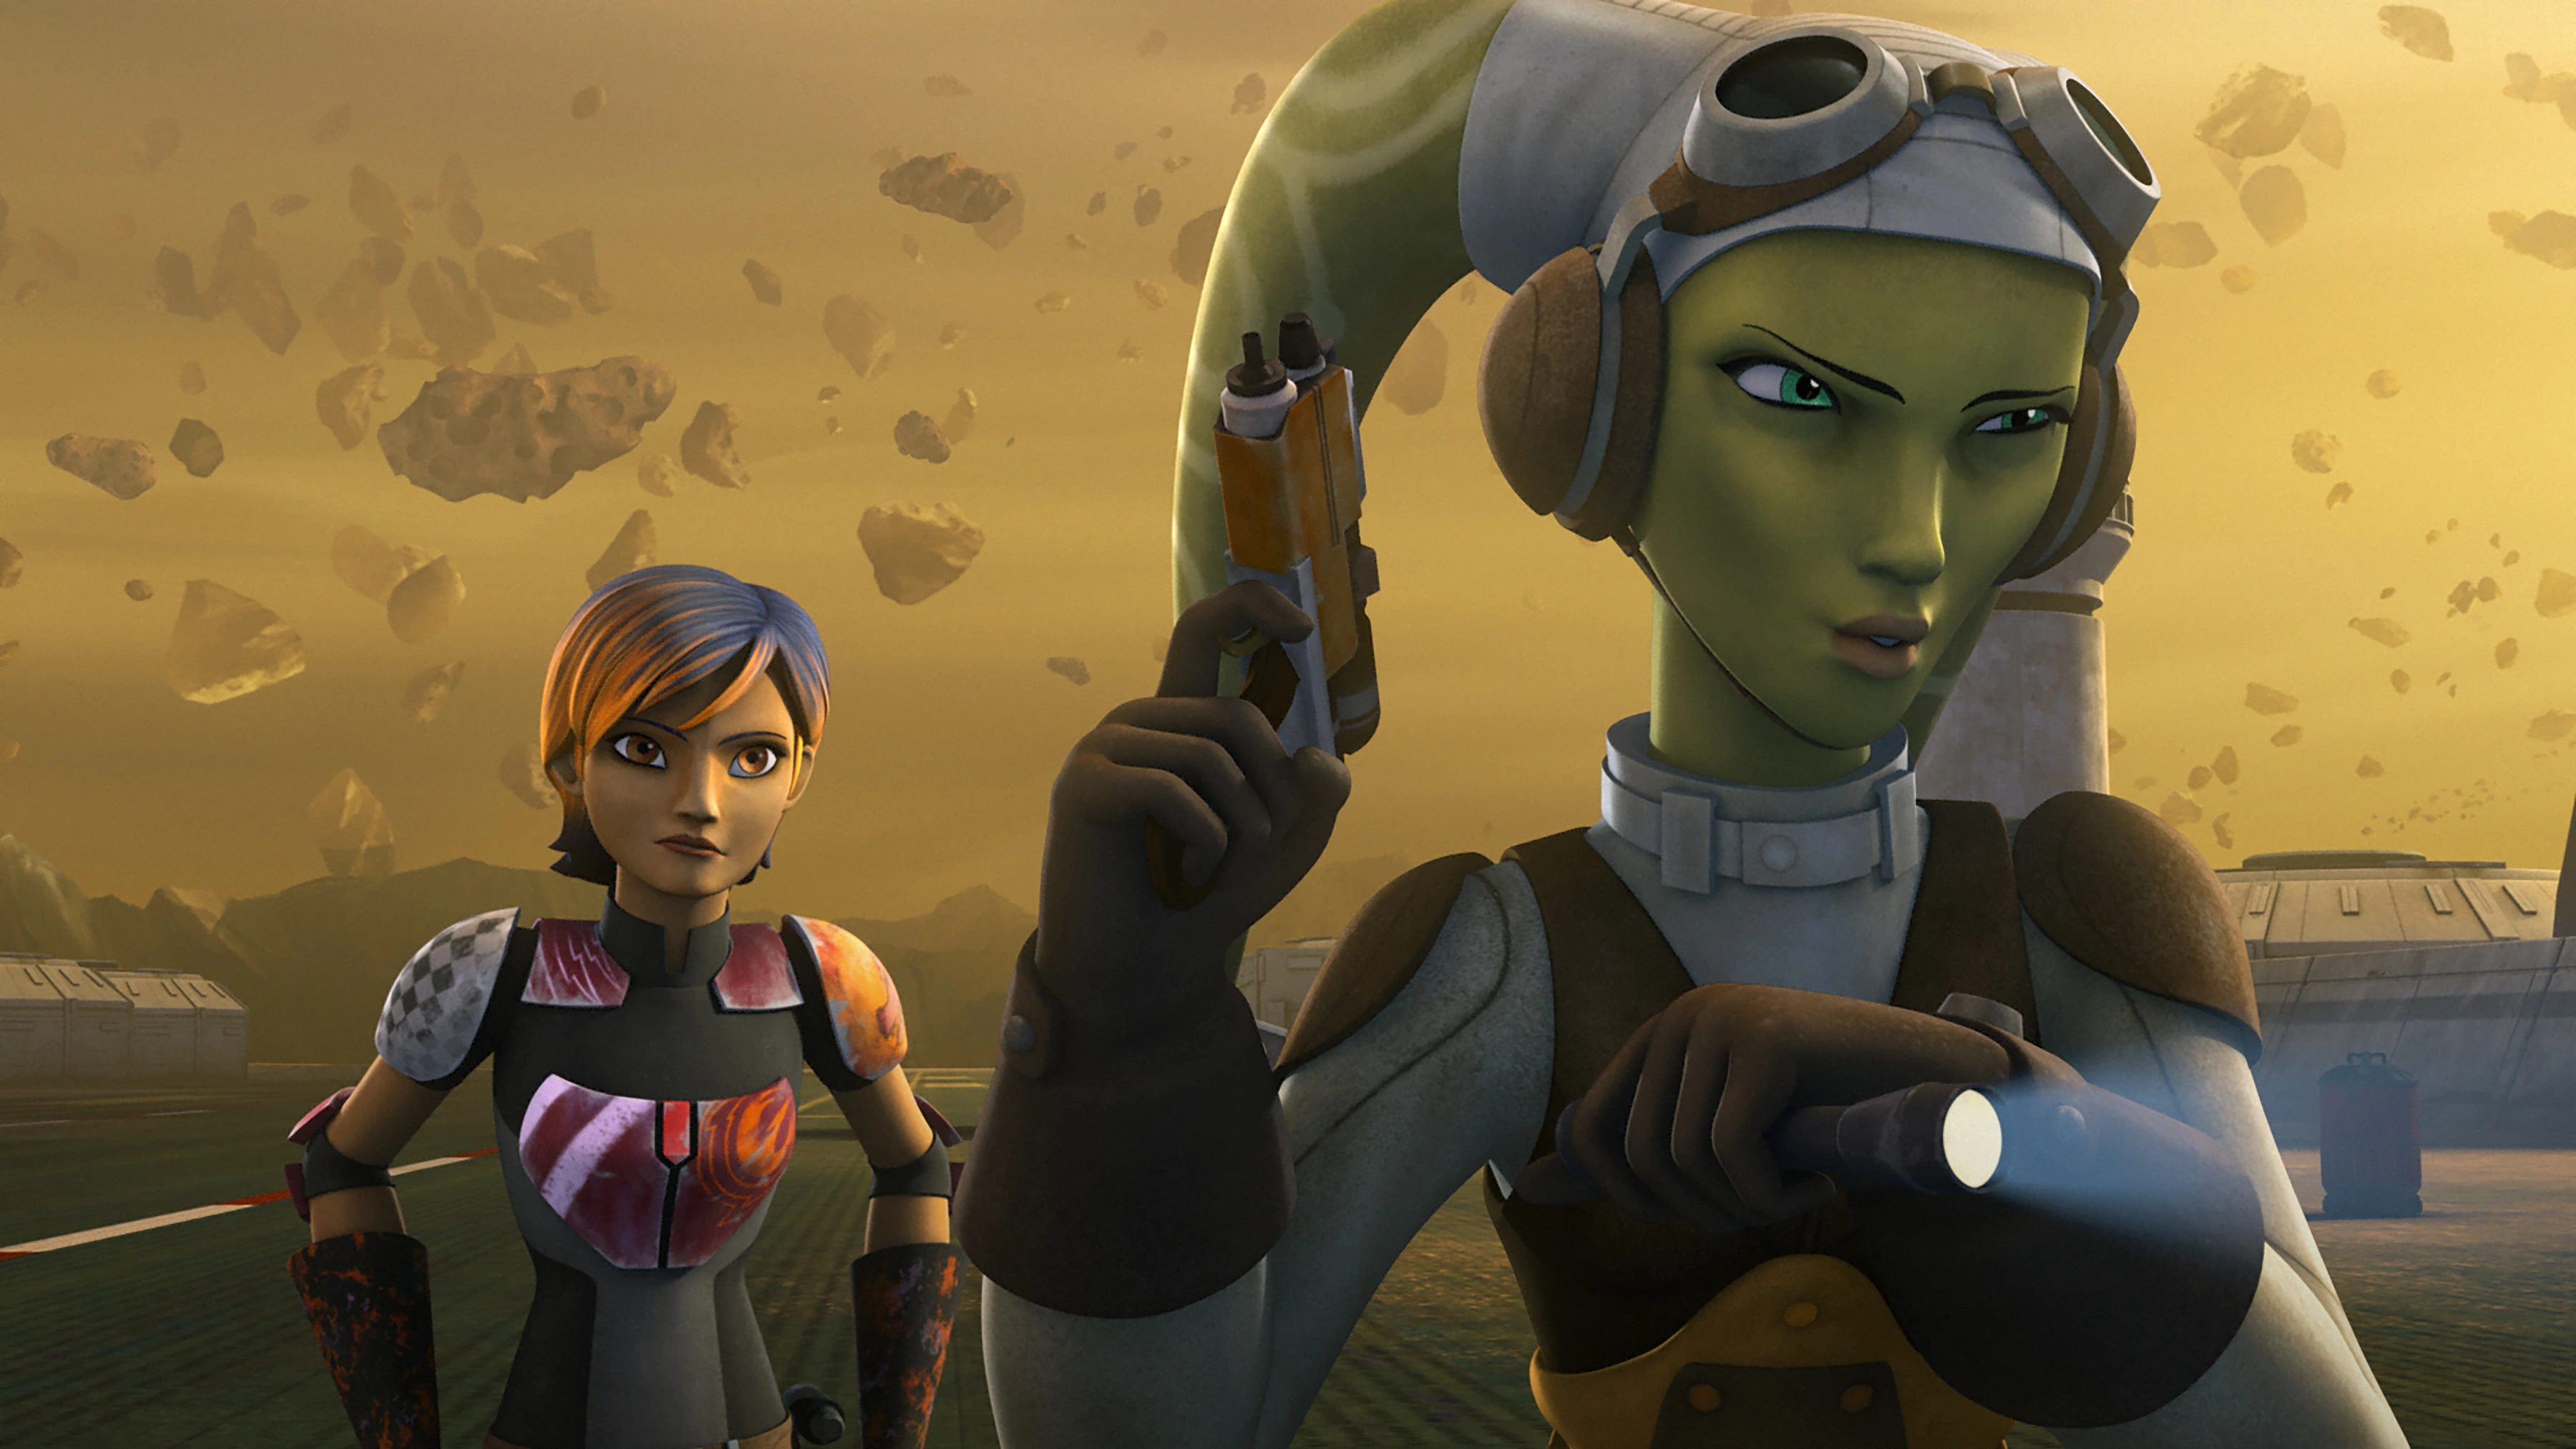
Jarrus, who recognized Rau from the Clone Wars, then took it upon himself to infiltrate the Protectors Camp and negotiate, and allowed only Chopper to accompany him. Wren, however, sneaked in the Phantom and went with him. After a discussion in which he wanted to complete Syndulla's goal to recruit the Protectors, Wren accepted with the condition that she could destroy their Fang fighters if Rau refused. Together, they infiltrated the base, and leaving Jarrus to talk to Rau, Wren planted the explosives. Before long, the Mandalorians were alerted to her presence and surrounded Wren, but she invoked the code and called Rau out for battle. Jarrus implored Wren not to kill Rau; she only told him to trust her, as she and Rau held steady in a standoff. Wren proved to be faster by landing a direct hit to Rau's blaster, and activated the scattered explosives, destroying the starfighters.[5]
As Wren had been unable to destroy Rau's ship and the Protector was headed for the ship with the intent to destroy the rebel fleet, Jarrus went after him; meanwhile, Wren rendezvoused with Chopper and boarded the Phantom to pursue Rau's ship, besieged by Jarrus. The Jedi then brought Rau aboard the Phantom. Now a rebel prisoner, Rau ordered his men to stand down and allow the rebels safe passage through Concord Dawn without any mention of the rebels to the Empire, lest Concord Dawn fell to Imperial servitude―thus forming an uneasy alliance between the Protectors and the rebellion.[5]
前往里拉桑[ | ]

Sabine (far left) and her rebel companions during the expedition to Lira San.
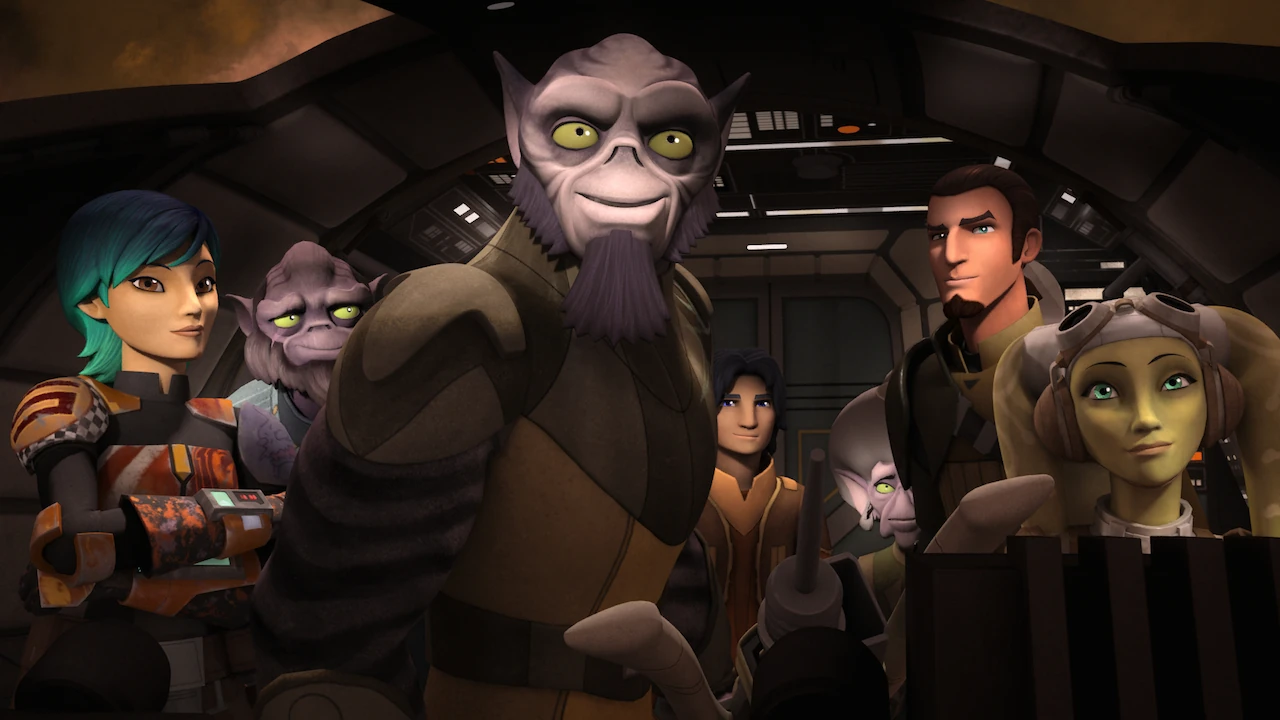
Sabine and the other crew of the Ghost accompanied Ezra to Nixus Hub 218. Ezra had received a tip from his one-time "business partner" Hondo Ohnaka about the arrival of two refugees at the spaceport. Upon landing, Sabine asked Ezra where he had gotten his transmitter from but Ezra received no response from Hondo. When they approached the cargo section, they discovered Imperial stormtroopers arresting two Lasat refugees, who had been hiding in a cargo container. Sabine and her rebel companions assaulted the Imperials and freed the Lasat captives. Shortly later, Hondo turned up and revealed that he was Ezra's mysterious source.[60]
The Lasat identified themselves as the former Lasan High Honor Guardsman Gron and the mystic Chava the Wise. From Gron, Sabine and the other rebels learned that Zeb had once been a captain in the Honor Guard. As the rebels made their way back to the Ghost, Chava told them that she and her companion were searching for the legendary Lasat planet of Lira San, which was rumored to be a safe refuge for the Lasat species. The rebels were pursued by more stormtroopers but they managed to escape back to the Ghost with the help of Hondo, who sealed several exits to prevent the Imperials from pursuing them. During the gunfight, Sabine and Hera shot the stormtroopers blocking their path to the GhostTemplate:'s hangar bay.[60]
After boarding the Ghost, Sabine and her companions fled into hyperspace. Sabine helped Hera pilot the Ghost during the ship's journey through hyperspace. Chava and Gron also began a ritual to help them find Lira San, which did not appear on any official star charts. Chava also spoke of a prophecy which stated that Lira San would only be found if the "child" saved both the "warrior" and the "fool". While initially reluctant, Zeb agreed to take part in order to save his people. Sabine and the other rebels were present when Zeb used his bo-rifle to pinpoint Lira San's location on a holographic map generated by Chopper. After determining Lira San's location, the rebels set a course for Wild Space, a region which lay beyond the Outer Rim Territories.[60]
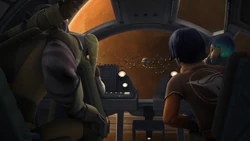
As the Ghost approached Wild Space, they encountered a new obstacle in the form of an imploded star cluster; which blocked their path to Lira San. The rebels' problems were further compounded when an Imperial light cruiser captained by Agent Kallus exited hyperspace behind them. Sabine and Hera manned the GhostTemplate:'s controls as the ship attempted to brave the maelstrom ahead. At that point, Zeb fulfilled the ancient Lasat prophecy by using his bo-rifle to guide the Ghost through the maelstrom ahead. Sabine and Hera were initially taken by surprise but were relieved when their ship entered the gravitational field intact. Meanwhile, the Imperial cruiser was forced to retreat due to damage from the gravitational pull of the star cluster.[60]
Upon entering the imploded star cluster, the Ghost jumped into hyperspace. Sabine and the other rebels were knocked out by a bright blast of light. When they awoke, they found themselves in an unknown region of space. Shortly later, they sighted Lira San on the horizon. Sabine and the other rebels stayed aboard while Zeb along with Gron and Chava traveled down to Lira San in the Phantom. The three Lasat subsequently discovered that Lira San was the original homeworld of the Lasat species and that it was home to millions of Lasat. While Gron and Chava elected to settle in Lira San, Zeb returned to rejoin the crew of the Ghost. Reunited, Sabine and her rebel companions exited the imploded star cluster through a safe route which Zeb had discovered.[60]
袭击小行星精炼厂[ | ]


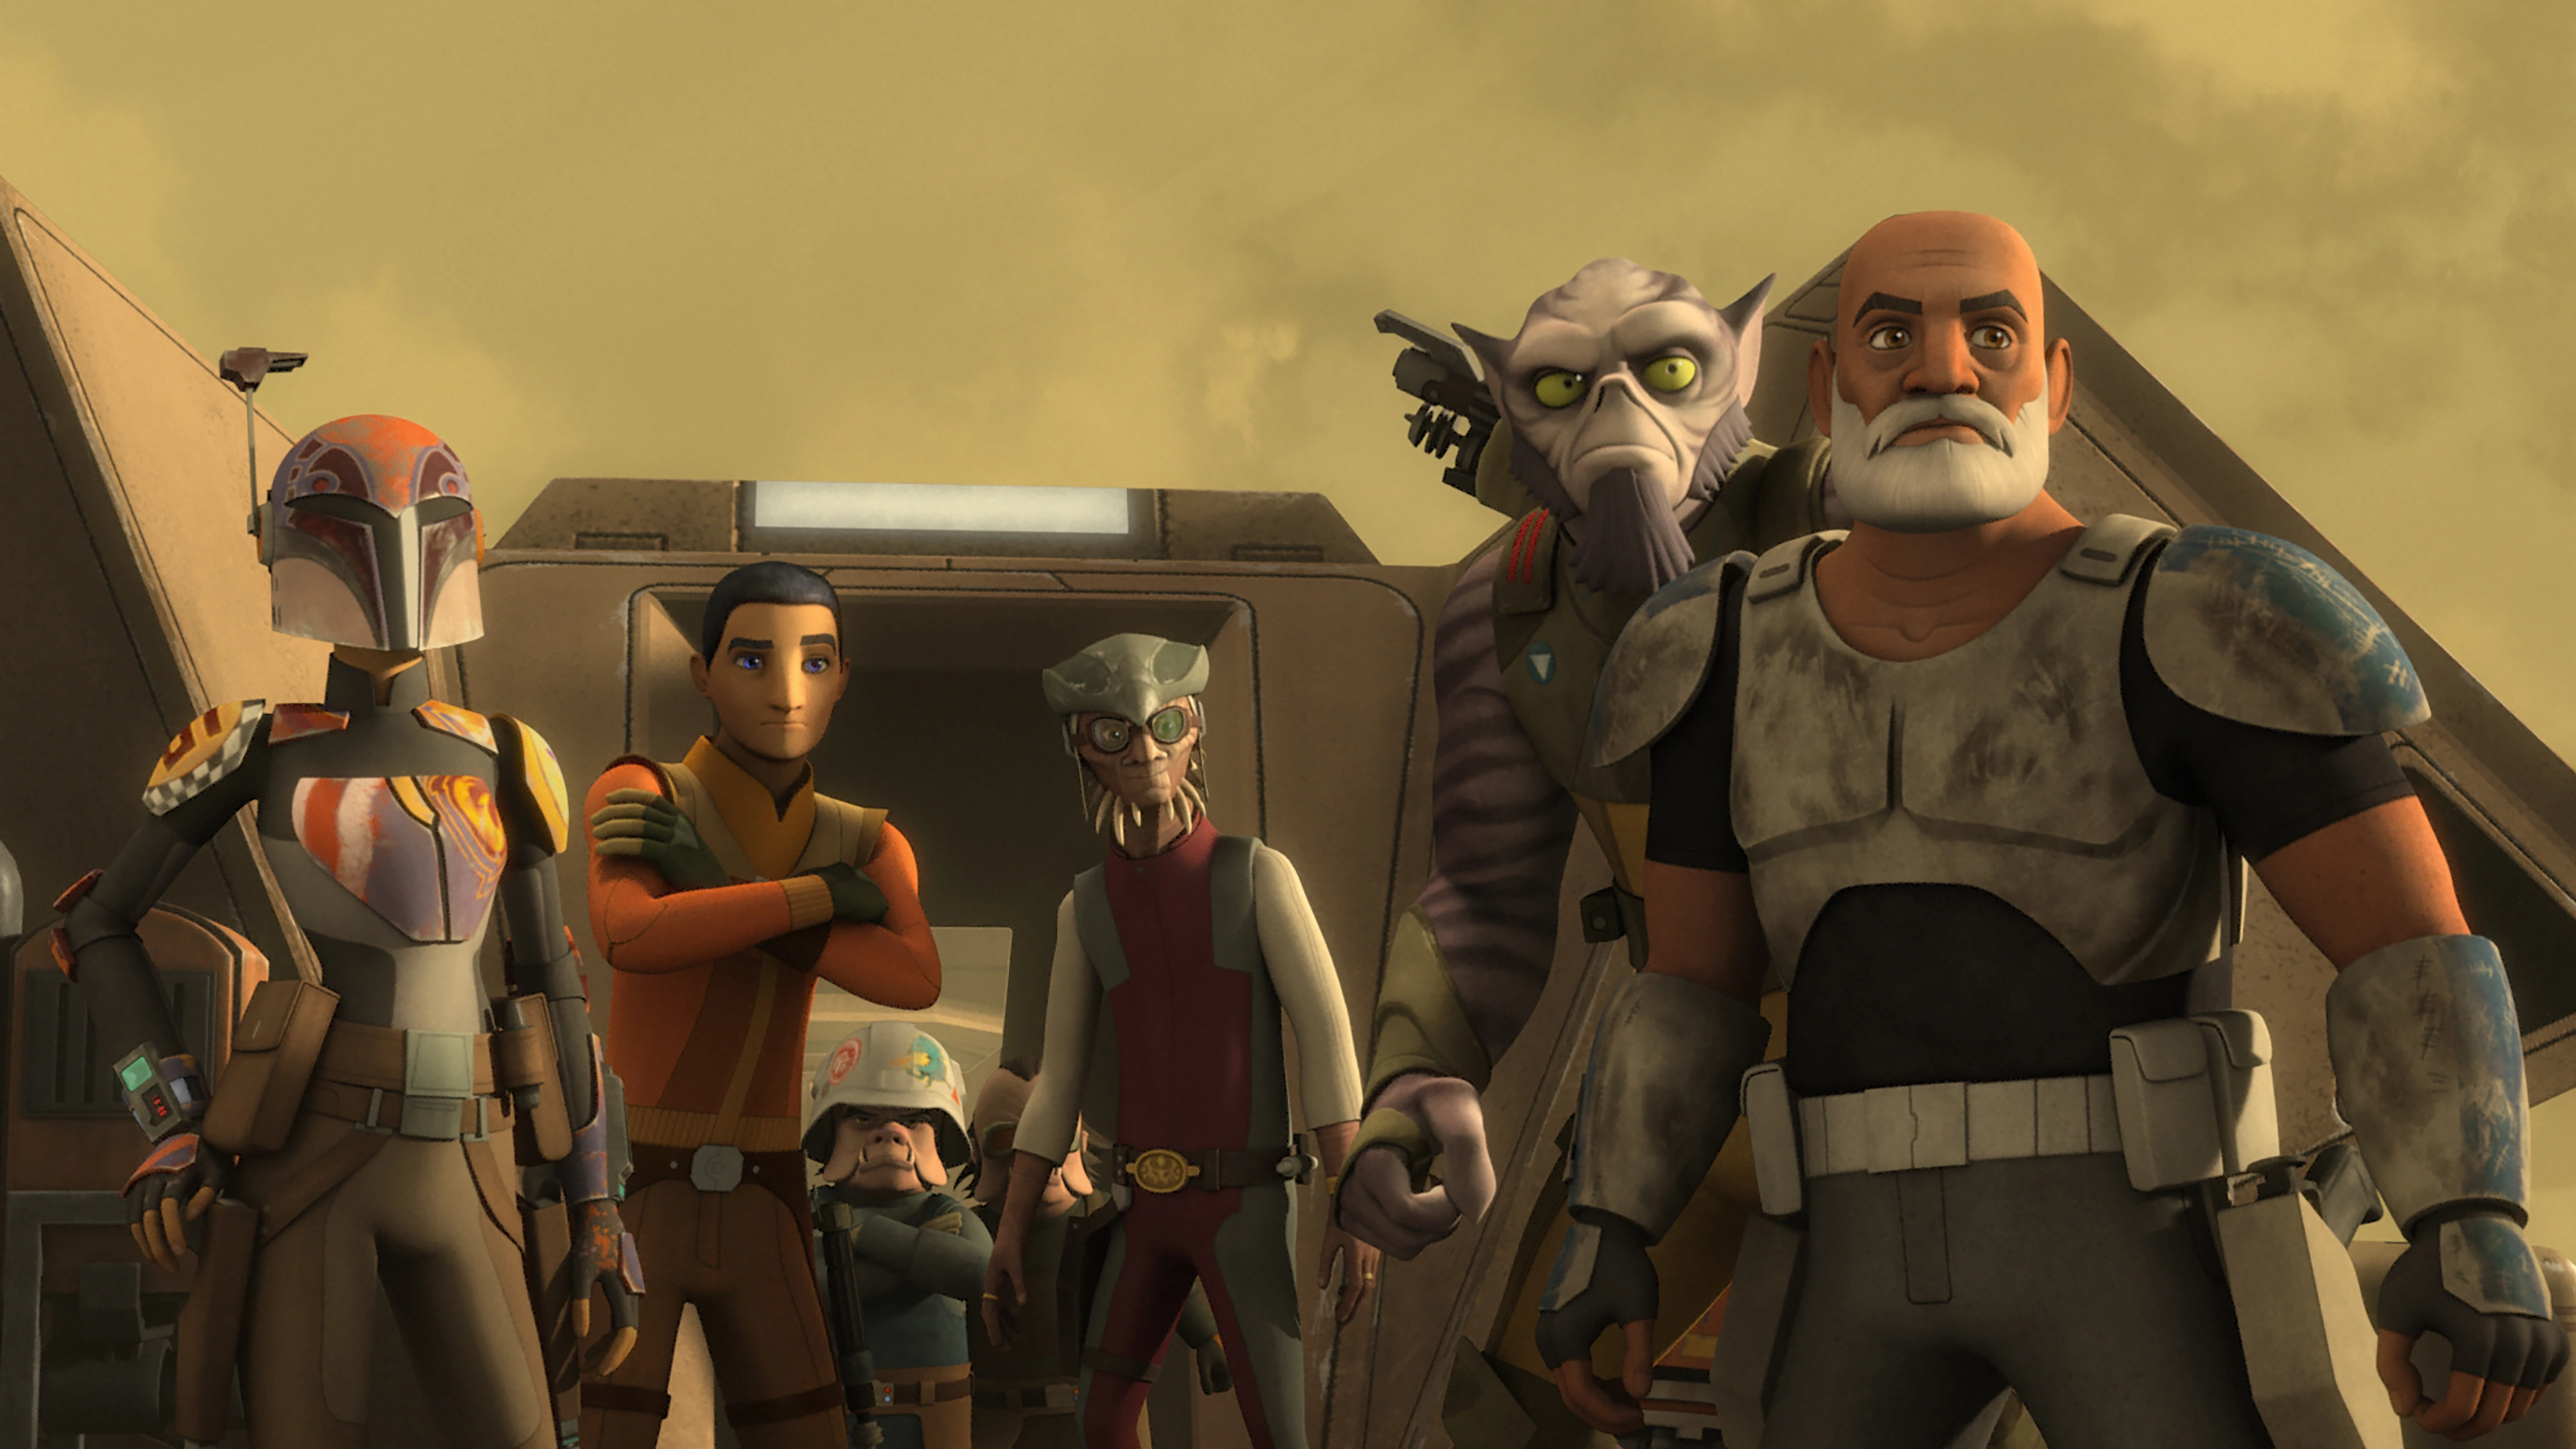
Sabine and her companions raided an asteroid gas refinery.
Sabine and her fellow rebels later took part in a raid on a Mining Guild asteroid gas refinery to obtain fuel supplies for the Ghost and the fleet. While traveling to the refinery, Sabine and her captain Hera was at the helm of the Ghost when their ship was surrounded by a herd of purrgils, large space-dwelling creatures that were capable of hyperspace travel. While Hera wanted to open fire on the purrgils, Kanan and Ezra advised caution. Shortly later, the crew of the Ghost fought off two TIE/mg Mining Guild starfighters which attempted to drive away the purrgils.[61]
Using the GhostTemplate:'s sensors, Sabine quickly tracked down the TIE fighters to the asteroid gas refinery. They also realized that the purrgils were traveling to the same destination. After they had parked the Ghost on a cliff overlooking the refinery, Sabine used her macrobinoculars to study the facility. While most the facility was defended by Rodian gunners and TIE fighters, she spotted a large platform that was used as a landing zone for shuttles picking up fuel canisters. The platform was undefended but they had to act fast. When the crew was assembled, Sabine and Hera outlined their plans to infiltrate the refinery and steal the canisters. Before leaving, they would ignite the volatile Clouzon-36 in the nearby planetoid to destroy the refinery; effectively denying it to the Empire.[61]
For the mission, Sabine along with Kanan, Chopper, and Ezra would jump from the Ghost and land on the landing platform. Kanan was initially annoyed after learning that Sabine had stylized his stolen stormtrooper helmet. During the jump, Sabine took a ride on Chopper, who used his rear rockets to control his descent. While Sabine, Chopper, and Kanan had no problems landing on a bridge, Ezra miscalculated his jump and almost descended into the planetoid below. After landing, the rebels came under attack from the Mining Guild guards. Sabine attempted to activate the detonators but was stopped by Ezra who convinced her and the other rebels that the purrgils depended on the gas to survive.[61]
After fighting off the Rodian guards, Sabine and her rebel comrades managed to secure the landing zone for the Ghost. After the Ghost landed, Sabine and the other rebels helped Chopper to load the canisters into the ship's cargo hold while Kanan and Ezra held back the refinery's security forces. During the fighter, Ezra was knocked off his gun emplacement while Kanan was cornered by two more TIE fighters. The refinery's boss Yushyn attempted to force the rebels to surrender. However, Ezra resurfaced with the purrgils and attacked the Mining Guild forces. Having finished refueling the Ghost, Sabine and her rebel comrades departed into space but not before destroying the refinery.[61]
In space, Sabine and her rebel comrades were reunited with Ezra, who revealed that he had managed to establish a bond with the Purrgil King. The purrgil were not native to the planetoid but depended on the gas there to survive and to travel into hyperspace. The crew of the Ghost then followed their purrgil allies through hyperspace.[61]
赖洛思任务[ | ]


Sabine (far left) and her fellow crew following the successful Ryloth heist.
With the rebellion losing starfighters and pilots at a faster rate than they could replace, Sabine and her fellow rebels took part in a mission to steal an Imperial fighter-carrier seen orbiting Ryloth. Needing help, Hera contacted her estranged father Cham Syndulla, the leader of the Ryloth rebels. Cham and his companions Numa and Gobi Glie rendezvoused with the Ghost in deep space. Upon meeting Cham, Sabine told him that she had learned about his tactics and role as the leader of the Twi'lek Resistance during her time at the Imperial Academy on Mandalore.[62]
Later, Sabine and the other rebels attended a briefing where Hera outlined her plan to use a stolen TIE/sa bomber to infiltrate and hijack the Imperial fighter carrier. Cham disagreed with Hera's plans and advocated destroying the vessel in order to demonstrate the Ryloth rebels' strength. In the end, Hera managed to convince Cham to put aside their difference and work together with her rebel cell to capture the ship for the rebellion.[62]
Sabine later accompanied the two rebel cells aboard Cham's Nu-class transport to Ryloth. During the journey, Sabine and the other rebels befriended Cham and his companions, who regaled them with stories about the Clone Wars and the Battle of Lessu. After exiting hyperspace, they entered their TIE bomber and headed towards the fighter carrier. In order to get aboard, Hera arranged for two rebel A-wing starfighters to attack their bomber. This ruse worked and the rebels were able to land their TIE aboard the fighter-carrier.[62]
After landing, Sabine spotted that the Twi'lek rebels had brought a bag of detonators. Before Sabine and her fellow rebels could respond, Cham and his companions stunned them. Cham and his companions then proceeded with their original mission to destroy the fighter-carrier. When Sabine and her companions stirred, she and Ezra informed Hera that the Ryloth rebels had brought explosives with them. Resolving to stop Cham, the rebels split up. While Hera, Kanan, Chopper, and Ezra headed to the command bridge, Sabine and Zeb headed to the munitions rack to stop Numa and Gobi.[62]
They eventually caught up with the two Twi'leks but were caught in a three-way blaster battle with Imperial stormtroopers. In the end, Sabine and Zeb managed to trip up Numa and Gobi by using a mouse droid to trip them up. With the two Twi'leks incapacitated, Sabine and Zeb bound them with restraints. Meanwhile, Hera had managed to convince Cham to abandon their differences and work together to secure the fighter carrier. Joining forces, the two rebel cells fought off Imperial reinforcements trying to reclaim the ship and repaired the ship's hyperdrive. Sabine also helped Ezra and Cham to shove a TIE bomber laden with explosives into the path of an Imperial light cruiser, destroying the enemy vessel. Having accomplished their mission, Sabine and the other rebels escaped into hyperspace with the stolen Imperial fighter-carrier. After Hera and Cham reconciled, Sabine and her fellow rebels were present in the carrier's hangar bay where they bade farewell to Cham and his companions.[62]
Mission to Oliu[ | ]
Sometime later, Wren, Orrelios, Bridger, Jarrus, Kitwarr, Wullffwarro went on a mission to the planet Oliu[63]
吉奥诺西斯任务[ | ]

Sabine (far right) and her fellow rebels approaching Geonosis.
莎宾·雷恩和战友们在雷克斯的陪伴下前往吉奥诺西斯星系,调查位于吉奥诺西斯星轨道上的帝国建造设施。After the Ghost landed in the abandoned module's hangar bay, she along with Ezra, Kanan, and Zeb ventured into the complex only to be surrounded by Imperial stormtroopers under Agent Kallus, a perennial foe of the crew of the Ghost. Following a skirmish, Sabine and most of her companions managed to make it back to the Ghost. However, Zeb was separated during the struggle and fled into an escape pod, only to be pursued by Kallus.[64]
Sabine and her fellow rebels then managed to escape their Imperial pursuers but stayed in the Geonosis system to search for their missing comrade Zeb. Despite efforts to track the trajectory of his escape pod and to sweep Geonosis with the Phantom, the rebels were unable to find their missing comrade. Meanwhile, Zeb and Kallus managed to land on icy Bahryn, one of Geonosis' moons. Together, they established an unlikely friendship to survive the cold and managed to escape several bonzami predators. After finding shelter and fixing his transponder, Sabine and her fellow rebels reunited with Zeb.[64]
Parting with the Jedi[ | ]
So, where are they [Kanan, Ezra, Ahsoka] going now?"
"Sometimes it is better not to know.
——Sabine and Hera watching the Phantom depart for Lothal[来源]
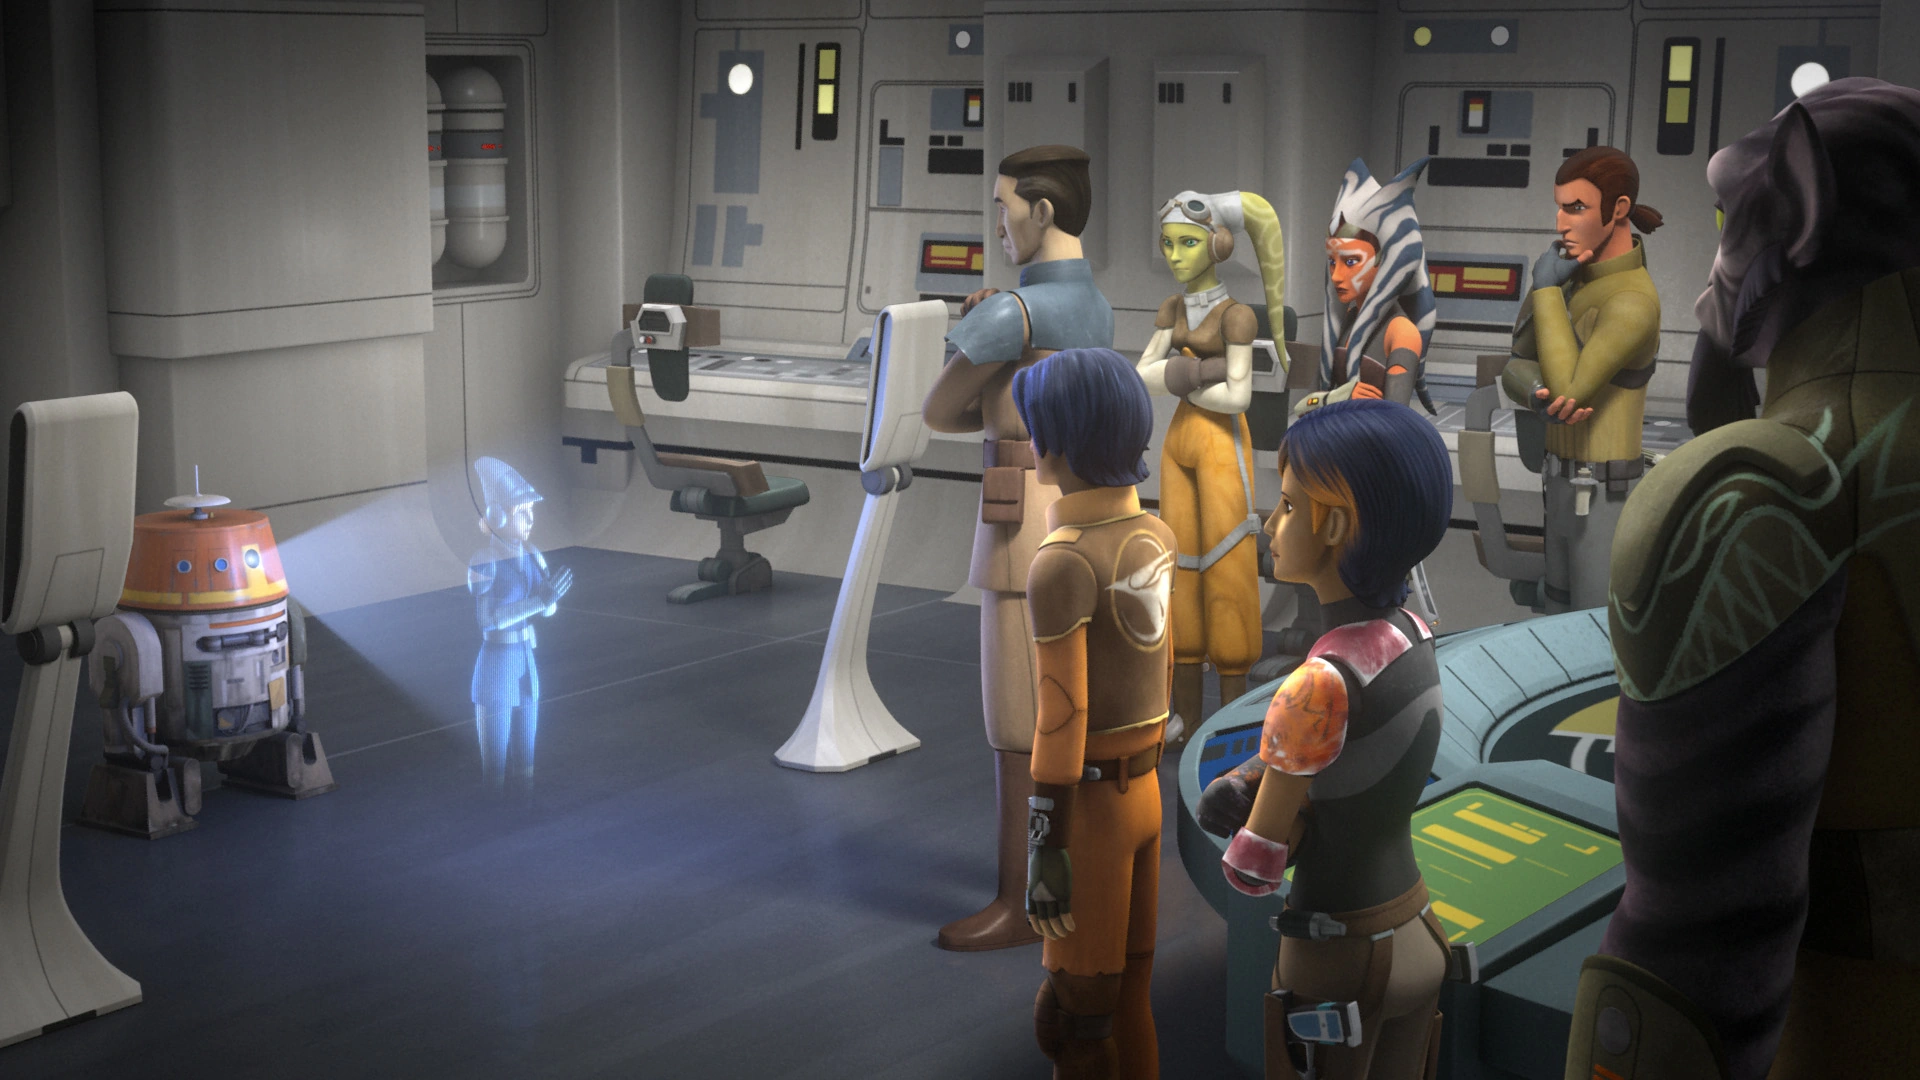
Sabine Wren was aboard the Ghost while Ezra, Kanan, and Chopper traveled on the Phantom to Oosalon to scout the planet as a potential site for a new rebel base. Shortly later, Ahsoka Tano visited the Ghost, and the ship later rendezvoused with the Phantom in deep space. One aboard, Sabine and her fellow rebels learned that the two Jedi had encountered two Inquisitors known as the Fifth Brother and the Seventh Sister on Oosalon. Fearing that the Inquisitors would hamper the three Jedis' efforts to aid the rebellion, Kanan, Ezra, and Ahsoka traveled to the Jedi Temple on Lothal. Sabine along with Hera and Zeb watched the Jedi and Chopper depart aboard the Phantom. When Sabine asked where they were going, Hera replied that it was sometimes better not to know.[65]
Heist at Horizon Base[ | ]
Sabine Wren and her fellow rebels attended a meeting aboard the former Imperial fighter carrier, which had become the Phoenix Squadron's new flagship, to discuss plans to establish a rebel base on Berzite's moon in the Yost system. The meeting was also attended by the former Clone Captain Rex and Sabine's old friend Ketsu Onyo, who had decided to help the rebellion. Ketsu recommended Berzite's moon on the grounds that it lacked an Imperial presence. However, the fighter carrier lacked enough fuel to travel to the Yost system. Sabine, who had been tracking Imperial fleet movements, then suggested raiding an incoming Imperial fuel shipment at Horizon Base. Upon arriving at Horizon Base, Hera and the other rebels made their way to the depot while the astromech droid Chopper stayed behind to guard the Ghost and to keep a watch for Imperial forces.[66]
Sabine and her friends managed to steal the fuel but were pursued by Imperial stormtroopers. They managed to make their way back to the ship but could not find Chopper; who was distracted by a droid leg being sold at a nearby stall. Upon arriving back at the Phoenix fleet, they found the fleet under attack from an Imperial force led by Admiral Kassius Konstantine, who gave his men orders to stop the Ghost from delivering fuel to the fighter carrier. However, the Ghost was able to dock in one of the fighter carrier's hangar bay due to the intervention of Ketsu's starship Shadow Caster. After refueling the fighter carrier, Sabine and the rebel fleet made preparations to depart to the Yost system. However, Hera and Commander Sato received warning from Chopper and the former Imperial inventory droid AP-5 that the Empire had set a trap in the Yost system. With the help of AP-5, the rebels instead fled to the planet Atollon, which had no Imperial presence.[66]
At Atollon, Sabine and the other rebels reunited with Chopper and AP-5, who had stolen an Imperial cargo ship. Sabine also repaired the badly-damaged AP-5, who had been blasted during the takeover. Chopper willingly relinquished his stolen droid leg to provide Sabine with parts to repair his friend. When AP-5 awoke, he chided Chopper for the "illogical act" of sacrificing his leg to fix him. Sabine and her fellow rebels watched the two droids insulting each other verbally before exiting the common room.[66]
Return to Garel[ | ]

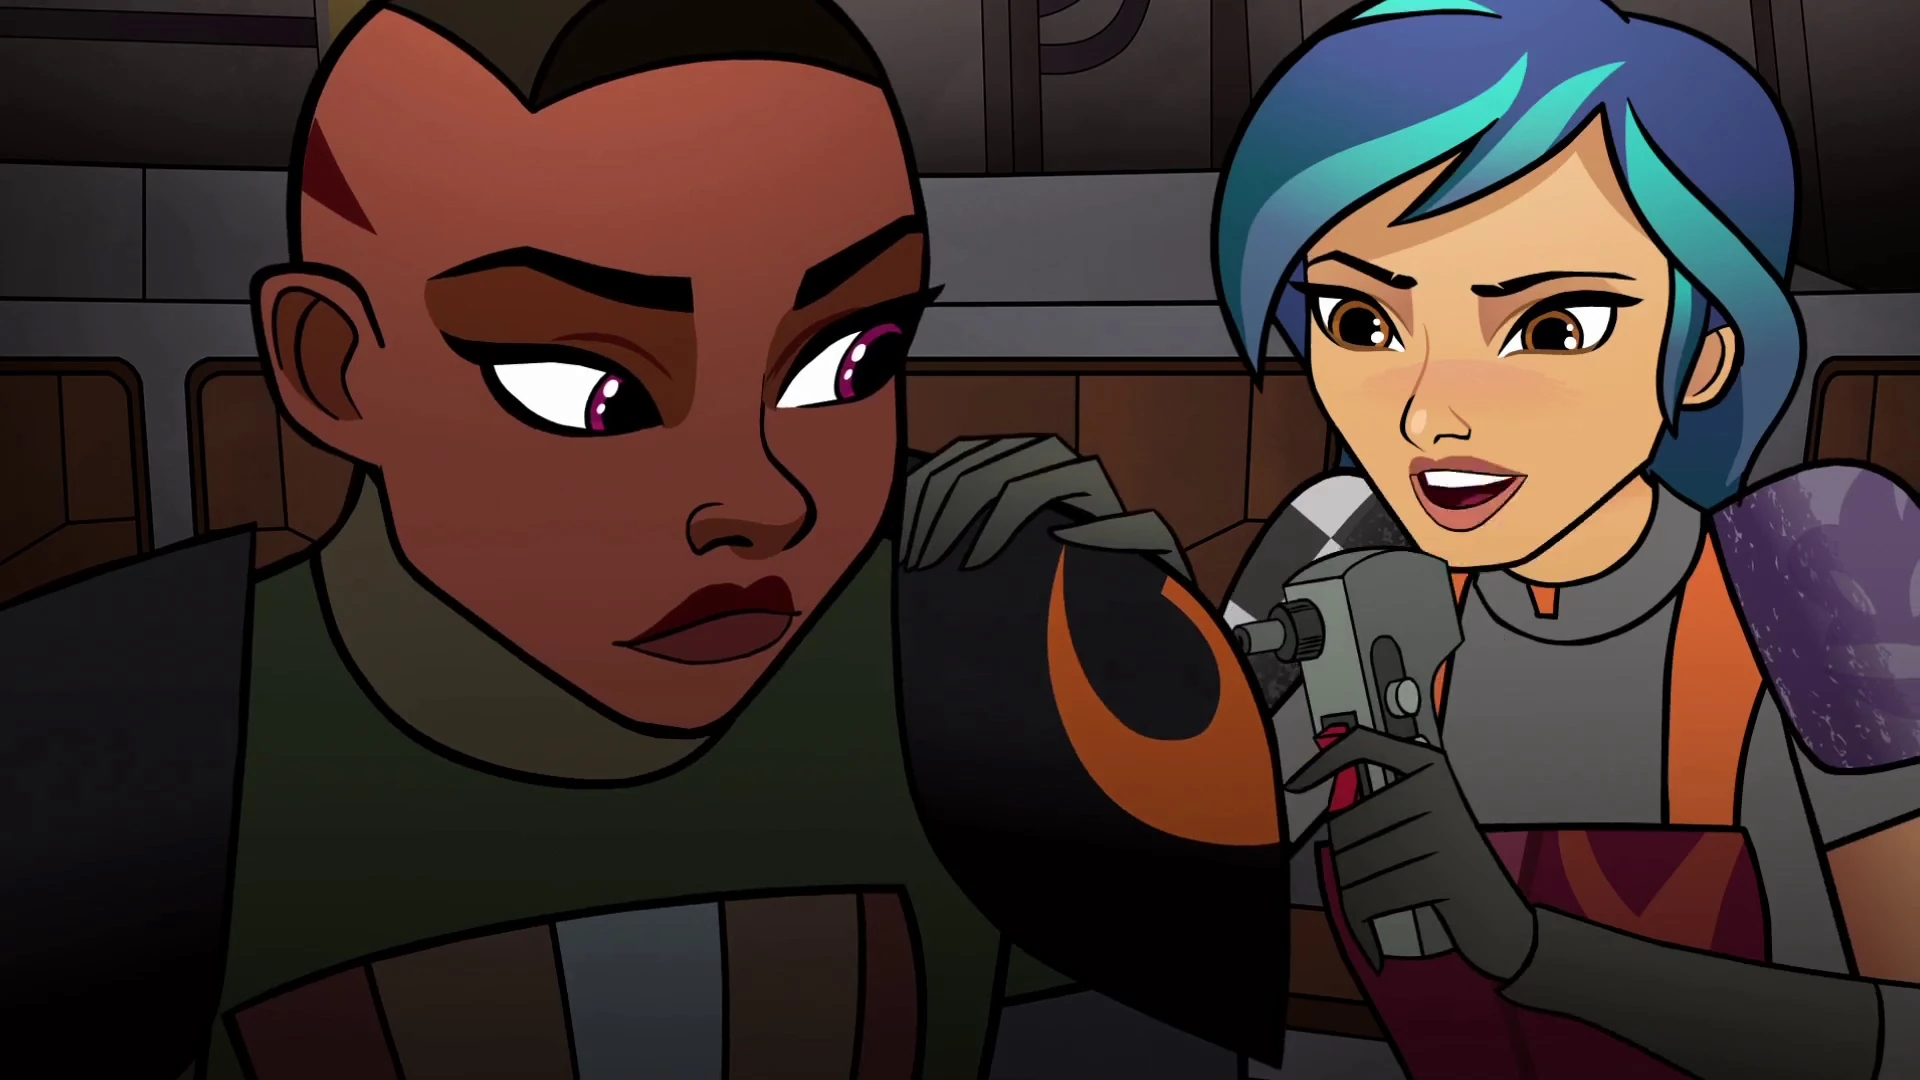
Sabine giving Kestu's armor a paint job.
Sabine then returned to Garel City with Ketsu, who left Black Sun. Sabine then gave her the chance to join the Rebellion, but she was hesitant. Their mission was to steal containers carrying food supplies for the rebellion. Together, they knocked out the stormtrooper guards with their helmets. When one of the food canisters fell, Sabine covered Ketsu while she rescued a Chadra-Fan boy. Sabine then called in Spectre 2 to pick them up. Sabine, Ketsu, and the boy were then picked up by the Ghost. After dropping off the boy, Ketsu decided to join the Rebellion. As thanks, Sabine spray-painted a red starbird on Ketsu's charred pauldron.[67]
建造切宝基地[ | ]

Sabine and Rex outside Chopper Base.
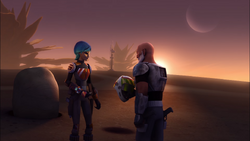
Following the discovery of Atollon, the Phoenix rebels established a base on the planet called Chopper Base. Sabine and the other Spectres assisted in the establishment of the base by ferrying supplies from the fleet. On one supply run to deliver power generators, Sabine and Captain Syndulla were at the helm of the Ghost. During the journey, Sabine and Hera watched Kanan and Ezra undergoing a lightsaber training session in the ship's cargo hold. When Sabine complimented Ezra's improved abilities, the young apprentice took it as a "put-down".[68]
After landing at Chopper Base, Sabine and her fellow rebels met Rex in the command center. Rex informed them that this scout had found an underground source of water. Sabine also helped the Phoenix rebels plant sensor beacons around the base to provide a warning for intruders. Later that evening, Sabine and Rex received a report that a fellow rebel named Lieutenant Dicer had not returned from planting a sensor marker in the northern perimeter. The two ventured to Dicer's last known location in the Phantom.[68]
Upon arriving there, Sabine and Rex found Dicer's sensor marker and helmet but no sign of the rebel. While examining her helmet, Rex concluded that Dicer had been taken after she had planted the sensor marker. At that point, Rex sensed movement coming from a "rock" behind Sabine. This "rock" turned out to be a krykna, a large spidery creature. Sabine managed to fight off the Krykna with two blaster pistols and call for help. However, Rex was overpowered and taken captive by the Krykna.[68]
Shortly later, the other Spectres arrived in the Ghost and Sabine informed her comrades that Rex had been taken by the Krykna. While Chopper guarded the Ghost, Sabine and her fellow rebels explored the tunnels. While Ezra and Kanan explored one section, Sabine along with Hera and Zeb explored a different section which led them to an underground nest. There, they managed to free Rex but were then pursued by several Krykna. After reuniting with Ezra and Kanan, the Spectres escaped the tunnels and made their way back to the Ghost.[68]
After boarding the ship, Sabine and her fellow rebels attempted to escape but the ship was trapped under a web woven by the Krykna. Under Hera's orders, Sabine diverted all auxiliary power to the hull. This had the effect of electrocuting a Krykna but it failed to drive the creatures away. As the fighting continued, Sabine realized that the Krykna avoided the sensor marker and suggested using the machine to hold the creatures at bay so that the rebels could break free of their web.[68]
During the rebel counter-attack, Ezra and Kanan used their Force powers to hurl Sabine towards the sensor marker. However, they miscalculated and she landed in a pit. Sabine managed to reach the top and escape a Krykna that was lurking at the bottom of the pit. Using the sensor marker, Sabine managed to fight her way back to the Ghost. Meanwhile, Ezra and Kanan used their lightsabers to break the web around the ship. Having freed the Ghost, the rebels were able to flee back to Chopper Base.[68]
The following day, the Phoenix rebels managed to secure Chopper base from the Krykna by erecting a fence of sensor markers around the base. Sabine and Kanan watch the rebels erecting the fence. At that point, Sabine took the opportunity to tell Kanan that Hera wanted to speak to him about the upcoming Jedi-only mission to Malachor. Kanan and Ezra were planning to travel there with the former Padawan Ahsoka Tano to seek answers about how they could fight against the Empire.[68]
Staying behind on Atollon[ | ]
Sabine and her fellow rebels including Rex stayed behind on Atollon while Kanan, Ezra, Chopper, and Ahsoka traveled to Malachor on a mission to seek knowledge on how to defeat the Sith. When Kanan, Ezra, and Chopper returned from Malachor, Sabine and her fellow rebels were there to greet them when the Phantom arrived at Chopper Base. While Hera hugged the now-blinded Kanan, Sabine and the other rebels remained silent. When Ezra exited the Phantom, Sabine along with Zeb and Rex looked with sadness upon realizing that Ahsoka had not survived the mission. Later, she and the other Spectres returned to the Ghost where they silently came to terms with Kanan's blindness and Ahsoka's apparent death.
解救杭多·奥纳卡[ | ]
Sabine's latest style.
在马拉科事件之后,莎宾再度更换了自己的发型、发色,并改变了装甲涂装。Sabine and her team later took part in a mission to Naraka to rescue the Weequay pirate Hondo Ohnaka, whom they had previously encountered at Nixus Hub 218. While Hera waited aboard the Ghost, Sabine and her team climbed under a bridge. After taking out two stormtroopers, they were joined by Chopper. Together, the rebels made their way inside the prison.[69]
Once inside the prison, the rebel team located cell 6611 where Hondo was being held. While Sabine was reluctant to rescue the opportunistic pirate, Ezra assured her that his information was reliable. When Sabine encountered Hondo's Ugnaught companion Terba, she expressed a reluctance to rescue the second target until Hondo assured her that Terba had access to information of interest to the rebellion. Sabine then spotted a stormtrooper sneaking up behind Ezra. Following a firefight, the rebels, Hondo, and Terba fled down a turbolift. Inside the lift, Sabine lent Hondo a Mandalorian blaster and warned him to return it.[69]
Upon exiting the lift, Sabine and Ezra opened fire on several stormtroopers. Following a brief skirmish, the rebels headed to the entrance. Terba then took the opportunity to break away from the group but was struck dead by laser fire from an AT-DP walker that was blocking their path. Trapped between Imperial forces on both sides, Sabine threw a grenade which killed the stormtroopers behind them. Chopper then shut the door. Meanwhile, Ezra used the Force to compel the AT-DP pilot to turn on his comrades and to drive his walker off the platform.[69]
When Sabine asked Ezra if Kanan had taught him that power, Ezra coolly replied that this was not the case. In secret, he had been delving into a Sith holocron he had obtained on Malachor. When the Ghost finally arrived, Sabine and her fellow rebels jumped onto the hull of the ship. Once aboard, Sabine reported to Hera about Terba's death. This prompted an argument between Ezra and Hera.[69]
Heist at Reklam Station[ | ]
Sabine and the other rebels later took part in a briefing where Hondo revealed that the Imperials were dismantling Old Republic Y-wing starfighters at the junkyard Reklam Station inside the gas planet Yarma. Sabine was a member of a recon mission led by Ezra, who had been promoted to the rank of Lieutenant Commander. Sabine and her team were tasked with scouting Reklam Station. Together with Rex and Hondo, the recon team traveled to Reklam Station.[69]
On the way, they had to exit hyperspace at Sereeda Waypoint in Mining Guild space. The Phantom was discovered by a Mining Guild patrol but Sabine and Chopper managed to shoot down two Mining Guild TIE fighters. Ezra then advocated destroying the Mining Guild command ship but Sabine pointed out that the Guild would have already alerted the Empire to their presence. The rebel team then traveled to Yarma. While Sabine flew the shuttle, Hondo guided her through the gassy atmosphere. The rebels eventually spotted Reklam Station in the distance.[69]

Sabine (far left) and her team at Reklam Station
However, they were attacked by two Imperial DTS-series Dismantler Droids. Chopper and Rex managed to destroy their pursuers but the Phantom sustained damaged and dived into the depths of Yarma. Sabine managed to regain control of the ship and parked it beneath Reklam Station. Once aboard the station, the rebels and Hondo convinced several Ugnaught laborers to assist them in stealing the Y-wings in return for gaining their freedom. After shutting down the conveyor belt, the rebels began refueling the starfighters at Sabine's insistence.[69]
Before the could finish refueling, they were spotted by a third dismantler droid, which alerted the Imperial Commander Brom Titus. Titus activated the magnetic locks and ordered the dismantler droid to attack the rebels. The dismantler droid attacked Chopper before attempting to throw Sabine and Zeb off a Y-wing. However, Rex used a magnetic crane to throw the droid off the station into the fiery depths of Yarma. Meanwhile, Ezra destroyed the station's power plant which freed the Y-wings. Sabine then instructed Chopper to activate the relay navigation system and autopilot the Y-wings.[69]
As the station disintegrated, Sabine and the other rebels minus Ezra escaped on the Y-wings into space. However, they were intercepted by an Imperial Star Destroyer, which deployed TIE fighters. Following a brief dogfight, the rebels were rescued by Phoenix Squadron, which dispatched the Quasar Fire-class cruiser-carrier Phoenix Nest to evacuate them. Sabine and the team managed to evacuate the Y-wings aboard the carrier while Hera and Kanan rescued Ezra. Back at Chopper Base, Sabine learned from Hera that the five stolen Y-wings were to be transferred to General Jan Dodonna's unit.[69]
摩尔的囚徒[ | ]


Sabine and her fellow rebels in Maul's custody
Later, Sabine along with Hera, Chopper, and Zeb was captured by the former Sith apprentice Maul, whom Ezra and Kanan had encountered earlier on Malachor. Maul had lured the rebels into a trap by attacking the crew of a Phoenix Hammerhead corvette. Maul then demanded that Kanan and Ezra hand him the Sith holocron they had recovered on Malachor and Kanan's Jedi holocron. If they failed, he threatened to execute his prisoners. After Maul inspected Sabine's artwork and surmised that the Ghost was their home, Sabine suggested that the Dark Sider walk to the airlock. When Maul forced Hera to take him on a tour of the ship, Sabine protested. However, Maul told her she should trust him as he once ruled her homeworld of Mandalore.[70]
Sabine and the other rebels later took part in an escape attempt. They managed to knock out Maul's repurposed tour guide droids and flee into the cargo hold. There, the Spectres attempted to trap Maul with the magnetizer. However, the Sith Lord broke free with his lightsaber, hit Zeb with a box an threw Wren into Hera with the Force. Maul then reasserted his authority and warned his prisoners that they were only alive as long as they were useful to him. Maul took his captives to the abandoned Mandalorian asteroid station Vizsla Keep 09 where he rendezvoused with Kanan and Ezra.[70]
After collecting the holocrons, Maul double-crossed Ezra and Kanan and ordered his droids to execute the prisoner. However, the droids were destroyed by Kanan. Sabine and the other rebels then confronted Maul in the command center. Maul and Ezra had combined the holocrons in order to see visions of the future. Sabine and the others except Kanan were blinded by the bright pink light. However, Kanan managed to convince Ezra to end the ritual by closing his eyes. Despite surviving Maul and recovering the holocrons, the former Sith managed to escape into space.[70]
Skystrike Academy[ | ]


Sabine with cadets Wedge Antilles and Hobbie.
Sabine went undercover as an Imperial cadet named "Ria Talla" to infiltrate Skystrike Academy and assist defecting cadets that an informant had alerted them to. Sabine went alone on this mission, due to being the least recognizable of the rebel cell and having been an Imperial cadet before. When she arrived at Skystrike Academy, she put her credentials in an Imperial astromech droid. The droid initially rejected her credentials, which prompted the attending Imperial officer to take her aside for questioning. Sabine took her helmet off and told the officer her problem, blew the dust off the credentials and put it back in the droid. None of the Imperials present noticed her as part of the rebel cell, and the droid accepted her credentials.[71]
The next day, Captain Vult Skerris sent Sabine and Wedge out on a simulation. They took out several Y-Wing fighters and arrived at a damaged transport. Sabine told Skerris that Imperial protocols dictated that the ship had to be boarded first, but Skerris insisted on destroying it. She voiced her protest and after the simulation, reported for a debriefing. After the debriefing, Wedge was impressed with Sabine's instincts but warned her that others in the Academy didn't share her views. She later overheard Wedge arguing with two of his friends, Hobbie and Rake about defecting. Later on, Sabine told Wedge that she was actually a rebel agent that was sent in to help defecting cadets, and formulated a plan.[71]
Skerris later ordered a combat simulation, which Sabine recognized as the chance to escape quickly. During the simulation, she gave the signal to break off. Unfortunately, Pryce pressed a button that removed their solar collectors and left them stranded. The Imperials killed one of the defectors and then attacked the rebel transport, forcing them to temporarily abandon them.[71]
Back in the Academy, Pryce told the remaining three cadets that she was aware that one of them was a rebel agent. Pryce presumed that Wedge was the agent and attempted to strap him to the torture device when Sabine revealed herself as the agent. Pryce ordered the two boys away and pulled up a glyph, recognizing Sabine as a former Imperial cadet and mockingly welcomed her back. Sabine later broke free from two Stormtroopers guarding her and engaged in a short fist fight with Pryce. The two were almost evenly matched, but Sabine eventually got the upper hand by pushing Pryce into the torture device's stinger, knocking her out, and escaped the cell.[71]
Sabine then found Wedge and Hobbie, and freed them from their cell. They attempted to find a way out when the Imperials seal the doors around them. Kallus then appeared and opened the blast door. Suspicious of Kallus, Sabine asked him to give her a good reason to trust him. Kallus told them to avoid Levels 3 to 5 and use Hangar 24 to escape, and asked Sabine to send Garazeb Orrelios his regards and that they were even now. They then hijacked a bomber and headed for space when Skerris pursued them, only to be saved when Ezra's CR90 corvette appeared. Sabine was surprised by his presence, and Ezra replied that they stuck around just in-case she managed to escape. When they arrived at the rebel base, Sabine introduced Wedge and Hobbie to Commander Sato.[71]
重返赖洛思[ | ]
Following a supply run to Hera's father Cham Syndulla's Free Ryloth movement, Sabine, the other Spectres, and Cham's band volunteered to helped Hera recover a family heirloom, the Kalikori, from Imperial forces. Imperial forces under Grand Admiral Thrawn had made advances against the Free Ryloth rebels and captured Tann Province. Thrawn had requisitioned the former Syndulla residence as his new local headquarters. Cham had been unable to take the Kalikori with him while fleeing his former home.[72]
While Hera, Ezra, and Chopper infiltrated the former Syndulla home, Sabine and the two rebel cells launched an attack on Imperial forces in the Tulara Ravine. Sabine blew up an AT-DP walker and an Imperial Troop Transport. The other rebels then attack before retreating into the wilderness. However, they were pursued by a second AT-DP walker and Syndulla's blurrg steed was gunned down. Sabine and the other rebels then positioned themselves around the rocks but were unable to stop the walker's advance.[72]
The walker then stopped firing to broadcast a hologram message from Captain Slavin, Thrawn's second-in-command. Slavin revealed that the Empire had captured Hera and Ezra. He demanded that Cham surrender himself in exchange for their safe return. Cham complied with the ultimatum in order to save his daughter. Sabine then piloted Cham and the other rebels to the Syndulla residence where the exchange would take place. However, the rebels were able to escape after Chopper activated several explosives which disoriented the Imperials. After fleeing into the wilderness, Sabine and the other crew mingled with Cham's subordinates Numa and Gobi Glie. Despite failing to recover the Kalikori from Thrawn, Hera found renewed contentment and love with her father, Kanan, and her crew including Sabine.[72]
Mission to Agamar[ | ]
Sabine later accompanied her fellow crew and the former Clone Captain Rex on a mission to Agamar. While Rex, Kanan, Ezra, Zeb, and Chopper explored an abandoned Separatist supply ship to salvage proton bombs, Sabine and Hera flew the Ghost to raid an Imperial fuel depot. They were pursued by TIE fighters. During the pursuit, Sabine remarked that Ezra and Kanan would be expecting them soon. However, they had not heard from their comrades; who had been captured by the Separatist super tactical droid Kalani. The rebels managed to escape their Imperial pursuers and resume contact with Kanan, who had made peace with Kalani and found a new transport for the Ghost.[73]
重返谐晨星[ | ]
Sabine, Ezra and Chopper escape Gar Saxon's men.
In an attempt to win the Protectors' leader Fenn Rau over to the rebellion, Sabine played a game of Cubikahd with him. However, Rau was adamant that the Protectors were doing enough for the rebellion by letting them travel through the Concord Dawn system. Their meeting was interrupted by Zeb, who summoned them for a war room briefing with Hera and Commander Sato. After losing contact with the Protectors, Sato suspected that the Mandalorians were setting a trap for them. To clear the Protectors' name, Rau offered to travel to the Concord Dawn system to reason with them. Hera dispatched Rau along with Sabine, Ezra, and Chopper on a mission to probe the system.[74]
Sabine, her rebel comrades, and Rau traveled to the Concord Dawn system in the Phantom II. During the journey, Rau managed to stun Sabine and Ezra and landed the ship on the third moon of Concord Dawn. After awakening, Chopper freed Sabine and Ezra from their restraints. They soon discovered Rau at the top of a hill. After rejoining Rau, they discovered that another Mandalorian force had attacked and massacred the Protectors. Rau was angry at Sabine and blamed the rebellion for the deaths of his men. While arguing, Ezra and Chopper sensed a signal approach. When a dwarf probe droid appeared, Ezra used the Force to trap the droid while Sabine destroyed it with her blaster. Rau wanted to bargain with the Empire but Sabine disagreed. She sent Chopper to secure the Phantom II.[74]
The rebels and Rau were then attacked by a column of Imperial Super Commandos led by Gar Saxon, the Imperial Viceroy of Mandalore. Sabine and Rau managed to flee but Ezra and Chopper were captured. While hiding, Rau advised Sabine not to rescue Ezra in order to avoid drawing attention to themselves. They then observed the movements of the Super Commandos from a safe vantage point on a hill. Despite Rau's hatred for the rebellion, Sabine managed to convince him to help her rescue her friends by appealing to his hatred for Rau. Putting their plans into action, Sabine knocked out a Super Commando and stole his jetpack. Rau then secured the Phantom II. She then used smoke grenades to disorientate Saxon and his guards and rescue Ezra and Chopper.[74]
The rebels attempted to flee aboard the Phantom II but discovered that Rau had stolen the craft. Sabine and her companions were then surrounded by Saxon, who chastised her for deserting the Imperial Academy and demanded that she pledge her fealty to him. Instead, Sabine got Chopper to upload frequency 337 feedback onto the Super Commandos' helmet, knocking them out. Sabine then donned her jetpack and held onto Ezra while Chopper ignited his rocket thrusters. The rebels were soon pursued by the Super Commandos. Due to Ezra's extra weight, Sabine was forced to fly low and the boy narrowly avoided colliding with a rock. With a Super Commando closing in on them, she dropped Ezra on a pinnacle. The Jedi used his lightsaber to damage the Super Commando's jetpack, causing him to fall. Sabine then reunited with Ezra and they proceeded towards Saxon's starship.[74]
Saxon and his three remaining men followed the rebels into a narrower part of the canyon. In order to delay them, Sabine threw grenades at Super Commando, blocking his path. When Saxon and another Super Commando fired upon her, Sabine lost hold of Ezra, and he landed on Chopper. Sabine then shot a second Mandalorian warrior with her blaster, causing his jetpack to explode. The rebels eventually reached Saxon's ship but the Super Commandos caught up with them. One of the Super Commandos seized Sabine's helmet. Saxon ordered his remaining Commando to shoot Ezra while he executed Sabine. Before they could carry out their execution, Rau arrived on the Phantom II and attacked Saxon's vessel and the remaining Commando. When Sabine and Ezra tried to board the Phantom II, Gar Saxon tackled Sabine and told her that he was going to bring her into the empire. They fought for a few seconds until Sabine managed to flee with Ezra and Chopper aboard their shuttle.[74] Once aboard the ship, Sabine confronted Rau about his sudden change of heart. Rau explained that he realized that she was willing to die for her friends even though they were not Mandalorians. He praised her for remaining true to the "old ways" and told her that she had gained his respect. When Ezra remarked that the Mandalorians were crazy, Rau responded that he was crazy enough to join the rebellion. Sabine then welcomed Rau to the family as they departed the Concord Dawn system.[74]
Evacuation of Mykapo[ | ]
After receiving intelligence that the Empire was planning to impose martial law on the planet Mykapo, Commander Sato sent Sabine, her fellow rebels, and Phoenix Squadron on a mission to evacuate local rebel sympathizers. Upon arriving in the system, Sabine spotted a YT-2400 light freighter skirmish with Imperial forces. The Spectres and Phoenix squadron helped by attacking the TIE fighters. Sabine expressed surprise when the freighter destroyed an Imperial Gozanti-class cruiser. The freighter crew declined the rebels' offer for assistance and identified themselves as the Iron Squadron.[75]
While Kanan and Zeb assisted with the evacuation efforts, Sabine accompanied Hera, Ezra, and Chopper aboard the Iron Squadron's ship Sato's Hammer. Once aboard, they were greeted by the crew members Gooti Terez, Jonner Jin, and the astromech droid R3-A3. When Sabine noted that the ship was in a state of disarray, Ezra advised her not to offend the crew while Gooti told them not to touch anything. Sabine along with Hera and Ezra tried to convince the ship's captain Mart Mattin to leave the system. However, Mart and his crew insisted on staying.[75]
Unable to reason with Iron Squadron, Hera made preparations to leave the Mykapo system and rendezvous the Ghost with the rebel fleet. However, Ezra convinced Hera to let him, Sabine, and Chopper repair the Iron Squadron's hyperdrive in order to win them over. Sabine and Chopper joined forces with R3-A3 to repair the hyperdrive. Despite their efforts, they were unable to restore the ship systems because Mart had diverted power to the ship's laser cannons and deflector shields. When Imperial forces under Admiral Konstantine arrived, Sabine and Ezra managed to convince Gooti and Jonner to see reason but Mart refused to back down.[75]
Sabine and the other rebels managed to flee aboard the Phantom II but Mart stayed behind on the Sato's Hammer to fight Konstantine's ships. Mart's ship was damaged and he was stranded in space. Sabine and the other rebels managed to flee into hyperspace. Sabine later attended a briefing aboard the Ghost where the Spectres, the remaining Iron Squadron crew, and the holographic forms of Rex and Commander Sato received a distress call from Mart. Hera mounted a rescue mission to save Mart and the rebels traveled back to the system.[75]
When Mart responded that the Imperials had attached something to the hull of his ship, Sabine recognized that it was a magno-mine. Chopper and R3-A3 managed to remove the mine. The rebels then managed to rescue Mart and his ship. The Spectres and Iron Squadron managed to escape destruction due to the intervention of Commander Sato's reinforcements. Sato was the uncle of Mart and had come to rescue his nephew. After damaging Konstantine's Imperial light cruiser with the magno-mine, the rebels managed to escape into hyperspace shortly after Grand Admiral Thrawn arrived on his Star Destroyer Chimaera. Sabine was later present at Chopper Base when Mart reconciled with his uncle and embraces his crew.[75]
Mission to Wynkahthu[ | ]


Hondo tells the rebels about the job
When Hondo tried to solicit the Spectres' help in retrieving cargo from a stricken Imperial cargo ship on the planet Wynkahthu, Sabine opined that Hondo could not be trusted since he had gotten them into trouble half the time. After a tense meeting, the Spectres agreed to assist Hondo and his business partner Azmorigan in recovering the treasure in return for obtaining the ship's proton bombs, a commodity desired by the rebellion. Prior to the mission, Sabine used the GhostTemplate:'s sensors to examine the cargo ship and discovered that it had gotten stuck in one of Wynkahthu's atmospheric storms.[76]
Later, Sabine inquired about Hondo's Ugnaught crew but was met by obfuscation. Later, the rebels learned that Hondo had lost most of his Ugnaught team except Melch while trying to board the cargo ship. While studying the sensor charts, Sabine discovered that they could not offload cargo from the Imperial cargo ship the normal way since it was sitting above a vortex. As a result, Hera solicited the services of the Imperial inventory droid AP-5, who worked with Zeb to devise a plan to retrieve the ship's cargo safely. For the mission, Sabine stayed aboard the GhostTemplate:'s cargo ramp to receive the cargo from Zeb's salvage team.[76]
After Zeb's team opened the GhostTemplate:'s outer cargo doors and attached grappling cables to the ship's hull, Sabine stored several shipments of proton bombs. Sabine kept Hera and Kanan informed about the deteriorating windy conditions. The salvage mission was complicated by a lightning strike that caused the cargo ship to dip into the vortex. Despite the presence of Imperial sentry droids, the rebels and their confederates managed to remove their cargo and evacuate the cargo ship before the vessel was ripped apart by the vortex. Sabine was present when the rebels examined their cargo and Hondo "reunited" with Melch.[76]
Mission to Lothal Imperial Factory[ | ]
Sabine along with Hera and Zeb stayed behind at Chopper Base while Ezra, Kanan, and Chopper undertook a mission to infiltrate the Imperial Armory Complex to steal the plans for a new Imperial weapon. She along with Zeb and Commander Sato watch as Hera corresponded with the rebellion's local Lothal contact Ryder Azadi via hologram. During the meeting, Ryder informed the Spectres and Sato that the factory was on full lockdown and that they had lost contact with Ezra, Kanan, and Chopper. Sabine and her comrades listened as Ryder informed the rebels about the new Imperial commander Grand Admiral Thrawn and that he was planning to launch an attack on the factory.[77]
After Ezra's team escaped the factory with the plans, Sabine decrypted them and discovered that they were the blueprints for a prototype TIE Interceptor that was fitted with deflector shields. Hera and Kanan feared that if the starfighter was produced in large numbers, it would pose a threat to the rebellion. Sabine expressed shock that Agent Kallus had helped Ezra and his team to escape despite Kallus' role in helping her and the defecting cadets flee the Skystrike Academy. However, Zeb vouched for Kallus. Hera then counseled her crew to be cautious of Kallus until they could discern what game he was playing.[77]
曼达洛的遗产[ | ]
The Specter of Maul[ | ]
Following Ezra's mission, Sabine attended a briefing chaired by Hera to discuss the upcoming attack on the Lothal Imperial factory. During the meeting, Sabine asked if Thrawn was present on Lothal. Hera replied that there was an increase in Imperial ships above Lothal but could not confirm Thrawn's presence. Sabine was present when Ezra began exhibiting erratic behavior and fainted after claiming that he had seen a vision of Maul. Sabine later questioned Ezra about the incident in his private quarters.[78]
When Ezra insisted that he was fit and insisted on proceeding with the mission, Sabine went to load an extra set of explosives aboard the Ghost. When the inventory droid AP-5 argued, Sabine insisted that she was the weapons expert and knew the right amount of explosives they needed. AP-5 grumbled but complied with Sabine's orders. When Sabine remarked that AP-5 and Chopper came from the same supply line, Chopper responded that she needed to change her attitude. Before they could argue, Ezra went on a rampage and Sabine told Chopper to get Kanan.[78]
Ezra was about to kill a rebel trooper whom he mistook for Maul when Kanan and Sabine restrained him. After Ezra came back to his senses, Hera decided to relieve him of his duties until Kanan had dealt with the threat of Maul. Under Kanan's orders, Sabine monitored Ezra's wrist comm. Meanwhile, Kanan and Ezra went to commune with Bendu in the wilderness. Maul then appeared and convinced Ezra to accompany him to Dathomir in order to severe their mental link. After Maul's ship Nightbrother jumped into hyperspace, Sabine was able to track Ezra and Maul.[78]
Sabine, under the control of the Nightsisters, attacks Ezra
Sabine and Kanan followed Maul and Ezra to Dathomir in the shuttle Phantom II. After landing outside the Nightsister lair, the rebels entered the cave where they found that Maul and Ezra had completed the ritual which involved summoning the spirits of fallen Nightsisters. Sabine and Kanan opened fire on the Nightsisters but were possessed by the spirits. The possessed Sabine and Kanan then attacked Ezra and Maul. Ezra was forced to dodge Sabine's blaster bolts.[78]
Ezra and Maul managed to escape the cave. Since the spirits' power came from the altar, the possessed Sabine and Kanan were unable to leave the cave. Unwilling to abandon his friends, Ezra re-entered the cave. The possessed Sabine crept up behind Ezra and attacked him with the Darksaber, an ancient Mandalorian weapon and symbol of power. Following a struggle, Ezra managed to use the Force to push Sabine out of the cave. This exorcised the Nightsister spirit. Ezra then told Sabine not to reenter the cave while he freed Kanan and destroyed the altar; vanishing the spirits.[78]
Following the skirmish, Sabine re-entered the cave. When Ezra reprimanded her, she responded that she had never listened to him before. Ezra then informed her and Kanan that the Jedi Master Obi-Wan Kenobi held the key to destroying the Sith. The three resolved to stop Maul from reaching Kenobi so that they could learn how to destroy the Sith. Before leaving, Sabine then picked up the Darksaber and took it with her.[78]
吉奥诺西斯行动[ | ]
在奥加纳议员的请求下,幽灵小队和雷克斯接受任务再度前往吉奥诺西斯星,寻找失踪的义军成员索·格雷拉,后者当时正在调查吉奥诺西斯人消失的秘密。After the Ghost entered Geonosis's atmosphere, Sabine had difficulty making contact with Saw and speculated that he and his team could be underground. The rebels landed their ship two klicks near where Saw had transmitted his last signal to Rebel Command. Sabine, Zeb, and Hera stayed aboard the Ghost while Rex, Kanan, Ezra, and Chopper explored an underground labyrinth near a Geonosian structure. [79]
Later, Hera dispatched Sabine and Zeb to trace the energy source that Saw had sighted before losing contact with Rebel Command. Despite the sandstorm, Sabine and Zeb managed to find a fully operational military grade deflector shield generator. Believing that Chopper Base could make use of the technology, Hera ordered Sabine and Zeb to extract the deflector core. Whenever Zeb expressed concerns about what the shield generator was protecting, she responded by telling him to work fast.[79]
Working together, Sabine and Zeb managed to extract the deflector core by the time the sandstorm had died down. Sabine then discovered that the deflector core was surrounded by several inactive droidekas. After some discussion with Zeb and Hera, the rebels agreed to carefully bring the deflector core back to the Ghost. On the way, the Geonosian Klik-Klak, who was being pursued by the other Spectres and Saw, activated the droidekas. Sabine managed to use her technical expertise to reactivate the deflector core and create an energy field to protect her and Zeb. The two rebels held out long enough for their comrades underground to capture Klik-Klak and destroy his droid controller.[79]
Sabine and Zeb then loaded the deflector core aboard the Ghost when Hera informed them that an Arquitens-class command cruiser had entered the Geonosis system. Sabine finished storing the deflector core while Zeb entered the cave to warn the other rebels. When the Ghost was attacked by two TIE bombers, Sabine and Zeb manned the ship's guns and managed to shoot them down. The rebels then flew the Ghost into a central air shaft where they picked up their comrades, Saw, and Klik-Klak.[79]
The rebels and Saw then became embroiled in an argument over taking Klik-Klak off-world. When the rebels refused to accept Saw's demands, Saw threatened to destroy the Geonosian queen egg that Klik-Klak was guarding. The rebels and Saw put aside their differences to repel a boarding party of Jumptroopers that had been dispatched by Captain Brunson's light cruiser. During the brief skirmish, Sabine donned her jetpack and took out two Jumptroopers with a grenade. The rebels then fled into the depths of Geonosis where they discovered several poison canisters which confirmed that the Empire had perpetrated genocide against the Geonosian species. Sabine recognized the canisters as belonging to the Imperial weapons division.[79]
Having discovered what had befallen the Geonosian species, Saw released Klik-Klak and the Geonosian queen egg. The rebels then managed to break through Brunson's light cruiser by firing their ship's cannons and proton bombs. They then escaped into space and informed Commander Sato and Senator Organa about Saw's rescue and their findings on Geonosis.[79]
Training exercise[ | ]
After the Secret mission to Geonosis, Sabine and some of the Spectres embarked on a training mission near Chopper Base, along with Wedge Antilles and Derek Klivian. Prior to leaving, she told the despondent Captain Zeb, who had been appointed Chief of Security, to cheer up. During the group's absence, an E-XD infiltrator droid designated EXD-9 infiltrated Chopper Base. With the assistance of AP-5 and Chopper, Zeb managed to send it back to its Imperial Star Destroyer base with its armed proton torpedo warhead.[80]
The warhead activated, triggering a chain reaction which destroyed the Imperial starship. Although Zeb's handling of the incident kept the location of Chopper Base secret, for the time being, it narrowed down the search area for Grand Admiral Thrawn's Seventh Fleet. After the rebels received a message from Fulcrum praising them for turning the infiltrator droid into an improvised bomb, Sabine asked Zeb and AP-5 what was going on. AP-5 was about to recount the story but Zeb playfully muzzled him.[80]
Trials with the Darksaber[ | ]
After discovering the Darksaber on Dathomir, Sabine handed it to Kanan for safekeeping. She refused to wield the weapon since she was still haunted by her estranged relationship with her family. After briefly haggling with Chopper over the transport of supplies, Sabine went to her cabin aboard the Ghost to reflect on her art. Chopper later entered the room to inform her that the other rebels and Fenn Rau had gathered in the ship's common room for a meeting. Sabine soon discovered that the Darksaber was to be the subject of the meeting.[11]
Due to her self-doubt and family issues, Sabine initially rebuffed the suggestion of her rebel comrades and Fenn that she master the use of the Darksaber and assume leadership of the Mandalorians. After Hera pointed out that the Mandalorians could help the rebellion attack Lothal, Sabine reluctantly acceded to begin training with the Darksaber under Kanan and Ezra's tutelage. However, she was still upset with Fenn and the other rebels due to the baggage associated with the Darksaber.[11]
In order to avoid the distractions of Chopper Base, Kanan and Ezra took Sabine to train in the wilderness. After setting up camp, Kanan got Sabine to demonstrate her combat skills with a melee stick. Despite her combat skills, Sabine was outmaneuvered by Kanan, who used the Force to compensate for his blindness. Unimpressed with Sabine's skills, he instructed Ezra to train her with lightsaber combat forms using the sticks as a substitute. Kanan was unwilling to let her use the Darksaber because he did not want Sabine to harm herself. For the next two days, Ezra drilled Sabine in lightsaber combat forms.[11]
After two days had passed, Sabine's fellow Mandalorian compatriot Fenn Rau arrived with provisions including a Mandalorian vambrace. Rau explained that the vambrace was equipped with paralyzing darts, cables, and a repulsor meant to counteract the Force abilities of the Jedi. Resuming the training session, Sabine used the repulsor on her vambrace to gain the upper hand over Ezra. Cockily, she challenged Kanan, temporarily immobilizing him with her grappling line. After a moment, Kanan was able to break free with his lightsaber and took the opportunity to lecture to Sabine that while such tools are helpful and might save her life from time to time, only training and discipline would keep her alive in the long run. Frustrated with Kanan for holding back her training, Sabine stormed off to a nearby cave to regain her composure.[11]
Later, Ezra met up with Sabine to comfort her. He reassured her that Kanan was not an easy teacher but that he meant well. Sabine then responded that she knew how to fight but did not want the responsibilities that came with the Darksaber. When Ezra asked about her family, Sabine told him that they regarded her as a traitor and disgrace. Due to her estranged family ties, Sabine believed that she lacked the prestige needed to lead her people. Ezra then comforted her by reminding her that at least she could still return to her parents unlike him.[11]
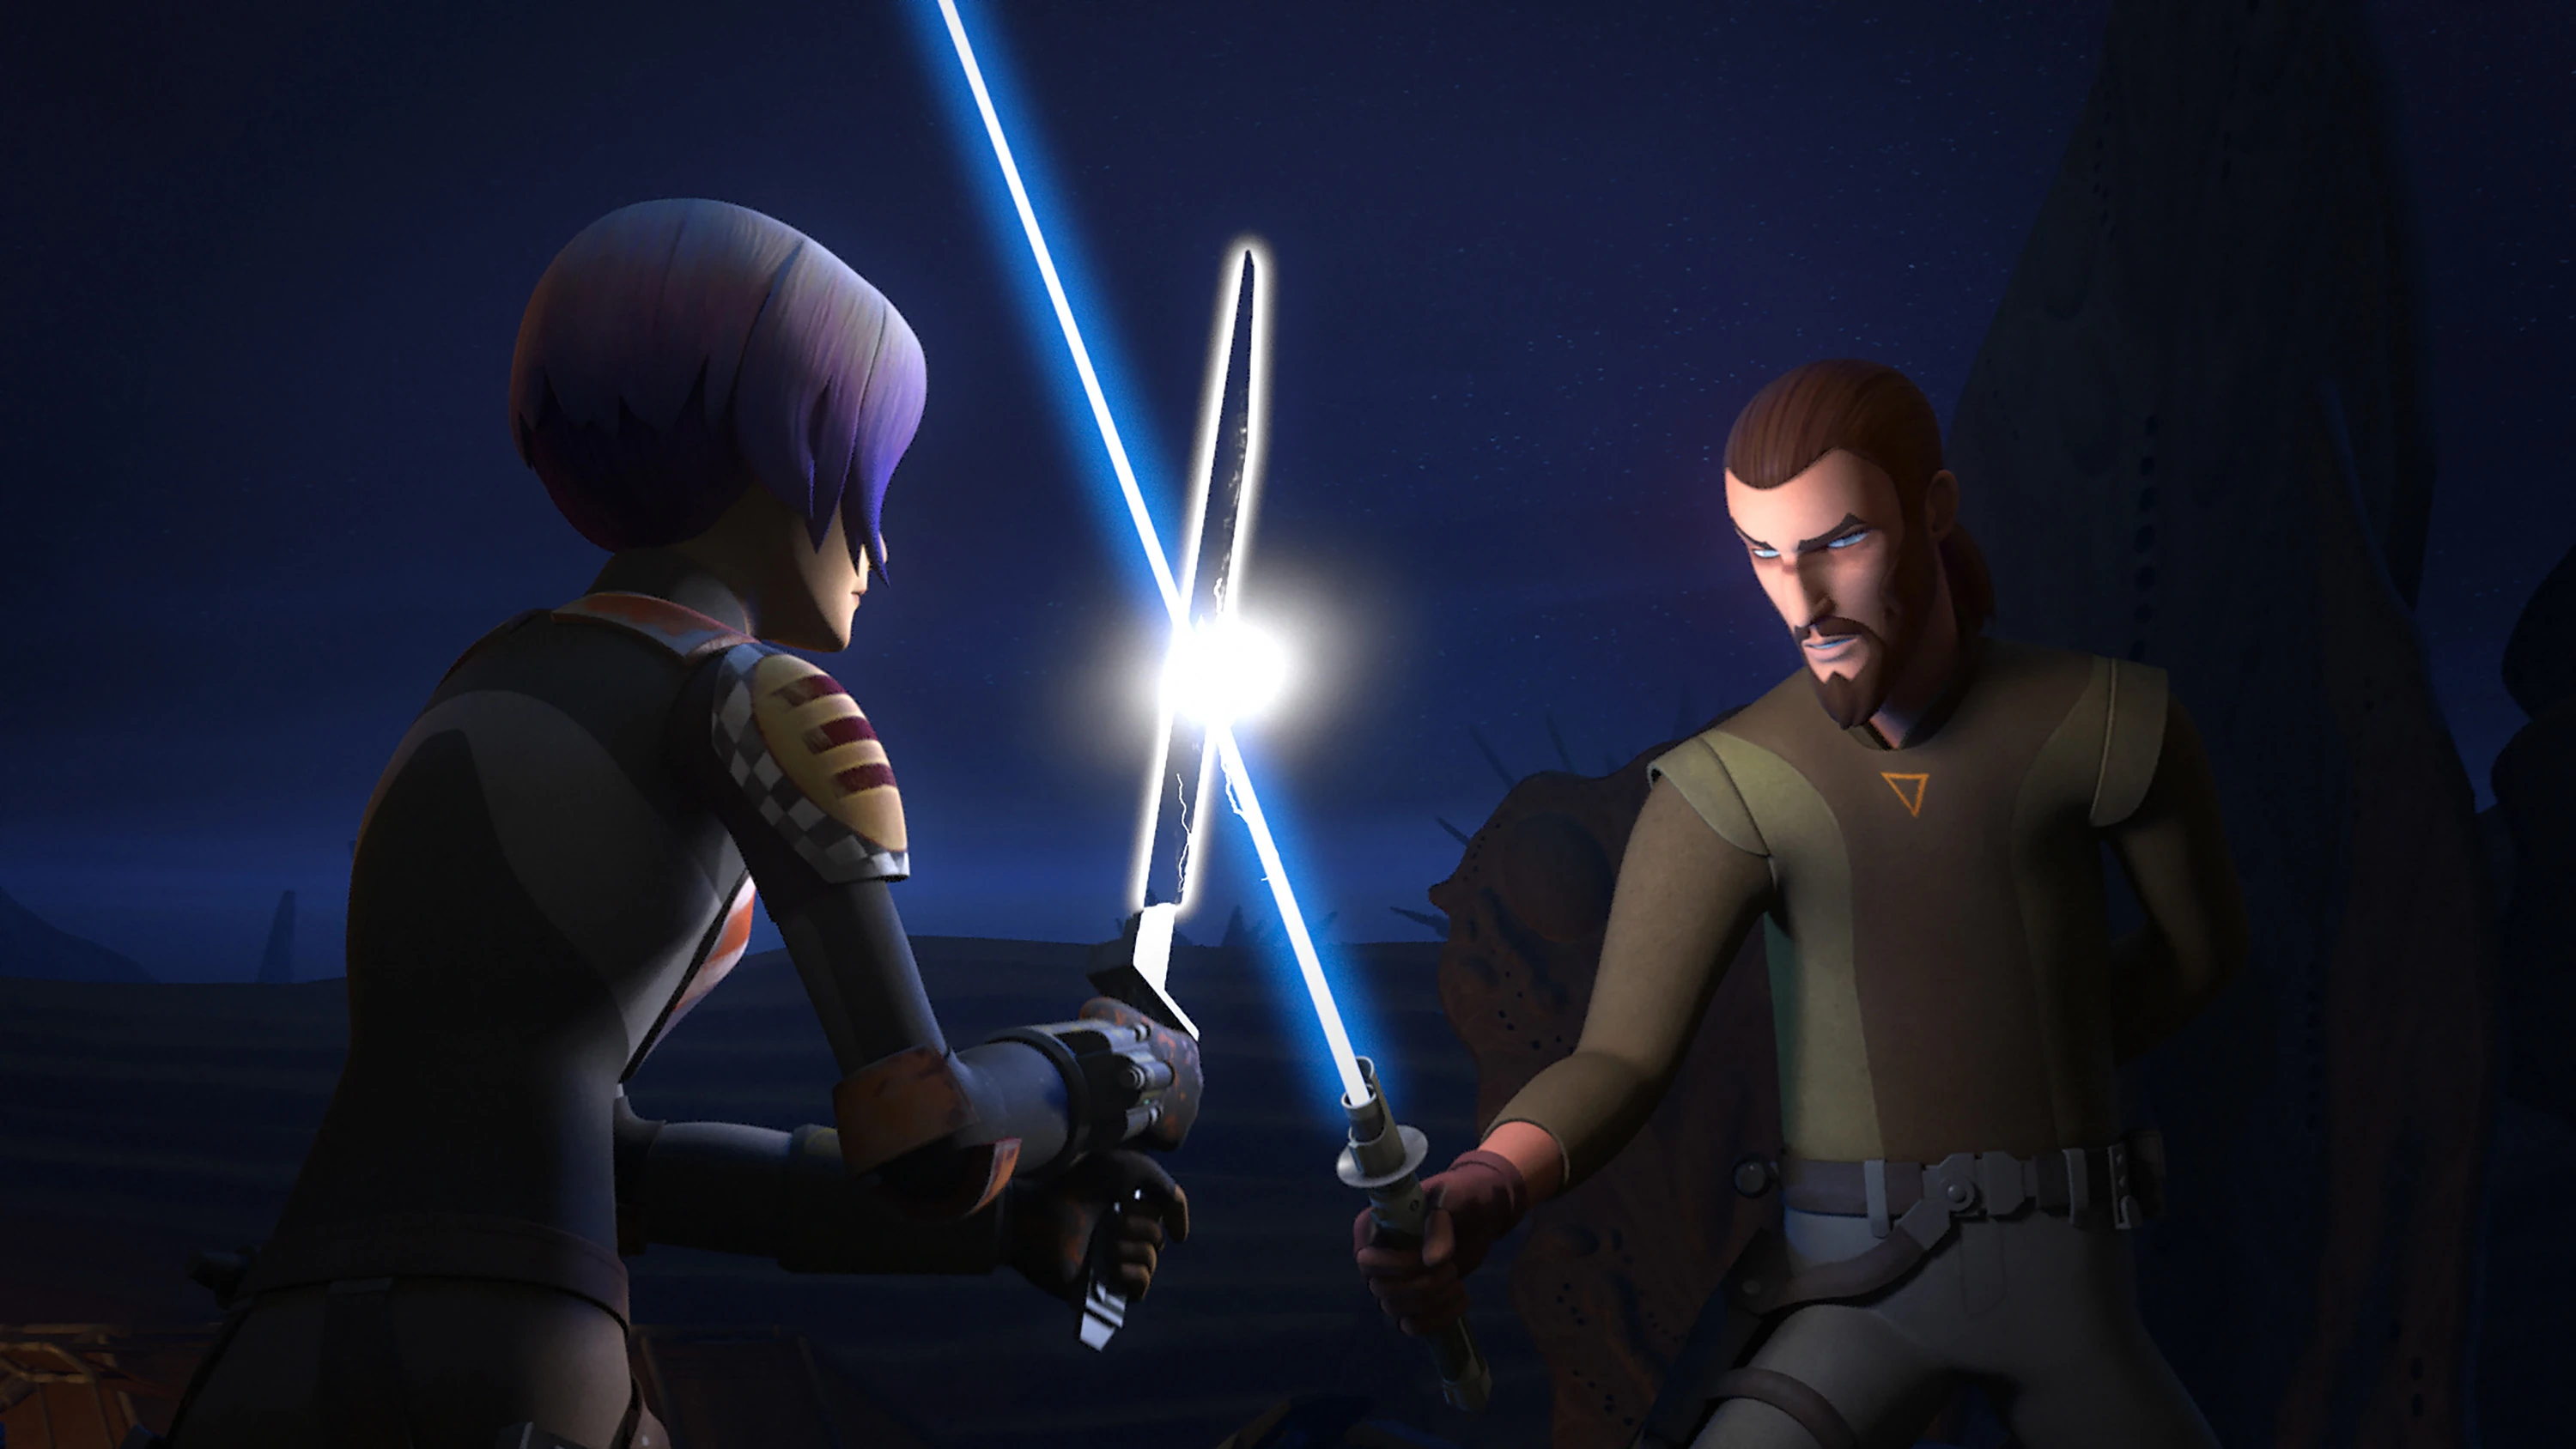

Kanan trains Sabine
Realizing that Ezra was right, Sabine went to the wilderness to clear her mind. Meanwhile, Kanan corresponded with Hera who advised him to let Sabine train with the Darksaber. She explained that holding back Sabine's training would only hurt her. Kanan realized that he had been wrong and apologized to Sabine when she returned from her walk. Sabine in return apologized to Kanan for her hostile attitude. The two then parried with Sabine wielding the Darksaber against Kanan's lightsaber.[11]
During the sparring session, Kanan challenged her about her past decisions to leave the Empire and abandon her family. Sabine revealed that she had left the Empire and her family due to her guilt at her own role in helping the Empire to build weapons used to subjugate Mandalore. Sabine also related how her family had turned on her for speaking out against the Empire and cast her out. Consumed by her pent-up emotions, Sabine gained the upper hand over Kanan, but did not kill him.[11]
After completing her trials, Sabine broke down weeping. A sympathetic Kanan then told her that the Empire ruled through fear and that her family were in a prison of their own making. Kanan then reassured her that she could free them. Kanan along with Fenn and Ezra then resolved to help Sabine to use the Darksaber to rally the Mandalorians to the rebellion.[11]
与母亲重聚[ | ]
在完成试炼后,Sabine along with Ezra, Kanan, Chopper, and Fenn Rau traveled on a mission to her former home Krownest in an attempt to recruit her family into the rebellion. Sabine suspected that they still saw her as a traitor and did not expect her to be welcomed there. Her expectations came true as Clan Wren warriors attacked the Phantom II, forcing it to crash-land onto the planet's surface. After landing, Fenn and Chopper hid in the ship while Sabine, Kanan, and Ezra confronted the Clan Wren warriors. A shootout ensued after Ezra ignited his green lightsaber. The Mandalorian warriors' leader ceased fired after hearing Sabine's voice. Sabine quickly learned that the warrior was her brother Tristan. Following a brief reunion, Sabine and her fellow rebels accompanied Tristan and the Mandalorians back to the Wren Stronghold.[12]
After arriving at her ancestral home, Sabine was greeted by her estranged mother Ursa. After seeing Sabine in the presence of the Jedi rebels, Ursa was about to imprison her daughter. However, Sabine told her mother they needed to talk and showed her the Darksaber. When Ursa told her daughter that she was unwelcome, Sabine responded that she had joined the rebellion. Sabine's mother allowed Sabine and her visitors to enter the Wren stronghold but ordered them to surrender their weapons including the Darksaber. While Kanan and Ezra were reluctant to part with their lightsabers, she managed to convince them by telling them that it would help the rebellion win the war.[12]
Inside the stronghold, Ursa criticized her daughter's decision to join the rebellion and told her that the Darksaber was a mere symbol. Sabine's mother also appraised her daughter about the trouble that her actions had brought on her family within Mandalorian society. Sabine also argued with her mother and brother about Gar Saxon's role in murdering the Journeyman Protectors. Unable to reach a common ground, Ursa ordered Sabine to walk with her. Daughter and mother continued their conversation over a balcony in private. When Sabine confronted Ursa over her decision to align Clan Wren with the Empire, her mother told her that their clan had little choice but to submit to Viceroy Saxon. Saxon had threatened Clan Wren with destruction and taken Sabine's father hostage to ensure the family's cooperation.[12]
When Sabine related that she did not obtain the Darksaber in a fight, Ursa responded that her daughter's ownership of the weapon was disputed due to the circumstances of its acquisition. When Sabine accused her mother of putting power and politics over her family, Ursa responded that she was doing everything she could to protect her family. Ursa then told her daughter she took after her father but had not turned out the way they had hoped. Sabine responded that she was still her mother's daughter. Sabine also told her mother that she and her rebel comrades had come to seek Clan Wren's support for the rebellion. Before they could continue the conversation, Tristan arrived and informed Ursa that Sundari was requesting an audience with her.[12]
Tristan then invited his younger sister for a sparring session. While sparring with metal rods, Sabine took the opportunity to ask Tristan whether he thought she was a traitor. Tristan confirmed that this was not the case but explained that the other clans regarded her family as traitors. When Sabine learned that from Tristan that her mother had planned to trade the Darksaber and her Jedi comrades to Viceroy Saxon, Sabine rushed to the throne room. There, she found that Saxon and his Imperial Super Commandos had already arrived to take the Darksaber and the Jedi into their custody. When Sabine protested, Saxon told her that her mother was loyal to him. Tristan then told his sister that it was for the best. When Ursa demanded that Saxon uphold his side of the bargain and spare Sabine, Saxon ordered his men to execute Clan Wren for allegedly colluding with "traitors."[12]
Before Saxon could put his plans into action, Fenn Rau arrived in the throne room and handed the Jedi back their lightsabers. During the ensuing skirmish, Sabine joined her family, the Jedi, and Fenn in defeating Saxon's guards. Ezra handed Sabine his green lightsaber, which she used to save her mother from being killed by Saxon, who was wielding the Darksaber. After igniting their jetpacks, Sabine and Saxon blasted their way out of the throne room and fought on the ice outside the Wren stronghold. Sabine dueled with Saxon and used her small portable shield to fend off his blasts. Sabine eventually managed to damage Saxon's jetpack, forcing him to fight her on the ice. Following a fierce duel, Sabine managed to recover the Darksaber and defeat Saxon. While Mandalorian tradition required her to execute her defeated foe, Sabine chose to spare his life. Unwilling to accept defeat, Saxon tried to kill her but was instead shot by Ursa, who was unwilling to let anyone harm her daughter.[12]
Due to her role in defeating Viceroy Saxon, Sabine regained the respect of her family. Tired of running, Sabine decided to stay behind with her family and Fenn Rau to helped reunify Mandalore. With the death of Gar Saxon, Mandalore would face a power vacuum. Sabine embraced Kanan before the Jedi departed with Chopper to rejoin the rebellion. She also thanked Kanan and Ezra for teaching her. While Clan Wren was still unwilling to help the rebellion, they had become sympathetic to the rebels. Despite her unwillingness to become Mandalore's new leader, Sabine still vowed to help Mandalore find it's true leader.[12]
Battle of Atollon[ | ]
My friends make the impossible possible.
——Sabine Wren speaking up for her rebel friends[来源]
Sabine Wren was present in Clan Wren's throne room with her mother Ursa and Fenn Rau when the rebels Ezra and Chopper arrived with news of Grand Admiral Thrawn's siege of Atollon. Ezra pleaded for Clan Wren to send reinforcements to aid them. However, Clan Wren was locked in a civil war against the Imperial-backed Clan Saxon. Fenn and Ursa advised against diverting Clan Wren's already stretched forces and resources to Atollon.[7]
During the meeting, Sabine, her clan, and the rebels studied a holographic battle plan of Thrawn's Seventh Fleet above Atollon. Sabine found that the Imperials had a second interdictor vessel which was preventing the rebel fleet from fleeing into hyperspace. With Fenn and Tristan opposed to Mandalorian involvement, Ezra and Chopper decided to leave and return to Atollon. When Sabine insisted on coming along with them, Tristan countered that Ezra's mission was impossible. Sabine responded that her friends "made the impossible possible" and thanked the rebels for reuniting her with her family.[7]
Moved by her daughter's loyalty to her friends, Ursa relented and allowed Sabine to recruit volunteers and ships for the Atollon mission. Fenn agreed to help lead the attack on Thrawn's Seventh Fleet. The rebels and Mandalorians exited hyperspace behind the Seventh Fleet. While Fenn's Fang fighters attacked the fleet, Sabine and Ezra flew the Gauntlet starfighter Nightbrother to the second interdictor cruiser and deployed a landing party. The Mandalorian warriors and Ezra proceeded to attack the gravity well projectors with blasters and explosives.[7]
The Mandalorians succeeded in blowing up the interdictor cruiser. This allowed the remaining rebel forces led by Captain Syndulla and General Dodonna to flee to hyperspace. Sabine reunited with Hera aboard the Ghost and was present when Ursa apologized for the rebel losses and thanked Hera for bringing her daughter back. Sabine then told Hera that she wanted to return a favor to her mother by helping them in their civil war. While Hera was unable to commit rebel reinforcements, she allowed Sabine to return to her people.[7]
重返曼达洛[ | ]
Tarre Vizsla's statue[ | ]
Sabine and her brother went to see Tarre Vizsla's Statue. Once there, she discovered that the Empire had set up an outpost on the statue. Sabine and Tristan then set up several detonators on the outpost and then cut one the metal beams with the Darksaber. After moving to a safe distance, Tristan set off the detonators which caused the outpost to come off the statue. Sabine then believed that the statue was smiling at them for what they did.[16]
解救父亲[ | ]
Sabine and her family later attempted to rescue her father, who was a hostage of Clan Saxon and was facing execution. Sabine was joined by several of her fellow Spectres including Kanan, Ezra, and Chopper, and the Journeyman Protector Fenn Rau. Sabine led a joint Mandalorian and rebel assault on an Imperial prison to rescue Alrich prior to his scheduled execution at the Mandalorian capital of Sundari. Despite catching the Imperial defenders off-guard, Sabine's forces were almost overwhelmed when Governor Tiber Saxon deployed a pair of AT-DP walkers. Sabine's forces were saved from defeat by the arrival of Clan Kryze forces led by Lady Bo-Katan Kryze, a former leader of the Death Watch and the sister of the late Satine Kryze.[18]
Despite defeating the Imperial defenders, Sabine was dismayed to discover that her father Alrich had already been evacuated. Sabine then chatted with her new ally Lady Bo-Katan, who had served as regent over Mandalore until she had been ousted by Clan Saxon and the Empire. Since Bo-Katan was regarded by many to be the rightful ruler of Mandalore, Sabine tried to offer her the Darksaber. However, Bo-Katan refused, believing that she had failed. Shortly later, Sabine's mother Ursa and brother Tristan arrived and informed her that her father Alrich was being transported to Sundari for execution.[18]
Sabine and her allies set up their ambush above a canyon. After Fenn Rau detected a single passenger in the middle Imperial Troop Transport, Sabine devised a plan which involved one of them sneaking in after the others caused a diversion. Sabine led the attack by flying down with her jetpack and ambushing several scout troopers, who were riding speeder bikes. She also threw a paint bomb at the windscreen of the middle transport. While Ezra landed on the middle transport, Sabine acquired a speeder. The Mandalorians and rebels managed to defeat the Imperial forces while Ezra managed to overpower the Imperial troops aboard the middle transport and rescue Alrich before the transport tumbled down a cliff.[18]
Sabine managed to rescue Ezra after he had Force jumped out of the descending transport. After reuniting with her father, Sabine contacted her mother to bring the good news. Ursa and Tristan were skirmishing with Imperial forces and had forced them into a retreat. This elation was short-lived when the Imperials deployed an AT-DP walker that was armed with The Duchess, an arc generator that Sabine had helped to develop during her days at the Imperial Academy. Recognizing the weapon's sound waves, Sabine tried to warn her mother and brother. However, the comlink signal was cut off.[18]
Sabine and her allies arrived at the battlefield where they found the charred armor and disintegrated bodies of several Clan Wren warriors. Stricken by grief and guilt, Sabine collapsed crying, believing that her mother and brother had died. Fortunately for Sabine, Ursa and Tristan had managed to take shelter and survived the weapon's effects. The group was then attacked by Imperial Super Commandos and TIE fighters but managed to escape aboard one of Bo-Katan's Gauntlet fighters. After a brief aerial skirmish, the rebels and Mandalorians managed to retreat to Bo-Katan's camp.[18]
Making amends[ | ]
During the journey, Sabine was accosted by a furious Bo-Katan, who was angered to learn that Sabine had created the "Duchess", a weapon that could target Mandalorian armor. By reacting with the beskar alloy in Mandalorian armor, the Duchess turned the strength of the Mandalorians against them. Sabine had destroyed the weapon but was distraught to learn that the Empire had used her research to create another one. When Ezra asked the Mandalorians why they did not make their armor from another alloy, Sabine explained that the armor was ancestral heirlooms passed down to the next generation. At Bo-Katan's camp, Sabine was greeted with hostility by some of the Mandalorians, who resented her earlier collaboration with the Empire as a cadet. Bo-Katan spoke out in Sabine's defense, warning that attacking her would antagonize Clan Wren.[18]
Sabine offered to atone for her misdeeds by leading an attack to destroy the "Duchess" once and for all. With the aid of Bo-Katan, the rebels and Mandalorians devised a plan to raid Tiber Saxon's Star Destroyer above Sundari. One team would destroy the weapon while the other would erase the weapon's blueprint from the Imperial database. In private, Fenn Rau and Bo-Katan confided that Sabine had a lot of potential for leadership. The Mandalorians and rebels infiltrated Tiber Saxon's Star Destroyer, which was docking above Sundari.[18]
They managed to sneak into the hangar but were spotted. At the advice of Thrawn, Tiber Saxon had concocted a plan to trap Sabine in order to force her to harness the arc generator's potential. While Kanan, Ezra, and Chopper searched for the Imperial databases, Sabine and Bo-Katan went to find the Duchess. The two managed to find the weapon but were ambushed by Tiber, who unleashed the weapon's energy rays on them. Tiber forced Sabine to strengthen the machine's power. However, Sabine instead reprogrammed the Duchess to target anyone wearing stormtrooper armor including Saxon himself. Sabine considered killing Saxon but relented after Bo-Katan warned her that doing so would make her little better than the Empire.[18]
Heeding Bo-Katan, Sabine spared Saxon and instead slashed the Duchess' power core with the Darksaber. The rebels and Mandalorians then escaped as Saxon's Star Destroyer exploded due to the malfunctioning weapon. Arriving back at Bo-Katan's camp, Sabine reassured Bo-Katan that she was the rightful leader. Sabine's family and Fenn Rau then joined the other Mandalorian clans in swearing allegiance to Bo-Katan, who accepted the Darksaber and the mantle of leadership over the Mandalorian clans.[18]
共和国光复同盟[ | ]
Raid above Jalindi[ | ]
Following the events on Mandalore, Sabine and the other Spectres traveled aboard the Gauntlet to Yavin 4 to join the larger Rebel Alliance. Upon arriving, they were greeted by Zeb. Shortly later, Hera's squadron of Y-wings returned from a supply run. Hera's Y-wing had sustained damaged during the run and almost collided with the Spectres. Sabine and the other Spectres then attended a briefing with the Alliance leadership including Mon Mothma, Senator Bail Organa, General Dodonna, and the former Imperial Agent Kallus.[10]
Using intelligence supplied by Saw Gerrera, the rebels had learned that the Empire was tracking their movements using a relay station on the planet Jalindi. While the Alliance disagreed with Saw's ruthless and violent methods, they reluctantly used his information. At the advice of Kallus, the Spectres agreed to undertake a mission to insert a spike on the Jalindi relay's dish. While traveling to Jalindi, Hera and Kanan briefed Sabine, Ezra, and Chopper about their plan. To avoid detection, the rebels would only activate their jetpacks at the last moment.[10]
The Spectres' plan proceeded initially and Sabine and her comrades managed to land on the Jalindi relay. Before they could plant the spike, they were interrupted by the arrival of Commander Brom Titus' light cruiser Marauder. After failing to distract Titus, Sabine opted to destroy the Jalindi relay with detonators. While she attached the detonators, Ezra fought with the relay's stormtroopers while Chopper realigned the dish in order to disorient the defenders. The Ghost was unable to assist since it was being pursued by TIE Defenders.[10]
During the skirmish, Sabine saved Ezra from falling out of the dish. Shortly later, Saw Gerrera arrived in a U-wing piloted by the Partisan Edrio. He offered Sabine and her comrades a lift, which they gladly accepted. After escaping aboard the U-wing, Saw destroyed the Jalindi relay and the Marauder with proton bombs. Before the Ghost could dock with Saw's U-wing to pick up the Spectres, a Star Destroyer emerged from hyperspace. Before jumping into hyperspace, Saw invited Sabine and her comrades to "fight with a real army for a change."[10]
Soldiering with Saw[ | ]
While traveling through hyperspace, Saw briefed Sabine and the others about his quest to investigate why the Empire had exterminated the Geonosians, and what they were hiding. Saw informed that he had intelligence that the Empire was smuggling something through Faos Station. Despite Chopper's objections, Sabine and Ezra agreed to the mission. After arriving, Sabine gave Chopper a new paint job to disguise him as an Imperial droid. While Sabine saw no sign of the Empire at the station, Saw countered that the Empire was hiding in plain sight.[10]
The rebels infiltrated Freighter 2716 by hiding in a cargo container pulled by Chopper. While the freighter traveled through hyperspace, Edrio followed in Saw's U-wing using Saw's tracker. Aboard the freighter, the rebels discovered an Imperial shuttle in hold 12 and that hold 17 was a restricted area. After subduing the stormtrooper sentries, the rebels discovered that hold 17 was holding several power and reactor technicians who had been kidnapped by the Empire for an unknown purpose.[10]
While Ezra advocated evacuating the civilians aboard the Imperial shuttle in hold 12, Sabine pointed out that the hangar was guarded and proposed using the ship's escape pods. Sabine also advocated shutting down the ship's hyperdrive to force the ship to jump out of hyperspace so that they could escape. While Sabine and the other rebels made their way to the hyperdrive, Chopper was tasked with leading the civilians to the escape pods. On the way, Ezra heard "singing" emanating from a door through the Force.[10]
Inside, the rebels encountered a squad of death troopers. After subduing most of the troopers except their commander DT-F16, the rebels discovered that the freighter was transporting a giant kyber crystal. Meanwhile, DT-F16 alerted the ship's commander, who jettisoned the escape pods to prevent the rebels and civilians from escaping. While Saw was determined to follow the freighter to its destination so that they could find out what the Empire was doing to the crystal, Sabine and Ezra insisted on safeguarding the civilians aboard. Saw agreed to guard the crystal while Sabine and Ezra headed to the engine room.[10]
Sabine and Ezra managed to subdue the guards there but were stunned by Saw before they could disable the hyperdrive. Upon awakening, Sabine and Ezra found themselves restrained in binders. They also discovered that Saw had brought the crystal into the engine room. Shortly later, the freighter exited hyperspace in the empty Tonnis sector where it was intercepted by Captain Slavin's Star Destroyer, which had come to pick up the crystal. Frustrated that the mission had failed its objective, Saw destabilized the kyber crystal with Ezra's lightsaber and damaged the hyperdrive; seeking to create an explosion.[10]
Despite their differences, Sabine and Ezra managed to convince Saw to remove their restraints. Still determined to rescue the civilians, the rebels declined Saw's offer of a ride. After arranging with Chopper to bring the civilians to the shuttle in hold 12, Sabine and Ezra raced there and fought DT-F16 and her remaining troopers. The rebels and civilians then escaped aboard the shuttle before the kyber crystal exploded and destroyed both the freighter and Slavin's Star Destroyer. Though the rebels escaped the inferno, their shuttle's engines were damaged.[10]
Fortunately for Sabine and the others, they were picked up by the Ghost. The liberated civilians volunteered to join the Rebellion out of gratitude to their rescuers. Sabine and Ezra briefed Kanan about their second encounter with the kyber crystal. When Sabine asked if it was possible to weaponize these crystals, Kanan replied that he was unsure.[10]
Infiltrating Lothal[ | ]
After the Alliance received intelligence about the Empire's new TIE/D Defender Elite project on Lothal, Sabine accompanied the Spectres on an undercover mission to the Imperial–occupied world. The crime lord Vizago managed to smuggle the Spectres in his ship Broken Horn while delivering a shipment of puffer pigs. After landing on Lothal, the Spectres split up to evade their Imperial pursuers. Sabine along with Ezra and Chopper visited the late Old Jho's former cantina in Jhothal, which had been taken over by the Empire.[81]
While Chopper waited outside, Ezra and Sabine ordered some drinks. They learned that Jho had been executing for aiding the Rebellion and that the Imperial pilot Baron Valen Rudor was now managing the cantina. Sabine had to caution Ezra not to show anger when Rudor ridiculed Jho. Before Rudor could question the strangers further, the two rebels were met by the former cadet Jai Kell, whom Ezra had rescued from the Grand Inquisitor years earlier. Kell managed to allay Rudor's suspicion by paying the Spectres' drinks. After leaving the cantina, Jai revealed that he had joined Ryder's Lothal resistance and contacted Ryder to arrange an extraction.[81]
Sabine and the Spectres soon reunited and escaped down Jhothal's sewers. Pursued by Imperial forces, the rebels used starbirds graffiti etched onto the walls to guide them to Ryder's rendezvous point. After eluding stormtroopers, the rebels managed to exit the sewers and meet Ryder, who evacuated them aboard a U-wing.[81]
Stealing the Defender[ | ]
Later, Sabine along with Ezra, Zeb, and Ryder Azadi stalked the Imperial testing facility where the TIE/D Defender Elite was being stabled. After confirming the starfighter's existence, Sabine proposed stealing the ship's flight data recorder so that the Alliance would know the fighter's capabilities. Despite problems bringing the weapon back to Yavin 4, Sabine and Ezra decided to pursue their plan. Infiltrating the base, the Sabine entered the TIE/D Defender Elite while Ezra kept watch. Before Sabine could extract the flight data recorder, Grand Admiral Thrawn, and Governor Pryce arrived at the airfield to witness a test flight.[82]
Before Commander Vult Skerris could enter the fighter for a test flight, Ezra distracted the stormtroopers and a gunfight broke out. Surrounded by death troopers, Sabine and Ezra flew away with the Defender Elite. Before leaving, Sabine used the fighter's armament to destroy the parked TIE fighters, TIE Interceptors, and Thrawn's shuttle. While flying the TIE Defender Elite, Sabine told Ezra that the fighter was equipped with a hyperdrive and suggesting using the craft to return with the flight recorder to the Rebellion. However, the Defender was pursued by three TIE Interceptors.[82]
While Ezra engaged the Interceptors in a dogfight, Sabine deactivated the homing beacon so that the Empire could not track them down. However, Governor Pryce activates the kill-switch. Sabine managed to cut off the signal which allowed the fighter to land on its remaining wing in Lothal's wilderness. Despite the loss of the TIE/D Defender Elite, Sabine proposed recovering the starfighter's hyperdrive so that they could install it on Ryder's U-wing. After hiding the hyperdrive, Ezra and Sabine traveled with the flight data recorder through the wilderness while evading Imperial gunships. During their travels, the two encountered a loth-wolf, a mythical creature long believed to be extinct. The loth-wolf put Sabine to sleep before interacting with Ezra. The loth-wolf then carried the two young humans to a clearing where they were picked up by Hera and Kanan, who had come in Ryder's U-wing.[82]
The following day, Sabine stayed behind at the Lothal resistance camp while Ezra, Zeb, and Jai Kell returned to the crash site to retrieve the hyperdrive. While waiting, Sabine expressed doubt that she would be able to install the hyperdrive on the aging U-wing but Hera reassured Sabine that she had faith in her abilities. Despite being pursued by Imperial forces, Zeb managed to return to the camp with the hyperdrive using a stolen Imperial Troop Transport. Sabine and the other rebels initially mistook Zeb's hijacked transport for a "hostile" but were mollified to see Zeb with the hyperdrive. Sabine then got to work on installing the hyperdrive onto Ryder's U-wing. This enabled Hera and Chopper to escape off-world with the stolen flight data recorder. Sabine and the other rebels then fled Imperial forces into a network of underground caves with the help of a pack of loth-wolves. The wolves led the Spectres and Ryder into a mountain ledge. After doing calculations, Sabine surmised that they had entered Lothal's southern hemisphere.[83]
Boarding the crawler[ | ]
After setting up base inside the caves, Sabine and the other rebels encountered Mining Guild Ore crawler Crawler 413-24, which was harvesting Lothal's surface for raw minerals. When Zeb recommended boarding the transport, Sabine concurred after discovering that the crawler had a long-range transmitter. While Ryder and the other Spectres followed in a speeder, Sabine used her jetpack to scout the walker and take out a sentry droid with a paralyzing dart. After Ezra, Kanan, and Zeb boarded the crawler, Ryder drove away in his speeder. Once inside the crawler, the Spectres overpowered the Trandoshan Mining Guild captain Seevor but failed to prevent him from alerting the Mining Guild.[84]
Sabine then repaired the old transmitter and discovered a signal originating from the reactor room. While Sabine and Ezra manned the bridge, Kanan and Zeb went to investigate. Below, they encountered several indentured prisoners including Vizago but were attacked by the foreman Proach. Following a struggle, Zeb managed to kill Proach. When Imperial forces responded to Seevor's distress signal, Sabine along with Ezra and Kanan hid in the bridge's cupboards while Zeb disguised himself as the foreman and Vizago pretended to be the captain. This convinced the Imperials, who promptly withdrew. However, Seevor managed to escape through the ventilators into the engine room and shut down the reactor. Sabine powered up the transmitter while Ezra fought and killed Seevor.[84]
After repairing the transmitter, the Spectres were able to re-establish contact with Hera. Hera informed them that Rebel Command had authorized a strike on Lothal. The Spectres on Lothal were designated as the ground support team. The liberated prisoners including Vizago also joined the rebel cause out of gratitude to their rescuers.[84]
Strike on Lothal[ | ]
During the Alliance's failed strike against Lothal's Imperial factories, Sabine along with Kanan, Ezra, and Zeb planted explosives on the anti-air defenses outside the Imperial Armory Complex. When Zeb asked if the explosives were powerful enough, Sabine reassured him that they would work. After planting their explosives, the rebels retreated on speeder bikes with Sabine igniting the detonator. Despite achieving this objective, the rebels were forced to abort the attack after Grand Admiral Thrawn inflicted heavy casualties on Hera's strike force. While retreating back to Ryder's camp, Kanan headed back to Capital City to rescue Hera. Sabine wanted to follow Kanan but Ezra reassured her that Kanan would handle the situation.[85]
Rescuing Hera[ | ]
After regrouping at the Lothal cliff dwelling, Sabine took part in the Spectres' mission to rescue their leader Hera Syndulla. While planning their rescue mission, Sabine accompanied Ezra and Zeb to Ezra's former "roost". After Ezra sensed that Hera was in the Imperial Complex, Sabine then confirmed that Hera was in Governor Pryce's office on the 157th level of the Imperial Complex. Sabine then joined Ezra, Zeb, and Chopper in assembling three Loth-bat gliders. While Ezra had proposed the idea, Sabine seconded it on the grounds that the Empire was equipped to target high-tech machinery and would overlook low-tech gliders.[86]
For the mission, Sabine and Ezra donned TIE fighter pilot uniforms while Kanan cut his hair. Sabine, Ezra, and Kanan rode the gliders while Zeb and Chopper towed them into the air using a speeder bike. Using the gliders, the Spectres managed to land at the Imperial Complex's south entrance garbage chute. While Kanan went to rescue Hera, Sabine and Ezra infiltrated the Imperial complex's hangar bay. When Sabine heard the alarms go off, she and Ezra realized that Kanan had rescued Hera. She and Ezra then boarded a patrol transport disguised as the pilot and co-pilot respectively. They were accompanied by several stormtroopers, who had been dispatched by Governor Pryce to hunt down the escapees.[86]
After learning that Hera and Kanan had headed to the Lothal City fuel depot, Sabine and Ezra dumped the stormtroopers on their transport overboard. Sabine then shot down another transport while Ezra took another out with his lightsaber. Sabine and Ezra then managed to rendezvous with Kanan and Hera at the Lothal City fuel depot, finding the couple embracing each other. Before they could leave, Governor Pryce arrived with a phalanx of AT-AT walkers and opened fire on the depot. Kanan used his Force powers to hold back the energy wave but was killed during the explosion. Sabine and the other Spectres escaped on their gunship.[86]
Kanan's death[ | ]
Following the death of Kanan, Sabine and her fellow Spectres mourned the death of their comrade. After hearing Alton Kastle announce a parade in Capital City to celebrate the Empire's "victory", Sabine and Zeb decided to sabotage Pryce's parade in the Capital City in order to avenge Kanan's death. When she and Zeb arrived on the outskirts of Capital City on their speeder bikes, Sabine initially believed that the Empire had grown and that the rebels were outnumbered. However, Zeb pointed out that the Imperial factories were not belching out smoke. As a result, the two realized that Kanan's sacrifice had not been in vain.[87]
Zeb then knocked out a scout trooper, which enabled Sabine to use the trooper's bike to tap into the local Imperial network. As a result, Sabine learned that the TIE Defender factory had been damaged during the fuel depot's explosion and realized that Pryce was trying to cover that up by holding a parade. She then vowed to get even with the Empire. Before leaving, Sabine planted a bomb on the scout trooper's bike. Sabine and Zeb's presence attracted the attention of the Noghri tracker Rukh, who had been sent by Thrawn to hunt down the remaining Specters.[87]
After witnessing the explosion, Sabine then saw the "thing" she and Ezra encountered at the airfield.[83] Knowing they could not let Rukh track them back to their base, Sabine and Zeb decided to ambush him. However, Rukh activated his cloaking device, which gave him an initial advantage. Sabine tried to shoot at Rukh with her rangefinder but the athletic Noghri was able to dodge her shots. Sabine then used a paint bomb on him that allowed Zeb to knock him out. When Zeb attempted to pummel Rukh to death, Sabine stopped him. After convincing Zeb to spare Rukh's life, she spray painted Rukh and sent him back to the Capital. Upon their return to the base, Sabine told Hera, Chopper, and Ezra that Kanan's death had not been in vain since they had managed to shut down the TIE Defender factory.[87]
Mission to Lothal's Jedi Temple[ | ]
Behind enemy lines[ | ]
At the urging of Ezra, Sabine and her fellow Spectres embarked on a mission to save the Lothal Jedi Temple from the Empire. Prior to the mission, Sabine and her comrades examined a key stone that the loth-wolf "Dume" and his pack brought from Lothal's Jedi Temple. Sabine and her companions then traveled to the Jedi Temple on a pack of loth-wolves that Ezra had summoned. Despite the temple being located in the northern hemisphere, the loth-wolves were able to hasten the journey by generating hyper tunnels.[88]
Upon arriving at the Lothal Jedi Temple, the Spectres discovered that the Empire and Mining Guild were excavating the Temple. With the help of Zeb, the Spectres were able to obtain two sets of scout trooper armor. Sabine assumed the identity of the scout trooper LS-515. Infiltrating the camp, Sabine and Ezra began examining several artifacts but were reprimanded by the Imperial Minister Veris Hydan, who was supervising the dig. After escaping the notice of Hydan and a Death trooper commander, the Spectres tapped Hydan's communications with the help of Chopper.[88]
The rebels subsequently learned that the Emperor was interested in a painting of the Mortis gods, which Hydan believed was the key to unlocking the temple's secrets. Sabine and Ezra headed to the mural and used the key stone to begin decoding the "Gateway". Sabine subsequently drew the attention of a pair of stormtroopers, who asked LS-515 why she was not on patrol. Dissatisfied with her answer, they brought her to Minister Hydan who identified her as a rebel spy. Hydan then attempted to apprehend Ezra but he managed to flee into a portal[88], which led to a mystical realm known as the World between worlds.[89]
Hydan's guest[ | ]
After Hydan had locked down the camp, Sabine was brought into his mobile command center. Minister Hydan attempted to flatter Sabine by praising her artistic talents but Sabine remained uncooperative and defiant. As the conversation continued, Hydan mocked Ezra's ability to survive in the World between worlds and warned that the Emperor would eventually find him. Sabine soon realized that whoever controlled the portal to the World between worlds would also control time and the fate of the universe. When Hydan quizzed her about the Mortis gods, Sabine taunted that she was "smarter than him." Hydan then forced her to cooperate by ordering one of his death troopers to strike her across the head with his rifle butt.[89]
Together, Sabine and Hydan studied a holographic project of the painting of the Mortis gods. The two realized that the Father was pointing the way to the portal and that the wolves were the portal guardians. When Sabine asked about the convor, Hydan speculated that the creature was a servant of the Daughter or the Daughter acting as a spirit guide. As a result, Sabine realized that if the Daughter opened the "Gateway", the Son was the key to closing the portal. Shortly later, a stormtrooper reported that something was happening to the portal. At that point, Sabine heard a faint knocking from Zeb as Hera activated the command center's thrusters. With the command center tilting on its top, Sabine took the opportunity to escape and shot a death trooper.[89]
As the mobile command center collapsed on a pile of crates, Sabine and her fellow rebels fled towards the painting of the Mortis gods. There, they were joined by Ezra, who had encountered Ahsoka Tano and barely escaped the Emperor. At the urging of Ezra, Sabine and Zeb helped him to seal back the portal. Zeb lifted Ezra up, enabling him to touch the Son who sealed the "Gateway." This caused the Lothal Jedi Temple to the ground, taking a distraught Hydan with it. Sabine and her rebel comrades then escaped on a Mining Guild excavation driller that Chopped had commandeered. Sabine drove the stolen transport away from the Jedi Temple. Later, they returned and found that the temple had sunk completely into the ground.[89]
Liberation of Lothal[ | ]
Capturing Governor Pryce[ | ]
After returning to the Lothal Resistance's base, Sabine and the other rebels attended a briefing to discuss their plan to take Capital City back from the Empire. Since the rebels lacked the numbers to capture Capital City, Ezra and Ryder Azadi concocted a plan to lure Governor Pryce and her forces to their base. As part of the ruse, Ryder pretended to betray his fellow rebels to the Empire.[90]
As planned, Governor Pryce led a fleet of patrol transports, jumptroopers, and stormtroopers to the rebel cliff base. During the skirmish, Sabine, using her jetpack, was able to take out several of the jumptroopers and the transport. As Governor Pryce's forces encircled the rebels, Sabine and the others retreated to a defensive position on top of their captured ore crawler. However, Pryce ordered one of her gunships to destroy the ore crawler. Amidst the falling debris, Sabine managed to rescue Vizago but they were captured by the Empire.[90]
When Governor Pryce thanked Ryder for his help, Sabine pretended to be angry at him, only to reveal that Ryder had merely lured Pryce into a trap. As Hera arrived with reinforcements, Sabine then had Chopper jam the Imperial forces' communications. With the help of Hera's reinforcements and the loth-wolf pack, Sabine and her rebel comrades were able to defeat the Imperial forces and capture Pryce.[90]
Destroying the Dome[ | ]
Sabine then took part in a rebel operation to infiltrate the Dome, the center of Imperial power on Lothal. Using the captive Pryce, the rebels managed to land their stolen patrol transports on the Dome's executive landing platform. After landing, Sabine and Zeb engaged stormtroopers in a gun battle while Ketsu unlocked the blast doors. Following a brief skirmish, the rebels were able to take control of the Dome's control room and issue a faux Protocol 13 to recall all Imperial forces to the Dome.[91]
After the majority of Lothal's Imperial forces had evacuated aboard the Dome, Sabine then prepared to fire the Dome's thrusters, which had not been fired in years. The Dome was a mobile Imperial Planetary Occupation Facility. However, their plan was delayed by the arrival of Thrawn and his Star Destroyer Chimaera. Sabine then told Rex to raise the planetary shields but they had been disabled by Rukh. As a show of force, Thrawn bombarded parts of Capital City and demanded that Ezra meet him aboard the Chimaera to surrender.[91]
Following Thrawn's ultimatum, Sabine and the other rebels debated their next move. Though Hera did not want Ezra to go, Sabine and Chopper helped Ezra to escape aboard a patrol transport to confront Thrawn. In Ezra's absence, Sabine convinced Hera and Rex to trust in Ezra's decision. After studying the base's schematics, she came up with a plan to raise the shields and take control of the two power terminals. Hera approved of Sabine's plan in order to buy Ezra more time.[91]
Under Sabine's leadership, the rebel forces were split into two teams which went to secure the northern and southern power terminals. Despite resistance from Rukh's Imperial forces, the rebels managed to secure the power terminals. During the course of the mission, Sabine guided her rebel comrades and even sealed a blast door to aid Rex's team. Though Chopper was electrocuted by the network terminal, Sabine told Rex to find the shield generator's manual override. As a result, the rebels were able to reactivate the Dome's shield generator, shielding Capital City from Thrawn's second bombardment wave.[91]
After a pod of purrgil summoned by Ezra carried away Thrawn, the Chimaera, and devastated much of the Imperial fleet, Sabine got Chopper to fire up the Dome's thrusters. After lift-off, Sabine and her fellow rebels evacuated aboard the Ghost before Imperial troops retook the control room. Following their evacuation, Sabine detonated the detonators inside the Dome, destroying the Imperial base and wiping out much of the Imperial garrison on Lothal.[91]
Following the destruction of the Dome, Sabine and the other Spectres listened to a pre-recorded hologram message by Ezra telling them that they were the best family he could hope for. The rebels then gazed down over Capital City as the Ghost did a fly-over.[91]
Legacy[ | ]
The attack we all anticipated never came. The once invincible Empire had begun to fracture. The small Rebellion had become bold. And with the decisive victory at the Battle of Endor, the Emperor's reign of terror came to an end. After the war, Zeb took Kallus along the secret hyperspace path to the planet Lira San. It was then that Kallus realized he hadn't destroyed the Lasat people, and that they were thriving on this new world. A world where he was welcomed as one of them. Hera fought in the battle of Endor, as did Commander Rex. By that time, there had been a new member added to the crew of the Ghost. Spectre-seven, Jacen Syndulla. Born to fly, just like his mother. And well, we all know what his father was like. As for me, I used to think that Ezra was counting on me to protect Lothal, the planet and the people he cared for so much. But one day, I realized there was more to it. There was something else I was meant to do. Ezra's out there somewhere, and it's time to bring him home.
——Sabine Wren[来源]
During the Age of the Empire, the Imperial tactician Grand Admiral Thrawn was familiar with Sabine Wren's artwork.[92] and even had a collection of it.[93] After Ezra left his bounty hunter's helmet behind during a mission to rescue the rogue ISB Agent Kallus, Thrawn identified the stylized art depicting a loth-cat as the work of Sabine Wren. Based on his knowledge of Sabine and the Spectres, Thrawn deduced that the helmet belonged to Ezra and that Kallus had willfully concealed Ezra's identity because he was the elusive rebel spy Fulcrum.[92]
Following the Battle of Jakku, Sabine reflected on the separate paths taken by her fellow rebel comrades in the aftermath of the Liberation of Lothal. To honor her rebel cell's contributions to the Rebellion and sense of family, she painted a mural of them flanked by loth-wolves. At some point following the disintegration of the Empire, Sabine traveled with the former Jedi Padawan Ahsoka Tano on a quest to bring Ezra home.[91]
By the time of the outbreak of the conflict between the Resistance and the First Order, Sabine Wren was credited by the renowned painter, poet and intellectual Janyor of Bith with painting several pro-Rebellion and anti-Imperial propaganda posters including Defaced Join and Fly For Freedom. However, her authorship of Join the Rebellion was disputed. Historians also speculated that Sabine's work inspired the Commission for the Preservation of the New Order artist Coba Dunivee's Imperial Campaign Poster 34.371.C.[94]
Personality and traits[ | ]
You know what I do in hopeless situations?"
"Yeah. Blow stuff up.
——Sabine Wren and Garazeb Orrelios[来源]
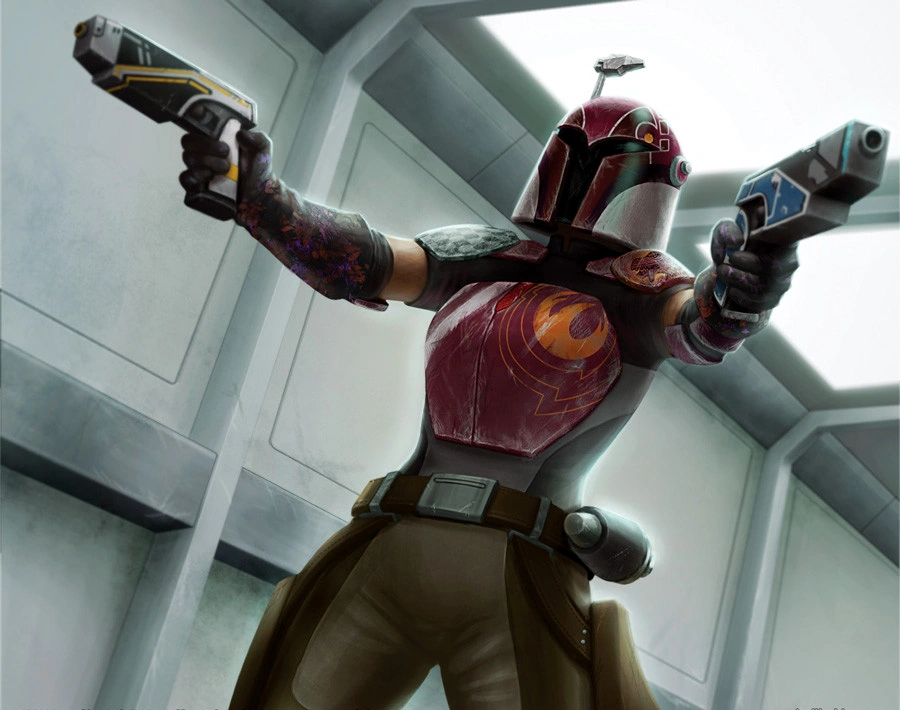
Wren's colorful personalized Mandalorian armor
A free-spirited young woman with an artistic flair,[2] Sabine Wren was driven by a desire to express herself artistically, and a fundamental distaste for following instructions she disagreed with.[6][47] Despite her frequent feisty sarcastic quipping, she rarely let personal feelings get in the way of her job and remained focused on the objective at hand,[26] though she still did her job with her unique artistic panache.[8] She often graffitied different rebel insignias with her airbrushes every time they attacked the Imperials.[8]
As an artist, Wren appreciated color and saw artistic license in her explosives,[8] and saw the galaxy as her canvas—everything from her hair and armor to the walls of the Ghost could be improved with bursts of color and an expressive line, and took particular delight in repainting Imperial gear, armor and vehicles, turning the Empire's drab equipment into expressions of freedom.[95] Wren had a 'practice makes perfect' attitude to her art, and so whenever she was struck by inspiration, she tended to paint on whatever there was at hand,[14] and would work on her art aboard the Ghost during her downtime.[96] A major influence in her works was Janyor of Bith.[41] She also enjoyed compliments and talking about art, though she knew better than to trust Lando Calrissian's silver tongue.[96]
Though her training in the Mandalorian warrior traditions (like armor restrictions) were often at odds with her artistic sensibilities,[20] she was proud of her riotously colored armor,[95] which was like a second skin to her, and sometimes forgot she had it on and fell asleep in it.[15] Her armor's breastplate had a starbird painted on it; the legendary creature, which represented her own free spirit and desire to liberate the galaxy from the Empire, had become her symbol[14] and trademark.[2]
She exuded confidence in her combat skills, often facing off against numerous foes with ease. Despite her bravado,[8] she occasionally doubted the possibility of defeating the Empire based on her past as an Imperial cadet.[6] That past, in which a younger Wren had once trusted the Empire implicitly and followed its orders blindly, was marked a nightmarish experience that opened Wren's eyes to the Empire's true nature,[6] and had caused her to despise the Imperial regime,[95] and to instinctively rebel when asked to follow orders unquestioningly.[96] As she grew to dislike secrecy, Wren sometimes let her more juvenile side cloud her better judgment in these matters.[6] She also developed a somewhat callous streak towards Imperial enemies.[8][21] During her academy training, Wren also had a few bad experiences with underwater missions that led her to develop a strong dislike for water; it could also wash away art, which she thought should never be allowed to happen.[17]


Sabine Wren's signature.
Because of her resourcefulness and improvisational gifts,[96] Kanan Jarrus and Hera Syndulla deferred to Wren when to improvise a plan or in case they needed to devise an entire operation, trusting her skills and knowledge.[26][21] As noted by Ezra Bridger, Wren was something of a loner among the crew of the Ghost, spending a lot of time in her room, and showing a tendency to eat and do combat practice on her own.[19]
Wren was tormented by guilt over her role in helping the Empire to build weapons used to subjugate Mandalore. When she spoke out, her family chose to side with the Empire and cast her out. Unable to cope with her past, Wren found comfort and self-expression in art and graffiti. She initially regarded the Darksaber as an ill omen for bringing nothing but trouble to her family. As a result, Wren was initially unwilling to assume the responsibility and leadership which came with wielding the weapon. With the help of Bridger, Rau, and Jarrus, Wren managed to overcome her fears and to master the weapon.[11] After her trials, Sabine found the inner strength to meet with her estranged family. Despite the hostility of her mother Ursa, Sabine still found the courage to stand up for her beliefs and values. Sabine regarded Gar Saxon as a traitor for his role in murdering the Journeyman Protectors, whom she regarded as true Mandalorian patriots. Despite her ideological differences with her family, Sabine still respected her parents and her brother Tristan.[12]
Sabine refused to abandon her rebel comrades Kanan and Ezra even though her mother Ursa had tried to trade them with Saxon for the safety of her family. Sabine and her family repaired their strained relationship after Gar Saxon reneged on his deal with Ursa and tried to destroy Clan Wren. Due to Bridger and Jarrus' training, Sabine found the fortitude to take on the Viceroy in single combat. Sabine was also magnanimous in victory and decided to spare Saxon's life. Saxon, however, did not return the favor and tried to shoot her in the back. Seeking to rebuild ties with her family, Sabine elected not to return with Ezra and Kanan to the rebellion. Instead, she dedicated herself to helping Clan Wren to reunite the Mandalorians. While Sabine did not regard herself as Mandalore's new leader, she vowed to help her people find that individual.[12]
Later, Sabine's loyalty to her rebel friends led her to convince her mother, Ursa Wren and Fenn Rau, to lend forces to help the besieged Phoenix Squadron and Massassi Group during the Battle of Atollon. As a warrior, Sabine was familiar with the military strategy and proposed concentrating the Mandalorian attack on the Imperial interdictor vessel in order to facilitate the rebels' escape.[7]
The older Sabine regretted her youthful idealistic naivety which led her to build the "Duchess", an energy weapon capable of turning the beskar alloy inside Mandalorian armor against their wearers. Seeing the weapon being used to subjugate Mandalore turned her against the Empire. Sabine's desire to atone for her past wrongs led her to lead a joint Mandalorian-rebel mission to destroy the weapon. Sabine's love for her family led her to save her father. Sabine was distraught when she thought that her mother Ursa and brother Tristan had perished at the hands of the "Duchess." While Sabine could be passionate and vengeful towards foes like Tiber Saxon, she chose not to descend to the same level of her enemy at the urging of Bo-Katan. Bo-Katan recognized Sabine's potential as a military leader. In return, Sabine recognized Bo-Katan's leadership qualities and successfully convinced her to assume the Darksaber and the mantle of Mandalorian leadership.[18]
While Sabine along with Ezra agreed to help Saw Gerrera in his quest to uncover the Empire's secret weapon, they became disillusioned with Saw's callous disregard for the lives of non-combatants and his determination to achieve results by any means necessary.[10] As a resourceful fighter who planned ahead, Sabine advocated stealing the TIE/D Defender Elite's flight data recorder to aid the Alliance's war effort against the Empire. After losing their escape transport, Sabine proposed recovering the fighter's hyperdrive so that they could use Ryder's U-wing to transport the flight recorder back to the Rebellion.[82]
Sabine's sense of comradeship led her to participate in a mission to rescue Hera.[86] Sabine was devastated by the death of Kanan and sought revenge against the Empire. However, she came to make peace with Kanan's sacrifice upon realizing that he had helped advance their mission to knock out Thrawn's TIE Defender factory on Lothal. Despite her hatred of the Empire, Sabine acted as a voice of caution and stopped Zeb from pummeling the Noghri Rukh to death.[87] Sabine also maintained a defiant face towards Minister Hydan and was unmoved by his flattery.[89]
After Ryder Azadi pretended to betray the Spectres and their rebel allies, Sabine feigned anger at him.[90] Sabine also showed leadership and ingenuity when she devised a plan to reactivate the Dome's shield generators that involved splitting the rebels into two teams. Sabine regarded her fellow Spectres as family and painted a mural of them in honor of their memory. Her bond to Ezra led her to undertake a quest with Ahsoka Tano following the Battle of Endor to bring him home.[91]
Skills and abilities[ | ]
Hey, I bet you know a thing or two about mechanics?"
"Yeah, good bet.
——CT-7567 "Rex" and Sabine Wren[来源]
Though she was first and foremost a free-spirited artist, Wren had been trained as a Mandalorian warrior from an early age,[14] and had extensive expertise and knowledge in weaponry, as well as proficiency in numerous combat skills. A prodigy of sorts,[97] accomplished and acrobatic warrior[14] and saboteur,[20] both Hera Syndulla and Kanan Jarrus had the greatest respect for Wren's skills and trusted her expertise on the inner workings of the Imperial military, a remnant of her past as a cadet at the Imperial Academy on Mandalore.[24][6][56] As munitions specialist of the Ghost crew, she maintained and tuned all weapons but her crewmates' lightsabers, but also created many of the explosive devices she and the team used.[20] She also took lessons from Kanan and Ezra in lightsaber combat[11] after she took the Darksaber from Dathomir.[78]

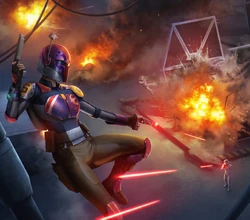
Sabine uses her skill with both explosives and blasters.
As a demolitions expert,[96] Wren could rig anything to explode, and in a fashion that was not only effective but also artistic.[95] She had the knowledge to manufacture her own explosives, and had enough knowledge of how the chemical elements of explosives worked in conjunction with fuels and even other munitions to create explosions infused with her unique touch. Also trained as an electronics and munitions engineer, she had used such skills to tinker with her twin WESTAR-35 blasters effectively, allowing her to increase their power efficiency and adding other features.[14] She demonstrated enough piloting skills to man a Gozanti-class cruiser,[56] a Lambda-class T-4a shuttle,[56] the auxiliary starfighter Phantom,[47][9] a Hammerhead corvette,[58] and an Imperial Troop Transport,[38] most of them in non-combat situations. She usually served as a gunner for the Ghost as well.[23][30]
Calling on her skills as a slicer,[96][15] Wren used her much-tinkered[15] computer-linked gauntlets to break into the Imperial encryption of Tseebo's implants,[38] and to help Chopper slice into an Imperial transmission system by preparing a data spike.[46] Wren also had some skills as a mechanic, repairing the Ghost or the Phantom when the need arose.[30][51][52]
Fluent in several languages, Wren had the ability to learn new languages quickly. Before she left the Academy, she was the fastest cadet to complete the language unit during espionage training. She spoke Galactic Basic, Mando'a, Huttese, Rodian, Aqualish, Binary, and some Shyriiwook.[15] During her days at the Imperial Academy, Sabine used her mechanical talents to build an Arc Pulse Generator known as the "Duchess." However, she turned against the Empire after learning that the weapon was used to subjugate Mandalore. As the creator of the Duchess, Sabine was the only one who could truly master its full potential.[18]
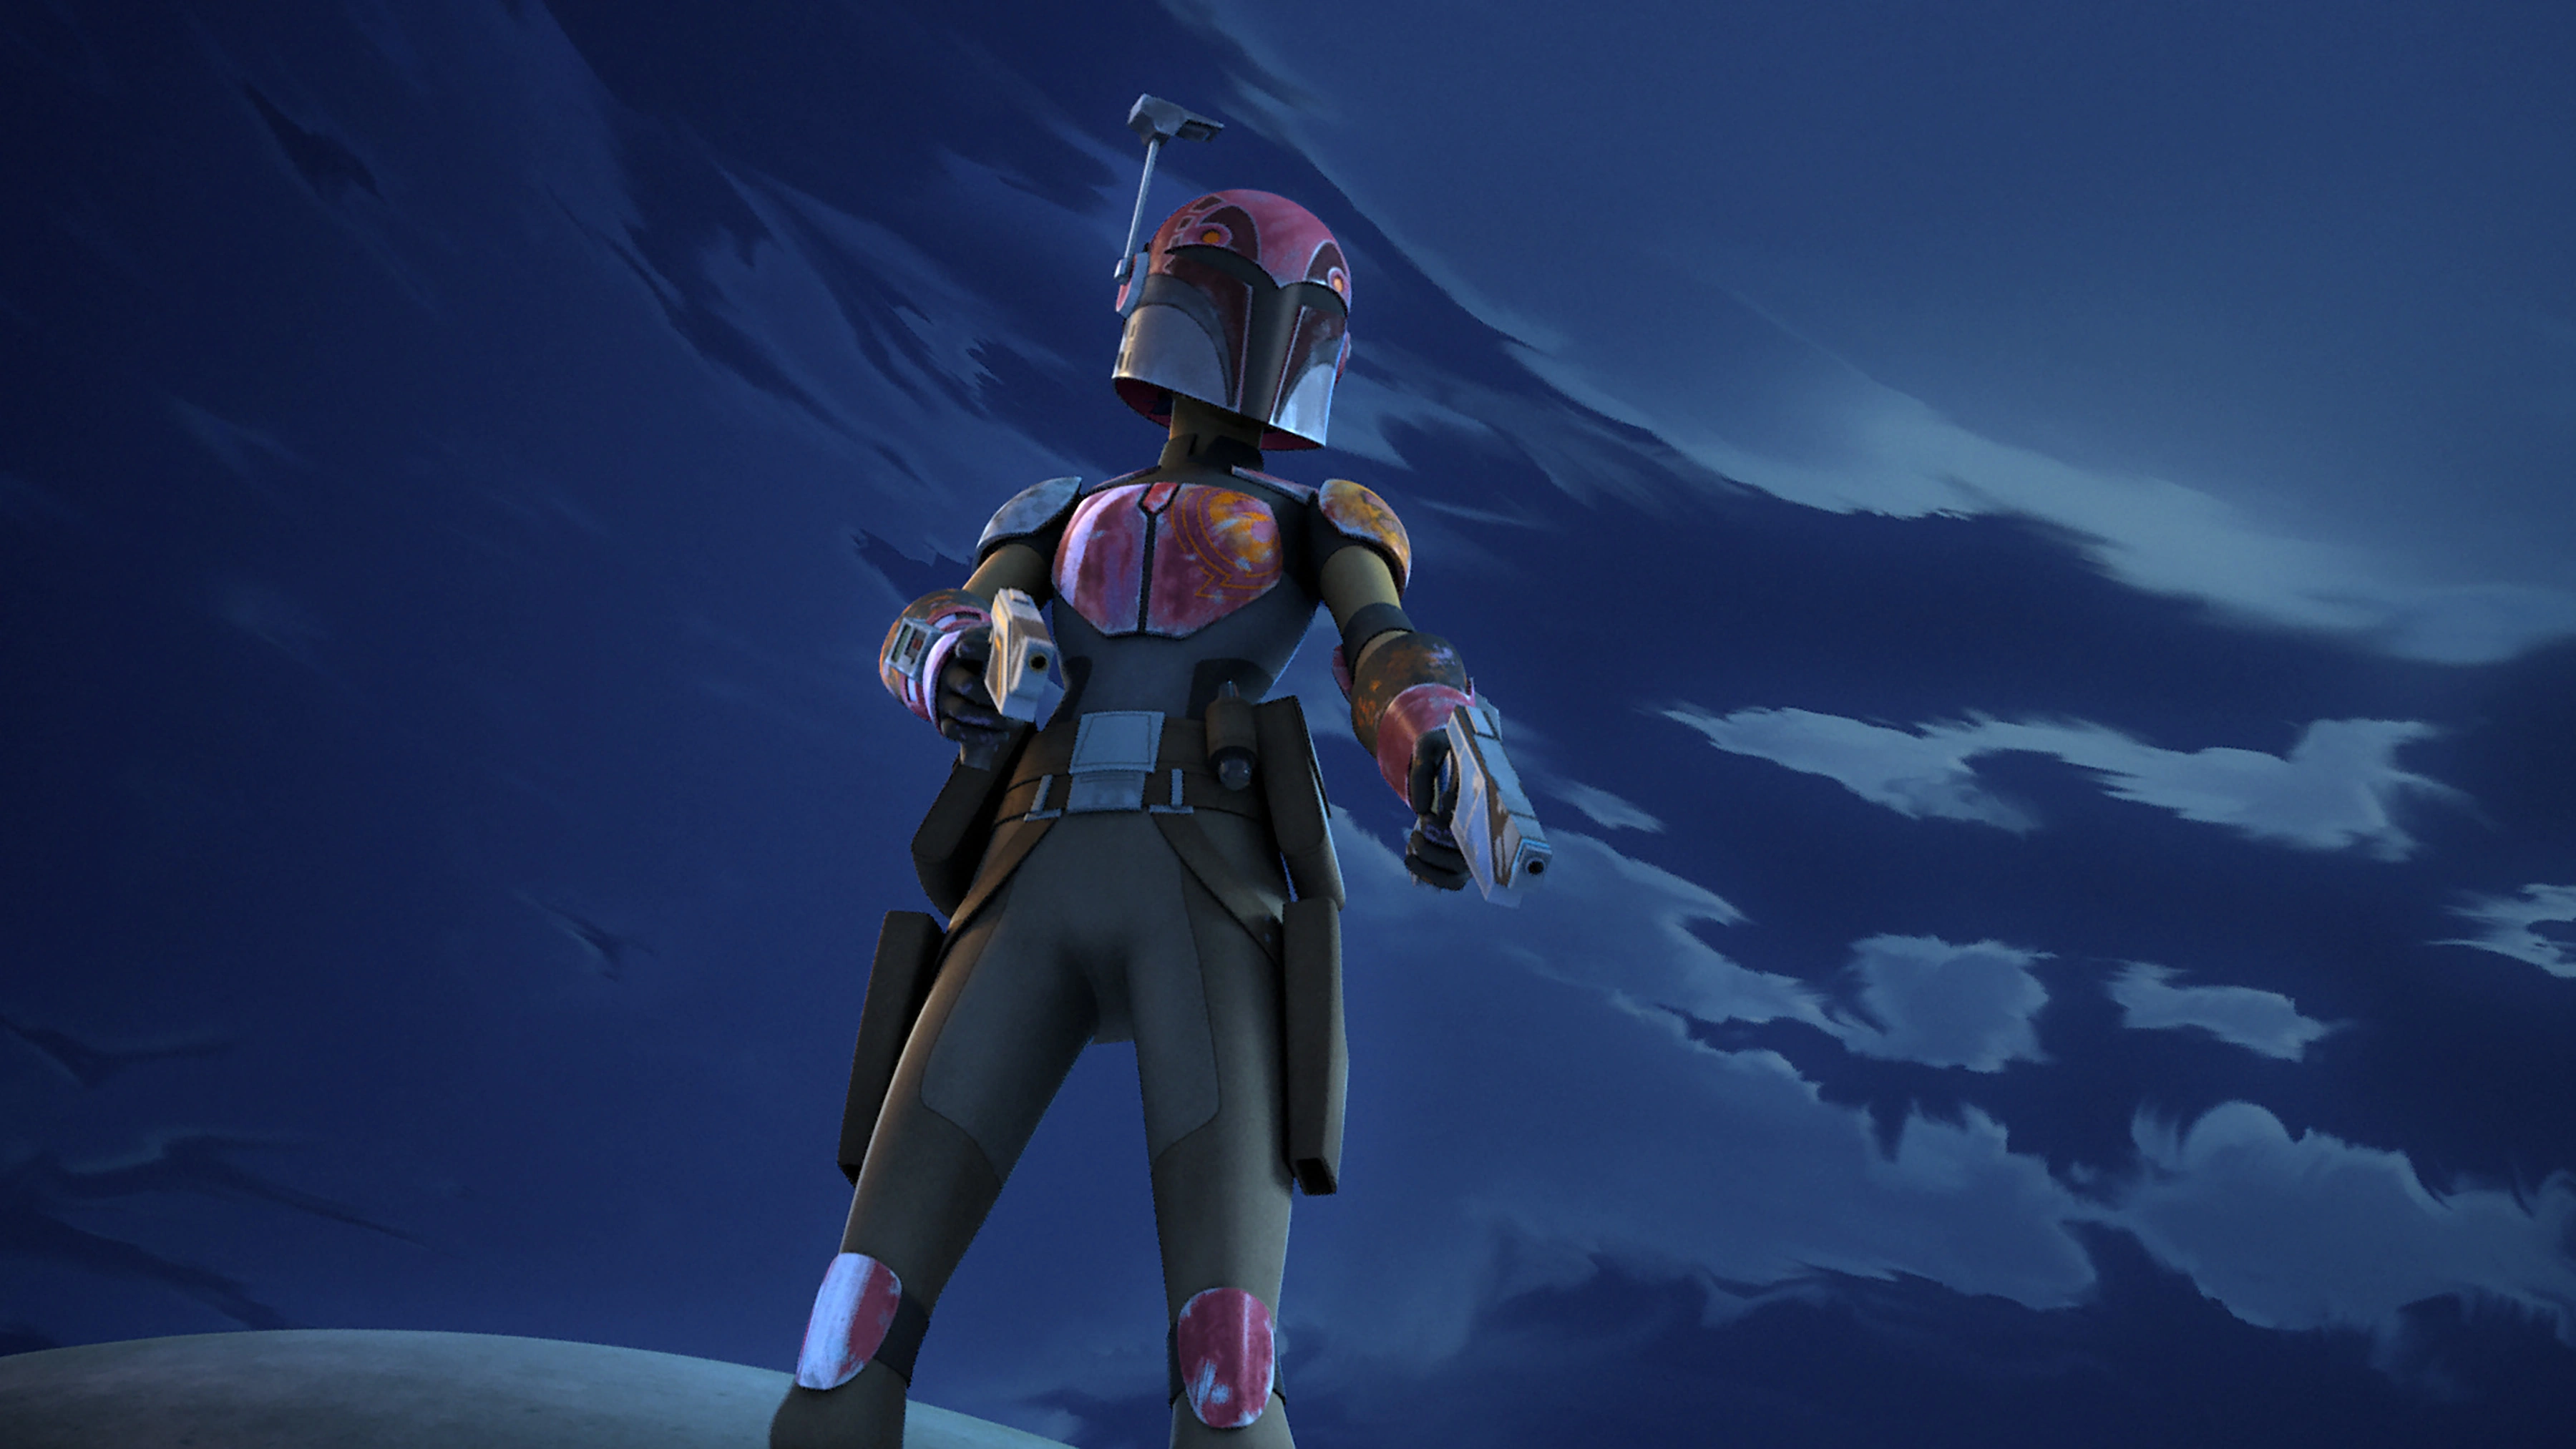

Wren with her twin WESTAR-35 blaster pistols.
While Wren was a skilled fighter, she was initially unable to match the Force powers and experience of Kanan Jarrus at the start of her training. Under Bridger's tutelage, Wren became familiar with lightsaber fighting strokes by sparring with sticks, eventually defeating him. She also learned how to wield the Darksaber against Jarrus's lightsaber during a training session.[11] Wren was also a competent pilot and was able to land the Phantom II safely on Krownest despite the ship being damaged by enemy fire. Though her brother proved to be more skilled with the weapons, Sabine was also competent when fighting with quarterstaffs. Due to Jarrus and Bridger's tutelage, Sabine was able to use a combination of Mandalorian gadgets and her lightsaber skills to defeat Gar Saxon and take possession of the Darksaber.[12]
Sabine was adept at undercover missions due to her Imperial Academy background. She posed as an Imperial pilot and later as a scout trooper during two missions on Lothal.[86][88] Sabine also used her talent with art to decipher a Lothal Jedi Temple key stone, which was crucial to unlocking a Gateway to the mystical world between worlds.[88]
While Sabine was a skilled fighter on the battlefield who was able to take out jumptroopers[90], she also had an appreciation of strategy and devised a successful plan to restart the Dome's shield generator.[91]
Equipment[ | ]
Ezra, the armor I wear is five hundred years old. I reforged it to my liking, but the battles, the history, the blood all lives within it. And the same goes for every Mandalorian.
——Sabine Wren[来源]
Wren wore a suit of Mandalorian armor which she heavily customized after leaving Mandalore, no longer being bound by the restrictions placed on armor customization by the Death Watch. She kept the insulating body glove to which the armor bonded, but stripped away much of the rest to give the greatest amount of mobility possible, keeping only the collar armor, ankle plates, breastplate, knee, elbow and shoulder pads. The only part of her armor that Wren did not reduce or personalize[14] was the Nite Owls[15] helmet she wore, as she had inherited it;[14] nevertheless, she did upgrade the comlink-incorporated helmet's interior electronics.[15] The headwear retained its traditional targeting viewfinder and macrobinocular viewplate and, though it featured a variety of control interfaces, Wren rarely used them.[14] She did, however, make use of the helmet's holo-imager, using its video and image recording features to capture her artistic efforts.[15] She also wore a pair of computer-linked gauntlets,[15] but rarely used their weaponized components or her jetpack and rocket pack, equipment used more commonly by the Death Watch.[14] Her pauldrons and helmet were blaster-proof to at least the point that bolts fired from a WESTAR-35 blaster pistol would not penetrate them, as evidenced when Darth Vader deflected two shots from her pistols into her right pauldron and helmet without injuring her.[9]


Sabine Wren's armor (first look) and pistols.
Wren applied a personalized paint job to each part of her armor based on the color scheme of her inherited helmet.[14] This consisted of a pink color scheme around the time Bridger joined the crew of the Ghost,[23] but changed to include more orange between the Siege of Lothal[9] and her meeting with the clones on Seelos. Consistent throughout both color schemes[51] were an image of an anooba on the left shoulder pad, a black and white dejarik pattern on the left shoulder pad,[15] and a starbird on her breastplate. On top of the custom paint job, Wren's clothes and armor were often splattered with paint from her most recent project.[98]
In battle, Wren used a pair of WESTAR-35 blaster pistols that were linked to her helmet's targeting systems. During a fight, her helmet would warn her of low ammo to prevent her running out at an inconvenient time, although the handles of the blasters themselves would pulse as a warning of low ammo if she was fighting helmetless. When not fighting Wren kept the pistols in a pair of nerf hide holsters around her waist.[14] As with her armor, Wren painted her pistols, although they were both sealed to prevent the paint interfering with the internal systems. Along with the holsters, she kept a backup comlink on her belt.[15]
To make her art, Wren used airbrushes that released a fine pressurized mist of paint, the width, color and intensity of which she could easily change,[15] and could be configured with her favorite stencils, allowing her to tag things quickly during missions.[14] She also possessed a deluxe paint sprayer she had converted from a fire extinguisher, which she only used outside due to its large area cover and sensitive trigger. The artist's favorite tools for art though were her explosives, which she personally constructed to release paint or colored explosions, and almost always had detonators on her belt, in her satchel and, sometimes, her pockets. Wren generally found thermal detonators too overpowered for her tastes and much preferred detonate tape. Aside from sprayers and explosives, Wren made use of color sticks and stencils when creating art, also wearing a respirator if working with paint fumes.[15] Furthermore, using modified thermal detonators, she created paint bombs that simultaneously destroyed equipment and vehicles but also covered the area with paint.[14]
Sabine was adept at using Mandalorian vambrace, equipped with a repulsor, a grappling line, paralyzing darts, a shield emitter, a flamethrower and paired blaster barrels. Under the tutelage of Ezra and Kanan, Sabine learned how to wield the Darksaber; a symbol of Mandalorian power, through the use of lightsaber combat.[11] Sabine knew how to fight with quarterstaffs.[12] Sabine's helmet, armor, and jetpack could also operate in zero gravity space.[7]
Behind the scenes[ | ]


Sabine Wren's season 2 appearance was revealed at Celebration Anaheim.
Sabine Wren is a character in the animated television series Star Wars Rebels. Her name was revealed via tie-in material.[99] She is voiced by actress Tiya Sircar.[3] Her surname was first revealed in the 148th issue of the Star Wars Insider magazine.[100] At Celebration Anaheim it was revealed that Wren's appearance would change for Star Wars Rebels Season Two. Changes included her hair being dyed blue and a new set of armor.[101]
According to the StarWars.com blogger James Burns, Sabine Wren's name was a reference to the Sabine women from Roman history. This legendary episode in Roman history influenced later Western literature and films like Stephen Vincent Benét's short story The Sobbin' Women and the 1950s musical Seven Brides for Seven Brothers. Burns also confirmed that the Star Wars Rebels director Dave Filoni and producer Simon Kinberg had named Sabine and the other protagonists after historical and Biblical figures to give them a greater sense of purpose and meaning.[102] Her "Ria Talla" alias was originally going to be a Rebel pilot and companion to Jyn Erso in Rogue One: A Star Wars Story.[103]
Non-canon history[ | ]
Sabine Wren appears in Angry Birds Star Wars II. She rescued the orphan Ezra Bridger and used her paint bombs to attack the Imperials. They managed to escape from Agent Kallus and leave Lothal aboard the Ghost with Bridger in tow.[104]
Appearances[ | ]
|
Non-canon appearances[ | ]
- LEGO Star Wars Movie Short (2015 Episode 10: Rebels Raw Deal)
- Disney Infinity 3.0
- Angry Birds Star Wars II
- Template:Droid Tales (出現在回憶中)
- LEGO Star Wars: The Force Awakens (DLC)
- Star Wars: Galaxy of Heroes
- Friends Like These (Pictured only)
Sources[ | ]
|
Notes and references[ | ]
|